Embed Size (px)
Citation preview

MV2 Installation Guide
OverviewThe Cisco Meraki MV2, a member of the second generation MV smart camera family, is a flex camera that is exceptionally simple to deploy and configure due toits compact yet flexible form-factor and integration into the Meraki dashboard. The MV family eliminates the complex and costly servers and video recordersrequired by traditional solutions which removes the limitations typically placed on video surveillance deployments.
Box ContentsOne camera gift box contains:
• 1x Camera-L hardware• 1x Magnetic Screw Mount with ¼” tripod screw• 2x M3.5 Screws with wall anchors
Powering MV2The MV2 is the first Meraki camera to come with only a USB-C port. The camera must be used with one of the two following accessories:
Note: These are not included in the box. They must be ordered separately
1
Ethernet to USB-C Dongle (Product Name: MA-PWR-ETH)One ethernet dongle lunch bag
• 1x ethernet dongle
• 1x 1m USB-C cable
• 2x Rectangular VHB tape strips
AC Power Adapter (Product Name: MA-PWR-USB-XX)1x power adapter lunch bag
• 1x power adapter
• 1x 3m USB-C cable
• 1x Cable Tie
2
Preparing DashboardThe following is a brief overview of the steps required to add an MV2 to your network.
1. Login to http://dashboard.meraki.com. If this is your first time, create a new account.
2. Find the network to which you plan to add your cameras or create a new network.
3. Add your cameras to your network. You will need your Meraki order number (found on your invoice) or the serial number of each camera, which lookslike Qxxx-xxxx-xxxx, and is found on the bottom of the unit.
4. Verify that your camera is now listed under Cameras > Monitor > Cameras.
The device can also be added to your network using the Meraki Mobile App
Firewall and Uplink Network setupIf a firewall is in place, it must allow outgoing connections on particular ports to particular IP addresses. The most current list of outbound ports and IP addressesfor your particular organization can be found here.
DNS ConfigurationEach MV2 will generate a unique domain name to allow for secured direct streaming functionality. These domain names resolve an A record for the private IPaddress of the camera. Any public recursive DNS server will resolve this domain.
If utilizing an on site DNS server, please whitelist *.devices.meraki.direct or configure a conditional forwarder so that local domains are not appended to*.devices.meraki.direct and that these domain requests are forwarded to Google public DNS.
Assign Wireless Info
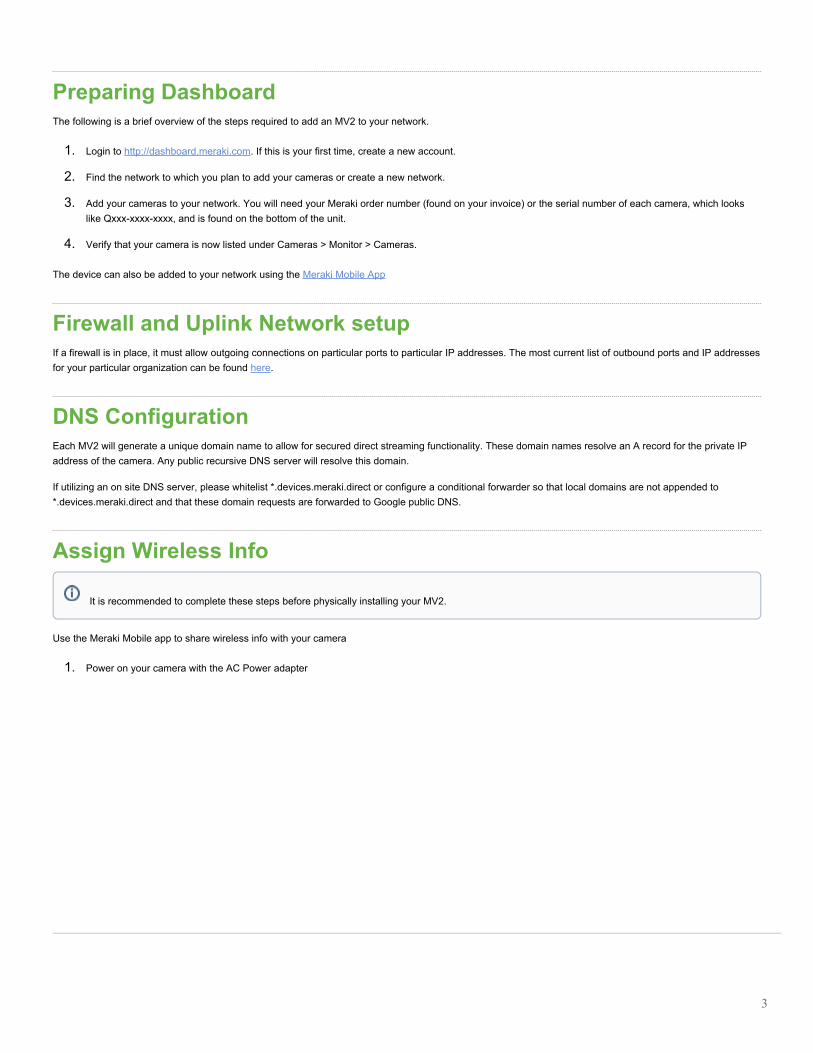
Use the Meraki Mobile app to share wireless info with your camera
1. Power on your camera with the AC Power adapter
It is recommended to complete these steps before physically installing your MV2.
3
2. On the Meraki Mobile App, select the camera to onboard. Tap configure wirelessly to onboard and follow the steps in the app
4
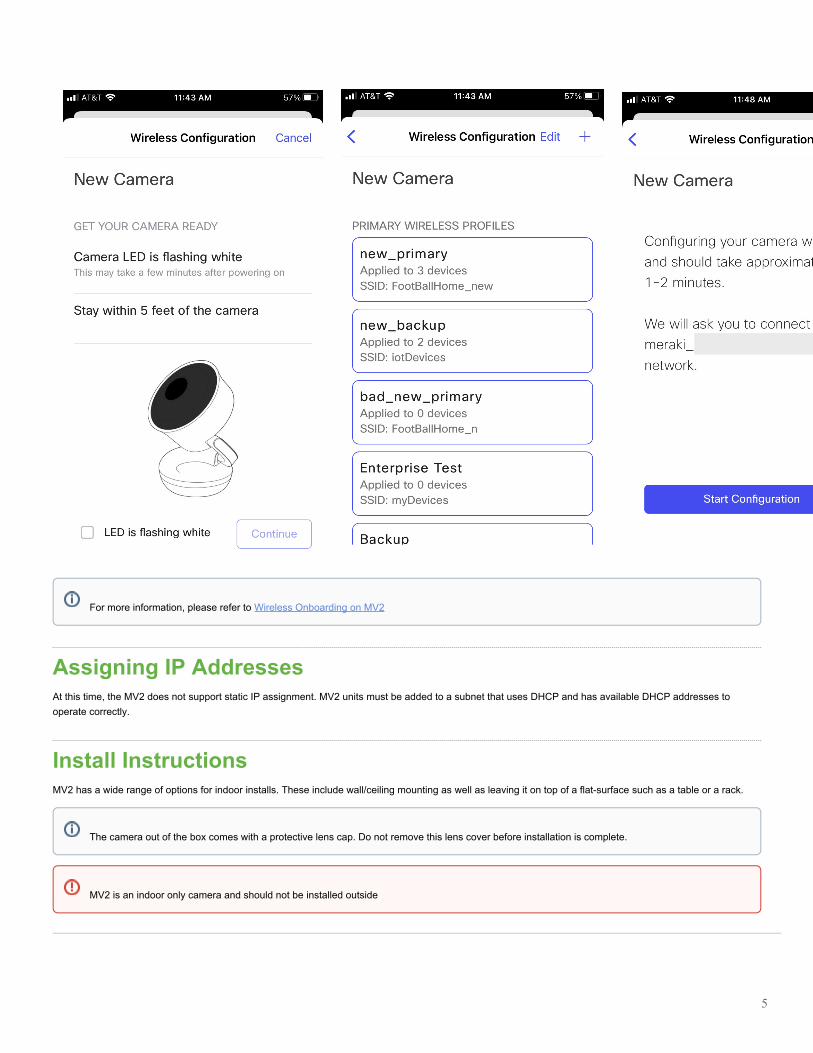
Assigning IP AddressesAt this time, the MV2 does not support static IP assignment. MV2 units must be added to a subnet that uses DHCP and has available DHCP addresses tooperate correctly.
Install InstructionsMV2 has a wide range of options for indoor installs. These include wall/ceiling mounting as well as leaving it on top of a flat-surface such as a table or a rack.
For more information, please refer to Wireless Onboarding on MV2
The camera out of the box comes with a protective lens cap. Do not remove this lens cover before installation is complete.
MV2 is an indoor only camera and should not be installed outside
5
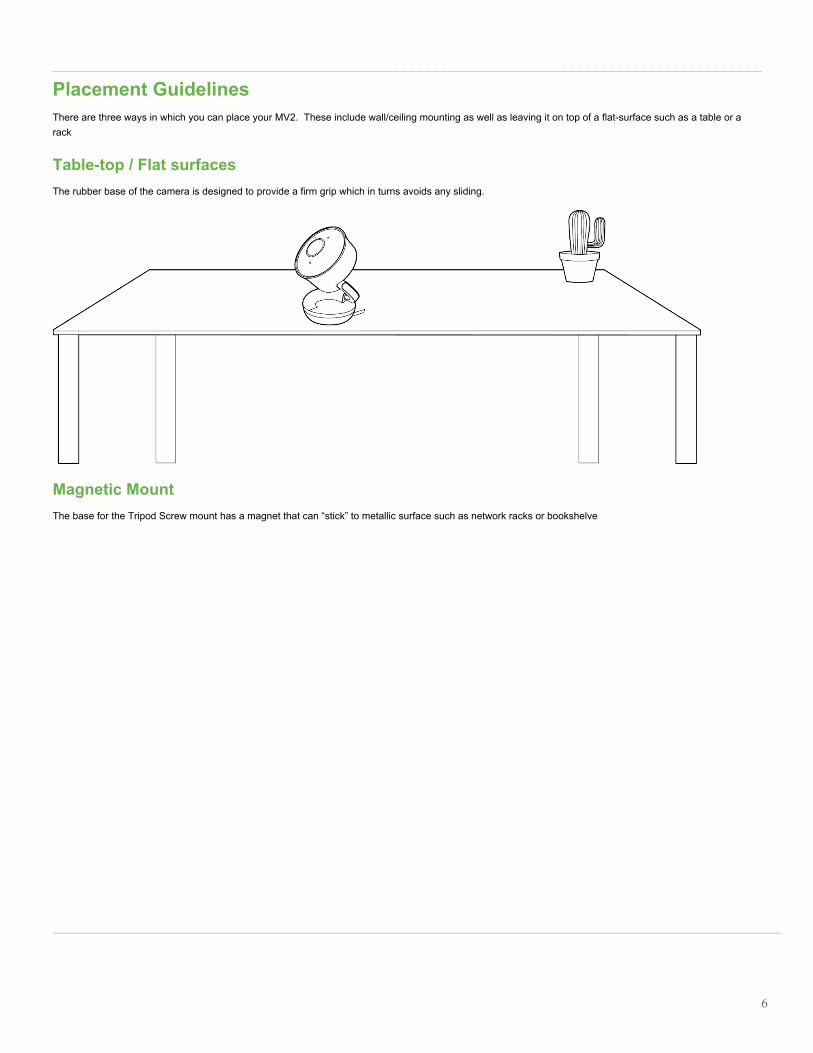
Placement GuidelinesThere are three ways in which you can place your MV2. These include wall/ceiling mounting as well as leaving it on top of a flat-surface such as a table or arack
Table-top / Flat surfacesThe rubber base of the camera is designed to provide a firm grip which in turns avoids any sliding.
Magnetic MountThe base for the Tripod Screw mount has a magnet that can “stick” to metallic surface such as network racks or bookshelve
6
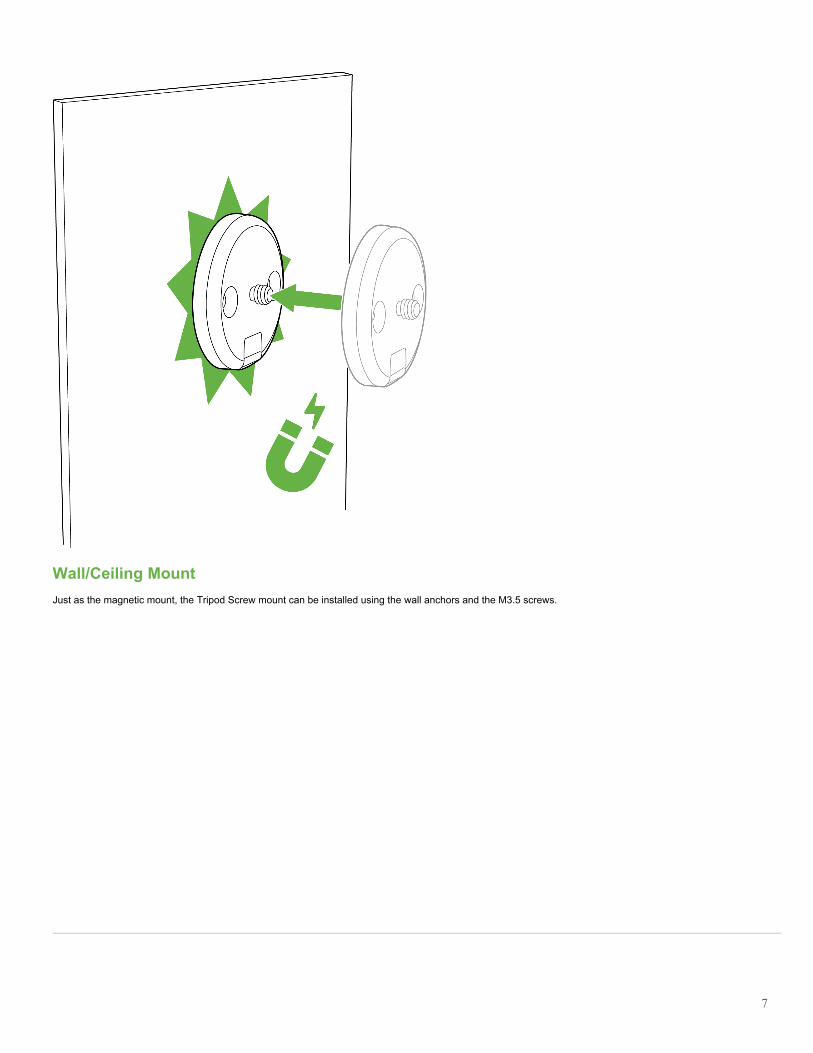
Wall/Ceiling MountJust as the magnetic mount, the Tripod Screw mount can be installed using the wall anchors and the M3.5 screws.
7
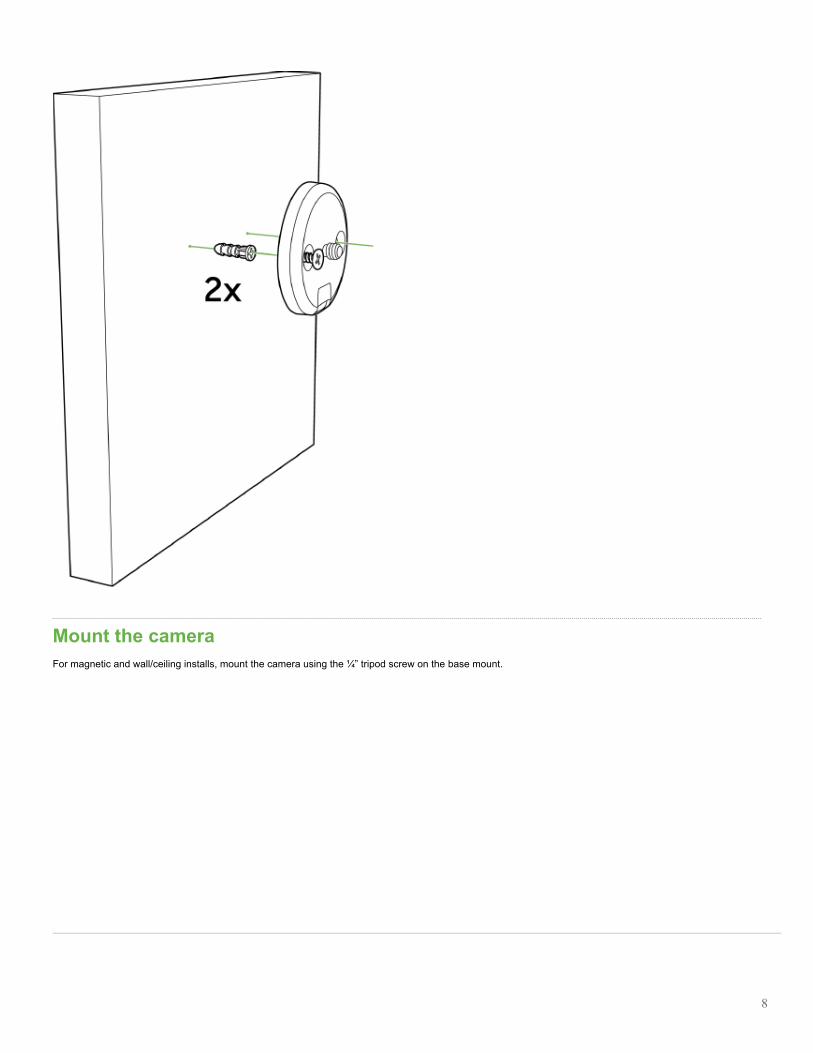
Mount the cameraFor magnetic and wall/ceiling installs, mount the camera using the ¼” tripod screw on the base mount.
8
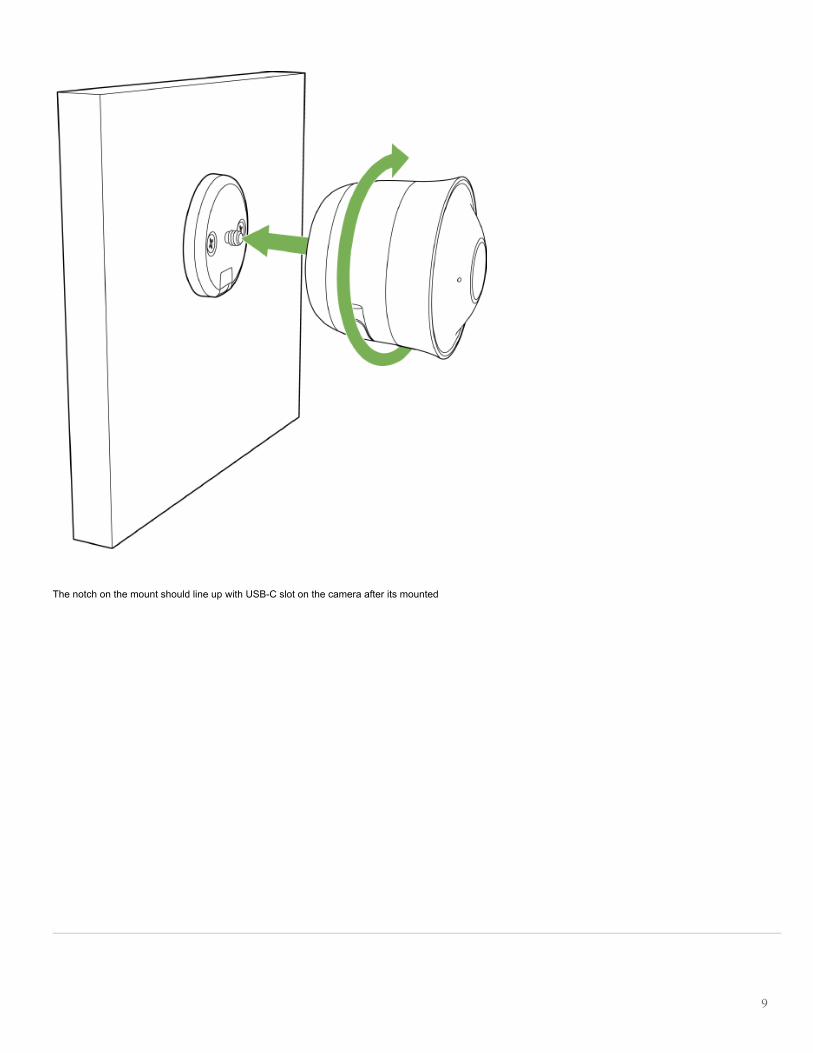
The notch on the mount should line up with USB-C slot on the camera after its mounted
9
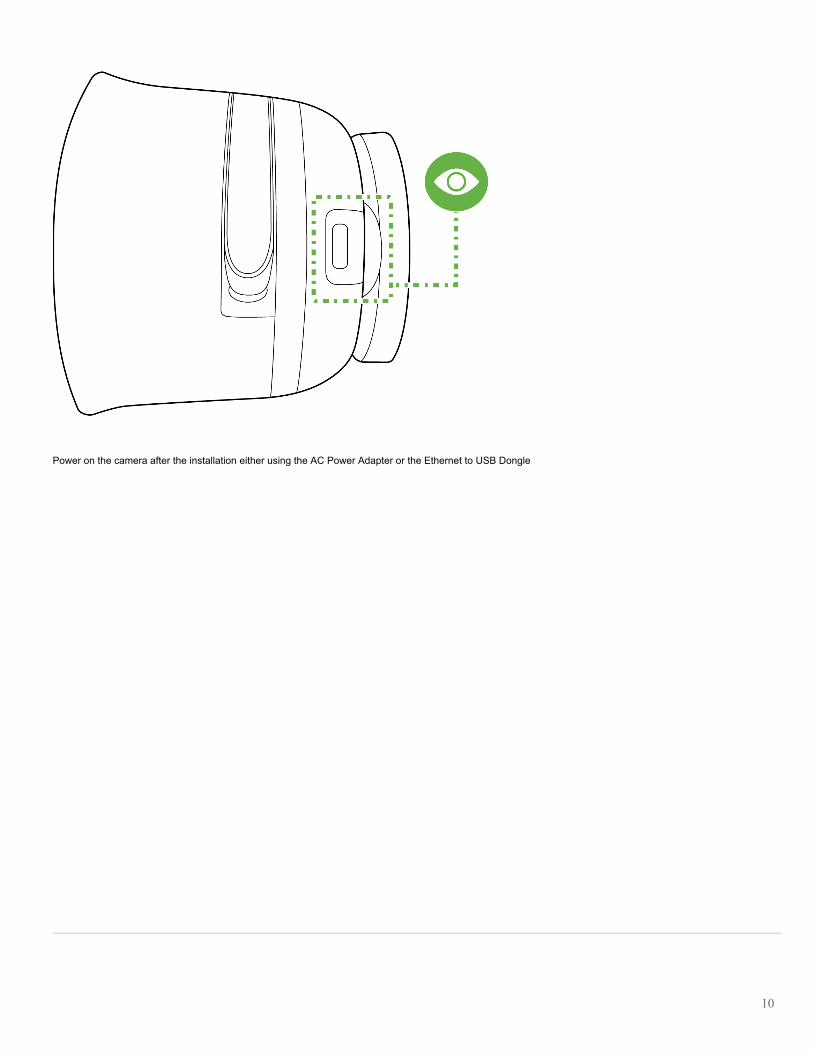
Power on the camera after the installation either using the AC Power Adapter or the Ethernet to USB Dongle
10
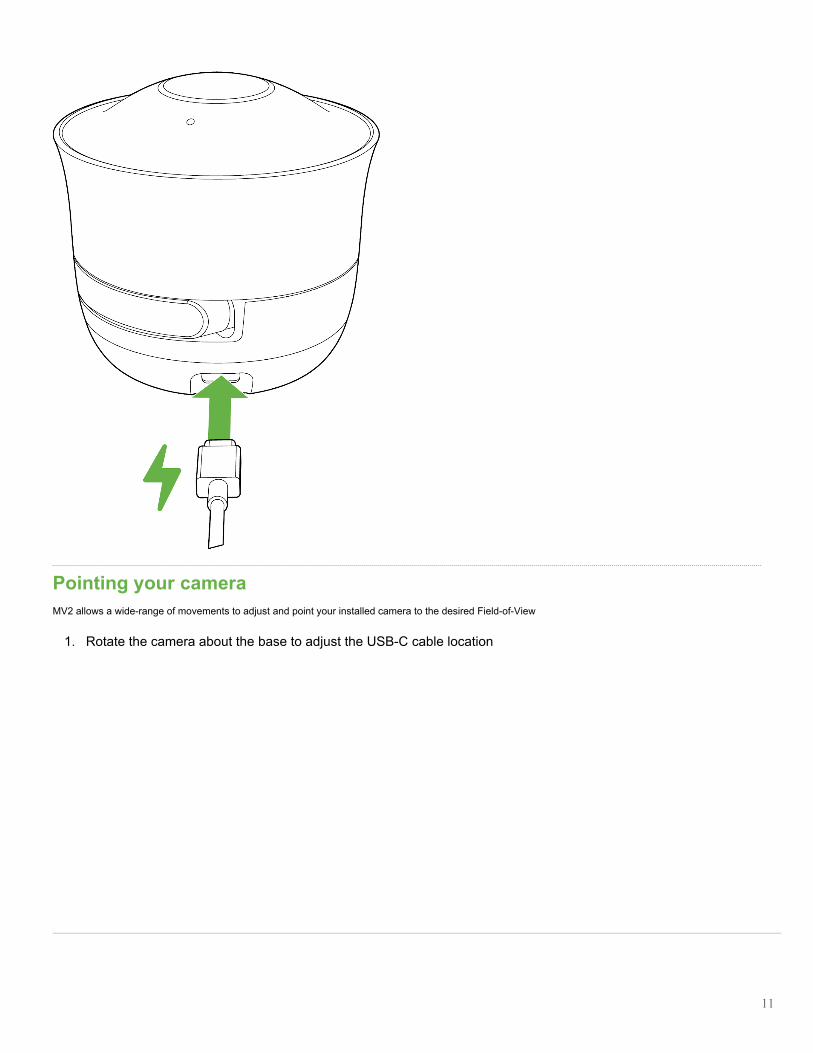
Pointing your cameraMV2 allows a wide-range of movements to adjust and point your installed camera to the desired Field-of-View
1. Rotate the camera about the base to adjust the USB-C cable location
11
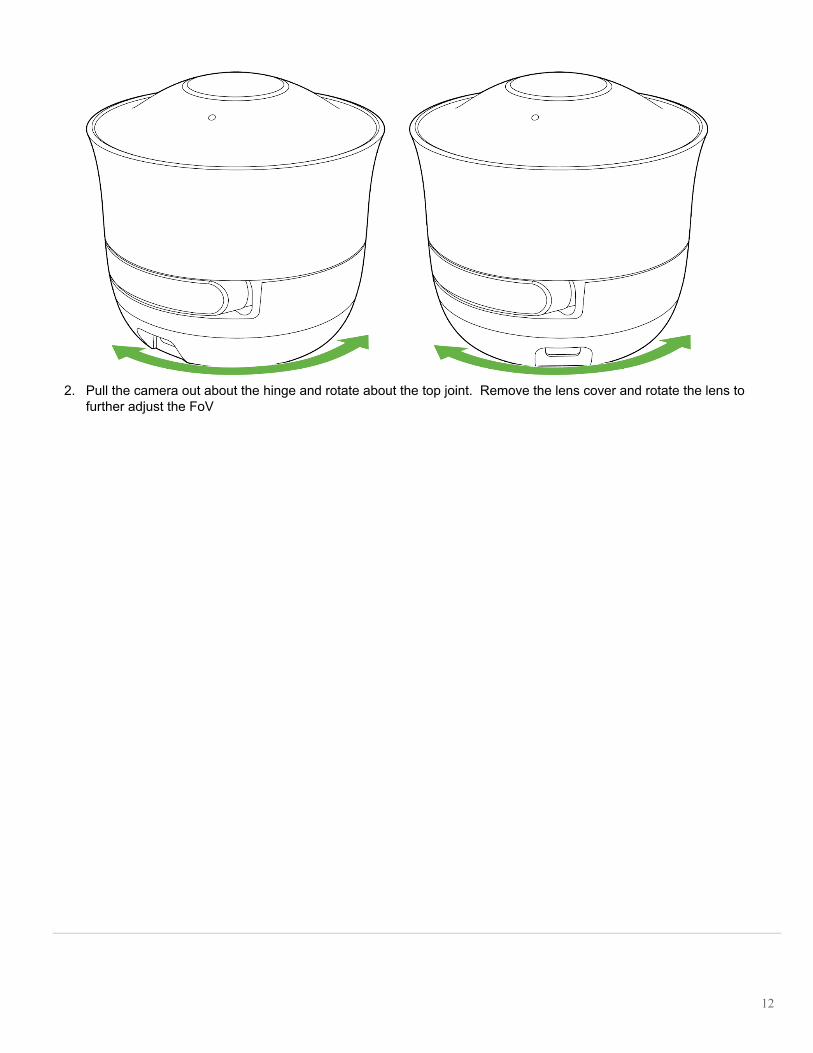
2. Pull the camera out about the hinge and rotate about the top joint. Remove the lens cover and rotate the lens tofurther adjust the FoV
12
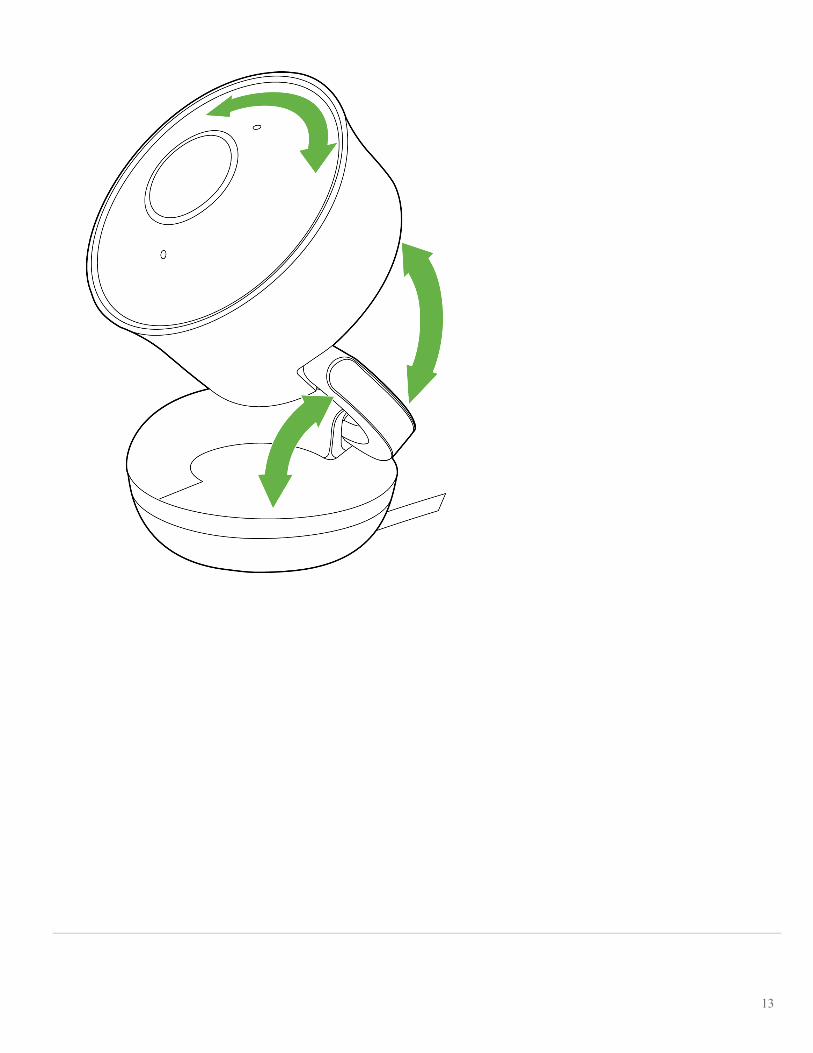
13
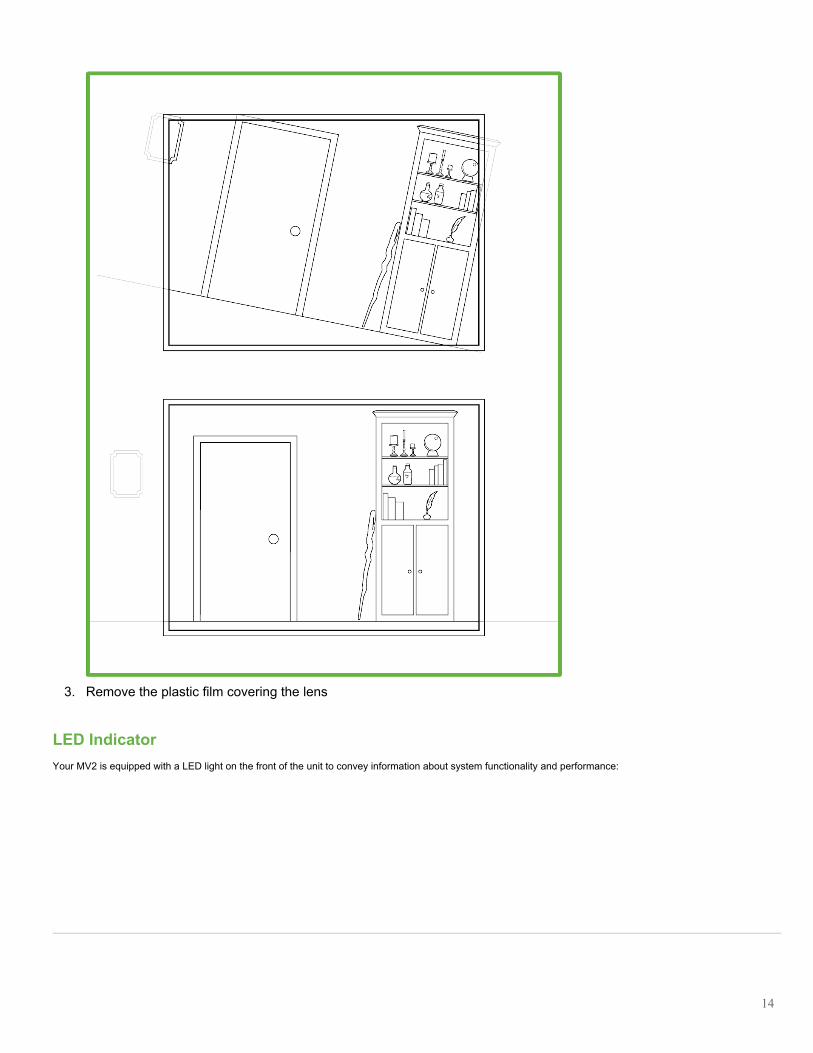
3. Remove the plastic film covering the lens
LED IndicatorYour MV2 is equipped with a LED light on the front of the unit to convey information about system functionality and performance:
14
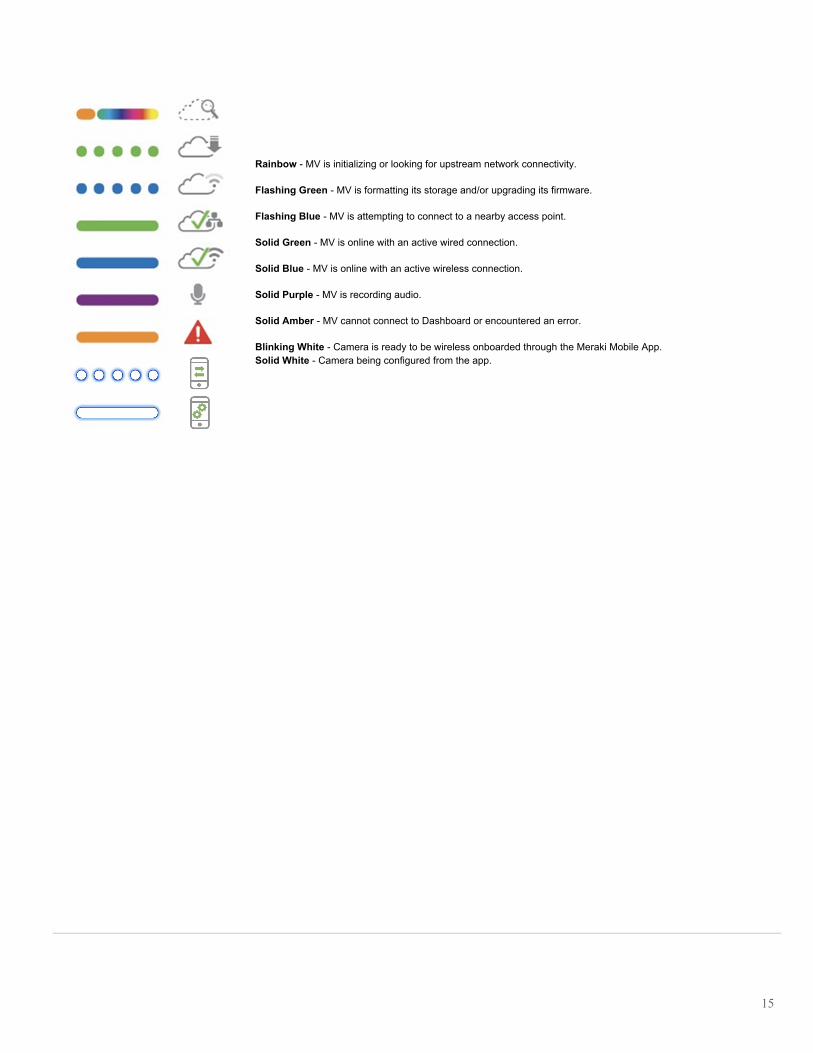
Rainbow - MV is initializing or looking for upstream network connectivity.
Flashing Green - MV is formatting its storage and/or upgrading its firmware.
Flashing Blue - MV is attempting to connect to a nearby access point.
Solid Green - MV is online with an active wired connection.
Solid Blue - MV is online with an active wireless connection.
Solid Purple - MV is recording audio.
Solid Amber - MV cannot connect to Dashboard or encountered an error.
Blinking White - Camera is ready to be wireless onboarded through the Meraki Mobile App.Solid White - Camera being configured from the app.
15


![Fast Cat Mv2[1]](https://img.pdfslide.net/doc/110x75/54c1c00b4a7959af208b4571/fast-cat-mv21.jpg)