Embed Size (px)
Citation preview
1
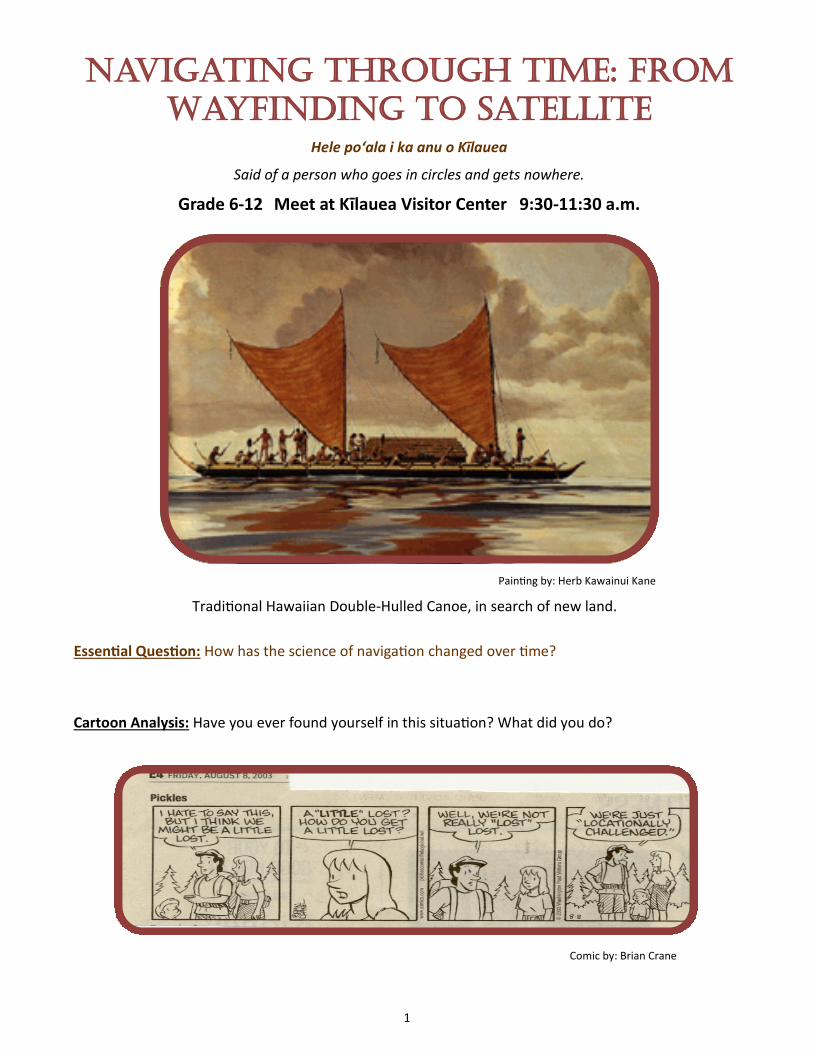
Navigating Through Time: From
WayFinding to Satellite
Hele po‘ala i ka anu o Kīlauea
Said of a person who goes in circles and gets nowhere.
Grade 6-12 Meet at Kīlauea Visitor Center 9:30-11:30 a.m.
Painting by: Herb Kawainui Kane
Essential Question: How has the science of navigation changed over time?
Comic by: Brian Crane
Cartoon Analysis: Have you ever found yourself in this situation? What did you do?
Traditional Hawaiian Double-Hulled Canoe, in search of new land.
2
Linking culture and science:
Polynesians had a unique sense of place and where they were on an island. They had a vast knowledge of their island home from the mountain to the ocean.
Polynesians used a system that is known as wayfinding to chart their destination. The complex task of Polynesian navigation depended on keen observation. Using this method they traveled throughout the vast Pacific Ocean without modern navigational instruments and found their way to Hawai‘i.
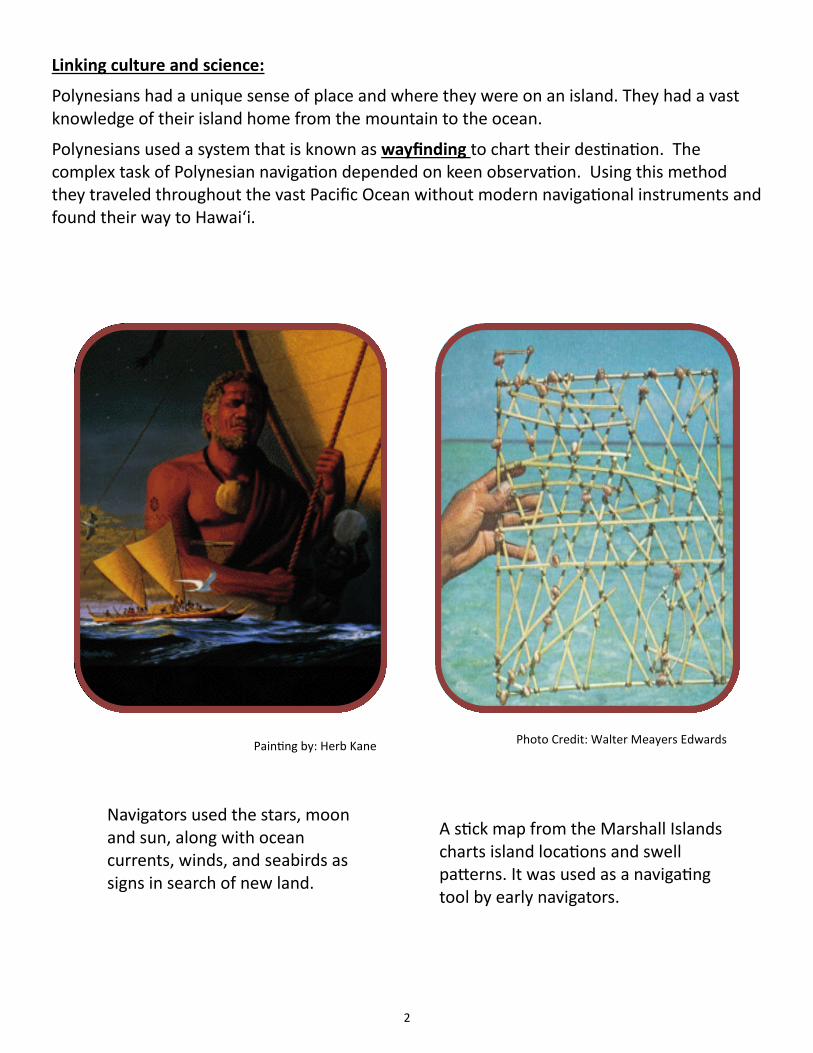
Navigators used the stars, moon and sun, along with ocean currents, winds, and seabirds as signs in search of new land.
A stick map from the Marshall Islands charts island locations and swell patterns. It was used as a navigating tool by early navigators.
Painting by: Herb Kane Photo Credit: Walter Meayers Edwards

3
Traditional Wayfinding - By Ocean
How did they do it? For traditional Pacific island people, wayfinding involved navigating on the open ocean without a sextant, compass, clock, GPS, radio, or weather reports. The navigator depends on observations of the stars, sun, moon, ocean swells, currents, migratory birds and other signs of life for clues to locate land. Wayfinding was used for thousands of years before the invention of European navigational instruments and is how the Polynesians migrated to Hawai’i.
In the 20th century, traditional wayfinding knowledge and techniques were in danger of being lost because of modernization and westernization of the cultures of these island peoples. The art and science of wayfind-ing continues in the Pacific islands because of the actions of a handful of people. A revival was led by Nainoa Thompson, the first modern-day Hawaiian to learn and use traditional navigation for long-distance, open-ocean voyaging. Thompson studied wayfinding under Mau Piailug, a grandmaster navigator from the island of Satawal in Micronesia. Piailug passed away in 2010 leaving a rich legacy of navigational knowledge and skills that were nearly lost to the world. Piailug navigated the first voyage of the Hōkūle‘a to Tahiti in 1976; Thompson navigated for the Hōkūle‘a voyages in 1980, 1985-87, and up through the present.
Mau Piailug - Grandmaster Navigator from Satawal in the Caroline Island Archipelago.
Nainoa Thompson - Master
Navigator from Hawai‘i.
Photo credit: Steve Thomas Photo Credit: Gregory Yamamoto
4
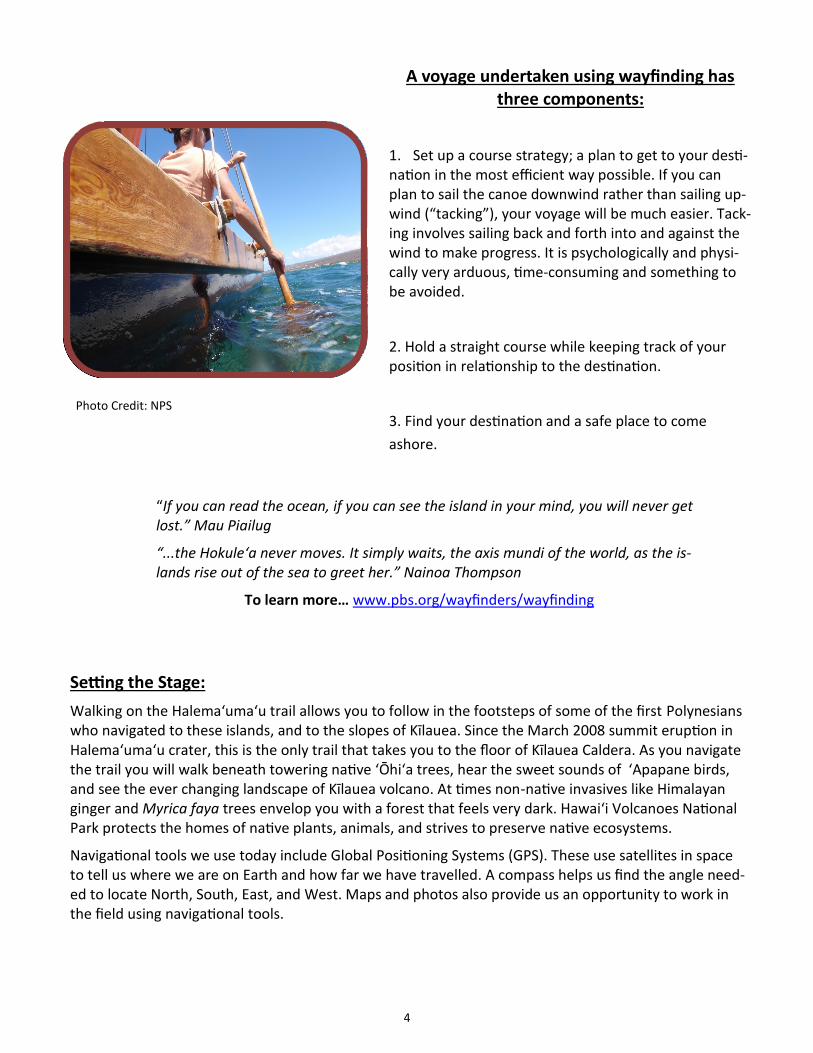
A voyage undertaken using wayfinding has
three components:
1. Set up a course strategy; a plan to get to your desti-nation in the most efficient way possible. If you can plan to sail the canoe downwind rather than sailing up-wind (“tacking”), your voyage will be much easier. Tack-ing involves sailing back and forth into and against the wind to make progress. It is psychologically and physi-cally very arduous, time-consuming and something to be avoided.
2. Hold a straight course while keeping track of your position in relationship to the destination.
3. Find your destination and a safe place to come
ashore.
“If you can read the ocean, if you can see the island in your mind, you will never get lost.” Mau Piailug
“...the Hokule‘a never moves. It simply waits, the axis mundi of the world, as the is-lands rise out of the sea to greet her.” Nainoa Thompson
To learn more… www.pbs.org/wayfinders/wayfinding
Setting the Stage:
Walking on the Halema‘uma‘u trail allows you to follow in the footsteps of some of the first Polynesians who navigated to these islands, and to the slopes of Kīlauea. Since the March 2008 summit eruption in Halema‘uma‘u crater, this is the only trail that takes you to the floor of Kīlauea Caldera. As you navigate the trail you will walk beneath towering native ‘Ōhi‘a trees, hear the sweet sounds of ‘Apapane birds, and see the ever changing landscape of Kīlauea volcano. At times non-native invasives like Himalayan ginger and Myrica faya trees envelop you with a forest that feels very dark. Hawaiʻi Volcanoes National Park protects the homes of native plants, animals, and strives to preserve native ecosystems.
Navigational tools we use today include Global Positioning Systems (GPS). These use satellites in space to tell us where we are on Earth and how far we have travelled. A compass helps us find the angle need-ed to locate North, South, East, and West. Maps and photos also provide us an opportunity to work in the field using navigational tools.
Photo Credit: NPS
5
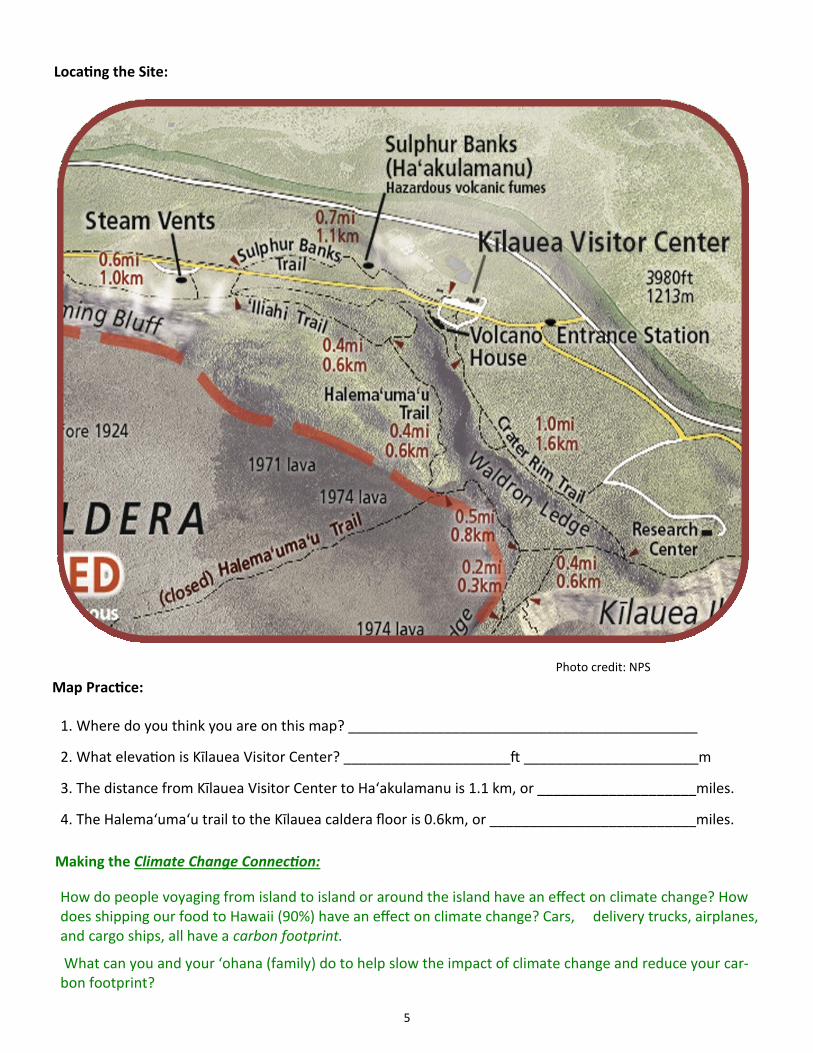
Locating the Site:
Photo credit: NPS
1. Where do you think you are on this map? ____________________________________________
2. What elevation is Kīlauea Visitor Center? _____________________ft ______________________m
3. The distance from Kīlauea Visitor Center to Haʻakulamanu is 1.1 km, or ____________________miles.
4. The Halemaʻumaʻu trail to the Kīlauea caldera floor is 0.6km, or __________________________miles.
Map Practice:
How do people voyaging from island to island or around the island have an effect on climate change? How does shipping our food to Hawaii (90%) have an effect on climate change? Cars, delivery trucks, airplanes, and cargo ships, all have a carbon footprint.
What can you and your ‘ohana (family) do to help slow the impact of climate change and reduce your car-bon footprint?
Making the Climate Change Connection:
6
Determining the Facts:
Hawai‘i Volcanoes National Park serves as a living laboratory for scientists of many fields who might use a compass and a GPS. Both are great tools to find your way, and mark points of importance that you may want to revisit later, when you can’t remember exactly where that place was. By learning these skills, you broaden your knowledge of the many tools people use in the field. Someday, you may have a job which requires you to use some of these tools.
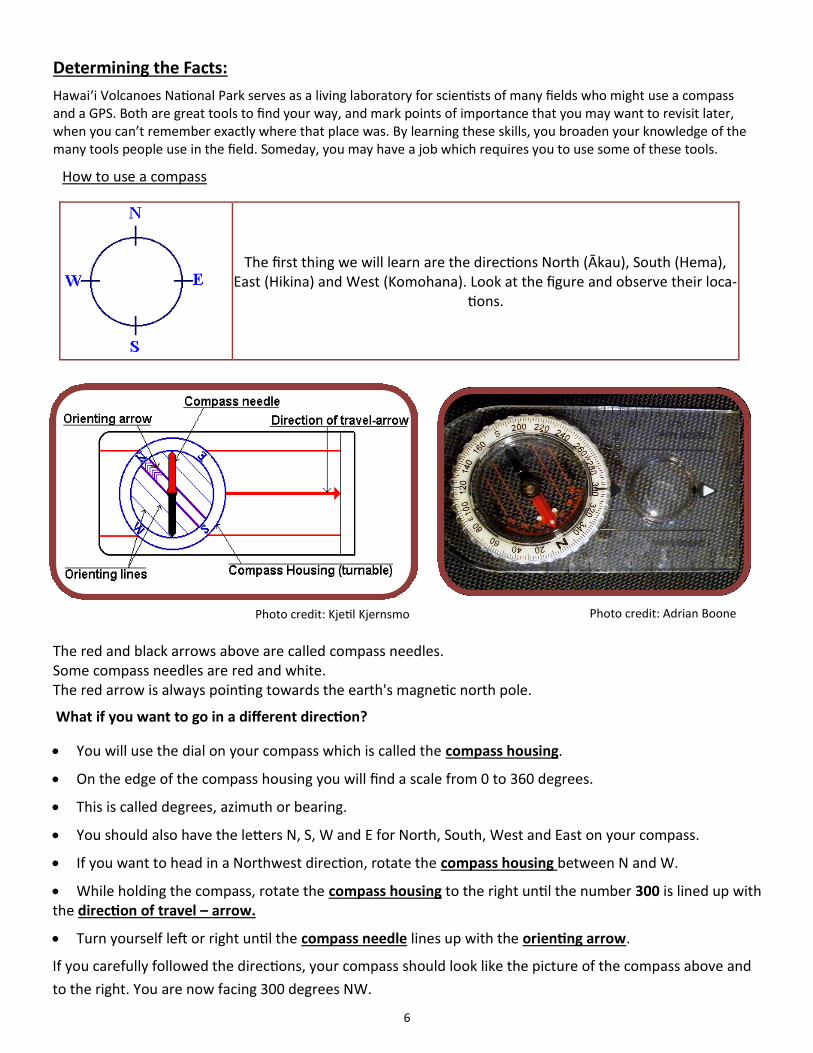
The red and black arrows above are called compass needles. Some compass needles are red and white. The red arrow is always pointing towards the earth's magnetic north pole.
You will use the dial on your compass which is called the compass housing.
On the edge of the compass housing you will find a scale from 0 to 360 degrees.
This is called degrees, azimuth or bearing.
You should also have the letters N, S, W and E for North, South, West and East on your compass.
If you want to head in a Northwest direction, rotate the compass housing between N and W.
While holding the compass, rotate the compass housing to the right until the number 300 is lined up with the direction of travel – arrow.
Turn yourself left or right until the compass needle lines up with the orienting arrow.
If you carefully followed the directions, your compass should look like the picture of the compass above and
to the right. You are now facing 300 degrees NW.
Photo credit: Adrian Boone
What if you want to go in a different direction?
Photo credit: Kjetil Kjernsmo
How to use a compass
The first thing we will learn are the directions North (Ākau), South (Hema), East (Hikina) and West (Komohana). Look at the figure and observe their loca-
tions.
7
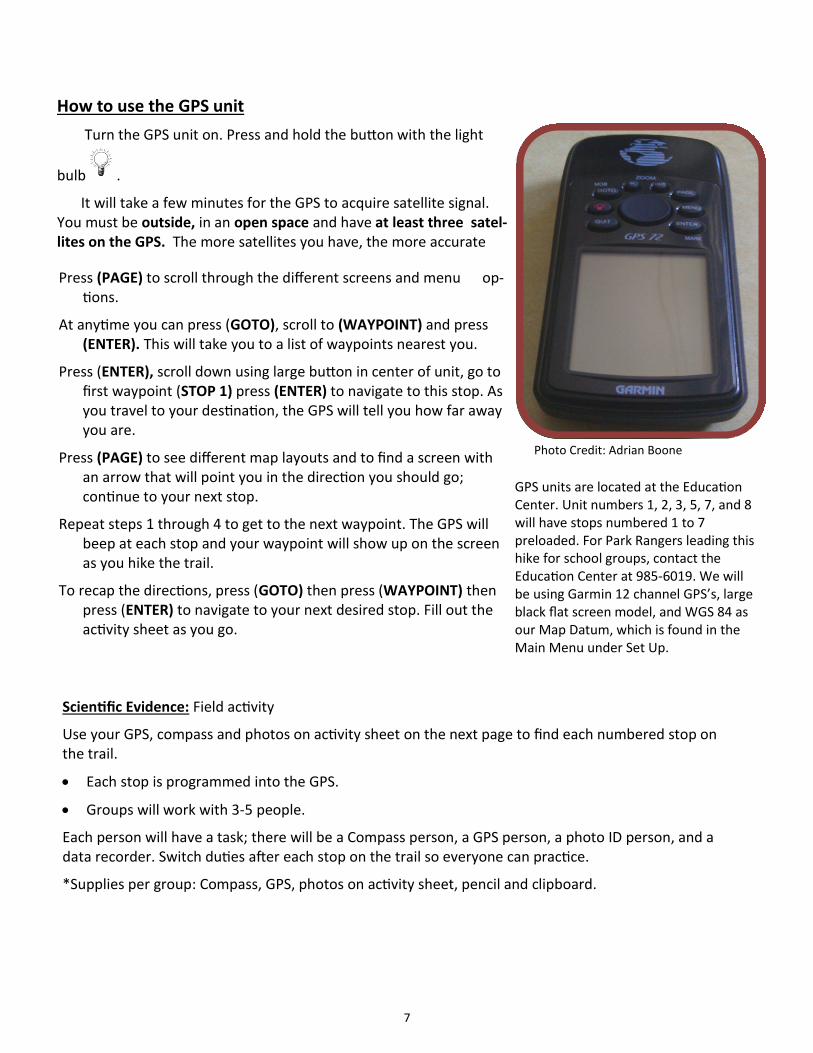
How to use the GPS unit
Turn the GPS unit on. Press and hold the button with the light
bulb .
It will take a few minutes for the GPS to acquire satellite signal. You must be outside, in an open space and have at least three satel-lites on the GPS. The more satellites you have, the more accurate
Press (PAGE) to scroll through the different screens and menu op-tions.
At anytime you can press (GOTO), scroll to (WAYPOINT) and press (ENTER). This will take you to a list of waypoints nearest you.
Press (ENTER), scroll down using large button in center of unit, go to first waypoint (STOP 1) press (ENTER) to navigate to this stop. As you travel to your destination, the GPS will tell you how far away you are.
Press (PAGE) to see different map layouts and to find a screen with an arrow that will point you in the direction you should go; continue to your next stop.
Repeat steps 1 through 4 to get to the next waypoint. The GPS will beep at each stop and your waypoint will show up on the screen as you hike the trail.
To recap the directions, press (GOTO) then press (WAYPOINT) then press (ENTER) to navigate to your next desired stop. Fill out the activity sheet as you go.
GPS units are located at the Education Center. Unit numbers 1, 2, 3, 5, 7, and 8 will have stops numbered 1 to 7 preloaded. For Park Rangers leading this hike for school groups, contact the Education Center at 985-6019. We will be using Garmin 12 channel GPS’s, large black flat screen model, and WGS 84 as our Map Datum, which is found in the Main Menu under Set Up.
Scientific Evidence: Field activity
Use your GPS, compass and photos on activity sheet on the next page to find each numbered stop on the trail.
Each stop is programmed into the GPS.
Groups will work with 3-5 people.
Each person will have a task; there will be a Compass person, a GPS person, a photo ID person, and a data recorder. Switch duties after each stop on the trail so everyone can practice.
*Supplies per group: Compass, GPS, photos on activity sheet, pencil and clipboard.
Photo Credit: Adrian Boone

8
Activity Worksheet: Notes & Observations
1. Think about the places you visited.
Make observations about what you felt, saw, smelled or heard. Write or draw about what impressed you the most.
2. For each stop answer the following questions to yourself out loud or as a group:
What kind of animal life did you see or hear?
What were some natural changes you observed in the landscape?
What were some anthropogenic (Human caused) changes you observed in the landscape?
What kind of natural landmarks could you use to find your way to these stops again?
Use your skills with compass and GPS to complete the following questions while hiking today.
9
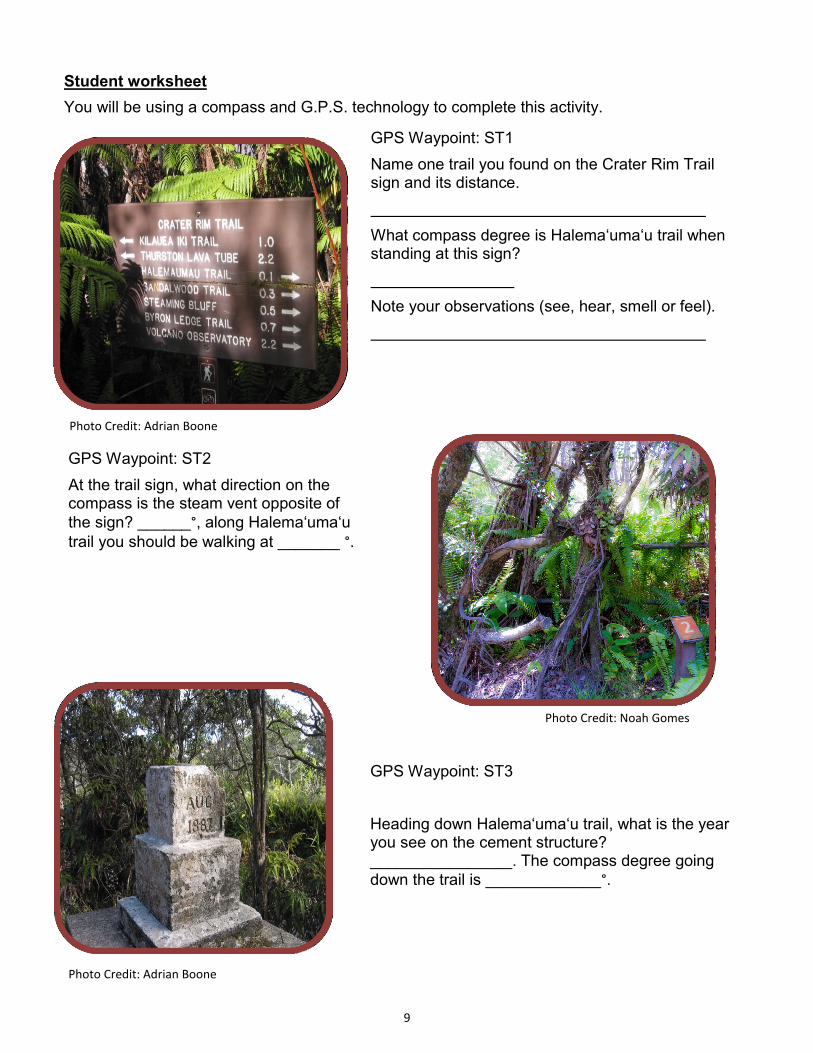
Student worksheet
You will be using a compass and G.P.S. technology to complete this activity.
GPS Waypoint: ST1
Name one trail you found on the Crater Rim Trail sign and its distance.
What compass degree is Halema‘uma‘u trail when standing at this sign?
Note your observations (see, hear, smell or feel).
GPS Waypoint: ST3
Heading down Halema‘uma‘u trail, what is the year you see on the cement structure? ________________. The compass degree going
down the trail is _____________°.
GPS Waypoint: ST2
At the trail sign, what direction on the compass is the steam vent opposite of
the sign? ______°, along Halema‘uma‘u
trail you should be walking at _______ °.
Photo Credit: Adrian Boone
Photo Credit: Noah Gomes
Photo Credit: Adrian Boone
10
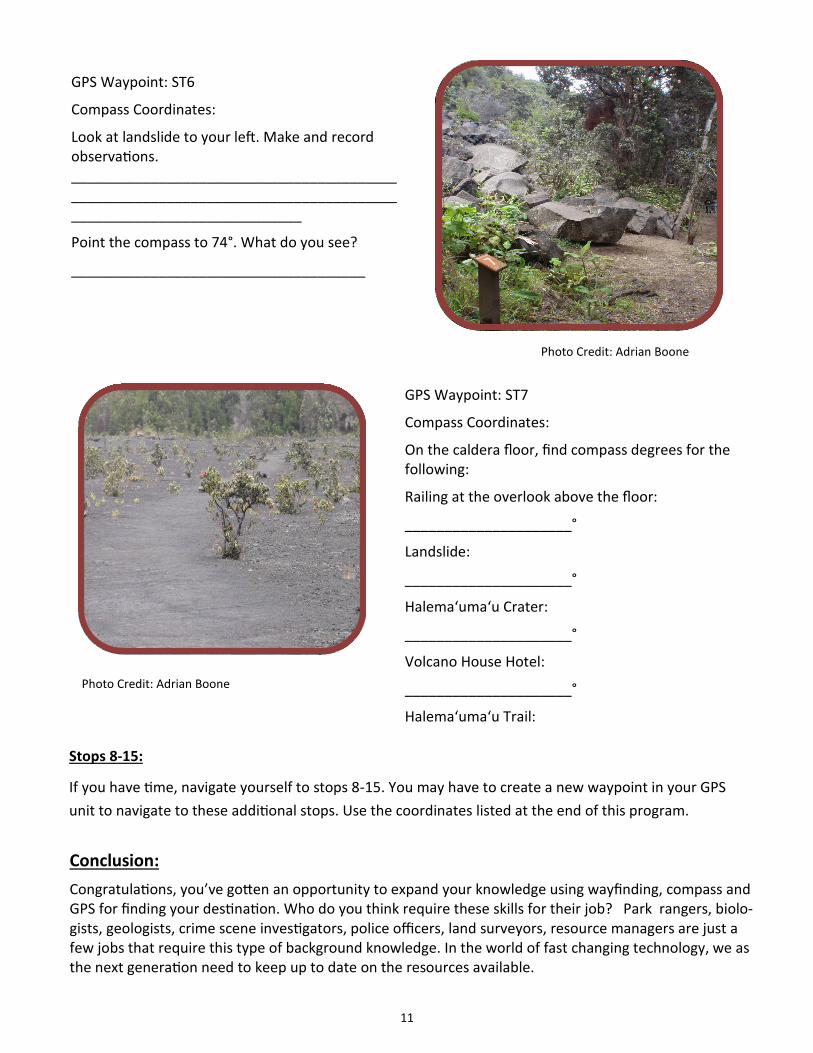
GPS Waypoint: ST5
Bench at the ‘Iliahi trail intersection, the trail goes in two directions. Walk on trail leading left, it will be the downhill course.
The trail is at what compass degree? ___________°.
Photo Credit: Adrian Boone
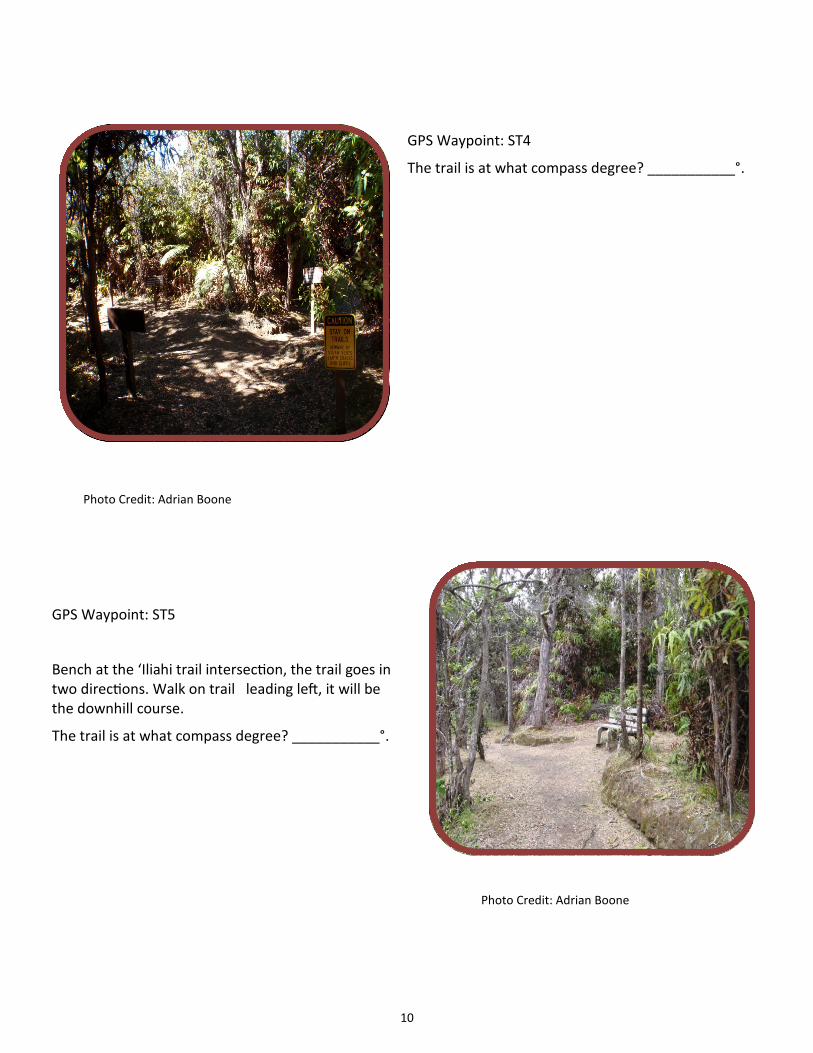
GPS Waypoint: ST4
The trail is at what compass degree? ___________°.
Photo Credit: Adrian Boone
11
GPS Waypoint: ST6
Compass Coordinates:
Look at landslide to your left. Make and record observations. _______________________________________________________________________________________________________________
Point the compass to 74°. What do you see?
_____________________________________
GPS Waypoint: ST7
Compass Coordinates:
On the caldera floor, find compass degrees for the following:
Railing at the overlook above the floor:
_____________________°
Landslide:
_____________________°
Halema‘uma‘u Crater:
_____________________°
Volcano House Hotel:
_____________________°
Halema‘uma‘u Trail:
Photo Credit: Adrian Boone
Photo Credit: Adrian Boone
Stops 8-15:
If you have time, navigate yourself to stops 8-15. You may have to create a new waypoint in your GPS
unit to navigate to these additional stops. Use the coordinates listed at the end of this program.
Conclusion:
Congratulations, you’ve gotten an opportunity to expand your knowledge using wayfinding, compass and GPS for finding your destination. Who do you think require these skills for their job? Park rangers, biolo-gists, geologists, crime scene investigators, police officers, land surveyors, resource managers are just a few jobs that require this type of background knowledge. In the world of fast changing technology, we as the next generation need to keep up to date on the resources available.

12
For Educators:
Below are the GPS points to be entered into GPS units, for teachers or educators to download, before they begin this program. Note Datum is WGS 84. The angle is also included in some of the stops.
ST1. N 19°25.785, W 155°15.461
ST2. N 19°25.785, W 155°15.499
ST3. N 19°25.781, W 155°15.537 trail at 310° angle
ST4. N 19°25.789, W 155°15.571 trail at 300° angle
ST5. N 19°25.798, W 155°15.571 trail at 160° angle
ST6. N 19°25.709, W 155°15.527 trail at 240° angle
ST7. N 19°25.710, W 155°15.609 trail at 130° angle
Optional GPS Waypoints:
ST8. N 19°25.619, W 155°15.548 trail at 160° angle
ST9. N 19°25.526, W 155°15.484 trail at 180° angle
ST10. N 19°25.459, W 155°15.507
ST11. N 19°25.332, W 155°15.522, 230° to plume, 140° to trail, 70° to railing, 270° to Jaggar Museum or Mauna Loa
ST12. Byron Ledge N 19°25.088 FIND W COORDINATE
ST13. N 19°25.089, W 155°15.186, 140° to trail, 240° to plume
ST14. N 19°25.048, W 155°15.186, 100° to Pu`u Pua`i, 350° to trail
ST15. 19°25.361, W 155°15.411, 210° to Jaggar Museum and Mauna Loa, 210° to plume, 340° to Visitor Center
Answer Key for Student Worksheet:
ST1. Halema’uma’u is 320
ST2. Steam vent is 130°. When on trail you walk at 310°
ST3. The year seen on the cement structure is 1887. Trail Direction is 330°
ST4. Trail direction is 320°
ST5. Walking left, the angle is 150°
ST6. The landslide formation was from an earthquake in 1982. Roots are hanging from the trees, which are called aerial stress roots. When pointing compass to 74° you should see a rail-ing on a cliff ledge.
ST7. The railing overlook is 65°. The landslide is 95°. Halemaʻumaʻu trail is 230°. Volcano House is 360°The angle across the caldera floor is 150°.


![wayfinding interpreti]e branding - Studio L'Imagestudiolimage.com/downloads/Wayfinding-Urban.pdf · Wayfinding Program In the heart of Chinatown, bilingual wayfinding signage directs](https://img.pdfslide.net/doc/110x75/5e8e6c5f99e6632d522e7817/wayfinding-interpretie-branding-studio-l-wayfinding-program-in-the-heart-of.jpg)