Embed Size (px)
Citation preview
1
Notes for Wireless LAN UsersThis manual explains how to connect the machine to the network via a wireless LAN interface in the infrastructure mode.In the infrastructure mode, communication is established via a wireless LAN access point.
DYX031
Ad hoc mode is not supported.•Ethernet and wireless LAN settings cannot be enabled at the same time.•
Checking Your Wireless Network EnvironmentBefore using the wireless LAN, configure the following settings and make the check.1. Before configuring the wireless LAN settings, configure the machine’s IP address or
make DHCP enabled.For details about configuring the machine's IP address, see "Preparing for Printing", Operat-ing Instructions .
2. Check that the access point is operating.
CHV600
2
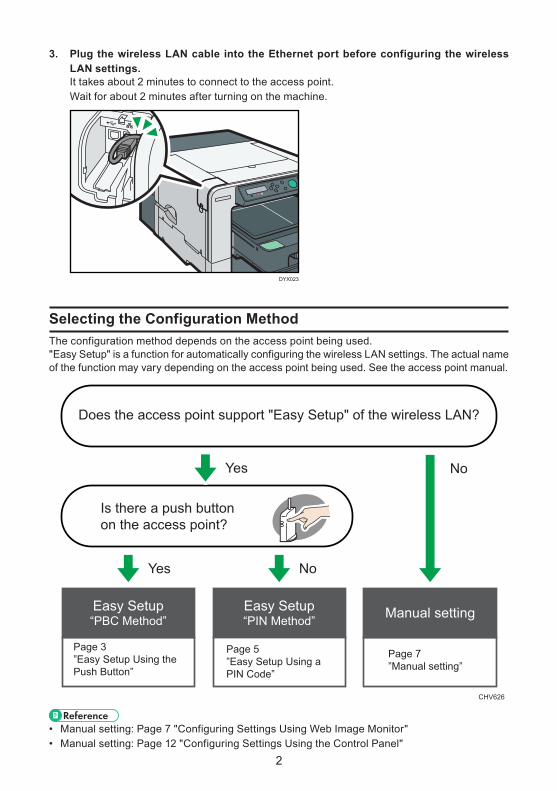
3. Plug the wireless LAN cable into the Ethernet port before configuring the wireless LAN settings.It takes about 2 minutes to connect to the access point.Wait for about 2 minutes after turning on the machine.
DYX023
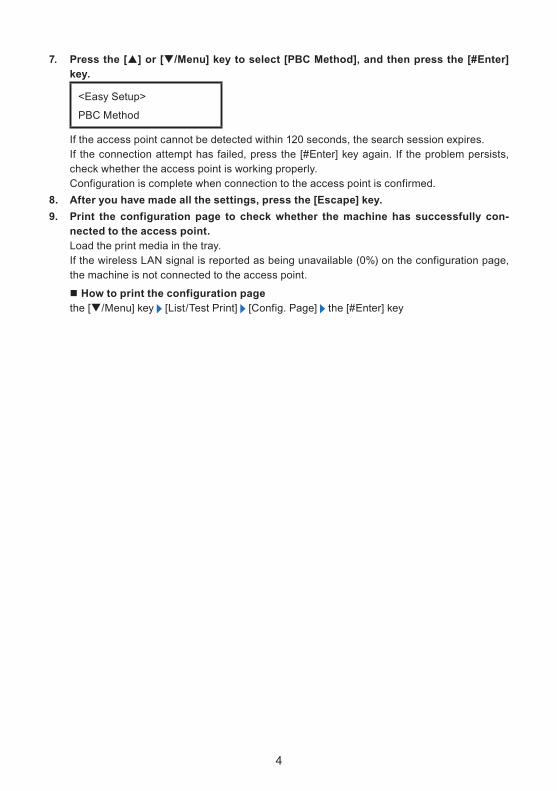
Selecting the Configuration MethodThe configuration method depends on the access point being used."Easy Setup" is a function for automatically configuring the wireless LAN settings. The actual name of the function may vary depending on the access point being used. See the access point manual.
Page 3”Easy Setup Using the Push Button”
Page 7”Manual setting”
Easy Setup“PBC Method”
Easy Setup“PIN Method” Manual setting
Does the access point support "Easy Setup" of the wireless LAN?
Is there a push button on the access point?
Page 5”Easy Setup Using a PIN Code”
Yes No
Yes No
CHV626
Manual setting: • Page 7 "Configuring Settings Using Web Image Monitor"Manual setting: • Page 12 "Configuring Settings Using the Control Panel"

3
Easy Setup Using the Push Button1. Turn the machine on.
DSB151
2. Press the [ /Menu] key.3. Press the [ ] or [ /Menu] key to display the [Host Interface] menu, and then press the
[#Enter] key.
<Menu>
Host Interface
4. Press the [ ] or [ /Menu] key to display [Wireless LAN], and then press the [#Enter] key.
<Host Interface>
Wireless LAN
5. Press the [ ] or [ /Menu] key to select [Easy Setup], and then press the [#Enter] key.
<Wireless LAN>
Easy Setup
6. Press the WPS button on the access point.
WPS
CHV607
4
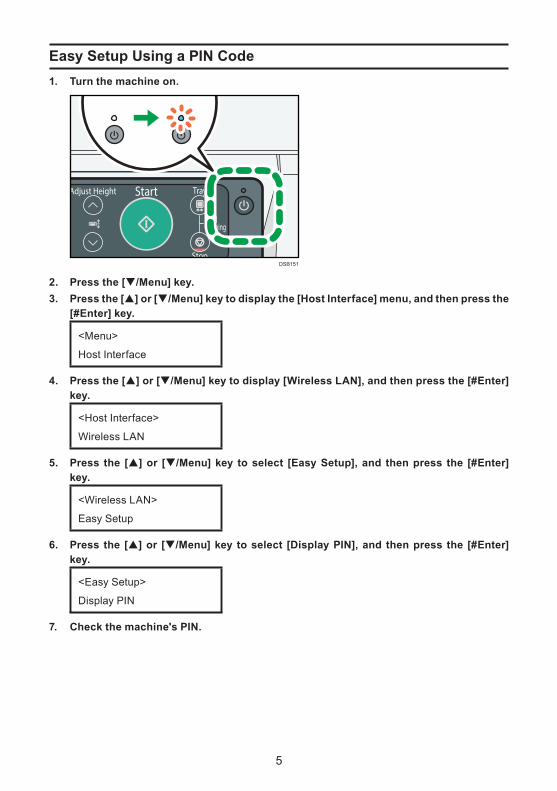
7. Press the [ ] or [ /Menu] key to select [PBC Method], and then press the [#Enter] key.
<Easy Setup>
PBC Method
If the access point cannot be detected within 120 seconds, the search session expires.If the connection attempt has failed, press the [#Enter] key again. If the problem persists, check whether the access point is working properly.Configuration is complete when connection to the access point is confirmed.
8. After you have made all the settings, press the [Escape] key.9. Print the configuration page to check whether the machine has successfully con-
nected to the access point.Load the print media in the tray.If the wireless LAN signal is reported as being unavailable (0%) on the configuration page, the machine is not connected to the access point.
How to print the configuration page �the [ /Menu] key [List/Test Print] [Config. Page] the [#Enter] key
5
Easy Setup Using a PIN Code1. Turn the machine on.
DSB151
2. Press the [ /Menu] key.3. Press the [ ] or [ /Menu] key to display the [Host Interface] menu, and then press the
[#Enter] key.
<Menu>
Host Interface
4. Press the [ ] or [ /Menu] key to display [Wireless LAN], and then press the [#Enter] key.
<Host Interface>
Wireless LAN
5. Press the [ ] or [ /Menu] key to select [Easy Setup], and then press the [#Enter] key.
<Wireless LAN>
Easy Setup
6. Press the [ ] or [ /Menu] key to select [Display PIN], and then press the [#Enter] key.
<Easy Setup>
Display PIN
7. Check the machine's PIN.
6
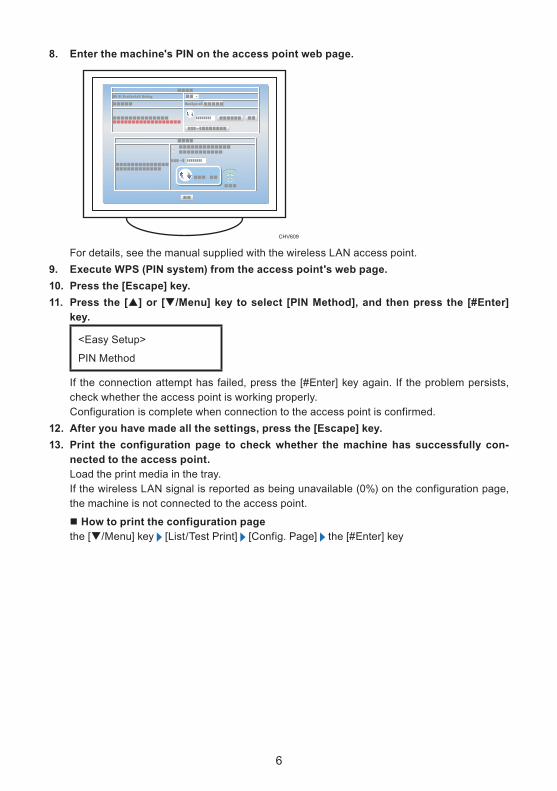
8. Enter the machine's PIN on the access point web page.
CHV609
For details, see the manual supplied with the wireless LAN access point.9. Execute WPS (PIN system) from the access point's web page.10. Press the [Escape] key.11. Press the [ ] or [ /Menu] key to select [PIN Method], and then press the [#Enter]
key.
<Easy Setup>
PIN Method
If the connection attempt has failed, press the [#Enter] key again. If the problem persists, check whether the access point is working properly.Configuration is complete when connection to the access point is confirmed.
12. After you have made all the settings, press the [Escape] key.13. Print the configuration page to check whether the machine has successfully con-
nected to the access point.Load the print media in the tray.If the wireless LAN signal is reported as being unavailable (0%) on the configuration page, the machine is not connected to the access point.
How to print the configuration page �the [ /Menu] key [List/Test Print] [Config. Page] the [#Enter] key

7
Manual SettingIf you cannot confirm the settings of the access point being used or the access point does not support WPS, configure the wireless LAN settings manually.You can configure the settings using Web Image Monitor or the control panel. This manual mainly explains configuration using Web Image Monitor.
Configuring Settings Using Web Image Monitor
Connect the machine and computer with an Ethernet cable before configuring the settings.•
DYX024
Check the security method employed by the access point being used.•Check the machine's IP address.•the [ /Menu] key [Host Interface] [Network Setup] [IPv4 Address]
1. Launch the Web browser.2. In the address bar, enter "http://(machine's IP address or host name)/".3. Click [Administrator Login].
DSB201
A dialog box for entering the user name and password appears.4. Enter the user name and password, and then click [OK].
If this is the first time to log in, enter "admin" as the user name and leave the password blank.
8
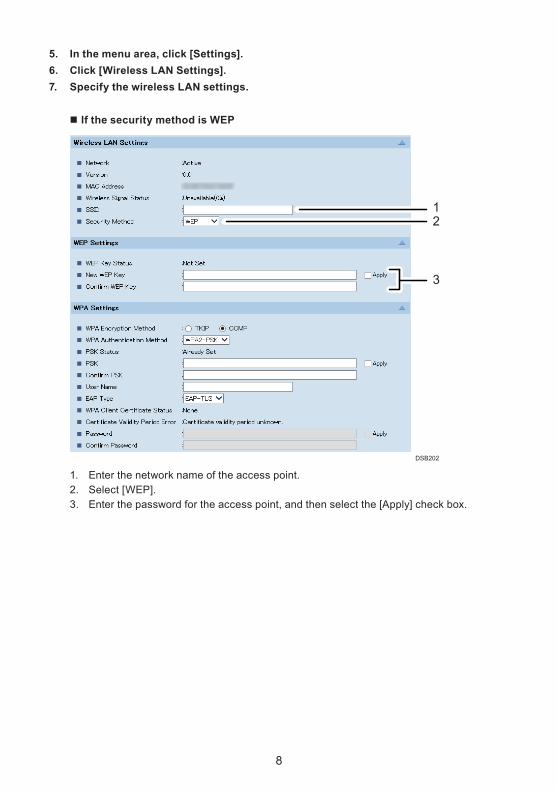
5. In the menu area, click [Settings].6. Click [Wireless LAN Settings].7. Specify the wireless LAN settings.
If the security method is WEP �
12
3
DSB202
1. Enter the network name of the access point.2. Select [WEP].3. Enter the password for the access point, and then select the [Apply] check box.
9
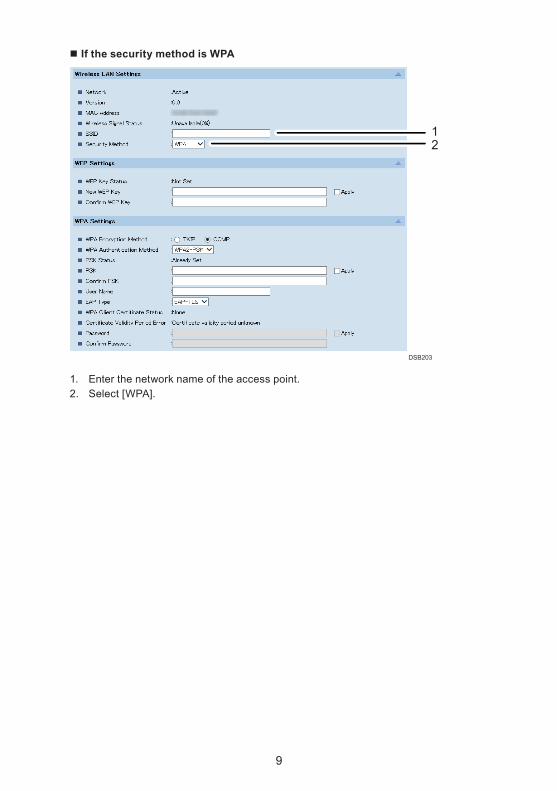
If the security method is WPA �
12
DSB203
1. Enter the network name of the access point.2. Select [WPA].
10
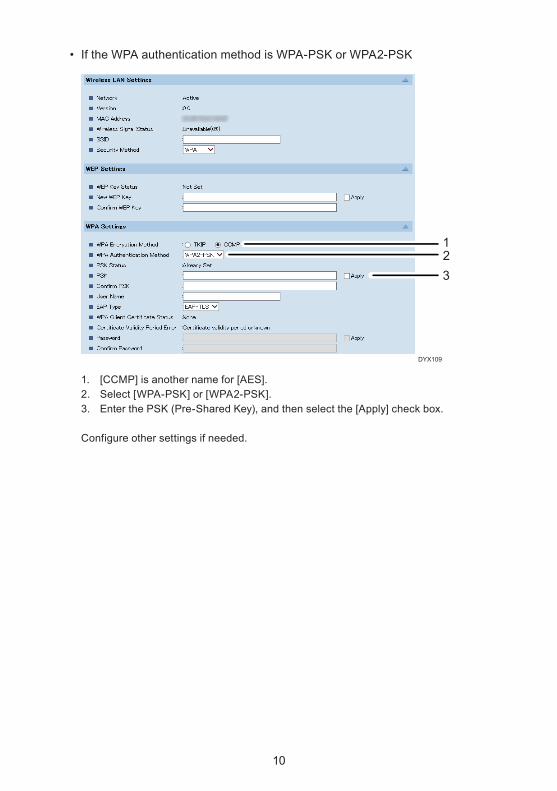
If the WPA authentication method is WPA-PSK or WPA2-PSK•
21
3
DYX109
1. [CCMP] is another name for [AES].2. Select [WPA-PSK] or [WPA2-PSK].3. Enter the PSK (Pre-Shared Key), and then select the [Apply] check box.
Configure other settings if needed.
11
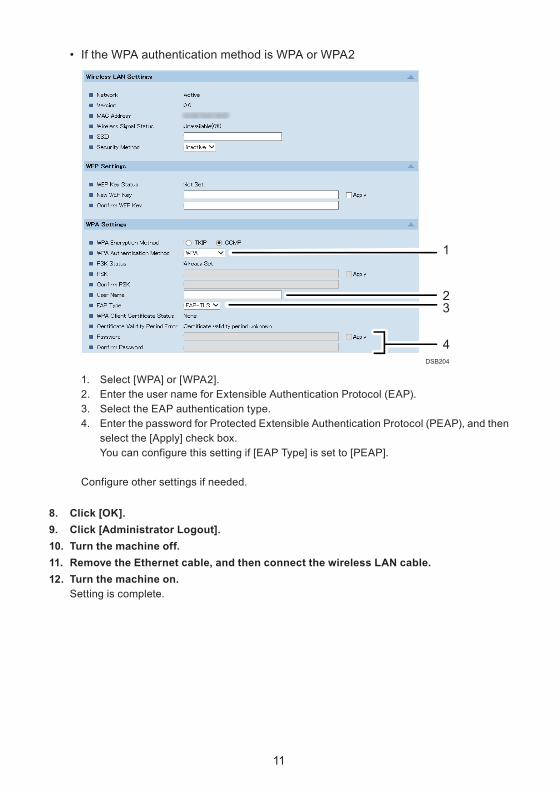
If the WPA authentication method is WPA or WPA2•
1
23
4DSB204
1. Select [WPA] or [WPA2].2. Enter the user name for Extensible Authentication Protocol (EAP).3. Select the EAP authentication type.4. Enter the password for Protected Extensible Authentication Protocol (PEAP), and then
select the [Apply] check box.You can configure this setting if [EAP Type] is set to [PEAP].
Configure other settings if needed.
8. Click [OK].9. Click [Administrator Logout].10. Turn the machine off.11. Remove the Ethernet cable, and then connect the wireless LAN cable.12. Turn the machine on.
Setting is complete.
© 2017, 2018 Ricoh Co.,Ltd.EN GB EN US EN AU J088-6621B
12
Configuring Settings Using the Control Panel
For details, see Notes for Wireless LAN Users on the manufacturer's Web site or the Operating •Instructions.
1. Configure the wireless LAN settings. Press the [#Enter] key for 2 seconds or more to complete the input.the [ /Menu] key [Host Interface] [Wireless LAN] [Security Method]
If Wireless LAN Cannot Be ConnectedIf you cannot connect the wireless LAN, check the following points:
Make sure that the wireless LAN cable is plugged into the Ethernet port.•If “Easy Setup” (push button) cannot be done successfully, try bringing the access point and •the machine closer together, to within 1 m (39.4 inches), and try again within range of the wire-less signal.The machine is not compatible with the 5 GHz band. Set the SSID and password to the 2.4 •GHz band.When you register the MAC address on the DHCP server, register the machine’s wired MAC •address, not the wireless MAC address of the machine.
![Notes for Wireless LAN Users - Ricohsupport.ricoh.com/bb_v1oi/pub_e/oi/0001048/0001048163/VJ0276645/J... · 1 Notes for Wireless LAN Users ... Easy Setup 6. Press the [] ... see Notes](https://img.pdfslide.net/doc/110x75/5b7289d17f8b9ae54f8ccada/notes-for-wireless-lan-users-1-notes-for-wireless-lan-users-easy-setup.jpg)