Embed Size (px)
Citation preview
Now!-BuildYour Own ATV
SPECIALIZED vehicles can be a ballbut all of them bring to mind one
immediate drawback—cost. For some-thing you may not use too often, justi-fying the expense could prevent yourhaving a lot of fun. The MI Marauderlicks this cost problem and adds safetyfeatures not found on other ATVs at thesame time.
$1,500 is par for the course for anATV, but you can build this one for lessthan $500. If you have some usablc partson hand, it can cost a whole lot less, butabout $500 is tops.
The MI Marauder is built like a tankfind has similar controls. Two sticksstart, shift and reverse the six wheels.To go, you push both levers forward.Pull back on them and you reverse.Push one and pull the other to change
What's an ATV? it's anAll-Terrain Vehicle, that'swhat. And the most popularnow fun vehicle on the scene.Here are complete plansfor building your own.
direction in the length of the machineas one set of wheels goes forward andthe opposite set go backwards. Let go ofboth handles and you come to a stopautomatically.
Transaxle Automatic Transmission orTAT as it's called, works this magicwith an infinite number of gear ratiosfrom High to Low. The TATs cone-shaped drive discs hold the secret thatmakes it a clutch, variable speed trans-mission, and differential all in one. Youdon't have to build or assemble the TAT
Mechanix Illustrated
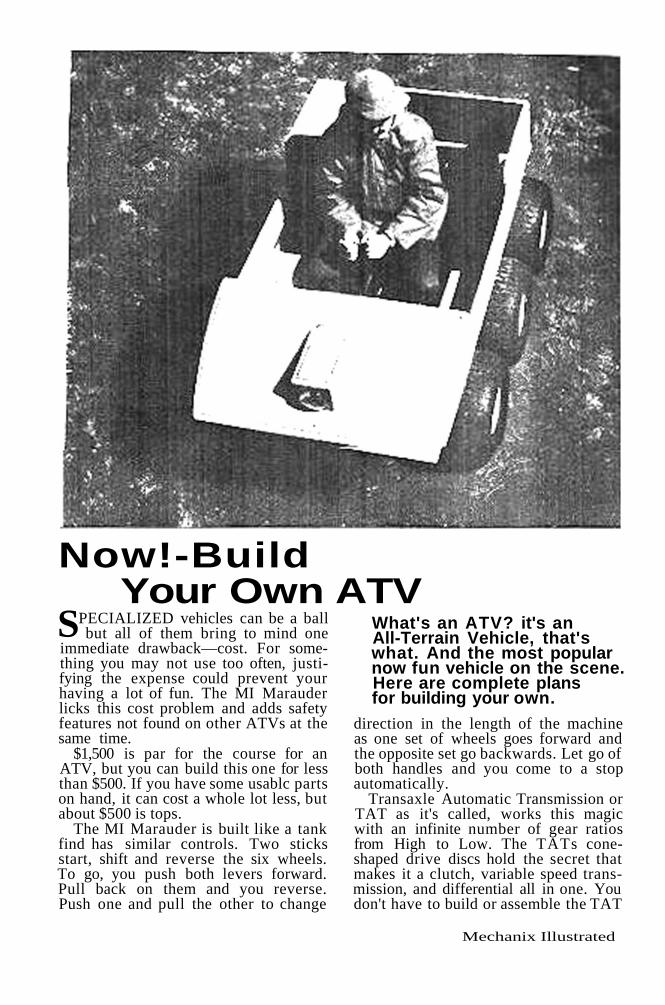
6-5 16
DRILL EXTENSION makes it easy to transferaxle bolt holes from chassis to Marauder 'sPlywood body within 1/2-in. of vertical side.
STEEL STRAPS on square steel tubing spac-ers hold dead axles securely in place. Out-board chains make the dead axles possible.
77
Build Your Own ATV
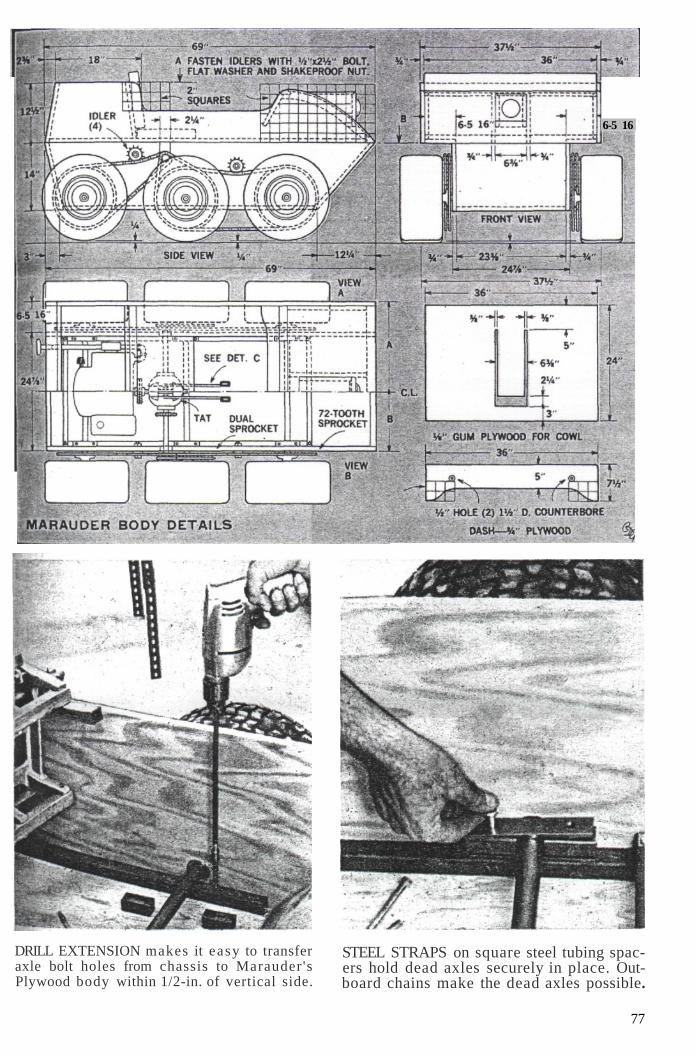
ALLEN KEY tightens axle locating collarworking through access hole in plywood.
TAT (left) coupled to engine (right) is con-trolled by rods from hand lever (arrows).
FLEXIBLE COUPLING at rear of TAT hooksup to front of 8-hp engine output shaft.
IDLER SPROCKET keeps drive chain underthe correct tension to prevent slipping.
for your Marauder, you buy it and in-stall it as a unit.
Throttle control is only used whenstarting up the 8-hp, 4-stroke engine.The TAT takes care of all speed anddirection change requirements.
Chain drive units outside the body ofthe vehicle mean that you can't get ahand or even a pants leg caught in theworks—a safety feature not found on78
PLANS AVAILABLEA 30x40-in. plan, describing the con-struction of the MI Marauder is avail-able for $5. It contains a completelist: of materials, plus extra photosdetailing construction. For your copy,send $5 to MECHANIX ILLUSTRATEDPlans Service, Greenwich, Conn. 06830.Please ask for Plan No. MATV-l-70when sending order and be sure you in-clude payment (check or money order).
Mechanix Illustrated

79
Build Your Own ATV
all other ATVs. Outside chain drive alsopermits large diameter gears for greaterpower through increased gear reduc-tion. Outboard sprockets mean you canuse dead axles eliminating the need forball-bearing axle shaft supports. Turfsaver tubeless tires fitted on offsetwheels cover and protect the drivechains.
Body and chassis are built from 3/4-in.plywood and square section steel tubing.These materials are easy to work andavailable locally. All mechanical partsincluding engine, wheels and drive unitscome from one source (The Armor Co.,Box 290, Deer Park, N.Y. 11729) whichsimplifies parts procurement.
The lower body section is built first.Cut plywood to size, bore the holes, andassemble using screws and waterproofglue. Follow the plans and pictures.When locating holes, note that thosethrough the sides for the center axle area little lower than the ones for front andrear axles. This slight seesaw effectgives longer tire life and increasedmaneuverability, especia l ly on drypavement as the vehicle tends to pivoton the two center wheels.
Steel tube framing goes in when thelower body section is completed. Cut,drill and mount it in place using 5/16-in.bolts with washers under the bolt headswhere they bear on plywood. You needlock washers on all nuts to keep themfrom vibrating loose.
Spacer blocks and 1/4xl-in. bar stockhold the 1-in. dead axles to the chassis.The holes in the spacer blocks are alittle larger than those in the chassis soyou can shim the spacers to set up chaintension correctly. Chain idlers for theruns to the four outer wheels take upmore slack. Adjust chains to the twocenter wheels by shimming the TATunit to raise or lower the drive sprocketsas required. Once you get the chaintension properly set up, you should findlittle further adjustment required.
To compensate for any slight inac-curacies in the body, it's best to drillaxle bolt holes after the TAT is in placeand the chains are tensioned.
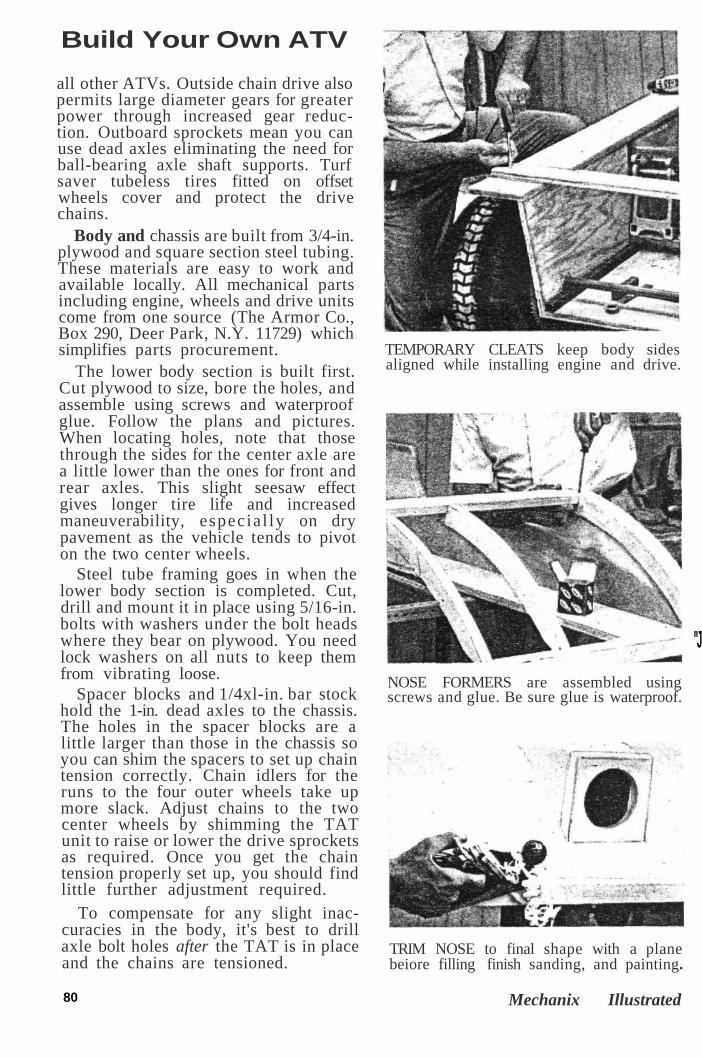
TEMPORARY CLEATS keep body sidesaligned while installing engine and drive.
"J
NOSE FORMERS are assembled usingscrews and glue. Be sure glue is waterproof.
TRIM NOSE to final shape with a planebeiore filling finish sanding, and painting.
80 Mechanix Illustrated
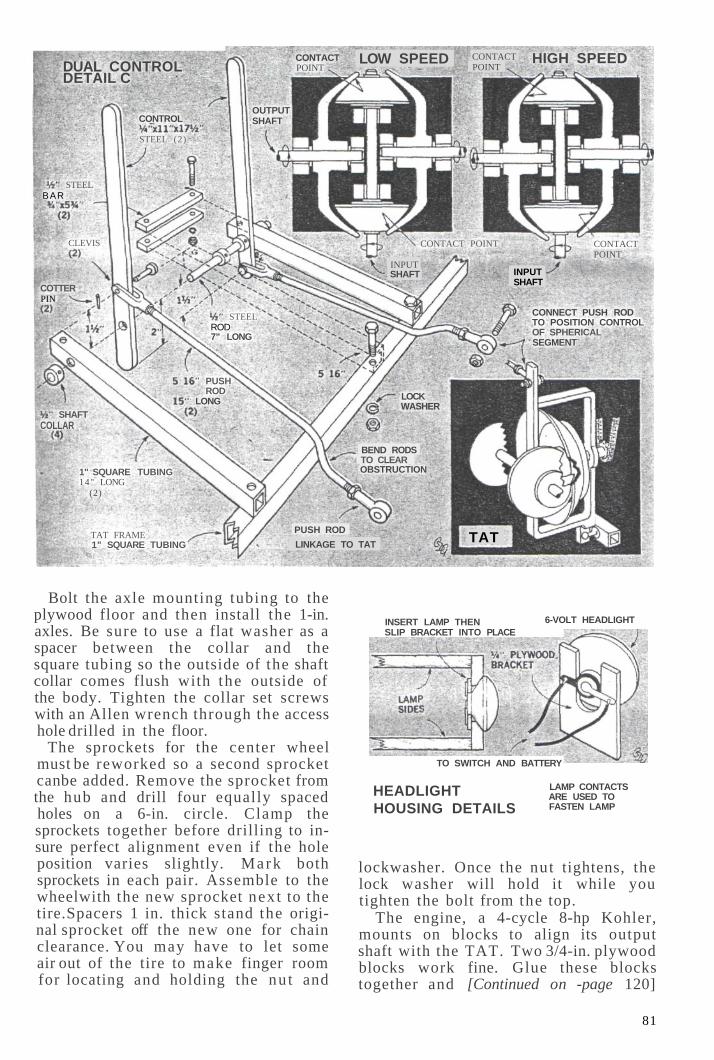
Bolt the axle mounting tubing to theplywood floor and then install the 1-in.axles. Be sure to use a flat washer as aspacer between the collar and thesquare tubing so the outside of the shaftcollar comes flush with the outside ofthe body. Tighten the collar set screwswith an Allen wrench through the accesshole drilled in the floor.
The sprockets for the center wheelmust be reworked so a second sprocketcan be added. Remove the sprocket fromthe hub and drill four equally spacedholes on a 6-in. circle. Clamp thesprockets together before drilling to in-sure perfect alignment even if the holeposition varies slightly. Mark bothsprockets in each pair. Assemble to thewheel with the new sprocket next to thetire. Spacers 1 in. thick stand the origi-nal sprocket off the new one for chainclearance. You may have to let someair out of the tire to make finger roomfor locating and holding the nu t and
INSERT LAMP THENSLIP BRACKET INTO PLACE
6-VOLT HEADLIGHT
TO SWITCH AND BATTERY
HEADLIGHTHOUSING DETAILS
LAMP CONTACTSARE USED TOFASTEN LAMP
lockwasher. Once the nut tightens, thelock washer will hold it while youtighten the bolt from the top.
The engine, a 4-cycle 8-hp Kohler,mounts on blocks to align its outputshaft with the TAT. Two 3/4-in. plywoodblocks work fine. Glue these blockstogether and [Continued on -page 120]
81
PUSH ROD
LINKAGE TO TATTAT FRAME
STEEL
INPUTSHAFT
CONTACT POINT
ROD7" LONG
SHAFTCOLLAR
1" SQUARE TUBING
COTTERPIN
CONNECT PUSH RODTO POSITION CONTROLOF SPHERICALSEGMENT
TAT
BEND RODSTO CLEAROBSTRUCTION
LOCKWASHER
CONTACTPOINT
INPUTSHAFT
HIGH SPEEDCONTACTPOINT
LOW SPEEDCONTACTPOINT
OUTPUTSHAFT
DUAL CONTROLDETAIL C
CONTROL
STEEL (2)
1" SQUARE TUBING
14" LONG(2)
STEELBAR
CLEVIS
PUSHROD
LONG

Build Your Own ATV
120 Mechanix Il lustrated
[Continued, from page 81]then locate the four mounting holes usingthe engine base as a template. To locatethe holes in the floor panel, hook up theengine output shaft with the TAT inputusing the flexible coupling. Make sure theengine doesn't bind on the rear axle.
The exhaust port faces the seat back soyou'll have to route it to the rear usingpipe and fittings as shown. |
Twin control handles are linked to theTAT by a pair of push rods. Note that onerod connects above the pivot on the controlsbracket and the other below. A threaded,-clevis gives fine adjustment, "
Mount idler sprockets only after alldrive chains are in place. Locate idler bolthole by engaging the gear in the chaintaking up the slack, and marking the cen-ter of the sprocket. Use flat washers onboth sides of the wood and shake-proofnuts on the idler bolts.
Throttle control attaches to the side ofthe body and goes in any convenient po-sition.
The plywood upper body is shaped withcurved formers at the front. Formers havea 1/8-in. setback from side panels to allowfor thickness of the plywood skin.
Cut the plywood to size making the cut-out for the light housing. Be sure to lay itout so surface grain on plywood runs fromside to side so the panel will take the curveGroove the nose piece to take the plywoodcowl. This eliminates the need for clamp-ing when gluing this edge. Clamp the topedge only. Position the lamp housing boxbefore adding cowl, then glue and screwdown permanently.
Final finish calls for a plane and routerto round all edges. Then sand smooth, sealand apply several coats of exterior enamel.Pick a bright color to make your Maraudereasier to spot should you get lost in the,boondocks.
Decorative striping adds the final touchto your machine. Do it the easy way with1/8-in. black plastic tape. Trimmed with arazor blade, tape is almost impossible totell from painted striping and it's a lotneater than most hand painted stripes.