Embed Size (px)
Citation preview
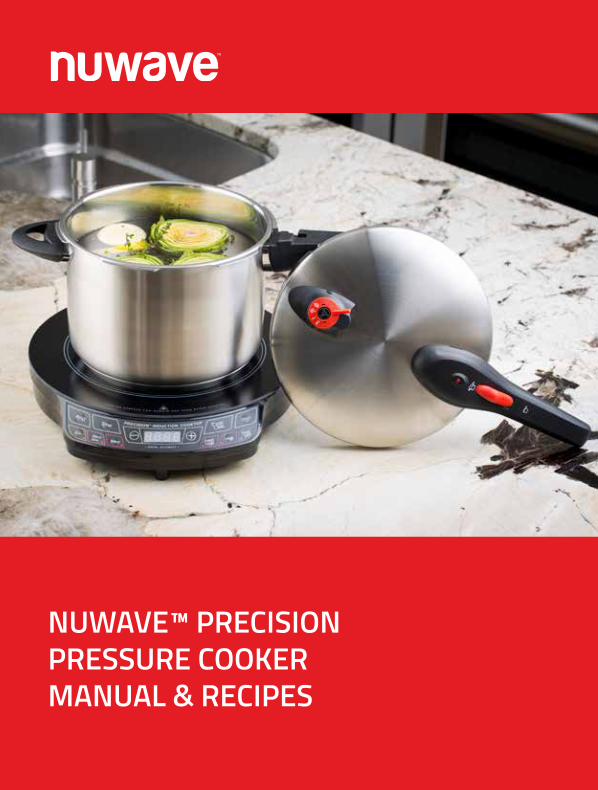
NUWAVE™ PRECISION PRESSURE COOKERMANUAL & RECIPES

Product Information 5Important Safeguards 6-7Safety Systems & Structure 8-9Benefits 10Operating Instructions 11-13Cooking Instructions 14-15Cleaning & Maintenance 16-17 Cooking Tricks & Tips 18-20NuWave™ Precision Pressure Cooker Recipes 21-33 Squash Soup 21 Spiced Tomato Rice Soup 22 Red Potatoes with Garlic & Butter Sauce 23 Simple Healthy Brown Rice 23 Creamy Mashed Potatoes 24 Fifteen Minute Risotto 25 Root Vegetable Casserole 26 Pork Chops 27 Italian Sausage with Peppers & Onions 28 Corned Beef & Cabbage 29 Beef Stroganoff 30 Texas Style Chili 31 Simply Whole Chicken 32 Beer Steamed Mussels 33
Table of Contents
5Product Information
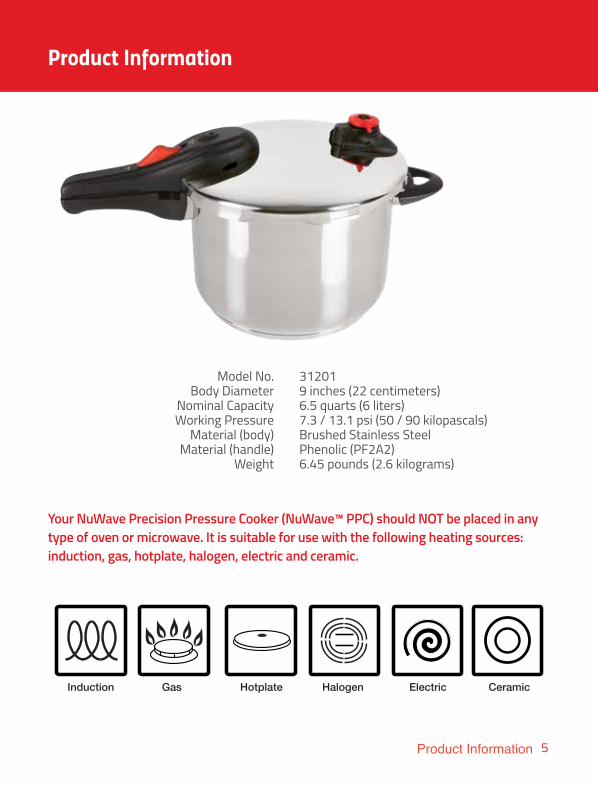
Your NuWave Precision Pressure Cooker (NuWave™ PPC) should NOT be placed in any type of oven or microwave. It is suitable for use with the following heating sources: induction, gas, hotplate, halogen, electric and ceramic.
Model No. 31201 Body Diameter 9 inches (22 centimeters) Nominal Capacity 6.5 quarts (6 liters) Working Pressure 7.3 / 13.1 psi (50 / 90 kilopascals) Material (body) Brushed Stainless Steel Material (handle) Phenolic (PF2A2) Weight 6.45 pounds (2.6 kilograms)
Induction Gas Hotplate Halogen Electric Ceramic
Product Information
6 Important Safeguards
Important Safeguards
Read all instructions1. Do not touch hot surfaces. Use handles.2. Close supervision is necessary when the pressure cooker is used near children.3. Do not place the pressure cooker in a heated oven.4. Extreme caution must be used when moving a pressure cooker containing hot
liquids.5. Do not use pressure cooker for other than intended use.6. This appliance cooks under pressure. Improper use may result in scalding
injury. Make certain unit is properly closed before operating. See Operating Instructions.
7. Do not fill the unit over ⅔ full. When cooking foods that expand during cooking such as rice or dried vegetables, do not fill the unit over ½ full. Over filling may cause a risk of clogging the vent pipe and developing excess pressure. See Operating Instructions.
8. Be aware that certain foods, such as applesauce, cranberries, pearl barley, oatmeal or other cereals, split peas, noodles, macaroni, rhubarb, or spaghetti can foam, froth, and sputter, and clog the pressure release device (steam vent). These foods should not be cooked in a pressure cooker.
9. Always check the pressure release devices for clogging before use.10. Do not open the pressure cooker until the unit has cooled and all internal
pressure has been released. If the handles are difficult to push apart, this indicates that the cooker is still pressurized – do not force it open. Any
pressure in the cooker can be hazardous. See Operating Instructions.11. Do not use this pressure cooker for pressure frying with oil.12. When the normal operating pressure is reached, turn the heat down so all the
liquid, which creates the steam, does not evaporate.
SAVE THESE INSTRUCTIONS.
7Important Safeguards
Additional Safeguards:• If you cook meat with skin, such as sausage, swelling can occur when cooked
under pressure. Piercing skin after cooking can lead to bursts of hot liquid.• Do not lean over the NuWave PPC at any time while it is cooking.• The NuWave PPC should not be used for any medical purposes. It is not
designed to reach the required temperature for sterilization.• The rubber gasket creates a pressure seal between lid and pot. Keep the gasket
completely clean and free from any cracks or deterioration.• It is extremely important to fill the NuWave PPC with liquid prior to operation.
Never cook in the NuWave PPC without liquid as doing so can cause the NuWave PPC to overheat and damage the safety mechanisms. In case of overheating, never remove the NuWave PPC from the heat source. Instead, turn off the heat immediately and let the NuWave PPC cool until the pressure indicator depresses.
• Make sure all parts of the pressure regulator and ventilated pipe are clean and properly assembled.
• If the pressure indicator button is raised and too much steam is escaping, lower the cooking temperature in order to lower the pressure.
• Do not alter the safety mechanisms or attempt to repair the NuWave PPC as this will void the warranty. Please adhere to the Maintenance Instructions specified for use, or contact customer service at 877-689-2838 for assistance.
• Use only the appropriate replacement parts from NuWave to maintain proper functionality and safety. Visit www.NuWaveNow.com for replacement part and pieces.
8 Safety Systems & Structure
Safety Systems & Structure
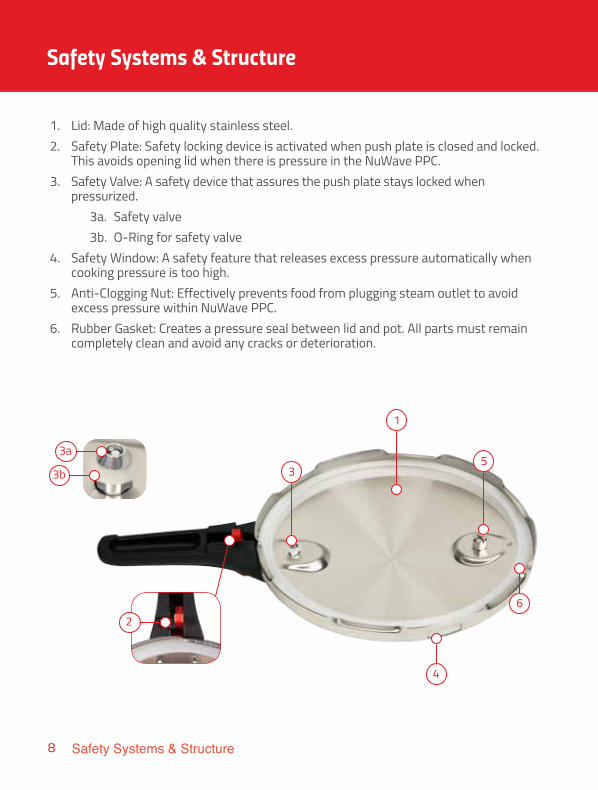
1. Lid: Made of high quality stainless steel. 2. Safety Plate: Safety locking device is activated when push plate is closed and locked.
This avoids opening lid when there is pressure in the NuWave PPC.3. Safety Valve: A safety device that assures the push plate stays locked when
pressurized. 3a. Safety valve 3b. O-Ring for safety valve4. Safety Window: A safety feature that releases excess pressure automatically when
cooking pressure is too high.5. Anti-Clogging Nut: Effectively prevents food from plugging steam outlet to avoid
excess pressure within NuWave PPC.6. Rubber Gasket: Creates a pressure seal between lid and pot. All parts must remain
completely clean and avoid any cracks or deterioration.
4
3a
3b
6
35
1
2
9Safety Systems & Structure
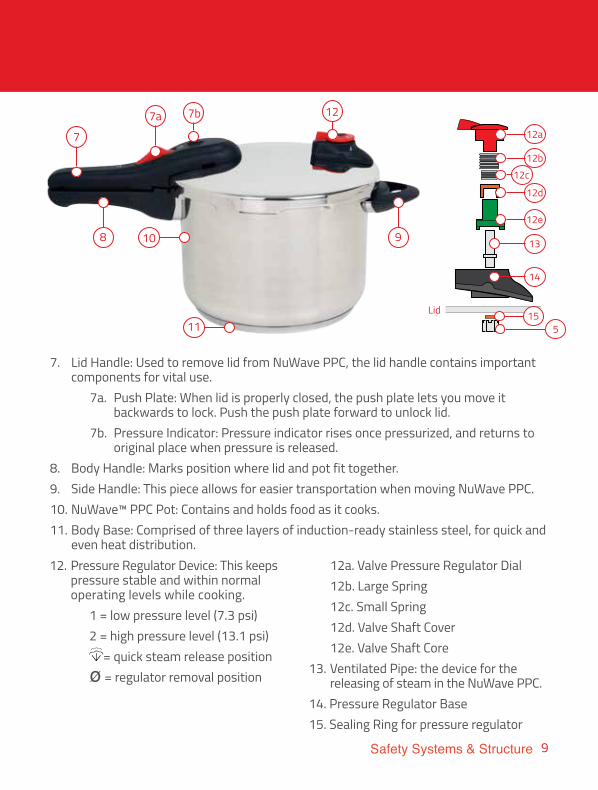
7. Lid Handle: Used to remove lid from NuWave PPC, the lid handle contains important components for vital use.
7a. Push Plate: When lid is properly closed, the push plate lets you move it backwards to lock. Push the push plate forward to unlock lid.
7b. Pressure Indicator: Pressure indicator rises once pressurized, and returns to original place when pressure is released.
8. Body Handle: Marks position where lid and pot fit together.9. Side Handle: This piece allows for easier transportation when moving NuWave PPC.10. NuWave™ PPC Pot: Contains and holds food as it cooks.11. Body Base: Comprised of three layers of induction-ready stainless steel, for quick and
even heat distribution.
10
11
98
12. Pressure Regulator Device: This keeps pressure stable and within normal operating levels while cooking.
1 = low pressure level (7.3 psi) 2 = high pressure level (13.1 psi) = quick steam release position ø = regulator removal position
12a. Valve Pressure Regulator Dial 12b. Large Spring 12c. Small Spring 12d. Valve Shaft Cover 12e. Valve Shaft Core13. Ventilated Pipe: the device for the
releasing of steam in the NuWave PPC.14. Pressure Regulator Base15. Sealing Ring for pressure regulator
7
7a 7b 12
12a
12b12c
12d
12e
515
13
14
Lid
10 Benefits
Benefits
NuWave™ PPC consists of a cooking pot and a special lid that locks into place on the top of the pot. When NuWave PPC is heated, steam is sealed inside, which creates pressure. With this high pressure, the internal temperature of the NuWave PPC is raised above the normal boiling point of water. The cooking process is thus expedited leading to healthier meals.
Faster• On average, the NuWave PPC prepares food faster than traditional cooking methods.
Tastier• Pressure cooking allows food to retain its full and natural flavor by cooking quickly
and efficiently. With the natural flavor intact, less seasoning is required, enabling you to craft your meals precisely to your taste.
Healthier• Vitamins and minerals are retained in food prepared with the NuWave PPC compared
to conventional stove top cooking. In addition, pressure cooking utilizes water in lieu of oil or fat, eliminating excess amounts from the meal.
Multifunctional• The NuWave PPC can be used for steaming, simmering and stewing fresh or
even frozen foods. Prepare everything from delicate soups and desserts to hearty meat dishes.
11Operating Instructions
Operating Instructions
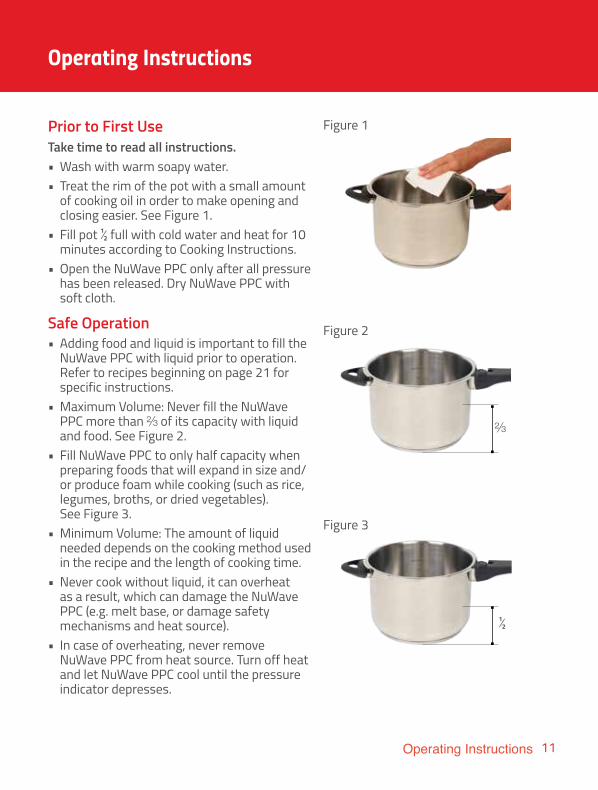
Prior to First UseTake time to read all instructions.• Wash with warm soapy water.• Treat the rim of the pot with a small amount
of cooking oil in order to make opening and closing easier. See Figure 1.
• Fill pot ½ full with cold water and heat for 10 minutes according to Cooking Instructions.
• Open the NuWave PPC only after all pressure has been released. Dry NuWave PPC with soft cloth.
Safe Operation• Adding food and liquid is important to fill the
NuWave PPC with liquid prior to operation. Refer to recipes beginning on page 21 for specific instructions.
• Maximum Volume: Never fill the NuWave PPC more than ⅔ of its capacity with liquid and food. See Figure 2.
• Fill NuWave PPC to only half capacity when preparing foods that will expand in size and/or produce foam while cooking (such as rice, legumes, broths, or dried vegetables). See Figure 3.
• Minimum Volume: The amount of liquid needed depends on the cooking method used in the recipe and the length of cooking time.
• Never cook without liquid, it can overheat as a result, which can damage the NuWave PPC (e.g. melt base, or damage safety mechanisms and heat source).
• In case of overheating, never remove NuWave PPC from heat source. Turn off heat and let NuWave PPC cool until the pressure indicator depresses.
Figure 1
Figure 2
Figure 3
⅔
½
12 Operating Instructions
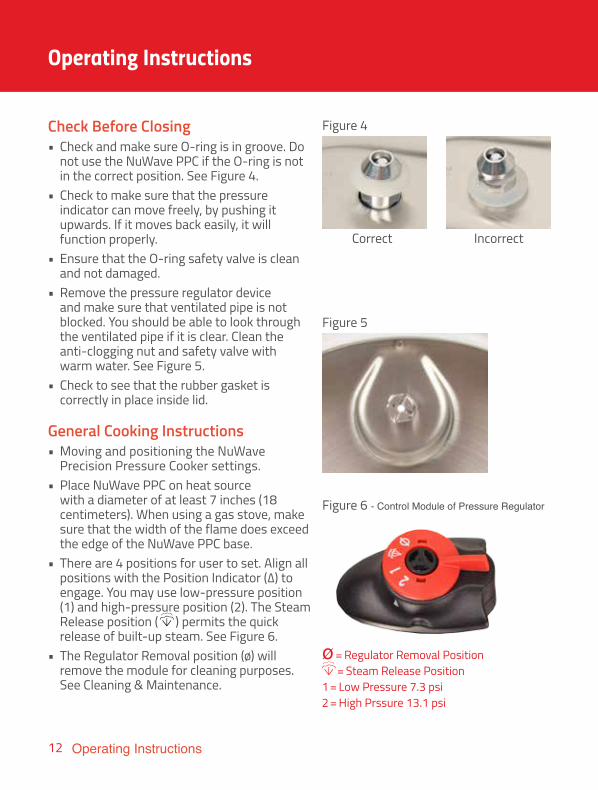
Check Before Closing• Check and make sure O-ring is in groove. Do
not use the NuWave PPC if the O-ring is not in the correct position. See Figure 4.
• Check to make sure that the pressure indicator can move freely, by pushing it upwards. If it moves back easily, it will function properly.
• Ensure that the O-ring safety valve is clean and not damaged.
• Remove the pressure regulator device and make sure that ventilated pipe is not blocked. You should be able to look through the ventilated pipe if it is clear. Clean the anti-clogging nut and safety valve with warm water. See Figure 5.
• Check to see that the rubber gasket is correctly in place inside lid.
General Cooking Instructions• Moving and positioning the NuWave
Precision Pressure Cooker settings. • Place NuWave PPC on heat source
with a diameter of at least 7 inches (18 centimeters). When using a gas stove, make sure that the width of the flame does exceed the edge of the NuWave PPC base.
• There are 4 positions for user to set. Align all positions with the Position Indicator (∆) to engage. You may use low-pressure position (1) and high-pressure position (2). The Steam Release position ( ) permits the quick release of built-up steam. See Figure 6.
• The Regulator Removal position (ø) will remove the module for cleaning purposes. See Cleaning & Maintenance.
Figure 4
Correct Incorrect
Figure 5
Operating Instructions
Figure 6 - Control Module of Pressure Regulator
ø = Regulator Removal Position = Steam Release Position
1 = Low Pressure 7.3 psi2 = High Prssure 13.1 psi
13Operating Instructions
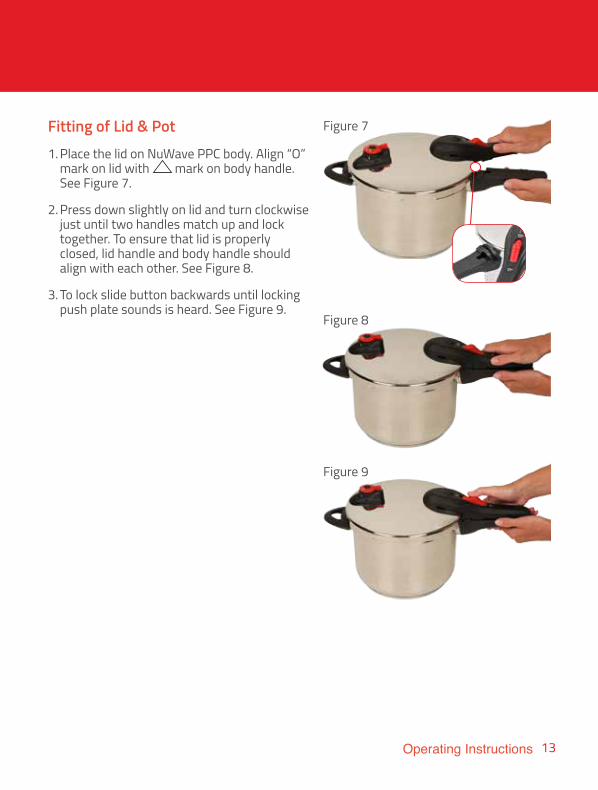
Fitting of Lid & Pot1. Place the lid on NuWave PPC body. Align “O”
mark on lid with mark on body handle. See Figure 7.
2. Press down slightly on lid and turn clockwise just until two handles match up and lock together. To ensure that lid is properly closed, lid handle and body handle should align with each other. See Figure 8.
3. To lock slide button backwards until locking push plate sounds is heard. See Figure 9.
Figure 8
Figure 9
Figure 7
14 Cooking Instructions
Cooking Instructions
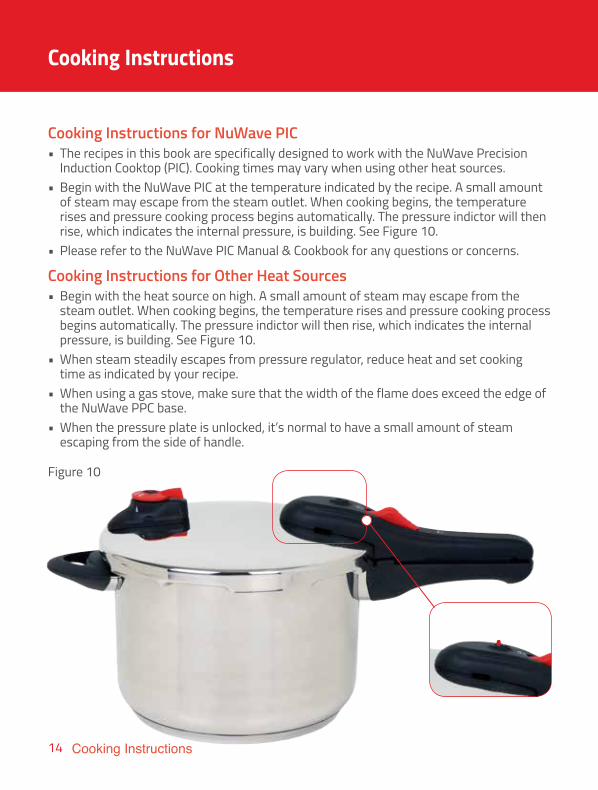
Cooking Instructions for NuWave PIC• The recipes in this book are specifically designed to work with the NuWave Precision
Induction Cooktop (PIC). Cooking times may vary when using other heat sources.• Begin with the NuWave PIC at the temperature indicated by the recipe. A small amount
of steam may escape from the steam outlet. When cooking begins, the temperature rises and pressure cooking process begins automatically. The pressure indictor will then rise, which indicates the internal pressure, is building. See Figure 10.
• Please refer to the NuWave PIC Manual & Cookbook for any questions or concerns.
Cooking Instructions for Other Heat Sources• Begin with the heat source on high. A small amount of steam may escape from the
steam outlet. When cooking begins, the temperature rises and pressure cooking process begins automatically. The pressure indictor will then rise, which indicates the internal pressure, is building. See Figure 10.
• When steam steadily escapes from pressure regulator, reduce heat and set cooking time as indicated by your recipe.
• When using a gas stove, make sure that the width of the flame does exceed the edge of the NuWave PPC base.
• When the pressure plate is unlocked, it’s normal to have a small amount of steam escaping from the side of handle.
Figure 10
15Cooking Instructions
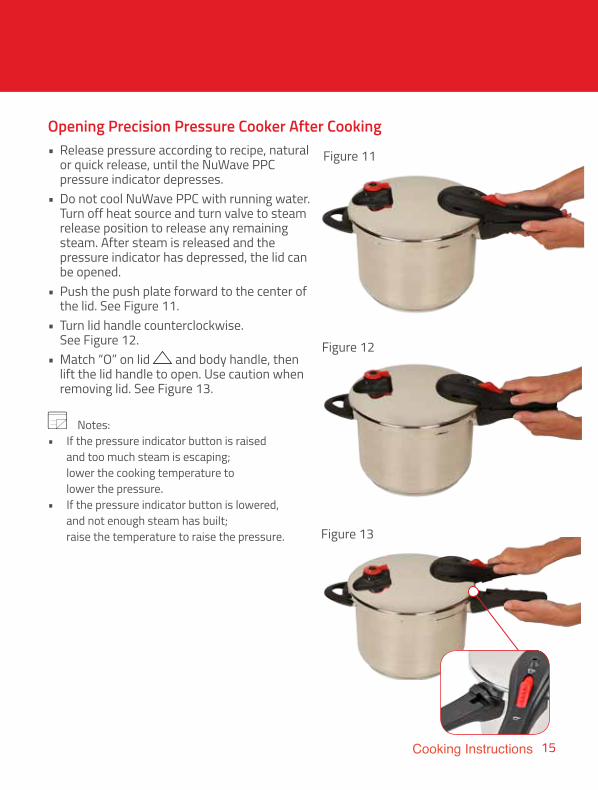
• Release pressure according to recipe, natural or quick release, until the NuWave PPC pressure indicator depresses.
• Do not cool NuWave PPC with running water. Turn off heat source and turn valve to steam release position to release any remaining steam. After steam is released and the pressure indicator has depressed, the lid can be opened.
• Push the push plate forward to the center of the lid. See Figure 11.
• Turn lid handle counterclockwise. See Figure 12.
• Match “O” on lid and body handle, then lift the lid handle to open. Use caution when removing lid. See Figure 13.
Notes: • If the pressure indicator button is raised and too much steam is escaping; lower the cooking temperature to lower the pressure.• If the pressure indicator button is lowered, and not enough steam has built; raise the temperature to raise the pressure.
Figure 11
Figure 12
Figure 13
Opening Precision Pressure Cooker After Cooking
16 Cleaning & Maintenance
• Do not store food in NuWave PPC when not in use.
• Clean and dry cookware after each use. (Warm soapy water is recommended for cleaning).
• After each use, release and clean anti-clogging nut and pressure regulator completely. The steam discharging tube and the anti-clogging nut should not be filled or blocked by any substances, such as food residue.
• When installing pressure regulator, make sure that it is placed in the correct position.
• After each use, safety valve should be examined to ensure it is clean. (Clean with hot water if required).
• After each use, rubber gasket should be cleaned thoroughly with warm water. It should be installed back in lid after washing.
• The rubber gasket will last longer if you place lid upside down on top of the NuWave PPC after it has been washed.
• Do not use steel wool, abrasive scouring powders or harsh liquids when cleaning the NuWave PPC.
• Depending on how often the NuWave PPC is used, replace rubber gasket for lid seal and sealing ring for Pressure Regulator Device every 1-2 years. In case of damage (tears or cracks, deformation on the edges or hardening), these parts should be replaced immediately. Failure to do so may affect proper functioning and safety. Replacement parts for your NuWave PPC go to: www.NuWaveNow.com or contact customer service at 877-689-2838.
Cleaning & Maintenance
17Cleaning & Maintenance
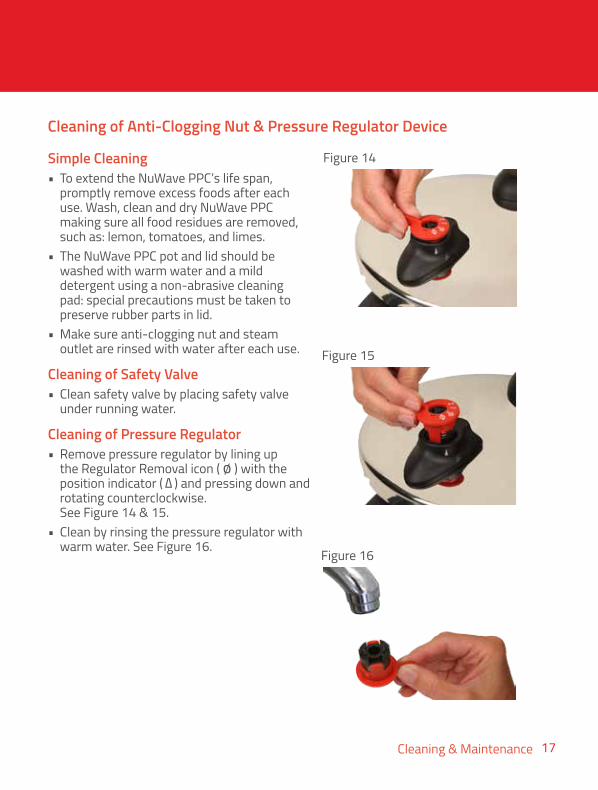
Simple Cleaning• To extend the NuWave PPC’s life span,
promptly remove excess foods after each use. Wash, clean and dry NuWave PPC making sure all food residues are removed, such as: lemon, tomatoes, and limes.
• The NuWave PPC pot and lid should be washed with warm water and a mild detergent using a non-abrasive cleaning pad: special precautions must be taken to preserve rubber parts in lid.
• Make sure anti-clogging nut and steam outlet are rinsed with water after each use.
Cleaning of Safety Valve• Clean safety valve by placing safety valve
under running water.
Cleaning of Pressure Regulator• Remove pressure regulator by lining up
the Regulator Removal icon ( ø ) with the position indicator ( ∆ ) and pressing down and rotating counterclockwise. See Figure 14 & 15.
• Clean by rinsing the pressure regulator with warm water. See Figure 16.
Cleaning of Anti-Clogging Nut & Pressure Regulator Device
Figure 14
Figure 15
Figure 16
18 Cooking Tips & Tricks
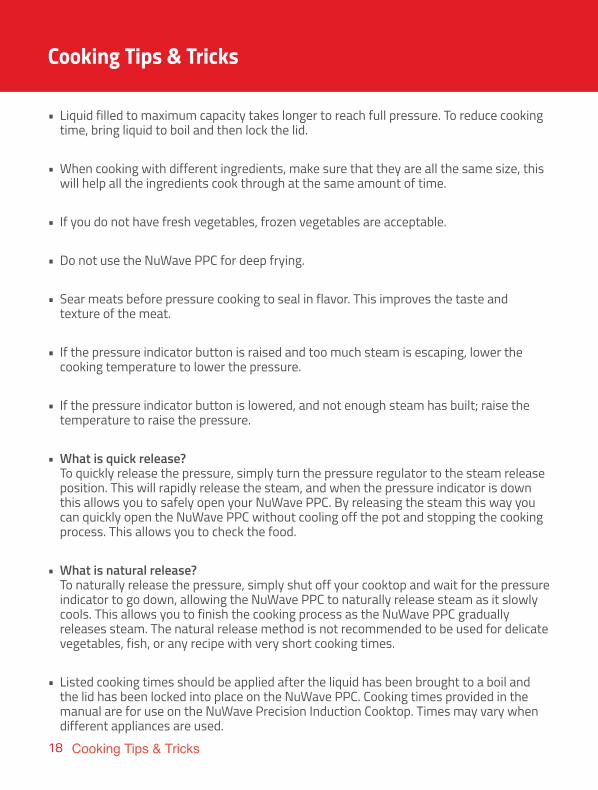
• Liquid filled to maximum capacity takes longer to reach full pressure. To reduce cooking time, bring liquid to boil and then lock the lid.
• When cooking with different ingredients, make sure that they are all the same size, this will help all the ingredients cook through at the same amount of time.
• If you do not have fresh vegetables, frozen vegetables are acceptable.
• Do not use the NuWave PPC for deep frying.
• Sear meats before pressure cooking to seal in flavor. This improves the taste and texture of the meat.
• If the pressure indicator button is raised and too much steam is escaping, lower the cooking temperature to lower the pressure.
• If the pressure indicator button is lowered, and not enough steam has built; raise the temperature to raise the pressure.
• What is quick release? To quickly release the pressure, simply turn the pressure regulator to the steam release position. This will rapidly release the steam, and when the pressure indicator is down this allows you to safely open your NuWave PPC. By releasing the steam this way you can quickly open the NuWave PPC without cooling off the pot and stopping the cooking process. This allows you to check the food.
• What is natural release? To naturally release the pressure, simply shut off your cooktop and wait for the pressure indicator to go down, allowing the NuWave PPC to naturally release steam as it slowly cools. This allows you to finish the cooking process as the NuWave PPC gradually releases steam. The natural release method is not recommended to be used for delicate vegetables, fish, or any recipe with very short cooking times.
• Listed cooking times should be applied after the liquid has been brought to a boil and the lid has been locked into place on the NuWave PPC. Cooking times provided in the manual are for use on the NuWave Precision Induction Cooktop. Times may vary when different appliances are used.
Cooking Tips & Tricks
19Cooking Tips & Tricks
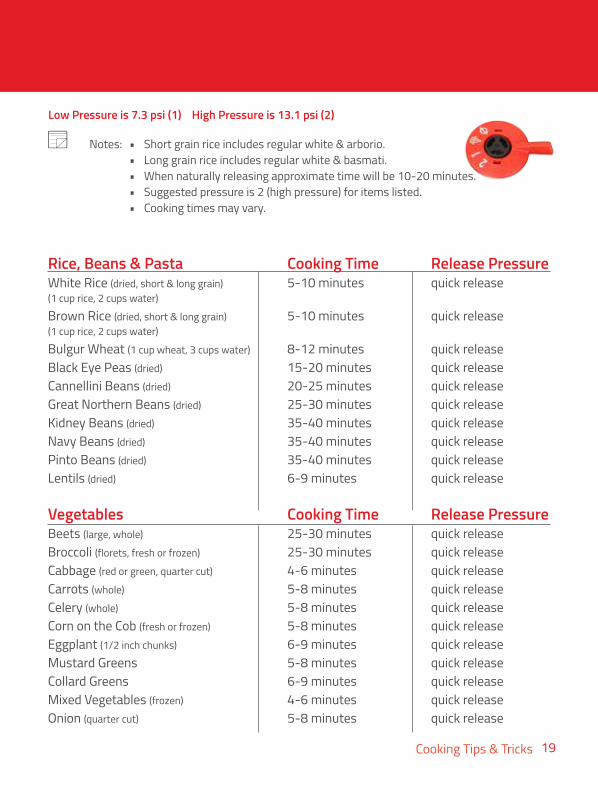
Low Pressure is 7.3 psi (1) High Pressure is 13.1 psi (2) Notes: • Short grain rice includes regular white & arborio.
• Long grain rice includes regular white & basmati. • When naturally releasing approximate time will be 10-20 minutes. • Suggested pressure is 2 (high pressure) for items listed. • Cooking times may vary.
Rice, Beans & Pasta Cooking Time Release PressureWhite Rice (dried, short & long grain) 5-10 minutes quick release (1 cup rice, 2 cups water)
Brown Rice (dried, short & long grain) 5-10 minutes quick release (1 cup rice, 2 cups water)
Bulgur Wheat (1 cup wheat, 3 cups water) 8-12 minutes quick releaseBlack Eye Peas (dried) 15-20 minutes quick releaseCannellini Beans (dried) 20-25 minutes quick releaseGreat Northern Beans (dried) 25-30 minutes quick releaseKidney Beans (dried) 35-40 minutes quick releaseNavy Beans (dried) 35-40 minutes quick releasePinto Beans (dried) 35-40 minutes quick releaseLentils (dried) 6-9 minutes quick release
Vegetables Cooking Time Release PressureBeets (large, whole) 25-30 minutes quick releaseBroccoli (florets, fresh or frozen) 25-30 minutes quick releaseCabbage (red or green, quarter cut) 4-6 minutes quick releaseCarrots (whole) 5-8 minutes quick releaseCelery (whole) 5-8 minutes quick releaseCorn on the Cob (fresh or frozen) 5-8 minutes quick releaseEggplant (1/2 inch chunks) 6-9 minutes quick releaseMustard Greens 5-8 minutes quick releaseCollard Greens 6-9 minutes quick releaseMixed Vegetables (frozen) 4-6 minutes quick releaseOnion (quarter cut) 5-8 minutes quick release
20 Cooking Tips & Tricks
Cooking Tips & Tricks
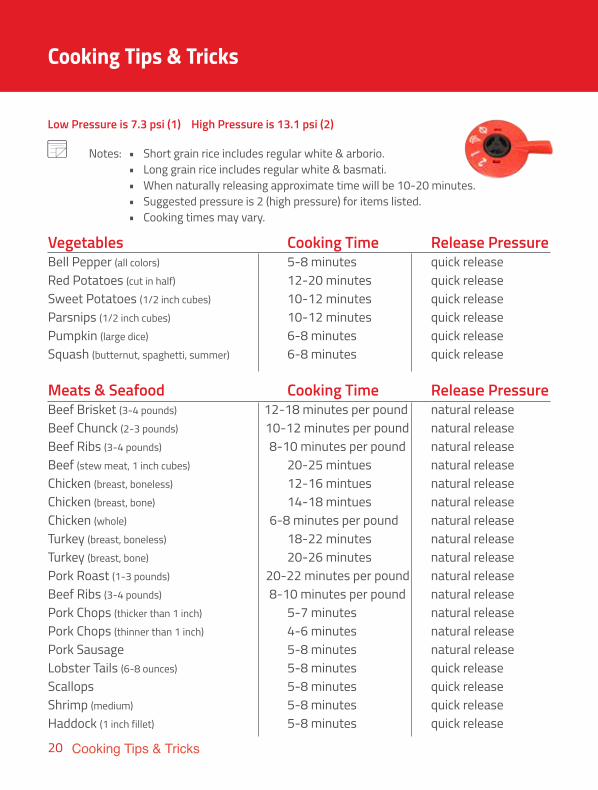
Vegetables Cooking Time Release PressureBell Pepper (all colors) 5-8 minutes quick releaseRed Potatoes (cut in half) 12-20 minutes quick releaseSweet Potatoes (1/2 inch cubes) 10-12 minutes quick releaseParsnips (1/2 inch cubes) 10-12 minutes quick releasePumpkin (large dice) 6-8 minutes quick releaseSquash (butternut, spaghetti, summer) 6-8 minutes quick release
Meats & Seafood Cooking Time Release PressureBeef Brisket (3-4 pounds) 12-18 minutes per pound natural releaseBeef Chunck (2-3 pounds) 10-12 minutes per pound natural release Beef Ribs (3-4 pounds) 8-10 minutes per pound natural release Beef (stew meat, 1 inch cubes) 20-25 mintues natural releaseChicken (breast, boneless) 12-16 mintues natural release Chicken (breast, bone) 14-18 mintues natural release Chicken (whole) 6-8 minutes per pound natural release Turkey (breast, boneless) 18-22 minutes natural releaseTurkey (breast, bone) 20-26 minutes natural release Pork Roast (1-3 pounds) 20-22 minutes per pound natural release Beef Ribs (3-4 pounds) 8-10 minutes per pound natural release Pork Chops (thicker than 1 inch) 5-7 minutes natural releasePork Chops (thinner than 1 inch) 4-6 minutes natural release Pork Sausage 5-8 minutes natural release Lobster Tails (6-8 ounces) 5-8 minutes quick release Scallops 5-8 minutes quick releaseShrimp (medium) 5-8 minutes quick release Haddock (1 inch fillet) 5-8 minutes quick release
Low Pressure is 7.3 psi (1) High Pressure is 13.1 psi (2) Notes: • Short grain rice includes regular white & arborio.
• Long grain rice includes regular white & basmati. • When naturally releasing approximate time will be 10-20 minutes. • Suggested pressure is 2 (high pressure) for items listed. • Cooking times may vary.
21NuWave™ Precision Pressure Cooker Recipes
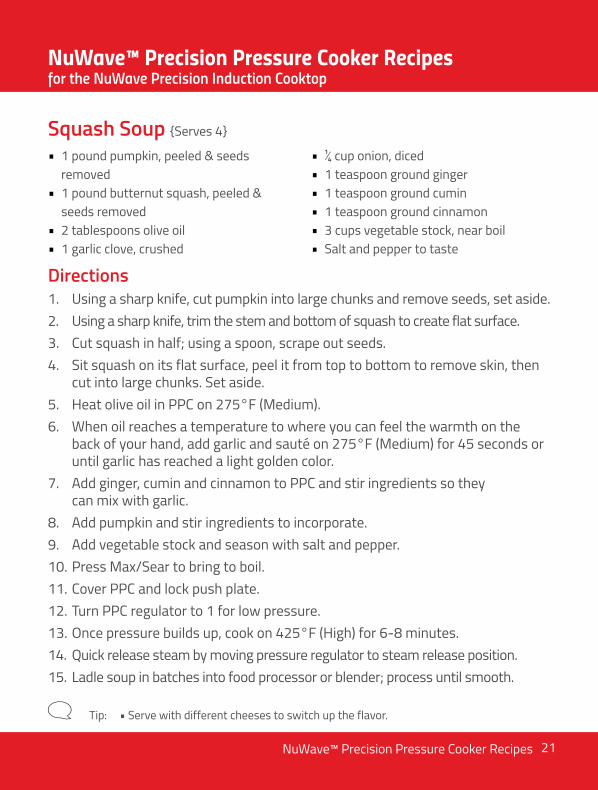
Squash Soup {Serves 4}
• 1 pound pumpkin, peeled & seeds removed • 1 pound butternut squash, peeled &
seeds removed • 2 tablespoons olive oil • 1 garlic clove, crushed
• ¼ cup onion, diced • 1 teaspoon ground ginger • 1 teaspoon ground cumin • 1 teaspoon ground cinnamon • 3 cups vegetable stock, near boil • Salt and pepper to taste
Directions1. Using a sharp knife, cut pumpkin into large chunks and remove seeds, set aside.2. Using a sharp knife, trim the stem and bottom of squash to create flat surface.3. Cut squash in half; using a spoon, scrape out seeds.4. Sit squash on its flat surface, peel it from top to bottom to remove skin, then
cut into large chunks. Set aside.5. Heat olive oil in PPC on 275°F (Medium).6. When oil reaches a temperature to where you can feel the warmth on the
back of your hand, add garlic and sauté on 275°F (Medium) for 45 seconds or until garlic has reached a light golden color.
7. Add ginger, cumin and cinnamon to PPC and stir ingredients so they can mix with garlic.
8. Add pumpkin and stir ingredients to incorporate.9. Add vegetable stock and season with salt and pepper.10. Press Max/Sear to bring to boil.11. Cover PPC and lock push plate.12. Turn PPC regulator to 1 for low pressure.13. Once pressure builds up, cook on 425°F (High) for 6-8 minutes.14. Quick release steam by moving pressure regulator to steam release position.15. Ladle soup in batches into food processor or blender; process until smooth.
Tip: • Serve with different cheeses to switch up the flavor.
NuWave™ Precision Pressure Cooker Recipesfor the NuWave Precision Induction Cooktop
22 NuWave™ Precision Pressure Cooker Recipes
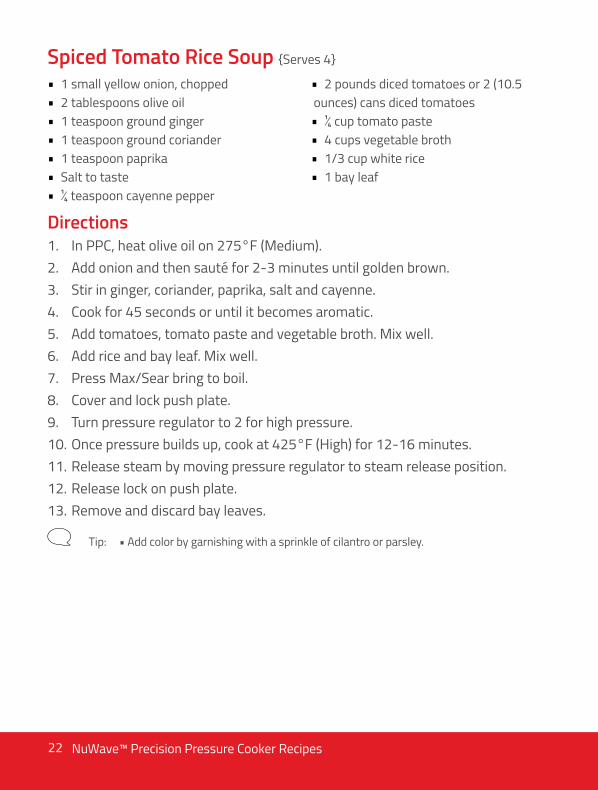
Spiced Tomato Rice Soup {Serves 4}
• 1 small yellow onion, chopped • 2 tablespoons olive oil • 1 teaspoon ground ginger • 1 teaspoon ground coriander • 1 teaspoon paprika • Salt to taste • ¼ teaspoon cayenne pepper
• 2 pounds diced tomatoes or 2 (10.5 ounces) cans diced tomatoes • ¼ cup tomato paste • 4 cups vegetable broth • 1/3 cup white rice • 1 bay leaf
Directions1. In PPC, heat olive oil on 275°F (Medium).2. Add onion and then sauté for 2-3 minutes until golden brown.3. Stir in ginger, coriander, paprika, salt and cayenne.4. Cook for 45 seconds or until it becomes aromatic.5. Add tomatoes, tomato paste and vegetable broth. Mix well.6. Add rice and bay leaf. Mix well.7. Press Max/Sear bring to boil.8. Cover and lock push plate.9. Turn pressure regulator to 2 for high pressure.10. Once pressure builds up, cook at 425°F (High) for 12-16 minutes.11. Release steam by moving pressure regulator to steam release position.12. Release lock on push plate.13. Remove and discard bay leaves.
Tip: • Add color by garnishing with a sprinkle of cilantro or parsley.
23NuWave™ Precision Pressure Cooker Recipes
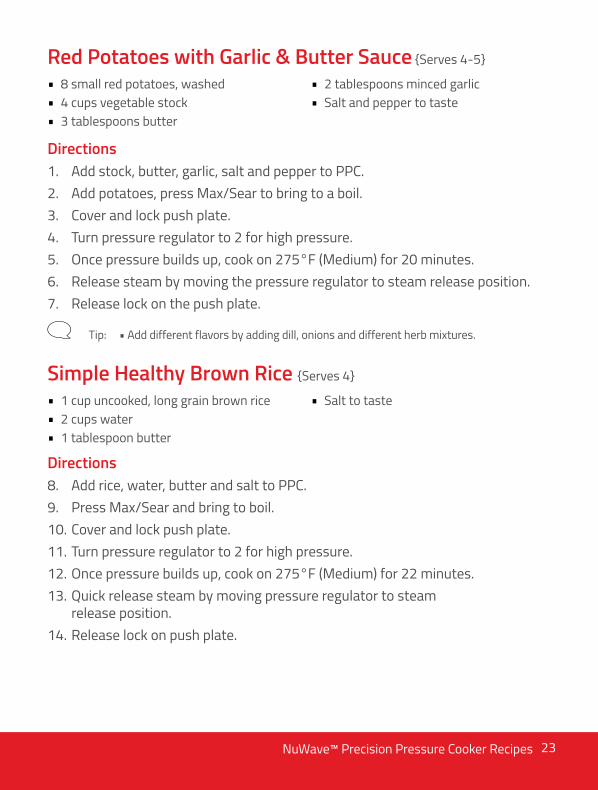
Red Potatoes with Garlic & Butter Sauce {Serves 4-5}
• 8 small red potatoes, washed • 4 cups vegetable stock • 3 tablespoons butter
• 2 tablespoons minced garlic • Salt and pepper to taste
Directions1. Add stock, butter, garlic, salt and pepper to PPC.2. Add potatoes, press Max/Sear to bring to a boil.3. Cover and lock push plate.4. Turn pressure regulator to 2 for high pressure.5. Once pressure builds up, cook on 275°F (Medium) for 20 minutes.6. Release steam by moving the pressure regulator to steam release position.7. Release lock on the push plate.
Tip: • Add different flavors by adding dill, onions and different herb mixtures.
Simple Healthy Brown Rice {Serves 4}
• 1 cup uncooked, long grain brown rice • 2 cups water • 1 tablespoon butter
• Salt to taste
Directions8. Add rice, water, butter and salt to PPC.9. Press Max/Sear and bring to boil.10. Cover and lock push plate.11. Turn pressure regulator to 2 for high pressure.12. Once pressure builds up, cook on 275°F (Medium) for 22 minutes.13. Quick release steam by moving pressure regulator to steam
release position.14. Release lock on push plate.

24 NuWave™ Precision Pressure Cooker Recipes
Creamy Mashed Potatoes {Serves 6}
• 3 large potatoes, peeled and cut into 2 inches cubes • 6 cups vegetable stock • ½ cup heavy cream
• 2 tablespoons butter • 2 tablespoons garlic • Salt and pepper to taste
Directions1. Combine potatoes, stock, salt and pepper in PPC.2. Press Max/Sear and bring to boil.3. Cover and lock push plate.4. Turn pressure regulator to 2 for high pressure.5. Once pressure builds up, cook on 375°F (Medium/High) for
15-20 minutes.6. Quick release steam by moving pressure regulator to steam
release position.7. Release lock on push plate.8. Drain potatoes and let them rest for 2 minutes.9. In PPC, add heavy cream, butter and garlic.10. Cook on 275°F (Medium) until steam appears. When this occurs,
shut off the NuWave PIC.11. Add potatoes to liquid and incorporate by mashing.12. Season with salt and pepper. Serve right away.
Tip: • For extra flavor, add scallions, sour cream, chives or fresh cut thyme.
NuWave™ products can be purchased at www.NuWaveNow.com or 1.877.689.2838
25NuWave™ Precision Pressure Cooker Recipes
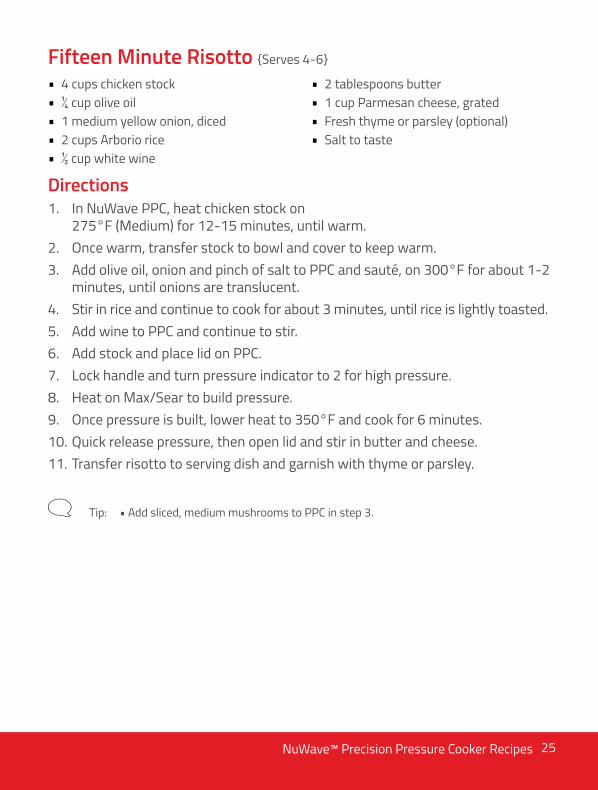
Fifteen Minute Risotto {Serves 4-6}
• 4 cups chicken stock • ¼ cup olive oil • 1 medium yellow onion, diced • 2 cups Arborio rice • ½ cup white wine
• 2 tablespoons butter • 1 cup Parmesan cheese, grated • Fresh thyme or parsley (optional) • Salt to taste
Directions1. In NuWave PPC, heat chicken stock on
275°F (Medium) for 12-15 minutes, until warm.2. Once warm, transfer stock to bowl and cover to keep warm.3. Add olive oil, onion and pinch of salt to PPC and sauté, on 300°F for about 1-2
minutes, until onions are translucent.4. Stir in rice and continue to cook for about 3 minutes, until rice is lightly toasted.5. Add wine to PPC and continue to stir.6. Add stock and place lid on PPC.7. Lock handle and turn pressure indicator to 2 for high pressure.8. Heat on Max/Sear to build pressure.9. Once pressure is built, lower heat to 350°F and cook for 6 minutes.10. Quick release pressure, then open lid and stir in butter and cheese.11. Transfer risotto to serving dish and garnish with thyme or parsley.
Tip: • Add sliced, medium mushrooms to PPC in step 3.
26 NuWave™ Precision Pressure Cooker Recipes
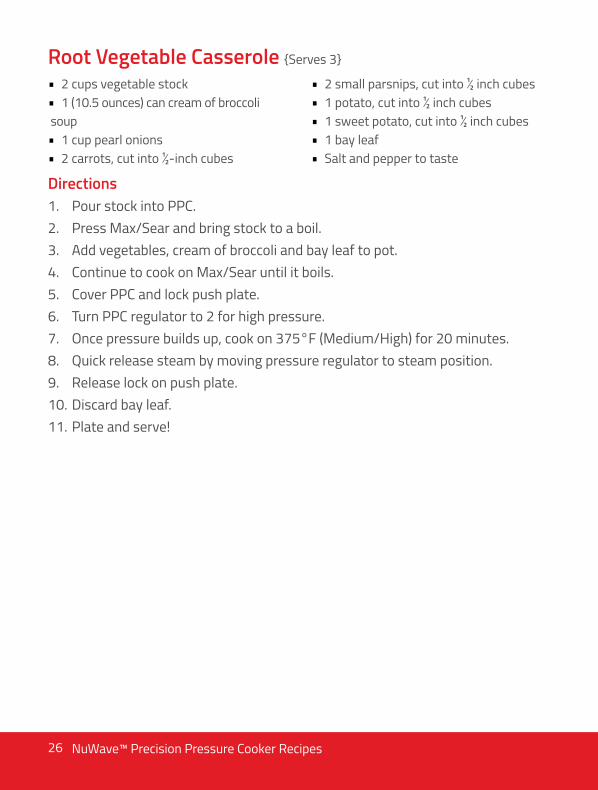
Root Vegetable Casserole {Serves 3}
• 2 cups vegetable stock • 1 (10.5 ounces) can cream of broccoli
soup • 1 cup pearl onions • 2 carrots, cut into ½-inch cubes
• 2 small parsnips, cut into ½ inch cubes • 1 potato, cut into ½ inch cubes • 1 sweet potato, cut into ½ inch cubes • 1 bay leaf • Salt and pepper to taste
Directions1. Pour stock into PPC.2. Press Max/Sear and bring stock to a boil.3. Add vegetables, cream of broccoli and bay leaf to pot.4. Continue to cook on Max/Sear until it boils.5. Cover PPC and lock push plate.6. Turn PPC regulator to 2 for high pressure.7. Once pressure builds up, cook on 375°F (Medium/High) for 20 minutes.8. Quick release steam by moving pressure regulator to steam position.9. Release lock on push plate.10. Discard bay leaf.11. Plate and serve!
27NuWave™ Precision Pressure Cooker Recipes
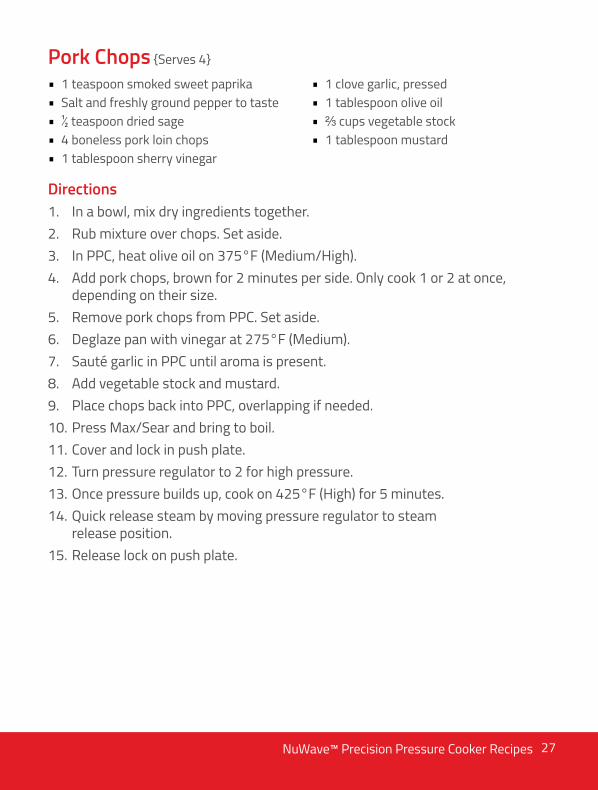
Pork Chops {Serves 4}
• 1 teaspoon smoked sweet paprika • Salt and freshly ground pepper to taste • ½ teaspoon dried sage • 4 boneless pork loin chops • 1 tablespoon sherry vinegar
• 1 clove garlic, pressed • 1 tablespoon olive oil • ⅔ cups vegetable stock • 1 tablespoon mustard
Directions1. In a bowl, mix dry ingredients together.2. Rub mixture over chops. Set aside.3. In PPC, heat olive oil on 375°F (Medium/High).4. Add pork chops, brown for 2 minutes per side. Only cook 1 or 2 at once,
depending on their size.5. Remove pork chops from PPC. Set aside.6. Deglaze pan with vinegar at 275°F (Medium).7. Sauté garlic in PPC until aroma is present.8. Add vegetable stock and mustard.9. Place chops back into PPC, overlapping if needed.10. Press Max/Sear and bring to boil.11. Cover and lock in push plate.12. Turn pressure regulator to 2 for high pressure.13. Once pressure builds up, cook on 425°F (High) for 5 minutes.14. Quick release steam by moving pressure regulator to steam
release position.15. Release lock on push plate.
28 NuWave™ Precision Pressure Cooker Recipes
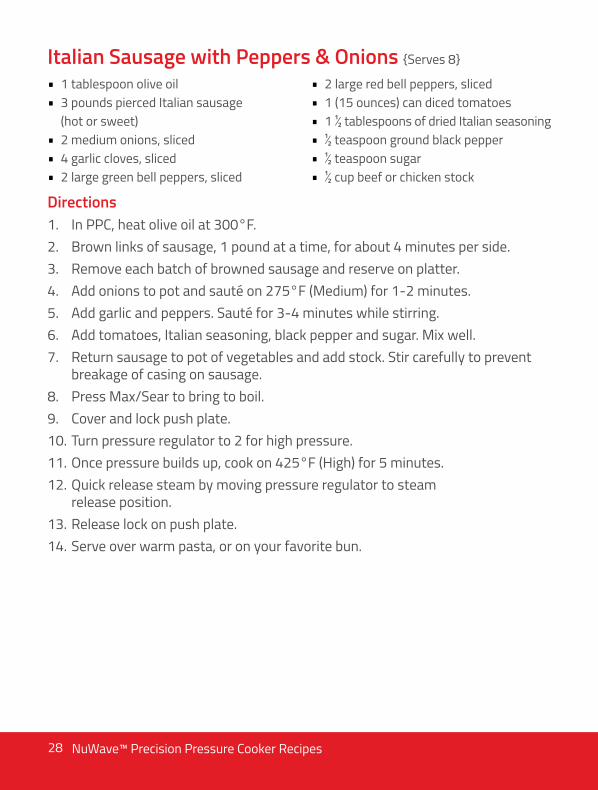
Italian Sausage with Peppers & Onions {Serves 8}
• 1 tablespoon olive oil • 3 pounds pierced Italian sausage
(hot or sweet) • 2 medium onions, sliced • 4 garlic cloves, sliced • 2 large green bell peppers, sliced
• 2 large red bell peppers, sliced • 1 (15 ounces) can diced tomatoes • 1 ½ tablespoons of dried Italian seasoning • ½ teaspoon ground black pepper • ½ teaspoon sugar • ½ cup beef or chicken stock
Directions1. In PPC, heat olive oil at 300°F.2. Brown links of sausage, 1 pound at a time, for about 4 minutes per side.3. Remove each batch of browned sausage and reserve on platter.4. Add onions to pot and sauté on 275°F (Medium) for 1-2 minutes.5. Add garlic and peppers. Sauté for 3-4 minutes while stirring.6. Add tomatoes, Italian seasoning, black pepper and sugar. Mix well.7. Return sausage to pot of vegetables and add stock. Stir carefully to prevent
breakage of casing on sausage.8. Press Max/Sear to bring to boil.9. Cover and lock push plate.10. Turn pressure regulator to 2 for high pressure.11. Once pressure builds up, cook on 425°F (High) for 5 minutes.12. Quick release steam by moving pressure regulator to steam
release position.13. Release lock on push plate.14. Serve over warm pasta, or on your favorite bun.
29NuWave™ Precision Pressure Cooker Recipes
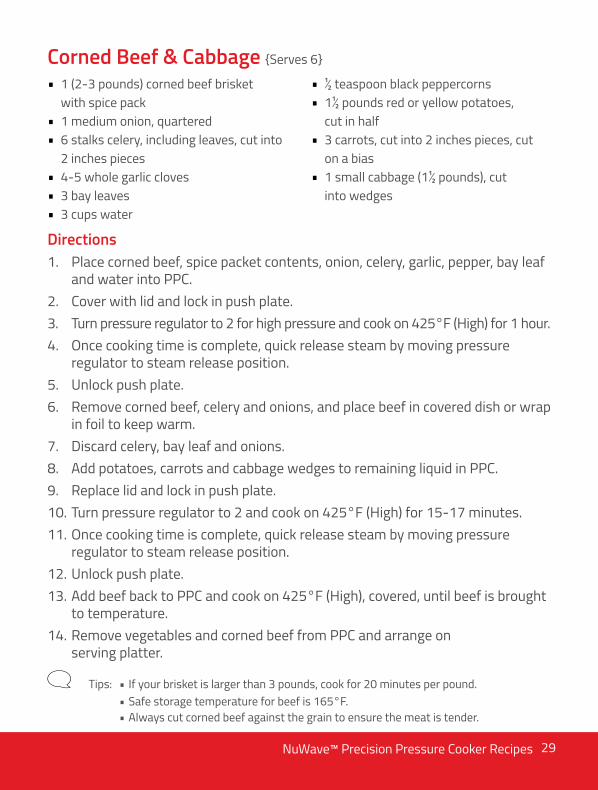
Corned Beef & Cabbage {Serves 6}
• 1 (2-3 pounds) corned beef brisket with spice pack • 1 medium onion, quartered • 6 stalks celery, including leaves, cut into
2 inches pieces • 4-5 whole garlic cloves • 3 bay leaves • 3 cups water
• ½ teaspoon black peppercorns • 1½ pounds red or yellow potatoes,
cut in half • 3 carrots, cut into 2 inches pieces, cut
on a bias • 1 small cabbage (1½ pounds), cut
into wedges
Directions1. Place corned beef, spice packet contents, onion, celery, garlic, pepper, bay leaf
and water into PPC.2. Cover with lid and lock in push plate.3. Turn pressure regulator to 2 for high pressure and cook on 425°F (High) for 1 hour.4. Once cooking time is complete, quick release steam by moving pressure
regulator to steam release position.5. Unlock push plate.6. Remove corned beef, celery and onions, and place beef in covered dish or wrap
in foil to keep warm.7. Discard celery, bay leaf and onions.8. Add potatoes, carrots and cabbage wedges to remaining liquid in PPC.9. Replace lid and lock in push plate.10. Turn pressure regulator to 2 and cook on 425°F (High) for 15-17 minutes.11. Once cooking time is complete, quick release steam by moving pressure
regulator to steam release position.12. Unlock push plate. 13. Add beef back to PPC and cook on 425°F (High), covered, until beef is brought
to temperature.14. Remove vegetables and corned beef from PPC and arrange on
serving platter.
Tips: • If your brisket is larger than 3 pounds, cook for 20 minutes per pound. • Safe storage temperature for beef is 165°F. • Always cut corned beef against the grain to ensure the meat is tender.
30 NuWave™ Precision Pressure Cooker Recipes
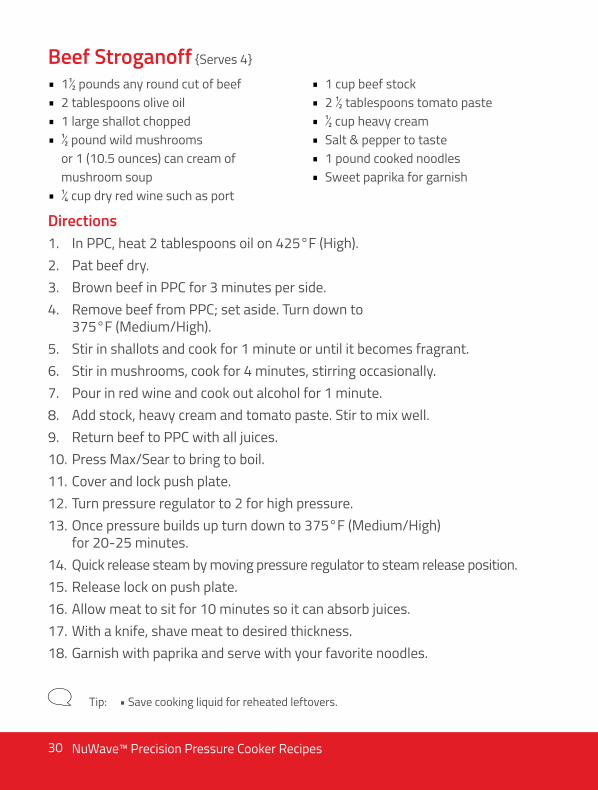
Beef Stroganoff {Serves 4}
• 1½ pounds any round cut of beef • 2 tablespoons olive oil • 1 large shallot chopped • ½ pound wild mushrooms
or 1 (10.5 ounces) can cream of mushroom soup • ¼ cup dry red wine such as port
• 1 cup beef stock • 2 ½ tablespoons tomato paste • ½ cup heavy cream • Salt & pepper to taste • 1 pound cooked noodles • Sweet paprika for garnish
Directions1. In PPC, heat 2 tablespoons oil on 425°F (High).2. Pat beef dry.3. Brown beef in PPC for 3 minutes per side.4. Remove beef from PPC; set aside. Turn down to
375°F (Medium/High).5. Stir in shallots and cook for 1 minute or until it becomes fragrant.6. Stir in mushrooms, cook for 4 minutes, stirring occasionally.7. Pour in red wine and cook out alcohol for 1 minute.8. Add stock, heavy cream and tomato paste. Stir to mix well.9. Return beef to PPC with all juices.10. Press Max/Sear to bring to boil.11. Cover and lock push plate.12. Turn pressure regulator to 2 for high pressure.13. Once pressure builds up turn down to 375°F (Medium/High)
for 20-25 minutes.14. Quick release steam by moving pressure regulator to steam release position.15. Release lock on push plate.16. Allow meat to sit for 10 minutes so it can absorb juices.17. With a knife, shave meat to desired thickness.18. Garnish with paprika and serve with your favorite noodles.
Tip: • Save cooking liquid for reheated leftovers.

31NuWave™ Precision Pressure Cooker Recipes
Texas Style Chili {Serves 6}
• 3 pounds beef chuck, cut into 1 inch cubes • 2 tablespoons olive oil • 1 yellow onion, finely chopped • 2 celery stalks, finely chopped • 1 red bell pepper, finely chopped • 3 cloves garlic, finely minced • 3 tablespoons ground chili powder • 1 tablespoon sweet paprika • 2 teaspoons ground cumin
• 1 teaspoon ground cinnamon • 1 teaspoon ground coriander • 1 teaspoon oregano leaves • 1 teaspoon bay leaf • 1 cup cannellini bean,
pre-soaked overnight • 2 cups diced tomatoes with juice • ¼ cup tomato paste • ½ cup beef broth • Salt to taste
Directions1. Pre-soak beans so they can thoroughly cook.2. Pat meat dry.3. In PPC, heat olive oil on 275°F (Medium).4. Also in PPC, brown meat in batches for 2-3 minutes per side, adding more
oil if necessary. Set aside.5. Inside PPC, add onions, celery and bell pepper. Cook for 2-3 minutes or
until soft.6. Stir in garlic and cook for 30 seconds.7. Add dry spices.8. Pour in beef broth, diced tomatoes and paste. Stir to combine.9. Add meat along with juices. Mix well.10. Press Max/Sear and bring to a boil.11. Cover and lock push plate.12. Turn pressure regulator to 2 for high pressure.13. Once pressure builds up, cook on 425°F (High) for 25 to 30 minutes.14. Quick release steam by moving pressure regulator to steam
release position.15. Release lock on push plate.16. Let chili stand for 5 minutes to marry flavors.
Tip: • For extra flavor, garnish with sour cream, cheddar cheese and green onion.

32 NuWave™ Precision Pressure Cooker Recipes
Simply Whole Chicken {Serves 8}
• 1 roaster chicken, cut into eighths • ¼ cup olive oil • 1 cup dry white wine, such as Sauvignon
Blanc or Chardonnay • 1 cup chicken stock
• 1 clove garlic, smashed • 1 tablespoon olive oil • 10 scallions • Salt and pepper to taste
Directions1. In PPC, heat ¼ cup olive oil on 375°F (Medium-High).2. Add chicken and sauté for 3-5 minutes, or until it is golden brown
on each side.3. Add salt, pepper, white wine and chicken stock.4. Press Max/Sear and bring to a boil.5. Cover and lock push plate.6. Turn pressure regulator to 2 for high pressure.7. Once pressure builds up, cook on 425°F (High) for 15-17 minutes.8. Quick release steam by moving pressure regulator to steam
release position.9. Release lock on push plate.10. Leave pot covered to hold food warm.11. Using a non-stick pan, heat 1 tablespoon oil on 275°F (Medium).12. Add scallions and sauté for 1 minute.13. Add scallions to chicken.14. Stir to incorporate ingredients.15. Serve with your favorite vegetable and sauce.
Tips: • A roaster chicken is any that is younger than 3-5 months old. You can substitute for a capon that is under 8 months old. These types of chickens are prized for their soft, tender meat.
• Garnish with chopped tarragon for added flavor.
33NuWave™ Precision Pressure Cooker Recipes
Beer Steamed Mussels {Serves 4}Mussels Ingredients: • 1 ½ -2 pounds mussels • 1 (16 ounces) canned beer
• ⅓ cup fresh lemon juice
Sauce Ingredients: • 2 tablespoons butter • ¼ cup fresh lemon juice
• 2 teaspoon garlic cloves, minced
Directions1. Wash mussels several times to remove sand.2. In PPC, add beer and lemon juice. 3. Add mussels, making sure most are submerged in liquid.4. Press Max/Sear and bring to a boil.5. Cover and lock push plate.6. Turn PPC regulator to 2 for high pressure.7. Once pressure builds up, cook on 175°F (Medium/Low) for 12 minutes.8. Quick release steam by moving pressure regulator to steam
release position.9. Release lock on push plate.10. Drain cooking liquid; set mussels aside.11. Add butter to the PPC, heat on 175°F (Medium-Low).12. Once butter is melted, add mussels, lemon juice and garlic.13. Gently stir to evenly coat mussels with sauce.
Tip: • Discard and do not eat mussels that are not opened after being cooked.
NuWave™ products can be purchased at www.NuWaveNow.com or 1.877.689.2838
Item No. BM 31200Rev. 04
NuWave Precision Pressure Cooker Manual & Recipes
FOR HOUSEHOLD USE ONLYFor patent information please to go: www.nuwavenow.com/legal/patentModel: 31201
Designed & Developedin U.S.A. by NuWave, LLC • Made in China1755 N. Butterfield Rd.LIbertyville, IL 60048, U.S.A.1-877-689-2838 Monday-Friday 8:00 AM - 4:30 PM CSTwww.NuWaveNow.com • [email protected]
©2016 NuWave, LLC • All Rights Reserved.
You can also visit www.NuWaveNow.com to learn more about the revolutionary products developed by the makers of the NuWave® Oven line, the NuWave® Precision Induction Cooktop line, the NuWave® Flavor-Lockers Storage System, NuWave® Duralon® Fry Pans, NuWave® Duralon® Cookware, ALSET® LED lighting, and other great accessories.
www.nuwavenow.com