Embed Size (px)
Citation preview

DA-08260-312_v04 | October 2017
Release Notes and Installation Guide
NVIDIA DGX OS SERVER VERSION 3.1.2

NVIDIA DGX OS Server Version 3.1.2 Release Notes ii
TABLE OF CONTENTS
NVIDIA DGX OS Server Release Notes for Version 3.1.2 ............................. 3 Update Advisement .......................................................................................... 3 Highlights and Changes since Version 2.x ............................................................... 4 Fixed Issues .................................................................................................. 5 Known Issues ................................................................................................ 5 Version Matrix ................................................................................................ 7
DGX OS Server Version 3.1.2 Installation Guide ........................................ 8 About the Re-Imaging Process ............................................................................ 8 Obtaining the DGX OS Server Image ..................................................................... 9 Connecting to the DGX-1 Console ......................................................................... 9 Re-imaging the DGX-1 Remotely ........................................................................ 10 Re-imaging the System from a USB Flash Drive ...................................................... 12 First Time Boot Setup ..................................................................................... 13
Updating to Version 3.1.2 ..................................................................... 15 Update Path Instructions ................................................................................. 15 Connecting to the DGX-1 Console ....................................................................... 16 Updating from 1.x to 2.x ................................................................................. 18
Update Instructions .................................................................................... 18 Recovering from an Interrupted Update ............................................................ 21
Updating from 2.x to 3.1.2 ............................................................................... 22 Update Instructions .................................................................................... 22 Verifying the nvidia-peer-memory Module .......................................................... 24 Recovering from an Interrupted Update ............................................................ 25
Updating from 3.1.1 to 3.1.2 ............................................................................. 26 Update Instructions .................................................................................... 26 Verifying the nvidia-peer-memory Module .......................................................... 27 Recovering from an Interrupted Update ............................................................ 27
Appendix A: Retaining the RAID Partition While Installing the OS .............. 28 Appendix B. Third Party License Notice .................................................. 30

NVIDIA DGX OS Server Version 3.1.2 Release Notes 3
NVIDIA DGX OS SERVER RELEASE NOTES FOR VERSION 3.1.2
This document describes version 3.1.2 of the NVIDIA® DGX™ OS Server Release 3.1 software. DGX OS Server v3.1.2 is installed at the factory, is provided by Enterprise Support as an ISO image in the event a system needs to be re-imaged, and is available as an over-the-network update.
UPDATE ADVISEMENT DGX OS Server software
Customers can choose to update the DGX OS Server software on their DGX-1 systems from version 1.x or 2.x to version 3.1.2. See the Highlights section for details of version 3.1.2.
Customers using DGX OS Server 3.1.1 and want to use NVIDIA Docker Containers Release version 17.09 and later must upgrade their DGX-1 systems to version 3.1.2 to ensure compatibility with the DGX Optimized Frameworks.
NVIDIA Docker Containers In conjunction with DGX OS Server v3.1.2, customers should update their NVIDIA Docker containers to the latest container release1.
1 See the NVIDIA Deep Learning Frameworks documentation website (http://docs.nvidia.com/deeplearning/dgx/index.htm) for information on the latest container releases as well as instructions for how to access them.

NVIDIA DGX OS Server Release Notes for Version 3.1.2
NVIDIA DGX OS Server Version 3.1.2 Release Notes 4
Ubuntu Security Updates Customers are responsible for keeping the DGX-1 up to date with the latest Ubuntu security updates using the ‘apt-get upgrade’ procedure. See the Ubuntu Wiki Upgrades web page for more information.
HIGHLIGHTS AND CHANGES SINCE VERSION 2.X Ubuntu 16.04 LTS
● Initialization daemon changed from Upstart to systemd. ● Updated network interface naming policy.
Policy now uses predictable names, rather than the native naming scheme used in previous releases. The first and second Ethernet interfaces, enumerated as em1 and em2 in previous releases, will now enumerate as enp1s0f0 and enp1s0f1 respectively.
NVIDIA Graphics Driver Release 384 ● Contains security fixes to mitigate multiple vulnerabilities in the kernel mode layer
of the driver. Refer to the Security Bulletin for vulnerability details. ● Supports the NVIDIA Tesla™ V100 GPUs. ● Supports CUDA 9.0
CUDA drivers and diagnostic packages updated to Release 384 Mellanox drivers updated to 4.0. Docker CE and nvidia-docker are pre-installed, and the docker daemon automatically
launched.
NVIDIA DGX OS Server Release Notes for Version 3.1.2
NVIDIA DGX OS Server Version 3.1.2 Release Notes 5
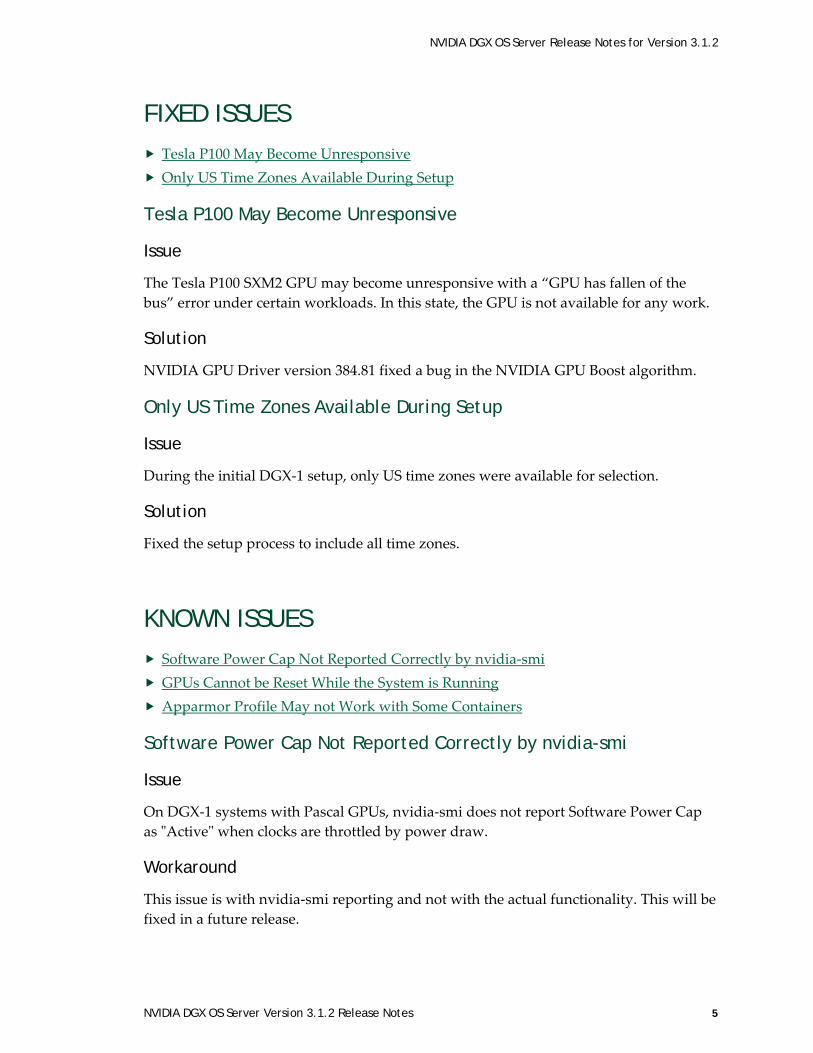
FIXED ISSUES Tesla P100 May Become Unresponsive Only US Time Zones Available During Setup
Tesla P100 May Become Unresponsive
Issue
The Tesla P100 SXM2 GPU may become unresponsive with a “GPU has fallen of the bus” error under certain workloads. In this state, the GPU is not available for any work.
Solution
NVIDIA GPU Driver version 384.81 fixed a bug in the NVIDIA GPU Boost algorithm.
Only US Time Zones Available During Setup
Issue
During the initial DGX-1 setup, only US time zones were available for selection.
Solution
Fixed the setup process to include all time zones.
KNOWN ISSUES Software Power Cap Not Reported Correctly by nvidia-smi GPUs Cannot be Reset While the System is Running Apparmor Profile May not Work with Some Containers
Software Power Cap Not Reported Correctly by nvidia-smi
Issue
On DGX-1 systems with Pascal GPUs, nvidia-smi does not report Software Power Cap as "Active" when clocks are throttled by power draw.
Workaround
This issue is with nvidia-smi reporting and not with the actual functionality. This will be fixed in a future release.

NVIDIA DGX OS Server Release Notes for Version 3.1.2
NVIDIA DGX OS Server Version 3.1.2 Release Notes 6
GPUs Cannot be Reset While the System is Running
Issue
You will not be able to reset the GPUs while the system is running.
Workaround
If an issue occurs which causes the GPUs to hang or if they need to be reset, you must reboot the system.
Apparmor Profile May not Work with Some Containers
Issue
Apparmor is enabled in this version of the DGX OS Server, with Docker generating a default profile. The default profile may or may not work with your containers.
Workaround
If there is a conflict with your containers, then either
Disable Apparmor, or Provide a custom Apparmor profile and include it in the docker run command.

NVIDIA DGX OS Server Release Notes for Version 3.1.2
NVIDIA DGX OS Server Version 3.1.2 Release Notes 7
VERSION MATRIX The following table provides version information for software included in the DGX OS Server ISO image. It also shows the firmware and BIOS versions for the DGX-1 hardware at the time of the ISO image release, and tested Docker and nvidia-docker versions.
Component Version Notes DGX OS Server 3.1.2
Software versions included in this DGX OS Server ISO
Graphics Driver 384.81
Ubuntu 16.04 LTS
Docker CE 17.06.1
nvidia-docker 1.0.1
DGX-1 BMC 3.12.30 Released versions for DGX-1 hardware (Pascal) at the time of this software release. Information provided for reference purposes.
DGX-1 SBIOS S2W_3A01.NVD02
DGX-1 VBIOS 86.00.41.00.05
DGX-1 BMC Rev31830 Released versions for DGX-1 hardware (Volta) at the time of this software release. Information provided for reference purposes.
DGX-1 SBIOS S2W_3A04
DGX-1 VBIOS 88.00.18.00.01

NVIDIA DGX OS Server Version 3.1.2 Release Notes 8
DGX OS SERVER VERSION 3.1.2 INSTALLATION GUIDE
This chapter provides general instructions for re-imaging the DGX-1 with DGX OS Server v3.1.2 from the ISO file and then performing the first time DGX-1 setup. Refer to the DGX-1 User Guide (http://docs.nvidia.com/dgx/dgx1-user-guide/index.html) for additional instructions where indicated.
ABOUT THE RE-IMAGING PROCESS
!
WARNING: This process destroys all data and software customizations that you have made on the DGX-1. Be sure to back up any data that you want to preserve, and push any Docker images that you want to keep to a trusted registry.
The re-imaging process creates a fresh installation of the DGX OS. The standard software installation overwrites any data or file systems that may exist on the OS disk as well as the RAID disks. All the disks are re-partitioned, and the RAID array is mounted as /raid.
Since the RAID array on the DGX-1 is intended to be used as a cache and not for long-term data storage, this should not be disruptive. However, if you are an advanced user, and have set up the disks for a non-cache purpose and want to keep the data on those drives, then select the Install DGX Server without formatting RAID option at the boot menu during the boot installation. When the installation is completed, you can repeat any configurations steps that you had performed to use the RAID disks as other than

DGX OS Server Version 3.1.2 Installation Guide
NVIDIA DGX OS Server Version 3.1.2 Release Notes 9
cache disks. See Appendix A: Choosing not to Reformat the RAID Disks for details on what this option does.
OBTAINING THE DGX OS SERVER IMAGE Obtain the correct ISO image file from NVIDIA Support Enterprise Services.
1. Log on to the NVIDIA Enterprise Services (https://nvid.nvidia.com/enterpriselogin/) site.
2. Click the Announcements tab to locate the download links for the DGX-1 software image.
3. Download the ISO image and save it to your local disk. 4. Restore the DGX-1 software image from this file either remotely through the BMC or
locally from a bootable USB flash drive as explained in the following sections.
CONNECTING TO THE DGX-1 CONSOLE Connect to the DGX-1 console using either a direct connection or a remote connection through the BMC.
Direct Connection 1. Connect a display to the VGA connector and a keyboard to any one of the USB ports. 2. Power on the DGX-1.
Remote Connection through the BMC
This method requires that you have the BMC login credentials.
1. Make sure you have connected the IPMI port on the DGX-1 to your LAN. 2. Open a Java-enabled browser within your LAN and go to http://<IPMI-IP-address>/.
Use Firefox or Internet Explorer. Google Chrome is not officially supported by the BMC.
Make sure popups are allowed for the BMC address.
3. Log in. If the administrator has not manually created a password, then the username that was created during the initial DGX-1 setup is used for both the BMC username and BMC password.

DGX OS Server Version 3.1.2 Installation Guide
NVIDIA DGX OS Server Version 3.1.2 Release Notes 10
4. If necessary, power on the DGX-1 using the power button icon on the upper right corner of the BMC window.
RE-IMAGING THE DGX-1 REMOTELY 1. Connect to the BMC as explained in the section Remote Connection through the
BMC. 2. Change user privileges.
a) From the top menu, click Configuration and then select User Management. b) Select the user name that you created for the BMC, then click Modify User. c) In the Modify User dialog, select the VMedia check box to add it to the extended
privileges for the user, then click Modify.
3. Set up the ISO image as virtual media.
a) From the top menu, click Remote Control and select Console Redirection.
b) Click Java Console to open the remote JViewer window.
Make sure pop-up blockers are disabled for this site.
c) From the JViewer top menu bar, click Media and then select Virtual Media Wizard.

DGX OS Server Version 3.1.2 Installation Guide
NVIDIA DGX OS Server Version 3.1.2 Release Notes 11
d) From the CD/DVD Media: I section of the Virtual Media dialog, click Browse
and then locate the re-image ISO file and click Open. You can ignore the device redirection warning at the bottom of the Virtual Media wizard as it does not affect the ability to re-image the system.
e) Click Connect CD/DVD, then click OK at the Information dialog. The Virtual Media window shows that the ISO image is connected.
f) Close the window.
The CD ROM icon in the menu bar turns green to indicate that the ISO image is attached.
4. Reboot, install the image, and complete the DGX-1 setup.
a) From the top menu, click Power and then select Reset Server.
DGX OS Server Version 3.1.2 Installation Guide
NVIDIA DGX OS Server Version 3.1.2 Release Notes 12
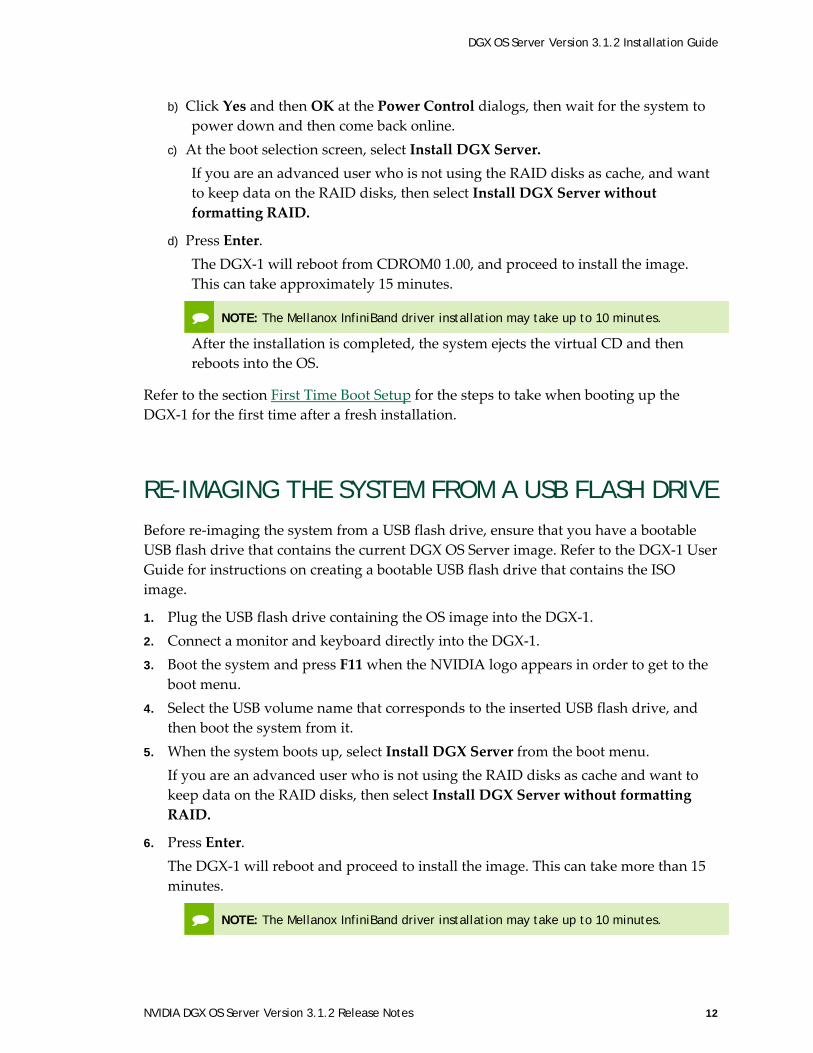
b) Click Yes and then OK at the Power Control dialogs, then wait for the system to power down and then come back online.
c) At the boot selection screen, select Install DGX Server. If you are an advanced user who is not using the RAID disks as cache, and want to keep data on the RAID disks, then select Install DGX Server without formatting RAID.
d) Press Enter. The DGX-1 will reboot from CDROM0 1.00, and proceed to install the image. This can take approximately 15 minutes.
NOTE: The Mellanox InfiniBand driver installation may take up to 10 minutes.
After the installation is completed, the system ejects the virtual CD and then reboots into the OS.
Refer to the section First Time Boot Setup for the steps to take when booting up the DGX-1 for the first time after a fresh installation.
RE-IMAGING THE SYSTEM FROM A USB FLASH DRIVE Before re-imaging the system from a USB flash drive, ensure that you have a bootable USB flash drive that contains the current DGX OS Server image. Refer to the DGX-1 User Guide for instructions on creating a bootable USB flash drive that contains the ISO image.
1. Plug the USB flash drive containing the OS image into the DGX-1. 2. Connect a monitor and keyboard directly into the DGX-1. 3. Boot the system and press F11 when the NVIDIA logo appears in order to get to the
boot menu. 4. Select the USB volume name that corresponds to the inserted USB flash drive, and
then boot the system from it. 5. When the system boots up, select Install DGX Server from the boot menu.
If you are an advanced user who is not using the RAID disks as cache and want to keep data on the RAID disks, then select Install DGX Server without formatting RAID.
6. Press Enter. The DGX-1 will reboot and proceed to install the image. This can take more than 15 minutes.
NOTE: The Mellanox InfiniBand driver installation may take up to 10 minutes.

DGX OS Server Version 3.1.2 Installation Guide
NVIDIA DGX OS Server Version 3.1.2 Release Notes 13
After the installation is completed, the system then reboots into the OS.
Refer to the next section for the steps to take when booting up the DGX-1 for the first time after a fresh installation.
FIRST TIME BOOT SETUP When you power on the DGX-1 for the first time, you are presented with the system setup screens.
1. Perform the steps to configure the DGX-1 software. ● Select your time zone and keyboard layout. ● Create a user account with your name, username, and password.
You will need these credentials to log in to the DGX-1 as well as to log in to the BMC remotely. When logging in to the BMC, enter your username for both the User ID as well as the password. Be sure to create a unique BMC password at the first opportunity.
NOTE: The BMC software will not accept "sysadmin" for a user name. If you create this user name for the system log in, "sysadmin" will not be available for logging in to the BMC.
● Choose a primary network interface for the DGX-1.
NOTE: After you select the primary network interface, the system attempts to configure the interface for DHCP and then asks you to enter a hostname for the system. If DHCP is not available, you will have the option to configure the network manually. If you need to configure a static IP address on a network interface connected to a DHCP network, then select Cancel at the Network configuration – Please enter the hostname for the system screen. The system will then present a screen with the option to configure the network manually.
● Choose a hostname for the DGX-1. ● Choose to install predefined software.
Press the space bar to select or deselect the software to install.
By default, the DGX-1 installs only minimal software packages necessary to ensure system functionality. During installation, you can deselect the OpenSSH package; however, NVIDIA recommends that you keep this package selected, and uninstall it only if required by your IT security policy.
2. Select OK to continue. You are presented with end user license agreement (EULAs) for the NVIDIA software. Accept all EULAs.

DGX OS Server Version 3.1.2 Installation Guide
NVIDIA DGX OS Server Version 3.1.2 Release Notes 14
The system completes the installation, reboots, then presents the system login prompt: <hostname> login: Password:
3. Log in.
Refer to the DGX-1 User Guide for additional information on configuring your DGX-1 system.
NVIDIA DGX OS Server Version 3.1.2 Release Notes 15
UPDATING TO VERSION 3.1.2
These instructions explain how to update the DGX-1 software through an internet connection to the NVIDIA public repository. The process updates a DGX-1 system image to the latest QA’d versions of the entire DGX-1 software stack, including the drivers.
Perform the updates using commands on the DGX-1 console.
UPDATE PATH INSTRUCTIONS The update instructions depend on the software version currently installed on the DGX-1. Follow the instructions corresponding to your current DGX-1 software.
Updating from Version 1.x a) Update from Version 1.x to 2.x b) Update from 2.x to 3.1.2
Updating from Version 2.x Follow instructions at Updating from 2.x to 3.1.2.
Updating from Version 3.1.1 Follow instructions at Updating from 3.1.1 to 3.1.2.

Updating to Version 3.1.2
NVIDIA DGX OS Server Version 3.1.2 Release Notes 16
CONNECTING TO THE DGX-1 CONSOLE Connect to the DGX-1 console using either a direct connection or a remote connection through the BMC.
NOTE: SSH can be used to perform the update. However, if the Ethernet port is configured for DHCP, there is the potential that the IP address can change after the DGX-1 is rebooted during the update, resulting in loss of connection. If this happens, connect using either a direct connection or through the BMC to continue the update process.
WARNING: Connect directly to the DGX-1 Console if the DGX-1 is connected to a 172.17.xx.xx subnet.
DGX OS Server software version 3.1.2 installs Docker CE which uses the 172.17.xx.xx subnet by default for Docker containers. If the DGX-1 system is on the same subnet, you will not be able to establish a network connection to the DGX-1.
Refer to the DGX-1 User Guide for instructions on how to change the default Docker network settings after performing the update.
Direct Connection 1. Connect a display to the VGA connector and a keyboard to any one of the USB ports. 2. Power on the DGX-1
Remote Connection through the BMC
This method requires that you have the BMC login credentials.
1. Make sure you have connected the IPMI port on the DGX-1 to your LAN. 2. Open a Java-enabled browser within your LAN and go to http://<IPMI IP Address>/.
Use Firefox or Internet Explorer. Google Chrome is not officially supported by the BMC.
Make sure popups are allowed for the BMC address.
3. Log in. If the administrator has not manually created a password, then the username that was created during the initial DGX-1 setup is used for both the BMC username and BMC password.
4. From the top menu, click Remote Control and then select Console Redirection. 5. Click Java Console to open the popup window.

Updating to Version 3.1.2
NVIDIA DGX OS Server Version 3.1.2 Release Notes 17
6. If necessary, power on the DGX-1 using the power button icon on the upper right corner of the BMC window.
Updating to Version 3.1.2
NVIDIA DGX OS Server Version 3.1.2 Release Notes 18
UPDATING FROM 1.X TO 2.X Follow these instructions only as part of the update to DGX OS Server software version 3.1.2. If you plan to use version 2.x without updating further, then refer to the Release Notes for version 2.x for the proper instructions.
See the section Connecting to the DGX-1 Console for guidance on connecting to the console to perform the update
Update Instructions 1. Verify that networking is enabled so that you can access the DGX-1 public
repository. For example: $ ping www.google.com
You may require alternate methods of verifying, if your network is not configured for ping.
2. Run the package manager. $ sudo apt-get update
3. Install CURL, if not already installed. $ sudo apt-get install curl
4. Verify that the DGX-1 public repository is configured. $ dpkg -l dgx1-repo-ubuntu1404
Expected output: ii dgx1-repo-ubuntu1404 1.1-1 amd64 dgx1 repository configuration files If this output appears, then proceed directly to step 5.
If the dgx1-repo-ubuntu1404 package is not present, then install the package manually as follows:
c) Download the debian repo using wget. $ sudo wget http://international.download.nvidia.com/dgx1/repos/pool/multiverse/d/dgx1-repo/dgx1-repo-ubuntu1404_1.1-1_amd64.deb -O /tmp/dgx1-repo-ubuntu1404_1.1-1_amd64.deb

Updating to Version 3.1.2
NVIDIA DGX OS Server Version 3.1.2 Release Notes 19
d) Install the package. $ sudo dpkg -i /tmp/dgx1-repo-ubuntu1404_1.1-1_amd64.deb
e) Verify that the package installed. $ dpkg -l dgx1-repo-ubuntu1404
Expected output: ii dgx1-repo-ubuntu1404 1.1-1 amd64 dgx1 repository configuration files
5. Get the new package list. $ sudo apt-get update
6. Install the update script. $ sudo apt-get -y --force-yes install dgx1-ota-update
7. Run the update script. The script automatically performs several steps:
● Removes packages (nvidia-361, ar-mgr, isert-dkms, etc). ● Installs the update meta package (dgx1-ota-update-meta). ● Reboots the DGX-1 upon completion. To run the script, enter the following: $ sudo /usr/bin/dgx1-ota-update.sh
Enter y at the prompt: Upgrade NVIDIA DGX1 from 2.0.x to 2.1.1? (y/NO) :y
● You may be presented with a configuration choice such as the following: Setting up dgx-limits (1.0-1) ... Configuration file '/etc/security/limits.d/dgx1- limits.conf' ==> File on system created by you or by a script. ==> File also in package provided by package maintainer. What would you like to do about it ? Your options are: Y or I : install the package maintainer's version N or O : keep your currently-installed version D : show the differences between the versions Z : start a shell to examine the situation The default action is to keep your current version.

Updating to Version 3.1.2
NVIDIA DGX OS Server Version 3.1.2 Release Notes 20
*** dgx1-limits.conf (Y/I/N/O/D/Z) [default=N] ?
Press Y to all such messages to “install the package maintainer’s version”.
● If you see the following message: A new version of configuration file /etc/default/grub is available, but the version installed currently has been locally modified. What do you want to do about modified configuration file grub? install the package maintainer's version
keep the local version currently installed show the differences between the versions show a side-by-side difference between the versions show a 3-way difference between available versions do a 3-way merge between available versions start a new shell to examine the situation
Select install the package maintainer’s version.
● You may see the following error message during DKMS configuration for the nv_peer_mem module while running the script: DKMS: install completed. modprobe: ERROR: could not insert 'nv_peer_mem': Exec format error
The update to version 3.1.2 will remedy this error.
8. When completed, press y at the prompt to reboot the system. Reboot now to finalize 2.1.1? (y/NO) : y
9. Wait for the system to come back up, then confirm that the Linux kernel version is 4.4.0-79 or later. $ uname -a
Expected output: Linux jws-1 4.4.0-79-generic #96~14.04.1-Ubuntu SMP Fri Mar 31 15:05:15 UTC 2017 x86_64 x86_64 x86_64 GNU/Linux
10. Confirm CUDA driver version is 384.81. $ nvidia-smi
Expected output (first line) NVIDIA-SMI 384.81 Driver Version: 384.81

Updating to Version 3.1.2
NVIDIA DGX OS Server Version 3.1.2 Release Notes 21
Recovering from an Interrupted Update If the script is interrupted during the update, such as from a loss of power or loss of network connection, you can attempt to recover as follows:
1. Restore power or restore the network connection, whichever caused the interruption. ● If the system encounters a kernel panic after you restore power and reboot the
DGX-1, you will not be able to perform the over-the-network update. You will need to re-image the DGX-1 with the latest image to update the software. Refer to the section DGX OS Server Version 3.1.2 Installation Guide for instructions.
● If you are successfully returned to the Linux command line, continue the following steps.
2. Reset the script. $ sudo dpkg --configure –a
3. Continue following the instructions from step 7 in the Updating from Version 1.x update instructions.

Updating to Version 3.1.2
NVIDIA DGX OS Server Version 3.1.2 Release Notes 22
UPDATING FROM 2.X TO 3.1.2 See the section Connecting to the DGX-1 Console for guidance on connecting to the console to perform the update.
Update Instructions 1. Verify that networking is enabled so that you can access the DGX-1 public
repository. For example: $ ping www.google.com
You may require alternate methods of verifying, if your network is not configured for ping.
2. Run the package manager. $ sudo apt-get update
3. Install any updates. $ sudo apt-get upgrade -y
4. Install dgx-release-upgrade. $ sudo apt-get install -y dgx-release-upgrade
5. Begin the update process. $ sudo dgx-release-upgrade
6. At the prompt to confirm starting the upgrade, press Y to begin. Do you want to start the upgrade? ... Installing the upgrade can take several hours. Once the download has finished, the process cannot be canceled. Continue [yN] Details [d]
7. At the prompt whether to restart services during the package upgrades without asking, select Yes. Restart services during package upgrades without asking? <Yes> <No>
8. After starting the update process, respond to the presented options as follows:

Updating to Version 3.1.2
NVIDIA DGX OS Server Version 3.1.2 Release Notes 23
● Select “keep the local version currently installed“ if there is a new grub package and you see the following text: A new version of configuration file /etc/default/grub is available, but the version installed currently has been locally modified. What do you want to do about modified configuration file grub? Install the package maintainer’s version keep the local version currently installed ← Select show the differences between the versions show a side-by-side difference between the versions show a 3-way difference between available versions do a 3-way merge between available versions start a new shell to examine the situation
The local version contains the changes that have been made on the DGX-1.
● Press Y if prompted about InfiniBand configuration choices. Configuration file ‘./usr/src/mlnx-ofed-kernel-4.0/ofed_scripts/ib_ipoib.conf’ ==> File on system created by you or by a script. ==> File also in package provided by package maintainer. What would you like to do about it ? Your options are: Y or I : install the package maintainer’s version N or O : keep your currently-installed version D : show the differences between the versions Z : start a shell to examine the situation The default action is to keep your current version. *** ib_ipoib.conf (Y/I/N/O/D/Z) [default=N] ?
● Press Y if prompted about docker.list configuration choices. Configuration file '/etc/apt/sources.list.d/docker.list' ==> File on system created by you or by a script. ==> File also in package provided by package maintainer. What would you like to do about it ? Your options are: Y or I : install the package maintainer's version N or O : keep your currently-installed version D : show the differences between the versions Z : start a shell to examine the situation The default action is to keep your current version. *** docker.list (Y/I/N/O/D/Z) [default=N] ?
9. Press Y to proceed with the final reboot.

Updating to Version 3.1.2
NVIDIA DGX OS Server Version 3.1.2 Release Notes 24
Restart required To finish the upgrade, a restart is required. Upon the next boot, the system will continue to install several packages in the background. *** This can take another ~7 minutes to complete. DO NOT shutdown or reboot the system during this period ***. If you select ‘y’ the system will be restarted. Continue [yN] After this reboot, the update process will take several minutes to perform some final installation steps.
10. Confirm the Linux kernel version. $ uname -a
Expected output: (or later version) Linux j220-128 4.4.0-96-generic #119-Ubuntu SMP Tue Sep 12 14:59:54 UTC 2017 x86_64 x86_64 x86_64 GNU/Linux
11. Confirm the CUDA driver version. $ nvidia-smi
Expected output, first line NVIDIA-SMI 384.81 Driver Version: 384.81
Verifying the nvidia-peer-memory Module 1. Make sure the nvidia-peer-memory module is installed.
$ lsmod | grep nv_peer_mem
Expected output: nv_peer_mem 16384 0 nvidia 11911168 30 nv_peer_mem,nvidia_modeset,nvidia_uvm ib_core 143360 13 rdma_cm,ib_cm,ib_sa,iw_cm,nv_peer_mem,mlx4_ib,mlx5_ib,ib_mad,ib_ucm,ib_umad,ib_uverbs,rdma_ucm,ib_ipoib
● If the expected output appears, then no further action is needed. ● If there is no output, then continue the steps to install the nvidia-peer-memory
module. 2. Install the module.

Updating to Version 3.1.2
NVIDIA DGX OS Server Version 3.1.2 Release Notes 25
$ sudo apt-get install --reinstall mlnx-ofed-kernel-dkms nvidia-peer-memory-dkms
Expected output: DKMS: install completed. Processing triggers for initramfs-tools (0.103ubuntu4.2) ... update-initramfs: Generating /boot/initrd.img-4.4.0-64-generic
3. Add the module to the Linux kernel. $ sudo modprobe nv_peer_mem
There is no expected output for this command.
4. Repeat step 1 to verify that the nvidia-peer-memory module is installed.
Recovering from an Interrupted Update If the script is interrupted during the update, such as from a loss of power or loss of network connection, restore power or restore the network connection, whichever caused the interruption.
If the system encounters a kernel panic after you restore power and reboot the DGX-1, you will not be able to perform the over-the-network update. You will need to re-image the DGX-1 with the latest image to update the software. Refer to the section DGX OS Server Version 3.1.2 Installation Guide for instructions.
If you are successfully returned to the Linux command line, continue following the instructions from step 5 in the Updating from Version 2.x to 3.1.2 update instructions.

Updating to Version 3.1.2
NVIDIA DGX OS Server Version 3.1.2 Release Notes 26
UPDATING FROM 3.1.1 TO 3.1.2 See the section Connecting to the DGX-1 Console for guidance on connecting to the console to perform the update.
Update Instructions 1. Run the package manager.
$ sudo apt-get update
2. Upgrade to version 3.1.2. ● To perform an attended upgrade, enter the following command. $ sudo apt-get dist-upgrade
Answer any questions that appear.
Most questions require a Yes or No response. When asked to select the grub configuration to use, select the current one on the system.
Other questions will depend on what other packages were installed before the update and how those packages interact with the update.
● To perform an unattended upgrade and keep the current configuration file, enter the following command. $ sudo DEBIAN_FRONTEND=noninteractive apt-get dist-upgrade -y -o Dpkg::Options::=”—force-confdef” -o Dpkg::Options::=”—force-confold”
3. Reboot the system. 4. To update Docker to the latest stable version of Docker CE, do the following after
rebooting the system. a) Run the package manager to access the docker-ce packages.
$ sudo apt-get update
b) Update Docker. $ sudo apt-get install dgx-docker-options docker-ce
If you are asked what you want to do with the configuration file /etc/systemd/system/docker.service.d/docker-override.conf, press N to keep your currently installed version.

Updating to Version 3.1.2
NVIDIA DGX OS Server Version 3.1.2 Release Notes 27
Verifying the nvidia-peer-memory Module 1. Make sure the nvidia-peer-memory module is installed.
$ lsmod | grep nv_peer_mem
Expected output: nv_peer_mem 16384 0 nvidia 11911168 30 nv_peer_mem,nvidia_modeset,nvidia_uvm ib_core 143360 13 rdma_cm,ib_cm,ib_sa,iw_cm,nv_peer_mem,mlx4_ib,mlx5_ib,ib_mad,ib_ucm,ib_umad,ib_uverbs,rdma_ucm,ib_ipoib
● If the expected output appears, then no further action is needed. ● If there is no output, then continue the steps to install the nvidia-peer-memory
module. 2. Install the module.
$ sudo apt-get install --reinstall mlnx-ofed-kernel-dkms nvidia-peer-memory-dkms
Expected output: DKMS: install completed. Processing triggers for initramfs-tools (0.103ubuntu4.2) ... update-initramfs: Generating /boot/initrd.img-4.4.0-64-generic
3. Add the module to the Linux kernel. $ sudo modprobe nv_peer_mem
There is no expected output for this command.
4. Repeat step 1 to verify that the nvidia-peer-memory module is installed.
Recovering from an Interrupted Update If the script is interrupted during the update, such as from a loss of power or loss of network connection, then restore power or restore the network connection, whichever caused the interruption.
If the system encounters a kernel panic after you restore power and reboot the DGX-1, you will not be able to perform the over-the-network update. You will need to re-image the DGX-1 with the latest image to update the software. Refer to the section DGX OS Server Version 3.1.2 Installation Guide for instructions.
If you are successfully returned to the Linux command line, continue following the instructions from step 2 in the Updating from Version 3.1.1 to 3.1.2 update instructions.

NVIDIA DGX OS Server Version 3.1.2 Release Notes 28
APPENDIX A: RETAINING THE RAID PARTITION WHILE INSTALLING THE OS
As part of the OS installation or re-imaging process, you are presented with a boot menu when booting the installer image. The default selection is Install DGX Software. The installation process then repartitions all the SSDs, including the OS SSD as well as the RAID SSDs.
If you have not been using the RAID SSDs as cache drives and do not want them reformatted, then select the Install DGX Server without formatting RAID option at the boot menu. This option retains data on the RAID disks and performs the following:
Installs the cache daemon but leaves it disabled by commenting out the RUN=yes line in /etc/default/cachefilesd.
Creates a /raid directory, leaves it out of the file system table by commenting out the entry containing “/raid” in /etc/fstab.
Does not format the RAID disks.
You can always choose to use the RAID disks as cache disks at a later time by enabling cachefilesd and adding /raid to the file system table as follows:
1. Uncomment the #RUN=yes line in /etc/default/cachefiled. 2. Uncomment the /raid line in etc/fstab. 3. Run the following:
Mount /raid. sudo mount /raid
Reload the systemd manager configuration.
Appendix A: Retaining the RAID Partition While Installing the OS
NVIDIA DGX OS Server Version 3.1.2 Release Notes 29
systemctl daemon-reload
Start the cache daemon. systemctl start cachefilesd.server
These changes are preserved across system reboots.

NVIDIA DGX OS Server Version 3.1.2 Release Notes 30
APPENDIX B. THIRD PARTY LICENSE NOTICE
This NVIDIA product contains third party software that is being made available to you under their respective open source software licenses. Some of those licenses also require specific legal information to be included in the product. This section provides such information.
libressl (OpenSSL)
LibreSSL http://www.libressl.org/ version 2.4.1 is provided under the following terms: * Copyright (c) 1998-2011 The OpenSSL Project. All rights reserved. * * Redistribution and use in source and binary forms, with or without * modification, are permitted provided that the following conditions * are met: * * 1. Redistributions of source code must retain the above copyright * notice, this list of conditions and the following disclaimer. * * 2. Redistributions in binary form must reproduce the above copyright * notice, this list of conditions and the following disclaimer in * the documentation and/or other materials provided with the * distribution. * * 3. All advertising materials mentioning features or use of this * software must display the following acknowledgment: * "This product includes software developed by the OpenSSL Project * for use in the OpenSSL Toolkit. (http:// www.openssl.org/)" *

Appendix B. Third Party License Notice
NVIDIA DGX OS Server Version 3.1.2 Release Notes 31
* 4. The names "OpenSSL Toolkit" and "OpenSSL Project" must not be used to * endorse or promote products derived from this software without * prior written permission. For written permission, please contact * [email protected]. * * 5. Products derived from this software may not be called "OpenSSL" * nor may "OpenSSL" appear in their names without prior written * permission of the OpenSSL Project. * * 6. Redistributions of any form whatsoever must retain the following * acknowledgment: * "This product includes software developed by the OpenSSL Project * for use in the OpenSSL Toolkit (http:// www.openssl.org/)" * * THIS SOFTWARE IS PROVIDED BY THE OpenSSL PROJECT ``AS IS'' AND ANY * EXPRESSED OR IMPLIED WARRANTIES, INCLUDING, BUT NOT LIMITED TO, THE * IMPLIED WARRANTIES OF MERCHANTABILITY AND FITNESS FOR A PARTICULAR * PURPOSE ARE DISCLAIMED. IN NO EVENT SHALL THE OpenSSL PROJECT OR * ITS CONTRIBUTORS BE LIABLE FOR ANY DIRECT, INDIRECT, INCIDENTAL, * SPECIAL, EXEMPLARY, OR CONSEQUENTIAL DAMAGES (INCLUDING, BUT * NOT LIMITED TO, PROCUREMENT OF SUBSTITUTE GOODS OR SERVICES; * LOSS OF USE, DATA, OR PROFITS; OR BUSINESS INTERRUPTION) * HOWEVER CAUSED AND ON ANY THEORY OF LIABILITY, WHETHER IN CONTRACT, * STRICT LIABILITY, OR TORT (INCLUDING NEGLIGENCE OR OTHERWISE) * ARISING IN ANY WAY OUT OF THE USE OF THIS SOFTWARE, EVEN IF ADVISED * OF THE POSSIBILITY OF SUCH DAMAGE.
Mellanox (OFED)
MLNX OFED (http://www.mellanox.com/) is provided under the following terms: Copyright (c) 2006 Mellanox Technologies. All rights reserved. Redistribution and use in source and binary forms, with or without modification, are permitted provided that the following conditions are met: 1. Redistributions of source code must retain the above copyright notice, this list of conditions and the following disclaimer. 2. Redistributions in binary form must reproduce the above copyright notice, this list of conditions and the following disclaimer in the documentation and/or other materials provided with the distribution. THIS SOFTWARE IS PROVIDED BY THE COPYRIGHT HOLDERS AND CONTRIBUTORS "AS IS" AND ANY EXPRESS OR IMPLIED WARRANTIES, INCLUDING, BUT NOT LIMITED TO, THE IMPLIED WARRANTIES OF MERCHANTABILITY AND FITNESS FOR A PARTICULAR PURPOSE ARE DISCLAIMED. IN NO EVENT SHALL THE COPYRIGHT HOLDER OR CONTRIBUTORS BE LIABLE FOR ANY DIRECT, INDIRECT, INCIDENTAL, SPECIAL, EXEMPLARY, OR CONSEQUENTIAL DAMAGES (INCLUDING, BUT NOT LIMITED TO, PROCUREMENT OF SUBSTITUTE GOODS OR SERVICES; LOSS OF USE, DATA, OR PROFITS; OR BUSINESS INTERRUPTION)

Appendix B. Third Party License Notice
NVIDIA DGX OS Server Version 3.1.2 Release Notes 32
HOWEVER CAUSED AND ON ANY THEORY OF LIABILITY, WHETHER IN CONTRACT, STRICT LIABILITY, OR TORT (INCLUDING NEGLIGENCE OR OTHERWISE) ARISING IN ANY WAY OUT OF THE USE OF THIS SOFTWARE, EVEN IF ADVISED OF THE POSSIBILITY OF SUCH DAMAGE.

www.nvidia.com
Notice THE INFORMATION IN THIS DOCUMENT AND ALL OTHER INFORMATION CONTAINED IN NVIDIA DOCUMENTATION REFERENCED IN THIS DOCUMENT IS PROVIDED “AS IS.” NVIDIA MAKES NO WARRANTIES, EXPRESSED, IMPLIED, STATUTORY, OR OTHERWISE WITH RESPECT TO THE INFORMATION FOR THE PRODUCT, AND EXPRESSLY DISCLAIMS ALL IMPLIED WARRANTIES OF NONINFRINGEMENT, MERCHANTABILITY, AND FITNESS FOR A PARTICULAR PURPOSE. Notwithstanding any damages that customer might incur for any reason whatsoever, NVIDIA’s aggregate and cumulative liability towards customer for the product described in this document shall be limited in accordance with the NVIDIA terms and conditions of sale for the product.
THE NVIDIA PRODUCT DESCRIBED IN THIS DOCUMENT IS NOT FAULT TOLERANT AND IS NOT DESIGNED, MANUFACTURED OR INTENDED FOR USE IN CONNECTION WITH THE DESIGN, CONSTRUCTION, MAINTENANCE, AND/OR OPERATION OF ANY SYSTEM WHERE THE USE OR A FAILURE OF SUCH SYSTEM COULD RESULT IN A SITUATION THAT THREATENS THE SAFETY OF HUMAN LIFE OR SEVERE PHYSICAL HARM OR PROPERTY DAMAGE (INCLUDING, FOR EXAMPLE, USE IN CONNECTION WITH ANY NUCLEAR, AVIONICS, LIFE SUPPORT OR OTHER LIFE CRITICAL APPLICATION). NVIDIA EXPRESSLY DISCLAIMS ANY EXPRESS OR IMPLIED WARRANTY OF FITNESS FOR SUCH HIGH RISK USES. NVIDIA SHALL NOT BE LIABLE TO CUSTOMER OR ANY THIRD PARTY, IN WHOLE OR IN PART, FOR ANY CLAIMS OR DAMAGES ARISING FROM SUCH HIGH RISK USES.
NVIDIA makes no representation or warranty that the product described in this document will be suitable for any specified use without further testing or modification. Testing of all parameters of each product is not necessarily performed by NVIDIA. It is customer’s sole responsibility to ensure the product is suitable and fit for the application planned by customer and to do the necessary testing for the application in order to avoid a default of the application or the product. Weaknesses in customer’s product designs may affect the quality and reliability of the NVIDIA product and may result in additional or different conditions and/or requirements beyond those contained in this document. NVIDIA does not accept any liability related to any default, damage, costs or problem which may be based on or attributable to: (i) the use of the NVIDIA product in any manner that is contrary to this document, or (ii) customer product designs.
Other than the right for customer to use the information in this document with the product, no other license, either expressed or implied, is hereby granted by NVIDIA under this document. Reproduction of information in this document is permissible only if reproduction is approved by NVIDIA in writing, is reproduced without alteration, and is accompanied by all associated conditions, limitations, and notices.
Trademarks NVIDIA, the NVIDIA logo, and DGX-1 are trademarks and/or registered trademarks of NVIDIA Corporation in the Unites States and other countries. Other company and product names may be trademarks of the respective companies with which they are associated.
Copyright © 2017 NVIDIA Corporation. All rights reserved.