Embed Size (px)
Citation preview
Page 1 of 32
Occupational Therapy
Advice for Children
Fine Motor Skills
Handwriting
Daily Living Skills
Children’s Occupational Therapy Department – Northumberland
Child Health
Woodhorn Lane
Ashington
Northumberland
NE63 9JJ
Tel: 01670 564 050

Page 2 of 32
Table of Contents
Page No Details
3 Occupational Therapy Advice for Children
5 Visual Perception
9 Independence Skills
15 Pre Writing and Fine Motor Skills
17 Handwriting Strategies
22 When is it time to use ICT?
23 Pre Scissor and Scissor Skills
28 Once You Have Completed The Pack…
29 Bike Skills Sessions
31-32 Progress Log

Page 3 of 32
Occupational Therapy Advice for Children
This booklet has been devised for use at both home and school for your child. Each
section has been separated to allow you to work on the difficulties your child
presents with.
The Progress Log is located at the back of the booklet. Please ensure this is
completed as you progress through the booklet. There is a scoring scale which
should be completed at Week 1, Week 6, and Week 12.
Equipment that may be useful for your child has been put in bold and underlined
throughout the booklet. Some equipment can be found at high street retailers; others
can be found at:
www.amazon.co.uk
www.nrshealthcare.co.uk
Handwriting resources:
www.specialdirect.com

Page 4 of 32

Page 5 of 32
Visual Perception Difficulties with Organisation, Reading and Writing
Area of difficulty Activities Strategies to try
Difficulty finding a toy in a toy box or cutlery in a drawer. Difficulty locating a word within a sentence or a place in a workbook
Finding items in story book pictures e.g. ‘Where’s Wally’ or ‘I spy’ books. Encourage your child to look for objects in pictures when reading with them. Play ‘find the colour’ or ‘find the shape’ – find all objects of a particular shape in a room or when walking along the street. Use a pile of Lego and describe a piece to your child, encourage them to find it. Search for corner pieces in a jig saw
Reduce distractions, e.g. have neat desk/table, blank walls. Organise compartments/special places for different items, e.g. particular place for pencils, books, etc. Use contrasting colours for important information, or colour code for each subject, e.g. all maths books/utensils in yellow. Encourage children to verbalise and/or visualise what they are looking for.
Struggles to complete shape sorting toys if they don’t have help to orientate the shape Children learning to read may struggle to recognise the same letters or numbers if they are written in a different font
Draw your child's attention to noticing visual cues in their environment, e.g. when driving, ‘There's a rectangle sign’, ‘That sign is like an upside down triangle’, etc.
Play games such as ‘Snap!’ with everyone turning their card in front of them so that the cards are in different orientations. Play searching games, e.g. try finding objects that are the same such as all the triangular blocks. Play games to match shapes, colour and size of objects, e.g. two cereal boxes but they have a different design, two triangles but some large and some small.
Provide what is to be copied on a paper lying flat on their desk, rather than the board, or copy from another child’s paper Try to use the same font or style of letter on handouts as is used to in school. (Like the “a” here is not like
an “a”.)
When learning a letter form, work in the same plane as it is being taught (they need a vertical board if that’s what you’re using) Teach the child to tilt their head or eyes if they have trouble visualising something at a certain angle.
May struggle with directional instructions (in, out, up, down, behind)
Play ‘How Many Steps?’ – ‘How many steps will it take you to reach that chair?’ - The child then guesses before stepping it out.
You can help children with spatial relations by giving verbal labels to spatial directions, e.g. ‘go right’ and ‘point right’. When giving

Page 6 of 32
May struggle with letter reversal particularly ‘b’, ‘d’ ‘p’ ‘q’
Copy patterns - See if your child can copy a pattern made out of blocks, loom bands, Lego, or follow a pattern of beads on a bracelet or necklace. Play with jigsaw puzzles.
Try pouring water between containers and see how full each container gets. Play pin the tail on the donkey. Play ‘Where are we?’ - Draw a floor plan of the room, move to different parts of the room and see if your child can point to or put a counter on the location on the plan. Show your child a picture of jumbled arrows - See if they can find all the arrows pointing in the same direction.
directions you can guide children with touch, e.g. ‘use your right hand’ giving a touch prompt to their right hand. Children may also need explanations about space and personal space and what is appropriate
Difficulty visualising a whole object if part of it is missing/hidden Difficulty reading fluently
Play with Lego or similar construction toys, try and find the parts you need from a pile of pieces.
Play Dominos and try and match the numbers. Play with magnetic letters to try and make words. Play hidden picture games where the child has to identify a picture that is partly covered. Try this with photos of people - see if your child can recognise who is in the photo without seeing their face.
Separate items out within draws in order that they can be easily identified, e.g. knives, forks and spoons. Practice breaking down shapes or objects into parts and talk about how they relate to the whole, e.g. the lid on the top of a bottle. Use objects the child can feel when teaching, e.g. magnetic letters, tactile letters, etc.
Problems with dressing (i.e., matching shoes or socks) Difficulty correcting errors in school work, Difficulty distinguishing similarities and differences in the
Play ‘What’s different?’ - put one different object amongst a group of toys that are the same, e.g. a toy horse amongst dinosaurs.
When children are starting to learn how to discriminate between objects make sure there is only one different feature, e.g. a small football and a large football. Make sure you are talking about position, shape, colour and size when you are looking at different objects with children.

Page 7 of 32
formation of letters (i.e., letter reversal) or objects,
Play ‘Where does this go?’ - Put objects into categories, e.g. things for writing - pen, pencil, chalk or things for cooking - wooden spoon, teaspoon, pot handle. Play card games such as ‘Snap!’ Try finding certain objects that you name within a picture or story book. Play with toy cars and see if children can follow directions, e.g. put the second car behind the green car, put the yellow car beside the blue car. Play with jigsaws. Try and work out which words are written correctly (e.g. cna, can, nca). Do a puzzle or pattern leaving 1 or 2 mistakes – see how quickly your child can find and fix it.
Look at similarities (e.g. lots of footballs) and then differences (e.g. which one is the small football).
Struggles to read words that cannot be sounded out phonetically, e.g. laugh. Finds it hard to copy off the board, having to look up after each letter or word as opposed to recalling a whole sentence.
‘What’s different?’ - Ask your child to look carefully at someone’s clothes or position. Ask the child to close their eyes while the person changes their clothes/position. Ask the child to work out what’s different. ‘What does it look like?’ - Ask your child to close their eyes and describe the room/what they are wearing/what it looks like out the window. Play ‘Kim’s Game’ - Ask your child to study a few objects on a tray, cover these with a tea towel and see if the child can remember what all the objects were. Take one object away and uncover the tray - see if the child can spot what’s missing.
Draw a Picture - Show your child a picture or simple shape and then see if they can draw this from memory. Start with simple designs
Teach children ways to remember difficult sentences or words, e.g. one collar, two sleeves in ‘necessary’. Practice remembering short sequences or one object at a time before trying to remember lots at once. Draw pictures on a strip of paper to remind children of a sequence of tasks. Practice memory skills in a quiet environment with few distractions.

Page 8 of 32
and then make them more difficult as the child can do it more easily. Play ‘I went shopping and I brought…’ everyone adds an item of shopping each time and you have to try and remember the sequence. Cut out a comic and try and put it back into order.
Child doesn’t look at what they are doing with their hands (eye-hand coordination)
Practicing eye tracking and visually following a stimulus with your eyes. Ball games such as swing ball. Target practice games, try throwing a ball or bean bag at a target or in a hoop. Free drawing activities. Draw using glitter pens. Try and complete mazes from puzzle books.
Origami, paper folding, craft activities. Trace the shortest route on a map. Word searches.
Visual motor skills involve a child’s ability to make sense of something visually and then appropriately use this information for a motor task such as handwriting or playing sport.

Page 9 of 32
Independence Skills Area of Difficulty Strategies to try Helpful hints
Buttons Children with fine motor skill difficulties often find it difficult to do up and undo buttons. These strategies provide some ideas to help children to learn to do buttons independently.
Make a posting box with three different holes – vertical, horizontal and diagonal. Your child has to place buttons in each of the holes. Grade this activity by starting off with large slots and large counters and progress to smaller slots/counters as the child succeeds. Lacing activities – either using a bought lacing board or try making your own by punching holes out of stiff card and using a lace. ‘Pinch’ theraputty or play doh between the thumb and index finger and pull slightly to strengthen pincer grip Putting pegs into a pegboard, prompting your child to use a pincer grip. Pinching large clothes pegs and standing them on the edge of a box. Pinching play dough or plasticine. Turning pennies or counters over in tiddly winks. Using tweezers and tongs to pick up small items such as raisins counters, pieces of play dough, cotton wool balls, beads, etc.
Ensure that you always begin with the bottom buttons so that it is possible to see the hands working. Find a large buttoned loose cardigan (adult cardigans are often ideal). Practice using a pincer grip by putting fingers through the buttonhole. Introduce the child to vertical buttonholes first and then progress to horizontal buttonholes as the child succeeds. Practice holding the button with a pincer grip and pulling it through the buttonhole Practice pulling button through enough for it to lie flat. For undoing buttons talk about pinching and ‘posting’ the button back through the hole. Decrease the size of buttons used to practice Start practicing buttons at a table before asking the child to complete buttons on themselves. Dressing in front of a mirror can assist a child in matching up their buttons with button holes.
Zips Fastening zips requires 2 hands working together in a co-ordinated way, a strong pincer grasp, strong hands and good hand eye co-ordination.
Opening Jars Screwing and unscrewing jar lids can help to develop hand strength. The amount of strength needed can be graded by how tightly the lids are put on. Try "hiding" little objects inside to make it more of a game For practice at isolating index fingers
When buying a coat with an open ended zip, test the zip thoroughly as the ease of fastening can vary a lot. Attach a key ring or curtain ring to the zip to aid grip. Backward chaining: completing the

Page 10 of 32
practice squeezing the triggers of small water pistols in the bath or into the sink. Squeeze the trigger of a
spray bottle. Threading beads and completing a lacing card, are fine motor activities that have a big eye-hand coordination component. Use chunky beads and laces if your child struggles, or thread beads onto a pipe cleaner/chenille stick for extra stability.
entire process but leaving the last part for him/her to do. Gradually reduce how much of the task you do. A better time to practice might be a slower-paced weekend morning or practicing buttons on pyjamas in the evening.
Shoe laces Fastening shoelaces requires two hands, a strong pincer grasp and strong hands. These activities work on the underlying skills required for this task.
Ripping paper/card to increase hand strength needed when tightening the lace
Paper weaving, constructional toys, sewing games (these help you to understand the concepts of how the lace goes behind and is posted through) Tying bows with ribbon/pipe cleaners Dressing dolls gives a good opportunity for practice Threading beads onto a string
Obstacle courses- practicing concepts of under, over, around and through. Try copying these in a sequence
Sit in a comfortable, balanced position with your back against a surface Lace a shoe using two different coloured laces before moving onto the same coloured laces
Add an extra ‘twist’ at stage 1 to keep laces tight. Always practice using thicker ‘fluffier’ laces as these will be less likely to come undone Place a shoe on the child’s lap to practice initially and then make sure their foot is up on a small stool in front of them. Alternatives: Toggles, Velcro, Greeper laces, ‘lacemups’

Page 11 of 32
Cutlery Using cutlery is a two handed activity where one hand does one job and the other hand does another job. Any activities that require your child to perform a task in this way helps to plan the movements required for skills such as using cutlery.
Using a dustpan and brush – emphasise keeping the dustpan still and moving the brush. Your child may be tempted to move both together at the same time.
Using scissors – start with making small snips in play doh or snipping straws, before moving onto easy patterns (straight lines) and progress to more complex designs.
Using play doh – practice cutting using cutlery.
Playing with clay (or other modelling material).
Cooking / Baking – holding a bowl while mixing with a spoon or spooning the mixture out of the bowl.
Colouring – ensure the paper is held with one hand whilst the other hand does the colouring.
Opening screw top bottles and jars.
Playing with construction games – e.g. Lego, meccano, k’nex.
Ensure the child is sitting at a suitable table and chair (with feet supported on the floor or a box). Arms should be able to rest supported on the table. Try using dycem or blue tac to hold the plate still initially. Encourage the child to practice cutting in other situations first, and let them decide when they are ready to try at mealtimes Ensure the cutlery is held appropriately (this does not have to be perfect in the first instance, but it does need to be effective, e.g. knife the correct way up). Try Kura care cutlery (adult or child size). This has a resting grip to identify where to place index fingers.
Alternatively try using chunkier cutlery if the child appears to having trouble gripping or try attaching foam tubing or plastizote to bulk it out.
Dressing Sequencing the task of dressing, struggling to perform all of the movements required for dressing.
Undressing is usually easier than dressing. Dress in front of the mirror to provide visual cues and use to check all is correct before going out. Undressing before bed and helping to
Ensure that your child is sitting in a stable position, e.g. on the floor or sitting on a chair or firm bed with his or her feet supported. If sitting balance is poor, try sitting against a wall.

Page 12 of 32
put on pyjamas is a good time to start as you have more time at night than in the morning.
Follow the same technique for each garment, e.g. t-shirt is put over the head first and then the arms are put through the sleeves. The order and technique can be written down or use pictures as a visual prompt to help your child remember. Describe actions and parts of the body as you are helping your child to dress, eg ‘put right foot in.’ Also get your child to help with the washing and discuss which way clothes go. Encourage your child to look (maybe in a mirror) and feel if all is correct. Then encourage them to identify and sort out what needs to be done, e.g. T-shirt needs pulling down; shoes ‘feel wrong’ because they are on the opposite feet. Use clothes with wide neck and arm holes to make it easier to locate these. Initially it may be easier to practise with clothing a size too big.
Sit next to, in front of, or directly behind your child during activity and guide him or her through the task. Backward chaining - This is where the adult begins a task and the child completes the last step. As the child gets better the adult then does less of the task. E.g. child may initially just pull t-shirt down at front once parent has placed this over their head. Forward chaining - This is where the child starts the task (e.g. putting t-shirt over child’s head) and the adult helps with the later stages. Always demonstrate the correct dressing technique first and talk through what you are doing when you are helping a child. Try not to watch all the time; your child may do more when left alone.
Putting on socks To be able to put on their socks independently, your child needs good core strength, strong hands/pincer grasp and a good awareness of their body. These activities help to develop the underlying skills for this task.
Play games where your child has to reach outside of his/her base of support without falling over. Squatting activities while your child is holding an object. Put a hula hoop on the floor. Can they squat down, pick up the hula hoop and reach it overhead? Put it back on the floor in front of them and repeat. Can you get across the whole room only stepping in the hula hoop? Roll a large ball to the child. Your child can squat down, pick it up with two hands and push it back.
Place socks partly over your child’s foot, then encourage them to perform the last part. Sport tubular socks are easier than those with a heel. Socks with coloured heels and toes make it easier to work out the correct way around. Alternatively mark the back of the sock with thread on the inside top edge.

Page 13 of 32
Body awareness game such as Simon Says adding in directions such as “Simon says touch your both hands to your left foot” or “Simon says squat down and touch the floor”. If Simon Says is difficult for your child, play a game of Match Me. Move your body a certain way ie reach your right arm behind your back and they try to match your actions exactly. Play catch or kick a ball to each other. Simple games of catching, throwing and kicking include many of the underlying skills necessary for learning how to get dressed.
For example, when kicking a ball, a child has to momentarily stand on one foot while the other side of the body is moving (skill needed for getting pants on and off in standing). Set up obstacles courses that require the child to plan the movements for different activities.
Make sure the elastic is not too tight, avoid tight fitting socks. Prompt your child to use their thumbs to help pull the socks on. e.g. ask the child to make ‘thumbs up’ sign with both hands then get them to place thumbs inside the socks to help pull them up. Roll down the top of the sock to make it easier to get the foot in. Use a loop on the back of the sock for the child to hold and pull up.
Bottom wiping Many children with co-ordination problems have difficulty with bottom wiping and the process of going to the toilet. The following strategies can be used to learn bottom wiping and assist with toileting.
Play games that encourage your child’s awareness of where their bottom is and how to reach it (‘Simon says’)
Try encouraging your child to reach for toys or bean bags and put these in the small of their back. You could do this as part of an obstacle course (e.g., commando crawl across a room with a bean bag on your back)
Struggling to get (un) dressed might be an issue (see dressing/buttons/zips sections) In Bath/when drying - Using a flannel/towel to clean/dry body parts and name them as you do so. Encourage your child to get into a routine of going to the toilet so they don’t feel rushed. Encouraging your child to go after breakfast may reduce the anxiety of needing to go at school. If your child’s feet don’t touch the floor they would benefit from a step under their feet to help them maintain their posture.

Page 14 of 32
Play games where you pass toys or bean bags through your legs from the back to the front Target Game for bottom wiping Laminate a target and put some chocolate spread in the middle of the target, Count and tear off 4 pieces of toilet roll Fold the tissue in half, then again (so they are 1 sheet big). Pinch at the chocolate spread so that you remove it without smearing. Try and score 10. Then try on the wall behind you not looking.
Wet wipes are good to use when learning bottom wiping as they wipe more easily and cover a larger surface area. If your child struggles with toileting it may be helpful to have a discussion with school about this in order that they can be aware and possibly make arrangements such as keeping your child’s wet wipes in the toilet for them to use.
Page 15 of 32
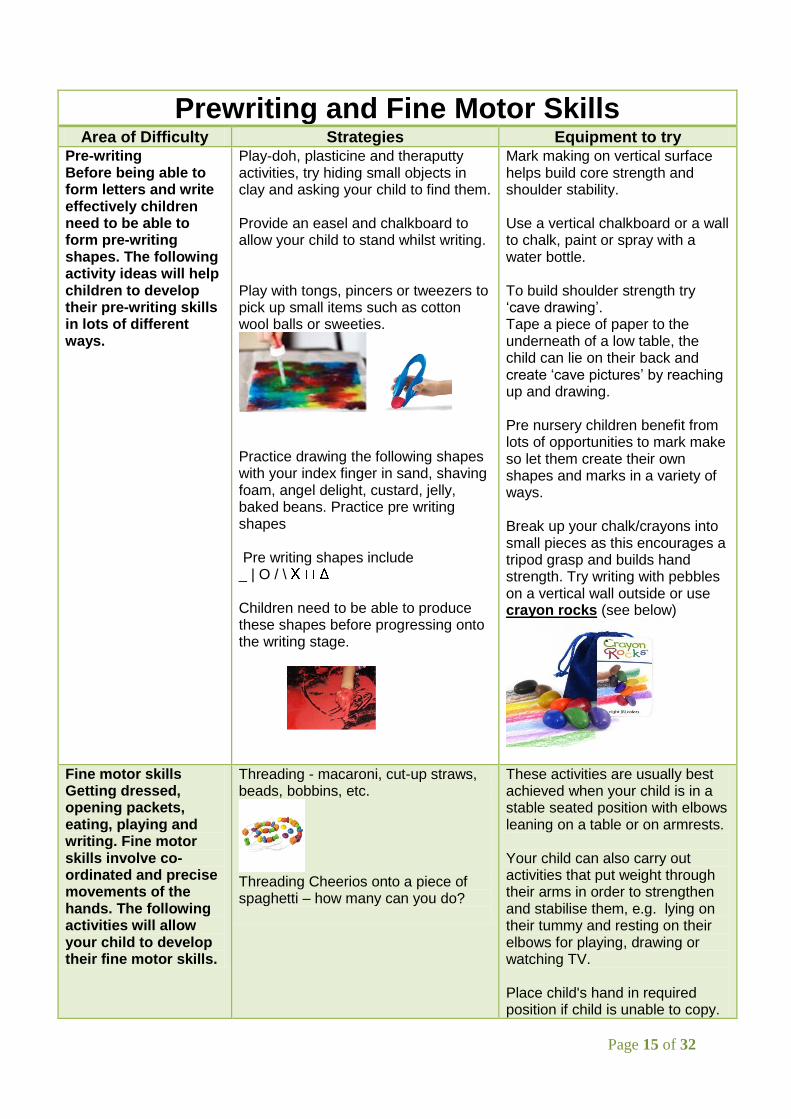
Prewriting and Fine Motor Skills Area of Difficulty Strategies Equipment to try
Pre-writing Before being able to form letters and write effectively children need to be able to form pre-writing shapes. The following activity ideas will help children to develop their pre-writing skills in lots of different ways.
Play-doh, plasticine and theraputty activities, try hiding small objects in clay and asking your child to find them. Provide an easel and chalkboard to allow your child to stand whilst writing. Play with tongs, pincers or tweezers to pick up small items such as cotton wool balls or sweeties.
Practice drawing the following shapes with your index finger in sand, shaving foam, angel delight, custard, jelly, baked beans. Practice pre writing shapes Pre writing shapes include _ | O / \ Children need to be able to produce these shapes before progressing onto the writing stage.
Mark making on vertical surface helps build core strength and shoulder stability. Use a vertical chalkboard or a wall to chalk, paint or spray with a water bottle. To build shoulder strength try ‘cave drawing’. Tape a piece of paper to the underneath of a low table, the child can lie on their back and create ‘cave pictures’ by reaching up and drawing. Pre nursery children benefit from lots of opportunities to mark make so let them create their own shapes and marks in a variety of ways. Break up your chalk/crayons into small pieces as this encourages a tripod grasp and builds hand strength. Try writing with pebbles on a vertical wall outside or use crayon rocks (see below)
Fine motor skills Getting dressed, opening packets, eating, playing and writing. Fine motor skills involve co-ordinated and precise movements of the hands. The following activities will allow your child to develop their fine motor skills.
Threading - macaroni, cut-up straws, beads, bobbins, etc.
Threading Cheerios onto a piece of spaghetti – how many can you do?
These activities are usually best achieved when your child is in a stable seated position with elbows leaning on a table or on armrests. Your child can also carry out activities that put weight through their arms in order to strengthen and stabilise them, e.g. lying on their tummy and resting on their elbows for playing, drawing or watching TV. Place child's hand in required position if child is unable to copy.

Page 16 of 32
Craft - activities that require colouring, cutting & assembling e.g. Collages, puzzles, paper tearing. Finger Puppets - puppets on each finger Clothes Pegs - around a box, on a piece of card, hanging clothes on a line, hanging dolls clothes on a line of string using mini pegs.
Bubbles - have your child blow them, pop by poking at them with different fingers, grasping them and hitting them with various body parts. Action Songs – ‘Twinkle Twinkle’, ‘Wheels on the Bus’, ‘Five Fat Sausages’, ‘Incey Wincey Spider’, ‘Two Little Dicky Birds’, etc.
Talk about the positions of fingers and hands as you are using them. Use heavy and solid pieces to provide weight for improved control, avoiding light toys initially. Work at a level within the child’s frustration limit so the child will stay at the activity. Encourage activities requiring hand manipulation. Help stabilise an object while the child completes the task.

Page 17 of 32
Handwriting Strategies Handwriting
Difficulty Strategies Equipment to try
Poor Handwriting Posture
Make sure children are facing the board directly so that they do not have to adopt a twisting posture which is bad for the spine. This may mean moving chairs out and around for board work.
Children should be working on regular core strengthening and shoulder strengthening activities.
Posture pack (sit on wedge and angled board/writing slope)
If feet are dangling: try a lower chair, try a foot rest/step.
Adjustable tables may be helpful if several children are too small for the desks.
Any child with a visual difficulty should use an angled board/writing slope for all reading and writing activities to bring their work closer to their visual field and reduce their need to slouch right over.
Consider ‘Start Write, Stay Right’ handwriting programme to consider environmental, postural and physical elements required for effective and automatic handwriting.
Left Handers Try not to sit a left hander on the right of a right hander as they will bump arms and distract each other.
Place paper to left of midline and tilt clockwise to avoid the child's hand obscuring the view of the line. It may be useful to place a tape on the table to outline where it should be positioned until the child gets used to it.
A lot of pencil grips are able to be used by left and right handers.
Some handwriting pens are designed specifically for left handers.
This pen helps to reduce the child’s hand obscuring the view (suitable for left and right handers)
Yoropen
Pencil Grip The most effective grip is a tripod grasp as shown. It allows the fingers to move without using the wrist, or whole arm. This means that less effort is used and writing can be more fluent. The forearm should be resting on the desk for stability.
Place a pencil grip on the pencil/pen to encourage a dynamic tripod grasp. Introduce use slowly.
The most effective tend to be:
Ultra Grip

Page 18 of 32
Encourage the child to hold the pencil between the thumb pad and index finger pad (like a bird beak). The pencil then rests on the middle finger.
Often children who lack hand strength or have joint laxity in their fingers and thumbs will find it difficult to hold the pencil in tripod grasp. Therefore working on hand strengthening exercises like Theraputty can help.
This also means that children who start using a new pencil grip which puts their fingers in a tripod grasp, may experience discomfort at first as the new muscles that it uses are fatiguing quickly but building strength. The pain should pass if the child perseveres as the muscles strength will improve.
Handwriting programmes often work on building the hand muscles for handwriting such as: Write from the Start and Speed up!
Ultra Grip with crossguard
The writing claw
For children who don’t pull away their ring and little finger and whose pencil/ pen does not sit in the web space handiwriters are great:
For older children specialist pens can also be helpful, particularly:
Pen Again Stabilo EASY Pen original pen
If the child really can’t maintain a tripod grasp, or is functional and has nice, effective handwriting without, the key is often comfort:
Comfort Grip Ridged Comfort Grip

Page 19 of 32
Pressure too hard Practice on carbon paper to be light enough to not get through sheets.
Play dough writing: flatten it on desk or table and use a pencil to write in it. For those that press too hard, the letters and lines come out all torn up so they get immediate feedback to lighten their pressure.
Writing on tin foil backed with cardboard – encourage the child not to rip the foil when they write.
Try using harder pencils e.g. 2H, 4H, 6H.
Think about increasing comfort of the pen by increasing diameter of pen/pencil with comfort pencil grips or pens which are comfortable to reduce fatigue.
Propelling pencils with lead length long. Too much pressure will snap the pencils and help practice reducing pressure so as not to snap.
Pressure too light Practice on carbon paper to put on enough pressure to get through sheets.
Writing on tin foil backed with cardboard – encourage the child to rip the foil when they write.
Use crayon rubbings - If too little pressure is used, the image does not come through clearly onto paper. After achieving the ‘perfect’ pressure when watching, ask the child to maintain the same pressure with eyes closed.
Light up pen to signal when not putting enough pressure on (light will be off) – light should go on/off when applying correct amount of pressure.
Try pencil grips to encourage tripod pencil grasp.
Provide an angled board/writing slope. The angle should be approximately 25°. This will ensure that the wrists are positioned on the writing surface.
Try using softer pencils e.g. 2B,4B, 6B
Spacing Words Try writing on squared paper and leaving out 1 square between each word.
Use a lolly stick/ emery board between each word – the child could decorate and individualise the stick.
After completing work, ask pupil to highlight the over/under spaced words and letters.
Get the child to try and read a sentence where there are no spaces left between the words so show why spaces are needed.
Ask child to imagine a letter e.g. an ‘o’ between each word.
Use the ‘Write from the Start Perceptuo-Motor Handwriting Programme’, especially section 2B
Introduce joined writing very early in the child’s education, this is guaranteed to improve spatial organisation; a good programme to work towards joined up handwriting is ‘SpeedUp! Handwriting Programme’
Consider ‘Start Write, Stay Right’ handwriting programme to consider environmental, postural and physical elements required for effective and automatic handwriting.
Finger Spacers can be helpful.

Page 20 of 32
Control and Fluency
Practise with activities such as:
Dot to Dots Mazes Matching one object to another Drawing along roads (start with wide lines)
Fluency can also be developed through practising letter patterns (it is easier to start large and then get smaller) eg
The Teodorescu Perceptuo -Motor Programme (Write from the Start) is a resource book that develops perceptual and fine motor control with the aim of developing fluency and accuracy.
Speed up! Also works on the fluency of handwriting working on a lot of handwriting patterns but using a kinaesthetic approach.
‘Start Write, Stay Right’ handwriting programme to consider environmental, postural and physical elements required for effective and automatic handwriting.
Alignment on page Always use lined paper rather than a line guide which easily moves.
Mark a margin at the left hand side in a bold colour or place starting points at the left margin to reiterate where each line of writing should start.
Stop and go margins help the child work out where to start and stop on the page.
Provide ‘Right line’ or ‘hint-print’ paper which incorporates lines which are slightly raised giving a tactile reference when writing each letter. Another way of doing this is to draw lines onto a page with pva glue and let them set.
Ascending and descending letters
Use visual and verbal cues e.g. coloured lines to encourage the child to place the letter in the correct place (see attached example):
Blue line symbolizes sky, green for grass, and brown for earth. E.g. for a ‘p’ start at the grass, go down to the earth and back up to the grass
This should give the idea of spacing and size of letters.
See Sky, grass, soil paper attached.
The paper is graded in difficulty so start with the biggest blocked out lines and gradually decrease the size and then move to the coloured lines with the white background.
A lot of children would benefit from regular practice on this paper to train their brains for orientation and placement of letters.
Letter Formation Write letters in the air using whole arm movements with eyes closed to reinforce kinaesthetic appreciation of letter orientation.
Create shapes using dough or clay encouraging the child to mould and knead the material into a clear shape (this reinforces tactile
Develop an appreciation of form using sections from the ‘Write from the Start Perceptuo-Motor Handwriting Programme’ especially sections 1A–2A.
Consider ‘Start Write, Stay Right’ handwriting programme to consider environmental,

Page 21 of 32
sensation).
Create letter forms out of Play-Doh and see if the child can detect what the shape or letter form is with their eyes closed (this reinforces proprioception and tactile sensation).
Using an index finger, create letters and shapes in trays of sand, shaving foam or silly soap.
Write letters on rough sandpaper using a variety of medium, ie, soft leaded pencil or wax crayons (the fine vibrations reinforce Kinaesthetic sense).
postural and physical elements required for effective and automatic handwriting.
Letter Reversals Provide a starting arrow to show which way a letter should be produced, ie, the letter ‘c’ is orientated in an anticlockwise direction and the letter ‘b’ requires a clockwise orientation.
Use odd one out games to help the child to determine discrepancies in orientation.
Reversals are normal when seen in children under 7 years.
Consider ‘Start Write, Stay Right’ handwriting programme to consider environmental, postural and physical elements required for effective and automatic handwriting.
Joint laxity in Hands ‘Bendy Fingers’
Children may complain of fatigue, because they are working very hard to maintain a pencil grip position– give them rest breaks and allow extra time for writing tasks.
If a child has joint laxity else where their posture may be affected – see ‘poor handwriting posture,’ for advice.
Allow the child to decide whether they find it easier to write in print or joined up – some students with joint laxity prefer print as they get a break between each letter, others prefer joined up as they get a break between each word.
Gentle hand strengthening exercises and movement throughout the day will help.
Increase the diameter of pens and pencils with comfort grips, chunky pens and pencils and consider Abiligrip or plastazote. This will reduce stress on the joints.
Abiligrip

Page 22 of 32
When is it time to use ICT?
When a child’s handwriting skills are limiting their ability to record their knowledge
effectively following handwriting intervention, increased ICT access should be
considered.
It is still important to continue work on pencil skills as writing notes is an important skill.
When the focus of the lesson is presentation and writing, students should be
encouraged to write. When the focus is on demonstrating knowledge, they should be
encouraged to use IT.
Test the speed of handwriting versus the speed of typing by timing some copied
sentences. Repeat these tests at regular intervals to review how IT is affecting
educational performance.
Any adaptations to recording of knowledge for examinations should be implemented for
at least 2 terms within their normal way of working to demonstrate a history of need,
with a view to school applying for access arrangements for exams.
Encourage the use of apps and software to develop touch typing skills.
If a child has known physical difficulties which will impact upon handwriting, ICT should
be introduced early to give opportunities to develop their handwriting skills.
Specialist software and access to ICT for students with special educational needs and
disabilities can often be required – schools can contact John Devlin for further details.

Page 23 of 32
Pre Scissor and Scissor Skills
Scissor
Difficulty
Strategies Equipment to try
Poor posture at
desk for scissor
tasks
Children should be working on regular
core strengthening and shoulder
strengthening activities such as animal
walks, superman position, bridging.
Children should have feet firmly on the
floor.
Wedged cushion –
Move’n’sit cushion or
wedged cushion.
If feet are dangling: try a
lower chair, try a foot
rest/step.
Adjustable tables may be
helpful if several children
are too small for the
desks.
Holding shoulder
out due to poor
shoulder stability
Put a paper folder under the cutting
arm and encourage the child to hold the
folder there without dropping it to teach
correct positioning for cutting.
Give verbal prompts to keep shoulder
in.
Unable to hold
scissors
correctly
How to Hold Scissors
Thumbs on top of the scissors and in
the hand supporting the cutting.
Encourage thumb through small loop,
index finger outside of loops and middle
finger in second loop.
Practice lots of finger isolation
activities; play with finger puppets, sing
nursery rhymes such as ‘Incey Wincey
Spider’ and move fingers, play with
There are various types
of adapted scissors
which can be used to
assist with scissor
difficulties.
Easi-Grip® Scissors
www.peta-uk.com
-Lightweight and easy to
use.
- Automatically reopens
the scissors when
pressure is released.

Page 24 of 32
water pistols or spray bottles, play with
clay or playdough and try pinching,
pulling, or making treasure pots, pick
up small beads with ‘pinchy’ fingers,
finger painting and popping bubbles
with index finger.
Put different coloured spot stickers on
index finger, thumb and middle finger.
Put the same coloured spot stickers on
the scissors where the student should
place their finger e.g. a red sticker on
the thumb and red sticker on thumb
loop of scissors.
Give hand over hand assistance until
the child requires less physical
prompting.
- Operated by squeezing
gently using thumb and
fingers, or fingers and
palm of the hand.
-Options include round-
ended or pointed blade
and left and right-handed
scissors.
Mini-Easi-Grip®
Scissors
www.peta-uk.com
As above for smaller
hands
Unable to use
‘helping hand’ to
support paper
Lots of 2 handed activities; practice
opening jars, stirring, reading books
using dominant hand and supporting
with non-dominant hand, practice
threading, drawing around stencils,
holding the stencil still with non-
dominant hand, sharpening pencils.
Put a coloured sticker on each hand
e.g. red on dominant hand and blue on
non-dominant hand; give verbal
prompts such as; ‘use your blue hand
to hold the paper.’
Give hand over hand assistance until
the child requires less physical
prompting.
Page 25 of 32
Unable to make
snipping motion
(open and close)
Practice separation of the hand
activities; squeeze the trigger of a spray
bottle with index and middle finger, tear
paper whilst keeping ring and little
fingers tucked into palms (you could
use this to make a collage), open
clothes pegs with the thumb and first
finger e.g. pegging out paintings to dry,
whilst doing pincer grasp activities
place a small object (e.g. marble, Blu -
Tack) in the child’s palm to be held in
place by the third, fourth and little
finger, practice opposition with thumb to
index finger thumb to middle finger
thumb to ring finger and thumb to little
finger.
Use large tweezers for tweezer games
like sorting pom poms into colours.
Punch holes with a hand-held hole
punch. Holes can be pasted on paper
and made into ladybugs.
Try stapling with a hand held stapler.
Start with snipping different materials:
Begin by snipping a variety of easy to
cut textured items e.g. straws, pieces of
string, corrugated cardboard strips,
aluminium foil, fabric, cardboard or firm
paper etc. Gradually increase the width
of the strips paper/card e.g. from 1cm
to 2cm to 4cm
Give hand under hand assistance until
the child requires less physical
prompting.
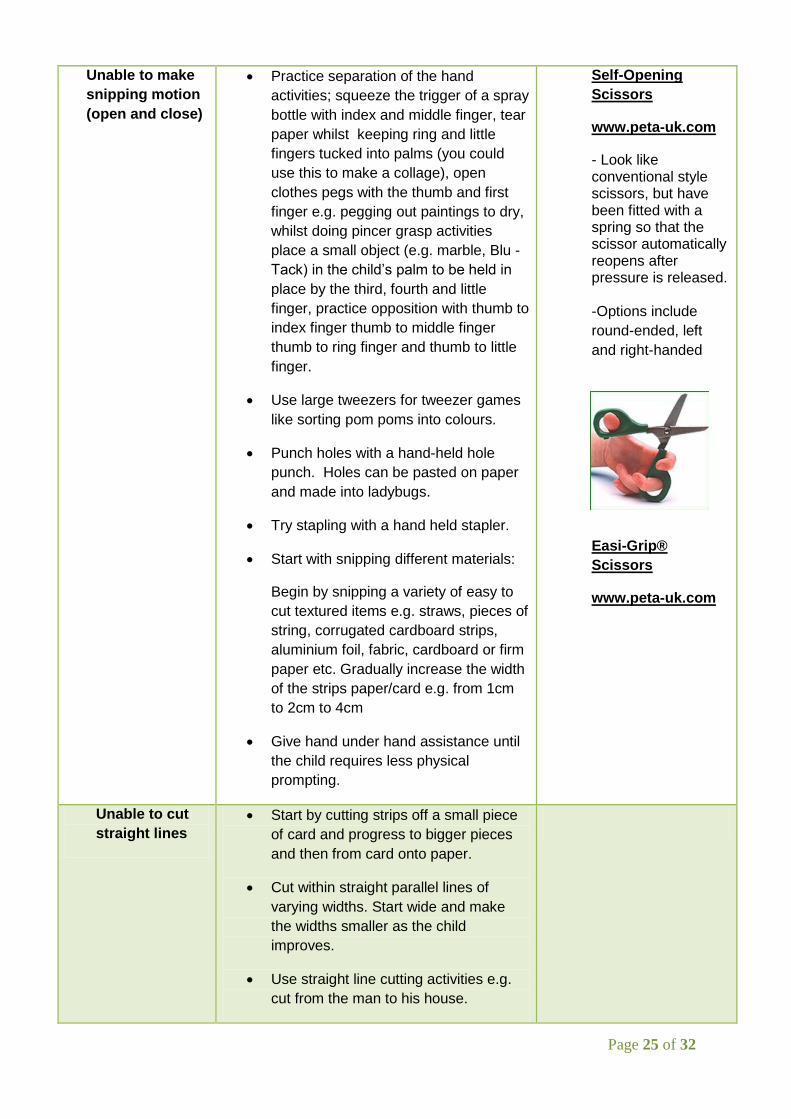
Self-Opening
Scissors
www.peta-uk.com
- Look like conventional style scissors, but have been fitted with a spring so that the scissor automatically reopens after pressure is released. -Options include
round-ended, left
and right-handed
Easi-Grip®
Scissors
www.peta-uk.com
Unable to cut
straight lines
Start by cutting strips off a small piece
of card and progress to bigger pieces
and then from card onto paper.
Cut within straight parallel lines of
varying widths. Start wide and make
the widths smaller as the child
improves.
Use straight line cutting activities e.g.
cut from the man to his house.

Page 26 of 32
Unable to
change
direction of
cutting
Once a student has mastered cutting
straight lines: progress to rotating the
paper with the helper hand.
Punch several holes at the top and
bottom of a sheet of material in a
square shape and draw line between
each hole. Cut from one hole to the
other turning the paper with the other
hand to change direction while cutting.
Start cutting corners on firmer card and
once this is mastered progress to
cutting corners on paper.
Use corner cutting activities e.g. draw a
right angle between a man and his dog-
ask the child to get from the man to his
dog.
Unable to cut
out shapes
Once a student has mastered cutting
around corners: progress to cutting
shapes.
Start cutting shapes on firmer card and
once this is mastered progress to
cutting shapes on paper.
Use shape cutting activities.

Page 27 of 32
Tires quickly
and accuracy
decreases
Practice hand strengthening activities
to build stamina:
- Tearing: Tear up paper only using
the tips of your fingers. Make it
more difficult by using more than
one piece of paper at once. Make
collages or paper Mache with the
torn paper.
- Squeezing: Practice squeezing
sponges. Transfer liquid from one
container to another by filling and
squeezing a sponge. Do some
sponge painting with runny paint
and squeeze out the sponge before
putting it onto the paper. Try
squeezing an old washing up liquid
bottle and make patterns on the
pavement.
- Practice wringing out flannels.
- Open jars
- Use a hole punch
- Use an eye dropper to squeeze
watery paint onto a piece of kitchen
towel and make a picture.
Self-Opening
Scissors
www.peta-uk.com
Easi-Grip®
Scissors
www.peta-uk.com
Long Loop
Scissors
www.peta-uk.com
-Long loop handle
allows the strength
of middle, ring finger
to be used whist the
index finger is placed
outside the loop and
used for guidance.
-Improved control of
cutting action
-Available in left
handed or right
handed and self-
opening option.

Page 28 of 32
Once you have completed the pack…
This pack includes advice and activities on Fine Motor Skills,
Handwriting and Daily Living Skills to complete with your child for a
minimum of 12 weeks. A Progress Log was also enclosed to record your
child’s progress in relation to the strategies.
For many children this pack will cover the issues relating to their
difficulties and they will not require any further intervention.
If you feel that progress has not been made following the 12 week trial
period you are welcome to contact the department to request an
appointment. At this point your child will be allocated an appointment for
an assessment. Please ensure that you bring your completed progress
log to this appointment.
The request for the appointment MUST come directly from the person
with parental responsibility.
If your child has made no progress with their fine motor skills,
handwriting and daily living skills please contact the Occupational
Therapy Department on 01670 564050.
If your child has made no progress with their gross motor skills i.e.
balance, coordination etc please contact the Physiotherapy
Department on 01670 564173.
Page 29 of 32
BIKE SKILLS SESSIONS
Did you know…..It takes lots of effort to learn to ride a bike!!
They need to be able to:
Maintaining an upright posture
Planning how to move your body (pedalling, turning handle bars, stepping
back to brake)
Pedalling (leg strength to turn pedals, taking feet off pedals when stopping
bike, pedalling fast enough, getting 2 feet on pedals and getting started)
Balance (this can be an issue due to decreased core strength)
Looking ahead!!
Then you need to put all of these steps together and remember them
(sequencing and working memory)
For children with co-ordination difficulties, putting all of these skills together is a
challenge and many may avoid riding their bikes.
The aim of the Bike Skills Sessions at Northburn Community Centre, Cramlington is
to teach children at their own pace whilst working on all of the underlying skills they
need to ride their bikes and…..it’s FUN!!
To book your child’s place please contact:
(Your child will need their own bikes with removable stabilisers- stabilisers will
need to be removed for the first session)

Page 30 of 32

Page 31 of 32
CHILDREN’S PHYSICAL DISABILITY OCCUPATIONAL THERAPY SERVICE NORTHUMBERLAND CHILD HEALTH CENTRE
WOODHORN LANE, ASHINGTON NORTHUMBERLAND, NE63 9JJ
TEL: 01670 564 050
Progress Log
Please use the progress table below to log work completed from the Occupational Therapy Booklet detailing comments and
observations. If your child requires intervention following working through the booklet for 12 weeks then please ensure you bring
this along to the appointment.
ACTIVITY COMMENTS SCORING
ie. Scissor skills, dressing
ie. Hand position, posture at table, using both hands, isolating finger movements
WEEK 1 1=Unable 10=Able
WEEK 6 1=Unable 10=Able
WEEK 12 1=Unable 10=Able

Page 32 of 32
ACTIVITY COMMENTS SCORING
ie. Scissor skills, dressing
ie. Hand position, posture at table, using both hands, isolating finger movements
WEEK 1 1=Unable 10=Able
WEEK 6 1=Unable 10=Able
WEEK 12 1=Unable 10=Able