Embed Size (px)
Citation preview

Occupational Therapy Resource Pack for School Aged Children
Information and resources for schools, SENCO’s, and other professionals involved in supporting children with additional needs This pack was designed by the Surrey Children’s Occupational Therapy teams in association with Surrey County Council

2
Contents Page Introduction to the Children’s Occupational Therapy Service 3 Introduction to the Resource Pack 6 Guidance on using Functional Outcome setting sheet 6,7 Functional Outcome setting sheet 8 Guidance on using the Flowcharts 9 Flowcharts
• Self Care 10
• Productivity 11
• Leisure 12 Guidance on using the Intervention sheets 13
Intervention Sheets
• Taking clothing on and off (inc, socks, coats) 14-16
• Fastenings (including buttons, zips, bags, belts, buckles) 17,18 • Tying (i.e. hair, shoelaces, tie, apron) 19-23
• Toileting 24-27
• Meals and snack time 28-30
• Recording written work (developing skills ) i.e. ks1 31-37
• Recording written work (consolidating skills ) i.e. ks2 38-42 • Cutting and pasting 43-49
• Participating in school routines 50-54
• Accessing play time 55-58
• Playing Sport and PE 59-62
Screening Record Form 63

3
Introduction to the Surrey Children’s Occupational Therapy Service Description of the Service
The role of the Children’s Occupational Therapy service is to enable or enhance children’s participation in everyday activities. This includes the child’s self-care, leisure and educational tasks. In order to practice, Occupational Therapists must have the necessary qualifications and be registered with the Health Professions Council, the regulatory body. The service recognises and encourages the active involvement of the child, parents and carers in achieving their functional performance outcomes in partnership with the Occupational Therapy service.

4
Making a Referral
You will need to complete a referral form for your local Occupational Therapy Team. Please include as much detail as possible about the child’s functional difficulties, information about what interventions and support have been used, and the outcome of these interventions. This should be provided using the screening record form. You can find further information at: Virgincare http://www.surreychildrenstherapies.co.uk/stakeholders/health-education-social-care-professionals/referral-information Telephone Helpline
07974230554 available Tuesday and Thursday 12 – 4 pm Email Helpline
Alternatively you can contact the OT service on the email helpline [email protected] . Please do not include identifiable information.
CSH Surrey https://www.cshsurrey.co.uk/our-services/service-children/occupational-therapy
Assessment
Assessment focuses on the areas of need in relation to the child’s functional difficulties. This may be carried out in the school or clinic environment. A report will be provided following the assessment to record findings and give recommendations. This report may contribute to the evidence for an Education, Health, and Care Plan. It is documented on the report which section (health or education) that Occupational Therapy should be included in. Please let the service know should you receive a child’s EHCP with Occupational Therapy documented.

5
Types of Intervention
An intervention package will be identified following an assessment based on the child’s needs. It is important that recommendations are incorporated into the child’s routine in the classroom and incorporated into intervention sessions which may take place outside the classroom. Evidence supports that practice of the task within the routine supports children to achieve their functional performance outcomes.

6
Introduction to the Resource Pack
The emphasis of the pack is on using functional approaches to practice and adapt daily tasks to enable children to participate in and achieve their daily functional occupations. This pack aims to support education staff to address children’s functional difficulties at school. The pack also aims to help referrers in identifying if the child’s needs are met through the pack or if referral to the Occupational Therapy service is needed.
Guidance on using the Functional Outcome Setting sheet
The functional Outcome Setting sheet should be completed by a member of the education staff who knows the child best.
• Identify on the sheet up to 3 priority functional concerns for the child, parent and/or teacher. This information could be taken from the one page profile of the Education and Health Care Plan
• For each functional concern describe how the child is doing the task.
• For each functional concern identify the functional outcome i.e. how the child needs to be able to do the task.
• When functional outcomes have been achieved, the functional outcome setting sheet should be completed if needed, to identify the next priority functional concerns.
See example on next page

7
Example of Functional Outcome sheet
Identify up to 3 priority functional concerns
1. Using scissors
2. Recording work
3. Changing for PE
Describe how the child is doing the tasks now
1. Unable to open and close
scissors to cut paper, hold and move paper
2. Handwriting production in the classroom is illegible
3. Unable to change clothing without assistance, loses items, unable to manage fastenings
Identify the functional outcome
What does success /
improvement in the task look like?
1. Able to use scissors to cut
paper as part of a class task.
2. To be able to record information in the classroom.
3. To be able to change for PE without assistance in time for start of PE.

8
Functional outcome sheet
Identify up to 3 priority functional concerns
1. 2. 3.
Describe how the child is doing the tasks now
1. 2. 3.
Identify the functional outcome What does success /
improvement in the task look like?
1. 2. 3.

9
Guidance for using the Flowcharts
What are the flowcharts? A set of screening questions devised to help you establish which of the intervention sheets are appropriate for the child.
How do I use the flowcharts?
• Identify flowcharts which are relevant for the 3 functional priority concerns identified on the functional outcome sheet.
• Record which flowcharts are used on the screening record form. Starting with the first question on the flowchart, work your way down through all of the questions to identify which intervention sheets should be used.
• When the answer is ‘YES’ note down the appropriate intervention sheets on the screening record form.

10
Self-Care
These are everyday personal care tasks, including dressing, toileting and eating
Does the child need assistance changing for PE?
Is the child slower than peers when changing for PE?
Yes Taking clothing on and off
Is the child struggling with fastenings?
(zips, buttons, buckles)
Yes
Managing fastenings
Does the child need assistance with tying
shoelaces, tie? Yes
Tying
(Hair, shoelaces, tie)
Does the child have difficulty with toileting at
school? Yes
Toileting
Taking clothes on and off
Managing fastenings
Does the child need assistance at meal times?
Yes
Meals and snack time
11
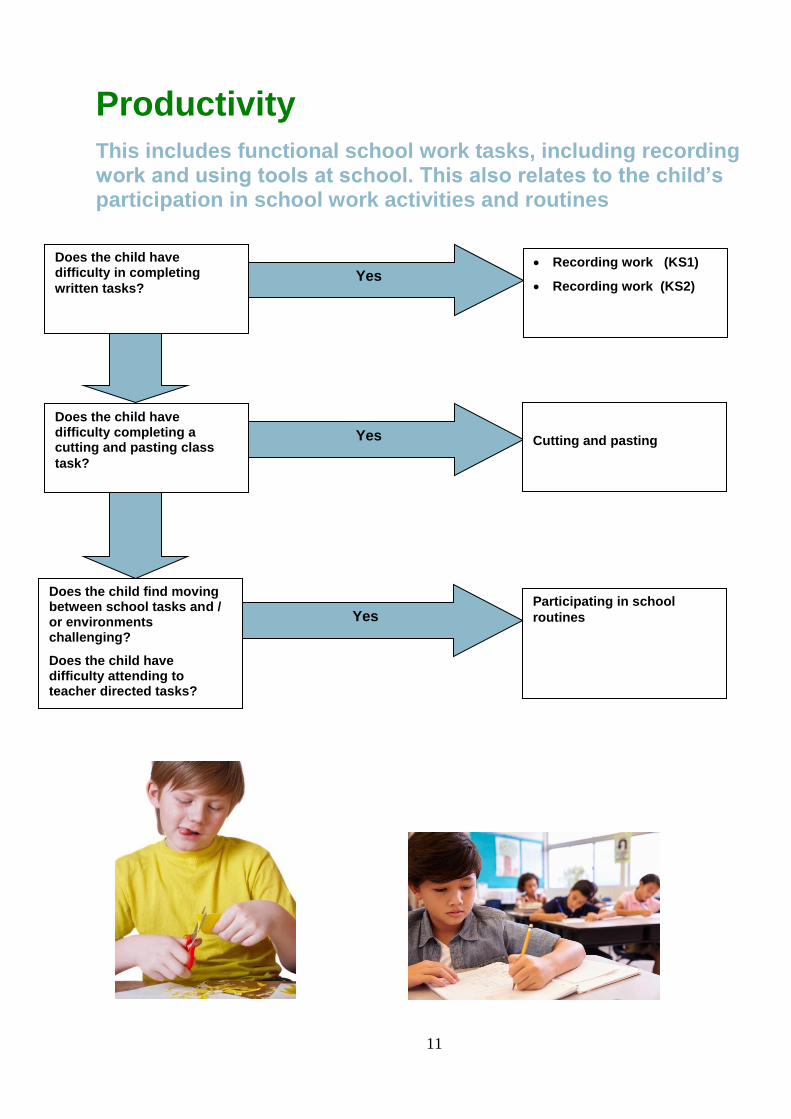
Productivity
This includes functional school work tasks, including recording work and using tools at school. This also relates to the child’s participation in school work activities and routines
Does the child have difficulty in completing
written tasks? Yes
• Recording work (KS1)
• Recording work (KS2)
Does the child have difficulty completing a cutting and pasting class
task?
Yes
Cutting and pasting
Does the child find moving between school tasks and / or environments challenging?
Does the child have difficulty attending to teacher directed tasks?
Yes
Participating in school
routines

12
Leisure
This includes the activities that children really enjoy and are motivated to do and may include hobbies, sport, structured and unstructured play
Does the child have difficulty participating in indoor and / or outdoor
play?
Yes
Accessing playtime
Does the child have difficulty participating in sport / PE activities?
Does the child need assistance changing for PE?
Is the child slower than peers when changing for PE?
Yes
Playing sport and PE
Taking clothing on and off
Managing fastenings

13
Guidance for using the Intervention sheets
The aim of the intervention sheets are to provide guidance for school based interventions facilitated in and outside of the classroom. The intervention sheets include: Strategies - Environmental adaptations Tools and Materials – Adaption of tools and materials used Doing the task – Adaption of how the task is carried out Activity Interventions A session plan is included with recommended warm up activities and suggestions for how to practice the task .This could be used with a child in a small group or on a one to one basis.
It is recommended that activity intervention sessions completed outside the classroom focus on the child practising the tasks and strategies they need to use in the classroom and during their routines. Examples are given on the following intervention sheets but you will have lots of your own ideas as well.

14
Intervention sheet
Putting clothes on and taking clothes off
Strategies Environmental Adaptations
• Ensure the child is well supported sitting on a small chair or sitting on the floor
(having their back supported against the wall can help).
• It can help to be in a quieter environment with fewer distractions.
• Child may benefit from having additional time to dress before PE.
Tools and Materials • Use easy clothing for the child to practice with. Larger sizes and short sleeved
clothing is usually easier.
• Encourage parents to adapt clothing to help the child cope at school. E.g. Velcro on top buttons of shirts, elastic waist bands, ribbon loops on coat zips.
• Labels and pictures on clothing may help the child to learn back from front.
• Visual checklists of the order in which items of clothing should be put on can be helpful.
Doing the task
• Start with undressing, as this is easier than dressing.
• Practice dressing as part of class dressing up resources
• Establish a routine and order for dressing. Clothes can be placed in a pile or laid out in the order in which they need to be put on.
• Encourage the child to place clothes in a basket or on a chair to help organise themselves when dressing / undressing

15
• Encourage child to put on each garment the same way each time. E.g. T shirt is put over the head first and then the arms are put through the sleeves.
The following techniques can help the child learn to dress
• Backward changing: The adult begins the task and encourages the child to do the last step. E.g. place sock partly over child’s foot and encourage child to complete the last part. (Turner et al 2001)
• Forward changing: Encourage child to do the first step of an activity. E.g. stepping into trousers and then assist them to pull them up. Allow child to go as far as they can, providing assistance before the child becomes frustrated or distressed. Reduce assistance gradually. (Ball 2008)
• Hand over hand technique: Use adult’s hand over child’s hand to assist grip (e.g. to hold sock) if needed. Withdraw assistance as soon as possible to prevent the child from becoming dependant on this.
Self-Monitoring
• Encourage the child to use a mirror to check how clothing looks. Dressing in front of a mirror may help some children.

16
Activity Interventions (session plan) Warm up activities
• Play ‘Simon Says’ and get the child to identify various body parts.
Practising the doing
• Dressing up in a variety of clothes and costumes.
• Musical dressing. Children put items of clothing on from a pile until the music stops, at the end of the game the child with the most clothes is the winner.
• Dressing and undressing dolls and soft toys, have the clothes in a PE bag to practise opening and closing.
• Matching sock game. Place a variety of socks in a pile, the child has to find pairs and put them on.
• Labelling clothes: Let the child develop labels for clothes to identify front from back. E.g. get an old white T-shirt and paint on labels.
Self-Monitoring
• Support the child to identify their dressing goal. E.g. putting on T-shirt. (Rodger and Brandenburg, 2008; CO-OP Academy, 2016)
• After practising their goal, discuss how well their goal was achieved. (Rodger and Brandenburg, 2008; CO-OP Academy, 2016)
• Instead of automatically correcting a mistake, encourage the child to identify and sort out what needs to be done e.g. T-shirt needs pulling down.
Resource list • Dressing up clothes (with variety of fastenings)
• Music
• Dolls/ soft toys to dress (for younger children)
• Bags with zips, buttons Velcro containing fun toys
• Visual picture schedule for dressing

17
Intervention Sheet
Fastenings (including buttons, zips and buckles)
Strategies Environmental Adaptations
• Limit distractions by creating a quiet environment i.e. a corner of classroom with a screen / bookcase.
• Ensure the child is well supported. E.g. sitting on a chair or leaning against a wall.
Tools and Materials
Zippers:
• Start with large zippers, preferably a different colour from the rest of the jacket.
• If the child has difficulty holding the zipper, put a key ring or loop of ribbon on the zipper.
• Nylon zippers are easier than metal.
• For sticky zippers, lubricate with crayon or candle wax.
Buttons:
• Use buttons that are a different colour to the shirt or jacket.
• Start with larger, flat, textured buttons.
• Use velcro on the tricky buttons. E.g. the top two buttons on a school shirt.
• Adaptive school clothing is available from Marks and Spencer’s.
18
Doing the task
• Start with unfastening rather than fastening.
• Make sure that the child is looking at the fastening.
• Show the child first clearly explaining how you holding the fastening and what you are doing
• Instead of automatically correcting the child’s mistake, encourage the child to check how they have done.
• Allow the child to persist and do not rush them.
Backward Changing
• The adult begins the task and encourages the child to do the last step. E.g. adult fastens three buttons and child fastens the fourth OR adult puts button into the hole and child pulls button through the hole.
Forward Changing
• Encourage child to do the first step of an activity. E.g. children puts button in hole and then assist them to pull it through hole. Allow child to go as far as they can, providing assistance before the child becomes frustrated or distressed. Reduce assistance gradually.
• The child may be encouraged to unfasten only a couple of buttons on their school shirt and then to lift the shirt over their head to save time when there are time limits for changing for PE.
Self-Monitoring I.e. identifying the goal and discussing how well it was achieved
• Goal: What do I want to do?
• Plan: How am I going to do it?
• Do: Do it (carry out the plan)
• Check: How well did my plan work?

19
Intervention Sheet
Tying hair, shoelaces and tie Strategies Shoes
• If the child is easily distracted remove distractions where possible.
• Make sure that the child is sitting comfortably with support as needed on a chair, the floor, or against a wall. The child may sit better in a corner where both walls give added support.
• Sit next to child during instruction, or sit behind, prompting with the activity in front of the child.
• Encourage the child to secure the shoe in their lap, while practising, which may be easier when learning this skill than bending down to the foot.
• Start with long, wide shoelaces; use 2 different coloured laces to enable the child to differentiate between the 2 laces.
There are assistive devices to aid with shoelace tying
Greeper Laces
Curly Elastic Shoelaces

20
Tie
• Find a quiet space away from distractions.
• The child may find it useful to look in a mirror.
• Using a clip on tie can be a good alternative in situations where the child needs to take on/off tie regularly, whilst learning the task.
• A thicker material tie, as opposed to a finer silk tie, will be easier for child to learn with or a child’s sized tie.
• Using a visual picture sequence of tying a tie can assist the child.
Tying hair
• Find a quiet space away from distractions.
• Child may find it useful to look in a mirror.
• Hair brush - encourage the child to practice this in front of a mirror
Doing the task
Working backwards The best way for your child to succeed with self-care is to start with trying the step closest to the end of the task. This is especially useful if your child doesn’t want to try, or if you are short of time.
The child is guided and assisted by an adult through the task and then is left to complete the last part independently. Once the child has mastered the last part then they can move on the second to last part and be left to complete the last sequence independently. Below is an example of steps required for tying shoelaces. Your child may tolerate hand over hand assistance when learning parts of the task. Encourage child to practice regularly. Remember: watch, copy, practice, repeat.
21
Shoes
1. The child pulls both loops tight, once positioned with assistance. 2. The child pulls both loops tight. 3. The child pushes the lace through the inner circle with their index finger
toward the thumb, making a second loop. 4. The child wraps the lace around the first loop. 5. The child makes a loop with one lace. 6. The child pulls two laces, making one-half knot. 7. The child brings the top lace over the other lace and into inner circle to
create one-half knot. 8. Child ties their own shoes.
There are a number of different methods to use when tying shoelaces; the following website contains information and visual steps on completing the task.
http://www.fieggen.com/shoelace/tipsforchildren.htm
http://www.sparklebox.co.uk/3621-3630/sb3623.html#.Vz14X5BwXcs
Ties There are a number of different methods to use when tying a tie; the following website contains information and visual steps on completing the task. http://www.tie-a-tie.net/
• Child may tolerate hand over hand assistance when learning parts of the task.
• Encourage child to practice regularly.
• Watch, copy, practice, repeat. Tying Hair
• When teaching a child how to comb or brush her hair, work from behind them, using hand-under-hand or hand-over-hand. They will probably need a lot of practice with this, but even if you have to fix or neaten her hair, give your child a chance to do it herself first. Talk to her about how you're fixing her hair and how other children wear theirs, so she learns what styles like ponytails, braids, and fringes mean.
• To use a hair band, start by teaching a ponytail at the side so she can see.

22
• Tie a pony tail for child then get them to practice tying another band/or scrunchie over the top without the risk of their hair falling out.
There are a number of different methods to use when tying hair; the following website contains information and visual steps on completing the task
https://www.cutegirlshairstyles.com www.youtube.com/user/CuteGirlsHairstyles
Self-Monitoring
• Provide positive feedback; explain to the child parts of the task that they did well.
• Ask, don’t tell! Instead of telling the child where to put their hand, ask them.” I see your hand is at the bottom, is there another place you could put your hand?”
• Allow child to practice at times when there is more time available to learn the tasks. For example, at weekends or in the evenings when you are not in a rush to leave the house.

23
Activity Interventions (session plan)
Warm up activities
• Threading e.g shoe lacing cards, picture lacing cards. Start with thicker laces and cards, progressing to smaller.
• Using a variety of combs and brushes on a model doll.
Practising the doing
• Make extra time to practice the above skills.
• Choose from the above strategies to help the child and practise within the child’s everyday routine.
For example: when the class dress for P.E take the identified child or children out of the classroom. In a small group give the child/children more time to practice with an adult helping them use the above strategies.

24
Intervention Sheet
Toileting Strategies
• Check the child is able to manage their clothing i.e. pull up and down trousers / skirts, pants.
• Check the child is wearing clothes without fastenings i.e. elasticated trousers, elasticated skirts not pinafore dresses.
• Ensure a routine is in place for going to the toilet.
• You may choose to introduce a sign, picture of the toilet or object of reference to support the child to communicate their needs—verbally or non-verbally.
Environmental Adaptations • Ensure the child is able to maintain a stable sitting position. Use a child sized
toilet seat and step combo or toilet insert seat and footstep as required.
• A fixed hand rail or free standing toilet frame may be necessary for additional support.
Assistive equipment can be found online at Boots.com, or Amazon or Mothercare.

25
Tools and Materials (adaption) • Interactive visual picture sequence on the door or wall of the toilet cubicle to
remind child of the steps for dressing and hygiene/wiping.
• Visual picture sequence of washing hands by the sink.
• Reward chart for the small steps of using the toilet.
• Easily removable clothing i.e. elasticated trousers or skirts.
• Have a good supply of loose fitting clothes e.g. jogging bottoms, shorts etc. with simple fasteners. This will enable you to support the child to manage their clothing independently.
Doing the task Make this time enjoyable and pleasant for the child to encourage them to stay on the seat. This is an initial step in toilet training. Do not ask the child to sit for longer than 2 minutes at a time. Break tasks down into small steps and teach each step within the sequence by itself before putting the steps together. If the child is easily distracted or disheartened work backwards from the last step. This aims to give the child a sense of achievement finishing the task. For example:
1. The child is encouraged to complete the last step independently.
2. When the last step is mastered, the teacher/parent provides assistance until the child is able to perform the step before the last one.
3. The child completes more and more ending steps independently until he/she masters all steps and is able to complete the task without assistance e.g. bottom wiping, removing clothes, washing hands.

26
Self-Monitoring This is important to develop independence.
• Establish a visual supportive routine by using an interactive picture schedule to let the child know the steps and sequence required to achieve their goal.
• Encourage the child to use the picture sequence to check that they have completed each step in the process of toileting correctly.

27
Activity Interventions (session plan) Warm up activities Games/ activities to help develop the child’s skill
• To increase the child’s ability to move their hand behind their body in a controlled manner, play games passing beanbags behind and in between the legs. Or hide coins under their bottom when sitting on a cushion, child then has to find coin.
• Guessing what objects are hidden in a bag by using their sense of touch only.
Practising the doing
• Place a small stool on the floor and place one leg on the stool to help give easier access for wiping. You can also place one hand against the wall to help balance.
• Try holding on to something (e.g. sink) to help with balance while wiping.
• Guide the child’s hand to wipe, so they get a “feel” for the correct movements.
• Use flushable wet wipes rather than toilet paper to increase sensory (touch) awareness of where to wipe.
• Encourage checking the tissue before dropping it into the bowl to establish if the child is clean or not.
• If boys have difficulty with their “aim” place a table tennis ball in the toilet and they attempt to sink the ball.
• Introduce the idea of using the toilet through play. Use a doll, potty, stories and pictures.
• For some children, sitting on the potty or toilet can be scary. To start with you can let the child sit on the toilet with their clothes on.
Visual Pictures for toileting Boys http://www.twinkl.co.uk/resource/t-c-124visual-timetable-using-the-toilet---boys Girls http://www.twinkl.co.uk/resource/t-c-128-visual-timetable-using-the-toilet---girls Toileting certificate http://www.twinkl.co.uk/resource/t-c-291-toilet-superhero-certificate

28
Intervention Sheet
Meals and Snack Time Strategies Environmental Adaptations
• Ensure the child is seated with feet flat on the floor or a foot step.
• Ensure the table is correct height (elbows resting comfortably on the table).
• If the child is sensitive to noise try the child being first to enter the canteen / hall to allow the noise to build up gradually around the child. Position the chid away from the noisy service area.
• Allow the child to be first or last in the queue to minimise bumping.
• Ensure the child has an easy route to his seat and is seated at the end of a bench.
• Sit the child next to an adult / peer who can model positive behaviour and cutlery skills.
• Check the child is able to open their lunch box, tubs and packets. Clip lock tubs are easier to manage.
Tools and Materials
• Show the child how to place their fingers on the knife and fork.
• Place a sticker / dot on the knife and fork to show where fingers should be positioned.
• Trial a dycem mat under the bowl or plate to stop the plate from slipping (see equipment lists for details).
• Encourage the child to use a knife and fork to cut soft foods at first and then progress to harder foods as their skill develops.
29
• If the child is a cautious eater, do not hide foods in other foods.
• Ensure the child who is cautious of new foods has opportunity to see and try a range of foods without the expectation of eating them.
• Praise trying foods and ‘good eating ‘instead of a clear plate.
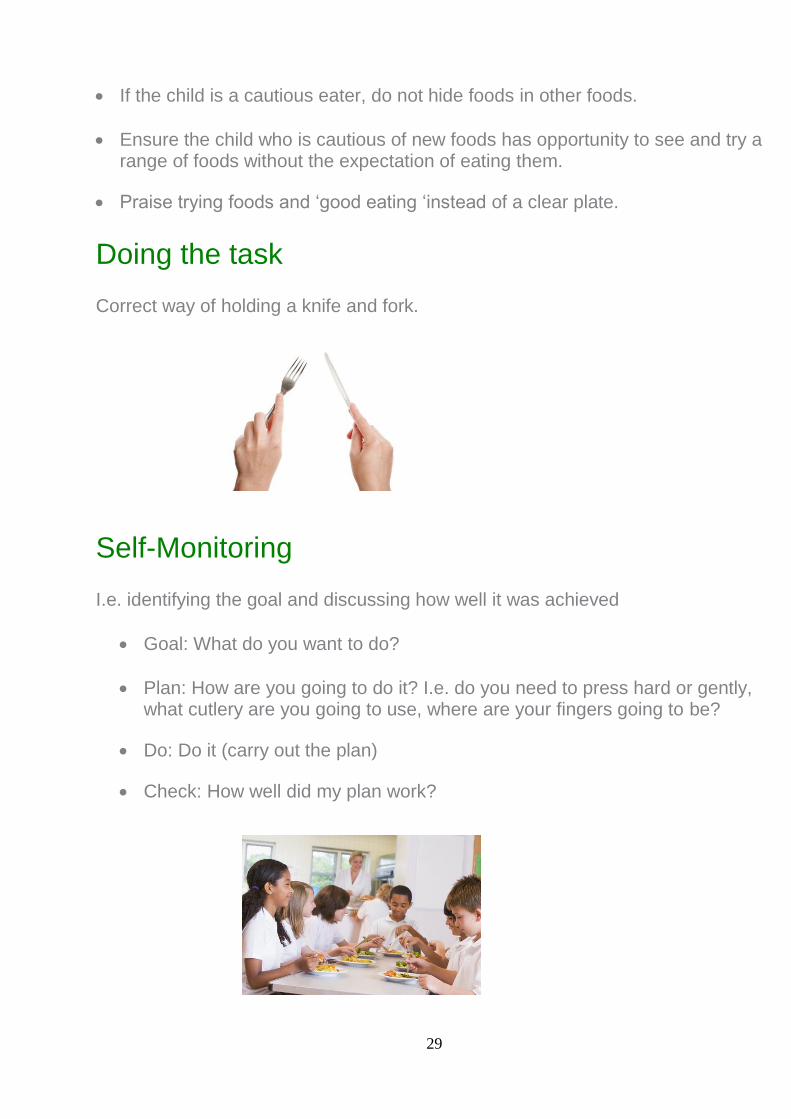
Doing the task Correct way of holding a knife and fork.
Self-Monitoring I.e. identifying the goal and discussing how well it was achieved
• Goal: What do you want to do?
• Plan: How are you going to do it? I.e. do you need to press hard or gently, what cutlery are you going to use, where are your fingers going to be?
• Do: Do it (carry out the plan)
• Check: How well did my plan work?

30
Activity Interventions (session plan) Warm up activities
• Roll a playdough sausage, use a knife and fork to cut the sausage, try to cut 10 pieces and place them in a pot.
Practising the doing
• Include children’s play forks, knives and spoons at the playdough table.
• At snack time include opportunities for the child to serve themselves ( scooping with a spoon, pouring drink)
• Identify opportunities for the child to help prepare snack either for the class snack time or during an intervention session E.g. by cutting the soft fruit, spreading toast.
• In role play include play food and cutlery.
• Place class / session resources in clear clip lock tubs, lunch boxes.
• Backward chaining: The adult begins the task and encourages the child to do the last step. E.g. Adult cuts first 2 pieces of fish finger, child finishes by doing last 2 cuts.
Equipment Dycem mat - Amazon Therapy Putty - Amazon Caring Cutlery - Boots.com/ Amazon (child size) Good Grip Cutlery - available from NRS Health Care www.nrshealthcare.co.uk
and www.competecareshop.co.uk
Kura cutlery. Available commercially from various suppliers
Fun printable place mats for your child: http://www.twinkl.co.uk/resource/t-t-2394-editable-plate-templateshttp://www.sparklebox.co.uk/previews/8826-8850/sb8849-dinnertime-cutlery-placemats.html#.Vz1_KJBwXcs

31
Intervention sheet Recording written work for Key Stage 1
Strategies Environmental Adaptations • A good sitting posture is essential to using our hands.
• Check furniture size i.e. too large or too small?
• Top of desk should be slightly higher than child’s flexed elbow.
• Borrow a different sized chair and table from another class or consider table raisers or height adjustable tables to increase height of table.
• Feet fully supported or flat on the floor using foot block if required.
• Lower back touching backrest of chair, forearms supported on the table and chair fully tucked in under the table.
• Consider position in room i.e. fully facing teacher, near the front of the class and away from distractions such as people walking past.
• Position left handed children to the left side of a right handed child.
Tools and Materials • Consider a range of equipment to use as part of an assessment kit to trial with
children who have handwriting difficulties.
• Observe whether the equipment makes a difference and whether the child prefers it and finds it more comfortable to use. Equipment could include:
o A range of pencil grips (please note, not all children will use a tripod grasp
and that some adapted grasps can be effective). o A range of different pencils such as wide barrel pencils for children who hold
a pencil tightly, and roller ball or fine felt tip for children who use light pressure.

32
o Paper with alternative line formats i.e. thicker lines, double lines, 4 lines, different colours.
o Alphabet strip as a visual prompt of letter placement in relation to the lines.
• Provide a visual reminder of commonly reversed letters as needed.
• Use a sticker or rubber band as a prompt of where to place fingers on pencil.
• Sloped work surface or a file for children who lean over close to their work.
• Use dycem or blue tac to keep paper in place.
• Consider paper position; typically with the right hand corner higher for right handers, and the left hand corner higher for left handers.
• Use masking tape as a prompt if needed. Try a Move n’ Sit cushion for children who fidget or get up frequently.
• Try a wedge cushion (posture pack cushion) for children who slouch or slide out of their chairs.
Doing the task • Children should be able to form basic pre writing shapes and be able to
recognise letters before learning to write.
• Encourage use of supporting hand to keep page still.
• Visual reminders and prompts such as picture of good sitting posture referred to at the start of a writing task.
Self-Monitoring • Encourage child to evaluate their own work and circle best formed letter for
each target letter.
• Encourage child to check sitting position

33

34
Activity Interventions (session plan)
Warm up activities • Hide and find marbles or coins within
theraputty
Practising the doing • Encourage a correct pencil grasp early before structured writing tasks are
introduced. E.g. during painting, drawing and colouring.
• Provide plenty of opportunity to practice controlling pencil strokes. E.g. mazes, colouring, dot-to-dot games, tracing and painting.
• Emphasise that work should be from ‘top to bottom’ and from ‘left to right’.
• Practise numbers and letters on different surfaces such as chalk board, magnetic drawing board, sheet of wall paper.
• Draw large numbers and letters in paint on an easel or paper pinned to the wall.
• Teach groups of letters with similar movement patterns and introduce new groups slowly, for example, c,a,q,o,d and g
• Revise the alphabet together with child i.e. singing alphabet song, point to target letters on alphabet strip and ask child to name them.
• Model how to form target letters. Encourage child to imitate letter formation once modelled.
• Continually reinforce and consolidate letters previously learnt.
• Emphasise ‘bumping’ the lines if using double lined paper.
• Consider future alternatives to handwriting and encourage developing keyboarding and typing skills.
• Provide additional time to complete handwriting tasks such as note taking or writing down homework.

35
• Reduce volume of written work expected by encouraging child to write main points, or provide handouts with part prepared information where only the gaps need to be filled.
• Allow child to record work learnt in a different way i.e. taking photographs or complete an oral presentation of ideas.
Multi-sensory Mark making Children learn and develop through their interaction with the environment via their sensory systems, (e.g. touch, vision, hearing, movement). The development of writing is no different. Multi-sensory writing is particularly effective at improving issues such as letter reversals, accurate letter formation and spelling. Our brain uses sensory information on the formation of shapes, letters and numbers transported via our skins surface, joints, tendons and ligaments. This information helps to reinforce our visual interpretation of the formation.
Activity Ideas
• Draw letters with the index finger of the dominant hand – sand, paint or shaving foam.
• Practise writing the letters in the air.
• Trace letters on the child’s back and let them guess the letter you have drawn.
• Practise writing the letters with their eyes shut as well as open.
• Write on paper that is hanging on the wall, and develop whole arm movements to formulate a pattern.
• Draw using crayons, chalk, pencils and pens and focus on the different feels of the writing when doing it.

36
• Use pavement chalks to draw on the pavement.
• Try writing on coloured paper.
• Use aluminium foil to write on or construct the shapes or letters.
• Use different types of paper.
• Use different types of tool, crayon, pencils, chalk etc.
Multi-sensory Activity Ideas can be found on: http://www.sparklebox.co.uk/5111-5120/sb5112.html#.Vz2D15BwXcs (Use this resource to practice both letters and words)
Visual prompts ‘How to hold my pencil’: http://www.sparklebox.co.uk/previews/8926-8950/sb8931-hold-pencil-correctly-reminder-cards.html#.Vz2H_5BwXcs
Letter reversals: http://www.sparklebox.co.uk/literacy/writing/letter-formation/confusing-letters.html#.Vz2HuJBwXcs
Equipment and Resource list
• Putty
• Paper
• Crayons
• Chalk
• Different media e.g. shaving foam, cornflour, finger paints
• Ribbons
Footstools: Available from Argos, Back care solutions Range of different types of pencil grips: e.g. large ultra, solo, ridged comfort, cross guard ultra, comfort available from: Taskmaster; TTS, LDA – Available from Amazon Range of papers: e.g. raised lines; square paper; lined with wide and narrow lines; Sparklebox, TES, Amazon

37
Sloping/angled writing desks: TTS, Amazon, Back in Action Wedge cushions/ Posture Pack (wedge cushion and sloping surface): Back in Action Move n Sit cushion: Back in Action, Amazon, TTS
Handwriting programmes available to purchase Handwriting without Tears; Pearson Assessment, www.hwtears.com
“Write from the Start” (Teodorescu Perceptuo – Motor Programme) Ion Teodorescu & Lois. M. Addy – Nes Arnold: www.write-start-handwriting.org

38
Intervention Sheet Recording written work for Key Stage 2 Strategies Environmental Adaptations
• A good sitting posture is essential to using our hands.
• Check furniture size i.e. too large or too small?
• Place a step under their feet if they cannot reach the floor.
• Consider position in room i.e. fully facing teacher, near the front of the class and away from distractions such as people walking past.
• Position left handed children to the left side of a right handed child.
• Use sloped work surface or a file for children who lean over close to their work.
• Try a wedge cushion (posture pack cushion) for children who slouch or slide out of their chairs.
• Try a Move n’ Sit cushion for children who fidget or get up frequently.
• Place tools i.e. scissors, pens, pencils in clear pencil cases / tubs
Tools and Materials (adaption) • To develop a functional grasp to hold a pencil, trial a variety of different grips
and pencils. These could include the claw grip, the triangular grip, ultra-pencil grip and a comfort grip. There are a variety of pencils such as hand huggers, stabilio pencils, and wide barrel pencils for children who hold a pencil tightly, and roller ball or fine felt tip for children who use light pressure. Use a sticker or rubber band as a prompt of where to place fingers on pencil.
• Paper with alternative line formats i.e. thicker lines, double lines, 4 lines, different colours, blocked paper to assist with spacing and sizing.

39
• Alphabet strip as a visual prompt of letter placement in relation to the lines or commonly reversed letters.
• ‘Spacers’ or lollipop sticks used to support spacing between words.
• A brightly coloured sticker or star drawn with a brightly coloured felt tip in the top left hand corner of the page to facilitate starting at the top left corner of the page.
• Highlighted line on left hand side of the page as a visual cue to start on the left side of the page when writing.
• Use dycem or blue tac to keep paper in place.
• If the child has difficulty using a standard ruler, try using a ruler with a handle or ridge for example,
• Access to a computer or laptop on which to record work could be considered.
Doing the task • Visual reminders and prompts such as picture of good sitting posture, how to
hold pencil, this can be referred to at the start of a writing task.
• Accommodations for children with difficulties may include:
• Reducing the amount of written work required (demand) to support improved quality of written work.
• Allowing the child to use print instead of joining.
• Alternating writing with typing or access to the computer.
• Alternating writing and having an adult scribe (turn taking to provide modelling for written work).
• Adjusting the task to limit the demand for writing e.g. providing them with a worksheet with ‘blanks’ to fill in as opposed to writing a paragraph.
40
• Allow breaks to stretch/rest their writing hand rather than swapping hands.
• Allow child to record work learnt in a different way i.e. taking photographs, drawing pictures with labels or bullet points or complete an oral presentation of ideas, use computer to put together a presentation.
• Detailed Assessment of Handwriting Speed (DASH, Anna Barnett, Shelia Henderson et al, 2007) can be used by teachers with children ages 9 years to 16 years 11 months to identify children with slow handwriting in order to support them/accommodate this.
Use of Handwriting Programmes All handwriting programmes incorporate an element of practice which is required to improve quality and speed of handwriting. Specific handwriting programmes also support development of correct letter formations, sizing of letters, spacing, positioning on the line, working left to right, joining up of letters and handwriting speed.
Handwriting programmes
• Write from the Start (Ion Teodorescu and Lois Addy): A Perceptuo Motor Approach to Handwriting.
• Speed Up (Lois Addy): A Kinesthetic Programme to develop Handwriting Fluency (a programme designed for children aged 8 – 13 years)
• Start Write, Stay Right (Alison Harris and Janet Taylor): A complete Handwriting approach for children of all ages
• Handwriting Without Tears (Jan Olsen, Occupational Therapist): A multisensory approach to handwriting (can be used with learners from Reception)
Self-Monitoring I.e. identifying the goal and discussing how well it was achieved
• Goal: What do you want to do?
• Plan: How are you going to do it? i.e. do you need to use finger spaces, correct sitting position, making letters touch the line on paper
• Do: Do it (carry out the plan)
• Check: How well did my plan work?

41
Visual Prompts/ Reminders Handwriting checklist:
http://www.twinkl.co.uk/resource/t-l-722-handwriting-reminder-sheets-1
‘How to hold my pencil’:
http://www.sparklebox.co.uk/previews/8926-8950/sb8931-hold-pencil-correctly-reminder-cards.html#.Vz2H_5BwXcs Letter reversals:
http://www.sparklebox.co.uk/literacy/writing/letter-formation/confusing-letters.html#.Vz2HuJBwXcs

42
Activity Interventions (session plan)
Warm up activities • ‘Hide and Seek’ Letters: Cloth bag full of plastic letters. Child to put both hands
into bag, feel, find and try to identify the letter by feeling it, without looking at it. Then pull letter out of the bag and position it on the whiteboard, positioning it correctly in relation to the line.
Practising the doing • Chalk on the wall: Put large lines on a wall outside in the playground. Call out a
letter and the child must draw the letter on the wall in chalk, positioning it correctly in relation to the line.
• Using stencils to write letters and practising placing letters correctly in relation to the line.
• Writing in the blocks: Using blocked paper (as in maths workbook) within which to write, with the size of the block providing structure for consistent sizing of letters and leaving a block empty for a space. Do turn taking with an adult (modelling) to write words into blocks.
• Completing a Handwriting Programme ensure all foundations for handwriting in terms of posture, pencil grip and attention are supported whilst completing the tasks set as part of the Handwriting programme.
• Consider future alternatives to handwriting and encourage developing keyboard and typing skills.
• Seek advice in terms of touch typing and other programmes to support recording written work.
• Turn taking with a scribe – Requiring the child to complete 2 lines of writing, followed by the adult scribing 2 lines of writing for the child.
Self-Monitoring • Allocate time to review targets set for handwriting and recording information.

43
Intervention Sheet Cutting and Pasting
Strategies Environmental Adaptations
• Supported sitting posture with feet flat on the floor.
• Table appropriate height in relation to chair i.e. elbows resting on the table so they don’t need to hunch over/ scrunch their shoulders.
• Minimal environmental distractions will support concentration i.e. quiet, clear work station, who they’re sitting next to.
• Sitting at the front of the class may help children who struggle to attend as they can focus directly on the teacher.
Tools and Materials
• There are a range of adaptive scissors available to support finger placement and cutting technique.
• Scissors can be graded to match the child’s ability.
• Stickers can also support finger placement on scissors by giving an additional visual cue.
• Progressive scissor skill worksheets can work through the stages of cutting.
• When cutting, thicker materials such as card are more stable and smaller materials such as straws / strips are easier to manipulate.
• Different tools are also available for pasting i.e. spatula / glue stick.
• When pasting, larger / 3D materials will be easier to hold.
• Visual cues can be used to encourage cutting on the line. (using thick black lines / physical borders (e.g. string / lollypop sticks), cutting forwards to a point (to a sticker), prompting where to paste.

44
Doing the task
• ‘Hand over hand’ technique can facilitate correct positioning and scissor movements i.e. cutting away from your body not across.
• Modelling the task alongside the child can support understanding.
• Visual symbols sequencing the task can support understanding.
• Tasks should be graded to the appropriate “just-right” level to ensure the child is progressing whilst successful (not frustrated!).
45
Activity Interventions (session plan) Warm up activities
• Tweezer task to pick up small items and transfer them from one location to another
Practicing the doing
• Making animals using putty and straws i.e. hedgehog / spider
• Making crafts relevant to the time of year i.e. paper chains, bookmarks, Christmas cards, harvest festival foods etc.
• Snip straws and thread through string to make them into a necklace.
• Make your own jigsaw, using the picture of an animal or other picture, have the child draw lines over the picture and then cut out the pieces.
• Make snowflakes, having the child fold the paper into shapes and then cut patterns into it.
• Make dress-up clothes from sheets of paper.
• Use themes i.e. pirates, jungle, seaside, circus, space.
• Use interesting materials i.e. sequins, glitter, playdough, putty.
• Paste items on vertical / horizontal surfaces.
• Cutting along a maze / trail to reach treasure.
• Large scale pasting activities i.e. collages / whole class.
• Incorporate into literacy and numeracy work.
• Incorporate into topic work i.e. through story board / weekend news / show and tell.
• Make posters.

46
Self-Monitoring
• Support the child to identify their goal (e.g. to cut on the curved line)
• After the activity, discuss how well their goal was achieved Encourage the child to check their work and adjust their plan as appropriate
Resource list
• Tweezers
• Small items (e.g. pegs, scrunched paper)
• Putty
• Straws
• Coloured paper and card
• String
Equipment
Mounted table top scissors Mini Easi Grip Scissors
www.peta-uk.com Push down table top scissors Easi Grip Scissors
www.peta-uk.com

47
Rolling paper cutter Long Loop scissors
www.peta-uk.com Self Opening/spring assisted scissors
48
Activity Interventions (session plan)
Warm up activities • Tweezer task to pick up small items and transfer them from one location to
another.
Practising the doing • Making animals using putty and straws i.e. hedgehog / another.
• Making crafts relevant to the time of year i.e. paper chains, bookmarks, Christmas cards, harvest festival foods etc.
• Snip straws and thread through string to make them into a necklace.
• Make your own jigsaw, using the picture of an animal or other picture, have the child draw lines over the picture and then cut out the pieces.
• Make snowflakes, having the child fold the paper into shapes and then cut patterns into it.
• Make dress-up clothes from sheets of paper.
• Use themes i.e. pirates, jungle, seaside, circus, space.
• Use interesting materials i.e. sequins, glitter, playdough, putty.
• Paste items on vertical / horizontal surfaces.
• Cutting along a maze / trail to reach treasure.
• Large scale pasting activities i.e. collages / whole class.
• Incorporate into literacy and numeracy work.
• Incorporate into topic work i.e. through story board / weekend news / show and tell.
• Make posters.

49
Self-Monitoring • Support the child to identify their goal (e.g. to cut on the curved line)
• After the activity, discuss how well their goal was achieved. Encourage the child to check their work and adjust their plan as appropriate.
Resource list • Tweezers
• Small items (e.g. pegs, scrunched paper)
• Putty/Playdough
• Straws
• Coloured paper or card

50
Intervention Sheet Participating in school routines Strategies Environmental Adaptations • Seat a distractible child so that distractions are minimised e.g. sitting at a table
directly in front of teacher, sitting on the carpet directly in front of the teacher.
• Seat a child who appears sensitive to unexpected touch at the edge of the group.
• The child may benefit from a space to sit with clear boundaries e.g. a carpet tile or floor grid.
• Reduce back ground noise by shutting doors, windows.
• Safe space i.e. tents, dark room.
• Bean bags.
• Visual schedules
• Reduce distractions
• Preparation and include a task between places.
Tools and Materials (adaption) • Now and Next board
• Timers
• Distractions using song games to aim transition
• Weighted waistcoats/bags
• Rewards

51
• Focus the child’s attention using pictures to remind the child of the rules for good sitting, good looking, listening.
• Model attentive behaviour by praising this in peers and encouraging the whole class to do the same behaviour
• Create a social story with pictures to describe the attentive behaviour required
• Re-enforce small improvements in attentive behaviour.
• The child may benefit from trial of a weighted lap cushion (see below).
• The child may be more settled at the back or front of the line.
Doing the task • Position in the room
• Timing (allow some minutes before/ after for him to settle.
• Consistency in communication.
• Focus the child’s attention before giving an instruction.
• An adult supporting the child may use shorter sentences.
• Use gesture to support what you are saying.
• Joining the session towards the end of teacher input or assembly. Increase the duration the child needs to attend for in graded steps.
• Agree a goal with child e.g. to look at teacher. After, discuss how this went with the child.
• Carrying heavy back packs/ books.
• Sit on a move and sit cushion or have a clearly marked space for sitting i.e. a carpet square
• When the child needs to listen, provide a ‘listening toy’ to hold i.e. a squeezy ball, fiddle band
• Running errands.

52
• Distractions (talking/ something else).
• Singing.
• Talking about hobbies.
• Reward systems.
Self-Monitoring i.e. identifying the goal and discussing how well it was achieved
Goal - plan - do – check
• Goal: What do you want to do?
• Plan: How are you going to do it?
• Do: Do it (carry out the plan)
• Check: How well did my plan work?

53
Activity Interventions (session plan) Warm up activities Younger Children
• Ball game: All the players (at least three) sit in a circle. An adult throws or rolls the ball to another player, and calls their name. The child catching the ball has to listen carefully for the name.
Older children • Shopping Games: Have an array of 4 or 5 items in a ‘shop’ e.g. egg carton,
juice bottle, cereal packet, margarine tub, bag of bread and also have a shopping bag to put things in. Ask the child to go and buy e.g. the eggs and bread, increase to 3 items and then extend choice to 4, 5 or 6 items.
Practising the doing • During small group or individual work sessions follow a similar format to
teacher input and practise some of the strategies described above e.g. Use a social story or picture prompts to remind the child to do good sitting, listening, looking.
• Use motivating, achievable tasks related to the general curriculum work to complete in the session.
• Use a White board to sketch a simple 3 step sequence for the session.
• Explain what tasks are going to be completed in the group / individual session.
When giving instructions • Simplify language if necessary.
• Ask the child to repeat instructions.
• Wait for the child to respond.
• Ask the child to identify how they did.

54
• Give feedback - Praise attentive behaviour and parts of the task successfully completed.
Self-Monitoring i.e. identifying the goal and discussing how well it was achieved
Goal - plan - do – check
• Goal: What do you want to do?
• Plan: How are you going to do it?
• Do: Do it (carry out the plan)
• Check: How well did my plan work?
Resource list
• Move’n’sit cushion
• Weighted lap cushion / pad
• Listening toy
• Small whiteboard for ‘Now and Next’.
• Carpet square

55
Intervention Sheet Accessing playtime Strategies Environmental Adaptations
• Ensure the children can access all areas of the environment where they can play. Some children may require major adaptations to the school environment to facilitate inclusion. Automated doors, soft tarmac, ramps, hand rails. It is the school responsibility to contact physical and sensory support team for advice and make reasonable adjustments if required.
• Consider environment, noise level, space available, health and safety by providing close supervision where necessary, particularly when using apparatus.
• Have a variety of height adjustable tables indoor and outdoor to enable the children to access table top activities, games.
• Remember to give opportunities for play lying on their tummy to read and play as this can develop core strength for younger children.
• Provide a quieter play area for children to access inside and outside.
• Remember to use visual cues, visual timetable, and story boards to facilitate the children to create ideas during imaginative play.
• Sensory gardens are also calm areas, involving the children in creating and maintaining the garden can help develop hand skills, coordination, social skills.
Tools and Materials (adaption)
• Use steps to enable petite children to be able to access water/ sand/ messy play.
• Height adjustable tables / sand and water trays
• Balls with bells in, light up toys, variety of cause and effect toys- theses toys are highly motivating for younger age group.

56
• Consider having alternative playtime activities available for children who prefer or need quieter / less physical activities i.e. giant garden jenga, connect 4, table with lego, games
Doing the task • Use now and next, visual cues to enable the child to choose play activity.
• Choosing boards- enable the child to take control but choose an activity they wouldn’t normally engage in, by selecting the choices available.
• Use a graded approach to encourage children to develop skills. By setting the just the right challenge the child feels a sense of achievement when they have accomplished a stage and can move to the next step until they have completed the activity. For example if a child is reluctant to play with messy play, begin by using dry objects they are familiar with then once they are confident with this try using sticky materials, water, ice - use utensils lollipop sticks.
• Play time buddy system- older children in the school volunteer to organise games for the younger children, taking out and putting away games equipment, look out for bullying behaviour and alert adults, promoting a happy, safe atmosphere, be a friendly person that other children can go to for help if they need it, being helpful to staff.

57
Activity Interventions (session plan) • Give a warning verbal, visual when play time will be and when it is going to
finish- some children can be sensitive to the noise of the bell/whistle- use flags, visual cue instead
• Line the children up prior to accessing play and following play.
• Show the child visual que cards so that they can choose which activity they would like to play with.
• Ensure the children understand the rules of the game, help them develop rules as a group.
• To understand routine of play time, some children may require additional support to maintain their safety and their peer’s safety. E.g. social stories, picture schedule, opening doors, accessing play equipment safely. Encourage the child to wear a coat, hat, or piece of clothing were staff can identify them easily.
Warm up activities
• Opposite game, line the children up facing the same direction with arm’s length space in between.
• Provide the child with the instruction left- they need to run/ walk/ wheel themselves to the right side of the playground set up makers/ use lines marked on playground floor.
Practicing the doing Throwing and catching • Push a ball across the floor: Encourage your child to receive the ball between
their outstretched legs and then push it back to you. This teaches your child the concept of reciprocal play as well as turn-taking. It also teaches them about the concept of cause and effect (push ball and the ball will roll).
• Catch a ball with both hands: Use an underhand movement to throw a large playground-sized ball to your child’s chest. When first learning to catch, encourage your child to catch the ball by wrapping their arms around the ball

58
and cradling it to their chest. When their accuracy to catch the ball against their chest improves, encourage them to use only the palms of their hands and fingers. Using beach balls, balloons to begin with slow down the movement of the object so they can coordinate their hands.
• If the child does not catch it ask them what they need to do to catch it, were you looking at the ball? Did you use two hands? Are you close enough, start by standing close together and then when 5 successful throw and catches have been achieved take a step back.
Self-Monitoring
• Ask the child what they would like to do at each play time.
• Ask them how they will do it
• Once completed ask them how they thought it went and what they could have done differently.
Resource list
• Alternative play time activities
• Choosing pictures
• Now and next boards for transitioning in or out to playtime
59
Intervention Sheet Playing Sport and PE Strategies
Environmental Adaptations • Consider environment, noise level, space available, health and safety by
providing close supervision where necessary, particularly when using apparatus.
• The child should be encouraged to stand near the teacher when instructions are provided.
• Instructions may need repeating, request the child to also repeat these back and discuss what it is they are going to do and how they are going to do it.
• Provide one direction at a time, once one action is successfully completed, add a further action.
• Reinforce verbal instruction with visual demonstration of the action required whilst standing next to the child.
• Child should be provided with additional opportunities to practice the task for ‘over learning’.
• Permit the child to also generalise their learnt task across different environmental contexts whilst continuing to implement the ‘plans’ already learnt. E.g. at home, school hall, school field, playground.
• Review previous plans learnt at each lesson.
• Be aware that the child may fatigue more quickly compared to peers. Always have a back-up plan to ensure the child is included. E.g. by providing a rest opportunity by doing a different role. E.g. keeping score, allowing to field, time keeper.

60
Tools and Materials • When mastering a new task, permit the child to use the same equipment from
lesson to lesson. E.g. same: rope, ball, racket etc.
• If working with a peer it may be helpful for the learning partner to also be kept consistent.
• If lessons are planned in advance provide the child opportunity to practice the task ahead of time. E.g. at playtime, at home. This may require loaning of school sporting equipment and for parents to be informed of the task/goal.
• Adapt equipment to grade activity to the just right level and to ensure success
• E.g. use a larger ball when hitting with a racket and then make smaller at each stage of success, stand within close proximity when target throwing or catching and then increase distance gradually, use larger targets.
• Revisit what the child has learnt regularly, the child may find it helpful to record their plans so these can be referred to when next practiced.
Doing the task Practice using this strategy during PE lessons and as part of small group intervention sessions. Within small group interventions practice the PE tasks that are planned for the half term using this strategy and the adaptations recommended. Within PE lessons encourage use of the strategy as a whole class learning tool. Step 1: GOAL: What do I want to do?
• Child identifies goal. For this approach to be successful, the child’s motivation is very important.
• The goal must be simple and well defined. Child or adult can record goal down on paper.
• Work with one goal at a time.
61
Step 2: PLAN: How am I going to do it?
• Child develops plan to achieve goal. This can be done by using the techniques and strategies below.
• It helps for the child to first give the task a try, and then to observe how to do it correctly. Once they have seen this they can talk through what they saw/are seeing, and the adult can record this down with pictures or writing.
• It may help to break down the goal into separate steps/plans which you will work on one at a time.
• The plan can be changed and adapted until it is perfect.
Step 3: DO: Carry out the plan!!!
• The child attempts to follow the plan step by step. If the goal isn’t achieved either the plan wasn’t followed correctly/accurately or the plan needs to be changed.
• Therefore if the child doesn’t succeed and achieve the goal, the problem is with the plan and not with themselves – this increases self-esteem.
Step 4: CHECK: How well did my plan work?
• Child to check if the plan worked perfectly and if plan was followed correctly.
• If not, go back and change/adapt plan.
• If so, practice again until child can complete task without difficulty.

62
Self-Monitoring Identifying the goal and discussing how well it was achieved, revisit whether the plans used were effective or does the child need to try a different plan. The aim is for the new learnt task to then become automatic. This will take time and practice.

63
Screening record form What is the Occupational Therapy Screening Record Form? A useful tool to record the screening details and implementation of intervention sheets. This form will assist the Occupational Therapy Service if a referral is made. Name: Date: Priority functional concerns (refer to functional outcome sheet): 1. 2. 3. What flow charts were used? Intervention sheets used: Taking clothing on and off (inc, socks, coats) Fastenings (including buttons, Zips bags, belts, buckles) Tying (i.e. Hair, shoe laces, tie, apron) Toileting Meals and snack time Recording written work (developing skills) i.e. ks1 Recording written work (consolidating skills) i.e. ks2 add DASH info Cutting and pasting Participating in school routines Accessing play time Playing Sport and PE Equipment put into place put in place: Describe changes to child’s function: Describe what tasks the child continues to find challenging: Referral Made to Occupational Therapy YES/NO Date: Screening carried out by: N.B. Please complete and include this form if a referral is being made to Occupational therapy. It is recommended that implementing the intervention sheets for 2 terms gives a clearer indication of the need for OT assessment or the extent of the difficulties.

64
References
Ball, J (2008). Early intervention and Autism: Real-life questions, real life answers. Future Horizons, Texas.
CO-OP Academy (2016) CO-OP Information Booklet in English. [Online] Available at: http://ot.utoronto.ca/coop/resources/documents/CO-OPbookletEnglish.pdf
Rodger S and Brandenburg J (2008) Cognitive Orientation to (daily) Occupational Performance (CO-OP) with children with Aspergers Syndrome who have motor-based occupational performance goals. Australian Occupational Therapy Journal. [ Online] Available at: http://www.strangeson.com/media/cognitive%20approach%20to%20motor%20skills%20in%20ASD.pdf
Turner, L; Lammi, B, Friesen, K and Phelan, N (2001) Your Child’s dressing workbook. CanChild Centre for Childhood Disability Research Chu, S. (1997). Occupational Therapy for Children with Handwriting Difficulties: A Framework for Evaluation and Treatment. The British Journal of Occupational Therapy, 60(12), pp.514-520. Zwicker JG, Hadwin AF (2009). Cognitive Versus Multisensory Approaches to Handwriting Intervention: A Randomized Controlled Trial. OTJR: Occupation, Participation and Health 29 (1) Marr D, Cermak S, Cohn ES and Henderson A (2003) Fine Motor Activities in Head Start and Kindergarten Classrooms. American Journal of Occupational Therapy 57, 500-557. Donica, Denise K (2015). Handwriting Without Tears ®: General Education Effectiveness Through A Consultative Approach". American Journal of Occupational Therapy 69 (6) Case-Smith, Jane, Lindy Weaver, and Terri Holland. (2014) Effects Of A Classroom-Embedded Occupational Therapist–Teacher Handwriting Program For First-Grade Students. American Journal of Occupational Therapy 68 (6)

65
Chu, S. (1997). Occupational Therapy for Children with Handwriting Difficulties: A Framework for Evaluation and Treatment . The British Journal of Occupational Therapy, 60(12) pp. 514-520 Zwicker JG, Hadwin AF (2009). Cognitive Versus Multisensory Approaches to Handwriting Intervention: A Randomized Controlled Trial. OTJR: Occupation, Participation and Health 29 (1) Marr D, Cermak S, Cohn ES and Henderson A (2003) Fine Motor Activities in Head Start and Kindergarten Classrooms. American Journal of Occupational Therapy 57, 500-557. Donica, Denise K (2015). Handwriting Without Tears ®: General Education Effectiveness Through A Consultative Approach". American Journal of Occupational Therapy 69 (6) Case-Smith, Jane, Lindy Weaver, and Terri Holland. (2014) Effects Of A Classroom-Embedded Occupational Therapist–Teacher Handwriting Program For First-Grade Students. American Journal of Occupational Therapy 68 (6) Link J and Brown T. (2015) The Association between Measures of Visual Perception, Visual-Motor Integration and In Hand Manipulation skills of School-Age children and their Manual Handwriting Speed. British Journal of Occupational Therapy 79 (3) 163 – 171. Addy L. (1996) A Perceptuo-Motor Approach to Handwriting. The British Journal of Occupational Therapy 59 (9) Hoy et al (2011) A Systematic Review of Interventions to Improve Handwriting. The Canadian Journal of Occupational Therapy 78 (13) Websites Teachhandwriting.co.uk http://www.teachhandwriting.co.uk/national-curriculum-england.html
Page Title: National curriculum 2014 – Handwriting CO-OP Academy (2016) CO-OP Information Booklet in English. [Online] Available at: http://ot.utoronto.ca/coop/resources/documents/CO-OPbookletEnglish.pdf GIG Cymru NHS Wales University Health Board (2015). Developing Scissor Skills. [Online] Available at: http://www.wales.nhs.uk/sitesplus/documents/863/Developing%20Scissor%20Skills%2002.10.14.pdf [Accessed 16/12/2015].

66
Rhonda, F.M. and Fewell, R.R. (2000). Peabody Developmental Motor Scales, 2nd Ed. Austin: Pro-Ed. Rodger S and Brandenburg J (2008) Cognitive Orientation to (daily) Occupational Performance (CO-OP) with children with Aspergers Syndrome who have motor-based occupational performance goals. Australian Occupational Therapy Journal. [ Online] Available at: http://www.strangeson.com/media/cognitive%20approach%20to%20motor%20skills%20in%20ASD.pdf Solomon J.W. and O’Brien J.C (2006) Paediatric Skills for Ocupational Therapy Assistants. Elsevier, Missori South Warwickshire NHS Foundation Trust Children, Young People and Families Occupational Therapy Team (2015). SCISSOR SKILLS [Online]. Available at: http://cyp.swft.nhs.uk/media/7494/scissor_skills.pdf. [Accessed 16/12/2015]
Case Smith, J (2013) Systematic review of interventions to promote socio-emotional development in young children with or at risk of disability American Journal of Occupational Therapy 67 4 395-404 Poulsen, A. and Ziviani, J. (2004). Can I Play Too? Physical Activity Engagement of Children with Developmental Coordination Disorders. Canadian Journal of Occupational Therapy, 71(2), pp.100-107. Poulsen, A., Ziviani, J. and Cuskelly, M. (2008). Leisure Time Physical Activity Energy Expenditure in Boys with Developmental Coordination Disorder: the Role of Peer Relations Self-Concept Perceptions. OTJR: Occupation, Participation, Health, 28(1), pp.30-39.