Embed Size (px)
Citation preview
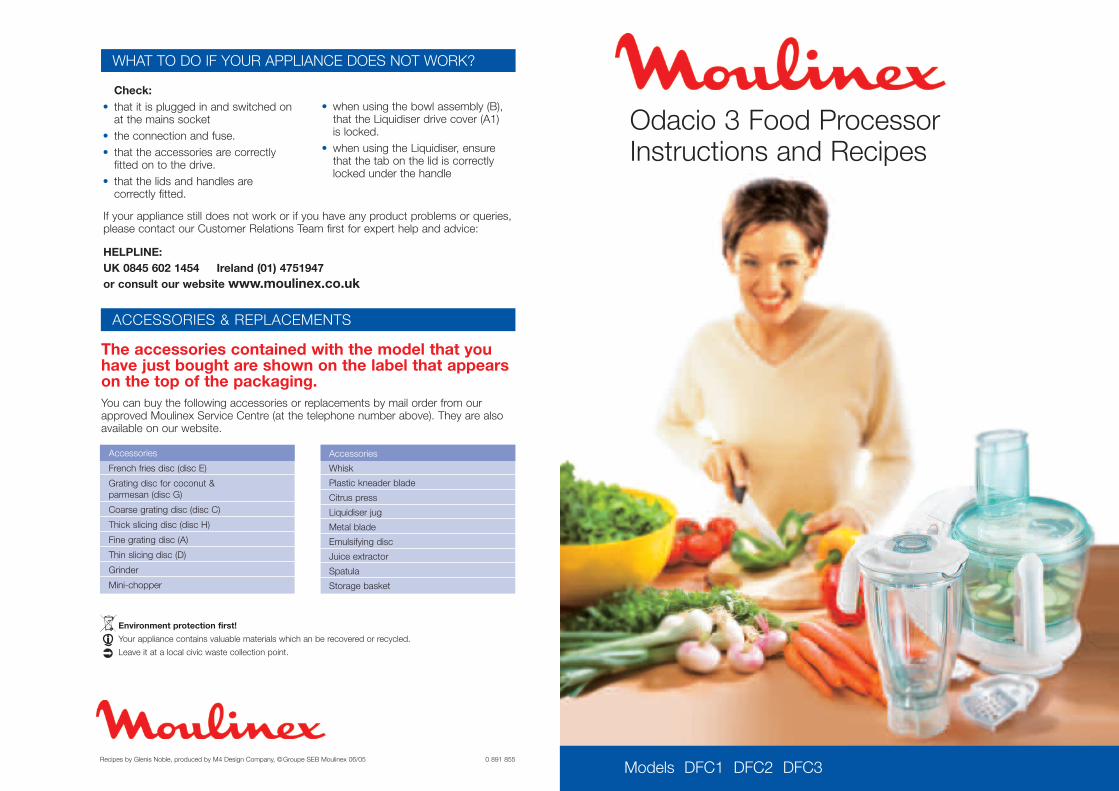
Models DFC1 DFC2 DFC3
Check:• that it is plugged in and switched on
at the mains socket• the connection and fuse.• that the accessories are correctly
fitted on to the drive.• that the lids and handles are
correctly fitted.
• when using the bowl assembly (B),that the Liquidiser drive cover (A1) is locked.
• when using the Liquidiser, ensurethat the tab on the lid is correctlylocked under the handle
The accessories contained with the model that youhave just bought are shown on the label that appearson the top of the packaging.You can buy the following accessories or replacements by mail order from ourapproved Moulinex Service Centre (at the telephone number above). They are alsoavailable on our website.
If your appliance still does not work or if you have any product problems or queries,please contact our Customer Relations Team first for expert help and advice:
HELPLINE:UK 0845 602 1454 Ireland (01) 4751947or consult our website www.moulinex.co.uk
WHAT TO DO IF YOUR APPLIANCE DOES NOT WORK?
ACCESSORIES & REPLACEMENTS
Accessories
French fries disc (disc E)
Grating disc for coconut & parmesan (disc G)
Coarse grating disc (disc C)
Thick slicing disc (disc H)
Fine grating disc (A)
Thin slicing disc (D)
Grinder
Mini-chopper
Accessories
Whisk
Plastic kneader blade
Citrus press
Liquidiser jug
Metal blade
Emulsifying disc
Juice extractor
Spatula
Storage basket
Recipes by Glenis Noble, produced by M4 Design Company, ©Groupe SEB Moulinex 06/05 0 891 855
Odacio 3 Food ProcessorInstructions and Recipes
Environment protection first!
Your appliance contains valuable materials which an be recovered or recycled.
Leave it at a local civic waste collection point.
I1
I2
I3
I4a
I4
H1
H2
H3
D
H
E
G
D2
A3B4
B4a
A4
A2
A5
A1
B1
B2
C
B3c
D1
F
K
L
M
N
I
J
E1
E2
B3
B3b
F1
F2
K1
K2
L1
L2
J5
J2
J1
J3
J4
A B C
2
1
B3a
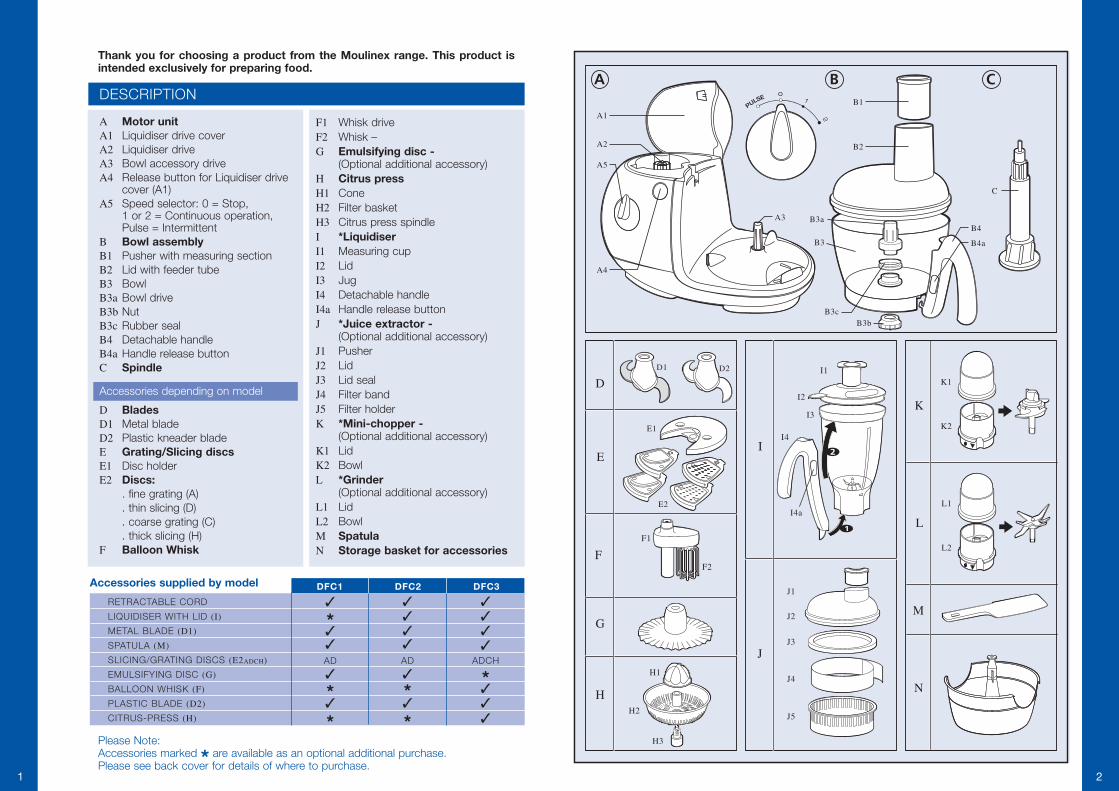
Thank you for choosing a product from the Moulinex range. This product isintended exclusively for preparing food.
F1 Whisk driveF2 Whisk – G Emulsifying disc -
(Optional additional accessory)H Citrus pressH1 ConeH2 Filter basketH3 Citrus press spindleI *LiquidiserI1 Measuring cupI2 LidI3 JugI4 Detachable handleI4a Handle release buttonJ *Juice extractor -
(Optional additional accessory)J1 PusherJ2 LidJ3 Lid sealJ4 Filter bandJ5 Filter holderK *Mini-chopper -
(Optional additional accessory)K1 LidK2 BowlL *Grinder
(Optional additional accessory)L1 LidL2 BowlM SpatulaN Storage basket for accessories
A Motor unitA1 Liquidiser drive coverA2 Liquidiser driveA3 Bowl accessory driveA4 Release button for Liquidiser drive
cover (A1)A5 Speed selector: 0 = Stop,
1 or 2 = Continuous operation,Pulse = Intermittent
B Bowl assemblyB1 Pusher with measuring sectionB2 Lid with feeder tubeB3 BowlB3a Bowl driveB3b NutB3c Rubber sealB4 Detachable handleB4a Handle release buttonC Spindle
Accessories depending on model
D BladesD1 Metal bladeD2 Plastic kneader bladeE Grating/Slicing discsE1 Disc holderE2 Discs:
. fine grating (A)
. thin slicing (D)
. coarse grating (C)
. thick slicing (H) F Balloon Whisk
Please Note:Accessories marked * are available as an optional additional purchase. Please see back cover for details of where to purchase.
RETRACTABLE CORD
LIQUIDISER WITH LID (I)
METAL BLADE (D1)
SPATULA (M)
SLICING/GRATING DISCS (E2ADCH)
EMULSIFYING DISC (G)
BALLOON WHISK (F)
PLASTIC BLADE (D2)
CITRUS-PRESS (H)
DESCRIPTION
3
*33AD
3
*3
*
DFC1 DFC2 DFC3
3333AD
3
*3
*
3333
ADCH
*333
Accessories supplied by model
21

• Always read the instructions for usecarefully before using yourappliance for the first time:This product has been designed fordomestic use only. The manufactureraccepts no responsibility, and theguarantee will not apply, for anycommercial use, inappropriate use orfailure to comply with the instructions.
• Do not leave the appliance within reachof children without supervision. Youngchildren or severely disabled personsmust always be supervised when usingthis appliance.
• Check that the voltage rating of yourappliance corresponds to that of yourhousehold electrical wiring system.
• This appliance is manufactured toconform to the Low Voltage ElectricalEquipment (Safety) Regulations 1989and is designed to comply with BS3456. It complies with the requirementsof the EEC Directive (89/336/EEC). Anyconnection error will render theguarantee void.
• Never leave your appliance to operateunattended.
• Unplug your appliance as soon as youhave finished using it (also in the eventof a power cut) and when you arecleaning it.
• Never use your appliance if it is notworking correctly or if it has beendamaged. If this happens, contact anapproved Moulinex Service Centre (seelist in service booklet).
• Do not place the appliance, the powercable or the plug under running water orin any other liquid.
• Do not allow the power cable to hangdown within reach of children.
• The power cable must never be close toa heat source or resting on sharp edges.
• If the power cable or the plug aredamaged, do not use the appliance. Toavoid any risk, these must be replacedby an approved Moulinex Service Centre(see list in service booklet).
• Do not use the appliance for juicing ifthe filter holder on the juice extractor is damaged.
• For your own safety, use only Moulinexaccessories and spare parts which aresuitable for your appliance.
• Always use the pushers to pushfood down the feeder tubes, neveruse your fingers, a fork, a spoon, a knife or other utensils.
SAFETY RECOMMENDATIONS
• Only remove the accessories when the appliance has come to a complete stop.
• Do not introduce any utensil (spoon,spatula...) through the feeder tube.
• Do not place any utensil containingmetal in a microwave oven.
• Use the accessories one at a time.• Handle the metal blade and
discs with great care: they areextremely sharp.
• You must remove the blades (D) andspindle (C) before emptying the bowl ofits content.
• Empty the chopping bowl or liquidiserjug before detaching the handle.
• Never touch the parts when they are moving.
• Do not run your appliance empty.• Do not allow long hair, scarves, ties etc.
to dangle over accessories duringoperation.
Never use or plug in your appliance if:• Its power cord is faulty or damaged.• The appliance has been dropped.• It has visible damage or operating faults.
In such cases, to avoid any danger,contact your Approved Service Centreto have the appliance repaired, as special tools are required.
Using your appliance• Before using for the first time, wash all
accessory parts in warm, soapy water.Rinse and dry.
• Place the motor unit on a stable, flat,clean and dry surface.
• Plug the appliance in.• Speed selector (A5). Choose the setting
required (see table page 14, or recipe).• Pulse (intermittent operation): turn knob
(A5) to the “pulse” position - using asuccession of pulses can give you bettercontrol when preparing certain foods.
• Continuous operation: turn knob (A5) toposition “1” or “2”.
• Stop: turn knob (A5) to position “0”.• Before using the liquidiser drive (A2):
ensure that there is no accessory fittedon the bowl and accessory drive.
43
Emulsifying disc(Available as an additional accessory)For whisking egg whites, meringues (2 to 7 egg whites) and whippedcream (up to 0.5 litre). Makingmayonnaise and mousses. Note: forwhipping egg whites the total timetaken is about 11/2 - 2 minuteinstead of seconds.
Citrus PressIdeal for all sorts of citrus fruitsincluding lemons, orangesand grapefruits.
Liquidiser JugIdeal for blending and puréeingsoups and sauces, making frothymilkshakes and cocktails, pureeingsoft fruits or cooked vegetables andfruit, making batters. Maximumcapacity of total ingredients 1.5 litre.
Centrifugal Juice Extractor(Available as an additional accessory DFC4)Suitable for extracting juice from fruitand vegetables such as apples,pineapples, grapes, carrots, andcelery. This accessory has its ownlid and food pusher.
Mini Chopper Chops cloves of garlic, herbs, parsley,ham, small amounts of bread orFrench bread for breadcrumbs, nuts(quantities up to 80g) and preparesbaby food. Note: It is not able togrind coffee beans or hard spices.
Grinder(Available as an additional accessory)Grinds spices, pepper and driedfruits in seconds.
French Fries disc(Available as an additional accessory)Easily cuts thin cut ‘American style’fries from potatoes.
Metal BladeBasic attachment for mixing,chopping, kneading, makingbreadcrumbs, crushing biscuits andbatters. You can also use it forblending and puréeing instead of theliquidiser, but the texture for soups isnot usually as smooth. The blade isfitted onto the spindle.
Plastic Kneader BladeFor kneading and mixing. Ideal for making bread, pastry, biscuits and cakes. The blade is fitted onto the spindle.
Grating DiscUse for grating cheese, vegetablesand fruit. The appropriate disc is fittedto the holder and then placed onto thespindle. (A) fine grating and (C) coarsegrating plus optional Parmesan gratingdisc. With all grating a piece ofunprocessed food always remainsbetween the holder and lid, thisis normal.
Slicing DiscFor slicing vegetables and fruit. Theappropriate disc is fitted to the holderand then placed onto the spindle.2 discs - (D) fine slicing and (H)coarse slicing. The fine disc giveswafer thin slicing but the coarsedisc gives food sliced to about2-3 mm thickness.
Balloon Whisk AttachmentFor whisking egg whites, meringues (2 to 7 egg whites) and whippedcream (up to 0.5 litre). Makingmayonnaise and mousses. Note: forwhipping egg whites the total timetaken is about 11/2 - 2 minutesinstead of seconds.
WHAT THE ACCESSORIES ARE USED FOR
Shown below are the main tasks that you would use the accessories for.Please note that some of the accessories fit onto the spindle.
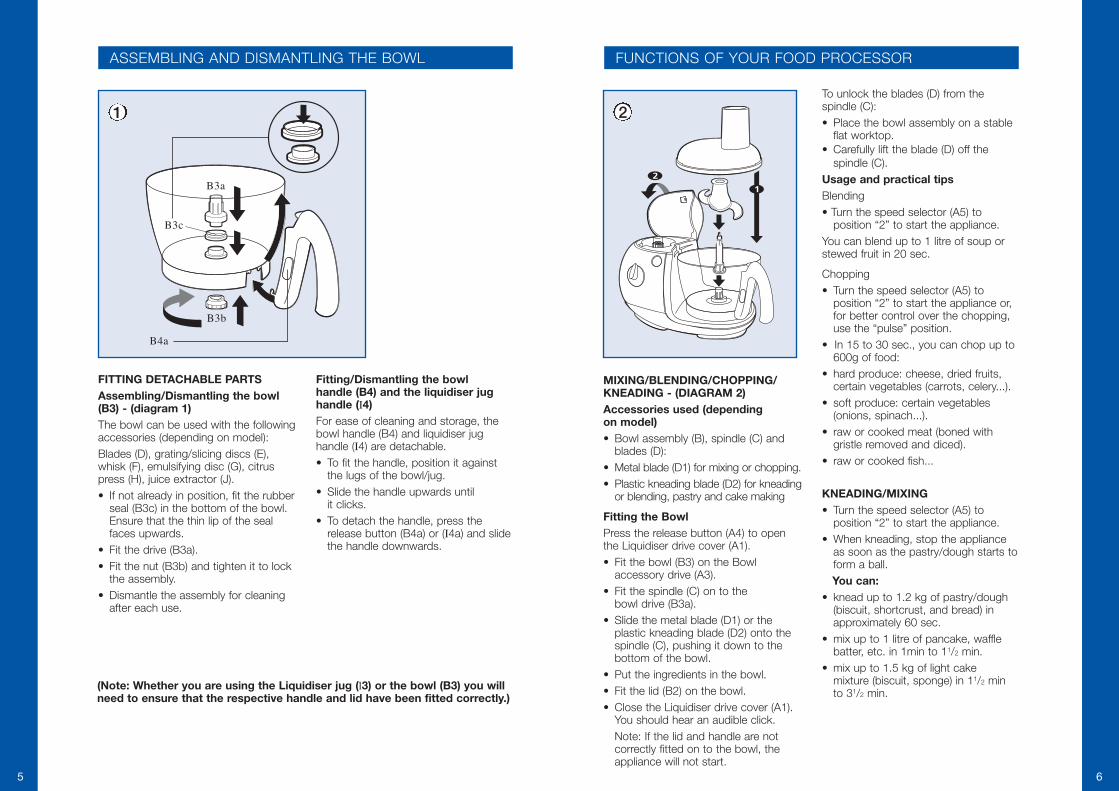
To unlock the blades (D) from thespindle (C):• Place the bowl assembly on a stable
flat worktop.• Carefully lift the blade (D) off the
spindle (C).Usage and practical tipsBlending• Turn the speed selector (A5) to
position “2” to start the appliance.You can blend up to 1 litre of soup orstewed fruit in 20 sec.
Chopping• Turn the speed selector (A5) to
position “2” to start the appliance or,for better control over the chopping,use the “pulse” position.
• In 15 to 30 sec., you can chop up to600g of food:
• hard produce: cheese, dried fruits,certain vegetables (carrots, celery...).
• soft produce: certain vegetables(onions, spinach...).
• raw or cooked meat (boned withgristle removed and diced).
• raw or cooked fish...
KNEADING/MIXING• Turn the speed selector (A5) to
position “2” to start the appliance.• When kneading, stop the appliance
as soon as the pastry/dough starts toform a ball.You can:
• knead up to 1.2 kg of pastry/dough(biscuit, shortcrust, and bread) inapproximately 60 sec.
• mix up to 1 litre of pancake, wafflebatter, etc. in 1min to 11/2 min.
• mix up to 1.5 kg of light cake mixture (biscuit, sponge) in 11/2 min to 31/2 min.
MIXING/BLENDING/CHOPPING/KNEADING - (DIAGRAM 2)Accessories used (depending on model)• Bowl assembly (B), spindle (C) and
blades (D):• Metal blade (D1) for mixing or chopping.• Plastic kneading blade (D2) for kneading
or blending, pastry and cake making
Fitting the BowlPress the release button (A4) to openthe Liquidiser drive cover (A1). • Fit the bowl (B3) on the Bowl
accessory drive (A3). • Fit the spindle (C) on to the
bowl drive (B3a).• Slide the metal blade (D1) or the
plastic kneading blade (D2) onto thespindle (C), pushing it down to thebottom of the bowl.
• Put the ingredients in the bowl.• Fit the lid (B2) on the bowl.• Close the Liquidiser drive cover (A1).
You should hear an audible click.Note: If the lid and handle are notcorrectly fitted on to the bowl, theappliance will not start.
2
2
1
FUNCTIONS OF YOUR FOOD PROCESSOR
Fitting/Dismantling the bowl handle (B4) and the liquidiser jughandle (I4)For ease of cleaning and storage, thebowl handle (B4) and liquidiser jughandle (I4) are detachable.• To fit the handle, position it against
the lugs of the bowl/jug.• Slide the handle upwards until
it clicks.• To detach the handle, press the
release button (B4a) or (I4a) and slidethe handle downwards.
FITTING DETACHABLE PARTSAssembling/Dismantling the bowl(B3) - (diagram 1)The bowl can be used with the followingaccessories (depending on model):Blades (D), grating/slicing discs (E),whisk (F), emulsifying disc (G), citruspress (H), juice extractor (J).• If not already in position, fit the rubber
seal (B3c) in the bottom of the bowl.Ensure that the thin lip of the sealfaces upwards.
• Fit the drive (B3a).• Fit the nut (B3b) and tighten it to lock
the assembly.• Dismantle the assembly for cleaning
after each use.
(Note: Whether you are using the Liquidiser jug (l3) or the bowl (B3) you willneed to ensure that the respective handle and lid have been fitted correctly.)
ASSEMBLING AND DISMANTLING THE BOWL
1
65
B3b
B3a
B4a
B3c

To use the emulsifying disc (G):• fit the spindle (C) on to the bowl drive
(B3a).• slide the emulsifying disc on to
the spindle.Then: - Place the ingredients in the bowl.
• Fit the lid (B2) on the bowl. • Close the Liquidiser drive cover (A1).
You should hear a click.
Usage and practical tips• Turn the speed selector (A5)
to position “1” or “2” to start the appliance.
• Do not use the balloon whisk or theemulsifying disc to knead dough or tomix cake mixtures, instead use theplastic kneading blade.
• You can prepare: mayonnaise,sauces, egg whites (up to 7 eggsmaximum), whipped cream (up to 0.5 litre).
BEATING/WHISKING/EMULSIFYING - (DIAGRAM 4A AND 4B)
Accessories used (depending on model)• Bowl assembly (B) and balloon whisk
(F) or • Bowl assembly (B), emulsifying disc
(G) and spindle (C).
Fitting the balloon whisk andemulsifying disc accessories
• Press the release button (A4) to openthe Liquidiser drive cover (A1).
• Fit the bowl (B3) on the Bowlaccessory drive(A3).
To use the balloon whisk (F):• fit it on to the bowl drive (B3a).
Usage and practical tips• Cut the food into pieces
approximately 8cm high and amaximum of 4cm width
• Push the food through the feedertube using the pusher (B1).
• Turn the speed selector (A5) toposition “1” for slicing or “2” for grating.
The slicing/grating discs (depending on model): • slice thickly (use disc H), slice thinly
(use disc D): potatoes, onions,cucumbers, beetroot, apples, carrots,and cabbage...
• coarsely grate (use disc C), finelygrate (use disc A): celery, potatoes,carrots, cheeses...
GRATING/SLICING/FRENCH FRIES -(Diagram 3)Accessories used• Bowl assembly (B), spindle (C) and
grating/slicing discs (E)
Fitting the Grating/Slicing/French Fries Discs• Press the release button (A4) to open
the Liquidiser drive cover (A1). • Fit the bowl (B3) on the Bowl
accessory drive(A3). • Fit the required disc (E2) on to the
disc holder (E1).• Fit the spindle (C) on the bowl drive
(B3a), then the disc holder (E1) on tothe spindle (C).
• Fit the lid (B2) on the bowl.• Close the Liquidiser drive cover (A1).
You should hear a click.
3
4
15
3
2
87
12
2
1
4a 4b

BLENDING/MIXING FINELY IN THE LIQUIDISER (DEPENDING ONMODEL) (DIAGRAM 6)
Accessory used• Liquidiser jug (I)
Fitting the Liquidiser Jug• Press the release button (A4) to open
the Liquidiser drive cover (A1).• Place the ingredients in the liquidiser
jug (I3) and lock the lid by putting thetab on the lid under the handle (I2) onthe jug.
• Fit the liquidiser jug (I) on theLiquidiser drive (A2) (you will hear anaudible click).
If the lid and handle are not fittedcorrectly onto the jug, the appliancewill not start.
Usage and practical tips• Turn the speed selector (A5) to
position “1” or “2” to start theappliance or, for better control overthe blending, use the “pulse” position.
• You can add ingredients duringblending through the hole of themeasuring cup (I1).
• Do not fill the liquidiser jug withboiling liquid. Only use liquids orfood at simmering temperature or below.
• Never use the blender to grind dryingredients (hazel nuts, almonds,peanuts, sugar and spices etc.).
You can:• prepare up to 1.5 litre of extra smooth
soup, sauces, stewed fruits, milkshakes and cocktails.
• blend all types of batter (pancake,fritters, waffles, Yorkshire pudding).
• crush ice at speed “2” no more than a 1/4 full
• To remove the liquidiser jug from theappliance, grasp it by the handle andpress the release button (A4).
6
Usage and practical tips• Firmly hold one half of the citrus fruit
on the cone (H1).• Turn the speed selector (A5) to pulse
or position “1” to start the appliance.You can squeeze up to a litre of juicewithout emptying the bowl.
SQUEEZING CITRUS FRUIT(DEPENDING ON MODEL)(DIAGRAM 5)
Accessories used• Bowl (B3) and citrus press (H)
Fitting the accessories for the citrus pressPress the release button (A4) to openthe Liquidiser drive cover (A1).• Fit the bowl (B3) on the Bowl
accessory drive (A3). • Fit the Citrus press spindle (H3) on
the bowl accessory drive (B3a).• Fit the filter basket (H2) onto the
drive (H3).• Fit the cone (H1) through the hole in
the strainer. • Close the Liquidiser drive cover (A1).
You should hear a click.
52
1
5
109
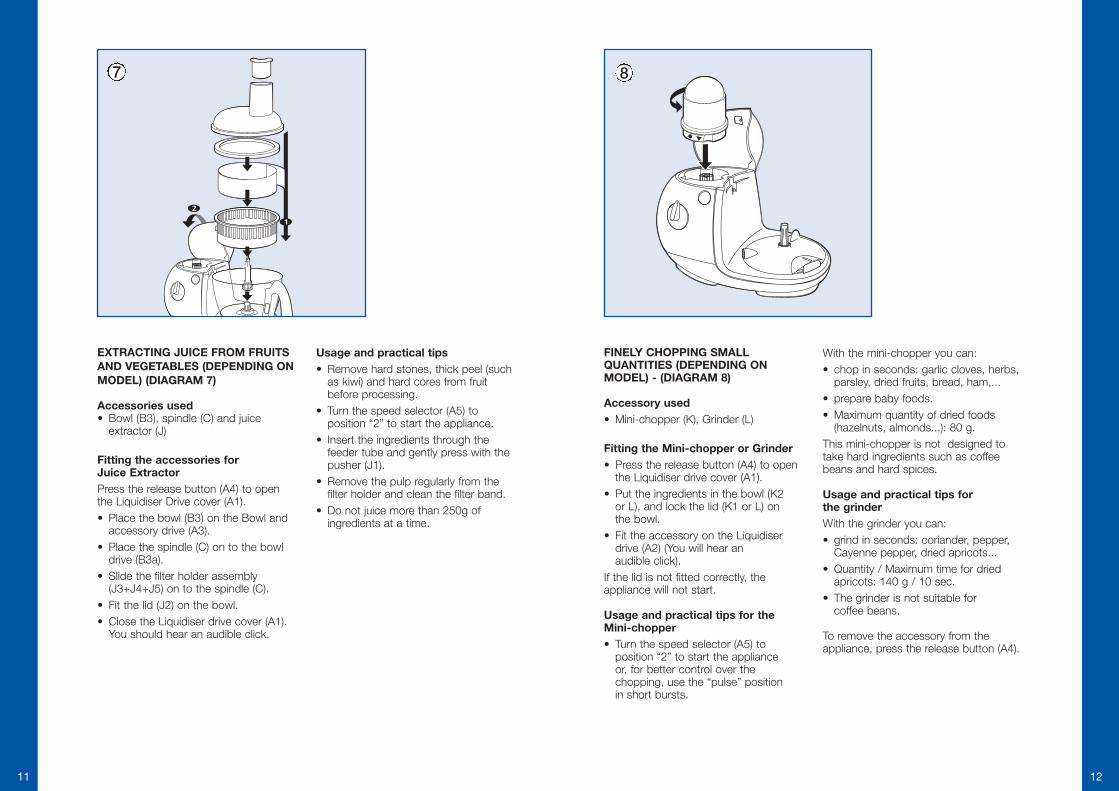
FINELY CHOPPING SMALLQUANTITIES (DEPENDING ONMODEL) - (DIAGRAM 8)
Accessory used• Mini-chopper (K), Grinder (L)
Fitting the Mini-chopper or Grinder• Press the release button (A4) to open
the Liquidiser drive cover (A1).• Put the ingredients in the bowl (K2
or L), and lock the lid (K1 or L) on the bowl.
• Fit the accessory on the Liquidiserdrive (A2) (You will hear an audible click).
If the lid is not fitted correctly, theappliance will not start.
Usage and practical tips for theMini-chopper• Turn the speed selector (A5) to
position “2” to start the appliance or, for better control over thechopping, use the “pulse” position in short bursts.
With the mini-chopper you can: • chop in seconds: garlic cloves, herbs,
parsley, dried fruits, bread, ham,...• prepare baby foods.• Maximum quantity of dried foods
(hazelnuts, almonds...): 80 g.This mini-chopper is not designed totake hard ingredients such as coffeebeans and hard spices.
Usage and practical tips forthe grinderWith the grinder you can:• grind in seconds: coriander, pepper,
Cayenne pepper, dried apricots...• Quantity / Maximum time for dried
apricots: 140 g / 10 sec.• The grinder is not suitable for
coffee beans.
To remove the accessory from theappliance, press the release button (A4).
8
EXTRACTING JUICE FROM FRUITSAND VEGETABLES (DEPENDING ONMODEL) (DIAGRAM 7)
Accessories used• Bowl (B3), spindle (C) and juice
extractor (J)
Fitting the accessories for Juice ExtractorPress the release button (A4) to openthe Liquidiser Drive cover (A1).• Place the bowl (B3) on the Bowl and
accessory drive (A3). • Place the spindle (C) on to the bowl
drive (B3a).• Slide the filter holder assembly
(J3+J4+J5) on to the spindle (C).• Fit the lid (J2) on the bowl. • Close the Liquidiser drive cover (A1).
You should hear an audible click.
Usage and practical tips• Remove hard stones, thick peel (such
as kiwi) and hard cores from fruitbefore processing.
• Turn the speed selector (A5) toposition “2” to start the appliance.
• Insert the ingredients through thefeeder tube and gently press with thepusher (J1).
• Remove the pulp regularly from thefilter holder and clean the filter band.
• Do not juice more than 250g ofingredients at a time.
7
1
2
1211
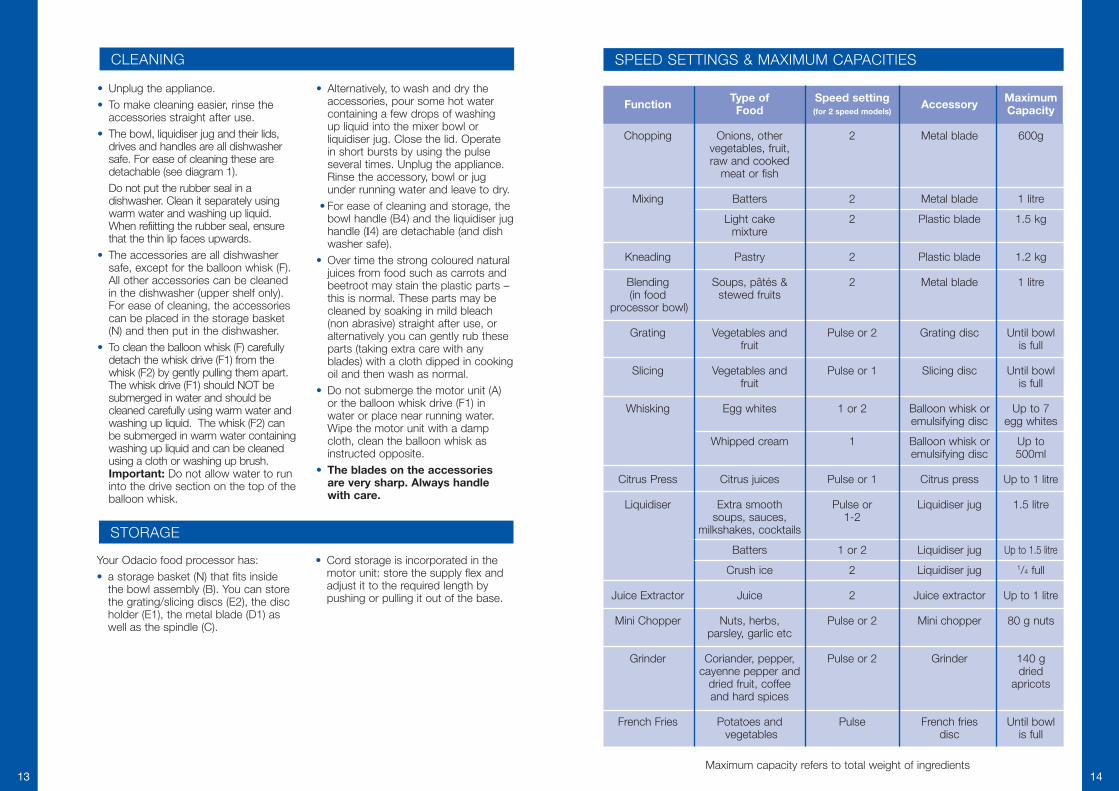
SPEED SETTINGS & MAXIMUM CAPACITIES
Function Type of Speed setting Accessory MaximumFood (for 2 speed models) Capacity
Chopping Onions, other 2 Metal blade 600gvegetables, fruit,raw and cooked
meat or fish
Mixing Batters 2 Metal blade 1 litre
Light cake 2 Plastic blade 1.5 kgmixture
Kneading Pastry 2 Plastic blade 1.2 kg
Blending Soups, pâtés & 2 Metal blade 1 litre(in food stewed fruits
processor bowl)
Grating Vegetables and Pulse or 2 Grating disc Until bowlfruit is full
Slicing Vegetables and Pulse or 1 Slicing disc Until bowlfruit is full
Whisking Egg whites 1 or 2 Balloon whisk or Up to 7emulsifying disc egg whites
Whipped cream 1 Balloon whisk or Up toemulsifying disc 500ml
Citrus Press Citrus juices Pulse or 1 Citrus press Up to 1 litre
Liquidiser Extra smooth Pulse or Liquidiser jug 1.5 litresoups, sauces, 1-2
milkshakes, cocktails
Batters 1 or 2 Liquidiser jug Up to 1.5 litre
Crush ice 2 Liquidiser jug 1/4 full
Juice Extractor Juice 2 Juice extractor Up to 1 litre
Mini Chopper Nuts, herbs, Pulse or 2 Mini chopper 80 g nutsparsley, garlic etc
Grinder Coriander, pepper, Pulse or 2 Grinder 140 gcayenne pepper and dried
dried fruit, coffee apricotsand hard spices
French Fries Potatoes and Pulse French fries Until bowlvegetables disc is full
Maximum capacity refers to total weight of ingredients
CLEANING
Your Odacio food processor has:• a storage basket (N) that fits inside
the bowl assembly (B). You can storethe grating/slicing discs (E2), the discholder (E1), the metal blade (D1) aswell as the spindle (C).
• Cord storage is incorporated in themotor unit: store the supply flex andadjust it to the required length bypushing or pulling it out of the base.
STORAGE
• Alternatively, to wash and dry theaccessories, pour some hot watercontaining a few drops of washing up liquid into the mixer bowl orliquidiser jug. Close the lid. Operate in short bursts by using the pulseseveral times. Unplug the appliance.Rinse the accessory, bowl or jugunder running water and leave to dry.
• For ease of cleaning and storage, thebowl handle (B4) and the liquidiser jughandle (I4) are detachable (and dishwasher safe).
• Over time the strong coloured naturaljuices from food such as carrots andbeetroot may stain the plastic parts –this is normal. These parts may becleaned by soaking in mild bleach(non abrasive) straight after use, oralternatively you can gently rub theseparts (taking extra care with anyblades) with a cloth dipped in cookingoil and then wash as normal.
• Do not submerge the motor unit (A) or the balloon whisk drive (F1) inwater or place near running water. Wipe the motor unit with a damp cloth, clean the balloon whisk asinstructed opposite.
• The blades on the accessories are very sharp. Always handlewith care.
• Unplug the appliance.• To make cleaning easier, rinse the
accessories straight after use.• The bowl, liquidiser jug and their lids,
drives and handles are all dishwashersafe. For ease of cleaning these aredetachable (see diagram 1).Do not put the rubber seal in adishwasher. Clean it separately usingwarm water and washing up liquid.When refiitting the rubber seal, ensurethat the thin lip faces upwards.
• The accessories are all dishwashersafe, except for the balloon whisk (F).All other accessories can be cleanedin the dishwasher (upper shelf only).For ease of cleaning, the accessoriescan be placed in the storage basket(N) and then put in the dishwasher.
• To clean the balloon whisk (F) carefullydetach the whisk drive (F1) from thewhisk (F2) by gently pulling them apart.The whisk drive (F1) should NOT besubmerged in water and should becleaned carefully using warm water andwashing up liquid. The whisk (F2) canbe submerged in warm water containingwashing up liquid and can be cleanedusing a cloth or washing up brush. Important: Do not allow water to runinto the drive section on the top of theballoon whisk.
1413
Recipes and Useful Notes
• In the following recipes, theconversions for Metric andImperial are approximate.Please do not mix the twosystems and follow eitherMetric or Imperial measures.
• All spoon measures are level,unless stated otherwise.
• Eggs used in recipes aremedium size, unless statedotherwise.
• Processing times are for thequantities stated in therecipes. For larger or smallerquantities adjust the timeaccordingly.
• The cooking times andtemperatures stated in therecipes are only a guide. If using a fan oven the timesand temperature may needadjusting as advised in themanufacturer’s instructions. If you have adapted the recipe in any way, you mayalso need to adjust thecooking time.
• The recipes in this book havebeen devised specifically foruse in your Odacio 3. If therecipes are prepared in a foodprocessor other than this, theprocessing times and resultsmay vary considerably.
• If you have a DCF1 or DCF2 model, instead of thewhisk accessory use theemulsifying disc.
Soups, Starters and Vegetable Accompaniments
16-18
Main Courses
19-21
Desserts
22-23
Mayonnaise and Dressings
24
Cakes, Scones & Biscuits
25-27
Pastry, Batters & Bread
28-29
Drinks
30
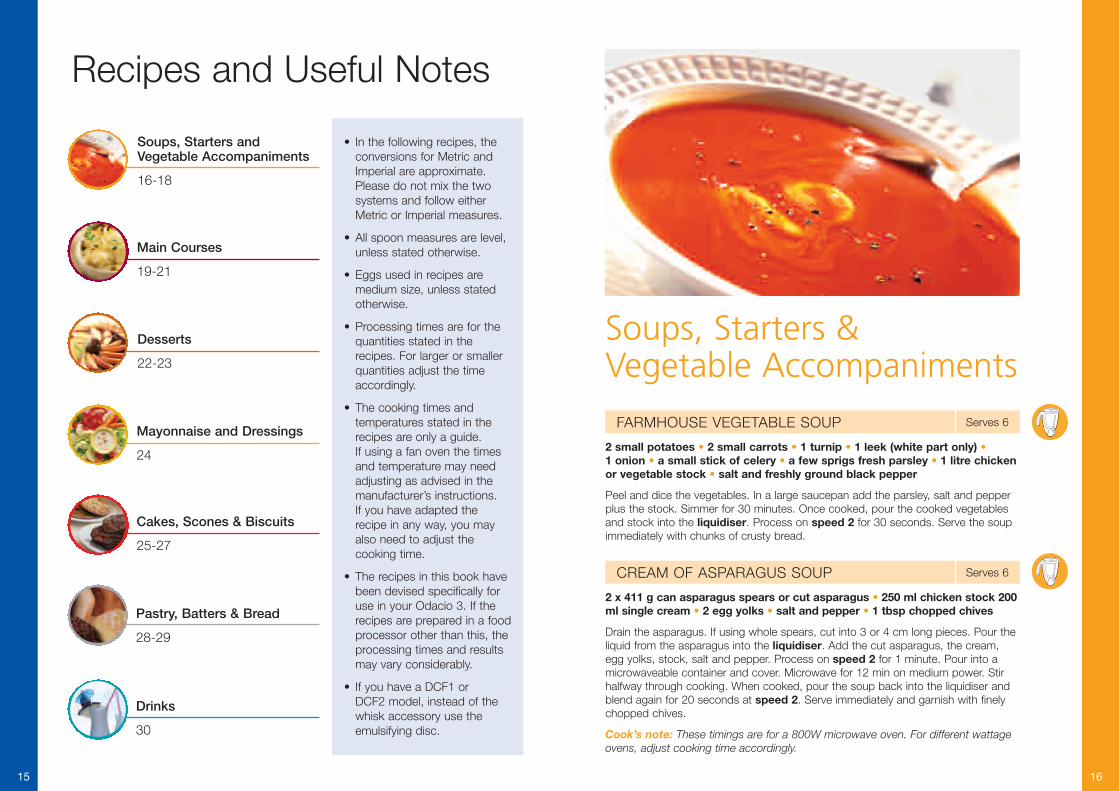
Soups, Starters & Vegetable Accompaniments
FARMHOUSE VEGETABLE SOUP Serves 6
2 small potatoes • 2 small carrots • 1 turnip • 1 leek (white part only) •1 onion • a small stick of celery • a few sprigs fresh parsley • 1 litre chickenor vegetable stock • salt and freshly ground black pepper
Peel and dice the vegetables. In a large saucepan add the parsley, salt and pepperplus the stock. Simmer for 30 minutes. Once cooked, pour the cooked vegetablesand stock into the liquidiser. Process on speed 2 for 30 seconds. Serve the soupimmediately with chunks of crusty bread.
CREAM OF ASPARAGUS SOUP Serves 6
2 x 411 g can asparagus spears or cut asparagus • 250 ml chicken stock 200ml single cream • 2 egg yolks • salt and pepper • 1 tbsp chopped chives
Drain the asparagus. If using whole spears, cut into 3 or 4 cm long pieces. Pour theliquid from the asparagus into the liquidiser. Add the cut asparagus, the cream,egg yolks, stock, salt and pepper. Process on speed 2 for 1 minute. Pour into amicrowaveable container and cover. Microwave for 12 min on medium power. Stirhalfway through cooking. When cooked, pour the soup back into the liquidiser andblend again for 20 seconds at speed 2. Serve immediately and garnish with finelychopped chives.
Cook’s note: These timings are for a 800W microwave oven. For different wattageovens, adjust cooking time accordingly.
1615
SALMON TERRINE Serves 8
300 g (11 oz) salmon fillet • 350 g (12 oz) cod fillet • 1 onion • 25 g (1 oz)butter 1 tbsp vegetable oil • 50 ml (2 fl oz) dry white wine • 3 whole eggs •150 ml (1/4 pt) crème fraîche • 3 tbsp tomato purée • salt and pepper •cayenne pepper
Chop the onion in the bowl fitted with the metal blade on speed 2. Gently fry theonion in the butter and oil until softened. Add the white wine and simmer rapidly untilthe liquid is reduced and cooked away. Cut the fish into 3 cm (1 in) pieces, place inthe bowl with metal blade and chop up on speed 2 for 20 seconds. Add the eggs,crème fraîche, tomato purée, onion, salt, pepper and a pinch of Cayenne pepper.Process on speed 1 for a few seconds then increase to speed 2 for 50 seconds.Grease a rectangular terrine mould (24 cm x 9 cm). Pour in the mixture. Stand in aroasting tin and pour in boiling water to come halfway up the sides. Cover withbuttered foil and bake in a preheated oven at 180°C/350°F (Fan oven 170°C), Gasmark 4 for about 1 hour. Leave to cool before turning out. Serve cold in slices, witha green salad accompanied by hot toast.
COUNTRY PÂTÉ
1 small garlic clove, peeled (optional) • 1 small onion, peeled and quartered• 25 g (1 oz) butter or margarine • 100 g (4 oz) unsmoked streaky bacon225 g (8 oz) lambs liver • 225 g (8 oz) lean pork • 1 tbsp finely chopped freshparsley • 2 tbsp double cream • 3 tbsp brandy or port (or half and half) •1/2 tsp dried mixed herbs • a pinch of ground allspice • salt and freshlyground black pepper • 1 beaten egg
Use the metal blade. Process the garlic and onion using speed 2 for about 10seconds until finely chopped. Melt the butter in a saucepan, add the onions andcook, without colouring, until softened. Add the alcohol and increase the heat,allowing the liquor to reduce until almost dry. Leave to cool.
Trim and dice the liver. Cut the bacon and pork into 2.5 cm (1 in) pieces. Process thebacon, liver and pork for 15 – 20 seconds on speed 2 until chopped to yourpreferred consistency. Remove the metal blade. Add the onions, parsley, cream,mixed herbs, all spice, salt, pepper and, lastly, the beaten egg. Mix with awooden spoon.
Place the mixture in a 900 g (2 lb loaf tin) or terrine mould. Gently press the mixturedown and cover with buttered foil. Stand in a roasting tin and pour in boiling waterto come halfway up the sides. Bake in a preheated oven at 180°C/350°F (Fan oven170°C), Gas mark 4 for 11/2 - 13/4 hours. Top up with more boiling water, ifnecessary. Leave to cool in the tin for 30 minutes. Cover with a piece of foil, thenplace a weight on top of the cooked pâté and chill overnight in the refrigerator. Turnout and serve cut in slices with crusty bread and a mixed salad.
DAUPHINOISE POTATOES Serves 6
1 kg (21/4 lb) non-waxy old potatoes, small size • 100 g (4 oz) Gruyère cheese •3 egg yolks • 284 ml carton single cream • 250 ml (9 fl oz) milk • pinch ofground nutmeg • salt and pepper • 1 clove of garlic, peeled (optional) •butter for greasing
Use the fine grating disc (A) and grate the cheese on speed 2. Set aside. Peelthe potatoes and trim to fit the feed feed tube. Use the coarse slicing disc (H)and slice the potatoes on speed 1. Do not leave in water and use straight away.Grease a shallow ovenproof dish with butter and rub with a garlic clove. Fill the dishwith potatoes. For a neater finish overlap the top layer of potatoes in rows. Cleanthe bowl and fit the whisk. Add the egg yolks, cream, milk, nutmeg, salt andpepper. Process on speed 2 for 1 minute. Pour this mixture over the potatoes.
Bake in a preheated oven at 200°C/400°F (Fan oven 190°F), Gas mark 6 for 45 – 60minutes. Cover with foil if the top browns too quickly. After 30 minutes cooking,sprinkle over the grated cheese. The exact cooking time will vary according to thetype of potatoes, so test the potatoes by piercing with a knife. Serve immediately.
Try this: For a Celeriac and Potato Dauphinois, reduce the quantity of potatoes to450 g (1 lb) and slice 1 large celeriac with disc H. Arrange the potatoes and celeriacin layers, making sure the potatoes are on the top and bottom.
COURGETTE AND CHEESE BAKE Serves 4-6
Serves 4 for lunch or 6 as a main course accompaniment.
1 kg (21/4 lb) courgettes • 100 g (4oz) Gruyère cheese • 250 ml (9 fl oz)double cream or crème fraiche • 3 eggs • salt and pepper • grated nutmeg• butter for greasing
Wash the courgettes but do not peel. Use the coarse slicing disc (H) and cut thecourgettes on speed 1. Blanch in boiling, salted water for 5 min. Drain well andplace in buttered ovenproof dish. Use the fine grating disc (A) and grate thecheese on speed 2. Set aside. Fit the wire whisk in the bowl and mix the eggs,cream or crème fraiche, salt, pepper and a pinch of nutmeg. Process on speed 2for 30 seconds. Remove the whisk and stir the grated cheese into the egg mixture.Pour the mixture over the courgettes and make sure they are all covered. Bake in apreheated oven at 230°C/450°F (Fan oven 220°C), Gas mark 8 for about 15minutes. If the top browns too quickly cover with foil. Ideal served on its own for alight lunch or to accompany a main course.
1817
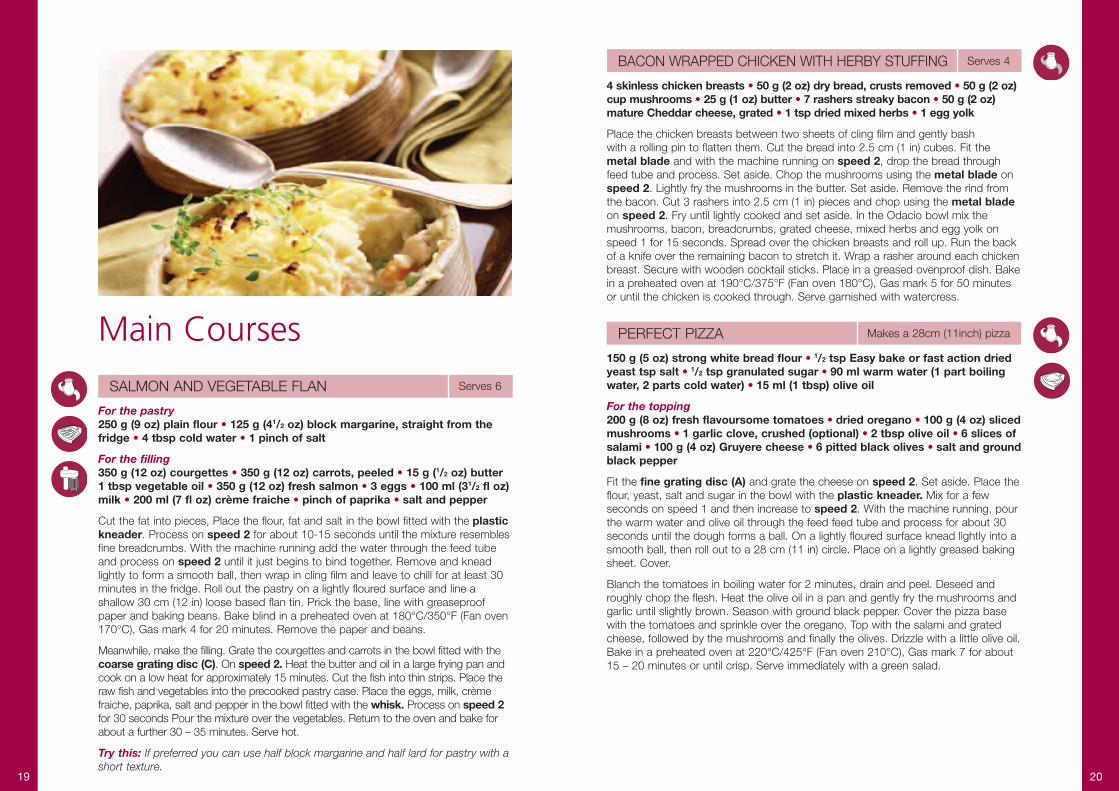
Main Courses
SALMON AND VEGETABLE FLAN Serves 6
For the pastry250 g (9 oz) plain flour • 125 g (41/2 oz) block margarine, straight from thefridge • 4 tbsp cold water • 1 pinch of salt
For the filling350 g (12 oz) courgettes • 350 g (12 oz) carrots, peeled • 15 g (1/2 oz) butter1 tbsp vegetable oil • 350 g (12 oz) fresh salmon • 3 eggs • 100 ml (31/2 fl oz)milk • 200 ml (7 fl oz) crème fraiche • pinch of paprika • salt and pepper
Cut the fat into pieces, Place the flour, fat and salt in the bowl fitted with the plastickneader. Process on speed 2 for about 10-15 seconds until the mixture resemblesfine breadcrumbs. With the machine running add the water through the feed tubeand process on speed 2 until it just begins to bind together. Remove and kneadlightly to form a smooth ball, then wrap in cling film and leave to chill for at least 30minutes in the fridge. Roll out the pastry on a lightly floured surface and line ashallow 30 cm (12 in) loose based flan tin. Prick the base, line with greaseproofpaper and baking beans. Bake blind in a preheated oven at 180°C/350°F (Fan oven170°C), Gas mark 4 for 20 minutes. Remove the paper and beans.
Meanwhile, make the filling. Grate the courgettes and carrots in the bowl fitted with thecoarse grating disc (C). On speed 2. Heat the butter and oil in a large frying pan andcook on a low heat for approximately 15 minutes. Cut the fish into thin strips. Place theraw fish and vegetables into the precooked pastry case. Place the eggs, milk, crèmefraiche, paprika, salt and pepper in the bowl fitted with the whisk. Process on speed 2for 30 seconds Pour the mixture over the vegetables. Return to the oven and bake forabout a further 30 – 35 minutes. Serve hot.
Try this: If preferred you can use half block margarine and half lard for pastry with ashort texture.
BACON WRAPPED CHICKEN WITH HERBY STUFFING Serves 4
4 skinless chicken breasts • 50 g (2 oz) dry bread, crusts removed • 50 g (2 oz)cup mushrooms • 25 g (1 oz) butter • 7 rashers streaky bacon • 50 g (2 oz)mature Cheddar cheese, grated • 1 tsp dried mixed herbs • 1 egg yolk
Place the chicken breasts between two sheets of cling film and gently bash with a rolling pin to flatten them. Cut the bread into 2.5 cm (1 in) cubes. Fit the metal blade and with the machine running on speed 2, drop the bread throughfeed tube and process. Set aside. Chop the mushrooms using the metal blade onspeed 2. Lightly fry the mushrooms in the butter. Set aside. Remove the rind fromthe bacon. Cut 3 rashers into 2.5 cm (1 in) pieces and chop using the metal bladeon speed 2. Fry until lightly cooked and set aside. In the Odacio bowl mix themushrooms, bacon, breadcrumbs, grated cheese, mixed herbs and egg yolk onspeed 1 for 15 seconds. Spread over the chicken breasts and roll up. Run the backof a knife over the remaining bacon to stretch it. Wrap a rasher around each chickenbreast. Secure with wooden cocktail sticks. Place in a greased ovenproof dish. Bakein a preheated oven at 190°C/375°F (Fan oven 180°C), Gas mark 5 for 50 minutesor until the chicken is cooked through. Serve garnished with watercress.
PERFECT PIZZA Makes a 28cm (11inch) pizza
150 g (5 oz) strong white bread flour • 1/2 tsp Easy bake or fast action driedyeast tsp salt • 1/2 tsp granulated sugar • 90 ml warm water (1 part boilingwater, 2 parts cold water) • 15 ml (1 tbsp) olive oil
For the topping200 g (8 oz) fresh flavoursome tomatoes • dried oregano • 100 g (4 oz) slicedmushrooms • 1 garlic clove, crushed (optional) • 2 tbsp olive oil • 6 slices ofsalami • 100 g (4 oz) Gruyere cheese • 6 pitted black olives • salt and groundblack pepper
Fit the fine grating disc (A) and grate the cheese on speed 2. Set aside. Place theflour, yeast, salt and sugar in the bowl with the plastic kneader. Mix for a fewseconds on speed 1 and then increase to speed 2. With the machine running, pourthe warm water and olive oil through the feed feed tube and process for about 30seconds until the dough forms a ball. On a lightly floured surface knead lightly into asmooth ball, then roll out to a 28 cm (11 in) circle. Place on a lightly greased bakingsheet. Cover.
Blanch the tomatoes in boiling water for 2 minutes, drain and peel. Deseed androughly chop the flesh. Heat the olive oil in a pan and gently fry the mushrooms andgarlic until slightly brown. Season with ground black pepper. Cover the pizza basewith the tomatoes and sprinkle over the oregano. Top with the salami and gratedcheese, followed by the mushrooms and finally the olives. Drizzle with a little olive oil.Bake in a preheated oven at 220°C/425°F (Fan oven 210°C), Gas mark 7 for about15 – 20 minutes or until crisp. Serve immediately with a green salad.
2019
MEATBALLS WITH GOATS CHEESE AND FRESH TOMATO SAUCE
25g (1oz) dry white bread, crusts removed • 30 ml (2 tbsp) milk • 1/2 onion,chopped • 350g (12oz) pork or lamb, cut into chunks • 15 ml (1 tbsp)chopped fresh marjoram • 30ml (2 tbsp) chopped fresh parsley • 10 ml (2 tsp) dark soy sauce • a pinch of sugar, optional • salt and pepper •15 ml (1 tbsp) vegetable oil • 100 g (4 oz) goats cheese, diced
For the fresh tomato sauce450g (1 lb) fresh flavoursome tomatoes • 1/2 onion • 1 clove garlic (optional) •25g (1 oz) butter • 225ml (71/2 fl oz) chicken stock • 7.5 ml spoon (11/2 tsp)sugar • 15ml (1 tbsp) tomato purée • 8 fresh basil leaves, roughly chopped •salt and pepper • 20g (scant 1 oz) cornflour (optional)
Fit the metal blade in the bowl. Cut the bread into cubes. Process into crumbs onspeed 2 for about 20 seconds. Place in a bowl, cover with the milk and leave tosoak for 10 mins. Chop the onion using pulse. Add the meat, herbs, bread, soysauce, sugar and seasoning. Process on speed 2 for about 20 seconds until finelychopped, but take care not to over process. Shape into walnut-sized balls and chill in the refrigerator for about 1 hour. Heat the oil and fry on a medium heat for 10 – 15 mins.
Meanwhile make the tomato sauce. Skin the tomatoes by placing in boiling water fora few minutes. Skin, cut in half and deseed. Clean the bowl and fit the metal blade.Chop the onion and garlic on speed 2 for 15-20 seconds. Melt the butter in a largepan. Cook the onion and garlic on a gentle heat for about 5 minutes until soft.Remove from the heat. Add the tomatoes, chicken stock, sugar, tomato purée, basilleaves and seasoning. Mix the cornflour with a little water and stir into the pan.Gently bring to the boil, stirring continuously until the sauce thickens. Cover andsimmer for 30 minutes. Purée the tomatoes in the liquidiser on speed 2 untilsmooth. Reheat and adjust the thickness, if necessary. Makes about 600ml (1 pint) of sauce.
Place the cooked meatballs in an ovenproof dish and pour over sufficient tomatosauce to cover them. Top with the diced goats cheese and bake in a preheatedoven at 200°C/400°F (Fan oven 190°C), Gas mark 6 for about 30 minutes untilpiping hot. Serve with bread and salad. Makes about 20 meatballs.
Try this: Served the cooked meatballs on a bed of spaghetti with the hot tomato sauce.
Desserts
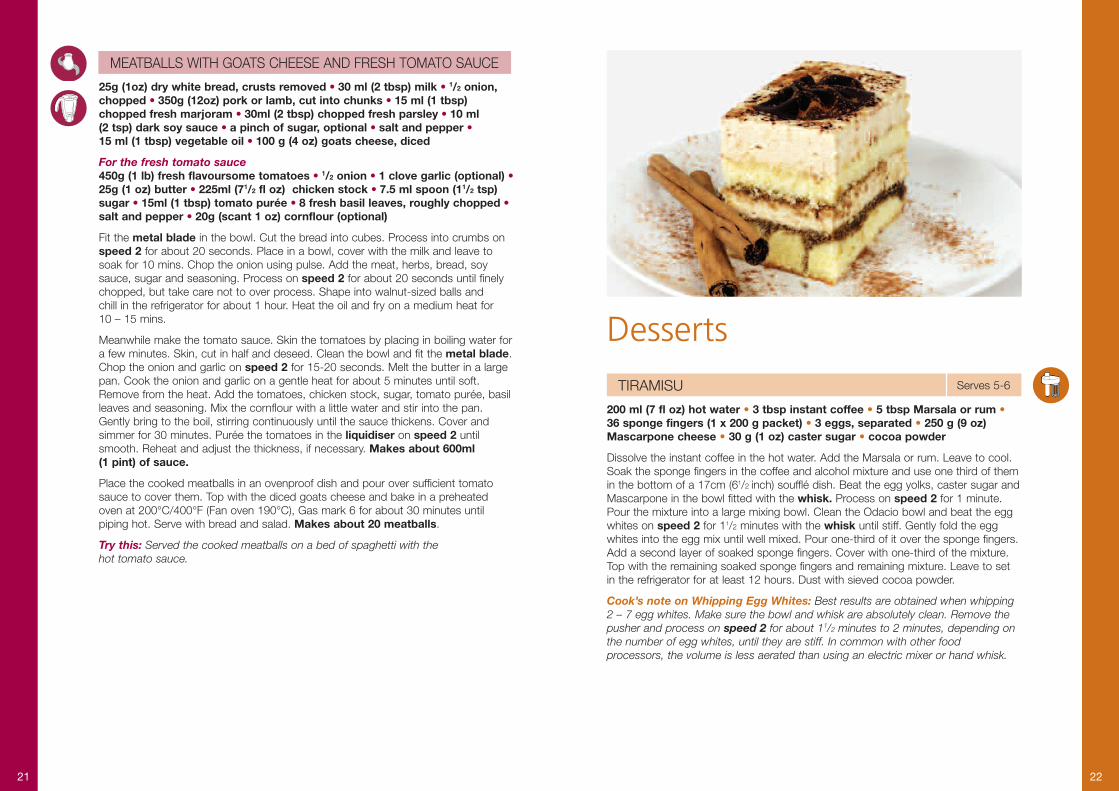
TIRAMISU Serves 5-6
200 ml (7 fl oz) hot water • 3 tbsp instant coffee • 5 tbsp Marsala or rum •36 sponge fingers (1 x 200 g packet) • 3 eggs, separated • 250 g (9 oz)Mascarpone cheese • 30 g (1 oz) caster sugar • cocoa powder
Dissolve the instant coffee in the hot water. Add the Marsala or rum. Leave to cool.Soak the sponge fingers in the coffee and alcohol mixture and use one third of themin the bottom of a 17cm (61/2 inch) soufflé dish. Beat the egg yolks, caster sugar andMascarpone in the bowl fitted with the whisk. Process on speed 2 for 1 minute.Pour the mixture into a large mixing bowl. Clean the Odacio bowl and beat the eggwhites on speed 2 for 11/2 minutes with the whisk until stiff. Gently fold the eggwhites into the egg mix until well mixed. Pour one-third of it over the sponge fingers.Add a second layer of soaked sponge fingers. Cover with one-third of the mixture.Top with the remaining soaked sponge fingers and remaining mixture. Leave to setin the refrigerator for at least 12 hours. Dust with sieved cocoa powder.
Cook’s note on Whipping Egg Whites: Best results are obtained when whipping2 – 7 egg whites. Make sure the bowl and whisk are absolutely clean. Remove thepusher and process on speed 2 for about 11/2 minutes to 2 minutes, depending onthe number of egg whites, until they are stiff. In common with other foodprocessors, the volume is less aerated than using an electric mixer or hand whisk.
2221
MINI PAVLOVAS WITH SUMMER FRUITS Makes 8
5 egg whites • 250 g (9 oz) icing sugar • pinch of salt
For the filling284 ml carton whipping cream, whipped • 450 g (1 lb) strawberries orraspberries or other summer berry fruits
Place the egg whites, icing sugar and salt in the bowl fitted with the whisk, but leavethe pusher out to allow more air in. Make sure the bowl and whisk are scrupulouslyclean otherwise the eggs will not whisk. Process on speed 2 for 8 minutes until stiff.Place 8 spoonfuls of mixture onto two baking sheets, lined with non-stick bakingparchment, and shape into 4 cm (10 in) circles. Bake in a preheated oven at110°C/225°F (Fan oven 100°C), Gas mark 1/4 for about 11/2-2 hours until firm andcrisp. Leave to cool. Top with whipped cream and cover with the fruit.
Cook’s note: This mixture can be made into meringue shells by shaping with aspoon, but is not firm enough to pipe. Alternatively, use it as a topping for LemonMeringue Pie or Baked Alaska.
PROFITEROLES WITH WARM TOFFEE SAUCE Serves 5 - 6
For the choux pastry:75 g (3 oz) butter • 225 ml (71/2 fl oz) water • 110 g (4 oz) plain flour • 3 eggs,medium size
For the filling:284 ml (10 fl oz) tub whipping cream, whipped
For the toffee sauce:115 g (4 oz) cream toffees • 75 ml (5 tbsp) double cream • 50 g (2 oz)toasted flaked almonds, for decoration
Melt the butter and water in a saucepan. When the mixture is boiling, remove fromthe heat and add the flour in one go. Beat with a wooden spoon until smooth andcomes away from the sides of the pan. Leave to cool slightly. Place the paste in thebowl fitted with the plastic kneader. With the machine running on speed 1 add theeggs one at a time through the feed tube. Increase to speed 2 and process foranother 1 minute.
Using a teaspoon place walnut size spoonfuls of mixture on a greased baking tray.Allow a little space between each spoonful as they will swell during cooking. Bake inbatches in a preheated oven at 220°C/425°F, gas mark 7 for about 20-25 minutesor until crisp, well puffed and golden brown. Lift onto a wire rack and make a smallhole in the base to release any steam. Leave to cool.
Fill the cooled choux puffs with the whipped cream.
Prepare the toffee sauce at the last minute so it can be served warm. In a saucepan melt the toffees on a low heat, stirring all the time. When half melted, add the double cream and keep mixing until all the toffees have melted. Pile theprofiteroles in individual dishes, pour over the warm sauce and sprinkle over thetoasted flaked almonds.
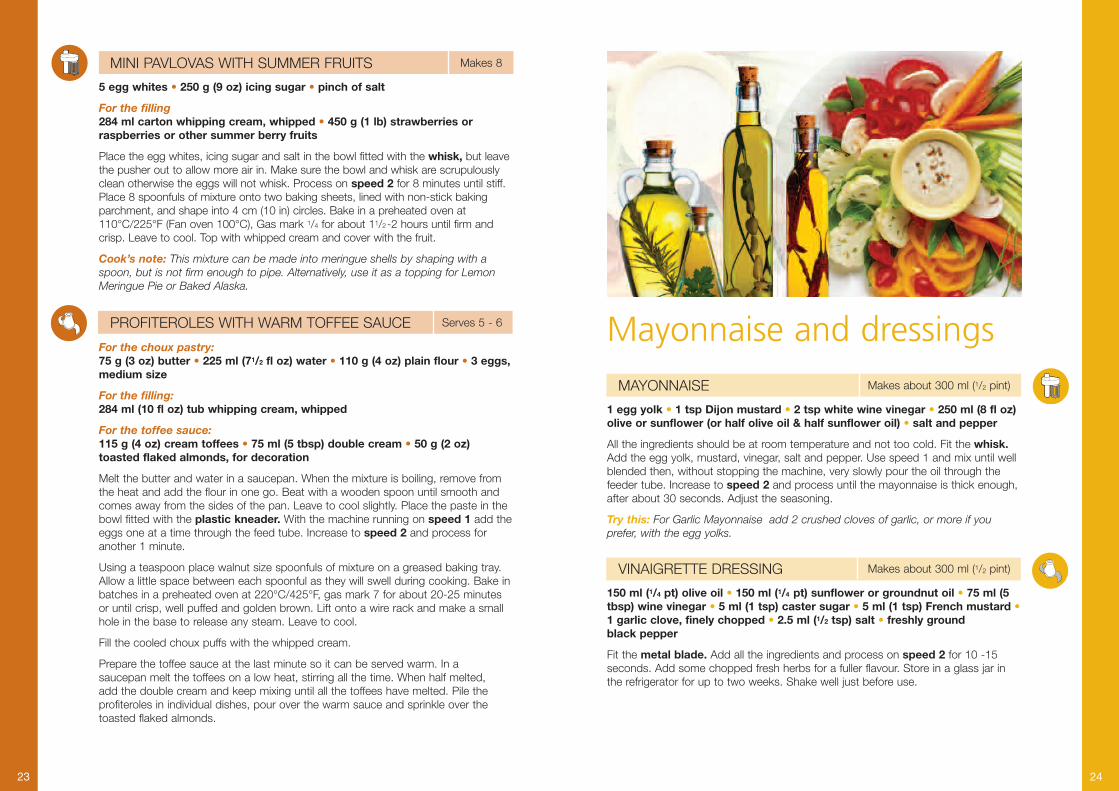
Mayonnaise and dressings
MAYONNAISE Makes about 300 ml (1/2 pint)
1 egg yolk • 1 tsp Dijon mustard • 2 tsp white wine vinegar • 250 ml (8 fl oz)olive or sunflower (or half olive oil & half sunflower oil) • salt and pepper
All the ingredients should be at room temperature and not too cold. Fit the whisk.Add the egg yolk, mustard, vinegar, salt and pepper. Use speed 1 and mix until wellblended then, without stopping the machine, very slowly pour the oil through thefeeder tube. Increase to speed 2 and process until the mayonnaise is thick enough,after about 30 seconds. Adjust the seasoning.
Try this: For Garlic Mayonnaise add 2 crushed cloves of garlic, or more if youprefer, with the egg yolks.
VINAIGRETTE DRESSING Makes about 300 ml (1/2 pint)
150 ml (1/4 pt) olive oil • 150 ml (1/4 pt) sunflower or groundnut oil • 75 ml (5tbsp) wine vinegar • 5 ml (1 tsp) caster sugar • 5 ml (1 tsp) French mustard •1 garlic clove, finely chopped • 2.5 ml (1/2 tsp) salt • freshly ground black pepper
Fit the metal blade. Add all the ingredients and process on speed 2 for 10 -15seconds. Add some chopped fresh herbs for a fuller flavour. Store in a glass jar inthe refrigerator for up to two weeks. Shake well just before use.
2423
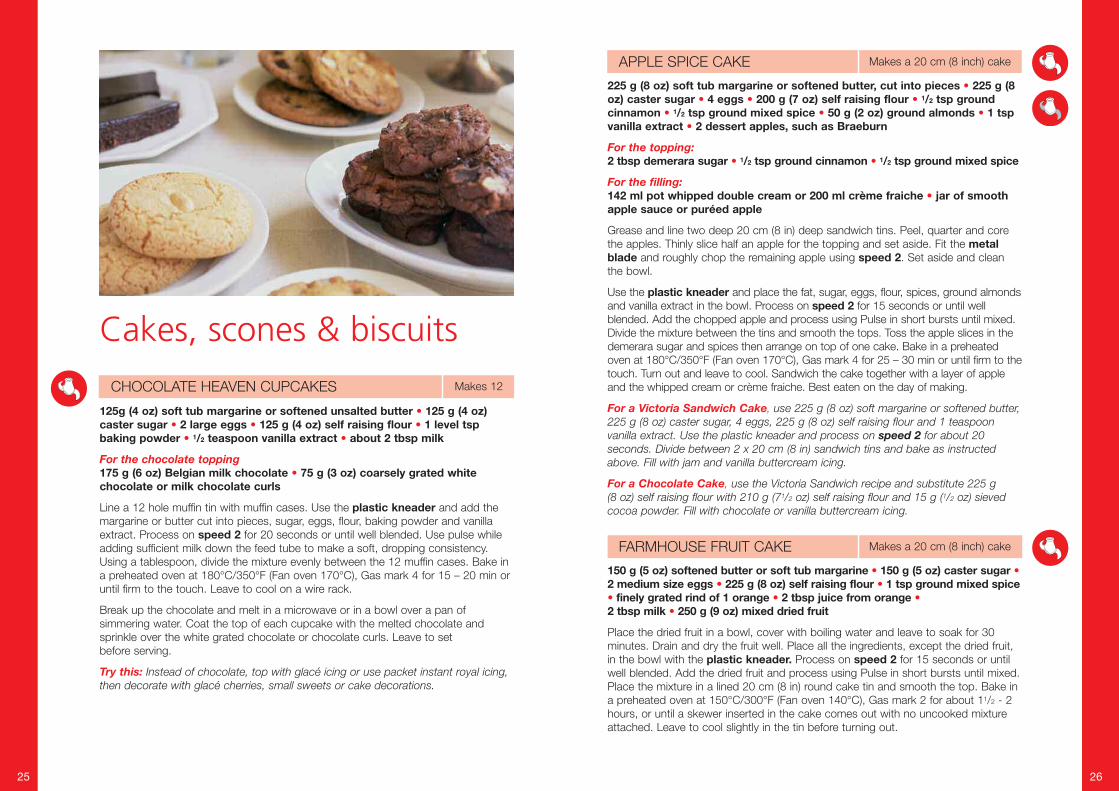
Cakes, scones & biscuits
CHOCOLATE HEAVEN CUPCAKES Makes 12
125g (4 oz) soft tub margarine or softened unsalted butter • 125 g (4 oz)caster sugar • 2 large eggs • 125 g (4 oz) self raising flour • 1 level tspbaking powder • 1/2 teaspoon vanilla extract • about 2 tbsp milk
For the chocolate topping175 g (6 oz) Belgian milk chocolate • 75 g (3 oz) coarsely grated whitechocolate or milk chocolate curls
Line a 12 hole muffin tin with muffin cases. Use the plastic kneader and add themargarine or butter cut into pieces, sugar, eggs, flour, baking powder and vanillaextract. Process on speed 2 for 20 seconds or until well blended. Use pulse whileadding sufficient milk down the feed tube to make a soft, dropping consistency.Using a tablespoon, divide the mixture evenly between the 12 muffin cases. Bake ina preheated oven at 180°C/350°F (Fan oven 170°C), Gas mark 4 for 15 – 20 min oruntil firm to the touch. Leave to cool on a wire rack.
Break up the chocolate and melt in a microwave or in a bowl over a pan ofsimmering water. Coat the top of each cupcake with the melted chocolate andsprinkle over the white grated chocolate or chocolate curls. Leave to set before serving.
Try this: Instead of chocolate, top with glacé icing or use packet instant royal icing,then decorate with glacé cherries, small sweets or cake decorations.
APPLE SPICE CAKE Makes a 20 cm (8 inch) cake
225 g (8 oz) soft tub margarine or softened butter, cut into pieces • 225 g (8oz) caster sugar • 4 eggs • 200 g (7 oz) self raising flour • 1/2 tsp groundcinnamon • 1/2 tsp ground mixed spice • 50 g (2 oz) ground almonds • 1 tspvanilla extract • 2 dessert apples, such as Braeburn
For the topping:2 tbsp demerara sugar • 1/2 tsp ground cinnamon • 1/2 tsp ground mixed spice
For the filling:142 ml pot whipped double cream or 200 ml crème fraiche • jar of smoothapple sauce or puréed apple
Grease and line two deep 20 cm (8 in) deep sandwich tins. Peel, quarter and corethe apples. Thinly slice half an apple for the topping and set aside. Fit the metalblade and roughly chop the remaining apple using speed 2. Set aside and clean the bowl.
Use the plastic kneader and place the fat, sugar, eggs, flour, spices, ground almondsand vanilla extract in the bowl. Process on speed 2 for 15 seconds or until wellblended. Add the chopped apple and process using Pulse in short bursts until mixed.Divide the mixture between the tins and smooth the tops. Toss the apple slices in thedemerara sugar and spices then arrange on top of one cake. Bake in a preheatedoven at 180°C/350°F (Fan oven 170°C), Gas mark 4 for 25 – 30 min or until firm to thetouch. Turn out and leave to cool. Sandwich the cake together with a layer of appleand the whipped cream or crème fraiche. Best eaten on the day of making.
For a Victoria Sandwich Cake, use 225 g (8 oz) soft margarine or softened butter,225 g (8 oz) caster sugar, 4 eggs, 225 g (8 oz) self raising flour and 1 teaspoonvanilla extract. Use the plastic kneader and process on speed 2 for about 20seconds. Divide between 2 x 20 cm (8 in) sandwich tins and bake as instructedabove. Fill with jam and vanilla buttercream icing.
For a Chocolate Cake, use the Victoria Sandwich recipe and substitute 225 g (8 oz) self raising flour with 210 g (71/2 oz) self raising flour and 15 g (1/2 oz) sievedcocoa powder. Fill with chocolate or vanilla buttercream icing.
FARMHOUSE FRUIT CAKE Makes a 20 cm (8 inch) cake
150 g (5 oz) softened butter or soft tub margarine • 150 g (5 oz) caster sugar • 2 medium size eggs • 225 g (8 oz) self raising flour • 1 tsp ground mixed spice• finely grated rind of 1 orange • 2 tbsp juice from orange • 2 tbsp milk • 250 g (9 oz) mixed dried fruit
Place the dried fruit in a bowl, cover with boiling water and leave to soak for 30minutes. Drain and dry the fruit well. Place all the ingredients, except the dried fruit,in the bowl with the plastic kneader. Process on speed 2 for 15 seconds or untilwell blended. Add the dried fruit and process using Pulse in short bursts until mixed.Place the mixture in a lined 20 cm (8 in) round cake tin and smooth the top. Bake ina preheated oven at 150°C/300°F (Fan oven 140°C), Gas mark 2 for about 11/2 - 2hours, or until a skewer inserted in the cake comes out with no uncooked mixtureattached. Leave to cool slightly in the tin before turning out.
2625
ALMOND SHORTBREAD BISCUITS Makes about 16
50g (2 oz) caster sugar • 120g (41/2 oz) plain flour • 85g (3oz) groundalmonds • 85g (3oz) softened butter, straight from the fridge • 1 egg yolk
Fit the plastic kneader. Add the sugar, flour and almonds. Cut the butter into piecesand add to the bowl. Process on speed 2 for 10 seconds until the mixture is like finebreadcrumbs. Add the egg yolk and process for on speed 2 for about 15-20seconds until mixed. Turn the mixture onto a floured surface and press together withyour fingertips to form a smooth ball. Roll out to about 3 mm (1/8 inch) thickness.Cut out rounds using a 7 cm (3 inch) cutter. Place on non-stick baking trays and bakein a preheated oven at 180°C/350°F (Fan oven 170°C), Gas mark 4 for 12-15minutes until a light golden brown. Cool slightly before transferring to a wire rack.
DEVON SCONES WITH WHIPPED CREAM Makes about 6 - 8
225 g (8 oz) self raising flour • 2.5 ml (1/2 tsp) cream of tartar • 2.5 ml (1/2 tsp)baking powder • pinch of salt • 15 g (1/2 oz) caster sugar • 50g (2 oz) butter,straight from the fridge cut into cubes • 1 medium size egg • about 75 ml (3 fl oz) milk
For the whipped cream284 ml carton whipped cream • 1 tsp caster sugar • jam and butter, to serve
Place the flour, cream of tartar, baking powder, salt and sugar in the bowl with theplastic kneader. Process briefly to mix. Add the butter and process on speed 2 for10-15 seconds, until the mixture resembles breadcrumbs. Beat the egg and milktogether in jug. With the machine still running, add the egg mixture through the feedtube, and process for a few seconds until it binds together. Take care not to overprocess. Tip out onto a lightly floured surface and lightly knead into a smooth ball.Roll out to about 2 cm (3/4 inch) thickness. Cut into rounds using a 5 cm (2 inch)cutter. Place on a greased baking tray and brush the tops with milk. Bake in apreheated oven at 200°C/400°F (Fan oven 190°C), Gas mark 6 for about 10 -15minutes until risen and golden brown. Leave to cool.
To whip the cream, fit the whisk in the bowl. Add the cream and sugar. Process onspeed 1 for about 1 minute. Stop frequently to check on the consistency to avoidover whipping. Serve the scones split and buttered with whipped cream and jam.
Try this: Add 25 g (1 oz) glace cherries and 1 teaspoon ground ginger to the dryingredients to make Cherry and Ginger Scones.
For Cheese Scones omit the sugar and add 50 (2 oz) mature cheddar cheesegrated using the fine grating disc (H) plus a pinch of dry mustard powder.
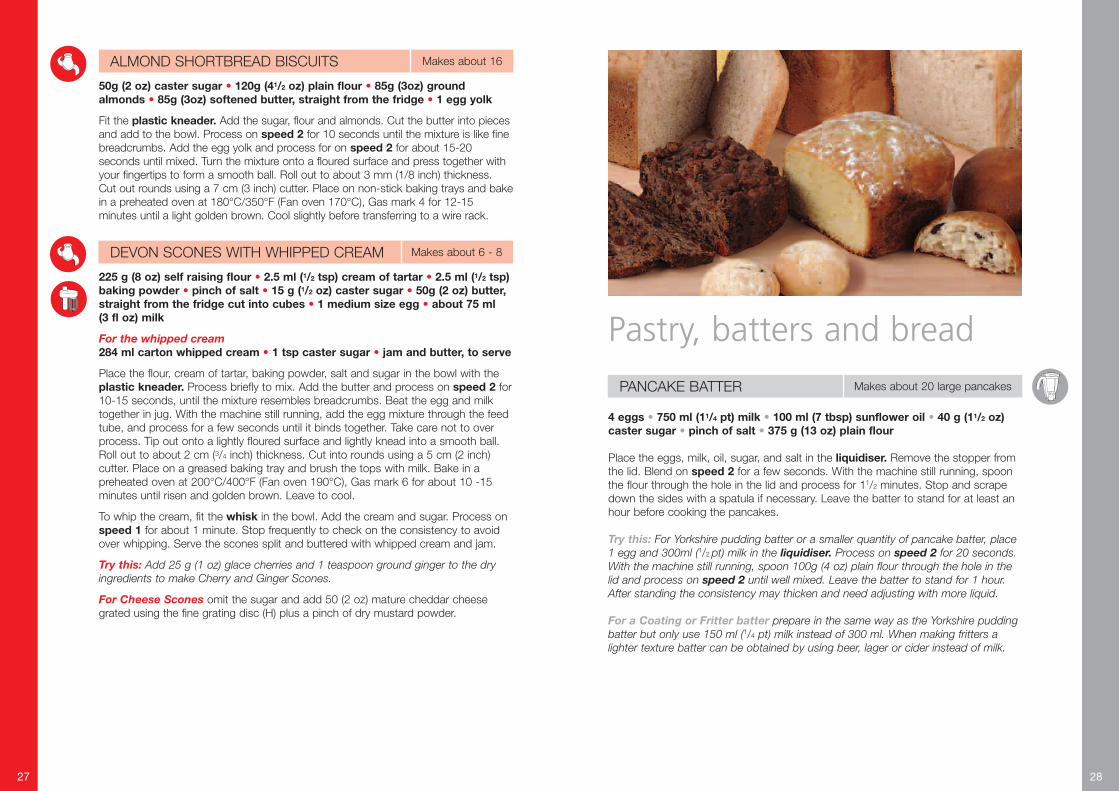
Pastry, batters and bread
PANCAKE BATTER Makes about 20 large pancakes
4 eggs • 750 ml (11/4 pt) milk • 100 ml (7 tbsp) sunflower oil • 40 g (11/2 oz)caster sugar • pinch of salt • 375 g (13 oz) plain flour
Place the eggs, milk, oil, sugar, and salt in the liquidiser. Remove the stopper fromthe lid. Blend on speed 2 for a few seconds. With the machine still running, spoonthe flour through the hole in the lid and process for 11/2 minutes. Stop and scrapedown the sides with a spatula if necessary. Leave the batter to stand for at least anhour before cooking the pancakes.
Try this: For Yorkshire pudding batter or a smaller quantity of pancake batter, place1 egg and 300ml (1/2 pt) milk in the liquidiser. Process on speed 2 for 20 seconds.With the machine still running, spoon 100g (4 oz) plain flour through the hole in thelid and process on speed 2 until well mixed. Leave the batter to stand for 1 hour.After standing the consistency may thicken and need adjusting with more liquid.
For a Coating or Fritter batter prepare in the same way as the Yorkshire puddingbatter but only use 150 ml (1/4 pt) milk instead of 300 ml. When making fritters alighter texture batter can be obtained by using beer, lager or cider instead of milk.
2827
RUSTIC WHITE BREAD This recipe makes one loaf or 8 -10 rolls
For 800 g (13/4 lb) of white bread dough: 500 g (1lb 2oz) strong white breadflour • 10ml (2 tsp) Easybake or Fast Action dried yeast • 5 ml (1 tsp) salt •2.5 ml (1/2 tsp) sugar • 10 ml (2 tsp) vegetable oil • 300 ml (1/2 pt) warm water (1 part boiling water to 2 parts cold) • milk, to glaze • poppy seeds, sesameseeds or coarse oatmeal (optional)
Grease and warm sufficient baking sheets. Fit the plastic kneader. Place the flour,yeast, salt, sugar and oil in the bowl. Select speed 2 and mix together for a fewseconds then, with the machine running, add the warm water through the feed tube.Process for about a further 40 seconds until the dough forms a ball. On a lightlyfloured surface, knead by hand until smooth.
If making a loaf, shape into a ball and place on a greased baking tray or use a 900 g(2 lb) loaf tin. If making rolls, cut the dough into 8 - 10 pieces, knead each piece andshape into balls. Place on the greased baking sheets, leaving space between therolls for them to expand. Loosely cover the shaped dough with oiled polythene.Leave to rise in a warm place, such as an airing cupboard, for about 1 hour or untildoubled in size. Slash the top of the loaf with a sharp knife. For a crisp crust, brushwith a little milk and scatter with seeds.
Bake in a preheated oven at 220°C/425°F (Fan oven 210°C), Gas mark 7 for 15 - 20minutes for rolls. For the loaf, bake for 20 minutes and then reduce to 180°C/350°F(Fan oven 170°C), Gas mark 4 and bake for a further 15 minutes. To test, tap thebase of the bread and it should sound hollow. Remove from the trays and cool on awire rack.
Try this: For Wholemeal Bread use strong wholemeal bread flour, or half strongwholemeal bread flour and half strong white bread flour, plus increase the warmwater to 325 ml (11 fl oz). For Brown Bread use the same quantities in the recipeabove, but substitute strong brown bread flour for strong white bread flour.
SHORTCRUST PASTRY
For 350 g of pastry
200g (8 oz) plain flour • 50 g (2 oz) block margarine, straight from the fridge• 50 g (2 oz) lard, straight from the fridge • 5 ml (1 tsp) salt • about 50 ml (3 tbsp) cold water
Fit the plastic kneader. Put the flour and salt in the bowl. Process for a fewseconds on speed 2 to mix. Cut the fat into pieces and add to the bowl. Processon speed 2 for about 15 seconds until the mixture resembles fine breadcrumbs.Pour the water through the feeder tube while the processor is running and processfor about 10 seconds until the dough just forms a ball. Remove and knead lightlyuntil smooth. Wrap the pastry in cling film or foil, and chill for at least 30 minutesbefore using. Use to make pies, flans, fruit tarts and jam tarts.
Try this: If preferred you can use 100 g (4 oz) block margarine instead of margarine and lard.
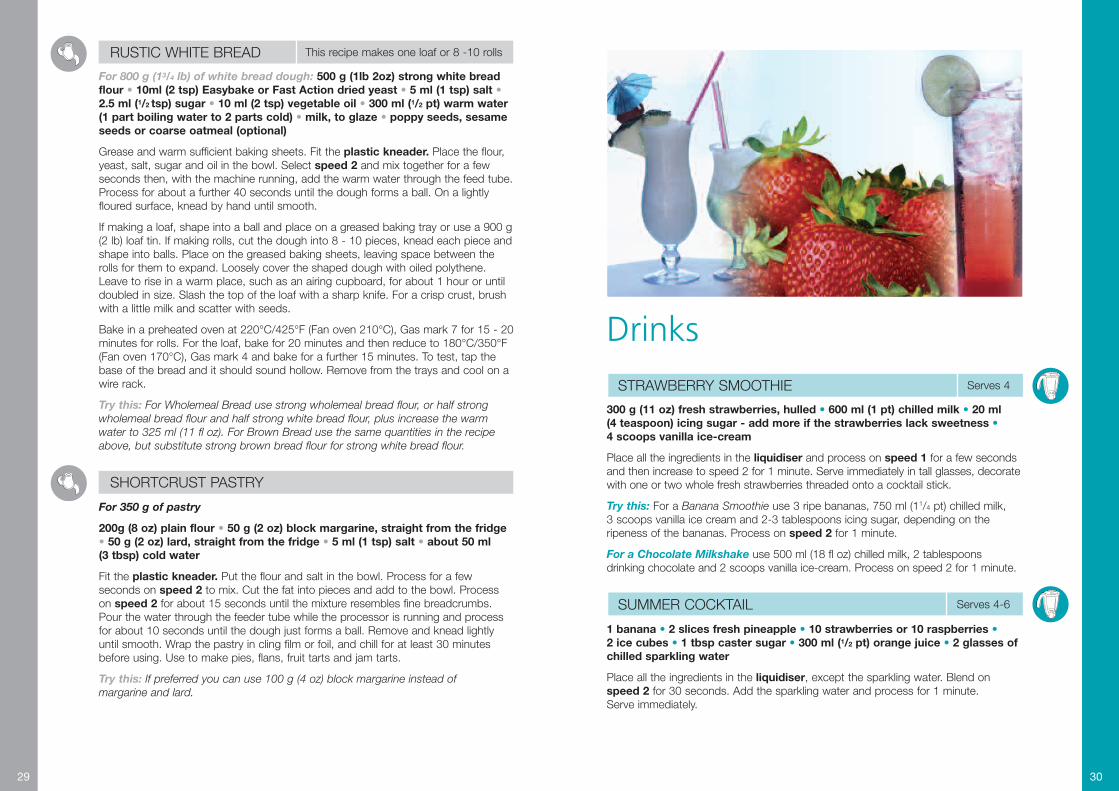
Drinks
STRAWBERRY SMOOTHIE Serves 4
300 g (11 oz) fresh strawberries, hulled • 600 ml (1 pt) chilled milk • 20 ml (4 teaspoon) icing sugar - add more if the strawberries lack sweetness • 4 scoops vanilla ice-cream
Place all the ingredients in the liquidiser and process on speed 1 for a few secondsand then increase to speed 2 for 1 minute. Serve immediately in tall glasses, decoratewith one or two whole fresh strawberries threaded onto a cocktail stick.
Try this: For a Banana Smoothie use 3 ripe bananas, 750 ml (11/4 pt) chilled milk, 3 scoops vanilla ice cream and 2-3 tablespoons icing sugar, depending on theripeness of the bananas. Process on speed 2 for 1 minute.
For a Chocolate Milkshake use 500 ml (18 fl oz) chilled milk, 2 tablespoonsdrinking chocolate and 2 scoops vanilla ice-cream. Process on speed 2 for 1 minute.
SUMMER COCKTAIL Serves 4-6
1 banana • 2 slices fresh pineapple • 10 strawberries or 10 raspberries • 2 ice cubes • 1 tbsp caster sugar • 300 ml (1/2 pt) orange juice • 2 glasses ofchilled sparkling water
Place all the ingredients in the liquidiser, except the sparkling water. Blend onspeed 2 for 30 seconds. Add the sparkling water and process for 1 minute. Serve immediately.
3029