Embed Size (px)
Citation preview

Office 365 Business Essentials and Business Premium with Symantec/MailDefender Plus Deployment Guide V2.0
January 2015

Office 365 Business Essentials and Business Premium – Deployment Guide
V2.0
January 2015
Table of Contents
1. Provisioning Office 365 ............................................................................................................ 1
1.1 Operating system requirements ............................................................................................. 1
1.2 Browser Requirements—Administration Centre and My Company Portal ............................ 1
1.3 Configuring with Symantec.cloud or MailDefender Plus ........................................................ 2
2. Obtaining your login credentials & Logging In ........................................................................ 2
3. Completing the Setup Wizard.................................................................................................. 2
3.1 Choose a Domain .................................................................................................................... 3
3.2 Add your Domain .................................................................................................................... 3
3.2.1 Specify a domain name and confirm ownership ..................................................................... 4
3.2.2 Confirm Ownership ................................................................................................................. 4
3.3 Add users and assign licenses ................................................................................................. 5
3.3.1 Add users manually ................................................................................................................. 5
3.3.2 Bulk add users with a .CSV file ................................................................................................. 6
3.3.3 Synchronise users from an Active Directory Environment (optional) ..................................... 7
3.3.4 Additional (optional) User Configuration ................................................................................ 7
3.3.4.1 Add User Aliases via Exchange Control Panel ......................................................................... 7
3.3.5 Add Distribution Groups .......................................................................................................... 8
3.4 Set the domain purpose and configure DNS ........................................................................... 9
3.4.1 Configuring the MX Records (Mail Exchange Records) ........................................................... 9
3.4.2 Additional Required DNS Records ......................................................................................... 10
4. Migrate legacy data (Optional) .............................................................................................. 10
4.1 From an existing exchange system ....................................................................................... 11
4.2 From an IMAP system ........................................................................................................... 11
4.3 From all other systems .......................................................................................................... 12
5. Start using your services ........................................................................................................ 12
6. Configure your mail scanning service .................................................................................... 12
6.1 Configure Symantec Protect.Cloud/MailDefender Plus and Live Switch to Office 365 ........ 13
6.2 Obtain your log in credentials for the Symantec Management Portal ................................. 13
6.3 Domains ................................................................................................................................ 14
6.4 Inbound Routes ..................................................................................................................... 15
6.4.1 Example text on inbound route verification email ................................................................ 16

Office 365 Business Essentials and Business Premium – Deployment Guide
V2.0
January 2015
6.5 Outbound Routes .................................................................................................................. 17
6.5.1 For Symantec Protect.Cloud: ................................................................................................. 18
6.5.2 For MailDefender Plus: .......................................................................................................... 18
6.6 Address Registration ............................................................................................................. 18
6.7 Cloud Security Services IP Ranges ......................................................................................... 19
6.8 SPF ......................................................................................................................................... 20
6.8.1 For Symantec Protect.Cloud .................................................................................................. 20
6.8.2 For MailDefender Plus ........................................................................................................... 20
6.9 MX Records ........................................................................................................................... 21
6.9.1 For Symantec Protect.Cloud customers: ............................................................................... 21
6.9.2 For MailDefender Plus customers ......................................................................................... 21
6.10 Redirecting inbound email traffic to the Email Services Infrastructure ............................... 22
6.10.1 Important Considerations ..................................................................................................... 22
7. Configure end user PC’s ......................................................................................................... 23
7.1 Install Office .......................................................................................................................... 23
7.2 Sync your OneDrive Library to your PC ................................................................................. 24
7.3 Install Office 365 Pro Plus on an RDS Server (Optional) ....................................................... 24
7.4 Install shortcuts and configure Outlook ................................................................................ 25
7.4.1 Configure Outlook manually .................................................................................................. 26
8. Setting up Mobile Devices ..................................................................................................... 29
9. Support and the future .......................................................................................................... 30

Office 365 Business Essentials and Business Premium – Deployment Guide
V2.0
January 2015
P a g e | 1
1. Provisioning Office 365
This plan will guide you through the required steps to deploy the intY Office 365 Business and Pro Plus services successfully into your environment. In order to increase the success criteria please follow these steps in sequential order.
1.1 Operating system requirements
Windows 7, Windows 8 (RTM).
Mac OS X 10.6 or later.
1.2 Browser Requirements—Administration Centre and My Company Portal
Internet Explorer 10
Latest Firefox “Release” version
Latest Safari version
Latest Chrome “Stable” version
Note: Outlook Web App also has a light version that supports a reduced set of features across
almost any browser.
Note for Mac users: At this time Communicator for Mac 2011 will not work with Office 365. See FAQ for additional information about Mac-related system requirements.
Any users who utilise a PC not meeting the required specification for any of the above options must utilise the Outlook Web Access portal available at:
https://Portal.office.com
Shared computer activation for Office Professional Plus in Office 365:
Shared computer activation lets you to deploy Office 365 ProPlus to a computer in your organization that is accessed by multiple users. For example, several nurses at a hospital connect to the same remote server to use their applications or a group of workers share a computer at a factory.
The most common shared computer activation scenario is to deploy Office 365 ProPlus to shared computers by using Remote Desktop Services (RDS). By using RDS, multiple users can connect to the same remote computer at the same time. The users can each run Office 365 ProPlus programs, such as Word or Excel, at the same time on the remote computer.
Shared computer activation is used only for situations where multiple users share the same computer. If you have users who are assigned individual computers, you use product key activation for Office 365 ProPlus. For further information and to learn how to enable shared computer activation please see the link below.
http://technet.microsoft.com/en-us/library/dn782860%28v=office.15%29.aspx

Office 365 Business Essentials and Business Premium – Deployment Guide
V2.0
January 2015
P a g e | 2
1.3 Configuring with Symantec.cloud or MailDefender Plus
If you have purchased your Office 365 subscription with Symantec.cloud or MailDefender Plus and intend to use Symantec.cloud or MailDefender Plus for Anti-Spam and Anti-Virus then please ensure that you follow the steps within phase 6 to configure your relevant service to relay mail for your Office 365 services.
2. Obtaining your login credentials & Logging In
From the Services screen listed in Cascade, click the Actions button for the relevant subscription and select the Details option. Once the subscription is active, you will find the administrator username and password listed here. You will also find a default onmicrosoft.com domain which is used for internal Office 365 purposes but can also be used as an external domain. For example:
Once you have your login credentials, please follow the steps below:
Go to the Administration Centre (https://portal.microsoftonline.com)
When prompted, sign in with credentials provided in CASCADE (PLEASE NOTE: Your password is
Case Sensitive)
For security reasons the password provided in Cascade is a one-time password and you will be
required to reset this upon first login.
3. Completing the Setup Wizard
Upon logging into the administration portal with an administrator account, select the Setup menu on the left menu bar and then select basic setup to begin planning your migration.

Office 365 Business Essentials and Business Premium – Deployment Guide
V2.0
January 2015
P a g e | 3
Note: please be aware that the custom setup plan is designed for large organisations with a dedicated on-staff IT contact responsible for maintaining services. Active Directory synchronisation requires a number of additional steps and falls outside of the scope of this deployment planning document though relevant information is referred to where applicable.
3.1 Choose a Domain
By default Microsoft will have configured your account on a “.onmicrosoft” version of the domain you have provisioned on. You can continue to use this domain as all DNS records are pre-polulated for you. Alternatively you can decide to add your own custom domain.
3.2 Add your Domain
You can add your domain to Office 365 either through clicking the ‘Start’ button on the Basic Setup option or by selecting ‘Domains’ from the left hand navigation menu within the Office 365 portal. The wizard which will guide you through adding and authenticating your domain will be the same regardless of which option you select.
Upon the wizard launching immediately click the ‘Let’s get started’ link to begin.

Office 365 Business Essentials and Business Premium – Deployment Guide
V2.0
January 2015
P a g e | 4
3.2.1 Specify a domain name and confirm ownership
You can only add domain names that you own. If you don't already own a domain, you can buy one from a domain registrar, and then come back and add it to Office 365. Otherwise specify your domain name by typing it into the field provided and then select Next.
3.2.2 Confirm Ownership
Before you set up your domain with Office 365, you’re required to add a specific record to the DNS records at your DNS hosting provider to confirm ownership.
Contact your domain host and request that they add the TXT record shown on screen. Alternatively if you have the ability to update DNS records yourself via a self service portal provided by your domain host, you should login and add this record immediately.

Office 365 Business Essentials and Business Premium – Deployment Guide
V2.0
January 2015
P a g e | 5
NOTE: the above is an example of a TXT record value. This value will be generic to your domain so please ensure that you add the record presented to you within your Office 365 tenant.
These changes will usually take around 15 minutes to update. Once the relevant DNS record has been added click the ‘done, verify now’ button. If the DNS records have been updated you will receive a final confirmation message to confirm the domain has been verified.
Click Finish to proceed.
3.3 Add users and assign licenses
Once you have added your domain you will now be prompted to add users using the domain name. You will be prompted with 3 options:
Add Users One at a time
Bulk Add Users with a CSV File
I don’t want to add users right now
3.3.1 Add users manually
To add users one at a time simply fill in the fields shown on screen to create each user account. Please ensure that all fields are filled before clicking add user.
You will now receive confirmation that the user has been created along with their temporary login details:
An email will also have been sent to the address specified when creating the user with the users login details.
Once complete click Close.

Office 365 Business Essentials and Business Premium – Deployment Guide
V2.0
January 2015
P a g e | 6
You will now be redirected back to the Office 365 dashboard. Select Users -> Active Users to manually add another user by clicking the + icon.
3.3.2 Bulk add users with a .CSV file
To Bulk add users select a CSV file containing user information. To see and example template select the Download a sample CSV File.
The only required fields are User Name and Display Name. All other fields are optional.
Once you have completed the CSV file, click the Browse.. option from the Office 365 portal and select your CSV file, then click Next.
You will now be prompted with the Verification results detailing whether the users in the CSV file you have imported have been created or whether there was any errors.

Office 365 Business Essentials and Business Premium – Deployment Guide
V2.0
January 2015
P a g e | 7
If there were any errors, please view the Log File available and correct any problems reported and then resubmit. Once successful, select Next
Then specify the user location then select Next
Now you will be prompted to assign the users licenses. If you have multiple subscriptions you can skip this section now and assign them to users at a later date. Otherwise specify the license selections you require and then click Next
Specify an email address to send the Users temporary login details to and then select Create. All of the users login details will now appear for your reference and a copy of these details emailed to the email address you have specified. Click Close to continue.
3.3.3 Synchronise users from an Active Directory Environment (optional)
While the standard migration plan does not detail configuration options for Active Directory Synchronization (DirSync) or Single Sign On (AD FS / SSO) information on these resources is available from the following Microsoft help topics:
Active Directory synchronization: Roadmap –
http://onlinehelp.microsoft.com/en-us/office365-enterprises/ff652543.aspx
Single sign-on roadmap –
http://onlinehelp.microsoft.com/en-us/office365-enterprises/hh125004.aspx
3.3.4 Additional (optional) User Configuration
3.3.4.1 Add User Aliases via Exchange Control Panel
1. Navigate to: https://portal.office.com
2. Log in using an account with Administrator rights
3. Select the admin drop-down and then click Exchange
4. Select mailboxes under the Recipients header
5. Select each user account by double-clicking their Display Name and clicking the email address

Office 365 Business Essentials and Business Premium – Deployment Guide
V2.0
January 2015
P a g e | 8
6. Click the add button icon ( ) and enter the new email address required. Please note that standard email aliases will be of the SMTP type. Other options available are for advanced use. If this email address is intended to be the primary sending
address of the user, please ensure the make this the reply address box is ticked. Finally, click ok to confirm.
7. Click save to complete the wizard. Any errors will be alerted at this point.
8. Repeat steps 5 to 7 for all users who require additional aliases.
3.3.5 Add Distribution Groups
1. Navigate to: https://portal.office.com
2. Log in using an account with Administrator rights
3. Select the admin drop-down and then click Exchange

Office 365 Business Essentials and Business Premium – Deployment Guide
V2.0
January 2015
P a g e | 9
4. Select groups under the Recipients header.
5. Click the add button icon ( ) then distribution group to create a new distribution
group.
6. Enter the required information into the pop up window to configure the new distribution group. Mandatory fields are marked with an asterisk. Additional fields can be entered by clicking additional details. Click save to complete the wizard.
7. If the distribution group must be open to email from external senders (users outside of the accounts on Office 365) it is important to double-click and re-open the group
then select delivery management on the left menu bar. From here, highlight the option for accepting mail from senders inside and outside of my organization. Click save to complete the wizard.
3.4 Set the domain purpose and configure DNS
Once you have verified ownership of the domain you now have to configure your Domain purpose by selecting which services you wish to use it with.
Please be aware that you cannot use a domain for SharePoint and for any other service as this option refers to public web hosting not site collections. If all three services are required, please use a subdomain (e.g. www.mydomain.com) for SharePoint.
Click done, go check to continue.
3.4.1 Configuring the MX Records (Mail Exchange Records)
If you have purchased a 3rd party Anti-Spam or Anti-Virus software such as Symantec Protect.cloud or MailDefender Plus then you may be required to ignore the MX record that Office 365 asks for you to add to your DNS. If you are planning on using Office 365 as a standalone service then proceed with adding this MX record to relay emails directly to Office 365.

Office 365 Business Essentials and Business Premium – Deployment Guide
V2.0
January 2015
P a g e | 10
1. If relaying direct to Office 365 (without Anti-Spam/ Anti-Virus mail relay)
Add this MX records into your DNS records
2. If you have purchase Syamntec.cloud in conjunction with Office 365
See Appendix 10.1 Note: If you have purchased Office 365 in conjunction with Symantec Protect.cloud or MailDefender Plus then Office 365 will be unable to verify you have added all of the required DNS entries and be unable to complete this step of the setup wizard. However as long as you have followed the details in the relevant Appendix this will not affect functionality and you can continue with your deployment by selecting Cancel.
3.4.2 Additional Required DNS Records
All of the other DNS records that are provided here should be added to your DNS via your domain provider. For details of how to add these records please contact your domain provider.
Note: The TXT record for Exchange Online is an optional record and does not need to be added to DNS. For more information on SPF records please see (http://www.openspf.org/Introduction)
4. Migrate legacy data (Optional)
If you are moving from an existing mail platform then you may wish to move the users’ mailbox data to Office 365 now. Therefore there are some useful guides available through this step as to how to go about moving your mailboxes from your existing mail platform onto office 365.
The topics covered are:

Office 365 Business Essentials and Business Premium – Deployment Guide
V2.0
January 2015
P a g e | 11
Migrate IMAP mailboxes
Import email data from your users’ PST files
Use a Cutover Exchange migration
Data can be imported from existing email systems by a number of options depending on the existing environment. All data can be transferred from Exchange 2003 & 2007 systems or just mail can be imported via IMAP via the admin portal. For other systems, PST files must be backed up and imported into the new system. To begin a new migration, please follow the steps below:
1. Navigate to: https://portal.office.com
2. Log in using an account with Administrator rights
3. Select the admin drop-down and then click Exchange
4. Select recipients on the left menu bar then migration along the top menu bar
5. Click the add button icon ( ) then migrate to exchange online
4.1 From an existing exchange system
Email migration is supported from existing Exchange Environments running Exchange 2003 or above.
Migrations with these systems will require an SSL certificate from a valid Certificate Authority to be
installed prior to beginning the data import process. Once this has been completed and the settings
are available, the process can be access by selecting the Cutover migration option following phase
6’s initial steps.
From here, please review the following documentation on setting up the migration
prerequisites and starting a migration batch:
http://technet.microsoft.com/en-us/library/jj898490(v=exchg.150).aspx
4.2 From an IMAP system
IMAP can be used to import emails from an existing system, but please be aware that this process
only supports email transfer; calendars and contacts must be migrated separately either by PSTs or

Office 365 Business Essentials and Business Premium – Deployment Guide
V2.0
January 2015
P a g e | 12
manual export to other support file types. To begin the migration, select the cutover migration
option following phase 6’s initial steps.
From here, please review the following documentation on setting up the migration
prerequisites and starting a migration batch:
http://technet.microsoft.com/en-us/library/jj200751(v=exchg.150).aspx
4.3 From all other systems
If your existing email system is not a Microsoft Exchange environment, you will need to export all users legacy email as PST files from within Outlook.
http://technet.microsoft.com/en-us/library/hh781036.aspx
When a new Outlook profile is created by Office 365, you as the system administrator will need to use the import/Export function within Outlook to import each user’s exported PST files. Once imported the office 365 mailbox will begin synchronizing back to Microsoft servers. Once the Synchronization is complete all emails will be available on the users Outlook and Outlook Web Access.
NOTE: We recommend that the import of legacy data is staggered across your user base as the synchronization process will increase traffic on your broadband line which may affect its performance during this time.
Please follow the relevant instructions to migrate your data. Once you have the required information proceed with the setup by clicking Done.
NOTE: If you have purchased MigrationWiz to migrate your organisations existing data to Office 365, please follow the MigrationWiz quick start guide to perform your data migration now. Return to this document one you have successfully run your first pass within MigrationWiz and verified the results.
5. Start using your services
Once you have completed setting up your domain and adding users to your account you can now start to use your services.
Click Start using your services to receive information regarding installing the software, setting up desktops and mobile devices and information about what to inform your users to get them deployed as quickly as possible.
Once you have the information require, select Done to continue.
6. Configure your mail scanning service
If you have purchased your Office 365 service in conjunction with Symantec Protect.Cloud or MailDefender Plus to provide anti-virus and anti-spam services please follow the steps below to configure this service to successfully route your inbound mail to Office 365.
NOTE: the steps to configure Symantec Protect.Cloud and MailDefender Plus services are identical (Except for MX relay and SMTP outbound relay values) due to MailDefender Plus being powered by Symantec.

Office 365 Business Essentials and Business Premium – Deployment Guide
V2.0
January 2015
P a g e | 13
6.1 Configure Symantec Protect.Cloud/MailDefender Plus and Live Switch to Office 365
Following completion of the phases above, the service is now live. All email must now be configured
to route via Symantec Protect.cloud/MailDefender Plus and onto the office 365 platform. Until the
actions within Phases 1 to 8 are complete Outlook Web Access will operate as the primary email
client for all new internal and external email.
For Outlook Web Access (the web-based email client) browse to https://portal.microsoftonline.com
and select “Outlook” from the top.
In order to fully switch your email system onto, your MX records and Symantec.cloud/MailDefender
Plus account must be set up to relay email directly to Microsoft’s servers. Follow the steps outlined
below to configure your Symantec.Cloud/MailDefender Plus account ahead of your live switch.
6.2 Obtain your log in credentials for the Symantec Management Portal
Once the service has been provisioned through CASCADE, the Symantec/MailDefender Plus account will start to be created. The service will show as pending whilst this process is being carried out. Once the account has been created and the service is live the service within CASCADE will change to Active.
Once the service is active you will be required to click on the ‘Actions -> View Details’ for the service in order to receive your initial login information to the Symantec portal. These login details are shown in the ‘Service Parameters’ section on the order details screen.
Using this Information login to the URL: <https://clients.messagelabs.com>
Note: The first time you login you will be prompted to change your password for security reasons.

Office 365 Business Essentials and Business Premium – Deployment Guide
V2.0
January 2015
P a g e | 14
And then to enter three security questions in order to reset your password in case you lose it or forget it.
Once these have been filled in you will be taken to the Symantec.Cloud dashboard from which we can begin to configure your account.
6.3 Domains
When the account was created the primary domain from CASCADE will have been added to this account. If this is the only domain you have or the only domain you use then this section should already appear up to date. However if you have any additional domains you wish to use they will need to be added through the CASCADE portal.
To configure a new domain:
1. Log into CASCADE
2. Select ‘Domains-> Add new’ from the left hand navigation menu
3. Enter the domain you wish to add then click the Submit button:

Office 365 Business Essentials and Business Premium – Deployment Guide
V2.0
January 2015
P a g e | 15
NOTE: You should see either the Symantec or MailDefender Plus listed as the services to which the domain will be added.
4. You should receive a confirmation message that the domain has been added successfully on CASCADE.
5. You will now be prompted to add a CNAME record to allow the domain to be verified by CASCADE.
6. Contact your domain host to add the required record listed. An example is:
7. When the record has been added and has propagated on the internet (may take up to 72 hours to fully propagate), click the ‘Confirm Ownership’ button.
8. Once you have successfully verified the domain in CASCADE, the domain will be automatically added to the Symantec Protect.Cloud/MailDefender Plus portals.
6.4 Inbound Routes
In order for Symantec/MailDefender Plus to accept mail for your domain you are required to configure an Inbound route. The IP address of each server that receives email from external sources must be registered. The Inbound route will be the public IP address or Mail Host name of the firewall, router, or mail server that is the point of entry into your network. To configure an Inbound Route go to the Services tab and select Inbound Routes.

Office 365 Business Essentials and Business Premium – Deployment Guide
V2.0
January 2015
P a g e | 16
Default routes are associated with all of your registered domains. You can also define custom routes for specific domains. For organisations who direct all of their email to one address, a global rule will be sufficient. However, if domains point to different addresses (such as multiple mail servers or if office 365 is in use) you must convert the domains to Custom.
To add a new Inbound Route, just click on the Add New Route button and then enter your IP address or Mail Host name and click Add
For example with Office 365 they require you to enter a Mail Host name in the format of:
domain-com.mail.protection.outlook.com. (MX record listed for the Domain within Office 365)
To locate the unique relay address for the domains that you have verified in Office 365, follow the steps listed in Appendix A.
If any of the domains listed on this page have the status of Custom then the Inbound route you have just created will have to be added to those to.
o Click Manage Settings by each domain, click Add and Check new.
o In IP address or Mail Host Name, enter the record again.
Any changes made to these settings via the web portal can take 4 to 6 hours to propagate.
NOTE: The email address specified in the Email Address field will receive a mail to confirm whether the inbound route has failed or succeeded. The subject follows the format “The requested inbound mail route has <passed/failed> validation: <Customer Name>”. It is ESSENTIAL that you review this email to review failed tests and take appropriate action to resolve the cause of the failures before proceeding any further. Any failures will result in the inbound route NOT being added to the account.
6.4.1 Example text on inbound route verification email
For failed tests: The requested inbound mail route has failed the technical checks. If you were checking a new IP address, it has not been possible to add this to your Email Services configuration. If you were re-checking an existing IP address, the IP address will remain in place but please review the cause of the error, correct it, and resubmit the route for checking.
In the case of any failure, the email will list the requested route and the issue. If any issues are reported, the domain cannot be used for mail so these errors must be resolved (raising with the customer if necessary) before restarting this phase from step 1.
For successful tests: The requested primary inbound mail route has passed the technical checks and has been updated in your Email Services configuration.
Office 365 Business Essentials and Business Premium – Deployment Guide
V2.0
January 2015
P a g e | 17
This would indicate the test was successful, however ensure that all tests say Pass and not Fail. The following error would indicate that the recipient server was behind a firewall which does not allow traffic through and the Symantec ranges would need to be whitelisted as per the user documentation:
Fail - The mail route does not accept SMTP connections from all of the designated towers at MessageLabs. Check that your organization does not restrict SMTP traffic currently; allow connectivity and telnets to the MessageLabs required IP range list. These can be found at http://images.messagelabs.com/EmailResources/ImplementationGuides/Subnet_IP.pdf (mydomain.com)
NOTE: When the service is fully following your MX record change to point to MailDefender Plus, if your email server is unavailable at any time then the mail will queue on MailDefender Plus’s servers for up to 7 days before they are discarded.
6.5 Outbound Routes
Outbound routes are not a necessary field, however it is recommended as it allows Symantec/MailDefender Plus to scan all outgoing emails from your organisation and will add to your email security. In order to configure an outbound route go to the Services tab and select Outbound Routes.
If your company sends out from an on premise mail server then you will have to register their external IP address by clicking on Add and Check New and entering that IP address. Symantec/MailDefender Plus will then run a scan on the connection to ensure that it is alright and most importantly that it is open on port 25. You can specify an email address to get sent the results of this scan.
NOTE: It is ESSENTIAL that you review this email to review failed tests and take appropriate action to resolve the cause of the failures before proceeding any further. Any failures will result in the inbound route NOT being added to the account.

Office 365 Business Essentials and Business Premium – Deployment Guide
V2.0
January 2015
P a g e | 18
If you have a Microsoft Office 365 subscription then you just have to go to the Hosted Email Service section and select Microsoft Office 365 from the dropdown.
You should set your mail platform to relay all external outbound mail to:
6.5.1 For Symantec Protect.Cloud:
For EMEA:
cluster8.eu.messagelabs.com
For US:
cluster6.us.messagelabs.com
6.5.2 For MailDefender Plus:
For EMEA
smtp.eu.plus.maildefender.net
For US
smtp.us.plus.maildefender.net
6.6 Address Registration
You may have completed this stage when configuring your Domain (see Domains section), however this section details how to register addresses after the domains have been created. Address registration allows you grant users the ability to monitor their own Quarantine mail and have alerts sent to their addresses once every 24 hours informing them of when emails addressed to them have been Quarantined.
NOTE: If you choose to enable address registration you must ensure that you keep the list of registered users up to date at all times as mail will only be accepted for the addresses listed.
To register addresses go to the Users and Group tab and then select Address Registration.

Office 365 Business Essentials and Business Premium – Deployment Guide
V2.0
January 2015
P a g e | 19
Once you are in the Address Registration section you will see each domain you have on your account present and an option to Upload or Download. If you select the Upload option then this will enable you to import a CSV or TXT record of user email addresses. There is no format necessary for the import file, it is simply a list of all the email addresses that you need to import.
Users will then be required to login to the Spam Manager portal and reset their passwords by clicking the Forgot your Password option.
Spam Manager Portal: https://spammanager-3.messagelabs.com/login.xsp
Symantec/MailDefender Plus will then send an email to the user with their Login credentials. Administrator users will have access to view all user’s quarantined items.
6.7 Cloud Security Services IP Ranges
Below are the IP addresses lists for the Cloud Security services. Please make sure your firewall is configured correctly to ensure full connectivity to the cloud Security servers. To further ensure that no malicious emails can bypass our mail system by connecting directly to your mail server, we recommend you firewall your mail server and only allow SMTP connections from the following IP address ranges on port 25.
All Regions - For All services
Subnet IP Subnet Mask Netmask IP Range
216.82.240.0 255.255.240.0 /20 216.82.240.0 - 216.82.255.255
67.219.240.0 255.255.240.0 /20 67.219.240.0 - 67.219.255.25
85.158.136.0 255.255.248.0 /21 85.158.136.0 - 85.158.143.255
95.131.104.0 255.255.248.0 /21 95.131.104.0 - 95.131.111.255

Office 365 Business Essentials and Business Premium – Deployment Guide
V2.0
January 2015
P a g e | 20
46.226.48.0 255.255.248.0 /21 46.226.48.0 - 46.226.55.255
117.120.16.0 255.255.248.0 /21 117.120.16.0 - 117.120.23.255
193.109.254.0 255.255.254.0 /23 193.109.254.0 - 193.109.255.255
194.406.220.0 255.255.254.0 /23 194.406.220.0 - 194.106.221.255
195.245.230.0 255.255.254.0 /23 195.245.230.0 - 195.245.231.255
103.9.96.0 255.255.252.0 /22 103.9.96.0 - 103.9.99.255
Asia Pacific only - Additional IP ranges for Web Security
Subnet IP Subnet Mask Netmask IP Range
203.183.222.96 255.255.255.224 /27 203.183.222.96 - 203.183.222.127
202.218.232.192 255.255.255.224 /27 202.218.232.192 - 202.183.222.127
203.116.194.128 255.255.255.224 /27 203.116.194.128 - 203.116.194.159
South Africa only - Additional IP ranges for Email Services
Subnet IP Subnet Mask Netmask IP Range
196.14.170.0 255.255.254.0 /23 196.14.17.0 - 196.14.171.255
NOTE: The above steps are the bare minimum to allow you to utilise your Symantec
Protect.Cloud/MailDefender Plus service with Office 365. There are additional enhanced features
which you may wish to implement for your organization. Please refer to the Admin Guide for
Symantec Protect.Cloud/MailDefender Plus to review and implement these features if desired.
6.8 SPF
If your organisation currently has SPF configured you will need to ensure that you include the following record before you switch mail to relay via Symantec Protect.Cloud or MailDefender Plus:
6.8.1 For Symantec Protect.Cloud
v=spf1 include:spf.messagelabs.com ~all
When it works as you expect "harden" the rule and switch to including:
v=spf1 include:spf.messagelabs.com -all
6.8.2 For MailDefender Plus
V=spf1 include:spf.maildefender.net ~all
When it works as you expect "harden" the rule and switch to including:
V=spf1 include:spf.maildefender.net -all

Office 365 Business Essentials and Business Premium – Deployment Guide
V2.0
January 2015
P a g e | 21
6.9 MX Records
More advanced settings and configuration of filters can be altered depending on your preference and details of how to do this are covered in our more detailed Administrator guide. However once these basic settings have been configured your account is ready to start handling mail for your organization.
To redirect your inbound email traffic to the Email Services infrastructure, you must change your MX
records. You must change your MX records for your Microsoft Office 365 hosted cloud service.
An MX record is a type of resource record in the Domain Name System (DNS) that defines how email
is routed. MX records point to the servers that should receive email and define their priority relative
to each other. Your MX records need to route your inbound email through the cloud security
services infrastructure, where Email Services scan the emails. The clean emails continue on to your
email recipients.
First, identify who hosts your domains; that is, the person or organization that is responsible for
maintaining your organisation's MX records or DNS settings. Your Internet service provider (ISP) may
be responsible for your MX records. Typically, each provider supplies an online form to make
changes. Or you may have to notify them that you require a change to your MX records.
The new MX record entries that you should use are in the format that is shown in the following
table.
Mail Route New MX Record
Primary (lowest) MX preference (default mail route) MX 10 clusterx.xx.messagelabs.com
Second MX preference (back-up mail route) MX 20 clusterxa.xx.messagelabs.com
Ensure that these changes are completed within five working days of receiving your confirmation
email and that no back-up MX records remain in place.
6.9.1 For Symantec Protect.Cloud customers:
For EU Organizations:
Cluster8.eu.messagelabs.com - Priority 10
Cluster8a.eu.messagelabs.com - Priority 20
For US Organizations:
Cluster6.us.messagelabs.com - Priority 10
Cluster6a.us.messagelabs.com - Priority 20
6.9.2 For MailDefender Plus customers
For EU Organizations:
mx1.eu.plus.maildefender.net - Priority 10
mx2.eu.plus.maildefender.net - Priority 20
For US Organizations:

Office 365 Business Essentials and Business Premium – Deployment Guide
V2.0
January 2015
P a g e | 22
mx1.us.plus.maildefender.net - Priority 10
mx2.us.plus.maildefender.net - Priority 20
Note: As soon as the MX record changes have been made and have propagated, Symantec
Protect.Cloud/MailDefender Plus will start scanning the emails that your domain receives from
external senders. When fully deployed, the AntiVirus and AntiSpam services are automatically active.
They are configured with default settings. Your inbound email (and outbound email, if provisioned)
passes through the Email Services infrastructure. To customize the settings for AntiVirus and
AntiSpam, make the necessary configuration changes in the portal before you change your MX
records.
Note: when your MX records are updated, the following points must be considered:
Any user who has not reconfigured their client (mobile device or PC) will not receive new mail.
Any user/group/contact/address which has not been created in Office 365 will reject email sent to it.
NOTE: The above steps are the bare minimum to allow you to utilise your Symantec Protect.Cloud/MailDefender Plus service with Office 365. There are additional enhanced features which you may wish to implement for your organization. Please refer to the Admin Guide for Symantec Protect.Cloud/MailDefender Plus to review and implement these features if desired.
6.10 Redirecting inbound email traffic to the Email Services Infrastructure 6.10.1 Important Considerations
Staged deployments
If you would like to still send mail to your current email server during deployment, the following additional steps are required:
• You should list your current email server address as the inbound route when
configuring Symantec Protect.Cloud. This will ensure that when your MX records are
updated to direct external mail to Symantec. You should also complete the following
step in conjunction with this.
• You must add a forwarding rule on the existing email system for each user to direct
new mail to a specific Office 365 address. These forwarders must be configured to
send mail to the unique @domain.onmicrosoft.com addresses which will be created
during your Office 365 account creation. The addresses can be found and updated in
the list of aliases detailed in section 3.
When you are ready to relay email directly to Office 365 simply update the inbound route
address with Office 365 details as documented above.
Cutover deployment
Please note that once the MX records for Symantec are in place, all new mail will be relayed to the
destination address set by intY as per the information above.

Office 365 Business Essentials and Business Premium – Deployment Guide
V2.0
January 2015
P a g e | 23
7. Configure end user PC’s
We have lots of end user guides available to assist your users with performing the basic steps required to access and start utilising Office 365 services. You can find them on the Office 365 landing page linked from your Office 365 services tile within CASCADE.
7.1 Install Office
Each user you have created and assigned a relevant license can access Office 365 to download/ install
their services:
(Note: Office 2013 Desktop suite not available to Business Essentials or Enterprise E1 Licences)
1. Sign in using your Microsoft Online Services ID. https://portal.office.com
Upon signing in you will be presented with a greeting screen like the below:
2. To install the Office 365 desktop suit click Install now and follow the on screen instructions.
Providing your Office 365 login detail when prompted.
3. Once the installation and configuration have completed, you may be required to restart your
computer to finalize the installation process.
4. After running Office 365 desktop setup, a shortcut to the Office 365 portal will be added to the
Start menu on your desktop.
Note: If you encounter a problem while setting up your desktop, a support agent or administrator may
ask you to collect a log by pressing Shift, Ctrl, and L simultaneously on your keyboard.
5. To utilize the Office WebApps feature, click on the desired program to open it in a new tab in
your browser.
6. Clicking OneDrive from the top navigation pane will open your OneDrive personal online storage
from where you can perform tasks such as uploading and sharing files.

Office 365 Business Essentials and Business Premium – Deployment Guide
V2.0
January 2015
P a g e | 24
7.2 Sync your OneDrive Library to your PC
3. In a web browser, sign in to Office 365 or SharePoint. 4. Select OneDrive at the top of the page to go to OneDrive for Business.
5. Select the Sync button.
6. At the prompt, click Sync Now to start the sync app wizard.
7. The wizard automatically fills in the name and web address of your OneDrive for Business library.
8. Select Sync Now in the wizard to start syncing. You can click Show my files… in the wizard
to open the synced OneDrive for Business library folder in File Explorer. The folder is listed in your Favorites with the name “OneDrive for Business” or “OneDrive @CompanyName.”
7.3 Install Office 365 Pro Plus on an RDS Server (Optional)
If you use Remote Desktop Services (RDS) to provide shared computers to users in your organization, you can install Office 365 ProPlus on those computers. But, you have to use the Office Deployment Tool and enable shared computer activation to do the installation.
The following are two common RDS scenarios:
Install Office 365 ProPlus on an RDS server. Install Office 365 ProPlus on a shared virtual machine.
Office 365 Business Essentials and Business Premium – Deployment Guide
V2.0
January 2015
P a g e | 25
For further information please refer to:
http://technet.microsoft.com/en-us/library/dn782858%28v=office.15%29.aspx
7.4 Install shortcuts and configure Outlook
We have lots of end user guides available to assist your users with performing the basic steps required to access and start utilising Office 365 services. You can find them on the Office 365 landing page linked from your Office 365 services tile within CASCADE.
The following steps must be completed for all users who are moving to Office 365 and do not use the Office 2013 desktop software. The steps are very simple so most end users should be able to complete the setup themselves.
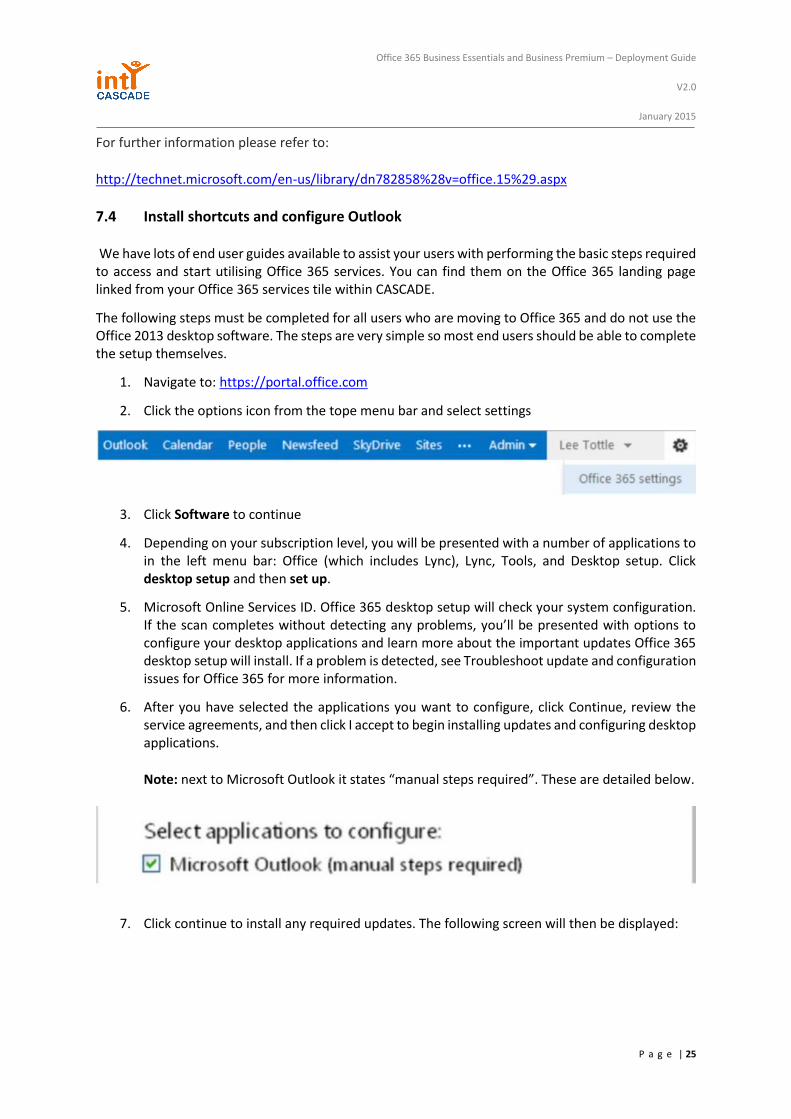
1. Navigate to: https://portal.office.com
2. Click the options icon from the tope menu bar and select settings
3. Click Software to continue
4. Depending on your subscription level, you will be presented with a number of applications to in the left menu bar: Office (which includes Lync), Lync, Tools, and Desktop setup. Click desktop setup and then set up.
5. Microsoft Online Services ID. Office 365 desktop setup will check your system configuration. If the scan completes without detecting any problems, you’ll be presented with options to configure your desktop applications and learn more about the important updates Office 365 desktop setup will install. If a problem is detected, see Troubleshoot update and configuration issues for Office 365 for more information.
6. After you have selected the applications you want to configure, click Continue, review the service agreements, and then click I accept to begin installing updates and configuring desktop applications.
Note: next to Microsoft Outlook it states “manual steps required”. These are detailed below.
7. Click continue to install any required updates. The following screen will then be displayed:

Office 365 Business Essentials and Business Premium – Deployment Guide
V2.0
January 2015
P a g e | 26
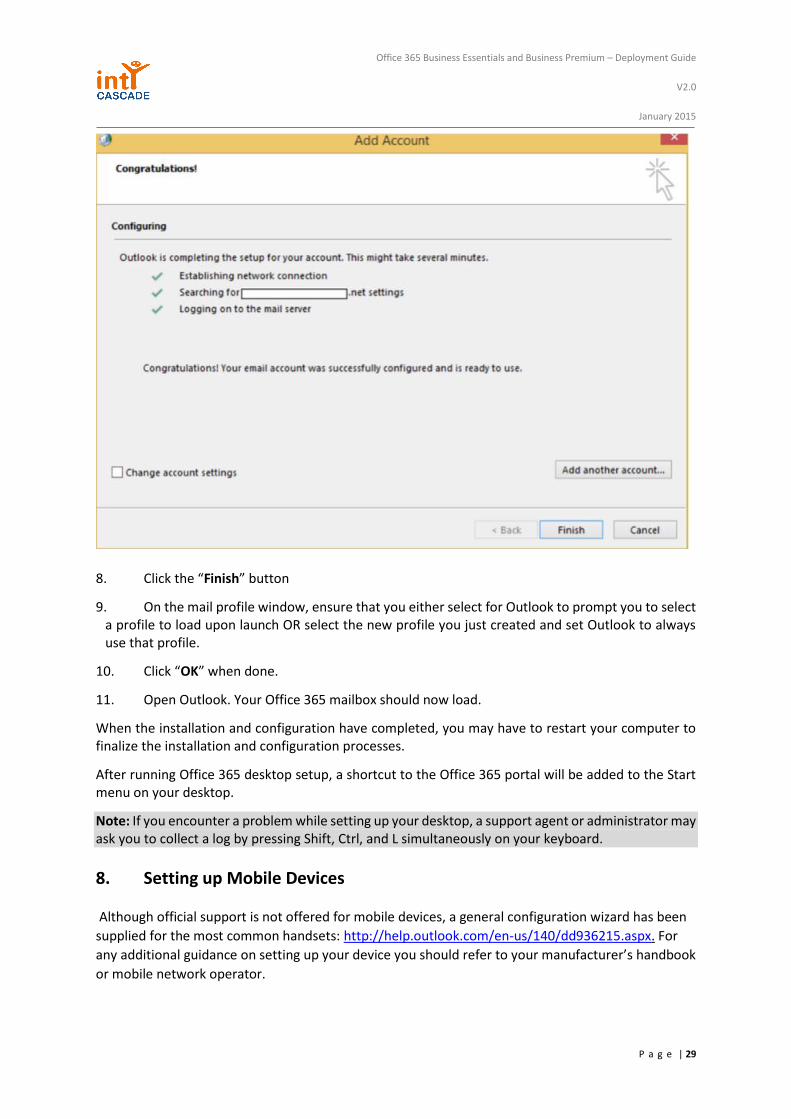
8. Click “finish”
7.4.1 Configure Outlook manually
1. On your PC go to the control panel and double click on “mail”
2. The mail set up window will load.
3. Click on “show profiles” then click “Add”
4. Enter a name for the profile. This should be something that effectively distinguishes it from other accounts that you may already have set up.

Office 365 Business Essentials and Business Premium – Deployment Guide
V2.0
January 2015
P a g e | 27
5. Enter your full name, Office 365 username and password on the next screen. Your username is usually your full email address. Then click the “Next” button to continue.

Office 365 Business Essentials and Business Premium – Deployment Guide
V2.0
January 2015
P a g e | 28
6. Your account details will now be verified. This may take a few minutes.
7. If your username and password have been entered correctly and your organization has an autodiscover record active and pointing to autodiscover.outlook.com the results should be returned as successful.
Office 365 Business Essentials and Business Premium – Deployment Guide
V2.0
January 2015
P a g e | 29
8. Click the “Finish” button
9. On the mail profile window, ensure that you either select for Outlook to prompt you to select a profile to load upon launch OR select the new profile you just created and set Outlook to always use that profile.
10. Click “OK” when done.
11. Open Outlook. Your Office 365 mailbox should now load.
When the installation and configuration have completed, you may have to restart your computer to finalize the installation and configuration processes.
After running Office 365 desktop setup, a shortcut to the Office 365 portal will be added to the Start menu on your desktop.
Note: If you encounter a problem while setting up your desktop, a support agent or administrator may ask you to collect a log by pressing Shift, Ctrl, and L simultaneously on your keyboard.
8. Setting up Mobile Devices
Although official support is not offered for mobile devices, a general configuration wizard has been
supplied for the most common handsets: http://help.outlook.com/en-us/140/dd936215.aspx. For
any additional guidance on setting up your device you should refer to your manufacturer’s handbook
or mobile network operator.

Office 365 Business Essentials and Business Premium – Deployment Guide
V2.0
January 2015
P a g e | 30
9. Support and the future
Should you require any support please contact your vendor.
Appendix A - Retrieve unique relay addresses for each verified domain on Office 365 The following steps will enable you to retrieve the unique relay address for each domain you have successfully verified on Office 365. This information should be used to either update your domains MX records to relay mail directly to Office 365 OR to add these records to a mail scanning service such as Symantec Protect.Cloud.
1. Navigate to: https://portal.microsoftonline.com 2. Login using your Office 365 administrator account username and password 3. Click the domains link from the left hand navigation pane.
4. Select the Start Setup hyperlink next to the domain for which you want to view the DNS information.
5. Click Set the domain purpose and configure DNS

Office 365 Business Essentials and Business Premium – Deployment Guide
V2.0
January 2015
P a g e | 31
6. Copy the value in the MX field highlighted in red