Embed Size (px)
Citation preview
Ooni ProEssentialsGuide
How to set up, use and look after Ooni Pro, plus handy tips and recipes.
The glass door with thermometer must be removed during the cooling process.
Ooni Pro’s legs must be fully extended before firing up.
Do not expose the glass door to water or moisture while hot! This may cause the glass to crack or break.
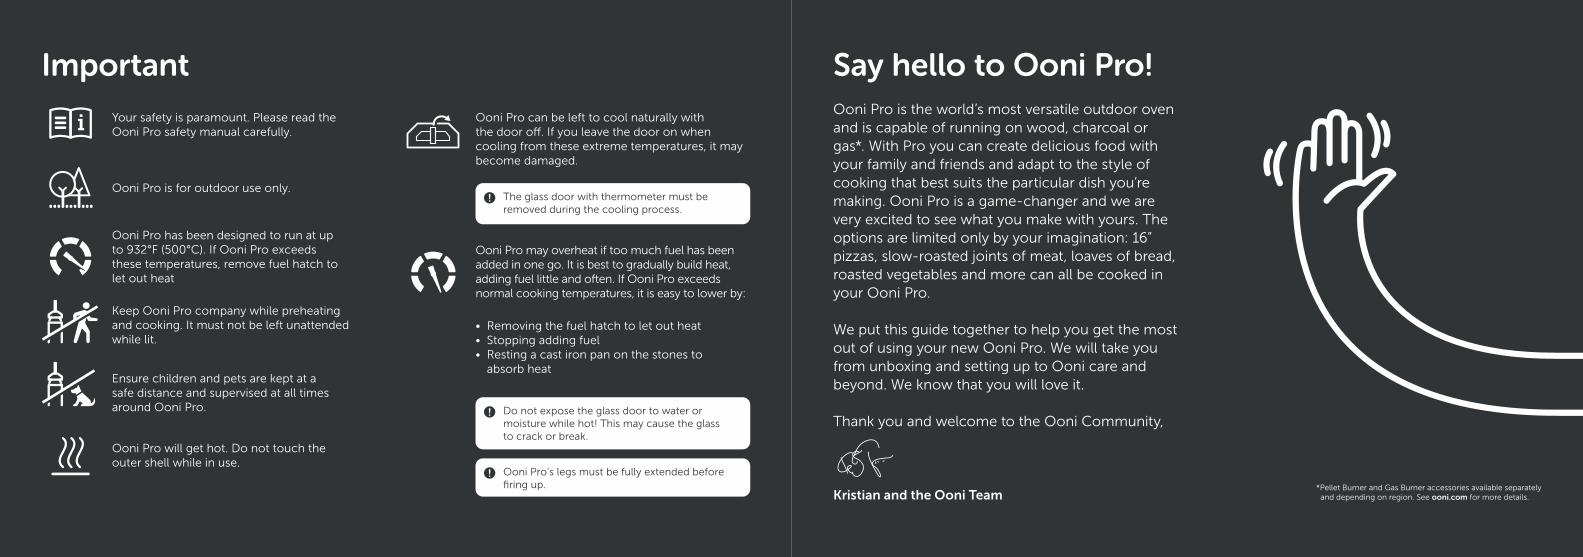
Say hello to Ooni Pro!Ooni Pro is the world’s most versatile outdoor oven and is capable of running on wood, charcoal or gas*. With Pro you can create delicious food with your family and friends and adapt to the style of cooking that best suits the particular dish you’re making. Ooni Pro is a game-changer and we are very excited to see what you make with yours. The options are limited only by your imagination: 16” pizzas, slow-roasted joints of meat, loaves of bread, roasted vegetables and more can all be cooked in your Ooni Pro.
We put this guide together to help you get the most out of using your new Ooni Pro. We will take you from unboxing and setting up to Ooni care and beyond. We know that you will love it.
Thank you and welcome to the Ooni Community,
Kristian and the Ooni Team
Important
*Pellet Burner and Gas Burner accessories available separately and depending on region. See ooni.com for more details.
Ooni Pro is for outdoor use only.
Your safety is paramount. Please read the Ooni Pro safety manual carefully.
Keep Ooni Pro company while preheating and cooking. It must not be left unattended while lit.
Ooni Pro has been designed to run at up to 932°F (500°C). If Ooni Pro exceeds these temperatures, remove fuel hatch to let out heat
Ensure children and pets are kept at a safe distance and supervised at all times around Ooni Pro.
Ooni Pro will get hot. Do not touch the outer shell while in use.
Ooni Pro can be left to cool naturally with the door off. If you leave the door on when cooling from these extreme temperatures, it may become damaged.
Ooni Pro may overheat if too much fuel has been added in one go. It is best to gradually build heat, adding fuel little and often. If Ooni Pro exceeds normal cooking temperatures, it is easy to lower by:
• Removing the fuel hatch to let out heat• Stopping adding fuel• Resting a cast iron pan on the stones to
absorb heat
Important notes before you cook 4
How and where to set up your Ooni Pro 6
How to get the best results from Ooni Pro 8
What’s in the box? 10
Which fuel should you use? 12
Chimney & ceiling vent positioning explained 14
The doors 16
Cooking with...
Wood 18
Charcoal 20
Gas 22
Care instructions 24
Troubleshooting 26
Recipes
Ooni Classic Pizza Dough 30
Diablo III Pizza 31
Roasted Veg 32
Reverse Seared Prime Rib 33
Seafood Stew 34
Keep in touch 35
Contents
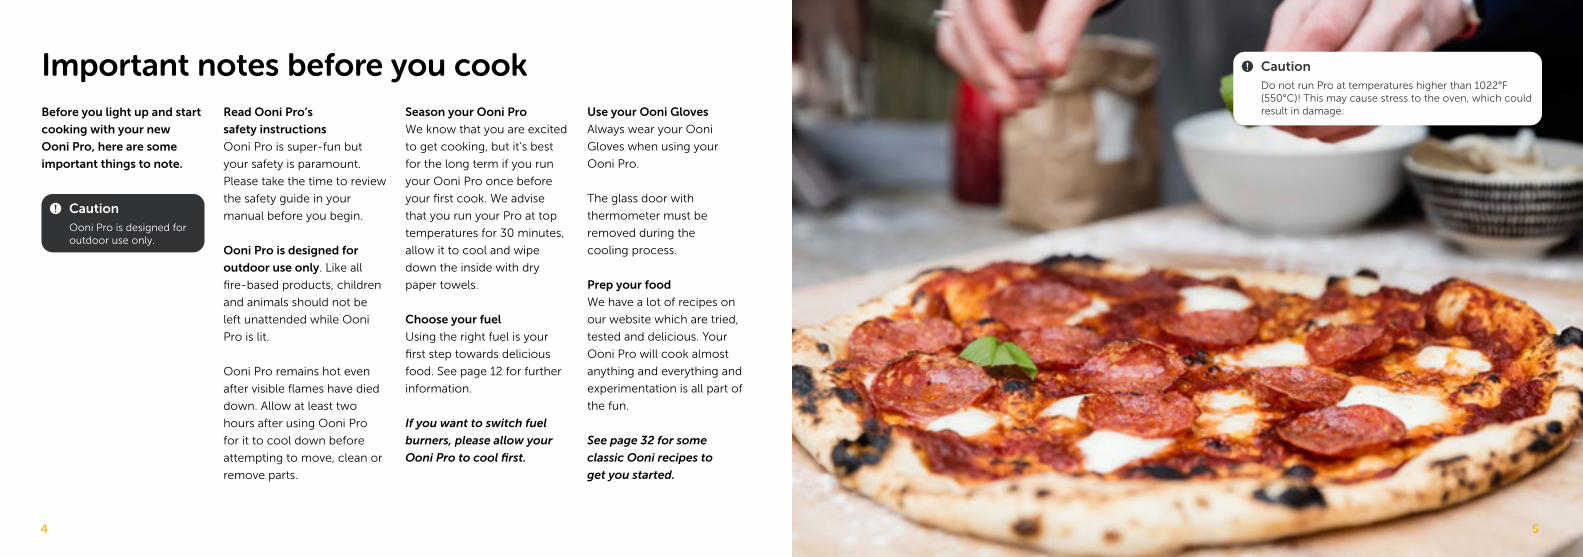
Important notes before you cookBefore you light up and start
cooking with your new
Ooni Pro, here are some
important things to note.
Read Ooni Pro’s
safety instructions
Ooni Pro is super-fun but
your safety is paramount.
Please take the time to review
the safety guide in your
manual before you begin.
Ooni Pro is designed for
outdoor use only. Like all
fire-based products, children
and animals should not be
left unattended while Ooni
Pro is lit.
Ooni Pro remains hot even
after visible flames have died
down. Allow at least two
hours after using Ooni Pro
for it to cool down before
attempting to move, clean or
remove parts.
Season your Ooni Pro
We know that you are excited
to get cooking, but it’s best
for the long term if you run
your Ooni Pro once before
your first cook. We advise
that you run your Pro at top
temperatures for 30 minutes,
allow it to cool and wipe
down the inside with dry
paper towels.
Choose your fuel
Using the right fuel is your
first step towards delicious
food. See page 12 for further
information.
If you want to switch fuel
burners, please allow your
Ooni Pro to cool first.
Use your Ooni Gloves
Always wear your Ooni
Gloves when using your
Ooni Pro.
The glass door with
thermometer must be
removed during the
cooling process.
Prep your food
We have a lot of recipes on
our website which are tried,
tested and delicious. Your
Ooni Pro will cook almost
anything and everything and
experimentation is all part of
the fun.
See page 32 for some
classic Ooni recipes to
get you started.
CautionOoni Pro is designed for outdoor use only.
CautionDo not run Pro at temperatures higher than 1022°F (550°C)! This may cause stress to the oven, which could result in damage.
54
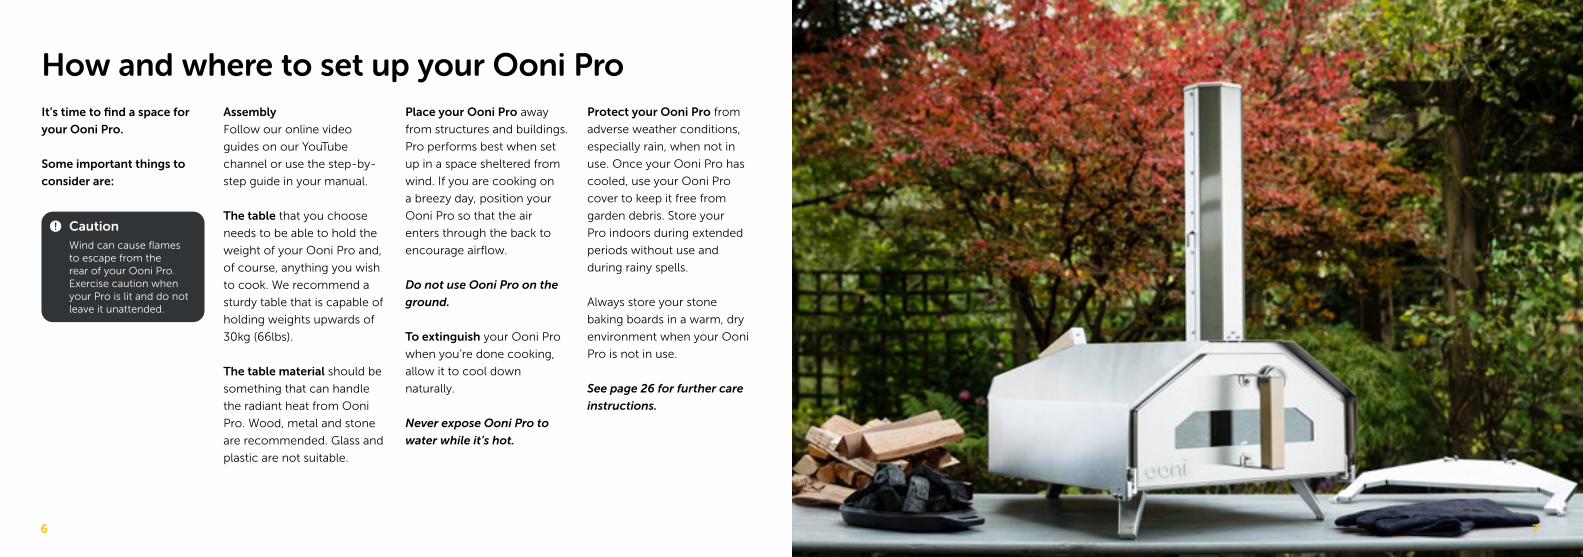
It’s time to find a space for
your Ooni Pro.
Some important things to
consider are:
Assembly
Follow our online video
guides on our YouTube
channel or use the step-by-
step guide in your manual.
The table that you choose
needs to be able to hold the
weight of your Ooni Pro and,
of course, anything you wish
to cook. We recommend a
sturdy table that is capable of
holding weights upwards of
30kg (66lbs).
The table material should be
something that can handle
the radiant heat from Ooni
Pro. Wood, metal and stone
are recommended. Glass and
plastic are not suitable.
Place your Ooni Pro away
from structures and buildings.
Pro performs best when set
up in a space sheltered from
wind. If you are cooking on
a breezy day, position your
Ooni Pro so that the air
enters through the back to
encourage airflow.
Do not use Ooni Pro on the
ground.
To extinguish your Ooni Pro
when you’re done cooking,
allow it to cool down
naturally.
Never expose Ooni Pro to
water while it’s hot.
Protect your Ooni Pro from
adverse weather conditions,
especially rain, when not in
use. Once your Ooni Pro has
cooled, use your Ooni Pro
cover to keep it free from
garden debris. Store your
Pro indoors during extended
periods without use and
during rainy spells.
Always store your stone
baking boards in a warm, dry
environment when your Ooni
Pro is not in use.
See page 26 for further care
instructions.
How and where to set up your Ooni Pro
CautionWind can cause flames to escape from the rear of your Ooni Pro. Exercise caution when your Pro is lit and do not leave it unattended.
76
How to get the best results from Ooni ProOoni Pro Essentials is a great place to start! This will be
your guide to the features of Ooni Pro and what makes
it the world’s best outdoor oven. You can also find
information online: We have a lot of awesome online
resources at ooni.com and video guides on our
YouTube channel.
If you have any questions, queries or comments then
you can reach us at [email protected].
We love hearing from the Ooni Community!
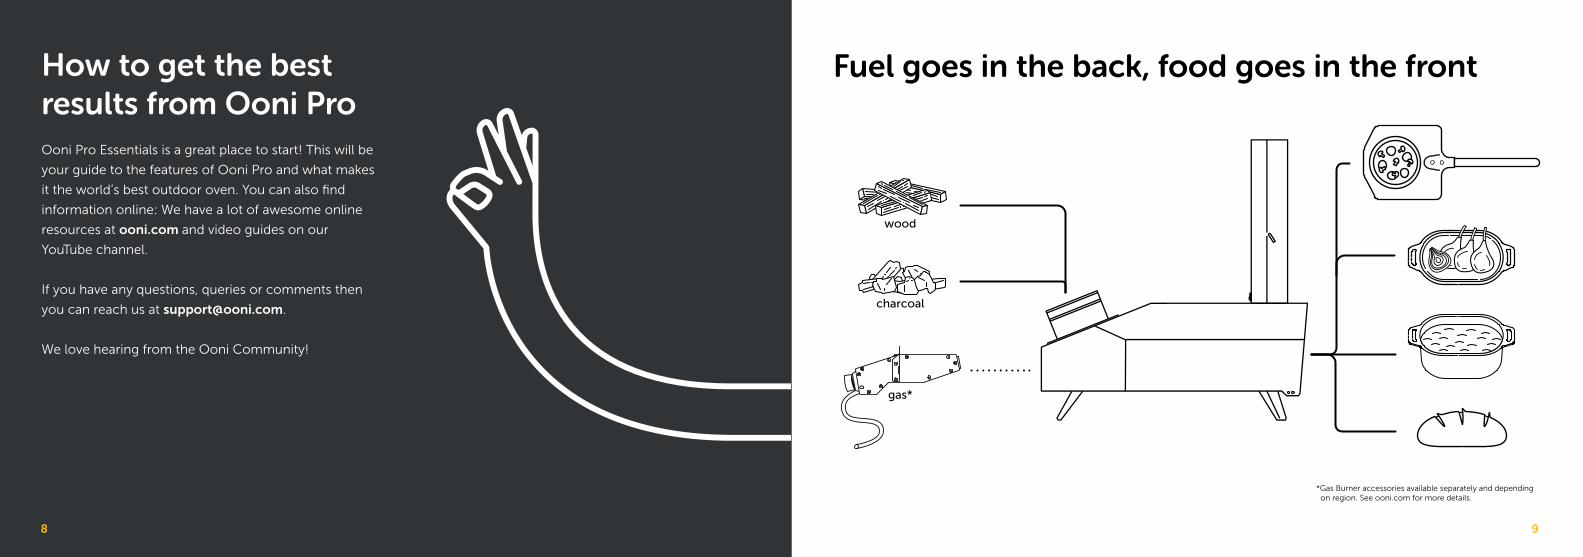
Fuel goes in the back, food goes in the front
wood
charcoal
*Gas Burner accessories available separately and depending on region. See ooni.com for more details.
gas*
98
x4
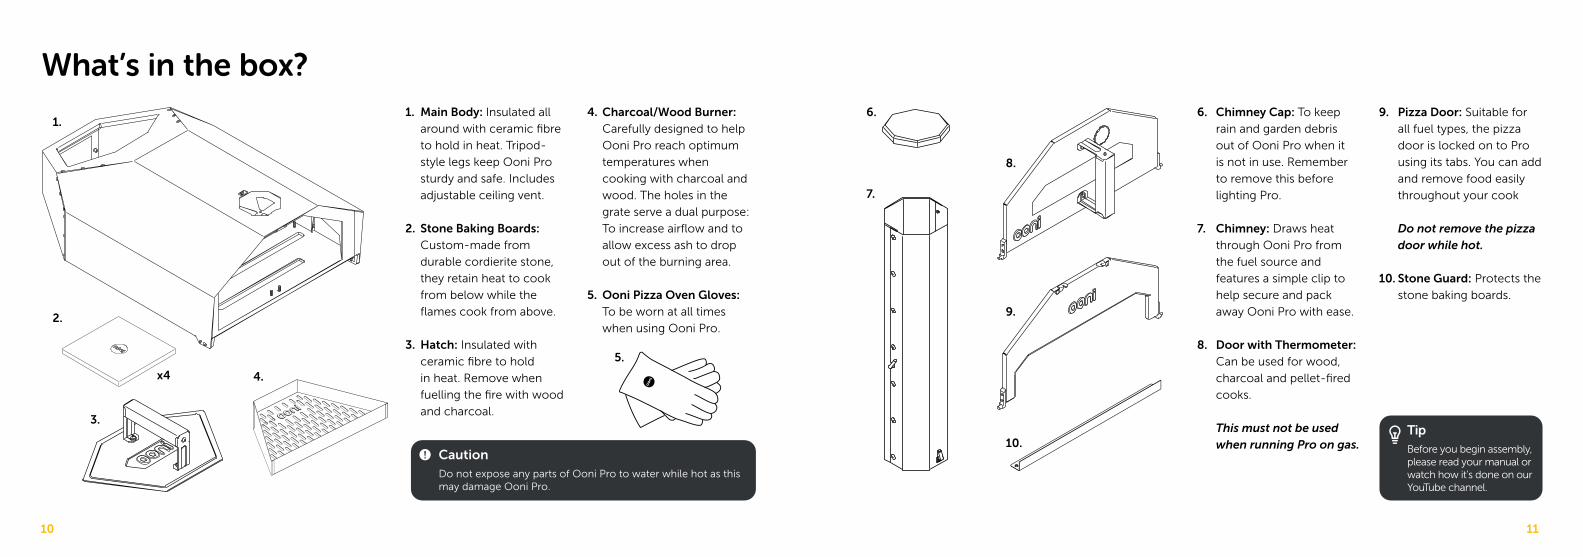
What’s in the box?1. Main Body: Insulated all
around with ceramic fibre
to hold in heat. Tripod-
style legs keep Ooni Pro
sturdy and safe. Includes
adjustable ceiling vent.
2. Stone Baking Boards: Custom-made from
durable cordierite stone,
they retain heat to cook
from below while the
flames cook from above.
3. Hatch: Insulated with
ceramic fibre to hold
in heat. Remove when
fuelling the fire with wood
and charcoal.
4. Charcoal/Wood Burner: Carefully designed to help
Ooni Pro reach optimum
temperatures when
cooking with charcoal and
wood. The holes in the
grate serve a dual purpose:
To increase airflow and to
allow excess ash to drop
out of the burning area.
5. Ooni Pizza Oven Gloves: To be worn at all times
when using Ooni Pro.
1.
3.
4.
5.
2.
6. Chimney Cap: To keep
rain and garden debris
out of Ooni Pro when it
is not in use. Remember
to remove this before
lighting Pro.
7. Chimney: Draws heat
through Ooni Pro from
the fuel source and
features a simple clip to
help secure and pack
away Ooni Pro with ease.
8. Door with Thermometer: Can be used for wood,
charcoal and pellet-fired
cooks.
This must not be used when running Pro on gas.
9. Pizza Door: Suitable for
all fuel types, the pizza
door is locked on to Pro
using its tabs. You can add
and remove food easily
throughout your cook
Do not remove the pizza door while hot.
10. Stone Guard: Protects the
stone baking boards.
6.
7.
8.
9.
10.CautionDo not expose any parts of Ooni Pro to water while hot as this may damage Ooni Pro.
TipBefore you begin assembly, please read your manual or watch how it’s done on our YouTube channel.
1110
The choice is yours!
Ooni Pro has been designed
with versatility in mind and
we use different fuels for
different reasons. While
cooking with fire is as much
an art as it is a science, the
following table will give you
some idea of what results to
expect from each fuel.
What to do if Pro heats past
1022°F (550°C)?
Pro may overheat if too much
fuel is added in one go. To
lower the temperature, stop
adding fuel and remove the
hatch to let heat out.
Which fuel should you use?
*Please note that the above figures are estimates and are dependent on weather and ambient temperatures.
Fuel Preheat Time Temperature Benefits
Charcoal & Wood
20-30 Minutes Up to 932°F (500°C)
Our favourite fuel source for Ooni Pro. Keep a steady base temperature with charcoal and add wood for a burst of heat and wood-fired flavour.
Wood 20-30 Minutes Up to 932°F (500°C)
Perfect for creating that stone-baked, wood-fired flavour for authentic Ne-apolitan style pizzas. Wood is ideal for anything that enjoys a fast cooking time, such as steaks, fish and vegetables.
Charcoal 20-30 Minutes Up to 932°F (500°C)
Charcoal gives you the option to run Ooni Pro at a lower and consistent heat which is ideal for larger pieces of meat or bread.
Gas 20-30 Minutes From 482-932°F (250-500°C)
Awesome for everything! Lower temperatures for bread, higher temperatures for pizza.
TipCheck out ooni.com for some inspiration
1312
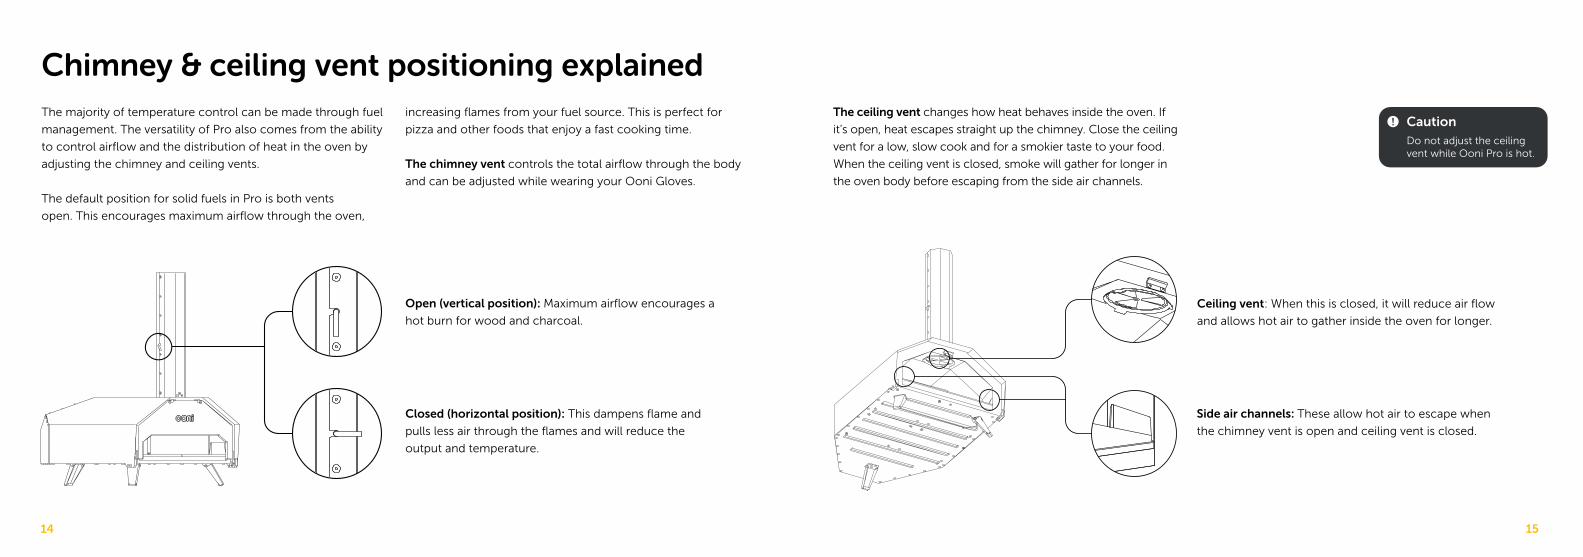
Chimney & ceiling vent positioning explainedThe majority of temperature control can be made through fuel
management. The versatility of Pro also comes from the ability
to control airflow and the distribution of heat in the oven by
adjusting the chimney and ceiling vents.
The default position for solid fuels in Pro is both vents
open. This encourages maximum airflow through the oven,
increasing flames from your fuel source. This is perfect for
pizza and other foods that enjoy a fast cooking time.
The chimney vent controls the total airflow through the body
and can be adjusted while wearing your Ooni Gloves.
Open (vertical position): Maximum airflow encourages a
hot burn for wood and charcoal.
Closed (horizontal position): This dampens flame and
pulls less air through the flames and will reduce the
output and temperature.
The ceiling vent changes how heat behaves inside the oven. If
it’s open, heat escapes straight up the chimney. Close the ceiling
vent for a low, slow cook and for a smokier taste to your food.
When the ceiling vent is closed, smoke will gather for longer in
the oven body before escaping from the side air channels.
Ceiling vent: When this is closed, it will reduce air flow
and allows hot air to gather inside the oven for longer.
Side air channels: These allow hot air to escape when
the chimney vent is open and ceiling vent is closed.
CautionDo not adjust the ceiling vent while Ooni Pro is hot.
1514
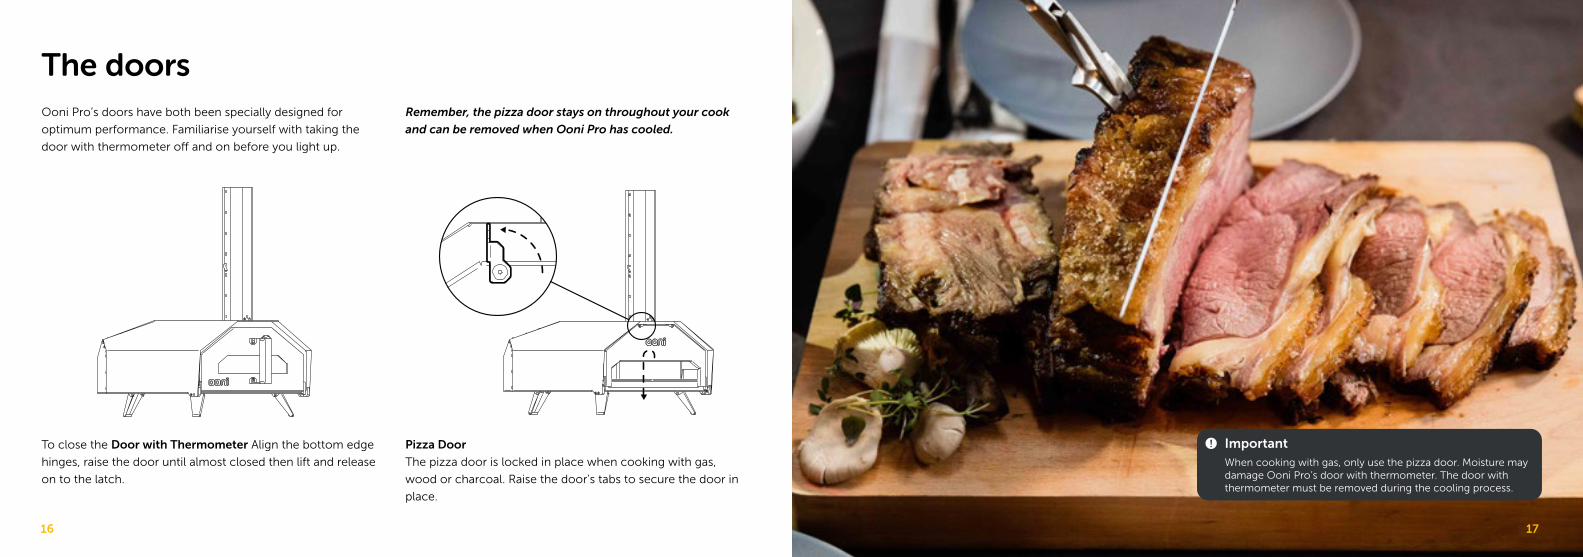
The doorsOoni Pro’s doors have both been specially designed for
optimum performance. Familiarise yourself with taking the
door with thermometer off and on before you light up.
Remember, the pizza door stays on throughout your cook
and can be removed when Ooni Pro has cooled.
To close the Door with Thermometer Align the bottom edge
hinges, raise the door until almost closed then lift and release
on to the latch.
Pizza Door
The pizza door is locked in place when cooking with gas,
wood or charcoal. Raise the door’s tabs to secure the door in
place.
ImportantWhen cooking with gas, only use the pizza door. Moisture may damage Ooni Pro’s door with thermometer. The door with thermometer must be removed during the cooling process.
1716

Cooking with woodThere is something special
about wood-fired food and
we love it at Ooni HQ. The
sights, sounds and smells
are hard to beat. Wood gives
Ooni-cooked dishes extra
flavour and is perfect for an
authentic Neapolitan stone-
baked pizza.
Types of wood
We recommend the use of
high-quality, dry hardwood
from deciduous trees
such as oak or beech. We
recommend wood pieces of
up to 25cm (10”) long and
around 4cm (1.5”) in diameter
as these will fit comfortably in
your charcoal/wood burner.
Do not use treated or
painted wood. Wood with
high resin content, such as
pine or spruce, might add
unwanted flavours to your
cooking.
Lighting method
To light the wood, add no
more than 4 pieces on the
charcoal/wood burner and
light using either a blow torch
or firestarters. Do not use
petroleum based firestarters
as these may impart
unwanted flavours to your
food. Once your wood is
fully lit (5-10 minutes) begin
adding more wood through
the hatch.
Always wear your Ooni
Gloves when using Ooni Pro.
Maintaining temperature
Wood will give a wide range
of temperatures based on
the amount burning. Add
little and often to keep Ooni
Pro running at a consistent
temperature.
As with all wood-fired
cooking, it is best to maintain
your fire gradually. Refuel
when the wood has mainly
burnt to embers but before
all visible flames have
disappeared.
Do not overload the grate
as too much wood may
damage your Ooni Pro and
cause excess smoke or soot.
1918
Cooking with charcoalCharcoal makes it easy to
control the temperature of
your Ooni Pro from very low
temperatures to as high as
450°C (840°F).
Types of charcoal
We recommend using regular
high quality charcoal.
It is best to avoid instant
lighting charcoal and
charcoal briquettes. Instant
lighting charcoal can add
unwanted flavours and
briquettes may block airflow
through the grate during a
long cooking session.
Lighting method
Place a couple of handfuls
of charcoal on the charcoal/
wood burner and use either
a firestarter or a blow torch
to light. Once the charcoal
is lit, gradually add more to
build a good charcoal fire.
Keep the hatch and door
with thermometer closed for
optimum performance.
Always wear your Ooni
Gloves when using Ooni Pro.
Maintaining temperature
Top up your charcoal as
required throughout your
cook. To maintain an even,
steady temperature, it is
better to add gradually than
to add a lot in one go.
Do not overload your
charcoal/wood burner with
charcoal as this may damage
your Ooni Pro and cause
excess smoke or soot.
ImportantDo not use petroleum based or other firestarters and charcoal that may impart unwanted flavour to your food.
2120

Cooking with gasNothing beats gas for ease
of use and temperature
control. You can be ready
to go at the flick of a switch
and using gas gives you the
ability to cook anything
from loaves of bread, to
pizza and steak.
Ooni gas burner is available
at ooni.com
Type of gas
Please refer to your Ooni Pro
gas burner manual for more
information on which type of
gas to use. Gas types can vary
from country to country.
Lighting method
1. Close the ceiling and
chimney vent and add
the pizza door.
(The hatch must be
removed before lighting).
2. Push in and slowly turn
the gas control knob anti-
clockwise. This should take
5 seconds. Continue to
push the control knob for
5 seconds after ignition.
3. Place the hatch back on.
You can find a video on how
to light your gas burner on
our YouTube channel.
If the gas does not light
please refer to your gas
burner manual.
Maintaining temperature
Use the gas burner control
to change the heat output of
your Ooni Pro gas burner.
ImportantIf the flames go out, turn off the gas and wait five minutes before reigniting.
ImportantOnly use the pizza door when cooking with gas.
2322
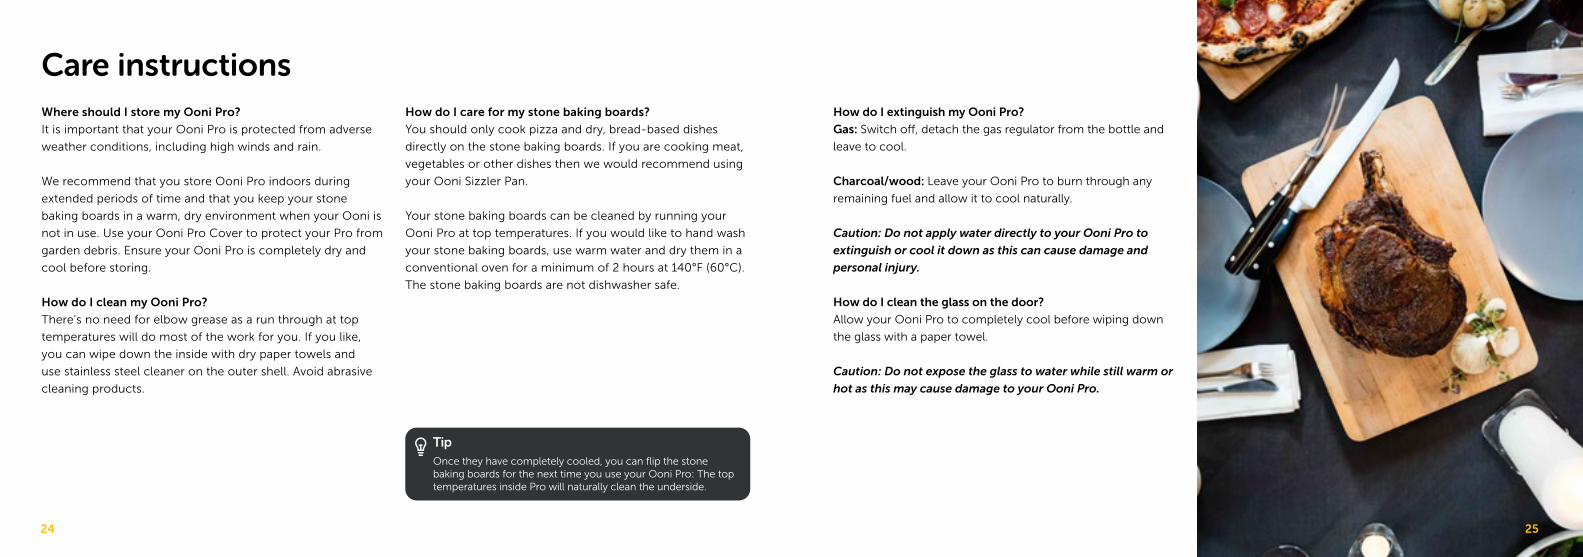
Care instructionsWhere should I store my Ooni Pro?
It is important that your Ooni Pro is protected from adverse
weather conditions, including high winds and rain.
We recommend that you store Ooni Pro indoors during
extended periods of time and that you keep your stone
baking boards in a warm, dry environment when your Ooni is
not in use. Use your Ooni Pro Cover to protect your Pro from
garden debris. Ensure your Ooni Pro is completely dry and
cool before storing.
How do I clean my Ooni Pro?
There’s no need for elbow grease as a run through at top
temperatures will do most of the work for you. If you like,
you can wipe down the inside with dry paper towels and
use stainless steel cleaner on the outer shell. Avoid abrasive
cleaning products.
How do I care for my stone baking boards?
You should only cook pizza and dry, bread-based dishes
directly on the stone baking boards. If you are cooking meat,
vegetables or other dishes then we would recommend using
your Ooni Sizzler Pan.
Your stone baking boards can be cleaned by running your
Ooni Pro at top temperatures. If you would like to hand wash
your stone baking boards, use warm water and dry them in a
conventional oven for a minimum of 2 hours at 140°F (60°C).
The stone baking boards are not dishwasher safe.
How do I extinguish my Ooni Pro?
Gas: Switch off, detach the gas regulator from the bottle and
leave to cool.
Charcoal/wood: Leave your Ooni Pro to burn through any
remaining fuel and allow it to cool naturally.
Caution: Do not apply water directly to your Ooni Pro to
extinguish or cool it down as this can cause damage and
personal injury.
How do I clean the glass on the door?
Allow your Ooni Pro to completely cool before wiping down
the glass with a paper towel.
Caution: Do not expose the glass to water while still warm or
hot as this may cause damage to your Ooni Pro.
TipOnce they have completely cooled, you can flip the stone baking boards for the next time you use your Ooni Pro: The top temperatures inside Pro will naturally clean the underside.
2524

Troubleshooting
I can’t light my Ooni Pro
Refer to the steps on page 18 onwards. The easiest way to
light wood and charcoal is using a blow torch. Remember to
remove the chimney cap and to open the vents as necessary.
If you are having difficulty lighting your gas burner, please refer
to the Ooni Pro gas burner manual.
My gas burner does not ignite
Refer to the steps in your gas burner manual and ensure that
you are using the pizza door.
I am seeing smoke or soot
When any wood or charcoal starts to burn, there will be smoke
produced until it reaches optimum temperatures. Add fuel
gradually and make sure it is burning cleanly before cooking. If
you continue to see dark smoke, it may be that your fuel is not
completely dry or that too much has been added at once.
My window is sooty
There will always be a light layer of soot when cooking with
wood or charcoal. If this happens during your cook, wait for
your Ooni Pro to completely cool before gently wiping the
glass with a paper towel.
It’s safe to say that on any given day at least one member of our team is out using their Ooni – whether trying out recipes or, well, just because we love the food Ooni cooks. Between us, we’ve racked up thousands of hours of cooking and we think we know how to get the best from Ooni Pro. We’re always happy to give advice and tips: Remember to check out our online resources and to contact us at [email protected] if you have any questions.
Caution: Do not expose the glass to water while still warm or
hot as this may cause damage to your Ooni Pro.
My Ooni Pro is too hot
If your Pro is running too hot, stop adding fuel and remove
the hatch to release some heat. You can also reduce the draw
from the chimney by adjusting the chimney vent.
My Ooni Pro is not hot enough
Your door with thermometer measures the ambient
temperature inside Ooni Pro. However, this may differ from
the temperature of the stones. We recommend an infrared
thermometer for reading the temperature on the stone baking
boards. If your Pro is not reaching top temperatures, here are
a few things to consider:
• Your stone baking boards should be dry before you cook
(you can dry them in a conventional oven at 140°F (60°C)
for 2 hours).
• If your Ooni Pro has been exposed to adverse weather
conditions, including rain, it will take longer to preheat.
• Make sure the chimney cap is removed before you light and
while you cook.
• Check that your ceiling and chimney vents are in the correct
position. Refer to page 14 in this guide for tips.
• Make sure the fuel that you are using is dry and suitable for
Ooni Pro.
• The grate in your charcoal/wood burner may need to be
brushed while cool to free up the air holes before lighting.
TipIf your stone baking board is too hot, try resting an Ooni Sizzler Pan on it for 30 seconds or so to absorb some of the heat.
CautionNever use your Ooni Pro in high winds.
2726
My stone baking boards look dirty
Your stone baking boards may change colour during your
cook but this will not affect performance. If you want, you can
scrape away any excess food with your peel. Once they have
completely cooled, you can flip the stone baking boards up-
side-down for the next time you use your Ooni Pro: the top
temperatures inside Pro will naturally clean them.
If you would prefer to handwash your stone baking boards,
allow them to completely cool before washing them with
warm water. They should then be dried in a conventional oven
for 2 hours at 140°F (60°C)
My pizza is stuck to the peel
It’s happened to the best of us, but try these tips and you’ll
never suffer the heartbreak of losing a pizza again:
• Your peel, dough and sauce should be at room temperature.
• The dough that you are using may be too wet: Add a
generous sprinkling of flour to the dough and peel before
beginning your stretch. Remember to use the Ooni Classic
Pizza Dough recipe (page 32) for the best results.
• Take care to ensure that there are no holes in the dough as
sauce can create a ‘glue’ effect between the dough and peel.
• Before you add toppings, give the peel a shake to ensure that
your dough is moving freely.
• Keep your toppings light.
• Do not leave your dough on the peel for a long time before
cooking.
• If your dough has become stuck, lift it at one side and give a
gentle blow of air underneath: This will create a ‘hovercraft’
effect and your pizza should glide more easily from your peel
to the stone.
My Ooni Pro has changed colour
The appearance of stainless steel can be affected when
exposed to temperatures of 1000°F (537°C) and parts of your
Pro will regularly reach this temperature and above. This will
not affect the performance of your Ooni Pro.
We recommend storing your Ooni Pro using your Ooni Pro
Cover and keeping it in a dry environment. Some imperfections
can be removed using a stainless steel cleaner.
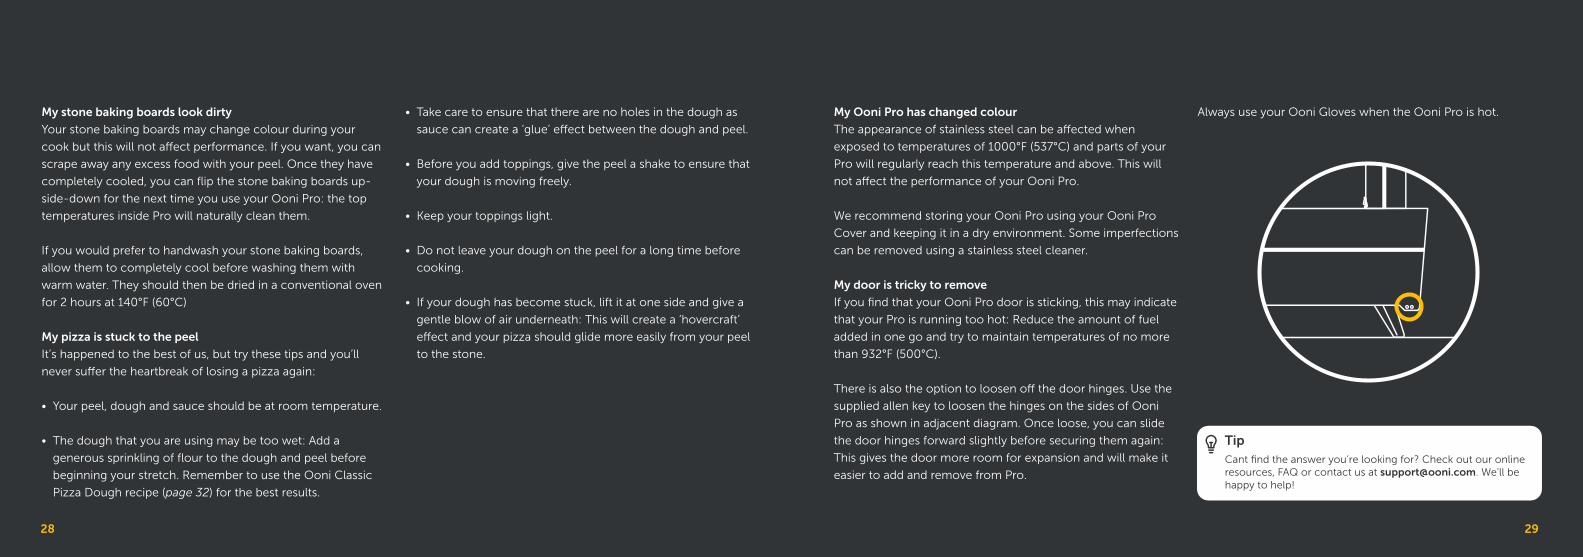
My door is tricky to remove
If you find that your Ooni Pro door is sticking, this may indicate
that your Pro is running too hot: Reduce the amount of fuel
added in one go and try to maintain temperatures of no more
than 932°F (500°C).
There is also the option to loosen off the door hinges. Use the
supplied allen key to loosen the hinges on the sides of Ooni
Pro as shown in adjacent diagram. Once loose, you can slide
the door hinges forward slightly before securing them again:
This gives the door more room for expansion and will make it
easier to add and remove from Pro.
Always use your Ooni Gloves when the Ooni Pro is hot.
TipCant find the answer you’re looking for? Check out our online resources, FAQ or contact us at [email protected]. We’ll be happy to help!
2928
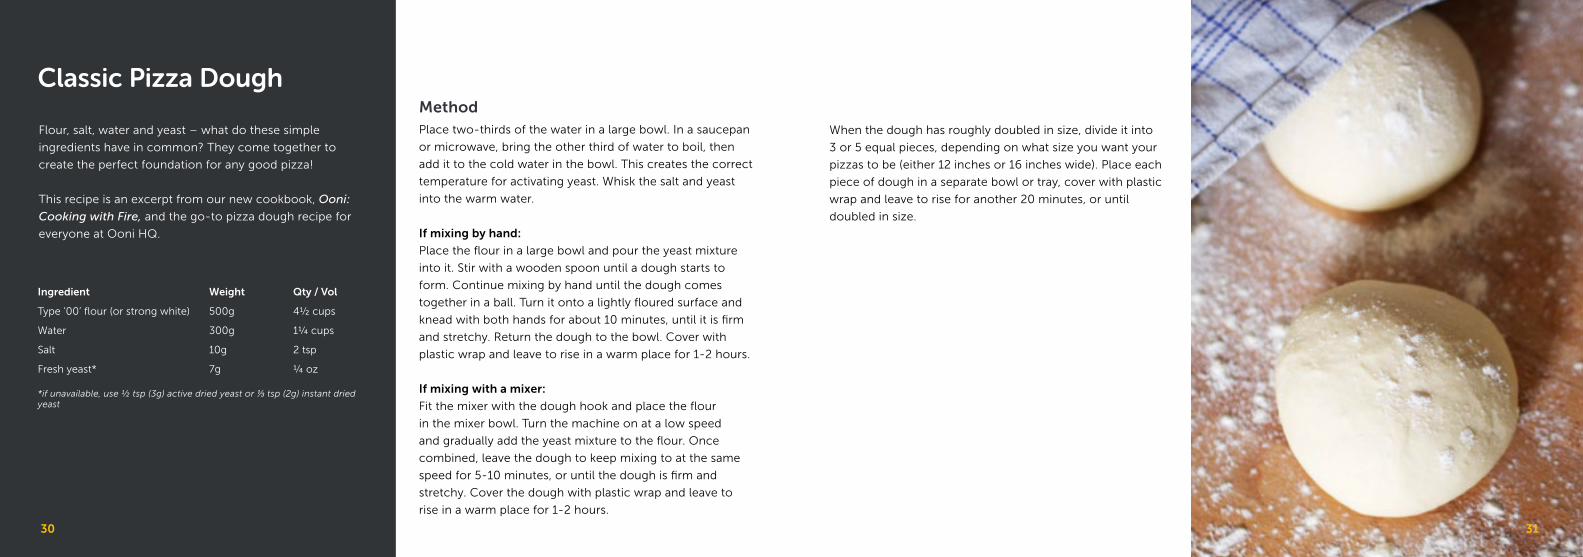
Classic Pizza Dough
Flour, salt, water and yeast – what do these simple
ingredients have in common? They come together to
create the perfect foundation for any good pizza!
This recipe is an excerpt from our new cookbook, Ooni:
Cooking with Fire, and the go-to pizza dough recipe for
everyone at Ooni HQ.
MethodPlace two-thirds of the water in a large bowl. In a saucepan
or microwave, bring the other third of water to boil, then
add it to the cold water in the bowl. This creates the correct
temperature for activating yeast. Whisk the salt and yeast
into the warm water.
If mixing by hand:
Place the flour in a large bowl and pour the yeast mixture
into it. Stir with a wooden spoon until a dough starts to
form. Continue mixing by hand until the dough comes
together in a ball. Turn it onto a lightly floured surface and
knead with both hands for about 10 minutes, until it is firm
and stretchy. Return the dough to the bowl. Cover with
plastic wrap and leave to rise in a warm place for 1-2 hours.
If mixing with a mixer:
Fit the mixer with the dough hook and place the flour
in the mixer bowl. Turn the machine on at a low speed
and gradually add the yeast mixture to the flour. Once
combined, leave the dough to keep mixing to at the same
speed for 5-10 minutes, or until the dough is firm and
stretchy. Cover the dough with plastic wrap and leave to
rise in a warm place for 1-2 hours.
*if unavailable, use ½ tsp (3g) active dried yeast or ⅓ tsp (2g) instant dried yeast
Ingredient Weight Qty / Vol
Type ‘00’ flour (or strong white) 500g 4½ cups
Water 300g 1¼ cups
Salt 10g 2 tsp
Fresh yeast* 7g ¼ oz
When the dough has roughly doubled in size, divide it into
3 or 5 equal pieces, depending on what size you want your
pizzas to be (either 12 inches or 16 inches wide). Place each
piece of dough in a separate bowl or tray, cover with plastic
wrap and leave to rise for another 20 minutes, or until
doubled in size.
3130

Classic Pizza Sauce
Simplicity at its finest, our super easy, no-nonsense Classic
Pizza Sauce creates the perfect complement for layering up
your pizza toppings of choice.
Made using a stovetop (hob) rather than in your Ooni, this
recipe is an excerpt from our cookbook, Ooni: Cooking with
Fire. Choosing good quality tomatoes will make a difference
to the flavor of your sauce - we like to go for canned San
Marzano tomatoes, which are the traditional choice for
Neapolitan pizzas.
MethodPlace the oil in a pan over a medium heat. When warm, add
the garlic and fry until softened but not brown.
Add all the remaining ingredients, then simmer on a low
heat for 20 minutes, or until the flavor has deepened and
the sauce has thickened slightly.
This sauce can be used straight away, or placed in an
airtight container and stored in the fridge for up to a week,
ready to be used as required.
Ingredient Weight Qty / Vol
Canned tomatoes 800g 4 cups
Olive oil 30g 2 tbsp
Sugar 10g 2 tsp
Salt 4g 1 tsp
2 garlic cloves, crushed or finely chopped
Handful of basil leaves, roughly chopped
Pinch of freshly ground black pepper
3332
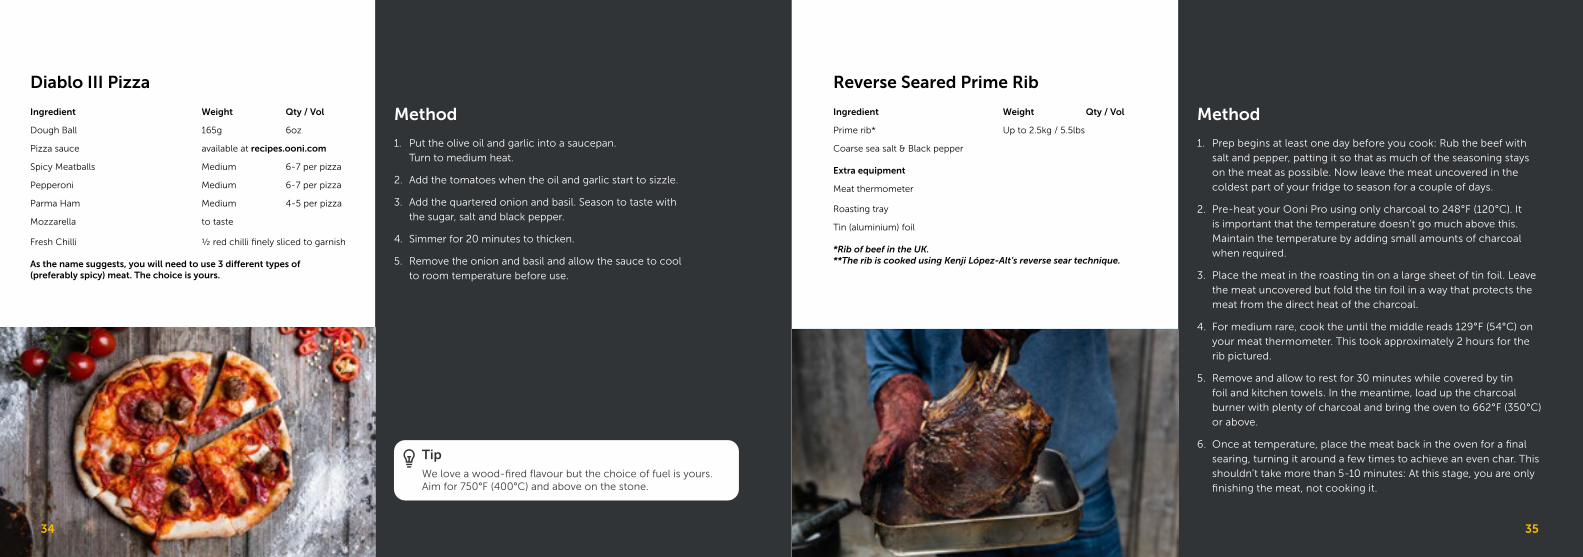
Method
1. Prep begins at least one day before you cook: Rub the beef with
salt and pepper, patting it so that as much of the seasoning stays
on the meat as possible. Now leave the meat uncovered in the
coldest part of your fridge to season for a couple of days.
2. Pre-heat your Ooni Pro using only charcoal to 248°F (120°C). It
is important that the temperature doesn’t go much above this.
Maintain the temperature by adding small amounts of charcoal
when required.
3. Place the meat in the roasting tin on a large sheet of tin foil. Leave
the meat uncovered but fold the tin foil in a way that protects the
meat from the direct heat of the charcoal.
4. For medium rare, cook the until the middle reads 129°F (54°C) on
your meat thermometer. This took approximately 2 hours for the
rib pictured.
5. Remove and allow to rest for 30 minutes while covered by tin
foil and kitchen towels. In the meantime, load up the charcoal
burner with plenty of charcoal and bring the oven to 662°F (350°C)
or above.
6. Once at temperature, place the meat back in the oven for a final
searing, turning it around a few times to achieve an even char. This
shouldn’t take more than 5-10 minutes: At this stage, you are only
finishing the meat, not cooking it.
Method
1. Put the olive oil and garlic into a saucepan.
Turn to medium heat.
2. Add the tomatoes when the oil and garlic start to sizzle.
3. Add the quartered onion and basil. Season to taste with
the sugar, salt and black pepper.
4. Simmer for 20 minutes to thicken.
5. Remove the onion and basil and allow the sauce to cool
to room temperature before use.
TipWe love a wood-fired flavour but the choice of fuel is yours. Aim for 750°F (400°C) and above on the stone.
Reverse Seared Prime Rib
Ingredient Weight Qty / Vol
Prime rib* Up to 2.5kg / 5.5lbs
Coarse sea salt & Black pepper
Extra equipment
Meat thermometer
Roasting tray
Tin (aluminium) foil
*Rib of beef in the UK.**The rib is cooked using Kenji López-Alt’s reverse sear technique.
Diablo III Pizza
Ingredient Weight Qty / Vol
Dough Ball 165g 6oz
Pizza sauce available at recipes.ooni.com
Spicy Meatballs Medium 6-7 per pizza
Pepperoni Medium 6-7 per pizza
Parma Ham Medium 4-5 per pizza
Mozzarella to taste
Fresh Chilli ½ red chilli finely sliced to garnish
As the name suggests, you will need to use 3 different types of (preferably spicy) meat. The choice is yours.
3534
1% of Ooni’s global turnover is actively managed for charitable causes and positive social
and environmental change through the Ooni Impact Fund. So far we have planted tens
of thousands of trees and we’re a member of 1% for the Planet.
Keep in touchWe love hearing and seeing what you create and cook with
your Ooni Pro so keep in touch by tagging your photos
with #ooni or #oonified
Follow us and keep up to date with all things Ooni via:
Subscribe to our mailing list at ooni.com for access to
delicious recipes, top tips and exclusive promotions.
If you have any questions, queries or comments then
you can reach us at [email protected].
3736

Everyone deserves great pizza
v1.9
ooni.com© 2020 OoniOoni is a registered trademark of Ooni Ltd. All rights reserved.