Embed Size (px)
Citation preview
OpenCV for FTC101 - Setup
FTC 7393Johan VandegriffNikita Woottengearbox4h.org
Who is this class for?
What you should know to fully learn this material:
● Java programming● Android Studio Basics (enough to make/modify an app and upload it
to a phone)
This class is mostly targeted at veteran team members, but if you are a rookie, you can still learn it, especially once your season has started and you are more familiar with programming your robot. You will also do fine in this class if you have made apps with Android Studio before.
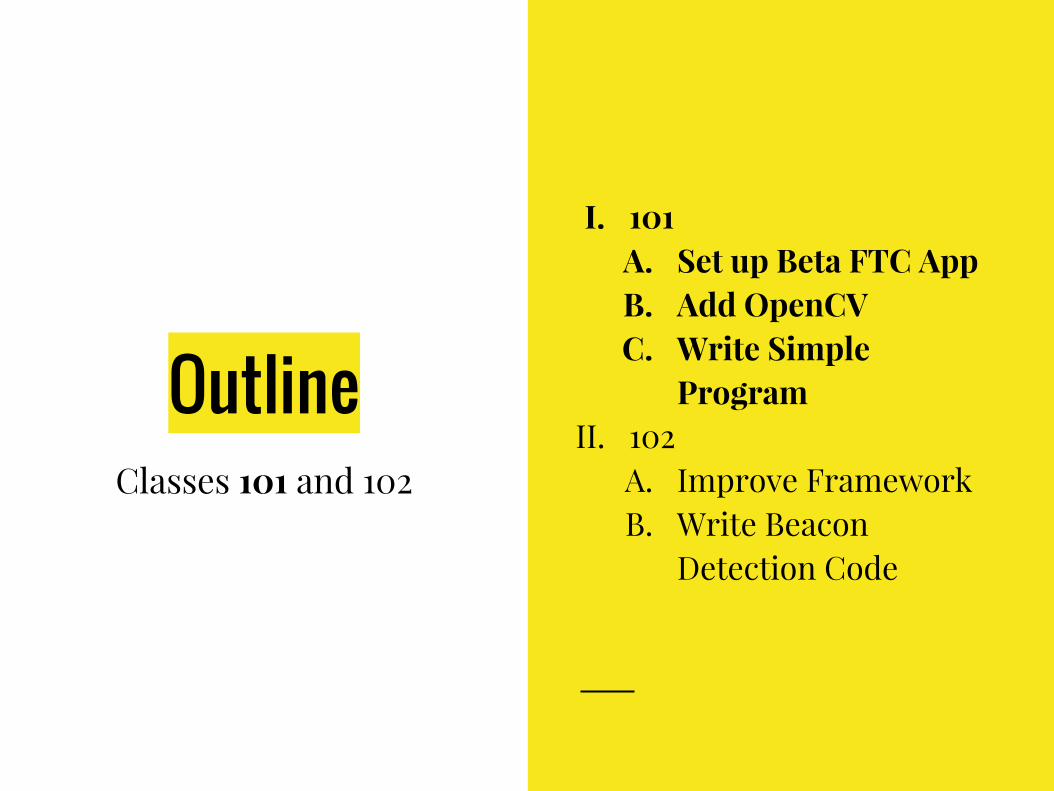
OutlineClasses 101 and 102
I. 101A. Set up Beta FTC AppB. Add OpenCVC. Write Simple
ProgramII. 102
A. Improve FrameworkB. Write Beacon
Detection Code
OpenCV for FTC 101 - Setup
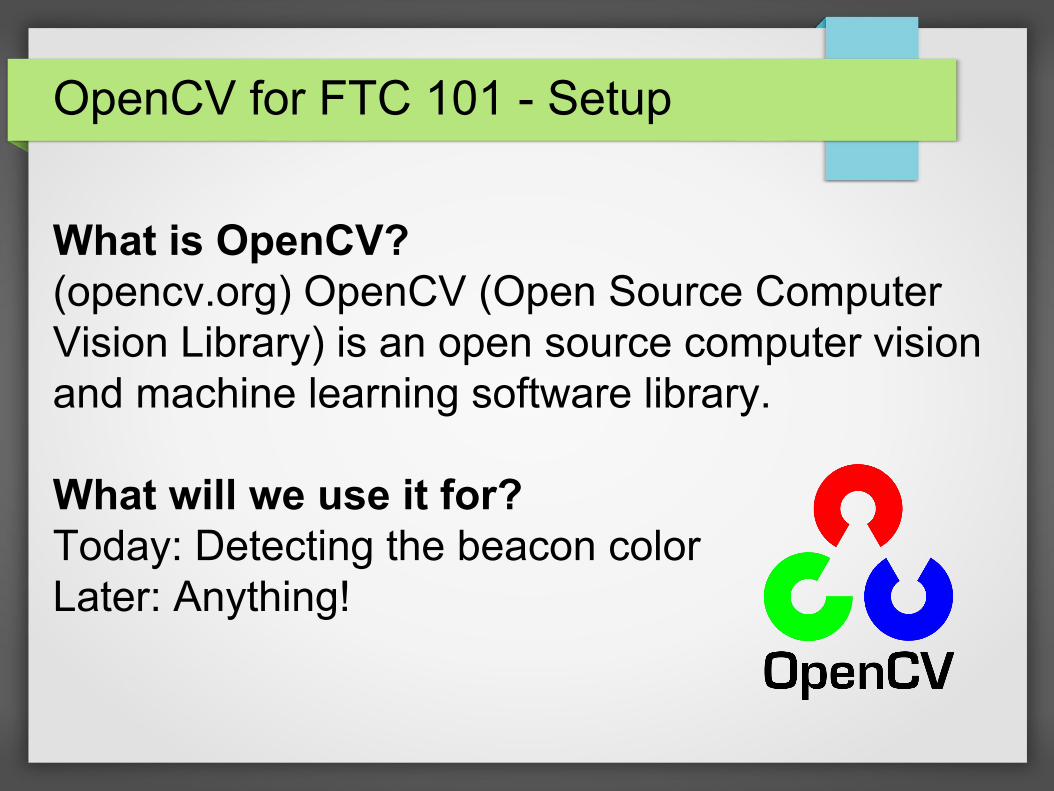
What is OpenCV?(opencv.org) OpenCV (Open Source Computer Vision Library) is an open source computer vision and machine learning software library.
What will we use it for?Today: Detecting the beacon colorLater: Anything!
OpenCV for FTC 101 Overview
I. Download needed filesII. Set up the FTC beta app
III. Import OpenCV into the appA. Modify the build.gradle filesB. Add OpenCV as a dependencyC. Copy the OpenCV jniLibs into the app
IV. Add camera capabilityA. Add the camera permissionB. Add the camera frame and button to the layoutC. Show the camera frame on the screen

What You Need
A copy of the ftc_app, (beta version as released on 2016-08-09 or newer)The OpenCV library, version 3.1 for AndroidA copy of the tutorial code for the class(Optional) Pictures of the beacon for easy testing
Visit gearbox4h.org/opencv for download links
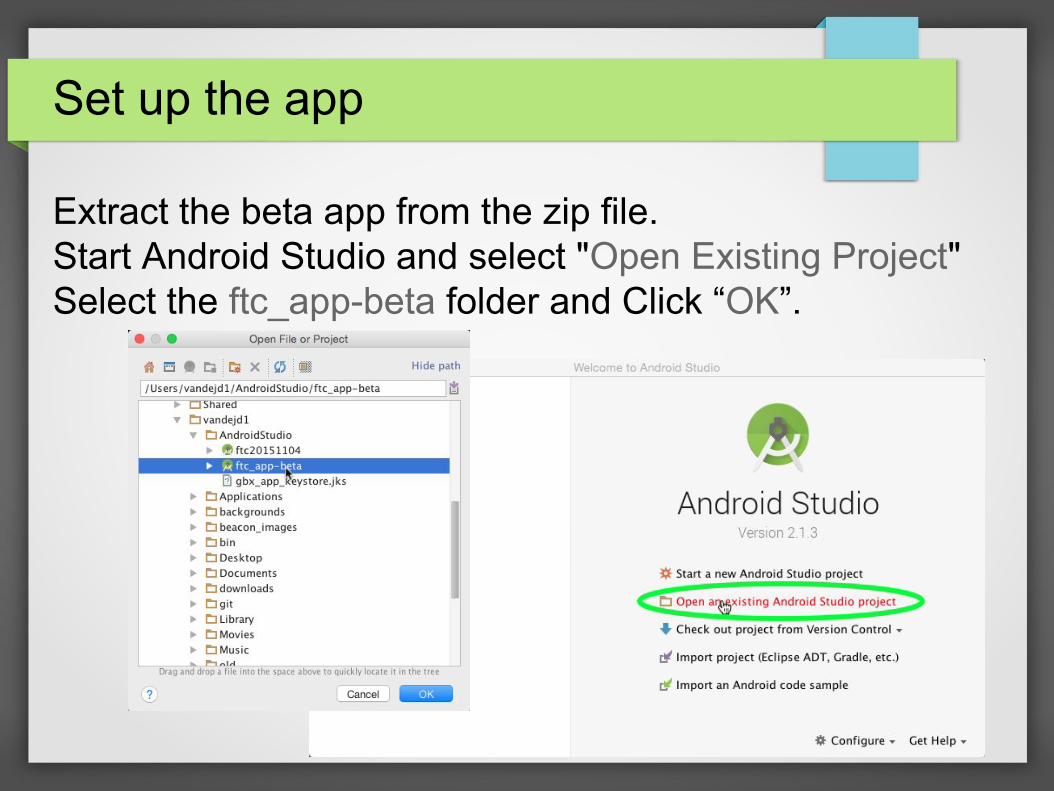
Set up the app
Extract the beta app from the zip file.Start Android Studio and select "Open Existing Project"Select the ftc_app-beta folder and Click “OK”.
Wait for Gradle to build (someday)....
Import OpenCV into the app
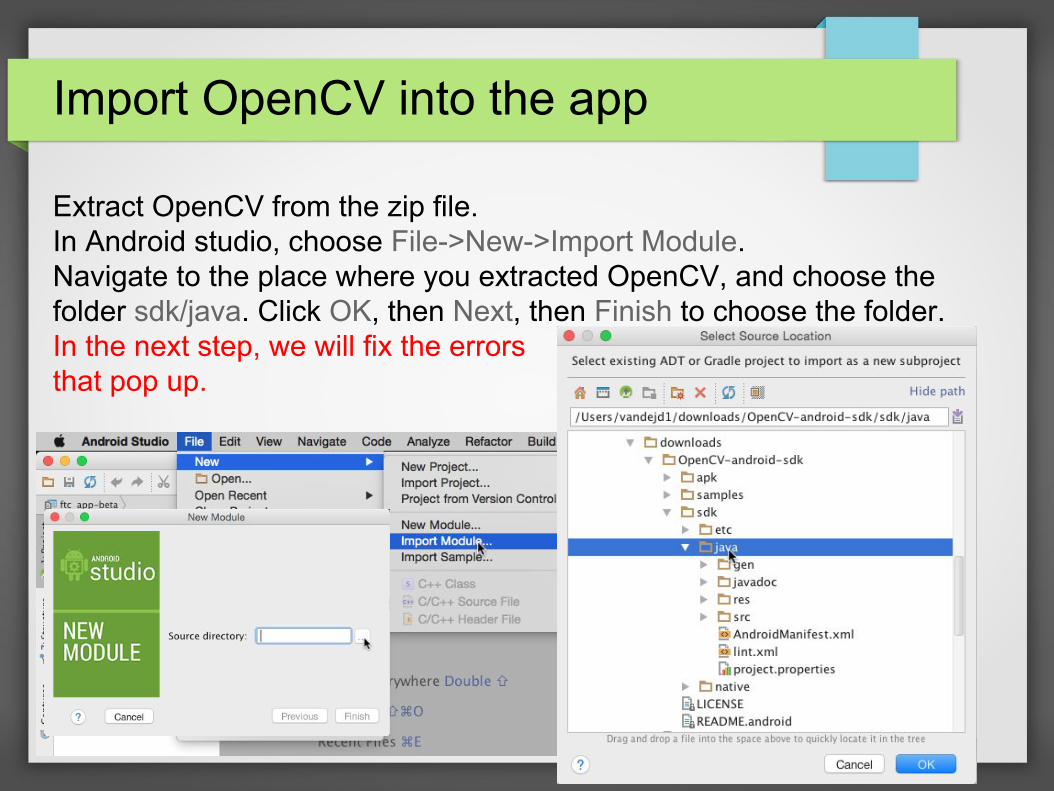
Extract OpenCV from the zip file.In Android studio, choose File->New->Import Module.Navigate to the place where you extracted OpenCV, and choose the folder sdk/java. Click OK, then Next, then Finish to choose the folder.In the next step, we will fix the errorsthat pop up.
Resolve Missing Build Tools
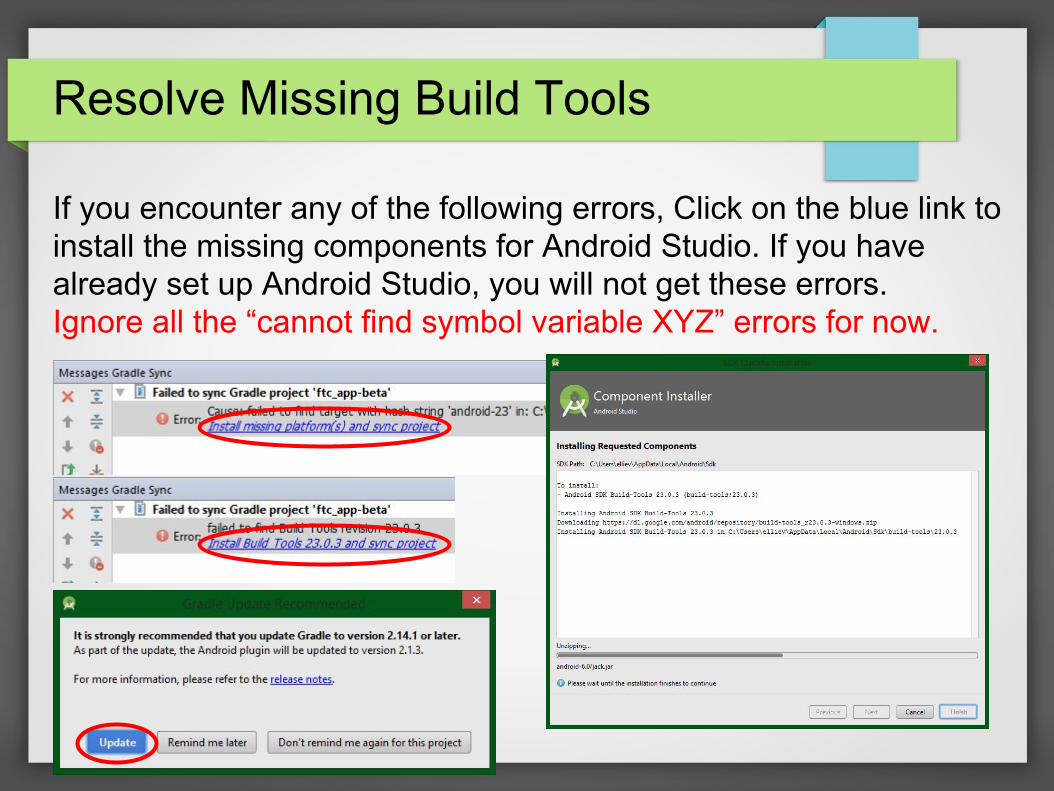
If you encounter any of the following errors, Click on the blue link to install the missing components for Android Studio. If you have already set up Android Studio, you will not get these errors.Ignore all the “cannot find symbol variable XYZ” errors for now.
Modify build.gradle Files
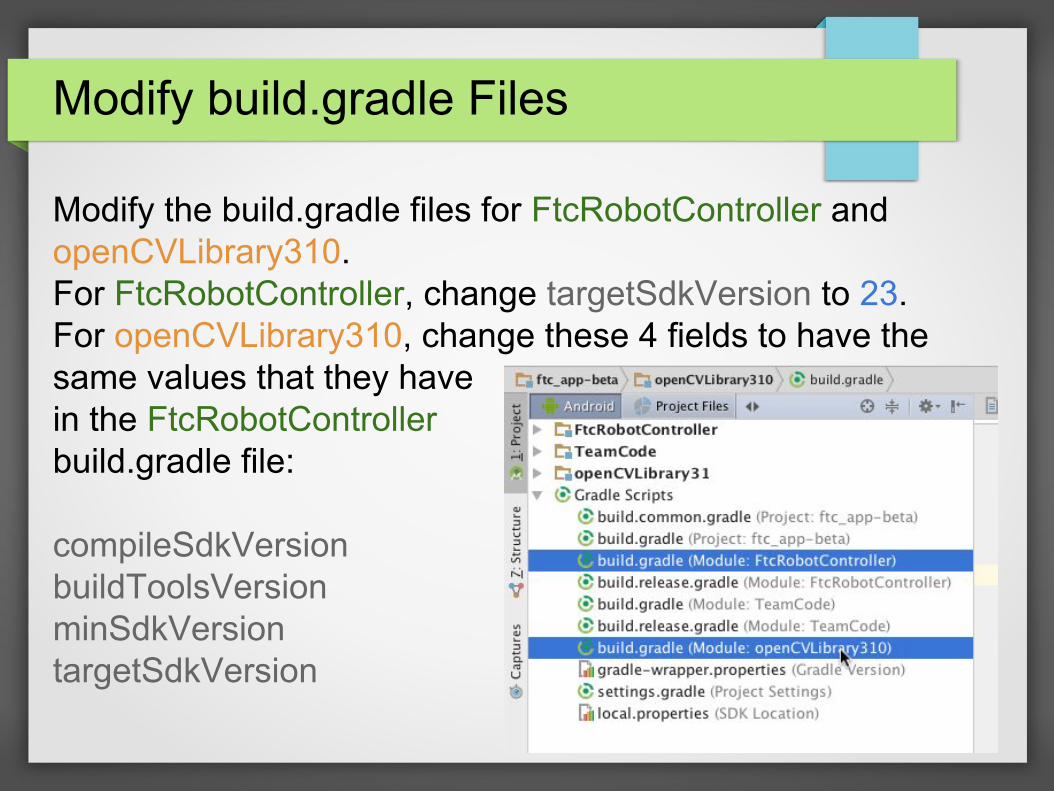
Modify the build.gradle files for FtcRobotController and openCVLibrary310.For FtcRobotController, change targetSdkVersion to 23.For openCVLibrary310, change these 4 fields to have the same values that they havein the FtcRobotControllerbuild.gradle file:
compileSdkVersionbuildToolsVersionminSdkVersiontargetSdkVersion
Add OpenCV as a Dependency
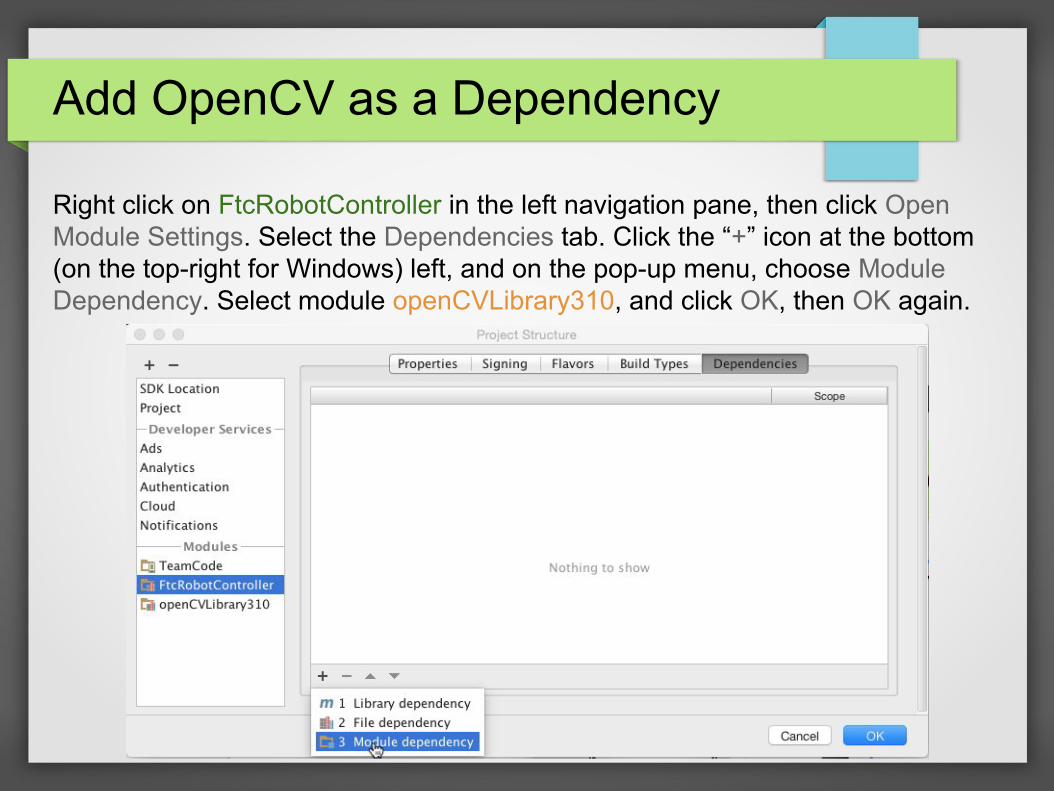
Right click on FtcRobotController in the left navigation pane, then click Open Module Settings. Select the Dependencies tab. Click the “+” icon at the bottom (on the top-right for Windows) left, and on the pop-up menu, choose Module Dependency. Select module openCVLibrary310, and click OK, then OK again.
Copy OpenCV jniLibs into the app
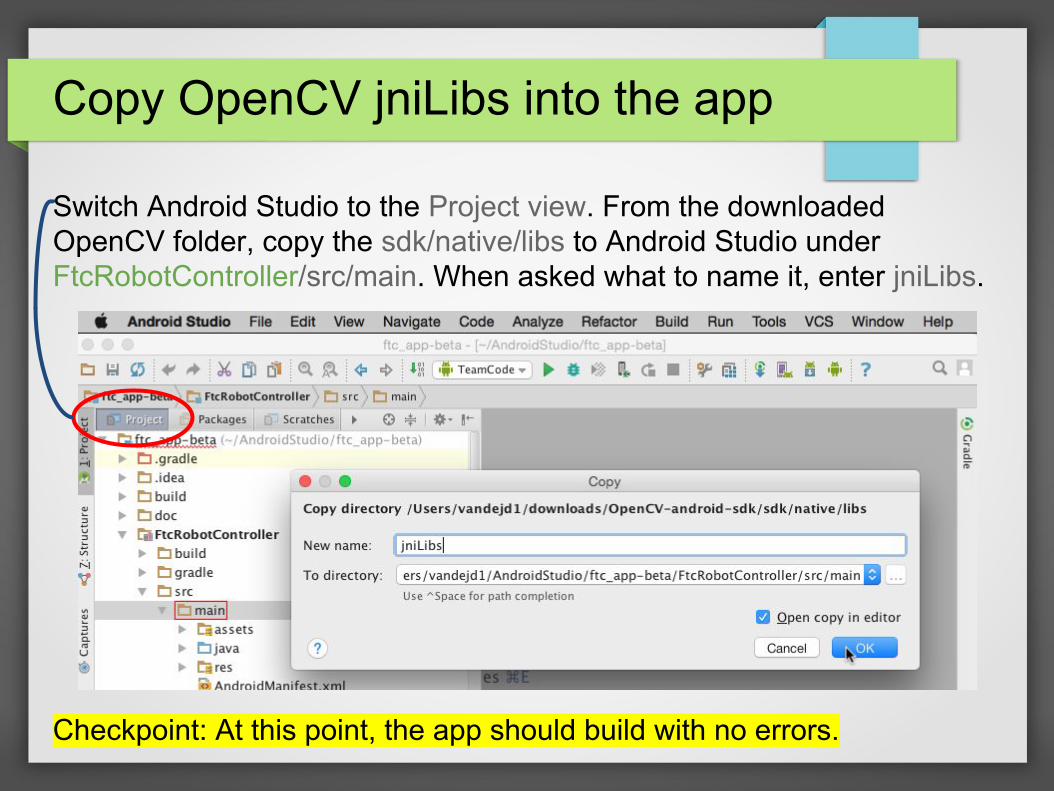
Switch Android Studio to the Project view. From the downloaded OpenCV folder, copy the sdk/native/libs to Android Studio under FtcRobotController/src/main. When asked what to name it, enter jniLibs.
Checkpoint: At this point, the app should build with no errors.

Adding Camera Permission
Switch the left navigation pane back to the Android View. Open FtcRobotController/manfests/AndroidManifest.xmlRight before the XML tag for “<application …”, insert the text from 101/CameraPermission.txt from the tutorial files.
Adding Camera Frame & Button
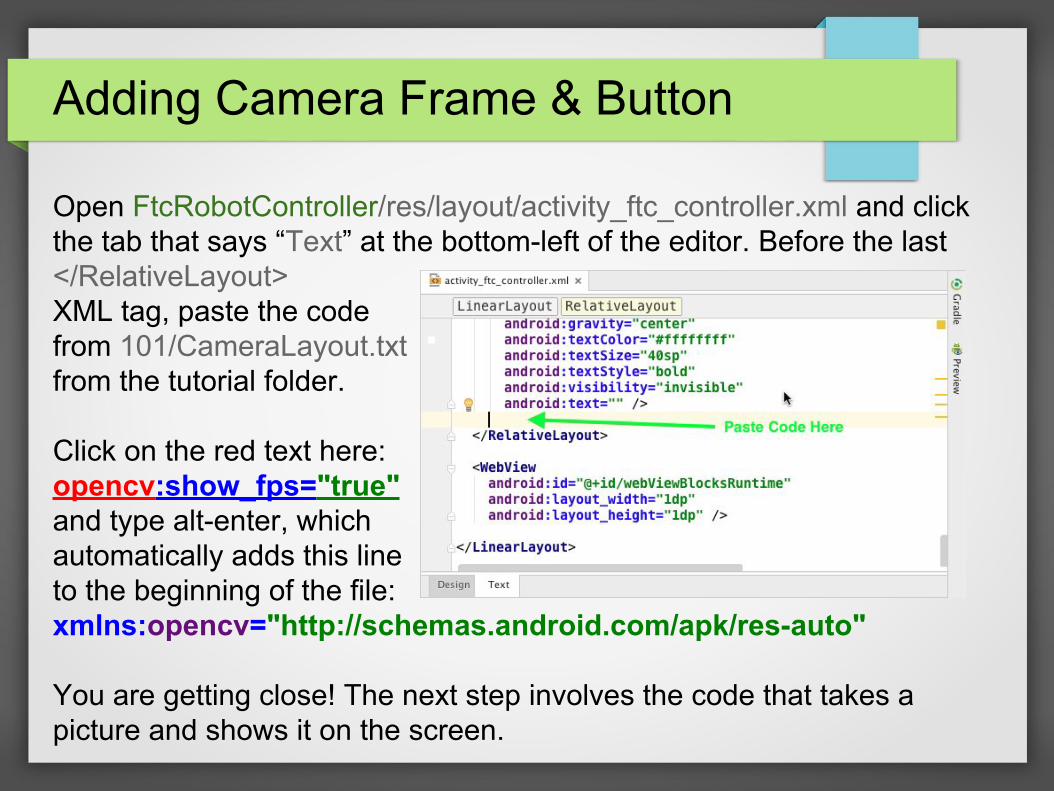
Open FtcRobotController/res/layout/activity_ftc_controller.xml and click the tab that says “Text” at the bottom-left of the editor. Before the last </RelativeLayout>XML tag, paste the codefrom 101/CameraLayout.txtfrom the tutorial folder.
Click on the red text here:opencv:show_fps="true"and type alt-enter, whichautomatically adds this lineto the beginning of the file:xmlns:opencv="http://schemas.android.com/apk/res-auto"
You are getting close! The next step involves the code that takes a picture and shows it on the screen.
Modify FtcRobotControllerActivity
This step requires modifying the FtcRobotController/java/org.firstinspires.ftc.robotcontroller.internal/FtcRobotControllerActivity.java class. In the tutorial folder 101, look at the modified version of FtcRobotControllerActivity.java for code inside these markers: ////////////// START VISION PROCESSING CODE ////////////// ////////////// END VISION PROCESSING CODE //////////////Copy the code into FtcRobotControllerActivity.java in the same places it appears in the reference. If you have not modified the file before, you might be able to copy and paste the entire file (but be careful).Ignore all the errors for now. They will be fixed in later steps.
Show the Frame on the Screen
Make a new package in FtcRobotController/java called ftc.vision. This is where we will put all our vision codeMake a new Class in that package:
public class FrameGrabber implements CameraBridgeViewBase.CvCameraViewListener2 {}
Click on the error and type Alt-EnterSelect “Implement Methods” and click “OK”This will create 3 methods automatically to override the ones on the CvCameraViewListener2 interface.
Show the Frame on the Screen
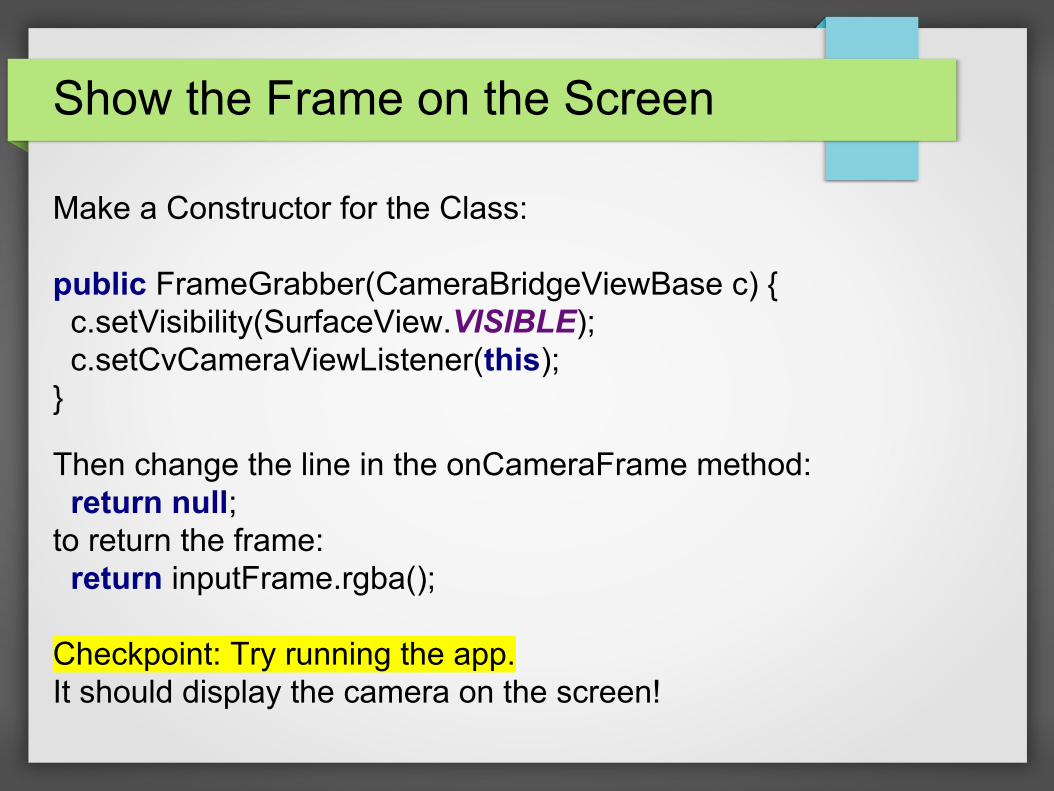
Make a Constructor for the Class:
public FrameGrabber(CameraBridgeViewBase c) { c.setVisibility(SurfaceView.VISIBLE); c.setCvCameraViewListener(this);}
Then change the line in the onCameraFrame method: return null;to return the frame: return inputFrame.rgba();
Checkpoint: Try running the app.It should display the camera on the screen!
Troubleshooting
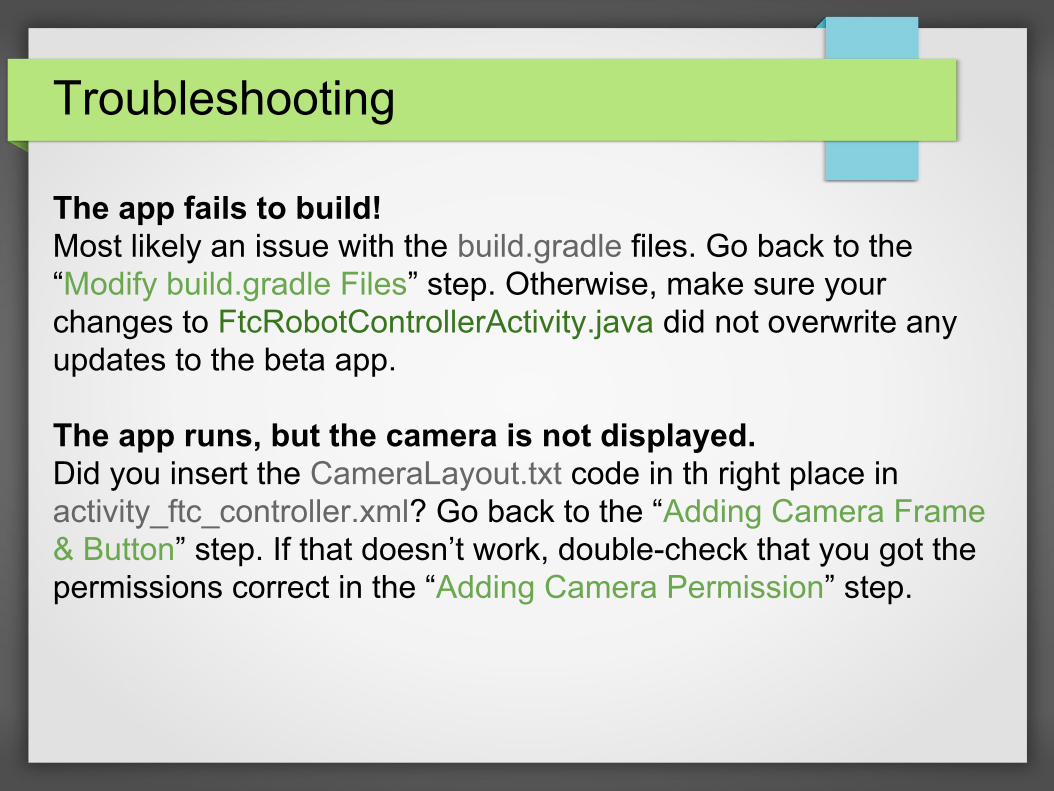
The app fails to build!Most likely an issue with the build.gradle files. Go back to the “Modify build.gradle Files” step. Otherwise, make sure your changes to FtcRobotControllerActivity.java did not overwrite any updates to the beta app.
The app runs, but the camera is not displayed.Did you insert the CameraLayout.txt code in th right place in activity_ftc_controller.xml? Go back to the “Adding Camera Frame & Button” step. If that doesn’t work, double-check that you got the permissions correct in the “Adding Camera Permission” step.
Results
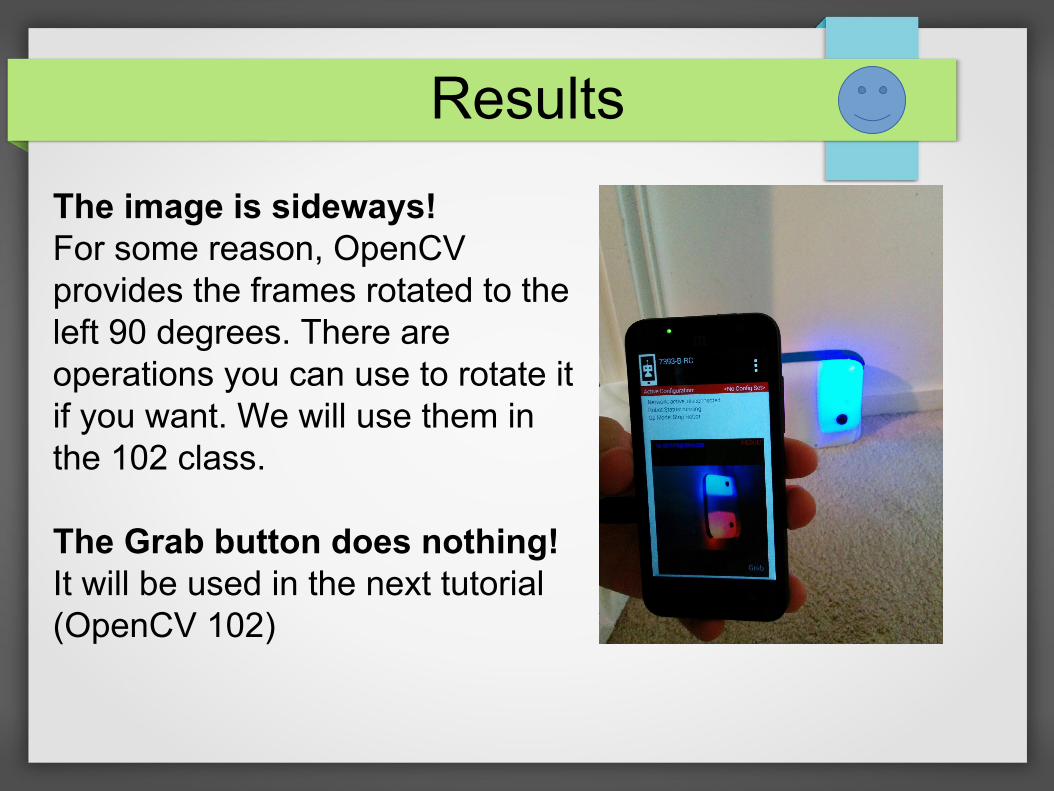
The image is sideways!For some reason, OpenCV provides the frames rotated to the left 90 degrees. There are operations you can use to rotate it if you want. We will use them in the 102 class.
The Grab button does nothing!It will be used in the next tutorial (OpenCV 102)
This Concludes Lesson 101
At this point you have OpenCV set up. You have two options from here:
● Write your own code inside the FrameGrabber class.● Continue the slides to class 102 to detect the beacon.

OpenCV for FTC102 - Beacon Detection
FTC 7393Johan VandegriffNikita Woottengearbox4h.org
OutlineClasses 101 and 102
I. 101A. Set up Beta FTC AppB. Add OpenCVC. Write Simple Program
II. 102A. Improve FrameworkB. Write Beacon
Detection Code
OpenCV for FTC 102 - Beacon Detection
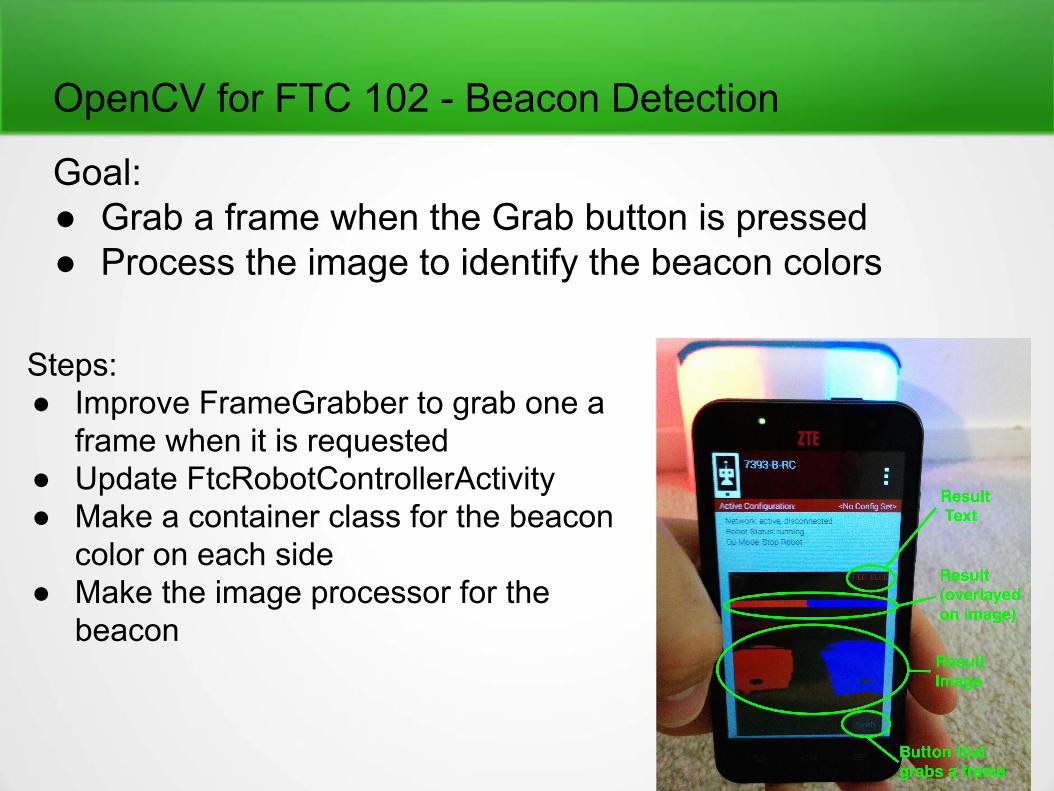
Steps:● Improve FrameGrabber to grab one a
frame when it is requested● Update FtcRobotControllerActivity● Make a container class for the beacon
color on each side● Make the image processor for the
beacon
Goal:● Grab a frame when the Grab button is pressed● Process the image to identify the beacon colors
Improve FrameGrabber
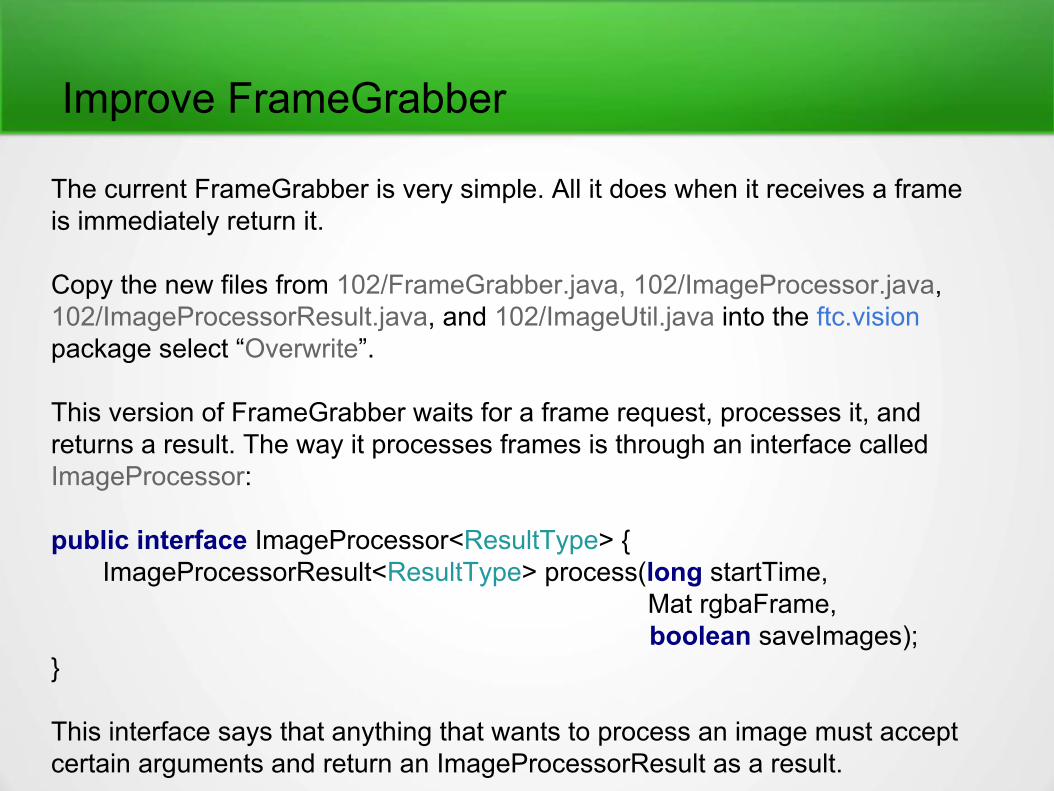
The current FrameGrabber is very simple. All it does when it receives a frame is immediately return it.
Copy the new files from 102/FrameGrabber.java, 102/ImageProcessor.java, 102/ImageProcessorResult.java, and 102/ImageUtil.java into the ftc.vision package select “Overwrite”.
This version of FrameGrabber waits for a frame request, processes it, and returns a result. The way it processes frames is through an interface called ImageProcessor:
public interface ImageProcessor<ResultType> { ImageProcessorResult<ResultType> process(long startTime, Mat rgbaFrame, boolean saveImages);}
This interface says that anything that wants to process an image must accept certain arguments and return an ImageProcessorResult as a result.
Update FtcRobotControllerActivity
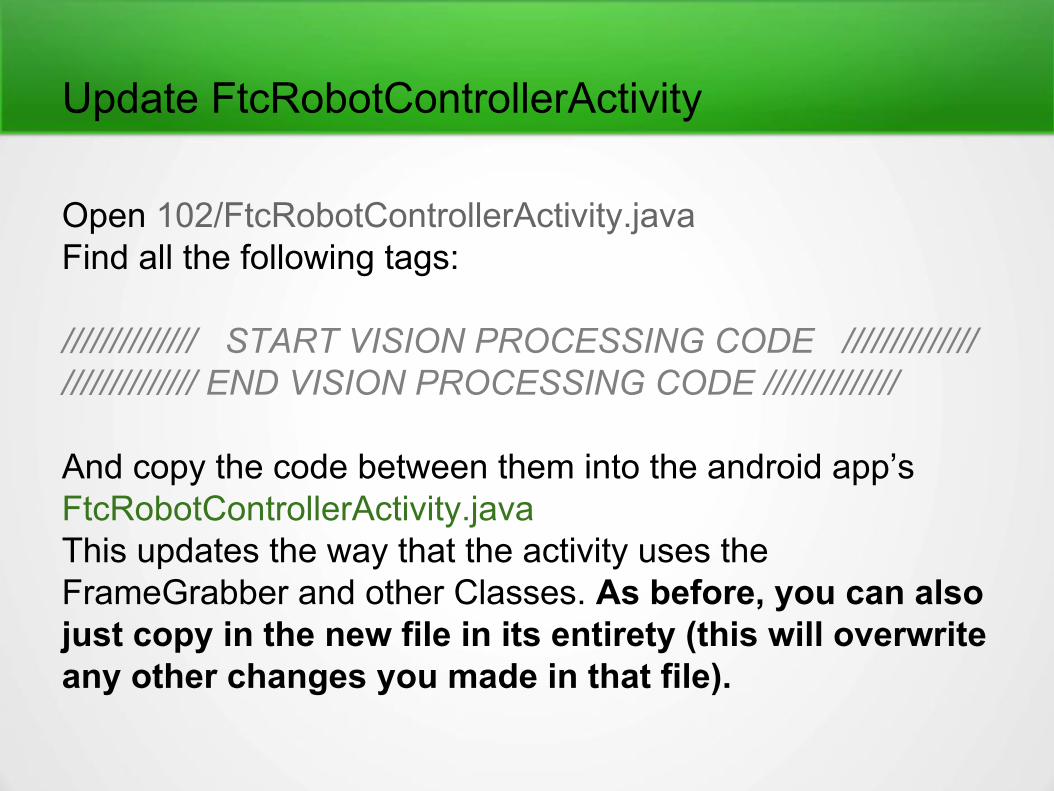
Open 102/FtcRobotControllerActivity.javaFind all the following tags:
////////////// START VISION PROCESSING CODE //////////////////////////// END VISION PROCESSING CODE //////////////
And copy the code between them into the android app’s FtcRobotControllerActivity.javaThis updates the way that the activity uses the FrameGrabber and other Classes. As before, you can also just copy in the new file in its entirety (this will overwrite any other changes you made in that file).
Beacon Color Result Container Class
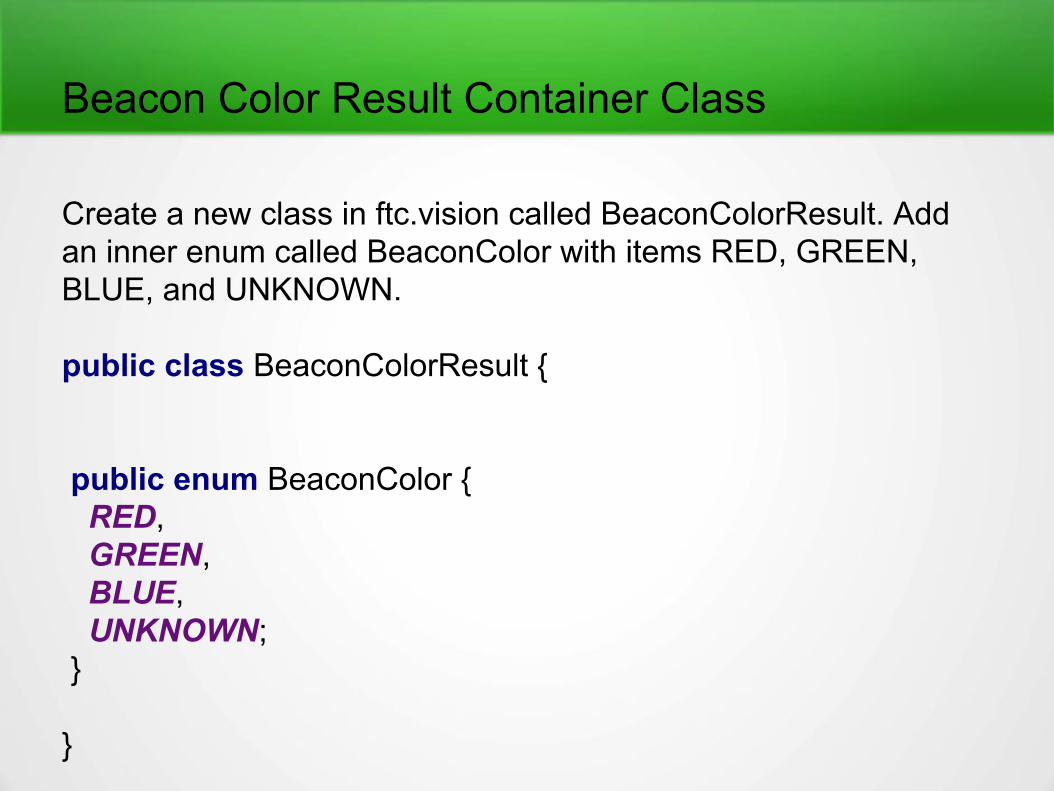
Create a new class in ftc.vision called BeaconColorResult. Add an inner enum called BeaconColor with items RED, GREEN, BLUE, and UNKNOWN.
public class BeaconColorResult {
public enum BeaconColor { RED, GREEN, BLUE, UNKNOWN; }
}
Beacon Result Container Class
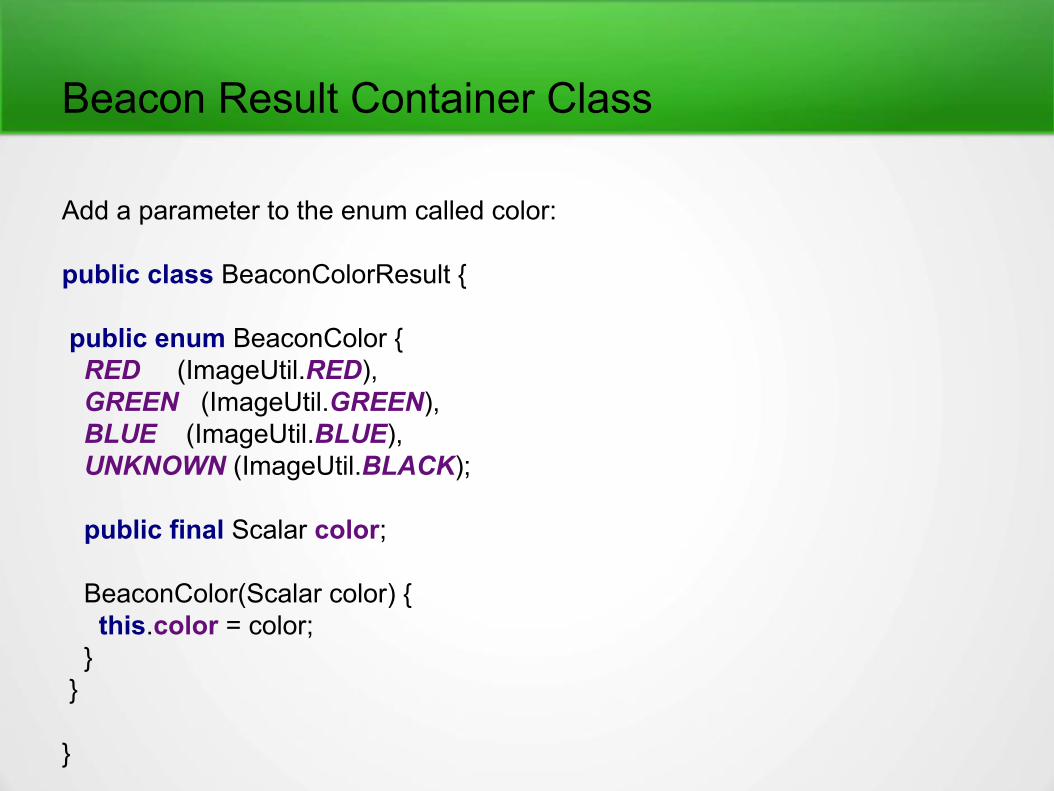
Add a parameter to the enum called color:
public class BeaconColorResult {
public enum BeaconColor { RED (ImageUtil.RED), GREEN (ImageUtil.GREEN), BLUE (ImageUtil.BLUE), UNKNOWN (ImageUtil.BLACK);
public final Scalar color;
BeaconColor(Scalar color) { this.color = color; } }
}
Beacon Result Container Class
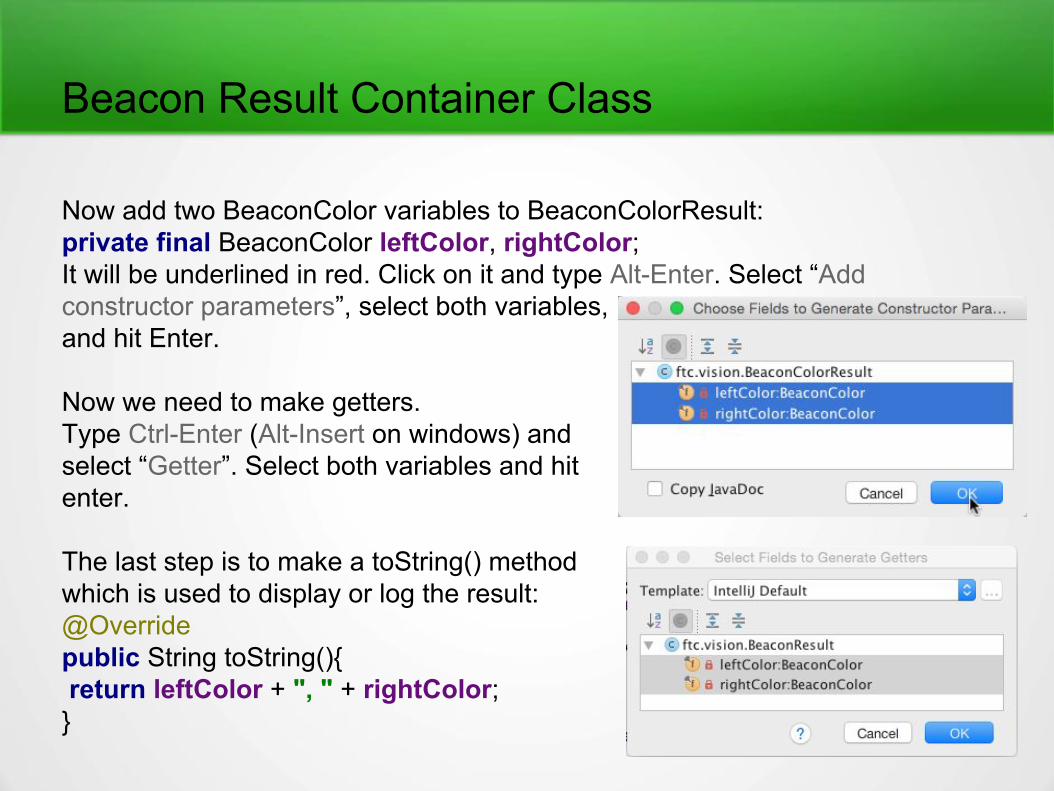
Now add two BeaconColor variables to BeaconColorResult:private final BeaconColor leftColor, rightColor;It will be underlined in red. Click on it and type Alt-Enter. Select “Add constructor parameters”, select both variables,and hit Enter.
Now we need to make getters.Type Ctrl-Enter (Alt-Insert on windows) andselect “Getter”. Select both variables and hitenter.
The last step is to make a toString() methodwhich is used to display or log the result:@Overridepublic String toString(){ return leftColor + ", " + rightColor;}
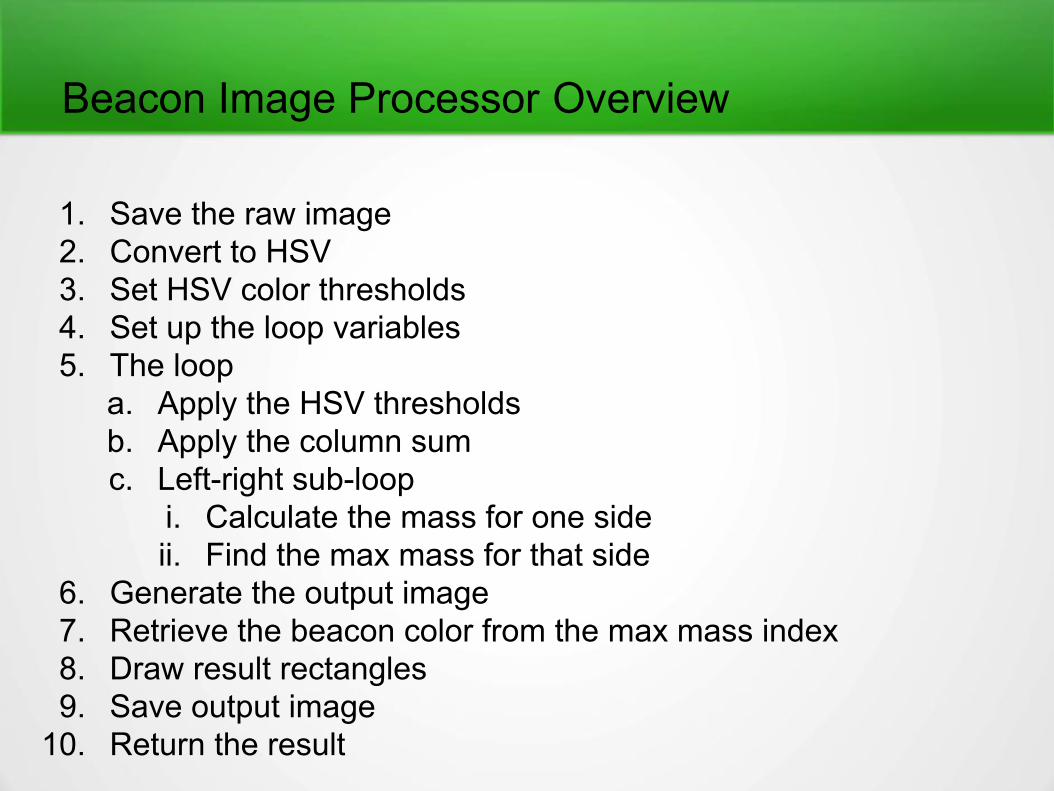
1. Save the raw image2. Convert to HSV3. Set HSV color thresholds4. Set up the loop variables5. The loop
a. Apply the HSV thresholdsb. Apply the column sumc. Left-right sub-loop
i. Calculate the mass for one sideii. Find the max mass for that side
6. Generate the output image7. Retrieve the beacon color from the max mass index8. Draw result rectangles9. Save output image
10. Return the result
Beacon Image Processor Overview
This is the final class! It is also the hardest since all the processing for the beacon takes place in this class.Copy 102/BeaconProcessor.java to ftc.visionThe following slides will go over each section of code.
Alternatively, you can type the code yourself by copying 102/BeaconProcessorStart.java to ftc.vision and renaming it to BeaconProcessor.javaYou will be writing the code that actually processes the frame in this class at the line: //<Type the processing code here>
Beacon Image Processor
Step 1: Save the Raw Image
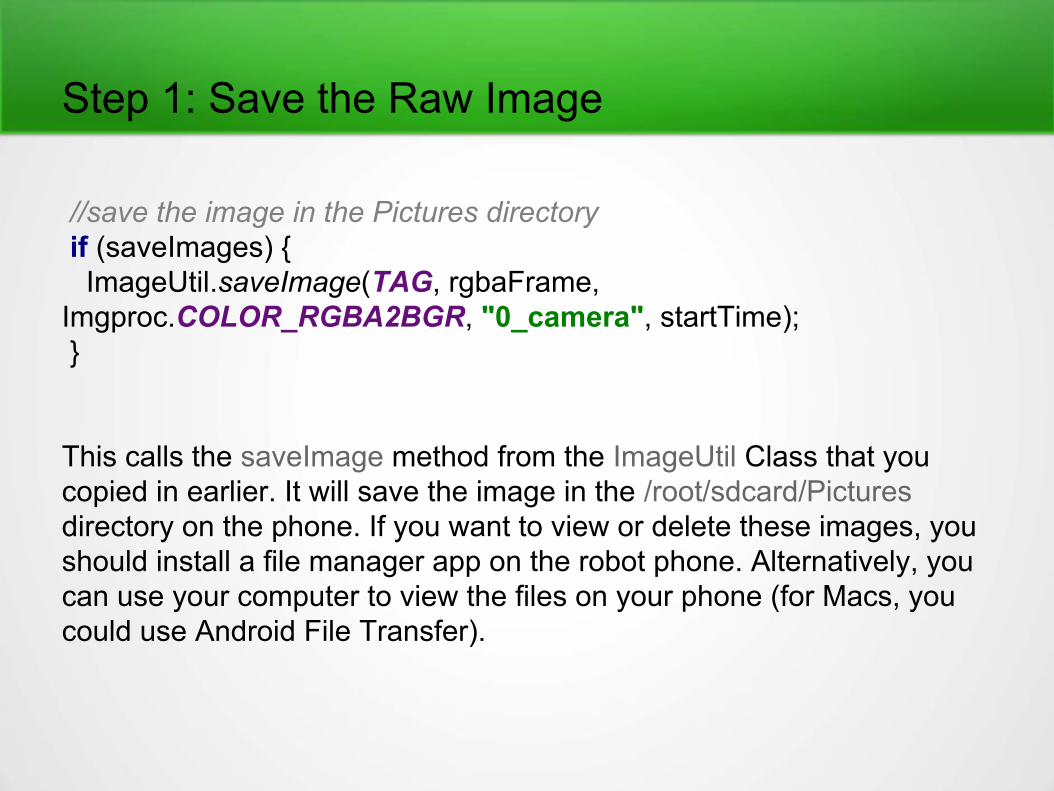
//save the image in the Pictures directory if (saveImages) { ImageUtil.saveImage(TAG, rgbaFrame, Imgproc.COLOR_RGBA2BGR, "0_camera", startTime); }
This calls the saveImage method from the ImageUtil Class that you copied in earlier. It will save the image in the /root/sdcard/Pictures directory on the phone. If you want to view or delete these images, you should install a file manager app on the robot phone. Alternatively, you can use your computer to view the files on your phone (for Macs, you could use Android File Transfer).
Step 2: Convert to HSV (Hue, Saturation, Value)
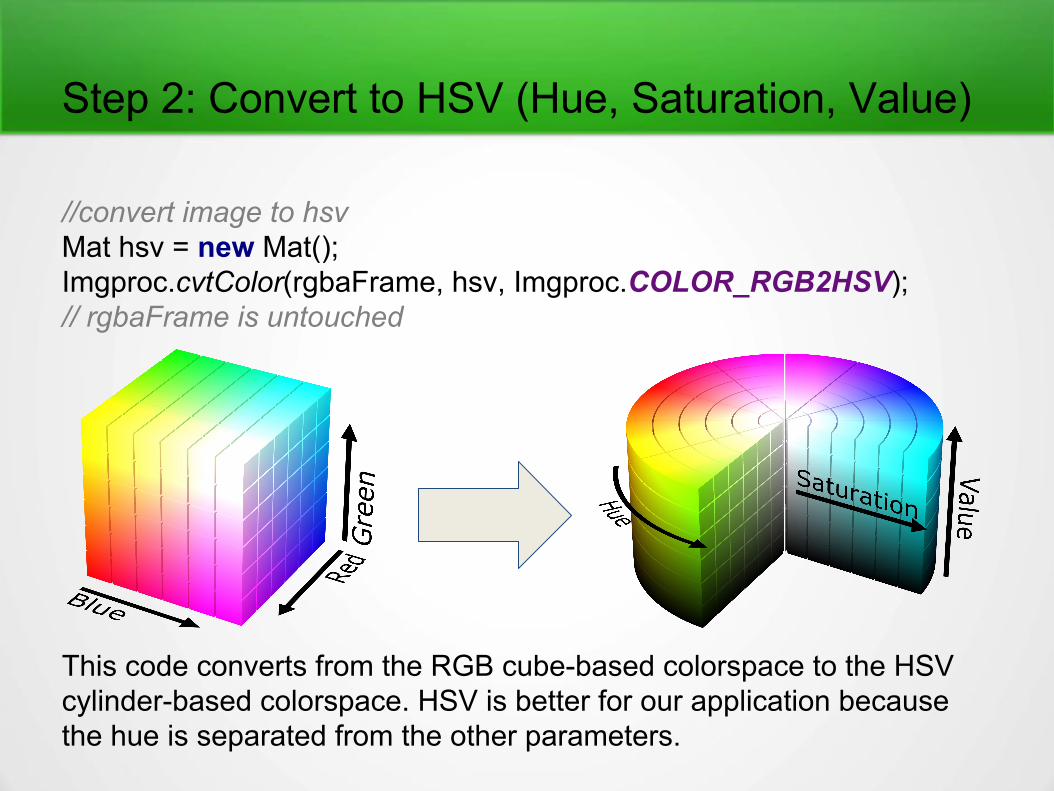
//convert image to hsvMat hsv = new Mat();Imgproc.cvtColor(rgbaFrame, hsv, Imgproc.COLOR_RGB2HSV);// rgbaFrame is untouched
This code converts from the RGB cube-based colorspace to the HSV cylinder-based colorspace. HSV is better for our application because the hue is separated from the other parameters.
Step 3: Set HSV thresholds
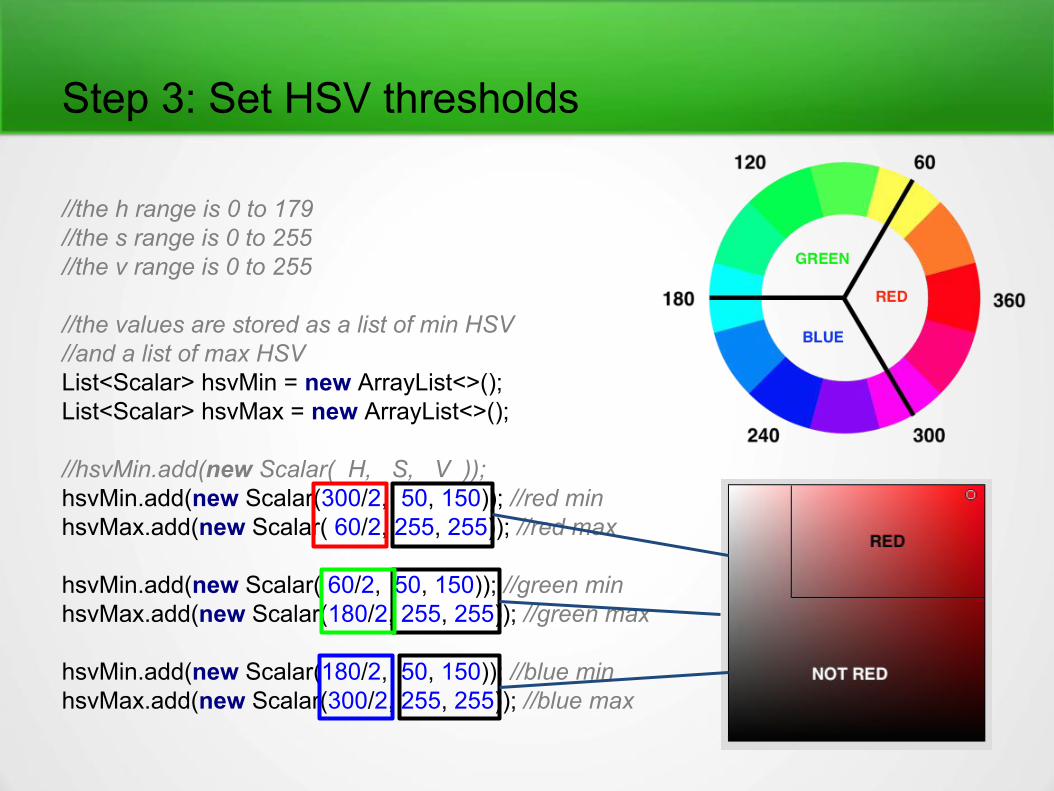
//the h range is 0 to 179//the s range is 0 to 255//the v range is 0 to 255
//the values are stored as a list of min HSV//and a list of max HSVList<Scalar> hsvMin = new ArrayList<>();List<Scalar> hsvMax = new ArrayList<>();
//hsvMin.add(new Scalar( H, S, V ));hsvMin.add(new Scalar(300/2, 50, 150)); //red minhsvMax.add(new Scalar( 60/2, 255, 255)); //red max
hsvMin.add(new Scalar( 60/2, 50, 150)); //green minhsvMax.add(new Scalar(180/2, 255, 255)); //green max
hsvMin.add(new Scalar(180/2, 50, 150)); //blue minhsvMax.add(new Scalar(300/2, 255, 255)); //blue max
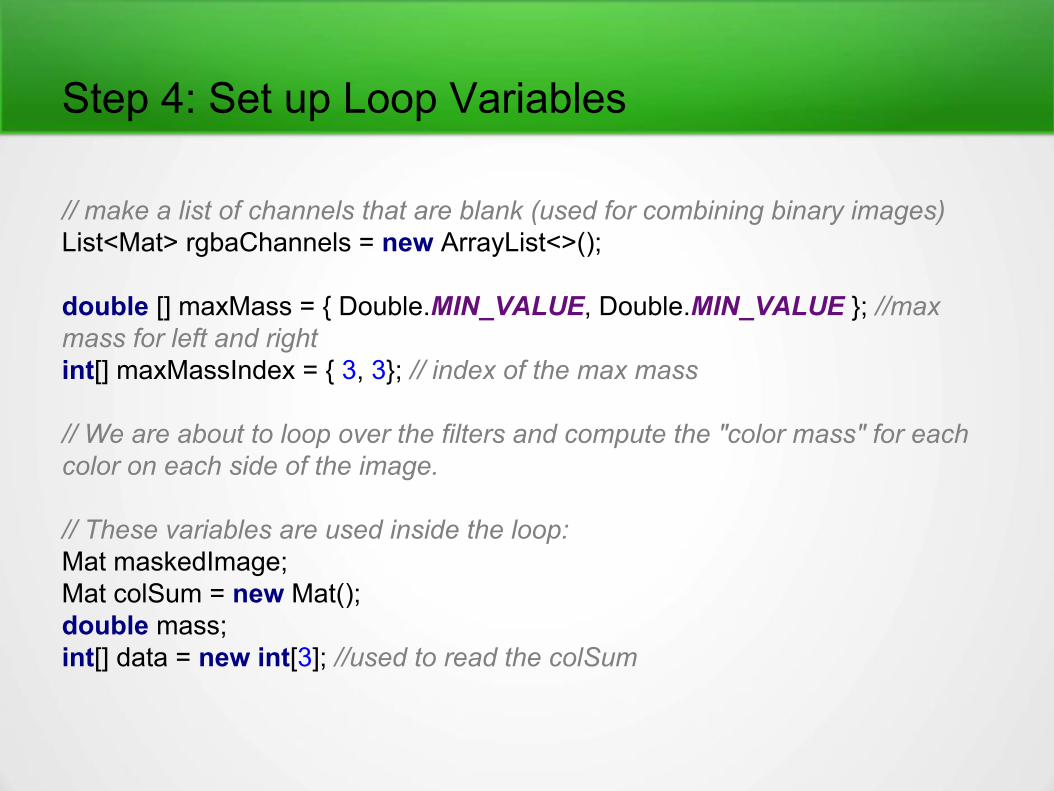
Step 4: Set up Loop Variables
// make a list of channels that are blank (used for combining binary images)List<Mat> rgbaChannels = new ArrayList<>();
double [] maxMass = { Double.MIN_VALUE, Double.MIN_VALUE }; //max mass for left and rightint[] maxMassIndex = { 3, 3}; // index of the max mass
// We are about to loop over the filters and compute the "color mass" for each color on each side of the image.
// These variables are used inside the loop:Mat maskedImage;Mat colSum = new Mat();double mass;int[] data = new int[3]; //used to read the colSum
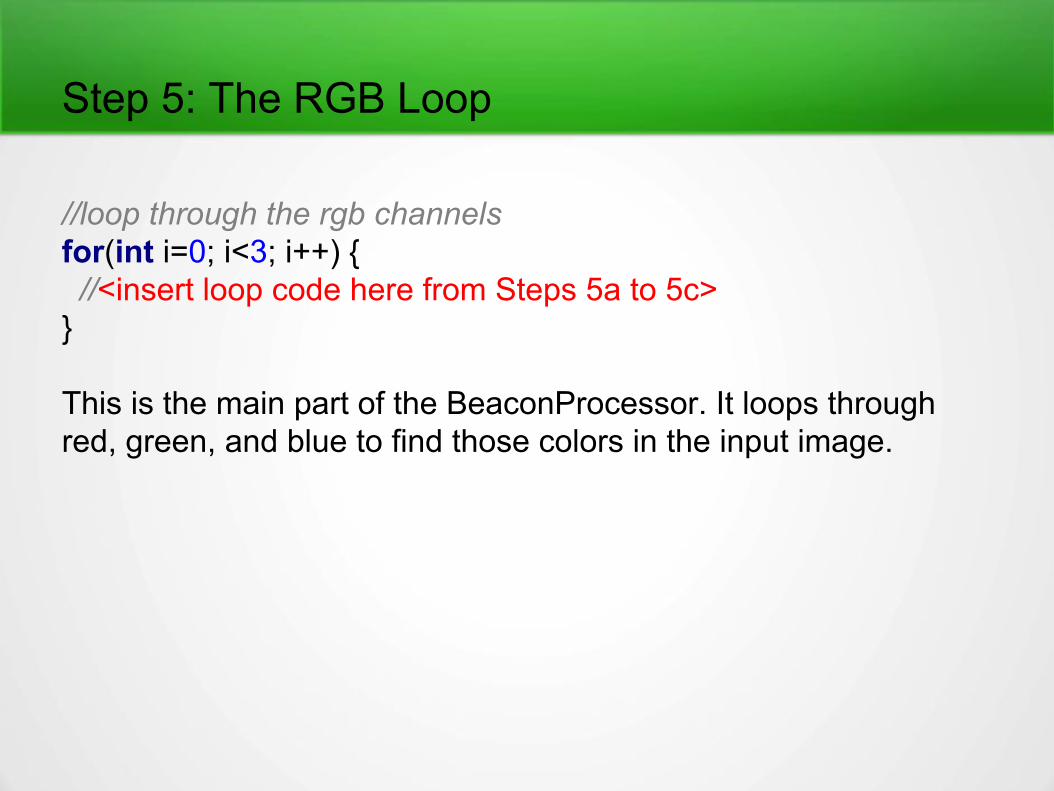
Step 5: The RGB Loop
//loop through the rgb channelsfor(int i=0; i<3; i++) { //<insert loop code here from Steps 5a to 5c>}
This is the main part of the BeaconProcessor. It loops through red, green, and blue to find those colors in the input image.
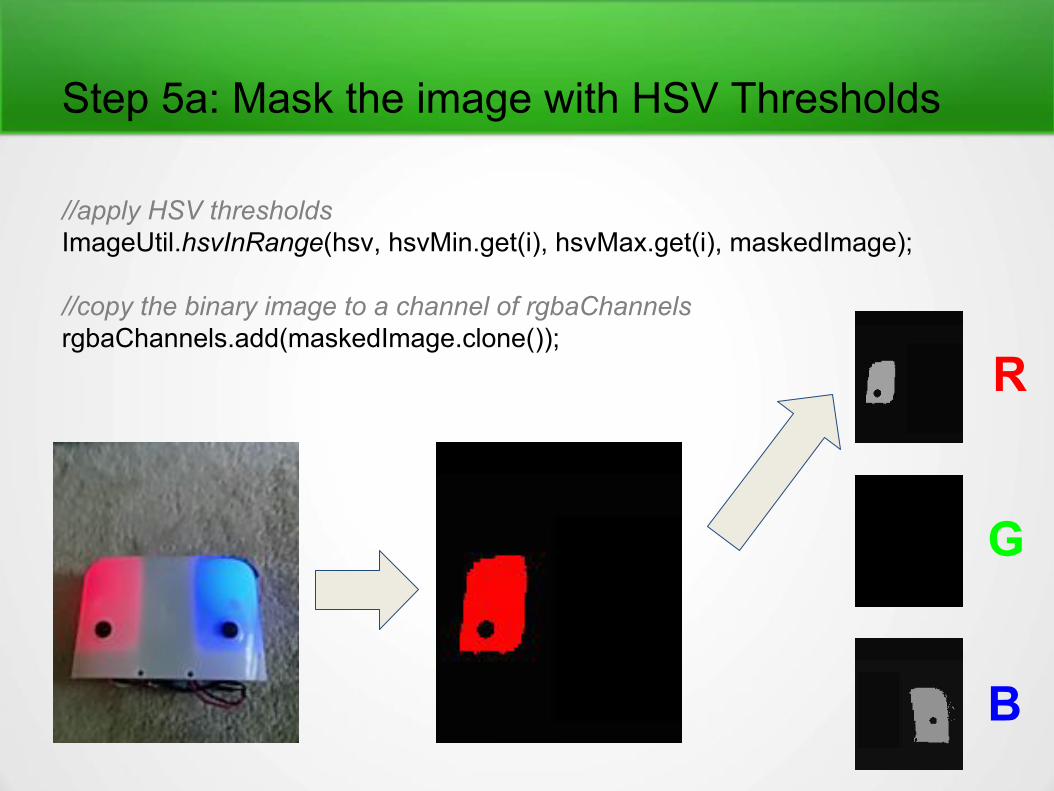
Step 5a: Mask the image with HSV Thresholds
//apply HSV thresholdsImageUtil.hsvInRange(hsv, hsvMin.get(i), hsvMax.get(i), maskedImage);
//copy the binary image to a channel of rgbaChannelsrgbaChannels.add(maskedImage.clone());
R
G
B

Step 5b: Column Sum
//apply a column sum to the (unscaled) binary imageCore.reduce(maskedImage, colSum, 0, Core.REDUCE_SUM, 4);
Graph
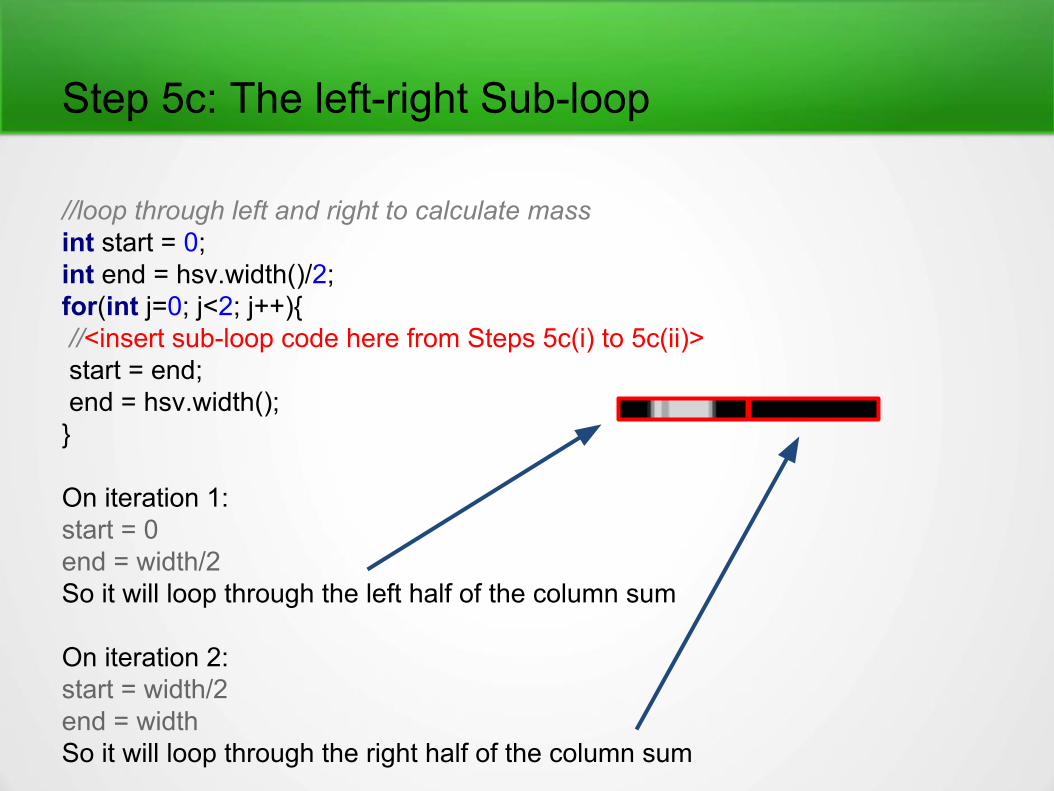
Step 5c: The left-right Sub-loop
//loop through left and right to calculate massint start = 0;int end = hsv.width()/2;for(int j=0; j<2; j++){ //<insert sub-loop code here from Steps 5c(i) to 5c(ii)> start = end; end = hsv.width();}
On iteration 1:start = 0end = width/2So it will loop through the left half of the column sum
On iteration 2:start = width/2end = widthSo it will loop through the right half of the column sum
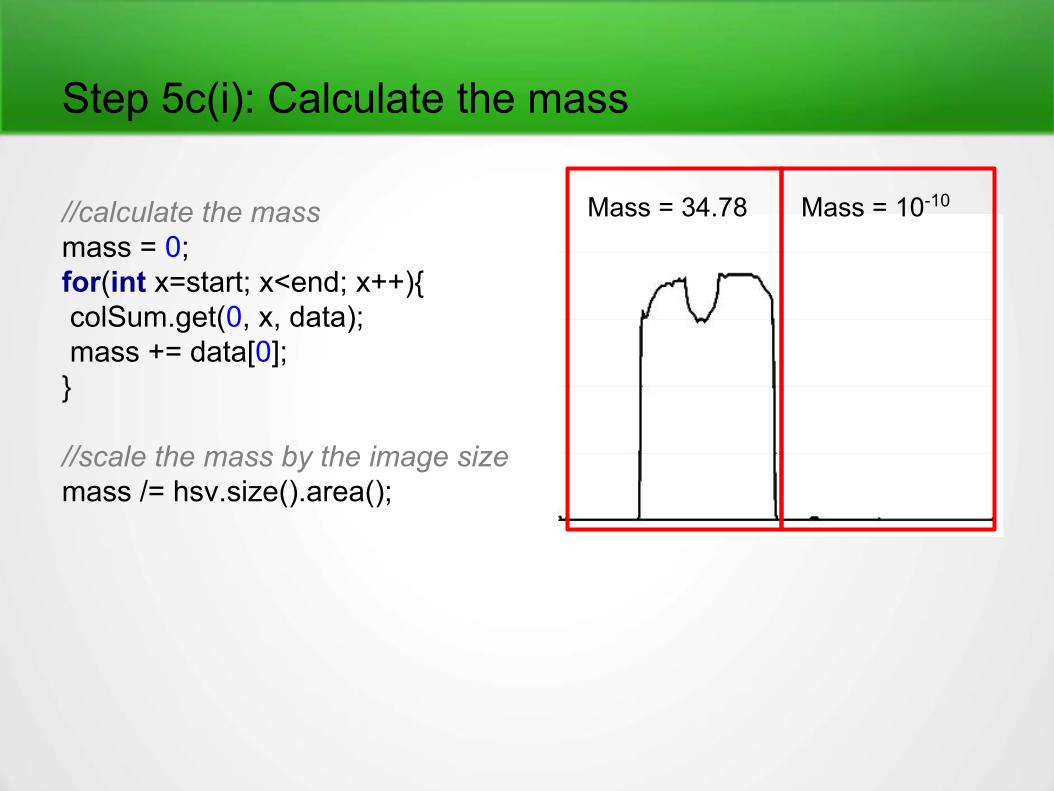
Step 5c(i): Calculate the mass
//calculate the massmass = 0;for(int x=start; x<end; x++){ colSum.get(0, x, data); mass += data[0];}
//scale the mass by the image sizemass /= hsv.size().area();
Mass = 34.78 Mass = 10-10
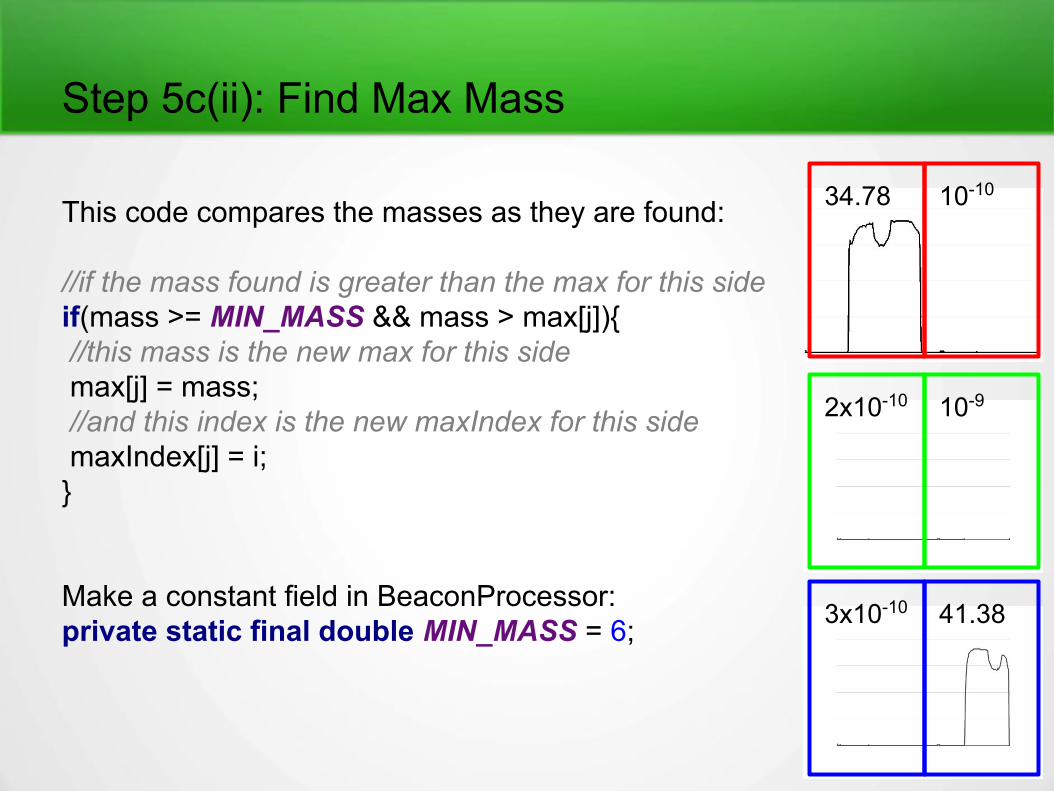
Step 5c(ii): Find Max Mass
This code compares the masses as they are found:
//if the mass found is greater than the max for this sideif(mass >= MIN_MASS && mass > max[j]){ //this mass is the new max for this side max[j] = mass; //and this index is the new maxIndex for this side maxIndex[j] = i;}
Make a constant field in BeaconProcessor:private static final double MIN_MASS = 6;
34.78 10-10
2x10⁻¹⁰ 10-9
3x10⁻¹⁰ 41.38
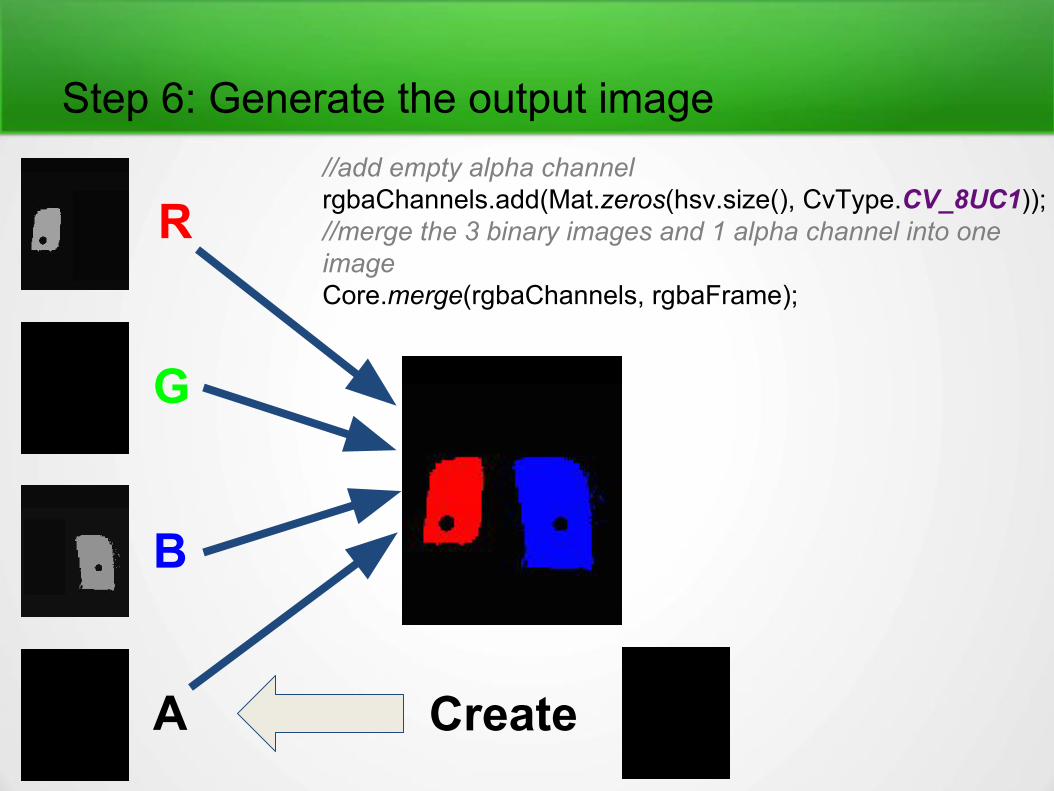
Step 6: Generate the output image//add empty alpha channelrgbaChannels.add(Mat.zeros(hsv.size(), CvType.CV_8UC1));//merge the 3 binary images and 1 alpha channel into one imageCore.merge(rgbaChannels, rgbaFrame);
R
G
B
A Create
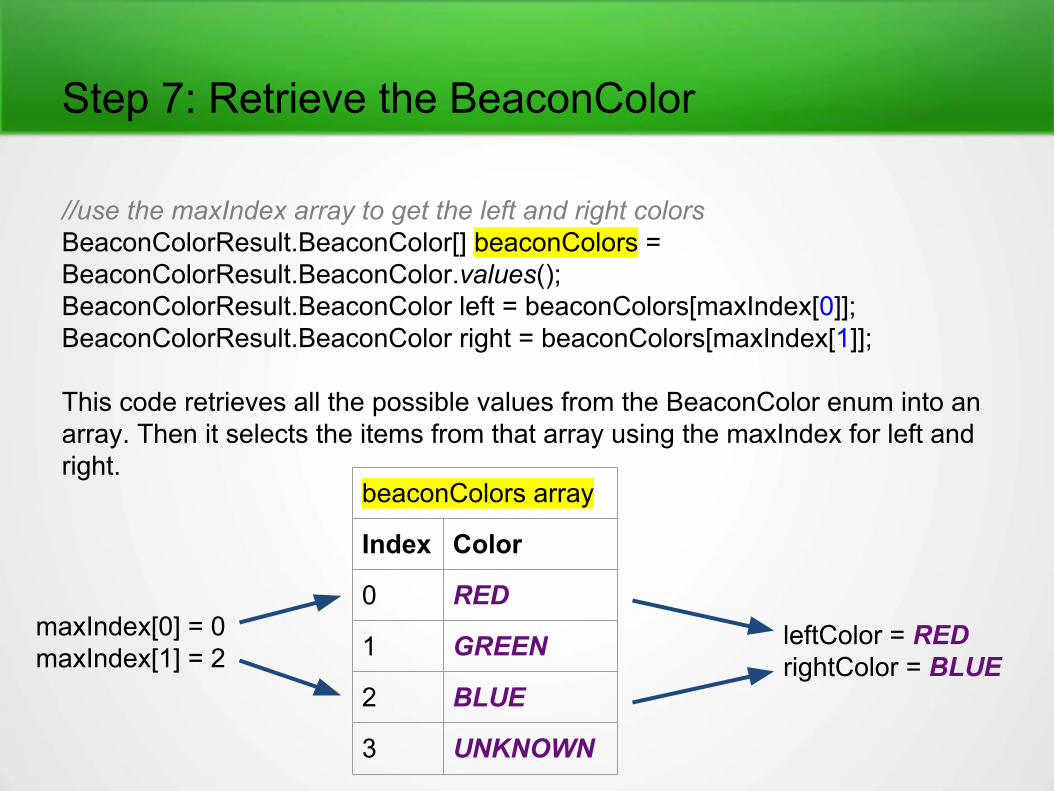
Step 7: Retrieve the BeaconColor
//use the maxIndex array to get the left and right colorsBeaconColorResult.BeaconColor[] beaconColors = BeaconColorResult.BeaconColor.values();BeaconColorResult.BeaconColor left = beaconColors[maxIndex[0]];BeaconColorResult.BeaconColor right = beaconColors[maxIndex[1]];
This code retrieves all the possible values from the BeaconColor enum into an array. Then it selects the items from that array using the maxIndex for left and right.
beaconColors array
Index Color
0 RED
1 GREEN
2 BLUE
3 UNKNOWN
maxIndex[0] = 0maxIndex[1] = 2
leftColor = REDrightColor = BLUE
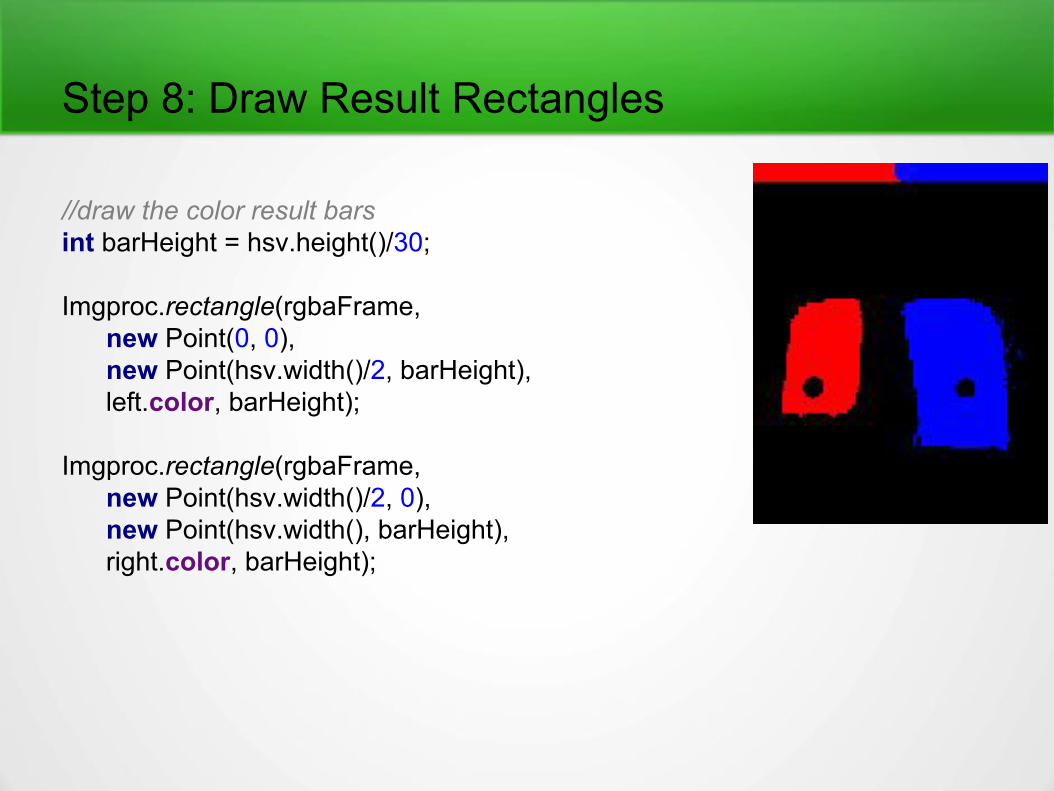
Step 8: Draw Result Rectangles
//draw the color result barsint barHeight = hsv.height()/30;
Imgproc.rectangle(rgbaFrame, new Point(0, 0), new Point(hsv.width()/2, barHeight), left.color, barHeight);
Imgproc.rectangle(rgbaFrame, new Point(hsv.width()/2, 0), new Point(hsv.width(), barHeight), right.color, barHeight);
Step 9: Save Output Image
if (saveImages) { ImageUtil.saveImage(TAG, rgbaFrame, Imgproc.COLOR_RGBA2BGR, "1_binary", startTime);}
Saving the output image for later analysis is really useful if something goes wrong!
Step 10: Return the Result
//construct and return the resultreturn new ImageProcessorResult<>(startTime, rgbaFrame, new BeaconColorResult(left, right));
This is the last step! From here your OpMode can easily make a decision on where to go!
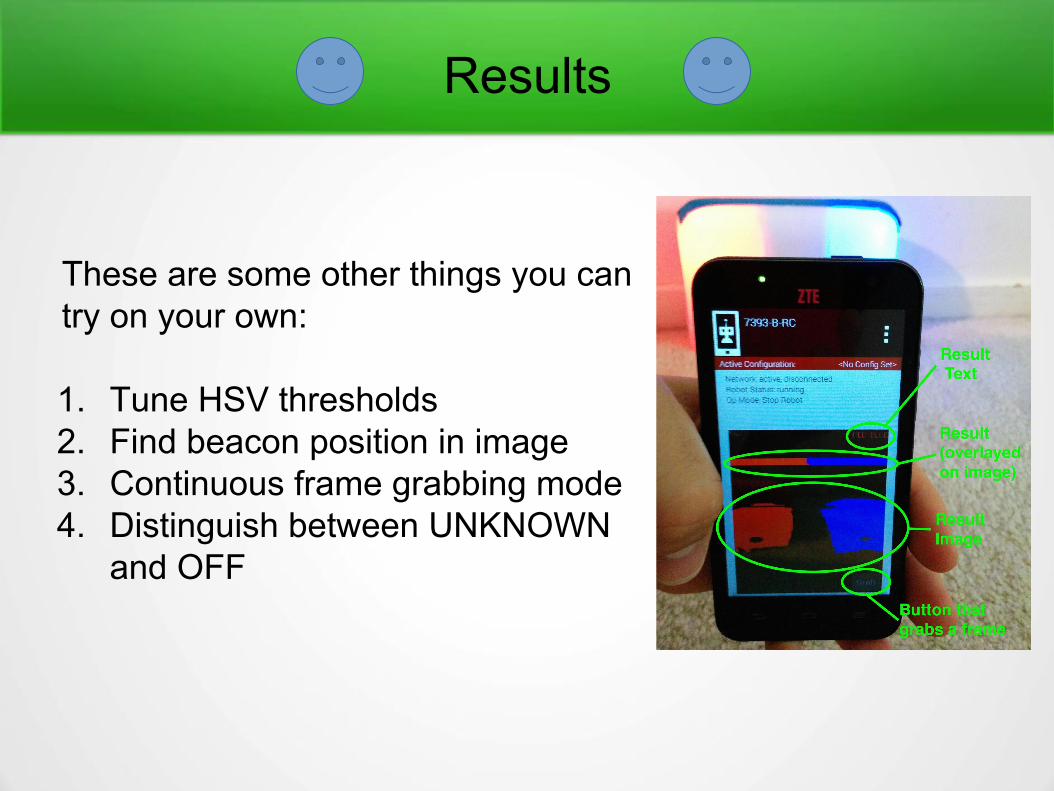
Results
These are some other things you can try on your own:
1. Tune HSV thresholds2. Find beacon position in image3. Continuous frame grabbing mode4. Distinguish between UNKNOWN
and OFF

OpMode Code - paste into your LinearOpMode(this only works after the other steps in the tutorial are done)
FrameGrabber frameGrabber = FtcRobotControllerActivity.frameGrabber; //Get the frameGrabber
frameGrabber.grabSingleFrame(); //Tell it to grab a framewhile (!frameGrabber.isResultReady()) { //Wait for the result Thread.sleep(5); //sleep for 5 milliseconds}
//Get the resultImageProcessorResult imageProcessorResult = frameGrabber.getResult();BeaconColorResult result = (BeaconColorResult) imageProcessorResult.getResult();
BeaconColorResult.BeaconColor leftColor = result.getLeftColor();BeaconColorResult.BeaconColor rightColor = result.getRightColor();
telemetry.addData("Result", result); //Display it on telemetrytelemetry.update();//wait before quitting (quitting clears telemetry)Thread.sleep(1000);

And Furthermore, I would Like to Conclude …
Another team that did this:https://github.com/lasarobotics/FTCVision
Visit us at gearbox4h.org● This tutorial is posted there● We also have a github repository● There is a super cool video (that I may or may not have edited)
Download this tutorial! (for reference ‘n stuff) at gearbox4h.org/opencv