Embed Size (px)
Citation preview
BC 23.16 STS
OPERATING VIDEOINSTALLATION VIDEO
www.sigma-qr.com
EN
2 3
ENGLISH
Foreword
Congratulations!Your SIGMA bike computer is a high-quality instrument with top-of-the-line quality and technology.We recommend carefully reading through these instructions to make optimal use of your bike computer. It provides all the information you need to operate the computer as well as many other helpful tips. We wish you hours of fun and enjoyment riding with your SIGMA bike computer.Your SIGMA SPORT team
Packaging content
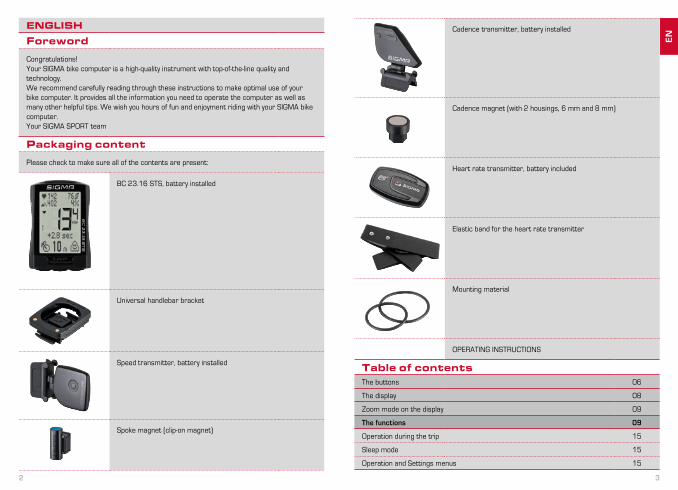
Please check to make sure all of the contents are present:
BC 23.16 STS, battery installed
Universal handlebar bracket
Speed transmitter, battery installed
Spoke magnet (clip-on magnet)
Cadence transmitter, battery installed
Cadence magnet (with 2 housings, 6 mm and 8 mm)
Heart rate transmitter, battery included
Elastic band for the heart rate transmitter
Mounting material
OPERATING INSTRUCTIONS
Table of contentsThe buttons 06
The display 08
Zoom mode on the display 09
The functions 09
Operation during the trip 15
Sleep mode 15
Operation and Settings menus 15
EN
4 5
Setting/recalibrating the home altitude 55
Setting/correcting the current altitude 56
Altitude selection menu (quick access) 58
Total value settings 59
Total distance 59
Total Ride Time 61
Total altitude uphill 62
Distance uphill 63
Total altitude downhill 65
Distance downhill 66
Total calories 67
Total reset for all totals 68
Activities 69
Retrieving activities 70
Setting the logging interval 71
Deleting activities 72
Retrieving ghost race information 73
Training Statistics 74
Retrieving totals 75
Resetting trip data after the trip 77
Lap counter 78
Lap view 78
Ghost race: The process 80
Logging 82
Battery warnings 83
Changing the battery in the bike computer 83
Changing the battery in the transmitters 84
Mounting the handlebar bracket and the sensors 86
Putting on the chest belt 95
Inserting the bike computer into the bracket/Functional test 96
Warranty conditions 97
Troubleshooting 98
Technical data 99
The settings 20
Device settings 20
Language 20
Unit of speed 22
Unit of temperature 23
Unit of weight 24
Unit of user height 25
Clock/Clock format 12h/24h 26
Date 27
Display contrast 29
Power Save sleep mode settings 30
Cadence transmitter ON/OFF 31
Heart rate transmitter ON/OFF 32
NFC settings 33
Using NFC to read data/modify settings 35
Display backlight 36
Bike settings 36
Wheel Size 36
Bike type 39
Bike weight 40
Bike selection for Bike 1 or Bike 2 42
User settings 42
Date of birth 43
Weight 44
User height 45
Shoulder width 46
Gender 47
Maximum personal heart rate HRmax 48
HR target zone 50
HR intensity zones 1 / 2 / 3 / 4 51
Zone alarm ON/OFF 53
Altitude settings 54
Altitude format in meters or feet 54
EN
6 7
The buttons
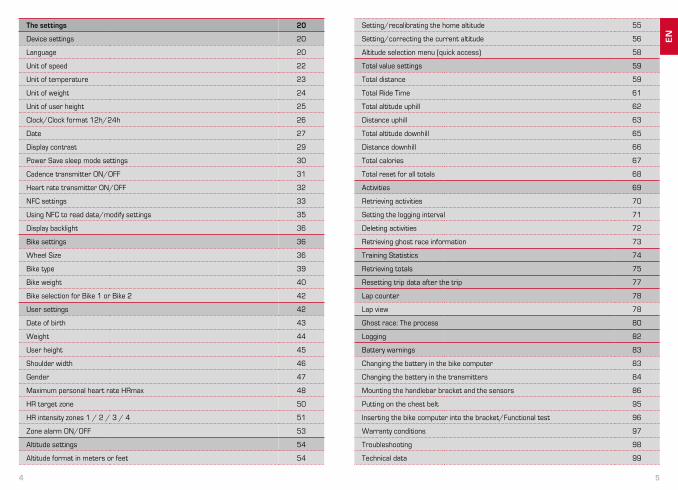
The BC 23.16 STS has 5 buttons:
LAPIn Function mode:– PRESS: Start the next lap (press for a moment)– PRESS AND HOLD: Open the Lap view (keep the button held down)
In the Lap view:– PRESS: Scroll forwards through the laps
MENUIn Function mode:– PRESS: Scroll backwards through the functions– PRESS AND HOLD: Open Setting mode
In Setting mode:– PRESS: Open the setting– PRESS: Confirm finished setting– PRESS: (in the BACK view): Go one level higher in the Settings menu– PRESS AND HOLD: Exit Setting mode; go back to Function mode
In the Lap view:– PRESS: Scroll backwards through the laps
BIKEIn Function mode:– PRESS: Access the BIKE functions (scroll forwards through the functions)– PRESS AND HOLD: Reset trip data back to zero
In Setting mode:– PRESS: Scroll in Setting mode (forwards)– PRESS: Change the data being set (forwards/increase)– PRESS AND HOLD: (in the setting menu): go up a level
In the Lap view:– PRESS: Scroll forwards through the lap values
MENU+BIKE: PRESS AND HOLD: Pairing re-sync (new pairing of the transmitter)MENU+BIKE: PRESS: Start the ghost race (if a comparison trip has been selected)MENU+HR: PRESS: Switch ON/OFF the zoom function of the upper LCD partMENU+ALTI: PRESS: Switch ON/OFF Light mode
ALTIIn Function mode:– PRESS: Access the ALTI functions (scroll forwards through the functions)– PRESS AND HOLD: Open the ALTI altitude settings
In Setting mode:– PRESS: Scroll in Setting mode (backwards)– PRESS: Change the data being set (backwards/reduce)
In the Lap view:– PRESS: Scroll backwards through the lap values
HR (heart rate)In Function mode:– PRESS: Access the HR (heart rate) functions (scroll forwards through the functions)– PRESS AND HOLD: Open the HR (heart rate) zone selection
EN
8 9
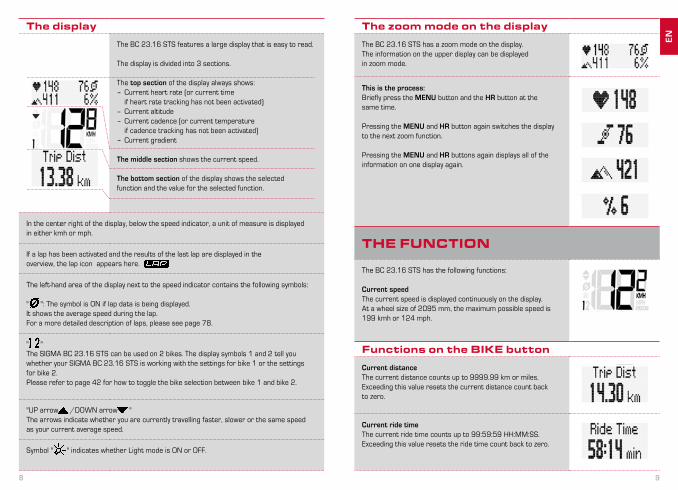
The display
The BC 23.16 STS features a large display that is easy to read.
The display is divided into 3 sections.
The top section of the display always shows:– Current heart rate (or current time if heart rate tracking has not been activated)– Current altitude– Current cadence (or current temperature if cadence tracking has not been activated)– Current gradient
The middle section shows the current speed.
The bottom section of the display shows the selected function and the value for the selected function.
In the center right of the display, below the speed indicator, a unit of measure is displayed in either kmh or mph.
If a lap has been activated and the results of the last lap are displayed in the overview, the lap icon appears here.
The left-hand area of the display next to the speed indicator contains the following symbols:
" ": The symbol is ON if lap data is being displayed. It shows the average speed during the lap.For a more detailed description of laps, please see page 78.
" "The SIGMA BC 23.16 STS can be used on 2 bikes. The display symbols 1 and 2 tell you whether your SIGMA BC 23.16 STS is working with the settings for bike 1 or the settings for bike 2.Please refer to page 42 for how to toggle the bike selection between bike 1 and bike 2.
"UP arrow /DOWN arrow "The arrows indicate whether you are currently travelling faster, slower or the same speed as your current average speed.
Symbol " " indicates whether Light mode is ON or OFF.
The zoom mode on the display
The BC 23.16 STS has a zoom mode on the display.The information on the upper display can be displayed in zoom mode.
This is the process:Briefly press the MENU button and the HR button at the same time.
Pressing the MENU and HR button again switches the display to the next zoom function.
Pressing the MENU and HR buttons again displays all of the information on one display again.
THE FUNCTION
The BC 23.16 STS has the following functions:
Current speedThe current speed is displayed continuously on the display.At a wheel size of 2095 mm, the maximum possible speed is 199 kmh or 124 mph.
Functions on the BIKE button
Current distanceThe current distance counts up to 9999.99 km or miles. Exceeding this value resets the current distance count back to zero.
Current ride timeThe current ride time counts up to 99:59:59 HH:MM:SS.Exceeding this value resets the ride time count back to zero.
EN
10 11
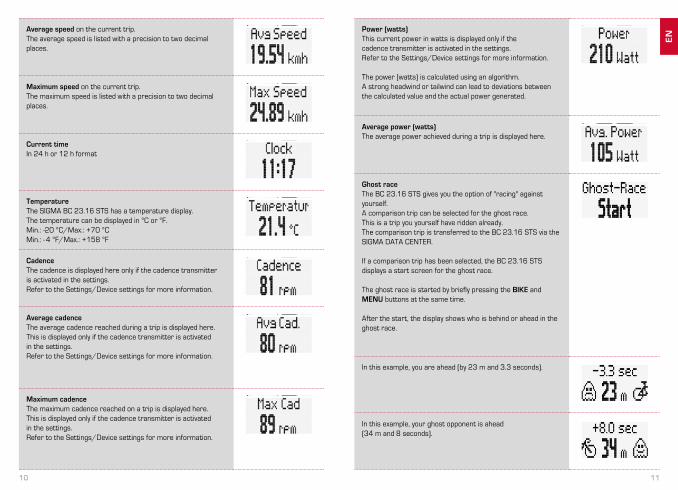
Average speed on the current trip.The average speed is listed with a precision to two decimal places.
Maximum speed on the current trip.The maximum speed is listed with a precision to two decimal places.
Current timeIn 24 h or 12 h format
TemperatureThe SIGMA BC 23.16 STS has a temperature display.The temperature can be displayed in °C or °F.Min.: -20 °C/Max.: +70 °CMin.: - 4 °F/Max.: +158 °F
CadenceThe cadence is displayed here only if the cadence transmitter is activated in the settings.Refer to the Settings/Device settings for more information.
Average cadenceThe average cadence reached during a trip is displayed here.This is displayed only if the cadence transmitter is activated in the settings.Refer to the Settings/Device settings for more information.
Maximum cadenceThe maximum cadence reached on a trip is displayed here.This is displayed only if the cadence transmitter is activated in the settings.Refer to the Settings/Device settings for more information.
Power (watts)This current power in watts is displayed only if the cadence transmitter is activated in the settings.Refer to the Settings/Device settings for more information.
The power (watts) is calculated using an algorithm.A strong headwind or tailwind can lead to deviations between the calculated value and the actual power generated.
Average power (watts)The average power achieved during a trip is displayed here.
Ghost raceThe BC 23.16 STS gives you the option of "racing" against yourself.A comparison trip can be selected for the ghost race. This is a trip you yourself have ridden already. The comparison trip is transferred to the BC 23.16 STS via the SIGMA DATA CENTER.
If a comparison trip has been selected, the BC 23.16 STS displays a start screen for the ghost race.
The ghost race is started by briefly pressing the BIKE and MENU buttons at the same time.
After the start, the display shows who is behind or ahead in the ghost race.
In this example, you are ahead (by 23 m and 3.3 seconds).
In this example, your ghost opponent is ahead (34 m and 8 seconds).
EN

12 13
Maximum altitudeShows the maximum altitude reached on the current trip.
Function on the HR (heart rate) button
HR (heart rate) graphThis displays the HR graph for approximately the last 2,75 km (depending on the travel speed).First the function description is displayed, followed by the graph.
Current HR (heart rate)Your current HR (heart rate) is displayed again here.
Average HR (heart rate)Shows the average HR on the current trip.
Maximum HR (heart rate)Shows the maximum HR on the current trip.
Target zone and HR in percent of the personal HRmaxShows the selected target zone (here FIT) and the current HR in percent of the maximum personal HR.The maximum HR can be set in the Settings/User menu. For a more detailed description of the target zones, please see page 50.
Functions on the ALTI button
Altitude graphThe altitude graph displays a graph of the trip for the last 2,75 km (depending on the speed).First the function description is displayed, followed by the graph.
Current altitudeShows the current altitude, optionally either in meters or feet.
Current gradientShows the current uphill or downhill gradient in percent (%).
Altitude uphillShows the vertical distance travelled uphill on the current trip.
Distance uphillShows the distance travelled uphill on the current trip.
Altitude downhillShows the vertical distance travelled downhill on the current trip.
Distance downhillShows the distance travelled downhill on the current trip.
EN
14 15
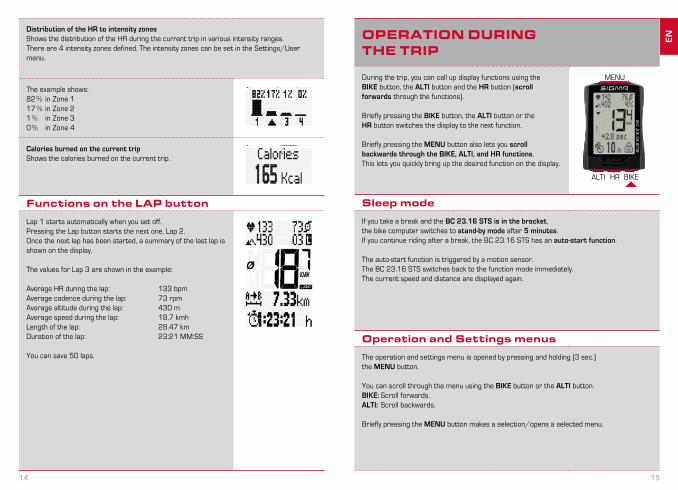
OPERATION DURING THE TRIP
During the trip, you can call up display functions using the BIKE button, the ALTI button and the HR button (scroll forwards through the functions).
Briefly pressing the BIKE button, the ALTI button or the HR button switches the display to the next function.
Briefly pressing the MENU button also lets you scroll backwards through the BIKE, ALTI, and HR functions.This lets you quickly bring up the desired function on the display.
ALTI HR BIKE
MENU
Sleep mode
If you take a break and the BC 23.16 STS is in the bracket, the bike computer switches to stand-by mode after 5 minutes.If you continue riding after a break, the BC 23.16 STS has an auto-start function.
The auto-start function is triggered by a motion sensor.The BC 23.16 STS switches back to the function mode immediately. The current speed and distance are displayed again.
Operation and Settings menus
The operation and settings menu is opened by pressing and holding (3 sec.) the MENU button.
You can scroll through the menu using the BIKE button or the ALTI button.BIKE: Scroll forwards.ALTI: Scroll backwards.
Briefly pressing the MENU button makes a selection/opens a selected menu.
Distribution of the HR to intensity zonesShows the distribution of the HR during the current trip in various intensity ranges.There are 4 intensity zones defined. The intensity zones can be set in the Settings/User menu.
The example shows:82 % in Zone 117 % in Zone 21 % in Zone 30 % in Zone 4
Calories burned on the current tripShows the calories burned on the current trip.
Functions on the LAP button
Lap 1 starts automatically when you set off.Pressing the Lap button starts the next one, Lap 2.Once the next lap has been started, a summary of the last lap is shown on the display.
The values for Lap 3 are shown in the example:
Average HR during the lap: 133 bpmAverage cadence during the lap: 73 rpmAverage altitude during the lap: 430 mAverage speed during the lap: 18.7 kmhLength of the lap: 28.47 kmDuration of the lap: 23:21 MM:SS
You can save 50 laps.
EN
16 19
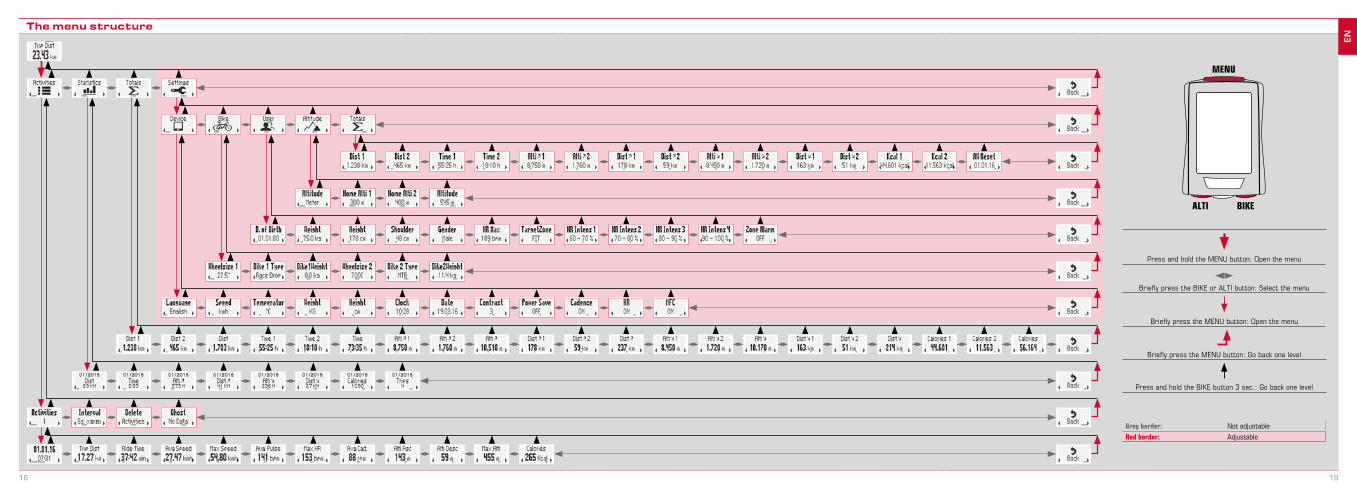
The menu structure
Grey border: Not adjustableRed border: Adjustable
MENU
Press and hold the MENU button: Open the menu
Briefly press the BIKE or ALTI button: Select the menu
Briefly press the MENU button: Open the menu
Briefly press the MENU button: Go back one level
Press and hold the BIKE button 3 sec.: Go back one level
BIKEALTI
EN
20 21
Open the settings using the MENU button.Device Settings is the first option that appears.
Open the device settings using the MENU button."Language" "English" or another language appears on the display.
Open the language setting using the MENU button."English" flashes.
Now you can use the BIKE button or the ALTI button to select a different language.
Confirm your language setting using the MENU button.
If you want to make any other changes to settings, you can go to the next setting using the BIKE button or the ALTI button.
If you do not want to change any other settings, press the BIKE button or the ALTI button until "BACK" appears on the display.Then briefly press the MENU button.
The Settings menu closes.
ALTERNATIVELY you can also press and hold the MENU button.The Settings menu closes.The BC 23.16 STS returns to function mode.
ALTERNATIVELY you can also press and hold the BIKE button.This takes you one level higher in the Settings menu.
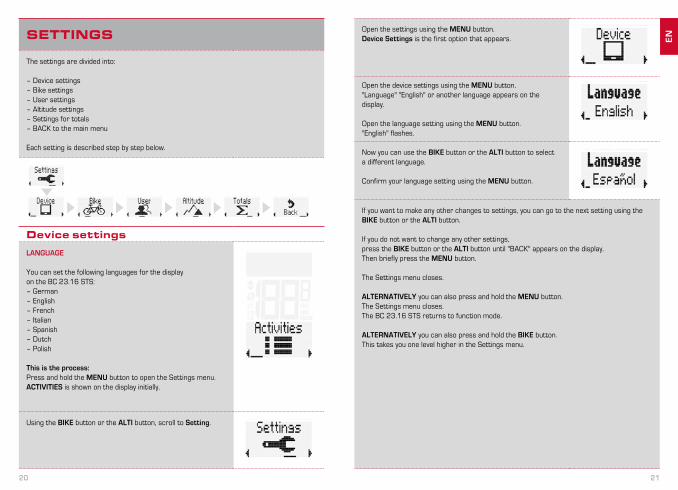
SETTINGS
The settings are divided into:
– Device settings– Bike settings– User settings– Altitude settings– Settings for totals– BACK to the main menu
Each setting is described step by step below.
Device settings
LANGUAGE
You can set the following languages for the display on the BC 23.16 STS:– German– English– French– Italian– Spanish– Dutch– Polish
This is the process:Press and hold the MENU button to open the Settings menu. ACTIVITIES is shown on the display initially.
Using the BIKE button or the ALTI button, scroll to Setting.
EN
22 23
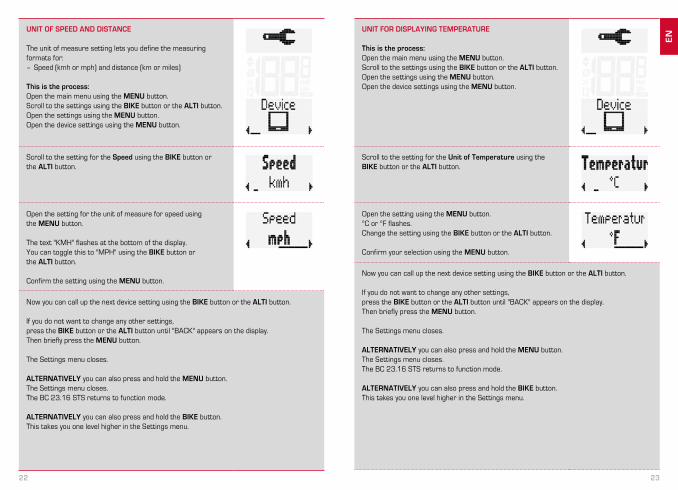
UNIT FOR DISPLAYING TEMPERATURE
This is the process:Open the main menu using the MENU button.Scroll to the settings using the BIKE button or the ALTI button.Open the settings using the MENU button.Open the device settings using the MENU button.
Scroll to the setting for the Unit of Temperature using the BIKE button or the ALTI button.
Open the setting using the MENU button.°C or °F flashes.Change the setting using the BIKE button or the ALTI button.
Confirm your selection using the MENU button.
Now you can call up the next device setting using the BIKE button or the ALTI button.
If you do not want to change any other settings, press the BIKE button or the ALTI button until "BACK" appears on the display.Then briefly press the MENU button.
The Settings menu closes.
ALTERNATIVELY you can also press and hold the MENU button.The Settings menu closes.The BC 23.16 STS returns to function mode.
ALTERNATIVELY you can also press and hold the BIKE button.This takes you one level higher in the Settings menu.
UNIT OF SPEED AND DISTANCE
The unit of measure setting lets you define the measuring formats for:– Speed (kmh or mph) and distance (km or miles)
This is the process:Open the main menu using the MENU button.Scroll to the settings using the BIKE button or the ALTI button.Open the settings using the MENU button.Open the device settings using the MENU button.
Scroll to the setting for the Speed using the BIKE button or the ALTI button.
Open the setting for the unit of measure for speed using the MENU button.
The text "KMH" flashes at the bottom of the display.You can toggle this to "MPH" using the BIKE button or the ALTI button.
Confirm the setting using the MENU button.
Now you can call up the next device setting using the BIKE button or the ALTI button.
If you do not want to change any other settings, press the BIKE button or the ALTI button until "BACK" appears on the display.Then briefly press the MENU button.
The Settings menu closes.
ALTERNATIVELY you can also press and hold the MENU button.The Settings menu closes.The BC 23.16 STS returns to function mode.
ALTERNATIVELY you can also press and hold the BIKE button.This takes you one level higher in the Settings menu.
EN
24 25
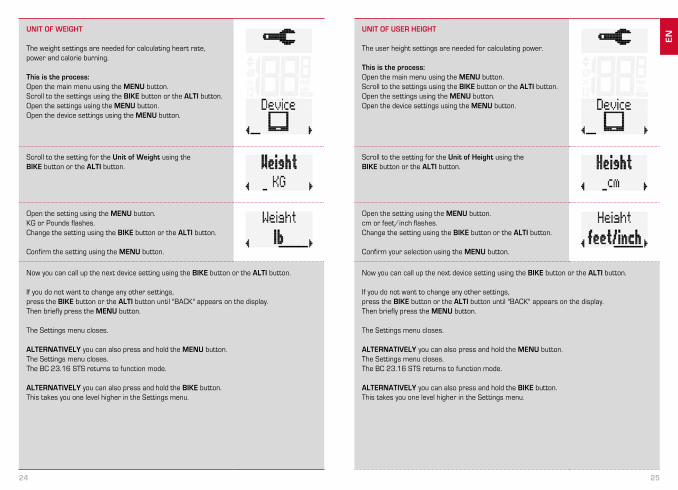
UNIT OF USER HEIGHT
The user height settings are needed for calculating power.
This is the process:Open the main menu using the MENU button.Scroll to the settings using the BIKE button or the ALTI button.Open the settings using the MENU button.Open the device settings using the MENU button.
Scroll to the setting for the Unit of Height using the BIKE button or the ALTI button.
Open the setting using the MENU button.cm or feet/inch flashes.Change the setting using the BIKE button or the ALTI button.
Confirm your selection using the MENU button.
Now you can call up the next device setting using the BIKE button or the ALTI button.
If you do not want to change any other settings, press the BIKE button or the ALTI button until "BACK" appears on the display.Then briefly press the MENU button.
The Settings menu closes.
ALTERNATIVELY you can also press and hold the MENU button.The Settings menu closes.The BC 23.16 STS returns to function mode.
ALTERNATIVELY you can also press and hold the BIKE button.This takes you one level higher in the Settings menu.
UNIT OF WEIGHT
The weight settings are needed for calculating heart rate, power and calorie burning.
This is the process:Open the main menu using the MENU button.Scroll to the settings using the BIKE button or the ALTI button.Open the settings using the MENU button.Open the device settings using the MENU button.
Scroll to the setting for the Unit of Weight using the BIKE button or the ALTI button.
Open the setting using the MENU button.KG or Pounds flashes.Change the setting using the BIKE button or the ALTI button.
Confirm the setting using the MENU button.
Now you can call up the next device setting using the BIKE button or the ALTI button.
If you do not want to change any other settings, press the BIKE button or the ALTI button until "BACK" appears on the display.Then briefly press the MENU button.
The Settings menu closes.
ALTERNATIVELY you can also press and hold the MENU button.The Settings menu closes.The BC 23.16 STS returns to function mode.
ALTERNATIVELY you can also press and hold the BIKE button.This takes you one level higher in the Settings menu.
EN
26 27
Now you can call up the next device setting using the BIKE button or the ALTI button.
If you do not want to change any other settings, press the BIKE button or the ALTI button until "BACK" appears on the display.Then briefly press the MENU button.
The Settings menu closes.
ALTERNATIVELY you can also press and hold the MENU button.The Settings menu closes.The BC 23.16 STS returns to function mode.
ALTERNATIVELY you can also press and hold the BIKE button.This takes you one level higher in the Settings menu.
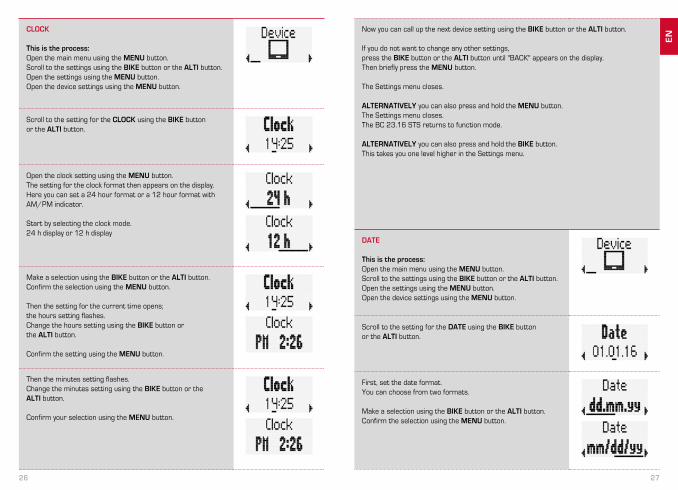
DATE
This is the process:Open the main menu using the MENU button.Scroll to the settings using the BIKE button or the ALTI button.Open the settings using the MENU button.Open the device settings using the MENU button.
Scroll to the setting for the DATE using the BIKE button or the ALTI button.
First, set the date format.You can choose from two formats.
Make a selection using the BIKE button or the ALTI button.Confirm the selection using the MENU button.
CLOCK
This is the process:Open the main menu using the MENU button.Scroll to the settings using the BIKE button or the ALTI button.Open the settings using the MENU button.Open the device settings using the MENU button.
Scroll to the setting for the CLOCK using the BIKE button or the ALTI button.
Open the clock setting using the MENU button.The setting for the clock format then appears on the display. Here you can set a 24 hour format or a 12 hour format with AM/PM indicator.
Start by selecting the clock mode. 24 h display or 12 h display
Make a selection using the BIKE button or the ALTI button.Confirm the selection using the MENU button.
Then the setting for the current time opens; the hours setting flashes.Change the hours setting using the BIKE button or the ALTI button.
Confirm the setting using the MENU button.
Then the minutes setting flashes.Change the minutes setting using the BIKE button or the ALTI button.
Confirm your selection using the MENU button.
EN
28 29
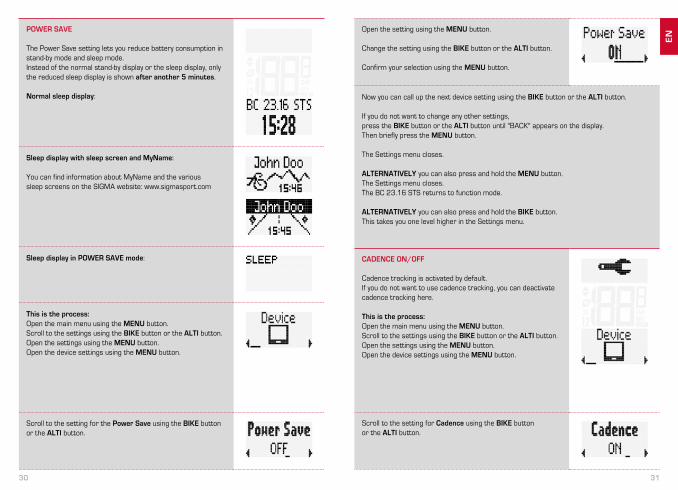
DISPLAY CONTRAST
You can set the contrast for the display on the BC 23.16 STS. You can set the display to be easy to read based on the amount of incoming sunlight.
This is the process:Open the main menu using the MENU button.Scroll to the settings using the BIKE button or the ALTI button.Open the settings using the MENU button.Open the device settings using the MENU button.
Scroll to the setting for the Contrast using the BIKE button or the ALTI button.
You will see the following figure on the display:Opening the setting using the MENU button.Set the value using the BIKE button or the ALTI button.
Confirm your selection using the MENU button.
Now you can call up the next device setting using the BIKE button or the ALTI button.
If you do not want to change any other settings, press the BIKE button or the ALTI button until "BACK" appears on the display.Then briefly press the MENU button.
The Settings menu closes.
ALTERNATIVELY you can also press and hold the MENU button.The Settings menu closes.The BC 23.16 STS returns to function mode.
ALTERNATIVELY you can also press and hold the BIKE button.This takes you one level higher in the Settings menu.
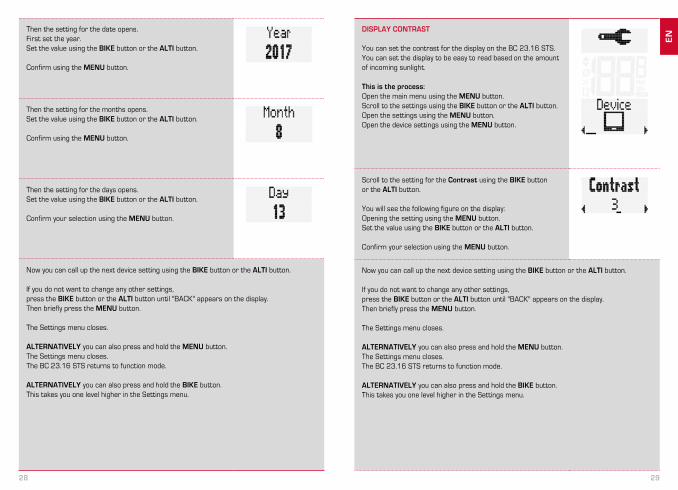
Then the setting for the date opens.First set the year.Set the value using the BIKE button or the ALTI button.
Confirm using the MENU button.
Then the setting for the months opens.Set the value using the BIKE button or the ALTI button.
Confirm using the MENU button.
Then the setting for the days opens.Set the value using the BIKE button or the ALTI button.
Confirm your selection using the MENU button.
Now you can call up the next device setting using the BIKE button or the ALTI button.
If you do not want to change any other settings, press the BIKE button or the ALTI button until "BACK" appears on the display.Then briefly press the MENU button.
The Settings menu closes.
ALTERNATIVELY you can also press and hold the MENU button.The Settings menu closes.The BC 23.16 STS returns to function mode.
ALTERNATIVELY you can also press and hold the BIKE button.This takes you one level higher in the Settings menu.
EN
30 31
Open the setting using the MENU button.
Change the setting using the BIKE button or the ALTI button.
Confirm your selection using the MENU button.
Now you can call up the next device setting using the BIKE button or the ALTI button.
If you do not want to change any other settings, press the BIKE button or the ALTI button until "BACK" appears on the display.Then briefly press the MENU button.
The Settings menu closes.
ALTERNATIVELY you can also press and hold the MENU button.The Settings menu closes.The BC 23.16 STS returns to function mode.
ALTERNATIVELY you can also press and hold the BIKE button.This takes you one level higher in the Settings menu.
CADENCE ON/OFF
Cadence tracking is activated by default.If you do not want to use cadence tracking, you can deactivate cadence tracking here.
This is the process:Open the main menu using the MENU button.Scroll to the settings using the BIKE button or the ALTI button.Open the settings using the MENU button.Open the device settings using the MENU button.
Scroll to the setting for Cadence using the BIKE button or the ALTI button.
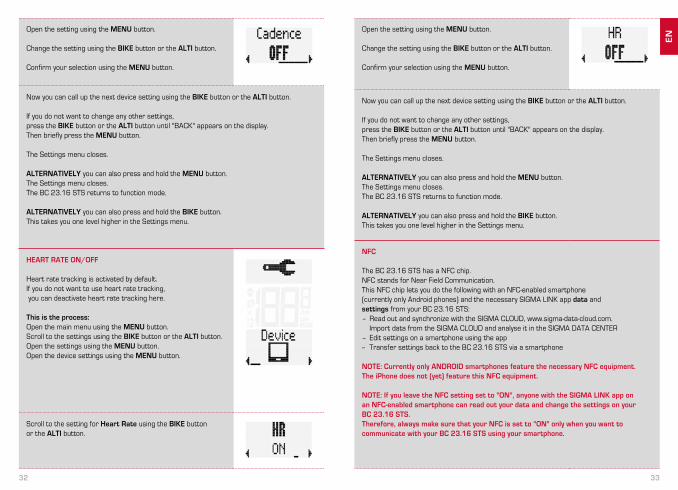
POWER SAVE
The Power Save setting lets you reduce battery consumption in stand-by mode and sleep mode.Instead of the normal stand-by display or the sleep display, only the reduced sleep display is shown after another 5 minutes.
Normal sleep display:
Sleep display with sleep screen and MyName:
You can find information about MyName and the various sleep screens on the SIGMA website: www.sigmasport.com
Sleep display in POWER SAVE mode:
This is the process:Open the main menu using the MENU button.Scroll to the settings using the BIKE button or the ALTI button.Open the settings using the MENU button.Open the device settings using the MENU button.
Scroll to the setting for the Power Save using the BIKE button or the ALTI button.
EN
32 33
Open the setting using the MENU button.
Change the setting using the BIKE button or the ALTI button.
Confirm your selection using the MENU button.
Now you can call up the next device setting using the BIKE button or the ALTI button.
If you do not want to change any other settings, press the BIKE button or the ALTI button until "BACK" appears on the display.Then briefly press the MENU button.
The Settings menu closes.
ALTERNATIVELY you can also press and hold the MENU button.The Settings menu closes.The BC 23.16 STS returns to function mode.
ALTERNATIVELY you can also press and hold the BIKE button.This takes you one level higher in the Settings menu.
NFC
The BC 23.16 STS has a NFC chip. NFC stands for Near Field Communication.This NFC chip lets you do the following with an NFC-enabled smartphone (currently only Android phones) and the necessary SIGMA LINK app data and settings from your BC 23.16 STS:– Read out and synchronize with the SIGMA CLOUD, www.sigma-data-cloud.com. Import data from the SIGMA CLOUD and analyse it in the SIGMA DATA CENTER– Edit settings on a smartphone using the app-- Transfer settings back to the BC 23.16 STS via a smartphone
NOTE: Currently only ANDROID smartphones feature the necessary NFC equipment. The iPhone does not (yet) feature this NFC equipment.
NOTE: If you leave the NFC setting set to "ON", anyone with the SIGMA LINK app on an NFC-enabled smartphone can read out your data and change the settings on your BC 23.16 STS. Therefore, always make sure that your NFC is set to "ON" only when you want to communicate with your BC 23.16 STS using your smartphone.
Open the setting using the MENU button.
Change the setting using the BIKE button or the ALTI button.
Confirm your selection using the MENU button.
Now you can call up the next device setting using the BIKE button or the ALTI button.
If you do not want to change any other settings, press the BIKE button or the ALTI button until "BACK" appears on the display.Then briefly press the MENU button.
The Settings menu closes.
ALTERNATIVELY you can also press and hold the MENU button.The Settings menu closes.The BC 23.16 STS returns to function mode.
ALTERNATIVELY you can also press and hold the BIKE button.This takes you one level higher in the Settings menu.
HEART RATE ON/OFF
Heart rate tracking is activated by default.If you do not want to use heart rate tracking, you can deactivate heart rate tracking here.
This is the process:Open the main menu using the MENU button.Scroll to the settings using the BIKE button or the ALTI button.Open the settings using the MENU button.Open the device settings using the MENU button.
Scroll to the setting for Heart Rate using the BIKE button or the ALTI button.
EN
34 35
USING NFC TO READ DATA/MODIFY SETTINGS
To read out trip data and logging data, place your Android smartphone against the BC 23.16 STS.
– NFC must be activated on the smartphone.– The SIGMA LINK app must be installed on the smartphone.– NFC must be set to ON on the BC 23.16 STS. (See the previous chapter)
The data and settings are transferred from the BC 23.16 STS to the app on the smartphone in a few seconds.From the app on the phone, the data can be synchronised with the SIGMA CLOUD. www.sigma-data-cloud.comData can be imported and analysed in the SIGMA DATA CENTER from the SIGMA CLOUD.
You can also use the app to export all of the BC 23.16 STS settings and conveniently edit them on your smartphone.Then the modified settings can be transferred back to the BC 23.16 STS using NFC.
This requires placing the smartphone against BC 23.16 STS again.
If communication is successful, the BC 23.16 STS shows this on the display. The app also displays an OK message.
If there is a problem with NFC, this is also indicated on the BC 23.16 STS display and a corresponding message appears in the app.
The messages must be confirmed by pressing any button.
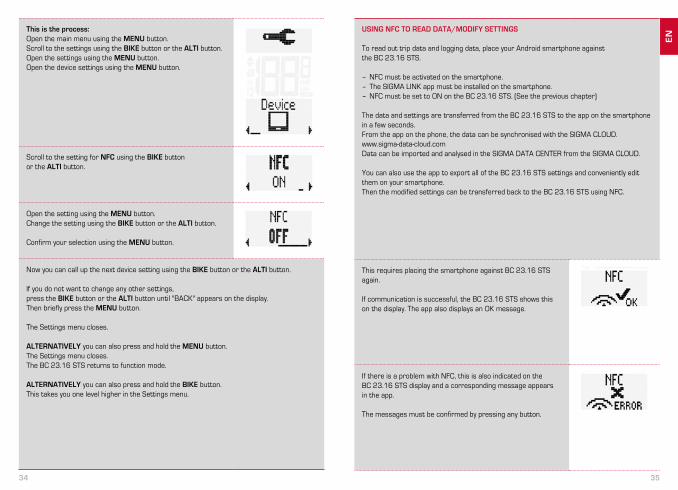
This is the process:Open the main menu using the MENU button.Scroll to the settings using the BIKE button or the ALTI button.Open the settings using the MENU button.Open the device settings using the MENU button.
Scroll to the setting for NFC using the BIKE button or the ALTI button.
Open the setting using the MENU button.Change the setting using the BIKE button or the ALTI button.
Confirm your selection using the MENU button.
Now you can call up the next device setting using the BIKE button or the ALTI button.
If you do not want to change any other settings, press the BIKE button or the ALTI button until "BACK" appears on the display.Then briefly press the MENU button.
The Settings menu closes.
ALTERNATIVELY you can also press and hold the MENU button.The Settings menu closes.The BC 23.16 STS returns to function mode.
ALTERNATIVELY you can also press and hold the BIKE button.This takes you one level higher in the Settings menu.
EN
36 37
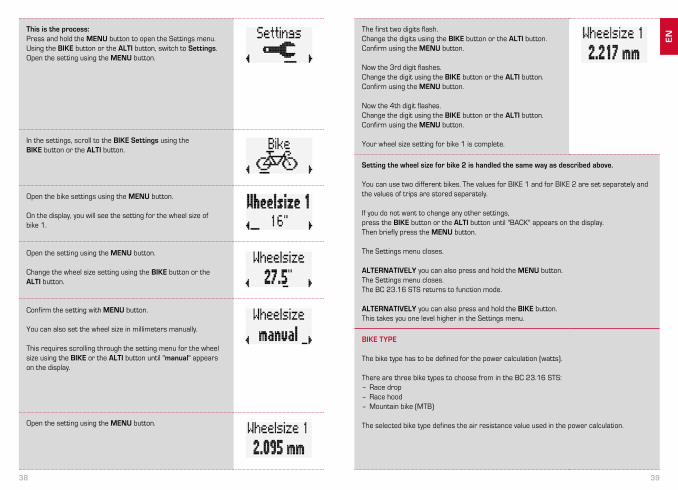
The following pre-defined tire sizes are available:16" / 18" / 20" / 22" / 24" / 26" / 27" / 27.5" / 28" / 29" / 700C and WS (setting the wheel size manually)
Using the wheel size table, you can read out and set additional values for your tires.
16 x 1.75 x 2
16" 1253 49.3
18" 1411 55.6
20" 1590 62.6
22" 1770 69.7
24" 1907 75.1
26" 2085 82.1
27" 2195 86.4
27.5" 2180 85.8
28" 2200 86.6
29" 2300 90.5
700C 2095 82.5
mm inchMin.: 500 mm / Max. 3999 mm
If your tire size is not listed in the table, you can precisely measure the rolling circumference.
= WS (mm)
1x
Conduct the measurement as follows:STEP 1 Position your bike upright and align the front wheel so that the valve points up, perfectly perpendicular to the ground. Ensure that the tire is fully pumped up in accordance with its usage conditions. Mark the position of the valve on the ground with a line or adhesive tape.STEP 2 Push the bike forwards in a straight line until the valve is back on the ground again after a full rotation. Again, mark the position of the valve with a line or adhesive tape.STEP 3 The distance between the two marks on the ground is your wheel circumference, i.e. your wheel size in millimeters.
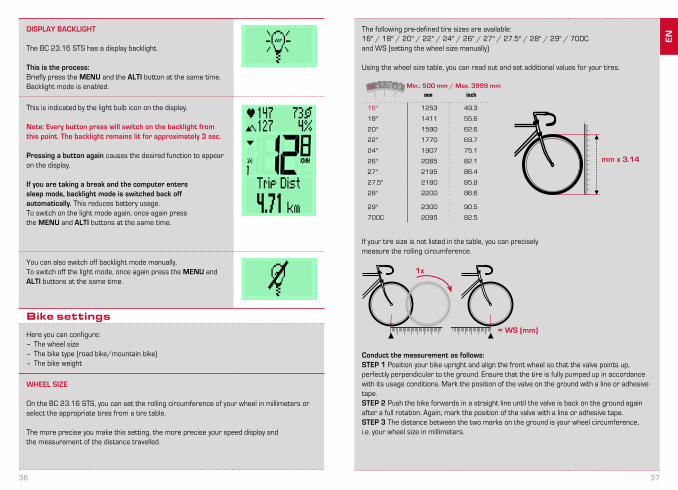
DISPLAY BACKLIGHT
The BC 23.16 STS has a display backlight.
This is the process:Briefly press the MENU and the ALTI button at the same time.Backlight mode is enabled.
This is indicated by the light bulb icon on the display.
Note: Every button press will switch on the backlight from this point. The backlight remains lit for approximately 3 sec.
Pressing a button again causes the desired function to appear on the display.
If you are taking a break and the computer enters sleep mode, backlight mode is switched back off automatically. This reduces battery usage.To switch on the light mode again, once again press the MENU and ALTI buttons at the same time.
You can also switch off backlight mode manually.To switch off the light mode, once again press the MENU and ALTI buttons at the same time.
Bike settings
Here you can configure:– The wheel size– The bike type (road bike/mountain bike)– The bike weight
WHEEL SIZE
On the BC 23.16 STS, you can set the rolling circumference of your wheel in millimeters or select the appropriate tires from a tire table.
The more precise you make this setting, the more precise your speed display and the measurement of the distance travelled.
mm x 3.14
EN
38 39
The first two digits flash.Change the digits using the BIKE button or the ALTI button.Confirm using the MENU button.
Now the 3rd digit flashes.Change the digit using the BIKE button or the ALTI button.Confirm using the MENU button.
Now the 4th digit flashes.Change the digit using the BIKE button or the ALTI button.Confirm using the MENU button.
Your wheel size setting for bike 1 is complete.
Setting the wheel size for bike 2 is handled the same way as described above.
You can use two different bikes. The values for BIKE 1 and for BIKE 2 are set separately and the values of trips are stored separately.
If you do not want to change any other settings, press the BIKE button or the ALTI button until "BACK" appears on the display.Then briefly press the MENU button.
The Settings menu closes.
ALTERNATIVELY you can also press and hold the MENU button.The Settings menu closes.The BC 23.16 STS returns to function mode.
ALTERNATIVELY you can also press and hold the BIKE button.This takes you one level higher in the Settings menu.
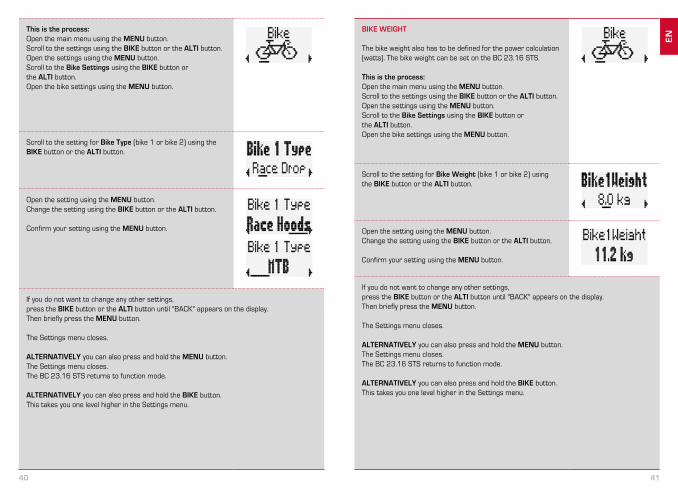
BIKE TYPE
The bike type has to be defined for the power calculation (watts).
There are three bike types to choose from in the BC 23.16 STS:– Race drop– Race hood– Mountain bike (MTB)
The selected bike type defines the air resistance value used in the power calculation.
This is the process:Press and hold the MENU button to open the Settings menu.Using the BIKE button or the ALTI button, switch to Settings.Open the setting using the MENU button.
In the settings, scroll to the BIKE Settings using the BIKE button or the ALTI button.
Open the bike settings using the MENU button.
On the display, you will see the setting for the wheel size of bike 1.
Open the setting using the MENU button.
Change the wheel size setting using the BIKE button or the ALTI button.
Confirm the setting with MENU button.
You can also set the wheel size in millimeters manually.
This requires scrolling through the setting menu for the wheel size using the BIKE or the ALTI button until "manual" appears on the display.
Open the setting using the MENU button.
EN
40 41
BIKE WEIGHT
The bike weight also has to be defined for the power calculation (watts). The bike weight can be set on the BC 23.16 STS.
This is the process:Open the main menu using the MENU button.Scroll to the settings using the BIKE button or the ALTI button.Open the settings using the MENU button.Scroll to the Bike Settings using the BIKE button or the ALTI button.Open the bike settings using the MENU button.
Scroll to the setting for Bike Weight (bike 1 or bike 2) using the BIKE button or the ALTI button.
Open the setting using the MENU button.Change the setting using the BIKE button or the ALTI button.
Confirm your setting using the MENU button.
If you do not want to change any other settings, press the BIKE button or the ALTI button until "BACK" appears on the display.Then briefly press the MENU button.
The Settings menu closes.
ALTERNATIVELY you can also press and hold the MENU button.The Settings menu closes.The BC 23.16 STS returns to function mode.
ALTERNATIVELY you can also press and hold the BIKE button.This takes you one level higher in the Settings menu.
This is the process:Open the main menu using the MENU button.Scroll to the settings using the BIKE button or the ALTI button.Open the settings using the MENU button.Scroll to the Bike Settings using the BIKE button or the ALTI button.Open the bike settings using the MENU button.
Scroll to the setting for Bike Type (bike 1 or bike 2) using the BIKE button or the ALTI button.
Open the setting using the MENU button.Change the setting using the BIKE button or the ALTI button.
Confirm your setting using the MENU button.
If you do not want to change any other settings, press the BIKE button or the ALTI button until "BACK" appears on the display.Then briefly press the MENU button.
The Settings menu closes.
ALTERNATIVELY you can also press and hold the MENU button.The Settings menu closes.The BC 23.16 STS returns to function mode.
ALTERNATIVELY you can also press and hold the BIKE button.This takes you one level higher in the Settings menu.
EN
42 43
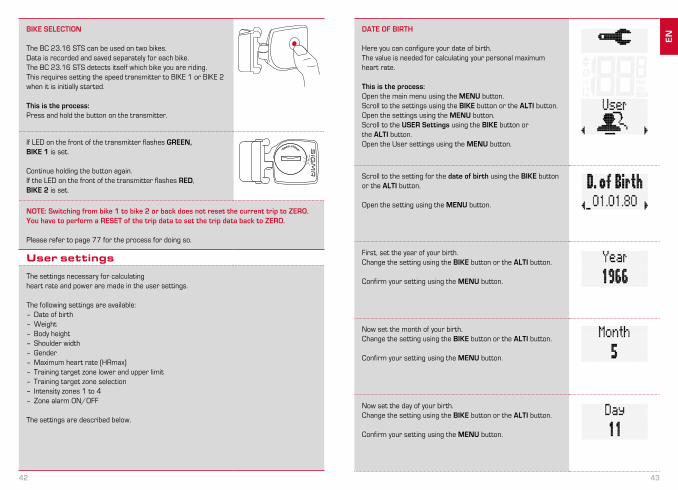
DATE OF BIRTH
Here you can configure your date of birth.The value is needed for calculating your personal maximum heart rate.
This is the process:Open the main menu using the MENU button.Scroll to the settings using the BIKE button or the ALTI button.Open the settings using the MENU button.Scroll to the USER Settings using the BIKE button or the ALTI button.Open the User settings using the MENU button.
Scroll to the setting for the date of birth using the BIKE button or the ALTI button.
Open the setting using the MENU button.
First, set the year of your birth.Change the setting using the BIKE button or the ALTI button.
Confirm your setting using the MENU button.
Now set the month of your birth.Change the setting using the BIKE button or the ALTI button.
Confirm your setting using the MENU button.
Now set the day of your birth.Change the setting using the BIKE button or the ALTI button.
Confirm your setting using the MENU button.
BIKE SELECTION
The BC 23.16 STS can be used on two bikes.Data is recorded and saved separately for each bike.The BC 23.16 STS detects itself which bike you are riding.This requires setting the speed transmitter to BIKE 1 or BIKE 2 when it is initially started.
This is the process:Press and hold the button on the transmitter.
If LED on the front of the transmitter flashes GREEN, BIKE 1 is set.
Continue holding the button again.If the LED on the front of the transmitter flashes RED, BIKE 2 is set.
open-close
NOTE: Switching from bike 1 to bike 2 or back does not reset the current trip to ZERO.You have to perform a RESET of the trip data to set the trip data back to ZERO.
Please refer to page 77 for the process for doing so.
User settings
The settings necessary for calculating heart rate and power are made in the user settings.
The following settings are available:– Date of birth– Weight– Body height– Shoulder width– Gender– Maximum heart rate (HRmax)– Training target zone lower and upper limit– Training target zone selection– Intensity zones 1 to 4– Zone alarm ON/OFF
The settings are described below.
EN

44 45
If you do not want to change any other settings, press the BIKE button or the ALTI button until "BACK" appears on the display.Then briefly press the MENU button.
The Settings menu closes.
ALTERNATIVELY you can also press and hold the MENU button.The Settings menu closes.The BC 23.16 STS returns to function mode.
ALTERNATIVELY you can also press and hold the BIKE button.This takes you one level higher in the Settings menu.
USER HEIGHT
Here you can configure your height.The value is used for calculating the power (watts).
This is the process:Open the main menu using the MENU button.Scroll to the settings using the BIKE button or the ALTI button.Open the settings using the MENU button.Scroll to the USER Settings using the BIKE button or the ALTI button.Open the User settings using the MENU button.
Scroll to the setting for Height using the BIKE button or the ALTI button.
Open the setting using the MENU button.Change the setting using the BIKE button or the ALTI button.
Confirm your setting using the MENU button.
If you do not want to change any other settings, press the BIKE button or the ALTI button until "BACK" appears on the display.Then briefly press the MENU button.
The Settings menu closes.
ALTERNATIVELY you can also press and hold the MENU button.The Settings menu closes.The BC 23.16 STS returns to function mode.
ALTERNATIVELY you can also press and hold the BIKE button.This takes you one level higher in the Settings menu.
WEIGHT
The weight value is needed for calculating your personal maximum heart rate and the power.
This is the process:Open the main menu using the MENU button.Scroll to the settings using the BIKE button or the ALTI button.Open the settings using the MENU button.Scroll to the USER Settings using the BIKE button or the ALTI button.Open the User settings using the MENU button.
Scroll to the setting for Weight using the BIKE button or the ALTI button.
Open the setting using the MENU button.Change the setting using the BIKE button or the ALTI button.
Confirm your setting using the MENU button.
EN
46 47
If you do not want to change any other settings, press the BIKE button or the ALTI button until "BACK" appears on the display.Then briefly press the MENU button.
The Settings menu closes.
ALTERNATIVELY you can also press and hold the MENU button.The Settings menu closes.The BC 23.16 STS returns to function mode.
ALTERNATIVELY you can also press and hold the BIKE button.This takes you one level higher in the Settings menu.
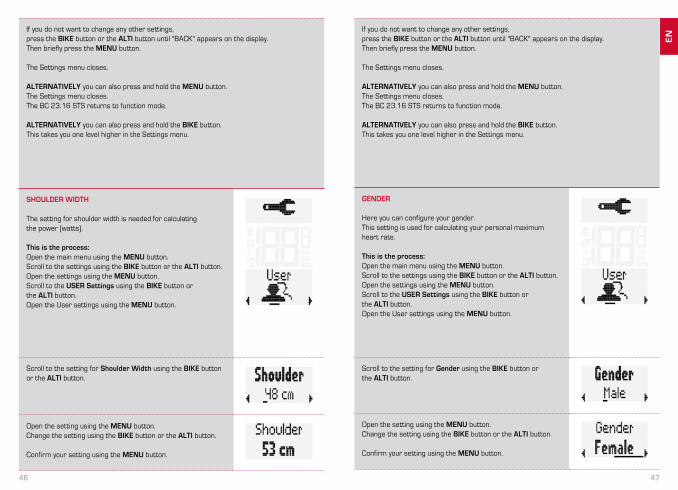
GENDER
Here you can configure your gender.This setting is used for calculating your personal maximum heart rate.
This is the process:Open the main menu using the MENU button.Scroll to the settings using the BIKE button or the ALTI button.Open the settings using the MENU button.Scroll to the USER Settings using the BIKE button or the ALTI button.Open the User settings using the MENU button.
Scroll to the setting for Gender using the BIKE button or the ALTI button.
Open the setting using the MENU button.Change the setting using the BIKE button or the ALTI button.
Confirm your setting using the MENU button.
If you do not want to change any other settings, press the BIKE button or the ALTI button until "BACK" appears on the display.Then briefly press the MENU button.
The Settings menu closes.
ALTERNATIVELY you can also press and hold the MENU button.The Settings menu closes.The BC 23.16 STS returns to function mode.
ALTERNATIVELY you can also press and hold the BIKE button.This takes you one level higher in the Settings menu.
SHOULDER WIDTH
The setting for shoulder width is needed for calculating the power (watts).
This is the process:Open the main menu using the MENU button.Scroll to the settings using the BIKE button or the ALTI button.Open the settings using the MENU button.Scroll to the USER Settings using the BIKE button or the ALTI button.Open the User settings using the MENU button.
Scroll to the setting for Shoulder Width using the BIKE button or the ALTI button.
Open the setting using the MENU button.Change the setting using the BIKE button or the ALTI button.
Confirm your setting using the MENU button.
EN
48 49
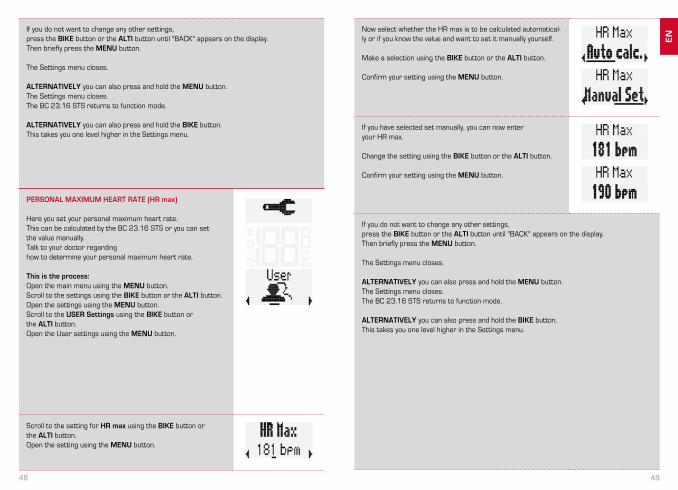
Now select whether the HR max is to be calculated automatical-ly or if you know the value and want to set it manually yourself.
Make a selection using the BIKE button or the ALTI button.
Confirm your setting using the MENU button.
If you have selected set manually, you can now enter your HR max.
Change the setting using the BIKE button or the ALTI button.
Confirm your setting using the MENU button.
If you do not want to change any other settings, press the BIKE button or the ALTI button until "BACK" appears on the display.Then briefly press the MENU button.
The Settings menu closes.
ALTERNATIVELY you can also press and hold the MENU button.The Settings menu closes.The BC 23.16 STS returns to function mode.
ALTERNATIVELY you can also press and hold the BIKE button.This takes you one level higher in the Settings menu.
PERSONAL MAXIMUM HEART RATE (HR max)
Here you set your personal maximum heart rate.This can be calculated by the BC 23.16 STS or you can set the value manually.Talk to your doctor regarding how to determine your personal maximum heart rate.
This is the process:Open the main menu using the MENU button.Scroll to the settings using the BIKE button or the ALTI button.Open the settings using the MENU button.Scroll to the USER Settings using the BIKE button or the ALTI button.Open the User settings using the MENU button.
Scroll to the setting for HR max using the BIKE button or the ALTI button.Open the setting using the MENU button.
EN
50 51
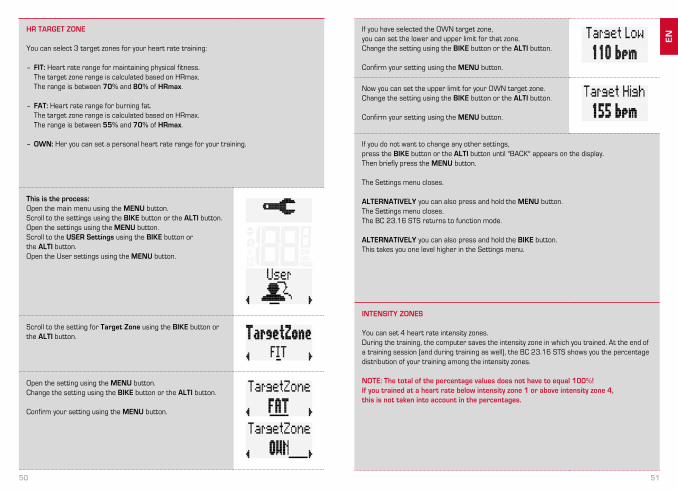
If you have selected the OWN target zone, you can set the lower and upper limit for that zone.Change the setting using the BIKE button or the ALTI button.
Confirm your setting using the MENU button.
Now you can set the upper limit for your OWN target zone.Change the setting using the BIKE button or the ALTI button.
Confirm your setting using the MENU button.
If you do not want to change any other settings, press the BIKE button or the ALTI button until "BACK" appears on the display.Then briefly press the MENU button.
The Settings menu closes.
ALTERNATIVELY you can also press and hold the MENU button.The Settings menu closes.The BC 23.16 STS returns to function mode.
ALTERNATIVELY you can also press and hold the BIKE button.This takes you one level higher in the Settings menu.
INTENSITY ZONES
You can set 4 heart rate intensity zones.During the training, the computer saves the intensity zone in which you trained. At the end of a training session (and during training as well), the BC 23.16 STS shows you the percentage distribution of your training among the intensity zones.
NOTE: The total of the percentage values does not have to equal 100%!If you trained at a heart rate below intensity zone 1 or above intensity zone 4, this is not taken into account in the percentages.
HR TARGET ZONE
You can select 3 target zones for your heart rate training:
– FIT: Heart rate range for maintaining physical fitness. The target zone range is calculated based on HRmax. The range is between 70% and 80% of HRmax.
– FAT: Heart rate range for burning fat. The target zone range is calculated based on HRmax. The range is between 55% and 70% of HRmax.
– OWN: Her you can set a personal heart rate range for your training.
This is the process:Open the main menu using the MENU button.Scroll to the settings using the BIKE button or the ALTI button.Open the settings using the MENU button.Scroll to the USER Settings using the BIKE button or the ALTI button.Open the User settings using the MENU button.
Scroll to the setting for Target Zone using the BIKE button or the ALTI button.
Open the setting using the MENU button.Change the setting using the BIKE button or the ALTI button.
Confirm your setting using the MENU button.
EN
52 53
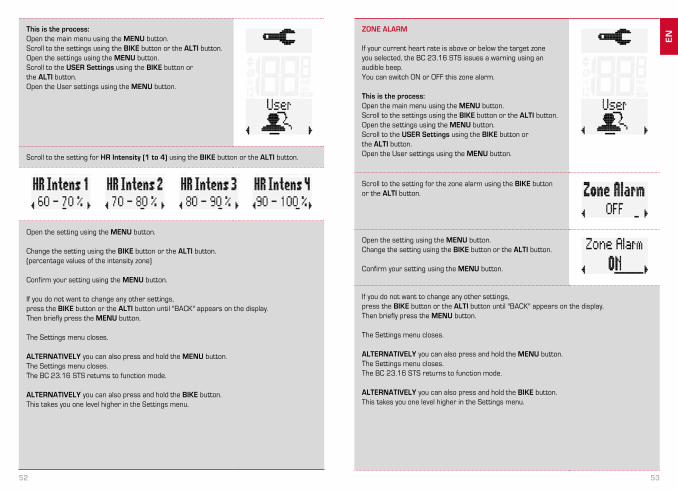
ZONE ALARM
If your current heart rate is above or below the target zone you selected, the BC 23.16 STS issues a warning using an audible beep.You can switch ON or OFF this zone alarm.
This is the process:Open the main menu using the MENU button.Scroll to the settings using the BIKE button or the ALTI button.Open the settings using the MENU button.Scroll to the USER Settings using the BIKE button or the ALTI button.Open the User settings using the MENU button.
Scroll to the setting for the zone alarm using the BIKE button or the ALTI button.
Open the setting using the MENU button.Change the setting using the BIKE button or the ALTI button.
Confirm your setting using the MENU button.
If you do not want to change any other settings, press the BIKE button or the ALTI button until "BACK" appears on the display.Then briefly press the MENU button.
The Settings menu closes.
ALTERNATIVELY you can also press and hold the MENU button.The Settings menu closes.The BC 23.16 STS returns to function mode.
ALTERNATIVELY you can also press and hold the BIKE button.This takes you one level higher in the Settings menu.
This is the process:Open the main menu using the MENU button.Scroll to the settings using the BIKE button or the ALTI button.Open the settings using the MENU button.Scroll to the USER Settings using the BIKE button orthe ALTI button.Open the User settings using the MENU button.
Scroll to the setting for HR Intensity (1 to 4) using the BIKE button or the ALTI button.
Open the setting using the MENU button.
Change the setting using the BIKE button or the ALTI button. (percentage values of the intensity zone)
Confirm your setting using the MENU button.
If you do not want to change any other settings, press the BIKE button or the ALTI button until "BACK" appears on the display.Then briefly press the MENU button.
The Settings menu closes.
ALTERNATIVELY you can also press and hold the MENU button.The Settings menu closes.The BC 23.16 STS returns to function mode.
ALTERNATIVELY you can also press and hold the BIKE button.This takes you one level higher in the Settings menu.
EN
54 55
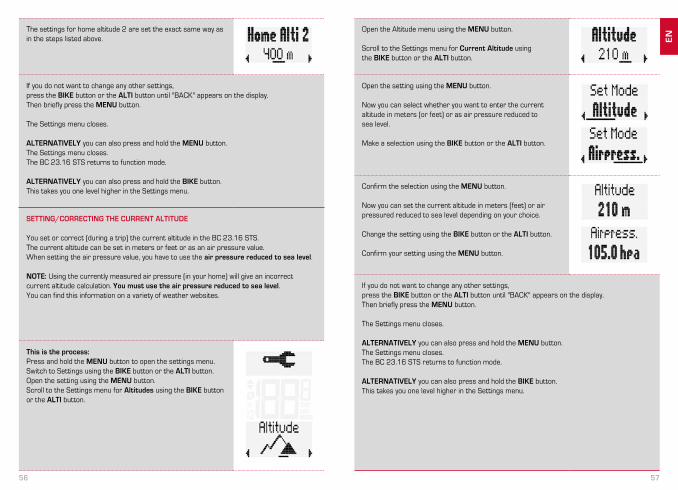
SETTING THE HOME ALTITUDE / RECALIBRATING
You can store (set) two different home altitudes in the BC 23.16 STS.The home altitude is the location from which you (normally) start your trip.Home altitude 1, for example, could be the altitude of your place of residence.Home altitude 2, for example, could be the altitude of your hotel while you are on vacation.
Using the home altitude, you can quickly and easily recalibrate your computer before each trip.
Recalibrating means:The altitude measurement works by measuring the air pressure.If the weather changes, the air pressure changes as well.As air pressure changes, a different (incorrect) altitude is displayed for your starting point.Your starting point is still at the same altitude, but the change in air pressure causes a different altitude to be displayed here.When recalibrating, the set home altitude is applied and the measured air pressure is back-calculated again based on the set home altitude.
This is how you set the home altitude:Press and hold the MENU button to open the settings menu.Switch to Settings using the BIKE button or the ALTI button.Open the setting using the MENU button.Scroll to the Settings menu for Altitudes using the BIKE button or the ALTI button.
Open the Altitude menu using the MENU button.
Scroll to the Settings menu for Home Altitude 1 (or 2) using the BIKE button or the ALTI button.
Open the setting using the MENU button.
Set home altitude 1 using the BIKE button or the ALTI button.
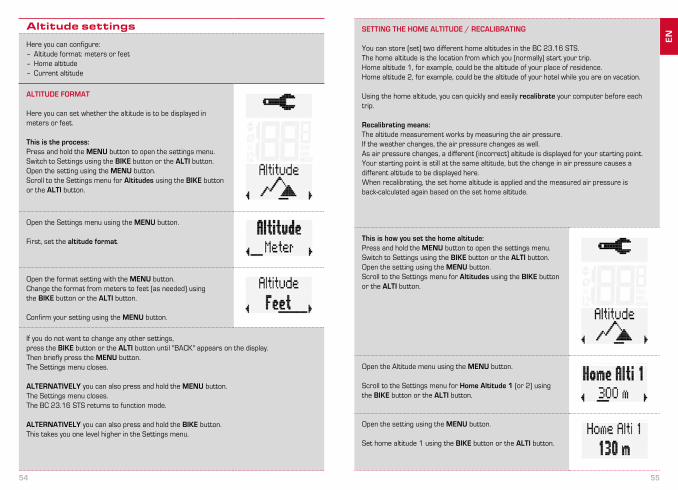
Altitude settings
Here you can configure:– Altitude format: meters or feet– Home altitude– Current altitude
ALTITUDE FORMAT
Here you can set whether the altitude is to be displayed in meters or feet.
This is the process:Press and hold the MENU button to open the settings menu.Switch to Settings using the BIKE button or the ALTI button.Open the setting using the MENU button.Scroll to the Settings menu for Altitudes using the BIKE button or the ALTI button.
Open the Settings menu using the MENU button.
First, set the altitude format.
Open the format setting with the MENU button.Change the format from meters to feet (as needed) using the BIKE button or the ALTI button.
Confirm your setting using the MENU button.
If you do not want to change any other settings, press the BIKE button or the ALTI button until "BACK" appears on the display.Then briefly press the MENU button.The Settings menu closes.
ALTERNATIVELY you can also press and hold the MENU button.The Settings menu closes.The BC 23.16 STS returns to function mode.
ALTERNATIVELY you can also press and hold the BIKE button.This takes you one level higher in the Settings menu.
EN
56 57
Open the Altitude menu using the MENU button.
Scroll to the Settings menu for Current Altitude using the BIKE button or the ALTI button.
Open the setting using the MENU button.
Now you can select whether you want to enter the current altitude in meters (or feet) or as air pressure reduced to sea level.
Make a selection using the BIKE button or the ALTI button.
Confirm the selection using the MENU button.
Now you can set the current altitude in meters (feet) or air pressured reduced to sea level depending on your choice.
Change the setting using the BIKE button or the ALTI button.
Confirm your setting using the MENU button.
If you do not want to change any other settings, press the BIKE button or the ALTI button until "BACK" appears on the display.Then briefly press the MENU button.
The Settings menu closes.
ALTERNATIVELY you can also press and hold the MENU button.The Settings menu closes.The BC 23.16 STS returns to function mode.
ALTERNATIVELY you can also press and hold the BIKE button.This takes you one level higher in the Settings menu.
The settings for home altitude 2 are set the exact same way as in the steps listed above.
If you do not want to change any other settings, press the BIKE button or the ALTI button until "BACK" appears on the display.Then briefly press the MENU button.
The Settings menu closes.
ALTERNATIVELY you can also press and hold the MENU button.The Settings menu closes.The BC 23.16 STS returns to function mode.
ALTERNATIVELY you can also press and hold the BIKE button.This takes you one level higher in the Settings menu.
SETTING/CORRECTING THE CURRENT ALTITUDE
You set or correct (during a trip) the current altitude in the BC 23.16 STS.The current altitude can be set in meters or feet or as an air pressure value.When setting the air pressure value, you have to use the air pressure reduced to sea level.
NOTE: Using the currently measured air pressure (in your home) will give an incorrect current altitude calculation. You must use the air pressure reduced to sea level.You can find this information on a variety of weather websites.
This is the process:Press and hold the MENU button to open the settings menu.Switch to Settings using the BIKE button or the ALTI button.Open the setting using the MENU button.Scroll to the Settings menu for Altitudes using the BIKE button or the ALTI button.
EN
58 59
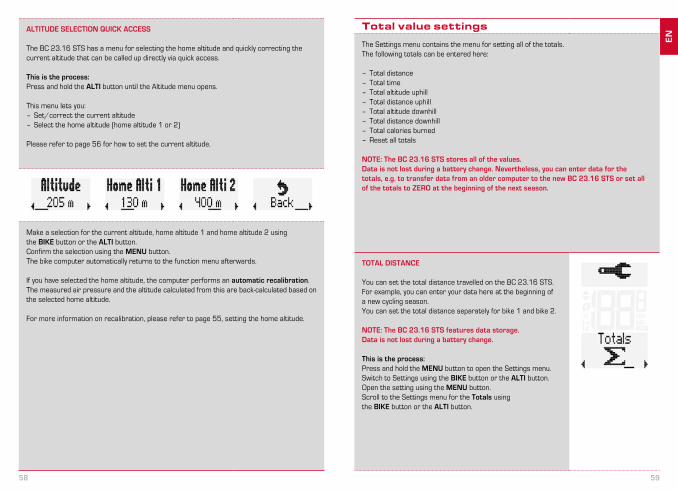
Total value settings
The Settings menu contains the menu for setting all of the totals.The following totals can be entered here:
– Total distance– Total time– Total altitude uphill– Total distance uphill– Total altitude downhill– Total distance downhill– Total calories burned– Reset all totals
NOTE: The BC 23.16 STS stores all of the values.Data is not lost during a battery change. Nevertheless, you can enter data for the totals, e.g. to transfer data from an older computer to the new BC 23.16 STS or set all of the totals to ZERO at the beginning of the next season.
TOTAL DISTANCE
You can set the total distance travelled on the BC 23.16 STS. For example, you can enter your data here at the beginning of a new cycling season.You can set the total distance separately for bike 1 and bike 2.
NOTE: The BC 23.16 STS features data storage.Data is not lost during a battery change.
This is the process:Press and hold the MENU button to open the Settings menu.Switch to Settings using the BIKE button or the ALTI button.Open the setting using the MENU button.Scroll to the Settings menu for the Totals using the BIKE button or the ALTI button.
ALTITUDE SELECTION QUICK ACCESS
The BC 23.16 STS has a menu for selecting the home altitude and quickly correcting the current altitude that can be called up directly via quick access.
This is the process:Press and hold the ALTI button until the Altitude menu opens.
This menu lets you:– Set/correct the current altitude– Select the home altitude (home altitude 1 or 2)
Please refer to page 56 for how to set the current altitude.
Make a selection for the current altitude, home altitude 1 and home altitude 2 using the BIKE button or the ALTI button.Confirm the selection using the MENU button.The bike computer automatically returns to the function menu afterwards.
If you have selected the home altitude, the computer performs an automatic recalibration.The measured air pressure and the altitude calculated from this are back-calculated based on the selected home altitude.
For more information on recalibration, please refer to page 55, setting the home altitude.
EN
60 61
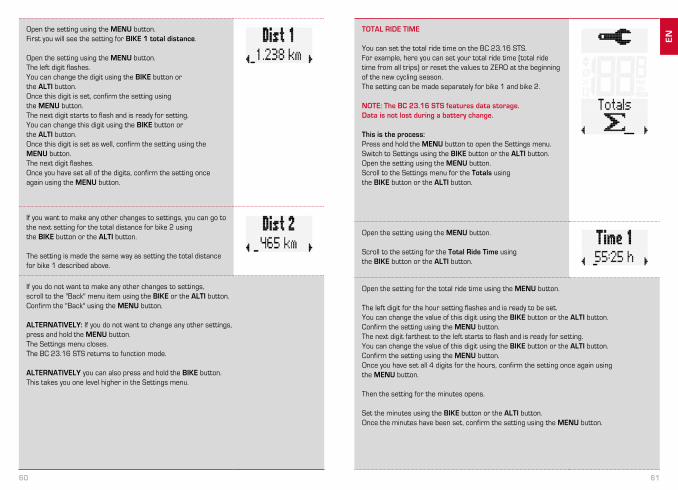
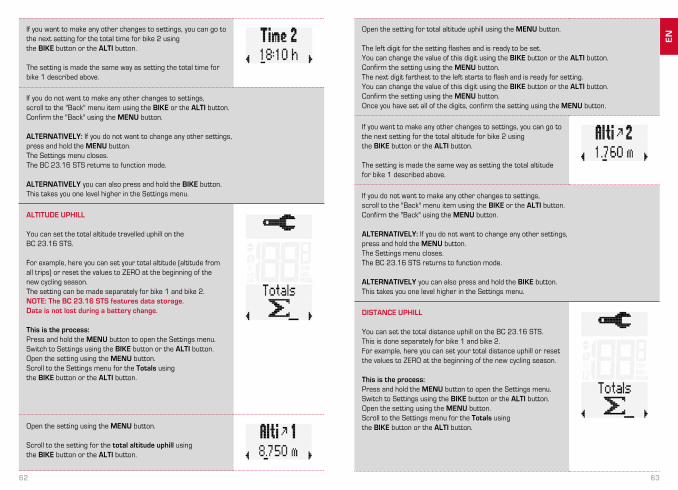
TOTAL RIDE TIME
You can set the total ride time on the BC 23.16 STS.For example, here you can set your total ride time (total ride time from all trips) or reset the values to ZERO at the beginning of the new cycling season.The setting can be made separately for bike 1 and bike 2.
NOTE: The BC 23.16 STS features data storage.Data is not lost during a battery change.
This is the process:Press and hold the MENU button to open the Settings menu.Switch to Settings using the BIKE button or the ALTI button.Open the setting using the MENU button.Scroll to the Settings menu for the Totals using the BIKE button or the ALTI button.
Open the setting using the MENU button.
Scroll to the setting for the Total Ride Time using the BIKE button or the ALTI button.
Open the setting for the total ride time using the MENU button.
The left digit for the hour setting flashes and is ready to be set.You can change the value of this digit using the BIKE button or the ALTI button.Confirm the setting using the MENU button.The next digit farthest to the left starts to flash and is ready for setting.You can change the value of this digit using the BIKE button or the ALTI button.Confirm the setting using the MENU button.Once you have set all 4 digits for the hours, confirm the setting once again using the MENU button.
Then the setting for the minutes opens.
Set the minutes using the BIKE button or the ALTI button.Once the minutes have been set, confirm the setting using the MENU button.
Open the setting using the MENU button.First you will see the setting for BIKE 1 total distance.
Open the setting using the MENU button.The left digit flashes.You can change the digit using the BIKE button or the ALTI button.Once this digit is set, confirm the setting using the MENU button.The next digit starts to flash and is ready for setting.You can change this digit using the BIKE button or the ALTI button.Once this digit is set as well, confirm the setting using the MENU button.The next digit flashes.Once you have set all of the digits, confirm the setting once again using the MENU button.
If you want to make any other changes to settings, you can go to the next setting for the total distance for bike 2 using the BIKE button or the ALTI button.
The setting is made the same way as setting the total distance for bike 1 described above.
If you do not want to make any other changes to settings, scroll to the "Back" menu item using the BIKE or the ALTI button.Confirm the "Back" using the MENU button.
ALTERNATIVELY: If you do not want to change any other settings, press and hold the MENU button.The Settings menu closes.The BC 23.16 STS returns to function mode.
ALTERNATIVELY you can also press and hold the BIKE button.This takes you one level higher in the Settings menu.
EN
62 63
Open the setting for total altitude uphill using the MENU button.
The left digit for the setting flashes and is ready to be set.You can change the value of this digit using the BIKE button or the ALTI button.Confirm the setting using the MENU button.The next digit farthest to the left starts to flash and is ready for setting.You can change the value of this digit using the BIKE button or the ALTI button.Confirm the setting using the MENU button.Once you have set all of the digits, confirm the setting using the MENU button.
If you want to make any other changes to settings, you can go to the next setting for the total altitude for bike 2 using the BIKE button or the ALTI button.
The setting is made the same way as setting the total altitude for bike 1 described above.
If you do not want to make any other changes to settings, scroll to the "Back" menu item using the BIKE or the ALTI button.Confirm the "Back" using the MENU button.
ALTERNATIVELY: If you do not want to change any other settings, press and hold the MENU button.The Settings menu closes.The BC 23.16 STS returns to function mode.
ALTERNATIVELY you can also press and hold the BIKE button.This takes you one level higher in the Settings menu.
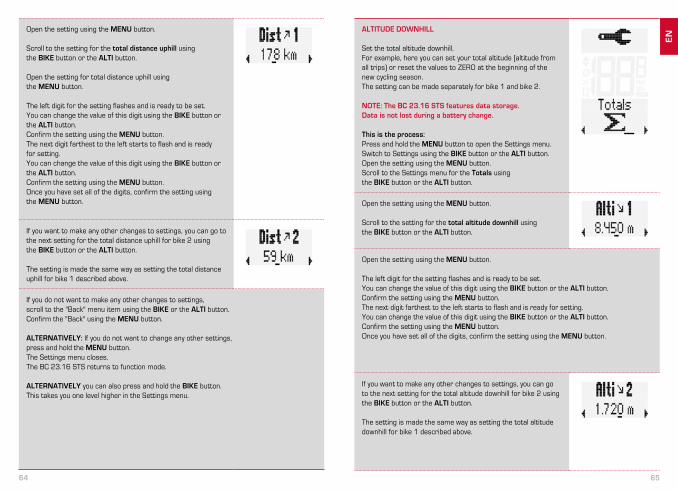
DISTANCE UPHILL
You can set the total distance uphill on the BC 23.16 STS. This is done separately for bike 1 and bike 2.For example, here you can set your total distance uphill or reset the values to ZERO at the beginning of the new cycling season.
This is the process:Press and hold the MENU button to open the Settings menu.Switch to Settings using the BIKE button or the ALTI button.Open the setting using the MENU button.Scroll to the Settings menu for the Totals using the BIKE button or the ALTI button.
If you want to make any other changes to settings, you can go to the next setting for the total time for bike 2 using the BIKE button or the ALTI button.
The setting is made the same way as setting the total time for bike 1 described above.
If you do not want to make any other changes to settings, scroll to the "Back" menu item using the BIKE or the ALTI button.Confirm the "Back" using the MENU button.
ALTERNATIVELY: If you do not want to change any other settings, press and hold the MENU button.The Settings menu closes.The BC 23.16 STS returns to function mode.
ALTERNATIVELY you can also press and hold the BIKE button.This takes you one level higher in the Settings menu.
ALTITUDE UPHILL
You can set the total altitude travelled uphill on the BC 23.16 STS. For example, here you can set your total altitude (altitude from all trips) or reset the values to ZERO at the beginning of the new cycling season.The setting can be made separately for bike 1 and bike 2.NOTE: The BC 23.16 STS features data storage.Data is not lost during a battery change.
This is the process:Press and hold the MENU button to open the Settings menu.Switch to Settings using the BIKE button or the ALTI button.Open the setting using the MENU button.Scroll to the Settings menu for the Totals using the BIKE button or the ALTI button.
Open the setting using the MENU button.
Scroll to the setting for the total altitude uphill using the BIKE button or the ALTI button.
EN
64 65
ALTITUDE DOWNHILL
Set the total altitude downhill.For example, here you can set your total altitude (altitude from all trips) or reset the values to ZERO at the beginning of the new cycling season.The setting can be made separately for bike 1 and bike 2.
NOTE: The BC 23.16 STS features data storage.Data is not lost during a battery change.
This is the process:Press and hold the MENU button to open the Settings menu.Switch to Settings using the BIKE button or the ALTI button.Open the setting using the MENU button.Scroll to the Settings menu for the Totals using the BIKE button or the ALTI button.
Open the setting using the MENU button.
Scroll to the setting for the total altitude downhill using the BIKE button or the ALTI button.
Open the setting using the MENU button.
The left digit for the setting flashes and is ready to be set.You can change the value of this digit using the BIKE button or the ALTI button.Confirm the setting using the MENU button.The next digit farthest to the left starts to flash and is ready for setting.You can change the value of this digit using the BIKE button or the ALTI button.Confirm the setting using the MENU button.Once you have set all of the digits, confirm the setting using the MENU button.
If you want to make any other changes to settings, you can go to the next setting for the total altitude downhill for bike 2 using the BIKE button or the ALTI button.
The setting is made the same way as setting the total altitude downhill for bike 1 described above.
Open the setting using the MENU button.
Scroll to the setting for the total distance uphill using the BIKE button or the ALTI button.
Open the setting for total distance uphill using the MENU button.
The left digit for the setting flashes and is ready to be set.You can change the value of this digit using the BIKE button or the ALTI button.Confirm the setting using the MENU button.The next digit farthest to the left starts to flash and is ready for setting.You can change the value of this digit using the BIKE button or the ALTI button.Confirm the setting using the MENU button.Once you have set all of the digits, confirm the setting using the MENU button.
If you want to make any other changes to settings, you can go to the next setting for the total distance uphill for bike 2 using the BIKE button or the ALTI button.
The setting is made the same way as setting the total distance uphill for bike 1 described above.
If you do not want to make any other changes to settings, scroll to the "Back" menu item using the BIKE or the ALTI button.Confirm the "Back" using the MENU button.
ALTERNATIVELY: If you do not want to change any other settings, press and hold the MENU button.The Settings menu closes.The BC 23.16 STS returns to function mode.
ALTERNATIVELY you can also press and hold the BIKE button.This takes you one level higher in the Settings menu.
EN
66 67
If you want to make any other changes to settings, you can go to the next setting for the total distance downhill for bike 2 using the BIKE button or the ALTI button.
The setting is made the same way as setting the total distance downhill for bike 1 described above.
If you do not want to make any other changes to settings, scroll to the "Back" menu item using the BIKE or the ALTI button.Confirm the "Back" using the MENU button.
ALTERNATIVELY: If you do not want to change any other settings, press and hold the MENU button.The Settings menu closes.The BC 23.16 STS returns to function mode.
ALTERNATIVELY you can also press and hold the BIKE button.This takes you one level higher in the Settings menu.
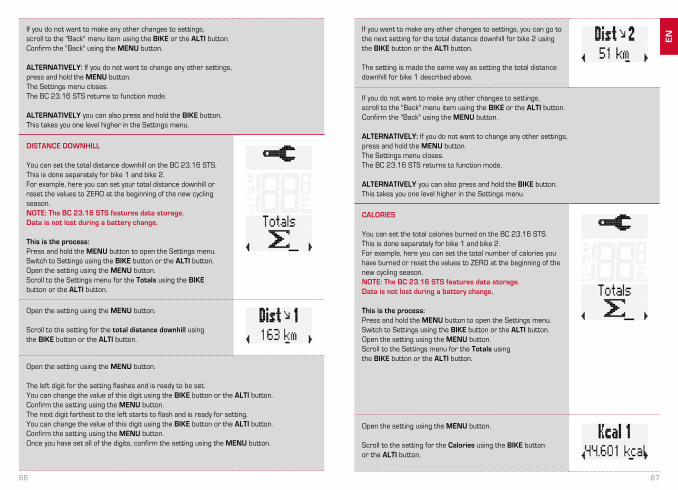
CALORIES
You can set the total calories burned on the BC 23.16 STS.This is done separately for bike 1 and bike 2.For example, here you can set the total number of calories you have burned or reset the values to ZERO at the beginning of the new cycling season.NOTE: The BC 23.16 STS features data storage.Data is not lost during a battery change.
This is the process:Press and hold the MENU button to open the Settings menu.Switch to Settings using the BIKE button or the ALTI button.Open the setting using the MENU button.Scroll to the Settings menu for the Totals using the BIKE button or the ALTI button.
Open the setting using the MENU button.
Scroll to the setting for the Calories using the BIKE button or the ALTI button.
If you do not want to make any other changes to settings, scroll to the "Back" menu item using the BIKE or the ALTI button.Confirm the "Back" using the MENU button.
ALTERNATIVELY: If you do not want to change any other settings, press and hold the MENU button.The Settings menu closes.The BC 23.16 STS returns to function mode.
ALTERNATIVELY you can also press and hold the BIKE button.This takes you one level higher in the Settings menu.
DISTANCE DOWNHILL
You can set the total distance downhill on the BC 23.16 STS. This is done separately for bike 1 and bike 2.For example, here you can set your total distance downhill or reset the values to ZERO at the beginning of the new cycling season.NOTE: The BC 23.16 STS features data storage.Data is not lost during a battery change.
This is the process:Press and hold the MENU button to open the Settings menu. Switch to Settings using the BIKE button or the ALTI button. Open the setting using the MENU button.Scroll to the Settings menu for the Totals using the BIKE button or the ALTI button.
Open the setting using the MENU button.
Scroll to the setting for the total distance downhill using the BIKE button or the ALTI button.
Open the setting using the MENU button.
The left digit for the setting flashes and is ready to be set.You can change the value of this digit using the BIKE button or the ALTI button.Confirm the setting using the MENU button.The next digit farthest to the left starts to flash and is ready for setting.You can change the value of this digit using the BIKE button or the ALTI button.Confirm the setting using the MENU button.Once you have set all of the digits, confirm the setting using the MENU button.
EN
68 69
Open the setting using the MENU button.
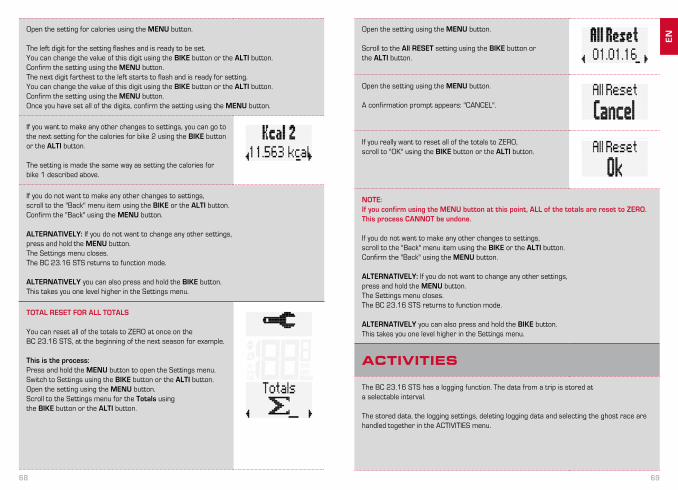
Scroll to the All RESET setting using the BIKE button or the ALTI button.
Open the setting using the MENU button.
A confirmation prompt appears: "CANCEL".
If you really want to reset all of the totals to ZERO, scroll to "OK" using the BIKE button or the ALTI button.
NOTE: If you confirm using the MENU button at this point, ALL of the totals are reset to ZERO. This process CANNOT be undone.
If you do not want to make any other changes to settings, scroll to the "Back" menu item using the BIKE or the ALTI button.Confirm the "Back" using the MENU button.
ALTERNATIVELY: If you do not want to change any other settings, press and hold the MENU button.The Settings menu closes.The BC 23.16 STS returns to function mode.
ALTERNATIVELY you can also press and hold the BIKE button.This takes you one level higher in the Settings menu.
ACTIVITIES
The BC 23.16 STS has a logging function. The data from a trip is stored at a selectable interval.
The stored data, the logging settings, deleting logging data and selecting the ghost race are handled together in the ACTIVITIES menu.
Open the setting for calories using the MENU button.
The left digit for the setting flashes and is ready to be set.You can change the value of this digit using the BIKE button or the ALTI button.Confirm the setting using the MENU button.The next digit farthest to the left starts to flash and is ready for setting.You can change the value of this digit using the BIKE button or the ALTI button.Confirm the setting using the MENU button.Once you have set all of the digits, confirm the setting using the MENU button.
If you want to make any other changes to settings, you can go to the next setting for the calories for bike 2 using the BIKE button or the ALTI button.
The setting is made the same way as setting the calories for bike 1 described above.
If you do not want to make any other changes to settings, scroll to the "Back" menu item using the BIKE or the ALTI button.Confirm the "Back" using the MENU button.
ALTERNATIVELY: If you do not want to change any other settings, press and hold the MENU button.The Settings menu closes.The BC 23.16 STS returns to function mode.
ALTERNATIVELY you can also press and hold the BIKE button.This takes you one level higher in the Settings menu.
TOTAL RESET FOR ALL TOTALS
You can reset all of the totals to ZERO at once on the BC 23.16 STS, at the beginning of the next season for example.
This is the process:Press and hold the MENU button to open the Settings menu.Switch to Settings using the BIKE button or the ALTI button.Open the setting using the MENU button.Scroll to the Settings menu for the Totals using the BIKE button or the ALTI button.
EN
70 71
Scroll forwards or backwards through the values from the activity using the BIKE or ALTI button.
The following values from an activity are displayed:– Distance– Ride time– Average speed– Max. speed– Average HR– Max. HR– Average cadence– Altitude uphill– Altitude downhill– Max. altitude– Calories
Continue scrolling to BACK to exit the menu.Confirm using the MENU button.
Alternatively: Press and hold the BIKE button.
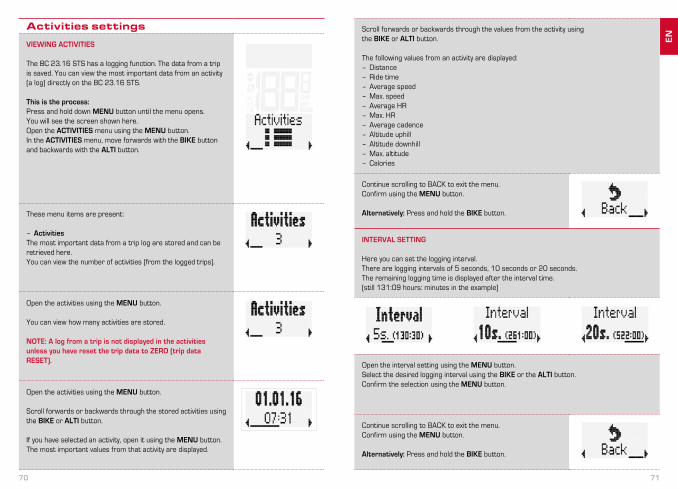
INTERVAL SETTING
Here you can set the logging interval.There are logging intervals of 5 seconds, 10 seconds or 20 seconds.The remaining logging time is displayed after the interval time. (still 131:09 hours: minutes in the example)
Open the interval setting using the MENU button.Select the desired logging interval using the BIKE or the ALTI button.Confirm the selection using the MENU button.
Continue scrolling to BACK to exit the menu.Confirm using the MENU button.
Alternatively: Press and hold the BIKE button.
Activities settings
VIEWING ACTIVITIES
The BC 23.16 STS has a logging function. The data from a trip is saved. You can view the most important data from an activity (a log) directly on the BC 23.16 STS.
This is the process:Press and hold down MENU button until the menu opens.You will see the screen shown here.Open the ACTIVITIES menu using the MENU button.In the ACTIVITIES menu, move forwards with the BIKE button and backwards with the ALTI button.
These menu items are present:
– ActivitiesThe most important data from a trip log are stored and can be retrieved here.You can view the number of activities (from the logged trips).
Open the activities using the MENU button.
You can view how many activities are stored.
NOTE: A log from a trip is not displayed in the activities unless you have reset the trip data to ZERO (trip data RESET).
Open the activities using the MENU button.
Scroll forwards or backwards through the stored activities using the BIKE or ALTI button.
If you have selected an activity, open it using the MENU button.The most important values from that activity are displayed.
EN
72 73
Continue scrolling to BACK to exit the menu.Confirm using the MENU button.
Alternatively: Press and hold the BIKE button.
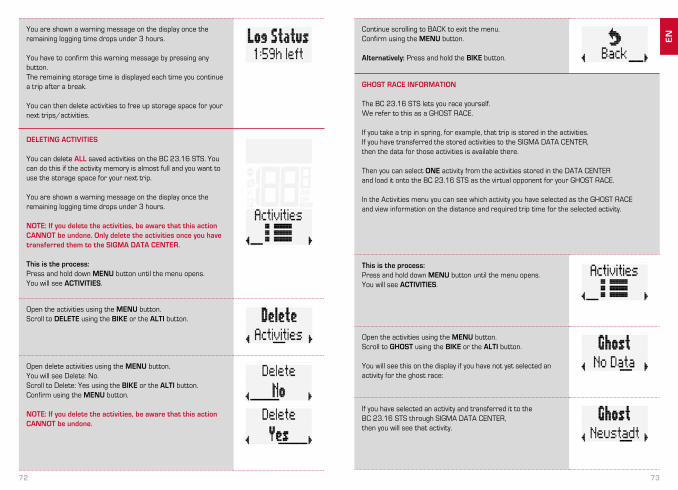
GHOST RACE INFORMATION
The BC 23.16 STS lets you race yourself.We refer to this as a GHOST RACE.
If you take a trip in spring, for example, that trip is stored in the activities. If you have transferred the stored activities to the SIGMA DATA CENTER, then the data for those activities is available there.
Then you can select ONE activity from the activities stored in the DATA CENTER and load it onto the BC 23.16 STS as the virtual opponent for your GHOST RACE.
In the Activities menu you can see which activity you have selected as the GHOST RACE and view information on the distance and required trip time for the selected activity.
This is the process:Press and hold down MENU button until the menu opens.You will see ACTIVITIES.
Open the activities using the MENU button.Scroll to GHOST using the BIKE or the ALTI button.
You will see this on the display if you have not yet selected an activity for the ghost race:
If you have selected an activity and transferred it to the BC 23.16 STS through SIGMA DATA CENTER, then you will see that activity.
You are shown a warning message on the display once the remaining logging time drops under 3 hours.
You have to confirm this warning message by pressing any button.The remaining storage time is displayed each time you continue a trip after a break.
You can then delete activities to free up storage space for your next trips/activities.
DELETING ACTIVITIES
You can delete ALL saved activities on the BC 23.16 STS. You can do this if the activity memory is almost full and you want to use the storage space for your next trip.
You are shown a warning message on the display once the remaining logging time drops under 3 hours.
NOTE: If you delete the activities, be aware that this action CANNOT be undone. Only delete the activities once you have transferred them to the SIGMA DATA CENTER.
This is the process:Press and hold down MENU button until the menu opens.You will see ACTIVITIES.
Open the activities using the MENU button.Scroll to DELETE using the BIKE or the ALTI button.
Open delete activities using the MENU button.You will see Delete: No.Scroll to Delete: Yes using the BIKE or the ALTI button.Confirm using the MENU button.
NOTE: If you delete the activities, be aware that this action CANNOT be undone.
EN
74 75
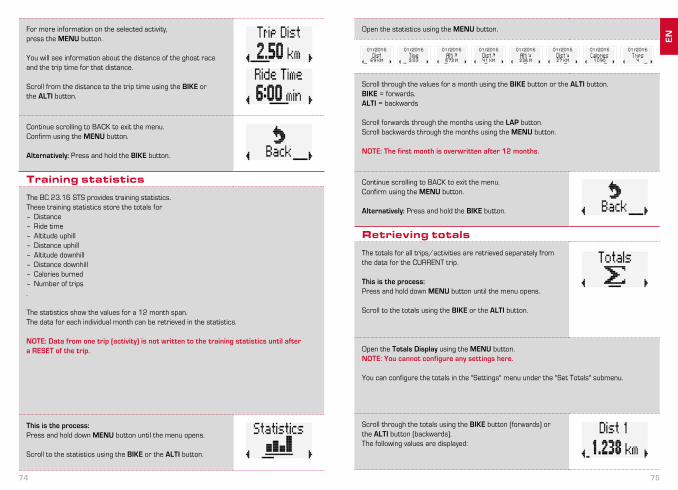
Open the statistics using the MENU button.
Scroll through the values for a month using the BIKE button or the ALTI button.BIKE = forwards.ALTI = backwards
Scroll forwards through the months using the LAP button.Scroll backwards through the months using the MENU button.
NOTE: The first month is overwritten after 12 months.
Continue scrolling to BACK to exit the menu.Confirm using the MENU button.
Alternatively: Press and hold the BIKE button.
Retrieving totals
The totals for all trips/activities are retrieved separately from the data for the CURRENT trip.
This is the process:Press and hold down MENU button until the menu opens.
Scroll to the totals using the BIKE or the ALTI button.
Open the Totals Display using the MENU button.NOTE: You cannot configure any settings here.
You can configure the totals in the "Settings" menu under the "Set Totals" submenu.
Scroll through the totals using the BIKE button (forwards) or the ALTI button (backwards).The following values are displayed:
For more information on the selected activity, press the MENU button.
You will see information about the distance of the ghost race and the trip time for that distance.
Scroll from the distance to the trip time using the BIKE or the ALTI button.
Continue scrolling to BACK to exit the menu.Confirm using the MENU button.
Alternatively: Press and hold the BIKE button.
Training statistics
The BC 23.16 STS provides training statistics. These training statistics store the totals for – Distance– Ride time– Altitude uphill– Distance uphill– Altitude downhill– Distance downhill– Calories burned– Number of trips.
The statistics show the values for a 12 month span.The data for each individual month can be retrieved in the statistics.
NOTE: Data from one trip (activity) is not written to the training statistics until after a RESET of the trip.
This is the process:Press and hold down MENU button until the menu opens.
Scroll to the statistics using the BIKE or the ALTI button.
EN
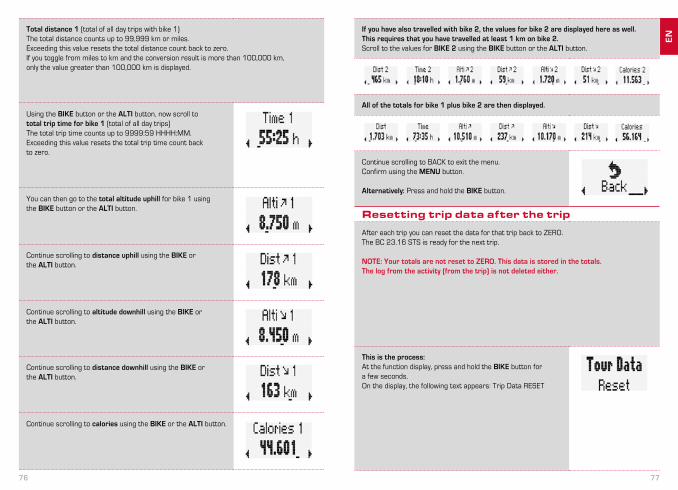
76 77
If you have also travelled with bike 2, the values for bike 2 are displayed here as well. This requires that you have travelled at least 1 km on bike 2. Scroll to the values for BIKE 2 using the BIKE button or the ALTI button.
All of the totals for bike 1 plus bike 2 are then displayed.
Continue scrolling to BACK to exit the menu.Confirm using the MENU button.
Alternatively: Press and hold the BIKE button.
Resetting trip data after the trip
After each trip you can reset the data for that trip back to ZERO.The BC 23.16 STS is ready for the next trip.
NOTE: Your totals are not reset to ZERO. This data is stored in the totals. The log from the activity (from the trip) is not deleted either.
This is the process:At the function display, press and hold the BIKE button for a few seconds.On the display, the following text appears: Trip Data RESET
Total distance 1 (total of all day trips with bike 1)The total distance counts up to 99,999 km or miles.Exceeding this value resets the total distance count back to zero.If you toggle from miles to km and the conversion result is more than 100,000 km, only the value greater than 100,000 km is displayed.
Using the BIKE button or the ALTI button, now scroll to total trip time for bike 1 (total of all day trips)The total trip time counts up to 9999:59 HHHH:MM.Exceeding this value resets the total trip time count back to zero.
You can then go to the total altitude uphill for bike 1 using the BIKE button or the ALTI button.
Continue scrolling to distance uphill using the BIKE or the ALTI button.
Continue scrolling to altitude downhill using the BIKE or the ALTI button.
Continue scrolling to distance downhill using the BIKE or the ALTI button.
Continue scrolling to calories using the BIKE or the ALTI button.
EN

78 79
If you continue to hold the BIKE button, the trip data is then reset to zero.
The following data is reset to zero:– Distance– Ride time– Average speed– Maximum speed– Average cadence (if cadence tracking is activated)– Maximum cadence (if cadence tracking is activated)– Average power (if cadence tracking is activated)– Altitude graph– Altitude uphill– Distance uphill– Altitude downhill– Distance downhill– Maximum altitude of the trip– Calories– Average heart rate– Maximum heart rate– Distribution of the intensity zones– Lap data
LAP COUNTER
The BC 23.16 STS has a lap counter that stores a series of values for a distance section = lap. You can store up to 50 laps for one trip.
START OF THE LAP COUNTER
The lap counter is always started automatically for the first lap if another trip is started after the trip data is reset.
The second lap and each additional lap is started by briefly pressing the LAP button.
The lap counter can be started from ANY function.
NOTE: If you take a break (speed is ZERO), the counter is stopped automatically. The lap counter automatically starts back up when you are back in motion.
RESET OF THE LAP COUNTER
The lap counter is reset if the trip data is reset to zero.
The lap counter is ready to start again after the RESET.
If a new lap is started by pressing the LAP button, a brief overview of the values of the last lap appears on the display of the BC 23.16 STS.
Here you can see:– Average heart rate during the lap– Average cadence during the lap– Current altitude during the lap– Lap number– Average speed during the lap– Length of the lap– Ride time of the lap
This information remains on the display for 10 seconds.Pressing any button ends the lap display and returns to function mode.
DISPLAY OF THE STORED LAP DATA
The BC 23.16 STS has a Lap view. The Lap view lets you retrieve the data for any stored lap and compare the data of different laps.
This is the process:Press and hold the LAP button until the Lap view opens.
You will see the first value of the first lap.Here Lap 1: Lap distance 0.96 km
EN

80 81
This is the process:The ghost race is started by briefly pressing the BIKE and MENU buttons at the same time.
After the start, the display shows who is behind or ahead in the ghost race.
In this example, you are ahead (by 23 m and 3.3 seconds)
The logging data is available for the comparison trip.This logging data is compared to the current data during a ghost race.This is used to determine whether you or the ghost is currently in the lead in the ghost race.
In this example, your ghost opponent is ahead (34 m and 8 seconds).
Once the ghost race is finished, a message appears on the display.
Pressing any button confirms this message.
The final data for the ghost race is then shown on the display again.The ghost opponent has taken the lead by 189 meters and 24.9 seconds.
You can scroll through the individual values for lap 1 using the BIKE or the ALTI button.
Scroll through the laps using the LAP button or the MENU button.This is how you can compare your values from various laps.Example: Average speed.
The Lap view closes automatically after 10 seconds if you do not press any buttons.
You can exit the Lap view by pressing the MENU button in the "Back" menu.
ALTERNATIVELY: Press and hold the LAP button. The Lap view closes.
GHOST RACE
The BC 23.16 STS gives you the option of "racing" against yourself or another cyclist.
A comparison trip can be selected for the ghost race. This is a trip you yourself have ridden earlier.
The comparison trip is transferred to the BC 23.16 STS via the SIGMA DATA CENTER.
If a comparison trip has been selected, the BC 23.16 STS displays a start screen for the ghost race.
EN
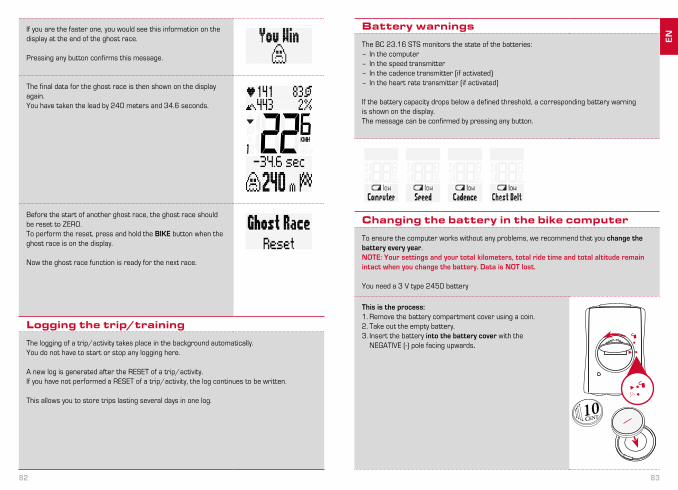
82 83
Battery warnings
The BC 23.16 STS monitors the state of the batteries:– In the computer– In the speed transmitter– In the cadence transmitter (if activated)– In the heart rate transmitter (if activated)
If the battery capacity drops below a defined threshold, a corresponding battery warning is shown on the display.The message can be confirmed by pressing any button.
Changing the battery in the bike computer
To ensure the computer works without any problems, we recommend that you change the battery every year.NOTE: Your settings and your total kilometers, total ride time and total altitude remain intact when you change the battery. Data is NOT lost.
You need a 3 V type 2450 battery
This is the process:1. Remove the battery compartment cover using a coin.2. Take out the empty battery.3. Insert the battery into the battery cover with the NEGATIVE (-) pole facing upwards. open-close
10CENT
If you are the faster one, you would see this information on the display at the end of the ghost race.
Pressing any button confirms this message.
The final data for the ghost race is then shown on the display again.You have taken the lead by 240 meters and 34.6 seconds.
Before the start of another ghost race, the ghost race should be reset to ZERO.To perform the reset, press and hold the BIKE button when the ghost race is on the display.
Now the ghost race function is ready for the next race.
Logging the trip/training
The logging of a trip/activity takes place in the background automatically.You do not have to start or stop any logging here.
A new log is generated after the RESET of a trip/activity.If you have not performed a RESET of a trip/activity, the log continues to be written.
This allows you to store trips lasting several days in one log.
EN
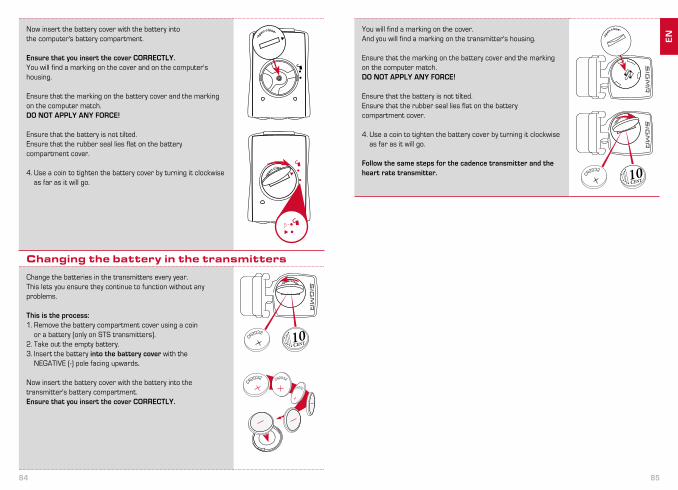
84 85
You will find a marking on the cover.And you will find a marking on the transmitter's housing.
Ensure that the marking on the battery cover and the marking on the computer match.DO NOT APPLY ANY FORCE!
Ensure that the battery is not tilted.Ensure that the rubber seal lies flat on the battery compartment cover.
4. Use a coin to tighten the battery cover by turning it clockwise as far as it will go.
Follow the same steps for the cadence transmitter and the heart rate transmitter.
op
en-close
10CENT
op
en-close
Now insert the battery cover with the battery into the computer's battery compartment.
Ensure that you insert the cover CORRECTLY.You will find a marking on the cover and on the computer's housing.
Ensure that the marking on the battery cover and the marking on the computer match.DO NOT APPLY ANY FORCE!
Ensure that the battery is not tilted.Ensure that the rubber seal lies flat on the battery compartment cover.
4. Use a coin to tighten the battery cover by turning it clockwise as far as it will go.
op
en-close
open
-close
Changing the battery in the transmitters
Change the batteries in the transmitters every year.This lets you ensure they continue to function without any problems.
This is the process:1. Remove the battery compartment cover using a coin or a battery (only on STS transmitters).2. Take out the empty battery.3. Insert the battery into the battery cover with the NEGATIVE (-) pole facing upwards.
Now insert the battery cover with the battery into the transmitter's battery compartment.Ensure that you insert the cover CORRECTLY.
10CENT
open-close
EN
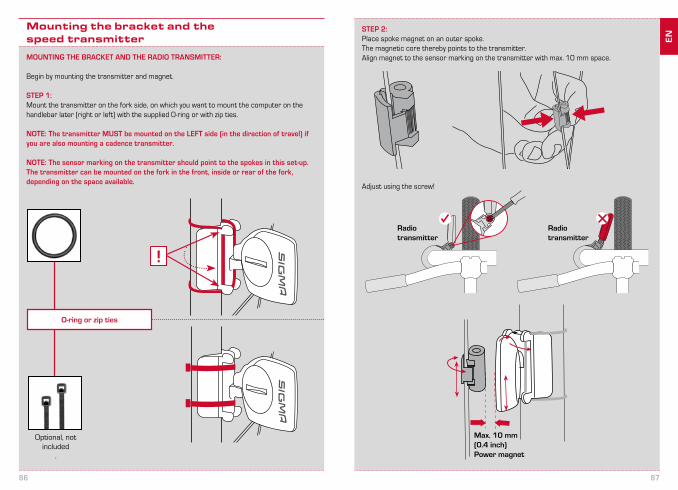
86 87
STEP 2: Place spoke magnet on an outer spoke.The magnetic core thereby points to the transmitter. Align magnet to the sensor marking on the transmitter with max. 10 mm space.
Adjust using the screw!
Radio transmitter
Radio transmitter
Max. 10 mm(0.4 inch)Power magnet
Mounting the bracket and the speed transmitter
MOUNTING THE BRACKET AND THE RADIO TRANSMITTER:
Begin by mounting the transmitter and magnet.
STEP 1: Mount the transmitter on the fork side, on which you want to mount the computer on the handlebar later (right or left) with the supplied O-ring or with zip ties.
NOTE: The transmitter MUST be mounted on the LEFT side (in the direction of travel) if you are also mounting a cadence transmitter.
NOTE: The sensor marking on the transmitter should point to the spokes in this set-up. The transmitter can be mounted on the fork in the front, inside or rear of the fork,depending on the space available.
!
O-ring or zip ties
Optional, not included
.
EN
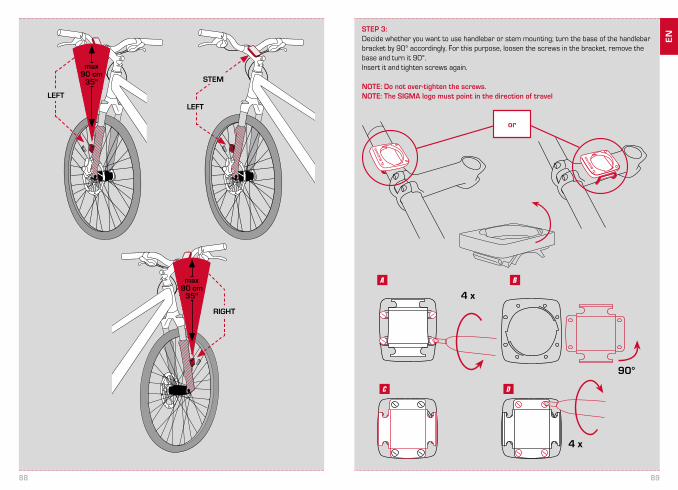
88 89
STEP 3: Decide whether you want to use handlebar or stem mounting; turn the base of the handlebar bracket by 90° accordingly. For this purpose, loosen the screws in the bracket, remove the base and turn it 90°. Insert it and tighten screws again.
NOTE: Do not over-tighten the screws.NOTE: The SIGMA logo must point in the direction of travel
or
RIGHT
LEFT
STEM
LEFT
max90 cm
35"
max90 cm
35"
90°
4 x
A B
C
4 x
D
EN
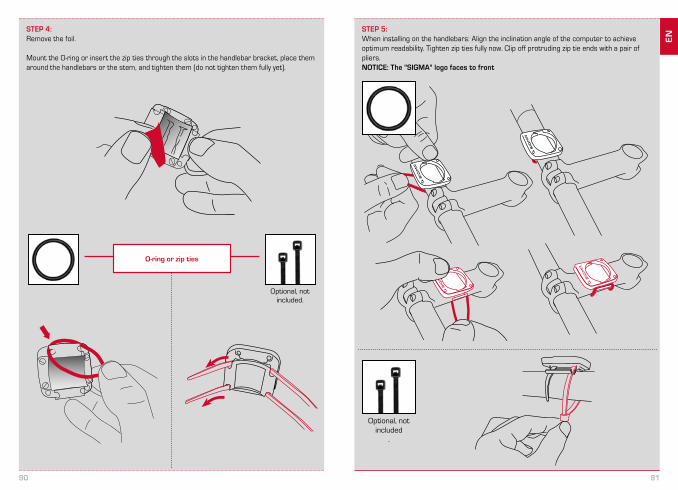
90 91
STEP 4: Remove the foil.
Mount the O-ring or insert the zip ties through the slots in the handlebar bracket, place them around the handlebars or the stem, and tighten them (do not tighten them fully yet).
STEP 5: When installing on the handlebars: Align the inclination angle of the computer to achieve optimum readability. Tighten zip ties fully now. Clip off protruding zip tie ends with a pair of pliers.NOTICE: The "SIGMA" logo faces to front
Optional, not included.
O-ring or zip ties
Optional, not included
.
EN

92 93
Mounting the cadence transmitter
O-ring or zip ties
Optional, not included
.
!!
STEP 2: Installation of the magnet
6 mm(0.24 inch)
8 mm(0.3 inch)
or
STEP 3: Attaching
EN
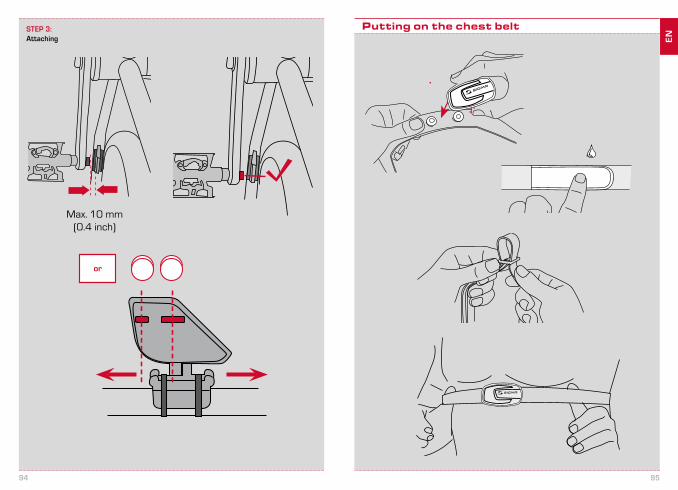
94 95
STEP 3: Attaching
Max. 10 mm(0.4 inch)
or
Putting on the chest belt
EN
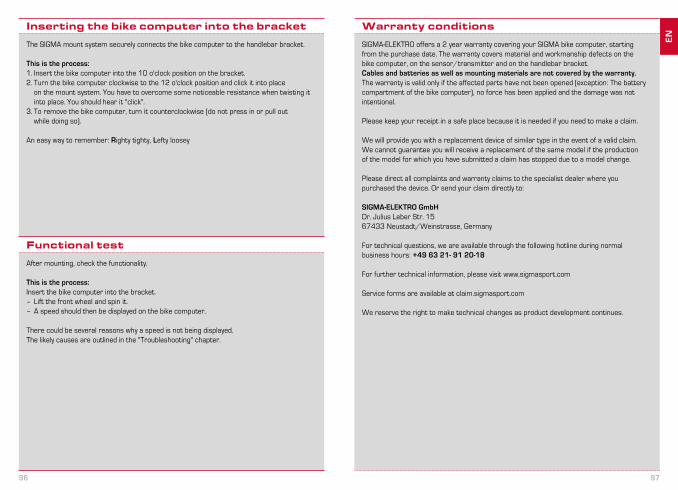
96 97
Warranty conditions
SIGMA-ELEKTRO offers a 2 year warranty covering your SIGMA bike computer, starting from the purchase date. The warranty covers material and workmanship defects on the bike computer, on the sensor/transmitter and on the handlebar bracket. Cables and batteries as well as mounting materials are not covered by the warranty.The warranty is valid only if the affected parts have not been opened (exception: The battery compartment of the bike computer), no force has been applied and the damage was not intentional.
Please keep your receipt in a safe place because it is needed if you need to make a claim.
We will provide you with a replacement device of similar type in the event of a valid claim. We cannot guarantee you will receive a replacement of the same model if the production of the model for which you have submitted a claim has stopped due to a model change.
Please direct all complaints and warranty claims to the specialist dealer where you purchased the device. Or send your claim directly to:
SIGMA-ELEKTRO GmbHDr. Julius Leber Str. 1567433 Neustadt/Weinstrasse, Germany
For technical questions, we are available through the following hotline during normal business hours: +49 63 21- 91 20-18
For further technical information, please visit www.sigmasport.com
Service forms are available at claim.sigmasport.com
We reserve the right to make technical changes as product development continues.
Inserting the bike computer into the bracket
The SIGMA mount system securely connects the bike computer to the handlebar bracket.
This is the process:1. Insert the bike computer into the 10 o'clock position on the bracket.2. Turn the bike computer clockwise to the 12 o'clock position and click it into place on the mount system. You have to overcome some noticeable resistance when twisting it into place. You should hear it "click".3. To remove the bike computer, turn it counterclockwise (do not press in or pull out while doing so).
An easy way to remember: Righty tighty, Lefty loosey
Functional test
After mounting, check the functionality.
This is the process:Insert the bike computer into the bracket.– Lift the front wheel and spin it.– A speed should then be displayed on the bike computer.
There could be several reasons why a speed is not being displayed.The likely causes are outlined in the "Troubleshooting" chapter.
EN
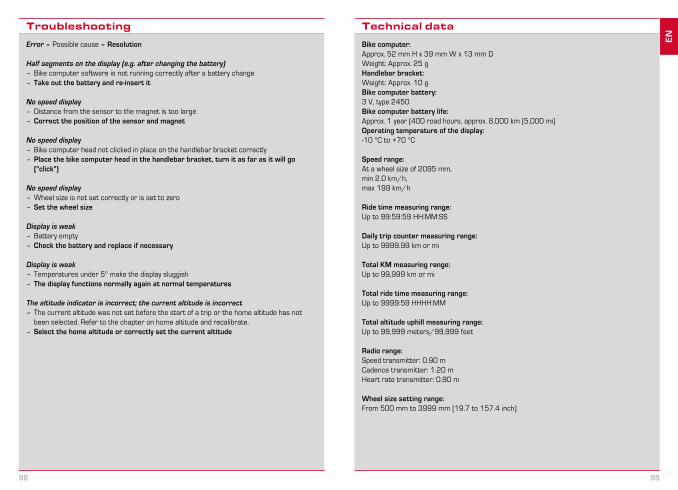
98 99
Technical data
Bike computer:Approx. 52 mm H x 39 mm W x 13 mm DWeight: Approx. 25 gHandlebar bracket:Weight: Approx. 10 gBike computer battery:3 V, type 2450Bike computer battery life:Approx. 1 year (400 road hours, approx. 8,000 km (5,000 mi)Operating temperature of the display:-10 °C to +70 °C
Speed range:At a wheel size of 2095 mm, min 2.0 km/h,max 199 km/h
Ride time measuring range:Up to 99:59:59 HH:MM:SS
Daily trip counter measuring range:Up to 9999.99 km or mi
Total KM measuring range:Up to 99,999 km or mi
Total ride time measuring range:Up to 9999:59 HHHH:MM
Total altitude uphill measuring range:Up to 99,999 meters/99,999 feet
Radio range:Speed transmitter: 0.90 mCadence transmitter: 1.20 mHeart rate transmitter: 0.90 m
Wheel size setting range:From 500 mm to 3999 mm (19.7 to 157.4 inch)
Troubleshooting
Error – Possible cause – Resolution
Half segments on the display (e.g. after changing the battery)– Bike computer software is not running correctly after a battery change– Take out the battery and re-insert it
No speed display– Distance from the sensor to the magnet is too large– Correct the position of the sensor and magnet
No speed display – Bike computer head not clicked in place on the handlebar bracket correctly– Place the bike computer head in the handlebar bracket, turn it as far as it will go ("click")
No speed display – Wheel size is not set correctly or is set to zero– Set the wheel size
Display is weak – Battery empty – Check the battery and replace if necessary
Display is weak – Temperatures under 5° make the display sluggish– The display functions normally again at normal temperatures
The altitude indicator is incorrect; the current altitude is incorrect– The current altitude was not set before the start of a trip or the home altitude has not been selected. Refer to the chapter on home altitude and recalibrate.– Select the home altitude or correctly set the current altitude
EN
100 101
Declaration of Conformity/IC
SIGMA-Elektro GmbHDr. Julius Leber Str. 15, D 67433 Neustadt/GermanyPhone: +49-6321-91200, [email protected] These models have transmitters for - Speed: Model number STS-S-3- Cadence: Model number STS-C-3- Heart Rate: Model number STS-F-4
We declare:This device complies with Industry Canada licence exempt RSS standard(s). Operation is subject to the following two conditions: (1) this device may not cause interference, and (2) this device must accept any interference, including interference that may cause unde-sired operation of the device. CAN ICES-3(B)/NMB-3(B)
Le présent appareil est conforme aux CNR d‘Industrie Canada applicables aux appareils radio exempts de licence. L‘exploitation est autorisée aux deux conditions suivantes:(1) il ne doit pas produire de brouillage et(2) l’ utilisateur du dispositif doit étre prêt à accepter tout brouillage radioélectrique reçu, même si ce brouillage est susceptible de compromettre le fomctionnement du dispositif.CAN ICES-3(B)/NMB-3(B)
The device meets the exemption from the routine evaluation limits in section 2.5 of RSS 102 and compliance with RSS-102 RF exposure, users can obtain Canadian information on RF exposure and compliance.
Le dispositif rencontre l‘exemption des limites courantes d‘évaluation dans la section 2.5 de RSS 102 et la conformité à l‘exposition de RSS-102 rf, utilisateurs peut obtenir l‘information canadienne sur l‘exposition et la conformité de rf.
This transmitter must not be co-located or operating in conjunction with any other antenna or transmitter. This equipment should be installed and operated with a minimum distance of 20 millimeters between the radiator and your body.
Cet émetteur ne doit pas être Co-placé ou ne fonctionnant en même temps qu‘aucune autre antenne ou émetteur. Cet équipement devrait être installé et actionné avec une distance minimum de 20 milliimètres entre le radiateur et votre corps.
Canadian Representative:LTP Sports Group Inc.1465 Kebet Way, Port Coquitlam BC, V3C 6L3, CanadaTel: 604-552-2930
SIGMA website: www.sigmasport.com
EU-Konformitätserklärung
Hiermit erklärt SIGMA-ELEKTRO GmbH, dass sich der kabellose Fahrradcomputer BC 23.16 STS in Übereinstimmung mit den grundlegenden Anforderungen und den anderen relevanten Vorschriften der Richtlinie 2014/53/EU befindet.
Sie finden die CE-Konformitäts-Erklärung unter: certificates.sigmasport.com
EU-Declaration of Conformity
SIGMA-ELEKTRO GmbH hereby declares that the wireless bike computers BC 23.16 STS comply with the fundamental requirements and other relevant regulations of Directive 2014/53/EU.
You can find the CE declaration at: certificates.sigmasport.com
Declaration of Conformity/FCC
You can find the Declaration of Conformity at: www.sigmasport.com
FCC statementThis device complies with part 15 of the FCC Rules. Operation is subject to the following two conditions: (1) This device may not cause harmful interference, and(2) this device must accept any interference received, including interference that may cause undesired operation.
NOTE: This equipment has been tested and found to comply with the limits for a Class B digital device, pursuant to part 15 of the FCC Rules. These limits are designed to provide reasonable protection against harmful interference in a residential installation. This equipment generates, uses and can radiate radio frequency energy and, if not installed and used in accordance with the instructions, may cause harmful interference to radio communications. However, there is no guarantee that interference will not occur in a particular installation. If this equipment does cause harmful interference to radio or television reception, which can be determined by turning the equipment off and on, the user is encouraged to try to correct the interference by one or more of the following measures:– Reorient or relocate the receiving antenna.– Increase the separation between the equipment and receiver.– Connect the equipment into an outlet on a circuit different from that to which the receiver is connected.– Consult the dealer or an experienced radio/TV technician for help.
Changes or modifications not expressly approved by the party responsible for compliance could void the user’s authority to operate the equipment.
EN

SIGMA-ELEKTRO GmbHDr. -Julius -Leber -Strasse 1567433 Neustadt/Weinstraße, GermanyTel. + 49 (0) 63 21-9120-0Fax. + 49 (0) 63 21-9120-34E-mail: [email protected]
SIGMA SPORT ASIAAsia, Australia, South America, Africa 4F, No.192, Zhonggong 2nd Rd., Xitun Dist., Taichung City 407, TaiwanTel. +886-4- 2358 3070Fax. +886-4- 2358 7830
SIGMA SPORT USANorth America1860B Dean St.St. Charles, IL 60174, U.S.A.Tel. +1 630-761-1106Fax. +1 630-761-1107Service Tel. 888-744-6277
www.sigmasport.com