Embed Size (px)
Citation preview
Oracle® BeehiveInstallation Guide
Release 2 (2.0.1.8) for Microsoft Windows x86
E16642-07
August 2013
Documentation for administrator that describes how to install, deploy, configure, administer, and maintain Oracle Beehive on Microsoft Windows x86 operating systems.

Oracle Beehive Installation Guide, Release 2 (2.0.1.8) for Microsoft Windows x86
E16642-07
Copyright © 2008, 2013, Oracle and/or its affiliates. All rights reserved.
Primary Author: Sujata Nimbalkar
This software and related documentation are provided under a license agreement containing restrictions on use and disclosure and are protected by intellectual property laws. Except as expressly permitted in your license agreement or allowed by law, you may not use, copy, reproduce, translate, broadcast, modify, license, transmit, distribute, exhibit, perform, publish, or display any part, in any form, or by any means. Reverse engineering, disassembly, or decompilation of this software, unless required by law for interoperability, is prohibited.
The information contained herein is subject to change without notice and is not warranted to be error-free. If you find any errors, please report them to us in writing.
If this is software or related documentation that is delivered to the U.S. Government or anyone licensing it on behalf of the U.S. Government, the following notice is applicable:
U.S. GOVERNMENT END USERS: Oracle programs, including any operating system, integrated software, any programs installed on the hardware, and/or documentation, delivered to U.S. Government end users are "commercial computer software" pursuant to the applicable Federal Acquisition Regulation and agency-specific supplemental regulations. As such, use, duplication, disclosure, modification, and adaptation of the programs, including any operating system, integrated software, any programs installed on the hardware, and/or documentation, shall be subject to license terms and license restrictions applicable to the programs. No other rights are granted to the U.S. Government.
This software or hardware is developed for general use in a variety of information management applications. It is not developed or intended for use in any inherently dangerous applications, including applications that may create a risk of personal injury. If you use this software or hardware in dangerous applications, then you shall be responsible to take all appropriate fail-safe, backup, redundancy, and other measures to ensure its safe use. Oracle Corporation and its affiliates disclaim any liability for any damages caused by use of this software or hardware in dangerous applications.
Oracle and Java are registered trademarks of Oracle and/or its affiliates. Other names may be trademarks of their respective owners.
Intel and Intel Xeon are trademarks or registered trademarks of Intel Corporation. All SPARC trademarks are used under license and are trademarks or registered trademarks of SPARC International, Inc. AMD, Opteron, the AMD logo, and the AMD Opteron logo are trademarks or registered trademarks of Advanced Micro Devices. UNIX is a registered trademark of The Open Group.
This software or hardware and documentation may provide access to or information on content, products, and services from third parties. Oracle Corporation and its affiliates are not responsible for and expressly disclaim all warranties of any kind with respect to third-party content, products, and services. Oracle Corporation and its affiliates will not be responsible for any loss, costs, or damages incurred due to your access to or use of third-party content, products, or services.
iii
Contents
Preface ............................................................................................................................................................... xxi
Audience..................................................................................................................................................... xxiDocumentation Accessibility ................................................................................................................... xxiRelated Documents ................................................................................................................................... xxiConventions .............................................................................................................................................. xxii
1 What You Should Know Before Installing Oracle Beehive
Requirements ............................................................................................................................................ 1-1Operating System Certification........................................................................................................ 1-2Web Browser Certification................................................................................................................ 1-2Database Requirements..................................................................................................................... 1-2Oracle Enterprise Manager Grid Control Requirements ............................................................. 1-3Hardware Requirements................................................................................................................... 1-3Host Name Resolution ...................................................................................................................... 1-3
Installation Scenarios .............................................................................................................................. 1-4Installing Oracle Beehive Against an Existing Database.............................................................. 1-4
Installing Oracle Beehive Integration for Zimbra .................................................................. 1-4Installing Oracle Beehive Provisioning Application to Allow Oracle Beehive Products to Be Provisioned .............................................................................................................................. 1-4Installing Oracle Beehive for Demilitarized Zone (DMZ) ........................................................... 1-5Installing Oracle Collaboration Coexistence Gateway ................................................................. 1-6
Requirements for Oracle Collaboration Coexistence Gateway............................................ 1-7Deploying on Microsoft Exchange Server 2007............................................................... 1-7
Uninstalling Oracle Collaboration Coexistence Gateway for Microsoft Exchange Server ............................................................................................................................................ 1-7Uninstalling Oracle Collaboration Coexistence Gateway Lotus Domino Server.............. 1-7
Installing Oracle Beekeeper .............................................................................................................. 1-8Requirements and Certifications .............................................................................................. 1-8
Installing Oracle Beehive in Silent Mode........................................................................................ 1-8Installing Oracle Beehive in High Availability Environment...................................................... 1-8Installing More Than One Instance ................................................................................................. 1-8
Upgrading Oracle Beehive ..................................................................................................................... 1-9Starting Oracle Beehive Install Wizard................................................................................................ 1-9Post-Installation Procedures .................................................................................................................. 1-9Cloning Application Tiers and Deployments.................................................................................. 1-10
iv
Uninstalling Oracle Beehive ............................................................................................................... 1-10
2 Oracle Beehive Database Requirements
General Requirements ............................................................................................................................ 2-1Patches ........................................................................................................................................................ 2-2Initialization Parameters......................................................................................................................... 2-3Logging Settings ....................................................................................................................................... 2-5Creating a Database ................................................................................................................................. 2-5Using Oracle Real Application Clusters Database ............................................................................ 2-5Customizing Oracle Beehive Tablespaces Layout ............................................................................. 2-5
Minimum Tablespace Sizes .............................................................................................................. 2-6Using Raw Storage ................................................................................................................................... 2-6Upgrading Oracle Database 11g Release 1 to Oracle Database 11g Release 2.............................. 2-6Post-Installation Procedures for Oracle Beehive Databases............................................................ 2-7
3 Oracle Beehive Install Wizard Checklist
Oracle Beehive (Standard Installation)................................................................................................ 3-1Oracle Beehive Provisioning Application ........................................................................................... 3-2Oracle Beehive for DMZ ......................................................................................................................... 3-2Oracle Beekeeper...................................................................................................................................... 3-2Oracle Collaboration Coexistence Gateway........................................................................................ 3-3
4 Oracle Beehive Install Wizard
Product Selection Sequence of Screens ............................................................................................... 4-1Welcome .............................................................................................................................................. 4-2New Inventory Location ................................................................................................................... 4-2Select Product Type ........................................................................................................................... 4-3
Oracle Beehive Release 2............................................................................................................ 4-4Provisioning Application for Oracle Beehive Release 2........................................................ 4-4Oracle Collaboration Coexistence Gateway............................................................................ 4-4Oracle Beehive Release 2 for DMZ ........................................................................................... 4-4
Oracle Beehive (Standard Installation) Sequence of Screens ......................................................... 4-4Specify Home Location ..................................................................................................................... 4-5
Specifying Oracle Home Directory .......................................................................................... 4-5Prerequisite Checks............................................................................................................................ 4-6Select Installation Type...................................................................................................................... 4-7Configure Security Updates ............................................................................................................. 4-7Database Information ........................................................................................................................ 4-9Template Information..................................................................................................................... 4-10Enterprise Definition Information ................................................................................................ 4-11Existing Enterprise Information.................................................................................................... 4-12Schema Password............................................................................................................................ 4-13Existing Schema Password ............................................................................................................ 4-13beeadmin Password........................................................................................................................ 4-13Installation Summary ..................................................................................................................... 4-14Progress Indicator ........................................................................................................................... 4-15
v
Configuration Assistants................................................................................................................ 4-15End of Installation ........................................................................................................................... 4-16
Oracle Beehive Provisioning Application Sequence of Screens.................................................. 4-16Specify Home Location .................................................................................................................. 4-17Repository Database Administrator Password .......................................................................... 4-17Software Library Configuration.................................................................................................... 4-17Beehive Software Image Archive.................................................................................................. 4-17Beekeeper Software Image Archive.............................................................................................. 4-18Installation Summary ..................................................................................................................... 4-18Installation Progress ....................................................................................................................... 4-18Configuration Assistants................................................................................................................ 4-18End of Installation ........................................................................................................................... 4-19
Oracle Beehive for DMZ Sequence of Screens................................................................................ 4-19Specify Home Location .................................................................................................................. 4-19Prerequisite Checks......................................................................................................................... 4-20Installation Summary ..................................................................................................................... 4-20Progress Indicator ........................................................................................................................... 4-20Configuration Assistants................................................................................................................ 4-20End of Installation ........................................................................................................................... 4-21
5 Oracle Beekeeper Installation Help
Product Selection Sequence of Screens ............................................................................................... 5-1Welcome .............................................................................................................................................. 5-1New Inventory Location ................................................................................................................... 5-2Select Product Type ........................................................................................................................... 5-2
Oracle Beekeeper Sequence of Screens ............................................................................................... 5-3Specify Home Location ..................................................................................................................... 5-3Prerequisite Checks............................................................................................................................ 5-3Database Information ........................................................................................................................ 5-4Site Key Information.......................................................................................................................... 5-5Installation Summary ........................................................................................................................ 5-5Installation Process ............................................................................................................................ 5-5Configuration Assistants................................................................................................................... 5-6End of Installation .............................................................................................................................. 5-6
Starting the Oracle Beekeeper Uninstall Wizard ............................................................................... 5-6Oracle Beekeeper Uninstall Wizard Sequence of Screens ............................................................... 5-6
Select Oracle Home to Uninstall ...................................................................................................... 5-6Start Uninstallation ............................................................................................................................ 5-7End of Uninstallation......................................................................................................................... 5-7
6 Provisioning Oracle Beehive
Introduction to Oracle Beehive Enterprise Deployment Procedure .............................................. 6-1Running Oracle Beehive Enterprise Deployment Procedure .......................................................... 6-2
Deployment Targets .......................................................................................................................... 6-3Adding Targets............................................................................................................................ 6-3Selecting Targets ......................................................................................................................... 6-3

vi
Upload ................................................................................................................................................. 6-4Configure Security Updates ............................................................................................................. 6-4Beehive Install Input .......................................................................................................................... 6-5Beehive Templates ............................................................................................................................. 6-7Beekeeper Install Input...................................................................................................................... 6-8Exchange/Domino Connector Install Input .................................................................................. 6-9Domino Install Input ...................................................................................................................... 6-10Credentials/Schedule..................................................................................................................... 6-10Summary Page................................................................................................................................. 6-11
Uploading New Software Image Archive to Oracle Enterprise Manager Grid Control ......... 6-11
7 Oracle Collaboration Coexistence Gateway Install Help
Starting Oracle Collaboration Coexistence Gateway Installation .................................................. 7-1Oracle Collaboration Coexistence Gateway Options........................................................................ 7-2Oracle Coexistence Connector for Microsoft Exchange Server Sequence of Screens................. 7-2
Specify Home Location ..................................................................................................................... 7-3Prerequisite Checks............................................................................................................................ 7-3Select Installation Type...................................................................................................................... 7-3Oracle Beehive Coexistence Service ................................................................................................ 7-4oc4jadmin Password .......................................................................................................................... 7-4Windows User Account .................................................................................................................... 7-5Summary ............................................................................................................................................. 7-6Installation Progress .......................................................................................................................... 7-6Configuration Assistants................................................................................................................... 7-6End of Installation .............................................................................................................................. 7-6
Oracle Coexistence Connector for Lotus Domino Server Sequence of Screens .......................... 7-6Specify Home Location ..................................................................................................................... 7-7Prerequisite Checks............................................................................................................................ 7-7Select Installation Type...................................................................................................................... 7-7Oracle Beehive Connection Details ................................................................................................. 7-8oc4jadmin Password .......................................................................................................................... 7-8Domino Server and User Info........................................................................................................... 7-9Domino Foreign Domain Name ...................................................................................................... 7-9Summary ............................................................................................................................................. 7-9Installation Progress .......................................................................................................................... 7-9Configuration Assistants................................................................................................................... 7-9End of Installation ........................................................................................................................... 7-10
8 Installing Oracle Beehive in Silent Mode (Non-Interactive)
Installing and Configuring Oracle Beehive in Silent Mode, Running Install Wizard .............. 8-1Installing and Configuring Oracle Beehive in Silent Mode, Running Install Wizard and Config Wizard ........................................................................................................................................... 8-3Installing Oracle Beehive Provisioning Application in Silent Mode ............................................ 8-4Installing Oracle Beehive for DMZ in Silent Mode.......................................................................... 8-4Installing Oracle Collaboration Coexistence Gateway in Silent Mode ........................................ 8-5Verifying Oracle Beehive Installation .................................................................................................. 8-5Recovering from Failed Oracle Beehive Configuration ................................................................... 8-5
vii
Upgrading Oracle Beehive in Silent Mode ......................................................................................... 8-5Uninstalling Oracle Beehive in Silent Mode ...................................................................................... 8-6
9 Oracle Beehive Install and Config Wizard Command-Line Options
Usage........................................................................................................................................................... 9-1Options ....................................................................................................................................................... 9-1
10 Oracle Beehive Uninstall Wizard
Starting the Oracle Beehive Install Wizard ...................................................................................... 10-1Oracle Beehive Uninstall Wizard Sequence of Screens................................................................. 10-1
Select Oracle Home to Uninstall ................................................................................................... 10-1Option to Remove Database Schema ........................................................................................... 10-2Start Uninstallation ......................................................................................................................... 10-2End of Uninstallation...................................................................................................................... 10-2
Uninstalling Provisioning Application for Oracle Beehive or Oracle Beekeeper.................... 10-2Uninstalling Multiple Instances ........................................................................................................ 10-3Manually Deleting Oracle Beehive Tablespaces and Datafiles ................................................... 10-3
Manually Deleting Customized Oracle Beehive Customized Tablespaces and Datafiles ... 10-5Manually Deleting Existing BEE_CODE Schema....................................................................... 10-5
Uninstalling Corrupted Installation .................................................................................................. 10-5
11 Troubleshooting Oracle Beehive Installation
12 Upgrading Oracle Beehive Overview
Upgrade Options ................................................................................................................................... 12-1Before Upgrading .................................................................................................................................. 12-2
Upgrade Database to Supported Version.................................................................................... 12-2Ensure Passwords for Active Code and Data Schemas Are Same........................................... 12-2Adjust XmppTimerKeepAliveTime Configuration Parameter ................................................ 12-2Analyze Application Tiers ............................................................................................................. 12-3Rollback Oracle Application Server Critical Patch Update ...................................................... 12-3Ensure tnsnames.ora File Exists .................................................................................................... 12-3Export Configuration Data ............................................................................................................ 12-4Prepare Oracle Beehive Integration for Zimbra for Upgrade................................................... 12-4
Upgrading Oracle Beehive Release 1 (1.5.x) with Oracle Beehive Integration for Zimbra Version 1.5.x ............................................................................................................... 12-5Upgrading Previously Upgraded Oracle Beehive Integration for Zimbra Instance...... 12-5
Configure Zero Downtime Upgrade............................................................................................ 12-6Configure Oracle Data Pump................................................................................................. 12-6
Defining Oracle Data Pump Directories for Non-Oracle RAC Deployments ......... 12-7Defining Oracle Data Pump Directories for Oracle RAC Deployments................... 12-8Backing up and Deleting Oracle Data Pump Log Files............................................... 12-8
Disable User Directory Services Synchronization............................................................... 12-9Shut down All Oracle Beehive Instances..................................................................................... 12-9
Upgrade Sequence................................................................................................................................. 12-9Upgrading Multiple Oracle Beehive Application Tiers .............................................................. 12-10
viii
Upgrading Oracle Beekeeper Version 1.5.x to Version 2.0 .......................................................... 12-11Post-Upgrade Procedures ................................................................................................................... 12-12
Running Perl Script post_upgrade_db_actions.pl.................................................................... 12-12Applying Deployment Template after Upgrade ...................................................................... 12-14Gathering Statistics About Oracle Beehive Data and Code Schemas After Upgrading..... 12-15
Gathering Statistics About Oracle Beehive Data Schema ................................................ 12-15Gathering Statistics About Oracle Beehive Code Schema ............................................... 12-15
Upgrading Voicemail Configuration ......................................................................................... 12-16Re-enabling UDS Synchronization ............................................................................................. 12-17Upgrading User Directory Services............................................................................................ 12-17Upgrading Mobile Device Management Service After Oracle Beehive Upgrade ............... 12-18
Upgrading Oracle Beehive by Clone Patching .............................................................................. 12-19Creating Batches For Use With add_search_recovery_scope Command ................................. 12-19
13 Upgrading Oracle Beehive
Oracle Beehive Upgrade Process Sequence of Screens.................................................................. 13-2Upgrade Existing Home................................................................................................................. 13-3Specify Home Location to Upgrade ............................................................................................. 13-3Running Instances........................................................................................................................... 13-3Configure Security Updates .......................................................................................................... 13-3Database Information for Upgrade .............................................................................................. 13-4Upgrade Summary.......................................................................................................................... 13-4Upgrade Process.............................................................................................................................. 13-5Configuration Assistants................................................................................................................ 13-5End of Upgrade ............................................................................................................................... 13-6
Oracle Beehive Provisioning Application Upgrade Process Sequence of Screens .................. 13-6Upgrade Existing Home................................................................................................................. 13-6Specify Home Location to Upgrade ............................................................................................. 13-6Database Information for Upgrade .............................................................................................. 13-7Upgrade Summary.......................................................................................................................... 13-7Upgrade Process.............................................................................................................................. 13-7Configuration Assistants................................................................................................................ 13-7End of Upgrade ............................................................................................................................... 13-7
Oracle Beehive for DMZ Upgrade Process Sequence of Screens ................................................ 13-8Upgrade Existing Home................................................................................................................. 13-8Specify Home Location to Upgrade ............................................................................................. 13-8Upgrade Summary.......................................................................................................................... 13-8Upgrade Process.............................................................................................................................. 13-9Configuration Assistants................................................................................................................ 13-9End of Upgrade ............................................................................................................................... 13-9
14 Upgrading Oracle Beekeeper
Oracle Beekeeper Upgrade Process Sequence of Screens ............................................................. 14-1Upgrade Existing Home................................................................................................................. 14-1Location to Upgrade ....................................................................................................................... 14-1Prerequisite Checks......................................................................................................................... 14-2Database Information for Upgrade .............................................................................................. 14-2
ix
Upgrade Summary.......................................................................................................................... 14-2Upgrade Process.............................................................................................................................. 14-3Configuration Assistants................................................................................................................ 14-3End of Upgrade ............................................................................................................................... 14-3
15 Upgrading Oracle Beehive Collaboration Coexistence Gateway
Oracle Coexistence Connector for Microsoft Exchange Server .................................................... 15-1Upgrade Oracle Home ................................................................................................................... 15-2Specify Home Location to Upgrade ............................................................................................. 15-2Shut down Coexistence Connector............................................................................................... 15-2Upgrade Summary.......................................................................................................................... 15-2Upgrade Process.............................................................................................................................. 15-3Configuration Assistants................................................................................................................ 15-3End of Upgrade ............................................................................................................................... 15-3
16 Oracle Beehive By Clone Patching
Introduction to Clone Patching .......................................................................................................... 16-1Types of Clone Patching ................................................................................................................ 16-2
Clone Patching ....................................................................................................................................... 16-5
17 Oracle Beehive Post-Installation Procedures
Using Oracle Beehive Command-Line Utility................................................................................. 17-1Performing Post-Installation Procedures on Oracle Beehive Database ..................................... 17-2Configuring DMZ Instances ............................................................................................................... 17-2Integrating and Synchronizing LDAP with Oracle Beehive ........................................................ 17-2Configuring SSL .................................................................................................................................... 17-2Configuring TLS.................................................................................................................................... 17-3Configuring SSL for LDAP Integration............................................................................................ 17-3Enabling AJPS........................................................................................................................................ 17-3Configuring Oracle Beehive E-mail................................................................................................... 17-3Configuring XMPP................................................................................................................................ 17-3Configuring Actionable Notifications .............................................................................................. 17-3Creating ASK User ................................................................................................................................ 17-3Configuring Notifications to Use SMS ............................................................................................. 17-4Configuring Oracle Secure Enterprise Search ................................................................................. 17-4Configuring Oracle Application Server Single Sign-On .............................................................. 17-4Installing Oracle Beehive Extensions for Outlook ......................................................................... 17-4Installing Oracle Beehive Extensions for Explorer......................................................................... 17-4Installing Oracle Beehive Conferencing Client .............................................................................. 17-5Configuring Oracle Beehive Integration for Zimbra ..................................................................... 17-5Configuring Remote Voice Conferencing Media Server for Oracle Beehive Conferencing .. 17-5Cloning Oracle Beehive ....................................................................................................................... 17-6Performing Oracle Beekeeper Post-Installation Procedures ........................................................ 17-6
x
18 Oracle Beehive Database Post-Installation Procedures
Modifying Database Connect String, Schema Name, or Credentials ......................................... 18-1
19 Configuring FTP
Enabling Active Mode FTP.................................................................................................................. 19-1Opening Ports Required by Oracle Beehive for FTP...................................................................... 19-2Configuring Passive Mode FTP .......................................................................................................... 19-4Setting other FTP Parameters .............................................................................................................. 19-6
20 Configuring Oracle Beehive Demilitarized Zone Instances
Step A: Configuring Oracle Wallet with Oracle Beehive DMZ Instances ................................. 20-1Step B: Configuring Oracle Beehive DMZ Instances..................................................................... 20-2
Configuring Oracle Application Server Single Sign-On with Oracle Beehive DMZ Instances ........................................................................................................................................... 20-5Troubleshooting DMZ Configuration.......................................................................................... 20-5Manually Deleting DMZ Instances............................................................................................... 20-6
21 Configuring SSL
SSL Checklist ......................................................................................................................................... 21-1Configuring SSL with Oracle Beehive .............................................................................................. 21-2
Configuring SSL with Test Certificates for Oracle Beehive ...................................................... 21-2Configuring SSL with Self-Signed Certificates During Installation of Oracle Beehive ........ 21-3Configuring SSL with Self-Signed Certificates After Installation of Oracle Beehive............ 21-4
Configuring SSL with Oracle Beehive DMZ Instances................................................................. 21-5Configuring SSL with Test Certificates After Installation of DMZ Instances ........................ 21-5Configuring SSL with Self-Signed Certificates After Installation of DMZ Instances ........... 21-5
Procedures Related to Configuring SSL ........................................................................................... 21-6Creating Self-Signed Certificate and Importing it into Wallet ................................................. 21-6
Using Oracle Wallet to Create Self-Signed Certificate ....................................................... 21-7Creating CA-Signed Certificate and Importing it into Wallet.................................................. 21-7
Installing Non-SSL Oracle Beehive Site........................................................................................... 21-8Installing Oracle Internet Directory in SSL mode .......................................................................... 21-9
Configuring the OID in SSL mode.............................................................................................. 21-11Appendix................................................................................................................................. 21-12
Configuring Beehive to connect to OID in non-SSL and SSL modes .................................... 21-13Appendix................................................................................................................................. 21-16
22 Configuring TLS with Oracle Wallet
Step 1: Enabling Auto Login Mode for Default Wallet.................................................................. 22-1Step 2: Configuring Oracle Beehive Instance to Use Oracle Wallet ............................................ 22-2Step 3: Replacing Test Certificates in Oracle Wallet....................................................................... 22-2Changing Oracle Wallet Password..................................................................................................... 22-2Configuring TLS on Multiple Instances........................................................................................... 22-3Enabling ORMIS with Password-Protected Oracle Wallet ........................................................... 22-3
Disable ORMIS ................................................................................................................................ 22-4
xi
Enable ORMIS with Default SSL................................................................................................... 22-4Enable ORMIS with Password Protection ................................................................................... 22-4
23 Configuring SSL for LDAP Integration
Requirements ......................................................................................................................................... 23-1Configure SSL for LDAP Verification............................................................................................... 23-2Configure Apache HTTP Server for WebDAV Folders ................................................................. 23-3
24 Configuring E-Mail with SSL
Securing E-Mail with SSL ................................................................................................................... 24-1Enabling Both Non-SSL and SSL Ports ............................................................................................ 24-2Modifying an Endpoint in SMTP ...................................................................................................... 24-2Adding an Endpoint to SMTP ............................................................................................................ 24-3Modifying or Adding an Endpoint in IMAP ................................................................................... 24-5Creating and Configuring an Endpoint ............................................................................................ 24-5Configuring E-Mail Client .................................................................................................................. 24-6
25 Configuring XMPP
26 Configuring Oracle Application Server Single Sign-On with Oracle Beehive
27 Installing Oracle Beehive Extensions for Outlook
System Requirements ........................................................................................................................... 27-1Device Management Service (DMS) Based Installation ............................................................... 27-2
Installing Oracle Beehive Extensions for Outlook Using Remote Downloader ................... 27-2Installing Oracle Beehive Extensions for Outlook Using Remote Downloader Using Silent Mode ............................................................................................................................... 27-3
Specifying Connection Parameters Through Command Line ................................... 27-3Specifying Connection Parameters in Initialization File............................................. 27-5
Updating and Configuring Oracle Beehive Extensions for Outlook Through DMS ............ 27-6Updating Oracle Beehive Extensions for Outlook in DMS Repository ........................... 27-6Updating Language Pack for Oracle Beehive Extensions for Outlook ............................ 27-7Applying Configuration Settings from DMS....................................................................... 27-8
Customizing Installation Settings ................................................................................ 27-10Creating XML Provisioning File to Customize Installation Settings ...................... 27-10Controlling New Global Address List Settings from DNS....................................... 27-12Modifying Registry Settings.......................................................................................... 27-13Modifying INI File Settings........................................................................................... 27-13Enforcing Upgrades........................................................................................................ 27-14
Uninstalling and Downgrading Oracle Beehive Extensions for Outlook (DMS Process).. 27-14Uninstalling Oracle Beehive Extensions for Outlook ....................................................... 27-14Downgrading Oracle Beehive Extensions for Outlook .................................................... 27-14
Desktop Based Installation (Non-DMS Process) .......................................................................... 27-14Installing Oracle Beehive Extensions for Outlook Using Executable File ............................ 27-15
Installing Oracle Beehive Extensions for Outlook in Silent Mode.................................. 27-15
xii
Configuring Profile for Lockdown Systems Using MSI Package .......................................... 27-15Configuring Oracle Beehive Extensions for Outlook Using Configuration Wizard........... 27-17
Configuration Wizard Modes .............................................................................................. 27-18Interactive Profile Creation and Configuration Mode .............................................. 27-18Interactive PRF File Creation Mode ............................................................................. 27-19Silent Profile Creation Mode......................................................................................... 27-20
Upgrading Oracle Beehive Extensions for Outlook Installation............................................ 27-21Updating Language Pack for Oracle Beehive Extensions for Outlook (Non-DMS) ........... 27-21Uninstalling and Downgrading Oracle Beehive Extensions for Outlook (Non-DMS Process) ........................................................................................................................................... 27-22
Uninstalling Oracle Beehive Extensions for Outlook ....................................................... 27-22Downgrading Oracle Beehive Extensions for Outlook .................................................... 27-22
Installing Oracle Beehive Extensions for Outlook Using Active Directory ............................ 27-22Creating MSI installation package for Oracle Beehive Extensions for Outlook .................. 27-23Deploying Oracle Beehive Extensions for Outlook using Active Directory Group Policy 27-23Verifying that Oracle Beehive Extensions for Outlook Is Available for Installation .......... 27-24
Using Oracle Beehive Extensions for Outlook as Profile Migration Tool ............................... 27-24Troubleshooting................................................................................................................................... 27-26
28 Installing Oracle Beehive Extensions for Explorer
System Requirements ........................................................................................................................... 28-1Device Management Service (DMS) Based Installation ............................................................... 28-2
Installing Oracle Beehive Extensions for Explorer Using Remote Downloader ................... 28-2Installing Oracle Beehive Extensions for Explorer Using Remote Downloader Using Silent Mode ............................................................................................................................... 28-3
Specifying Connection Parameters Through Command Line ................................... 28-3Specifying Connection Parameters in Initialization File............................................. 28-4
Update Oracle Beehive Extensions for Explorer Through DMS.............................................. 28-6Updating Oracle Beehive Extensions for Explorer in DMS Repository........................... 28-6Updating Language Pack for Oracle Beehive Extensions for Explorer ........................... 28-7
Uninstalling and Downgrading Oracle Beehive Extensions for Explorer (DMS Process) ... 28-8Uninstalling Oracle Beehive Extensions for Explorer ........................................................ 28-8Downgrading Oracle Beehive Extensions for Explorer ..................................................... 28-8
Configuring Oracle Beehive Extensions for Explorer Using MSI Package ............................... 28-8Desktop Based Installation (Non-DMS Process) ............................................................................ 28-9
Installing Oracle Beehive Extensions for Explorer Using Executable File.............................. 28-9Configuring Oracle Beehive Extensions for Explorer Using MSI Package............................. 28-9
Custom MSI-based Deployment and Configuration........................................................ 28-10Upgrading Oracle Beehive Extensions for Explorer Installation ........................................... 28-11Updating Language Pack for Oracle Beehive Extensions for Explorer (Non-DMS)........... 28-12Uninstalling and Downgrading Oracle Beehive Extensions for Explorer (Non-DMS Process) ........................................................................................................................................... 28-13
Uninstalling Oracle Beehive Extensions for Explorer ...................................................... 28-13Downgrading Oracle Beehive Extensions for Explorer ................................................... 28-13
29 Installing Oracle Beehive Conferencing Client
System Requirements ........................................................................................................................... 29-1
xiii
Device Management Service (DMS) Based Installation ............................................................... 29-3Installing JavaFX Conferencing Client......................................................................................... 29-3
Deploying the JavaFX Client .................................................................................................. 29-3Installing Oracle Beehive Conferencing Desktop Client Using Remote Downloader.......... 29-3
DMS Connection Settings ....................................................................................................... 29-4Specifying Connection Parameters in Executable Name............................................ 29-4Specifying Connection Parameters Through Command Line ................................... 29-4
Additional Command Line Options ..................................................................................... 29-5Remote Downloader Return Values ..................................................................................... 29-5
Updating Oracle Beehive Conferencing in DMS Repository ................................................... 29-5Updating Oracle Beehive Conferencing Through DMS..................................................... 29-6
Uninstalling and Downgrading Oracle Beehive Conferencing Client.................................... 29-6Uninstalling Oracle Beehive Conferencing Client .............................................................. 29-6Downgrading Oracle Beehive Conferencing Client ........................................................... 29-6
30 Configuring Oracle Beehive Integration for Zimbra
Setting Screen Resolution for Oracle Beehive Integration for Zimbra Client .......................... 30-1Configuring Oracle Beehive Integration for Zimbra for SSL-Enabled Oracle Beehive Deployment ............................................................................................................................................ 30-1Changing HTTP Port for Oracle Beehive Integration for Zimbra ............................................... 30-2Tuning Oracle Beehive to Improve Performance of Oracle Beehive Integration for Zimbra 30-3
Disabling ORMIS............................................................................................................................. 30-3Disabling SSL ................................................................................................................................... 30-4
31 Cloning Oracle Beehive Application Tiers and Sites
Introduction to Cloning ....................................................................................................................... 31-1Preparing Source Application Tier Instance .................................................................................... 31-4
Step 1: Verify Requirements .......................................................................................................... 31-4Step 2: Clear or Activate Any Pending Configuration Changes to the Central Configuration Repository .............................................................................................................. 31-4Step 3: Shut Down All Processes On the Application Tier ....................................................... 31-5Step 4: Call beectl clone_preparation Command ....................................................................... 31-5Step 5: Zip Files to Create Clone Image ....................................................................................... 31-5
Application Tier Cloning ..................................................................................................................... 31-6Step 1: Unzip Compressed Oracle Home .................................................................................... 31-6Step 2: Set PERL5LIB Environment Variable .............................................................................. 31-7Step 3: Modify Oracle Home Path ................................................................................................ 31-7Step 4: Execute beectl clone_midtier Command ........................................................................ 31-7
beectl clone_midtier Command............................................................................................. 31-7Step 5: Perform Miscellaneous Operations ............................................................................... 31-10
Site Cloning .......................................................................................................................................... 31-10Step 1: Unzip Compressed Oracle Home .................................................................................. 31-10Step 2: Set PERL5LIB Environment Variable ............................................................................ 31-10Step 3: Modify Oracle Home Path .............................................................................................. 31-10Step 4: Execute beectl clone_site Command.............................................................................. 31-11
beectl clone_site Command.................................................................................................. 31-11
xiv
Step 5: Prevent Services from Target Application Tiers from Referring to External Resources........................................................................................................................................ 31-14
Stopping User Directory Service from Referring to LDAP Server ................................. 31-15Stopping Authentication Service from Referring to LDAP Server................................. 31-15Stopping Coexistence Service from Referring to Microsoft Exchange........................... 31-15Stopping Virus Scanner Process from Referring to External Virus Scan Engine ......... 31-15
Step 6: Perform Miscellaneous Operations ............................................................................... 31-16OC4J Instance Cloning ....................................................................................................................... 31-16Oracle Beehive Integration for Zimbra Cloning ........................................................................... 31-17Customizing Files or Directories in a Cloned Image ................................................................... 31-17Customizing Ports in a Cloned Instance......................................................................................... 31-17Oracle Inventory Location Option of Clone Commands on UNIX-Based Systems............... 31-18Cloned Application Tiers Are Not Automatically SSL or AJPS Enabled ................................ 31-18
Cloning SSL-Enabled Application Tiers .................................................................................... 31-19Cloned Application Tiers and LDAP Synchronization ............................................................... 31-19Replicating LDAP Server for Cloned Instance.............................................................................. 31-19
Testing Replicated LDAP in Cloned Instance........................................................................... 31-22Troubleshooting Replicated LDAP............................................................................................. 31-22
Site Cloning and Multiple Instances............................................................................................... 31-22References to Oracle Application Server Cloning Documentation .......................................... 31-22
32 Oracle Beekeeper Post-Installation Procedures
Configuring Environment Variables for Microsoft Windows...................................................... 32-1Configuring Oracle Beekeeper for SSL Access ............................................................................... 32-1Configuring Oracle Beekeeper with Oracle Wallet ........................................................................ 32-2Changing Oracle Beekeeper Port ....................................................................................................... 32-3
Changing Oracle Beekeeper RMI Port ......................................................................................... 32-3Extending Java Single Sign-On Session Timeout........................................................................... 32-4Configuring Oracle Beekeeper for LDAP-Based Authentication................................................ 32-4
Reconfiguring Oracle Beekeeper for UDS-Based Authentication............................................ 32-6Configuring Virtual Host..................................................................................................................... 32-7Restarting OC4J ..................................................................................................................................... 32-8
33 Enabling AJPS
Enabling AJPS........................................................................................................................................ 33-1Disabling AJPS ...................................................................................................................................... 33-4
34 Configuring and Installing Oracle Beehive for Oracle RAC
Naming Conventions............................................................................................................................ 34-1Pre-Install Steps ..................................................................................................................................... 34-2Installation .............................................................................................................................................. 34-2Post-Install Steps ................................................................................................................................... 34-2
Enabling Secure ONS Notification ............................................................................................... 34-3Installing Multiple Oracle Beehive Instances with Oracle RAC ................................................. 34-4
Install All Oracle Beehive Instances, then Apply Post-Install Steps........................................ 34-4Install One Oracle Beehive Instance, Apply Post-Install Steps, then Install Additional
xv
Instances ........................................................................................................................................... 34-4Enabling Oracle Beehive Affinity Service ....................................................................................... 34-4Troubleshooting..................................................................................................................................... 34-6
35 Installing Oracle Beehive in High Availability Environment
Configuring High Availability Environment with Load Balancer .............................................. 35-1Configuring High Availability Environment with a DMZ Instance .......................................... 35-3Configuring High Availability Environment with DMZ Instances and Load Balancer ......... 35-4Configuring SSL Termination at Load Balancer ............................................................................. 35-6

xvi

xvii
List of Examples
27–1 Template for Silent Initialization File.................................................................................... 27-527–2 Sample metadata.xml XML Provisioning File ..................................................................... 27-927–3 Sample XML Provisioning File ............................................................................................ 27-1027–4 Template for Migration Initialization File.......................................................................... 27-2428–1 Template for Silent Initialization File.................................................................................... 28-528–2 Template for Silent Initialization File.................................................................................. 28-10

xviii
List of Figures
1–1 Oracle Beehive DMZ Instance Integrated in Oracle Beehive System.................................. 1-66–1 Provisioning Advisor Framework Architecture..................................................................... 6-216–1 Oracle Beehive Deployment Before Clone Patching........................................................... 16-116–2 Backing up Application Tier Before Clone Patching .......................................................... 16-216–3 Oracle Beehive Deployment After Clone Patching............................................................. 16-231–1 Application Tier Cloning ........................................................................................................ 31-231–2 Site Cloning............................................................................................................................... 31-335–1 Multiple Instances in High Availability Environment ....................................................... 35-235–2 Multiple DMZ Instances in High Availability Environment ............................................ 35-5
xix
List of Tables
2–1 Minimum Values of Oracle Database Initialization Parameters......................................... 2-49–1 Install and Config Wizard Command-Line Options ............................................................ 9-112–1 Oracle Beehive Upgrade Options for 2.0.1.8.0 .................................................................... 12-116–1 beectl clone_patching Options for Specifying Backed up Oracle home ......................... 16-316–2 beectl clone_patching Options for Specifying System Model Identifier......................... 16-318–1 Options for sync_configuration.pl........................................................................................ 18-219–1 Ports Required Open .............................................................................................................. 19-219–2 FTP Parameters ....................................................................................................................... 19-527–1 Oracle Beehive Extensions for Outlook Downloader Options......................................... 27-427–2 Initialization FIle Parameters ................................................................................................ 27-527–3 Public Properties ................................................................................................................... 27-1227–4 Installer UI Options .............................................................................................................. 27-1527–5 MSI Package Public Properties ........................................................................................... 27-1627–6 Configuration WIzard Command Line Options .............................................................. 27-1827–7 Relationship Between Fields in the Profile Options Screen and Settings in the General
Section of the PRF File 27-2027–8 Migration Initialization File Parameters............................................................................ 27-2528–1 Oracle Beehive Extensions for Explorer Downloader Options........................................ 28-328–2 Initialization File Parameters ................................................................................................ 28-528–3 MSI Package Public Properties ............................................................................................. 28-828–4 MSI Package Public Properties ........................................................................................... 28-1029–1 Oracle Beehive Conferencing Downloader Options.......................................................... 29-429–2 Oracle Beehive Conferencing Downloader Options.......................................................... 29-531–1 beectl clone_preparation Options......................................................................................... 31-531–2 beectl modify_beectl Options................................................................................................ 31-731–3 beectl clone_midtier Options ................................................................................................ 31-831–4 beectl clone_site Options...................................................................................................... 31-1131–5 beectl clone_oc4j_instance Options .................................................................................... 31-16

xx
xxi
Preface
The Oracle Beehive Installation Guide for Microsoft Windows x86 describes how to install and configure Oracle Beehive.
AudienceThe Oracle Beehive Installation Guide for Microsoft Windows x86 is directed at any administrator whose task is the installation, deployment, configuration, administration, and maintenance of Oracle Beehive.
Documentation AccessibilityFor information about Oracle's commitment to accessibility, visit the Oracle Accessibility Program website at http://www.oracle.com/pls/topic/lookup?ctx=acc&id=docacc.
Access to Oracle SupportOracle customers have access to electronic support through My Oracle Support. For information, visit http://www.oracle.com/pls/topic/lookup?ctx=acc&id=info or visit http://www.oracle.com/pls/topic/lookup?ctx=acc&id=trs if you are hearing impaired.
Related DocumentsFor more information, see the following documents in the Oracle Beehive Release 2 (2.0) documentation library:
Administration Guides■ Oracle® Beehive Administrator's Guide
■ Oracle® Beehive Administrator's Reference Guide
■ Oracle® Beekeeper Online Help (Integrated UA)
■ Oracle® Beehive Integration Guide
Application Development■ Oracle® Beehive Application Developer's Guide
■ Oracle® Beehive Business Views
■ Oracle® Beehive Java Content Repository Java API Reference
xxii
■ Oracle® Beehive RESTful Web Services API Reference
■ Oracle® Beehive SOAP Web Services API Reference
Installation Guides■ Oracle® Beehive Installation Guide for Linux
■ Oracle® Beehive Installation Guide for Oracle Solaris on SPARC (64-Bit)
■ Oracle® Beehive Installation Help (Integrated UA)
Online Helps■ Oracle® Beehive Central
■ Oracle® Beehive Webmail
■ Oracle® Beehive Standards-based Clients
■ Oracle® Beehive Team Collaboration
■ Oracle® Beehive Conferencing
■ Oracle® Beehive Extensions for Explorer Supplemental Help & Release Notes
■ Oracle® Beehive Extensions for Outlook Supplemental Help & Release Notes
■ Oracle® Beehive Extensions for Explorer (OBEE) (Integrated UA)
■ Oracle® Beehive Extensions for Outlook (OBEO) (Integrated UA)
Mobile Devices■ Oracle® Beehive Using Windows Mobile Device
■ Oracle® Beehive Using iPhone or iPad
■ Oracle® Beehive Using BlackBerry
■ Oracle® Beehive Registering and Configuring Mobile Devices
Planning Guides■ Oracle® Beehive Concepts
■ Oracle® Beehive Deployment Guide
■ Oracle® Beehive Licensing Information
Release Notes■ Oracle® Beehive Release Notes
ConventionsThe following text conventions are used in this document:

xxiii
Convention Meaning
boldface Boldface type indicates graphical user interface elements associated with an action, or terms defined in text or the glossary.
italic Italic type indicates book titles, emphasis, or placeholder variables for which you supply particular values.
monospace Monospace type indicates commands within a paragraph, URLs, code in examples, text that appears on the screen, or text that you enter.

xxiv
Part IPart I Oracle Beehive Installation
The Part I of Installation Guide describes how to install and uninstall Oracle Beehive. To upgrade Oracle Beehive, refer to Part II, "Oracle Beehive Upgrade Procedures". To configure Oracle Beehive, refer to Part III, "Oracle Beehive Post-Installation Configuration". To install Oracle Beehive in a high availability environment, refer to Part IV, "Oracle Beehive High Availability Configuration".
This part contains the following chapters:
■ What You Should Know Before Installing Oracle Beehive
■ Oracle Beehive Database Requirements
■ Oracle Beehive Install Wizard Checklist
■ Oracle Beehive Install Wizard
■ Oracle Beekeeper Installation Help
■ Provisioning Oracle Beehive
■ Oracle Collaboration Coexistence Gateway Install Help
■ Installing Oracle Beehive in Silent Mode (Non-Interactive)
■ Oracle Beehive Install and Config Wizard Command-Line Options
■ Oracle Beehive Uninstall Wizard
■ Troubleshooting Oracle Beehive Installation

1
What You Should Know Before Installing Oracle Beehive 1-1
1What You Should Know Before InstallingOracle Beehive
This module describes the hardware and software prerequisites of Oracle Beehive and available installation scenarios. It covers the following topics:
■ Requirements
■ Installation Scenarios
■ Upgrading Oracle Beehive
■ Starting Oracle Beehive Install Wizard
■ Post-Installation Procedures
■ Cloning Application Tiers and Deployments
■ Uninstalling Oracle Beehive
RequirementsThis section describes the following Oracle Beehive software and hardware requirements:
■ Operating System Certification
■ Web Browser Certification
■ Database Requirements
■ Oracle Enterprise Manager Grid Control Requirements
■ Hardware Requirements
■ Host Name Resolution
The hardware and software requirements included in this installation guide were current at the time this guide was published. However, because new platforms and operating system software versions might be certified after this guide is published, review the certification matrix on the My Oracle Support Web site for the most up-to-date list of certified hardware platforms and operating system versions.
My Oracle Support is available at the following URL:
http://support.oracle.com/
You must register online before using My Oracle Support.
Follow the steps below to locate the certification information for your platform:1. After logging in, click the Certifications tab.
Requirements
1-2 Oracle Beehive Installation Guide
2. In the Certification Search pane, on the Search tab, select the following information:
■ Product: Enter the product name or select from the drop-down list of Products.
■ Release: Select the release number of the product.
■ Platform: Select the target platform by choosing from the submenu list.
For example, certification matrix for Oracle Beehive, Release 2.0, on Microsoft Windows x86.
3. Click Search.
A new window appears with the product certification details.
4. Click the Release Number link to view the certified version of the product on a specific operating system version.
For example, Oracle Beehive 2.0 is certified with Oracle Database 11.1.0.7.0 on Operating System Microsoft Windows x86.
5. Click the Operating System version to view Support Information and Notes.
Operating System CertificationOracle Beehive supports the following Microsoft Windows (x86 32-bit) operating system certifications:
■ Microsoft Windows Server 2003 Standard Edition SP1
■ Microsoft Windows Server 2003 Standard Edition SP2
■ Microsoft Windows Server 2003 Enterprise Edition SP2
Web Browser CertificationOracle Beehive supports the following Web browsers:
■ Microsoft Windows 7
– Internet Explorer 7, 8, and 9
– Mozilla Firefox 3.5, 3.6, and 4
– Google Chrome 10 and 11
■ Microsoft Windows XP
– Internet Explorer 7 and 8
– Mozilla Firefox 3.5 and 3.6
Database RequirementsRefer to "Oracle Beehive Database Requirements" for information about Oracle Beehive database requirements, creating databases, and configuring database settings.
Note: Contact your Oracle sales representative if you do not have a My Oracle Support account.
Requirements
What You Should Know Before Installing Oracle Beehive 1-3
Oracle Enterprise Manager Grid Control RequirementsIf you want to install the Oracle Beehive Provisioning Application, which enables you to install Oracle Beehive from Oracle Enterprise Manager Grid Control, you must have Oracle Enterprise Manager 10g Release 5 Grid Control (10.2.0.5) or later.
Hardware RequirementsThe following are the minimum hardware requirements for Oracle Beehive:
■ Disk Space: 2.6 GB
■ Swap Space: Oracle Beehive requires at least 2,048 MB available swap space.
■ Memory:
– Oracle Beehive (refer to "Template Information" for more information about these templates):
* Basic Server Template: 2 GB
* Basic Server and Client Template: 3 GB
* Client Only Template: 2 GB
– Oracle Collaboration Coexistence Gateway: 1 GB
– Oracle Beehive for DMZ: 1 GB
Host Name ResolutionBefore installing Oracle Beehive, configure host name resolution and verify that your host name or host names resolve.
1. Verify that the host name has been set by using the hostname command:
hostname
The output of this command should be similar to the following:
myhost.mycomputer.com
2. Verify that the <Windows operating system directory>\system32\drivers\etc\hosts file contains an entry for the
Note: The installation scenario "Installing Oracle Beehive for Demilitarized Zone (DMZ)" does not require a database.
Note: Installing Oracle Beehive on a Network File System (NFS) file system is currently not supported.
Note: The values for minimum disk space and memory do not include the amounts required for the target database.
Oracle Beehive does not support IPv6 (Internet Protocol version 6). You must disable IPv6 from the server on which you plan to install Oracle Beehive before starting the installation process.
Installation Scenarios
1-4 Oracle Beehive Installation Guide
fully qualified host name. (The file also contains an entry for localhost.) For example:
192.168.100.16 myhost.mycompany.com127.0.0.1 localhost
If the hosts file does not contain the fully qualified host name, then edit the file and make the required changes in it.
Installation ScenariosThis section describes the possible ways you may install Oracle Beehive. It covers the following topics:
■ Installing Oracle Beehive Against an Existing Database
■ Installing Oracle Beehive Provisioning Application to Allow Oracle Beehive Products to Be Provisioned
■ Installing Oracle Beehive for Demilitarized Zone (DMZ)
■ Installing Oracle Collaboration Coexistence Gateway
■ Installing Oracle Beekeeper
■ Installing Oracle Beehive in Silent Mode
■ Installing Oracle Beehive in High Availability Environment
■ Installing More Than One Instance
Installing Oracle Beehive Against an Existing DatabaseThis is the standard installation scenario that will give you a fully functioning instance of Oracle Beehive.
This scenario gives you the choice to install and configure Oracle Beehive, or to install Oracle Beehive now and configure it later.
For more information about installing Oracle Beehive against an existing database, refer to "Oracle Beehive (Standard Installation) Sequence of Screens".
Installing Oracle Beehive Integration for ZimbraOracle Beehive Integration for Zimbra is a Web-based client for Oracle Beehive. To install this product, select the Basic Server and Client template when installing Oracle Beehive. This will install Oracle Beehive and Oracle Beehive Integration for Zimbra in the same location. Alternatively, if you have already installed at least one Oracle Beehive instance, you may select the Client Only template, which enables you to install Oracle Beehive Integration for Zimbra in a different location than your Oracle Beehive instance.
After installing this product, refer to "Configuring Oracle Beehive Integration for Zimbra".
Installing Oracle Beehive Provisioning Application to Allow Oracle Beehive Products to Be Provisioned
Oracle Enterprise Manager Grid Control offers a centralized environment with which you can manage the complete Oracle IT infrastructure, including systems running Oracle and non-Oracle technologies. Oracle Enterprise Manager Grid Control gives
Installation Scenarios
What You Should Know Before Installing Oracle Beehive 1-5
you a broad set of administration, configuration management, provisioning, end-to-end monitoring, and security capabilities.
Oracle Beehive Provisioning Application enables you to install and configure Oracle Beehive products in the robust environment of Oracle Enterprise Manager Grid Control.
Oracle Beehive Provisioning Application enables you to upload installable versions of Oracle Beehive products into the central software library of Oracle Enterprise Manager Grid Control. Oracle Beehive Provisioning Application also creates the Oracle Beehive Enterprise Deployment Procedure with which you can install and configure Oracle Beehive products on any host through the deployment procedure manager of Oracle Enterprise Manager Grid Control.
Refer to "Oracle Beehive Provisioning Application Sequence of Screens" and "Provisioning Oracle Beehive" for more information.
Installing Oracle Beehive for Demilitarized Zone (DMZ) This scenario installs and configures Oracle Beehive into a demilitarized zone (DMZ) that will integrate with the rest of the Oracle Beehive system.
An Oracle Beehive DMZ configuration consists of one or more Oracle Beehive DMZ instances that are isolated from the Internet by a firewall on one side, and from one or more Oracle Beehive non-DMZ instances by a firewall on the other side. The DMZ instances are viewed as semi-secure. They are protected from the open Internet, but are not completely trusted like the non-DMZ instances that are inside the second firewall and part of the company's intranet. Oracle Beehive data is stored only in the non-DMZ instances, and administrative tasks may only be performed on the non-DMZ instances.
Oracle Beehive for DMZ requires an existing (non-DMZ) Oracle Beehive instance.
Oracle Beehive for DMZ does not require a database. However, the administration tool beectl will be disabled. Because this installation scenario does not require a database, you only have to specify a target installation location, which the Oracle Beehive Install Wizard will configure as a DMZ.
The following image illustrates an Oracle Beehive DMZ instance integrated in an Oracle Beehive system:
Note: If you have any additional management service instances connected to the Management Repository, you must shut down all additional management service instances before installing Oracle Beehive Provisioning Application.
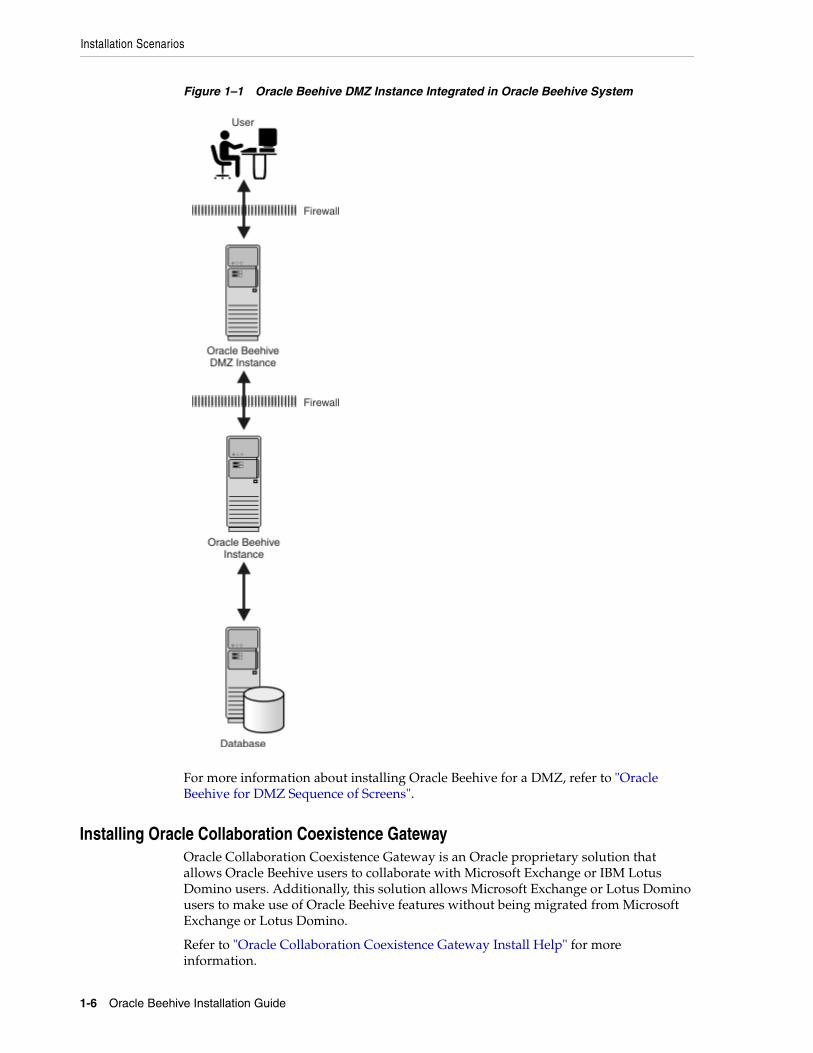
Installation Scenarios
1-6 Oracle Beehive Installation Guide
Figure 1–1 Oracle Beehive DMZ Instance Integrated in Oracle Beehive System
For more information about installing Oracle Beehive for a DMZ, refer to "Oracle Beehive for DMZ Sequence of Screens".
Installing Oracle Collaboration Coexistence GatewayOracle Collaboration Coexistence Gateway is an Oracle proprietary solution that allows Oracle Beehive users to collaborate with Microsoft Exchange or IBM Lotus Domino users. Additionally, this solution allows Microsoft Exchange or Lotus Domino users to make use of Oracle Beehive features without being migrated from Microsoft Exchange or Lotus Domino.
Refer to "Oracle Collaboration Coexistence Gateway Install Help" for more information.
Installation Scenarios
What You Should Know Before Installing Oracle Beehive 1-7
Installing Oracle Collaboration Coexistence Gateway consists of the following steps:
1. Install Oracle Coexistence Connector for Microsoft Exchange Server.
2. Alternatively, install Oracle Coexistence Connector for Lotus Domino Server if you want your Lotus Domino users to coexist with your Oracle Beehive users.
3. Perform post-installation tasks. This includes configuring a coexistence connector for your Oracle Beehive deployment. For more information, refer to "Integrating Microsoft Exchange Server 2003 or 2007 with Oracle Beehive" or "Integrating IBM Lotus Domino with Oracle Beehive" in Oracle Beehive Integration Guide.
Requirements for Oracle Collaboration Coexistence GatewayFor Oracle Coexistence Connector for Microsoft Exchange Server you need Microsoft Exchange Server 2003 on Windows Server 2003.
For Oracle Coexistence Connector for Lotus Domino Server, you need IBM Lotus Domino Server version 8.x on Windows Server 2003.
Deploying on Microsoft Exchange Server 2007 Your Oracle Collaboration Coexistence Gateway deployment may include Microsoft Exchange Server 2007 if it includes at least one Microsoft Exchange Server 2003 in the Exchange organization:
■ Install Microsoft Exchange Server 2007 in your network that contains coexisting Exchange users' mailboxes.
■ You may install Oracle Coexistence Connector only on Microsoft Exchange Server 2003.
Uninstalling Oracle Collaboration Coexistence Gateway for Microsoft Exchange ServerManually stop Oracle Connector for Exchange before starting the Oracle Beehive uninstallation process. You may do this in the Windows Services panel by selecting and stopping "Oracle Coexistence Connector for Exchange" and "Oracle Coexistence Administration Service".
For more information, refer to "Stopping Oracle Connector for Exchange" in Oracle Beehive Integration Guide.
Uninstalling Oracle Collaboration Coexistence Gateway Lotus Domino ServerManually stop Oracle Connector for Lotus Domino before starting the Oracle Beehive uninstallation process. You may do this in the Windows Services panel by selecting and stopping "Oracle Coexistence Connector for Domino" and "Oracle Coexistence Administration Service".
For more information, refer to "Stopping the Oracle Connector for IBM Lotus Domino" in Oracle Beehive Integration Guide.
Note: You must install Microsoft Exchange Server MAPI Client and Collaboration Data Objects 1.2.1 on each Microsoft Exchange Server 2007. To obtain this software, go to the Microsoft Download Center at http://www.microsoft.com/downloads.
Microsoft Exchange Server 2007 can be installed on Windows Server 2003 64-bit or Windows Server 2008 64-bit.
Installation Scenarios
1-8 Oracle Beehive Installation Guide
Installing Oracle BeekeeperOracle Beekeeper is a secure, browser-based administration client. It provides Oracle Beehive administrators centralized and role-based access to system configuration and management, user and workspace administration, monitoring, and reporting functions. For more information, refer to "Oracle Beekeeper Installation Help".
Run setup.exe (Microsoft Windows) or runInstaller (UNIX-based operating systems) from the Oracle Beekeeper installation media to start the Install Wizard for this product.
Requirements and Certificationsabove
The following are the minimum hardware requirements for Oracle Beekeeper:
■ Disk Space: 750 MB
■ Memory: 1 GB RAM
Installing Oracle Beehive in Silent ModeSilent mode enables you to install Oracle Beehive with minimal interaction. You provide the Oracle Beehive Install Wizard with a response file that contains all the required information to install and configure Oracle Beehive. As a result, you do not have to be present to select, specify, and confirm options in each step of the installation process.
This scenario is appropriate if you want to install Oracle Beehive as a batch process or do not want to use the GUI provided by the Install Wizard.
You may install Oracle Beehive against an existing database or Oracle Beehive Provisioning Application in silent mode.
For more information about installing Oracle Beehive in silent mode, refer to "Installing Oracle Beehive in Silent Mode (Non-Interactive)".
Installing Oracle Beehive in High Availability EnvironmentInstalling Oracle Beehive in a high availability environment involves installing a third-party load balancer, installing multiple Oracle Beehive instances, and configuring the virtual server of each instance.
For more information, refer to "Installing Oracle Beehive in High Availability Environment".
Installing More Than One InstanceTo install more than one instance of Oracle Beehive so that each instance is in its own computer and shares the same database, simply install each instance with the Install Wizard. When entering the database information for each instance, use the same global service name for the server name.
Note: If your Oracle Beehive deployment will be using WebDAV, your load balancer must be RFC 2518 (HTTP Extensions for Distributed Authoring -- WEBDAV) compliant.
Post-Installation Procedures
What You Should Know Before Installing Oracle Beehive 1-9
To install multiple instances of Oracle Beehive with Oracle RAC, refer to the section, "Installing Multiple Oracle Beehive Instances with Oracle RAC".
To configure a load balancer after installing multiple Oracle Beehive instances, refer to "Installing Oracle Beehive in High Availability Environment".
Upgrading Oracle BeehiveRefer to "Upgrading Oracle Beehive Overview" for steps to perform before upgrading your Oracle Beehive deployment to Oracle Beehive Release 2 (2.0), the order in which you should upgrade Oracle Beehive products, and other procedures to perform after upgrading.
Starting Oracle Beehive Install WizardAll installation scenarios use the Oracle Beehive Install Wizard.
Run setup.exe to start the installation and configuration of Oracle Beehive
The Oracle Beehive Install Wizard has several command-line options available. For more information about these options, refer to "Oracle Beehive Install and Config Wizard Command-Line Options".
Post-Installation ProceduresDepending on the installation scenario you have chosen, your security requirements, the standards-based clients you want to use with Oracle Beehive, or any other issue particular to your deployment, perform the appropriate procedures described in "Oracle Beehive Post-Installation Procedures".
These procedures include the following:
■ Using Oracle Beehive Command-Line Utility
■ Configuring DMZ Instances
■ Integrating and Synchronizing LDAP with Oracle Beehive
Note: If the Install Wizard resides in a directory path containing spaces, you will not be able to launch the installer by double-clicking the setup.exe icon within the Disk1 directory.
Either run setup.exe from a command shell or move the Oracle Beehive installation files to a path that does not contain spaces.
Note: Oracle Beekeeper is shipped on its own installation media (separate from Oracle Beehive). Run setup.exe from this installation media to start the installation and configuration of Oracle Beekeeper.
Note: For all installation scenarios, except "Installing Oracle Beehive in Silent Mode", you may run the Oracle Beehive Install Wizard without any command-line options. For more information about installing Oracle Beehive in silent mode, refer to "Installing Oracle Beehive in Silent Mode (Non-Interactive)".
Cloning Application Tiers and Deployments
1-10 Oracle Beehive Installation Guide
■ Configuring SSL
■ Configuring TLS
■ Configuring SSL for LDAP Integration
■ Enabling AJPS
■ Configuring Oracle Beehive E-mail
■ Configuring XMPP
■ Configuring Actionable Notifications
■ Creating ASK User
■ Configuring Notifications to Use SMS
■ Configuring Oracle Secure Enterprise Search
■ Configuring Oracle Application Server Single Sign-On
■ Installing Oracle Beehive Extensions for Outlook
■ Installing Oracle Beehive Extensions for Explorer
■ Installing Oracle Beehive Conferencing Client
■ Configuring Oracle Beehive Integration for Zimbra
■ Configuring Remote Voice Conferencing Media Server for Oracle Beehive Conferencing
■ Cloning Oracle Beehive
■ Performing Oracle Beekeeper Post-Installation Procedures
Cloning Application Tiers and DeploymentsCloning is the process of copying an existing installation to a different location while preserving its configuration.
You may clone an application tier, which involves preparing a "gold" image of a patched Oracle home. With this clone, you may create a new application tier with all patches applied to it in a single step. This is in contrast to separately installing, configuring, and applying any patches to Oracle Beehive.
You may also clone a deployment, which involves creating an installation that is a copy of a production, test, or development installation.
Refer to "Cloning Oracle Beehive Application Tiers and Sites" for more information.
Uninstalling Oracle BeehiveYou may uninstall the following products with the Oracle Beehive Uninstall Wizard:
■ Oracle Beehive Release 2 (2.0)
■ Oracle Beehive Provisioning Application
■ Oracle Coexistence Connector for Microsoft Exchange
■ Oracle Coexistence Connector for Lotus Domino
■ Oracle Beehive for DMZ
Start the Oracle Beehive Uninstall Wizard by running setup.exe -uninstall from the installation media.
Uninstalling Oracle Beehive
What You Should Know Before Installing Oracle Beehive 1-11
For more information about Oracle Beehive Install Wizard or Oracle Beehive Config Wizard, refer to "Oracle Beehive Install and Config Wizard Command-Line Options".
For more information about uninstalling Oracle Beehive, refer to "Oracle Beehive Uninstall Wizard".
You may uninstall Oracle Beehive in silent mode. For more information, refer to the section "Uninstalling Oracle Beehive in Silent Mode" in "Installing Oracle Beehive in Silent Mode (Non-Interactive)".
Caution: Do not use the Add or Remove Programs tool from the Control Panel to uninstall Oracle Beehive. Instead, use the Oracle Beehive Uninstall Wizard.
Note: The Oracle Beehive Uninstall Wizard cannot remove the Oracle Beehive schema of a site-cloned application tier. Refer to "Manually Deleting Oracle Beehive Tablespaces and Datafiles" in "Oracle Beehive Uninstall Wizard" to manually remove the schema.

Uninstalling Oracle Beehive
1-12 Oracle Beehive Installation Guide
2
Oracle Beehive Database Requirements 2-1
2 Oracle Beehive Database Requirements
This chapter describes Oracle Beehive database requirements, creating databases, and configuring database settings.
It covers the following topics:
■ General Requirements
■ Patches
■ Initialization Parameters
■ Logging Settings
■ Creating a Database
■ Using Oracle Real Application Clusters Database
■ Customizing Oracle Beehive Tablespaces Layout
■ Using Raw Storage
■ Upgrading Oracle Database 11g Release 1 to Oracle Database 11g Release 2
■ Post-Installation Procedures for Oracle Beehive Databases
General RequirementsOracle Beehive requires an existing database with the following characteristics:
■ Supports Oracle Database 11g Release 1 and 2 (11.1.0.7, 11.2.0.1, 11.2.0.2, and 11.2.0.3) Enterprise Edition, installed on any supported operating system. Ensure that you have applied all the patches listed in the section "Patches".
■ Uses character set AL32UTF8 (Unicode)
■ Contains the following standard database components:
– Oracle XML DB
– Oracle interMedia (Oracle Multimedia in Oracle Database 11g)
– Oracle Text
– Partitioning
■ Contains Rules Manager and Expression Filter (Rules Manager and Expression Filter are installed automatically with Oracle Database 11g Enterprise Edition.)
Patches
2-2 Oracle Beehive Installation Guide
Patches
Microsoft WindowsFor Microsoft Windows (32-bit and 64-bit versions), install the latest patch bundle for your database.
Operating Systems Other Than Microsoft WindowsInstall the following patches for Oracle Database 11g Release 1 (11.1.0.7):
■ 9548753: MERGE REQUEST ON TOP OF 11.1.0.7.0 FOR BUGS 9128529 8499043
■ 8537211: MERGE LABEL REQUEST ON TOP OF 11.1.0.7 FOR BUGS 6625210 7694979 7378322
■ 8531282: MERGE LABEL REQUEST ON TOP OF 11.1.0.7 FOR BUGS 8352309 7586451
■ 8499600: ORA-01555 ERRORS ON SECUREFILES READS EVEN UNDER LOW LOADS/NO UPDATE ACTIVITY
■ 8487273: MERGE LABEL REQUEST ON TOP OF 11.1.0.7 FOR BUGS 8214576 7258928
■ 8221425: STBH:HP:11G - ORA-04031: UNABLE TO ALLOCATE 912 BYTES OF SHARED MEMORY
■ 7707103: RECOMPILATION OF LIBRARY UNIT GIVES END-OF-FILE COMMUNICATION CHANNEL
■ 7690421: INVALID TZ VALUE IN TIMEZONE COLUMN PRODUCES ORA-01875
■ 7685452: 10.2.0.5.0 : HP-PA : ORA-00600: INTERNAL ERROR CODE, ARGUMENTS: [4449], [],
■ 7643188: SQL VERSION COUNT REPORTED IN AWR DOES NOT MATCH SQLSTATS FOR 1 SQL ID
■ 7500792: HIGH GETS ON "KOKC DESCRIPTOR ALLOCATION LATCH" WITH MORE THAN 400 USERS
■ 7313961: MISSING LSFEND IN DRUERE() CALLS ADDED FOR BUG 6499258
■ 7311226: PARTITIONED TABLE AND FILTER BY OPTIMIZE_INDEX NOT PICKING UP WHERE IT LEFT OFF
■ 7273988: TST&PERF:QUERY PLAN IS VERY BAD IN RDBMS_MAIN_LINUX_080623
■ 7156912: ORACLE TEXT INDEXING HANGS ON A HTML DOCUMENT WITH LONG COMMENTS
■ 7047984: ORA-00600: INTERNAL ERROR CODE, ARGUMENTS: [KJBCLOSE:MAS], [3], [1]...
■ 6977167: ORA-04092: CANNOT ROLLBACK IN A TRIGGER RECEIVED REQUIRING INSTANCE BOUNCE
Note: Refer to latest Patchset Readme for information on: Patch Required for Upgraded Beehive Instances on Oracle Database 11.2.
The latest Patset Readme is available on the Beehive Documentation Library at: http://www.oracle.com/pls/bee2/homepage
Initialization Parameters
Oracle Beehive Database Requirements 2-3
■ 6782437: QUERY WITH MULTIPLE SUBQUERIES PERFORMING POORLY AFTER 10G UPGRADE
■ 6750049: LIBNNZ10.SO DLOPEN FAILED WHEN TRYING TO START ONS (NODEAPPS)
■ 6698219: DBMS_LINK ALLOWS PATH > 1024 CAUSING CORRUPT REPOSITORY
■ 6355412: JOB CONSUMES 100% CPU FOR EXTENDED PERIODS
■ 6263237: TCH11G: ORA-7445 WHILE RUNNING ADPATCH
■ 6083201: MERGE STATEMENT WITH XML TYPE FAILS WITH ORA-7445 [FCLOSE()+29]
Install the following patches for Oracle Database 11g Release 1 (11.1.0.7.2):
■ 9348916: MERGE REQUEST ON TOP OF 11.1.0.7.2 FOR BUGS 6856345 7284151 8465729 9010222
■ 7047984: ORA-00600: INTERNAL ERROR CODE, ARGUMENTS: [KJBCLOSE:MAS], [3], [1]...
■ 6782437: QUERY WITH MULTIPLE SUBQUERIES PERFORMING POORLY AFTER 10G UPGRADE
■ 6625210: ORA-22370: INCORRECT USAGE OF METHOD ANYDATA INSERT
Install the following patches for Oracle Database 11g Release 2 (11.2.0.1):
■ 9275876: PEOPLESOFT QUERY FAILED WITH CORE DUMP ORA 7445 QERIXGETKEY
■ 9033671: REGR: ORA-07445: EXCEPTION ENCOUNTERED: CORE DUMP [KKQFPPDRV1()+66] [SIGSEGV]
■ 9010222: APPS ST 11G ORA-00600 [KKSFBC-REPARSE-INFINITE-LOOP]
■ 8772524: ORA-38500: EXPRESSION IS INVALID IF WE USE THE IN OPERATOR
Initialization ParametersThe database requires some initialization parameters to have a minimum value as specified in the following table:
Note: Install patches in the following order:
1. Oracle Database 11g Release 1 (11.1.0.7) patches as specified in this document
2. Oracle Database 11g Release 1 (11.1.0.7.2) Patch Set Update; for more information about Patch Set Updates, refer to Oracle My Support Note 854428.1
3. Oracle Database 11g Release 1 (11.1.0.7.2) as specified in the following list
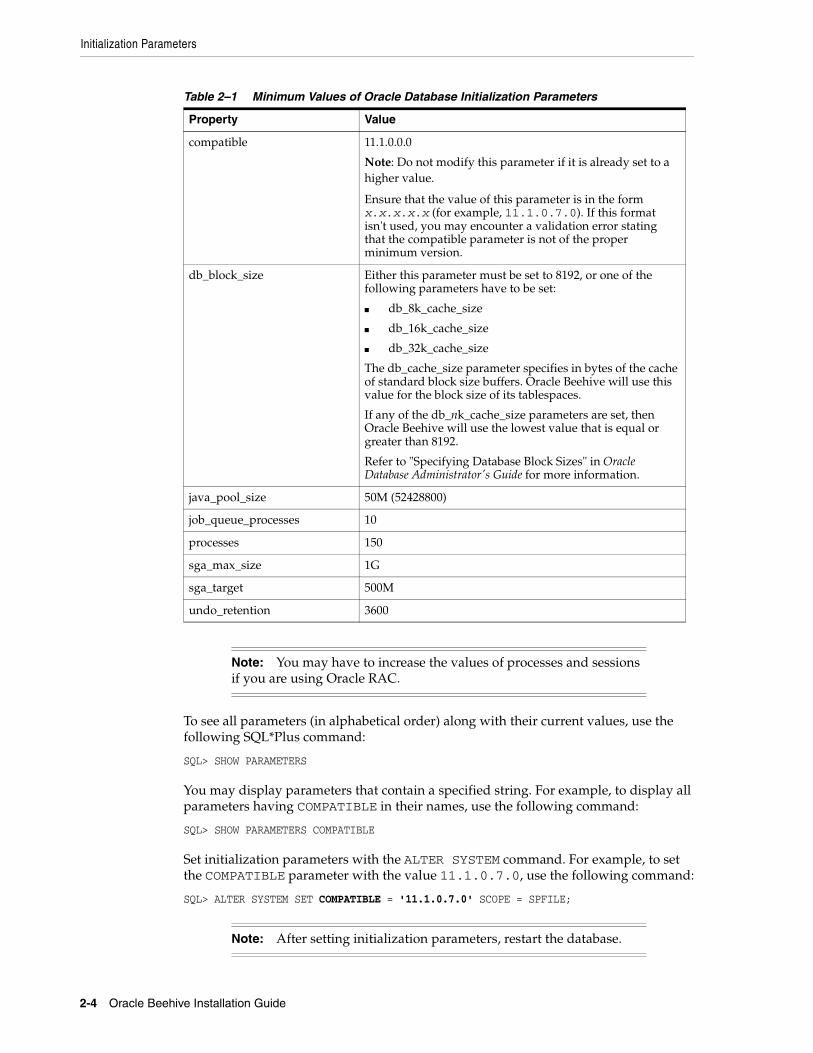
Initialization Parameters
2-4 Oracle Beehive Installation Guide
To see all parameters (in alphabetical order) along with their current values, use the following SQL*Plus command:
SQL> SHOW PARAMETERS
You may display parameters that contain a specified string. For example, to display all parameters having COMPATIBLE in their names, use the following command:
SQL> SHOW PARAMETERS COMPATIBLE
Set initialization parameters with the ALTER SYSTEM command. For example, to set the COMPATIBLE parameter with the value 11.1.0.7.0, use the following command:
SQL> ALTER SYSTEM SET COMPATIBLE = '11.1.0.7.0' SCOPE = SPFILE;
Table 2–1 Minimum Values of Oracle Database Initialization Parameters
Property Value
compatible 11.1.0.0.0
Note: Do not modify this parameter if it is already set to a higher value.
Ensure that the value of this parameter is in the form x.x.x.x.x (for example, 11.1.0.7.0). If this format isn't used, you may encounter a validation error stating that the compatible parameter is not of the proper minimum version.
db_block_size Either this parameter must be set to 8192, or one of the following parameters have to be set:
■ db_8k_cache_size
■ db_16k_cache_size
■ db_32k_cache_size
The db_cache_size parameter specifies in bytes of the cache of standard block size buffers. Oracle Beehive will use this value for the block size of its tablespaces.
If any of the db_nk_cache_size parameters are set, then Oracle Beehive will use the lowest value that is equal or greater than 8192.
Refer to "Specifying Database Block Sizes" in Oracle Database Administrator's Guide for more information.
java_pool_size 50M (52428800)
job_queue_processes 10
processes 150
sga_max_size 1G
sga_target 500M
undo_retention 3600
Note: You may have to increase the values of processes and sessions if you are using Oracle RAC.
Note: After setting initialization parameters, restart the database.
Customizing Oracle Beehive Tablespaces Layout
Oracle Beehive Database Requirements 2-5
Logging SettingsIf your Oracle Beehive deployment is a production system, it is strongly recommended that you set the archive log mode of the database to ARCHIVELOG, which enables the archiving of the redo logs. Use the following command to determine the database's archive log mode:
SQL> SELECT LOG_MODE FROM SYS.V$DATABASE;
To set the archive log mode to ARCHIVELOG, use the following commands:
SQL> shutdown immediateSQL> startup mount exclusiveSQL> alter database archivelog;SQL> alter database open;
Creating a DatabaseYou may use Database Configuration Assistant (DBCA) to create and configure a database. For more information about this tool, refer to "Creating a Database Using DBCA" in Chapter 2, "Installing Oracle Database and Creating a Database" in Oracle Database 2 Day DBA.
Using Oracle Real Application Clusters DatabaseRefer to "Configuring and Installing Oracle Beehive for Oracle RAC" for pre-installation and post-installation steps required for Oracle Beehive deployments that use Oracle Real Application Clusters (Oracle RAC) databases.
Customizing Oracle Beehive Tablespaces LayoutYou may customize the layout of Oracle Beehive tablespaces with the script <Oracle home>\beehive\db\framework\beehive_custom_ts.sql. You may change tablespace names, initial size of the datafile, block size, and datafile autoextend options.
By default, Oracle Beehive uses eleven tablespaces. The beehive_custom_ts.sql script maps each tablespace to a placeholder. The Oracle Beehive Install Wizard uses these placeholders (instead of the real tablespace name) for configuration.
For example, in the beehive_custom_ts.sql script, the tablespace BEE_DATA is mapped to the placeholder ts_data:
REM Tables containing transactional dataDEFINE ts_data = BEE_DATADEFINE ts_data_path = ''DEFINE ts_data_sz = 512MDEFINE ts_data_bsz = 8192DEFINE ts_data_ae = ONDEFINE ts_data_ae_nx = 128M
Tip: When creating a database for Oracle Beehive with DBCA, you may choose any template. With DBCA, you may also turn on the archive log mode (by selecting the option Enable Archiving), set the character set to AL32UTF8, and set initialization parameters listed in "Initialization Parameters".
Using Raw Storage
2-6 Oracle Beehive Installation Guide
You must specify the mapping between the placeholders, such as ts_data and ts_index, and the corresponding tablespaces. If one tablespace is to be shared across multiple placeholders, adjust the tablespace size accordingly.
This script creates a special view named bee_tablespaces, which then is used by the install scripts. You may drop the view after a successful installation. Since the tablespace mapping information can be reused for subsequent product reinstallations, the installation script does not drop it.
The script also produces an output file with the actual CREATE TABLESPACE commands. The output file name is create_beehive_tablespaces.sql
After making your changes to the script, run it with SYS privileges.
Minimum Tablespace SizesBy default, Oracle Beehive tablespaces are created with autoexend enabled. If you prefer to manage the size of the Oracle Beehive tablespaces yourself, the total size of all Oracle Beehive tablespaces should be at least 15 GB.
Using Raw StorageIf you want to use a database that uses raw storage, customize the script <Oracle home>\beehive\db\framework\beehive_custom_ts.sql. Refer to "Customizing Oracle Beehive Tablespaces Layout" for more information about this script.
To use a raw device (which you have created and properly configured) for a particular tablespace, specify the full path of its datafile in the appropriate variable. For example, if you want to use a raw device for the BEE_DATA tablespace, specify the full path of its datafile in the ts_data_path variable.
By default, Oracle Beehive uses eleven tablespaces. The beehive_custom_ts.sql script maps each tablespace to a placeholder. The Oracle Beehive Install Wizard uses these placeholders (instead of the real tablespace name) for configuration.
To use a raw device (which you have created and properly configured) for a particular tablespace, specify the full path of its datafile in the appropriate variable. For example, if you want to use a raw device for the BEE_DATA tablespace, specify the full path of its datafile in the ts_data_path variable.
In addition, set the variable APPEND_FILE_NAME to N.
After making your changes to the script, run it with SYS privileges.
Upgrading Oracle Database 11g Release 1 to Oracle Database 11g Release 2
If you upgrade Oracle Database 11g Release 1 (11.1.0.7) to Oracle Database 11g Release 2 (11.2) after installing Oracle Beehive, follow these steps:
1. Shut down Oracle Beehive:
beectl stop --all
2. Run the following SQL scripts as the BEE_CODE user in the specified order:
a. <Oracle Beehive home>\beehive\db\framework\ocs_stop_jobs.sql
Post-Installation Procedures for Oracle Beehive Databases
Oracle Beehive Database Requirements 2-7
b. <Oracle Beehive home>\db\dbclone\drop_expression_indexes.sql
c. <Oracle Beehive home>\db\dbclone\create_expression_indexes.sql
d. <Oracle Beehive home>\db\framework\ocs_enable_jobs.sql
3. Start Oracle Beehive:
beectl start --all
Post-Installation Procedures for Oracle Beehive DatabasesAfter you have successfully installed Oracle Beehive, refer to "Oracle Beehive Database Post-Installation Procedures" for tuning recommendations to perform on your Oracle Beehive database.

Post-Installation Procedures for Oracle Beehive Databases
2-8 Oracle Beehive Installation Guide
3
Oracle Beehive Install Wizard Checklist 3-1
3 Oracle Beehive Install Wizard Checklist
This chapter lists the information the Oracle Beehive Install Wizard requests during the installation process for the following products:
■ Oracle Beehive (Standard Installation)
■ Oracle Beehive Provisioning Application
■ Oracle Beehive for DMZ
■ Oracle Beekeeper
■ Oracle Collaboration Coexistence Gateway
Oracle Beehive (Standard Installation)■ New Inventory Location: Oracle inventory directory path.
The Oracle Beehive Install Wizard will ask you for the Oracle inventory directory path if Oracle Beehive is the first Oracle product you are installing on your system.
■ Specify Home Location: Full path of the location where you want to install Oracle Beehive.
■ Prerequisite Checks: Refer to "Requirements" in "What You Should Know Before Installing Oracle Beehive" for Oracle Beehive software and hardware requirements.
■ Database Information: Refer to "Oracle Beehive Database Requirements" for database requirements.
– Host and Port
– Service Name
– Admin User Name
– Admin User Password
■ Template Information
– Select Template: Templates include options to install Oracle Beehive Integration for Zimbra.
– Memory to Allocate
■ Enterprise Definition Information or Existing Enterprise Information
– Enterprise
– Organization
Oracle Beehive Provisioning Application
3-2 Oracle Beehive Installation Guide
– Site
– Site Key
– Instance
■ Schema Password or Existing Schema Password
■ beeadmin Password
Oracle Beehive Provisioning Application■ New Inventory Location: Oracle inventory directory path.
The Oracle Beehive Install Wizard will ask you for the Oracle inventory directory path if this is the first Oracle product you are installing on your system.
■ Specify Home Location: Full path of the location where you want to install Oracle Beehive Provisioning Application.
■ Repository Database Administrator Password
■ Software Library Configuration: Full path of a directory that will contain software image archives of Oracle Beehive products in binary format.
■ Beehive Software Image Archive
■ Beekeeper Software Image Archive
Oracle Beehive for DMZ■ New Inventory Location: Oracle inventory directory path.
The Oracle Beehive Install Wizard will ask you for the Oracle inventory directory path if this is the first Oracle product you are installing on your system.
■ Specify Home Location: Full path of the location where you want to install Oracle Beehive for DMZ.
■ Prerequisite Checks: Refer to "Requirements" in "What You Should Know Before Installing Oracle Beehive" for Oracle Beehive software and hardware requirements.
Oracle Beekeeper■ New Inventory Location: Oracle inventory directory path.
The Oracle Beehive Install Wizard will ask you for the Oracle inventory directory path if this is the first Oracle product you are installing on your system.
■ Specify Home Location: Full path of the location where you want to install Oracle Beekeeper.
■ Prerequisite Checks: Refer to "Requirements and Certifications" in "What You Should Know Before Installing Oracle Beehive" for Oracle Beekeeper requirements and certifications.
■ Database Information: Refer to "Oracle Beehive Database Requirements" for database requirements.
– Host and Port
– Service Name
Oracle Collaboration Coexistence Gateway
Oracle Beehive Install Wizard Checklist 3-3
– Schema User Password
■ Site Key Information
Oracle Collaboration Coexistence GatewayOracle Coexistence Connector for Microsoft Exchange Server
■ Specify Home Location
■ Prerequisite Checks: Refer to "Requirements for Oracle Collaboration Coexistence Gateway".
■ Select Installation Type
■ Oracle Beehive Coexistence Service
■ oc4jadmin Password
■ Windows User Account
Oracle Coexistence Connector for Lotus Domino Server
■ Specify Home Location
■ Prerequisite Checks: Refer to "Requirements for Oracle Collaboration Coexistence Gateway".
■ Select Installation Type
■ Oracle Beehive Connection Details
■ oc4jadmin Password
■ Domino Server and User Info
■ Domino Foreign Domain Name

Oracle Collaboration Coexistence Gateway
3-4 Oracle Beehive Installation Guide
4
Oracle Beehive Install Wizard 4-1
4 Oracle Beehive Install Wizard
This chapter describe the Oracle Beehive Install Wizard screens that appear during installation of Oracle Beehive:
■ Product Selection Sequence of Screens
■ Oracle Beehive (Standard Installation) Sequence of Screens
■ Oracle Beehive Provisioning Application Sequence of Screens
■ Oracle Beehive for DMZ Sequence of Screens
Product Selection Sequence of ScreensThe following screens appear before product selection:
■ Welcome
■ New Inventory Location
■ Select Product Type
Once you select a product type, you will proceed to one of the following sequence of screens:
■ Oracle Beehive (Standard Installation) Sequence of Screens
■ Oracle Beehive Provisioning Application Sequence of Screens
■ Oracle Beehive for DMZ Sequence of Screens
Note: To install Oracle Beekeeper, run setup.exe (Microsoft Windows) or runInstaller (UNIX-based operating systems) from the Oracle Beekeeper installation media.
Product Selection Sequence of Screens
4-2 Oracle Beehive Installation Guide
WelcomeThe Welcome screen is the first screen of the Oracle Beehive Install Wizard. It will guide you through the installation and configuration of Oracle Beehive Release 2.
Preview ModeSelecting the check box Preview Mode enables you to run the Install Wizard in preview mode. In this mode, the Install Wizard does not validate any of your input and disables the Install and Uninstall buttons. Consequently, the preview mode enables you to view all the screens of the Install Wizard without installing any Oracle Beehive products.
Install Wizard ButtonsThe following describes the buttons that appear on most of the installation screens:
■ Click Help to view the online help.
■ Click Save to save the inputs you have entered to a file that you can use later as a response file. You can use this response file to continue the installation at a later time or perform a silent (non-interactive) installation.
Refer to "Installing Oracle Beehive in Silent Mode (Non-Interactive)" for detailed information about installing Oracle Beehive with a response file.
■ Click Back to go back to the previous step.
■ Click Next to go to the next step.
■ Click Install to start the installation of the product.
This button is available only on the Summary screen.
■ Click Uninstall to uninstall a previously installed Oracle Beehive product.
■ Click Cancel to exit from the Oracle Install Wizard at any time during the installation.
New Inventory LocationIf Oracle Beehive Release 2 is the first Oracle product you are installing on a computer, then this screen is displayed.
Note: In Microsoft Windows, ensure the following before installing or upgrading Oracle Beehive:
■ Ensure that there is only one window session (desktop) is present. Close all other window sessions. Many window sessions can be opened with Windows Remote Desktop or Virtual Network Computing (VNC) applications.
■ Ensure that you have closed all Windows Explorer windows, unnecessary applications, and command prompts. These may interfere with the upgrade process, especially if Windows Explorer or a command prompt is pointing to the directory <Oracle home>\j2ee.
Tip: Press F1 to open the online help section for the field where your cursor focus is on the installation screen.
Product Selection Sequence of Screens
Oracle Beehive Install Wizard 4-3
Inventory Directory PathOn this screen, you specify the location of an inventory directory (the oraInventory directory) in the Inventory Directory Path field. The Oracle Beehive Install Wizard will use this inventory directory to keep track of all Oracle products installed on the computer.
Operating System GroupOn Linux and UNIX-based platforms, specify in the Operating System Group field the operating system group that has the write permission to the target inventory directory location.
Select Product TypeChoose how you want to install Oracle Beehive from one of the following options:
■ Complete installation by using the Oracle Beehive Release 2 option.
■ Plug-in installation by using the Provisioning Application for Oracle Beehive Release 2 option.
■ Products that allow Oracle Beehive users to collaborate with Microsoft Exchange users by using the Oracle Collaboration Coexistence Gateway
■ Installation for a demilitarized zone by using the Oracle Beehive Release 2 for DMZ option.
The following sequence of screens depend on the option that you select in the above option.
Note: Note the following about the inventory directory:
■ If an Oracle product was installed previously on the computer, then the Oracle Beehive Install Wizard uses the existing inventory directory. To ensure that you have write permissions on that directory, run the Oracle Beehive Install Wizard as the same operating system user who installed the existing Oracle product.
■ The inventory directory location should be different from the directory path in which you are going to install Oracle Beehive Release 2.
■ The Oracle Beehive Install Wizard (as well as other installation programs from other Oracle products) will store its log files in the directory <inventory directory path>/logs.
However, if this is the first Oracle product you are installing on your computer, the Install Wizard will store its log files in a temporary directory, such as /tmp on Linux and UNIX-based operating systems. When you exit the Install Wizard, the Install Wizard will move these log files to <inventory directory path>/logs.
Note: This option is only available on Windows systems. You will also need an installed and configured instance of Oracle Beehive.
Oracle Beehive (Standard Installation) Sequence of Screens
4-4 Oracle Beehive Installation Guide
Oracle Beehive Release 2Use this option to perform a complete installation of Oracle Beehive Release 2 on the specified host.
See "Oracle Beehive (Standard Installation) Sequence of Screens" to continue installing Oracle Beehive Release 2.
Provisioning Application for Oracle Beehive Release 2Use this option to install the Provisioning Application. This will allow you to install and configure Oracle Beehive Release 2 instances from Oracle Enterprise Manager Grid Control.
The prerequisite for installing this plug-in is that you must have a preinstalled instance of Oracle Enterprise Manager 10g Grid Control Release 5 (10.2.0.5) or later.
See "Oracle Beehive Provisioning Application Sequence of Screens" to continue installing Oracle Beehive Release 2 Provisioning Application.
Oracle Collaboration Coexistence GatewayUse this option to install the following products required for Oracle Collaboration Coexistence Gateway:
■ Oracle Coexistence Connector for Microsoft Exchange 2003
■ Oracle Coexistence Connector for IBM Lotus Domino 8
Oracle Beehive Release 2 for DMZUse this option to install Oracle Beehive Release 2 and configure the installation location as a demilitarized zone (DMZ).
This option uses a local, file-based configuration and does not require an existing database. In addition, the administration tool beectl will be disabled for this instance.
See "Oracle Beehive for DMZ Sequence of Screens" to continue installing Oracle Beehive Release 2 for DMZ.
Oracle Beehive (Standard Installation) Sequence of ScreensThe following screens appear during the installation of Oracle Beehive Release 2 (standard installation):
■ Specify Home Location
■ Prerequisite Checks
■ Select Installation Type
■ Configure Security Updates
■ Database Information
Note: One of the prerequisites for selection the Oracle Beehive Release 2 option is that you must have an existing instance of Oracle Database. This database is not installed by this procedure.
Refer to "Oracle Beehive Database Requirements" for database requirements for Oracle Beehive Release 2 (2.0).
Oracle Beehive (Standard Installation) Sequence of Screens
Oracle Beehive Install Wizard 4-5
■ Template Information
■ Enterprise Definition Information
■ Existing Enterprise Information
■ Schema Password
■ Existing Schema Password
■ beeadmin Password
■ Installation Summary
■ Progress Indicator
■ Configuration Assistants
■ End of Installation
Other Oracle Install Wizard Sequence of ScreensIf you are installing Oracle Beehive Provisioning Application, refer to "Oracle Beehive Provisioning Application Sequence of Screens".
If you are installing Oracle Beehive for DMZ, refer to "Oracle Beehive for DMZ Sequence of Screens".
Specify Home LocationEnter the full path of the location where you want to install the product. Do not leave the Location field blank.
Specifying Oracle Home DirectorySpecify the directory where you want to install Oracle Beehive. You must specify a new Oracle home directory for each new installation of Oracle Beehive.
See the following guidelines for specifying the Oracle home directory on different platforms:
■ Specifying Oracle Home Directory on Linux and UNIX-Based Systems
■ Specifying Oracle Home Directory on Windows Systems
Specifying Oracle Home Directory on Linux and UNIX-Based SystemsOn Linux and UNIX-based systems, the Oracle Beehive Install Wizard suggests a path similar to the following for the Oracle home directory:
/home_directory/oracle/product/version_number/identifier_n
Note: If you selected the Provisioning Application for Oracle Beehive Release 2 option on the Select Product Type screen, ensure that you specify the Oracle home for your Oracle Enterprise Manager Grid Control instance. This is a prerequisite for installing the provisioning plug-in.
For more information on prerequisites for installing the provisioning plug-in, refer to "Provisioning Application for Oracle Beehive Release 2". Refer to "What You Should Know Before Installing Oracle Beehive" for information on prerequisites for installing Oracle Beehive Release 2.
Oracle Beehive (Standard Installation) Sequence of Screens
4-6 Oracle Beehive Installation Guide
■ home_directory is the home directory of the user running the Oracle Beehive Install Wizard
■ version_number is the version number of the product being installed
■ identifier identifies the product installed in this Oracle home directory
■ n is a number that ensures that this path is unique
You may also click Browse to choose a directory to install your product. This location is the destination directory in which the product will be installed.
Specifying Oracle Home Directory on Windows Systems On Windows systems, the Oracle Beehive Install Wizard suggests a path similar to the following for the Oracle home directory:
X:\oracle\product\version_number\identifier_n
■ X is the default drive
■ version_number is the version number of the product being installed
■ identifier identifies the product installed in this Oracle home directory
■ n is a number that ensures that this path is unique
If the directory specified does not exist, the Oracle Beehive Install Wizard creates it. Unless you want to install the software on a different drive with sufficient free space, you can accept the default value.
You may also click Browse to choose a directory to install your product. This location is the destination directory in which the product will be installed.
Prerequisite ChecksThis screen displays the prerequisite checks that the Oracle Beehive Install Wizard runs. It verifies that the host (where you are installing Oracle Beehive Release 2) meets all minimum requirements for installing and configuring the product type that you selected on the Select Product Type screen.
Some of the platform-independent checks that the Oracle Beehive Install Wizard performs include:
■ Operating system certification (or version)
■ Operating system patches and packages
■ Security kernel parameters
■ Memory
■ Swap space
■ Disk space
■ In Microsoft Windows, ensuring that the Window user for Oracle Beehive installation has administrative privileges.
If an automatic check fails, fix it and click Retry.
Note: You must have write permissions in the directory that you specify, if it exists, or you must have permissions to create it.
Oracle Beehive (Standard Installation) Sequence of Screens
Oracle Beehive Install Wizard 4-7
Select Installation TypeSpecify the type of installation you want to perform. You can choose from:
■ Install and Configure
■ Install Only
Install and ConfigureSelect this option if you want to install and automatically start the configuration of the product.
If you select this option, the Oracle Beehive Release 2 instance is functional with minimal configuration after the installation is completed.
Install OnlySelect this option to only install the product. This will only copy files to your system. Until you configure Oracle Beehive, you will not be able to perform any tasks with it nor start any Oracle Beehive managed component.
To configure the product after installation, you must run the Configuration wizard as follows:
1. Navigate to the following directory:
■ On Linux and UNIX-based platforms: $ORACLE_HOME/beehive/oobwiz
■ On Microsoft Windows: %ORACLE_HOME%\beehive\oobwiz
2. Run the configWizard script as follows:
– On Linux and UNIX-based platforms, enter the following command:
./configWizard
– On Microsoft Windows, run the configWizard.bat script.
Configure Security UpdatesSpecify your My Oracle Support account details so that Oracle can notify you of any critical security updates.
Note: If the disk space check fails and after clicking Retry (after fixing the low disk space issue) the check states "Not Executed," exit the Oracle Beehive Install Wizard and start it again.
In Microsoft Windows, the Windows user indicated in the Browse and Select: File or Directory screen must belong to the "Log on as a batch job" policy of the agent machine. To add a user to this policy, click Start, Programs, Administrative Tools, and then Local Security Policy. In Local Security Settings, expand Local Policies, expand Local Policies, and then click User Rights Assignment. Double-click the policy Log on as a batch job. Click Add User or Group to add the user.
Tip: For details on why a check failed, select the check box against it and see the details in the description box at the bottom of the screen.
Oracle Beehive (Standard Installation) Sequence of Screens
4-8 Oracle Beehive Installation Guide
Periodically, Security Updates automatically gathers configuration information of your installed Oracle products and uploads it to Oracle's support systems. Consequently, you may access this information through your My Oracle Support account and Oracle can contact you if there are any security updates.
E-mailSpecify your My Oracle Support e-mail address. If you do not have a My Oracle Support account, you may specify a personal e-mail address.
I wish to receive security updates via My Oracle SupportSelect this check box if you want to receive security updates through My Oracle Support. Ensure that the e-mail address you entered in Email and the password you entered in My Oracle Support Password corresponds to your My Oracle Support user name and password, respectively.
If you specified a personal e-mail address in Email, then ensure that this check box is not selected.
My Oracle Support PasswordSpecify your My Oracle Support password.
Specify proxy server informationIf you click Next and the Install Wizard cannot establish a direct connection to an outside network to send your My Oracle Support information, the Specify proxy server information window appears. Enter the following information:
■ Proxy Server: The host name of your proxy server
■ Proxy Port: The port number of your proxy server
■ Proxy Username: The user name required to authenticate your proxy server, if required
■ Proxy Password: The password required to authenticate your proxy server, if required
■ I want to remain uninformed of critical issues in my configuration: Selecting this check box disables Security Updates. If you select this check box, you do not need to specify any proxy details.
Note: The information collected by Security Updates is limited to configuration information. The data collected does not include personally identifiable information (with the exception of a local contact name in case of transmission problems). You may still use all licensed Oracle functionality if you decline to enable Security Updates.
You may choose not to be notified for any critical security updates. Simply leave all fields in the Configure Security Updates screen blank and click Next to continue.
The link to Oracle's policy page may not open if your default Web browser is an older version or not supported. Either update your browser or enter the following URL in your browser:
http://www.oracle.com/support/policies.html
Oracle Beehive (Standard Installation) Sequence of Screens
Oracle Beehive Install Wizard 4-9
Database InformationSpecify the following details of an existing Oracle Database instance that will be used by this installation:
■ Host and Port
■ Service Name
■ Admin User Name
■ Admin User Password
Host and PortHost
Specify the fully qualified domain name (FQDN) of the host where the target database is running.
For example, if the host name is foo, its domain is abc.com, and the database listener port is 1521, then enter the following:
foo.abc.com:1521
The default port on which the database listener listens for connection requests is 1521.
To determine this port number, run the command <Database home>/bin/lsnrctl status. (Ensure that the environment variable ORACLE_HOME is set to the directory in which Oracle Database is installed and ORACLE_SID is set to the system identifier of your database.)
Service NameEnter the service name for the Oracle Database. This is the same as the global database name, and must be unique across all databases.
A database is identified by its global database name. The global database name is comprised of two parts:
database_name.database_domain
For example:
Note: The database that you specify on this screen must use the Unicode Standard UTF-8 AL32UTF8 character set.
To determine the character set of an existing database, perform the following steps:
1. Log in to the SQL*Plus console of the target Oracle database.
2. Run the following query:
select value from nls_database_parameters where parameter='NLS_CHARACTERSET';
If the character set of the Oracle database is not Unicode Standard UTF-8 AL32UTF8, then you must create a new Oracle database. You may use Database Configuration Assistant (DBCA) to do this.
Refer to the module "Oracle Beehive Database Requirements" in the Oracle Beehive Installation Guide of your operating system for database requirements for Oracle Beehive Release 2.
Oracle Beehive (Standard Installation) Sequence of Screens
4-10 Oracle Beehive Installation Guide
sales.us.yourcompany.com
Admin User NameSpecify the administrative user name (that can perform database administration tasks) for the database instance. Typically, this user is the SYS account.
For more information about the SYS account, refer to Oracle Database Administrator's Guide.
Admin User PasswordEnter the password for the Oracle database administrative user account that you specified in the Admin User Name field.
After clicking Next, the Oracle Beehive Install Wizard verifies the connection to the Oracle Database Server, initialization parameters, and other requirements. If an error occurs, then you must correct the problem before the installation process can continue.
Template InformationSpecify the template and memory to allocate for this Oracle Beehive installation:
Select TemplateSelect from one of the following templates:
■ Basic Server Template: This is the default template. It will install and configure Oracle Beehive Release 2 against an existing database. The computer on which you are installing Oracle Beehive Release 2 must have at least 2 GB of RAM.
■ Basic Server and Client Template: This template will install and configure Oracle Beehive Release 2, including Oracle Beehive Integration for Zimbra and Oracle Beehive Team Collaboration on the same computer. To use this template, your computer must have at least 3 GB of RAM.
■ Client Only Template: This template will only configure Oracle Beehive Integration for Zimbra and Oracle Beehive Team Collaboration on your computer. An Oracle Beehive schema must already be installed in an existing database, you must have at least one Oracle Beehive application tier already installed, and your computer must have at least 2 GB of RAM.
Memory to AllocateSpecify the amount of RAM in GB to allocate for this Oracle Beehive installation. The amount you specify must be a whole number. The minimum amount depends on the template that you selected. In particular, the minimum amount for the Basic Server and Client templates is 2 GB and the minimum for the Basic Service and Client template is 3 GB. The maximum amount depends on the amount of RAM in your
Note: The global database name may not contain a hyphen (-), and it may not start with a digit. It may contain only alphanumeric characters and the underscore (_).
Note: The Basic Server and Client and Client Only templates replace the option to install Oracle Beehive Integration for Zimbra in previous releases of Oracle Beehive.
Oracle Beehive (Standard Installation) Sequence of Screens
Oracle Beehive Install Wizard 4-11
computer. For example, if you chose the Basic Server template and have 6 GB of RAM, you may specify 2, 3, 4, 5, or 6 GB of memory to allocate.
Enterprise Definition InformationSpecify the following enterprise site information that identifies this installation of Oracle Beehive Release 2:
■ Enterprise
■ Organization
■ Site
■ Site Key
■ Confirm Site Key
■ Instance
EnterpriseSpecify the name for the new enterprise you want to create. An enterprise is the top-level container for all users and objects. An enterprise may contain any number of organizations and workspaces.
The enterprise name is typically a company name, such as Oracle.
The enterprise name may only contain only letters, numbers, spaces, the period (.), the hyphen (-) and the underscore (_). The name cannot be greater than 127 bytes. The name cannot consist of only one or two periods (. or ..).
In Oracle Beehive Release 2, an Oracle Beehive deployment may have only one enterprise.
OrganizationSpecify the name of the organization to be created and added to the enterprise you specified previously. An organization is a logical grouping of users, groups, workspaces, and resources at a level lower than the enterprise level. Later, you may add any number of organizations to the enterprise you specified previously.
The organization is typically a sub-level or department under the enterprise, such as Sales or Accounting.
The enterprise name may only contain only letters, numbers, spaces, the period (.), the hyphen (-) and the underscore (_). The name cannot be greater than 127 bytes. The name cannot consist of only one or two periods (. or ..).
SiteSpecify the name of the site. A site consists of all Oracle Beehive services and service instances and the database they use.
A site is typically a reference to a physical location, such as Headquarters or Montreal.
The site name may only contain ASCII letters (a-z, A-Z), numbers, and the underscore (_). The name cannot be greater than 19 characters.
In Oracle Beehive Release 2, an Oracle Beehive deployment may have only one site.
Oracle Beehive (Standard Installation) Sequence of Screens
4-12 Oracle Beehive Installation Guide
Site KeyIf you are installing your first Oracle Beehive application tier, specify the site key for this site. If you install any additional Oracle Beehive application tiers, you will be prompted for this site key. The site key must have the following characteristics:
■ Be between 8 and 30 characters long.
■ Only contain characters from the database character set (AL32UTF8).
■ Only contain any valid Unicode letter character, digit, period, hyphen, and underscore.
■ Contain at least one upper case character, one lower case character, and one numeric character.
■ May not start or end with a space.
Confirm Site KeyConfirm the site key that you specified in the previous field.
InstanceSpecify the name of the instance for this Oracle Beehive installation. The instance name is used during server configuration.
The full name of an Oracle Beehive instance consists of the instance, host, and domain names. For example, if you name your instance myinstance1, your host is myhost, and your domain is example.com, the full name of your instance will be myinstance1.myhost.example.com.
The instance name may only contain ASCII letters (a-z, A-Z), numbers, and the underscore (_). The name cannot be greater than 63 characters. The name cannot be tempinst.
Existing Enterprise Information
Specify the following information:
■ Enterprise: Select an enterprise to which this Oracle Beehive installation will belong.
■ Site: The site to which the selected enterprise belongs will be displayed.
■ Site Key: Specify the site key of the indicated site.
Note: Only enter the instance name; do not specify the host and domain name. Oracle Beehive will append the host and domain name to the instance name. For example, you would specify myinstance1, not myinstance1.myhost.example.com.
All Oracle Beehive Release 2 instances must have a unique name.
Note: This screen will only appear if you are installing Oracle Beehive Release 2 against a database that is already configured for an existing Oracle Beehive instance.
The Oracle Beehive Install Wizard will use the enterprise and site of the existing Oracle Beehive instance; the enterprise and site name displayed on this screen are those of this Oracle Beehive instance.
Oracle Beehive (Standard Installation) Sequence of Screens
Oracle Beehive Install Wizard 4-13
■ Instance: Specify a name for this Oracle Beehive installation that will distinguish it from others in the selected enterprise. This name has have the following characteristics:
– Not empty
– Contain no spaces
– Contain only valid ASCII characters
– Not longer than 63 characters
– Unique among other Oracle products configured in the same computer
Schema PasswordSpecify and confirm the password for the new database schema that will be created and used by the instance of Oracle Beehive Release 2.
Password RestrictionsThe schema password must have the following characteristics:
■ Be between 5 and 30 characters long.
■ Only contain alpha-numeric characters (a-z, A-Z, and 0-9) or the underscore (_); the password cannot contain any other punctuation mark character.
■ Contain at least one alphabetic character and at least one numeric character
■ Begin with an alphabetic character; the password cannot begin with a number or the underscore (_).
Password Recommendations■ Passwords should not be simple or obvious words, such as welcome, account,
database, or user.
■ Passwords should not be the same as the user name.
■ Passwords should not be Oracle reserved words such as ACCESS, AUTHORIZATION, UID, or VARCHAR,
Existing Schema PasswordEnter the password for the Oracle database schema that the Oracle Beehive Install Wizard has detected. This schema is used by the Oracle Beehive Release 2 instance.
After clicking Next, the Oracle Beehive Install Wizard verifies the schema password. If an error occurs, then you must correct the password before the installation process can continue.
beeadmin PasswordSpecify and confirm the password for the beeadmin user. The oc4jadmin users will have the same password.
The oc4jadmin user will be exposed if you set up monitoring with Oracle Enterprise Manager Grid Control.
Oracle Beehive (Standard Installation) Sequence of Screens
4-14 Oracle Beehive Installation Guide
Password RestrictionsThe password of the beeadmin user must have the following characteristics:
■ Be between 8 and 30 characters long.
■ Only contain alpha-numeric characters (a-z, A-Z, and 0-9) or the underscore (_); the password cannot contain any other punctuation mark character.
■ Contain at least one uppercase and one lowercase alphabetic character.
■ Contain at least one numeric character.
■ Begin with an alphabetic character; the password cannot begin with a number or the underscore (_).
Password Recommendations■ Passwords should not be simple or obvious words, such as welcome, account,
database, or user.
■ Passwords should not be the same as the user name.
■ Passwords should not be Oracle reserved words such as ACCESS, AUTHORIZATION, UID, or VARCHAR,
Installation SummaryThe Installation Summary screen presents a summary of the options you have selected so far.
Depending on the installation, the information may include the following:
■ Space Requirements: The disk space required to install the product. The space requirement appears in a different color if the disk space available is less than what is required.
Note: This screen will not appear if you are installing Oracle Beehive against a database that is already configured for an existing Oracle Beehive instance.
Note: When entering your password, check that the state of your Caps Lock key is what you want it to be. Passwords are case-sensitive.
Note: If you are in preview mode, the Install button is disabled. If you want to install Oracle Beehive, repeatedly click Back until you reach the Welcome screen and deselect the Preview Mode option.
Alternatively, click the Save button to save your non-validated input to a response file.
Oracle Beehive (Standard Installation) Sequence of Screens
Oracle Beehive Install Wizard 4-15
■ Product Type: A predefined component set that automatically selects which components and dependency groups to install. To change the product type, go back to the Select Product Type screen.
■ Install Type: The option to only install Oracle Beehive Release 2 or to install and configure Oracle Beehive Release 2. To change the install type, go to the Select Installation Type screen.
■ Inventory Location: The location of the oraInventory directory where all the installation information about your product will be stored. To change this location, go back to the New Inventory Location screen.
■ Interview Details: The details of your inputs for the other screens, such as:
– Home Details: The location of the Oracle home where you want to install your product. To change the Oracle home, go back to the Specify Home Location screen.
– Database Information: The host name, port, service name, administrator user name, and password of the existing Oracle Database instance that will be used by this installation. To change the details, go back to the Database Information screen.
– Template Information: The template and memory to allocate for this installation. To change the details, go back to the Template Information screen.
– Enterprise Definition Information: The detailed enterprise site information that identifies this installation. To change the details, go back to the Enterprise Definition Information screen.
– Schema Password: The masked password for the Oracle database schema that the Oracle Beehive Install Wizard detects and is used by this Oracle Beehive instance.
– beeadmin Password: The masked password for the beeadmin user, which is the administrative user for Oracle Beehive Release 2 instances. To change the details, go back to the beeadmin Password screen.
When you have reviewed your inputs, click Install to continue.
Progress IndicatorUse this screen to monitor the progress of your installation. Click Show Details to see the details in the description box that appears.
Configuration AssistantsThis screen displays the configuration assistants that the Oracle Beehive Install Wizard runs to configure the product type that you selected on the Select Product Type screen.
Note: The space requirements shown on this screen do not include the space required in the target database.
The space requirements shown on this screen also might differ slightly from the actual space the component occupies on the installation disk. This is because of the differences in the disk configurations. For example, the space required on one hard drive might differ from the space required on another hard drive that uses different block size or that is managed by a different file system.
Oracle Beehive Provisioning Application Sequence of Screens
4-16 Oracle Beehive Installation Guide
The Oracle Beehive Install Wizard performs the following configuration assistants:
■ Pre-configuration Actions: Removes directories not needed
■ Oracle Beehive Initialization: Runs the Oracle Application Server clone method
■ Oracle Beehive Database Configuration - SOA schemas: Runs the Oracle Application Server Integration Repository Creation Assistant (IRCA) script to seed SOA schemas into the target database
■ Base Platform Support Configuration: Runs all required Oracle Application Server configuration tools
■ Disabling OC4J Home Instance: Reconfigures opmn.xml to not start up the OC4J home instance
■ Oracle Beehive Database Configuration - Beehive schemas: Runs schema_install.pl to seed Oracle Beehive database schemas
■ Oracle Beehive Framework Core Configuration: Performs core configuration with BeehiveCoreConfiguration.pl
If any configuration is flagged as Failed, then you must manually run the assistant to configure it. You do so by selecting the check box against it and clicking Retry.
You may also use the Oracle Beehive Config Wizard to complete all pending and failed configuration assistants at a later time. The full path of the command is <Oracle home>/beehive/oobwiz/configWizard.
For more information about the Oracle Beehive Config Wizard, refer to the module "Oracle Beehive Install and Config Wizard Command-Line Options" in the Oracle Beehive Installation Guide of your operating system.
End of InstallationClick Finish to complete the installation process and close the Oracle Beehive Install Wizard.
Oracle Beehive Provisioning Application Sequence of ScreensThe following screens appear during the installation of Oracle Beehive Release 2 Provisioning Application:
■ Specify Home Location
■ Repository Database Administrator Password
■ Software Library Configuration
■ Beehive Software Image Archive
■ Beekeeper Software Image Archive
■ Installation Summary
■ Progress Indicator
■ Configuration Assistants
Tip: For details on why a configuration failed, select the check box against it and see the details in the description box at the bottom of the screen. Also, review the log files in <Oracle inventory directory>/logs whose names start with installActions or oraInstall.

Oracle Beehive Provisioning Application Sequence of Screens
Oracle Beehive Install Wizard 4-17
■ End of Installation
Other Oracle Beehive Install Wizard Sequence of ScreensIf you are installing Oracle Beehive (standard installation), refer to "Oracle Beehive (Standard Installation) Sequence of Screens"
If you are installing Oracle Beehive for DMZ, refer to "Oracle Beehive for DMZ Sequence of Screens".
Specify Home LocationIn the Location field, specify the full path of Oracle Management Service Oracle home in which you want to install Oracle Beehive Provisioning Application.
Oracle Management Service is part of Oracle Enterprise Manager Grid Control.
You may not leave the Location field blank.
Typically, the name of this directory is oms10g.
Repository Database Administrator PasswordIn the SYS Password field, specify the password for the SYS account of the repository database that Oracle Management Service uses.
This repository database will be used by Oracle Beehive Provisioning Application to store required information.
The screen displays the details of the Oracle Enterprise Manager Grid Control database that is used as the repository for the Oracle Beehive Release 2 provisioning plug-in that you are installing. It displays the following information:
■ Host name where the Oracle database is installed
■ Port on which it listens to the incoming requests
■ System identifier (SID) that defines the name of the Oracle database instance
The Oracle Beehive Install Wizard verifies the password. If you specified an incorrect password, an error occurs. In this case, you must correct the password before the installation process can continue.
Software Library ConfigurationIn the Location field, specify the full path of a directory that will contain software images (in particular, zipped, installable versions of Oracle Beehive products). This directory must reside in the same host as your Oracle Management Service.
You will only see this screen if the Install Wizard cannot find a software library location already configured for Oracle Management Service.
Beehive Software Image ArchiveThe Install Wizard automatically uploads a zipped, installable version of Oracle Beehive for the same operating system as the Install Wizard to the Oracle Enterprise Manager Grid Control central software library.
In this screen, you may optionally specify the locations of zipped, installable versions of Oracle Beehive for other operating systems, which the Install Wizard uploads to the central software library.

Oracle Beehive Provisioning Application Sequence of Screens
4-18 Oracle Beehive Installation Guide
The location of this software image archive is normally <Oracle Beehive installation media>/install/beehive_home.zip.
Alternatively, you may upload Oracle Beehive software image archives from Oracle Enterprise Manager Grid Control.
Beekeeper Software Image ArchiveThe Install Wizard automatically uploads a zipped, installable version of Oracle Beekeeper for the same operating system as the Install Wizard to the Oracle Enterprise Manager Grid Control central software library.
In this screen, you may optionally specify the locations of zipped, installable versions of Oracle Beekeeper for other operating systems, which the Install Wizard uploads to the central software library.
The location of this software image archive is normally <Oracle Beekeeper installation media>/install/beekeeper_home.zip.
Alternatively, you may upload Oracle Beekeeper software image archives from Oracle Enterprise Manager Grid Control.
Installation SummaryThe Installation Summary screen presents a summary of the options you have selected so far. Depending on the installation, the information may include the following interview details:
■ Home Detail: The location of the Oracle home where you want to install your product. To change the Oracle home, go back to the Specify Home Location screen.
■ Repository Administrator Password: The masked password for the SYS user, which is the administrative user for the database that this Oracle Beehive Release 2 instance uses as a repository.
■ Software Library Configuration: The full path of the directory that will contain software image archives.
■ Beehive Software Image Archive: The locations of zipped, installable versions of Oracle Beehive for other operating systems.
■ Beekeeper Software Image Archive: The locations of zipped, installable versions of Oracle Beekeeper for other operating systems.
When you have reviewed your inputs, click Install to continue.
Installation ProgressUse this screen to monitor the progress of your installation. Click Show Details to see the details in the description box that appears.
Configuration AssistantsThis screen displays the configuration assistants that the Oracle Beehive Install Wizard runs to configure Oracle Beehive Provisioning Application.
The Oracle Beehive Install Wizard performs the following configuration assistants:
■ Repository Upgrade
■ Configure Software Library
Oracle Beehive for DMZ Sequence of Screens
Oracle Beehive Install Wizard 4-19
■ Package Beehive Software Image Archive
■ Package Beekeeper Software Image Archive
■ OMS Redeployment
■ Deploy Provision Application
■ Start Oracle Management Server
If any configuration is flagged as Failed, then you must manually run the assistant to configure it. You do so by selecting the check box against it and clicking Retry.
End of InstallationThe End of Installation screen indicates if the installation of Oracle Beehive Provisioning Application was successful.
Click Finish to complete the installation process and close the Oracle Beehive Install Wizard.
Refer to "Provisioning Oracle Beehive" to install Oracle Beehive with Oracle Beehive Provisioning Application.
Oracle Beehive for DMZ Sequence of ScreensThe following screens appear during the installation of Oracle Beehive Release 2 for DMZ:
■ Specify Home Location
■ Prerequisite Checks
■ Installation Summary
■ Progress Indicator
■ Configuration Assistants
■ End of Installation
Other Oracle Beehive Install Wizard Sequence of ScreensIf you are installing Oracle Beehive (standard installation), refer to "Oracle Beehive (Standard Installation) Sequence of Screens"
If you are installing Oracle Beehive Provisioning Application, refer to "Oracle Beehive Provisioning Application Sequence of Screens".
Specify Home LocationEnter the complete path for the location where you want to install Oracle Beehive Release 2 and configure as a DMZ.
Tip: For details on why a configuration failed, select the check box against it and see the details in the description box at the bottom of the screen. Also, review the log files in <Oracle inventory directory>/logs whose names start with installActions.
Oracle Beehive for DMZ Sequence of Screens
4-20 Oracle Beehive Installation Guide
Prerequisite ChecksThis screen displays the prerequisite checks that the Oracle Beehive Install Wizard runs. It verifies that the host (where you are installing Oracle Beehive Release 2 for DMZ) meets all minimum requirements for installing and configuring the product type that you selected on the Select Product Type screen.
Some of the platform-independent checks that the Oracle Beehive Install Wizard performs include:
■ Operating system certification (or version)
■ Operating system patches and packages
■ Security kernel parameters
■ Memory
■ Swap space
■ Disk space
Installation SummaryThe Installation Summary screen presents a summary of the options you have selected so far. The information includes the following:
■ Space Requirements: The disk space required to install the product. The space requirement appears in a different color if the disk space available is less than what is required.
■ Inventory Location: The location of the oraInventory directory where all the installation information about your product will be stored. To change this location, go back to the New Inventory Location screen.
■ Interview Details: The details of your inputs for the other screens:
– Home Details: The location of the Oracle home where you want to install Oracle Beehive Release 2 for DMZ. To change the Oracle home, go back to the Specify Home Location screen.
Progress IndicatorUse this screen to monitor the progress of your installation. Click Show Details to see the details in the description box that appears.
Configuration AssistantsThis screen displays the configuration assistants that the Oracle Beehive Install Wizard runs to configure Oracle Beehive Release 2 for DMZ.
Tip: For details on why a check failed, select the check box against it and see the details in the description box at the bottom of the screen.
Note: The space requirements shown on this screen might differ slightly from the actual space the component occupies on the installation disk. This is because of the differences in the disk configurations. For example, the space required on one hard drive might differ from the space required on another hard drive that uses different block size or that is managed by a different file system.
Oracle Beehive for DMZ Sequence of Screens
Oracle Beehive Install Wizard 4-21
The Oracle Beehive Install Wizard performs the following configuration assistants:
■ Oracle Beehive for DMZ Product Preparation
■ Oracle Beehive for DMZ Initialization
■ Disabling OC4J Instances
■ BTI (Oracle Beehive Transport Infrastructure) Configuration
If any configuration is flagged as Failed, then you must manually run the assistant to configure it. You do so by selecting the check box against it and clicking Retry.
You may also use the Oracle Beehive Config Wizard to complete all pending and failed configuration assistants at a later time. The full path of the command is <Oracle home>/beehive/oobwiz/configWizard.
For more information about the Oracle Beehive Config Wizard, refer to the module "Oracle Beehive Install and Config Wizard Command-Line Options" in the Oracle Beehive Installation Guide of your operating system.
End of InstallationThe End of Installation screen indicates if the installation of Oracle Beehive Release 2 for DMZ was successful.
Click Finish to complete the installation process and close the Oracle Beehive Install Wizard.
Refer to "Configuring Oracle Beehive Demilitarized Zone Instances" to configure the Oracle Beehive DMZ instance you have just installed.
Tip: For details on why a configuration failed, select the check box against it and see the details in the description box at the bottom of the screen. Also, review the log files in <Oracle inventory directory>/logs whose names start with installActions.

Oracle Beehive for DMZ Sequence of Screens
4-22 Oracle Beehive Installation Guide
5
Oracle Beekeeper Installation Help 5-1
5 Oracle Beekeeper Installation Help
Run setup.exe (Microsoft Windows) or runInstaller (UNIX-based operating systems) from the Oracle Beekeeper installation media to start the Install Wizard for this product.
Refer to "Starting the Oracle Beekeeper Uninstall Wizard" to uninstall Oracle Beekeeper.
Product Selection Sequence of ScreensThe following screens appear before product selection:
■ Welcome
■ New Inventory Location
■ Select Product Type
Once you select a product type, you will proceed to "Oracle Beekeeper Sequence of Screens".
WelcomeThe Welcome screen is the first screen of the Oracle Install Wizard. It will guide you through the installation and configuration of Oracle Beekeeper.
The following describes the buttons that appear on most of the installation screens:
■ Click Help to view the online help.
Note: In Microsoft Windows, ensure the following before installing or upgrading Oracle Beekeeper:
■ Ensure that there is only one window session (desktop) is present. Close all other window sessions. Many window sessions can be opened with Windows Remote Desktop or Virtual Network Computing (VNC) applications.
■ Ensure that you have closed all Windows Explorer windows, unnecessary applications, and command prompts. These may interfere with the upgrade process, especially if Windows Explorer or a command prompt is pointing to the directory <Oracle home>\j2ee.
Product Selection Sequence of Screens
5-2 Oracle Beehive Installation Guide
■ Click Save to save the inputs you have entered to a file that you can use later as a response file. You can use this response file to continue the installation at a later time.
■ Click Back to go back to the previous step.
■ Click Next to go to the next step.
■ Click Install to start the installation of the product.
This button is available only on the Summary screen.
■ Click Uninstall to uninstall a previously installed Oracle Beekeeper product
■ Click Cancel to exit from the Oracle Install Wizard at any time during the installation.
New Inventory LocationIf Oracle Beekeeper is the first Oracle product you are installing on a computer, then this screen is displayed.
On this screen, you specify in the Inventory Directory Path field the location of an inventory directory (the oraInventory directory). The Install Wizard will use this inventory directory to keep track of all Oracle products installed on the computer.
On Linux and UNIX-based platforms, specify in the Operating System Group field the operating system group that has the write permission to the target inventory directory location.
Select Product TypeSelect which Oracle Beekeeper product you want to install:
Tip: Press F1 to open the online help section for the field where your cursor focus is on the installation screen.
Note: The following notes are about the inventory directory:
■ If an Oracle product was installed previously on the computer, then the Install Wizard uses the existing inventory directory. To ensure that you have write permissions on that directory, run the Install Wizard as the same operating system user who installed the existing Oracle product.
■ The inventory directory location should be different from the directory path in which you are going to install Oracle Beekeeper.
■ The Install Wizard (as well as other installation programs from other Oracle products) will store its log files in the directory <inventory directory path>/logs.
However, if this is the first Oracle product you are installing on your computer, the Install Wizard will store its log files in a temporary directory, such as /tmp on Linux and UNIX-based operating systems. When you exit the Install Wizard, the Install Wizard will move these log files to <inventory directory path>/logs.
Oracle Beekeeper Sequence of Screens
Oracle Beekeeper Installation Help 5-3
■ Oracle Beekeeper: This option installs Oracle Beekeeper on the computer from which you are running the Install Wizard.
■ Provisioning Application for Oracle Beekeeper: This will allow you to install and configure Oracle Beekeeper from Oracle Enterprise Manager Grid Control.
The prerequisite for installing this plug-in is that you must have a preinstalled instance of Oracle Enterprise Manager 10g Grid Control Release 5 (10.2.0.5) or later.
Oracle Beekeeper Sequence of ScreensThe following screens appear during the installation of Oracle Beekeeper:
■ Specify Home Location
■ Prerequisite Checks
■ Database Information
■ Site Key Information
■ Installation Summary
■ Installation Process
■ Configuration Assistants
■ End of Installation
Specify Home LocationEnter the full path of the location where you want to install the product. Do not leave the Location field blank. The location you provide must not already be present in the Oracle inventory and must be empty.
Prerequisite ChecksThis screen displays the prerequisite checks that the Install Wizard runs. It verifies that the host (where you are installing Oracle Beekeeper) meets all minimum requirements.
Some of the platform-independent checks that the Oracle Beekeeper Install Wizard performs include:
■ Operating system certification
■ Kernel parameters
■ Recommended operating system packages
■ Available swap space
■ Recommended glibc version (Linux and UNIX-based operating systems)
■ libdb.so.2 exists (UNIX-based operating systems)
■ Sufficient file descriptors are allocated (Linux)
■ Disk space
Note: You may not install Oracle Beekeeper into an existing Oracle home.
Oracle Beekeeper Sequence of Screens
5-4 Oracle Beehive Installation Guide
■ In Microsoft Windows, ensuring that the Window user for Oracle Beekeeper installation has administrative privileges.
If an automatic check fails, fix it and click Retry.
Database InformationSpecify the following details of an existing Oracle Beehive database that will be used by this installation:
■ Host and Port
■ Service Name
■ Schema User Password
Host and PortSpecify the fully qualified domain name (FQDN) of the host where the target database is running.
For example, if the host name is foo, its domain is abc.com, and the database listener port is 1521, then enter the following:
foo.abc.com:1521
The default port on which the database listener listens for connection requests is 1521.
To determine this port number, run the command <Database home>/bin/lsnrctl status. (Ensure that the environment variable ORACLE_HOME is set to the directory in which Oracle Database is installed and ORACLE_SID is set to the system identifier of your database.)
Service NameEnter the service name for the Oracle database. This is the same as the global database name, and must be unique across all databases.
A database is identified by its global database name. The global database name is comprised of two parts:
database_name.database_domain
For example:
Note: If the disk space check fails and after clicking Retry (after fixing the low disk space issue) the check states "Not Executed," exit the Install Wizard and start it again.
In Microsoft Windows, the Windows user indicated in the Browse and Select: File or Directory screen must belong to the "Log on as a batch job" policy of the agent machine.
To add a user to this policy, click Start, Programs, Administrative Tools, and then Local Security Policy. In Local Security Settings, expand Local Policies, expand Local Policies, and then click User Rights Assignment. Double-click the policy Log on as a batch job. Click Add User or Group to add the user.
Tip: For details on why a check failed, select the check box against it and see the details in the description box at the bottom of the screen.
Oracle Beekeeper Sequence of Screens
Oracle Beekeeper Installation Help 5-5
sales.us.yourcompany.com
Schema User PasswordEnter the password for the Oracle Beehive database schema that is stored in the database whose information you have specified in this screen.
After clicking Next, the Install Wizard verifies the connection to the Oracle Database Server, initialization parameters, and other requirements. If an error occurs, then you must correct the problem before the installation process can continue.
Site Key InformationEnter the site key that you specified when you installed your first Oracle Beehive application tier.
Installation SummaryThe Installation Summary screen presents a summary of the options you have specified so far:
■ Space Requirements: The disk space required to install the product. The space requirement appears in a different color if the disk space available is less than what is required.
■ Inventory Location: The location of the oraInventory directory where all the installation information about your product will be stored.
■ Product: The name of the product you are installing, Oracle Beekeeper.
■ Interview Details: The details of your inputs for the other screens, such as:
– Home Details: The location of the Oracle home where you are installing the product.
– Database Information: The host name, port, service name, and masked schema user password of the existing Oracle Beehive database that will be used by this installation process.
– Site Key: The masked site key that you entered.
When you have reviewed your inputs, click Install to continue.
Installation ProcessUse this screen to monitor the installation process. Click Show Details to see the details in the description box that appears
Note: The space requirements shown on this screen do not include the space required in the target database.
The space requirements shown on this screen also might differ slightly from the actual space the component occupies on the installation disk. This is because of the differences in the disk configurations. For example, the space required on one hard drive might differ from the space required on another hard drive that uses different block size or that is managed by a different file system.
Starting the Oracle Beekeeper Uninstall Wizard
5-6 Oracle Beehive Installation Guide
Configuration AssistantsThis screen displays the configuration assistants that the Install Wizard runs to install Oracle Beekeeper:
■ Oracle Beekeeper Initialization: Runs the Oracle Universal Installer clone method
■ Oracle Beekeeper Port Configuration: Ensures that the Oracle Beekeeper OC4J instance has dynamically allocated port values to ensure that no port conflicts occur with other processes after install
■ Oracle Beehive Control OC4J Configuration: Ensures proper java arguments are configured in the standard oc4j command
■ Oracle Beehive Control Service Creation: Establishes the Oracle Beekeeper service in the Oracle Beehive repository
■ Starting OC4J Instance: Starts the OC4J container instance
■ Oracle Beekeeper Framework Deployment: Deploys the Oracle Beehive Framework application into the home instance
■ Oracle Beekeeper Application Deployment: Deploys the beehivecontrol.ear file into the home OC4J instance
■ Configuring OC4J Application Settings: This modifies the OC4J related configuration files for Oracle Beekeeper operation
■ Stopping OC4J Instance: Stops the OC4J instance
■ Starting OC4J Instance: Starts the OC4J container instance
End of InstallationThis screen indicates if the installation of Oracle Beekeeper was successful.
Starting the Oracle Beekeeper Uninstall WizardStart the Oracle Beekeeper Uninstall Wizard by running setup.exe -uninstall from the installation media.
Oracle Beekeeper Uninstall Wizard Sequence of ScreensThe following screens appear during the uninstallation of Oracle Beekeeper:
■ Select Oracle Home to Uninstall: This screen will not appear if you started Oracle Beekeeper Uninstall Wizard with Oracle Beekeeper Config Wizard.
■ Start Uninstallation
■ End of Uninstallation
Select Oracle Home to UninstallThis screen lists all the Oracle Beekeeper instances you have installed and their respective Oracle homes.
Select the Oracle Beekeeper home you want to uninstall.
This screen will not appear if you started the uninstall process by running the Config Wizard. In this case, the Config Wizard will uninstall the current Oracle home.
Oracle Beekeeper Uninstall Wizard Sequence of Screens
Oracle Beekeeper Installation Help 5-7
Start UninstallationThis screen will list actions that the Oracle Beekeeper Uninstall Wizard must perform to uninstall your chosen Oracle Beekeeper instance.
Click Start Uninstall to proceed with the uninstallation of your chosen Oracle Beekeeper instance.
End of UninstallationThis screen indicates that the uninstallation of the chosen Oracle Beekeeper instance is successful.
Note: If you started the uninstall process with the Config Wizard, the "Delete Oracle Home" action will not be displayed. This action will be performed after you have exited the Config Wizard graphical user interface.
Note: On Microsoft Windows, if you receive an error message from the Oracle Beekeeper Uninstall Wizard that it was unable to delete the Oracle home folder, delete it manually, then restart your computer.

Oracle Beekeeper Uninstall Wizard Sequence of Screens
5-8 Oracle Beehive Installation Guide
6
Provisioning Oracle Beehive 6-1
6Provisioning Oracle Beehive
The Oracle Beehive Enterprise Deployment Procedure enables you to provision and deploy Oracle Beehive products from Oracle Enterprise Manager Grid Control. The Provisioning Advisor Framework (PAF) is used for provisioning of Oracle Beehive products.
You may deploy the following Oracle Beehive products with the Oracle Beehive Enterprise Deployment Procedure:
■ Oracle Beehive
■ Oracle Beehive for DMZ
■ Oracle Beekeeper
■ Oracle Coexistence Connector for Microsoft Exchange Server
■ Oracle Coexistence Connector for Lotus Domino Server
This chapter covers the following topics:
■ Introduction to Oracle Beehive Enterprise Deployment Procedure
■ Running Oracle Beehive Enterprise Deployment Procedure
■ Uploading New Software Image Archive to Oracle Enterprise Manager Grid Control
Introduction to Oracle Beehive Enterprise Deployment ProcedureThe Oracle Beehive Enterprise Deployment Procedure consists of the following components:
■ Provisioning Advisor Framework
■ Software Library
■ Job System
Provisioning Advisor FrameworkProvisioning Advisor Framework (PAF) provides a seamless process to integrate tasks that are associated with an application. The framework automates, orchestrates, and tracks the tasks of various applications, such as installers, upgrade assistants, and custom scripts.
PAF is built on top of the Enterprise Manager Grid Control structure. This structure comprises of Oracle Management Server (OMS), Job System, Oracle Enterprise Manager (EM) Repository, Agent and the Software Library. PAF uses an XML file called the Deployment Procedure (DP) as an input from an application. The different
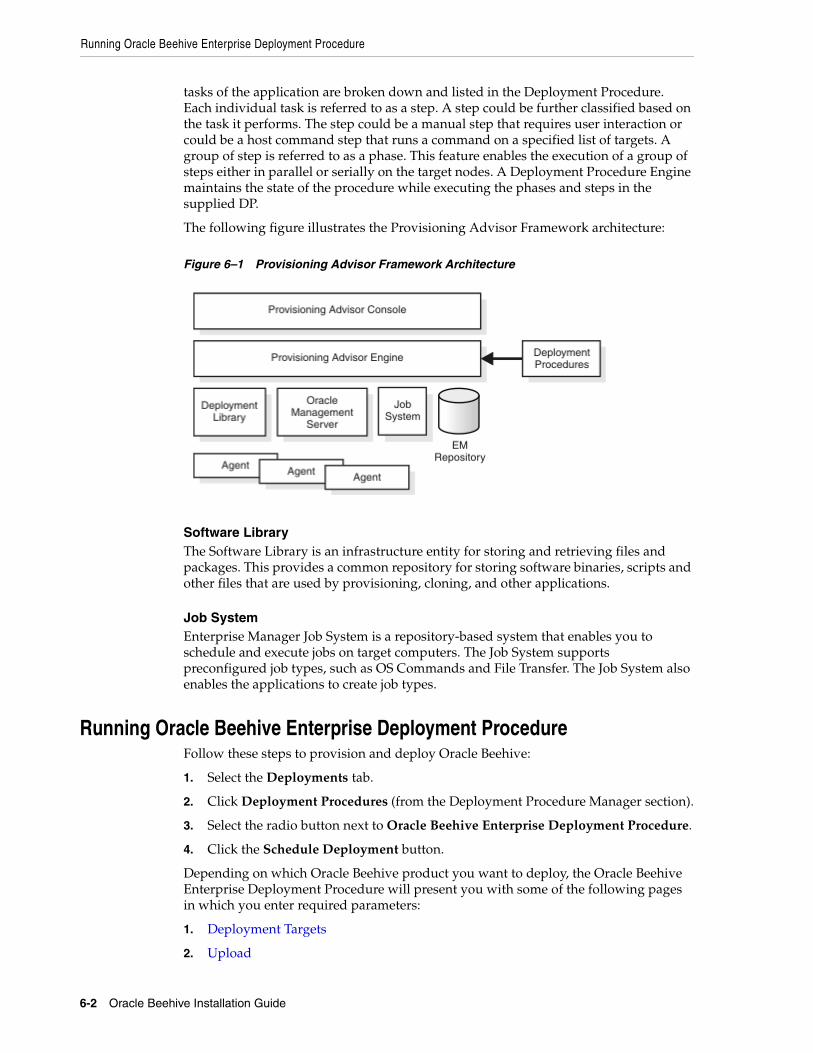
Running Oracle Beehive Enterprise Deployment Procedure
6-2 Oracle Beehive Installation Guide
tasks of the application are broken down and listed in the Deployment Procedure. Each individual task is referred to as a step. A step could be further classified based on the task it performs. The step could be a manual step that requires user interaction or could be a host command step that runs a command on a specified list of targets. A group of step is referred to as a phase. This feature enables the execution of a group of steps either in parallel or serially on the target nodes. A Deployment Procedure Engine maintains the state of the procedure while executing the phases and steps in the supplied DP.
The following figure illustrates the Provisioning Advisor Framework architecture:
Figure 6–1 Provisioning Advisor Framework Architecture
Software LibraryThe Software Library is an infrastructure entity for storing and retrieving files and packages. This provides a common repository for storing software binaries, scripts and other files that are used by provisioning, cloning, and other applications.
Job SystemEnterprise Manager Job System is a repository-based system that enables you to schedule and execute jobs on target computers. The Job System supports preconfigured job types, such as OS Commands and File Transfer. The Job System also enables the applications to create job types.
Running Oracle Beehive Enterprise Deployment ProcedureFollow these steps to provision and deploy Oracle Beehive:
1. Select the Deployments tab.
2. Click Deployment Procedures (from the Deployment Procedure Manager section).
3. Select the radio button next to Oracle Beehive Enterprise Deployment Procedure.
4. Click the Schedule Deployment button.
Depending on which Oracle Beehive product you want to deploy, the Oracle Beehive Enterprise Deployment Procedure will present you with some of the following pages in which you enter required parameters:
1. Deployment Targets
2. Upload
Running Oracle Beehive Enterprise Deployment Procedure
Provisioning Oracle Beehive 6-3
3. Configure Security Updates
4. Beehive Install Input
5. Beehive Templates
6. Beekeeper Install Input
7. Exchange/Domino Connector Install Input
8. Domino Install Input
9. Credentials/Schedule
10. Summary Page
Deployment TargetsSelect the targets on which you want to install an Oracle Beehive product. You may select more than one target, add a target to the list, and remove a target from the list.
Adding TargetsTo add targets to the list of targets on this page, follow these steps:
1. Click the Add button.
2. In the Select Target window, search for available targets by specifying the following criteria. By default, the deployment procedure will search for all available targets:
■ Type: This is always set as Host.
■ Host Name: Specify the name of the host. Leave blank to search for hosts of any name. You may use the percent sign (%) and the asterisk (*) as wildcard replacements, for example %value, %value%, or *value%.
■ Platform: Specify All to search for targets of any supported platform. Specify a particular platform to search for targets of that platform.
Click Go to perform the search.
3. Select the targets you want to add and click the Select button to return to the Deployment Targets window.
Selecting TargetsSpecify the following for each target that you want deploy an Oracle Beehive product:
■ Deployment Type: Depending on the type of target, you may deploy one or more of the following:
– Oracle Beehive
– Oracle Beehive for DMZ: After deployment, you must configure DMZ instances from a non-DMZ Oracle Beehive instance
– Oracle Beekeeper
Note: The parameters are similar to the installation procedure described in "Oracle Beehive (Standard Installation) Sequence of Screens" in "Oracle Beehive Install Wizard" in the Oracle Beehive Installation Guide of your operating system.
Running Oracle Beehive Enterprise Deployment Procedure
6-4 Oracle Beehive Installation Guide
– Oracle Collaboration Coexistence Gateway: At least one Oracle Coexistence Connector is required per Microsoft Exchange domain. To deploy this product, select the Oracle Coexistence Connector for Microsoft Exchange Server.
– Oracle Coexistence Connector for IBM Lotus Domino Server: Lotus Domino Server must reside in the specified deployment target
■ Home Location: Specify the absolute path name of the directory in which you want to deploy the Oracle Beehive product.
■ Inventory Pointer: This option is available only for UNIX-based operating systems.
By default, this field contains the absolute path name of the target host's central Oracle inventory pointer file. You may instead specify the absolute path name of a different inventory pointer file, which the deployment procedure will use as a private inventory for the Oracle Beehive product you are deploying.
UploadIf you have not already uploaded a zipped installable version of the Oracle Beehive product you are deploying to Oracle Beehive Enterprise Manager Grid Control Software Library, this page will prompt you to do so.
Microsoft WindowsUpload the zipped installable version of Oracle Beehive from <Oracle Beehive installation media directory>\install\beehive_home.zip.
Upload the zipped installable version of Oracle Beekeeper from <Oracle Beekeeper installation media directory>\install\beekeeper_home.zip.
Configure Security UpdatesSpecify your My Oracle Support account details so that Oracle can notify you of any critical security updates.
Periodically, Security Updates automatically gathers configuration information of your installed Oracle products and uploads it to Oracle's support systems. Consequently, you may access this information through your My Oracle Support account and Oracle can contact you if there are any security updates.
■ My Oracle Support Details:
Note: The information collected by Security Updates is limited to configuration information. The data collected does not include personally identifiable information (with the exception of a local contact name in case of transmission problems). You may still use all licensed Oracle functionality if you decline to enable Security Updates.
You may choose not to be notified for any critical security updates. Simply leave all fields in the Configure Security Updates page blank and click Next to continue. The deployment procedure will ask you, "Do you wish to remain uninformed of critical security issues in your configuration?" Click No to continue.
Running Oracle Beehive Enterprise Deployment Procedure
Provisioning Oracle Beehive 6-5
– Email: Specify your My Oracle Support e-mail address. If you do not have a My Oracle Support account, you may specify a personal e-mail address.
– I wish to receive security updates via My Oracle Support: Select this check box if you want to receive security updates through My Oracle Support. Ensure that the e-mail address you entered in Email and the password you entered in My Oracle Support Password corresponds to your My Oracle Support user name and password, respectively.
If you specified a personal e-mail address in Email, then ensure that this check box is not selected.
– My Oracle Support Password: Specify your My Oracle Support password.
■ Connection Details: If you cannot establish a direct connection to an outside network to send your My Oracle Support information without a proxy server, then enter the following information:
■ Proxy Server: The host name of your proxy server
■ Proxy Port: The port number of your proxy server
■ Proxy Username: The user name required to authenticate your proxy server, if required
■ Proxy Password: The password required to authenticate your proxy server, if required
Beehive Install InputThe following describes the parameters for the Beehive Install Input page.
■ Database Information: Specify the following details of an existing Oracle Database instance that will be used by this installation. Refer to "Oracle Beehive Database Requirements" in this guide for database requirements for Oracle Beehive Release 2.
Note: If the operating system of your target host is Microsoft Windows, the Oracle Beehive Enterprise Deployment Procedure does not support non-ASCII data.
Oracle RAC Note: If you are specifying details for an Oracle Real Application Cluster (Oracle RAC) database, ensure that you have entered the following information correctly; the Oracle Beehive Enterprise Deployment Procedure will not verify it by trying to connect to each database host. Instead, the Oracle Beehive Enterprise Deployment Procedure constructs the connect descriptor with the database information you provide, then verifies if the connect descriptor can reach the database.
If you are installing Oracle Beehive in a high availability environment (you are installing multiple instances of Oracle Beehive) with the deployment procedure and you are using an Oracle RAC database, you may only use test certificates; you may not use self-signed certificates in this situation.
Running Oracle Beehive Enterprise Deployment Procedure
6-6 Oracle Beehive Installation Guide
– Hostname and Port: Specify the fully qualified domain name (FQDN) of the host where the target database is running followed by the database listener port.
For example, if the host name is foo, its domain is abc.com, and the database listener port is 1521, then you must enter the following:
foo.abc.com:1521
– Service Name: Enter the service name for the Oracle Database. This is the same as the global database name, and must be unique across all databases. This is also the same as the Service Name the Oracle Beehive Install Wizard asks you when you choose to install Oracle Beehive against an existing database.
In the Oracle Beehive Installation Guide of your operating system, refer to "Installing Oracle Beehive Against an Existing Database" for more information. Refer to "Database Information" in "Oracle Beehive Install Wizard" for more information about the service name.
– Username: Specify the administrative user name (that can perform database administration tasks) for the database instance. Typically, this user is the SYS account.
– Password: Enter the password for the Oracle database administrative user account that you specified in the Username field.
■ Enterprise Information
– Enterprise: Specify the name for the new enterprise you want to create. An enterprise is the top-level container for all users and objects. An enterprise may contain any number of organizations and workspaces.
The enterprise name is typically a company name, such as Oracle.
In Oracle Beehive Release 2, an Oracle Beehive deployment may have only one enterprise.
– Organization: Specify the name of the organization to be created and added to the enterprise you specified previously. An organization is a logical grouping of users, groups, workspaces, and resources at a level lower than the enterprise level. Later, you may add any number of organizations to the enterprise you specified previously.
The organization is typically a sub-level or department under the enterprise, such as Sales or Accounting.
– Site: Specify the name of the site. A site consists of all Oracle Beehive services and service instances and the database they use.
A site is typically a reference to a physical location, such as Headquarters or Montreal.
In Oracle Beehive Release 2, an Oracle Beehive deployment may have only one site.
Note: In case of an Oracle RAC database, use the following format:
virtual_host1:virtual_port1^virtual_host2:virtual_port2^ ...

Running Oracle Beehive Enterprise Deployment Procedure
Provisioning Oracle Beehive 6-7
– Site Key: If you are installing your first Oracle Beehive application tier, specify the site key for this site. If you install any additional Oracle Beehive application tiers, you will be prompted for this site key.
– Confirm Site Key: Confirm the site key that you specified in the previous field.
– Instance: Specify the name of the instance for this Oracle Beehive installation. The instance name is used during server configuration.
The full name of an Oracle Beehive instance consists of the instance, host, and domain names. For example, if you name your instance myinstance1, your host is myhost, and your domain is example.com, the full name of your instance will be myinstance1.myhost.example.com.
■ Schema Credentials
– Password: Specify and confirm the password for the new database schema that will be created and used by the Oracle Beehive instance.
– Confirm Password: Re-enter the password you entered in the previous field.
■ beeadmin Credentials
– Password: Specify the password for the beeadmin user. The oc4jadmin users will have the same password.
– Confirm Password: Re-enter the password you entered in the previous field.
Beehive TemplatesThe following describes the parameters for the Beehive Templates page:
■ Select Template: For each deployment target, select from one of the following templates:
– Basic Server Template: This is the default template. It will install and configure Oracle Beehive against an existing database. The deployment target must have at least 2 GB of RAM.
– Basic Server and Client Template: This template will install and configure Oracle Beehive, including Oracle Beehive Integration for Zimbra and Oracle Beehive Team Collaboration on the same computer. The deployment target must have at least 3 GB of RAM.
– Client Only Template: This template will only configure Oracle Beehive Integration for Zimbra and Oracle Beehive Team Collaboration on the deployment target. The deployment target must have an Oracle Beehive schema installed in an existing database, at least one Oracle Beehive application tier, and at least 2 GB of RAM.
■ Allocate Mem (GB): Specify the amount of RAM in GB to allocate for this deployment. The amount you specify must be a whole number. The minimum amount depends on the template that you selected. In particular, the minimum
Note: Only enter the instance name; do not specify the host and domain name. Oracle Beehive will append the host and domain name to the instance name. For example, you would specify myinstance1, not myinstance1.myhost.example.com.
All Oracle Beehive Release 2 instances must have a unique name.
Running Oracle Beehive Enterprise Deployment Procedure
6-8 Oracle Beehive Installation Guide
amount for the Basic Server and Client templates is 2 GB and the minimum for the Basic Service and Client template is 3 GB. The maximum amount depends on the amount of RAM in your computer. For example, if you chose the Basic Server template and have 6 GB of RAM, you may specify 2, 3, 4, 5, or 6 GB of memory to allocate.
Beekeeper Install InputThe following describes the parameters for the Beekeeper Install Input page:
■ Beehive Database Information: Specify the following details of an existing Oracle Database instance that will be used by this deployment. Refer to "Oracle Beehive Database Requirements" in this guide for database requirements for Oracle Beehive.
– Hostname and Port: Specify the fully qualified domain name (FQDN) of the host where the target database is running followed by the database listener port.
For example, if the host name is foo, its domain is abc.com, and the database listener port is 1521, then you must enter the following:
foo.abc.com:1521
– Service Name: Enter the service name for the Oracle Database. This is the same as the global database name, and must be unique across all databases. This is also the same as the Service Name the Oracle Beehive Install Wizard asks you when you choose to install Oracle Beehive against an existing database.
In the Oracle Beehive Installation Guide of your operating system, refer to "Installing Oracle Beekeeper" for more information. Refer to "Database Information" in "Oracle Beekeeper Installation Help" for more information about the service name.
– Password: Enter the password for the Oracle Beehive database schema that is stored in the database whose information you have specified in this screen.
■ Site Key: Enter the site key that you specified when you installed your first Oracle Beehive application tier.
Oracle RAC Note: If you are specifying details for an Oracle Real Application Cluster (Oracle RAC) database, ensure that you have entered the following information correctly; the deployment procedure will not verify it by trying to connect to each database host. Instead, the deployment procedure constructs the connect descriptor with the database information you provide, then verifies if the connect descriptor can reach the database.
Note: In case of an Oracle RAC database, use the following format:
virtual_host1:virtual_port1^virtual_host2:virtual_port2^ ...
Running Oracle Beehive Enterprise Deployment Procedure
Provisioning Oracle Beehive 6-9
Exchange/Domino Connector Install InputThe following describes the parameters for the Exchange/Domino Connector Install Input page:
■ Oracle Beehive Server details: Specify the following details of the Oracle Beehive application tier that is running Oracle Coexistence Connector.
– Host: Enter the host name, real or virtual, used to access your Oracle Beehive installation.
– Port: Enter the HTTP port used to access your Oracle Beehive installation.
– HTTPS: Select this option if you want to use an HTTPS connection
– Partnership Key: The partnership key is a password that will be used for authentication between Oracle Coexistence Connector and Oracle Beehive Coexistence Service.
Enter any string to be used as partnership site key.
– Confirm Partnership Key: Re-enter the password you entered in the previous field.
■ Password for "oc4jadmin" administrative user: Specify and confirm the password for the oc4jadmin administrative user. The oc4jadmin user will be exposed if you set up monitoring with Oracle Enterprise Manager Grid Control.
– Password: Enter the password for the oc4jadmin user.
– Confirm Password: Re-enter the password you entered in the previous field.
Note: Password Restrictions: The password of the oc4jadmin user must have the following characteristics:
■ Be between 8 and 30 characters long.
■ Only contain alpha-numeric characters (a-z, A-Z, and 0-9) or the underscore (_); the password cannot contain any other punctuation mark character.
■ Contain at least one uppercase and one lowercase alphabetic character.
■ Contain at least one numeric character.
■ Begin with an alphabetic character; the password cannot begin with a number or the underscore (_).
Passwords are case-sensitive.When entering your password, ensure that the state of your Caps Lock key is what you want it to be.
Password Recommendations:
■ Passwords should not be simple or obvious words, such as welcome, account, database, or user.
■ Passwords should not be the same as the user name.
■ Passwords should not be Oracle reserved words such as ACCESS, AUTHORIZATION, UID, or VARCHAR,
Running Oracle Beehive Enterprise Deployment Procedure
6-10 Oracle Beehive Installation Guide
Domino Install InputThe following describes the parameters for the Domino Install Input page:
■ Domino Server and User Info: Coexistence Connector for Domino requires a Domino user account with administrative privileges to access the Lotus Domino server. This is a Domino user and password account (not a Windows user account).
– Domino Host HTTP Port: Specify the HTTP port number of your Domino server.
– Domino Admin User Name: Specify the user name of your Domino server administrator's account.
– Domino Admin User Password: Specify the password of the user you specified in the previous field.
■ Domino Foreign Domain Name: All coexisting Oracle Beehive users will reside or be created in this foreign domain as foreign users.
– Foreign Domain Name: Specify the Domino foreign domain name. This name must be between one and 64 characters long. The only valid characters are a-z, A-Z, 0-9, and the underscore (_).
Credentials/ScheduleThe following describes the parameters for the Credentials/Schedule page:
■ Oracle Home Credentials: The user credentials you will specify on this page must already exist on the target nodes. Also, ensure that the specified user is a part of the osinstall group.
– Specify Credentials for: Specify the Oracle homes that the deployment procedure will access with the credentials (username and password) that you will specify in the following fields.
* Username, Password, and Confirm Password: Specify the user name and the password of the user that can access the Oracle homes you specified in Specify Credentials for.
■ Schedule
– One Time (Immediately): Starts the installation immediately
– One Time (Later): Starts the installation at the specified time. If you do not want the procedure to start immediately, select this option and use the Time Zone, Start Date, and Start Time to schedule the procedure. If you change the date or time to a time in the future, the procedure will start on the specified date and time.
– Grace Period
* Indefinite: Use this option if you want the Oracle Management Service to continue to attempt to start the patching job for an infinite amount of time.
* End After n Hours m Minutes: In addition, you can specify the End After option of Grace Period to allow the Oracle Management Service to continue to attempt to start the job up to the specified time. This is useful, if the Oracle Management Agent is down and the Oracle Management Service is unable to start the patching job, because if the patching job is not started within the allotted time frame, the Oracle Management Service marks the patching job as skipped.
Uploading New Software Image Archive to Oracle Enterprise Manager Grid Control
Provisioning Oracle Beehive 6-11
Summary PageReview the installation parameters in the Summary page and click Finish to start the installation of Oracle Beehive.
Uploading New Software Image Archive to Oracle Enterprise Manager Grid Control
You may upload a new software image archive (an installable version of an Oracle Beehive product) to the central software library of Oracle Enterprise Manager Grid Control. Oracle Beehive Provisioning Application uses this software image archive install Oracle Beehive products.
To upload a new software image archive to the central library of Oracle Enterprise Manager Grid Control, follow these steps:
1. Click the Deployments tab. Click Provisioning in the menu bar. You will see a list of software you may provision through Oracle Enterprise Manager Grid Control.
2. In the TreeTable, expand the Components entry until you see Oracle Beehive Software Image Archive or Oracle Beekeeper Software Image Archive. Select the software image archive you want to replace with a new one. Click Edit.
3. In the Edit Component page, select Update from Agent Machine. Specify the zip file that contains the new software image archive:
■ Oracle Beehive
– Linux and UNIX-Based operating systems: <Oracle Beehive installation media>/install/beehive_home.zip
– Microsoft Windows: <Oracle Beehive installation media>\install\beehive_home.zip
■ Oracle Beekeeper
– Linux and UNIX-Based operating systems: <Oracle Beekeeper installation media>/install/beekeeper_home.zip
– Microsoft Windows: <Oracle Beekeeper installation media>\install\beekeeper_home.zip
4. Click Finish.
Caution: Do not click Delete.

Uploading New Software Image Archive to Oracle Enterprise Manager Grid Control
6-12 Oracle Beehive Installation Guide
7
Oracle Collaboration Coexistence Gateway Install Help 7-1
7 Oracle Collaboration Coexistence GatewayInstall Help
Oracle Collaboration Coexistence Gateway is an Oracle proprietary solution that enables Oracle Beehive users to collaborate with Microsoft Exchange or IBM Lotus Domino users. Additionally, this solution enables Exchange or Lotus Domino users to make use of Oracle Beehive features without being migrated from Microsoft Exchange or Lotus Domino.
This chapter describes the Oracle Beehive Install Wizard screens that appear during the installation of Oracle Collaboration Coexistence Gateway:
■ Oracle Collaboration Coexistence Gateway Options
■ Oracle Coexistence Connector for Microsoft Exchange Server Sequence of Screens
■ Oracle Coexistence Connector for Lotus Domino Server Sequence of Screens
Starting Oracle Collaboration Coexistence Gateway InstallationFollow these steps to install Oracle Collaboration Coexistence Gateway:
1. Install Oracle Coexistence Connector for Microsoft Exchange Server.
2. Alternatively, install Oracle Coexistence Connector for Lotus Domino Server if you want your Lotus Domino users to coexist with your Oracle Beehive users.
3. Perform post-installation tasks. This includes configuring a coexistence connector for your Oracle Beehive deployment. For more information, refer to "Integrating Microsoft Exchange Server 2003 or 2007 with Oracle Beehive" in Oracle Beehive Integration Guide.
To install Oracle Coexistence Connector for Microsoft Exchange Server or Oracle Coexistence Connector for Lotus Domino Server, run the Oracle Beehive Install Wizard (you do not need any command line arguments). For more information about the Oracle Beehive Install Wizard, refer to "Starting Oracle Beehive Install Wizard" in "What You Should Know Before Installing Oracle Beehive".
Note: If you configured Oracle Beehive to use HTTPS, follow the directions described in the section "Configuring Oracle Connector for Exchange to Use HTTPS" in the module "Configuring and Managing Oracle Collaboration Coexistence Gateway" in Oracle Beehive Administrator's Guide.
Oracle Collaboration Coexistence Gateway Options
7-2 Oracle Beehive Installation Guide
Oracle Collaboration Coexistence Gateway OptionsChoose from one of the following install options:
■ Oracle Coexistence Connector for Microsoft Exchange Server
Choose this option to enable your Oracle Beehive deployment to coexist with your Microsoft Exchange Server.
The Oracle Coexistence Connector for Microsoft Exchange Server is an Oracle Collaboration Coexistence Gateway service that is responsible for the following tasks:
■ Converting outgoing messages to a format accepted by Oracle Beehive and dispatching the delivery to the Oracle Communication Service
■ Delivering meeting requests, responses, and cancellations arriving from Oracle Beehive to Microsoft Exchange users
■ Updating free/busy information
If you pick this option, you will proceed to "Oracle Coexistence Connector for Microsoft Exchange Server Sequence of Screens".
■ Oracle Coexistence Connector for Lotus Domino Server
Choose this option to enable your Oracle Beehive deployment to coexist with your Lotus Domino Server. The Oracle Coexistence Connector for Lotus Domino Server is an Oracle Collaboration Coexistence Gateway service that is responsible for the following tasks:
■ Enabling Lotus Domino and Oracle Beehive users to look up each other's Free/Busy information
■ Enabling Lotus Domino and Oracle Beehive users to invite each other to meetings and view their responses in their respective calendar applications
■ Converting outgoing messages to a format accepted by Oracle Beehive and dispatching the delivery to the Oracle Communication Service
If you pick this option, you will proceed to "Oracle Coexistence Connector for Lotus Domino Server Sequence of Screens".
Oracle Coexistence Connector for Microsoft Exchange Server Sequence of Screens
The following screens appear during the installation of Oracle Coexistence Connector for Microsoft Exchange Server:
■ Specify Home Location
■ Prerequisite Checks
■ Select Installation Type
■ Oracle Beehive Coexistence Service
■ oc4jadmin Password
■ Windows User Account
■ Summary
■ Installation Progress
■ Configuration Assistants
Oracle Coexistence Connector for Microsoft Exchange Server Sequence of Screens
Oracle Collaboration Coexistence Gateway Install Help 7-3
■ End of Installation
Specify Home LocationEnter the full path of the location where you want to install the Oracle Coexistence Connector for Microsoft Exchange Server. Do not leave the Location field blank.
Prerequisite ChecksThis screen displays the prerequisite checks that the Oracle Beehive Install Wizard runs. It verifies that the host (where you are installing Oracle Coexistence Connector) meets all minimum requirements for installation and configuration.
Some of the checks that the Oracle Beehive Install Wizard performs include:
■ Operating system requirements
■ Service pack requirements
■ Physical memory requirements
Select Installation TypeSpecify the type of installation you want to perform. You can choose from:
■ Install and Configure
■ Install Only
Install and ConfigureSelect this option if you want to install and automatically start the configuration of the product.
If you select this option, the Oracle Coexistence Connector is functional with minimal configuration after the installation is completed.
Install OnlySelect this option to only install the Oracle Coexistence Connector This will only copy files to your system. Until you configure the Oracle Coexistence Connector, you will not be able to perform any tasks with it.
Note: Oracle Coexistence Connector for Microsoft Exchange Server must be installed on the same domain as the Microsoft Exchange deployment and on a dedicated server that does not contain user mailboxes. Oracle recommends that a separate machine be used with pre-installed Microsoft Exchange Admin Tools.
Note: If any check is flagged as Manual check, then you must manually run and verify it.
After verifying a Manual check, select the check box next to it. All check boxes must be selected before you can proceed to the next screen.
Tip: For details on why a check failed, select the check box against it and see the details in the description box at the bottom of the screen.
Oracle Coexistence Connector for Microsoft Exchange Server Sequence of Screens
7-4 Oracle Beehive Installation Guide
To configure the product after installation, you must run the Config Wizard.
Oracle Beehive Coexistence ServiceThe Oracle Beehive Coexistence Service is automatically enabled when Oracle Beehive is installed and is required by Oracle Collaboration Coexistence Gateway. The Oracle Beehive Coexistence Service relays data between the Oracle Coexistence Connector and Oracle Beehive.
Specify the following details for your Oracle Beehive installation. The installer will automatically determine the URL for the Oracle Beehive Coexistence Service that is installed with Oracle Beehive:
Oracle Beehive HostEnter the host name, real or virtual, used to access your Oracle Beehive installation.
Oracle Beehive PortEnter the HTTP port used to access your Oracle Beehive installation.
The Oracle Beehive Coexistence endpoint (specified by URL) will be generated based on the values of Oracle Beehive Host and Oracle Beehive Port.
Partnership KeyThe partnership key is a password that is used for authentication between the Oracle Coexistence Connector and the Oracle Beehive Coexistence Service. It is used when Coexistence System (beectl create_coexistence_system) is created in Beehive Coexistence Service.
Each Coexistence System on the same Beehive Coexistence Service should be unique.
Enter any string to be used as the partnership key. The Partnership key must be at least 8 characters and contain at least one uppercase and one digit.
Confirm Partnership KeyEnter the same string that you entered in Partnership Key.
oc4jadmin PasswordSpecify and confirm the password for the oc4jadmin user.
Password RestrictionsThe password of the oc4jadmin user must have the following characteristics:
■ Be between 8 and 30 characters long.
■ Only contain alpha-numeric characters (a-z, A-Z, and 0-9) or the underscore (_); the password cannot contain any other punctuation mark character.
■ Contain at least one uppercase and one lowercase alphabetic character.
■ Contain at least one numeric character.
■ Begin with an alphabetic character; the password cannot begin with a number or the underscore (_).
Note: When entering your password, check that the state of your Caps Lock key is what you want it to be. Passwords are case-sensitive.
Oracle Coexistence Connector for Microsoft Exchange Server Sequence of Screens
Oracle Collaboration Coexistence Gateway Install Help 7-5
Password Recommendations■ Passwords should not be simple or obvious words, such as welcome, account,
database, or user.
■ Passwords should not be the same as the user name.
■ Passwords should not be Oracle reserved words such as ACCESS, AUTHORIZATION, UID, or VARCHAR.
Windows User AccountOracle Coexistence Connector for Microsoft Exchange Server requires the user name and password of a Windows user that has certain administrator privileges.
Follow these steps to create a Windows user account with these administrator privileges. (Alternatively, ensure that the Windows user that you specify in this screen has these privileges.)
1. Using the Active Directory Users and Computers interface, create a Microsoft Exchange user in the top level Windows domain so that it can have access to all Windows domains.
2. In the Windows Registry Editor, go to the HKCU\Software\Microsoft\Exchange\ExAdmin registry key. In this registry key, create a new DWORD property with the name ShowSecurityPage and value 1. (To run the Registry Editor, click Start, Run, then enter regedit. Click OK.)
3. Open the Exchange System Manager. Right-click the top level organization and select Delegate Control.
4. Add the Microsoft Exchange user that you created as an Exchange Full Administrator. Click OK.
5. Right-click the top level organization and select Properties.
6. Click the Security tab. Highlight the user you added. Remove the Deny Send As and Receive As privileges. Click OK.
7. Using the Active Directory Users and Computers interface, enable Advanced Features. Right-click the top level domain and select Properties.
8. Click the Security tab and select Advanced.
9. Click Add and select the user you created.
10. Click the Object tab. In the Apply Onto drop-down box, select User Objects. Select Allow for the Send As privilege.
11. Click the Properties tab. In the Apply Onto drop-down box, select User Objects. Select Allow for the Write Public Information privilege. Click OK.
12. For each computer on which you will install Oracle Coexistence Connector, grant the following permissions to the user account:
a. Local Administrator Rights: Right click My Computer and select Manage. Expand Local Users and Groups, expand Groups, and double click Administrators. Add the user account to the list of users.
b. Log on as a service: From the Control Panel, open Administrative Tools. Open Local Security Policy. Expand Local Policies, select User Rights Assignment, and double click the Log on as a service policy. Add the user account to the list of users.
Oracle Coexistence Connector for Lotus Domino Server Sequence of Screens
7-6 Oracle Beehive Installation Guide
User NameEnter the fully qualified name of the user with administrator privileges to the Microsoft Exchange server. The syntax for the user name is DOMAIN\username or username@FQDN.
For example, if the network domain name of the computer that has Microsoft Exchange Server installed is MYSERVER and the name of the user that has administrator privileges is admin, the username would be MYSERVER\admin.
PasswordEnter the password of the user you entered in the User Name field.
SummaryThe Installation Summary screen presents a summary of the options you have selected so far.
Installation ProgressUse this screen to monitor the progress of your installation. Click Show Details to see the details in the description box that appears.
Configuration AssistantsThis screen displays the configuration assistants that the Oracle Beehive Install Wizard runs to configure the product type that you selected on the Select Product Type screen.
If any configuration is flagged as Failed, then you must manually run the assistant to configure it. You do so by selecting the check box against it and clicking Retry.
End of InstallationClick Finish to complete the installation process and close the Oracle Beehive Install Wizard.
Complete the installation of Oracle Collaboration Coexistence Gateway, by perform the post-installation tasks, such as starting the Oracle Coexistence Connector for Microsoft Exchange. For more information, refer to "Integrating Microsoft Exchange Server 2003 or 2007 with Oracle Beehive" in Oracle Beehive Integration Guide.
Oracle Coexistence Connector for Lotus Domino Server Sequence of Screens
The following screens appear during the installation of Oracle Coexistence Connector for Lotus Domino Server:
■ Specify Home Location
■ Prerequisite Checks
■ Select Installation Type
Note: It may take up to 24 hours for Microsoft Exchange Server to replicate the privileges described in these steps among all your Active Directory domain controllers in your organization.
Oracle Coexistence Connector for Lotus Domino Server Sequence of Screens
Oracle Collaboration Coexistence Gateway Install Help 7-7
■ Oracle Beehive Connection Details
■ oc4jadmin Password
■ Domino Server and User Info
■ Domino Foreign Domain Name
■ Summary
■ Installation Progress
■ Configuration Assistants
■ End of Installation
Specify Home LocationEnter the full path of the location where you want to install Oracle Coexistence Connector for Lotus Domino Server. Do not leave the Location field blank.
Prerequisite ChecksThis screen displays the prerequisite checks that the Oracle Beehive Install Wizard runs. It verifies that the host (where you are installing Oracle Coexistence Connector for Lotus Domino Server) meets all minimum requirements for installation and configuration.
Some of the checks that the Oracle Beehive Install Wizard performs include:
■ Operating system requirements
■ Service pack requirements
■ Physical memory requirements
■ Disk space
Select Installation TypeSpecify the type of installation you want to perform. You can choose from:
■ Install and Configure
■ Install Only
Install and ConfigureSelect this option if you want to install and automatically start the configuration of the product. If you select this option, the Oracle Coexistence Connector is functional with minimal configuration after the installation is completed.
Note: If any check is flagged as Manual check, then you must manually run and verify it.
After verifying a Manual check, select the check box next to it. All check boxes must be selected before you can proceed to the next screen.
Tip: For details on why a check failed, select the check box against it and see the details in the description box at the bottom of the screen.

Oracle Coexistence Connector for Lotus Domino Server Sequence of Screens
7-8 Oracle Beehive Installation Guide
Install OnlySelect this option to only install the Oracle Coexistence Connector. This will only copy files to your system. Until you configure the Oracle Coexistence Connector, you will not be able to perform any tasks with it.
To configure the product after installation, you must run the Configuration wizard.
Oracle Beehive Connection DetailsSpecify the following details of the HTTP server of your Oracle Beehive instance:
HostSpecify the host name of your Oracle Beehive instance.
PortSpecify the HTTP or HTTPS port number of your Oracle Beehive instance.
Use HTTPSIf you specified the HTTPS port number of your Oracle Beehive instance, select this check box.
Test ConnectionClick this button to verify the URL of your Oracle Beehive HTTP/HTTPS server. You may proceed with the installation if this test fails.
URLThe Install Wizard will generate the value of this field, the Oracle Beehive Coexistence service endpoint, based on the values you entered in the previous fields.
Partnership KeyThe partnership key is a password that will be used for authentication between the Oracle Coexistence Connector and the Oracle Beehive Coexistence Service.
Enter any string to be used as the partnership key.
Confirm Partnership KeyEnter the same string that you entered in Partnership Key.
oc4jadmin PasswordSpecify and confirm the password for the oc4jadmin user.
Password RestrictionsThe password of the oc4jadmin user must have the following characteristics:
■ Be between 8 and 30 characters long.
■ Only contain alpha-numeric characters (a-z, A-Z, and 0-9) or the underscore (_); the password cannot contain any other punctuation mark character.
■ Contain at least one uppercase and one lowercase alphabetic character.
■ Contain at least one numeric character.
■ Begin with an alphabetic character; the password cannot begin with a number or the underscore (_).
Oracle Coexistence Connector for Lotus Domino Server Sequence of Screens
Oracle Collaboration Coexistence Gateway Install Help 7-9
Password Recommendations■ Passwords should not be simple or obvious words, such as welcome, account,
database, or user.
■ Passwords should not be the same as the user name.
■ Passwords should not be Oracle reserved words such as ACCESS, AUTHORIZATION, UID, or VARCHAR.
Domino Server and User InfoOracle Collaboration Coexistence Gateway requires a Domino user account with administrative privileges to access Lotus Domino Server. This is a Domino user and password account, not a Microsoft Windows account. Specify the following information:
■ Domain Host HTTP Port: Specify the HTTP port of your Lotus Domino Server
■ Domain Admin User Name: Specify the user name of a Domino account with administrative privileges.
■ Admin User Password: Specify the password of the Domino account you entered in the previous field.
Domino Foreign Domain NameEnter the name of the foreign domain that will represent Oracle Beehive on your Lotus Domino Server. All coexisting Oracle Beehive users will reside or be created in this foreign domain as foreign users.
Foreign domain name must be between 1 and 64 characters. The only valid characters are a-z, A-Z, 0-9, and the underscore.
SummaryThe Installation Summary screen presents a summary of the options you have selected so far.
Installation ProgressUse this screen to monitor the progress of your installation. Click Show Details to see the details in the description box that appears.
Configuration AssistantsThis screen displays the configuration assistants that the Oracle Beehive Install Wizard runs to configure the product type that you selected on the Select Product Type screen.
If any configuration is flagged as Failed, then you must manually run the assistant to configure it. You do so by selecting the check box against it and clicking Retry.
Note: When entering your password, check that the state of your Caps Lock key is what you want it to be. Passwords are case-sensitive.
Oracle Coexistence Connector for Lotus Domino Server Sequence of Screens
7-10 Oracle Beehive Installation Guide
End of InstallationClick Finish to complete the installation process and close the Oracle Beehive Install Wizard.
To complete the installation of Oracle Coexistence Connector for Lotus Domino Server, perform the following tasks:
1. Take note of the following information:
■ URL for Oracle Coexistence Connector for Lotus Domino Server:
http://$hostname:$portNum/coexConnector/CoexMLPort
■ Partnership key you specified in "Oracle Beehive Connection Details"
2. Configure Oracle Coexistence Connector for Lotus Domino Server. Refer to "Integrating IBM Lotus Domino with Oracle Beehive" in Oracle Beehive Integration Guide.
8
Installing Oracle Beehive in Silent Mode (Non-Interactive) 8-1
8 Installing Oracle Beehive in Silent Mode(Non-Interactive)
This chapter describes how to install Oracle Beehive in silent mode, which allows minimal input from the user. This process involves creating a response file, which is an XML file that contains values required by the Oracle Beehive Install Wizard.
Use this process if you want to install Oracle Beehive with a batch process or do not want to use the GUI provided by the Oracle Beehive Install Wizard.
This chapter covers the following silent mode processes:
■ Installing and Configuring Oracle Beehive in Silent Mode, Running Install Wizard
■ Installing and Configuring Oracle Beehive in Silent Mode, Running Install Wizard and Config Wizard
■ Installing Oracle Beehive Provisioning Application in Silent Mode
■ Installing Oracle Beehive for DMZ in Silent Mode
■ Installing Oracle Collaboration Coexistence Gateway in Silent Mode
■ Verifying Oracle Beehive Installation
■ Recovering from Failed Oracle Beehive Configuration
■ Upgrading Oracle Beehive in Silent Mode
■ Uninstalling Oracle Beehive in Silent Mode
Installing and Configuring Oracle Beehive in Silent Mode, Running Install Wizard
This process installs and configures Oracle Beehive by running the Oracle Beehive Install Wizard only once. It consists of the following steps:
1. Verify that Oracle Database is installed and running
2. Create a response file
3. Start the installation and configuration in silent mode
4. Verify the installation
Step 1 Verify that Oracle Database is installed and running To verify that Oracle Database is running, connect to it and run a query as follows:
1. Run the following commands to check the version of Oracle Database and verify that it is running (<Database home> is where you installed Oracle Database):
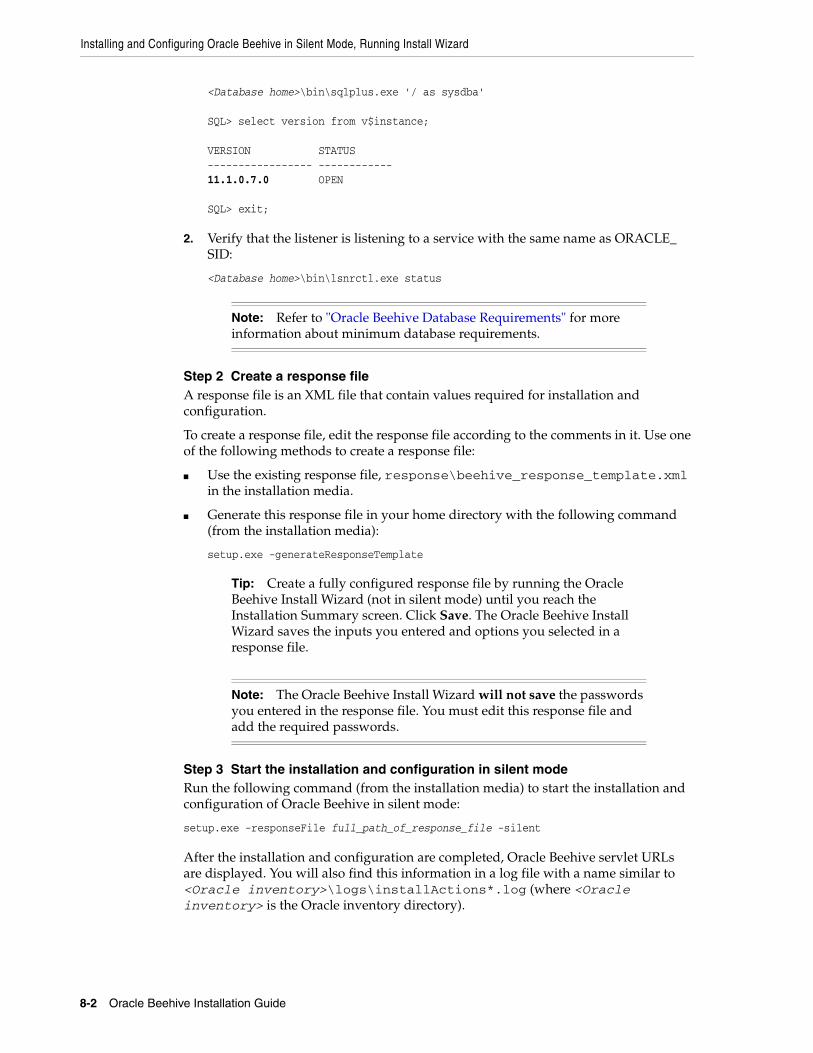
Installing and Configuring Oracle Beehive in Silent Mode, Running Install Wizard
8-2 Oracle Beehive Installation Guide
<Database home>\bin\sqlplus.exe '/ as sysdba'
SQL> select version from v$instance;
VERSION STATUS----------------- ------------11.1.0.7.0 OPEN
SQL> exit;
2. Verify that the listener is listening to a service with the same name as ORACLE_SID:
<Database home>\bin\lsnrctl.exe status
Step 2 Create a response fileA response file is an XML file that contain values required for installation and configuration.
To create a response file, edit the response file according to the comments in it. Use one of the following methods to create a response file:
■ Use the existing response file, response\beehive_response_template.xml in the installation media.
■ Generate this response file in your home directory with the following command (from the installation media):
setup.exe -generateResponseTemplate
Step 3 Start the installation and configuration in silent modeRun the following command (from the installation media) to start the installation and configuration of Oracle Beehive in silent mode:
setup.exe -responseFile full_path_of_response_file -silent
After the installation and configuration are completed, Oracle Beehive servlet URLs are displayed. You will also find this information in a log file with a name similar to <Oracle inventory>\logs\installActions*.log (where <Oracle inventory> is the Oracle inventory directory).
Note: Refer to "Oracle Beehive Database Requirements" for more information about minimum database requirements.
Tip: Create a fully configured response file by running the Oracle Beehive Install Wizard (not in silent mode) until you reach the Installation Summary screen. Click Save. The Oracle Beehive Install Wizard saves the inputs you entered and options you selected in a response file.
Note: The Oracle Beehive Install Wizard will not save the passwords you entered in the response file. You must edit this response file and add the required passwords.
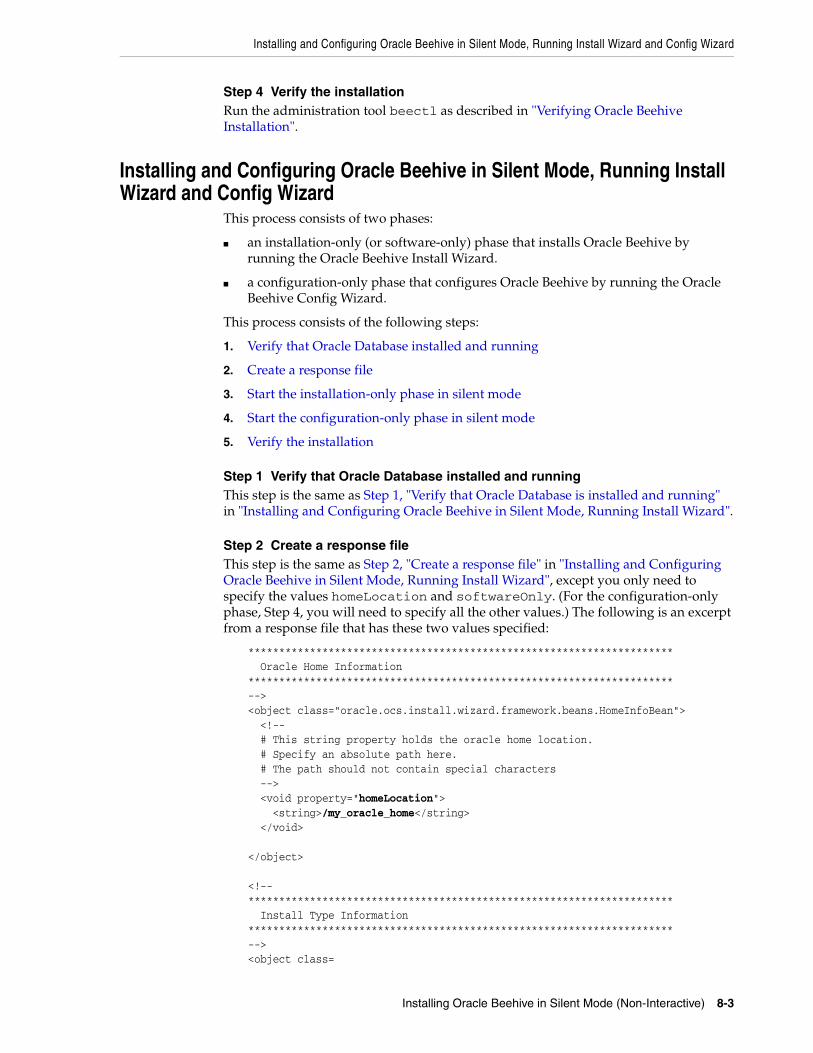
Installing and Configuring Oracle Beehive in Silent Mode, Running Install Wizard and Config Wizard
Installing Oracle Beehive in Silent Mode (Non-Interactive) 8-3
Step 4 Verify the installationRun the administration tool beectl as described in "Verifying Oracle Beehive Installation".
Installing and Configuring Oracle Beehive in Silent Mode, Running Install Wizard and Config Wizard
This process consists of two phases:
■ an installation-only (or software-only) phase that installs Oracle Beehive by running the Oracle Beehive Install Wizard.
■ a configuration-only phase that configures Oracle Beehive by running the Oracle Beehive Config Wizard.
This process consists of the following steps:
1. Verify that Oracle Database installed and running
2. Create a response file
3. Start the installation-only phase in silent mode
4. Start the configuration-only phase in silent mode
5. Verify the installation
Step 1 Verify that Oracle Database installed and runningThis step is the same as Step 1, "Verify that Oracle Database is installed and running" in "Installing and Configuring Oracle Beehive in Silent Mode, Running Install Wizard".
Step 2 Create a response fileThis step is the same as Step 2, "Create a response file" in "Installing and Configuring Oracle Beehive in Silent Mode, Running Install Wizard", except you only need to specify the values homeLocation and softwareOnly. (For the configuration-only phase, Step 4, you will need to specify all the other values.) The following is an excerpt from a response file that has these two values specified:
********************************************************************* Oracle Home Information ********************************************************************* --> <object class="oracle.ocs.install.wizard.framework.beans.HomeInfoBean"> <!-- # This string property holds the oracle home location. # Specify an absolute path here. # The path should not contain special characters --> <void property="homeLocation"> <string>/my_oracle_home</string> </void> </object> <!-- ********************************************************************* Install Type Information ********************************************************************* --> <object class=
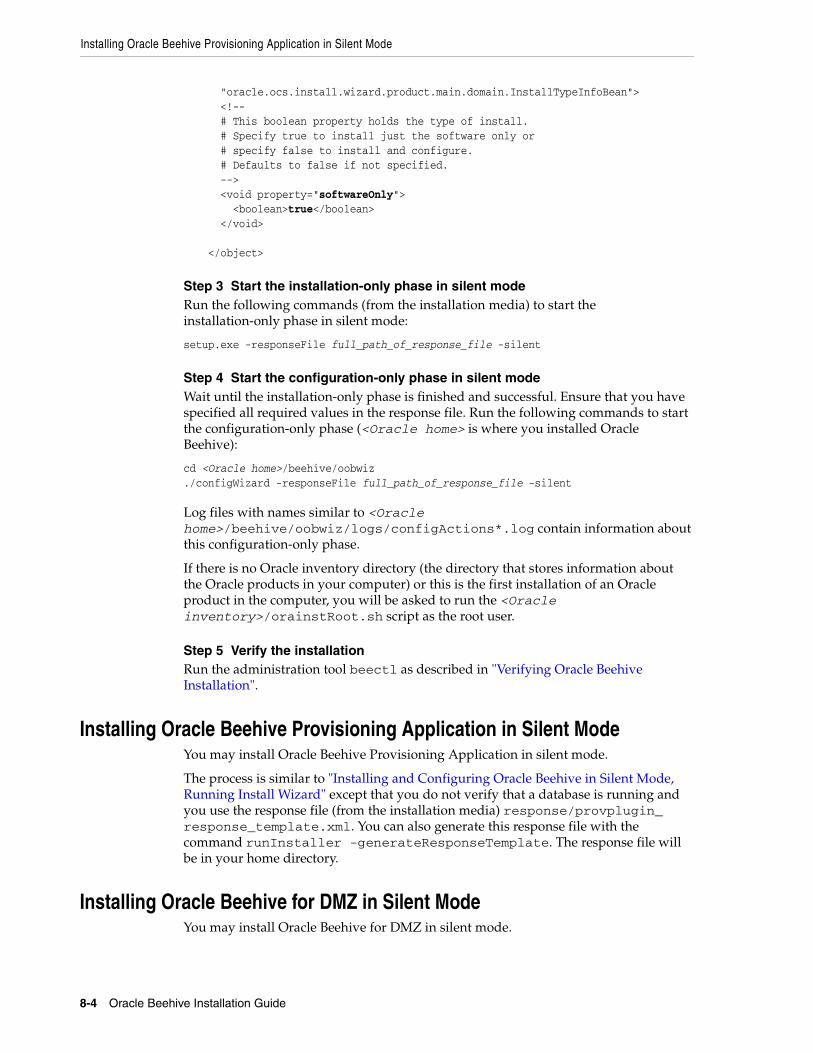
Installing Oracle Beehive Provisioning Application in Silent Mode
8-4 Oracle Beehive Installation Guide
"oracle.ocs.install.wizard.product.main.domain.InstallTypeInfoBean"> <!-- # This boolean property holds the type of install. # Specify true to install just the software only or # specify false to install and configure. # Defaults to false if not specified. --> <void property="softwareOnly"> <boolean>true</boolean> </void> </object>
Step 3 Start the installation-only phase in silent modeRun the following commands (from the installation media) to start the installation-only phase in silent mode:
setup.exe -responseFile full_path_of_response_file -silent
Step 4 Start the configuration-only phase in silent modeWait until the installation-only phase is finished and successful. Ensure that you have specified all required values in the response file. Run the following commands to start the configuration-only phase (<Oracle home> is where you installed Oracle Beehive):
cd <Oracle home>/beehive/oobwiz./configWizard -responseFile full_path_of_response_file -silent
Log files with names similar to <Oracle home>/beehive/oobwiz/logs/configActions*.log contain information about this configuration-only phase.
If there is no Oracle inventory directory (the directory that stores information about the Oracle products in your computer) or this is the first installation of an Oracle product in the computer, you will be asked to run the <Oracle inventory>/orainstRoot.sh script as the root user.
Step 5 Verify the installationRun the administration tool beectl as described in "Verifying Oracle Beehive Installation".
Installing Oracle Beehive Provisioning Application in Silent ModeYou may install Oracle Beehive Provisioning Application in silent mode.
The process is similar to "Installing and Configuring Oracle Beehive in Silent Mode, Running Install Wizard" except that you do not verify that a database is running and you use the response file (from the installation media) response/provplugin_response_template.xml. You can also generate this response file with the command runInstaller -generateResponseTemplate. The response file will be in your home directory.
Installing Oracle Beehive for DMZ in Silent ModeYou may install Oracle Beehive for DMZ in silent mode.
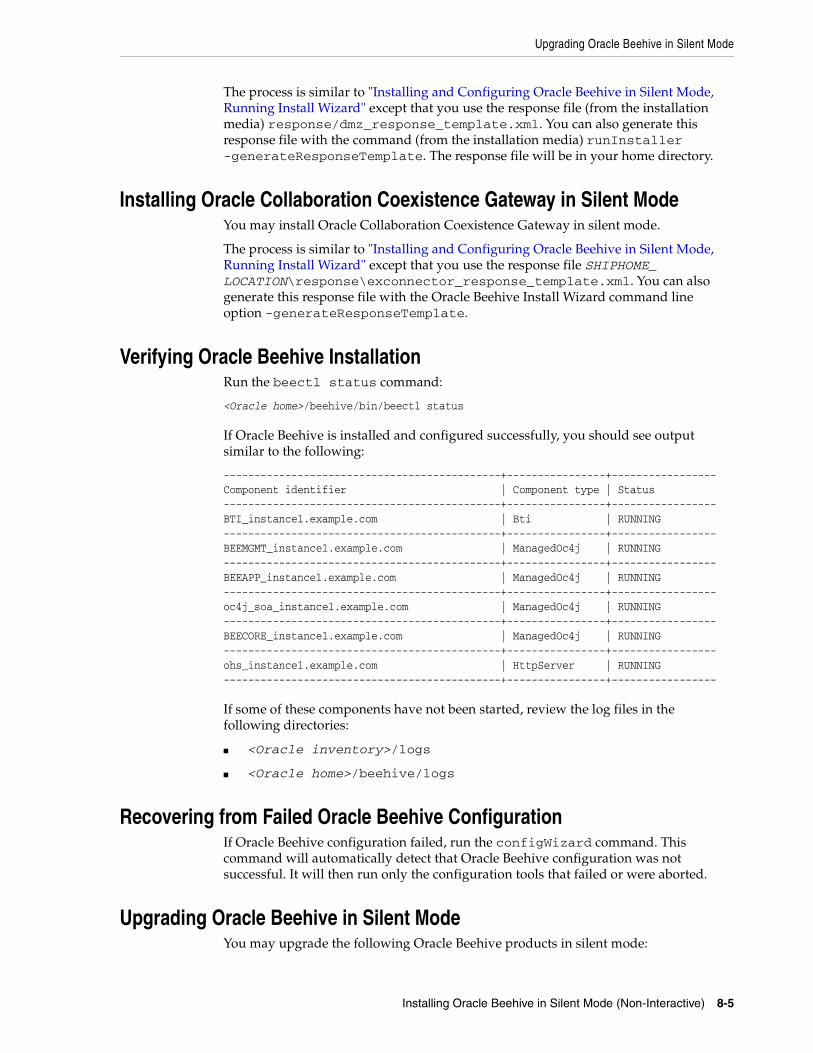
Upgrading Oracle Beehive in Silent Mode
Installing Oracle Beehive in Silent Mode (Non-Interactive) 8-5
The process is similar to "Installing and Configuring Oracle Beehive in Silent Mode, Running Install Wizard" except that you use the response file (from the installation media) response/dmz_response_template.xml. You can also generate this response file with the command (from the installation media) runInstaller -generateResponseTemplate. The response file will be in your home directory.
Installing Oracle Collaboration Coexistence Gateway in Silent ModeYou may install Oracle Collaboration Coexistence Gateway in silent mode.
The process is similar to "Installing and Configuring Oracle Beehive in Silent Mode, Running Install Wizard" except that you use the response file SHIPHOME_LOCATION\response\exconnector_response_template.xml. You can also generate this response file with the Oracle Beehive Install Wizard command line option -generateResponseTemplate.
Verifying Oracle Beehive InstallationRun the beectl status command:
<Oracle home>/beehive/bin/beectl status
If Oracle Beehive is installed and configured successfully, you should see output similar to the following:
---------------------------------------------+----------------+-----------------Component identifier | Component type | Status ---------------------------------------------+----------------+-----------------BTI_instance1.example.com | Bti | RUNNING ---------------------------------------------+----------------+-----------------BEEMGMT_instance1.example.com | ManagedOc4j | RUNNING ---------------------------------------------+----------------+-----------------BEEAPP_instance1.example.com | ManagedOc4j | RUNNING ---------------------------------------------+----------------+-----------------oc4j_soa_instance1.example.com | ManagedOc4j | RUNNING ---------------------------------------------+----------------+-----------------BEECORE_instance1.example.com | ManagedOc4j | RUNNING ---------------------------------------------+----------------+-----------------ohs_instance1.example.com | HttpServer | RUNNING ---------------------------------------------+----------------+-----------------
If some of these components have not been started, review the log files in the following directories:
■ <Oracle inventory>/logs
■ <Oracle home>/beehive/logs
Recovering from Failed Oracle Beehive ConfigurationIf Oracle Beehive configuration failed, run the configWizard command. This command will automatically detect that Oracle Beehive configuration was not successful. It will then run only the configuration tools that failed or were aborted.
Upgrading Oracle Beehive in Silent ModeYou may upgrade the following Oracle Beehive products in silent mode:
Uninstalling Oracle Beehive in Silent Mode
8-6 Oracle Beehive Installation Guide
■ Oracle Beehive
■ Oracle Beehive Provisioning Application. (You may not upgrade any version of Oracle Beehive Provisioning Application earlier than 1.2.1.0.0.)
■ Oracle Collaboration Coexistence Gateway
■ Oracle Beehive for DMZ
■ Oracle Beekeeper
The upgrade process to upgrade any of these Oracle Beehive products is the same as "Installing and Configuring Oracle Beehive in Silent Mode, Running Install Wizard" except that you create a response file from a different template depending on the product you are upgrading. The following lists the names of the response file templates to use for each Oracle Beehive product to upgrade:
■ Oracle Beehive: beehive_upgrade_response_template.xml
■ Oracle Beehive Provisioning Application: provplugin_upgrade_repsonse_template.xml
■ Oracle Beehive for DMZ: dmz_upgrade_response_template.xml
■ Oracle Collaboration Coexistence Gateway: exconnector_upgrade_response_template.xml
■ Oracle Beekeeper: beekeeper_upgrade_response_template.xml
Uninstalling Oracle Beehive in Silent Mode
Note: You cannot uninstall Oracle Beehive in silent mode in Microsoft Windows. To uninstall Oracle Beehive, run setup.exe -uninstall from the installation media. Refer to "Oracle Beehive Uninstall Wizard" for more information.
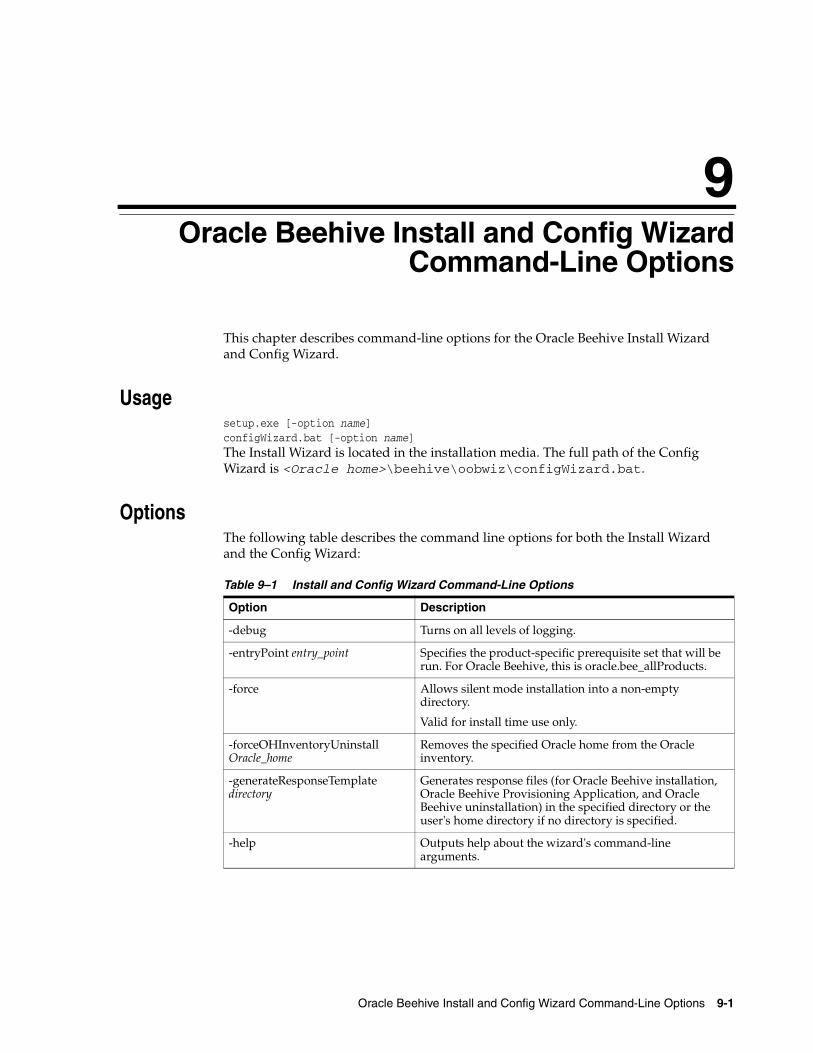
9
Oracle Beehive Install and Config Wizard Command-Line Options 9-1
9 Oracle Beehive Install and Config WizardCommand-Line Options
This chapter describes command-line options for the Oracle Beehive Install Wizard and Config Wizard.
Usagesetup.exe [-option name]configWizard.bat [-option name]The Install Wizard is located in the installation media. The full path of the Config Wizard is <Oracle home>\beehive\oobwiz\configWizard.bat.
OptionsThe following table describes the command line options for both the Install Wizard and the Config Wizard:
Table 9–1 Install and Config Wizard Command-Line Options
Option Description
-debug Turns on all levels of logging.
-entryPoint entry_point Specifies the product-specific prerequisite set that will be run. For Oracle Beehive, this is oracle.bee_allProducts.
-force Allows silent mode installation into a non-empty directory.
Valid for install time use only.
-forceOHInventoryUninstall Oracle_home
Removes the specified Oracle home from the Oracle inventory.
-generateResponseTemplate directory
Generates response files (for Oracle Beehive installation, Oracle Beehive Provisioning Application, and Oracle Beehive uninstallation) in the specified directory or the user's home directory if no directory is specified.
-help Outputs help about the wizard's command-line arguments.
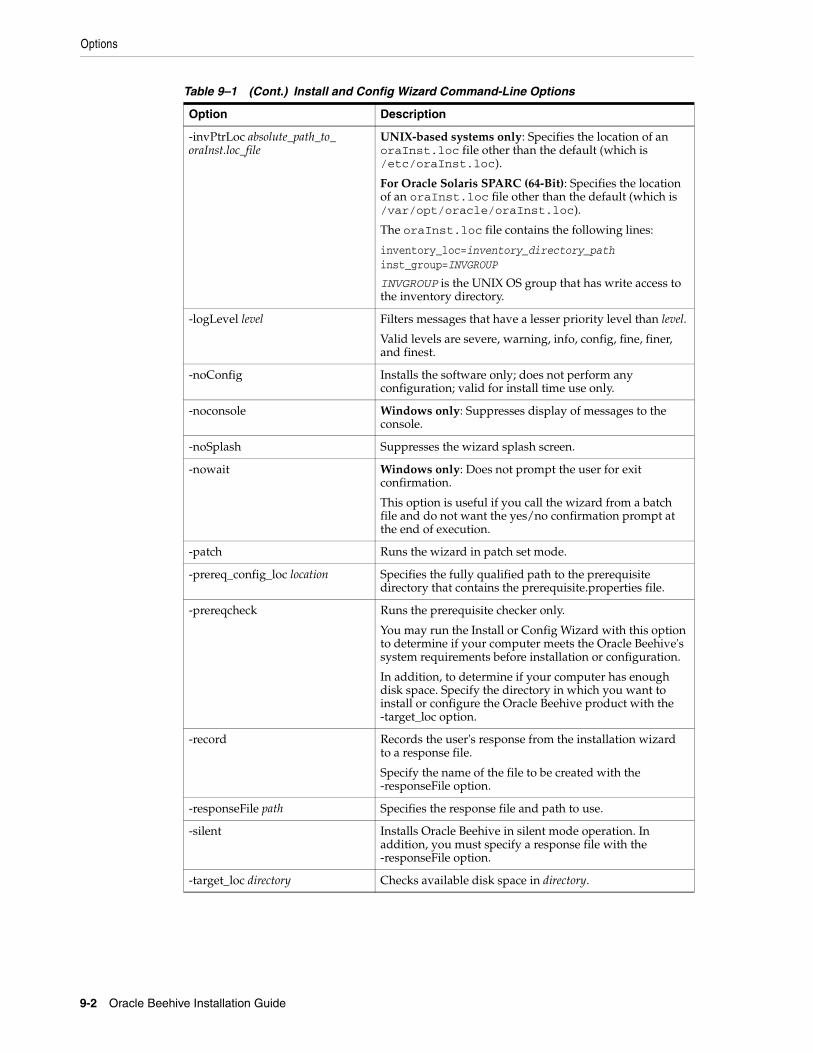
Options
9-2 Oracle Beehive Installation Guide
-invPtrLoc absolute_path_to_oraInst.loc_file
UNIX-based systems only: Specifies the location of an oraInst.loc file other than the default (which is /etc/oraInst.loc).
For Oracle Solaris SPARC (64-Bit): Specifies the location of an oraInst.loc file other than the default (which is /var/opt/oracle/oraInst.loc).
The oraInst.loc file contains the following lines:
inventory_loc=inventory_directory_pathinst_group=INVGROUP
INVGROUP is the UNIX OS group that has write access to the inventory directory.
-logLevel level Filters messages that have a lesser priority level than level.
Valid levels are severe, warning, info, config, fine, finer, and finest.
-noConfig Installs the software only; does not perform any configuration; valid for install time use only.
-noconsole Windows only: Suppresses display of messages to the console.
-noSplash Suppresses the wizard splash screen.
-nowait Windows only: Does not prompt the user for exit confirmation.
This option is useful if you call the wizard from a batch file and do not want the yes/no confirmation prompt at the end of execution.
-patch Runs the wizard in patch set mode.
-prereq_config_loc location Specifies the fully qualified path to the prerequisite directory that contains the prerequisite.properties file.
-prereqcheck Runs the prerequisite checker only.
You may run the Install or Config Wizard with this option to determine if your computer meets the Oracle Beehive's system requirements before installation or configuration.
In addition, to determine if your computer has enough disk space. Specify the directory in which you want to install or configure the Oracle Beehive product with the -target_loc option.
-record Records the user's response from the installation wizard to a response file.
Specify the name of the file to be created with the -responseFile option.
-responseFile path Specifies the response file and path to use.
-silent Installs Oracle Beehive in silent mode operation. In addition, you must specify a response file with the -responseFile option.
-target_loc directory Checks available disk space in directory.
Table 9–1 (Cont.) Install and Config Wizard Command-Line Options
Option Description
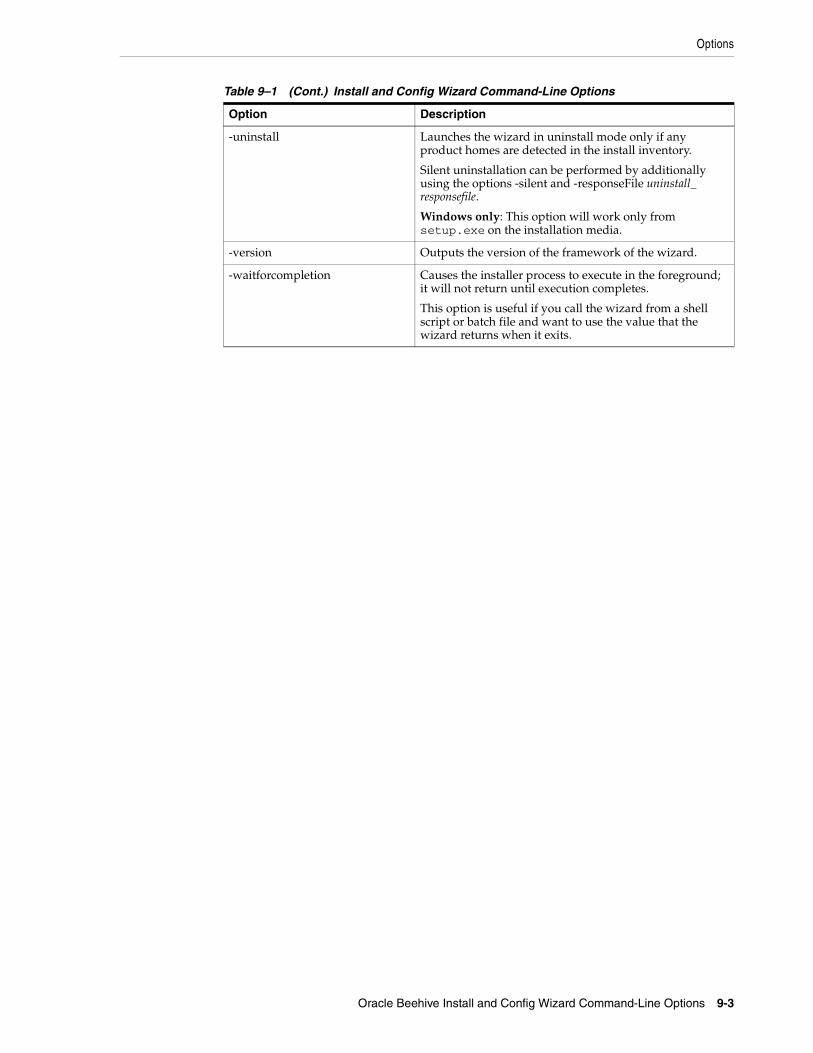
Options
Oracle Beehive Install and Config Wizard Command-Line Options 9-3
-uninstall Launches the wizard in uninstall mode only if any product homes are detected in the install inventory.
Silent uninstallation can be performed by additionally using the options -silent and -responseFile uninstall_responsefile.
Windows only: This option will work only from setup.exe on the installation media.
-version Outputs the version of the framework of the wizard.
-waitforcompletion Causes the installer process to execute in the foreground; it will not return until execution completes.
This option is useful if you call the wizard from a shell script or batch file and want to use the value that the wizard returns when it exits.
Table 9–1 (Cont.) Install and Config Wizard Command-Line Options
Option Description

Options
9-4 Oracle Beehive Installation Guide
10
Oracle Beehive Uninstall Wizard 10-1
10 Oracle Beehive Uninstall Wizard
You may uninstall the following products with the Oracle Beehive Uninstall Wizard:
■ Oracle Beehive Release 2 (2.0)
■ Oracle Beehive Provisioning Application
■ Oracle Coexistence Connector for Microsoft Exchange
■ Oracle Beehive for DMZ
This chapter covers the following topics about uninstalling Oracle Beehive:
■ Starting the Oracle Beehive Install Wizard
■ Oracle Beehive Uninstall Wizard Sequence of Screens
■ Uninstalling Provisioning Application for Oracle Beehive or Oracle Beekeeper
■ Uninstalling Multiple Instances
■ Manually Deleting Oracle Beehive Tablespaces and Datafiles
■ Uninstalling Corrupted Installation
Starting the Oracle Beehive Install WizardStart the Oracle Beehive Uninstall Wizard by running setup.exe -uninstall from the installation media.
Oracle Beehive Uninstall Wizard Sequence of ScreensThe following screens appear during the uninstallation of Oracle Beehive:
■ Select Oracle Home to Uninstall: This screen will not appear if you start Oracle Beehive Uninstall Wizard with Oracle Beehive Config Wizard.
■ Option to Remove Database Schema: This screen will only appear if you are uninstalling Oracle Beehive Release 2 (2.0) and it is the last one configured in your database.
■ Start Uninstallation
■ End of Uninstallation
Select Oracle Home to UninstallThis screen lists all the Oracle Beehive products you have installed and their respective Oracle homes.

Uninstalling Provisioning Application for Oracle Beehive or Oracle Beekeeper
10-2 Oracle Beehive Installation Guide
Select the Oracle Beehive home you want to uninstall.
This screen will not appear if you started the uninstall process by running the Config Wizard. In this case, the Config Wizard will uninstall the current Oracle Beehive home.
Option to Remove Database SchemaYou will see this screen if you are uninstalling Oracle Beehive Release 2 (2.0) and it is the last instance configured in your database.
Select from one of the following options:
Remove Oracle Beehive Instance OnlyThis option will only deconfigure the Oracle Beehive instance.
Remove Oracle Beehive and SchemaThis option will deconfigure the Oracle Beehive instance and remove the Oracle Beehive schema from the database. If you choose this option, you must provide the following information:
■ Admin User Name: Specify the administrative user name (that can perform database administration tasks) for the database instance. Typically, this user is the SYS account.
■ Admin User Password: Enter the password for the Oracle database administrative user account that you specified in the Admin User Name field.
Start UninstallationThis screen will list actions that the Oracle Beehive Uninstall Wizard must perform to uninstall your chosen Oracle Beehive product.
Click Start Uninstall to proceed with the uninstallation of your chosen Oracle Beehive product.
End of UninstallationThis screen indicates that the uninstallation of the chosen Oracle Beehive product is successful.
Uninstalling Provisioning Application for Oracle Beehive or Oracle Beekeeper
Uninstall Oracle Beehive Provisioning Application or Oracle Beekeeper Provisioning Application with the Oracle Beehive Universal Installer:
Note: If you started the uninstall process with the Config Wizard, the "Delete Oracle Home" action will not be displayed. This action will be performed after you have exited the Config Wizard graphical user interface.
Note: On Microsoft Windows, if you receive an error message from the Oracle Beehive Uninstall Wizard that it was unable to delete the Oracle home folder, delete it manually, then restart your computer.
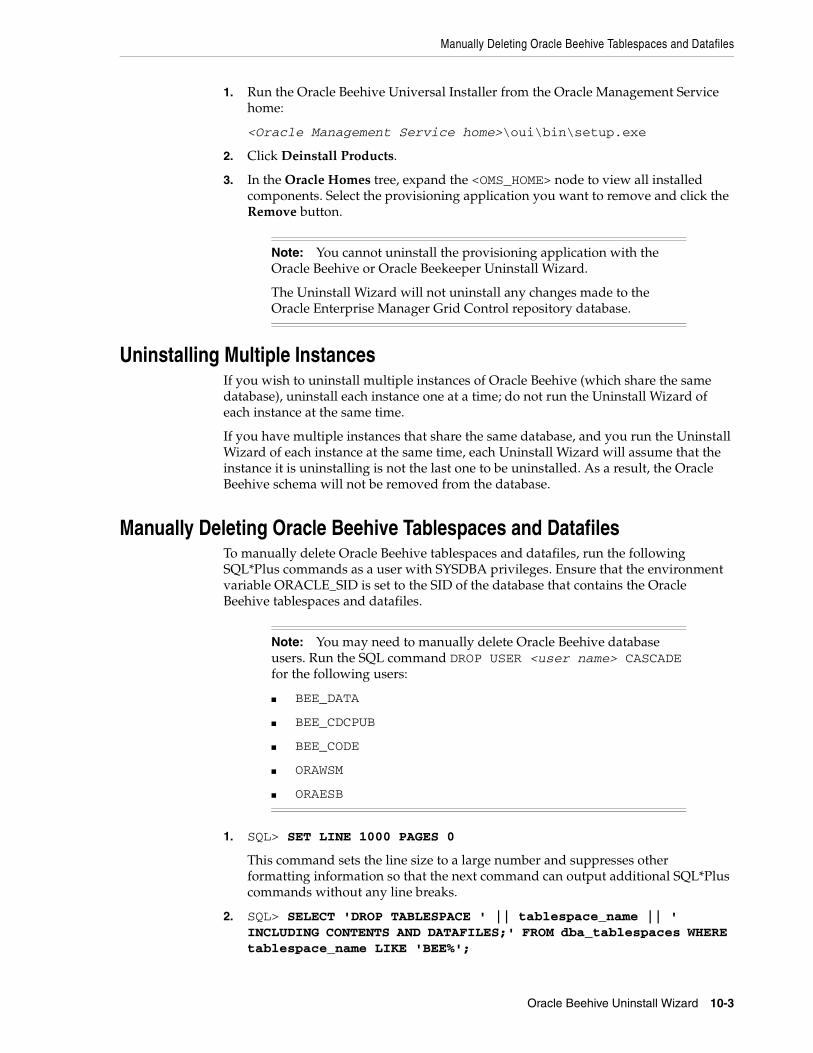
Manually Deleting Oracle Beehive Tablespaces and Datafiles
Oracle Beehive Uninstall Wizard 10-3
1. Run the Oracle Beehive Universal Installer from the Oracle Management Service home:
<Oracle Management Service home>\oui\bin\setup.exe
2. Click Deinstall Products.
3. In the Oracle Homes tree, expand the <OMS_HOME> node to view all installed components. Select the provisioning application you want to remove and click the Remove button.
Uninstalling Multiple InstancesIf you wish to uninstall multiple instances of Oracle Beehive (which share the same database), uninstall each instance one at a time; do not run the Uninstall Wizard of each instance at the same time.
If you have multiple instances that share the same database, and you run the Uninstall Wizard of each instance at the same time, each Uninstall Wizard will assume that the instance it is uninstalling is not the last one to be uninstalled. As a result, the Oracle Beehive schema will not be removed from the database.
Manually Deleting Oracle Beehive Tablespaces and DatafilesTo manually delete Oracle Beehive tablespaces and datafiles, run the following SQL*Plus commands as a user with SYSDBA privileges. Ensure that the environment variable ORACLE_SID is set to the SID of the database that contains the Oracle Beehive tablespaces and datafiles.
1. SQL> SET LINE 1000 PAGES 0
This command sets the line size to a large number and suppresses other formatting information so that the next command can output additional SQL*Plus commands without any line breaks.
2. SQL> SELECT 'DROP TABLESPACE ' || tablespace_name || ' INCLUDING CONTENTS AND DATAFILES;' FROM dba_tablespaces WHERE tablespace_name LIKE 'BEE%';
Note: You cannot uninstall the provisioning application with the Oracle Beehive or Oracle Beekeeper Uninstall Wizard.
The Uninstall Wizard will not uninstall any changes made to the Oracle Enterprise Manager Grid Control repository database.
Note: You may need to manually delete Oracle Beehive database users. Run the SQL command DROP USER <user name> CASCADE for the following users:
■ BEE_DATA
■ BEE_CDCPUB
■ BEE_CODE
■ ORAWSM
■ ORAESB

Manually Deleting Oracle Beehive Tablespaces and Datafiles
10-4 Oracle Beehive Installation Guide
This command outputs a list of tablespace DROP commands. Review each command before running them.
The following is an example of running these two commands, then running each of the generated tablespace DROP commands:
SQL> SET LINE 1000 PAGES 0SQL> SELECT 'DROP TABLESPACE ' || tablespace_name || ' INCLUDING CONTENTS AND DATAFILES;' FROM dba_tablespaces WHERE tablespace_name LIKE 'BEE%';DROP TABLESPACE BEE_ARCHIVE INCLUDING CONTENTS AND DATAFILES;DROP TABLESPACE BEE_AUDIT INCLUDING CONTENTS AND DATAFILES;DROP TABLESPACE BEE_DATA INCLUDING CONTENTS AND DATAFILES;DROP TABLESPACE BEE_INDEX INCLUDING CONTENTS AND DATAFILES;DROP TABLESPACE BEE_INTERFACE INCLUDING CONTENTS AND DATAFILES;DROP TABLESPACE BEE_LOBS INCLUDING CONTENTS AND DATAFILES;DROP TABLESPACE BEE_QUEUES INCLUDING CONTENTS AND DATAFILES;DROP TABLESPACE BEE_SEARCH_DATA INCLUDING CONTENTS AND DATAFILES;DROP TABLESPACE BEE_SEARCH_INDEX INCLUDING CONTENTS AND DATAFILES;DROP TABLESPACE BEE_SEARCH_LOBS INCLUDING CONTENTS AND DATAFILES;DROP TABLESPACE BEE_SEED INCLUDING CONTENTS AND DATAFILES; 11 rows selected. SQL> DROP TABLESPACE BEE_ARCHIVE INCLUDING CONTENTS AND DATAFILES; Tablespace dropped. SQL> DROP TABLESPACE BEE_AUDIT INCLUDING CONTENTS AND DATAFILES; Tablespace dropped. SQL> DROP TABLESPACE BEE_DATA INCLUDING CONTENTS AND DATAFILES; Tablespace dropped. SQL> DROP TABLESPACE BEE_INDEX INCLUDING CONTENTS AND DATAFILES; Tablespace dropped. SQL> DROP TABLESPACE BEE_INTERFACE INCLUDING CONTENTS AND DATAFILES; Tablespace dropped. SQL> DROP TABLESPACE BEE_LOBS INCLUDING CONTENTS AND DATAFILES; Tablespace dropped. SQL> DROP TABLESPACE BEE_QUEUES INCLUDING CONTENTS AND DATAFILES; Tablespace dropped. SQL> DROP TABLESPACE BEE_SEARCH_DATA INCLUDING CONTENTS AND DATAFILES; Tablespace dropped. SQL> DROP TABLESPACE BEE_SEARCH_INDEX INCLUDING CONTENTS AND DATAFILES; Tablespace dropped. SQL> DROP TABLESPACE BEE_SEARCH_LOBS INCLUDING CONTENTS AND DATAFILES;
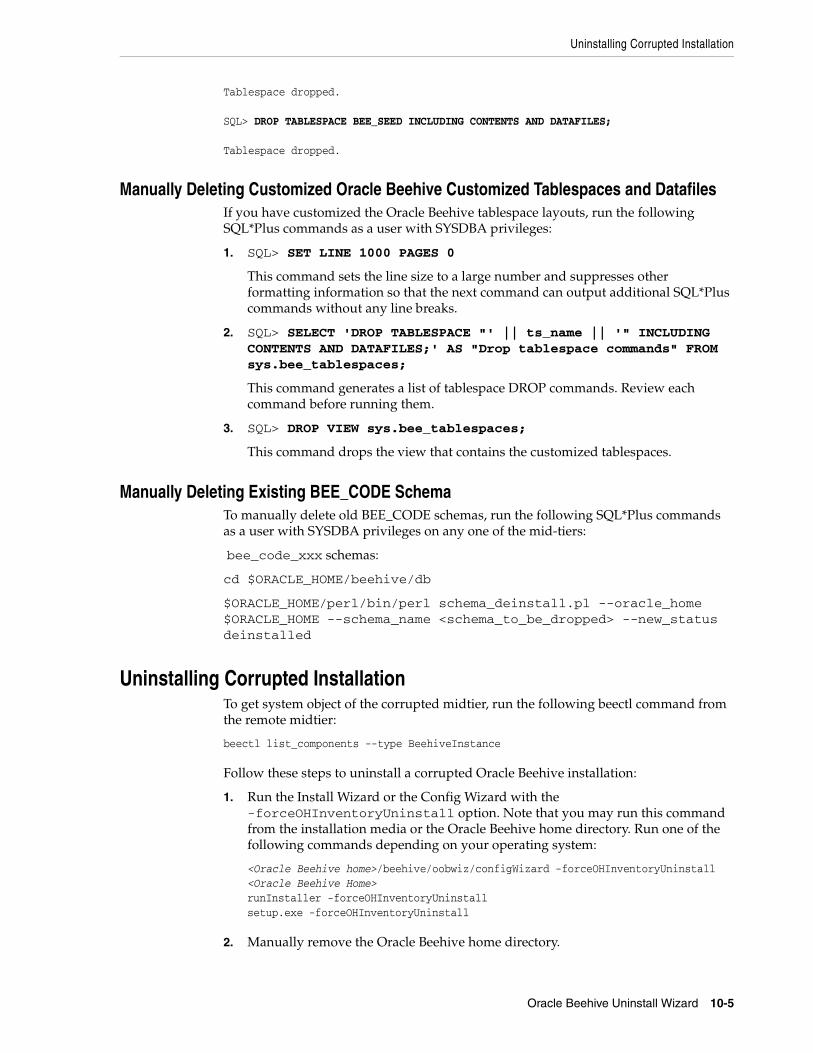
Uninstalling Corrupted Installation
Oracle Beehive Uninstall Wizard 10-5
Tablespace dropped. SQL> DROP TABLESPACE BEE_SEED INCLUDING CONTENTS AND DATAFILES; Tablespace dropped.
Manually Deleting Customized Oracle Beehive Customized Tablespaces and DatafilesIf you have customized the Oracle Beehive tablespace layouts, run the following SQL*Plus commands as a user with SYSDBA privileges:
1. SQL> SET LINE 1000 PAGES 0
This command sets the line size to a large number and suppresses other formatting information so that the next command can output additional SQL*Plus commands without any line breaks.
2. SQL> SELECT 'DROP TABLESPACE "' || ts_name || '" INCLUDING CONTENTS AND DATAFILES;' AS "Drop tablespace commands" FROM sys.bee_tablespaces;
This command generates a list of tablespace DROP commands. Review each command before running them.
3. SQL> DROP VIEW sys.bee_tablespaces;
This command drops the view that contains the customized tablespaces.
Manually Deleting Existing BEE_CODE SchemaTo manually delete old BEE_CODE schemas, run the following SQL*Plus commands as a user with SYSDBA privileges on any one of the mid-tiers:
bee_code_xxx schemas:
cd $ORACLE_HOME/beehive/db
$ORACLE_HOME/perl/bin/perl schema_deinstall.pl --oracle_home $ORACLE_HOME --schema_name <schema_to_be_dropped> --new_status deinstalled
Uninstalling Corrupted InstallationTo get system object of the corrupted midtier, run the following beectl command from the remote midtier:
beectl list_components --type BeehiveInstance
Follow these steps to uninstall a corrupted Oracle Beehive installation:
1. Run the Install Wizard or the Config Wizard with the -forceOHInventoryUninstall option. Note that you may run this command from the installation media or the Oracle Beehive home directory. Run one of the following commands depending on your operating system:
<Oracle Beehive home>/beehive/oobwiz/configWizard -forceOHInventoryUninstall <Oracle Beehive Home>runInstaller -forceOHInventoryUninstallsetup.exe -forceOHInventoryUninstall
2. Manually remove the Oracle Beehive home directory.
Uninstalling Corrupted Installation
10-6 Oracle Beehive Installation Guide
3. Clean up the Oracle Beehive configuration remotely by running the beectl delete_remote_home_instance command.
Note that you must run this command from a remote Oracle Beehive instance.
11
Troubleshooting Oracle Beehive Installation 11-1
11 Troubleshooting Oracle Beehive Installation
Unable to Perform FTP OperationsCheck the log files of BEEAPP, BEECORE, and BEEMGMT. If you see an exception thrown by oracle.ocs.omb.transport.exception.TimedOutException, ensure the port defined by ServerPort in the BTI component is accessible.
This may occur if you have two Oracle Beehive instances, and you block this port (through your firewall) between these instances.
ORA-12850: Could not allocate slaves on all specified instances, ORA-00018: Maximum number of sessions exceededIf you receive the error "Failed to access configuration repository (database). Internal error message: java.sql.SQLException: Connection Unavailable" when running a beectl command and in your database alert log see the errors ORA-12850: Could not allocate slaves on all specified instances and ORA-00018: Maximum number of sessions exceeded, increase the processes initialization parameter in your database. Refer to "Initialization Parameters" in "Oracle Beehive Database Requirements" for information on changing initialization parameters in your database.
Oracle Beehive Install Wizard Fails Because Apache HTTP Server Unable to StartOracle Beehive Install Wizard may fail because of an error similar to the following:
<ORACLE_HOME>/Apache/Apache/bin/apachectl startssl: execing httpdSyntax error on line 233 of <ORACLE_HOME>/Apache/Apache/conf/httpd.conf:Cannot load <ORACLE_HOME>/Apache/Apache/libexec/mod_auth_dbm.so into server: <ORACLE_HOME>/Apache/Apache/libexec/mod_auth_dbm.so: undefined symbol: dbm_fetch
The undefined symbol error may result from the symbolic link /usr/lib/libdb.so.2 pointing to a different file or an incorrect version of the shared library.
Before starting the Install Wizard, create (or recreate) the following symbolic link as the root user:
ln -s /usr/lib/libgdbm.so.2.0.0 /usr/lib/libdb.so.2
Exporting Configuration DataYou may export the entire system model configuration data into an XML file for any given configuration version with the beectl export_configuration_data command.
You may provide your Oracle support representative the output from this command. This will help your representative investigate any problems with your Oracle Beehive deployment faster. You may also use the output of this command to compare the
11-2 Oracle Beehive Installation Guide
configuration between different Oracle Beehive deployments, such as between a test and a production deployment.
Note that secure values do not appear in the output for security reasons.
HTTP Server mod_oc4j Continues Trying to Route to OC4J after Being DisconnectedIf you suddenly shut down an application tier, you may receive the following error messages in your Oracle HTTP Server error log file (typically named error.log):
[Thu Sep 4 12:59:07 2008] [error] [client 140.87.120.38] [ecid:1220558336:144.25.34.13:3454:0:2430,0] mod_oc4j: request to OC4J myhost.example.com:12503 failed: Connect failed (errno=113) ... [Thu Sep 4 13:02:40 2008] [error] [client 140.87.120.38] [ecid:1220558560:144.25.34.13:3802:0:2395,0] mod_oc4j: request to OC4J myhost.oracle.com:12503 failed: Connect failed (errno=111)
In this situation, the mod_oc4j module has not been notified that the application tier it is trying to connect to has been shut down. Consequently, it will repeatedly attempt to connect to the application tier until it fails a certain number of times, which is specified by the mod_oc4j parameter MaxErrors.
The default value for MaxErrors is 100. You may change the value of this parameter to a lower value (such as 1) by following these steps:
1. Edit the file <Oracle home>/beehive/conf/scripts/httpd.conf.tmp and add the line Oc4jSet MaxErrors 1 in the <IfModule mod_oc4j.c> section:
<IfModule mod_oc4j.c> Oc4jSet MaxErrors 1</IfModule>
2. Run the following command to regenerate the file <Oracle home>/Apache/Apache/conf/mod_oc4j.conf (which contains the mod_oc4j parameter):
beectl modify_local_configuration_files --restart_needed false
3. Run the following command to restart Oracle HTTP Server:
<Oracle home>/opmn/bin/opmnctl restartproc process-type=HTTP_Server
Refer to My Oracle Support Note 468325.1 "HTTP Server mod_oc4j Continues Trying To Route To OC4J After Node Is Disconnected" for more information.
When running the stress tool, BEEAPP OC4J crashes due to Out Of Memory ErrorDuring post install or patch install on the first midtier, follow the below mentioned steps:
1. Get all BSOM Database objects, this command lists all database objects in the system.
beectl list_components --type Database
2. For each Database object listed in step 1, run the following command:
beectl append_value --component <Database-BSOM-OBJECT-ID>:AffinityPool --name
Troubleshooting Oracle Beehive Installation 11-3
ConnectionProperties --value oracle.jdbc.FreeMemoryOnEnterImplicitCache:true beectl append_value --component <Database-BSOM-OBJECT-ID>:DefaultNonXaPool --name ConnectionProperties --value oracle.jdbc.FreeMemoryOnEnterImplicitCache:true <Database-BSOM-OBJECT-ID> is the Database component ID listed in step 1.
3. Activate the configuration:
beectl activate_configuration beectl modify_local_configuration_files
4. Restart the midtier and then install the patch on the second midtier.
Cloning for new UCF MTS failed on IAS The workaround for this bug is to edit the $OH/oui/oraparam.ini file and replace the following uninstantiated values:
%JRE_LOCATION% -- Change this to point to the location of the jre directory (for whatever JDK has been used) i.e. /scratch/smayer/jdk16/jre
%JRE_MEMORY_OPTIONS% -- Change this to " -mx160m"

11-4 Oracle Beehive Installation Guide
Part IIPart II Oracle Beehive Upgrade Procedures
The Part II of the Installation Guide describes how to upgrade your Oracle Beehive deployment to Oracle Beehive Release 2 (2.0). To install Oracle Beehive, refer to Part I, "Oracle Beehive Installation". To configure Oracle Beehive, refer to Part III, "Oracle Beehive Post-Installation Configuration". To install Oracle Beehive in a high availability environment, refer to Part IV, "Oracle Beehive High Availability Configuration"
This part contains the following chapters:
■ Upgrading Oracle Beehive Overview
■ Upgrading Oracle Beehive
■ Upgrading Oracle Beekeeper
■ Upgrading Oracle Beehive Collaboration Coexistence Gateway
■ Oracle Beehive By Clone Patching

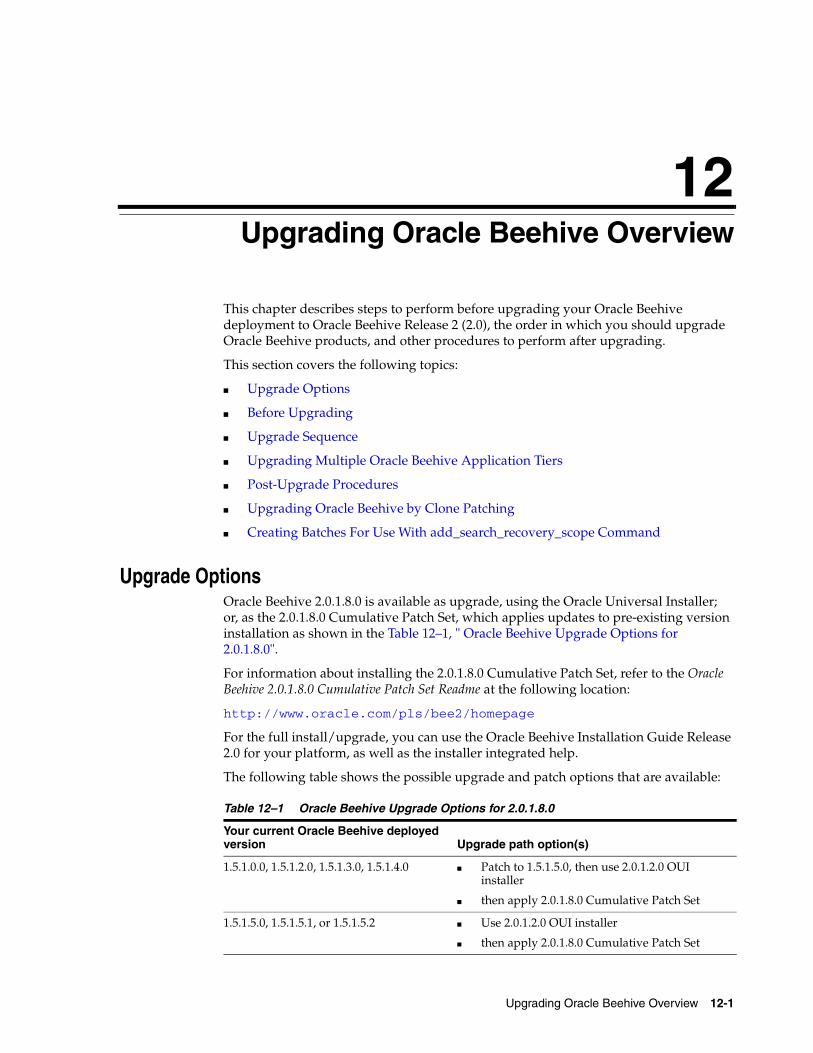
12
Upgrading Oracle Beehive Overview 12-1
12Upgrading Oracle Beehive Overview
This chapter describes steps to perform before upgrading your Oracle Beehive deployment to Oracle Beehive Release 2 (2.0), the order in which you should upgrade Oracle Beehive products, and other procedures to perform after upgrading.
This section covers the following topics:
■ Upgrade Options
■ Before Upgrading
■ Upgrade Sequence
■ Upgrading Multiple Oracle Beehive Application Tiers
■ Post-Upgrade Procedures
■ Upgrading Oracle Beehive by Clone Patching
■ Creating Batches For Use With add_search_recovery_scope Command
Upgrade OptionsOracle Beehive 2.0.1.8.0 is available as upgrade, using the Oracle Universal Installer; or, as the 2.0.1.8.0 Cumulative Patch Set, which applies updates to pre-existing version installation as shown in the Table 12–1, " Oracle Beehive Upgrade Options for 2.0.1.8.0".
For information about installing the 2.0.1.8.0 Cumulative Patch Set, refer to the Oracle Beehive 2.0.1.8.0 Cumulative Patch Set Readme at the following location:
http://www.oracle.com/pls/bee2/homepage
For the full install/upgrade, you can use the Oracle Beehive Installation Guide Release 2.0 for your platform, as well as the installer integrated help.
The following table shows the possible upgrade and patch options that are available:
Table 12–1 Oracle Beehive Upgrade Options for 2.0.1.8.0
Your current Oracle Beehive deployed version Upgrade path option(s)
1.5.1.0.0, 1.5.1.2.0, 1.5.1.3.0, 1.5.1.4.0 ■ Patch to 1.5.1.5.0, then use 2.0.1.2.0 OUI installer
■ then apply 2.0.1.8.0 Cumulative Patch Set
1.5.1.5.0, 1.5.1.5.1, or 1.5.1.5.2 ■ Use 2.0.1.2.0 OUI installer
■ then apply 2.0.1.8.0 Cumulative Patch Set

Before Upgrading
12-2 Oracle Beehive Installation Guide
Before UpgradingPerform or ensure the following before upgrading to Oracle Beehive Release 2 (2.0):
■ Upgrade Database to Supported Version
■ Ensure Passwords for Active Code and Data Schemas Are Same
■ Adjust XmppTimerKeepAliveTime Configuration Parameter
■ Analyze Application Tiers
■ Rollback Oracle Application Server Critical Patch Update
■ Ensure tnsnames.ora File Exists
■ Export Configuration Data
■ Prepare Oracle Beehive Integration for Zimbra for Upgrade
■ Configure Zero Downtime Upgrade
■ Shut down All Oracle Beehive Instances
Upgrade Database to Supported VersionIf your Oracle Beehive deployment uses an Oracle Database version earlier than 11.1.0.7, then upgrade it to a version that Oracle Beehive Release 2 (2.0) supports. Refer to "Oracle Beehive Database Requirements" for more information.
Ensure Passwords for Active Code and Data Schemas Are SameEnsure that the passwords for the active Code and Data schemas are the same. If not, change the password before proceeding with the upgrade.
Adjust XmppTimerKeepAliveTime Configuration ParameterEnsure the value of the configuration parameter XmppTimerKeepAliveTime is 10 or less. Run the following command to obtain the value of XmppTimerKeepAliveTime:
beectl list_properties --component _xmppservice --name XmppTimerKeepAliveTime
-------------------------+------------------------------------------------------Property name | Property value-------------------------+------------------------------------------------------XmppTimerKeepAliveTime | 5-------------------------+------------------------------------------------------
2.0.1.0.0, 2.0.1.1.0, 2.0.1.2.0, 2.0.1.2.1, 2.0.1.3.0, 2.0.1.4.0, 2.0.1.5.0, 2.0.1.6.0 and 2.0.1.7.0
Apply 2.0.1.8.0 Cumulative Patch Set.
Note: You can determine your Oracle Beehive version number by running the beectl version command from any Oracle Beehive Oracle home.
Table 12–1 (Cont.) Oracle Beehive Upgrade Options for 2.0.1.8.0
Your current Oracle Beehive deployed version Upgrade path option(s)
Before Upgrading
Upgrading Oracle Beehive Overview 12-3
If the value of XmppTimerKeepAliveTime is greater than 10, set it to 5 (the default value) with the beectl modify_property command. After that, run the command beectl activate_configuration to commit changes to the configuration.
Analyze Application Tiers
Before upgrading Oracle Beehive Release 1 (1.5.x) to Oracle Beehive Release 2 (2.0), analyze each of your Oracle Beehive application tiers by running the command beectl clone_preparation on each of them. For more information about running this command, refer to "Step 4: Call beectl clone_preparation Command" in "Cloning Oracle Beehive Application Tiers and Sites". This command creates a text file that contains the names of files in the source Oracle home to be copied for cloning to the target location. You will not need this file to upgrade Oracle Beehive. However, if the beectl clone_preparation command fails for a particular application tier, you will not be able to upgrade it. You must uninstall any application tier where the beectl clone_preparation command fails before upgrading your Oracle Beehive deployment.
Rollback Oracle Application Server Critical Patch UpdateIf you applied an Oracle Application Server Critical Patch Update (CPU) patch to any of your Oracle Beehive Release 1 (1.5.x) application tiers, follow the steps described in My Oracle Support Note 735631.1, "Symbol Referencing Error on nzospRandNum When AS Patchset Applies Patch 4601861 (CPU Patch Previously Applied)." These steps involve rolling back previously applied CPU patches and applying the latest CPU patch for the new patchset version.
Ensure tnsnames.ora File ExistsIf you are upgrading an Oracle Beehive Release 1 (1.5.x) application tier that has been upgraded from an Oracle Beehive Release 1 (1.3.1) application tier or earlier, ensure the file <Oracle Beehive home>/network/admin/tnsnames.ora exists before upgrading your Oracle Beehive Release 1 (1.5.x) application tier.
The tnsnames.ora file must contain an entry that specifies the TNS (Transport Network Substrate) identifier of BEEDB and the connection information of the database used by your Oracle Beehive deployment.
The following is an example of this entry (line breaks have been inserted for clarity):
BEEDB = (DESCRIPTION=(ADDRESS_LIST=(ADDRESS=(PROTOCOL=TCP)(HOST=mydb.example.com) (PORT=1521)))(CONNECT_DATA=(SERVICE_NAME=myservice.example.com)))
Use one of the following methods to obtain the TNS identifier of BEEDB:
Note: You do not have to perform this step in the following situations:
■ You have installed (but not upgraded to) Oracle Beehive Release 1 (1.4).
■ You have installed Oracle Beehive Release 1 (1.2) or Release 1 (1.3) and have never cloned any application tiers or sites.
■ You have cloned an application tier or site only after upgrading to Oracle Beehive Release 1 (1.4).
Before Upgrading
12-4 Oracle Beehive Installation Guide
■ Run the command beectl list_bootstrap_configuration and look for the ConnectString property (the --format option is optional):
beectl list_bootstrap_configuration --format xml <?xml version="1.1" encoding="UTF-8"?><beectl-output resultset="table"> <row> <column name="Property Name">ConnectString</column> <column name="Property Value"> (DESCRIPTION=(ADDRESS_LIST= (ADDRESS=(PROTOCOL=TCP) (HOST=mydb.example.com)(PORT=1521))) (CONNECT_DATA=(SERVICE_NAME=beedb.example.com))) </column> </row>
■ Run the command beectl list_properties --component _CURRENT_SITE:Database and look for the ConnectDescriptor property (the --format option is optional):
beectl list_properties --component _CURRENT_SITE:Database --format xml
...<row> <column name="Property name">ConnectDescriptor</column> <column name="Property value"> (DESCRIPTION=(ADDRESS_LIST= (ADDRESS=(PROTOCOL=TCP) (HOST=mydb.example.com)(PORT=1521))) (CONNECT_DATA=(SERVICE_NAME=beedb.example.com))) </column></row>
Export Configuration DataBefore upgrading Oracle Beehive Release 1 (1.5.x) to Oracle Beehive Release 2 (2.0), export configuration data of your Oracle Beehive Release 1 (1.5.x) deployment that you want to preserve for future reference. In particular, you may want to preserve the configuration data of your Oracle Beehive deployment before you upgrade it.
Use the beectl export_configuration_data command to export configuration data.
Although the upgrade process does not remove or delete configuration data, it does not upgrade it to the new configuration data structure that Oracle Beehive Release 2 (2.0) uses. Consequently, you cannot access configuration data of previous versions of Oracle Beehive with the beectl command; contact your Oracle representative if you require access to this data.
Prepare Oracle Beehive Integration for Zimbra for UpgradeDepending on which version and where you installed Oracle Beehive Integration for Zimbra, follow the steps in these sections:
■ Upgrading Oracle Beehive Release 1 (1.5.x) with Oracle Beehive Integration for Zimbra Version 1.5.x
■ Upgrading Previously Upgraded Oracle Beehive Integration for Zimbra Instance
Before Upgrading
Upgrading Oracle Beehive Overview 12-5
Upgrading Oracle Beehive Release 1 (1.5.x) with Oracle Beehive Integration for Zimbra Version 1.5.xIf you are upgrading Oracle Beehive Release 1 (1.5.x) with Oracle Beehive Integration for Zimbra version 1.5.x registered in the same Oracle Inventory location, follow these steps before upgrading Oracle Beehive and Oracle Beekeeper to version 2.0. (Note that these steps still apply if you previously upgraded your Oracle Beehive or Oracle Beehive Integration for Zimbra instances to version 1.5.x):
1. Backup the file <Oracle Beehive Integration for Zimbra home>/beehive/oobwiz/configWizard.properties.
2. Edit the file <Oracle Beehive Integration for Zimbra home>/beehive/oobwiz/configWizard.properties as follows:
Find the line that begins with InstallType= and perform one of the following actions depending on your Oracle Beehive deployment:
■ If you chose the Basic Server or Basic Server and Client template when installing Oracle Beehive (only Oracle Beehive or Oracle Beehive and Oracle Beehive Integration for Zimbra reside in the computer), ensure the line is InstallType=Beehive.
■ If you chose the Client Only template when installing Oracle Beehive, ensure the line is InstallType=Client.
3. Perform any other required tasks before upgrading Oracle Beehive as described in this module, then upgrade Oracle Beehive to version 2.0.
4. After upgrading Oracle Beehive to version 2.0 but before upgrading Oracle Beehive Integration for Zimbra to version 2.0, copy the version of configWizard.properties you backed up to <Oracle Beehive Integration for Zimbra home>/beehive/oobwiz.
Alternatively, edit the file <Oracle Beehive Integration for Zimbra home>/beehive/oobwiz/configWizard.properties and change the line InstallType= to InstallType=Client.
5. Upgrade Oracle Beehive Integration for Zimbra to version 2.0.
Upgrading Previously Upgraded Oracle Beehive Integration for Zimbra InstanceIf you are upgrading Oracle Beehive Integration for Zimbra version 1.5.x to version 2.0, perform the following steps before upgrading:
1. Backup the contents of the directory <Oracle Beehive Integration for Zimbra home>/inventory/ContentsXML/ConfigXML.
2. Retrieve a list of all the XML files that begin with Beehive from the directory <Oracle Beehive Integration for Zimbra home>/inventory/ContentsXML/ConfigXML:
dir Beehive*.*l
BeehiveAggregate.<version number>.xmlBeehiveConfig.<version number>.xmlBeehiveDeconfig.<version number>.xml
From this list, delete all files except those whose <version number> is 1_5_1_0_0.
For example, the folder ConfigXML may contain the following files on your system:
Before Upgrading
12-6 Oracle Beehive Installation Guide
dir Beehive*l
BeehiveAggregate.1_4_1_0_0.xmlBeehiveAggregate.1_4_3_0_0.xmlBeehiveAggregate.1_5_1_0_0.xmlBeehiveConfig.1_4_1_0_0.xmlBeehiveConfig.1_4_3_0_0.xmlBeehiveConfig.1_5_1_0_0.xmlBeehiveDeconfig.1_4_1_0_0.xmlBeehiveDeconfig.1_4_3_0_0.xmlBeehiveDeconfig.1_5_1_0_0.xml
After deleting the files that do not contain the version number 1_5_1_0_0, the folder ConfigXML should contain the following files:
dir Beehive*l
BeehiveAggregate.1_5_1_0_0.xmlBeehiveConfig.1_5_1_0_0.xmlBeehiveDeconfig.1_5_1_0_0.xml
3. Edit the file <Oracle Beehive Integration for Zimbra home>/beehive/install/beeStart.pl and comment out the line that launches the owsmInstallProperties subroutine.
Search for the following lines in the file beeStart.pl:
# prepare owsm properties file&owsmInstallProperties();
Add the number sign (#) to the beginning of the line &owsmInstallProperties();
# prepare owsm properties file# &owsmInstallProperties();
Configure Zero Downtime Upgrade
Oracle Beehive Release 2 (2.0) comes with Zero Downtime Upgrade (ZDU), which minimizes the amount of downtime required for upgrading or applying patches to Oracle Beehive.
After upgrading to Oracle Beehive Release 2 (2.0) Patch and before upgrading or applying a newer patch to Oracle Beehive, perform the following steps:
■ Configure Oracle Data Pump
■ Disable User Directory Services Synchronization
Configure Oracle Data PumpPart of the upgrade or patching process involves updating code objects, which are stored in its own code schema in the Oracle Beehive database. The ZDU process first clones the code schema, then updates the cloned schema. This allows users in a multi-application tier environment to continue using Oracle Beehive during the upgrade or patching process; updated application tiers would use the cloned, updated
Note: This section only applies to patches for Oracle Beehive Release 2 (2.0).
Before Upgrading
Upgrading Oracle Beehive Overview 12-7
code schema while those tiers that have not been updated would use the original code schema.
The code schema cloning process uses Oracle Data Pump technology, which enables very high-speed movement of data and metadata from one database to another. You must configure Oracle Data Pump before upgrading or patching Oracle Beehive.
During the upgrade or patching process, Oracle Beehive uses two database directory objects named BEEHIVE_DATA_PUMP and BEEHIVE_DATA_PUMP_LOG, which Oracle Beehive uses as the Oracle Data Pump data directory and log file directory, respectively. Depending on whether your Oracle Beehive deployment uses Oracle RAC nodes or not, either perform "Defining Oracle Data Pump Directories for Non-Oracle RAC Deployments" or "Defining Oracle Data Pump Directories for Oracle RAC Deployments". Afterwards, perform "Backing up and Deleting Oracle Data Pump Log Files".
Defining Oracle Data Pump Directories for Non-Oracle RAC Deployments If your Oracle Beehive deployment does not use Oracle RAC, follow these steps to define the Oracle Data Pump directories BEEHIVE_DATA_PUMP and BEEHIVE_DATA_PUMP_LOG:
1. Create two directories on the computer that is hosting your database, one that will store Oracle Data Pump data and another Oracle Data Pump log files. Use regular file system commands, like mkdir, to create these directories.
2. Run the following SQL*Plus commands from the computer hosting your database or from any Oracle RAC node as a DBA user or a user with the CREATE ANY DIRECTORY privilege:
SQL> CREATE OR REPLACE DIRECTORY BEEHIVE_DATA_PUMP AS '<Oracle Data Pump data directory>';SQL> GRANT READ, WRITE ON DIRECTORY beehive_data_pump TO bee_code;SQL> GRANT READ, WRITE ON DIRECTORY beehive_data_pump TO bee_data;SQL> CREATE OR REPLACE DIRECTORY BEEHIVE_DATA_PUMP_LOG AS '<Oracle Data Pump log directory>';SQL> GRANT READ, WRITE ON DIRECTORY beehive_data_pump_log TO bee_code;SQL> GRANT READ, WRITE ON DIRECTORY beehive_data_pump_log TO bee_data;
bee_code and bee_data are the names of the Oracle Beehive code schema and data schema, respectively. To retrieve the names of these schemas, run the command beectl list_schemas.
ASM Note: If your database is using Oracle Automatic Storage Management (ASM), you must create the data directory in a new or existing disk group. Use the ASMCMD command-line utility as follows:
ASMCMD> mkdir +DISKGROUP1/beehive_data_pump_directory
DISKGROUP1 is either an existing or new disk group. beehive_data_pump_directory is the name of the data directory you are creating.
You must not create the log file directory in ASM; it must be a regular directory in the file system of the computer that is hosting your database.
Refer to "ASM Command-Line Utility" in Oracle Database Storage Administrator's Guide for more information about ASMCMD.
Before Upgrading
12-8 Oracle Beehive Installation Guide
Refer to "CREATE DIRECTORY" in Oracle Database SQL Language Reference for more information.
Defining Oracle Data Pump Directories for Oracle RAC Deployments If your Oracle Beehive deployment uses Oracle RAC, then ensure that all your Oracle RAC nodes can access both Oracle Data Pump directories.
Follow one of the followings steps to create and specify these directories:
■ Follow the steps as described in "Defining Oracle Data Pump Directories for Non-Oracle RAC Deployments".
– If you are using ASM, then ensure that all your Oracle RAC nodes can access BEEHIVE_DATA_PUMP_LOG.
Use regular file system commands, like mkdir, to create the same directory (you must use the same directory path) on the local disk of each Oracle RAC node.
– If you are not using ASM, the Oracle Beehive patch requires the connect string of the database instance that is hosted on the computer that contains the Oracle Data Pump directories. In this connect string, use the INSTANCE_NAME parameter to specify which database instance contains the Oracle Data Pump directories. For example, the following specifies the database instance afserv1 on node host1.example.com:
(DESCRIPTION= (ADDRESS_LIST= (ADDRESS=(PROTOCOL=TCP)(HOST=host1.example.com)(PORT=1521))) (CONNECT_DATA= (SERVER=DEDICATED) (SERVICE_NAME=afserv1.example.com) (INSTANCE_NAME=afserv1))
Refer to the documentation of the Oracle Beehive patch for directions on how to specify the connect string. Refer to "Local Naming Parameters (tnsnames.ora)" in Oracle Database Net Services Reference and "Understanding the Oracle Real Application Clusters Installed Configuration" in Oracle Real Application Clusters Installation Guide for Microsoft Windows for more information about the INSTANCE_NAME parameter.
■ Create the Oracle Data Pump directories in a Direct Network File System (NFS), then perform step 2 as described in "Defining Oracle Data Pump Directories for Non-Oracle RAC Deployments".
Backing up and Deleting Oracle Data Pump Log Files If you previously upgraded or patched Oracle Beehive, backup and delete Oracle Data Pump data and log files.
Note: If your environment uses the OCFS2 file system, and that file system is shared between all Oracle RAC nodes, then follow the steps described in "Defining Oracle Data Pump Directories for Non-Oracle RAC Deployments". Ensure that you create the Oracle Data Pump data and log directories in the same OCFS2 file system that your Oracle RAC nodes can access.
You do not need a special connection string as described in the following steps for Oracle RAC deployments since all Oracle RAC nodes can access the data and log directories in an OCFS2 file system.
Upgrade Sequence
Upgrading Oracle Beehive Overview 12-9
Disable User Directory Services SynchronizationThis is a recommended but not mandatory step.
From any application tier, run the following command to disable User Directory Services (UDS) synchronization:
beectl modify_property --component OID_Profile --name ProfileState --value DISABLE --activate_configuration
Shut down All Oracle Beehive InstancesShut down all your Oracle Beehive application tiers by following these steps for each application tier:
1. Ensure that all Oracle Beehive processes are running with the following command:
beectl start --all
2. Run the following command repeatedly until the output indicates that all Oracle Beehive processes are running:
beectl status
3. Stop the application tier with the following command:
beectl stop --all
Upgrade SequenceTo upgrade an Oracle Beehive deployment, upgrade the following Oracle Beehive products in the indicated order:
1. Oracle Beehive. Refer to "Oracle Beehive Upgrade Process Sequence of Screens".
Note: Ensuring that all Oracle Beehive processes are running before shutting down the application tier ensures that any processes managed by OPMN remain stopped during upgrade.
If a computer goes down while OPMN is running, upon restart, OPMN will attempt to automatically restart all processes that were running at the time the system went down.
Consequently, upgrading an Oracle Beehive application tier that was shut down unexpectedly (for example, by rebooting the computer without first shutting down Oracle Beehive) may fail. When the upgrade process starts OPMN, OPMN will attempt to restart any of processes that were running, which in turn will cause the upgrade process to fail.
Upgrading Multiple Oracle Beehive Application Tiers
12-10 Oracle Beehive Installation Guide
2. Any standalone Oracle Beehive Integration for Zimbra, Oracle Beehive Provisioning Application, or Oracle Collaboration Coexistence Gateway (Windows only).
3. Any Oracle Beehive for DMZ instances. Refer to "Oracle Beehive for DMZ Upgrade Process Sequence of Screens".
4. Any Oracle Beekeeper Release instances, refer to "Upgrading Oracle Beekeeper".
Refer to "Upgrading Oracle Beehive" for information about upgrading Oracle Beehive products.
Refer to "Upgrading Oracle Beehive in Silent Mode" in "Installing Oracle Beehive in Silent Mode (Non-Interactive)" for more information about upgrading Oracle Beehive products in silent mode.
Upgrading Multiple Oracle Beehive Application TiersFollow these steps to upgrade multiple Oracle Beehive application tiers:
1. Shut down all your Oracle Beehive application tiers as described in "Shut down All Oracle Beehive Instances".
2. Upgrade an Oracle Beehive application tier.
3. Wait until the upgrade process is complete.
4. Upgrade a subsequent Oracle Beehive application tier. Do not start upgrading this tier until the previous tier's upgrade process is complete. You do not have to shut down any upgraded application tiers.
5. Repeat step 4 until all application tiers are upgraded.
Note: You must shut down all Oracle Beehive application tiers as described in "Shut down All Oracle Beehive Instances" before upgrading them.
Ensure that the upgrade process has started your newly upgraded Oracle Beehive application tiers before proceeding to upgrade other Oracle Beehive products.
Refer to "Upgrading Multiple Oracle Beehive Application Tiers" if you are upgrading more than one Oracle Beehive application tier.
Note: You must shut down all Oracle Beehive for DMZ instances before upgrading them.
Ensure that the upgrade process has started your newly upgraded Oracle Beehive DMZ instances before proceeding to upgrade other Oracle Beehive products.
Note: Before upgrading Oracle Beekeeper, refer to the section "Upgrading Oracle Beekeeper Version 1.5.x to Version 2.0".

Upgrading Oracle Beekeeper Version 1.5.x to Version 2.0
Upgrading Oracle Beehive Overview 12-11
Upgrading Oracle Beekeeper Version 1.5.x to Version 2.0To upgrade Oracle Beekeeper version 1.5.x to version 2.0, follow these steps:
1. If you have configured Oracle Beekeeper for SSL access, follow these steps. Otherwise, proceed to the next step.
These steps involve reconfiguring Oracle Beekeeper for SSL with the default-web-site.xml file:
a. Copy <Oracle Beekeeper home>/j2ee/home/config/secure-web-site.xml as <Oracle Beekeeper home>/j2ee/home/config/default-web-site.xml (replacing default-web-site.xml with secure-web-site.xml)
b. Edit the file <Oracle Beekeeper home>/j2ee/home/config/server.xml and replace secure-web-site.xml with default-web-site.xml.
c. Restart Oracle Beekeeper with the following commands and verify that SSL is working properly:
<Oracle Beekeeper home>/opmn/bin/opmnctl stopall<Oracle Beekeeper home>/opmn/bin/opmnctl startall
2. Determine if Oracle Beekeeper is using the database or your LDAP server for authentication. Open the file <Oracle Beekeeper home>/j2ee/home/applications/javasso/jps-config.xml. Search for the element <jpsContexts>. The value of the default attribute may be either ldap or db:
■ If it is db, then no further action is required; do not proceed with the following steps. Upgrade Oracle Beekeeper version 1.5.x to Oracle Beekeeper 2.0; refer to "Upgrading Oracle Beekeeper".
■ If it is ldap, then perform steps 3-6.
3. Save a copy of the following files:
■ <Oracle Beekeeper version 1.5 home>/j2ee/home/application-deployments/javasso/jps-config.xml
■ <Oracle Beekeeper version 1.5 home>/j2ee/home/application-deployments/beehivecontrol/jps-config.xml
4. Upgrade Oracle Beekeeper version 1.5.x to version 2.0; refer to "Upgrading Oracle Beekeeper".
5. To configure LDAP-based authentication for your upgraded Oracle Beekeeper version 2.0 instance, modify the following files with the data contained in the files you saved in step 3:
■ <Oracle Beekeeper version 2.0 home>/j2ee/home/application-deployments/javasso/jps-config.xml
■ <Oracle Beekeeper version 2.0 home>/j2ee/home/application-deployments/beekeeper/jps-config.xml
Refer to the section "Configuring Oracle Beekeeper for LDAP-Based Authentication" in "Oracle Beekeeper Post-Installation Procedures" for more
Post-Upgrade Procedures
12-12 Oracle Beehive Installation Guide
information about which attribute values you must modify in these files to configure LDAP-based authentication.
6. Restart the Oracle Beekeeper unmanaged OC4J instance with the following commands:
<Oracle Beekeeper home>/opmn/bin/opmnctl stopall<Oracle Beekeeper home>/opmn/bin/opmnctl startall
Post-Upgrade ProceduresThe following topics are covered in this section:
■ Running Perl Script post_upgrade_db_actions.pl
■ Applying Deployment Template after Upgrade
■ Gathering Statistics About Oracle Beehive Data and Code Schemas After Upgrading
■ Upgrading Voicemail Configuration
■ Re-enabling UDS Synchronization
■ Upgrading User Directory Services
■ Upgrading Mobile Device Management Service After Oracle Beehive Upgrade
Running Perl Script post_upgrade_db_actions.pl
Run the script post_upgrade_db_actions.pl as follows:
perl post_upgrade_db_actions.pl <BEE_DATA> <OLD_BEE_CODE> <NEW_BEE_CODE> <BEE_CODE_PASSWORD> <CONNECT_STRING>
■ <BEE_DATA>: Name of the Oracle Beehive data schema
■ <OLD_BEE_CODE>: Name of the old Oracle Beehive code schema
■ <NEW_BEE_CODE>: Name of the cloned and upgraded Oracle Beehive code schema
Note: Run the script <Oracle Beehive home>/beehive/db/post_upgrade_db_actions.pl only if the following conditions are true:
■ You are applying a patch to Oracle Beehive Release 2 (2.0) or later.
■ The patch you are applying involves schema cloning.
In particular, run this script if you did not specify the option -no_schema_cloning when you applied the patch.
The -no_schema_cloning option of the opatch command line tool enables you to apply a patch without schema cloning, which may potentially reduce the time required to apply the patch. Only use this option if you can fully shut down processes in all your Oracle Beehive application tiers, including Oracle Beekeeper instances. Note that this option is not recommended because it disables ZDU.

Post-Upgrade Procedures
Upgrading Oracle Beehive Overview 12-13
■ <BEE_CODE_PASSWORD>: Password for the Oracle Beehive schemas (all Oracle Beehive schemas have the same password)
■ <CONNECT_STRING>: Oracle Beehive database connect string
To retrieve the names of these schemas, run the following command:
beectl list_schemas --schema_type <schema type> --status <schema status> --sort_by <sort condition>
■ <schema type>: Type of schema to retrieve; it may have one of the following values:
– 1: Code schema
– 2: Data schema
– 3: Search-related Change Data Capture publisher (CDCPUB) schema
■ <schema status>: Status of the schema. For purposes of running the script post_upgrade_db_actions.pl, you use only statuses 4, 5, and 6:
– 1: Created; the code schema has been newly created
– 2: Upgrade ready; the code schema has been cloned and is ready to be upgraded
– 3: Activation ready; the code schema has been upgraded and is ready to be activated
– 4: Active; the schema is active
– 5: Legacy; the original schema that was cloned is set to this status. During a multi-application tier upgrade, application tiers that have not been upgraded will use this schema.
– 6: Deactivated; when all application tiers have been upgraded, the original schema is set to this status
– 7: Deinstalled; the schema has been deinstalled
Running beectl list_schemas without any options lists all schemas.
ExamplesThe following examples show you how to retrieve the names of schemas required for the post_upgrade_db_actions.pl script.
■ The following example lists all data schemas:
beectl list_schemas --schema_type 2
schema_name: BEE_DATA schema_id: 131 version_id: 2.0.1.0.0schema_type: 2 status: 4 creation_time: 2009-05-02 11:29:54.0activation_time: 2009-05-02 11:29:54.0 description: BEE_DATA schema
■ The following example lists all code schemas:
Note: The database connect string cannot contain any new line characters (\n, \r, or \n\r); the connect string must be a single-line value.
Post-Upgrade Procedures
12-14 Oracle Beehive Installation Guide
beectl list_schemas --schema_type 1 schema_name: BEE_CODE schema_id: 132 version_id: 2.0.1.1.0schema_type: 1 status: 6 creation_time: 2009-05-02 11:29:54.0activation_time: 2009-05-02 11:29:54.0 legacy_time: 2009-05-0409:30:07.0 deactivation_time: 2009-05-04 10:14:57.0 description: BEE_CODE schema
schema_name: BEE_CODE_05042009 schema_id: 134 version_id: 2.0.1.1.0schema_type: 1 status: 6 creation_time: 2009-05-04 09:00:30.0activationready_time: 2009-05-04 09:29:20.0 upgradeready_time:2009-05-04 09:28:43.0 activation_time: 2009-05-04 09:30:07.0legacy_time: 2009-05-04 13:11:42.0 deactivation_time: 2009-05-11 12:06:02.0 description: insert description here
schema_name: BEE_CODE_05042009_1 schema_id: 135 version_id: 2.0.1.1.0schema_type: 1 status: 4 creation_time: 2009-05-0412:26:03.0 activationready_time: 2009-05-04 12:52:50.0activation_time: 2009-05-04 13:11:42.0 description: insert description here
schema_name: BEE_CODE_05112009 schema_id: 136 version_id: 2.0.1.1.0schema_type: 1 status: 2 creation_time: 2009-05-11 12:13:43.0upgradeready_time: 2009-05-11 12:48:14.0 description: insert description here
■ The following example lists the active code schema. At the end of an upgrade involving schema cloning, the active code schema should be the cloned schema:
beectl list_schemas --schema_type 1 --status 4 schema_name: BEE_CODE_05042009_1 schema_id: 135 version_id: 2.0.1.1.0schema_type: 1 status: 4 creation_time: 2009-05-0412:26:03.0 activationready_time: 2009-05-04 12:52:50.0activation_time: 2009-05-04 13:11:42.0 description: insert description here
■ The following example lists all code schemas that are marked "LEGACY" and the sorts them by the time they were marked this status. The newest schema in this list is the old code schema:
beectl list_schemas --schema_type 1 --status 5 --sort_by LEGACY_TIME
■ The following example lists call deactivated code schemas. After running the post_upgrade_db_actions.pl script, the old code schema will be marked as deactivated.
beectl list_schemas --schema_type 1 --status 6
Applying Deployment Template after UpgradeIt is highly recommended that you apply a deployment template to your upgraded Oracle Beehive Release 2 (2.0) deployment provided that it is not already applied; the upgrade process does not automatically do this for you. Note that a new Oracle Beehive Release 2 (2.0) installation already has a deployment template associated with it.
A deployment template is an XML file that represents the formally defined structure of an Oracle Beehive application tier and its components such as OC4J instances, services, Oracle Beehive Transport Infrastructure (BTI), and the HTTP server.
If your upgraded Oracle Beehive Release 1 (1.4) deployment does not have a deployment template associated with it, those beectl commands that change the deployment structure (such as those that add and delete OC4J and service instances)
Post-Upgrade Procedures
Upgrading Oracle Beehive Overview 12-15
will succeed. However, you will receive a message indicating that you should apply a deployment template.
In addition, future upgrades will fail if your deployment does not have a deployment template associated with it.
Follow these steps to apply a deployment template to an Oracle Beehive deployment:
1. Retrieve a list of available deployment templates with the command beectl list_deployment_templates. This command will output the identifier of each deployment template and a short description.
2. Select an appropriate deployment template and apply it with the beectl modify_deployment_structure. The following example applies the deployment template SERVER_AND_CLIENT to the local Oracle Beehive application tier:
modify_deployment_structure --primary_template SERVER_AND_CLIENT
Gathering Statistics About Oracle Beehive Data and Code Schemas After UpgradingAfter upgrading to Oracle Beehive Release 2 (2.0) and before your users access your upgrade Oracle Beehive deployment, you must gather statistics about the Oracle Beehive data and code schemas. Otherwise, you may experience serious performance degradation or service interruptions.
This section contains the following topics:
■ Gathering Statistics About Oracle Beehive Data Schema
■ Gathering Statistics About Oracle Beehive Code Schema
Refer to "Gathering Statistics with DBMS_STATS Procedures" in the chapter "Managing Optimized Statistics" in Oracle Database Performance Tuning Guide for more information.
Gathering Statistics About Oracle Beehive Data SchemaRun the following SQL*Plus command as the SYS user to gather statistics about the Oracle Beehive data schema:
SQL> exec DBMS_STATS.GATHER_SCHEMA_STATS('BEE_DATA');
BEE_DATA is the name of the Oracle Beehive data schema.
Gathering Statistics About Oracle Beehive Code SchemaRun the following SQL*Plus commands as the SYS user to gather statistics about the Oracle Beehive code schema:
SQL> exec DBMS_STATS.GATHER_SCHEMA_STATS('<CODE_SCHEMA>');
Note: Any customization to the deployment structure (such as extra OC4J or service instances) or start/stop parameters (such as the maximum heap size of an OC4J instance) will be lost when you apply a deployment template with the command beectl modify_deployment_structure. The deployment template specified by this command will overwrite any customization in your Oracle Beehive deployment.
Post-Upgrade Procedures
12-16 Oracle Beehive Installation Guide
<CODE_SCHEMA> is the name of the code schema user. To retrieve the name of the code schema, run the beectl list_schemas command as follows:
beectl list_schemas --schema_type 1 --status 4
schema_name: BEE_CODE_05042009_1 schema_id: 135 version_id: 2.0.1.1.0schema_type: 1 status: 4 creation_time: 2009-05-0412:26:03.0 activationready_time: 2009-05-04 12:52:50.0activation_time: 2009-05-04 13:11:42.0 description: insert description here
Refer to "Running Perl Script post_upgrade_db_actions.pl" for more information about the beectl list_schemas command.
Upgrading Voicemail ConfigurationAfter you have upgraded Oracle Beehive from an earlier version to version 1.4, you must re-create your voicemail facilities using the new method, and remove facilities that you created in earlier version with the beectl add_config_object command.
You can list facilities and groups created using the earlier method by using the following command (from the operating system shell, so you can make use of the grep utility):
beectl list_components | grep -i voice
Locate all the voice components defined with a voicemail DNIS alias. Then, check which group is associated to each voicemail DNIS by using the beectl list_properties command:
beectl list_properties --component <voicemail DNIS>
Run this command for each identified component, and make a note of the group associated with each voicemail DNIS.
Once you have this information, you can assign the groups and phone numbers using the new facility configuration method, by using the new beectl add_voice_facility command. The following example demonstrates briefly how to use the command:
beectl add_voice_facility --group_collabid <GROUP_COLLAB_ID> --include "18885551111|18885552???" --exclude "188855529??"
The --include statement associates phone number 18885551111 and phone number range 18885552000-18885552999.
The --exclude statement associates the phone number range 18885552900-18885552999 not to be included in the broader include range.
The value of --group_collabid is the CollabID of a group. You can find this value for any group by using the beectl list_groups command with the global option --entity_format id:
beectl list_groups --group <group identifier> --show ALL --entity_format id
See Also: For complete information on creating voicemail facilities, see "Managing Oracle Beehive Voicemail and Fax" in the Oracle Beehive Administrator's Guide.
Post-Upgrade Procedures
Upgrading Oracle Beehive Overview 12-17
Use this command with the group that was defined for voicemail. If you followed the upgrade procedure described earlier to gather all the information, then the value for the <GROUP_COLLAB_ID> was listed when you used the beectl list_properties command.
Re-enabling UDS Synchronization
If you disabled UDS synchronization as described in "Disable User Directory Services Synchronization", run the following command from any application tier to enable it:
beectl modify_property --component OID_Profile --name ProfileState --value ENABLE --activate_configuration
Upgrading User Directory ServicesAfter upgrading Oracle Beehive to version 2.0, run the following SQL scripts:
1. Run the following script as the code schema user of your upgraded Oracle Beehive instance.
Select count(*) from user_scheduler_jobs where job_name like 'PATCH_UDS_CON_GUARD_UPD_%’;
To retrieve the name of the code schema, refer to "Gathering Statistics About Oracle Beehive Code Schema". If you see a count greater than 0, this means that the contact sensitivity upgrade process is still running. Rerun this script to check if the contact sensitivity fixing dbms jobs have completed. If you see a count equal to 0, this means that the contact sensitivity upgrade process is over. Please execute the next script.
2. Run the following SQL as the code schema user of your upgraded Oracle Beehive instance.
Select job_name, status, additional_info from user_scheduler_job_run_details where job_name like 'PATCH_UDS_CON_GUARD_UPD_%';
If the status of any of the job is not 'SUCCEEDED', that means the contact sensitivity fixing dbms jobs have not successfully completed. Please contact support. If the status for all the jobs is 'SUCCEEDED', it means that the contact sensitivity fixing dbms jobs have successfully completed. Please execute the next script.
3. Apply the patch for defect 9854302 before proceeding to the next step. If this patch is not applied, then the post upgrade step may delete E-mail preferences which may result in users losing their Zimbra e-mail preferences.
Note: If you upgrading from 1.5.x to 2.0.x, comment out the vm_purge.sql before executing the script vm_seed.sql.
Note: This section only applies to patches for Oracle Beehive Release 2 (2.0).
Note: The system should not be made accessible to users until all the following scripts have been completed successfully.
Post-Upgrade Procedures
12-18 Oracle Beehive Installation Guide
4. Run the following script as the BEE_DATA user, which is the name of the Oracle Beehive data schema.
<Oracle Beehive home>/beehive/tmp/patch/7685703/db/uds_post_upgrade_data.sql;
Run this script only after the previous script has been successfully executed. On successful execution of this script, run the next script.
5. Run this script as the code schema user of your upgraded Oracle Beehive instance:
<Oracle Beehive home>/beehive/tmp/patch/7685703/db/uds_post_upgrade_seed.sql;sIf you see the message "Contact sensitivity fixing dbms jobs are running. Please execute the script after some time" this means that the contact sensitivity upgrade process is still running. Rerun the script at a later time. Run this script only after the previous scripts have been successfully completed.
This script will start a job to cleanup entries. You can now proceed with the execution of the subsequent steps. However no further patch should be applied till the clean job has been completed.
6. To check the status of the job, run the following query:
SQL> SELECT COUNT(*) FROM user_scheduler_jobs WHERE job_name LIKE 'PATCH_UDS_POST_UPG_2_0_JOB%';
Run this script as the code schema user of your upgraded Oracle Beehive instance. If you see a count greater then 0, this means that the cleanup process is still running. No further patches should be applied. Rerun this script at a later time to check if the cleanup dbms jobs have completed. If you see a count equal to 0, it means that the cleanup dbms job is over.
7. Execute the next script.
SQL> SELECT job_name, status, additional_info FROM user_scheduler_job_run_details WHERE job_name LIKE 'PATCH_UDS_POST_UPG_2_0_JOB%';
Run this script as the code schema user of your upgraded Oracle Beehive instance. If the status of the job is not 'SUCCEEDED', it means that the cleanup dbms job has not successfully completed.
If the status for all the jobs is 'SUCCEEDED', it means that the cleanup dbms jobs have successfully completed.
Upgrading Mobile Device Management Service After Oracle Beehive UpgradeIf you configured Oracle Application Server Single Sign-On for your Oracle Beehive Release 1 (1.5.x) deployment, and you upgraded it to Oracle Beehive Release 2 (2.0), follow these steps to upgrade the Mobile Device Management Service:
1. List all service instances of type MobileDmServiceInstance:
beectl list_components --type MobileDmServiceInstance -------------------------+--------------------------------------------------Component type | Component identifier-------------------------+--------------------------------------------------MobileDmServiceInstance | <instance_####1>MobileDmServiceInstance | <instance_####2>-------------------------+--------------------------------------------------
2. Upgrade each service instance of type MobileDmServiceInstance. For example:
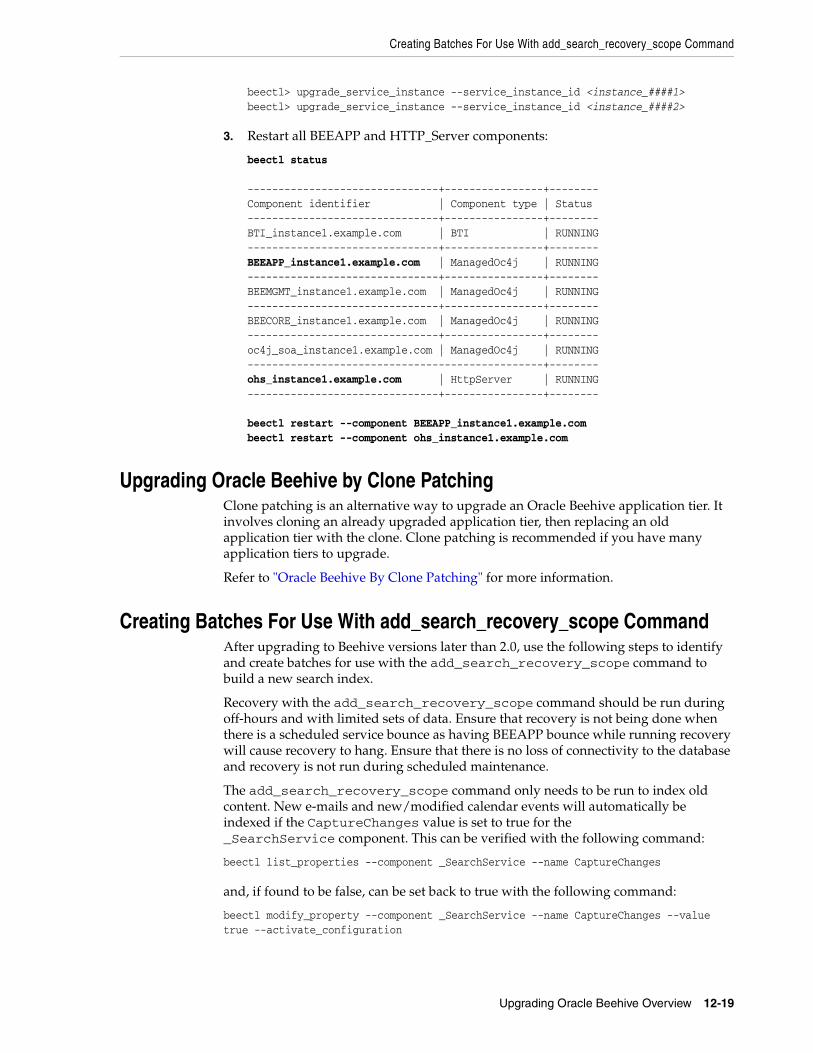
Creating Batches For Use With add_search_recovery_scope Command
Upgrading Oracle Beehive Overview 12-19
beectl> upgrade_service_instance --service_instance_id <instance_####1>beectl> upgrade_service_instance --service_instance_id <instance_####2>
3. Restart all BEEAPP and HTTP_Server components:
beectl status -------------------------------+----------------+--------Component identifier | Component type | Status -------------------------------+----------------+--------BTI_instance1.example.com | BTI | RUNNING -------------------------------+----------------+--------BEEAPP_instance1.example.com | ManagedOc4j | RUNNING -------------------------------+----------------+--------BEEMGMT_instance1.example.com | ManagedOc4j | RUNNING -------------------------------+----------------+--------BEECORE_instance1.example.com | ManagedOc4j | RUNNING -------------------------------+----------------+--------oc4j_soa_instance1.example.com | ManagedOc4j | RUNNING ------------------------------------------------+--------ohs_instance1.example.com | HttpServer | RUNNING -------------------------------+----------------+--------
beectl restart --component BEEAPP_instance1.example.combeectl restart --component ohs_instance1.example.com
Upgrading Oracle Beehive by Clone PatchingClone patching is an alternative way to upgrade an Oracle Beehive application tier. It involves cloning an already upgraded application tier, then replacing an old application tier with the clone. Clone patching is recommended if you have many application tiers to upgrade.
Refer to "Oracle Beehive By Clone Patching" for more information.
Creating Batches For Use With add_search_recovery_scope Command After upgrading to Beehive versions later than 2.0, use the following steps to identify and create batches for use with the add_search_recovery_scope command to build a new search index.
Recovery with the add_search_recovery_scope command should be run during off-hours and with limited sets of data. Ensure that recovery is not being done when there is a scheduled service bounce as having BEEAPP bounce while running recovery will cause recovery to hang. Ensure that there is no loss of connectivity to the database and recovery is not run during scheduled maintenance.
The add_search_recovery_scope command only needs to be run to index old content. New e-mails and new/modified calendar events will automatically be indexed if the CaptureChanges value is set to true for the _SearchService component. This can be verified with the following command:
beectl list_properties --component _SearchService --name CaptureChanges
and, if found to be false, can be set back to true with the following command:
beectl modify_property --component _SearchService --name CaptureChanges --value true --activate_configuration
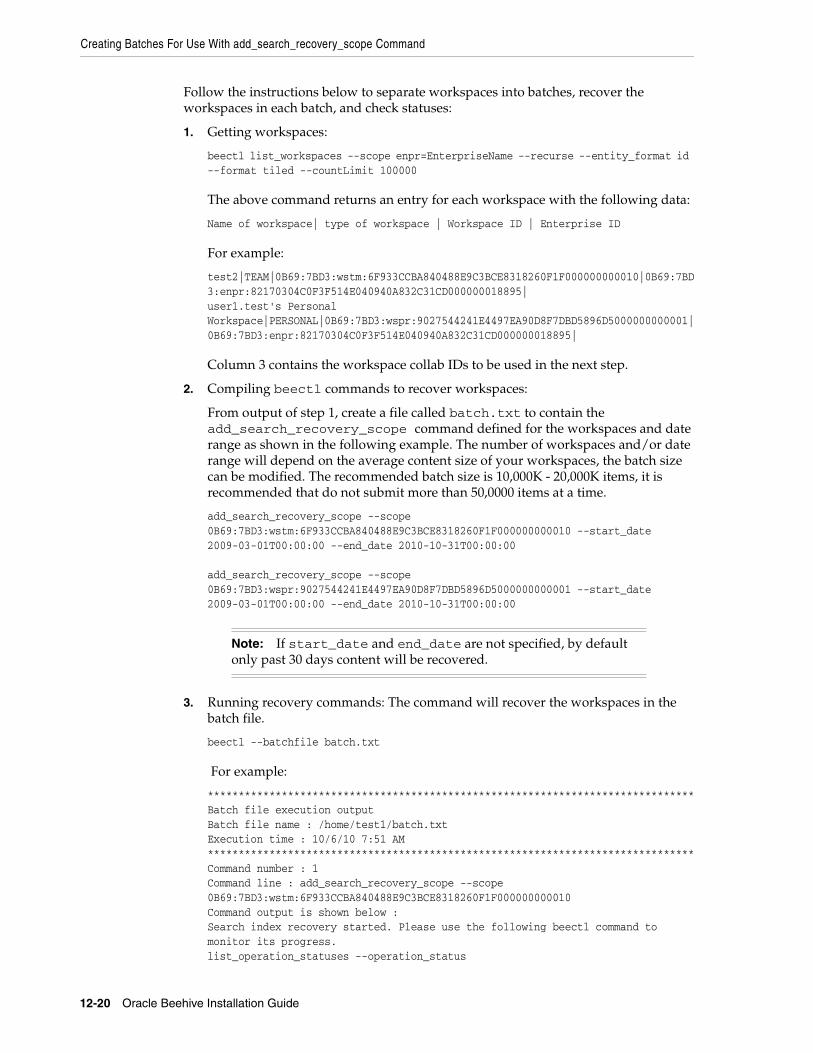
Creating Batches For Use With add_search_recovery_scope Command
12-20 Oracle Beehive Installation Guide
Follow the instructions below to separate workspaces into batches, recover the workspaces in each batch, and check statuses:
1. Getting workspaces:
beectl list_workspaces --scope enpr=EnterpriseName --recurse --entity_format id --format tiled --countLimit 100000
The above command returns an entry for each workspace with the following data:
Name of workspace| type of workspace | Workspace ID | Enterprise ID
For example:
test2|TEAM|0B69:7BD3:wstm:6F933CCBA840488E9C3BCE8318260F1F000000000010|0B69:7BD3:enpr:82170304C0F3F514E040940A832C31CD000000018895|user1.test's Personal Workspace|PERSONAL|0B69:7BD3:wspr:9027544241E4497EA90D8F7DBD5896D5000000000001|0B69:7BD3:enpr:82170304C0F3F514E040940A832C31CD000000018895|
Column 3 contains the workspace collab IDs to be used in the next step.
2. Compiling beectl commands to recover workspaces:
From output of step 1, create a file called batch.txt to contain the add_search_recovery_scope command defined for the workspaces and date range as shown in the following example. The number of workspaces and/or date range will depend on the average content size of your workspaces, the batch size can be modified. The recommended batch size is 10,000K - 20,000K items, it is recommended that do not submit more than 50,0000 items at a time.
add_search_recovery_scope --scope 0B69:7BD3:wstm:6F933CCBA840488E9C3BCE8318260F1F000000000010 --start_date 2009-03-01T00:00:00 --end_date 2010-10-31T00:00:00
add_search_recovery_scope --scope 0B69:7BD3:wspr:9027544241E4497EA90D8F7DBD5896D5000000000001 --start_date 2009-03-01T00:00:00 --end_date 2010-10-31T00:00:00
3. Running recovery commands: The command will recover the workspaces in the batch file.
beectl --batchfile batch.txt
For example:
*******************************************************************************Batch file execution outputBatch file name : /home/test1/batch.txtExecution time : 10/6/10 7:51 AM*******************************************************************************Command number : 1Command line : add_search_recovery_scope --scope 0B69:7BD3:wstm:6F933CCBA840488E9C3BCE8318260F1F000000000010Command output is shown below :Search index recovery started. Please use the following beectl command to monitor its progress.list_operation_statuses --operation_status
Note: If start_date and end_date are not specified, by default only past 30 days content will be recovered.
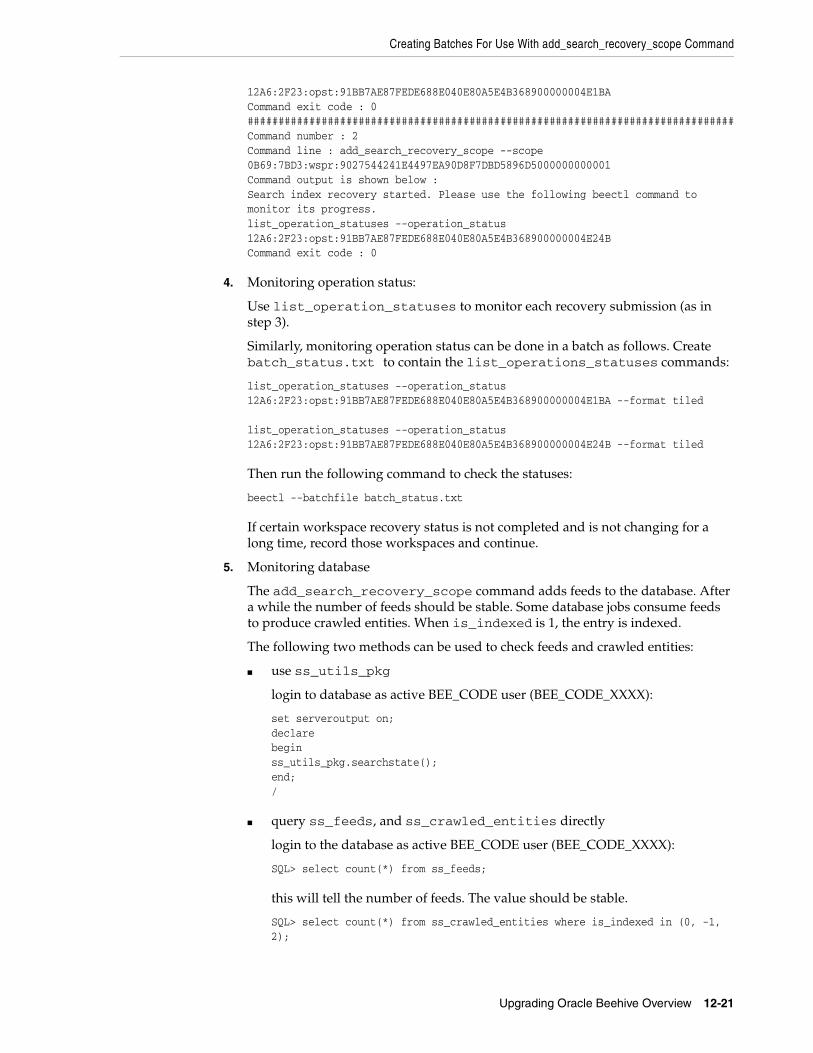
Creating Batches For Use With add_search_recovery_scope Command
Upgrading Oracle Beehive Overview 12-21
12A6:2F23:opst:91BB7AE87FEDE688E040E80A5E4B368900000004E1BACommand exit code : 0###############################################################################Command number : 2Command line : add_search_recovery_scope --scope 0B69:7BD3:wspr:9027544241E4497EA90D8F7DBD5896D5000000000001Command output is shown below :Search index recovery started. Please use the following beectl command to monitor its progress.list_operation_statuses --operation_status 12A6:2F23:opst:91BB7AE87FEDE688E040E80A5E4B368900000004E24BCommand exit code : 0
4. Monitoring operation status:
Use list_operation_statuses to monitor each recovery submission (as in step 3).
Similarly, monitoring operation status can be done in a batch as follows. Create batch_status.txt to contain the list_operations_statuses commands:
list_operation_statuses --operation_status 12A6:2F23:opst:91BB7AE87FEDE688E040E80A5E4B368900000004E1BA --format tiled
list_operation_statuses --operation_status 12A6:2F23:opst:91BB7AE87FEDE688E040E80A5E4B368900000004E24B --format tiled
Then run the following command to check the statuses:
beectl --batchfile batch_status.txt
If certain workspace recovery status is not completed and is not changing for a long time, record those workspaces and continue.
5. Monitoring database
The add_search_recovery_scope command adds feeds to the database. After a while the number of feeds should be stable. Some database jobs consume feeds to produce crawled entities. When is_indexed is 1, the entry is indexed.
The following two methods can be used to check feeds and crawled entities:
■ use ss_utils_pkg
login to database as active BEE_CODE user (BEE_CODE_XXXX):
set serveroutput on;declarebeginss_utils_pkg.searchstate();end;/
■ query ss_feeds, and ss_crawled_entities directly
login to the database as active BEE_CODE user (BEE_CODE_XXXX):
SQL> select count(*) from ss_feeds;
this will tell the number of feeds. The value should be stable.
SQL> select count(*) from ss_crawled_entities where is_indexed in (0, -1, 2);

Creating Batches For Use With add_search_recovery_scope Command
12-22 Oracle Beehive Installation Guide
this will tell the number of crawled entities under indexing.
Wait for a while until both the numbers of feeds and of ss_crawled_entities are stable before handling the next batch.
6. Continue from step 2 to handle the next batch.
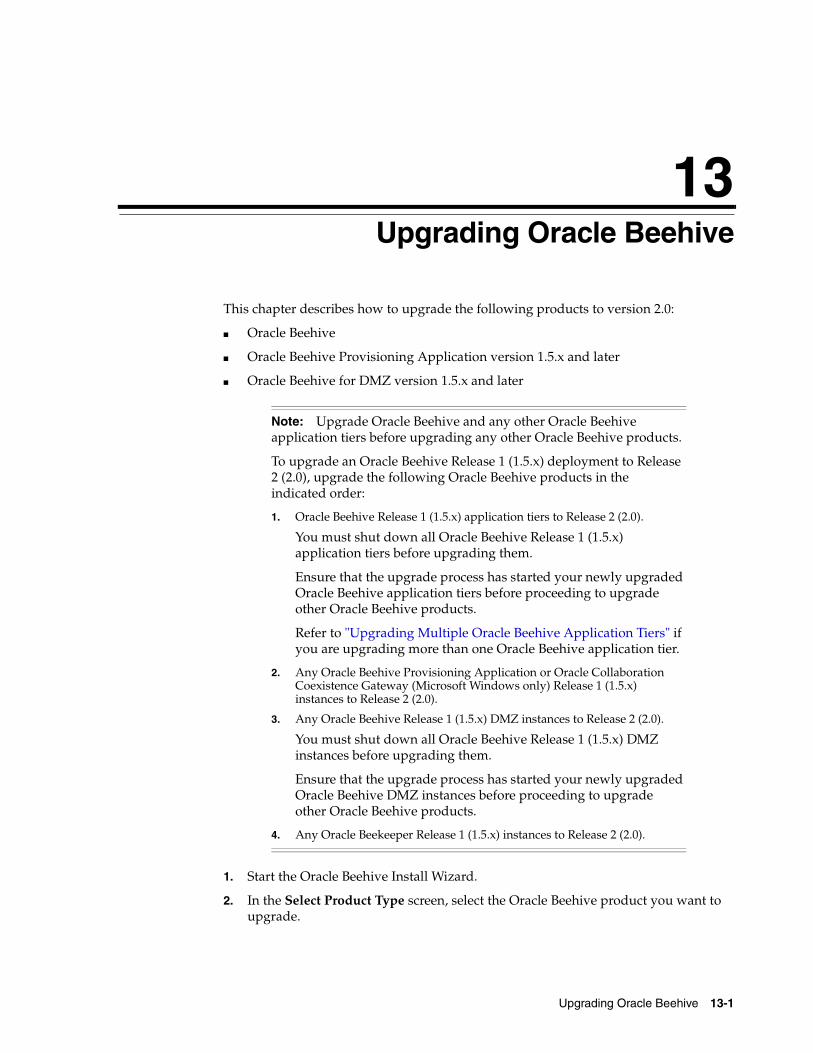
13
Upgrading Oracle Beehive 13-1
13Upgrading Oracle Beehive
This chapter describes how to upgrade the following products to version 2.0:
■ Oracle Beehive
■ Oracle Beehive Provisioning Application version 1.5.x and later
■ Oracle Beehive for DMZ version 1.5.x and later
1. Start the Oracle Beehive Install Wizard.
2. In the Select Product Type screen, select the Oracle Beehive product you want to upgrade.
Note: Upgrade Oracle Beehive and any other Oracle Beehive application tiers before upgrading any other Oracle Beehive products.
To upgrade an Oracle Beehive Release 1 (1.5.x) deployment to Release 2 (2.0), upgrade the following Oracle Beehive products in the indicated order:
1. Oracle Beehive Release 1 (1.5.x) application tiers to Release 2 (2.0).
You must shut down all Oracle Beehive Release 1 (1.5.x) application tiers before upgrading them.
Ensure that the upgrade process has started your newly upgraded Oracle Beehive application tiers before proceeding to upgrade other Oracle Beehive products.
Refer to "Upgrading Multiple Oracle Beehive Application Tiers" if you are upgrading more than one Oracle Beehive application tier.
2. Any Oracle Beehive Provisioning Application or Oracle Collaboration Coexistence Gateway (Microsoft Windows only) Release 1 (1.5.x) instances to Release 2 (2.0).
3. Any Oracle Beehive Release 1 (1.5.x) DMZ instances to Release 2 (2.0).
You must shut down all Oracle Beehive Release 1 (1.5.x) DMZ instances before upgrading them.
Ensure that the upgrade process has started your newly upgraded Oracle Beehive DMZ instances before proceeding to upgrade other Oracle Beehive products.
4. Any Oracle Beekeeper Release 1 (1.5.x) instances to Release 2 (2.0).
Oracle Beehive Upgrade Process Sequence of Screens
13-2 Oracle Beehive Installation Guide
3. After the Select Installation Type screen, the Oracle Beehive Installation Wizard will automatically detect if you have any existing Oracle Beehive products on the computer from which you started the Oracle Beehive Install Wizard.
If the Install Wizard detects any existing Oracle Beehive products that can be upgraded, you will see the screen Upgrade Existing Home. Depending on the product you want to upgrade, refer to one of the following sections:
■ Oracle Beehive Upgrade Process Sequence of Screens
■ Oracle Beehive Provisioning Application Upgrade Process Sequence of Screens
■ Oracle Beehive for DMZ Upgrade Process Sequence of Screens
Oracle Beehive Upgrade Process Sequence of ScreensIf the Oracle Beehive Wizard detects any existing Oracle Beehive Release 1 (1.5.x) instances on the computer from which you started the wizard, the following screens will appear:
■ Upgrade Existing Home
■ Specify Home Location to Upgrade
■ Running Instances
■ Configure Security Updates
■ Database Information for Upgrade
■ Upgrade Summary
■ Upgrade Process
■ Configuration Assistants
Note: In Microsoft Windows, ensure the following before proceeding with upgrading Oracle Beehive:
■ Ensure that there is only one window session (desktop) is present. Close all other window sessions. Many window sessions can be opened with Windows Remote Desktop or Virtual Network Computing (VNC) applications.
■ Ensure that you have closed all Windows Explorer windows, unnecessary applications, and command prompts. These may interfere with the upgrade process, especially if Windows Explorer or a command prompt is pointing to the directory <Oracle home>\j2ee.
Note: You must shut down all Oracle Beehive Release 1 (1.5.x) application tiers before upgrading them.
Ensure that the upgrade process has started your newly upgraded Oracle Beehive application tiers before proceeding to upgrade other Oracle Beehive products.
Refer to "Upgrading Multiple Oracle Beehive Application Tiers" if you are upgrading more than one Oracle Beehive application tier.
Oracle Beehive Upgrade Process Sequence of Screens
Upgrading Oracle Beehive 13-3
Upgrade Existing HomeSpecify if you want to upgrade the product you selected in Select Product Type.
If the installer detected any existing Oracle Beehive Release 1 (1.5.x) instances, specify Yes to upgrade one of those instances to Oracle Beehive Release 2 (2.0).
If you specify No, the Install Wizard will proceed to perform a standard installation of Oracle Beehive Release 2 (2.0).
Specify Home Location to UpgradeSelect from the drop down box the complete path of the Oracle Beehive instance you want to upgrade.
The drop down box will only contain Oracle Beehive home paths with the following characteristics:
■ Contains an instance of Oracle Beehive Release 1 (1.5.x) or Oracle Beehive Integration for Zimbra version 1.5.x
■ Is registered in the central Oracle Universal Installer inventory of the computer from which you started the Install Wizard.
Running InstancesShut down all instances listed in the table. Once you have shut the instances down, click the Rescan button to verify that all managed instances are down.
You must manually verify that all unmanaged instances (listed in red) are shut down. Unmanaged instances include Oracle Beekeeper instances and Oracle Beehive DMZ instances. Currently, Oracle Beehive cannot determine whether an unmanaged instance has been fully shut down (regardless of whether the instance is on the same machine as the pending upgrade or not). Once you have shut down all unmanaged instances, select Unmanaged Instances Verified to continue the upgrade.
Configure Security UpdatesSpecify your My Oracle Support account details so that Oracle can notify you of any critical security updates.
Periodically, Security Updates automatically gathers configuration information of your installed Oracle products and uploads it to Oracle's support systems. Consequently, you may access this information through your My Oracle Support account and Oracle can contact you if there are any security updates.
Note: The information collected by Security Updates is limited to configuration information. The data collected does not include personally identifiable information (with the exception of a local contact name in case of transmission problems). You may still use all licensed Oracle functionality if you decline to enable Security Updates.
You may choose not to be notified for any critical security updates. Simply leave all fields in the Configure Security Updates screen blank and click Next to continue.

Oracle Beehive Upgrade Process Sequence of Screens
13-4 Oracle Beehive Installation Guide
EmailSpecify your My Oracle Support e-mail address. If you do not have a My Oracle Support account, you may specify a personal e-mail address.
I wish to receive security updates via My Oracle SupportSelect this check box if you want to receive security updates through My Oracle Support. Ensure that the e-mail address you entered in Email and the password you entered in My Oracle Support Password corresponds to your My Oracle Support user name and password, respectively.
If you specified a personal e-mail address in Email, then ensure that this check box is not selected.
My Oracle Support PasswordSpecify your My Oracle Support password.
Specify proxy server informationIf you click Next and the Install Wizard cannot establish a direct connection to an outside network to send your My Oracle Support information, the Specify proxy server information window appears. Enter the following information:
■ Proxy Server: The host name of your proxy server
■ Proxy Port: The port number of your proxy server
■ Proxy Username: The user name required to authenticate your proxy server, if required
■ Proxy Password: The password required to authenticate your proxy server, if required
■ I want to remain uninformed of critical issues in my configuration: Selecting this check box disables Security Updates. If you select this check box, you do not need to specify any proxy details.
Database Information for UpgradeSpecify the password of the SYS schema for the database with the specified service name.
Upgrade SummaryThe Upgrade Summary screen presents a summary of the options you have specified so far:
■ Space Requirements: The disk space required to upgrade the product. The space requirement appears in a different color if the disk space available is less than what is required.
Oracle Beehive Upgrade Process Sequence of Screens
Upgrading Oracle Beehive 13-5
■ Inventory Location: The location of the oraInventory directory where all the installation information about your product will be stored.
■ Product: The name of the product you are upgrading, Oracle Beehive Release 1
■ Interview Details: The details of your inputs for the other screens, such as:
– Home Details: The location of the Oracle home that you are upgrading.
– Running Instances: Oracle Beehive instances that are still running. You must shut down and then verify that all Oracle Beehive instances are down before proceeding with the upgrade.
– Database Information for Upgrade: The masked password of the SYS schema of the existing Oracle Database instance that will be used by this upgrade process.
– Site Key: The masked site key that you specified. This is only requested if you are upgrading your first Oracle Beehive application tier.
When you have reviewed your inputs, click Upgrade to continue.
Upgrade ProcessUse this screen to monitor the upgrade process. Click Show Details to see the details in the description box that appears.
Configuration AssistantsThis screen displays the configuration assistants that the Oracle Beehive Install Wizard runs to upgrade Oracle Beehive.
The Oracle Beehive Install Wizard performs the following configuration assistants:
■ Upgrade Pre-Configuration
■ Upgrading Central Inventory
■ Enabling Home Instance
■ Configuring OPMN Memory Parameters (this is performed only if the Oracle home being upgrade is a standalone Oracle Beehive Integration for Zimbra home)
■ Base Platform Configuration
■ Stopping OPMN
■ Upgrading SOA Schemas (this is performed only for the first Oracle Beehive application tier being upgraded)
■ Preparing OWSM Upgrade
■ Disabling Beehive and Home Instances
Note: The space requirements shown on this screen do not include the space required in the target database.
The space requirements shown on this screen also might differ slightly from the actual space the component occupies on the installation disk. This is because of the differences in the disk configurations. For example, the space required on one hard drive might differ from the space required on another hard drive that uses different block size or that is managed by a different file system.
Oracle Beehive Provisioning Application Upgrade Process Sequence of Screens
13-6 Oracle Beehive Installation Guide
■ Starting OPMN
■ Performing OWSM Upgrade
■ Performing ESB Upgrade
■ Stopping OPMN
■ Running OPMN Log Configuration Assistant
■ Finalizing Application Server 10.1.3.4.0 Updates
■ Upgrading Beehive Schemas
■ Upgrading Beehive Midtier
■ Performing Post-Upgrade Actions
End of UpgradeThis screen indicates if the upgrade of Oracle Beehive is successful.
Oracle Beehive Provisioning Application Upgrade Process Sequence of Screens
If the Oracle Beehive Wizard detects that Oracle Beehive Provisioning Application version 1.5.x is installed on the computer from which you started the wizard, the following screens will appear:
■ Upgrade Existing Home
■ Specify Home Location to Upgrade
■ Database Information for Upgrade
■ Upgrade Summary
■ Upgrade Process
■ Configuration Assistants
■ End of Upgrade
Upgrade Existing HomeSpecify if you want to upgrade the product you selected in Select Product Type.
If the installer detected that Oracle Beehive Provisioning Application version 1.5.x is installed in your computer, specify Yes to upgrade it to version 2.0.
If you specify No, the Install Wizard will proceed to install Oracle Beehive Provisioning Application version 2.0 in a new Oracle home.
Specify Home Location to UpgradeSelect from the drop down box the complete path of the Oracle Beehive product you want to upgrade.
The drop down box will only contain Oracle Beehive home paths with the following characteristics:
■ Contains Oracle Beehive Provisioning Application version 1.5.x
■ Is registered in the central Oracle Universal Installer inventory of the computer from which you started the Install Wizard.

Oracle Beehive Provisioning Application Upgrade Process Sequence of Screens
Upgrading Oracle Beehive 13-7
Database Information for UpgradeSpecify the password of the SYS schema for the database with the specified service name.
Upgrade SummaryThe Upgrade Summary screen presents a summary of the options you have specified so far:
■ Space Requirements: The disk space required to upgrade the product. The space requirement appears in a different color if the disk space available is less than what is required.
■ Inventory Location: The location of the oraInventory directory where all the installation information about your product will be stored.
■ Product: The name of the product you are upgrading, Oracle Beehive Provisioning Application
■ Interview Details: The details of your inputs for the other screens, such as:
– Home Details: The location of the Oracle home that you are upgrading.
When you have reviewed your inputs, click Upgrade to continue.
Upgrade ProcessUse this screen to monitor the upgrade process. Click Show Details to see the details in the description box that appears.
Configuration AssistantsThis screen displays the configuration assistants that the Oracle Beehive Install Wizard runs to upgrade Oracle Beehive.
End of UpgradeThis screen indicates if the upgrade of Oracle Beehive Provisioning Application is successful.
Note: The space requirements shown on this screen do not include the space required in the target database.
The space requirements shown on this screen also might differ slightly from the actual space the component occupies on the installation disk. This is because of the differences in the disk configurations. For example, the space required on one hard drive might differ from the space required on another hard drive that uses different block size or that is managed by a different file system.
Note: After upgrading Oracle Beehive Provisioning Application to version 2.0, a component named after the version number to which you upgraded will be added to the Oracle Enterprise Manager Grid Control software library.
Oracle Beehive for DMZ Upgrade Process Sequence of Screens
13-8 Oracle Beehive Installation Guide
Oracle Beehive for DMZ Upgrade Process Sequence of ScreensIf the Oracle Beehive Wizard detects that Oracle Beehive for DMZ version 1.5.x is installed on the computer from which you started the wizard, the following screens will appear:
■ Upgrade Existing Home
■ Specify Home Location to Upgrade
■ Upgrade Summary
■ Upgrade Process
■ Configuration Assistants
■ End of Upgrade
Upgrade Existing HomeSpecify if you want to upgrade the product you selected in Select Product Type.
If the installer detected that Oracle Beehive for DMZ version 1.5.x is installed in your computer, specify Yes to upgrade it to version 2.0.
If you specify No, the Install Wizard will proceed to install Oracle Beehive for DMZ version 2.0 in a new Oracle home.
Specify Home Location to UpgradeSelect from the drop down box the complete path of the Oracle Beehive product you want to upgrade.
The drop down box will only contain Oracle Beehive home paths with the following characteristics:
■ Contains Oracle Beehive for DMZ version 1.
■ Is registered in the central Oracle Universal Installer inventory of the computer from which you started the Install Wizard.
Upgrade SummaryThe Upgrade Summary screen presents a summary of the options you have specified so far:
■ Space Requirements: The disk space required to upgrade the product. The space requirement appears in a different color if the disk space available is less than what is required.
Note: You must shut down all Oracle Beehive Release 1 (1.5.x) DMZ instances before upgrading them.
Ensure that the upgrade process has started your newly upgraded Oracle Beehive DMZ instances before proceeding to upgrade other Oracle Beehive products.
Oracle Beehive for DMZ Upgrade Process Sequence of Screens
Upgrading Oracle Beehive 13-9
■ Inventory Location: The location of the oraInventory directory where all the installation information about your product will be stored.
■ Product: The name of the product you are upgrading, Oracle Beehive for DMZ
■ Interview Details: The details of your inputs for the other screens, such as:
– Home Details: The location of the Oracle home that you are upgrading.
When you have reviewed your inputs, click Upgrade to continue.
Upgrade ProcessUse this screen to monitor the upgrade process. Click Show Details to see the details in the description box that appears.
Configuration AssistantsThis screen displays the configuration assistants that the Oracle Beehive Install Wizard runs to upgrade Oracle Beehive for DMZ.
End of UpgradeThis screen indicates if the upgrade of Oracle Beehive for DMZ is successful.
Note: The space requirements shown on this screen do not include the space required in the target database.
The space requirements shown on this screen also might differ slightly from the actual space the component occupies on the installation disk. This is because of the differences in the disk configurations. For example, the space required on one hard drive might differ from the space required on another hard drive that uses different block size or that is managed by a different file system.

Oracle Beehive for DMZ Upgrade Process Sequence of Screens
13-10 Oracle Beehive Installation Guide
14
Upgrading Oracle Beekeeper 14-1
14 Upgrading Oracle Beekeeper
This chapter describes how to upgrade Oracle Beekeeper version 1.5.x and later to Oracle Beekeeper version 2.0.
Start the Oracle Beekeeper Install Wizard. If the Install Wizard detects that Oracle Beekeeper version 1.5.x or later is installed in your computer, you will see the screen Upgrade Existing Home. Refer to "Oracle Beekeeper Upgrade Process Sequence of Screens" for a summary of the upgrade process.
Oracle Beekeeper Upgrade Process Sequence of ScreensIf the Oracle Beekeeper Install Wizard detects that Oracle Beekeeper version 1.5 or later is installed on the computer from which you started the wizard, the following screens will appear:
■ Upgrade Existing Home
■ Location to Upgrade
■ Prerequisite Checks
■ Database Information for Upgrade
■ Upgrade Summary
■ Upgrade Process
■ Configuration Assistants
■ End of Upgrade
Upgrade Existing HomeSpecify if you want to upgrade the product you selected in Select Product Type.
If the Install Wizard detected that Oracle Beekeeper version 1.5.x is installed in your computer, specify Yes to upgrade it to Oracle Beekeeper version 2.0.
If you specify No, the Install Wizard will proceed to install Oracle Beekeeper version 2.0 in a new Oracle home.
Location to UpgradeSelect from the drop down box the complete path of the Oracle Beehive product you want to upgrade.
The drop down box will only contain Oracle Beehive home paths with the following characteristics:
Oracle Beekeeper Upgrade Process Sequence of Screens
14-2 Oracle Beehive Installation Guide
■ Contains Oracle Beekeeper version 1.5.x
■ Is registered in the central Oracle Universal Installer inventory of the computer from which you started the Install Wizard
Prerequisite ChecksThis screen displays the prerequisite checks that the Install Wizard runs. It verifies that the host (where you are upgrading to Oracle Beekeeper) meets all minimum requirements.
Some of the platform-independent checks that the Install Wizard performs include:
■ Operating system certification (or version)
■ Operating system patches and packages
■ Security kernel parameters
■ Memory
■ Swap space
■ Disk space
■ In Microsoft Windows, ensuring that the Window user for Oracle Beehive installation has administrative privileges.
If an automatic check fails, fix it and click Retry.
Database Information for UpgradeSpecify the password of the BEE_CODE schema for the database with the specified service name.
Upgrade SummaryThe Upgrade Summary screen presents a summary of the options you have specified so far:
■ Space Requirements: The disk space required to upgrade the product. The space requirement appears in a different color if the disk space available is less than what is required.
Note: If the disk space check fails and after clicking Retry (after fixing the low disk space issue) the check states "Not Executed," exit the Install Wizard and start it again.
In Microsoft Windows, The Windows user indicated in the Browse and Select: File or Directory screen must belong to the "Log on as a batch job" policy of the agent machine.
To add a user to this policy, click Start, Programs, Administrative Tools, and then Local Security Policy. In Local Security Settings, expand Local Policies, expand Local Policies, and then click User Rights Assignment. Double-click the policy Log on as a batch job. Click Add User or Group to add the user.
Tip: For details on why a check failed, select the check box against it and see the details in the description box at the bottom of the screen.
Oracle Beekeeper Upgrade Process Sequence of Screens
Upgrading Oracle Beekeeper 14-3
■ Inventory Location: The location of the oraInventory directory where all the installation information about your product will be stored.
■ Product: The name of the product you are upgrading, Oracle Beekeeper
■ Interview Details: The details of your inputs for the other screens, such as:
– Home Details: The location of the Oracle home that you are upgrading.
When you have reviewed your inputs, click Upgrade to continue.
Upgrade ProcessUse this screen to monitor the upgrade process. Click Show Details to see the details in the description box that appears.
Configuration AssistantsThis screen displays the configuration assistants that the Oracle Beehive Install Wizard runs to upgrade Oracle Beekeeper.
The Oracle Beehive Install Wizard performs the following configuration assistants:
■ Oracle Beekeeper Initialization
■ Installing Application Server 10.1.3.4.0 Patchset
■ Applying Oneoff Patches
■ Upgrading Required Applications
■ Deconfiguring Oracle Beekeeper Instance
■ Oracle Beekeeper Service Creation
■ Starting OC4J Instance
■ Oracle Beekeeper Application Deployment
■ Configuring OC4J Application Settings
■ Stopping OC4J Instance
■ Starting OC4J Instance
■ Performing Post-Upgrade Actions
End of UpgradeThis screen indicates if the upgrade of Oracle Beekeeper is successful.
Note: The space requirements shown on this screen do not include the space required in the target database.
The space requirements shown on this screen also might differ slightly from the actual space the component occupies on the installation disk. This is because of the differences in the disk configurations. For example, the space required on one hard drive might differ from the space required on another hard drive that uses different block size or that is managed by a different file system.

Oracle Beekeeper Upgrade Process Sequence of Screens
14-4 Oracle Beehive Installation Guide
15
Upgrading Oracle Beehive Collaboration Coexistence Gateway 15-1
15Upgrading Oracle Beehive CollaborationCoexistence Gateway
This chapter describes how to upgrade Oracle Collaboration Coexistence Gateway from version 2.0 to version 2.0.x:
1. Start the Oracle Beehive Install Wizard.
2. In the Select Product Type screen, select Oracle Beehive Collaboration Coexistence Gateway.
3. Select Oracle Coexistence Connector for Microsoft Exchange Server.
Oracle Coexistence Connector for Microsoft Exchange ServerIf the Oracle Beehive Wizard detects Oracle Coexistence Connector installed on the machine from which you started the wizard, the following screens will appear:
■ Upgrade Oracle Home
■ Specify Home Location to Upgrade
■ Shut down Coexistence Connector
■ Upgrade Summary
■ Upgrade Process
■ Configuration Assistants
Note: Upgrade all Oracle Coexistence Connector for Microsoft Exchange Server instances installed in the current Microsoft Exchange Server environment.
Ensure the following before proceeding with upgrading Oracle Collaboration Coexistence Gateway:
■ Ensure that there is only one window session (desktop) is present. Close all other window sessions. Many window sessions can be opened with Windows Remote Desktop or Virtual Network Computing (VNC) applications.
■ Ensure that you have closed all Windows Explorer windows, unnecessary applications, and command prompts. These may interfere with the upgrade process, especially if Windows Explorer or a command prompt is pointing to the directory <Oracle home>\j2ee.
Oracle Coexistence Connector for Microsoft Exchange Server
15-2 Oracle Beehive Installation Guide
■ End of Upgrade
Upgrade Oracle HomeIf the installer detected that Oracle Coexistence Connector version 2.0 is installed in your machine, specify Yes to upgrade it to the next higher version.
If you specify No, the Install Wizard will proceed to install Oracle Coexistence Connector version 2.0.x in a new Oracle home.
Specify Home Location to UpgradeSelect from the drop down box the complete path of the Oracle Beehive product you want to upgrade.
The drop down box will only contain Oracle Beehive home paths with the following characteristics:
■ Contains Oracle Coexistence Connector version 2.0.x
■ Is registered in the central Oracle Universal Installer inventory of the machine from which you started the Install Wizard.
Shut down Coexistence ConnectorShut down the Oracle Coexistence Connector instance that you are upgrading. Select the Manually Verified check box once you have shut down Oracle Coexistence Connector.
Refer to "Stopping Oracle Connector for Exchange" and "Stopping the Oracle Connector for IBM Lotus Domino" in Oracle Beehive Integration Guide for more information.
Upgrade SummaryThe Upgrade Summary screen presents a summary of the options you have specified so far:
■ Space Requirements: The disk space required to upgrade the product. The space requirement appears in a different color if the disk space available is less than what is required.
■ Inventory Location: The location of the oraInventory directory where all the installation information about your product will be stored.
■ Product: The name of the product you are upgrading, Oracle Coexistence Connector
■ Interview Details: The details of your inputs for the other screens, such as:
Note: The space requirements shown on this screen do not include the space required in the target database.
The space requirements shown on this screen also might differ slightly from the actual space the component occupies on the installation disk. This is because of the differences in the disk configurations. For example, the space required on one hard drive might differ from the space required on another hard drive that uses different block size or that is managed by a different file system.
Oracle Coexistence Connector for Microsoft Exchange Server
Upgrading Oracle Beehive Collaboration Coexistence Gateway 15-3
– Home Details: The location of the Oracle home that you are upgrading.
When you have reviewed your inputs, click Upgrade to continue.
Upgrade ProcessUse this screen to monitor the upgrade process. Click Show Details to see the details in the description box that appears.
Configuration AssistantsThis screen displays the configuration assistants that the Oracle Beehive Install Wizard runs to upgrade Oracle Coexistence Connector.
End of UpgradeThis screen indicates if the upgrade of Oracle Coexistence Connector is successful.

Oracle Coexistence Connector for Microsoft Exchange Server
15-4 Oracle Beehive Installation Guide
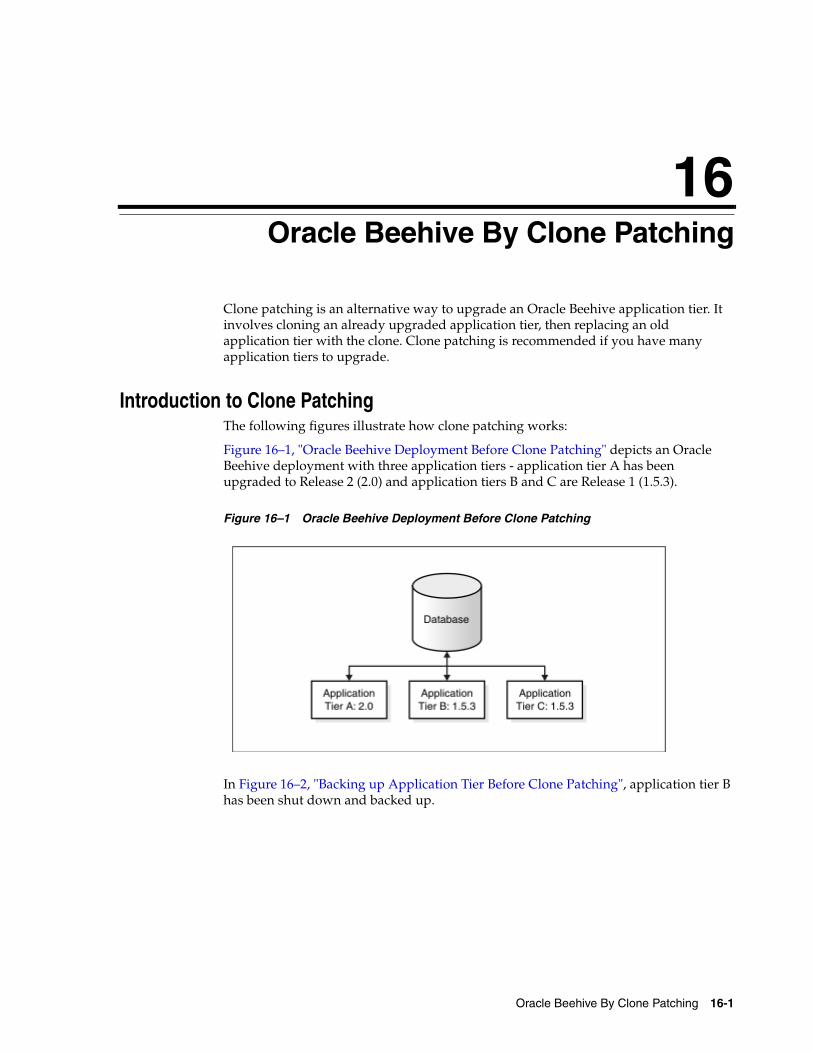
16
Oracle Beehive By Clone Patching 16-1
16 Oracle Beehive By Clone Patching
Clone patching is an alternative way to upgrade an Oracle Beehive application tier. It involves cloning an already upgraded application tier, then replacing an old application tier with the clone. Clone patching is recommended if you have many application tiers to upgrade.
Introduction to Clone PatchingThe following figures illustrate how clone patching works:
Figure 16–1, "Oracle Beehive Deployment Before Clone Patching" depicts an Oracle Beehive deployment with three application tiers - application tier A has been upgraded to Release 2 (2.0) and application tiers B and C are Release 1 (1.5.3).
Figure 16–1 Oracle Beehive Deployment Before Clone Patching
In Figure 16–2, "Backing up Application Tier Before Clone Patching", application tier B has been shut down and backed up.
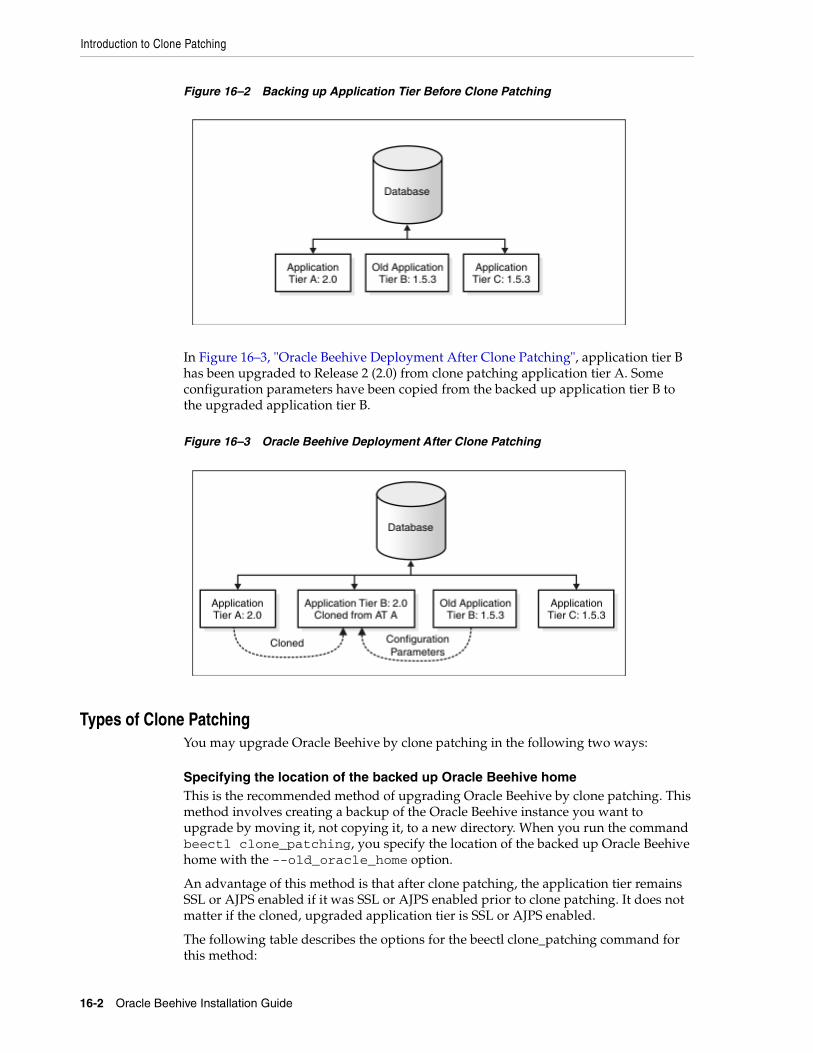
Introduction to Clone Patching
16-2 Oracle Beehive Installation Guide
Figure 16–2 Backing up Application Tier Before Clone Patching
In Figure 16–3, "Oracle Beehive Deployment After Clone Patching", application tier B has been upgraded to Release 2 (2.0) from clone patching application tier A. Some configuration parameters have been copied from the backed up application tier B to the upgraded application tier B.
Figure 16–3 Oracle Beehive Deployment After Clone Patching
Types of Clone PatchingYou may upgrade Oracle Beehive by clone patching in the following two ways:
Specifying the location of the backed up Oracle Beehive homeThis is the recommended method of upgrading Oracle Beehive by clone patching. This method involves creating a backup of the Oracle Beehive instance you want to upgrade by moving it, not copying it, to a new directory. When you run the command beectl clone_patching, you specify the location of the backed up Oracle Beehive home with the --old_oracle_home option.
An advantage of this method is that after clone patching, the application tier remains SSL or AJPS enabled if it was SSL or AJPS enabled prior to clone patching. It does not matter if the cloned, upgraded application tier is SSL or AJPS enabled.
The following table describes the options for the beectl clone_patching command for this method:
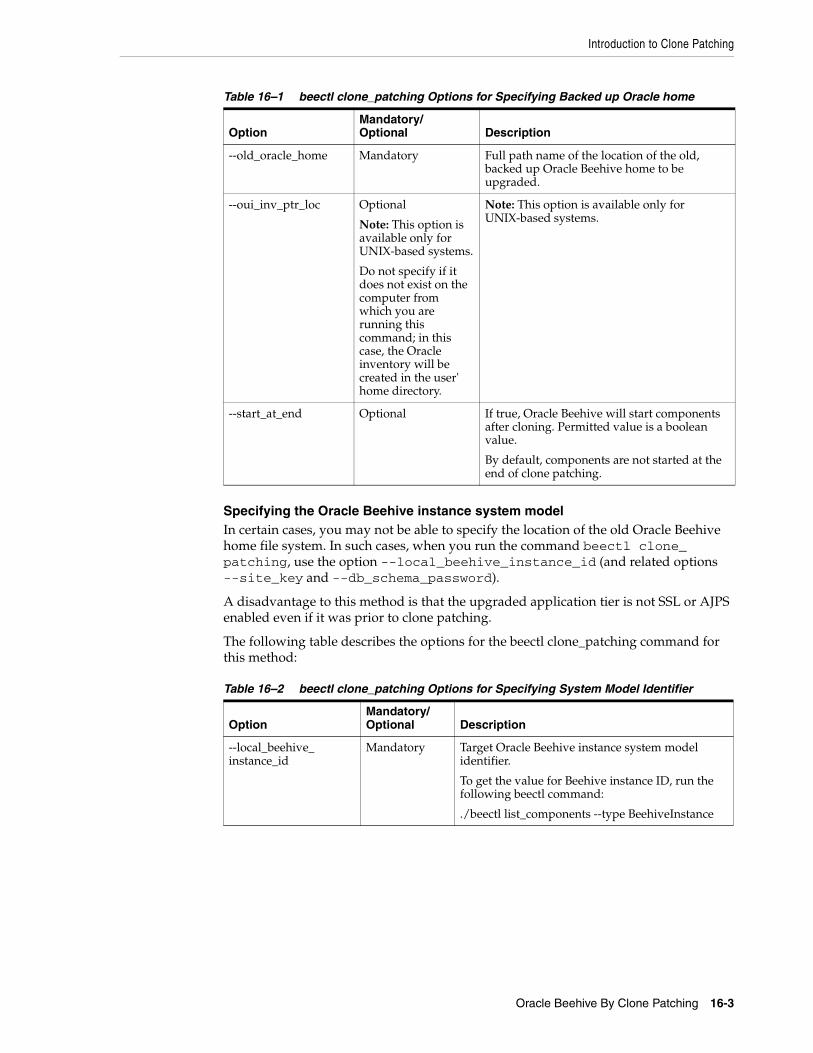
Introduction to Clone Patching
Oracle Beehive By Clone Patching 16-3
Specifying the Oracle Beehive instance system modelIn certain cases, you may not be able to specify the location of the old Oracle Beehive home file system. In such cases, when you run the command beectl clone_patching, use the option --local_beehive_instance_id (and related options --site_key and --db_schema_password).
A disadvantage to this method is that the upgraded application tier is not SSL or AJPS enabled even if it was prior to clone patching.
The following table describes the options for the beectl clone_patching command for this method:
Table 16–1 beectl clone_patching Options for Specifying Backed up Oracle home
OptionMandatory/ Optional Description
--old_oracle_home Mandatory Full path name of the location of the old, backed up Oracle Beehive home to be upgraded.
--oui_inv_ptr_loc Optional
Note: This option is available only for UNIX-based systems.
Do not specify if it does not exist on the computer from which you are running this command; in this case, the Oracle inventory will be created in the user' home directory.
Note: This option is available only for UNIX-based systems.
--start_at_end Optional If true, Oracle Beehive will start components after cloning. Permitted value is a boolean value.
By default, components are not started at the end of clone patching.
Table 16–2 beectl clone_patching Options for Specifying System Model Identifier
OptionMandatory/ Optional Description
--local_beehive_instance_id
Mandatory Target Oracle Beehive instance system model identifier.
To get the value for Beehive instance ID, run the following beectl command:
./beectl list_components --type BeehiveInstance
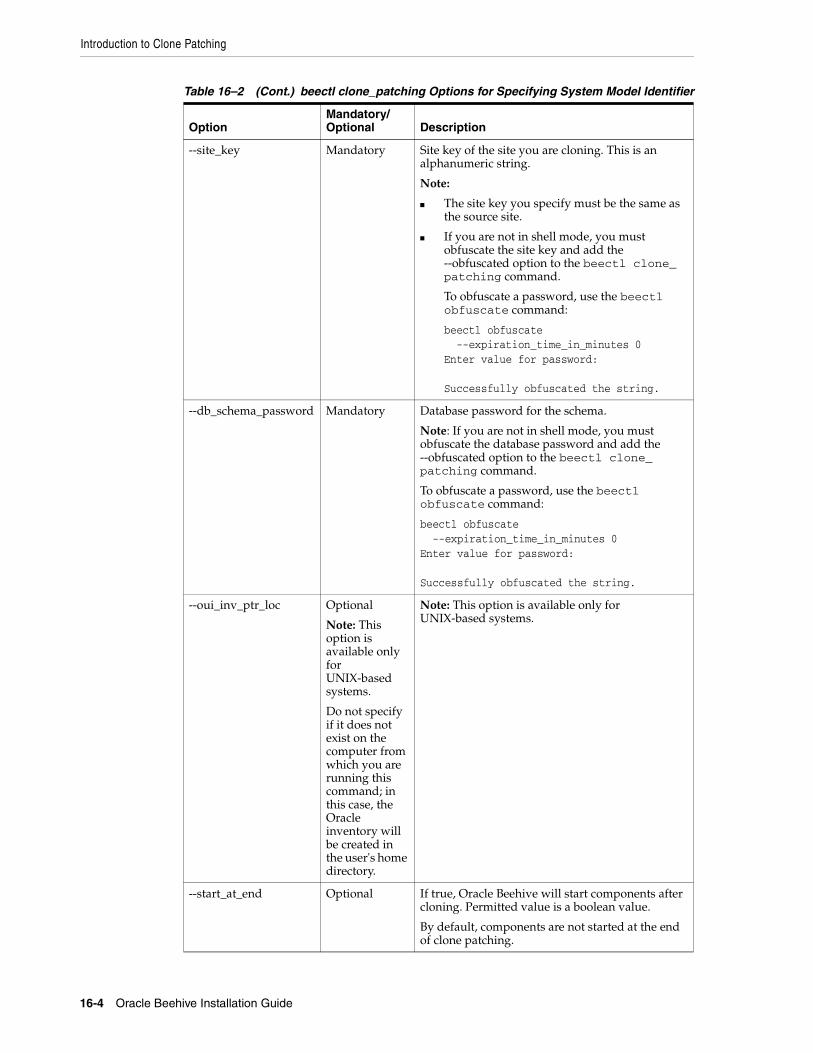
Introduction to Clone Patching
16-4 Oracle Beehive Installation Guide
--site_key Mandatory Site key of the site you are cloning. This is an alphanumeric string.
Note:
■ The site key you specify must be the same as the source site.
■ If you are not in shell mode, you must obfuscate the site key and add the --obfuscated option to the beectl clone_patching command.
To obfuscate a password, use the beectl obfuscate command:
beectl obfuscate --expiration_time_in_minutes 0Enter value for password: Successfully obfuscated the string.
--db_schema_password Mandatory Database password for the schema.
Note: If you are not in shell mode, you must obfuscate the database password and add the --obfuscated option to the beectl clone_patching command.
To obfuscate a password, use the beectl obfuscate command:
beectl obfuscate --expiration_time_in_minutes 0Enter value for password: Successfully obfuscated the string.
--oui_inv_ptr_loc Optional
Note: This option is available only for UNIX-based systems.
Do not specify if it does not exist on the computer from which you are running this command; in this case, the Oracle inventory will be created in the user's home directory.
Note: This option is available only for UNIX-based systems.
--start_at_end Optional If true, Oracle Beehive will start components after cloning. Permitted value is a boolean value.
By default, components are not started at the end of clone patching.
Table 16–2 (Cont.) beectl clone_patching Options for Specifying System Model Identifier
OptionMandatory/ Optional Description
Clone Patching
Oracle Beehive By Clone Patching 16-5
Clone PatchingFollow the below mentioned steps to upgrade an Oracle Beehive by clone patching:
Step 1 Verify RequirementsEnsure that the chipset and the operating system version (including any operating system patches) of all the application tiers you want to upgrade by clone patching is the same.
Step 2 Upgrade one of your application tiersRefer to "Upgrading Oracle Beehive Overview" and "Upgrading Oracle Beehive" for more information.
Step 3 Create a source image of the upgraded application tierCreate a source image of the upgraded application tier by following the steps described in the section "Preparing Source Application Tier Instance" in "Cloning Oracle Beehive Application Tiers and Sites".
Step 4 Shut down the application tier you want to upgradeRun the command beectl stop --all on the application tier you want to upgrade.
Step 5 Move the application tier you want to upgradeMove the contents of the Oracle Beehive home you are upgrading to another directory:
Use Windows Explorer or a similar utility to move the contents of the Oracle Beehive home to another directory.
In the following steps, %ORACLE_HOME% is the Oracle home of the application tier you are moving, and %BACKUP_ORACLE_HOME% contains the contents of %ORACLE_HOME%.
Step 6 Unzip the source image of the upgraded application tierUnzip the source image of the upgraded application tier (which you created in step 3) in the same location as the Oracle Beehive home you are upgrading. (The Oracle home for this unzipped source image will be %ORACLE_HOME%).
To unzip this source image, follow "Step 1: Unzip Compressed Oracle Home" in the section "Application Tier Cloning" in "Oracle Beehive By Clone Patching".
Step 7 Update ORACLE_HOME in the beectl commandUpdate ORACLE_HOME in the beectl command to refer to the upgraded target Oracle Beehive application tier as described in "Step 3: Modify Oracle Home Path" in "Cloning Oracle Beehive Application Tiers and Sites".
Step 8 Run the clone patching commandIf you are using the clone method "Specifying the location of the backed up Oracle Beehive home", run the beectl clone_patching command as follows:
beectl clone_patching --old_oracle_home %BACKUP_ORACLE_HOME%
If you are using the clone method "Specifying the Oracle Beehive instance system model", run the beectl clone_patching command as follows:
beectl clone_patching -–site_key <secure site key> --db_schema_password <secure database password> --local_beehive_instance_id <Oracle Beehive instance system
Clone Patching
16-6 Oracle Beehive Installation Guide
model ID>The following is an example of running this command:
beectl clone_patching --local_beehive_instance_id beehive_instance_instM2.example.com --db_schema_password c2ufOaQ9IYRPpVFnsUOmng8BD3S+O42hZxWlUYHnljZx5EqOH5TkcA== --site_key c2ufOaQ9IYRPpVFnsUOmng8BD3S+O42hZxWlUYHnljZx5EqOH5TkcA== --obfuscated
Note: When using obfuscated passwords with the beectl clone_patching command, ensure the following:
■ If your Oracle Beehive deployment consists of multiple application tiers, obfuscate passwords on the same application tier you plan to use them; do not use an obfuscated password created on one instance on another instance.
■ Do not enclose obfuscated passwords in single or double quotes.
Part IIIPart III Oracle Beehive Post-Installation
Configuration
The Part III of the Installation Guide describes how to configure Oracle Beehive. In particular, it describes how to configure security-related issues, install Oracle Beehive Extensions for Outlook, and create Oracle Beehive clones ideal for testing changes to an Oracle Beehive instance before applying them to a production modules.
This part contains the following chapters:
■ Oracle Beehive Post-Installation Procedures
■ Oracle Beehive Database Post-Installation Procedures
■ Configuring FTP
■ Configuring Oracle Beehive Demilitarized Zone Instances
■ Configuring SSL
■ Configuring TLS with Oracle Wallet
■ Configuring SSL for LDAP Integration
■ Enabling AJPS
■ Configuring E-Mail with SSL
■ Configuring XMPP
■ Configuring Oracle Application Server Single Sign-On with Oracle Beehive
■ Installing Oracle Beehive Extensions for Outlook
■ Installing Oracle Beehive Extensions for Explorer
■ Installing Oracle Beehive Conferencing Client
■ Configuring Oracle Beehive Integration for Zimbra
■ Cloning Oracle Beehive Application Tiers and Sites
■ Oracle Beekeeper Post-Installation Procedures

17
Oracle Beehive Post-Installation Procedures 17-1
17 Oracle Beehive Post-Installation Procedures
Depending on the installation scenario you have chosen, your security requirements, the standards-based clients you want to use with Oracle Beehive, or any other issue particular to your deployment, perform one or more of the following procedures:
■ Using Oracle Beehive Command-Line Utility
■ Configuring DMZ Instances
■ Integrating and Synchronizing LDAP with Oracle Beehive
■ Configuring SSL
■ Configuring TLS
■ Configuring SSL for LDAP Integration
■ Enabling AJPS
■ Configuring Oracle Beehive E-mail
■ Configuring XMPP
■ Configuring Actionable Notifications
■ Creating ASK User
■ Configuring Notifications to Use SMS
■ Configuring Oracle Secure Enterprise Search
■ Configuring Oracle Application Server Single Sign-On
■ Installing Oracle Beehive Extensions for Outlook
■ Installing Oracle Beehive Extensions for Explorer
■ Installing Oracle Beehive Conferencing Client
■ Configuring Oracle Beehive Integration for Zimbra
■ Configuring Remote Voice Conferencing Media Server for Oracle Beehive Conferencing
■ Cloning Oracle Beehive
■ Performing Oracle Beekeeper Post-Installation Procedures
Using Oracle Beehive Command-Line UtilityMany of the following post-installation procedures use the Oracle Beehive command-line utility beectl. For more information about beectl, refer to "Oracle Beehive Command-Line Utility" in Oracle Beehive Administrator's Reference Guide.
Performing Post-Installation Procedures on Oracle Beehive Database
17-2 Oracle Beehive Installation Guide
Performing Post-Installation Procedures on Oracle Beehive DatabaseAfter successfully installing Oracle Beehive, refer to "Oracle Beehive Database Post-Installation Procedures" for tuning recommendations to perform on your Oracle Beehive database.
Configuring DMZ InstancesRefer to "Configuring Oracle Beehive Demilitarized Zone Instances" for instructions on how to configure DMZ instances and Oracle Wallet with DMZ instances.
Integrating and Synchronizing LDAP with Oracle BeehiveOracle Beehive user data may be mastered in Oracle Beehive User Directory Service (UDS) or in an external LDAP-based directory, such as Oracle Internet Directory. "Mastered" means that a master source is used as the point of reference to determine the correct value for any user account attribute, and this source is used for making any changes to any account details.
Oracle Beehive provides flexible user account management and provisioning by supporting both native and system-external user directory options. With Oracle Beehive, administrators can manage user account data either natively in Oracle Beehive or externally through integration with a supported LDAP-based user directory server. Oracle Beehive provides this flexibility for user account management through the User Directory Service.
Currently, Oracle Beehive supports the following user directory servers:
■ Oracle Internet Directory
■ IBM Tivoli Directory Server
■ Microsoft Active Directory Server
■ OpenLDAP Directory Server
■ Oracle Directory Server Enterprise edition (formerly Sun Directory Server)
After you have installed and configured Oracle Beehive, you may synchronize your external LDAP-based directory with UDS so that you may continue to manage your users and groups through your LDAP server.
For more information, refer to "Integrating an External User Directory with Oracle Beehive" in Oracle Beehive Integration Guide.
Configuring SSLRefer to "Configuring SSL" for information about configuring SSL with Oracle Beehive and DMZ instances.
If you do not want to use SSL with your Oracle Beehive deployment, follow the steps described in "Installing Non-SSL Oracle Beehive Site".
Note: If the external directory server is Sun ONE Application Server 7, Enterprise Edition, ensure to enable the cn=changelog entry using "dsconf set-server-prop -h host -p port retro-cl-enabled:on" where host and port are the hostname of the directory server and port on which the server is listening.
Creating ASK User
Oracle Beehive Post-Installation Procedures 17-3
Configuring TLSSome services, such as XMPP, require a Transport Layer Security (TLS) encrypted communication channel. Use Oracle Wallet to provide this.
To configure Oracle Beehive with Oracle Wallet so that clients may access it with a TLS connection, refer to "Configuring TLS with Oracle Wallet".
Configuring SSL for LDAP IntegrationAfter configuring LDAP and Oracle Wallet with Oracle Beehive, you may configure Oracle Beehive authentication with Certificate Authority verification. For more information, refer to "Configuring SSL for LDAP Integration".
Enabling AJPSTo enable secure Apache JServ Protocol (AJPS), which is used instead of HTTP for communication between Oracle HTTP Server and OC4J, refer to "Enabling AJPS".
Configuring Oracle Beehive E-mailThe default installation of Oracle Beehive includes a basic configuration of e-mail services. This configuration does not include any filtering, dispatch rules, relay configuration, attachment blocking, or other common settings. For detailed configuration options and procedures, refer to "Managing Oracle Beehive E-Mail" in Oracle Beehive Administrator's Guide.
To secure Oracle Beehive e-mail with SSL, refer to "Configuring E-Mail with SSL". This involves configuring Oracle Beehive and your e-mail client.
Configuring XMPPExtensible Messaging and Presence Protocol (XMPP) is an open XML technology for presence and real-time communication. For users to authenticate against Oracle Beehive's XMPP Service, you must perform the steps described in "Configuring XMPP" to configure it.
Configuring Actionable NotificationsAn actionable notification is an Oracle Beehive feature that allows users to accept or decline an invitation or assignment by replying to notifications they receive.
By default, however, notifications are one-way (from the server to the user). In order to enable actionable notifications, refer to "Configuring Actionable Notifications" in "Managing Oracle Beehive Subscriptions and Notifications" in Oracle Beehive Administrator's Guide.
Creating ASK UserWhen Actionable Notifications with SMS is enabled, users can interact with the ASK service interface, which allows them to send SMS commands to the Notification Delivery Service and retrieve e-mail, calendar, and contacts data.
Configuring Notifications to Use SMS
17-4 Oracle Beehive Installation Guide
For more information about the ASK service, refer to see "Using ASK Commands" in "Registering and Configuring Mobile Devices" help on Oracle Technology Network. This page is available at the following URL:
http://www.oracle.com/technology/products/beehive/beehive_users/2_0/mobile.htm#BABDCJGH
Oracle Beehive Mobile Communicator also relies on the ASK service.
To enable actionable notifications and the ASK service, an ASK user is required. For more information on setting up such a user, refer to "Configuring Actionable Notifications" in "Managing Oracle Beehive Subscriptions and Notifications" in Oracle Beehive Administrator's Guide
Configuring Notifications to Use SMSOracle Beehive can send users notifications as e-mail messages, instant messages, or as mobile messages in the form of SMS. SMS notifications are only possible if the Oracle Beehive SMS delivery channel is enabled and configured to point to an SMS Aggregator.
For more information, refer to the section "Configuring Notifications to use SMS" in "Managing Oracle Beehive Subscriptions and Notifications" in Oracle Beehive Administrator's Guide.
Configuring Oracle Secure Enterprise SearchOracle Secure Enterprise Search 10g is a stand-alone enterprise search solution. It incorporates best-in-class indexing crawling and security capabilities to create a reliable and comprehensive search solution for any organization.
For more information, refer to "Integrating Oracle Secure Enterprise Search 10g with Oracle Beehive" in Oracle Beehive Integration Guide.
Configuring Oracle Application Server Single Sign-OnYou may register Oracle Beehive as a partner application with Oracle Application Server Single Sign-On, which means that you may delegate the authentication function to the single sign-on server. Refer to "Configuring Oracle Application Server Single Sign-On with Oracle Beehive".
Installing Oracle Beehive Extensions for OutlookOracle Beehive Extensions for Outlook extends the functionality of Microsoft Outlook by providing Outlook users with unified access to Oracle Beehive-based collaborative features and data in a familiar environment.
Oracle Beehive Extensions for Outlook requires installation on the computers of individual users. For information about installing Oracle Beehive Extensions for Outlook, refer to "Installing Oracle Beehive Extensions for Outlook".
Installing Oracle Beehive Extensions for ExplorerOracle Beehive Extensions for Explorer is an extension to Microsoft Windows Explorer that provides Oracle Beehive users direct access to their workspaces and workspace content, such as folders and documents. Oracle Beehive Extensions for Explorer also facilitates seamless team collaboration. For example, users can launch Oracle Beehive
Configuring Remote Voice Conferencing Media Server for Oracle Beehive Conferencing
Oracle Beehive Post-Installation Procedures 17-5
conferences directly from Windows Explorer, where they can share and discuss workspace content in real time.
Oracle Beehive Extensions for Explorer requires installation on the computers of individual users. For information about installing Oracle Beehive Extensions for Explorer, refer to "Installing Oracle Beehive Extensions for Explorer".
Installing Oracle Beehive Conferencing ClientThe Oracle Beehive Conferencing client enables Oracle Beehive users to conduct Web-based meetings and presentations.
The Oracle Beehive Conferencing client requires installation on the computers of individual users. For information about installing the Oracle Beehive Conferencing client, refer to "Installing Oracle Beehive Conferencing Client".
Configuring Oracle Beehive Integration for ZimbraOracle Beehive Integration for Zimbra is installed and configured in the same Oracle home as Oracle Beehive if you install Oracle Beehive on a computer with at least 3 gigabytes (GBs) of memory and you select the Server + Client template during the installation process. If you have installed Oracle Beehive Integration for Zimbra in a different Oracle home than your Oracle Beehive instance, then it acts like an application tier and should be configured as such.
If you have not configured TLS or SSL for your Oracle Beehive deployment, you do not need to perform any post-installation steps.
If you have configured TLS or SSL for your Oracle Beehive deployment, follow the steps described in "Configuring Oracle Beehive Integration for Zimbra" (these steps are similar to "Configuring SSL with Self-Signed Certificates During Installation of Oracle Beehive").
Configuring Remote Voice Conferencing Media Server for Oracle Beehive Conferencing
Oracle Beehive comes with the Voice Conferencing Media Server, which provides the voice conferencing functionality for Oracle Beehive Conferencing. To improve the performance of the Oracle Beehive server and the general quality of voice conferences, Oracle recommends that you install the Voice Conferencing Media Server in its own dedicated computer and then configure your Oracle Beehive instance to use that Voice Conferencing Media Server remotely.
The Voice Conferencing Media Server is only available for Oracle Beehive for Linux x86. Consequently, you must configure Oracle Beehive for Oracle Solaris SPARC (64-bit) or for Microsoft Windows to use a remote Voice Conferencing Media Server from an Oracle Beehive for Linux x86 instance.
The following steps describe how to configure Oracle Beehive to use a Voice Conferencing Media Server remotely from another Oracle Beehive instance:
1. Install Oracle Beehive for Linux x86; use the same database as the one your current Oracle Beehive instance uses.
2. From your current Oracle Beehive instance, in the _ConferenceService component, set the OwcUseRemoteMediaSessions to true:
beectl modify_property --component _ConferenceService
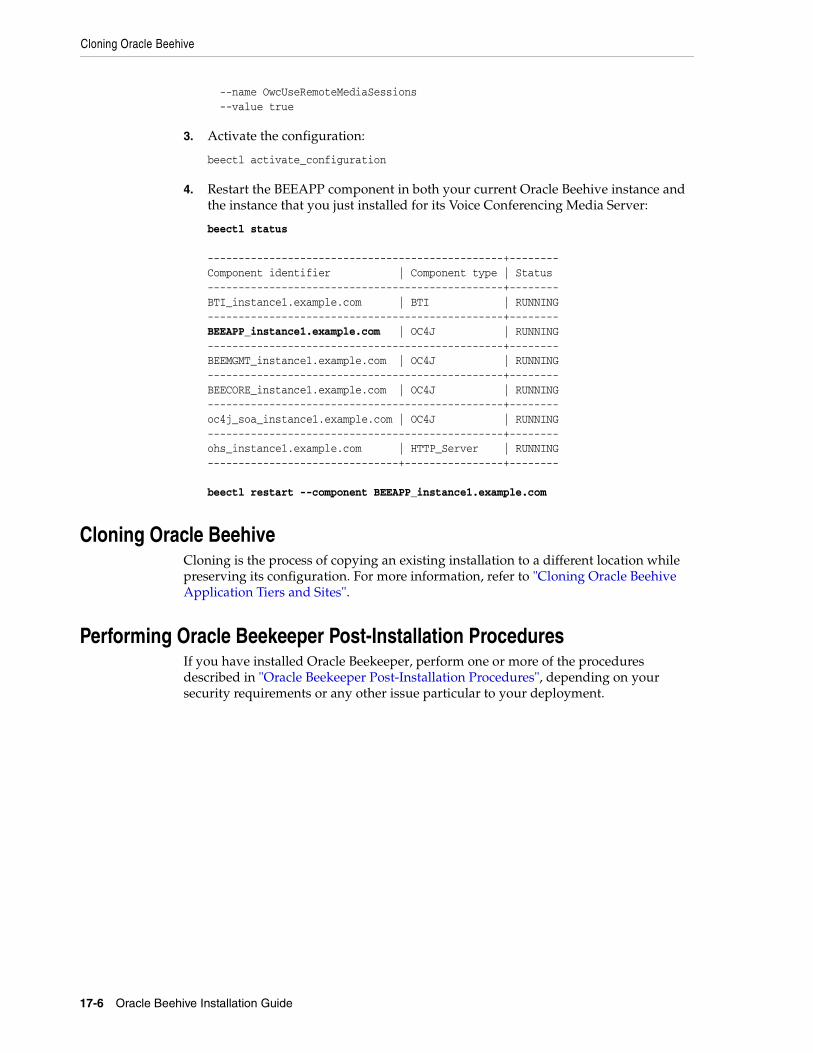
Cloning Oracle Beehive
17-6 Oracle Beehive Installation Guide
--name OwcUseRemoteMediaSessions --value true
3. Activate the configuration:
beectl activate_configuration
4. Restart the BEEAPP component in both your current Oracle Beehive instance and the instance that you just installed for its Voice Conferencing Media Server:
beectl status ------------------------------------------------+--------Component identifier | Component type | Status ------------------------------------------------+--------BTI_instance1.example.com | BTI | RUNNING ------------------------------------------------+--------BEEAPP_instance1.example.com | OC4J | RUNNING ------------------------------------------------+--------BEEMGMT_instance1.example.com | OC4J | RUNNING ------------------------------------------------+--------BEECORE_instance1.example.com | OC4J | RUNNING ------------------------------------------------+--------oc4j_soa_instance1.example.com | OC4J | RUNNING ------------------------------------------------+--------ohs_instance1.example.com | HTTP_Server | RUNNING -------------------------------+----------------+--------
beectl restart --component BEEAPP_instance1.example.com
Cloning Oracle BeehiveCloning is the process of copying an existing installation to a different location while preserving its configuration. For more information, refer to "Cloning Oracle Beehive Application Tiers and Sites".
Performing Oracle Beekeeper Post-Installation ProceduresIf you have installed Oracle Beekeeper, perform one or more of the procedures described in "Oracle Beekeeper Post-Installation Procedures", depending on your security requirements or any other issue particular to your deployment.
18
Oracle Beehive Database Post-Installation Procedures 18-1
18Oracle Beehive Database Post-InstallationProcedures
This chapter covers the following topic:
■ Modifying Database Connect String, Schema Name, or Credentials
Modifying Database Connect String, Schema Name, or CredentialsPerform the following steps to modify the database connect string, schema name, or credentials of Oracle Beehive:
1. From your Oracle Beehive home, run the following command to specify the new connect string of the central configuration repository (which is also known as the bootstrap database):
beectl modify_bootstrap_configuration --connect_string <new connectstring>
Run the following command to specify the new schema name:
beectl modify_bootstrap_configuration --schema_name <new schema name>
Run the following command to specify the new schema password:
beectl modify_bootstrap_configuration --schema_name <obfuscated new password> --obfuscated
To obfuscate a password, use the beectl obfuscate command:
beectl obfuscate --expiration_time_in_minutes 0Enter value for password: Successfully obfuscated the string.
Alternatively, you may run beectl in shell mode and specify the password in plain text.
2. Activate the configuration:
beectl activate_configuration
Note: The database connect string cannot contain any new line characters (\n, \r, or \n\r); the connect string must be a single-line value.
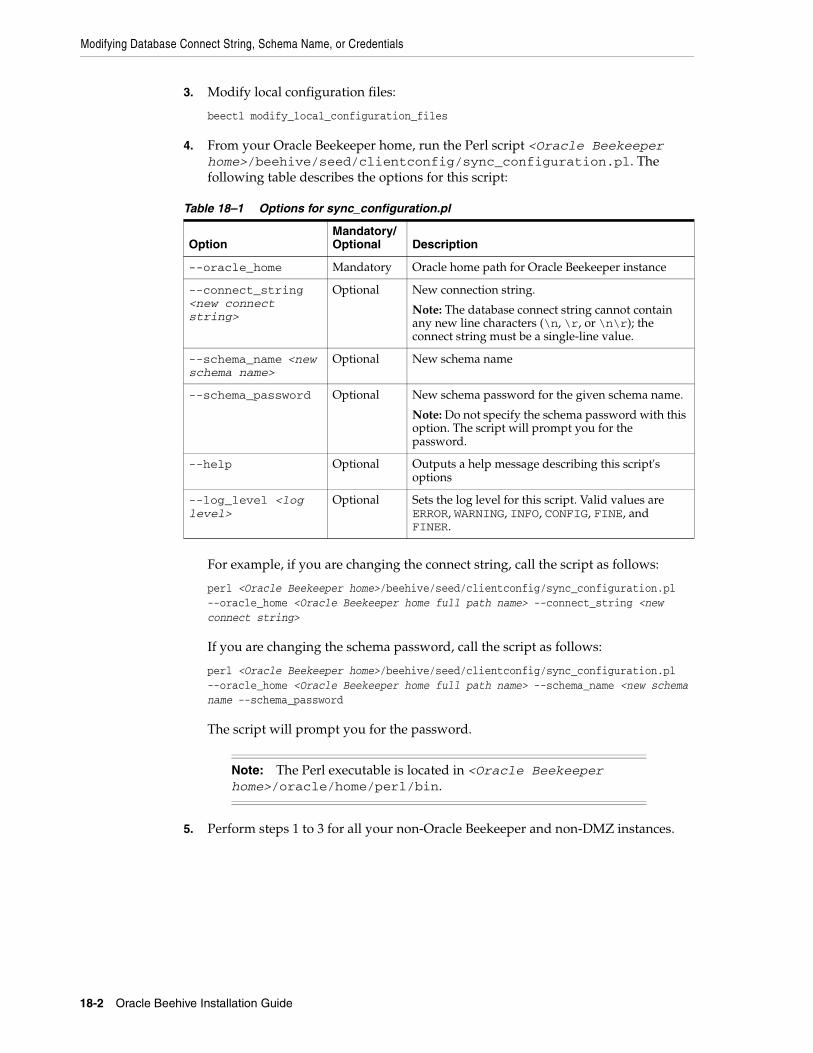
Modifying Database Connect String, Schema Name, or Credentials
18-2 Oracle Beehive Installation Guide
3. Modify local configuration files:
beectl modify_local_configuration_files
4. From your Oracle Beekeeper home, run the Perl script <Oracle Beekeeper home>/beehive/seed/clientconfig/sync_configuration.pl. The following table describes the options for this script:
For example, if you are changing the connect string, call the script as follows:
perl <Oracle Beekeeper home>/beehive/seed/clientconfig/sync_configuration.pl --oracle_home <Oracle Beekeeper home full path name> --connect_string <new connect string>
If you are changing the schema password, call the script as follows:
perl <Oracle Beekeeper home>/beehive/seed/clientconfig/sync_configuration.pl --oracle_home <Oracle Beekeeper home full path name> --schema_name <new schema name --schema_password
The script will prompt you for the password.
5. Perform steps 1 to 3 for all your non-Oracle Beekeeper and non-DMZ instances.
Table 18–1 Options for sync_configuration.pl
OptionMandatory/Optional Description
--oracle_home Mandatory Oracle home path for Oracle Beekeeper instance
--connect_string <new connect string>
Optional New connection string.
Note: The database connect string cannot contain any new line characters (\n, \r, or \n\r); the connect string must be a single-line value.
--schema_name <new schema name>
Optional New schema name
--schema_password Optional New schema password for the given schema name.
Note: Do not specify the schema password with this option. The script will prompt you for the password.
--help Optional Outputs a help message describing this script's options
--log_level <log level>
Optional Sets the log level for this script. Valid values are ERROR, WARNING, INFO, CONFIG, FINE, and FINER.
Note: The Perl executable is located in <Oracle Beekeeper home>/oracle/home/perl/bin.
19
Configuring FTP 19-1
19Configuring FTP
This chapter describes how to perform the following tasks:
■ Enabling Active Mode FTP
■ Opening Ports Required by Oracle Beehive for FTP
■ Configuring Passive Mode FTP
■ Setting other FTP Parameters
Enabling Active Mode FTPBy default, active mode FTP (FTP in PORT mode) connections to your Oracle Beehive instances are disabled. Follow these steps to enable them:
1. Set the ActiveModeEnabled property in the _FtpService property to true:
list_properties --component _FtpService -----------------------+---------------------Property name | Property value-----------------------+---------------------ActiveModeEnabled | false-----------------------+---------------------Alias | _FtpService
...
beectl modify_property --component _FtpService --name ActiveModeEnabled --value true
2. Activate changes:
beectl activate_configuration
Note: If the beectl activate_configuration command asks you to run the beectl modify_local_configuration_files command, then run this command. It will then ask you do run the command on all your other instances. Run this command on all your instances.
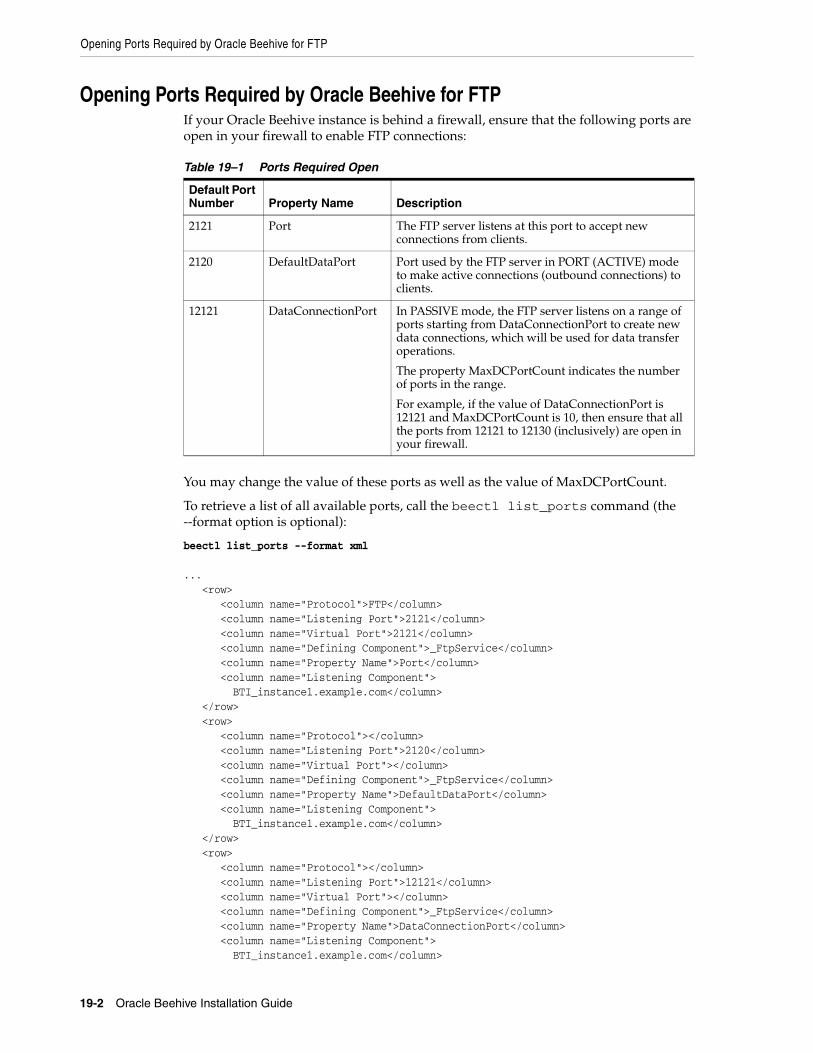
Opening Ports Required by Oracle Beehive for FTP
19-2 Oracle Beehive Installation Guide
Opening Ports Required by Oracle Beehive for FTPIf your Oracle Beehive instance is behind a firewall, ensure that the following ports are open in your firewall to enable FTP connections:
You may change the value of these ports as well as the value of MaxDCPortCount.
To retrieve a list of all available ports, call the beectl list_ports command (the --format option is optional):
beectl list_ports --format xml
... <row> <column name="Protocol">FTP</column> <column name="Listening Port">2121</column> <column name="Virtual Port">2121</column> <column name="Defining Component">_FtpService</column> <column name="Property Name">Port</column> <column name="Listening Component"> BTI_instance1.example.com</column> </row> <row> <column name="Protocol"></column> <column name="Listening Port">2120</column> <column name="Virtual Port"></column> <column name="Defining Component">_FtpService</column> <column name="Property Name">DefaultDataPort</column> <column name="Listening Component"> BTI_instance1.example.com</column> </row> <row> <column name="Protocol"></column> <column name="Listening Port">12121</column> <column name="Virtual Port"></column> <column name="Defining Component">_FtpService</column> <column name="Property Name">DataConnectionPort</column> <column name="Listening Component"> BTI_instance1.example.com</column>
Table 19–1 Ports Required Open
Default Port Number Property Name Description
2121 Port The FTP server listens at this port to accept new connections from clients.
2120 DefaultDataPort Port used by the FTP server in PORT (ACTIVE) mode to make active connections (outbound connections) to clients.
12121 DataConnectionPort In PASSIVE mode, the FTP server listens on a range of ports starting from DataConnectionPort to create new data connections, which will be used for data transfer operations.
The property MaxDCPortCount indicates the number of ports in the range.
For example, if the value of DataConnectionPort is 12121 and MaxDCPortCount is 10, then ensure that all the ports from 12121 to 12130 (inclusively) are open in your firewall.
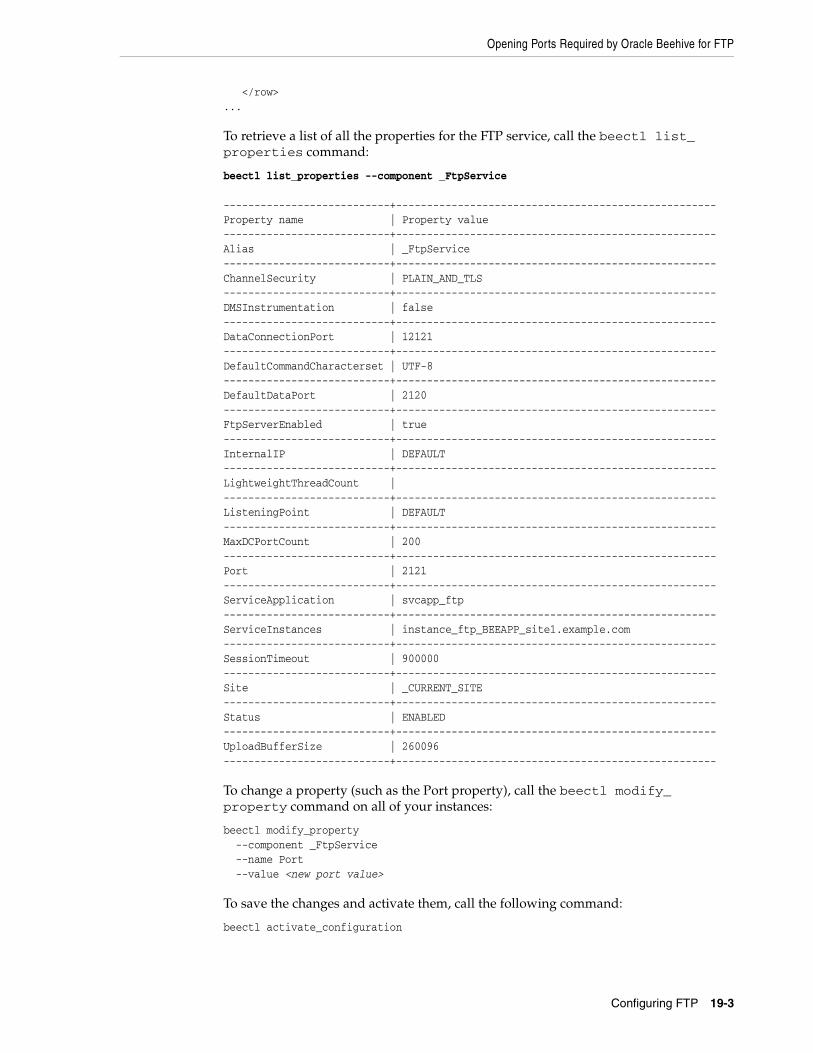
Opening Ports Required by Oracle Beehive for FTP
Configuring FTP 19-3
</row>...
To retrieve a list of all the properties for the FTP service, call the beectl list_properties command:
beectl list_properties --component _FtpService
---------------------------+----------------------------------------------------Property name | Property value ---------------------------+----------------------------------------------------Alias | _FtpService ---------------------------+----------------------------------------------------ChannelSecurity | PLAIN_AND_TLS ---------------------------+----------------------------------------------------DMSInstrumentation | false ---------------------------+----------------------------------------------------DataConnectionPort | 12121 ---------------------------+----------------------------------------------------DefaultCommandCharacterset | UTF-8 ---------------------------+----------------------------------------------------DefaultDataPort | 2120 ---------------------------+----------------------------------------------------FtpServerEnabled | true ---------------------------+----------------------------------------------------InternalIP | DEFAULT ---------------------------+----------------------------------------------------LightweightThreadCount | ---------------------------+----------------------------------------------------ListeningPoint | DEFAULT ---------------------------+----------------------------------------------------MaxDCPortCount | 200 ---------------------------+----------------------------------------------------Port | 2121 ---------------------------+----------------------------------------------------ServiceApplication | svcapp_ftp ---------------------------+----------------------------------------------------ServiceInstances | instance_ftp_BEEAPP_site1.example.com---------------------------+----------------------------------------------------SessionTimeout | 900000 ---------------------------+----------------------------------------------------Site | _CURRENT_SITE ---------------------------+----------------------------------------------------Status | ENABLED ---------------------------+----------------------------------------------------UploadBufferSize | 260096 ---------------------------+----------------------------------------------------
To change a property (such as the Port property), call the beectl modify_property command on all of your instances:
beectl modify_property --component _FtpService --name Port --value <new port value>
To save the changes and activate them, call the following command:
beectl activate_configuration
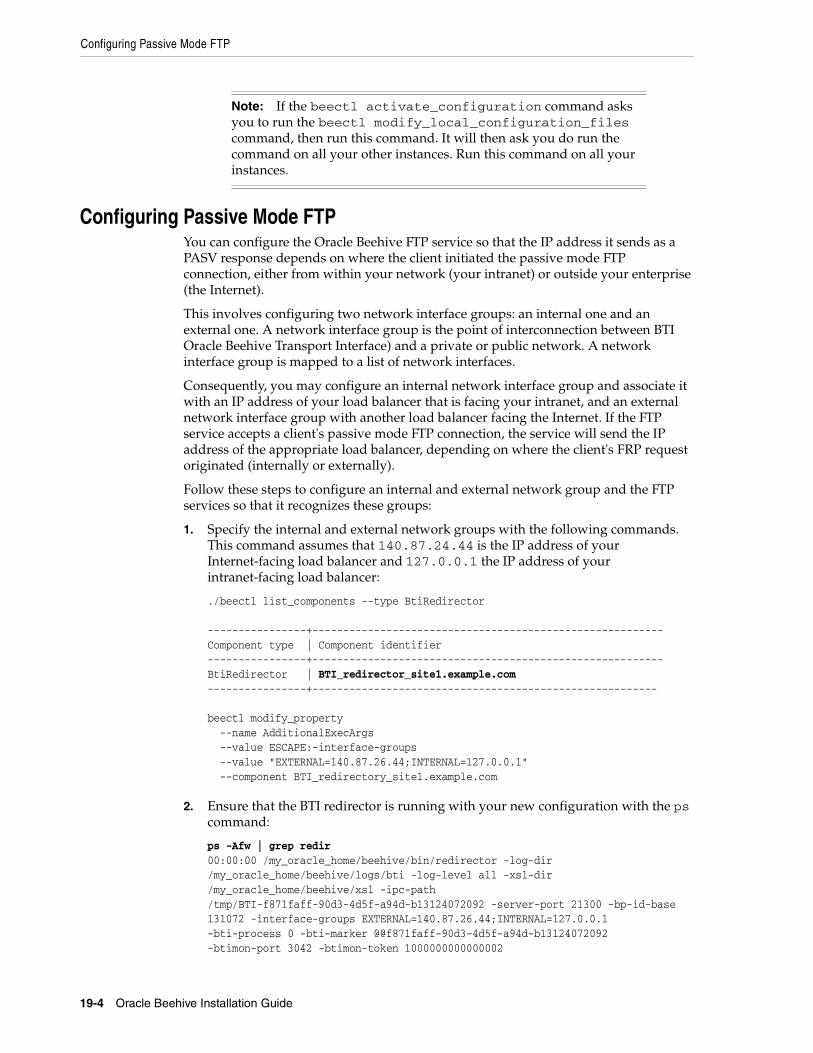
Configuring Passive Mode FTP
19-4 Oracle Beehive Installation Guide
Configuring Passive Mode FTPYou can configure the Oracle Beehive FTP service so that the IP address it sends as a PASV response depends on where the client initiated the passive mode FTP connection, either from within your network (your intranet) or outside your enterprise (the Internet).
This involves configuring two network interface groups: an internal one and an external one. A network interface group is the point of interconnection between BTI Oracle Beehive Transport Interface) and a private or public network. A network interface group is mapped to a list of network interfaces.
Consequently, you may configure an internal network interface group and associate it with an IP address of your load balancer that is facing your intranet, and an external network interface group with another load balancer facing the Internet. If the FTP service accepts a client's passive mode FTP connection, the service will send the IP address of the appropriate load balancer, depending on where the client's FRP request originated (internally or externally).
Follow these steps to configure an internal and external network group and the FTP services so that it recognizes these groups:
1. Specify the internal and external network groups with the following commands. This command assumes that 140.87.24.44 is the IP address of your Internet-facing load balancer and 127.0.0.1 the IP address of your intranet-facing load balancer:
./beectl list_components --type BtiRedirector
----------------+---------------------------------------------------------Component type | Component identifier ----------------+---------------------------------------------------------BtiRedirector | BTI_redirector_site1.example.com ----------------+--------------------------------------------------------
beectl modify_property --name AdditionalExecArgs --value ESCAPE:-interface-groups --value "EXTERNAL=140.87.26.44;INTERNAL=127.0.0.1" --component BTI_redirectory_site1.example.com
2. Ensure that the BTI redirector is running with your new configuration with the ps command:
ps -Afw | grep redir00:00:00 /my_oracle_home/beehive/bin/redirector -log-dir/my_oracle_home/beehive/logs/bti -log-level all -xsl-dir/my_oracle_home/beehive/xsl -ipc-path/tmp/BTI-f871faff-90d3-4d5f-a94d-b13124072092 -server-port 21300 -bp-id-base131072 -interface-groups EXTERNAL=140.87.26.44;INTERNAL=127.0.0.1-bti-process 0 -bti-marker @@f871faff-90d3-4d5f-a94d-b13124072092-btimon-port 3042 -btimon-token 1000000000000002
Note: If the beectl activate_configuration command asks you to run the beectl modify_local_configuration_files command, then run this command. It will then ask you do run the command on all your other instances. Run this command on all your instances.
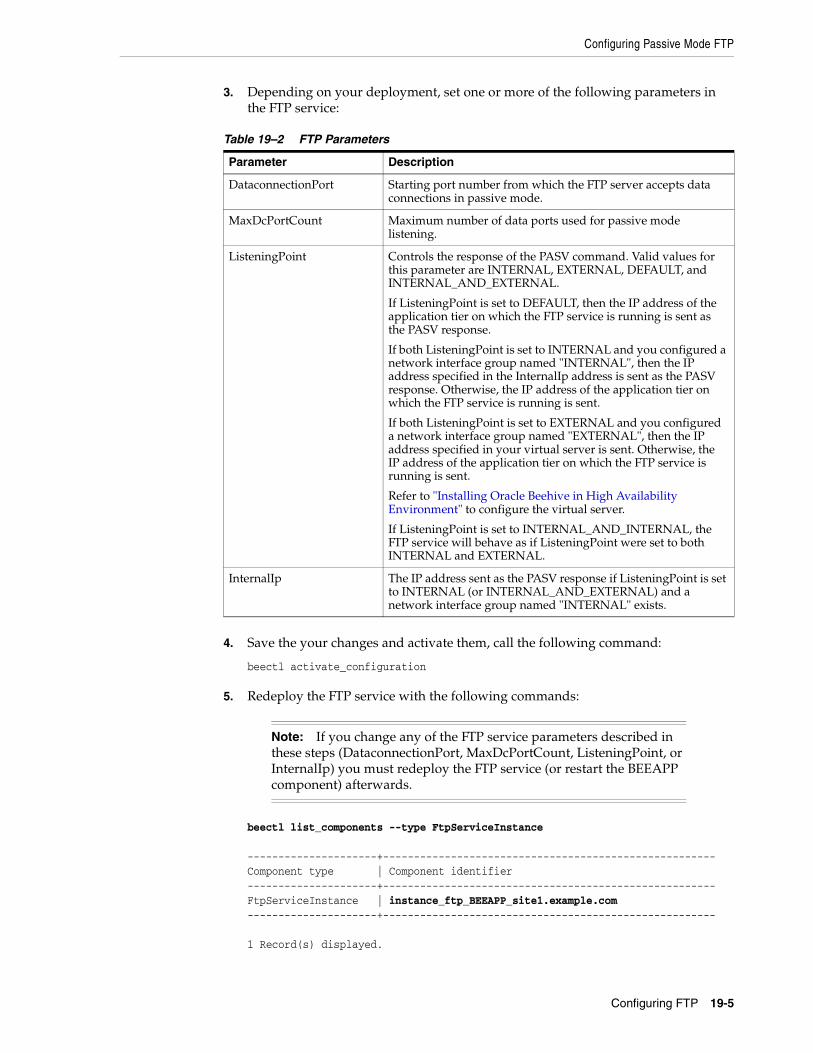
Configuring Passive Mode FTP
Configuring FTP 19-5
3. Depending on your deployment, set one or more of the following parameters in the FTP service:
4. Save the your changes and activate them, call the following command:
beectl activate_configuration
5. Redeploy the FTP service with the following commands:
beectl list_components --type FtpServiceInstance ---------------------+------------------------------------------------------Component type | Component identifier ---------------------+------------------------------------------------------FtpServiceInstance | instance_ftp_BEEAPP_site1.example.com---------------------+------------------------------------------------------ 1 Record(s) displayed.
Table 19–2 FTP Parameters
Parameter Description
DataconnectionPort Starting port number from which the FTP server accepts data connections in passive mode.
MaxDcPortCount Maximum number of data ports used for passive mode listening.
ListeningPoint Controls the response of the PASV command. Valid values for this parameter are INTERNAL, EXTERNAL, DEFAULT, and INTERNAL_AND_EXTERNAL.
If ListeningPoint is set to DEFAULT, then the IP address of the application tier on which the FTP service is running is sent as the PASV response.
If both ListeningPoint is set to INTERNAL and you configured a network interface group named "INTERNAL", then the IP address specified in the InternalIp address is sent as the PASV response. Otherwise, the IP address of the application tier on which the FTP service is running is sent.
If both ListeningPoint is set to EXTERNAL and you configured a network interface group named "EXTERNAL", then the IP address specified in your virtual server is sent. Otherwise, the IP address of the application tier on which the FTP service is running is sent.
Refer to "Installing Oracle Beehive in High Availability Environment" to configure the virtual server.
If ListeningPoint is set to INTERNAL_AND_INTERNAL, the FTP service will behave as if ListeningPoint were set to both INTERNAL and EXTERNAL.
InternalIp The IP address sent as the PASV response if ListeningPoint is set to INTERNAL (or INTERNAL_AND_EXTERNAL) and a network interface group named "INTERNAL" exists.
Note: If you change any of the FTP service parameters described in these steps (DataconnectionPort, MaxDcPortCount, ListeningPoint, or InternalIp) you must redeploy the FTP service (or restart the BEEAPP component) afterwards.
Setting other FTP Parameters
19-6 Oracle Beehive Installation Guide
beectl upgrade_service_instance --service_instance_id instance_ftp_BEEAPP_site1.example.com
Setting other FTP ParametersYou must redeploy the FTP service (or restart the BEEAPP component) if you change one of the following FTP service parameters:
■ DataconnectionPort
■ MaxDcPortCount
■ SessionTimeout: Amount of time between activity before the connection times out; default is 900 seconds or 15 minutes. Unit of measure is milliseconds.
■ Port
■ ListeningPoint
■ InternalIp
20
Configuring Oracle Beehive Demilitarized Zone Instances 20-1
20 Configuring Oracle Beehive DemilitarizedZone Instances
This chapter describes how to configure Oracle Beehive DMZ instances. It includes the following steps:
■ Step A: Configuring Oracle Wallet with Oracle Beehive DMZ Instances
■ Step B: Configuring Oracle Beehive DMZ Instances
If you want to manually uninstall a DMZ instance, have made an error while configuring your DMZ instances, or would like to completely rollback any DMZ configuration steps without uninstalling your DMZ instances, refer to "Manually Deleting DMZ Instances".
Step A: Configuring Oracle Wallet with Oracle Beehive DMZ InstancesFollow these steps on all DMZ instances. Refer to "Configuring TLS with Oracle Wallet" for more information about Oracle Wallet.
1. Set the ORACLE_HOME environment variable to the Oracle home of the DMZ instance.
2. Enable auto login mode for the default wallet with the following command. The default password for the default wallet is welcome:
<Oracle home of DMZ instance>\bin\orapki wallet create -wallet <Oracle home of DMZ instance>\Apache\Apache\conf\ssl.wlt\default -auto_login -pwd welcome
Note: If you want to configure your DMZ instances with SSL, follow the directions described in "Configuring SSL with Oracle Beehive DMZ Instances" in "Configuring SSL" These steps involve configuring your entire Oracle Beehive deployment for SSL.
Note: Alternatively, you may create a new wallet with auto login mode enabled. Use the same command except specify a different directory that does not contain a wallet. You may specify any password when creating a new wallet.
Step B: Configuring Oracle Beehive DMZ Instances
20-2 Oracle Beehive Installation Guide
3. Edit the file <Oracle home of DMZ instance>\beehive\conf\bti.properties and change the value of WalletDir to the wallet directory you configured in the previous step:
WalletDir= <Oracle home of DMZ instance>\\Apache\\Apache\\conf\\ssl.wlt\\default
4. Edit the file <Oracle home of DMZ instance>\opmn\conf\opmn.xml and change the value of wallet-file to the wallet directory you configured in Step 2:
<notification-server interface="ipv4"> <!-- ... --> <ssl enabled="true" wallet-file="<Oracle home of DMZ instance> \Apache\Apache\conf\ssl.wlt\default"/>
5. Restart the DMZ instance:
opmnctl stopallopmnctl startall
Step B: Configuring Oracle Beehive DMZ Instances1. If you have not already done so, configure Oracle Wallet with your Oracle Beehive
DMZ instance. Refer to "Step A: Configuring Oracle Wallet with Oracle Beehive DMZ Instances".
2. If you have configured your Oracle Beehive DMZ instances for SSL as described in "Configuring SSL with Oracle Beehive DMZ Instances" in "Configuring SSL", then ensure that SSL is enabled for Oracle Notification Services (ONS) for your non-DMZ Oracle Beehive instances. Ensure that the property NotificationServerSslEnabled is true in the component _current_site:OpmnCluster. To set this property, run the following commands on your non-DMZ instances:
beectl modify_property --component _current_site:OpmnCluster --name NotificationServerSslEnabled --value true --activate_configuration
<Oracle Beehive home>\opmn\bin\opmnctl stopall<Oracle Beehive home>\opmn\bin\opmnctl startall
3. If you have not configured your Oracle Beehive DMZ instances for SSL and specifically do not want to your Oracle Beehive DMZ instances for SSL, then follow this step.
Note: Escape colons (:) and backslashes (\) with a backslash. For example, if the location of your wallet is C:\DMZ\Apache\Apache\conf\ssl.wlt\default, then you would specify C\:\\DMZ\\Apache\\Apache\\conf\\ssl.wlt\\default in the bti.properties file.
When using path names from this file for other purposes, such as in a command line, remember to remove the backslash escape character.
Step B: Configuring Oracle Beehive DMZ Instances
Configuring Oracle Beehive Demilitarized Zone Instances 20-3
By default, Oracle Beehive DMZ instances are configured to receive secure ONS notifications. If you do not want to use SSL, you must configure ONS to receive non-SSL notifications.
To do this, edit the file <Oracle home of DMZ instance>/opmn/conf/opmn.xml as follows in all Oracle Beehive DMZ instances. In the <ssl> element, set the enable attribute to false:
<ssl enabled="false" wallet-file="$ORACLE_HOME/opmn/conf/ssl.wlt/default"/>
4. Update the file <Oracle home of DMZ instance>\opmn\conf\opmn.xml as follows in all Oracle Beehive DMZ instances to add the topology definition for all Oracle Beehive (non-DMZ) application tiers that are part of this configuration:
<notification-server> <!-- ... --> <topology> <nodes list=" <Application tier 1 host name>:<OPMN remote port of application tier 1>, <Application tier 2 host name>:<OPMN remote port of application tier 2>, ... "/> </topology></notification-server>
For example, if you have two Oracle Beehive application tiers with host names example1.com and example2.com and OPMN remote port numbers 6200 and 6300, respectively, add the following topology definition to the opmn.xml file in your DMZ instances:
<notification-server> <!-- ... --> <topology> <nodes list="example1.com:6200,example2.com:6300"/> </topology></notification-server>
5. Restart each DMZ instance whose opmn.xml file you changed with the <Oracle home of DMZ instance>\opmn\bin\opmnctl command:
opmnctl stopallopmnctl startall
6. From every DMZ instance, retrieve the following values from the specified files:
■ <Oracle home of DMZ instance>\opmn\conf\opmn.xml:
– opmn_request_port
– opmn_remote_port
■ <Oracle home of DMZ instance>\beehive\conf\bti.properties
– bti_server_port
– bti_unique_id (PersistentId)
Tip: Retrieve the OPMN port of an Oracle Beehive application tier from the file <Oracle Beehive home>\opmn\conf\opmn.xml (of a non-DMZ application tier). The OPMN port is specified by the remote attribute of the port element in the notification-server element.
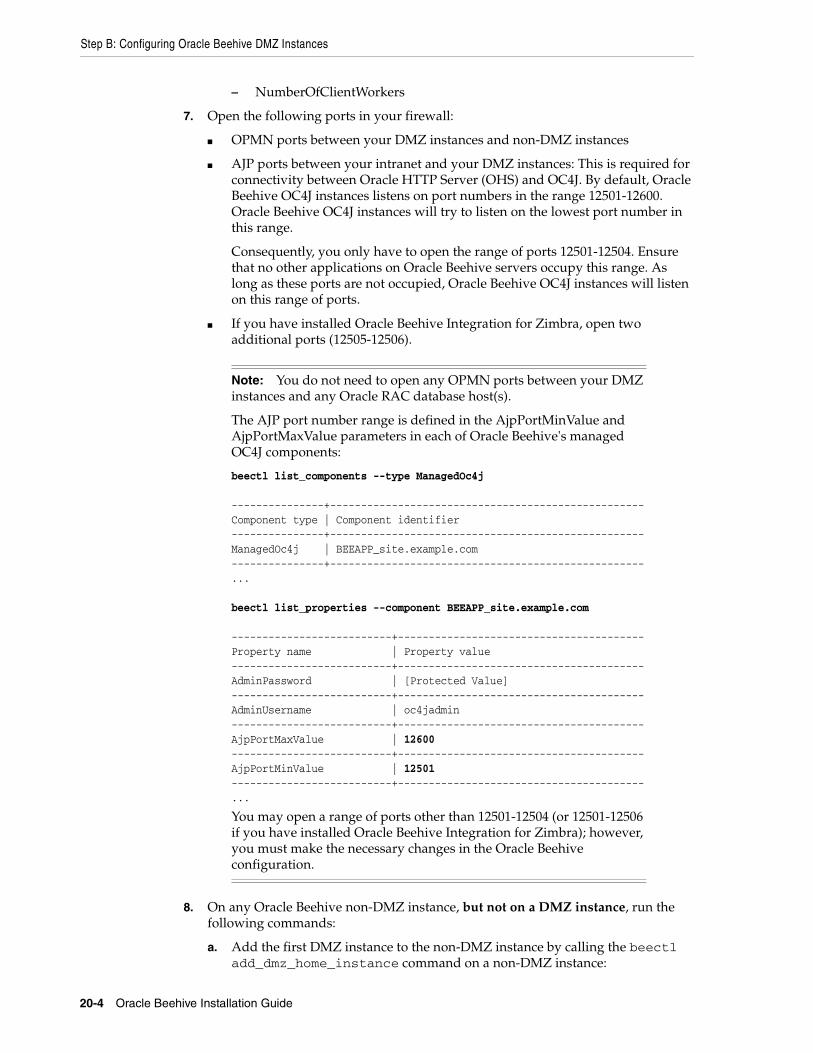
Step B: Configuring Oracle Beehive DMZ Instances
20-4 Oracle Beehive Installation Guide
– NumberOfClientWorkers
7. Open the following ports in your firewall:
■ OPMN ports between your DMZ instances and non-DMZ instances
■ AJP ports between your intranet and your DMZ instances: This is required for connectivity between Oracle HTTP Server (OHS) and OC4J. By default, Oracle Beehive OC4J instances listens on port numbers in the range 12501-12600. Oracle Beehive OC4J instances will try to listen on the lowest port number in this range.
Consequently, you only have to open the range of ports 12501-12504. Ensure that no other applications on Oracle Beehive servers occupy this range. As long as these ports are not occupied, Oracle Beehive OC4J instances will listen on this range of ports.
■ If you have installed Oracle Beehive Integration for Zimbra, open two additional ports (12505-12506).
8. On any Oracle Beehive non-DMZ instance, but not on a DMZ instance, run the following commands:
a. Add the first DMZ instance to the non-DMZ instance by calling the beectl add_dmz_home_instance command on a non-DMZ instance:
Note: You do not need to open any OPMN ports between your DMZ instances and any Oracle RAC database host(s).
The AJP port number range is defined in the AjpPortMinValue and AjpPortMaxValue parameters in each of Oracle Beehive's managed OC4J components:
beectl list_components --type ManagedOc4j ---------------+---------------------------------------------------Component type | Component identifier---------------+---------------------------------------------------ManagedOc4j | BEEAPP_site.example.com---------------+---------------------------------------------------...
beectl list_properties --component BEEAPP_site.example.com
--------------------------+----------------------------------------Property name | Property value--------------------------+----------------------------------------AdminPassword | [Protected Value]--------------------------+----------------------------------------AdminUsername | oc4jadmin--------------------------+----------------------------------------AjpPortMaxValue | 12600--------------------------+----------------------------------------AjpPortMinValue | 12501--------------------------+----------------------------------------...
You may open a range of ports other than 12501-12504 (or 12501-12506 if you have installed Oracle Beehive Integration for Zimbra); however, you must make the necessary changes in the Oracle Beehive configuration.
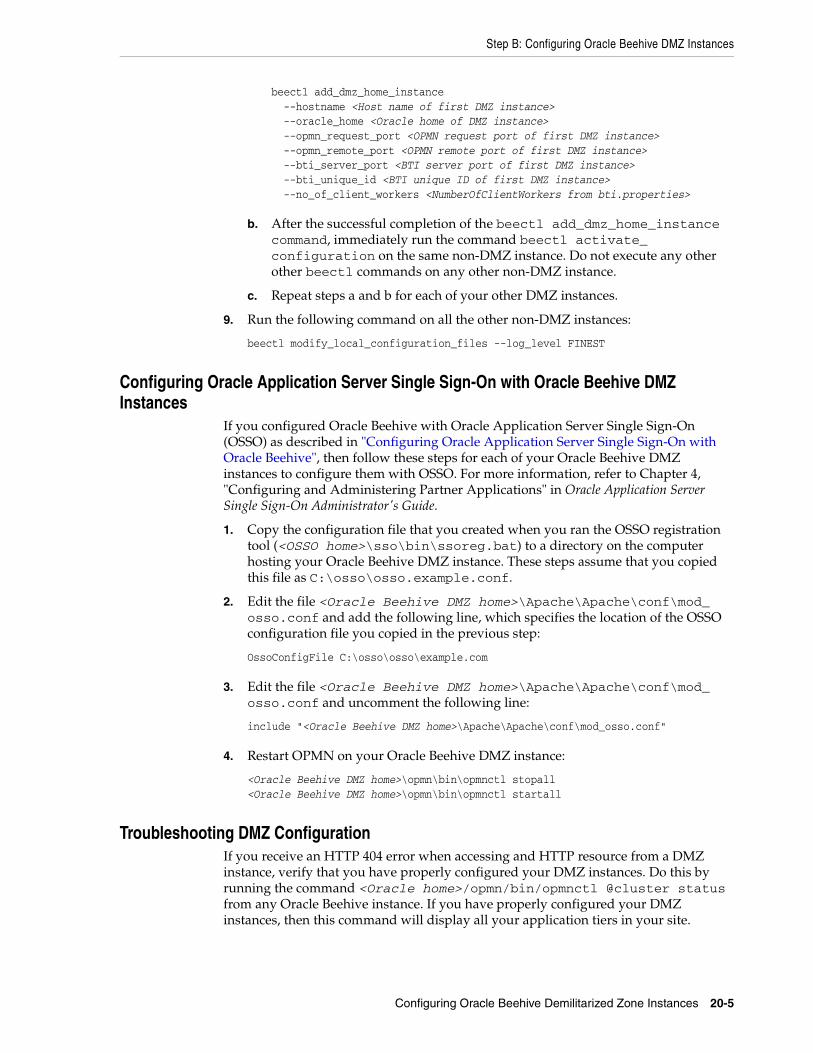
Step B: Configuring Oracle Beehive DMZ Instances
Configuring Oracle Beehive Demilitarized Zone Instances 20-5
beectl add_dmz_home_instance --hostname <Host name of first DMZ instance> --oracle_home <Oracle home of DMZ instance> --opmn_request_port <OPMN request port of first DMZ instance> --opmn_remote_port <OPMN remote port of first DMZ instance> --bti_server_port <BTI server port of first DMZ instance> --bti_unique_id <BTI unique ID of first DMZ instance> --no_of_client_workers <NumberOfClientWorkers from bti.properties>
b. After the successful completion of the beectl add_dmz_home_instance command, immediately run the command beectl activate_configuration on the same non-DMZ instance. Do not execute any other other beectl commands on any other non-DMZ instance.
c. Repeat steps a and b for each of your other DMZ instances.
9. Run the following command on all the other non-DMZ instances:
beectl modify_local_configuration_files --log_level FINEST
Configuring Oracle Application Server Single Sign-On with Oracle Beehive DMZ Instances
If you configured Oracle Beehive with Oracle Application Server Single Sign-On (OSSO) as described in "Configuring Oracle Application Server Single Sign-On with Oracle Beehive", then follow these steps for each of your Oracle Beehive DMZ instances to configure them with OSSO. For more information, refer to Chapter 4, "Configuring and Administering Partner Applications" in Oracle Application Server Single Sign-On Administrator's Guide.
1. Copy the configuration file that you created when you ran the OSSO registration tool (<OSSO home>\sso\bin\ssoreg.bat) to a directory on the computer hosting your Oracle Beehive DMZ instance. These steps assume that you copied this file as C:\osso\osso.example.conf.
2. Edit the file <Oracle Beehive DMZ home>\Apache\Apache\conf\mod_osso.conf and add the following line, which specifies the location of the OSSO configuration file you copied in the previous step:
OssoConfigFile C:\osso\osso\example.com
3. Edit the file <Oracle Beehive DMZ home>\Apache\Apache\conf\mod_osso.conf and uncomment the following line:
include "<Oracle Beehive DMZ home>\Apache\Apache\conf\mod_osso.conf"
4. Restart OPMN on your Oracle Beehive DMZ instance:
<Oracle Beehive DMZ home>\opmn\bin\opmnctl stopall<Oracle Beehive DMZ home>\opmn\bin\opmnctl startall
Troubleshooting DMZ ConfigurationIf you receive an HTTP 404 error when accessing and HTTP resource from a DMZ instance, verify that you have properly configured your DMZ instances. Do this by running the command <Oracle home>/opmn/bin/opmnctl @cluster status from any Oracle Beehive instance. If you have properly configured your DMZ instances, then this command will display all your application tiers in your site.
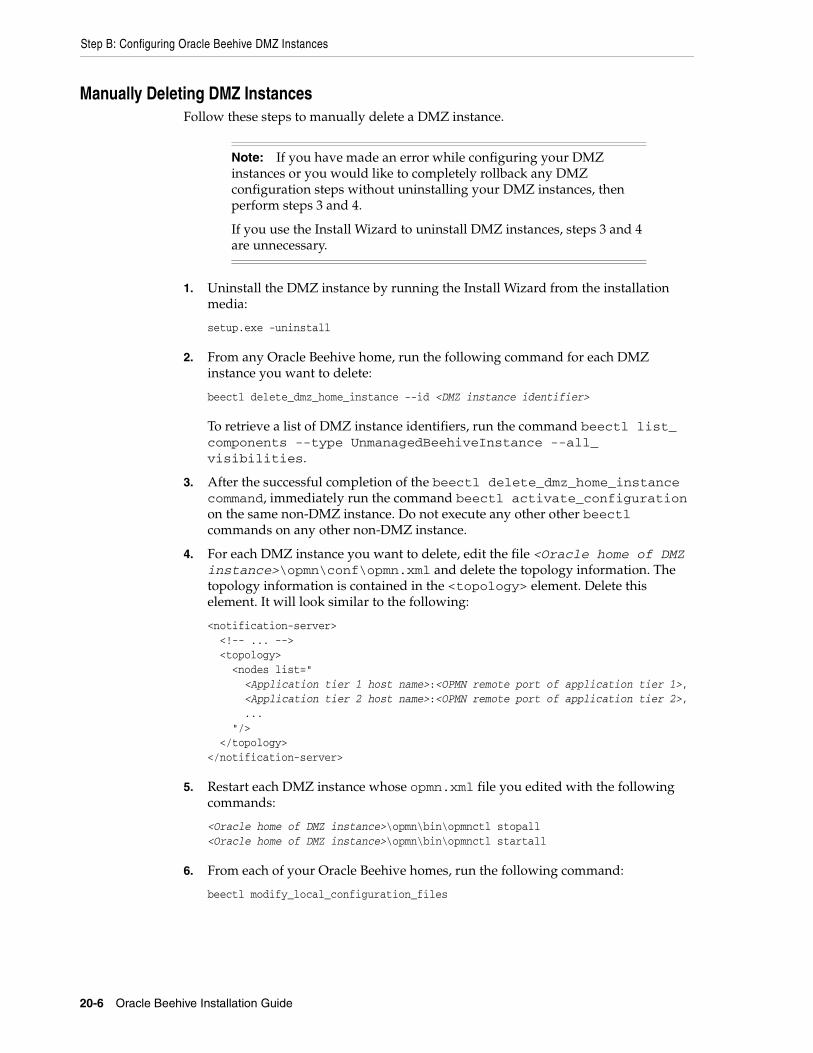
Step B: Configuring Oracle Beehive DMZ Instances
20-6 Oracle Beehive Installation Guide
Manually Deleting DMZ InstancesFollow these steps to manually delete a DMZ instance.
1. Uninstall the DMZ instance by running the Install Wizard from the installation media:
setup.exe -uninstall
2. From any Oracle Beehive home, run the following command for each DMZ instance you want to delete:
beectl delete_dmz_home_instance --id <DMZ instance identifier>
To retrieve a list of DMZ instance identifiers, run the command beectl list_components --type UnmanagedBeehiveInstance --all_visibilities.
3. After the successful completion of the beectl delete_dmz_home_instance command, immediately run the command beectl activate_configuration on the same non-DMZ instance. Do not execute any other other beectl commands on any other non-DMZ instance.
4. For each DMZ instance you want to delete, edit the file <Oracle home of DMZ instance>\opmn\conf\opmn.xml and delete the topology information. The topology information is contained in the <topology> element. Delete this element. It will look similar to the following:
<notification-server> <!-- ... --> <topology> <nodes list=" <Application tier 1 host name>:<OPMN remote port of application tier 1>, <Application tier 2 host name>:<OPMN remote port of application tier 2>, ... "/> </topology></notification-server>
5. Restart each DMZ instance whose opmn.xml file you edited with the following commands:
<Oracle home of DMZ instance>\opmn\bin\opmnctl stopall<Oracle home of DMZ instance>\opmn\bin\opmnctl startall
6. From each of your Oracle Beehive homes, run the following command:
beectl modify_local_configuration_files
Note: If you have made an error while configuring your DMZ instances or you would like to completely rollback any DMZ configuration steps without uninstalling your DMZ instances, then perform steps 3 and 4.
If you use the Install Wizard to uninstall DMZ instances, steps 3 and 4 are unnecessary.
21
Configuring SSL 21-1
21 Configuring SSL
This chapter describes various ways to configure Oracle Beehive with SSL. It covers the following topics:
■ SSL Checklist
■ Configuring SSL with Oracle Beehive
■ Configuring SSL with Oracle Beehive DMZ Instances
■ Procedures Related to Configuring SSL
■ Installing Non-SSL Oracle Beehive Site
■ Installing Oracle Internet Directory in SSL mode
SSL ChecklistAfter following the steps described in this module, ensure the following for all your application tiers:
■ A properly configured Oracle wallet resides in <Oracle home>\Apache\Apache\conf\ssl.wlt\default for each application tier.
■ For each Oracle Beehive instance, the property WalletDir is set to the properly configured Oracle wallet. In addition, the property WalletDir refer to the same location for each application tier.
■ Each Oracle Beehive instance's wallet contains a valid certificate.
■ The file <Oracle home of DMZ instance>\beehive\conf\bti.properties is configured properly for each Oracle Beehive DMZ instance.
Note: Refer to "Configuring Oracle Beekeeper for SSL Access" to configure SSL for Oracle Beekeeper.
If you do not want to use SSL with your Oracle Beehive deployment, follow the steps described in "Installing Non-SSL Oracle Beehive Site".
If you have a load balancer supports SSL termination or offloading, you may offload SSL processing to your load balancer so that your Oracle Beehive instances do not have to decrypt SSL-encrypted data, thereby reducing the load of your Oracle Beehive instances. Refer to "Configuring SSL Termination at Load Balancer" in "Installing Oracle Beehive in High Availability Environment" for more information.
Configuring SSL with Oracle Beehive
21-2 Oracle Beehive Installation Guide
■ The file <Oracle home>\opmn\conf\opmn.xml is configured properly for each application tier.
Configuring SSL with Oracle BeehiveThis section covers the following procedures:
■ Configuring SSL with Test Certificates for Oracle Beehive
■ Configuring SSL with Self-Signed Certificates During Installation of Oracle Beehive
■ Configuring SSL with Self-Signed Certificates After Installation of Oracle Beehive
Configuring SSL with Test Certificates for Oracle BeehiveThe following steps describe how to configure SSL with test certificates during or after the installation of one or more Oracle Beehive instances:
1. Install your first Oracle Beehive instance, if you have not already done so.
2. By default, an Oracle wallet with test certificates for OPMN is created in Oracle Beehive. This Oracle wallet is located in the following location:
<Oracle Beehive home>\opmn\conf\ssl.wlt\default.
Copy the contents of <Oracle Beehive home>\opmn\conf\ssl.wlt\default to the <Database home>\opmn\conf\ssl.wlt\default directory. This will overwrite the Oracle wallet files in this directory.
If you are using Oracle RAC, copy the contents of <Oracle Beehive home>\opmn\conf\ssl.wlt\default to the <Database home>\opmn\conf\ssl.wlt\default directory on each Oracle RAC node.
3. Configure TLS on your first Oracle Beehive instance. Refer to "Configuring TLS with Oracle Wallet".
4. Perform the post-install steps for configuring Oracle RAC except step 7 (Register for ONS Notification). Refer to "Post-Install Steps" in "Configuring and Installing Oracle Beehive for Oracle RAC"
5. Configure the virtual server of your Oracle Beehive instance with a load balancer. Refer to "Configuring High Availability Environment with Load Balancer" in "Installing Oracle Beehive in High Availability Environment".
6. If you have more than one Oracle Beehive instance, configure TLS on all your other Oracle Beehive instances. Refer to "Configuring TLS on Multiple Instances" in "Configuring TLS with Oracle Wallet".
7. Enable ORMIS on all your Oracle Beehive instances. Refer to "Enabling ORMIS with Password-Protected Oracle Wallet" in "Configuring TLS with Oracle Wallet".
8. Enable AJPS on all your Oracle Beehive instances. Refer to "Enabling AJPS".
Configuring SSL with Oracle Beehive
Configuring SSL 21-3
Configuring SSL with Self-Signed Certificates During Installation of Oracle BeehiveThe following steps describe how to configure SSL with self-signed certificates during the installation of one or more Oracle Beehive instances:
1. Remove all test certificates using Oracle Wallet Manager from the wallet you created for Oracle Database in Step 1, if any. The order of removal should be (1) user certificate, (2) certificate request, and (3) trusted certificate.
2. For the wallet of Oracle Database you created in Step 1, create a self-signed server certificate for each Oracle RAC node using a root certificate (from a certificate authority). Import these self-signed server certificates as well as the root certificate to the wallet for Oracle Database. Refer to "Creating Self-Signed Certificate and Importing it into Wallet".
3. Install your first Oracle Beehive instance.
4. Configure TLS on your first Oracle Beehive instance. Refer to "Configuring TLS with Oracle Wallet".
5. Remove the test certificates using Oracle Wallet Manager from the wallets in Oracle Beehive. The order of removal should be (1) user certificate, (2) certificate request, and (3) trusted certificate. These wallets should be located in <Oracle Beehive home>\opmn\conf\ssl.wlt\default and <Oracle Beehive home>\Apache\Apache\conf\ssl.wlt\default.
6. For the wallet located in <Oracle Beehive home>\opmn\conf\ssl.wlt\default, create a self-signed server certificate for the Oracle Beehive server using a root certificate (from a certificate authority). Import this self-signed server certificate as well as the root certificate to this wallet. Refer to "Creating Self-Signed Certificate and Importing it into Wallet".
Repeat this step for the wallet located in the following locationL
<Oracle Beehive home>\Apache\Apache\conf\ssl.wlt\default.
7. Perform the post-install steps for configuring Oracle RAC except Step 7 (Register for ONS Notification).
8. Configure the virtual server of each Oracle Beehive instances with a load balancer. Refer to "Configuring High Availability Environment with Load Balancer" in "Installing Oracle Beehive in High Availability Environment".
Note: After configuring SSL with test (self-signed) certificates for an Oracle Beehive environment with multiple instances, you may receive an alert message similar to the following:
You have received an invalid certificate.... Your certificate contains the same serial number as another certificate issued by the certificate authority. Please get a new certificate containing a unique serial number.
In this scenario, create a self-signed certificate for each Oracle Beehive instance with a unique serial number. If you are using OpenSSL to create self-signed certificates, use the -set_serial option:
openssl x509 -req -in certreq.csr -CA cacert.crt -CAkey cakey.pem -CAcreateserial -set_serial 01 -days 365 > server.crt
For more information about creating self-signed certificates with OpenSSL (and then importing them into Oracle Wallet), refer to "Creating Self-Signed Certificate and Importing it into Wallet".
Configuring SSL with Oracle Beehive
21-4 Oracle Beehive Installation Guide
9. Install an additional Oracle Beehive instance (software only install). In the following steps, this instance will be referred to as the second instance.
10. Replace orapki and Oracle Wallet Manager (owm.exe) binaries of the second instance with those from the first instance. Create new wallets located in <Oracle Beehive new instance home>\opmn\conf\ssl.wlt\default and <Oracle Beehive new instance home>/Apache/Apache/conf/ssl.wlt/default\Apache\Apache\conf\ssl.wlt\default. Refer to "Configuring TLS with Oracle Wallet".
11. Remove test certificates using Oracle Wallet Manager from the wallets in <Oracle Beehive new instance home>\opmn\conf\ssl.wlt\default and <Oracle Beehive new instance home>\Apache\Apache\conf\ssl.wlt\default, if any. The order of removal should be (1) user certificate, (2) certificate request, and (3) trusted certificate.
12. Repeat Step 8 for the second instance.
13. Run the Config Wizard for the second instance and complete the configuration.
14. Configure TLS on all Oracle Beehive instances.
15. If you want to install another Oracle Beehive instance, repeat Steps 11 to 15.
16. Enable ORMIS on all Oracle Beehive instances. Refer to "Enabling ORMIS with Password-Protected Oracle Wallet" in "Configuring TLS with Oracle Wallet"
17. Enable AJPS on all Oracle Beehive instances. Refer to "Enabling AJPS".
Configuring SSL with Self-Signed Certificates After Installation of Oracle BeehiveThe following steps describe how to configure SSL with self-signed certificates after the installation of one or more Oracle Beehive instances:
1. Remove all test certificates using Oracle Wallet Manager from the wallet you created for Oracle Database in Step 1, if any. The order of removal should be (1) user certificate, (2) certificate request, and (3) trusted certificate.
2. For the wallet of Oracle Database you created in Step 1, create a self-signed server certificate for each Oracle RAC node using a root certificate (from a certificate authority). Import these self-signed server certificates as well as the root certificate to the wallet for Oracle Database. Refer to "Creating Self-Signed Certificate and Importing it into Wallet".
3. Choose one of your Oracle Beehive instances on which to perform Steps 4 to 7 (you will repeat these steps on your other instances later). Configure TLS on the Oracle Beehive instance. Refer to "Configuring TLS with Oracle Wallet".
4. Remove the test certificates from the wallets of the Oracle Beehive instance. The order of removal should be (1) user certificate, (2) certificate request, and (3) trusted certificate. These wallets should be located in <Oracle Beehive home>\opmn\conf\ssl.wlt\default and <Oracle Beehive home>\Apache\Apache\conf\ssl.wlt\default.
5. For the wallet located in <Oracle Beehive home>\opmn\conf\ssl.wlt\default, create a self-signed server certificate for Oracle Beehive using a root certificate (from a certificate authority). Import this self-signed server certificate as well as the root certificate to this wallet. Refer to "Creating Self-Signed Certificate and Importing it into Wallet".
Repeat this step for the wallet located in the following location:
Configuring SSL with Oracle Beehive DMZ Instances
Configuring SSL 21-5
<Oracle Beehive home>\Apache\Apache\conf\ssl.wlt\default.
6. If you have multiple Oracle Beehive instances, repeat Steps 4 to 7 for each of your instances.
7. Enable ORMIS on all Oracle Beehive instances. Refer to "Enabling ORMIS with Password-Protected Oracle Wallet" in "Configuring TLS with Oracle Wallet"
8. Enable AJPS on all Oracle Beehive instances. Refer to "Enabling AJPS".
Configuring SSL with Oracle Beehive DMZ InstancesThis section covers the following procedures:
■ Configuring SSL with Test Certificates After Installation of DMZ Instances
■ Configuring SSL with Self-Signed Certificates After Installation of DMZ Instances
Configuring SSL with Test Certificates After Installation of DMZ InstancesThe following steps describe how to configure SSL with test certificates during the installation of one or more Oracle Beehive instances:
1. Install your DMZ instance.
2. Configure Oracle Wallet for the DMZ instance. For more information, refer to "Step A: Configuring Oracle Wallet with Oracle Beehive DMZ Instances" in "Configuring Oracle Beehive Demilitarized Zone Instances". This step involves creating an Oracle Wallet for your DMZ instance and editing the file <Oracle home of DMZ instance>\opmn\conf\opmn.xml so that it refers to the new Oracle Wallet.
3. Follow the steps described in "Step B: Configuring Oracle Beehive DMZ Instances" in "Configuring Oracle Beehive Demilitarized Zone Instances"
4. Configure the virtual server of your Oracle Beehive DMZ instances with a load balancer. For more information, refer to "Configuring High Availability Environment with DMZ Instances and Load Balancer" in "Installing Oracle Beehive in High Availability Environment".
Configuring SSL with Self-Signed Certificates After Installation of DMZ InstancesThe following steps describe how to configure SSL with self-signed certificates after the installation of one or more Oracle Beehive DMZ instances:
1. Install your DMZ instance.
2. Configure Oracle Wallet for the DMZ instance. For more information, refer to "Step A: Configuring Oracle Wallet with Oracle Beehive DMZ Instances" in "Configuring Oracle Beehive Demilitarized Zone Instances". This step involves creating an Oracle Wallet for your DMZ instance and editing the file <Oracle home of DMZ instance>\opmn\conf\opmn.xml so that it refers to the new Oracle Wallet.
3. For the wallet located in <Oracle Beehive DMZ home>\opmn\conf\ssl.wlt\default, create a self-signed server certificate for the Oracle Beehive DMZ instance using a root certificate (from a certificate authority). Import this self-signed server certificate as well as the root certificate to this wallet. For more information, refer to "Creating Self-Signed Certificate and Importing it into Wallet"
Procedures Related to Configuring SSL
21-6 Oracle Beehive Installation Guide
Repeat this step for the wallet located in <Oracle Beehive DMZ home>\Apache\Apache\conf\ssl.wlt\default.
4. Follow the steps described in "Step B: Configuring Oracle Beehive DMZ Instances" in "Configuring Oracle Beehive Demilitarized Zone Instances"
5. Configure the virtual server of your Oracle Beehive DMZ instances with a load balancer. For more information, refer to "Configuring High Availability Environment with DMZ Instances and Load Balancer" in "Installing Oracle Beehive in High Availability Environment".
Procedures Related to Configuring SSLThis section covers the following procedures related to configuring SSL:
■ Creating Self-Signed Certificate and Importing it into Wallet
■ Creating CA-Signed Certificate and Importing it into Wallet
Creating Self-Signed Certificate and Importing it into WalletThe following steps create a self-signed server certificate and imports it into an Oracle Wallet. You may also create a certificate signed by a certificate authority (CA) and import that into an Oracle Wallet. Refer to "Creating CA-Signed Certificate and Importing it into Wallet" for more information.
You will be performing these steps for the wallet you created in the following procedures:
■ "Configuring TLS with Oracle Wallet" (which creates a wallet for Oracle Beehive)
■ "Step A: Configuring Oracle Wallet with Oracle Beehive DMZ Instances" (which creates a wallet for an Oracle Beehive DMZ instance)
1. Create your own certificate authority. This step uses OpenSSL. For more information about OpenSSL, refer to http://www.openssl.org/.
openssl req -new -x509 -keyout cakey.pem -out cacert.crt -days 365
This command generates two files named cakey.pem and cacert.crt.
2. Create and export a certificate request with Oracle Wallet Manager:
a. Run Oracle Wallet manager, <Oracle Beehive home>\bin\owm. (Use <Database home>\bin\owm instead if you have not installed any Oracle Beehive instances.)
b. Open the wallet (to which you want to add the certificate).
c. Create a certificate request. Click the Operations tab. Click Add Certificate Request. Fill out the form. The Common Name should be the name of the server for which you are creating the certificate (such as the name of the Oracle RAC node). Click OK.
d. Save the wallet.
e. Click the Operation tab. Click Export Certificate Request. Enter the path and file name of the certificate request. These steps assume that the name of this file is certreq.csr. (Keep Oracle Wallet Manager open; you will use it in Step 4.)
3. From a command prompt, generate a server certificate with the following command:
Procedures Related to Configuring SSL
Configuring SSL 21-7
openssl x509 -req -in certreq.csr -CA cacert.crt -CAkey cakey.pem -CAcreateserial -days 365 > server.crt
This command generates two files, cacert.srl and server.crt (which is the server certificate).
4. In Oracle Wallet Manager, click the Operations tab. Click Import Trusted Certificate. Select the file cacert.crt. Click OK.
5. Click Import User Certificate. Select the file server.crt. Click OK.
6. Repeat Steps 2 to 5 (except Step 1; you can use the same cakey.pem and cacert.crt files for other servers) for each server for which you want to create a certificate. (In particular, you would repeat these steps for each Oracle RAC node.)
Using Oracle Wallet to Create Self-Signed CertificateAlternatively, you may use Oracle Wallet to create a self-signed certificate.
Add a self-signed certificate to the wallet with the following command:
orapki wallet add -wallet <Oracle home>/Apache/Apache/conf/ssl.wlt/default/ -dn CN=user -keysize 2048 -self_signed -validity 365
CN=user is the distinguished name of an arbitrary user who will be the certificate owner.
Creating CA-Signed Certificate and Importing it into WalletAlternatively, you may create a certificate signed by a certificate authority (CA), and import that into the Oracle Beehive wallet:
1. Add a certificate request to the Oracle Beehive wallet:
orapki wallet add -wallet <Oracle home>/Apache/Apache/conf/ssl.wlt/default/ -dn CN=user -keysize 2048 -validity 365
The directory <Oracle home>/Apache/Apache/conf/ssl.wlt/default/ is the Oracle Beehive default wallet directory. CN=user is the distinguished name of an arbitrary user who will be the certificate owner.
2. Export the certificate request to a file:
orapki wallet export -wallet <Oracle home>/Apache/Apache/conf/ssl.wlt/default/ -dn CN=user -request certificate_request.txt
The file certificate_request.txt is the exported certificate request.
3. With your certificate authority (CA) and your certificate request (certificate_request.txt), create a signed user certificate. In addition, export the trusted certificate from your CA. These steps use the file user_certificate.txt as the signed user certificate and the file trusted_certificate.txt as the trusted certificate exported from your CA.
Installing Non-SSL Oracle Beehive Site
21-8 Oracle Beehive Installation Guide
You may use Oracle Wallet as a CA for testing purposes by following these steps.
a. Create an auto-login wallet to act as a certificate authority. These steps assume that this wallet is stored in /private/ca_wallet. Create a signed certificate from the request for test purposes:
orapki cert create -wallet /private/ca_wallet -request certificate_request.txt -cert user_certificate.txt -validity 365
The file user_certificate.txt is the signed user certificate.
b. Export the trusted certificate from the CA wallet:
orapki wallet export -wallet /private/ca_wallet -dn CN=ca_user -cert trusted_certificate.txt
The file trusted_certificate.txt is the exported (test) trusted certificate from the CA wallet.
4. Add the trusted certificate from the CA to the Oracle Beehive wallet:
orapki wallet add -wallet <Oracle home>/Apache/Apache/conf/ssl.wlt/default/ -trusted_cert -cert trusted_certificate.txt
5. Add the user certificate to the Oracle Beehive wallet:
orapki wallet add -wallet <Oracle home>/Apache/Apache/conf/ssl.wlt/default/ -user_cert -cert user_certificate.txt
Installing Non-SSL Oracle Beehive SiteThe following steps describe how to install a non-SSL Oracle Beehive site in which none of its tiers communicate using SSL:
1. Install your first Oracle Beehive application tier. Note that this application tier, by default, will have SSL disabled for Oracle Notification Service (ONS), which is used by OPMN of this application tier to communicate with other OPMNs in the site. In the next step, you will disable SSL (if necessary).
2. Ensure that the value of NotificationServerSslEnabled in the _current_site:OpmnCluster component in the first Oracle Beehive application tier is false:
beectl list_properties --component _current_site:OpmnCluster --name NotificationServerSslEnabled
Note: Because Oracle Beehive DMZ instances have SSL enabled by default, the following steps will not work for DMZ instances unless you configure them to receive non-SSL notifications as described in "Step B: Configuring Oracle Beehive DMZ Instances" in "Configuring Oracle Beehive Demilitarized Zone Instances".
Installing Oracle Internet Directory in SSL mode
Configuring SSL 21-9
If NotificationServerSslEnabled is true, then set it to false:
beectl modify_property --component _current_site:OpmnCluster --name NotificationServerSslEnabled --value false --activate_configuration
3. In the first Oracle Beehive application tier, set the value of HttpServerSslEnabled in the _current_site:HttpServerCluster component to false, then run beectl modify_local_configuration_files:
beectl modify_property --component _current_site:HttpServerCluster --name HttpServerSslEnabled --value false --activate_configuration
beectl modify_local_configuration_files
4. Install any additional Oracle Beehive application tiers. You do not need to perform any additional steps for these application tiers.
Installing Oracle Internet Directory in SSL modeOracle Identity Management Infrastructure and Oracle Identity Federation are supported on the following Operating System versions:
■ Red Hat Enterprise Linux AS Release 4
■ Red Hat 2.1
■ Red Hat 3
■ SuSE 9
■ UnitedLinux 1.0
The following steps describe how to install Oracle Internet Directory in a Secure Sockets Layer (SSL):
1. Download Oracle Identity Management Infrastructure and Oracle Identity Federation from the following URL:
http://www.oracle.com/technetwork/middleware/ias/downloads/101401-099957.html
■ Download x86 version from Linux column (Both Disk1 and Disk2) to an empty directory. (Prefer a subdirectory of /scratch/$USER/)
■ To verify the integrity of the downloaded file, after the file has been transferred to a Unix host, run cksum and compare with the cksum information listed on the download page.
■ Go to the directory and extract the contents by using the following command.
cpio -idvm < <Dick1 cpio_file>cpio -idvm < <Disk2 cpio file>
2. If an old installation exists, reboot the system and remove the directory containing the previous OID installation.
Installing Oracle Internet Directory in SSL mode
21-10 Oracle Beehive Installation Guide
3. Start the installation of OID using Disk1/runInstaller. Execute orainstRoot.sh present in oraInventory directory to start the installation.
Click Next wherever no input is asked.
■ On the Specify File Locations screen, change the Destination Path to your Oracle Home.
■ On the Select a Product to Install screen, select Oracle Application Server Infrastructure 10g and click Next.
■ On the Select Installation Type screen, select Identity Management and Metadata Repository.
■ On the Product-specific Prerequisite Checks screen, let the check complete. It may show one warning. Select the checkbox Checking security kernel parameters and click Next.
■ On the Confirm Pre-Installation Requirement screen, select the checkbox Root Privileges and click Next.
■ On the Select Configuration Options screen, select the checkbox Oracle Application Server Certificate Authority (OCA) and click Next.
■ On the Specify Port Configuration Options screen, select Automatic and click Next.
■ On the Specify Namespace in Internet Directory screen, leave the Suggested Namespace selected and click Next.
■ On the Specify OCA Distinguished Name screen, enter "test" in all three textboxes under Typical DN, leave it selected and click Next.
■ On the Specify OCA Key Length screen, select the needed Key Length and click Next. Prefer ’1024’ unless otherwise needed.
■ On the Specify OCA Administrator's Password screen, specify the password as "Welcome1" and click Next.
■ On the Specify Database Configuration Options screen, ensure that the database file location is a subdirectory of $ORACLE_HOME and click Next. (You may want to note down the details on this page.)
■ On the Specify Database Schema Passwords screen, select Use the same password for all the accounts, specify the password as "Welcome1" and click Next.
■ On the Specify Instance Name and ias_admin Password screen, specify a suitable instance name, specify the password as "Welcome1", confirm it and click Next.
4. The Confirmation screen displays the summary of what you have selected, check the details and click install.
5. When the installation starts, if your disk 2 is not in the same directory, the system will prompt you for the location of the disk 2 directory, specify the path and proceed further.
Note: If the specified SID already exists choose a name of your choice.
Installing Oracle Internet Directory in SSL mode
Configuring SSL 21-11
6. In between the installation, the system will ask you to run a script as a root user, run the script and click OK on the pop-up message.
7. Save the configuration details in a file for reference.
To test the installation:■ Run the following script to check whether ldapbind works:
$ORACLE_HOME/bin/ldapbind -D cn=orcladmin -w Welcome1 -U 1 -h <OID_hostname> -p <port>
■ "-U 1" is for non-SSL mode
■ See Appendix to find out the port
Configuring the OID in SSL mode1. Create an Auto Login Wallet with self signed user certificate by running the
following commands:
setenv ORACLE_HOME /scratch/$USER/OraHome_1cd $ORACLE_HOME/binorapki wallet create -wallet /home/$USER/ORACLE/WALLET -auto_login -pwd Welcome1orapki wallet add -wallet /home/$USER/ORACLE/WALLET -keysize 1024 -dn "cn=<OID_hostname>" -self_signed -validity 365
2. Add a new configuration set:
a. In the navigator pane, select Oracle Internet Directory Servers, then Directory Server instance, and then select Server Management.
b. Select Directory Server. The numbered configuration sets are listed beneath your selection.
c. Right click on the Configuration Set 1 and select Create Like.
d. In the new configuration set window, enter Non SSL port that is not already in use.
e. Select the SSL Settings tab, modify the fields as described below:
SSL Authentication: SSL Server Authentication
SSL Enable: Both SSL and Non-SSL
SSL Wallet URL: file://home/<username>/ORACLE/WALLET
SSL Port: 1636 (Any unused port)
f. Click Ok.
You can review the settings by clicking the newly created configuration set node.
g. Exit the Oracle Directory Manager.
3. Start a new instance by running the following command:
$ORACLE_HOME/bin/oidctl connect=orcl server=oidldapd instance=2 configset=2 start
4. Test if the SSL is working by running the following command:
$ORACLE_HOME/bin/ldapbind -p 1636 -U 2 -W file:/home/$USER/ORACLE/WALLET -P Welcome1 -h <hostname>
Installing Oracle Internet Directory in SSL mode
21-12 Oracle Beehive Installation Guide
Appendix1. Shell variables that need to be set:
■ $ORACLE_HOME=/scratch/$USER/OraHome_1
■ $ORACLE_SID=orcl
2. Find out the ports on which the OID is listening:
a. Run the following command:
ps -ef | grep oidldapd
b. Look for options -port and -sport.
3. Start the OID manager:
a. Run the following command to start the OID manager:
$ORACLE_HOME/bin/oidadmin
b. Enter the following details:
■ User: orcladmin
■ Password: Welcome1
■ Add a new server with hostname and port by clicking the icon against Server.
■ Click Login.
4. To restart OID after rebooting the system:
a. Place the following content in a file /scratch/$USER/.ENV
setenv ORACLE_HOME /scratch/$USER/OraHome_1setenv ORACLE_SID orclsetenv PATH ${PATH}:${ORACLE_HOME}/bin
b. Use the following command to start the database:
source /scratch/$USER/.ENV
Note: If the wallet does not contain any user certificate or if there is a mismatch in certificate.
$ldapbind -p 1636 -U 2 -W file:/home/$USER/ORACLE/WALLET -P welcome1Unknown Error Encountered
If you make any changes in the configuration set, you must restart the instance that is running the configuration set for the changes to take effect by running the following commands:
oidctl connect=orcl server=oidldapd instance=nn configset=<config no.> stopoidctl connect=orcl server=oidldapd instance=nn configset=<config no.> start
Note: Port number can be found out by running the following command:
ps -ef | grep oidldapd
Installing Oracle Internet Directory in SSL mode
Configuring SSL 21-13
sqlplus "sys/Welcome1 as sysdba" <<EOF?startup?EOFlsnrctl start
c. Use the following command to all instances of OID:
oidmon connect=orcl start
d. Use the following command to start the only one of the instances of OID:
oidctl connect=orcl server=oidldapd instance=nn configset=cf start
Configuring Beehive to connect to OID in non-SSL and SSL modesBefore you begin to configure Beehive to connect to OID, ensure the following:
■ For non-SSL mode:
■ OID is installed in the $ORACLE_HOME folder.
■ ldapbind is working correctly; to check, the following command should give outputas "Bind Successful".
$ORACLE_HOME/bin/ldapbind -D cn=orcladmin -w Welcome1 -U 1 -h <OID_hostname> -p <port>
■ $MWH is Beehive installation Directory.
■ For SSL mode:
■ Include $ORACLE_HOME/bin in $PATH environment variable.
■ OID is listening only on SSL-port in SSL-only mode.
■ /home/$USER/ORACLE/WALLET contains self signed certificate of OID with cn = hostname of OID, and the same certificate in the trusted certificate list.
■ ldapbind is working correctly; to check, following command should give output as "Bind Successful"
ldapbind -p <SSL-port> -U 2 -W file:/home/$USER/ORACLE/WALLET -P Welcome1
■ $MWH is Beehive installation Directory.
■ Keytool utility is available, if not, include the bin directory of jdk6 or later in the $PATH environment variable.
■ OID entries and profile entries match. See Initial configuration in non-SSL mode.
To configure Beehive to connect to OID (in non-SSL mode):1. Set the initial configuration. Refer the Appendix section to start oiddas. Skip this
step if already done.
If group Extps exists in your ldap_profile xml, add the group to OID using oiddas.
2. Make the following necessary changes in ldap_profile xml file; skip the step if already done.
■ Change the host name, port number, and SSL-port to match the OID installation. Refer the Appendix section to find out the port numbers.
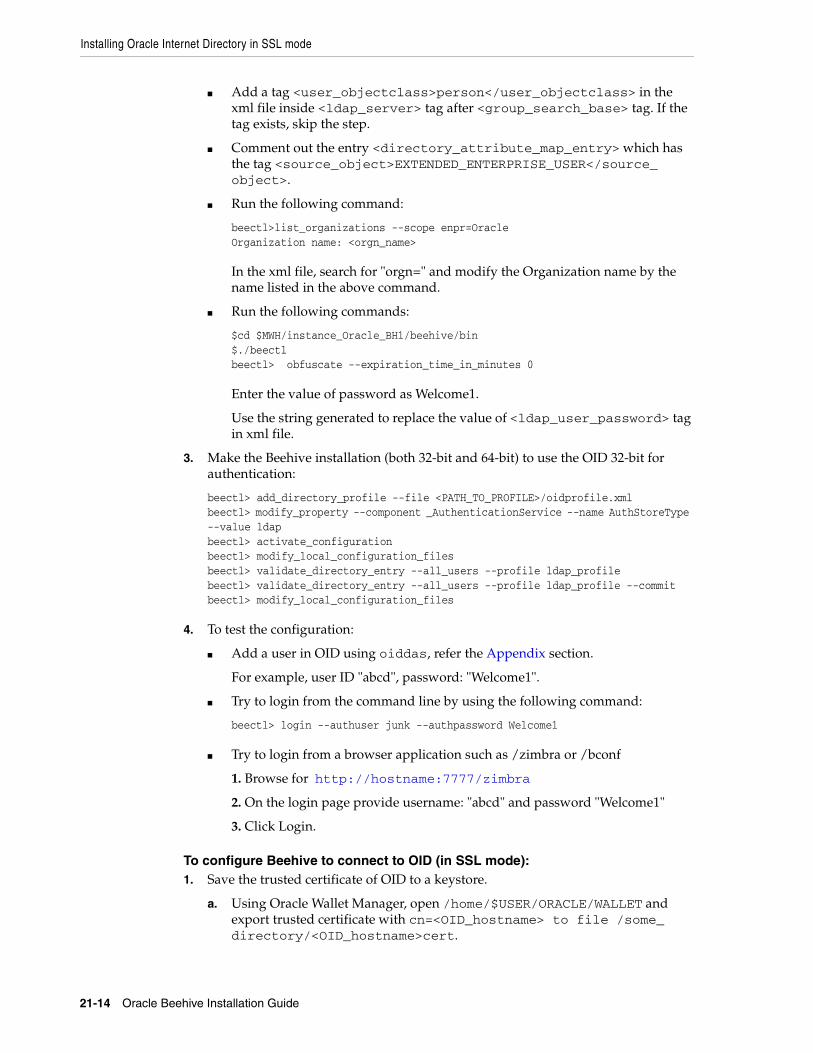
Installing Oracle Internet Directory in SSL mode
21-14 Oracle Beehive Installation Guide
■ Add a tag <user_objectclass>person</user_objectclass> in the xml file inside <ldap_server> tag after <group_search_base> tag. If the tag exists, skip the step.
■ Comment out the entry <directory_attribute_map_entry> which has the tag <source_object>EXTENDED_ENTERPRISE_USER</source_object>.
■ Run the following command:
beectl>list_organizations --scope enpr=OracleOrganization name: <orgn_name>
In the xml file, search for "orgn=" and modify the Organization name by the name listed in the above command.
■ Run the following commands:
$cd $MWH/instance_Oracle_BH1/beehive/bin$./beectlbeectl> obfuscate --expiration_time_in_minutes 0
Enter the value of password as Welcome1.
Use the string generated to replace the value of <ldap_user_password> tag in xml file.
3. Make the Beehive installation (both 32-bit and 64-bit) to use the OID 32-bit for authentication:
beectl> add_directory_profile --file <PATH_TO_PROFILE>/oidprofile.xmlbeectl> modify_property --component _AuthenticationService --name AuthStoreType --value ldapbeectl> activate_configurationbeectl> modify_local_configuration_filesbeectl> validate_directory_entry --all_users --profile ldap_profilebeectl> validate_directory_entry --all_users --profile ldap_profile --commitbeectl> modify_local_configuration_files
4. To test the configuration:
■ Add a user in OID using oiddas, refer the Appendix section.
For example, user ID "abcd", password: "Welcome1".
■ Try to login from the command line by using the following command:
beectl> login --authuser junk --authpassword Welcome1
■ Try to login from a browser application such as /zimbra or /bconf
1. Browse for http://hostname:7777/zimbra
2. On the login page provide username: "abcd" and password "Welcome1"
3. Click Login.
To configure Beehive to connect to OID (in SSL mode):1. Save the trusted certificate of OID to a keystore.
a. Using Oracle Wallet Manager, open /home/$USER/ORACLE/WALLET and export trusted certificate with cn=<OID_hostname> to file /some_directory/<OID_hostname>cert.
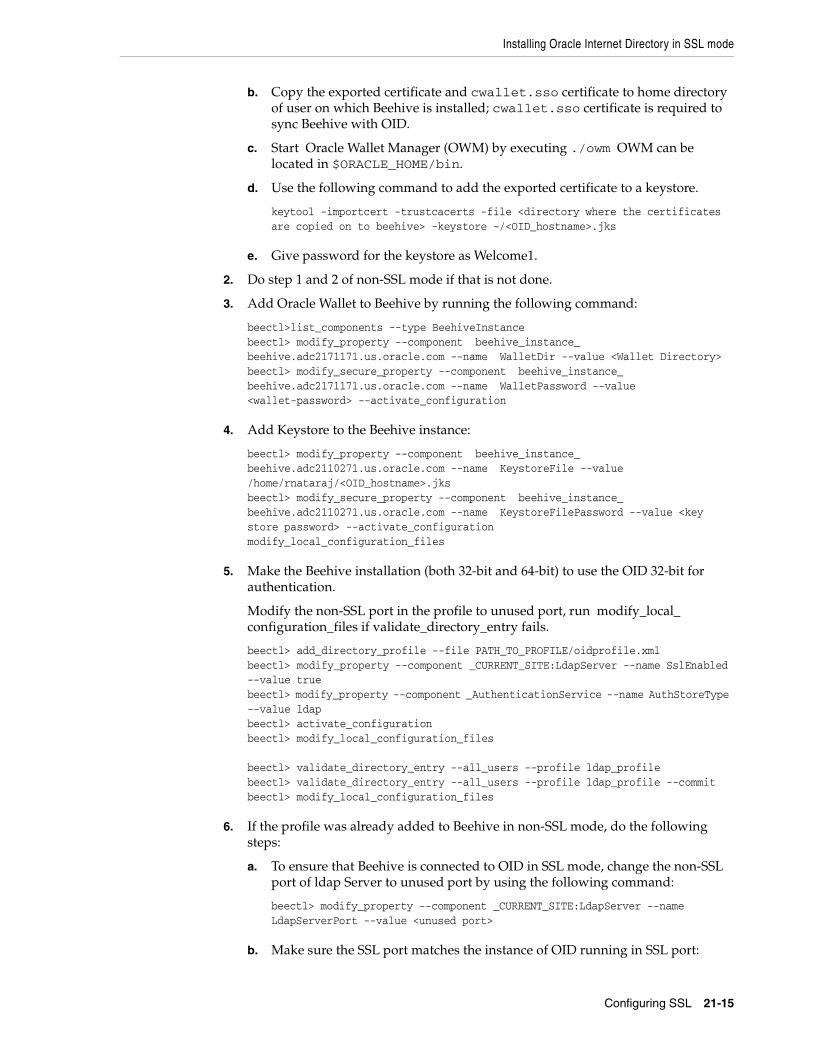
Installing Oracle Internet Directory in SSL mode
Configuring SSL 21-15
b. Copy the exported certificate and cwallet.sso certificate to home directory of user on which Beehive is installed; cwallet.sso certificate is required to sync Beehive with OID.
c. Start Oracle Wallet Manager (OWM) by executing ./owm OWM can be located in $ORACLE_HOME/bin.
d. Use the following command to add the exported certificate to a keystore.
keytool -importcert -trustcacerts -file <directory where the certificates are copied on to beehive> -keystore ~/<OID_hostname>.jks
e. Give password for the keystore as Welcome1.
2. Do step 1 and 2 of non-SSL mode if that is not done.
3. Add Oracle Wallet to Beehive by running the following command:
beectl>list_components --type BeehiveInstancebeectl> modify_property --component beehive_instance_beehive.adc2171171.us.oracle.com --name WalletDir --value <Wallet Directory>beectl> modify_secure_property --component beehive_instance_beehive.adc2171171.us.oracle.com --name WalletPassword --value <wallet-password> --activate_configuration
4. Add Keystore to the Beehive instance:
beectl> modify_property --component beehive_instance_beehive.adc2110271.us.oracle.com --name KeystoreFile --value /home/rnataraj/<OID_hostname>.jksbeectl> modify_secure_property --component beehive_instance_beehive.adc2110271.us.oracle.com --name KeystoreFilePassword --value <key store password> --activate_configurationmodify_local_configuration_files
5. Make the Beehive installation (both 32-bit and 64-bit) to use the OID 32-bit for authentication.
Modify the non-SSL port in the profile to unused port, run modify_local_configuration_files if validate_directory_entry fails.
beectl> add_directory_profile --file PATH_TO_PROFILE/oidprofile.xmlbeectl> modify_property --component _CURRENT_SITE:LdapServer --name SslEnabled --value truebeectl> modify_property --component _AuthenticationService --name AuthStoreType --value ldapbeectl> activate_configurationbeectl> modify_local_configuration_files
beectl> validate_directory_entry --all_users --profile ldap_profilebeectl> validate_directory_entry --all_users --profile ldap_profile --commitbeectl> modify_local_configuration_files
6. If the profile was already added to Beehive in non-SSL mode, do the following steps:
a. To ensure that Beehive is connected to OID in SSL mode, change the non-SSL port of ldap Server to unused port by using the following command:
beectl> modify_property --component _CURRENT_SITE:LdapServer --name LdapServerPort --value <unused port>
b. Make sure the SSL port matches the instance of OID running in SSL port:
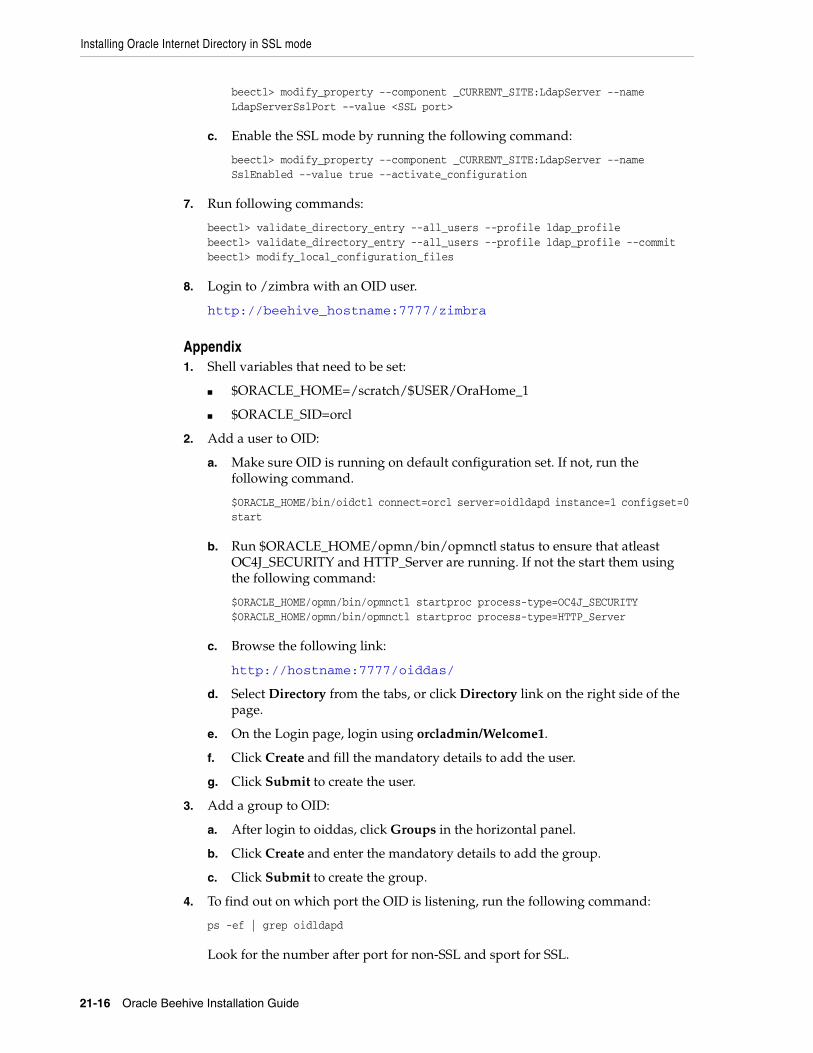
Installing Oracle Internet Directory in SSL mode
21-16 Oracle Beehive Installation Guide
beectl> modify_property --component _CURRENT_SITE:LdapServer --name LdapServerSslPort --value <SSL port>
c. Enable the SSL mode by running the following command:
beectl> modify_property --component _CURRENT_SITE:LdapServer --name SslEnabled --value true --activate_configuration
7. Run following commands:
beectl> validate_directory_entry --all_users --profile ldap_profilebeectl> validate_directory_entry --all_users --profile ldap_profile --commitbeectl> modify_local_configuration_files
8. Login to /zimbra with an OID user.
http://beehive_hostname:7777/zimbra
Appendix1. Shell variables that need to be set:
■ $ORACLE_HOME=/scratch/$USER/OraHome_1
■ $ORACLE_SID=orcl
2. Add a user to OID:
a. Make sure OID is running on default configuration set. If not, run the following command.
$ORACLE_HOME/bin/oidctl connect=orcl server=oidldapd instance=1 configset=0 start
b. Run $ORACLE_HOME/opmn/bin/opmnctl status to ensure that atleast OC4J_SECURITY and HTTP_Server are running. If not the start them using the following command:
$ORACLE_HOME/opmn/bin/opmnctl startproc process-type=OC4J_SECURITY$ORACLE_HOME/opmn/bin/opmnctl startproc process-type=HTTP_Server
c. Browse the following link:
http://hostname:7777/oiddas/
d. Select Directory from the tabs, or click Directory link on the right side of the page.
e. On the Login page, login using orcladmin/Welcome1.
f. Click Create and fill the mandatory details to add the user.
g. Click Submit to create the user.
3. Add a group to OID:
a. After login to oiddas, click Groups in the horizontal panel.
b. Click Create and enter the mandatory details to add the group.
c. Click Submit to create the group.
4. To find out on which port the OID is listening, run the following command:
ps -ef | grep oidldapd
Look for the number after port for non-SSL and sport for SSL.
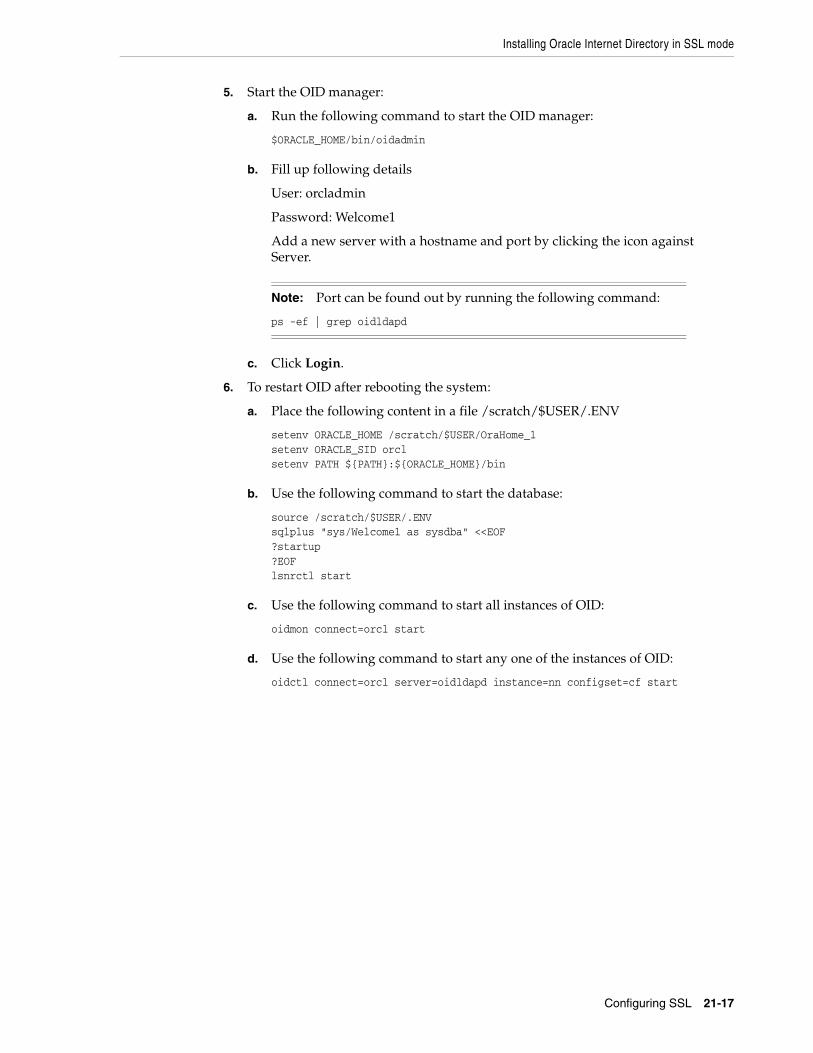
Installing Oracle Internet Directory in SSL mode
Configuring SSL 21-17
5. Start the OID manager:
a. Run the following command to start the OID manager:
$ORACLE_HOME/bin/oidadmin
b. Fill up following details
User: orcladmin
Password: Welcome1
Add a new server with a hostname and port by clicking the icon against Server.
c. Click Login.
6. To restart OID after rebooting the system:
a. Place the following content in a file /scratch/$USER/.ENV
setenv ORACLE_HOME /scratch/$USER/OraHome_1setenv ORACLE_SID orclsetenv PATH ${PATH}:${ORACLE_HOME}/bin
b. Use the following command to start the database:
source /scratch/$USER/.ENVsqlplus "sys/Welcome1 as sysdba" <<EOF?startup?EOFlsnrctl start
c. Use the following command to start all instances of OID:
oidmon connect=orcl start
d. Use the following command to start any one of the instances of OID:
oidctl connect=orcl server=oidldapd instance=nn configset=cf start
Note: Port can be found out by running the following command:
ps -ef | grep oidldapd

Installing Oracle Internet Directory in SSL mode
21-18 Oracle Beehive Installation Guide
22
Configuring TLS with Oracle Wallet 22-1
22 Configuring TLS with Oracle Wallet
This chapter describes how to configure Transport Layer Security (TLS) with Oracle Wallet.
A wallet is a password-protected container that stores authentication and signing credentials, including private keys, certificates, and trusted certificates, all of which are used by SSL for strong authentication.
Oracle Wallet provides a TLS encrypted communication channel that some services support or require, such as XMPP and FTPS. The following steps configure Oracle Beehive to use Oracle Wallet so that clients may access Oracle Beehive with a TLS connection.
■ Step 1: Enabling Auto Login Mode for Default Wallet
■ Step 2: Configuring Oracle Beehive Instance to Use Oracle Wallet
■ Step 3: Replacing Test Certificates in Oracle Wallet
Refer to the section "Changing Oracle Wallet Password" to change the password of your Oracle Wallet.
Refer to the section "Configuring TLS on Multiple Instances" if you have more than one Oracle Beehive instance.
Refer to the section "Enabling ORMIS with Password-Protected Oracle Wallet" if you want to enable Oracle Remote Method Invocation over SSL.
Step 1: Enabling Auto Login Mode for Default Wallet1. Ensure that the environment variable ORACLE_HOME is set to the home
directory of Oracle Beehive.
2. Enable auto login mode for the default wallet with the following command. The default password for the default wallet is welcome:
<Oracle home>\bin\orapki wallet create -wallet <Oracle home>\Apache\Apache\conf\ssl.wlt\default\ -auto_login -pwd welcome
Note: Alternatively, you may create a new wallet with auto login mode enabled. Use the same command except specify a different directory that does not contain a wallet. You may specify any password when creating a new wallet.
Step 2: Configuring Oracle Beehive Instance to Use Oracle Wallet
22-2 Oracle Beehive Installation Guide
Step 2: Configuring Oracle Beehive Instance to Use Oracle WalletThe following steps describe how to configure your Oracle Beehive instance to use Oracle Wallet.
1. Run the following beectl command:
beectl modify_property --component beehive_instance_<instance>.<host name> --name WalletDir --value <Oracle home>\Apache\Apache\conf\ssl.wlt\default
<instance> is the instance name you specified when you installed Oracle Beehive. To retrieve the full instance name, run the command beectl list_components --type BeehiveInstance.
<Oracle home>\Apache\Apache\conf\ssl.wlt\default is the location of the auto login wallet you configured or created previously.
2. Activate the configuration and restart by running the following beectl command:
beectl activate_configuration
Step 3: Replacing Test Certificates in Oracle WalletIf you created a wallet as part of TLS configuration, it will contain test certificates. These certificates are valid for a very short period of time and will expire quickly. Once they expire, when a user tries to access HTTPS, that user will receive an error similar to one of the following:
■ You have received an invalid certificate.
■ The security certificate presented by this Website has expired or is not yet valid.
■ The connection is untrusted.
Consequently, you must replace these test certificates with self-signed or CA-signed certificates. Refer to the sections "Creating Self-Signed Certificate and Importing it into Wallet" and "Creating CA-Signed Certificate and Importing it into Wallet" in "Configuring SSL" for more information.
Changing Oracle Wallet PasswordFollow these steps to change the Oracle Wallet password:
Note: If the beectl activate_configuration command asks you to run the beectl modify_local_configuration_files command, run this command.
The beectl modify_local_configuration_files will ask you to run this command on all your other instances. Do not run this command on all your other instances at this time. For each instance, you must perform steps 1 and 2 before running the beectl modify_local_configuration_files command.
Note: After replacing these certificates with self-signed or CA-signed certificates, restart Oracle Beehive.
Enabling ORMIS with Password-Protected Oracle Wallet
Configuring TLS with Oracle Wallet 22-3
1. Specify the wallet's new password in Oracle Beehive by running the following beectl commands:
beectl modify_property --component beehive_instance_<instance>.<host name> --name WalletDir --value <$ORACLE_HOME>/Apache/Apache/conf/ssl.wlt/default
beectl modify_local_configuration_files
<instance> is the instance name you specified when you installed Oracle Beehive. To retrieve the full instance name, run the command beectl list_components --type BeehiveInstance.
--value is the directory location of the wallet.
To obfuscate a password, use the beectl obfuscate command:
beectl obfuscate --expiration_time_in_minutes 0Enter value for password: Successfully obfuscated the string.
2. Set the wallet password:
beectl modify_secure_property –-component beehive_instance_<instance>.<host name> --name WalletPassword --value <password>
3. Change the password to the one you specified in the previous step in Oracle Wallet Manager, <Oracle home>/bin/owm. Refer to "Changing the Password" in Chapter 11, "Managing Wallets and Certificates" in Oracle Application Server Administrator's Guide for more information.
4. Activate the configuration and commit changes:
beectl activate_configurationbeectl modify_local_configuration_files
Configuring TLS on Multiple InstancesFor each instance, run all the steps required to configure TLS with Oracle Wallet.
Enabling ORMIS with Password-Protected Oracle WalletOracle Remote Method Invocation over Secure Socket Layer (ORMIS) is ORMI over SSL. For more information about ORMIS, refer to "Using ORMI/SSL (ORMIS) in OC4J" in Chapter 6, "Using Remote Method Invocation" in Oracle Containers for J2EE Services Guide.
By default, Oracle Beehive is ORMIS enabled using an anonymous cipher suite.
This section covers the following topics:
■ Disable ORMIS
■ Enable ORMIS with Default SSL
■ Enable ORMIS with Password Protection
Enabling ORMIS with Password-Protected Oracle Wallet
22-4 Oracle Beehive Installation Guide
Disable ORMIS1. Modify the property _CURRENT_SITE:ManagedOc4jCluster:OrmisEnabled to
false and activate the configuration:
beectl modify_property --component _CURRENT_SITE:ManagedOc4jCluster --name OrmisEnabled --value false
2. Activate the configuration:
beectl activate_configuration
3. Run the command beectl modify_local_configuration_files. This command may restart your application tier:
beectl modify_local_configuration_files
Enable ORMIS with Default SSL1. Modify the property _CURRENT_SITE:ManagedOc4jCluster to true and activate
the configuration:
beectl modify_property --component _CURRENT_SITE:ManagedOc4jCluster --name OrmisEnabled --value true
2. Activate the configuration:
beectl activate_configuration
3. Run the command beectl modify_local_configuration_files. This command may restart your application tier:
beectl modify_local_configuration_files
Enable ORMIS with Password Protection1. Create a wallet as described in this module.
2. Modify the property _CURRENT_SITE:ManagedOc4jCluster to true:
beectl modify_property --component _CURRENT_SITE:ManagedOc4jCluster --name OrmisEnabled --value true
3. Modify the property WalletDir of your Oracle Beehive instance to the path of your Oracle Wallet directory you just created with the following beectl commands:
beectl list_components --type BeehiveInstance-------------------------------------------------------| Component type | Component identifier |-------------------------------------------------------| BeehiveInstance | beehive_instance_example.com |...
beectl modify_property --component beehive_instance_example.com --name WalletDir --value <Your wallet directory>
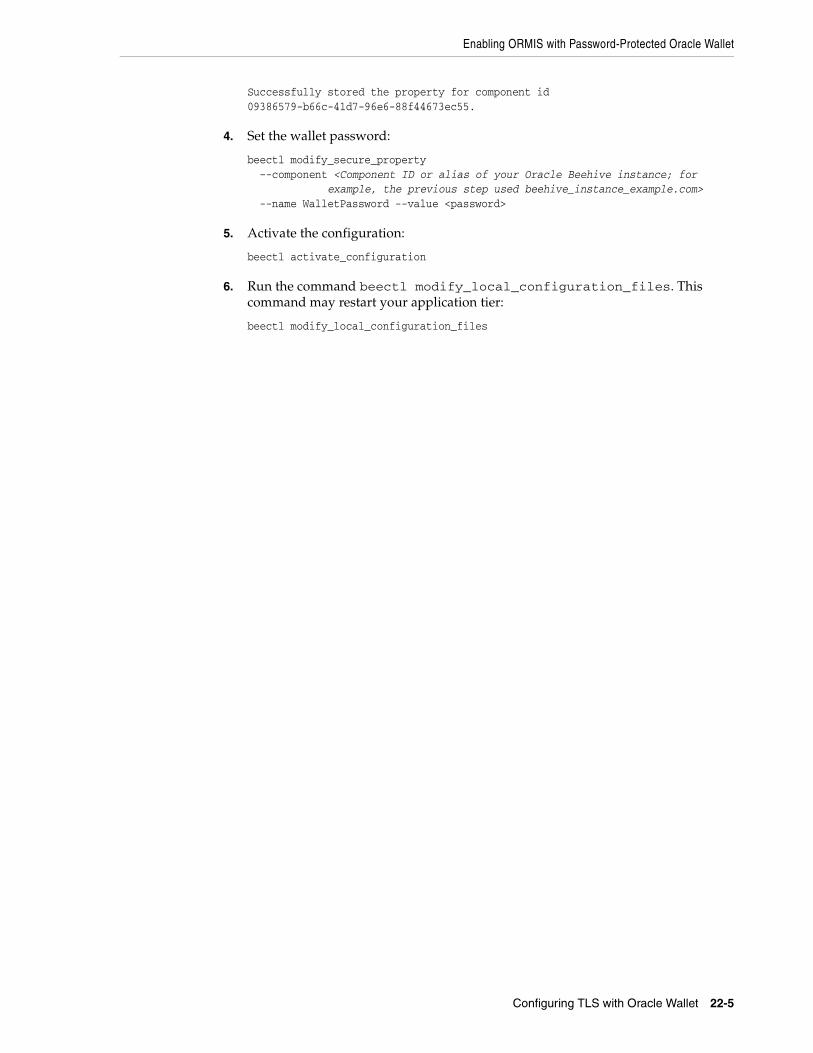
Enabling ORMIS with Password-Protected Oracle Wallet
Configuring TLS with Oracle Wallet 22-5
Successfully stored the property for component id 09386579-b66c-41d7-96e6-88f44673ec55.
4. Set the wallet password:
beectl modify_secure_property –-component <Component ID or alias of your Oracle Beehive instance; for example, the previous step used beehive_instance_example.com> --name WalletPassword --value <password>
5. Activate the configuration:
beectl activate_configuration
6. Run the command beectl modify_local_configuration_files. This command may restart your application tier:
beectl modify_local_configuration_files

Enabling ORMIS with Password-Protected Oracle Wallet
22-6 Oracle Beehive Installation Guide
23
Configuring SSL for LDAP Integration 23-1
23 Configuring SSL for LDAP Integration
This chapter describes how to configure Oracle Beehive LDAP-based authentication with certificate authority (CA) verification. It covers the following topics:
■ Requirements
■ Configure SSL for LDAP Verification
■ Configure Apache HTTP Server for WebDAV Folders
RequirementsComplete these tasks before configuring SSL for LDAP integration:
1. Configure your LDAP server for SSL so that your directory server authenticates itself to the client. If you are using Oracle Internet Directory as your LDAP server, choose SSL Server Authentication as your SSL authentication method. For more information, refer to "Configure Oracle Internet Directory for SSL" in Chapter 13, "Secure Sockets Layer (SSL) and the Directory" in Oracle Internet Directory Administrator's Guide.
2. Request a certificate from your CA for your Oracle Beehive instance. When the CA sends the signed user certificate and its associated trusted certificate, import them into a wallet configured for your Oracle Beehive instance. Enable auto login for the wallet.
To configure an Oracle Beehive instance to use a wallet, refer to "Configuring TLS with Oracle Wallet". Refer to the following sections in Oracle Application Server Administrator's Guide for more information about certificates, importing certificates into Oracle Wallet, and enabling auto login:
■ Section 10.5, "Certificates and Oracle Wallets" in Chapter 10, "Overview of Secure Sockets Layer (SSL) in Oracle Application Server"
■ Section 11.1.3, "How to Create a Complete Wallet: Process Overview" and Section 11.1.4.14, "Using Auto Login" in Chapter 11, "Managing Wallets and Certificates"
You may use Oracle Application Server Certificate Authority as your CA. For more information, refer to Oracle Application Server Certificate Authority Administrator's Guide.
3. Configure LDAP with Oracle Beehive as described in "Integrating an External User Directory with Oracle Beehive" in Oracle Beehive Integration Guide.
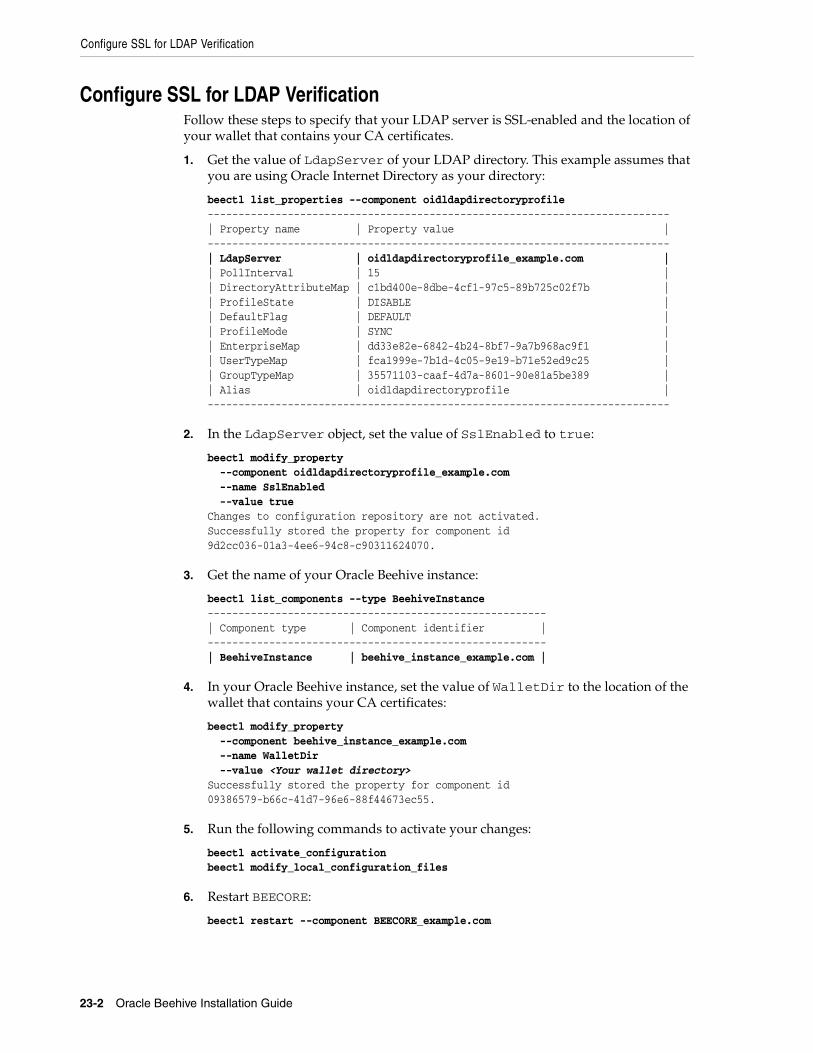
Configure SSL for LDAP Verification
23-2 Oracle Beehive Installation Guide
Configure SSL for LDAP VerificationFollow these steps to specify that your LDAP server is SSL-enabled and the location of your wallet that contains your CA certificates.
1. Get the value of LdapServer of your LDAP directory. This example assumes that you are using Oracle Internet Directory as your directory:
beectl list_properties --component oidldapdirectoryprofile---------------------------------------------------------------------------| Property name | Property value |---------------------------------------------------------------------------| LdapServer | oidldapdirectoryprofile_example.com || PollInterval | 15 || DirectoryAttributeMap | c1bd400e-8dbe-4cf1-97c5-89b725c02f7b || ProfileState | DISABLE || DefaultFlag | DEFAULT || ProfileMode | SYNC || EnterpriseMap | dd33e82e-6842-4b24-8bf7-9a7b968ac9f1 || UserTypeMap | fca1999e-7b1d-4c05-9e19-b71e52ed9c25 || GroupTypeMap | 35571103-caaf-4d7a-8601-90e81a5be389 || Alias | oidldapdirectoryprofile |---------------------------------------------------------------------------
2. In the LdapServer object, set the value of SslEnabled to true:
beectl modify_property --component oidldapdirectoryprofile_example.com --name SslEnabled --value trueChanges to configuration repository are not activated.Successfully stored the property for component id 9d2cc036-01a3-4ee6-94c8-c90311624070.
3. Get the name of your Oracle Beehive instance:
beectl list_components --type BeehiveInstance-------------------------------------------------------| Component type | Component identifier |-------------------------------------------------------| BeehiveInstance | beehive_instance_example.com |
4. In your Oracle Beehive instance, set the value of WalletDir to the location of the wallet that contains your CA certificates:
beectl modify_property --component beehive_instance_example.com --name WalletDir --value <Your wallet directory>Successfully stored the property for component id 09386579-b66c-41d7-96e6-88f44673ec55.
5. Run the following commands to activate your changes:
beectl activate_configurationbeectl modify_local_configuration_files
6. Restart BEECORE:
beectl restart --component BEECORE_example.com
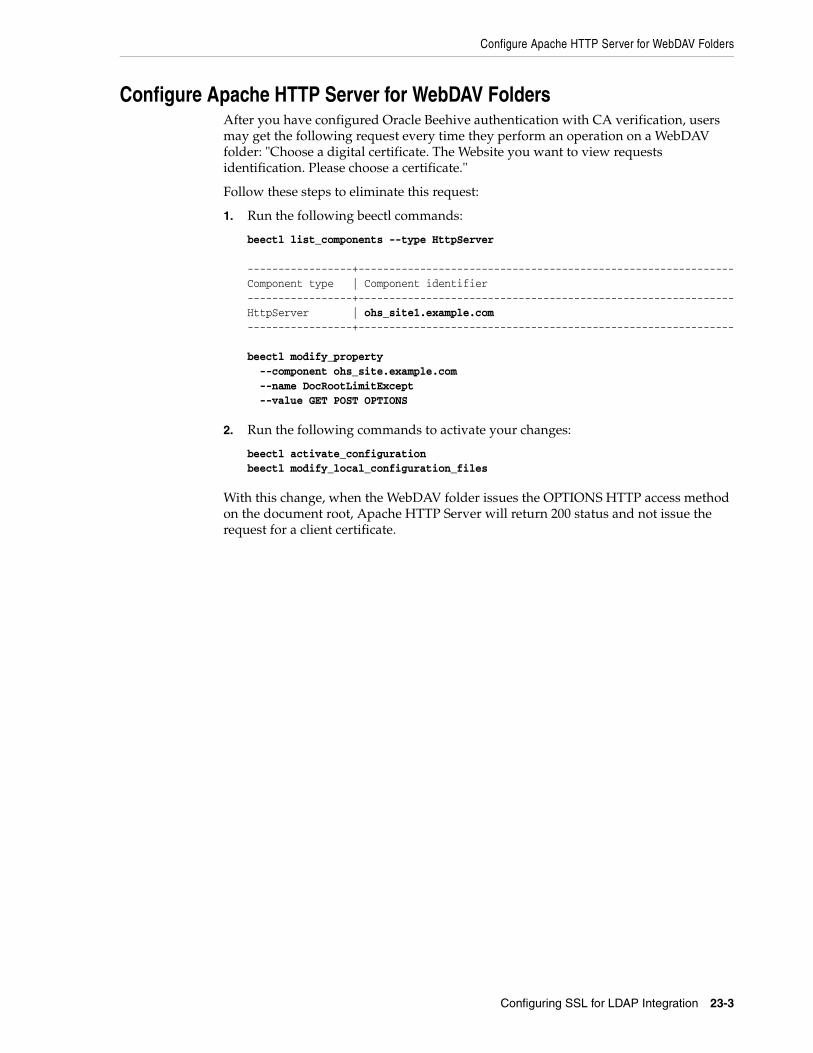
Configure Apache HTTP Server for WebDAV Folders
Configuring SSL for LDAP Integration 23-3
Configure Apache HTTP Server for WebDAV FoldersAfter you have configured Oracle Beehive authentication with CA verification, users may get the following request every time they perform an operation on a WebDAV folder: "Choose a digital certificate. The Website you want to view requests identification. Please choose a certificate."
Follow these steps to eliminate this request:
1. Run the following beectl commands:
beectl list_components --type HttpServer
-----------------+-------------------------------------------------------------Component type | Component identifier -----------------+-------------------------------------------------------------HttpServer | ohs_site1.example.com-----------------+-------------------------------------------------------------
beectl modify_property --component ohs_site.example.com --name DocRootLimitExcept --value GET POST OPTIONS
2. Run the following commands to activate your changes:
beectl activate_configurationbeectl modify_local_configuration_files
With this change, when the WebDAV folder issues the OPTIONS HTTP access method on the document root, Apache HTTP Server will return 200 status and not issue the request for a client certificate.

Configure Apache HTTP Server for WebDAV Folders
23-4 Oracle Beehive Installation Guide
24
Configuring E-Mail with SSL 24-1
24 Configuring E-Mail with SSL
You may add and configure multiple sending SMTP and receiving IMAP endpoints. As a result, you may configure Oracle Beehive e-mail so that SMTP and IMAP both listen on multiple ports; in particular, you may have SMTP and IMAP ports secured with Secure Socket Layer (SSL), and other ports with SSL not enabled.
This chapter covers the following topics:
■ Securing E-Mail with SSL
■ Enabling Both Non-SSL and SSL Ports
■ Adding an Endpoint to SMTP
■ Modifying an Endpoint in SMTP
■ Modifying or Adding an Endpoint in IMAP
■ Creating and Configuring an Endpoint
■ Configuring E-Mail Client
Securing E-Mail with SSLTo secure Oracle Beehive e-mail with SSL, follow these steps:
1. Modify the endpoint in SMTP so that it uses an SSL-enabled port. Follow the directions in "Modifying an Endpoint in SMTP".
Note: The steps in this module involve changing the property AssumeSingleEndpoint to false in SMTPProperty and IMAPProperty, properties that store e-mail ports and endpoints.
If AssumeSingleEndpoint is true, then it will use the port number defined in SMTPProperty or IMAPProperty.
SMTPProperty and IMAPProperty contain a property named EndpointPropertiesList that contains a list of endpoints. If AssumeSingleEndpoint is false, then the port number defined in SMTPProperty or IMAPProperty will be ignored. Instead, the port numbers defined in the endpoints contained in EndpointPropertiesList will be used.
If you use the command beectl modify_port to change an e-mail port, the command assumes you want to use only one e-mail port. As a result, the command sets AssumeSingleEndpoint to true and modifies the port number defined in SMTPProperty or IMAPProperty.
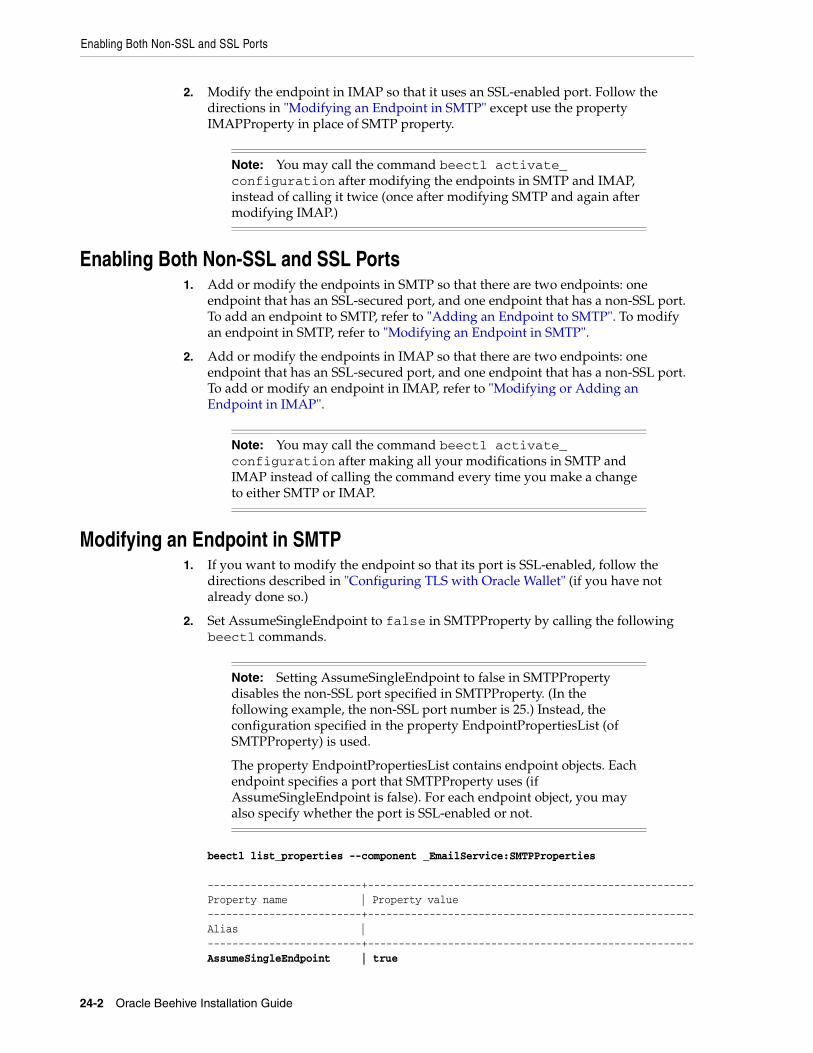
Enabling Both Non-SSL and SSL Ports
24-2 Oracle Beehive Installation Guide
2. Modify the endpoint in IMAP so that it uses an SSL-enabled port. Follow the directions in "Modifying an Endpoint in SMTP" except use the property IMAPProperty in place of SMTP property.
Enabling Both Non-SSL and SSL Ports1. Add or modify the endpoints in SMTP so that there are two endpoints: one
endpoint that has an SSL-secured port, and one endpoint that has a non-SSL port. To add an endpoint to SMTP, refer to "Adding an Endpoint to SMTP". To modify an endpoint in SMTP, refer to "Modifying an Endpoint in SMTP".
2. Add or modify the endpoints in IMAP so that there are two endpoints: one endpoint that has an SSL-secured port, and one endpoint that has a non-SSL port. To add or modify an endpoint in IMAP, refer to "Modifying or Adding an Endpoint in IMAP".
Modifying an Endpoint in SMTP1. If you want to modify the endpoint so that its port is SSL-enabled, follow the
directions described in "Configuring TLS with Oracle Wallet" (if you have not already done so.)
2. Set AssumeSingleEndpoint to false in SMTPProperty by calling the following beectl commands.
beectl list_properties --component _EmailService:SMTPProperties -------------------------+-----------------------------------------------------Property name | Property value -------------------------+-----------------------------------------------------Alias | -------------------------+-----------------------------------------------------AssumeSingleEndpoint | true
Note: You may call the command beectl activate_configuration after modifying the endpoints in SMTP and IMAP, instead of calling it twice (once after modifying SMTP and again after modifying IMAP.)
Note: You may call the command beectl activate_configuration after making all your modifications in SMTP and IMAP instead of calling the command every time you make a change to either SMTP or IMAP.
Note: Setting AssumeSingleEndpoint to false in SMTPProperty disables the non-SSL port specified in SMTPProperty. (In the following example, the non-SSL port number is 25.) Instead, the configuration specified in the property EndpointPropertiesList (of SMTPProperty) is used.
The property EndpointPropertiesList contains endpoint objects. Each endpoint specifies a port that SMTPProperty uses (if AssumeSingleEndpoint is false). For each endpoint object, you may also specify whether the port is SSL-enabled or not.
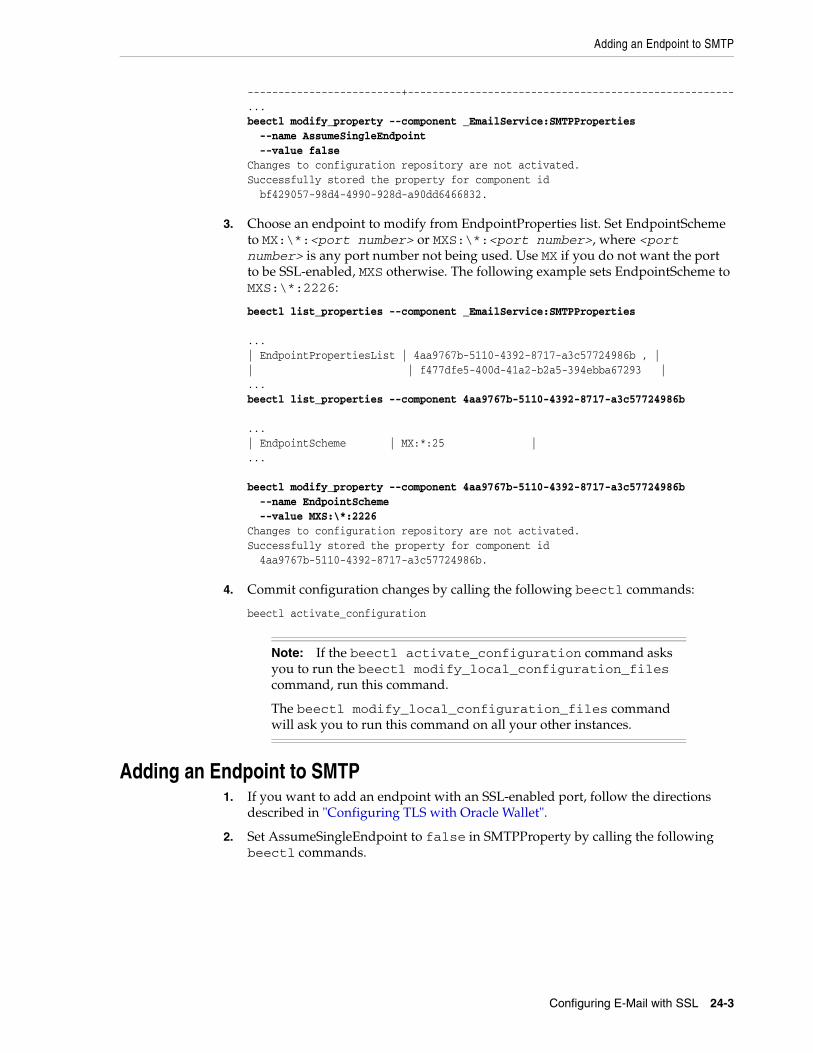
Adding an Endpoint to SMTP
Configuring E-Mail with SSL 24-3
-------------------------+-----------------------------------------------------...beectl modify_property --component _EmailService:SMTPProperties --name AssumeSingleEndpoint --value falseChanges to configuration repository are not activated.Successfully stored the property for component id bf429057-98d4-4990-928d-a90dd6466832.
3. Choose an endpoint to modify from EndpointProperties list. Set EndpointScheme to MX:\*:<port number> or MXS:\*:<port number>, where <port number> is any port number not being used. Use MX if you do not want the port to be SSL-enabled, MXS otherwise. The following example sets EndpointScheme to MXS:\*:2226:
beectl list_properties --component _EmailService:SMTPProperties
...| EndpointPropertiesList | 4aa9767b-5110-4392-8717-a3c57724986b , || | f477dfe5-400d-41a2-b2a5-394ebba67293 |...beectl list_properties --component 4aa9767b-5110-4392-8717-a3c57724986b
...| EndpointScheme | MX:*:25 |...
beectl modify_property --component 4aa9767b-5110-4392-8717-a3c57724986b --name EndpointScheme --value MXS:\*:2226Changes to configuration repository are not activated.Successfully stored the property for component id 4aa9767b-5110-4392-8717-a3c57724986b.
4. Commit configuration changes by calling the following beectl commands:
beectl activate_configuration
Adding an Endpoint to SMTP1. If you want to add an endpoint with an SSL-enabled port, follow the directions
described in "Configuring TLS with Oracle Wallet".
2. Set AssumeSingleEndpoint to false in SMTPProperty by calling the following beectl commands.
Note: If the beectl activate_configuration command asks you to run the beectl modify_local_configuration_files command, run this command.
The beectl modify_local_configuration_files command will ask you to run this command on all your other instances.
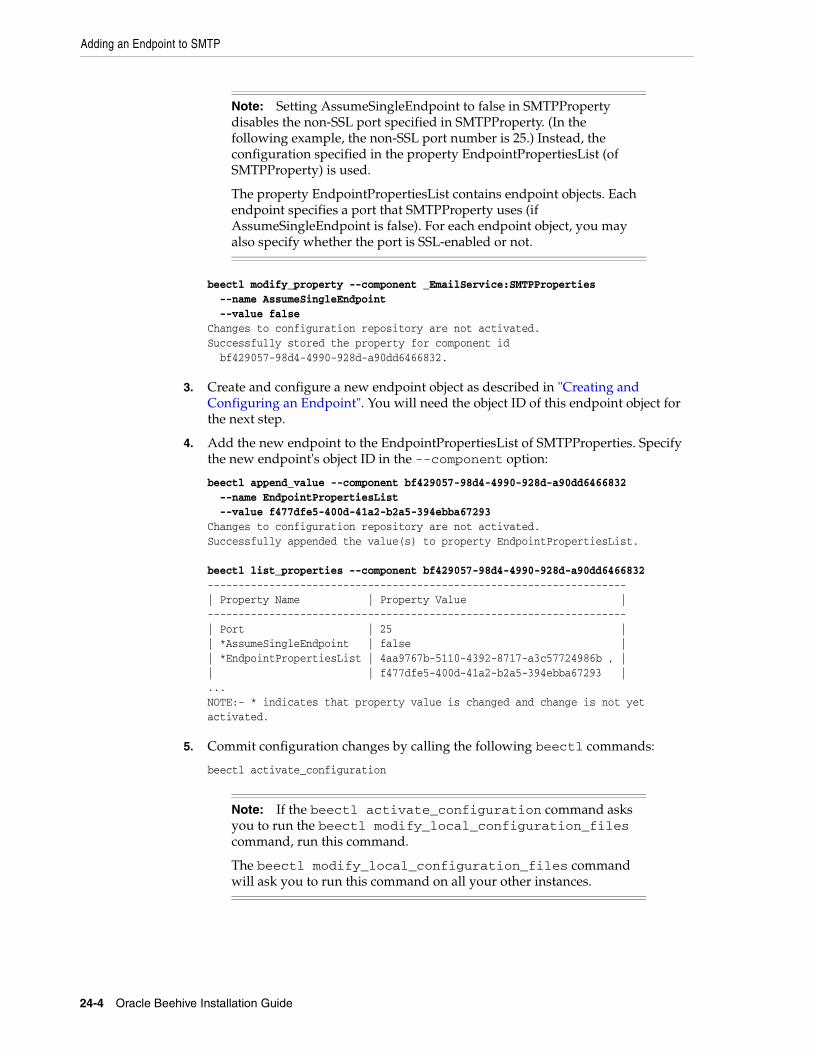
Adding an Endpoint to SMTP
24-4 Oracle Beehive Installation Guide
beectl modify_property --component _EmailService:SMTPProperties --name AssumeSingleEndpoint --value falseChanges to configuration repository are not activated.Successfully stored the property for component id bf429057-98d4-4990-928d-a90dd6466832.
3. Create and configure a new endpoint object as described in "Creating and Configuring an Endpoint". You will need the object ID of this endpoint object for the next step.
4. Add the new endpoint to the EndpointPropertiesList of SMTPProperties. Specify the new endpoint's object ID in the --component option:
beectl append_value --component bf429057-98d4-4990-928d-a90dd6466832 --name EndpointPropertiesList --value f477dfe5-400d-41a2-b2a5-394ebba67293Changes to configuration repository are not activated.Successfully appended the value(s) to property EndpointPropertiesList. beectl list_properties --component bf429057-98d4-4990-928d-a90dd6466832--------------------------------------------------------------------| Property Name | Property Value |--------------------------------------------------------------------| Port | 25 || *AssumeSingleEndpoint | false || *EndpointPropertiesList | 4aa9767b-5110-4392-8717-a3c57724986b , || | f477dfe5-400d-41a2-b2a5-394ebba67293 |...NOTE:- * indicates that property value is changed and change is not yet activated.
5. Commit configuration changes by calling the following beectl commands:
beectl activate_configuration
Note: Setting AssumeSingleEndpoint to false in SMTPProperty disables the non-SSL port specified in SMTPProperty. (In the following example, the non-SSL port number is 25.) Instead, the configuration specified in the property EndpointPropertiesList (of SMTPProperty) is used.
The property EndpointPropertiesList contains endpoint objects. Each endpoint specifies a port that SMTPProperty uses (if AssumeSingleEndpoint is false). For each endpoint object, you may also specify whether the port is SSL-enabled or not.
Note: If the beectl activate_configuration command asks you to run the beectl modify_local_configuration_files command, run this command.
The beectl modify_local_configuration_files command will ask you to run this command on all your other instances.
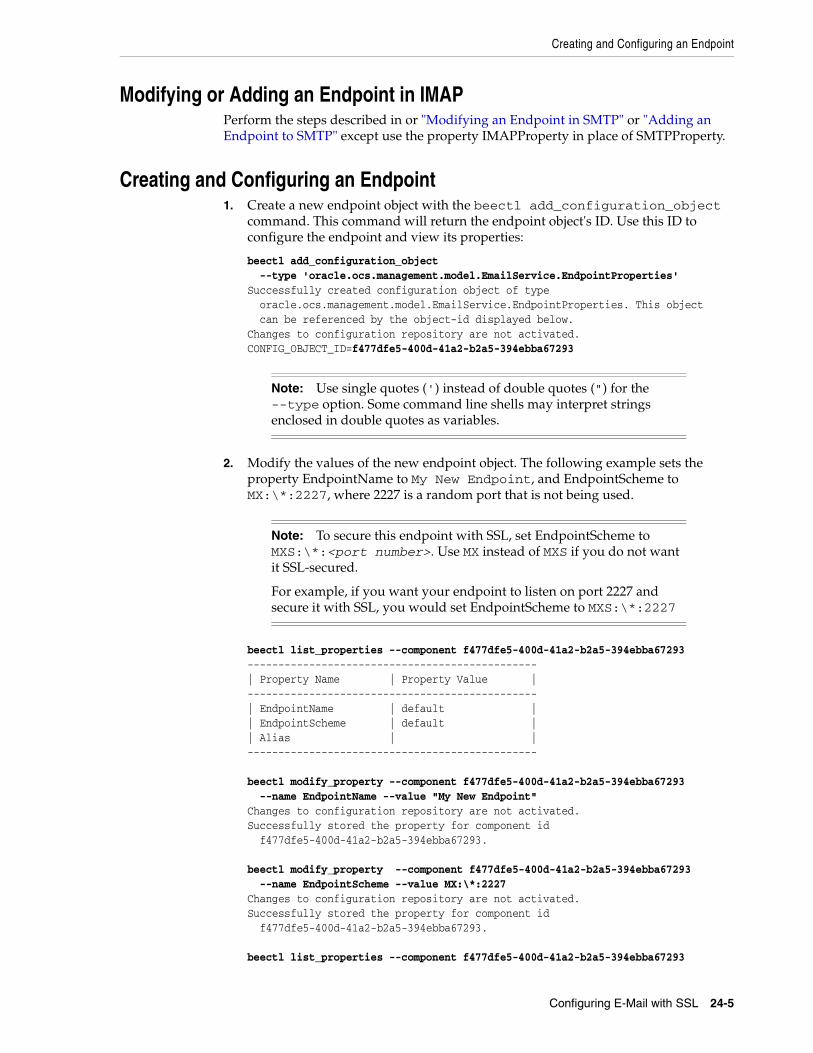
Creating and Configuring an Endpoint
Configuring E-Mail with SSL 24-5
Modifying or Adding an Endpoint in IMAPPerform the steps described in or "Modifying an Endpoint in SMTP" or "Adding an Endpoint to SMTP" except use the property IMAPProperty in place of SMTPProperty.
Creating and Configuring an Endpoint1. Create a new endpoint object with the beectl add_configuration_object
command. This command will return the endpoint object's ID. Use this ID to configure the endpoint and view its properties:
beectl add_configuration_object --type 'oracle.ocs.management.model.EmailService.EndpointProperties'Successfully created configuration object of type oracle.ocs.management.model.EmailService.EndpointProperties. This object can be referenced by the object-id displayed below.Changes to configuration repository are not activated.CONFIG_OBJECT_ID=f477dfe5-400d-41a2-b2a5-394ebba67293
2. Modify the values of the new endpoint object. The following example sets the property EndpointName to My New Endpoint, and EndpointScheme to MX:\*:2227, where 2227 is a random port that is not being used.
beectl list_properties --component f477dfe5-400d-41a2-b2a5-394ebba67293 -----------------------------------------------| Property Name | Property Value |-----------------------------------------------| EndpointName | default || EndpointScheme | default || Alias | |-----------------------------------------------
beectl modify_property --component f477dfe5-400d-41a2-b2a5-394ebba67293 --name EndpointName --value "My New Endpoint" Changes to configuration repository are not activated.Successfully stored the property for component id f477dfe5-400d-41a2-b2a5-394ebba67293.
beectl modify_property --component f477dfe5-400d-41a2-b2a5-394ebba67293 --name EndpointScheme --value MX:\*:2227 Changes to configuration repository are not activated.Successfully stored the property for component id f477dfe5-400d-41a2-b2a5-394ebba67293.
beectl list_properties --component f477dfe5-400d-41a2-b2a5-394ebba67293
Note: Use single quotes (') instead of double quotes (") for the --type option. Some command line shells may interpret strings enclosed in double quotes as variables.
Note: To secure this endpoint with SSL, set EndpointScheme to MXS:\*:<port number>. Use MX instead of MXS if you do not want it SSL-secured.
For example, if you want your endpoint to listen on port 2227 and secure it with SSL, you would set EndpointScheme to MXS:\*:2227
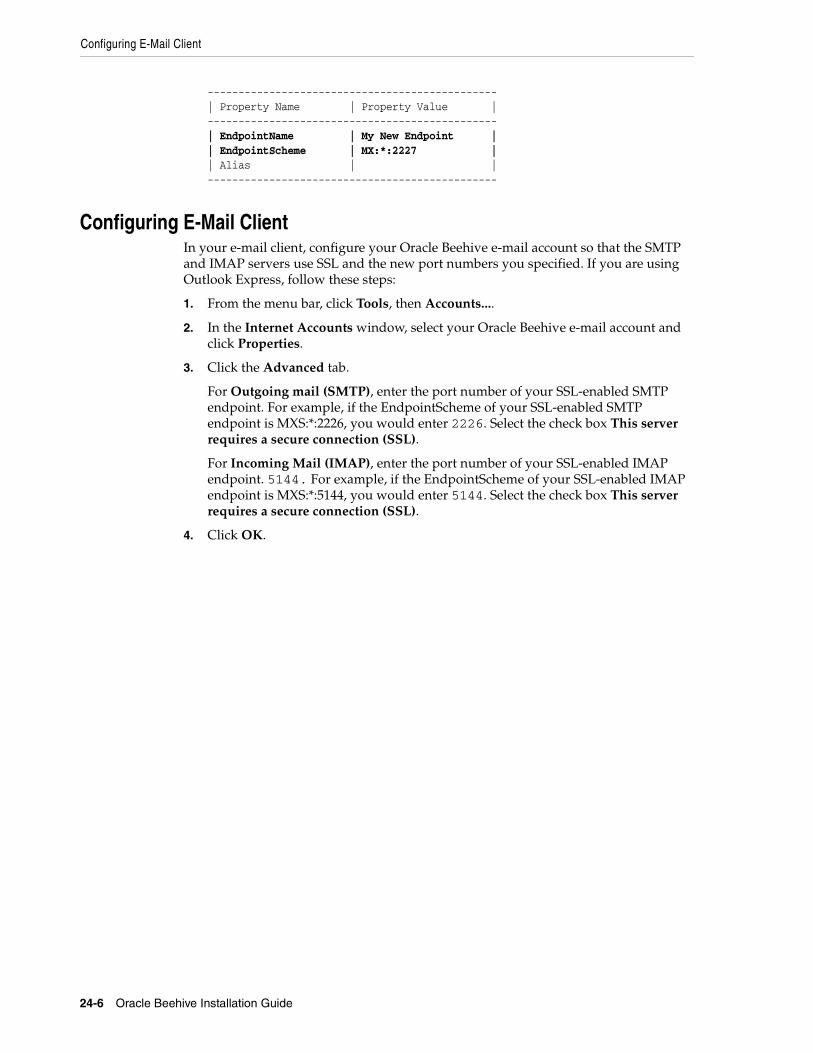
Configuring E-Mail Client
24-6 Oracle Beehive Installation Guide
-----------------------------------------------| Property Name | Property Value |-----------------------------------------------| EndpointName | My New Endpoint || EndpointScheme | MX:*:2227 || Alias | |-----------------------------------------------
Configuring E-Mail ClientIn your e-mail client, configure your Oracle Beehive e-mail account so that the SMTP and IMAP servers use SSL and the new port numbers you specified. If you are using Outlook Express, follow these steps:
1. From the menu bar, click Tools, then Accounts....
2. In the Internet Accounts window, select your Oracle Beehive e-mail account and click Properties.
3. Click the Advanced tab.
For Outgoing mail (SMTP), enter the port number of your SSL-enabled SMTP endpoint. For example, if the EndpointScheme of your SSL-enabled SMTP endpoint is MXS:*:2226, you would enter 2226. Select the check box This server requires a secure connection (SSL).
For Incoming Mail (IMAP), enter the port number of your SSL-enabled IMAP endpoint. 5144. For example, if the EndpointScheme of your SSL-enabled IMAP endpoint is MXS:*:5144, you would enter 5144. Select the check box This server requires a secure connection (SSL).
4. Click OK.
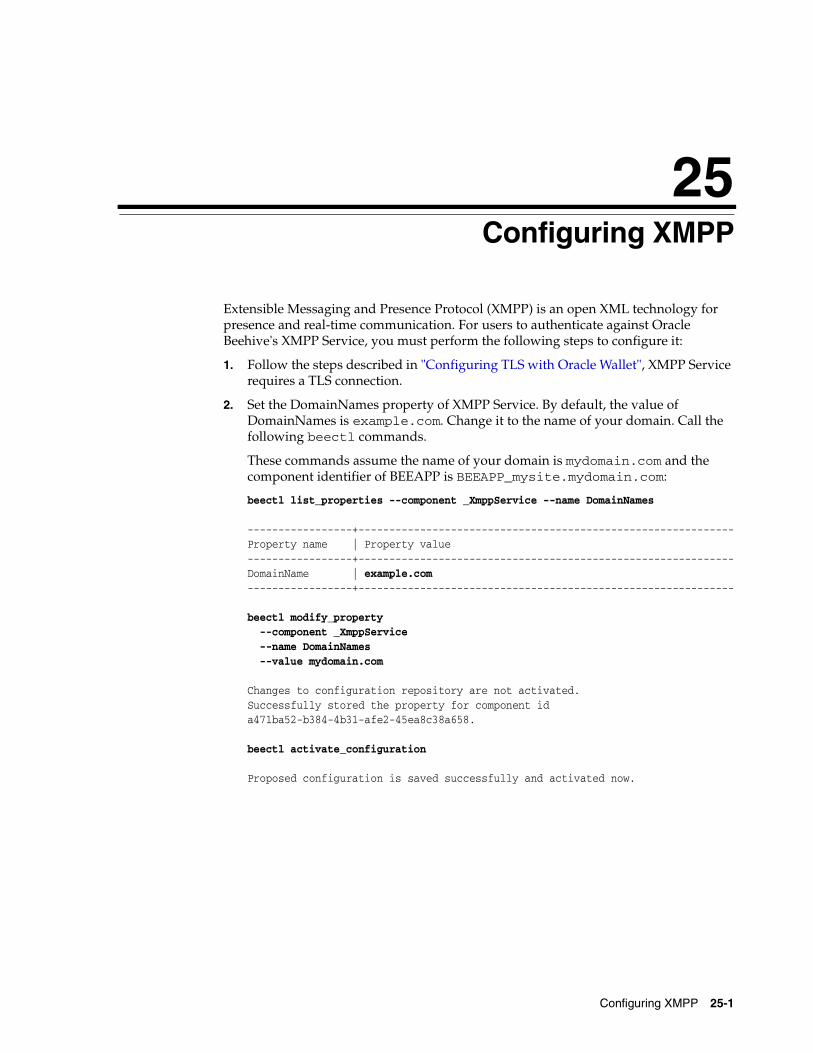
25
Configuring XMPP 25-1
25Configuring XMPP
Extensible Messaging and Presence Protocol (XMPP) is an open XML technology for presence and real-time communication. For users to authenticate against Oracle Beehive's XMPP Service, you must perform the following steps to configure it:
1. Follow the steps described in "Configuring TLS with Oracle Wallet", XMPP Service requires a TLS connection.
2. Set the DomainNames property of XMPP Service. By default, the value of DomainNames is example.com. Change it to the name of your domain. Call the following beectl commands.
These commands assume the name of your domain is mydomain.com and the component identifier of BEEAPP is BEEAPP_mysite.mydomain.com:
beectl list_properties --component _XmppService --name DomainNames -----------------+-------------------------------------------------------------Property name | Property value -----------------+-------------------------------------------------------------DomainName | example.com -----------------+-------------------------------------------------------------
beectl modify_property --component _XmppService --name DomainNames --value mydomain.com Changes to configuration repository are not activated.Successfully stored the property for component id a471ba52-b384-4b31-afe2-45ea8c38a658.
beectl activate_configuration
Proposed configuration is saved successfully and activated now.

25-2 Oracle Beehive Installation Guide
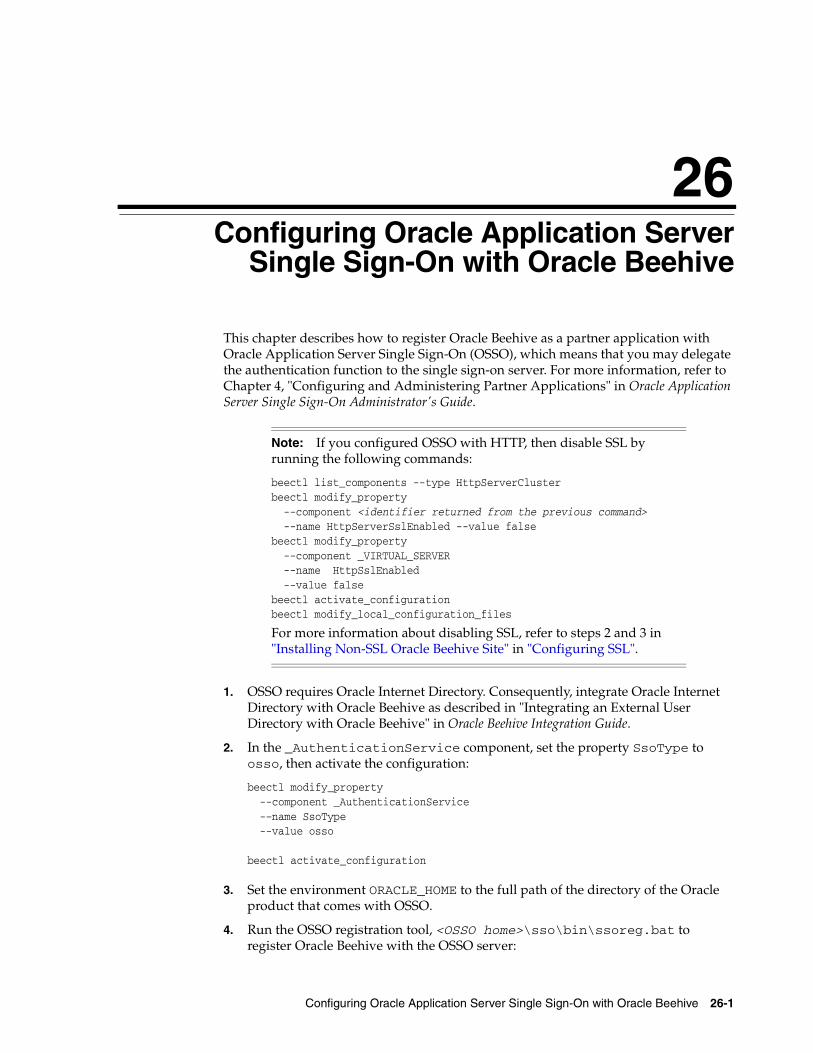
26
Configuring Oracle Application Server Single Sign-On with Oracle Beehive 26-1
26 Configuring Oracle Application ServerSingle Sign-On with Oracle Beehive
This chapter describes how to register Oracle Beehive as a partner application with Oracle Application Server Single Sign-On (OSSO), which means that you may delegate the authentication function to the single sign-on server. For more information, refer to Chapter 4, "Configuring and Administering Partner Applications" in Oracle Application Server Single Sign-On Administrator's Guide.
1. OSSO requires Oracle Internet Directory. Consequently, integrate Oracle Internet Directory with Oracle Beehive as described in "Integrating an External User Directory with Oracle Beehive" in Oracle Beehive Integration Guide.
2. In the _AuthenticationService component, set the property SsoType to osso, then activate the configuration:
beectl modify_property --component _AuthenticationService -–name SsoType --value osso
beectl activate_configuration
3. Set the environment ORACLE_HOME to the full path of the directory of the Oracle product that comes with OSSO.
4. Run the OSSO registration tool, <OSSO home>\sso\bin\ssoreg.bat to register Oracle Beehive with the OSSO server:
Note: If you configured OSSO with HTTP, then disable SSL by running the following commands:
beectl list_components --type HttpServerClusterbeectl modify_property --component <identifier returned from the previous command> --name HttpServerSslEnabled --value falsebeectl modify_property --component _VIRTUAL_SERVER --name HttpSslEnabled --value falsebeectl activate_configurationbeectl modify_local_configuration_files
For more information about disabling SSL, refer to steps 2 and 3 in "Installing Non-SSL Oracle Beehive Site" in "Configuring SSL".

26-2 Oracle Beehive Installation Guide
ssoreg.bat -oracle_home_path C:\oracle\appserver -site_name example.com> -config_mod_osso TRUE -mod_osso_url http://example.com:7777 -remote_midtier -config_file C:\oracle\appserver\Apache\Apache\conf\osso\osso.example.conf
■ oracle_home_path: Specify the installation directory of the Oracle product that comes with OSSO (in this example, OSSO is installed in C:\oracle\appserver\sso.
■ site_name: Specify the host name (including domain) of your Oracle Beehive instance.
■ config_mod_osso: Specify TRUE so that a configuration file is generated.
■ mod_osso_url: Specify the effective URL of your Oracle Beehive instance. Use the following format:
http[s]://<Oracle Beehive HTTP host>.<domain>:<port>
For example:
https://application.mydomain.com:4443
Omit the port number if the HTTP server is listening on the default HTTP port of 80 or the default HTTPS port of 4443. To determine the HTTP or HTTPS listening port, run the beectl list_ports command.
■ remote_midtier: You must specify this option because Oracle Beehive is installed in a different home than OSSO.
■ config_file: The specified configuration file will be created.
5. Copy the configuration file you created in the previous step (osso.example.com) to <Oracle Beehive home>\Apache\Apache\conf\osso. Rename the file to osso.conf.
6. In the _AuthenticationService component, set the property OssoConfigFile to <Oracle Beehive home>\Apache\Apache\conf\osso\osso.conf, activate the configuration, then commit changes:
beectl modify_property --component _AuthenticationService -–name OssoConfigFile --value <Oracle Beehive home>\Apache\Apache\conf\osso\osso.conf
beectl activate_configurationbeectl modify_local_configuration_files
7. Restart the HTTP server:
beectl list_components --type HttpServer
-----------------+-------------------------------------------------------------Component type | Component identifier -----------------+-------------------------------------------------------------HttpServer | ohs_site1.example.com-----------------+-------------------------------------------------------------beectl restart --component ohs_site1.example.com
27
Installing Oracle Beehive Extensions for Outlook 27-1
27 Installing Oracle Beehive Extensions forOutlook
This chapter describes how to install and configure Oracle Beehive Extensions for Outlook.
Oracle recommends that you install and deploy Oracle Beehive Extensions for Outlook using Oracle Beehive's Device Management Service (DMS). This installation method is recommended for almost all desktops with standard environments and administrative privileges. A desktop based, non-DMS installation, deployment, and configuration method is available for custom environments and lockdown systems with limited administrative privileges. Locked down users may also install Oracle Beehive Extensions for Outlook using an Active Directory group policy.
This chapter covers the following topics:
■ System Requirements
■ Device Management Service (DMS) Based Installation
■ Desktop Based Installation (Non-DMS Process)
■ Installing Oracle Beehive Extensions for Outlook Using Active Directory
■ Using Oracle Beehive Extensions for Outlook as Profile Migration Tool
System RequirementsThis section describes the software and hardware requirements for Oracle Beehive Extensions for Outlook. For updated list of certified hardware platforms and operating system version, review the certification matrix on the My Oracle Support Web site at the following URL:
http://support.oracle.com/
Operating SystemOracle Beehive Extensions for Outlook supports the following Microsoft® Windows® operating systems, running Microsoft Outlook 2003, 2007, 2010, and 2010 64-bit:
■ Microsoft Windows XP - Home or Professional
■ Microsoft Windows 7 (32-bit and 64-bit edition) - Home Premium, Professional, Ultimate or Enterprise
■ Microsoft Windows 2003 Server
■ Microsoft Windows 2008 Server
■ Microsoft Windows 2008 Server R2
Device Management Service (DMS) Based Installation
27-2 Oracle Beehive Installation Guide
Disk Space■ 200 MB minimum
■ Hard disk usage varies according to configuration. Custom installation options may require more or less hard disk space. The amount of online data the user accesses may also affect the disk space requirement.
RAMRefer to the RAM requirements of your Microsoft Outlook client.
Microsoft Outlook■ Microsoft Outlook 2010 (32-bit and 64-bit)
■ Microsoft Outlook 2007 (with Service Pack 2)
■ Microsoft Outlook 2003 (with Service Pack 3)
Device Management Service (DMS) Based InstallationOracle recommends that you install and deploy Oracle Beehive Extensions for Outlook using Oracle Beehive's Device Management Service (DMS). This installation method is recommended for almost all desktops with standard environments and administrative privileges. It is designed for centralized installation, configuration, management of auto-updates, and deployment.
This section covers the following topics:
■ Installing Oracle Beehive Extensions for Outlook Using Remote Downloader
■ Updating and Configuring Oracle Beehive Extensions for Outlook Through DMS
■ Uninstalling and Downgrading Oracle Beehive Extensions for Outlook (DMS Process)
Installing Oracle Beehive Extensions for Outlook Using Remote Downloader You may install Oracle Beehive Extensions for Outlook by distributing a remote downloader to end users. The remote downloader enables end users to download and install the provisioned Oracle Beehive Extensions for Outlook application from the
Note: You need administrative privileges to install Oracle Beehive Extensions for Outlook on Windows XP and Windows 2003 Server.
You must install Windows XP Service Pack 2 on Windows XP computers if you intend to use non-English locales with Oracle Beehive Extensions for Outlook. Attempting to run Oracle Beehive Extensions for Outlook with a non-English locale on a computer with Windows XP Service Pack 1 (or earlier) may result in the computer failing to operate normally.
Note: Oracle certifies and recommends the latest service pack version for Microsoft Outlook. However, other service packs may also work with Oracle Beehive Extensions for Outlook.
You must install a native language version or Multilingual User Interface Pack (MUI) for non-English version localization.

Device Management Service (DMS) Based Installation
Installing Oracle Beehive Extensions for Outlook 27-3
Device Management Service (DMS) repository. By default, the DMS contains a pre-seeded Oracle Beehive Extensions for Outlook application that is provisioned for all end users.
For more information on how to provision applications for specific users or groups of users, refer to "Managing the Device Management Service" in Oracle Beehive Administrator's Guide. You may do this in silent mode. Refer to "Installing Oracle Beehive Extensions for Outlook Using Remote Downloader Using Silent Mode" for more information.
Obtaining Remote DownloaderObtain the Oracle Beehive Extensions for Outlook remote downloader, outlook_extensions_downloader.exe in the directory <Oracle Beehive home>/beehive/bootstrap/obio/downloader.
You may also obtain the remote downloader from Oracle Beehive Central, a Web-based client that provides users a central location to download supported clients and set their preferences for Oracle Beehive functionality.
Pre-Seeding Server Name in Remote DownloaderThe remote downloader prompts the end user to provide a server name, account name, and password to initiate download and installation. If you want to pre-seed a server name to prevent end users from having to specify a server name on their own, rename the remote downloader to <fully qualified server name>.exe. For example, if your server name is faulkner.oracle.com, your remote downloader name would be faulkner.oracle.com.exe.
Pre-Seeding Port NumberYou may pre-seed the port number that Oracle Beehive Extensions for Outlook uses to connect to the server.
For example, if your remote downloader name is faulkner.oracle.com.exe and you want to pre-seed the port number in the downloader, rename the file to faulkner.oracle.com,443.exe, where 443 is your port number.
Installing Oracle Beehive Extensions for Outlook Using Remote Downloader Using Silent ModeYou may also use the Oracle Beehive Extensions for Outlook downloader to provide a full, non-interactive deployment option. To do so, use the silent switch, /s.
Specify the required connection parameters through the command line or in an initialization file.
Specifying Connection Parameters Through Command Line The following is an example of specifying connection parameters through the command line (line breaks have been added for clarity):
outlook_extensions_downloader.exe /server example.com /user OracleBeehiveUserName /direct port=5224 secure=true
Note: The pre-seeded port number is the port number of the DMS on the server that is used to obtain the settings for direct and HTTPS connections.
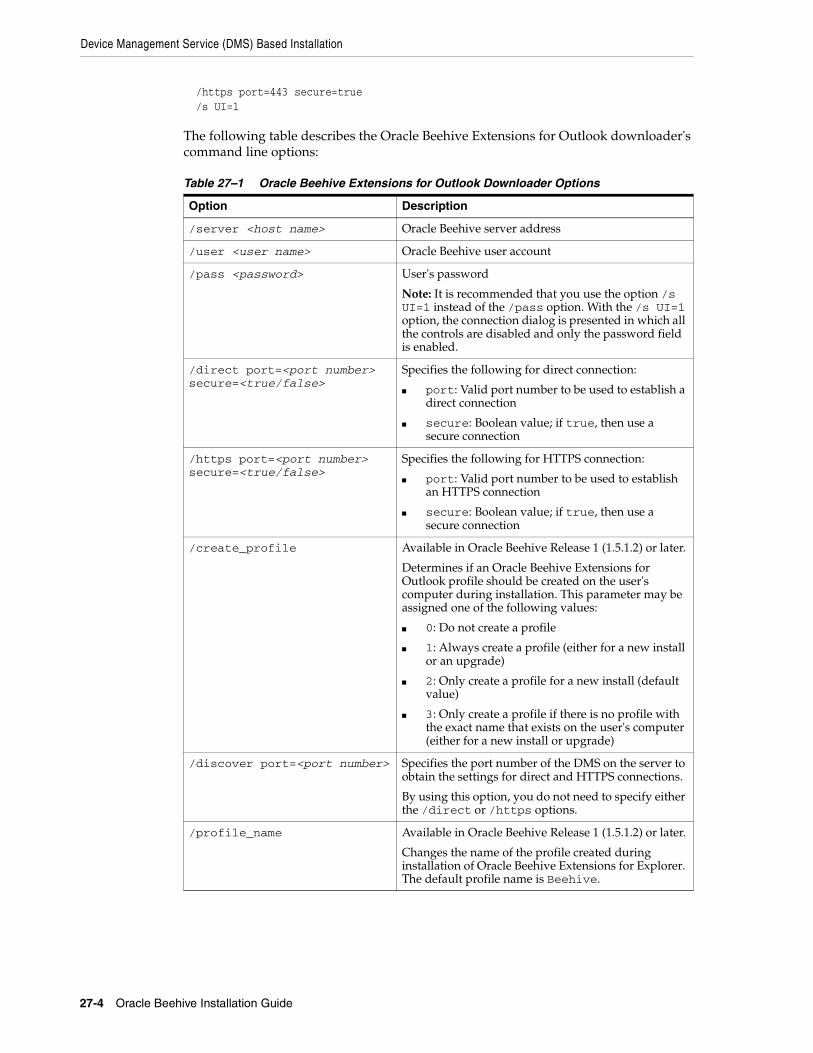
Device Management Service (DMS) Based Installation
27-4 Oracle Beehive Installation Guide
/https port=443 secure=true /s UI=1
The following table describes the Oracle Beehive Extensions for Outlook downloader's command line options:
Table 27–1 Oracle Beehive Extensions for Outlook Downloader Options
Option Description
/server <host name> Oracle Beehive server address
/user <user name> Oracle Beehive user account
/pass <password> User's password
Note: It is recommended that you use the option /s UI=1 instead of the /pass option. With the /s UI=1 option, the connection dialog is presented in which all the controls are disabled and only the password field is enabled.
/direct port=<port number> secure=<true/false>
Specifies the following for direct connection:
■ port: Valid port number to be used to establish a direct connection
■ secure: Boolean value; if true, then use a secure connection
/https port=<port number> secure=<true/false>
Specifies the following for HTTPS connection:
■ port: Valid port number to be used to establish an HTTPS connection
■ secure: Boolean value; if true, then use a secure connection
/create_profile Available in Oracle Beehive Release 1 (1.5.1.2) or later.
Determines if an Oracle Beehive Extensions for Outlook profile should be created on the user's computer during installation. This parameter may be assigned one of the following values:
■ 0: Do not create a profile
■ 1: Always create a profile (either for a new install or an upgrade)
■ 2: Only create a profile for a new install (default value)
■ 3: Only create a profile if there is no profile with the exact name that exists on the user's computer (either for a new install or upgrade)
/discover port=<port number> Specifies the port number of the DMS on the server to obtain the settings for direct and HTTPS connections.
By using this option, you do not need to specify either the /direct or /https options.
/profile_name Available in Oracle Beehive Release 1 (1.5.1.2) or later.
Changes the name of the profile created during installation of Oracle Beehive Extensions for Explorer. The default profile name is Beehive.
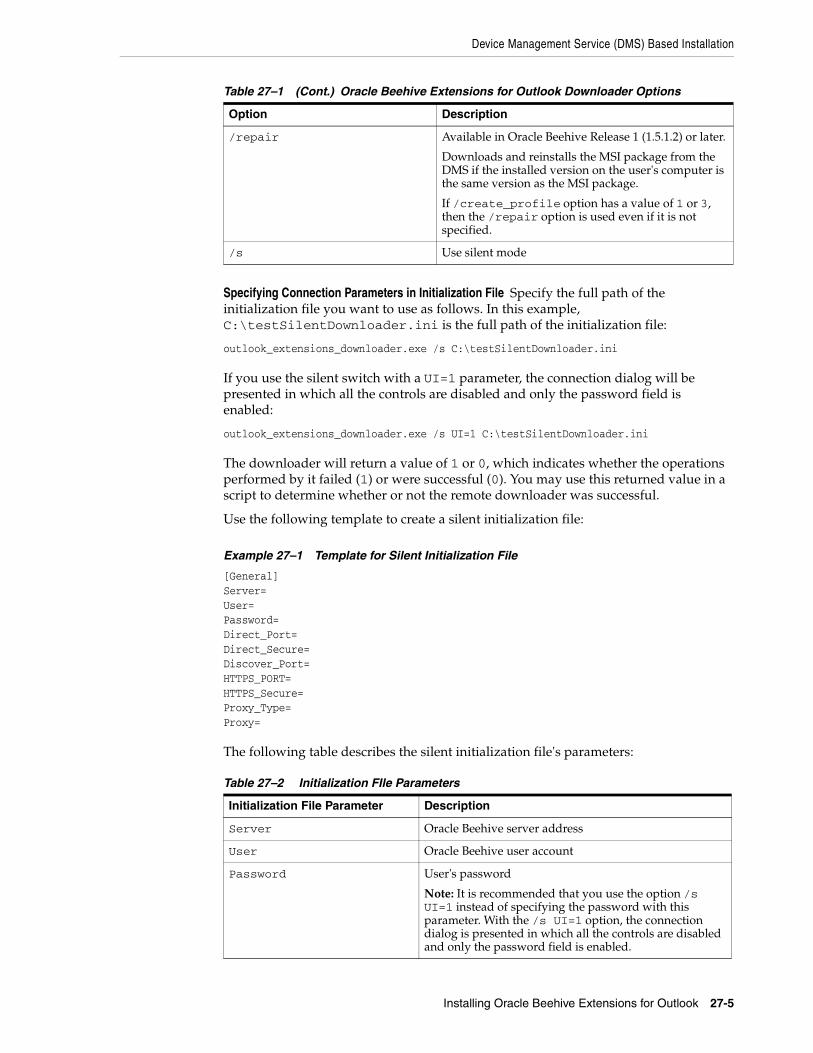
Device Management Service (DMS) Based Installation
Installing Oracle Beehive Extensions for Outlook 27-5
Specifying Connection Parameters in Initialization File Specify the full path of the initialization file you want to use as follows. In this example, C:\testSilentDownloader.ini is the full path of the initialization file:
outlook_extensions_downloader.exe /s C:\testSilentDownloader.ini
If you use the silent switch with a UI=1 parameter, the connection dialog will be presented in which all the controls are disabled and only the password field is enabled:
outlook_extensions_downloader.exe /s UI=1 C:\testSilentDownloader.ini
The downloader will return a value of 1 or 0, which indicates whether the operations performed by it failed (1) or were successful (0). You may use this returned value in a script to determine whether or not the remote downloader was successful.
Use the following template to create a silent initialization file:
Example 27–1 Template for Silent Initialization File
[General]Server=User=Password=Direct_Port=Direct_Secure=Discover_Port=HTTPS_PORT=HTTPS_Secure=Proxy_Type=Proxy=
The following table describes the silent initialization file's parameters:
/repair Available in Oracle Beehive Release 1 (1.5.1.2) or later.
Downloads and reinstalls the MSI package from the DMS if the installed version on the user's computer is the same version as the MSI package.
If /create_profile option has a value of 1 or 3, then the /repair option is used even if it is not specified.
/s Use silent mode
Table 27–2 Initialization FIle Parameters
Initialization File Parameter Description
Server Oracle Beehive server address
User Oracle Beehive user account
Password User's password
Note: It is recommended that you use the option /s UI=1 instead of specifying the password with this parameter. With the /s UI=1 option, the connection dialog is presented in which all the controls are disabled and only the password field is enabled.
Table 27–1 (Cont.) Oracle Beehive Extensions for Outlook Downloader Options
Option Description
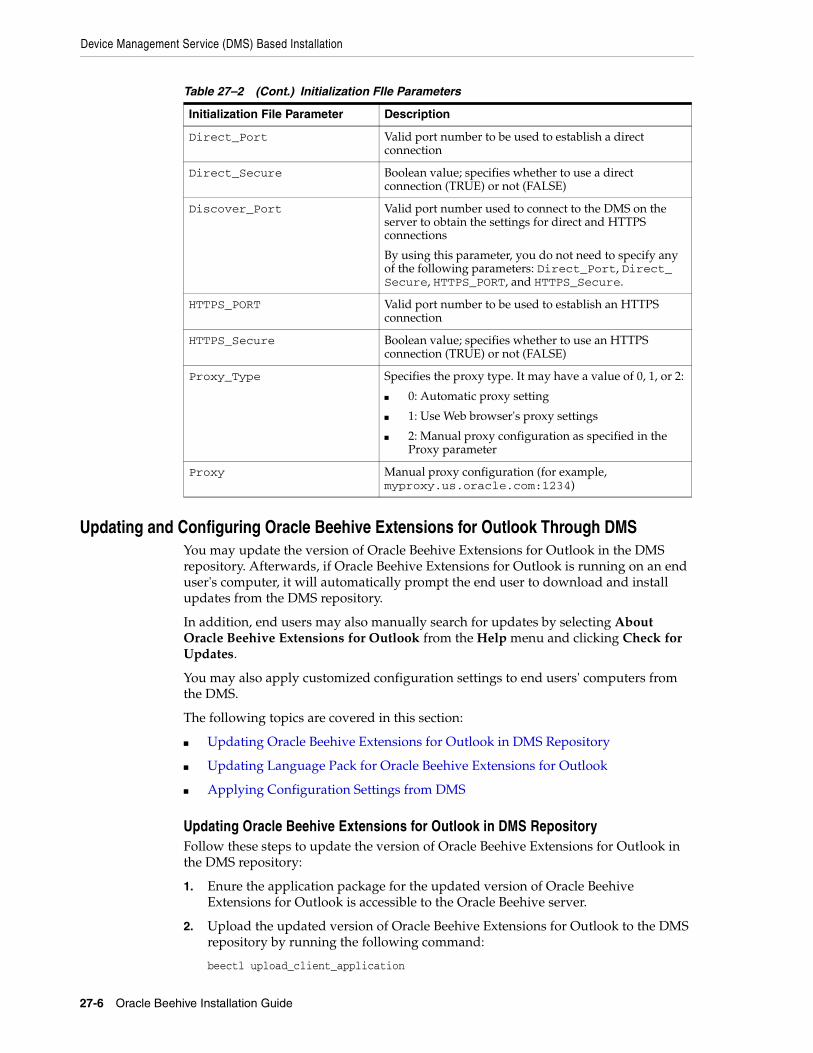
Device Management Service (DMS) Based Installation
27-6 Oracle Beehive Installation Guide
Updating and Configuring Oracle Beehive Extensions for Outlook Through DMSYou may update the version of Oracle Beehive Extensions for Outlook in the DMS repository. Afterwards, if Oracle Beehive Extensions for Outlook is running on an end user's computer, it will automatically prompt the end user to download and install updates from the DMS repository.
In addition, end users may also manually search for updates by selecting About Oracle Beehive Extensions for Outlook from the Help menu and clicking Check for Updates.
You may also apply customized configuration settings to end users' computers from the DMS.
The following topics are covered in this section:
■ Updating Oracle Beehive Extensions for Outlook in DMS Repository
■ Updating Language Pack for Oracle Beehive Extensions for Outlook
■ Applying Configuration Settings from DMS
Updating Oracle Beehive Extensions for Outlook in DMS RepositoryFollow these steps to update the version of Oracle Beehive Extensions for Outlook in the DMS repository:
1. Enure the application package for the updated version of Oracle Beehive Extensions for Outlook is accessible to the Oracle Beehive server.
2. Upload the updated version of Oracle Beehive Extensions for Outlook to the DMS repository by running the following command:
beectl upload_client_application
Direct_Port Valid port number to be used to establish a direct connection
Direct_Secure Boolean value; specifies whether to use a direct connection (TRUE) or not (FALSE)
Discover_Port Valid port number used to connect to the DMS on the server to obtain the settings for direct and HTTPS connections
By using this parameter, you do not need to specify any of the following parameters: Direct_Port, Direct_Secure, HTTPS_PORT, and HTTPS_Secure.
HTTPS_PORT Valid port number to be used to establish an HTTPS connection
HTTPS_Secure Boolean value; specifies whether to use an HTTPS connection (TRUE) or not (FALSE)
Proxy_Type Specifies the proxy type. It may have a value of 0, 1, or 2:
■ 0: Automatic proxy setting
■ 1: Use Web browser's proxy settings
■ 2: Manual proxy configuration as specified in the Proxy parameter
Proxy Manual proxy configuration (for example, myproxy.us.oracle.com:1234)
Table 27–2 (Cont.) Initialization FIle Parameters
Initialization File Parameter Description
Device Management Service (DMS) Based Installation
Installing Oracle Beehive Extensions for Outlook 27-7
--file <Path to Oracle Beehive Extensions for Outlook zip file>
If Oracle Beehive Extensions for Outlook is running on an end user's computer, it will automatically prompt the end user to download and install updates from the DMS repository. The end users may also manually search for updates by selecting About Oracle Beehive Extensions for Outlook from the Help menu and clicking Check for Updates.
Updating Language Pack for Oracle Beehive Extensions for OutlookYou may localize the user interface of Oracle Beehive Extensions for Outlook to match Microsoft Outlook languages by updating the language pack with the one found at <Oracle Beehive home>/beehive/bootstrap/obio/languagepack. The following languages are currently supported in the language pack:
■ French
■ German
■ Italian
■ Spanish
■ Brazilian Portuguese
■ Japanese
■ Korean
■ Simplified Chinese
■ Traditional Chinese
To update the language pack for Oracle Beehive Extensions for Outlook, upload it to the DMS repository using the beectl upload_client_application command. By default, the language pack is uploaded and provisioned to all users. Follow these steps to update the language pack:
1. Ensure the language pack for Oracle Beehive Extensions for Outlook is accessible to the Oracle Beehive server.
2. Upload the language pack for Oracle Beehive Extensions for Outlook to the DMS repository by running the following command:
beectl upload_client_application --file <Path to Oracle Beehive Extensions for Outlook language pack>
If Oracle Beehive Extensions for Outlook is running on an end user's computer, it will automatically prompt the end user to download and install updates (including language packs) from the DMS repository. End users also may manually search for updates by selecting About Oracle Beehive Extensions for Outlook from the Help menu and clicking Check for Updates.
Note: This command will upload the new version of the Oracle Beehive Extensions for Outlook application to the DMS repository and will make it available for those who are already provisioned to it.
If you have not provisioned Oracle Beehive Extensions for Outlook, run the provisioning commands (such as beectl add_client_application_provisioning). Refer to "Managing the Device Management Service" in Oracle Beehive Administrator's Guide for more information.
Device Management Service (DMS) Based Installation
27-8 Oracle Beehive Installation Guide
Applying Configuration Settings from DMSWhen deploying Oracle Beehive Extensions for Outlook from DMS, you may apply customized configuration settings to end users' computers. You may associate the configuration settings to a specific version or all versions of the provisioned Oracle Beehive Extensions for Outlook software. Configuration settings associated with all versions are persistent and are always available regardless of the version of Oracle Beehive Extensions for Outlook provisioned to the user. However, configuration settings associated with a specific version are only applied when users are provisioned to that specific version of the software.
This section covers the following topics:
■ Associating Configuration Settings to All Versions of Application
■ Associating Configuration Settings to Specific Version of Application
Associating Configuration Settings to All Versions of ApplicationFollow these steps to apply configuration settings at the application level from the DMS:
1. Create an application package. This is a zip file that contains the following two files:
■ metadata.xml: This is an XML provisioning file that includes all the setting parameters you want to apply. Refer to Example 27–2, "Sample metadata.xml XML Provisioning File" for an example.
■ readme.txt: This is simply a text file. You may place any content you want in this file.
2. Upload the application package into the DMS repository with the following command:
beectl upload_client_application --file <path to application package zip file>
3. Obtain your enterprise EID by running the following command:
beectl list_enterprises --entity_format id
4. Obtain your application ID by running the command beectl list_client_applications and looking for "Application Settings for Oracle Beehive Extensions for Outlook" in the generated list. This is what is in the sample metadata.xml provisioning file.
5. Provision the new application by running the following command:
Note: The language installed by the Oracle Beehive Extensions for Outlook language pack will automatically match the Outlook language installed by the end user, provided that Oracle Beehive Extensions for Outlook supports the language. If the end user has installed Microsoft Outlook in an unsupported language, Oracle Beehive Extensions for Outlook will default to English.
Note: When settings are applied to the specific version level, if the user is later provisioned to a newer software release, the configurations settings are no longer applied.
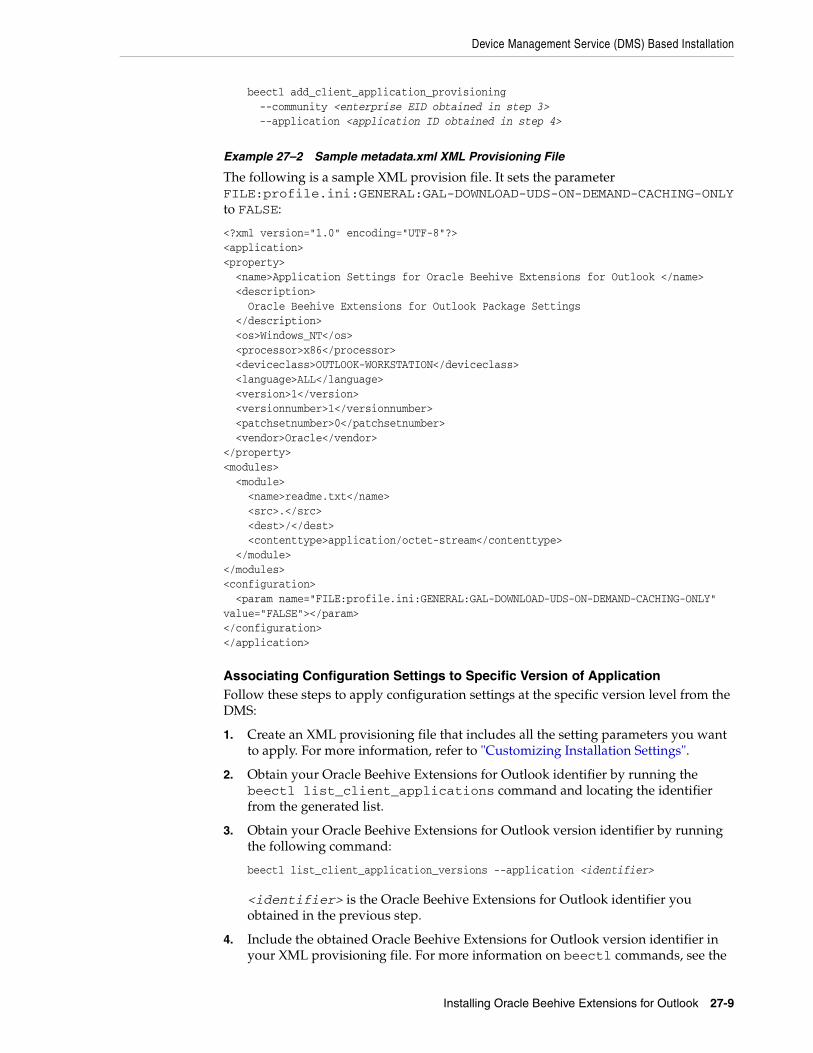
Device Management Service (DMS) Based Installation
Installing Oracle Beehive Extensions for Outlook 27-9
beectl add_client_application_provisioning --community <enterprise EID obtained in step 3> --application <application ID obtained in step 4>
Example 27–2 Sample metadata.xml XML Provisioning File
The following is a sample XML provision file. It sets the parameter FILE:profile.ini:GENERAL:GAL-DOWNLOAD-UDS-ON-DEMAND-CACHING-ONLY to FALSE:
<?xml version="1.0" encoding="UTF-8"?><application><property> <name>Application Settings for Oracle Beehive Extensions for Outlook </name> <description> Oracle Beehive Extensions for Outlook Package Settings </description> <os>Windows_NT</os> <processor>x86</processor> <deviceclass>OUTLOOK-WORKSTATION</deviceclass> <language>ALL</language> <version>1</version> <versionnumber>1</versionnumber> <patchsetnumber>0</patchsetnumber> <vendor>Oracle</vendor></property><modules> <module> <name>readme.txt</name> <src>.</src> <dest>/</dest> <contenttype>application/octet-stream</contenttype> </module></modules><configuration> <param name="FILE:profile.ini:GENERAL:GAL-DOWNLOAD-UDS-ON-DEMAND-CACHING-ONLY" value="FALSE"></param></configuration></application>
Associating Configuration Settings to Specific Version of ApplicationFollow these steps to apply configuration settings at the specific version level from the DMS:
1. Create an XML provisioning file that includes all the setting parameters you want to apply. For more information, refer to "Customizing Installation Settings".
2. Obtain your Oracle Beehive Extensions for Outlook identifier by running the beectl list_client_applications command and locating the identifier from the generated list.
3. Obtain your Oracle Beehive Extensions for Outlook version identifier by running the following command:
beectl list_client_application_versions --application <identifier>
<identifier> is the Oracle Beehive Extensions for Outlook identifier you obtained in the previous step.
4. Include the obtained Oracle Beehive Extensions for Outlook version identifier in your XML provisioning file. For more information on beectl commands, see the
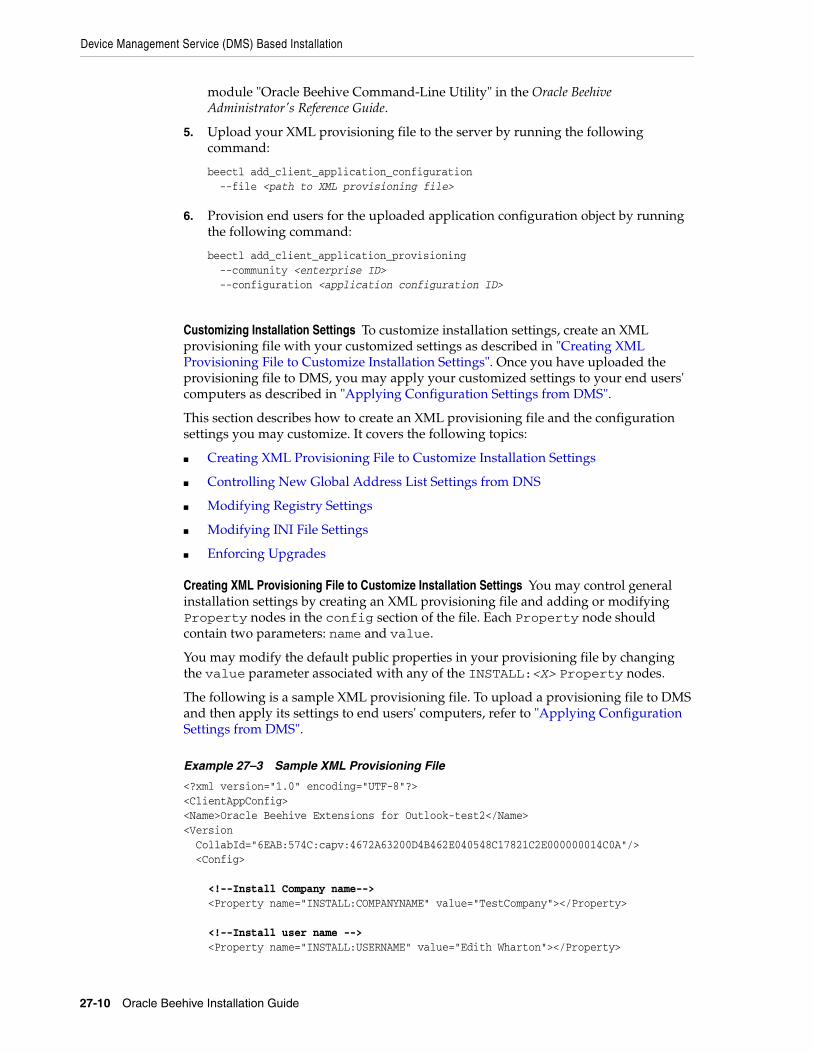
Device Management Service (DMS) Based Installation
27-10 Oracle Beehive Installation Guide
module "Oracle Beehive Command-Line Utility" in the Oracle Beehive Administrator's Reference Guide.
5. Upload your XML provisioning file to the server by running the following command:
beectl add_client_application_configuration --file <path to XML provisioning file>
6. Provision end users for the uploaded application configuration object by running the following command:
beectl add_client_application_provisioning --community <enterprise ID> --configuration <application configuration ID>
Customizing Installation Settings To customize installation settings, create an XML provisioning file with your customized settings as described in "Creating XML Provisioning File to Customize Installation Settings". Once you have uploaded the provisioning file to DMS, you may apply your customized settings to your end users' computers as described in "Applying Configuration Settings from DMS".
This section describes how to create an XML provisioning file and the configuration settings you may customize. It covers the following topics:
■ Creating XML Provisioning File to Customize Installation Settings
■ Controlling New Global Address List Settings from DNS
■ Modifying Registry Settings
■ Modifying INI File Settings
■ Enforcing Upgrades
Creating XML Provisioning File to Customize Installation Settings You may control general installation settings by creating an XML provisioning file and adding or modifying Property nodes in the config section of the file. Each Property node should contain two parameters: name and value.
You may modify the default public properties in your provisioning file by changing the value parameter associated with any of the INSTALL:<X> Property nodes.
The following is a sample XML provisioning file. To upload a provisioning file to DMS and then apply its settings to end users' computers, refer to "Applying Configuration Settings from DMS".
Example 27–3 Sample XML Provisioning File
<?xml version="1.0" encoding="UTF-8"?><ClientAppConfig><Name>Oracle Beehive Extensions for Outlook-test2</Name><Version CollabId="6EAB:574C:capv:4672A63200D4B462E040548C17821C2E000000014C0A"/> <Config>
<!--Install Company name--> <Property name="INSTALL:COMPANYNAME" value="TestCompany"></Property>
<!--Install user name --> <Property name="INSTALL:USERNAME" value="Edith Wharton"></Property>
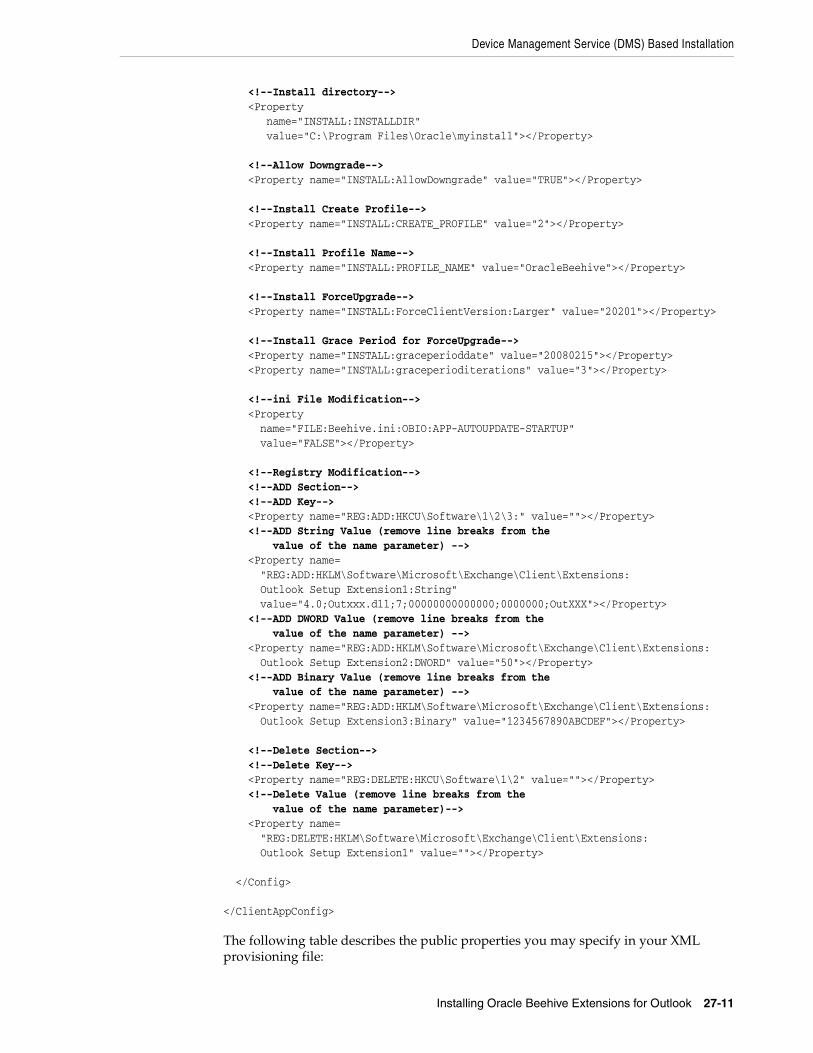
Device Management Service (DMS) Based Installation
Installing Oracle Beehive Extensions for Outlook 27-11
<!--Install directory--> <Property name="INSTALL:INSTALLDIR" value="C:\Program Files\Oracle\myinstall"></Property>
<!--Allow Downgrade--> <Property name="INSTALL:AllowDowngrade" value="TRUE"></Property>
<!--Install Create Profile--> <Property name="INSTALL:CREATE_PROFILE" value="2"></Property>
<!--Install Profile Name--> <Property name="INSTALL:PROFILE_NAME" value="OracleBeehive"></Property>
<!--Install ForceUpgrade--> <Property name="INSTALL:ForceClientVersion:Larger" value="20201"></Property>
<!--Install Grace Period for ForceUpgrade--> <Property name="INSTALL:graceperioddate" value="20080215"></Property> <Property name="INSTALL:graceperioditerations" value="3"></Property>
<!--ini File Modification--> <Property name="FILE:Beehive.ini:OBIO:APP-AUTOUPDATE-STARTUP" value="FALSE"></Property>
<!--Registry Modification--> <!--ADD Section--> <!--ADD Key--> <Property name="REG:ADD:HKCU\Software\1\2\3:" value=""></Property> <!--ADD String Value (remove line breaks from the value of the name parameter) --> <Property name= "REG:ADD:HKLM\Software\Microsoft\Exchange\Client\Extensions: Outlook Setup Extension1:String" value="4.0;Outxxx.dll;7;00000000000000;0000000;OutXXX"></Property> <!--ADD DWORD Value (remove line breaks from the value of the name parameter) --> <Property name="REG:ADD:HKLM\Software\Microsoft\Exchange\Client\Extensions: Outlook Setup Extension2:DWORD" value="50"></Property> <!--ADD Binary Value (remove line breaks from the value of the name parameter) --> <Property name="REG:ADD:HKLM\Software\Microsoft\Exchange\Client\Extensions: Outlook Setup Extension3:Binary" value="1234567890ABCDEF"></Property>
<!--Delete Section--> <!--Delete Key--> <Property name="REG:DELETE:HKCU\Software\1\2" value=""></Property> <!--Delete Value (remove line breaks from the value of the name parameter)--> <Property name= "REG:DELETE:HKLM\Software\Microsoft\Exchange\Client\Extensions: Outlook Setup Extension1" value=""></Property>
</Config>
</ClientAppConfig>
The following table describes the public properties you may specify in your XML provisioning file:
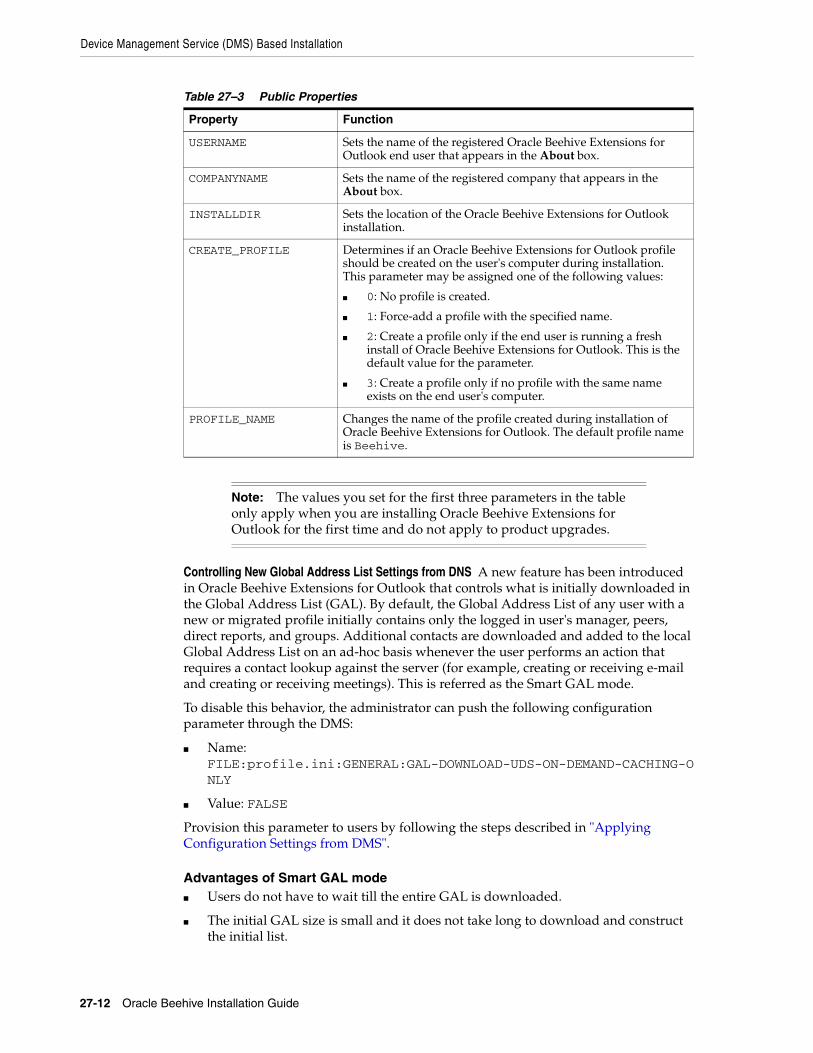
Device Management Service (DMS) Based Installation
27-12 Oracle Beehive Installation Guide
Controlling New Global Address List Settings from DNS A new feature has been introduced in Oracle Beehive Extensions for Outlook that controls what is initially downloaded in the Global Address List (GAL). By default, the Global Address List of any user with a new or migrated profile initially contains only the logged in user's manager, peers, direct reports, and groups. Additional contacts are downloaded and added to the local Global Address List on an ad-hoc basis whenever the user performs an action that requires a contact lookup against the server (for example, creating or receiving e-mail and creating or receiving meetings). This is referred as the Smart GAL mode.
To disable this behavior, the administrator can push the following configuration parameter through the DMS:
■ Name: FILE:profile.ini:GENERAL:GAL-DOWNLOAD-UDS-ON-DEMAND-CACHING-ONLY
■ Value: FALSE
Provision this parameter to users by following the steps described in "Applying Configuration Settings from DMS".
Advantages of Smart GAL mode ■ Users do not have to wait till the entire GAL is downloaded.
■ The initial GAL size is small and it does not take long to download and construct the initial list.
Table 27–3 Public Properties
Property Function
USERNAME Sets the name of the registered Oracle Beehive Extensions for Outlook end user that appears in the About box.
COMPANYNAME Sets the name of the registered company that appears in the About box.
INSTALLDIR Sets the location of the Oracle Beehive Extensions for Outlook installation.
CREATE_PROFILE Determines if an Oracle Beehive Extensions for Outlook profile should be created on the user's computer during installation. This parameter may be assigned one of the following values:
■ 0: No profile is created.
■ 1: Force-add a profile with the specified name.
■ 2: Create a profile only if the end user is running a fresh install of Oracle Beehive Extensions for Outlook. This is the default value for the parameter.
■ 3: Create a profile only if no profile with the same name exists on the end user's computer.
PROFILE_NAME Changes the name of the profile created during installation of Oracle Beehive Extensions for Outlook. The default profile name is Beehive.
Note: The values you set for the first three parameters in the table only apply when you are installing Oracle Beehive Extensions for Outlook for the first time and do not apply to product upgrades.
Device Management Service (DMS) Based Installation
Installing Oracle Beehive Extensions for Outlook 27-13
■ The GAL grows dynamically and adds entries in the local list incrementally as the user communicates with other users and groups.
■ Adding new contacts and groups is easy and automatic.
Limitations of Smart GAL mode ■ The initial local GAL does not contain the full list as on the server.
■ If needed, users have to initiate the download of the full GAL manually from the menu options.
■ Server lookup for new contacts and groups is necessary when they are not in the local GAL.
Modifying Registry Settings You may modify the registry information on end-user computers by changing the values for certain Property nodes in your provisioning file. Modifying registry information enables you to control end user settings from the server side.
■ Adding Key or Registry Value: To add a key or registry value, use the following in your provisioning file:
<Property name="REG:ADD:{HIVE}\{keypath}:{Value Name}:{DataType}" value="{Value Data}"></Property>
– The value for {HIVE} may be either HKLM or HKCU, which are the two locations where user registry information may be stored and which correspond to HKEY_LOCAL_MACHINE and HKEY_CURRENT_USER in the registry.
– The value for {DataType} may be String, Binary, or Dword.
– If you are adding a key, you do not need to provide values for {Value Name}, {DataType}, or {Value Data}.
■ Deleting Key or Registry Value: To delete a key or registry value, use the following in your provisioning file:
<Property name="REG:Delete:{HIVE}\{keypath}:{Value Name}" value=""></Property>
If you are deleting a key, do not provide a value for {Value Name}. Additionally, the key must reside at least two levels under the user hive.
Modifying INI File Settings Modify Oracle Beehive Extensions for Outlook INI settings by including a property with the following structure:
<Property name="FILE:Beehive.ini:{Section Name}:{Property Name}" value="{Value Data}"></Property>
WARNING: If you modify the registry incorrectly, serious problems may occur that could require you to reinstall your operating system. Modify the registry at your own risk.
Desktop Based Installation (Non-DMS Process)
27-14 Oracle Beehive Installation Guide
Enforcing Upgrades You may force end users to upgrade to a new version of Oracle Beehive Extensions for Outlook that you have uploaded to the DMS. End users will not be able to use Oracle Beehive Extensions for Outlook until they upgrade.
■ Forcing End Users to Upgrade to New Version of Oracle Beehive Extensions for Outlook: In your XML provisioning file, add a property with the following structure:
<Property> name="INSTALL:ForceClientVersion:{comparison operation}" value="{build number}"></Property>
{build number} is the Oracle Beehive Extensions for Outlook build number, which will be used for the comparison operation.
■ Allowing End Users to Use Older Version of Oracle Beehive Extensions for Outlook Until Certain Date: Optionally, you may allow end users to continue using their old version of Oracle Beehive Extensions for Outlook for a specific period of time or for a fixed number of logins to Oracle Beehive.
In your XML provisioning file, add a property with the following structure:
<Property> name="INSTALL:graceperioditerations" value="{number of logins}"></Property>
{number of logins} is the number of times end users are allowed to login to Oracle Beehive Extensions for Outlook before they are forced to upgrade.
Uninstalling and Downgrading Oracle Beehive Extensions for Outlook (DMS Process)Use the following methods to uninstall or downgrade Oracle Beehive Extensions for Outlook.
Uninstalling Oracle Beehive Extensions for OutlookEnd users may remove Oracle Beehive Extensions for Outlook from their computers by selecting Add/Remove Programs from the Control Panel, selecting Oracle Beehive Extensions for Outlook from the list, and clicking Remove.
Downgrading Oracle Beehive Extensions for OutlookBy default, Oracle Beehive Extensions for Outlook will only detect updates if the server version is newer than the currently installed version. If you want to allow end users to install downgraded versions of Oracle Beehive Extensions for Outlook as updates, set the value of the INSTALL:AllowDowngrade Property node to TRUE in your provisioning file.
Desktop Based Installation (Non-DMS Process)It is recommended to install Oracle Beehive Extensions for Outlook using Oracle's Device Management Service (DMS). However, custom environments and lockdown systems with limited administrative privileges may require custom or alternative methods of installation, deployment, and configuration that is non-DMS based.
This section covers the following topics:
■ Installing Oracle Beehive Extensions for Outlook Using Executable File
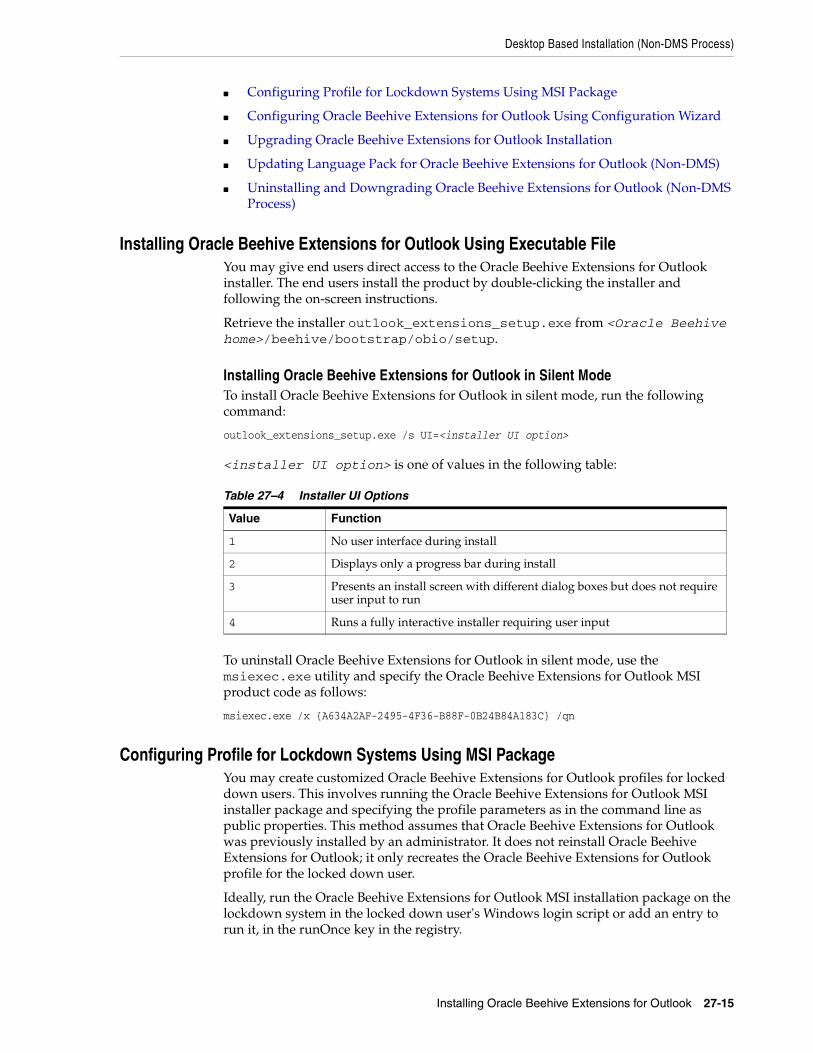
Desktop Based Installation (Non-DMS Process)
Installing Oracle Beehive Extensions for Outlook 27-15
■ Configuring Profile for Lockdown Systems Using MSI Package
■ Configuring Oracle Beehive Extensions for Outlook Using Configuration Wizard
■ Upgrading Oracle Beehive Extensions for Outlook Installation
■ Updating Language Pack for Oracle Beehive Extensions for Outlook (Non-DMS)
■ Uninstalling and Downgrading Oracle Beehive Extensions for Outlook (Non-DMS Process)
Installing Oracle Beehive Extensions for Outlook Using Executable FileYou may give end users direct access to the Oracle Beehive Extensions for Outlook installer. The end users install the product by double-clicking the installer and following the on-screen instructions.
Retrieve the installer outlook_extensions_setup.exe from <Oracle Beehive home>/beehive/bootstrap/obio/setup.
Installing Oracle Beehive Extensions for Outlook in Silent ModeTo install Oracle Beehive Extensions for Outlook in silent mode, run the following command:
outlook_extensions_setup.exe /s UI=<installer UI option>
<installer UI option> is one of values in the following table:
To uninstall Oracle Beehive Extensions for Outlook in silent mode, use the msiexec.exe utility and specify the Oracle Beehive Extensions for Outlook MSI product code as follows:
msiexec.exe /x {A634A2AF-2495-4F36-B88F-0B24B84A183C} /qn
Configuring Profile for Lockdown Systems Using MSI PackageYou may create customized Oracle Beehive Extensions for Outlook profiles for locked down users. This involves running the Oracle Beehive Extensions for Outlook MSI installer package and specifying the profile parameters as in the command line as public properties. This method assumes that Oracle Beehive Extensions for Outlook was previously installed by an administrator. It does not reinstall Oracle Beehive Extensions for Outlook; it only recreates the Oracle Beehive Extensions for Outlook profile for the locked down user.
Ideally, run the Oracle Beehive Extensions for Outlook MSI installation package on the lockdown system in the locked down user's Windows login script or add an entry to run it, in the runOnce key in the registry.
Table 27–4 Installer UI Options
Value Function
1 No user interface during install
2 Displays only a progress bar during install
3 Presents an install screen with different dialog boxes but does not require user input to run
4 Runs a fully interactive installer requiring user input

Desktop Based Installation (Non-DMS Process)
27-16 Oracle Beehive Installation Guide
Run the Oracle Beehive Extensions for Outlook MSI installation package with the following command line options (line breaks have been inserted for clarity):
msiexec -i {MSI_PRODUCT_CODE} REINSTALL=ALL REINSTALLMODE=u CREATE_PROFILE=3 PROFILE_NAME=MyProfileName {List of public properties with their values} /qn
The following is an example of running the MSI package:
msiexec -i {A634A2AF-2495-4F36-B88F-0B24B84A183C} REINSTALL=ALL REINSTALLMODE=u CREATE_PROFILE=3 PROFILE_NAME=MyprofileName BEEHIVE_SERVER=staqm05.us.oracle.com BEEHIVE_USER=ferasa BEEHIVE_PORT_DIRECT=12345 BEEHIVE_PORT_HTTPS=5533 BEEHIVE_TIMEOUT=40000 BEEHIVE_PROXY_TYPE=0 BEEHIVE_DATA_DIRECT=65536 BEEHIVE_DATA_HTTPS=257 /qn
The following table describes the public properties you may specify:
Table 27–5 MSI Package Public Properties
Property Description
CREATE_PROFILE Determines if an Oracle Beehive Extensions for Outlook profile should be created on the user's computer during installation. This parameter may be assigned one of the following values:
■ 0: No profile is created
■ 1: Force-add a profile with the specified name
■ 2: Default value; create a profile only if the end user is running a fresh install of Oracle Beehive Extensions for Outlook
■ 3: Create a profile only if no profile with the same name exists on the end user's computer
PROFILE_NAME Changes the name of the profile created during installation of Oracle Beehive Extensions for Outlook. The default profile name is Beehive.
BEEHIVE_SERVER Oracle Beehive server address.
BEEHIVE_USER Oracle Beehive user account.
BEEHIVE_PORT_DIRECT Valid port number to be used to establish a direct connection.
BEEHIVE_PORT_HTTPS Valid port number to be used to establish an HTTPS connection.
BEEHIVE_TIMEOUT The Timeout duration before reporting failure to connect. (milliseconds)
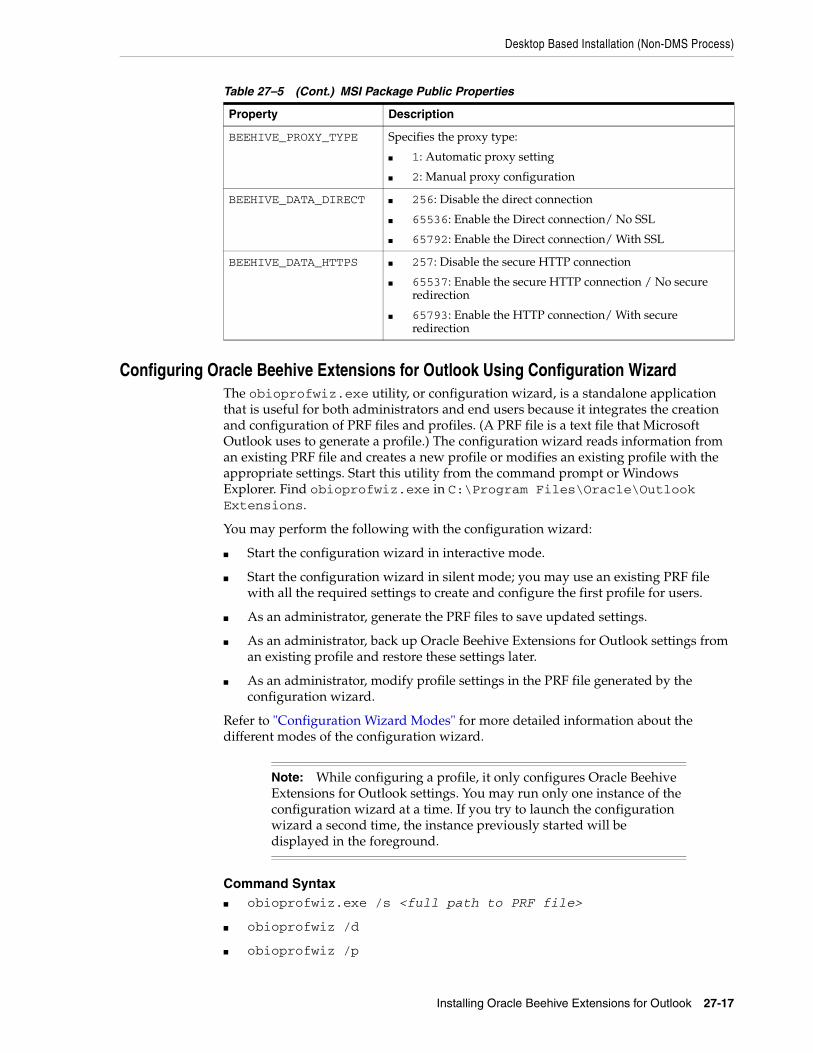
Desktop Based Installation (Non-DMS Process)
Installing Oracle Beehive Extensions for Outlook 27-17
Configuring Oracle Beehive Extensions for Outlook Using Configuration WizardThe obioprofwiz.exe utility, or configuration wizard, is a standalone application that is useful for both administrators and end users because it integrates the creation and configuration of PRF files and profiles. (A PRF file is a text file that Microsoft Outlook uses to generate a profile.) The configuration wizard reads information from an existing PRF file and creates a new profile or modifies an existing profile with the appropriate settings. Start this utility from the command prompt or Windows Explorer. Find obioprofwiz.exe in C:\Program Files\Oracle\Outlook Extensions.
You may perform the following with the configuration wizard:
■ Start the configuration wizard in interactive mode.
■ Start the configuration wizard in silent mode; you may use an existing PRF file with all the required settings to create and configure the first profile for users.
■ As an administrator, generate the PRF files to save updated settings.
■ As an administrator, back up Oracle Beehive Extensions for Outlook settings from an existing profile and restore these settings later.
■ As an administrator, modify profile settings in the PRF file generated by the configuration wizard.
Refer to "Configuration Wizard Modes" for more detailed information about the different modes of the configuration wizard.
Command Syntax■ obioprofwiz.exe /s <full path to PRF file>
■ obioprofwiz /d
■ obioprofwiz /p
BEEHIVE_PROXY_TYPE Specifies the proxy type:
■ 1: Automatic proxy setting
■ 2: Manual proxy configuration
BEEHIVE_DATA_DIRECT ■ 256: Disable the direct connection
■ 65536: Enable the Direct connection/ No SSL
■ 65792: Enable the Direct connection/ With SSL
BEEHIVE_DATA_HTTPS ■ 257: Disable the secure HTTP connection
■ 65537: Enable the secure HTTP connection / No secure redirection
■ 65793: Enable the HTTP connection/ With secure redirection
Note: While configuring a profile, it only configures Oracle Beehive Extensions for Outlook settings. You may run only one instance of the configuration wizard at a time. If you try to launch the configuration wizard a second time, the instance previously started will be displayed in the foreground.
Table 27–5 (Cont.) MSI Package Public Properties
Property Description
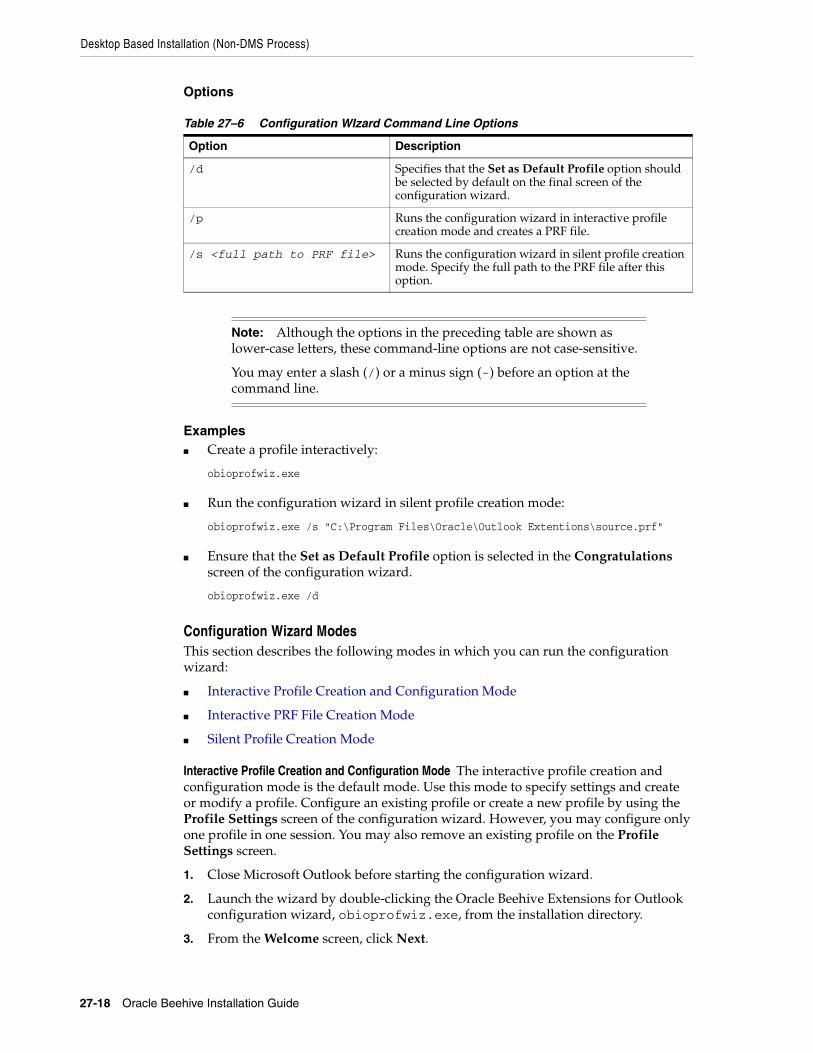
Desktop Based Installation (Non-DMS Process)
27-18 Oracle Beehive Installation Guide
Options
Examples■ Create a profile interactively:
obioprofwiz.exe
■ Run the configuration wizard in silent profile creation mode:
obioprofwiz.exe /s "C:\Program Files\Oracle\Outlook Extentions\source.prf"
■ Ensure that the Set as Default Profile option is selected in the Congratulations screen of the configuration wizard.
obioprofwiz.exe /d
Configuration Wizard ModesThis section describes the following modes in which you can run the configuration wizard:
■ Interactive Profile Creation and Configuration Mode
■ Interactive PRF File Creation Mode
■ Silent Profile Creation Mode
Interactive Profile Creation and Configuration Mode The interactive profile creation and configuration mode is the default mode. Use this mode to specify settings and create or modify a profile. Configure an existing profile or create a new profile by using the Profile Settings screen of the configuration wizard. However, you may configure only one profile in one session. You may also remove an existing profile on the Profile Settings screen.
1. Close Microsoft Outlook before starting the configuration wizard.
2. Launch the wizard by double-clicking the Oracle Beehive Extensions for Outlook configuration wizard, obioprofwiz.exe, from the installation directory.
3. From the Welcome screen, click Next.
Table 27–6 Configuration WIzard Command Line Options
Option Description
/d Specifies that the Set as Default Profile option should be selected by default on the final screen of the configuration wizard.
/p Runs the configuration wizard in interactive profile creation mode and creates a PRF file.
/s <full path to PRF file> Runs the configuration wizard in silent profile creation mode. Specify the full path to the PRF file after this option.
Note: Although the options in the preceding table are shown as lower-case letters, these command-line options are not case-sensitive.
You may enter a slash (/) or a minus sign (-) before an option at the command line.
Desktop Based Installation (Non-DMS Process)
Installing Oracle Beehive Extensions for Outlook 27-19
4. If you want to create a new profile, select New and enter a name for the new profile. If you want to configure an existing profile, select it from the Profiles list. Click Next.
5. You may view or modify settings for the selected user profile in the Service Settings screen. You must fill all non-password fields to proceed to the next screen. To configure advanced settings, such as resetting your local mailbox cache, setting a folder refresh rate for incoming mail, or selecting a refresh option for the Global Address Book, click More Settings. Click Next to proceed.
6. When the Congratulations screen is displayed, verify that Set as Default Profile is selected. The Outlook Address Book service is added to a new profile by default.
Interactive PRF File Creation Mode As an administrator, you may run the obioprofwiz.exe utility in interactive PRF file creation mode. In this mode, you may create a PRF file by starting with a blank template or by importing information from an existing profile or PRF file.
By default, the PRF file created is a blank template. For security reasons, password fields are not saved in the resulting PRF file if information is imported from an existing profile. The final PRF file contains user profile information and settings information, which may be used by the configuration wizard or by the NewProf.exe utility.
1. Close Microsoft Outlook before starting the configuration wizard.
2. Run the configuration wizard with the /p option at the command line. For example:
obioprofwiz.exe /p
3. In the Source Template in the PRF Configuration Settings screen, select one of the following options for the PRF file:
■ Empty PRF File: If you select this option as the source template, you must manually specify the settings.
■ Existing PRF File: If you select this option as the source template, initial settings information is imported from the source PRF file.
■ MAPI Profile: If you select this option as the source template, initial settings information is imported from the source profile.
4. Enter the name and location of the new PRF file in the Destination File field.
5. In the Profile Options screen, configure the settings for the General section of the new PRF file. The following table shows the relationship between the fields in the Profile Options screen and the parameters in the General section of the PRF file:
Note: If Microsoft Outlook is open and you are using the same profile while you are configuring profile settings, the fields on the Service Settings screen are disabled.
Note: If you import information from an existing PRF file or MAPI profile, Microsoft Outlook address book information is added to the Service List section of the output PRF file if the existing PRF file or MAPI profile already contains address book information or the Outlook Address Book service, respectively.
Desktop Based Installation (Non-DMS Process)
27-20 Oracle Beehive Installation Guide
6. View or modify Oracle Beehive Extensions for Outlook settings for the selected user profile in the Service Settings screen. All non-password fields must be filled to proceed to the next screen. Click Next to proceed.
To configure advanced settings, such as resetting your local mailbox cache, setting a folder refresh rate for incoming mail, or selecting a refresh option for the Global Address Book, click More Settings. The Oracle Beehive Extensions for Outlook settings information will be saved to the new PRF file.
7. If View PRF File is selected when the Congratulations screen is displayed, the wizard displays the newly created PRF file. You may then verify the information or modify parameters in the PRF file.
Silent Profile Creation Mode In this mode, you may use an existing PRF file as a template to create a corresponding profile. When installing Oracle Beehive Extensions for Outlook in silent mode, you may start the configuration wizard after the installation is complete. The configuration wizard reads information from an existing PRF file and creates a new profile or modifies an existing profile with the appropriate settings.
The Outlook Address Book service is imported into the profile if it is listed in the Service List section. Limited support is also available for some other types of message services.
When Oracle Beehive Extensions for Outlook is configured in silent mode, a log file is created to record success and error information. This log file is stored in a temporary folder on the computer with a path and file name similar to C:\Documents and Settings\user\Local Settings\Temp\obioConfigWizardLog\obioConfigWizard.log, where user is the login name of the currently logged in Windows user.
Table 27–7 Relationship Between Fields in the Profile Options Screen and Settings in the General Section of the PRF File
Field in Profile Options Screen Parameter in General Section of PRF File
Profile Name ProfileName
Default Store DefaultStore
Use this profile as the default MAPI profile DefaultProfile=Yes/No
Overwrite existing profile with the same name
OverwriteProfile=Yes/No
Note: Oracle recommends that you use a PRF file generated by the Oracle Beehive Extensions for Outlook configuration wizard. You may configure most of the parameters in the PRF file with the configuration wizard in the interactive PRF file creation mode. If you modify a value manually, then you must verify that the new value falls within the valid range of values. To verify that you are within the valid range of values, consult the PRF file distributed with the installation package.
Desktop Based Installation (Non-DMS Process)
Installing Oracle Beehive Extensions for Outlook 27-21
Upgrading Oracle Beehive Extensions for Outlook InstallationWhen you provision a new version of Oracle Beehive Extensions for Outlook in the DMS repository, end users will be notified about the new update and will be able to download and install it.
If administrators prefer to upgrade to a newer version of Oracle Beehive Extensions for Outlook on end users' systems without relying on the DMS upgrade process (because, for example, the computers they want to upgrade are lockdown systems), then they need to deploy the new version of Oracle Beehive Extensions for Outlook before performing any server updates.
Alternatively, you may remove any Oracle Beehive Extensions for Outlook packages from the DMS repository so that end users are never prompted to upgrade to newer versions. Perform the following steps to remove Oracle Beehive Extensions for Outlook packages:
1. Run the following command:
beectl list_client_applications
2. The previous command should list the following two Oracle Beehive Extensions for Outlook application packages and their identifiers:
■ Oracle Beehive Extensions for Outlook
■ Oracle Beehive Extensions for Outlook Language Pack
Remove both client applications by running the following command (for each application):
beectl delete_client_application --application <identifier of client application>
Updating Language Pack for Oracle Beehive Extensions for Outlook (Non-DMS)The default localization of the user interface of OBEO can be changed according to the user preference. This can be done by supplying newer xliff files for the preferred languages that would contain the required changes. If the default language pack is satisfactory, however, then no change will be required and hence no updating of the language pack will be necessary.
Follow the steps below to update the modified language packs:
1. Obtain the default language pack from the following location:
<Oracle Beehivehome>/beehive/bootstrap/obio/languagepack
2. Unzip the package.
Note: If you are configuring Oracle Beehive Extensions for Outlook in silent mode, then you must check the log file to verify the results. The log file contains a record of errors, as well as successful imports of information into the profile.
The configuration wizard may write some information to the log file in interactive profile creation and configuration mode and interactive PRF file creation mode. Usually, high-level warning messages are displayed on the screen, while low-level technical information is recorded in the log file.
Installing Oracle Beehive Extensions for Outlook Using Active Directory
27-22 Oracle Beehive Installation Guide
3. Find the corresponding xliff file of the language that needs to be modified and make the changes.
4. Place the changed file in a folder.
For example: c:\lab\Updates (This would be the path to xliff chm files)
5. These modified files can be deployed on the users' machines using one of the following commands:
outlook_extension_setup.exe /package_langpack {path_to_a_folder_of_xliff_chm_files}
This command generates a newer installation package with the updated xliff files packaged inside it. This full installation package is generated in the same folder of the original installation package. It can then be executed normally by the users to install and update their deployed language pack in the deployed location (usually C:\Program Files\Oracle\Outlook Extensions\languages\Updates).
outlook_extension_setup.exe /install_langpack {path_to_a_folder_of_xliff_chm_files}
This command does not generate a new installation package. Instead, it copies the modified files directly to its deployed location. It can be used by the user to update the deployed language pack, provided that the user running the installation has access to the folder where the updated files are located (this can be a network location) during the installation time.
Uninstalling and Downgrading Oracle Beehive Extensions for Outlook (Non-DMS Process)
Use the following methods to uninstall or downgrade Oracle Beehive Extensions for Outlook.
Uninstalling Oracle Beehive Extensions for OutlookEnd users may remove Oracle Beehive Extensions for Outlook from their computers by selecting Add/Remove Programs from the Control Panel, selecting Oracle Beehive Extensions for Outlook from the list, and clicking Remove.
Downgrading Oracle Beehive Extensions for OutlookIf you want to install downgraded versions of Oracle Beehive Extensions for Outlook on end users' systems, then simply run the installer older Oracle Beehive Extensions for Outlook version.
Installing Oracle Beehive Extensions for Outlook Using Active DirectoryIf your end users are running systems on Windows XP or Windows Vista that are locked down, they may install Oracle Beehive Extensions for Outlook using an Active Directory group policy. To perform an Active Directory installation, the domain administrator must create a package for Oracle Beehive Extensions for Outlook in the Active Directory Administrative Tool and then assign the package to the organization units that contain the intended end users. The software will then be installed on end users' computers during startup.
This section covers the following topics:
■ Creating MSI installation package for Oracle Beehive Extensions for Outlook
Installing Oracle Beehive Extensions for Outlook Using Active Directory
Installing Oracle Beehive Extensions for Outlook 27-23
■ Deploying Oracle Beehive Extensions for Outlook using Active Directory Group Policy
■ Verifying that Oracle Beehive Extensions for Outlook Is Available for Installation
Creating MSI installation package for Oracle Beehive Extensions for OutlookActive Directory only recognizes software packaged in the MSI file format, which contains information about the application setup and installation. Follow these steps to create an MSI installation package for Oracle Beehive Extensions for Outlook:
1. Extract the outlook_extensions_application.msi file from the Oracle Beehive Extensions for Outlook package using the outlook_extensions_setup.exe /export type=client <extracted folder path> command.
2. Extract the prerequisite.msi file from the Oracle Beehive Extensions for Outlook package using the outlook_extensions_setup.exe /export type=system <extracted folder path> command.
Deploying Oracle Beehive Extensions for Outlook using Active Directory Group PolicyBefore proceeding, ensure you have extracted the MSI files for Oracle Beehive Extensions for Outlook to an accessible location. Follow these steps to deploy Oracle Beehive Extensions for Outlook using an Active Directory group policy:
1. From the Start menu, select Control Panel, then Administrative Tools.
2. Click Active Directory Users and Computers.
3. Create an organization unit that includes all the computers on which you want to install Oracle Beehive Extensions for Outlook. Alternatively, select an existing organization unit.
4. Right-click your chosen organization unit in the Active Directory Users and Computers tree.
5. From the Shortcut menu, click Properties.
6. In the Properties dialog box, click the Group Policy tab.
7. Click Edit if you are modifying an existing group policy, or Add if you are creating a group policy.
8. Select and expand the Computer Configuration node.
9. Under the Computer Configuration node, expand the Software Settings folder.
10. Right-click Software Installation and select New.
11. From the Shortcut menu, click Package.
12. Enter the path to your extracted prerequisite.msi file.
13. Selected Assigned and click OK.
14. Repeat steps 10-13 for your extracted outlook_extensions_application.msi file.
Note: The following steps will ensure that Oracle Beehive Extensions for Outlook is installed on all computers in your chosen organization unit. It also ensures that all users of a given computer have access to Oracle Beehive Extensions for Outlook.
Using Oracle Beehive Extensions for Outlook as Profile Migration Tool
27-24 Oracle Beehive Installation Guide
15. In the Properties dialog box, click OK.
16. Exit the Active Directory Users and Computers console.
Verifying that Oracle Beehive Extensions for Outlook Is Available for InstallationTo verify that Oracle Beehive Extensions for Outlook is available to end users for installation, restart any computer in the domain and make sure that Oracle Beehive Extensions for Outlook installation starts when the computer restarts.
Using Oracle Beehive Extensions for Outlook as Profile Migration ToolYou may also use the Oracle Beehive Extensions for Outlook downloader as a tool to migrate and integrate some configurations settings into an Oracle Beehive Extensions for Outlook profile. This includes the following options:
■ Migrating existing personal folder data files (files with a .pst extension) from previous profiles
■ Migrating LDAP settings from previous profiles
■ Adding new LDAP settings
■ Adding new personal folders data file
Use the /migrate switch as follows:
outlook_extensions_downloader.exe /migrate C:\migrateinifile.ini
If you do not provide an initialization file (such as C:\migrateinifile.ini in the previous example), you will be presented with an interactive user interface that enables you to choose the personal folders data files and the LDAP settings from previous profiles to migrate.
Use the following template to create a migration initialization file:
Example 27–4 Template for Migration Initialization File
[migrate_psts]Src=Dest=CopyFile= [migrate_ldaps]Src=Dest= [add_pst]Path=Dest= [add_ldap]Name=Host=Port=
Note: For more information on how to obtain MSI files for Oracle Beehive Extensions for Outlook, see Creating MSI installation package for Oracle Beehive Extensions for Outlook.
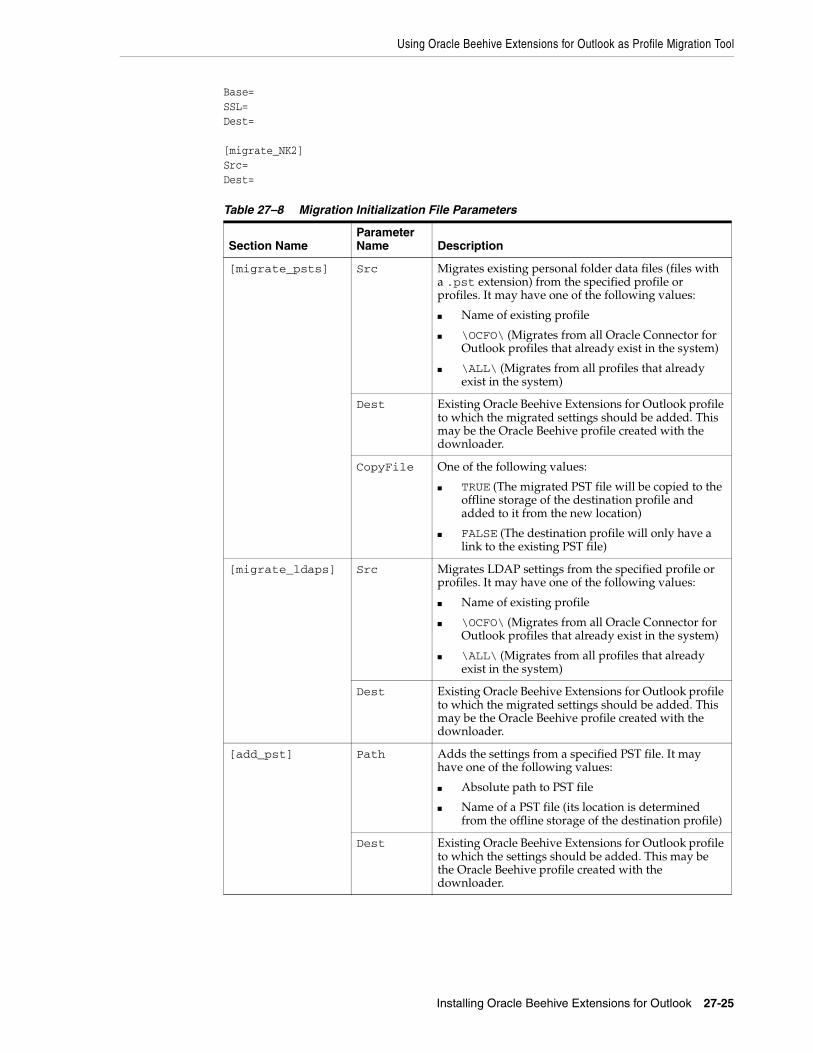
Using Oracle Beehive Extensions for Outlook as Profile Migration Tool
Installing Oracle Beehive Extensions for Outlook 27-25
Base=SSL=Dest=
[migrate_NK2]Src=Dest=
Table 27–8 Migration Initialization File Parameters
Section NameParameter Name Description
[migrate_psts] Src Migrates existing personal folder data files (files with a .pst extension) from the specified profile or profiles. It may have one of the following values:
■ Name of existing profile
■ \OCFO\ (Migrates from all Oracle Connector for Outlook profiles that already exist in the system)
■ \ALL\ (Migrates from all profiles that already exist in the system)
Dest Existing Oracle Beehive Extensions for Outlook profile to which the migrated settings should be added. This may be the Oracle Beehive profile created with the downloader.
CopyFile One of the following values:
■ TRUE (The migrated PST file will be copied to the offline storage of the destination profile and added to it from the new location)
■ FALSE (The destination profile will only have a link to the existing PST file)
[migrate_ldaps] Src Migrates LDAP settings from the specified profile or profiles. It may have one of the following values:
■ Name of existing profile
■ \OCFO\ (Migrates from all Oracle Connector for Outlook profiles that already exist in the system)
■ \ALL\ (Migrates from all profiles that already exist in the system)
Dest Existing Oracle Beehive Extensions for Outlook profile to which the migrated settings should be added. This may be the Oracle Beehive profile created with the downloader.
[add_pst] Path Adds the settings from a specified PST file. It may have one of the following values:
■ Absolute path to PST file
■ Name of a PST file (its location is determined from the offline storage of the destination profile)
Dest Existing Oracle Beehive Extensions for Outlook profile to which the settings should be added. This may be the Oracle Beehive profile created with the downloader.
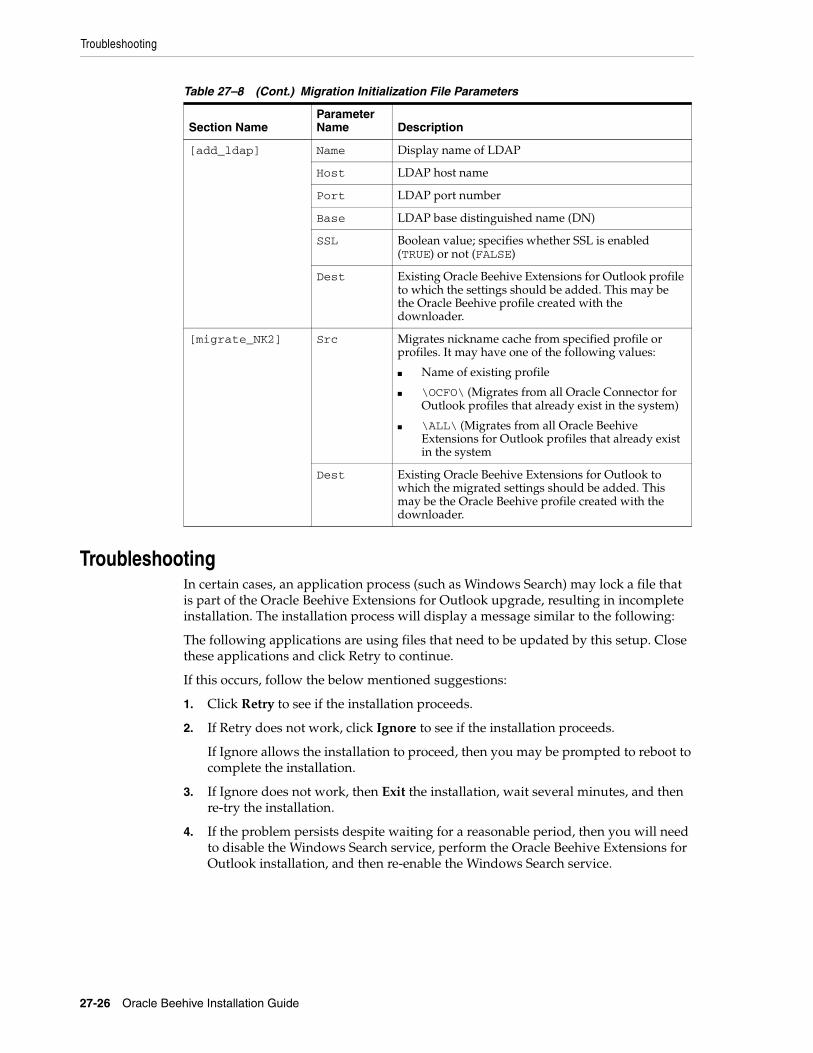
Troubleshooting
27-26 Oracle Beehive Installation Guide
TroubleshootingIn certain cases, an application process (such as Windows Search) may lock a file that is part of the Oracle Beehive Extensions for Outlook upgrade, resulting in incomplete installation. The installation process will display a message similar to the following:
The following applications are using files that need to be updated by this setup. Close these applications and click Retry to continue.
If this occurs, follow the below mentioned suggestions:
1. Click Retry to see if the installation proceeds.
2. If Retry does not work, click Ignore to see if the installation proceeds.
If Ignore allows the installation to proceed, then you may be prompted to reboot to complete the installation.
3. If Ignore does not work, then Exit the installation, wait several minutes, and then re-try the installation.
4. If the problem persists despite waiting for a reasonable period, then you will need to disable the Windows Search service, perform the Oracle Beehive Extensions for Outlook installation, and then re-enable the Windows Search service.
[add_ldap] Name Display name of LDAP
Host LDAP host name
Port LDAP port number
Base LDAP base distinguished name (DN)
SSL Boolean value; specifies whether SSL is enabled (TRUE) or not (FALSE)
Dest Existing Oracle Beehive Extensions for Outlook profile to which the settings should be added. This may be the Oracle Beehive profile created with the downloader.
[migrate_NK2] Src Migrates nickname cache from specified profile or profiles. It may have one of the following values:
■ Name of existing profile
■ \OCFO\ (Migrates from all Oracle Connector for Outlook profiles that already exist in the system)
■ \ALL\ (Migrates from all Oracle Beehive Extensions for Outlook profiles that already exist in the system
Dest Existing Oracle Beehive Extensions for Outlook to which the migrated settings should be added. This may be the Oracle Beehive profile created with the downloader.
Table 27–8 (Cont.) Migration Initialization File Parameters
Section NameParameter Name Description
28
Installing Oracle Beehive Extensions for Explorer 28-1
28 Installing Oracle Beehive Extensions forExplorer
This chapter describes how to install Oracle Beehive Extensions for Explorer.
Oracle recommends that you install Oracle Beehive Extensions for Explorer using Oracle Beehive's Device Management Service (DMS). This installation method is recommended for almost all desktops with standard environments and administrative privileges. A desktop based, non-DMS installation method is available for custom environments with limited administrative privileges.
It covers the following topics:
■ System Requirements
■ Device Management Service (DMS) Based Installation
■ Desktop Based Installation (Non-DMS Process)
System RequirementsThis section describes the software and hardware requirements for Oracle Beehive Extensions for Explorer. For updated list of certified hardware platforms and operating system version, review the certification matrix on the My Oracle Support Web site at the following URL:
http://support.oracle.com/
Operating System■ Microsoft Windows XP: Home or Professional
■ Microsoft Windows 7 (32-bit and 64-bit edition) - Home Premium, Professional, Ultimate or Enterprise
■ Microsoft Windows Server 2003
■ Microsoft Windows Server 2008
■ Microsoft Windows Server 2008 R2
Device Management Service (DMS) Based Installation
28-2 Oracle Beehive Installation Guide
Disk Space■ 100 MB minimum
■ Hard disk usage varies according to configuration. Custom installation options may require more or less hard disk space. The amount of online data the user accesses may also affect the disk space requirement.
Device Management Service (DMS) Based InstallationOracle recommends that you install and deploy Oracle Beehive Extensions for Explorer using Oracle Beehive's Device Management Service (DMS). This installation method is recommended for almost all desktops with standard environments and administrative privileges. It is designed for centralized installation and management of auto-updates.
This section covers the following topics:
■ Installing Oracle Beehive Extensions for Explorer Using Remote Downloader
■ Update Oracle Beehive Extensions for Explorer Through DMS
■ Uninstalling and Downgrading Oracle Beehive Extensions for Explorer (DMS Process)
Installing Oracle Beehive Extensions for Explorer Using Remote Downloader You may install Oracle Beehive Extensions for Explorer by distributing a remote downloader to end users. The remote downloader enables end users to download and install the provisioned Oracle Beehive Extensions for Explorer application from the Device Management Service (DMS) repository. By default, the DMS contains a pre-seeded Oracle Beehive Extensions for Explorer application that is provisioned for all end users.
For more information on how to provision applications for specific users or groups of users, refer to "Managing the Device Management Service" in Oracle Beehive Administrator's Guide.
Obtaining Remote DownloaderObtain the Oracle Beehive Extensions for Explorer remote downloader, explorer_extensions_downloader.exe in the directory <Oracle Beehive home>/beehive/bootstrap/obee/downloader.
You may also obtain the remote downloader from Oracle Beehive Central, a Web-based client that provides users a central location to download supported clients and set their preferences for Oracle Beehive functionality.
Note: You need administrative privileges to install Oracle Beehive Extensions for Explorer on Windows XP, Windows Server 2003, and Windows Server 2008.
You must install Windows XP Service Pack 2 on Windows XP computers if you intend to use non-English locales with Oracle Beehive Extensions for Explorer. Attempting to run Oracle Beehive Extensions for Explorer with a non-English locale on a computer with Windows XP Service Pack 1 (or earlier) may result in the computer failing to operate normally.
Device Management Service (DMS) Based Installation
Installing Oracle Beehive Extensions for Explorer 28-3
Pre-Seeding Server Name in Remote DownloaderThe remote downloader prompts the end user to provide a server name, account name, and password to initiate download and installation. If you want to pre-seed a server name to prevent end users from having to specify a server name on their own, rename the remote downloader to <fully qualified server name>.exe. For example, if your server name is faulkner.oracle.com, your remote downloader name would be faulkner.oracle.com.exe.
Pre-Seeding Port NumberYou may pre-seed the port number that Oracle Beehive Extensions for Outlook uses to connect to the server.
For example, if your remote downloader name is faulkner.oracle.com.exe and you want to pre-seed the port number in the downloader, rename the file to faulkner.oracle.com,443.exe, where 443 is your port number.
Installing Oracle Beehive Extensions for Explorer Using Remote Downloader Using Silent ModeThis option is available for Oracle Beehive Release 1 (1.5.1.2) and later.
You may also use the Oracle Beehive Extensions for Explorer downloader to provide a full, non-interactive deployment option. To do so, use the silent switch, /s.
Specify the required connection parameters through the command line or in an initialization file.
Specifying Connection Parameters Through Command Line The following is an example of specifying connection parameters through the command line (line breaks have been added for clarity):
explorer_extensions_downloader.exe /server example.com /user OracleBeehiveUserName /direct port=5224 secure=true /https port=443 secure=true /s UI=1
The following table describes the Oracle Beehive Extensions for Explorer downloader's command line options:
Note: The pre-seeded port number is the port number of the DMS on the server that is used to obtain the settings for direct and HTTPS connections.
Table 28–1 Oracle Beehive Extensions for Explorer Downloader Options
Option Description
/server Oracle Beehive server address
/user Oracle Beehive user account
/pass User's password
Note: It is recommended that you use the option /s UI=1 instead of the /pass option. With the /s UI=1 option, the connection dialog is presented in which all the controls are disabled and only the password field is enabled.
Device Management Service (DMS) Based Installation
28-4 Oracle Beehive Installation Guide
Specifying Connection Parameters in Initialization File Specify the full path of the initialization file you want to use as follows. In this example, C:\testSilentDownloader.ini is the full path of the initialization file:
explorer_extensions_downloader.exe /s C:\testSilentDownloader.ini
/direct port=<port number> secure=<true/false>
Specifies the following for direct connection:
■ port: Valid port number to be used to establish a direct connection
■ secure: Boolean value; if true, then use a secure connection
/https port=<port number> secure=<true/false>
Specifies the following for HTTPS connection:
■ port: Valid port number to be used to establish an HTTPS connection
■ secure: Boolean value; if true, then use a secure connection
/create_profile Determines if an Oracle Beehive Extensions for Explorer profile should be created on the user's computer during installation. This parameter may be assigned one of the following values:
■ 0: Do not create a profile
■ 1: Always create a profile (either for a new install or an upgrade)
■ 2: Only create a profile for a new install (default value)
■ 3: Only create a profile if there is no profile with the exact name that exists on the user's computer (either for a new install or upgrade)
/discover port=<port number> Specifies the port number of the DMS on the server to obtain the settings for direct and HTTPS connections.
By using this option, you do not need to specify either the /direct or /https options.
/profile_name Changes the name of the profile created during installation of Oracle Beehive Extensions for Outlook. The default profile name is Beehive.
/repair Downloads and reinstalls the MSI package from the DMS if the installed version on the user's computer is the same version as the MSI package.
If /create_profile option has a value of 1 or 3, then the /repair option is used even if it is not specified.
/launch_explorer Determines if Windows Explorer is launched after Oracle Beehive Extensions for Explorer is installed. This parameter may be assigned one of the following values:
■ 0: Do not launch Windows Explorer
■ 1: Launch Windows Explorer (default value)
/s Use silent mode
Table 28–1 (Cont.) Oracle Beehive Extensions for Explorer Downloader Options
Option Description
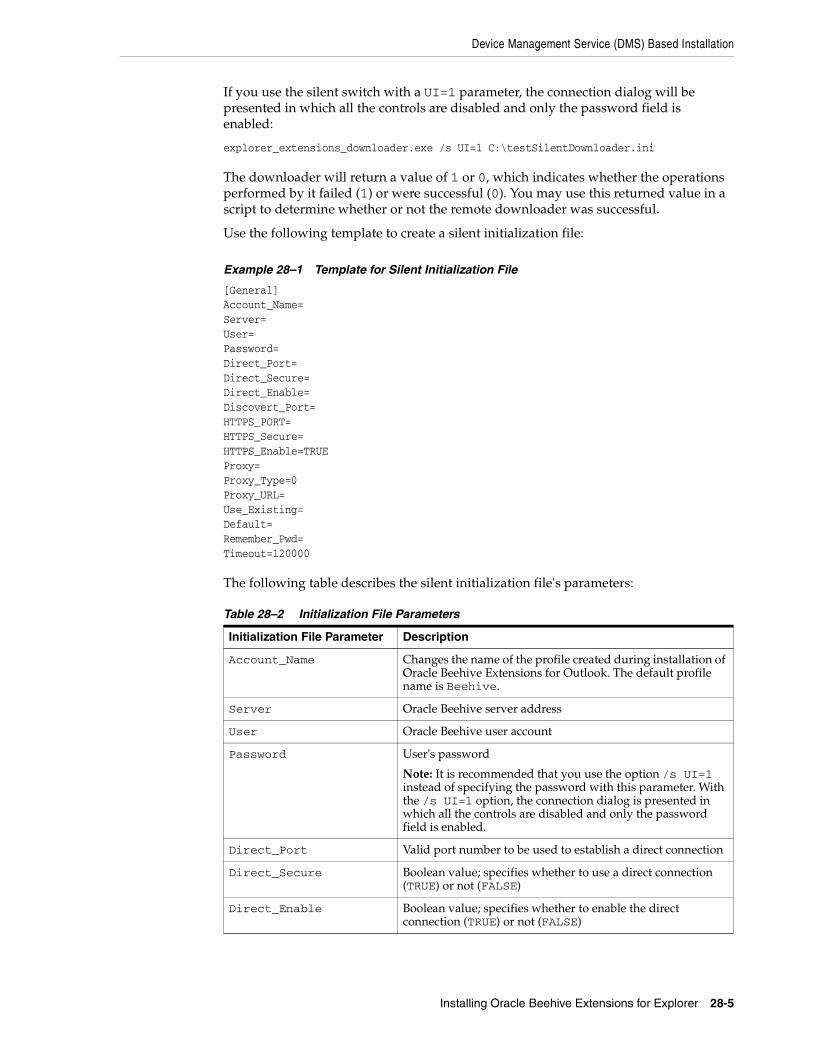
Device Management Service (DMS) Based Installation
Installing Oracle Beehive Extensions for Explorer 28-5
If you use the silent switch with a UI=1 parameter, the connection dialog will be presented in which all the controls are disabled and only the password field is enabled:
explorer_extensions_downloader.exe /s UI=1 C:\testSilentDownloader.ini
The downloader will return a value of 1 or 0, which indicates whether the operations performed by it failed (1) or were successful (0). You may use this returned value in a script to determine whether or not the remote downloader was successful.
Use the following template to create a silent initialization file:
Example 28–1 Template for Silent Initialization File
[General]Account_Name=Server=User=Password=Direct_Port=Direct_Secure=Direct_Enable=Discovert_Port=HTTPS_PORT=HTTPS_Secure=HTTPS_Enable=TRUEProxy=Proxy_Type=0Proxy_URL=Use_Existing=Default=Remember_Pwd=Timeout=120000
The following table describes the silent initialization file's parameters:
Table 28–2 Initialization File Parameters
Initialization File Parameter Description
Account_Name Changes the name of the profile created during installation of Oracle Beehive Extensions for Outlook. The default profile name is Beehive.
Server Oracle Beehive server address
User Oracle Beehive user account
Password User's password
Note: It is recommended that you use the option /s UI=1 instead of specifying the password with this parameter. With the /s UI=1 option, the connection dialog is presented in which all the controls are disabled and only the password field is enabled.
Direct_Port Valid port number to be used to establish a direct connection
Direct_Secure Boolean value; specifies whether to use a direct connection (TRUE) or not (FALSE)
Direct_Enable Boolean value; specifies whether to enable the direct connection (TRUE) or not (FALSE)
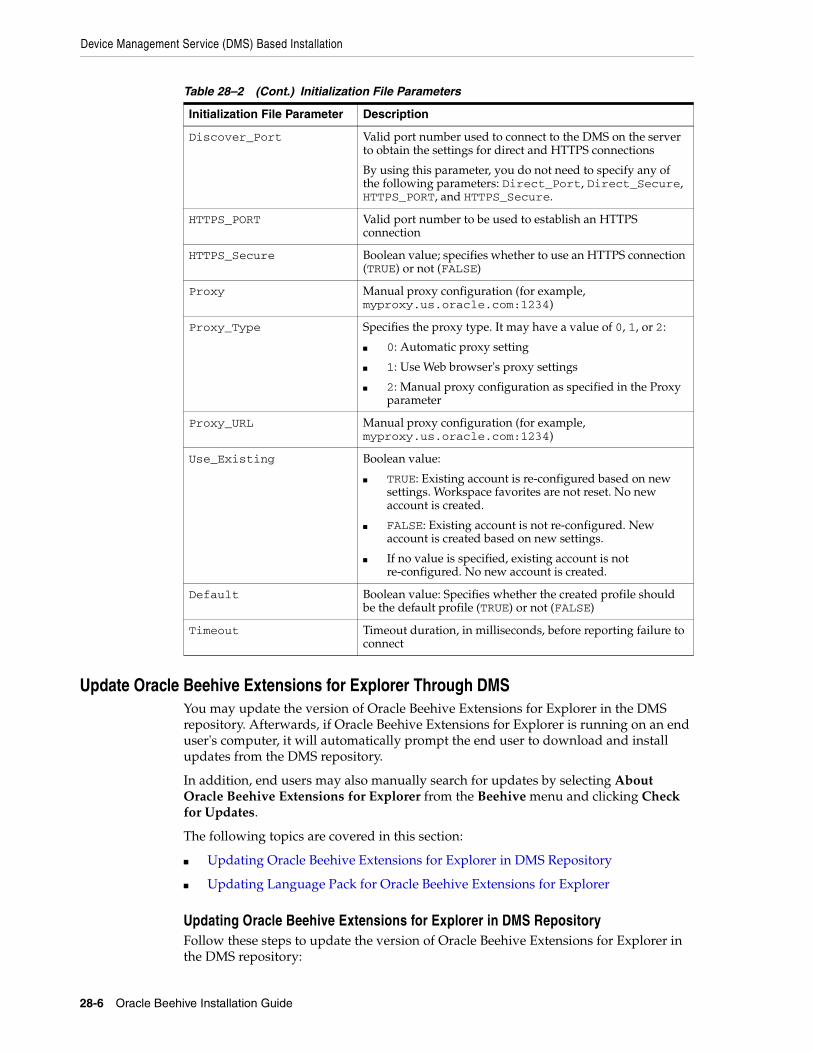
Device Management Service (DMS) Based Installation
28-6 Oracle Beehive Installation Guide
Update Oracle Beehive Extensions for Explorer Through DMSYou may update the version of Oracle Beehive Extensions for Explorer in the DMS repository. Afterwards, if Oracle Beehive Extensions for Explorer is running on an end user's computer, it will automatically prompt the end user to download and install updates from the DMS repository.
In addition, end users may also manually search for updates by selecting About Oracle Beehive Extensions for Explorer from the Beehive menu and clicking Check for Updates.
The following topics are covered in this section:
■ Updating Oracle Beehive Extensions for Explorer in DMS Repository
■ Updating Language Pack for Oracle Beehive Extensions for Explorer
Updating Oracle Beehive Extensions for Explorer in DMS RepositoryFollow these steps to update the version of Oracle Beehive Extensions for Explorer in the DMS repository:
Discover_Port Valid port number used to connect to the DMS on the server to obtain the settings for direct and HTTPS connections
By using this parameter, you do not need to specify any of the following parameters: Direct_Port, Direct_Secure, HTTPS_PORT, and HTTPS_Secure.
HTTPS_PORT Valid port number to be used to establish an HTTPS connection
HTTPS_Secure Boolean value; specifies whether to use an HTTPS connection (TRUE) or not (FALSE)
Proxy Manual proxy configuration (for example, myproxy.us.oracle.com:1234)
Proxy_Type Specifies the proxy type. It may have a value of 0, 1, or 2:
■ 0: Automatic proxy setting
■ 1: Use Web browser's proxy settings
■ 2: Manual proxy configuration as specified in the Proxy parameter
Proxy_URL Manual proxy configuration (for example, myproxy.us.oracle.com:1234)
Use_Existing Boolean value:
■ TRUE: Existing account is re-configured based on new settings. Workspace favorites are not reset. No new account is created.
■ FALSE: Existing account is not re-configured. New account is created based on new settings.
■ If no value is specified, existing account is not re-configured. No new account is created.
Default Boolean value: Specifies whether the created profile should be the default profile (TRUE) or not (FALSE)
Timeout Timeout duration, in milliseconds, before reporting failure to connect
Table 28–2 (Cont.) Initialization File Parameters
Initialization File Parameter Description
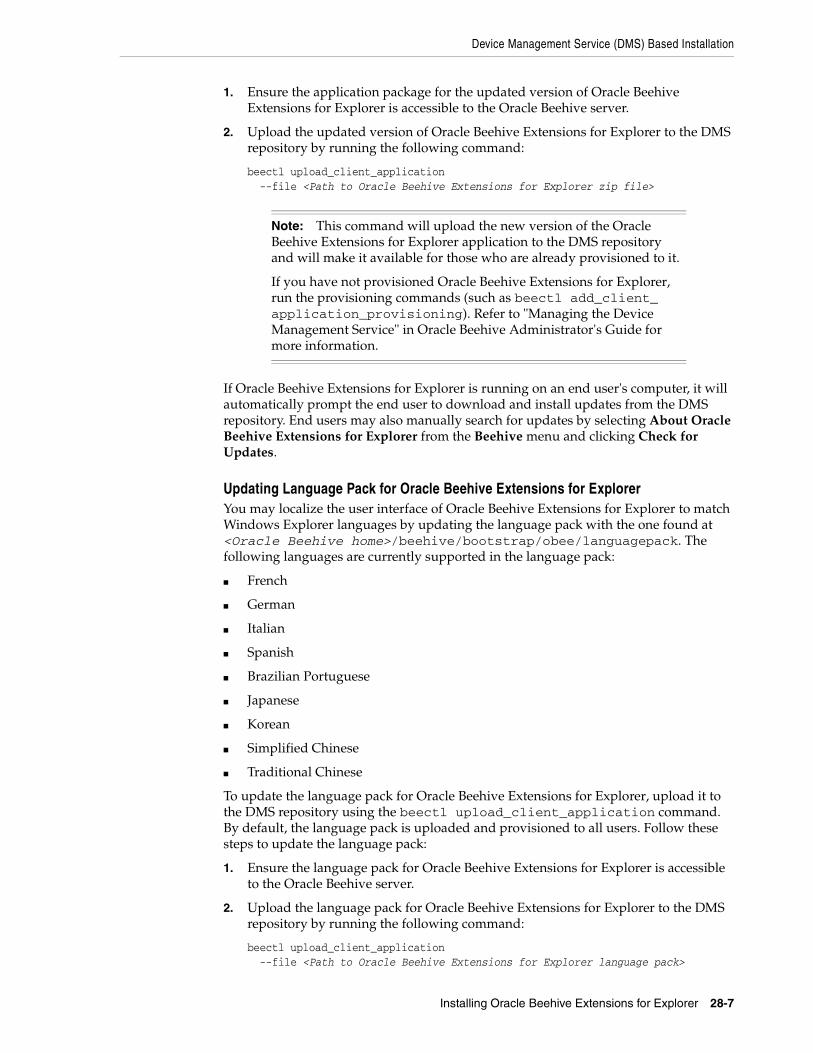
Device Management Service (DMS) Based Installation
Installing Oracle Beehive Extensions for Explorer 28-7
1. Ensure the application package for the updated version of Oracle Beehive Extensions for Explorer is accessible to the Oracle Beehive server.
2. Upload the updated version of Oracle Beehive Extensions for Explorer to the DMS repository by running the following command:
beectl upload_client_application --file <Path to Oracle Beehive Extensions for Explorer zip file>
If Oracle Beehive Extensions for Explorer is running on an end user's computer, it will automatically prompt the end user to download and install updates from the DMS repository. End users may also manually search for updates by selecting About Oracle Beehive Extensions for Explorer from the Beehive menu and clicking Check for Updates.
Updating Language Pack for Oracle Beehive Extensions for ExplorerYou may localize the user interface of Oracle Beehive Extensions for Explorer to match Windows Explorer languages by updating the language pack with the one found at <Oracle Beehive home>/beehive/bootstrap/obee/languagepack. The following languages are currently supported in the language pack:
■ French
■ German
■ Italian
■ Spanish
■ Brazilian Portuguese
■ Japanese
■ Korean
■ Simplified Chinese
■ Traditional Chinese
To update the language pack for Oracle Beehive Extensions for Explorer, upload it to the DMS repository using the beectl upload_client_application command. By default, the language pack is uploaded and provisioned to all users. Follow these steps to update the language pack:
1. Ensure the language pack for Oracle Beehive Extensions for Explorer is accessible to the Oracle Beehive server.
2. Upload the language pack for Oracle Beehive Extensions for Explorer to the DMS repository by running the following command:
beectl upload_client_application --file <Path to Oracle Beehive Extensions for Explorer language pack>
Note: This command will upload the new version of the Oracle Beehive Extensions for Explorer application to the DMS repository and will make it available for those who are already provisioned to it.
If you have not provisioned Oracle Beehive Extensions for Explorer, run the provisioning commands (such as beectl add_client_application_provisioning). Refer to "Managing the Device Management Service" in Oracle Beehive Administrator's Guide for more information.
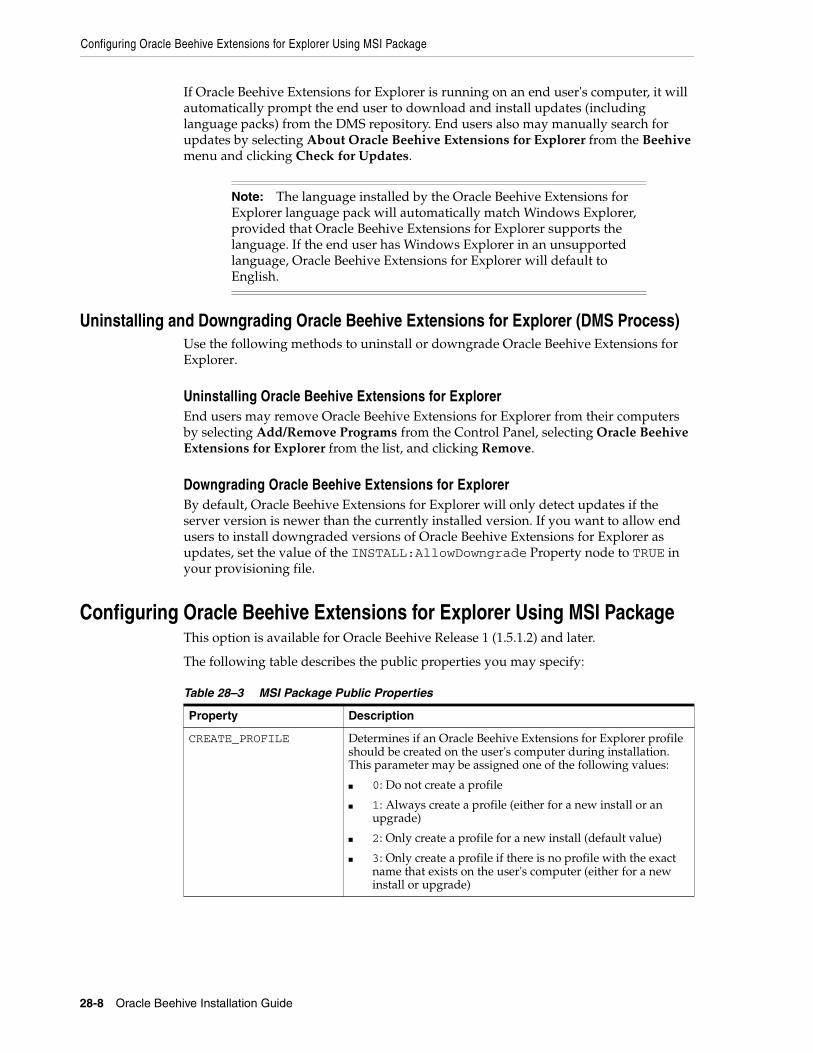
Configuring Oracle Beehive Extensions for Explorer Using MSI Package
28-8 Oracle Beehive Installation Guide
If Oracle Beehive Extensions for Explorer is running on an end user's computer, it will automatically prompt the end user to download and install updates (including language packs) from the DMS repository. End users also may manually search for updates by selecting About Oracle Beehive Extensions for Explorer from the Beehive menu and clicking Check for Updates.
Uninstalling and Downgrading Oracle Beehive Extensions for Explorer (DMS Process)Use the following methods to uninstall or downgrade Oracle Beehive Extensions for Explorer.
Uninstalling Oracle Beehive Extensions for ExplorerEnd users may remove Oracle Beehive Extensions for Explorer from their computers by selecting Add/Remove Programs from the Control Panel, selecting Oracle Beehive Extensions for Explorer from the list, and clicking Remove.
Downgrading Oracle Beehive Extensions for ExplorerBy default, Oracle Beehive Extensions for Explorer will only detect updates if the server version is newer than the currently installed version. If you want to allow end users to install downgraded versions of Oracle Beehive Extensions for Explorer as updates, set the value of the INSTALL:AllowDowngrade Property node to TRUE in your provisioning file.
Configuring Oracle Beehive Extensions for Explorer Using MSI PackageThis option is available for Oracle Beehive Release 1 (1.5.1.2) and later.
The following table describes the public properties you may specify:
Note: The language installed by the Oracle Beehive Extensions for Explorer language pack will automatically match Windows Explorer, provided that Oracle Beehive Extensions for Explorer supports the language. If the end user has Windows Explorer in an unsupported language, Oracle Beehive Extensions for Explorer will default to English.
Table 28–3 MSI Package Public Properties
Property Description
CREATE_PROFILE Determines if an Oracle Beehive Extensions for Explorer profile should be created on the user's computer during installation. This parameter may be assigned one of the following values:
■ 0: Do not create a profile
■ 1: Always create a profile (either for a new install or an upgrade)
■ 2: Only create a profile for a new install (default value)
■ 3: Only create a profile if there is no profile with the exact name that exists on the user's computer (either for a new install or upgrade)
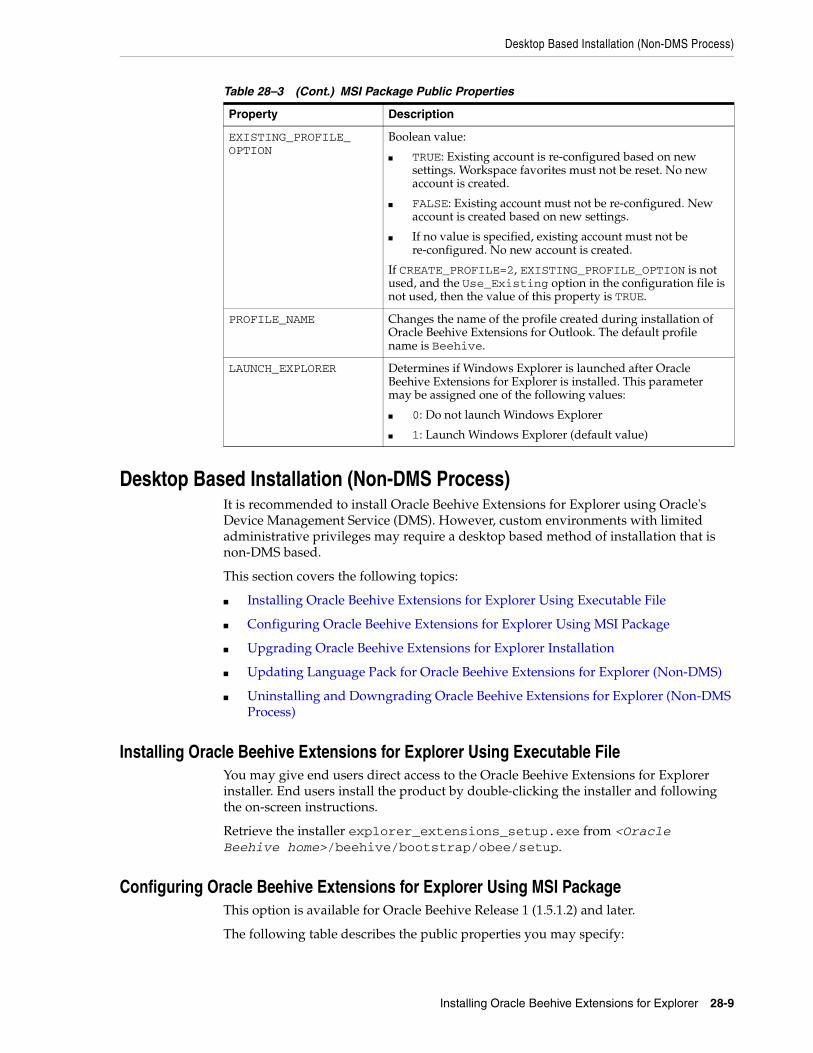
Desktop Based Installation (Non-DMS Process)
Installing Oracle Beehive Extensions for Explorer 28-9
Desktop Based Installation (Non-DMS Process)It is recommended to install Oracle Beehive Extensions for Explorer using Oracle's Device Management Service (DMS). However, custom environments with limited administrative privileges may require a desktop based method of installation that is non-DMS based.
This section covers the following topics:
■ Installing Oracle Beehive Extensions for Explorer Using Executable File
■ Configuring Oracle Beehive Extensions for Explorer Using MSI Package
■ Upgrading Oracle Beehive Extensions for Explorer Installation
■ Updating Language Pack for Oracle Beehive Extensions for Explorer (Non-DMS)
■ Uninstalling and Downgrading Oracle Beehive Extensions for Explorer (Non-DMS Process)
Installing Oracle Beehive Extensions for Explorer Using Executable FileYou may give end users direct access to the Oracle Beehive Extensions for Explorer installer. End users install the product by double-clicking the installer and following the on-screen instructions.
Retrieve the installer explorer_extensions_setup.exe from <Oracle Beehive home>/beehive/bootstrap/obee/setup.
Configuring Oracle Beehive Extensions for Explorer Using MSI PackageThis option is available for Oracle Beehive Release 1 (1.5.1.2) and later.
The following table describes the public properties you may specify:
EXISTING_PROFILE_OPTION
Boolean value:
■ TRUE: Existing account is re-configured based on new settings. Workspace favorites must not be reset. No new account is created.
■ FALSE: Existing account must not be re-configured. New account is created based on new settings.
■ If no value is specified, existing account must not be re-configured. No new account is created.
If CREATE_PROFILE=2, EXISTING_PROFILE_OPTION is not used, and the Use_Existing option in the configuration file is not used, then the value of this property is TRUE.
PROFILE_NAME Changes the name of the profile created during installation of Oracle Beehive Extensions for Outlook. The default profile name is Beehive.
LAUNCH_EXPLORER Determines if Windows Explorer is launched after Oracle Beehive Extensions for Explorer is installed. This parameter may be assigned one of the following values:
■ 0: Do not launch Windows Explorer
■ 1: Launch Windows Explorer (default value)
Table 28–3 (Cont.) MSI Package Public Properties
Property Description
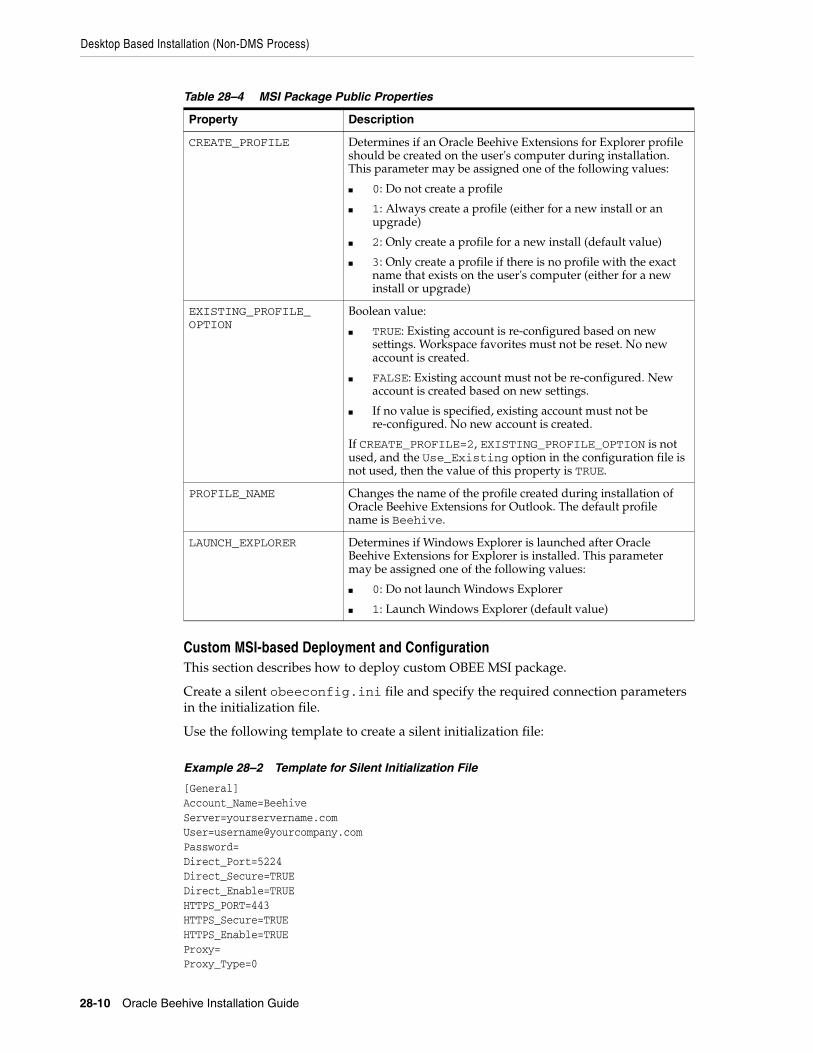
Desktop Based Installation (Non-DMS Process)
28-10 Oracle Beehive Installation Guide
Custom MSI-based Deployment and ConfigurationThis section describes how to deploy custom OBEE MSI package.
Create a silent obeeconfig.ini file and specify the required connection parameters in the initialization file.
Use the following template to create a silent initialization file:
Example 28–2 Template for Silent Initialization File
[General]Account_Name=BeehiveServer=yourservername.comUser=username@yourcompany.comPassword=Direct_Port=5224Direct_Secure=TRUEDirect_Enable=TRUEHTTPS_PORT=443HTTPS_Secure=TRUEHTTPS_Enable=TRUEProxy=Proxy_Type=0
Table 28–4 MSI Package Public Properties
Property Description
CREATE_PROFILE Determines if an Oracle Beehive Extensions for Explorer profile should be created on the user's computer during installation. This parameter may be assigned one of the following values:
■ 0: Do not create a profile
■ 1: Always create a profile (either for a new install or an upgrade)
■ 2: Only create a profile for a new install (default value)
■ 3: Only create a profile if there is no profile with the exact name that exists on the user's computer (either for a new install or upgrade)
EXISTING_PROFILE_OPTION
Boolean value:
■ TRUE: Existing account is re-configured based on new settings. Workspace favorites must not be reset. No new account is created.
■ FALSE: Existing account must not be re-configured. New account is created based on new settings.
■ If no value is specified, existing account must not be re-configured. No new account is created.
If CREATE_PROFILE=2, EXISTING_PROFILE_OPTION is not used, and the Use_Existing option in the configuration file is not used, then the value of this property is TRUE.
PROFILE_NAME Changes the name of the profile created during installation of Oracle Beehive Extensions for Outlook. The default profile name is Beehive.
LAUNCH_EXPLORER Determines if Windows Explorer is launched after Oracle Beehive Extensions for Explorer is installed. This parameter may be assigned one of the following values:
■ 0: Do not launch Windows Explorer
■ 1: Launch Windows Explorer (default value)
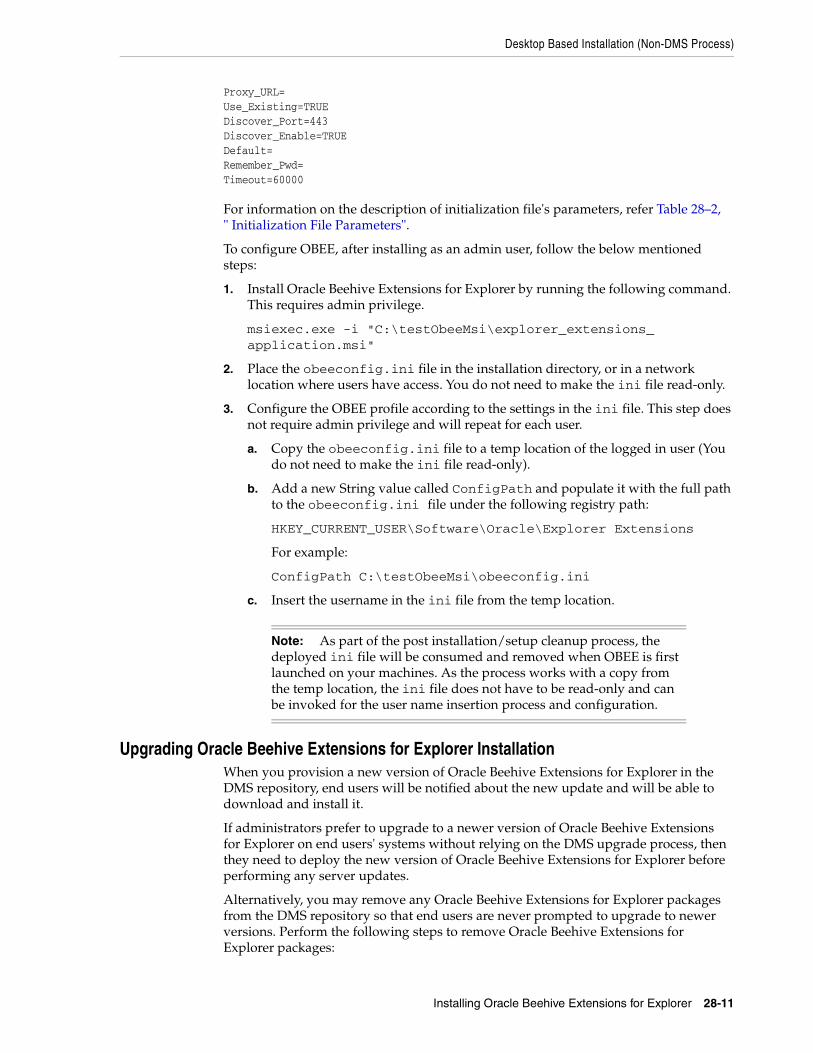
Desktop Based Installation (Non-DMS Process)
Installing Oracle Beehive Extensions for Explorer 28-11
Proxy_URL=Use_Existing=TRUEDiscover_Port=443Discover_Enable=TRUEDefault=Remember_Pwd=Timeout=60000
For information on the description of initialization file's parameters, refer Table 28–2, " Initialization File Parameters".
To configure OBEE, after installing as an admin user, follow the below mentioned steps:
1. Install Oracle Beehive Extensions for Explorer by running the following command. This requires admin privilege.
msiexec.exe -i "C:\testObeeMsi\explorer_extensions_application.msi"
2. Place the obeeconfig.ini file in the installation directory, or in a network location where users have access. You do not need to make the ini file read-only.
3. Configure the OBEE profile according to the settings in the ini file. This step does not require admin privilege and will repeat for each user.
a. Copy the obeeconfig.ini file to a temp location of the logged in user (You do not need to make the ini file read-only).
b. Add a new String value called ConfigPath and populate it with the full path to the obeeconfig.ini file under the following registry path:
HKEY_CURRENT_USER\Software\Oracle\Explorer Extensions
For example:
ConfigPath C:\testObeeMsi\obeeconfig.ini
c. Insert the username in the ini file from the temp location.
Upgrading Oracle Beehive Extensions for Explorer InstallationWhen you provision a new version of Oracle Beehive Extensions for Explorer in the DMS repository, end users will be notified about the new update and will be able to download and install it.
If administrators prefer to upgrade to a newer version of Oracle Beehive Extensions for Explorer on end users' systems without relying on the DMS upgrade process, then they need to deploy the new version of Oracle Beehive Extensions for Explorer before performing any server updates.
Alternatively, you may remove any Oracle Beehive Extensions for Explorer packages from the DMS repository so that end users are never prompted to upgrade to newer versions. Perform the following steps to remove Oracle Beehive Extensions for Explorer packages:
Note: As part of the post installation/setup cleanup process, the deployed ini file will be consumed and removed when OBEE is first launched on your machines. As the process works with a copy from the temp location, the ini file does not have to be read-only and can be invoked for the user name insertion process and configuration.
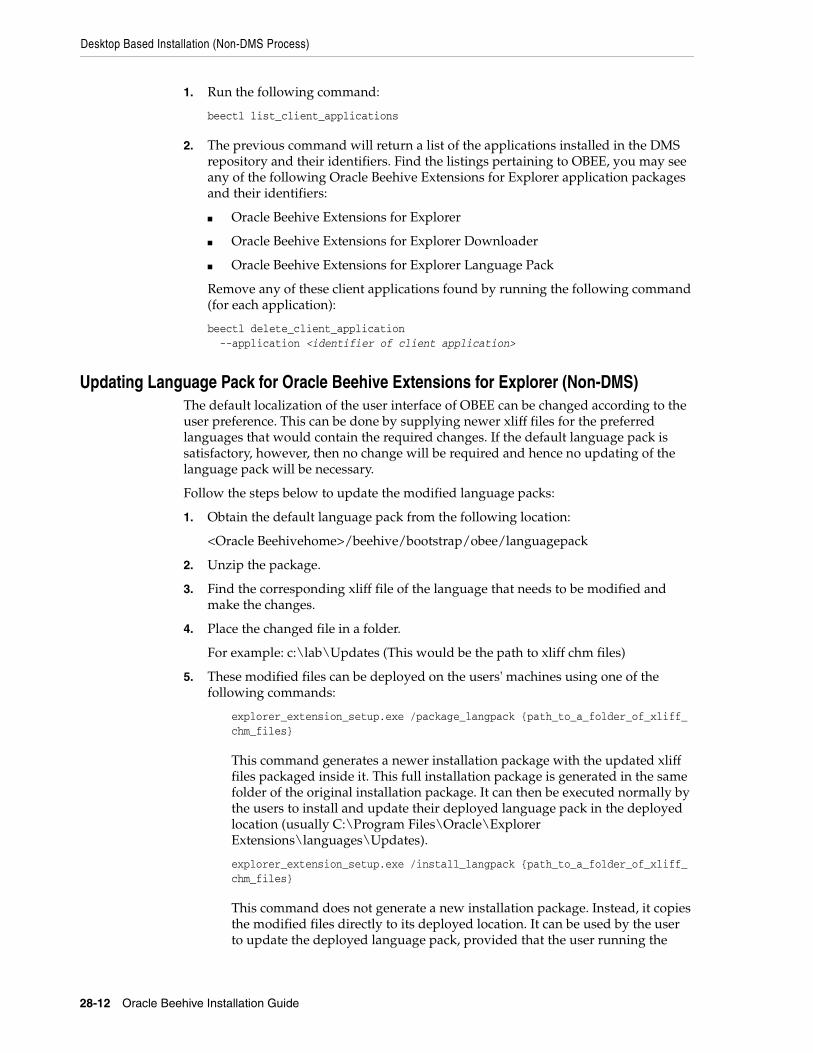
Desktop Based Installation (Non-DMS Process)
28-12 Oracle Beehive Installation Guide
1. Run the following command:
beectl list_client_applications
2. The previous command will return a list of the applications installed in the DMS repository and their identifiers. Find the listings pertaining to OBEE, you may see any of the following Oracle Beehive Extensions for Explorer application packages and their identifiers:
■ Oracle Beehive Extensions for Explorer
■ Oracle Beehive Extensions for Explorer Downloader
■ Oracle Beehive Extensions for Explorer Language Pack
Remove any of these client applications found by running the following command (for each application):
beectl delete_client_application --application <identifier of client application>
Updating Language Pack for Oracle Beehive Extensions for Explorer (Non-DMS)The default localization of the user interface of OBEE can be changed according to the user preference. This can be done by supplying newer xliff files for the preferred languages that would contain the required changes. If the default language pack is satisfactory, however, then no change will be required and hence no updating of the language pack will be necessary.
Follow the steps below to update the modified language packs:
1. Obtain the default language pack from the following location:
<Oracle Beehivehome>/beehive/bootstrap/obee/languagepack
2. Unzip the package.
3. Find the corresponding xliff file of the language that needs to be modified and make the changes.
4. Place the changed file in a folder.
For example: c:\lab\Updates (This would be the path to xliff chm files)
5. These modified files can be deployed on the users' machines using one of the following commands:
explorer_extension_setup.exe /package_langpack {path_to_a_folder_of_xliff_chm_files}
This command generates a newer installation package with the updated xliff files packaged inside it. This full installation package is generated in the same folder of the original installation package. It can then be executed normally by the users to install and update their deployed language pack in the deployed location (usually C:\Program Files\Oracle\Explorer Extensions\languages\Updates).
explorer_extension_setup.exe /install_langpack {path_to_a_folder_of_xliff_chm_files}
This command does not generate a new installation package. Instead, it copies the modified files directly to its deployed location. It can be used by the user to update the deployed language pack, provided that the user running the
Desktop Based Installation (Non-DMS Process)
Installing Oracle Beehive Extensions for Explorer 28-13
installation has access to the folder where the updated files are located (this can be a network location) during the installation time.
Uninstalling and Downgrading Oracle Beehive Extensions for Explorer (Non-DMS Process)
Use the following methods to uninstall or downgrade Oracle Beehive Extensions for Explorer.
Uninstalling Oracle Beehive Extensions for ExplorerEnd users may remove Oracle Beehive Extensions for Explorer from their computers by selecting Add/Remove Programs from the Control Panel, selecting Oracle Beehive Extensions for Explorer from the list, and clicking Remove.
Downgrading Oracle Beehive Extensions for ExplorerIf you want to install downgraded versions of Oracle Beehive Extensions for Explorer on end users' systems, then simply run the installer older Oracle Beehive Extensions for Explorer version.

Desktop Based Installation (Non-DMS Process)
28-14 Oracle Beehive Installation Guide
29
Installing Oracle Beehive Conferencing Client 29-1
29Installing Oracle Beehive ConferencingClient
This chapter describes how to install Oracle Beehive Conferencing clients.
There are two clients supported by Beehive Conferencing:
■ Oracle Beehive Java-based (JavaFX) Conferencing Client
The Oracle Beehive Java-based Conferencing client (also referred to as JavaFX client), by default, is the primary client used to participate in Beehive conferences. However, a user can customize the primary client through Oracle Beehive Central.
When a user joins a conference from a calendar event, e-mail notification, or directly from the Oracle Beehive Conferencing Web Center, the user will be brought to the Oracle Beehive Conferencing Web Center where they will automatically launch into Java-based conferencing application. Being Java-based, the installation of the client is done automatically, with all the necessary Java and JavaFX components. End users are not required to install or deploy any components directly on their machines themselves.
■ Oracle Beehive Conferencing Desktop Client
The Oracle Beehive Conferencing Desktop Client is a desktop-based application that requires a local installation on each machine. It is only recommended for users using platforms not supported by the JavaFX client.
This section describes how to deploy the JavaFX Conferencing client and the Oracle Beehive Conferencing desktop client using Oracle Beehive's Device Management Service (DMS). This deployment method is recommended for all desktops with standard environments. Currently a desktop based, non-DMS installation method is not available for custom installation.
This chapter covers the following topics:
■ System Requirements
■ Installing JavaFX Conferencing Client
■ Installing Oracle Beehive Conferencing Desktop Client Using Remote Downloader
■ Device Management Service (DMS) Based Installation
System RequirementsThis section describes the software and hardware requirements for the JavaFX Conferencing and the Oracle Beehive Conferencing client. For updated list of certified
System Requirements
29-2 Oracle Beehive Installation Guide
hardware platforms and operating system version, review the certification matrix on the My Oracle Support Web site at the following URL:
http://support.oracle.com/
JavaFX Conferencing Client Operating System■ Microsoft Windows Vista: Home, Business, or Ultimate
■ Microsoft Windows XP: Home or Professional
■ Microsoft Windows 7 (32-bit and 64-bit edition) - Home Premium, Professional, Ultimate or Enterprise
■ Apple Mac OS X 10.6 (Snow Leopard) and 10.7 (Lion)
■ Linux Ubuntu 10.x
Other Components for JavaFX Conferencing Client■ Java Runtime Environment 1.6.0.23 or later. The end user will be prompted to
upgrade if the Java version in their machine does not match the requirements.
■ Mac and Linux users may need to set the Web proxy in the Java Control Panel to an explicit proxy.
Oracle Beehive Conferencing Client Operating System■ Microsoft Windows Vista: Home, Business, or Ultimate
■ Microsoft Windows XP: Home or Professional
■ Microsoft Windows 7: Home Premium, Professional, Ultimate or Enterprise
■ Apple Mac OS X 10.5 (Leopard), 10.6 (Snow Leopard), and 10.7 (Lion)
Note: Write privileges are required for the destination folder of the installation path of Oracle Beehive Conferencing.
Microsoft Installer framework version 2.0 or above is required for Windows installations. This framework is included in Microsoft Windows XP and later versions of Microsoft Windows.
Note: The Java-based Conferencing Client for the Macintosh only supports Intel processors; PowerPC processors are not supported.
Note: Write privileges are required for the destination folder of the installation path of Oracle Beehive Conferencing.
Microsoft Installer framework version 2.0 or above is required for Windows installations. This framework is included in Microsoft Windows XP and later versions of Microsoft Windows.
Note: The Desktop Conferencing Client for the Macintosh is supported on machines with either Intel or PowerPC (minimum 1GHz G4) processors.
Device Management Service (DMS) Based Installation
Installing Oracle Beehive Conferencing Client 29-3
Disk Space■ 100 MB minimum
■ Hard disk usage varies according to configuration. Custom installation options may require more or less hard disk space.
Device Management Service (DMS) Based InstallationOracle recommends that you install and deploy the Oracle Beehive Conferencing client using Oracle Beehive's Device Management Service (DMS). This installation method is recommended for all desktops with standard environments. It is designed for centralized installation and management of auto-updates.
This section covers the following topics:
■ Installing JavaFX Conferencing Client
■ Installing Oracle Beehive Conferencing Desktop Client Using Remote Downloader
■ Updating Oracle Beehive Conferencing in DMS Repository
■ Uninstalling and Downgrading Oracle Beehive Conferencing Client
Installing JavaFX Conferencing ClientThe Java-based architecture JavaFX Conferencing Client can be used by users without requiring any Operating System specific desktop installation. The advantages of this new architecture is the ability to leverage Java to auto-detect, auto-install, and auto-update all the necessary components required by Beehive Conferencing to run. Therefore, for a user to join a conference, the Beehive Conferencing application needs to access:
■ JavaScript code (deployJava.js) for launching Java applications and detecting JRE versions
Deploying the JavaFX ClientBeehive Conferencing uses the Java resources by accessing the files through java.com site over the Web. This may be a cause for concern if you do not have access to the internet, or cannot access the java.com site (because it is unavailable at that time), and/or do not have proxy settings configured correctly.
To avoid this issue, Oracle recommends that users distribute the resources through the Beehive Desktop Management Service as a DMS package.
1. Configure the Web Conferencing Center to use deployJava.js from DMS:
beectl modify_property--component _BeehiveConferencingService--name ConfJavaDeployJavaURL--value DMS://deployJava.js
2. Activate the changes:
beectl activate_configuration
Installing Oracle Beehive Conferencing Desktop Client Using Remote DownloaderYou may install the Oracle Beehive Conferencing Desktop client by distributing a remote downloader to end users. The remote downloader enables end users to download and install the provisioned Oracle Beehive Conferencing client application
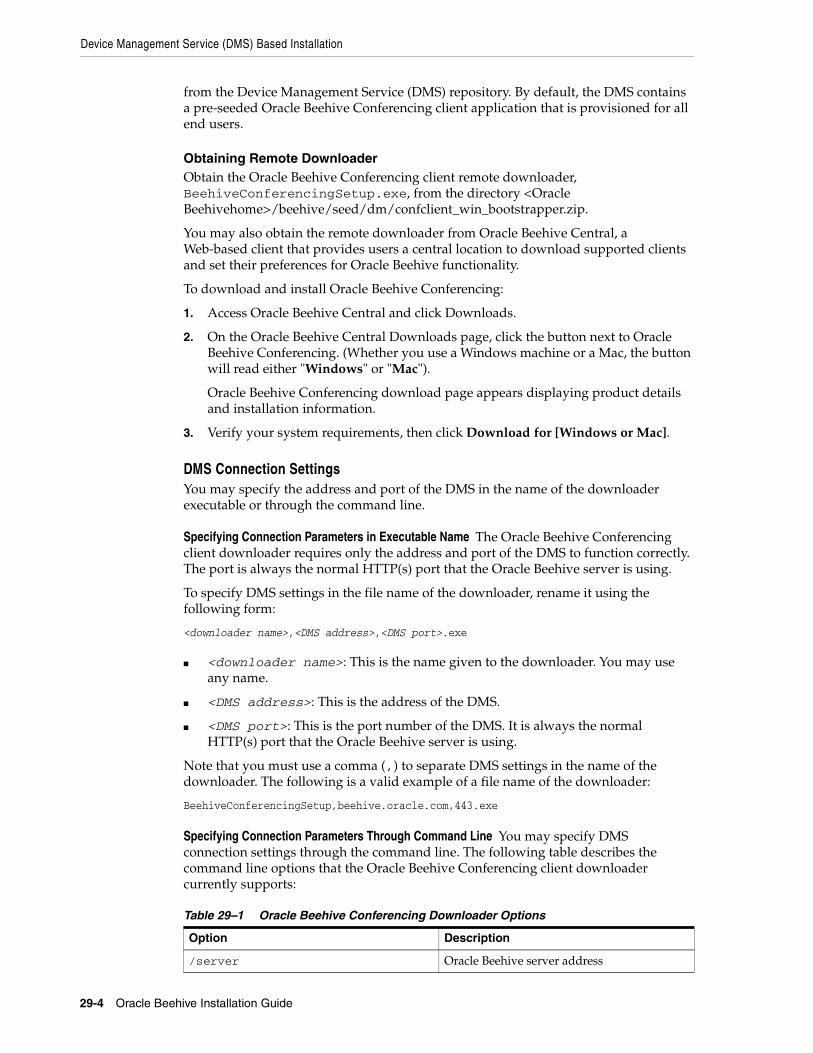
Device Management Service (DMS) Based Installation
29-4 Oracle Beehive Installation Guide
from the Device Management Service (DMS) repository. By default, the DMS contains a pre-seeded Oracle Beehive Conferencing client application that is provisioned for all end users.
Obtaining Remote DownloaderObtain the Oracle Beehive Conferencing client remote downloader, BeehiveConferencingSetup.exe, from the directory <Oracle Beehivehome>/beehive/seed/dm/confclient_win_bootstrapper.zip.
You may also obtain the remote downloader from Oracle Beehive Central, a Web-based client that provides users a central location to download supported clients and set their preferences for Oracle Beehive functionality.
To download and install Oracle Beehive Conferencing:
1. Access Oracle Beehive Central and click Downloads.
2. On the Oracle Beehive Central Downloads page, click the button next to Oracle Beehive Conferencing. (Whether you use a Windows machine or a Mac, the button will read either "Windows" or "Mac").
Oracle Beehive Conferencing download page appears displaying product details and installation information.
3. Verify your system requirements, then click Download for [Windows or Mac].
DMS Connection SettingsYou may specify the address and port of the DMS in the name of the downloader executable or through the command line.
Specifying Connection Parameters in Executable Name The Oracle Beehive Conferencing client downloader requires only the address and port of the DMS to function correctly. The port is always the normal HTTP(s) port that the Oracle Beehive server is using.
To specify DMS settings in the file name of the downloader, rename it using the following form:
<downloader name>,<DMS address>,<DMS port>.exe
■ <downloader name>: This is the name given to the downloader. You may use any name.
■ <DMS address>: This is the address of the DMS.
■ <DMS port>: This is the port number of the DMS. It is always the normal HTTP(s) port that the Oracle Beehive server is using.
Note that you must use a comma (,) to separate DMS settings in the name of the downloader. The following is a valid example of a file name of the downloader:
BeehiveConferencingSetup,beehive.oracle.com,443.exe
Specifying Connection Parameters Through Command Line You may specify DMS connection settings through the command line. The following table describes the command line options that the Oracle Beehive Conferencing client downloader currently supports:
Table 29–1 Oracle Beehive Conferencing Downloader Options
Option Description
/server Oracle Beehive server address
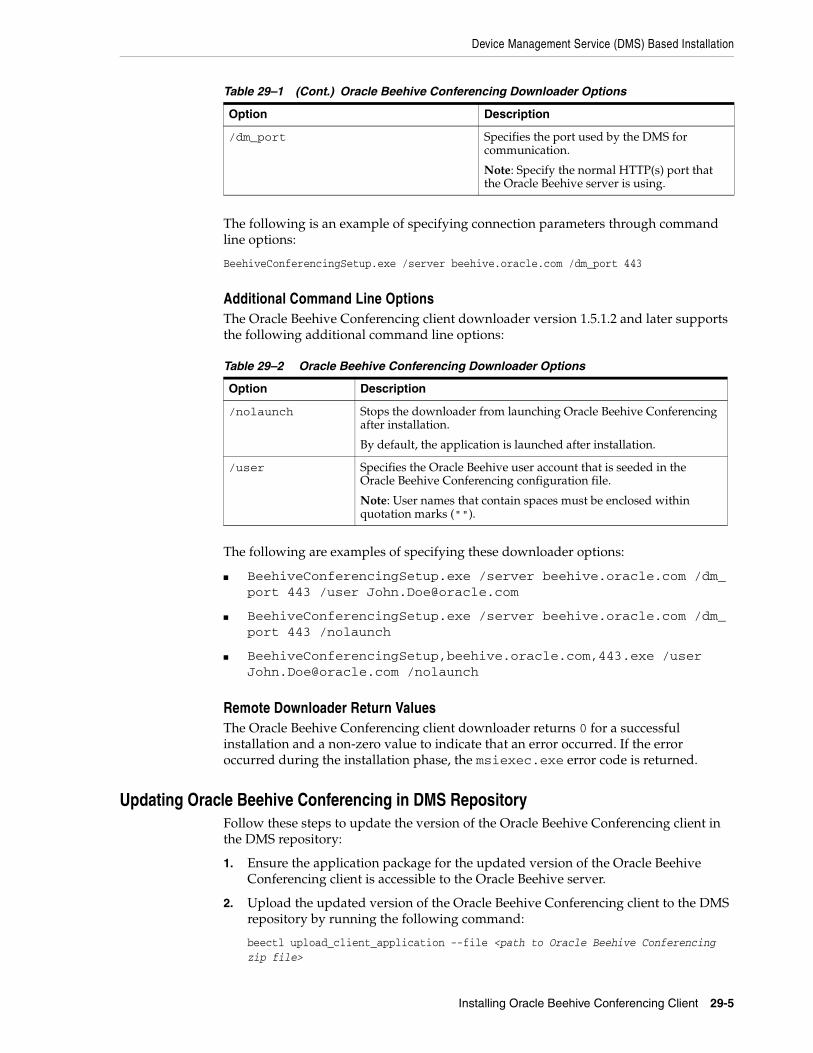
Device Management Service (DMS) Based Installation
Installing Oracle Beehive Conferencing Client 29-5
The following is an example of specifying connection parameters through command line options:
BeehiveConferencingSetup.exe /server beehive.oracle.com /dm_port 443
Additional Command Line OptionsThe Oracle Beehive Conferencing client downloader version 1.5.1.2 and later supports the following additional command line options:
The following are examples of specifying these downloader options:
■ BeehiveConferencingSetup.exe /server beehive.oracle.com /dm_port 443 /user [email protected]
■ BeehiveConferencingSetup.exe /server beehive.oracle.com /dm_port 443 /nolaunch
■ BeehiveConferencingSetup,beehive.oracle.com,443.exe /user [email protected] /nolaunch
Remote Downloader Return ValuesThe Oracle Beehive Conferencing client downloader returns 0 for a successful installation and a non-zero value to indicate that an error occurred. If the error occurred during the installation phase, the msiexec.exe error code is returned.
Updating Oracle Beehive Conferencing in DMS RepositoryFollow these steps to update the version of the Oracle Beehive Conferencing client in the DMS repository:
1. Ensure the application package for the updated version of the Oracle Beehive Conferencing client is accessible to the Oracle Beehive server.
2. Upload the updated version of the Oracle Beehive Conferencing client to the DMS repository by running the following command:
beectl upload_client_application --file <path to Oracle Beehive Conferencing zip file>
/dm_port Specifies the port used by the DMS for communication.
Note: Specify the normal HTTP(s) port that the Oracle Beehive server is using.
Table 29–2 Oracle Beehive Conferencing Downloader Options
Option Description
/nolaunch Stops the downloader from launching Oracle Beehive Conferencing after installation.
By default, the application is launched after installation.
/user Specifies the Oracle Beehive user account that is seeded in the Oracle Beehive Conferencing configuration file.
Note: User names that contain spaces must be enclosed within quotation marks ("").
Table 29–1 (Cont.) Oracle Beehive Conferencing Downloader Options
Option Description
Device Management Service (DMS) Based Installation
29-6 Oracle Beehive Installation Guide
Updating Oracle Beehive Conferencing Through DMSAfter you update the version of the Oracle Beehive Conferencing client in the DMS repository, when an end user starts the client, Oracle Beehive will automatically check, download, and install any updates from the DMS repository. Oracle Beehive always checks for a newer version when the Oracle Beehive Conferencing client is started.
Uninstalling and Downgrading Oracle Beehive Conferencing ClientUse the following methods to uninstall or downgrade the Oracle Beehive Conferencing client.
Uninstalling Oracle Beehive Conferencing ClientThe end users may uninstall the Oracle Beehive Conferencing client from their computers by selecting Add/Remove Programs from the Control Panel, selecting Oracle Beehive Conferencing from the list, and clicking Remove.
Downgrading Oracle Beehive Conferencing ClientThe end users are always forced to upgrade or downgrade the Oracle Beehive Conferencing client depending on the version in the DMS repository.
Note: This command uploads the new version of the Oracle Beehive Conferencing client application to the DMS repository and makes it available for those who are already provisioned to it.
If you have not provisioned the Oracle Beehive Conferencing client, run the provisioning commands (such as beectl add_client_application_provisioning). Refer to "Managing the Device Management Service" in Oracle Beehive Administrator's Guide for more information.
Note: End users may also re-run the remote downloader to install any updated version uploaded to the DMS repository. If the version of the Oracle Beehive Conferencing client in the DMS repository is the same as the one installed in an end user's computer, re-running the remote downloader simply reinstalls the application.
30
Configuring Oracle Beehive Integration for Zimbra 30-1
30Configuring Oracle Beehive Integration forZimbra
Oracle Beehive Integration for Zimbra is installed and configured in the same Oracle home as Oracle Beehive if you have installed Oracle Beehive on a computer with at least 3 gigabytes (GBs) of memory and you select the Server + Client template during the installation process. If you have installed Oracle Beehive Integration for Zimbra in a different Oracle home than your Oracle Beehive instance, then it acts like an application tier and should be configured as such.
If you have not configured TLS or SSL for your Oracle Beehive deployment, you do not need to perform any post-installation steps.
This chapter covers the following topics:
■ Setting Screen Resolution for Oracle Beehive Integration for Zimbra Client
■ Configuring Oracle Beehive Integration for Zimbra for SSL-Enabled Oracle Beehive Deployment
■ Changing HTTP Port for Oracle Beehive Integration for Zimbra
Setting Screen Resolution for Oracle Beehive Integration for Zimbra Client
Ensure that the screen resolution of all computers running the Oracle Beehive Integration for Zimbra client is 1024 x 768 or higher.
Configuring Oracle Beehive Integration for Zimbra for SSL-Enabled Oracle Beehive Deployment
If you have configured TLS or SSL for your Oracle Beehive deployment, follow these steps to configure Oracle Beehive Integration for Zimbra (these steps are similar to "Configuring SSL with Self-Signed Certificates During Installation of Oracle Beehive"):
1. If you have configured SSL for your Oracle Beehive deployment, ensure that all your Oracle Beehive application tiers are configured for SSL, including DMZ instances. Refer to "Configuring SSL".
2. Perform a software only install for Oracle Beehive Integration for Zimbra.
3. Replace orapki and Oracle Wallet Manager (owm.exe) binaries of Oracle Beehive Integration for Zimbra with those from your Oracle Beehive instance. Create a new wallet located in <Oracle Beehive Integration for Zimbra home>/Apache/Apache/conf/ssl.wlt/default\Apache\Apache\conf\s
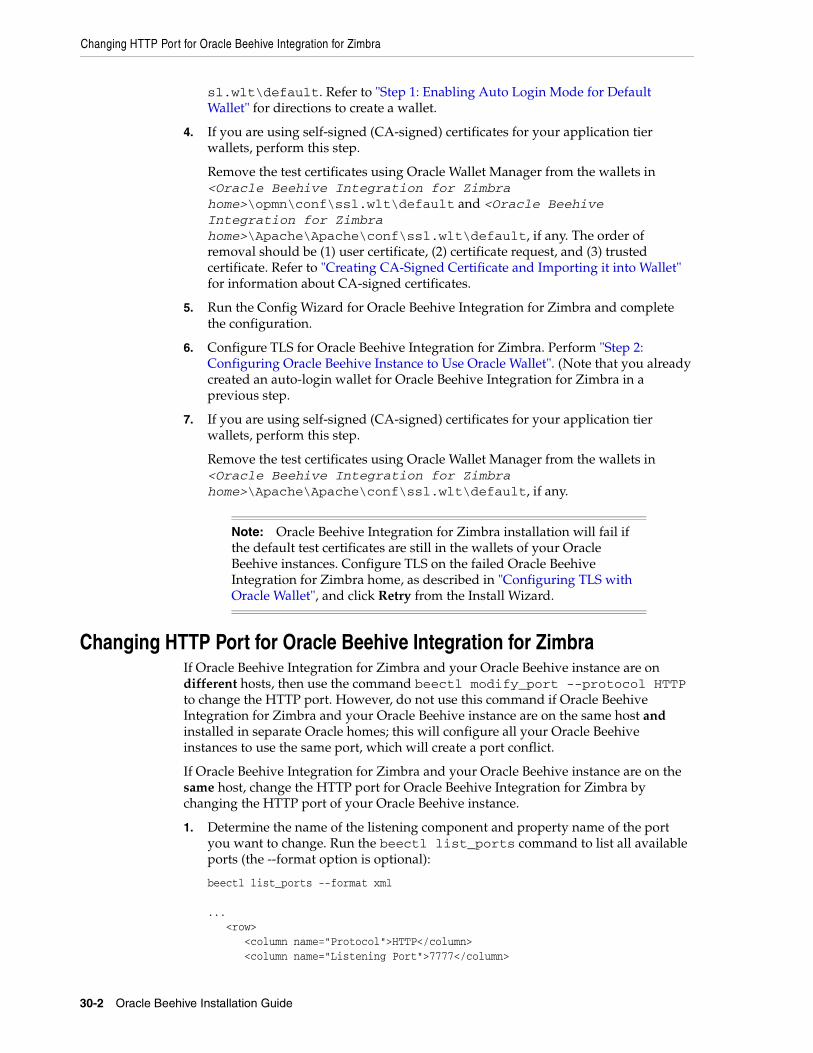
Changing HTTP Port for Oracle Beehive Integration for Zimbra
30-2 Oracle Beehive Installation Guide
sl.wlt\default. Refer to "Step 1: Enabling Auto Login Mode for Default Wallet" for directions to create a wallet.
4. If you are using self-signed (CA-signed) certificates for your application tier wallets, perform this step.
Remove the test certificates using Oracle Wallet Manager from the wallets in <Oracle Beehive Integration for Zimbra home>\opmn\conf\ssl.wlt\default and <Oracle Beehive Integration for Zimbra home>\Apache\Apache\conf\ssl.wlt\default, if any. The order of removal should be (1) user certificate, (2) certificate request, and (3) trusted certificate. Refer to "Creating CA-Signed Certificate and Importing it into Wallet" for information about CA-signed certificates.
5. Run the Config Wizard for Oracle Beehive Integration for Zimbra and complete the configuration.
6. Configure TLS for Oracle Beehive Integration for Zimbra. Perform "Step 2: Configuring Oracle Beehive Instance to Use Oracle Wallet". (Note that you already created an auto-login wallet for Oracle Beehive Integration for Zimbra in a previous step.
7. If you are using self-signed (CA-signed) certificates for your application tier wallets, perform this step.
Remove the test certificates using Oracle Wallet Manager from the wallets in <Oracle Beehive Integration for Zimbra home>\Apache\Apache\conf\ssl.wlt\default, if any.
Changing HTTP Port for Oracle Beehive Integration for ZimbraIf Oracle Beehive Integration for Zimbra and your Oracle Beehive instance are on different hosts, then use the command beectl modify_port --protocol HTTP to change the HTTP port. However, do not use this command if Oracle Beehive Integration for Zimbra and your Oracle Beehive instance are on the same host and installed in separate Oracle homes; this will configure all your Oracle Beehive instances to use the same port, which will create a port conflict.
If Oracle Beehive Integration for Zimbra and your Oracle Beehive instance are on the same host, change the HTTP port for Oracle Beehive Integration for Zimbra by changing the HTTP port of your Oracle Beehive instance.
1. Determine the name of the listening component and property name of the port you want to change. Run the beectl list_ports command to list all available ports (the --format option is optional):
beectl list_ports --format xml
... <row> <column name="Protocol">HTTP</column> <column name="Listening Port">7777</column>
Note: Oracle Beehive Integration for Zimbra installation will fail if the default test certificates are still in the wallets of your Oracle Beehive instances. Configure TLS on the failed Oracle Beehive Integration for Zimbra home, as described in "Configuring TLS with Oracle Wallet", and click Retry from the Install Wizard.
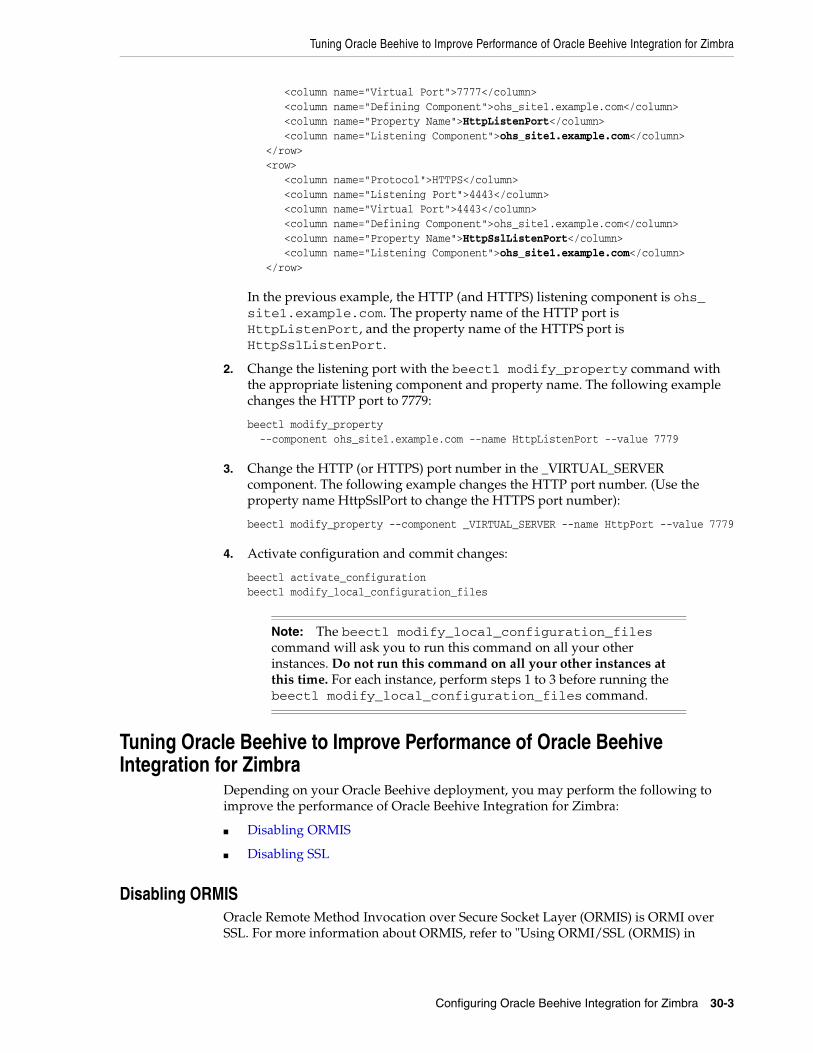
Tuning Oracle Beehive to Improve Performance of Oracle Beehive Integration for Zimbra
Configuring Oracle Beehive Integration for Zimbra 30-3
<column name="Virtual Port">7777</column> <column name="Defining Component">ohs_site1.example.com</column> <column name="Property Name">HttpListenPort</column> <column name="Listening Component">ohs_site1.example.com</column> </row> <row> <column name="Protocol">HTTPS</column> <column name="Listening Port">4443</column> <column name="Virtual Port">4443</column> <column name="Defining Component">ohs_site1.example.com</column> <column name="Property Name">HttpSslListenPort</column> <column name="Listening Component">ohs_site1.example.com</column> </row>
In the previous example, the HTTP (and HTTPS) listening component is ohs_site1.example.com. The property name of the HTTP port is HttpListenPort, and the property name of the HTTPS port is HttpSslListenPort.
2. Change the listening port with the beectl modify_property command with the appropriate listening component and property name. The following example changes the HTTP port to 7779:
beectl modify_property --component ohs_site1.example.com --name HttpListenPort --value 7779
3. Change the HTTP (or HTTPS) port number in the _VIRTUAL_SERVER component. The following example changes the HTTP port number. (Use the property name HttpSslPort to change the HTTPS port number):
beectl modify_property --component _VIRTUAL_SERVER --name HttpPort --value 7779
4. Activate configuration and commit changes:
beectl activate_configurationbeectl modify_local_configuration_files
Tuning Oracle Beehive to Improve Performance of Oracle Beehive Integration for Zimbra
Depending on your Oracle Beehive deployment, you may perform the following to improve the performance of Oracle Beehive Integration for Zimbra:
■ Disabling ORMIS
■ Disabling SSL
Disabling ORMISOracle Remote Method Invocation over Secure Socket Layer (ORMIS) is ORMI over SSL. For more information about ORMIS, refer to "Using ORMI/SSL (ORMIS) in
Note: The beectl modify_local_configuration_files command will ask you to run this command on all your other instances. Do not run this command on all your other instances at this time. For each instance, perform steps 1 to 3 before running the beectl modify_local_configuration_files command.
Tuning Oracle Beehive to Improve Performance of Oracle Beehive Integration for Zimbra
30-4 Oracle Beehive Installation Guide
OC4J" in Chapter 6, "Using Remote Method Invocation" in Oracle Containers for J2EE Services Guide.
By default, for security purposes, Oracle Beehive is ORMIS enabled. Consequently, SSL is used for all RMI communication, which adds a significant overhead to your system. ORMIS is required if you configure Oracle Beehive with SSL as described in "Configuring SSL".
You may not require ORMIS if you have no requirement to encrypt traffic between your application tiers and absolutely no intrusion or eavesdropping risk exists among your application tiers. You may disable ORMIS by following the steps described in the section "Disable ORMIS" in "Configuring TLS with Oracle Wallet".
Disabling SSLDisabling SSL can improve the performance of Oracle Beehive Integration for Zimbra. If you do not require SSL in your Oracle Beehive deployment, follow these steps to disable SSL:
1. Retrieve the identifier for the component HttpServerCluster:
beectl list_components --type HttpServerCluster
2. Set the value of HttpServerSslEnabled in the HttpServerCluster component to false, then run beectl modify_local_configuration_files:
beectl modify_property --component <HttpServerCluster identifier retrieved from previous step> --name HttpServerSslEnabled --value false
3. Activate the configuration and commit changes:
beectl activate_configurationbeectl modify_local_configuration_files
31
Cloning Oracle Beehive Application Tiers and Sites 31-1
31 Cloning Oracle Beehive Application Tiersand Sites
This chapter covers the following topics:
■ Introduction to Cloning
■ Preparing Source Application Tier Instance
■ Application Tier Cloning
■ Site Cloning
■ OC4J Instance Cloning
■ Oracle Beehive Integration for Zimbra Cloning
This chapter also covers the following topics about customizing and troubleshooting the cloning process:
■ Customizing Files or Directories in a Cloned Image
■ Customizing Ports in a Cloned Instance
■ Oracle Inventory Location Option of Clone Commands on UNIX-Based Systems
■ Cloned Application Tiers Are Not Automatically SSL or AJPS Enabled
■ Cloned Application Tiers and LDAP Synchronization
■ Replicating LDAP Server for Cloned Instance
■ Site Cloning and Multiple Instances
■ References to Oracle Application Server Cloning Documentation
Introduction to CloningCloning is the process of copying an existing installation to a different location while preserving its configuration.
Cloning enables you to safely modify an existing Oracle Beehive instance in production, such as installing a new patch or making changes to the database. Clone your existing Oracle Beehive instance and apply your changes to the clone. Once you have verified and certified that your changes work as expected, you may safely apply those changes to your Oracle Beehive instance in production.
A cloned installation behaves the same as the source installation. For example, you can uninstall or patch the cloned instance with the Oracle Beehive Install Wizard. You can also use a cloned installation as the source for another cloning operation.
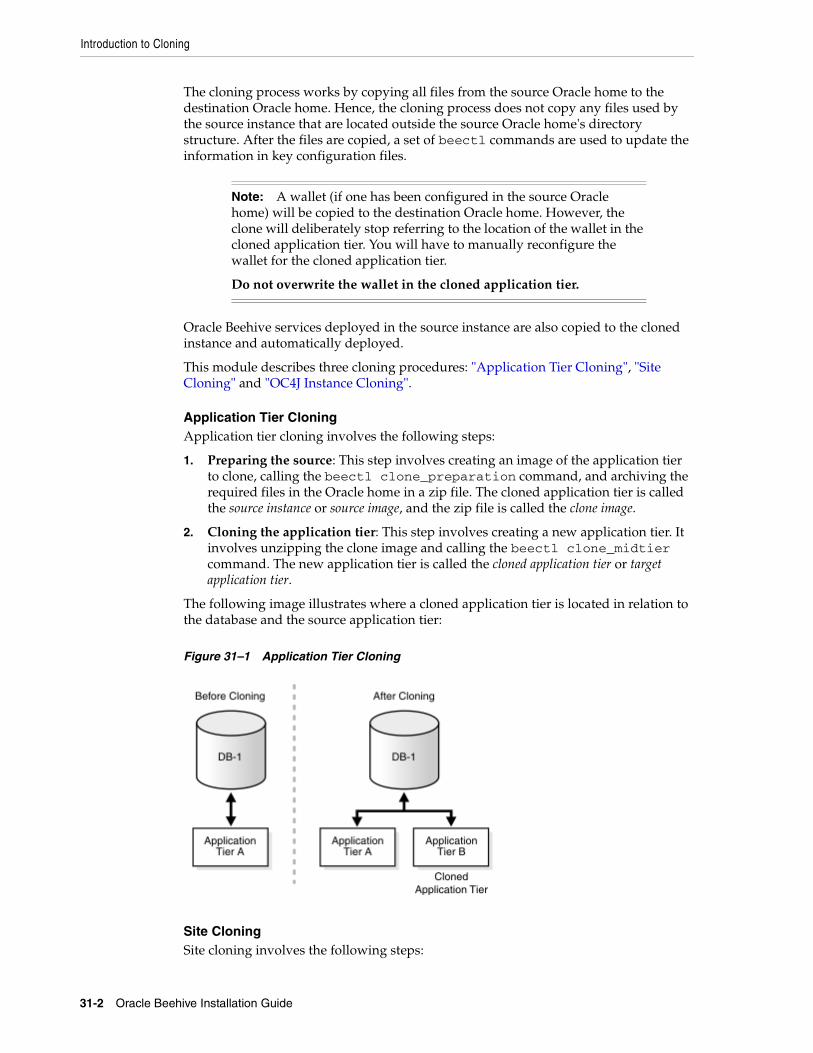
Introduction to Cloning
31-2 Oracle Beehive Installation Guide
The cloning process works by copying all files from the source Oracle home to the destination Oracle home. Hence, the cloning process does not copy any files used by the source instance that are located outside the source Oracle home's directory structure. After the files are copied, a set of beectl commands are used to update the information in key configuration files.
Oracle Beehive services deployed in the source instance are also copied to the cloned instance and automatically deployed.
This module describes three cloning procedures: "Application Tier Cloning", "Site Cloning" and "OC4J Instance Cloning".
Application Tier CloningApplication tier cloning involves the following steps:
1. Preparing the source: This step involves creating an image of the application tier to clone, calling the beectl clone_preparation command, and archiving the required files in the Oracle home in a zip file. The cloned application tier is called the source instance or source image, and the zip file is called the clone image.
2. Cloning the application tier: This step involves creating a new application tier. It involves unzipping the clone image and calling the beectl clone_midtier command. The new application tier is called the cloned application tier or target application tier.
The following image illustrates where a cloned application tier is located in relation to the database and the source application tier:
Figure 31–1 Application Tier Cloning
Site CloningSite cloning involves the following steps:
Note: A wallet (if one has been configured in the source Oracle home) will be copied to the destination Oracle home. However, the clone will deliberately stop referring to the location of the wallet in the cloned application tier. You will have to manually reconfigure the wallet for the cloned application tier.
Do not overwrite the wallet in the cloned application tier.
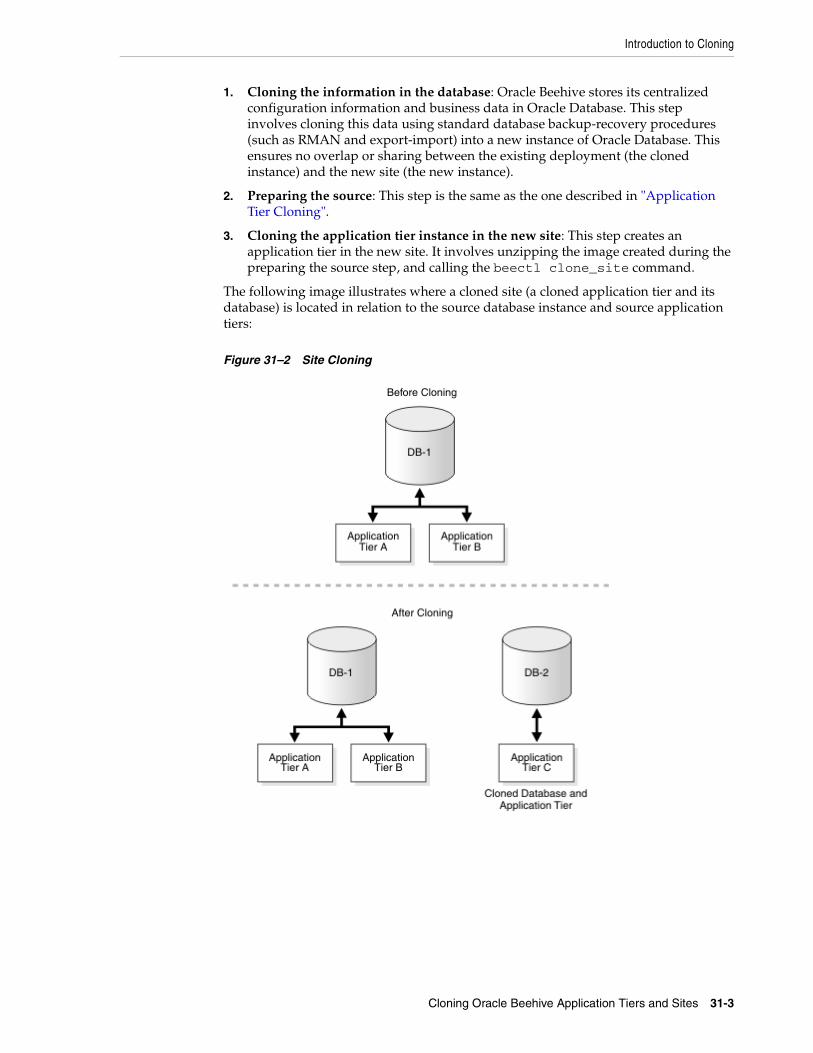
Introduction to Cloning
Cloning Oracle Beehive Application Tiers and Sites 31-3
1. Cloning the information in the database: Oracle Beehive stores its centralized configuration information and business data in Oracle Database. This step involves cloning this data using standard database backup-recovery procedures (such as RMAN and export-import) into a new instance of Oracle Database. This ensures no overlap or sharing between the existing deployment (the cloned instance) and the new site (the new instance).
2. Preparing the source: This step is the same as the one described in "Application Tier Cloning".
3. Cloning the application tier instance in the new site: This step creates an application tier in the new site. It involves unzipping the image created during the preparing the source step, and calling the beectl clone_site command.
The following image illustrates where a cloned site (a cloned application tier and its database) is located in relation to the source database instance and source application tiers:
Figure 31–2 Site Cloning
Preparing Source Application Tier Instance
31-4 Oracle Beehive Installation Guide
OC4J Instance CloningOC4J instance cloning enables you to clone Oracle Beehive's managed components. When you clone an Oracle Beehive managed component, a new OC4J instance is created and all the services in the source managed component are deployed in the newly cloned OC4J instance.
Oracle Beehive Integration for Zimbra CloningYou may clone an instance of Oracle Beehive Integration for Zimbra. Refer to "Oracle Beehive Integration for Zimbra Cloning" for more information.
Preparing Source Application Tier InstanceFollow these steps to create a source image of the application tier you want to clone:
■ Step 1: Verify Requirements
■ Step 2: Clear or Activate Any Pending Configuration Changes to the Central Configuration Repository
■ Step 3: Shut Down All Processes On the Application Tier
■ Step 4: Call beectl clone_preparation Command
■ Step 5: Zip Files to Create Clone Image
Step 1: Verify RequirementsEnsure that the chipset and the operating system version (including any operating system patches) of the source computer is the same as the destination computer. (The source computer contains the installation of Oracle Beehive you want to clone.)
WindowsYou must have administrator privileges to clone an installation of Oracle Beehive.
Step 2: Clear or Activate Any Pending Configuration Changes to the Central Configuration Repository
The cloning commands update the central configuration repository (the database tables of the Oracle Beehive schema).
If you have made any changes to the central configuration repository (for example, by running the beectl modify_property command), activate those changes by running beectl activate_configuration or clear them by running beectl clear_proposed_configuration.
Note: As Figure 31–2, "Site Cloning" illustrates, site cloning will create a single application tier in the cloned site irrespective of the number of application tiers in the source site.
To create multiple application tiers in the cloned site, follow the procedures for application tier cloning for each application tier.
Note that the cloned application tier will not be SSL enabled if the source application tier was. For more information, refer to "Cloned Application Tiers Are Not Automatically SSL or AJPS Enabled".
Preparing Source Application Tier Instance
Cloning Oracle Beehive Application Tiers and Sites 31-5
Not activating or clearing any pending configuration changes may hinder the cloning process.
Step 3: Shut Down All Processes On the Application TierCall the command beectl stop --all to shut down all processes running in the source Oracle home.
Step 4: Call beectl clone_preparation CommandThe beectl clone_preparation command calls the Oracle Application Server prepare_clone.pl script, which creates local copies of several files that contain information useful for the cloning process. For example, this command creates a file in the Oracle home that contains the current host name and Oracle home path. The cloning process uses this information to search for and replace various strings in local configuration files on the target application tier.
This command also outputs a list of files (relative to the location of Oracle home) required to be zipped up to create the clone image.
The cloning commands (beectl clone_midtier and beectl clone_site) will fail if you have not called the beectl clone_preparation command previously:
beectl clone_preparation --file <fully qualified file name>
The following table describes the options for the beectl clone_preparation command:
Step 5: Zip Files to Create Clone ImageArchive and compress the files listed in the file generated by the beectl clone_preparation command. Use a file archiver tool that can archive and compress a list of files that total at least 2 GB in size. Also, make sure that the tool preserves the
Note: Shutting down all processes in the application tier is strongly advised. This ensures that none of the files in the Oracle home are in use. You will later archive the Oracle home into a zip file. You may receive warnings or errors from your zip tool if some files are in use.
Table 31–1 beectl clone_preparation Options
OptionMandatory/ Optional Description
--file Mandatory The name of the text file that will be created by the beectl clone_preparation command. This text file will contain the names of files in the source Oracle home to be copied for cloning to the target location.
All the files in source Oracle home need not be copied because log files, cache data, and other security files specific to the Oracle home will not be useful on the cloned Oracle home and may present a security concern.
Note: This text file must not be located in the Oracle home because you may receive warnings or errors from some zip tools about zipping an open file.
Application Tier Cloning
31-6 Oracle Beehive Installation Guide
permissions and timestamps of the files. For example, you may use the tool 7-Zip, which you may download from http://www.7-zip.org/.
Use the following command to archive the Oracle Beehive home with the 7-Zip tool:
C:\7-zip\7z.exe a C:\clone_beehive.7z @C:\clone_prepare.txt
C:\clone_prepare.txt is the file generated by the beectl clone_preparation command. C:\clone_beehive.7z is the name of the file that contains the archived Oracle Beehive home.
Application Tier CloningCloning the application tier consists of the following steps:
■ Step 1: Unzip Compressed Oracle Home
■ Step 2: Set PERL5LIB Environment Variable
■ Step 3: Modify Oracle Home Path
■ Step 4: Execute beectl clone_midtier Command
■ Step 5: Perform Miscellaneous Operations
Step 1: Unzip Compressed Oracle Home
1. Copy the compressed Oracle home from the source computer to the destination computer.
2. Extract the compressed Oracle home into a directory, which will become the new Oracle home at the destination location.
WARNING: Only archive and compress those files listed in the file generated by the beectl clone_preparation command, not the entire Oracle home you want to clone.
Note: Do not use WinZip to archive the source Oracle Beehive home. Some empty directories may exist in the Oracle Beehive home, which must exist in the target Oracle Beehive home. However, some versions of WinZip may not archive empty directories.
Do not use the jar utility to archive and compress the Oracle home. This avoids warnings or errors from the zip tool about zipping open files (for example, the <Oracle home>\jdk files).
WARNING: Ensure that you have created a compressed Oracle home by following the steps described in "Preparing Source Application Tier Instance".
Do not simply recursively copy the Oracle home from the source application tier to the destination computer. The steps described in in "Preparing Source Application Tier Instance" ensure that all required files have been copied properly. (Depending on your operating system, the recursive copying operation may not be able to copy certain files.)
Application Tier Cloning
Cloning Oracle Beehive Application Tiers and Sites 31-7
If you are using 7-Zip as your file archiver tool, extract the compressed Oracle home with the following commands:
cd C:\new_oracle_homeC:\7-zip\7z.exe x -r C:\clone_beehive.7z
Step 2: Set PERL5LIB Environment VariableYou must have Perl 5.8.3 or later installed on your system.
Before running the cloning Perl scripts, set the PERL5LIB environment variable to the path of the Perl directory in the Oracle home. This path must be the first one listed in the variable definition. For example:
set PERL5LIB=%ORACLE_HOME%\perl\5.8.3\lib; %ORACLE_HOME%\perl\5.8.3\lib\MSWin32-x86-multi-thread; %ORACLE_HOME%\perl\site\5.6.1\lib; %ORACLE_HOME%\perl\site\5.8.3\lib
Step 3: Modify Oracle Home Path
The beectl command is a Perl script that has the path to Oracle home embedded in it. Modify this path to the new Oracle home. Execute the following beectl command to update the embedded Oracle home path. Note that in this case you must add the Perl executable path to the command:
$ORACLE_HOME/perl/bin/perl $ORACLE_HOME/beehive/bin/beectl modify_beectl --new_oracle_home <fully qualified path to new Oracle home>
The following table describes the options for the beectl modify_beectl command:
Step 4: Execute beectl clone_midtier Command1. Ensure that no executables are running on the target application tier. Use Windows
Task Manager to do this. For example, if <target application tier Oracle home>/bin/sqlplus is running, then the cloning process will fail.
2. Run the beectl clone_midtier command as described in the following section.
beectl clone_midtier CommandThe clone_midtier command creates a new application tier and configures it:
beectl clone_midtier [options]
Note: This step applies only to UNIX-based operating systems.
Table 31–2 beectl modify_beectl Options
OptionMandatory/ Optional Description
--new_oracle_home Mandatory Path of the new Oracle home.
Specify only a fully qualified path without trailing slashes. For example:
/app/oracle
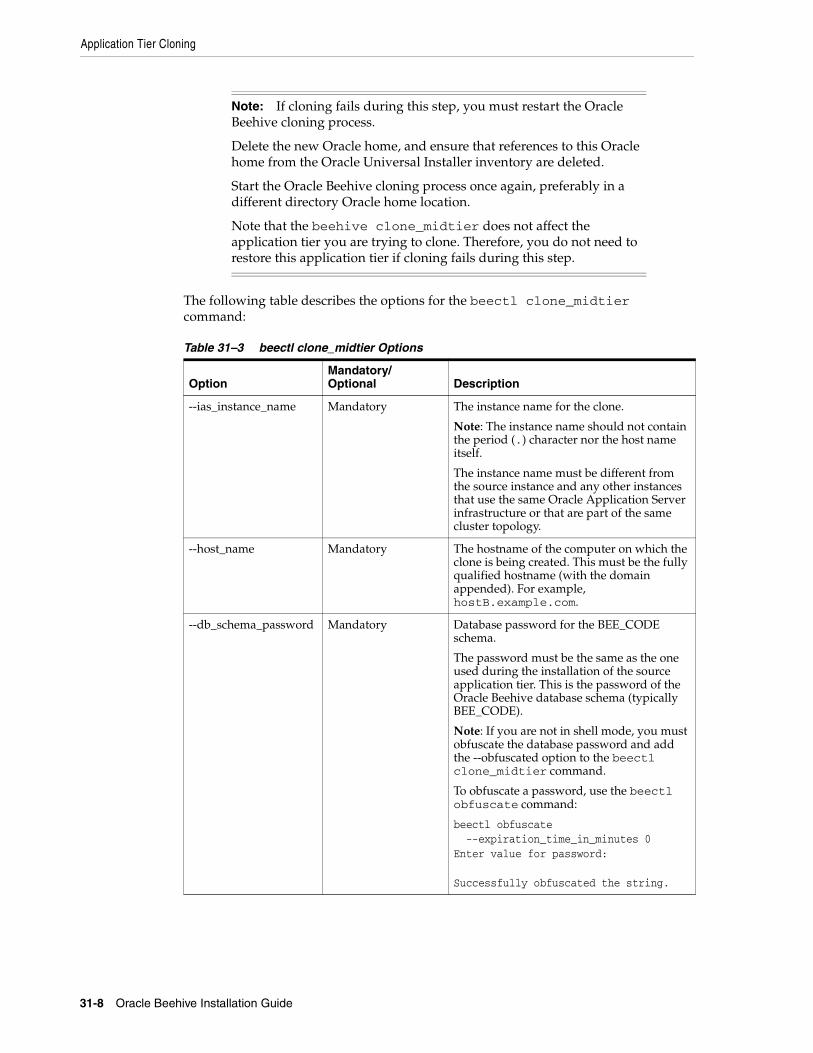
Application Tier Cloning
31-8 Oracle Beehive Installation Guide
The following table describes the options for the beectl clone_midtier command:
Note: If cloning fails during this step, you must restart the Oracle Beehive cloning process.
Delete the new Oracle home, and ensure that references to this Oracle home from the Oracle Universal Installer inventory are deleted.
Start the Oracle Beehive cloning process once again, preferably in a different directory Oracle home location.
Note that the beehive clone_midtier does not affect the application tier you are trying to clone. Therefore, you do not need to restore this application tier if cloning fails during this step.
Table 31–3 beectl clone_midtier Options
OptionMandatory/ Optional Description
--ias_instance_name Mandatory The instance name for the clone.
Note: The instance name should not contain the period (.) character nor the host name itself.
The instance name must be different from the source instance and any other instances that use the same Oracle Application Server infrastructure or that are part of the same cluster topology.
--host_name Mandatory The hostname of the computer on which the clone is being created. This must be the fully qualified hostname (with the domain appended). For example, hostB.example.com.
--db_schema_password Mandatory Database password for the BEE_CODE schema.
The password must be the same as the one used during the installation of the source application tier. This is the password of the Oracle Beehive database schema (typically BEE_CODE).
Note: If you are not in shell mode, you must obfuscate the database password and add the --obfuscated option to the beectl clone_midtier command.
To obfuscate a password, use the beectl obfuscate command:
beectl obfuscate --expiration_time_in_minutes 0Enter value for password: Successfully obfuscated the string.
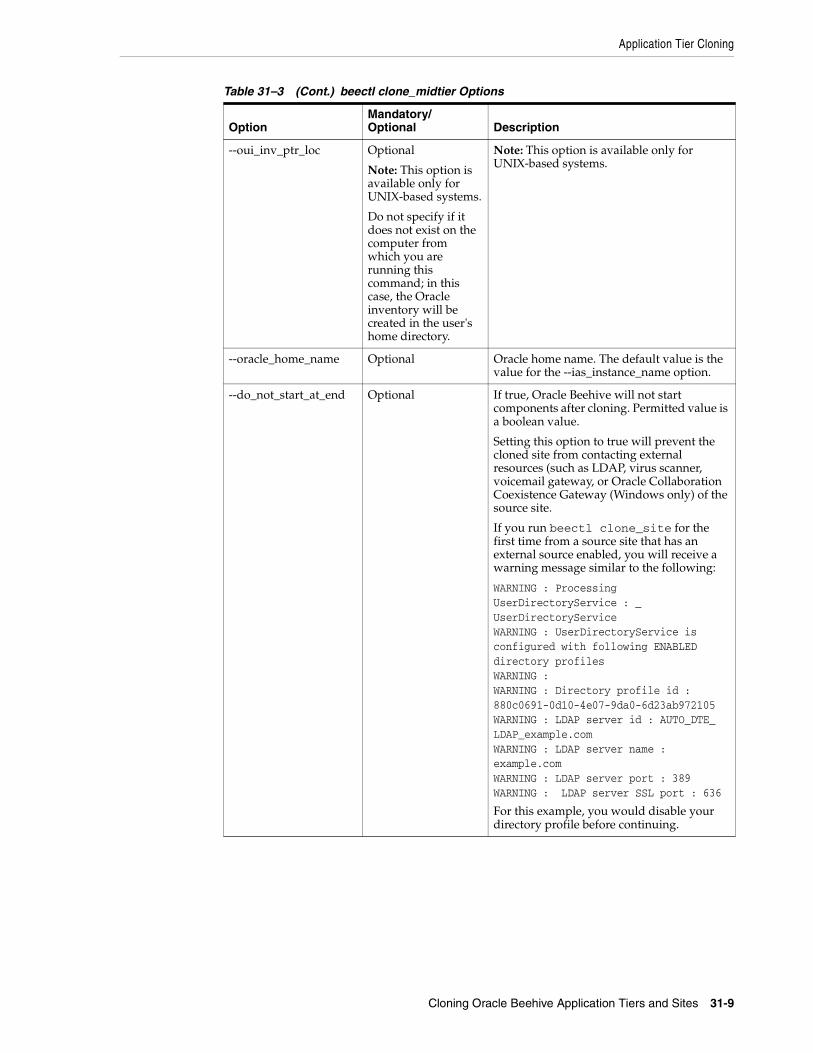
Application Tier Cloning
Cloning Oracle Beehive Application Tiers and Sites 31-9
--oui_inv_ptr_loc Optional
Note: This option is available only for UNIX-based systems.
Do not specify if it does not exist on the computer from which you are running this command; in this case, the Oracle inventory will be created in the user's home directory.
Note: This option is available only for UNIX-based systems.
--oracle_home_name Optional Oracle home name. The default value is the value for the --ias_instance_name option.
--do_not_start_at_end Optional If true, Oracle Beehive will not start components after cloning. Permitted value is a boolean value.
Setting this option to true will prevent the cloned site from contacting external resources (such as LDAP, virus scanner, voicemail gateway, or Oracle Collaboration Coexistence Gateway (Windows only) of the source site.
If you run beectl clone_site for the first time from a source site that has an external source enabled, you will receive a warning message similar to the following:
WARNING : Processing UserDirectoryService : _UserDirectoryServiceWARNING : UserDirectoryService is configured with following ENABLED directory profilesWARNING :WARNING : Directory profile id : 880c0691-0d10-4e07-9da0-6d23ab972105WARNING : LDAP server id : AUTO_DTE_LDAP_example.comWARNING : LDAP server name : example.comWARNING : LDAP server port : 389WARNING : LDAP server SSL port : 636
For this example, you would disable your directory profile before continuing.
Table 31–3 (Cont.) beectl clone_midtier Options
OptionMandatory/ Optional Description

Site Cloning
31-10 Oracle Beehive Installation Guide
Step 5: Perform Miscellaneous Operations
1. Run the root.sh script in the new Oracle home so that the cloned instance works properly. You must log in as the root user to run the script. The script is located in the cloned instance's Oracle home directory, for example: $ORACLE_HOME/root.sh.
2. If this is the first Oracle installation on the host, run the orainstRoot.sh script as the root user to register the Oracle inventory directory. The script is located in the oraInventory directory.
Site CloningRun all the steps described in "Application Tier Cloning", except call the beectl clone_site command (instead of beectl clone_midtier).
Step 1: Unzip Compressed Oracle HomeThis step is the same as "Step 1: Unzip Compressed Oracle Home".
Step 2: Set PERL5LIB Environment VariableThis step is the same as "Step 2: Set PERL5LIB Environment Variable".
Step 3: Modify Oracle Home PathThis step is the same as "Step 3: Modify Oracle Home Path"
--site_key Mandatory Site key of the Oracle Beehive application tier you are cloning. This is an alphanumeric string.
Note: If you are not in shell mode, you must obfuscate the site key and add the --obfuscated option to the beectl clone_midtier command.
To obfuscate a password, use the beectl obfuscate command:
beectl obfuscate --expiration_time_in_minutes 0Enter value for password: Successfully obfuscated the string.
Note: This step applies only to UNIX-based platforms.
Table 31–3 (Cont.) beectl clone_midtier Options
OptionMandatory/ Optional Description
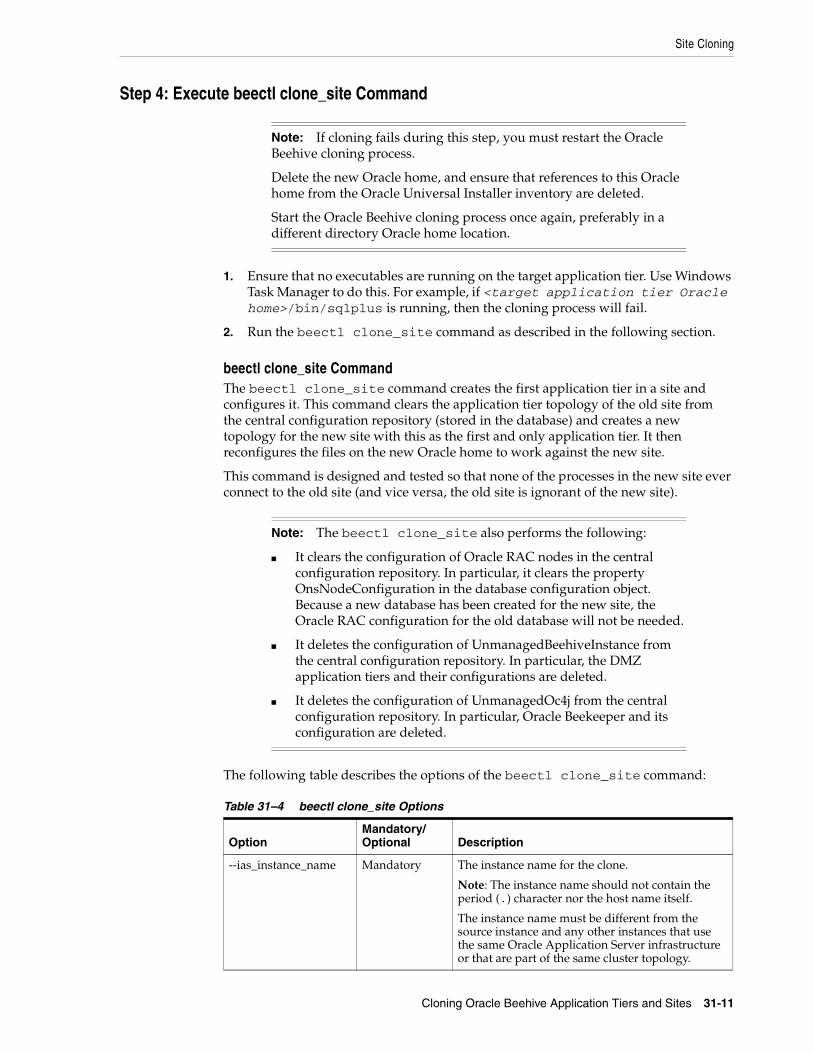
Site Cloning
Cloning Oracle Beehive Application Tiers and Sites 31-11
Step 4: Execute beectl clone_site Command
1. Ensure that no executables are running on the target application tier. Use Windows Task Manager to do this. For example, if <target application tier Oracle home>/bin/sqlplus is running, then the cloning process will fail.
2. Run the beectl clone_site command as described in the following section.
beectl clone_site CommandThe beectl clone_site command creates the first application tier in a site and configures it. This command clears the application tier topology of the old site from the central configuration repository (stored in the database) and creates a new topology for the new site with this as the first and only application tier. It then reconfigures the files on the new Oracle home to work against the new site.
This command is designed and tested so that none of the processes in the new site ever connect to the old site (and vice versa, the old site is ignorant of the new site).
The following table describes the options of the beectl clone_site command:
Note: If cloning fails during this step, you must restart the Oracle Beehive cloning process.
Delete the new Oracle home, and ensure that references to this Oracle home from the Oracle Universal Installer inventory are deleted.
Start the Oracle Beehive cloning process once again, preferably in a different directory Oracle home location.
Note: The beectl clone_site also performs the following:
■ It clears the configuration of Oracle RAC nodes in the central configuration repository. In particular, it clears the property OnsNodeConfiguration in the database configuration object. Because a new database has been created for the new site, the Oracle RAC configuration for the old database will not be needed.
■ It deletes the configuration of UnmanagedBeehiveInstance from the central configuration repository. In particular, the DMZ application tiers and their configurations are deleted.
■ It deletes the configuration of UnmanagedOc4j from the central configuration repository. In particular, Oracle Beekeeper and its configuration are deleted.
Table 31–4 beectl clone_site Options
OptionMandatory/ Optional Description
--ias_instance_name Mandatory The instance name for the clone.
Note: The instance name should not contain the period (.) character nor the host name itself.
The instance name must be different from the source instance and any other instances that use the same Oracle Application Server infrastructure or that are part of the same cluster topology.
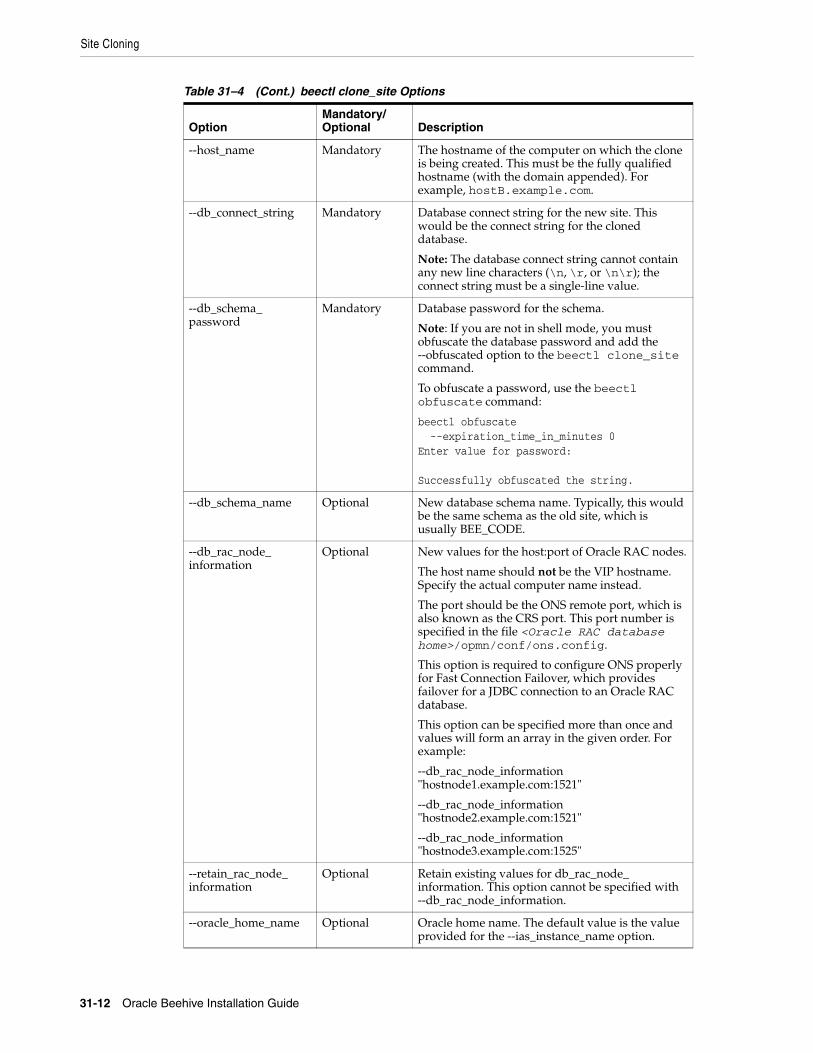
Site Cloning
31-12 Oracle Beehive Installation Guide
--host_name Mandatory The hostname of the computer on which the clone is being created. This must be the fully qualified hostname (with the domain appended). For example, hostB.example.com.
--db_connect_string Mandatory Database connect string for the new site. This would be the connect string for the cloned database.
Note: The database connect string cannot contain any new line characters (\n, \r, or \n\r); the connect string must be a single-line value.
--db_schema_password
Mandatory Database password for the schema.
Note: If you are not in shell mode, you must obfuscate the database password and add the --obfuscated option to the beectl clone_site command.
To obfuscate a password, use the beectl obfuscate command:
beectl obfuscate --expiration_time_in_minutes 0Enter value for password: Successfully obfuscated the string.
--db_schema_name Optional New database schema name. Typically, this would be the same schema as the old site, which is usually BEE_CODE.
--db_rac_node_information
Optional New values for the host:port of Oracle RAC nodes.
The host name should not be the VIP hostname. Specify the actual computer name instead.
The port should be the ONS remote port, which is also known as the CRS port. This port number is specified in the file <Oracle RAC database home>/opmn/conf/ons.config.
This option is required to configure ONS properly for Fast Connection Failover, which provides failover for a JDBC connection to an Oracle RAC database.
This option can be specified more than once and values will form an array in the given order. For example:
--db_rac_node_information "hostnode1.example.com:1521"
--db_rac_node_information "hostnode2.example.com:1521"
--db_rac_node_information "hostnode3.example.com:1525"
--retain_rac_node_information
Optional Retain existing values for db_rac_node_information. This option cannot be specified with --db_rac_node_information.
--oracle_home_name Optional Oracle home name. The default value is the value provided for the --ias_instance_name option.
Table 31–4 (Cont.) beectl clone_site Options
OptionMandatory/ Optional Description

Site Cloning
Cloning Oracle Beehive Application Tiers and Sites 31-13
--oui_inv_ptr_loc Optional.
Note: This option is available only for UNIX-based systems.
Note: This option is available only for UNIX-based systems.
--do_not_start_at_end Optional If true, Oracle Beehive will not start components after cloning. Permitted value is a boolean value.
Setting this option to true will prevent the cloned site from contacting external resources (such as LDAP, virus scanner, voicemail gateway, or Oracle Collaboration Coexistence Gateway (Windows only) of the source site.
If you run beectl clone_site for the first time from a source site that has an external source enabled, you will receive a warning message similar to the following:
WARNING : Processing UserDirectoryService : _UserDirectoryServiceWARNING : UserDirectoryService is configured with following ENABLED directory profilesWARNING :WARNING : Directory profile id : 880c0691-0d10-4e07-9da0-6d23ab972105WARNING : LDAP server id : AUTO_DTE_LDAP_example.comWARNING : LDAP server name : example.comWARNING : LDAP server port : 389WARNING : LDAP server SSL port : 636
For this example, you would disable your directory profile before continuing.
--site_name Optional If you specify this option, the site cloning process will clone Oracle Beehive on the target application tier with this new name as the site name of the cloned application tier.
--ignore_validation_warnings
Optional If you specify this option, the site cloning process will proceed regardless of warnings about target application tiers referring to external resources. Refer to "Step 5: Prevent Services from Target Application Tiers from Referring to External Resources" for more information about external resources.
Table 31–4 (Cont.) beectl clone_site Options
OptionMandatory/ Optional Description
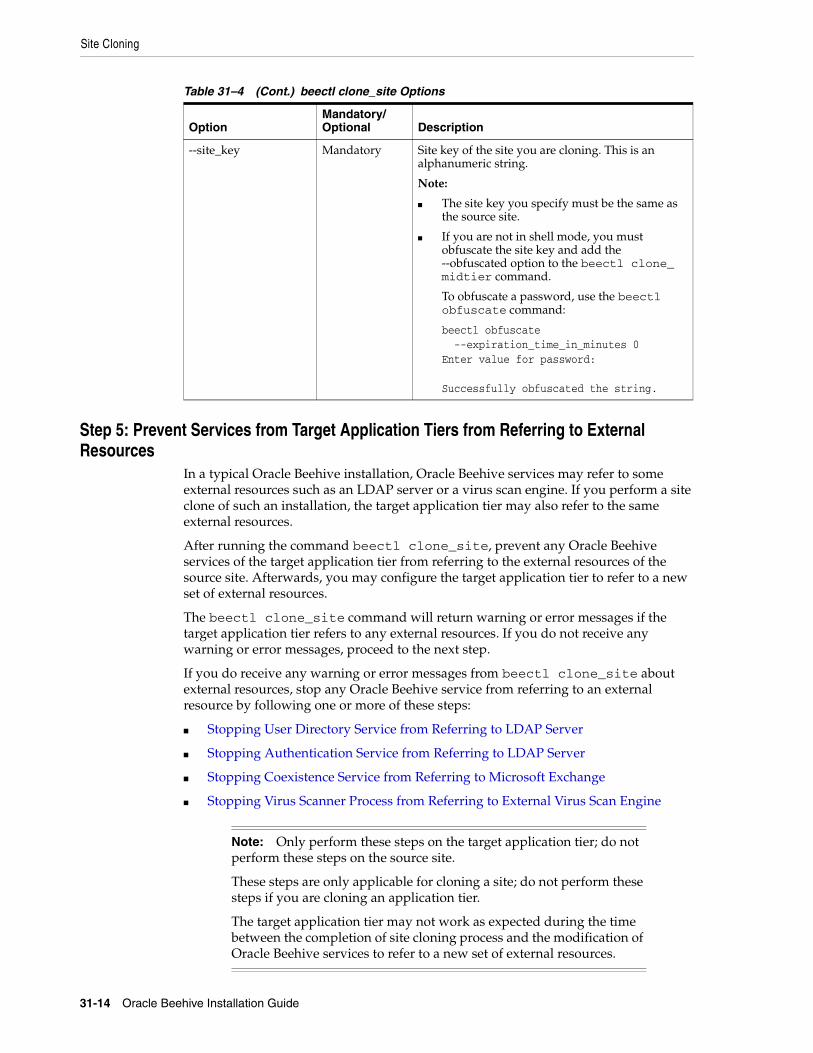
Site Cloning
31-14 Oracle Beehive Installation Guide
Step 5: Prevent Services from Target Application Tiers from Referring to External Resources
In a typical Oracle Beehive installation, Oracle Beehive services may refer to some external resources such as an LDAP server or a virus scan engine. If you perform a site clone of such an installation, the target application tier may also refer to the same external resources.
After running the command beectl clone_site, prevent any Oracle Beehive services of the target application tier from referring to the external resources of the source site. Afterwards, you may configure the target application tier to refer to a new set of external resources.
The beectl clone_site command will return warning or error messages if the target application tier refers to any external resources. If you do not receive any warning or error messages, proceed to the next step.
If you do receive any warning or error messages from beectl clone_site about external resources, stop any Oracle Beehive service from referring to an external resource by following one or more of these steps:
■ Stopping User Directory Service from Referring to LDAP Server
■ Stopping Authentication Service from Referring to LDAP Server
■ Stopping Coexistence Service from Referring to Microsoft Exchange
■ Stopping Virus Scanner Process from Referring to External Virus Scan Engine
--site_key Mandatory Site key of the site you are cloning. This is an alphanumeric string.
Note:
■ The site key you specify must be the same as the source site.
■ If you are not in shell mode, you must obfuscate the site key and add the --obfuscated option to the beectl clone_midtier command.
To obfuscate a password, use the beectl obfuscate command:
beectl obfuscate --expiration_time_in_minutes 0Enter value for password: Successfully obfuscated the string.
Note: Only perform these steps on the target application tier; do not perform these steps on the source site.
These steps are only applicable for cloning a site; do not perform these steps if you are cloning an application tier.
The target application tier may not work as expected during the time between the completion of site cloning process and the modification of Oracle Beehive services to refer to a new set of external resources.
Table 31–4 (Cont.) beectl clone_site Options
OptionMandatory/ Optional Description
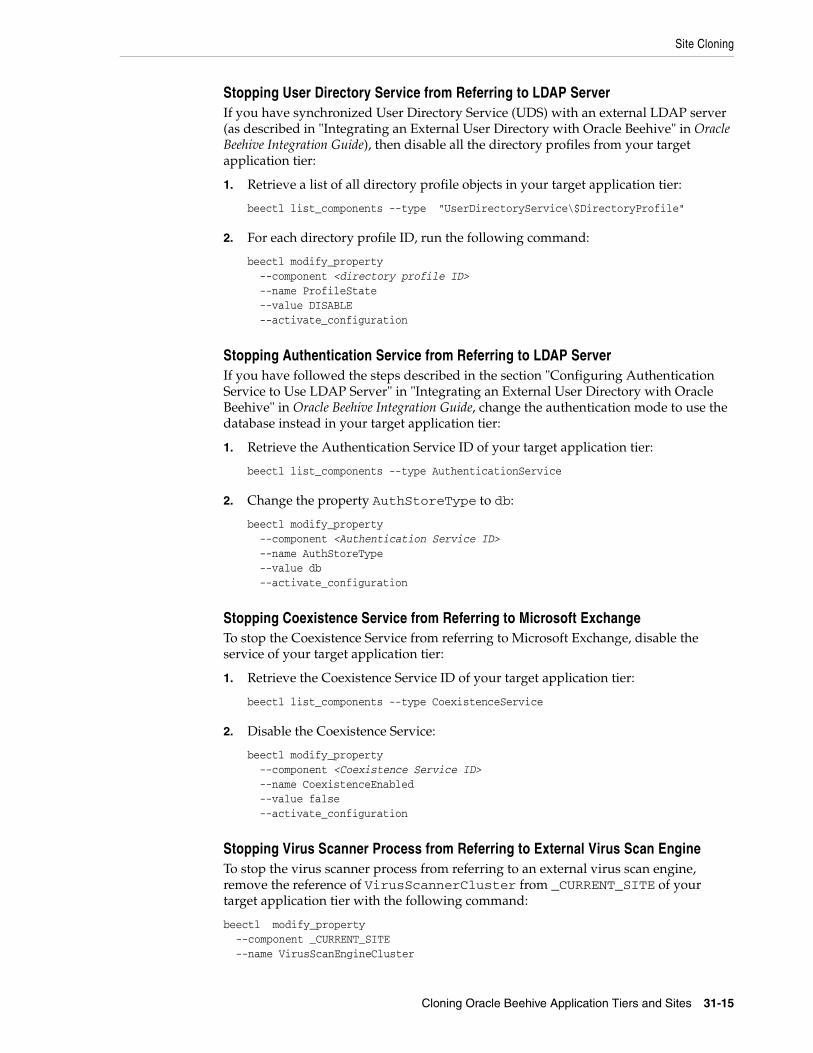
Site Cloning
Cloning Oracle Beehive Application Tiers and Sites 31-15
Stopping User Directory Service from Referring to LDAP ServerIf you have synchronized User Directory Service (UDS) with an external LDAP server (as described in "Integrating an External User Directory with Oracle Beehive" in Oracle Beehive Integration Guide), then disable all the directory profiles from your target application tier:
1. Retrieve a list of all directory profile objects in your target application tier:
beectl list_components --type "UserDirectoryService\$DirectoryProfile"
2. For each directory profile ID, run the following command:
beectl modify_property --component <directory profile ID> --name ProfileState --value DISABLE --activate_configuration
Stopping Authentication Service from Referring to LDAP ServerIf you have followed the steps described in the section "Configuring Authentication Service to Use LDAP Server" in "Integrating an External User Directory with Oracle Beehive" in Oracle Beehive Integration Guide, change the authentication mode to use the database instead in your target application tier:
1. Retrieve the Authentication Service ID of your target application tier:
beectl list_components --type AuthenticationService
2. Change the property AuthStoreType to db:
beectl modify_property --component <Authentication Service ID> --name AuthStoreType --value db --activate_configuration
Stopping Coexistence Service from Referring to Microsoft ExchangeTo stop the Coexistence Service from referring to Microsoft Exchange, disable the service of your target application tier:
1. Retrieve the Coexistence Service ID of your target application tier:
beectl list_components --type CoexistenceService
2. Disable the Coexistence Service:
beectl modify_property --component <Coexistence Service ID> --name CoexistenceEnabled --value false --activate_configuration
Stopping Virus Scanner Process from Referring to External Virus Scan EngineTo stop the virus scanner process from referring to an external virus scan engine, remove the reference of VirusScannerCluster from _CURRENT_SITE of your target application tier with the following command:
beectl modify_property --component _CURRENT_SITE --name VirusScanEngineCluster
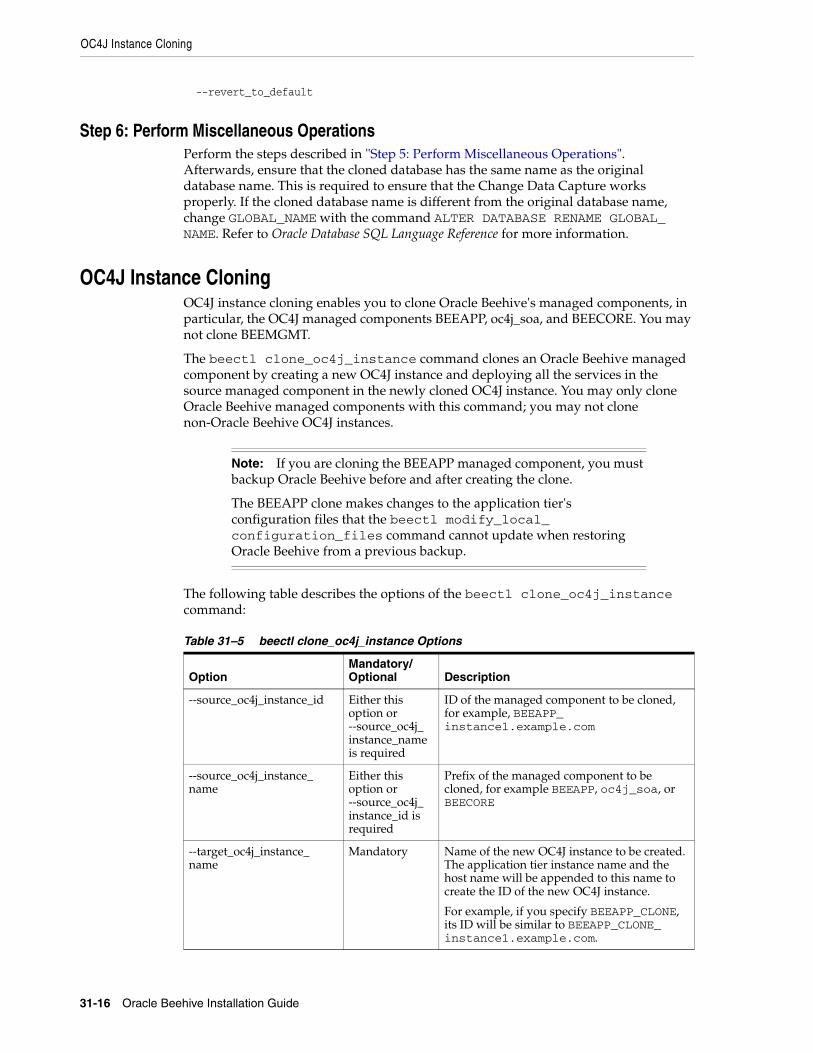
OC4J Instance Cloning
31-16 Oracle Beehive Installation Guide
--revert_to_default
Step 6: Perform Miscellaneous OperationsPerform the steps described in "Step 5: Perform Miscellaneous Operations". Afterwards, ensure that the cloned database has the same name as the original database name. This is required to ensure that the Change Data Capture works properly. If the cloned database name is different from the original database name, change GLOBAL_NAME with the command ALTER DATABASE RENAME GLOBAL_NAME. Refer to Oracle Database SQL Language Reference for more information.
OC4J Instance CloningOC4J instance cloning enables you to clone Oracle Beehive's managed components, in particular, the OC4J managed components BEEAPP, oc4j_soa, and BEECORE. You may not clone BEEMGMT.
The beectl clone_oc4j_instance command clones an Oracle Beehive managed component by creating a new OC4J instance and deploying all the services in the source managed component in the newly cloned OC4J instance. You may only clone Oracle Beehive managed components with this command; you may not clone non-Oracle Beehive OC4J instances.
The following table describes the options of the beectl clone_oc4j_instance command:
Note: If you are cloning the BEEAPP managed component, you must backup Oracle Beehive before and after creating the clone.
The BEEAPP clone makes changes to the application tier's configuration files that the beectl modify_local_configuration_files command cannot update when restoring Oracle Beehive from a previous backup.
Table 31–5 beectl clone_oc4j_instance Options
OptionMandatory/ Optional Description
--source_oc4j_instance_id Either this option or --source_oc4j_instance_name is required
ID of the managed component to be cloned, for example, BEEAPP_instance1.example.com
--source_oc4j_instance_name
Either this option or --source_oc4j_instance_id is required
Prefix of the managed component to be cloned, for example BEEAPP, oc4j_soa, or BEECORE
--target_oc4j_instance_name
Mandatory Name of the new OC4J instance to be created. The application tier instance name and the host name will be appended to this name to create the ID of the new OC4J instance.
For example, if you specify BEEAPP_CLONE, its ID will be similar to BEEAPP_CLONE_instance1.example.com.
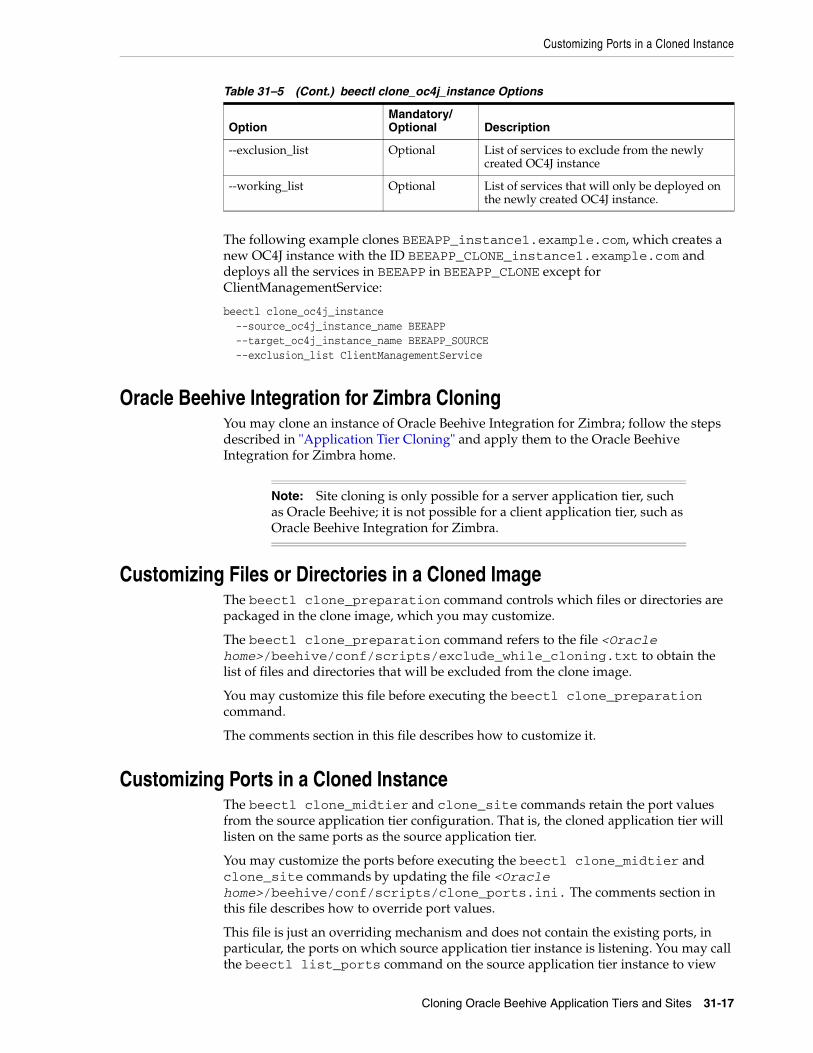
Customizing Ports in a Cloned Instance
Cloning Oracle Beehive Application Tiers and Sites 31-17
The following example clones BEEAPP_instance1.example.com, which creates a new OC4J instance with the ID BEEAPP_CLONE_instance1.example.com and deploys all the services in BEEAPP in BEEAPP_CLONE except for ClientManagementService:
beectl clone_oc4j_instance --source_oc4j_instance_name BEEAPP --target_oc4j_instance_name BEEAPP_SOURCE --exclusion_list ClientManagementService
Oracle Beehive Integration for Zimbra CloningYou may clone an instance of Oracle Beehive Integration for Zimbra; follow the steps described in "Application Tier Cloning" and apply them to the Oracle Beehive Integration for Zimbra home.
Customizing Files or Directories in a Cloned ImageThe beectl clone_preparation command controls which files or directories are packaged in the clone image, which you may customize.
The beectl clone_preparation command refers to the file <Oracle home>/beehive/conf/scripts/exclude_while_cloning.txt to obtain the list of files and directories that will be excluded from the clone image.
You may customize this file before executing the beectl clone_preparation command.
The comments section in this file describes how to customize it.
Customizing Ports in a Cloned InstanceThe beectl clone_midtier and clone_site commands retain the port values from the source application tier configuration. That is, the cloned application tier will listen on the same ports as the source application tier.
You may customize the ports before executing the beectl clone_midtier and clone_site commands by updating the file <Oracle home>/beehive/conf/scripts/clone_ports.ini. The comments section in this file describes how to override port values.
This file is just an overriding mechanism and does not contain the existing ports, in particular, the ports on which source application tier instance is listening. You may call the beectl list_ports command on the source application tier instance to view
--exclusion_list Optional List of services to exclude from the newly created OC4J instance
--working_list Optional List of services that will only be deployed on the newly created OC4J instance.
Note: Site cloning is only possible for a server application tier, such as Oracle Beehive; it is not possible for a client application tier, such as Oracle Beehive Integration for Zimbra.
Table 31–5 (Cont.) beectl clone_oc4j_instance Options
OptionMandatory/ Optional Description
Oracle Inventory Location Option of Clone Commands on UNIX-Based Systems
31-18 Oracle Beehive Installation Guide
the existing port assignments, which will also be the port assignments for the cloned application tier instance.
Oracle Inventory Location Option of Clone Commands on UNIX-Based Systems
Typically, information about Oracle products on a UNIX-based host are stored in a single location, the Oracle inventory. The location of the Oracle inventory is defined in the Oracle inventory location pointer file. For , the Oracle inventory location pointer file is :
prompt>cat inventory_loc=/private/beehive/oraInventoryinst_group=g900
■ The value for inventory_loc must be a valid existing location, or the parent directory of this value must exist. In this example, /private/beehive must exist.
■ Any user installing Oracle software must belong to the operating system group specified by inst_group.
The beectl clone_midtier and clone_site commands (with the aid of Oracle Application Server scripts) use the Oracle inventory location pointer from its default location ( on ) to determine the location of the Oracle inventory. The Oracle inventory is updated with any new Oracle Beehive application tier instance information so that the standard Oracle install and upgrade tools such as Oracle Universal Installer and Opatch will work seamlessly on the cloned application tier instance.
The Oracle inventory location pointer file can be located elsewhere. If this file is not located in the platform default location ( on ), then you must specify its location when executing the beectl clone_midtier and clone_site commands.
Cloned Application Tiers Are Not Automatically SSL or AJPS EnabledCloned application tiers are not SSL or AJPS enabled even if the source image is SSL or AJPS enabled.
Enabling SSL and AJPS is a post-install configuration step. Currently, the Oracle Beehive cloning process deliberately does not preserve the SSL and AJPS settings of the source image because the process of enabling them is specific to each application tier and requires administrator input (such as the generation of new certificates).
You must individually enable SSL and AJPS for each of your cloned application tiers. Note that the source application tier is not affected and will remain SSL and AJPS enabled.
For more information about configuring SSL, or more specifically Transport Layer Security (TLS), which is the successor of SSL, and AJPS, refer to the following modules:
■ Configuring TLS with Oracle Wallet
■ Configuring SSL for LDAP Integration
■ Enabling AJPS
Replicating LDAP Server for Cloned Instance
Cloning Oracle Beehive Application Tiers and Sites 31-19
Cloning SSL-Enabled Application TiersIf you have cloned an SSL-enabled application tier with self-signed certificates, then follow these steps to enable SSL for your cloned application tier:
1. Recreate the self-signed certificates on the cloned application tier.
2. Perform "Step 2: Configuring Oracle Beehive Instance to Use Oracle Wallet" in "Configuring TLS with Oracle Wallet".
If you have cloned an SSL-enabled application tier with test certificates, you only need to perform "Step 2: Configuring Oracle Beehive Instance to Use Oracle Wallet" in "Configuring TLS with Oracle Wallet".
Cloned Application Tiers and LDAP SynchronizationIf you have cloned an application tier that you have synchronized with an LDAP server (as described in "Integrating an External User Directory with Oracle Beehive" in Oracle Beehive Integration Guide), the cloned application tier should still be synchronized with the same LDAP server.
However, if you have configured the Domain Name Service (DNS) on the host of the source instance, as described in the section "Active Directory Considerations" in "Integrating an External User Directory with Oracle Beehive" in Oracle Beehive Integration Guide, you must perform the same configurations on the host of the cloned instance.
If you wish to synchronize your cloned Oracle Beehive instance with another LDAP server, that LDAP server must be a clone of the source LDAP server. It must have matching GUIDs as the source LDAP server, although not necessarily matching hostname, port, or administrator credentials. Refer to the next section, "Replicating LDAP Server for Cloned Instance" to create a clone of the source LDAP server (these directions are specific to Oracle Internet Directory).
Replicating LDAP Server for Cloned InstanceIf you have cloned an application tier that you have synchronized with an LDAP server, the cloned application tier will be synchronized with the same LDAP server. However, if you wish to synchronize the cloned instance with a replicated LDAP server instead, follow the steps in this section.
These steps only apply to a source instance that is synchronized with Oracle Internet Directory.
1. Install a new instance of an LDAP server for the cloned instance.
■ If you are using Oracle Internet Directory, install it in replicated mode. You may choose any type of replication (LDAP replication or Advanced Replication). However, you probably only need one-way LDAP replication; you probably do not want changes in the cloned LDAP server to be propagated to the source LDAP server.
For more information about installing Oracle Internet Directory in replicated mode, refer to Oracle Application Server Installation Guide for Microsoft Windows.
■ If you are using Active Directory, create a new domain controller.
2. Add a replica of the supplier (the source LDAP server) to the LDAP server you just created (which is called the consumer). Replicate the nodes specified in the
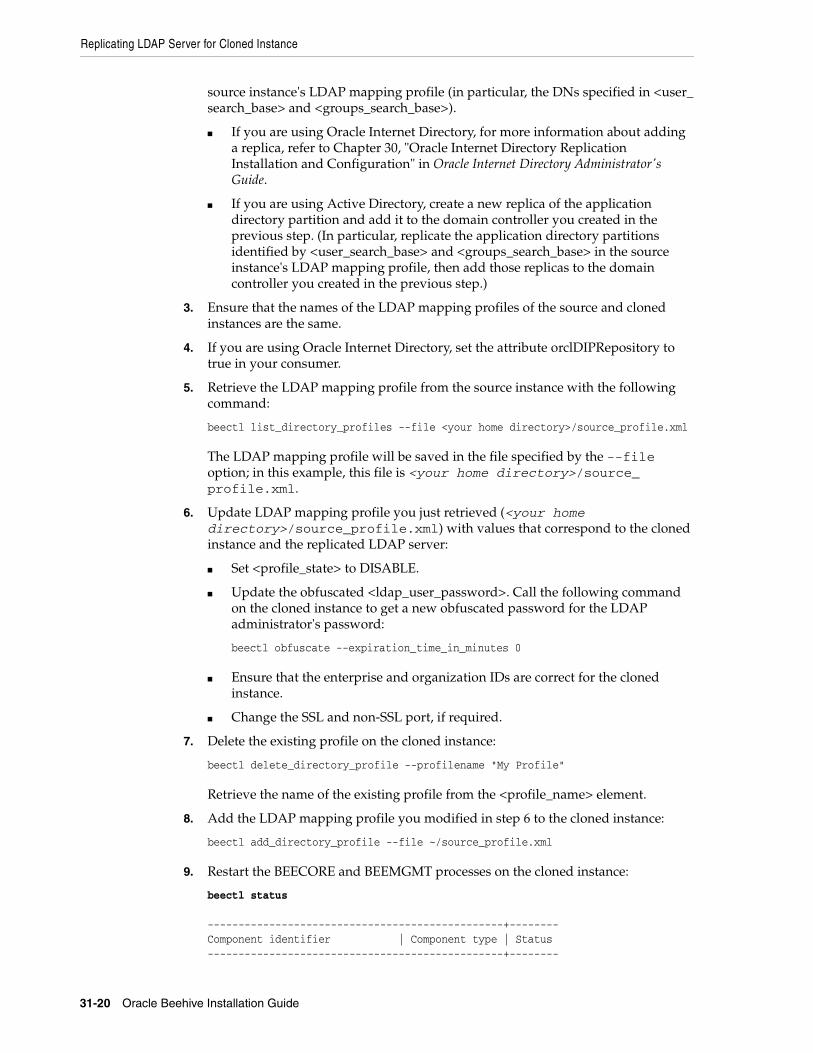
Replicating LDAP Server for Cloned Instance
31-20 Oracle Beehive Installation Guide
source instance's LDAP mapping profile (in particular, the DNs specified in <user_search_base> and <groups_search_base>).
■ If you are using Oracle Internet Directory, for more information about adding a replica, refer to Chapter 30, "Oracle Internet Directory Replication Installation and Configuration" in Oracle Internet Directory Administrator's Guide.
■ If you are using Active Directory, create a new replica of the application directory partition and add it to the domain controller you created in the previous step. (In particular, replicate the application directory partitions identified by <user_search_base> and <groups_search_base> in the source instance's LDAP mapping profile, then add those replicas to the domain controller you created in the previous step.)
3. Ensure that the names of the LDAP mapping profiles of the source and cloned instances are the same.
4. If you are using Oracle Internet Directory, set the attribute orclDIPRepository to true in your consumer.
5. Retrieve the LDAP mapping profile from the source instance with the following command:
beectl list_directory_profiles --file <your home directory>/source_profile.xml
The LDAP mapping profile will be saved in the file specified by the --file option; in this example, this file is <your home directory>/source_profile.xml.
6. Update LDAP mapping profile you just retrieved (<your home directory>/source_profile.xml) with values that correspond to the cloned instance and the replicated LDAP server:
■ Set <profile_state> to DISABLE.
■ Update the obfuscated <ldap_user_password>. Call the following command on the cloned instance to get a new obfuscated password for the LDAP administrator's password:
beectl obfuscate --expiration_time_in_minutes 0
■ Ensure that the enterprise and organization IDs are correct for the cloned instance.
■ Change the SSL and non-SSL port, if required.
7. Delete the existing profile on the cloned instance:
beectl delete_directory_profile --profilename "My Profile"
Retrieve the name of the existing profile from the <profile_name> element.
8. Add the LDAP mapping profile you modified in step 6 to the cloned instance:
beectl add_directory_profile --file ~/source_profile.xml
9. Restart the BEECORE and BEEMGMT processes on the cloned instance:
beectl status ------------------------------------------------+--------Component identifier | Component type | Status ------------------------------------------------+--------
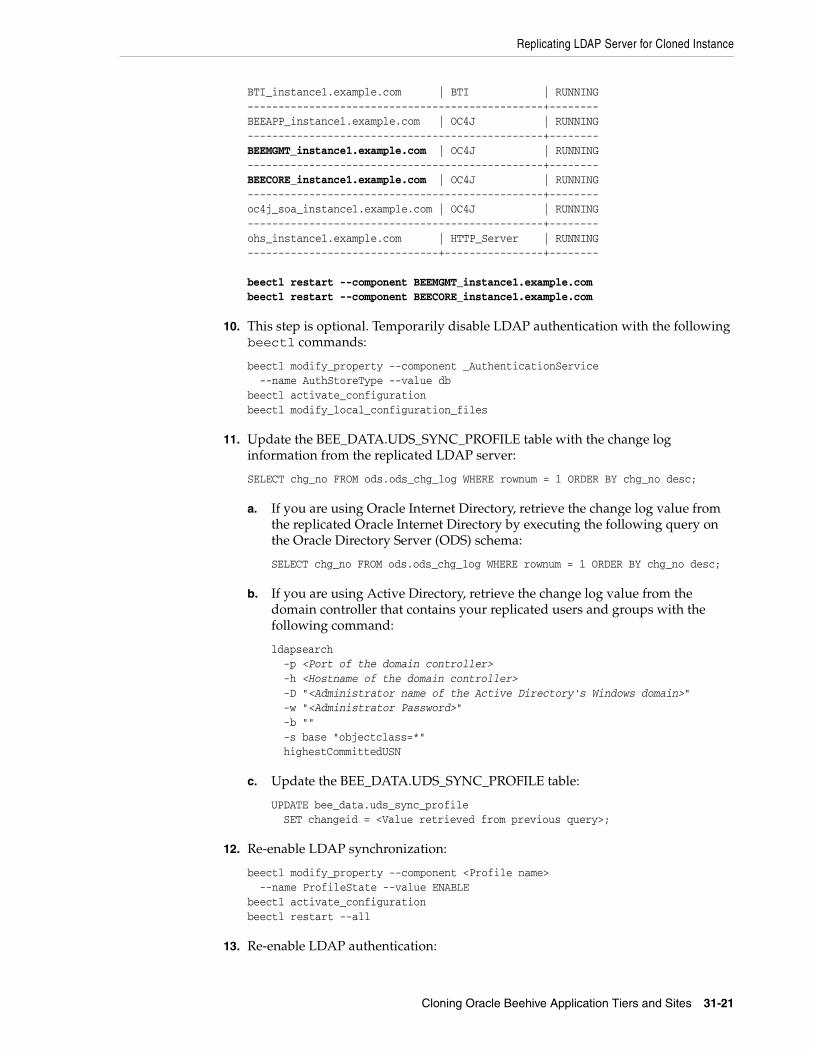
Replicating LDAP Server for Cloned Instance
Cloning Oracle Beehive Application Tiers and Sites 31-21
BTI_instance1.example.com | BTI | RUNNING ------------------------------------------------+--------BEEAPP_instance1.example.com | OC4J | RUNNING ------------------------------------------------+--------BEEMGMT_instance1.example.com | OC4J | RUNNING ------------------------------------------------+--------BEECORE_instance1.example.com | OC4J | RUNNING ------------------------------------------------+--------oc4j_soa_instance1.example.com | OC4J | RUNNING ------------------------------------------------+--------ohs_instance1.example.com | HTTP_Server | RUNNING -------------------------------+----------------+--------
beectl restart --component BEEMGMT_instance1.example.combeectl restart --component BEECORE_instance1.example.com
10. This step is optional. Temporarily disable LDAP authentication with the following beectl commands:
beectl modify_property --component _AuthenticationService --name AuthStoreType --value dbbeectl activate_configurationbeectl modify_local_configuration_files
11. Update the BEE_DATA.UDS_SYNC_PROFILE table with the change log information from the replicated LDAP server:
SELECT chg_no FROM ods.ods_chg_log WHERE rownum = 1 ORDER BY chg_no desc; a. If you are using Oracle Internet Directory, retrieve the change log value from
the replicated Oracle Internet Directory by executing the following query on the Oracle Directory Server (ODS) schema:
SELECT chg_no FROM ods.ods_chg_log WHERE rownum = 1 ORDER BY chg_no desc;
b. If you are using Active Directory, retrieve the change log value from the domain controller that contains your replicated users and groups with the following command:
ldapsearch -p <Port of the domain controller> -h <Hostname of the domain controller> -D "<Administrator name of the Active Directory's Windows domain>" -w "<Administrator Password>" -b "" -s base "objectclass=*" highestCommittedUSN
c. Update the BEE_DATA.UDS_SYNC_PROFILE table:
UPDATE bee_data.uds_sync_profile SET changeid = <Value retrieved from previous query>;
12. Re-enable LDAP synchronization:
beectl modify_property --component <Profile name> --name ProfileState --value ENABLEbeectl activate_configurationbeectl restart --all
13. Re-enable LDAP authentication:
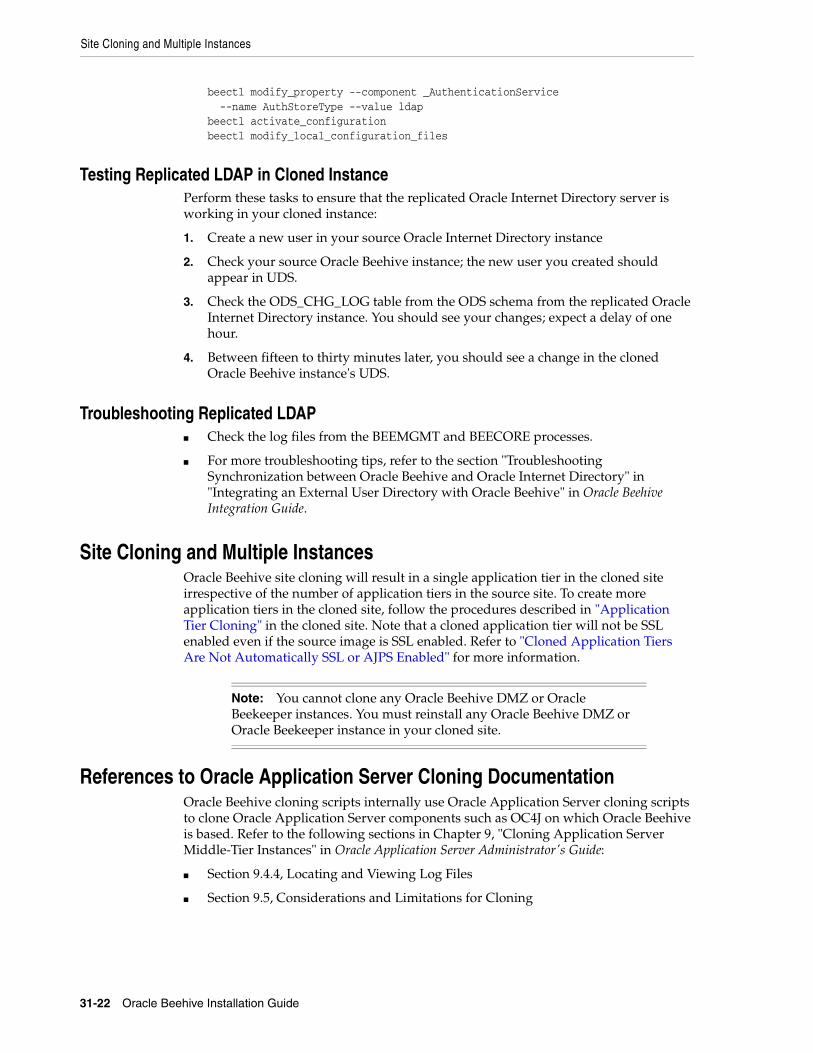
Site Cloning and Multiple Instances
31-22 Oracle Beehive Installation Guide
beectl modify_property --component _AuthenticationService --name AuthStoreType --value ldapbeectl activate_configurationbeectl modify_local_configuration_files
Testing Replicated LDAP in Cloned InstancePerform these tasks to ensure that the replicated Oracle Internet Directory server is working in your cloned instance:
1. Create a new user in your source Oracle Internet Directory instance
2. Check your source Oracle Beehive instance; the new user you created should appear in UDS.
3. Check the ODS_CHG_LOG table from the ODS schema from the replicated Oracle Internet Directory instance. You should see your changes; expect a delay of one hour.
4. Between fifteen to thirty minutes later, you should see a change in the cloned Oracle Beehive instance's UDS.
Troubleshooting Replicated LDAP■ Check the log files from the BEEMGMT and BEECORE processes.
■ For more troubleshooting tips, refer to the section "Troubleshooting Synchronization between Oracle Beehive and Oracle Internet Directory" in "Integrating an External User Directory with Oracle Beehive" in Oracle Beehive Integration Guide.
Site Cloning and Multiple InstancesOracle Beehive site cloning will result in a single application tier in the cloned site irrespective of the number of application tiers in the source site. To create more application tiers in the cloned site, follow the procedures described in "Application Tier Cloning" in the cloned site. Note that a cloned application tier will not be SSL enabled even if the source image is SSL enabled. Refer to "Cloned Application Tiers Are Not Automatically SSL or AJPS Enabled" for more information.
References to Oracle Application Server Cloning DocumentationOracle Beehive cloning scripts internally use Oracle Application Server cloning scripts to clone Oracle Application Server components such as OC4J on which Oracle Beehive is based. Refer to the following sections in Chapter 9, "Cloning Application Server Middle-Tier Instances" in Oracle Application Server Administrator's Guide:
■ Section 9.4.4, Locating and Viewing Log Files
■ Section 9.5, Considerations and Limitations for Cloning
Note: You cannot clone any Oracle Beehive DMZ or Oracle Beekeeper instances. You must reinstall any Oracle Beehive DMZ or Oracle Beekeeper instance in your cloned site.

32
Oracle Beekeeper Post-Installation Procedures 32-1
32Oracle Beekeeper Post-InstallationProcedures
Depending on your security requirements or any other issue particular to your deployment, perform one or more of the following procedures after installing Oracle Beekeeper:
■ Configuring Environment Variables for Microsoft Windows
■ Configuring Oracle Beekeeper for SSL Access
■ Configuring Oracle Beekeeper with Oracle Wallet
■ Changing Oracle Beekeeper Port
■ Extending Java Single Sign-On Session Timeout
■ Configuring Oracle Beekeeper for LDAP-Based Authentication
■ Configuring Virtual Host
■ Restarting OC4J
Configuring Environment Variables for Microsoft WindowsIn Microsoft Windows, set the environment variable OPMN_USE_ORACLELIBS to false in your command shell if you use opmnctl to control Oracle Beekeeper.
Refer to the section "Starting and Stopping Oracle Beekeeper" in "Starting and Stopping Oracle Beehive" in Oracle Beehive Administrator's Guide for more information about controlling Oracle Beekeeper with opmnctl.
If you only use the Services management console (from the Windows Control Panel) to control Oracle Beekeeper, setting this environment variable is not necessary.
Configuring Oracle Beekeeper for SSL Access1. Create a keystore with the keytool command. This command is located in
<Oracle Beekeeper home>/jdk/bin. The following example will create a keystore named server.keystore in the directory <Oracle Beekeeper home> with the password welcome:
keytool -genkey -keyalg "RSA" -keystore <Oracle Beekeeper home>/server.keystore -storepass welcome -validity 90
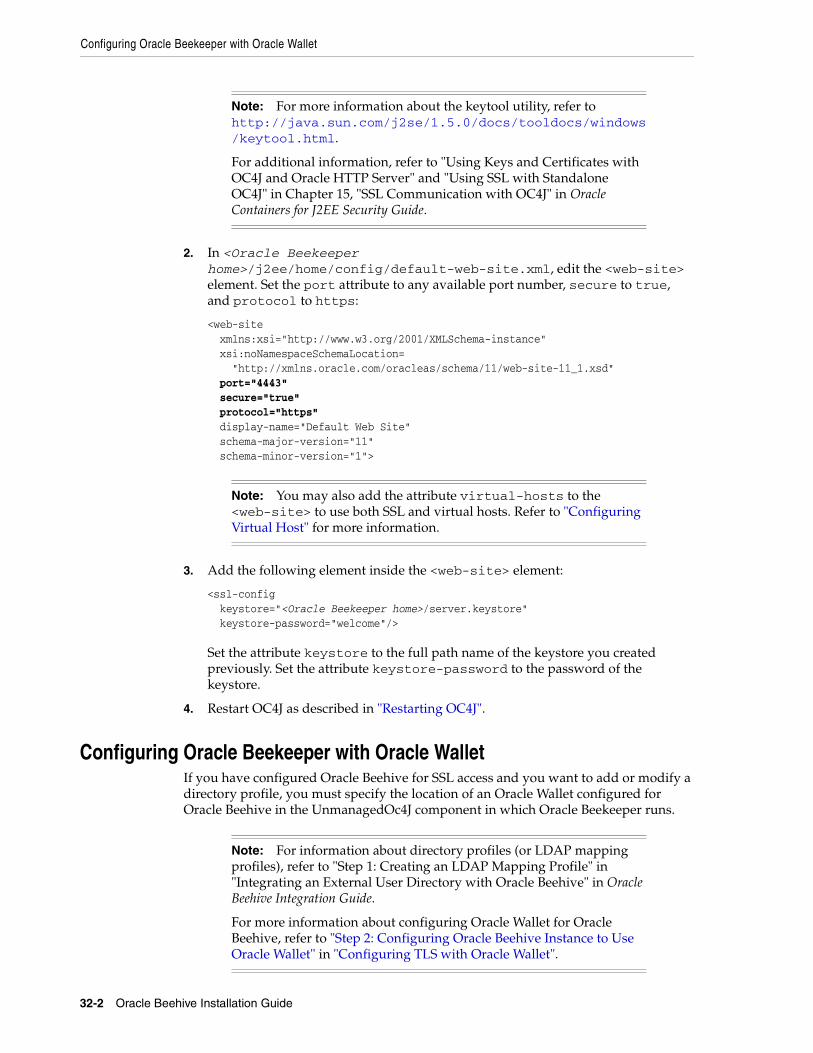
Configuring Oracle Beekeeper with Oracle Wallet
32-2 Oracle Beehive Installation Guide
2. In <Oracle Beekeeper home>/j2ee/home/config/default-web-site.xml, edit the <web-site> element. Set the port attribute to any available port number, secure to true, and protocol to https:
<web-site xmlns:xsi="http://www.w3.org/2001/XMLSchema-instance" xsi:noNamespaceSchemaLocation= "http://xmlns.oracle.com/oracleas/schema/11/web-site-11_1.xsd" port="4443" secure="true" protocol="https" display-name="Default Web Site" schema-major-version="11" schema-minor-version="1">
3. Add the following element inside the <web-site> element:
<ssl-config keystore="<Oracle Beekeeper home>/server.keystore" keystore-password="welcome"/>
Set the attribute keystore to the full path name of the keystore you created previously. Set the attribute keystore-password to the password of the keystore.
4. Restart OC4J as described in "Restarting OC4J".
Configuring Oracle Beekeeper with Oracle WalletIf you have configured Oracle Beehive for SSL access and you want to add or modify a directory profile, you must specify the location of an Oracle Wallet configured for Oracle Beehive in the UnmanagedOc4J component in which Oracle Beekeeper runs.
Note: For more information about the keytool utility, refer to http://java.sun.com/j2se/1.5.0/docs/tooldocs/windows/keytool.html.
For additional information, refer to "Using Keys and Certificates with OC4J and Oracle HTTP Server" and "Using SSL with Standalone OC4J" in Chapter 15, "SSL Communication with OC4J" in Oracle Containers for J2EE Security Guide.
Note: You may also add the attribute virtual-hosts to the <web-site> to use both SSL and virtual hosts. Refer to "Configuring Virtual Host" for more information.
Note: For information about directory profiles (or LDAP mapping profiles), refer to "Step 1: Creating an LDAP Mapping Profile" in "Integrating an External User Directory with Oracle Beehive" in Oracle Beehive Integration Guide.
For more information about configuring Oracle Wallet for Oracle Beehive, refer to "Step 2: Configuring Oracle Beehive Instance to Use Oracle Wallet" in "Configuring TLS with Oracle Wallet".
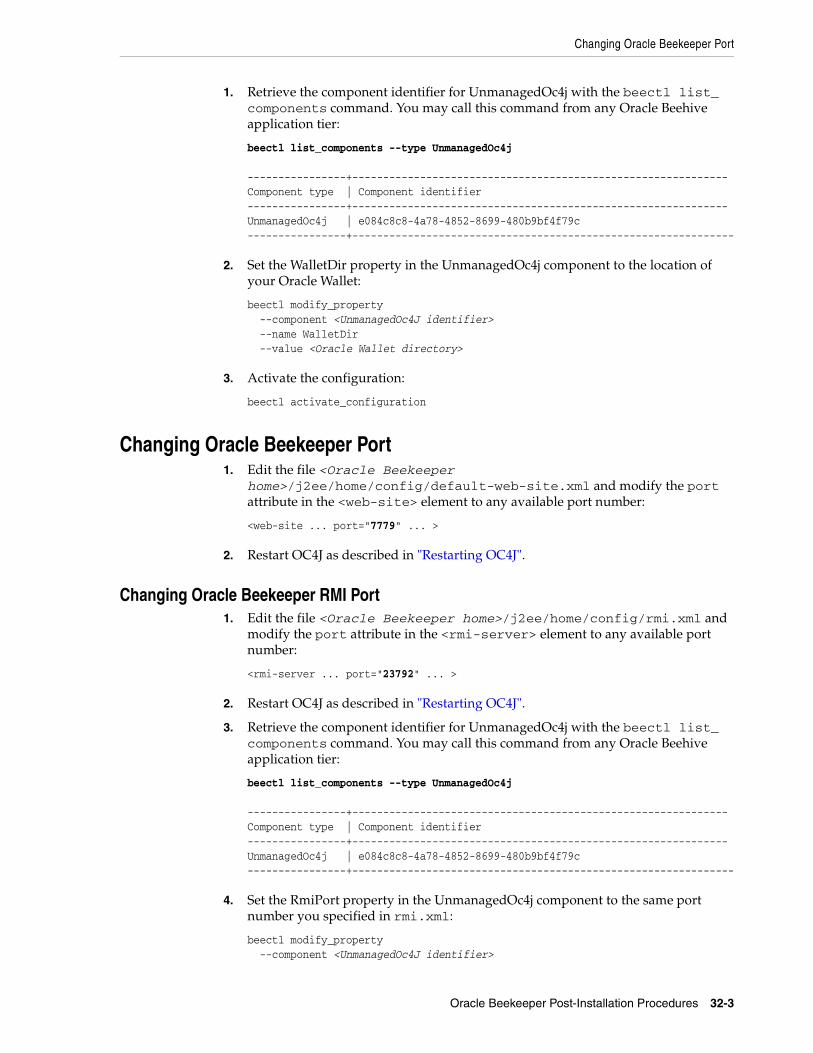
Changing Oracle Beekeeper Port
Oracle Beekeeper Post-Installation Procedures 32-3
1. Retrieve the component identifier for UnmanagedOc4j with the beectl list_components command. You may call this command from any Oracle Beehive application tier:
beectl list_components --type UnmanagedOc4j ----------------+-------------------------------------------------------------Component type | Component identifier ----------------+-------------------------------------------------------------UnmanagedOc4j | e084c8c8-4a78-4852-8699-480b9bf4f79c----------------+--------------------------------------------------------------
2. Set the WalletDir property in the UnmanagedOc4j component to the location of your Oracle Wallet:
beectl modify_property --component <UnmanagedOc4J identifier> --name WalletDir --value <Oracle Wallet directory>
3. Activate the configuration:
beectl activate_configuration
Changing Oracle Beekeeper Port1. Edit the file <Oracle Beekeeper
home>/j2ee/home/config/default-web-site.xml and modify the port attribute in the <web-site> element to any available port number:
<web-site ... port="7779" ... >
2. Restart OC4J as described in "Restarting OC4J".
Changing Oracle Beekeeper RMI Port1. Edit the file <Oracle Beekeeper home>/j2ee/home/config/rmi.xml and
modify the port attribute in the <rmi-server> element to any available port number:
<rmi-server ... port="23792" ... >
2. Restart OC4J as described in "Restarting OC4J".
3. Retrieve the component identifier for UnmanagedOc4j with the beectl list_components command. You may call this command from any Oracle Beehive application tier:
beectl list_components --type UnmanagedOc4j ----------------+-------------------------------------------------------------Component type | Component identifier ----------------+-------------------------------------------------------------UnmanagedOc4j | e084c8c8-4a78-4852-8699-480b9bf4f79c----------------+--------------------------------------------------------------
4. Set the RmiPort property in the UnmanagedOc4j component to the same port number you specified in rmi.xml:
beectl modify_property --component <UnmanagedOc4J identifier>
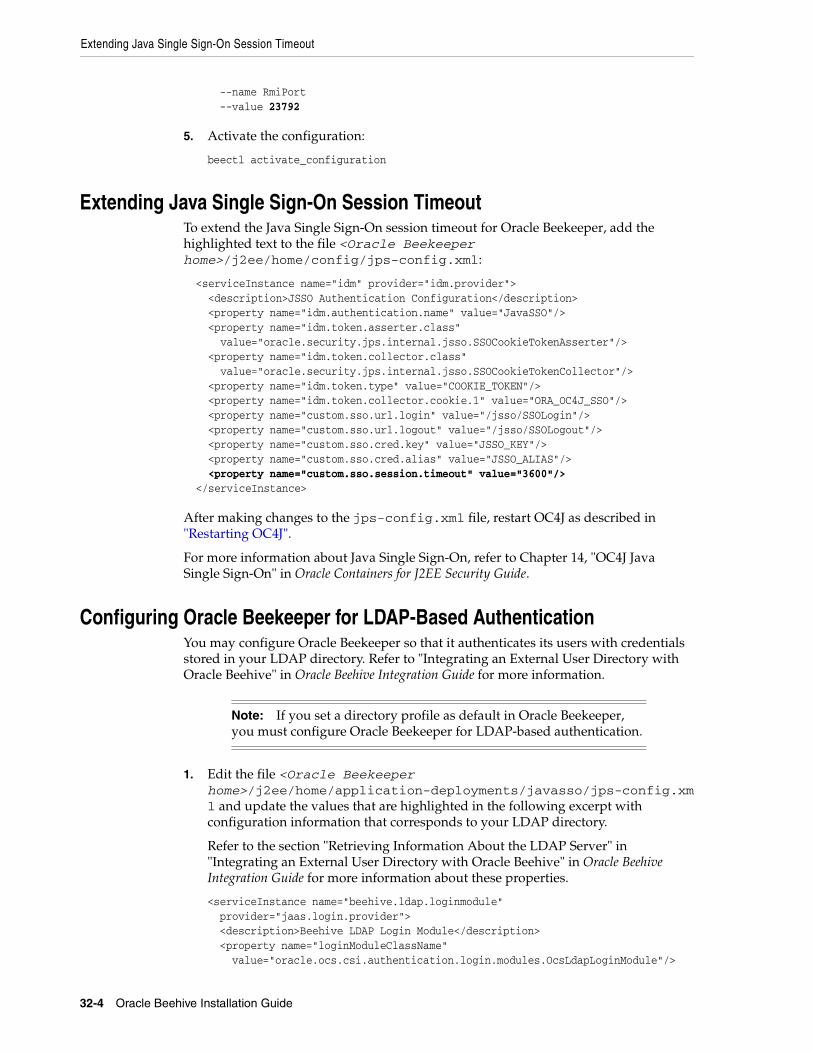
Extending Java Single Sign-On Session Timeout
32-4 Oracle Beehive Installation Guide
--name RmiPort --value 23792
5. Activate the configuration:
beectl activate_configuration
Extending Java Single Sign-On Session TimeoutTo extend the Java Single Sign-On session timeout for Oracle Beekeeper, add the highlighted text to the file <Oracle Beekeeper home>/j2ee/home/config/jps-config.xml:
<serviceInstance name="idm" provider="idm.provider"> <description>JSSO Authentication Configuration</description> <property name="idm.authentication.name" value="JavaSSO"/> <property name="idm.token.asserter.class" value="oracle.security.jps.internal.jsso.SSOCookieTokenAsserter"/> <property name="idm.token.collector.class" value="oracle.security.jps.internal.jsso.SSOCookieTokenCollector"/> <property name="idm.token.type" value="COOKIE_TOKEN"/> <property name="idm.token.collector.cookie.1" value="ORA_OC4J_SSO"/> <property name="custom.sso.url.login" value="/jsso/SSOLogin"/> <property name="custom.sso.url.logout" value="/jsso/SSOLogout"/> <property name="custom.sso.cred.key" value="JSSO_KEY"/> <property name="custom.sso.cred.alias" value="JSSO_ALIAS"/> <property name="custom.sso.session.timeout" value="3600"/> </serviceInstance>
After making changes to the jps-config.xml file, restart OC4J as described in "Restarting OC4J".
For more information about Java Single Sign-On, refer to Chapter 14, "OC4J Java Single Sign-On" in Oracle Containers for J2EE Security Guide.
Configuring Oracle Beekeeper for LDAP-Based AuthenticationYou may configure Oracle Beekeeper so that it authenticates its users with credentials stored in your LDAP directory. Refer to "Integrating an External User Directory with Oracle Beehive" in Oracle Beehive Integration Guide for more information.
1. Edit the file <Oracle Beekeeper home>/j2ee/home/application-deployments/javasso/jps-config.xml and update the values that are highlighted in the following excerpt with configuration information that corresponds to your LDAP directory.
Refer to the section "Retrieving Information About the LDAP Server" in "Integrating an External User Directory with Oracle Beehive" in Oracle Beehive Integration Guide for more information about these properties.
<serviceInstance name="beehive.ldap.loginmodule" provider="jaas.login.provider"> <description>Beehive LDAP Login Module</description> <property name="loginModuleClassName" value="oracle.ocs.csi.authentication.login.modules.OcsLdapLoginModule"/>
Note: If you set a directory profile as default in Oracle Beekeeper, you must configure Oracle Beekeeper for LDAP-based authentication.
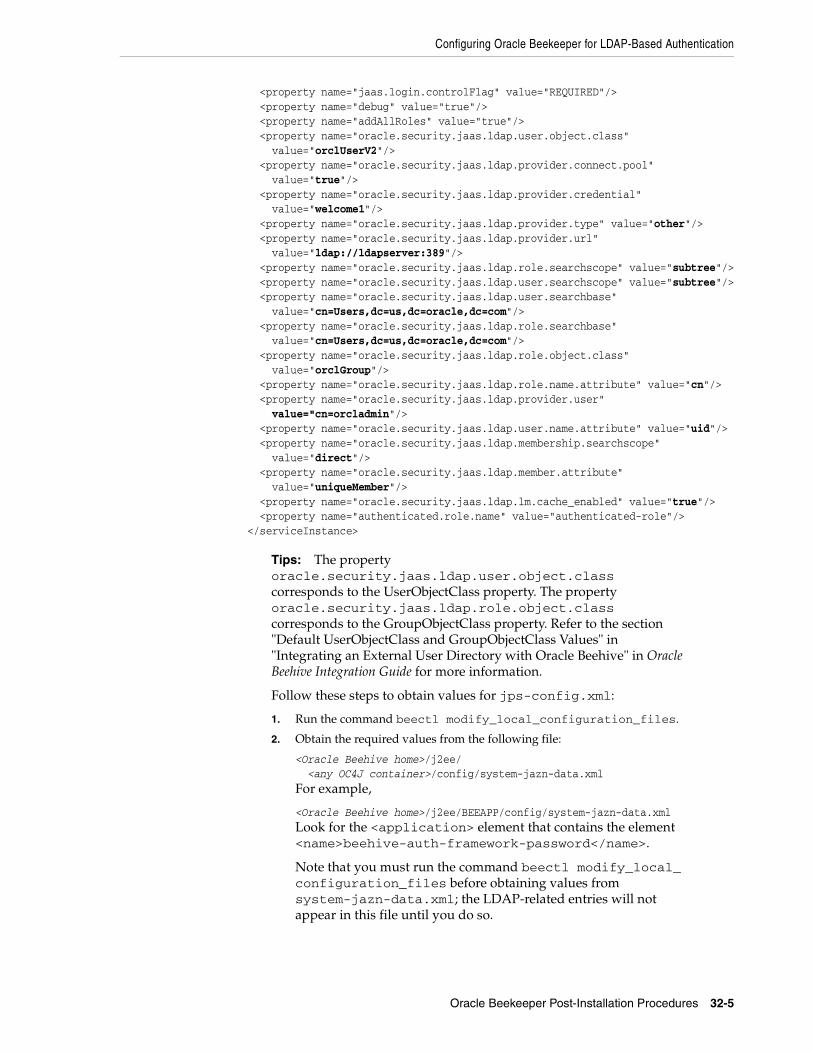
Configuring Oracle Beekeeper for LDAP-Based Authentication
Oracle Beekeeper Post-Installation Procedures 32-5
<property name="jaas.login.controlFlag" value="REQUIRED"/> <property name="debug" value="true"/> <property name="addAllRoles" value="true"/> <property name="oracle.security.jaas.ldap.user.object.class" value="orclUserV2"/> <property name="oracle.security.jaas.ldap.provider.connect.pool" value="true"/> <property name="oracle.security.jaas.ldap.provider.credential" value="welcome1"/> <property name="oracle.security.jaas.ldap.provider.type" value="other"/> <property name="oracle.security.jaas.ldap.provider.url" value="ldap://ldapserver:389"/> <property name="oracle.security.jaas.ldap.role.searchscope" value="subtree"/> <property name="oracle.security.jaas.ldap.user.searchscope" value="subtree"/> <property name="oracle.security.jaas.ldap.user.searchbase" value="cn=Users,dc=us,dc=oracle,dc=com"/> <property name="oracle.security.jaas.ldap.role.searchbase" value="cn=Users,dc=us,dc=oracle,dc=com"/> <property name="oracle.security.jaas.ldap.role.object.class" value="orclGroup"/> <property name="oracle.security.jaas.ldap.role.name.attribute" value="cn"/> <property name="oracle.security.jaas.ldap.provider.user" value="cn=orcladmin"/> <property name="oracle.security.jaas.ldap.user.name.attribute" value="uid"/> <property name="oracle.security.jaas.ldap.membership.searchscope" value="direct"/> <property name="oracle.security.jaas.ldap.member.attribute" value="uniqueMember"/> <property name="oracle.security.jaas.ldap.lm.cache_enabled" value="true"/> <property name="authenticated.role.name" value="authenticated-role"/></serviceInstance>
Tips: The property oracle.security.jaas.ldap.user.object.class corresponds to the UserObjectClass property. The property oracle.security.jaas.ldap.role.object.class corresponds to the GroupObjectClass property. Refer to the section "Default UserObjectClass and GroupObjectClass Values" in "Integrating an External User Directory with Oracle Beehive" in Oracle Beehive Integration Guide for more information.
Follow these steps to obtain values for jps-config.xml:
1. Run the command beectl modify_local_configuration_files.
2. Obtain the required values from the following file:
<Oracle Beehive home>/j2ee/ <any OC4J container>/config/system-jazn-data.xmlFor example,
<Oracle Beehive home>/j2ee/BEEAPP/config/system-jazn-data.xmlLook for the <application> element that contains the element <name>beehive-auth-framework-password</name>.
Note that you must run the command beectl modify_local_configuration_files before obtaining values from system-jazn-data.xml; the LDAP-related entries will not appear in this file until you do so.

Configuring Oracle Beekeeper for LDAP-Based Authentication
32-6 Oracle Beehive Installation Guide
2. In the same file (<Oracle Beekeeper home>/j2ee/home/application-deployments/javasso/jps-config.xml), update the <jpsContexts> element with the highlighted value:
<jpsContexts default="ldap">
3. Edit the file <Oracle Beekeeper home>/j2ee/home/application-deployments/beekeeper/jps-config.xml) and make the same changes as in step 1.
4. In the same file (<Oracle Beekeeper home>/j2ee/home/application-deployments/beekeeper/jps-config.xml), update the <jpsContexts> element with the highlighted value:
<jpsContexts default="jsso-ldap">
5. Modify the AuthStoreType property of the Authentication Service to ldap with the beectl modify_property command. Refer to the section "Configuring Authentication Service to Use LDAP Server" in "Integrating an External User Directory with Oracle Beehive" in Oracle Beehive Integration Guide for more information.
6. Activate the configuration and commit changes:
beectl activate_configurationbeectl modify_local_configuration_files
7. Edit the file <Oracle Beekeeper home>/j2ee/home/application-deployments/javasso/jps-config.xml and update the value of oracle.security.jaas.ldap.provider.credential by copying the obfuscated password from <Oracle Beehive home>/j2ee/<any OC4J container>/config/system-jazn-data.xml. The obfuscated password is in the <application> element that contains the element <name>beehive-auth-framework-password</name>.
8. Restart OC4J as described in "Restarting OC4J".
Reconfiguring Oracle Beekeeper for UDS-Based AuthenticationFollow these steps to reconfigure Oracle Beekeeper to use User Directory Services (UDS) instead of LDAP for authentication.
1. In the file <Oracle Beekeeper home>/j2ee/home/application-deployments/javasso/jps-config.xml, update the <jpsContexts> element with the highlighted value:
Note: You may also modify this property through Oracle Beekeeper.
Note: Although you may activate the configuration through Oracle Beehive, you must run the command beectl modify_local_configuration_files from the command line.
Note: If you set a directory profile as non-default in Oracle Beekeeper, configure Oracle Beekeeper for UDS-based authentication.
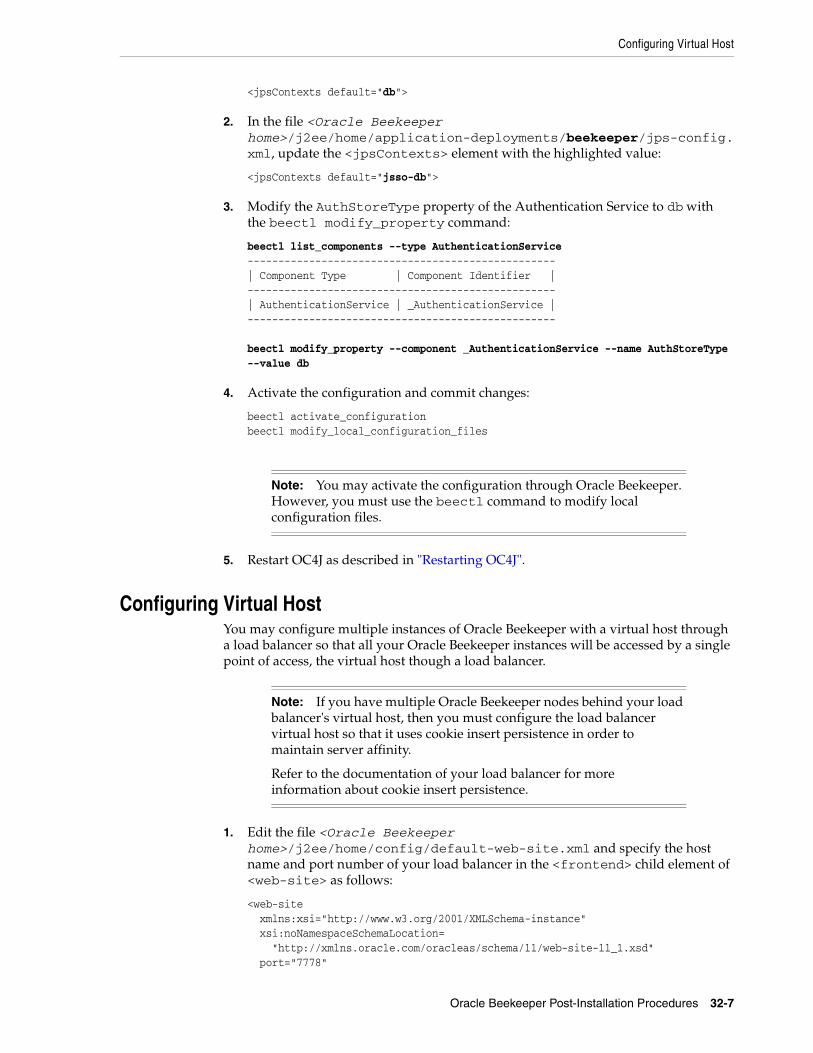
Configuring Virtual Host
Oracle Beekeeper Post-Installation Procedures 32-7
<jpsContexts default="db">
2. In the file <Oracle Beekeeper home>/j2ee/home/application-deployments/beekeeper/jps-config.xml, update the <jpsContexts> element with the highlighted value:
<jpsContexts default="jsso-db">
3. Modify the AuthStoreType property of the Authentication Service to db with the beectl modify_property command:
beectl list_components --type AuthenticationService--------------------------------------------------| Component Type | Component Identifier |--------------------------------------------------| AuthenticationService | _AuthenticationService |--------------------------------------------------
beectl modify_property --component _AuthenticationService --name AuthStoreType --value db
4. Activate the configuration and commit changes:
beectl activate_configurationbeectl modify_local_configuration_files
5. Restart OC4J as described in "Restarting OC4J".
Configuring Virtual HostYou may configure multiple instances of Oracle Beekeeper with a virtual host through a load balancer so that all your Oracle Beekeeper instances will be accessed by a single point of access, the virtual host though a load balancer.
1. Edit the file <Oracle Beekeeper home>/j2ee/home/config/default-web-site.xml and specify the host name and port number of your load balancer in the <frontend> child element of <web-site> as follows:
<web-site xmlns:xsi="http://www.w3.org/2001/XMLSchema-instance" xsi:noNamespaceSchemaLocation= "http://xmlns.oracle.com/oracleas/schema/11/web-site-11_1.xsd" port="7778"
Note: You may activate the configuration through Oracle Beekeeper. However, you must use the beectl command to modify local configuration files.
Note: If you have multiple Oracle Beekeeper nodes behind your load balancer's virtual host, then you must configure the load balancer virtual host so that it uses cookie insert persistence in order to maintain server affinity.
Refer to the documentation of your load balancer for more information about cookie insert persistence.
Restarting OC4J
32-8 Oracle Beehive Installation Guide
secure="false" protocol="http" display-name="Default Web Site" schema-major-version="11" schema-minor-version="1"> <default-web-app application="default" name="defaultWebApp" /> ... <frontend host="beehiveadmin.us.oracle.com" port="80" /></web-site>
In this example, beehiveadmin.us.oracle.com is the host name of the load balancer and 80 is the port number.
2. If you or an administrator uses a Microsoft Windows computer to access Oracle Beekeeper, then on that computer, edit the file C:\WINDOWS\system32\drivers\etc\hosts file and map the IP address of the computer that runs Oracle Beehive with the host name of your virtual host.
For example, if 10.229.175.134 is the host name of the computer that runs Oracle Beekeeper and beehiveadmin.us.oracle.com is the host name of your load balancer, then add the following line to your hosts file:
10.229.175.134 beehiveadmin.us.oracle.com
3. Restart OC4J as described in "Restarting OC4J".
Restarting OC4JRestart the Oracle Beekeeper unmanaged OC4J instance with the following commands:
<Oracle Beekeeper home>/opmn/bin/opmnctl stopall<Oracle Beekeeper home>/opmn/bin/opmnctl startall
For information about starting and stopping OC4J, refer to Chapter 5, "Starting and Stopping OC4J" in Oracle Containers for J2EE Configuration and Administrator's Guide.
Part IVPart IV Oracle Beehive High Availability
Configuration
The Part IV of the Installation Guide describes how to install and configure Oracle Beehive in a high availability environment. It contains the following chapters:
■ Enabling AJPS
■ Configuring and Installing Oracle Beehive for Oracle RAC
■ Installing Oracle Beehive in High Availability Environment

33
Enabling AJPS 33-1
33 Enabling AJPS
This chapter describes how to enable (and disable) secure Apache JServ Protocol (AJPS), so that it could be used instead of HTTP for communication between Oracle HTTP Server and OC4J.
By default, AJPS is not enabled when you install Oracle Beehive.
This chapter covers the following topics:
■ Enabling AJPS
■ Disabling AJPS
Enabling AJPSThese steps involve creating wallets and certificates. Because both of these are specific to an Oracle Beehive instances, you must perform the following steps on every Oracle Beehive instance:
1. Create a keystore with an RSA private/public key pair using the keytool utility.
The following example generates a keystore in a file named mykeystore.jks, which has a password of 123456, using the RSA key pair generation algorithm:
<Oracle home>\jdk\bin\keytool -genkey -keyalg RSA -keystore mykeystore.jks -validity <number of days> -storepass 123456
Note: A keystore stores certificates, including the certificates of all trusted parties, for use by an application. Through its keystore, an entity such as OC4J (for example) can authenticate other parties, as well as authenticate itself to other parties. (Oracle HTTP Server uses a wallet for the same purpose).
In Java, a keystore is a java.security.KeyStore instance that you can create and manipulate using the keytool utility that is provided with the JDK. The underlying physical manifestation of this object is a file.
For more information about the keytool utility, refer to http://java.sun.com/j2se/1.5.0/docs/tooldocs/windows/keytool.html.
For additional information, refer to "Using Keys and Certificates with OC4J and Oracle HTTP Server" and "Using SSL with Standalone OC4J" in Chapter 15, "SSL Communication with OC4J" in Oracle Containers for J2EE Security Guide.

Enabling AJPS
33-2 Oracle Beehive Installation Guide
In this utility:
■ The keystore option sets the filename where the keys are stored.
■ The -validity <number of days> option sets the expiry date.
■ The storepass option sets the password for protecting the keystore. You can optionally omit this from the command line and be prompted for a password instead.
The keytool utility prompts you for additional information, as follows:
What is your first and last name? [Unknown]: Test UserWhat is the name of your organizational unit? [Unknown]: SupportWhat is the name of your organization? [Unknown]: OracleWhat is the name of your City or Locality? [Unknown]: Redwood ShoresWhat is the name of your State or Province? [Unknown]: CAWhat is the two-letter country code for this unit? [Unknown]: USIs <CN=Test User, OU=Support, O=Oracle, L=Redwood Shores, ST=CA, C=US> correct? [no]: yes Enter key password for <mykey> (RETURN if same as keystore password):
The mykeystore.jks file is created in the current directory. The default alias of the key is mykey.
2. Export the certificate from the keystore you just created to a file with the keytool utility. The following example exports the certificate into a file named C:\cert.txt:
<Oracle home>\jdk\bin\keytool -export -file C:\cert.txt -keystore mykeystore.jks -storepass 123456
Ensure you specify the same password you used to create the keystore.
3. Import the certificate file into Oracle Wallet.
a. If you have not already done so, create a wallet and configure it for Oracle Beehive by following the steps described in "Configuring TLS with Oracle Wallet".
b. Use Oracle Wallet Manager to import the certificate. Select Menu, Operations, Import Trusted Certificate. Save the wallet.
4. Modify the KeystoreFile property of your Oracle Beehive instance:
beectl modify_property --component <Oracle Beehive instance identifier> --name KeystoreFile --value <full path name of the keystore file>
Note: Always press RETURN for the key password. The keystore password must be the same as the key entry password.
Enabling AJPS
Enabling AJPS 33-3
For example, if the identifier of your Oracle Beehive instance is beehive_instance_instance1.example.com and the full path name of your keystore file is C:\mykeystore.jks, then run the following command:
beectl modify_property --component beehive_instance_instance1.example.com --name KeystoreFile --value C:\mykeystore.jks
To retrieve the identifier of your Oracle Beehive instance, call the following command, where example.com is the host name of your Oracle Beehive instance:
beectl list_properties --component example.com
-------------------+-----------------------------------------------------------Property name | Property value -------------------+-----------------------------------------------------------PrimaryHostName | example.com -------------------+-----------------------------------------------------------Site | _CURRENT_SITE -------------------+-----------------------------------------------------------AlternateHostNames | -------------------+-----------------------------------------------------------BeehiveInstances | beehive_instance_instance1.example.com-------------------+-----------------------------------------------------------Alias | example.com -------------------+-----------------------------------------------------------
5. Modify the KeystoreFilePassword property (the command will prompt you for the password):
beectl modify_secure_property --component <Oracle Beehive instance identifier> --name KeystoreFilePassword --value
6. Modify the AjpsEnabled property of the ManagedOc4jCluster object if it is false:
beectl modify_property --component _CURRENT_SITE:ManagedOc4jCluster --name AjpsEnabled --value true
7. Modify the AjpsEnabled property of the HttpServerCluster object if it is false:
beectl modify_property --component _CURRENT_SITE:HttpServerCluster --name HttpServerSslEnabled --value true
8. Commit configuration changes by calling the following beectl command:
beectl activate_configuration
Note: If the beectl activate_configuration command asks you to run the beectl modify_local_configuration_files command, run this command. The command may restart your application tier.
Disabling AJPS
33-4 Oracle Beehive Installation Guide
Disabling AJPS1. Set the AjpsEnabled property of the ManagedOc4jCluster object to false (this
example also commits configuration changes):
beectl modify_property --component _CURRENT_SITE:ManagedOc4jCluster --name AjpsEnabled --value false --activate_configuration true
2. Modify local files (the following command may restart the application tier):
beectl modify_local_configuration_files
34
Configuring and Installing Oracle Beehive for Oracle RAC 34-1
34 Configuring and Installing Oracle Beehivefor Oracle RAC
This chapter describes how to install and configure Oracle Beehive to support deployment on multiple Oracle Real Application Clusters (Oracle RAC) nodes. It covers the following topics:
■ Naming Conventions
■ Pre-Install Steps
■ Installation
■ Post-Install Steps
■ Installing Multiple Oracle Beehive Instances with Oracle RAC
■ Enabling Oracle Beehive Affinity Service
■ Troubleshooting
Naming ConventionsThis module uses the following naming conventions:
■ Global service name of the Oracle RAC database to be used: MYDB
■ Number of Oracle RAC nodes: R
■ SID of first Oracle RAC node: MyDB1
■ SID of second Oracle RAC node: MyDB2
■ SID of Rth Oracle RAC node: MyDBR
■ Virtual Internet Protocol (VIP) host names and listener port numbers for each Oracle RAC node: HOST-VIP1:PORT1 to HOST-VIPR:PORTR
■ Oracle Notification Services (ONS) host names and remote port numbers for each Oracle RAC node: ONS_HOST1:ONS_PORT1 to ONS_HOSTR:ONS_PORTR
Note: You may use Database Configuration Assistant (DBCA) to create Oracle RAC nodes. However, refer to My Oracle Support Note 342419.1 to properly configure the LOCAL_LISTENER initialization parameter.
Pre-Install Steps
34-2 Oracle Beehive Installation Guide
Pre-Install StepsIf your Oracle RAC database uses raw storage, you must manually create the tablespace before running the Oracle Beehive Install Wizard.
Installation
Install Oracle Beehive with the Oracle Beehive Install Wizard. Enter the following database information:
■ Host and Port: HOST-VIP1:PORT1^HOST-VIP2:PORT2^HOST-VIP3:PORT3
■ Service Name: Use the global service name (MYDB).
Post-Install StepsThese steps update Oracle Beehive with the Oracle RAC global service name and the multiple database service names:
1. Backup Bootstrap File
2. Update Database System Object
3. Commit Configuration Changes
4. Restart Oracle Beehive
5. Enable Secure ONS Notification
Step 1 Backup Bootstrap FileThe file <Oracle home>/beehive/conf/beehiveconfig.xml contains the bootstrap database connect information. Take a backup of this file before applying any post-install steps.
Note: The location of the archive redo logs for each Oracle RAC node must be accessible by all nodes in your Oracle RAC database.
Refer to "Managing Archived Redo Logs Using RMAN in Oracle Real Application Clusters" in Chapter 5, "Configuring Recovery Manager And Archiving" in Oracle Real Application Clusters Administration and Deployment Guide for more information.
Note: If you want to install Oracle Beehive with Oracle Beehive Provisioning Application and you require SSL Oracle Notification Services (ONS) notification, you must follow the steps described in "Enabling Secure ONS Notification".
For more information about Oracle Beehive Provisioning Application, refer to "Provisioning Oracle Beehive".
Note: During the installation of Oracle Beehive, ensure the first Oracle RAC node (MyDB1) remains up. Otherwise, the install will fail due to bug 5693566 (Web Services Manager Configuration Assistant will fail).
Post-Install Steps
Configuring and Installing Oracle Beehive for Oracle RAC 34-3
Step 2 Update Database System ObjectModify the database system object's configuration to specify the ONS remote ports that are listening on your Oracle RAC nodes. The following example specifies two ONS remote ports with the ons_entry option:
beectl modify_database --database _CURRENT_SITE:Database --ons_entry ONS_HOST1:ONS_PORT1 --ons_entry ONS_HOST2:ONS_PORT2
To determine the ONS remote port, run the following command:
<Oracle Cluster Ready Services home>/bin/onsctl ping
You should see output similar to the following. The ONS remote port is indicated by the highlighted text:
Number of onsconfiguration retrieved, numcfg = 2onscfg[0] {node = strasha05.us.oracle.com, port = 6200}Adding remote host strasha05.us.oracle.com:6200onscfg[1] {node = strasha06.us.oracle.com, port = 6200}Adding remote host strasha06.us.oracle.com:6200ons is running ...
Step 3 Commit Configuration ChangesCall beectl activate_configuration on your Oracle Beehive instance. Afterwards, call beectl modify_local_configuration_files on the same Oracle Beehive instance.
Step 4 Restart Oracle BeehiveRestart your Oracle Beehive instance. You may use the beectl restart --all command.
Step 5 Enable Secure ONS NotificationIf you have not already done so and you require SSL ONS notification, follow the steps described in "Enabling Secure ONS Notification".
Enabling Secure ONS NotificationYou may ignore this step if your deployment does not require SSL notification.
Note: The beectl modify_local_configuration_files command will ask you to run this command on all your other Oracle Beehive instances. Do not run this command on all your other instances at this time.
If you have, or plan to have, more than Oracle Beehive instance, refer to "Installing Multiple Oracle Beehive Instances with Oracle RAC".
Note: You must restart Oracle Beehive (after calling beectl modify_local_configuration_files) if you modify the ONS details in the database system object's configuration (as you have done previously).
Installing Multiple Oracle Beehive Instances with Oracle RAC
34-4 Oracle Beehive Installation Guide
This step involves specifying the Oracle Wallet directory in the ons.config file. As a result, Oracle Cluster Ready Services (CRS) will use SSL when communicating with other nodes (other Oracle RAC nodes and Oracle Beehive instances) and require SSL certificate authentication from all Oracle Notification Services (ONS) instances that try to connect to it.
To enable SSL ONS notification, add the following line to all <Oracle Cluster Ready Services home>/opmn/conf/ons.config files of each Oracle RAC node:
walletfile=MY_SECURE_WALLET_DIR
MY_SECURE_WALLET_DIR is your Oracle Wallet directory. Refer to "Configuring TLS with Oracle Wallet" for information about configuring Oracle Wallet.
Installing Multiple Oracle Beehive Instances with Oracle RACOracle Beehive supports the following ways to install multiple instances Oracle Beehive with Oracle RAC:
■ Install All Oracle Beehive Instances, then Apply Post-Install Steps
■ Install One Oracle Beehive Instance, Apply Post-Install Steps, then Install Additional Instances
Install All Oracle Beehive Instances, then Apply Post-Install StepsYou can install multiple Oracle Beehive instances, then run the post-install steps afterwards on all those instances as described in this module:
1. Install all your Oracle Beehive instances.
2. For one instance, apply all the post-installation steps.
3. For all the other instances, run the following post-installation steps:
■ Step 1, "Backup Bootstrap File"
■ Step 3, "Commit Configuration Changes", except run only the beectl modify_local_configuration_files command.
Install One Oracle Beehive Instance, Apply Post-Install Steps, then Install Additional Instances
Alternatively, instead of installing multiple Oracle Beehive instances then running the post-install steps on each one, you may install one Oracle Beehive instance, apply the post-install steps on that instance, then install additional Oracle Beehive instances.
Enabling Oracle Beehive Affinity ServiceOracle Beehive Affinity Service enables other Oracle Beehive services to take advantage of the enhanced performance when instances or nodes from your Oracle RAC environment has affinity for any data. Currently, only the event framework, or
Note: You must perform this step if you wish to install Oracle Beehive with Oracle Beehive Provisioning Application. Refer to "Provisioning Oracle Beehive" for more information.
Enabling Oracle Beehive Affinity Service
Configuring and Installing Oracle Beehive for Oracle RAC 34-5
the Object Event Framework (OEF), and the E-mail Service can take advantage of the Affinity Service.
To enable Oracle Beehive Affinity Service, follow these steps:
1. Create one database service for each Oracle RAC node with the following command:
srvctl add service -d <database global service name> -s <database service name> -r <Oracle RAC node instance ID>
For example, suppose your database has the global service name BEEHIVE, and has four Oracle RAC nodes with IDs BEEHIVE1, BEEHIVE2, BEEHIVE3, and BEEHIVE4. Create four database services (named afserv1, afserv2, afserv3, and afserv4) with the following commands:
srvctl add service -d BEEHIVE -s afserv1 -r BEEHIVE1srvctl add service -d BEEHIVE -s afserv2 -r BEEHIVE2srvctl add service -d BEEHIVE -s afserv3 -r BEEHIVE3srvctl add service -d BEEHIVE -s afserv4 -r BEEHIVE4
2. Start the database services you just created. For example:
srvctl start service -d BEEHIVE -s afserv1srvctl start service -d BEEHIVE -s afserv2srvctl start service -d BEEHIVE -s afserv3srvctl start service -d BEEHIVE -s afserv4
3. Set the property AffinityServiceNames with the connection descriptors of your newly created database services. For example, to set this property with the four database services created in the previous step, call the following command. The example assumes the domain name is example.com.
beectl modify_property --component _CURRENT_SITE:Database --name AffinityServiceNames --value "(DESCRIPTION= (ADDRESS_LIST= (ADDRESS=(PROTOCOL=TCP)(HOST=host1.example.com)(PORT=1521))) (CONNECT_DATA=(SERVER=DEDICATED)(SERVICE_NAME=afserv1.example.com)))" --value "(DESCRIPTION= (ADDRESS_LIST= (ADDRESS=(PROTOCOL=TCP)(HOST=host2.example.com)(PORT=1521))) (CONNECT_DATA=(SERVER=DEDICATED)(SERVICE_NAME=afserv2.example.com)))" --value "(DESCRIPTION= (ADDRESS_LIST= (ADDRESS=(PROTOCOL=TCP)(HOST=host3.example.com)(PORT=1521)))
Note: These services should run on only one Oracle RAC node and should not failover to other nodes.
Note: (Line breaks have been inserted in the following example for better readability.)
A connect descriptor cannot contain any new line characters (\n, \r, or \n\r); this connect string must be a single-line value.
Troubleshooting
34-6 Oracle Beehive Installation Guide
(CONNECT_DATA=(SERVER=DEDICATED)(SERVICE_NAME=afserv3.example.com)))" --value "(DESCRIPTION= (ADDRESS_LIST= (ADDRESS=(PROTOCOL=TCP)(HOST=host4.example.com)(PORT=1521))) (CONNECT_DATA=(SERVER=DEDICATED)(SERVICE_NAME=afserv4.example.com)))"
Refer to "Modifying AffinityServiceNames Property" for more information about setting this property.
4. Activate the configuration with the following command:
beectl activate_configuration
The database framework will immediately start using the Affinity Service.
Troubleshooting
Automated Failover, beectl, and Oracle BeekeeperIf your Oracle RAC database is in the process of performing an automated failover, beectl commands and Oracle Beekeeper instances that are currently running may appear to hang. If this persists for a long period of time, for beectl, terminate the beectl process (with the kill commandin Windows Task Manager, for example) and then run the beectl command again later. For Oracle Beekeeper, restart the Oracle Beekeeper unmanaged OC4J instance with the following commands:
<Oracle Beekeeper home>/opmn/bin/opmnctl stopall<Oracle Beekeeper home>/opmn/bin/opmnctl startall
Modifying AffinityServiceNames PropertyIf the global service name has been created with the domain name (such as example.com), all the database services should use the same domain name even though they have not been created with the domain name.
Alternatively, you may specify the service name instead of the connection descriptor. For example:
beectl modify_property --component _CURRENT_SITE:Database --name AffinityServiceNames
Note: You must disable SSL ONS notifications. Follow these steps to do so:
1. Set the property NotificationServerSslEnabled to false:
beectl modify_property --component _CURRENT_SITE:OpmnCluster --name NotificationServerSslEnabled --value false
2. Activate the configuration:
beectl activate_configuration
To restart a Oracle RAC node with which you have configured Oracle Beehive Affinity Service, follow these steps:
1. Stop the database service associated with the Oracle RAC node you want to restart.
2. Restart the Oracle RAC node.
3. Start the associated database service.
Troubleshooting
Configuring and Installing Oracle Beehive for Oracle RAC 34-7
--value afserv1.example.com --value afserv2.example.com --value afserv3.example.com --value afserv4.example.com
If you use service names instead of connection descriptors, Oracle Beehive will use the connection string specified by the property ConnectDescriptor in the _CURRENT_SITE:Database component. For example, you would ensure that the ConnectDescriptor would be set as follows:
beectl list_properties --component _CURRENT_SITE:Database --format xml
<?xml version="1.1" encoding="UTF-8"?><beectl-output resultset="table"> <row> <column name="Property name">AccessSchemas</column> <column name="Property value"></column> </row>... <row> <column name="Property name">ConnectDescriptor</column> <column name="Property value"> (DESCRIPTION= (ADDRESS_LIST= (LOAD_BALANCE=yes) (FAILOVER=on) (ADDRESS=(PROTOCOL=TCP)(HOST=host1.example.com) (PORT=1521)) (ADDRESS=(PROTOCOL=TCP)(HOST=host2.example.com) (PORT=1521)) (ADDRESS=(PROTOCOL=TCP)(HOST=host3.example.com) (PORT=1521))) (ADDRESS=(PROTOCOL=TCP)(HOST=host4.example.com) (PORT=1521))) (CONNECT_DATA= (SERVER=DEDICATED) (SERVICE_NAME=beehive.us.oracle.com))) </column> </row>
Oracle Beehive does not support multiple connect strings for the same affinity service. However, Oracle Beehive supports multiple listeners for the same affinity service. For example, suppose you have the following entries:
■ Primary service:
(DESCRIPTION= (ADDRESS_LIST=(ADDRESS= (PROTOCOL=TCP) (HOST=host11-vip.example.com) (PORT=32044)))(CONNECT_DATA= (SERVER=DEDICATED) (SERVICE_NAME=beehive.us.oracle.com)))
■ Stand-by service:
(DESCRIPTION= (ADDRESS_LIST=(ADDRESS= (PROTOCOL=TCP) (HOST=host2-vip.us.oracle.com)

Troubleshooting
34-8 Oracle Beehive Installation Guide
(PORT=32044)))(CONNECT_DATA= (SERVER=DEDICATED) (SERVICE_NAME=beehive.us.oracle.com)))
Use the following connect string for these two services:
(DESCRIPTION= (ADDRESS_LIST= (ADDRESS= (PROTOCOL=TCP) (HOST=host1-vip.us.oracle.com) (PORT=32044)) (ADDRESS= (PROTOCOL=TCP) (HOST=host2-vip.us.oracle.com) (PORT=32044)))(CONNECT_DATA= (SERVER=DEDICATED) (SERVICE_NAME=beehive.us.oracle.com)))
35
Installing Oracle Beehive in High Availability Environment 35-1
35 Installing Oracle Beehive in High AvailabilityEnvironment
Installing Oracle Beehive in a high availability environment involves installing a third-party load balancer or an Oracle Beehive DMZ instance (or both) and configuring the virtual server of each Oracle Beehive (non-DMZ) instance. Configuring the virtual server ensures that there is a single point of access to your Oracle Beehive instances.
This chapter covers the following topics:
■ Configuring High Availability Environment with Load Balancer
■ Configuring High Availability Environment with a DMZ Instance
■ Configuring High Availability Environment with DMZ Instances and Load Balancer
■ Configuring SSL Termination at Load Balancer
Configuring High Availability Environment with Load BalancerThe following diagram illustrates multiple Oracle Beehive instances and a load balancer in a high availability environment:
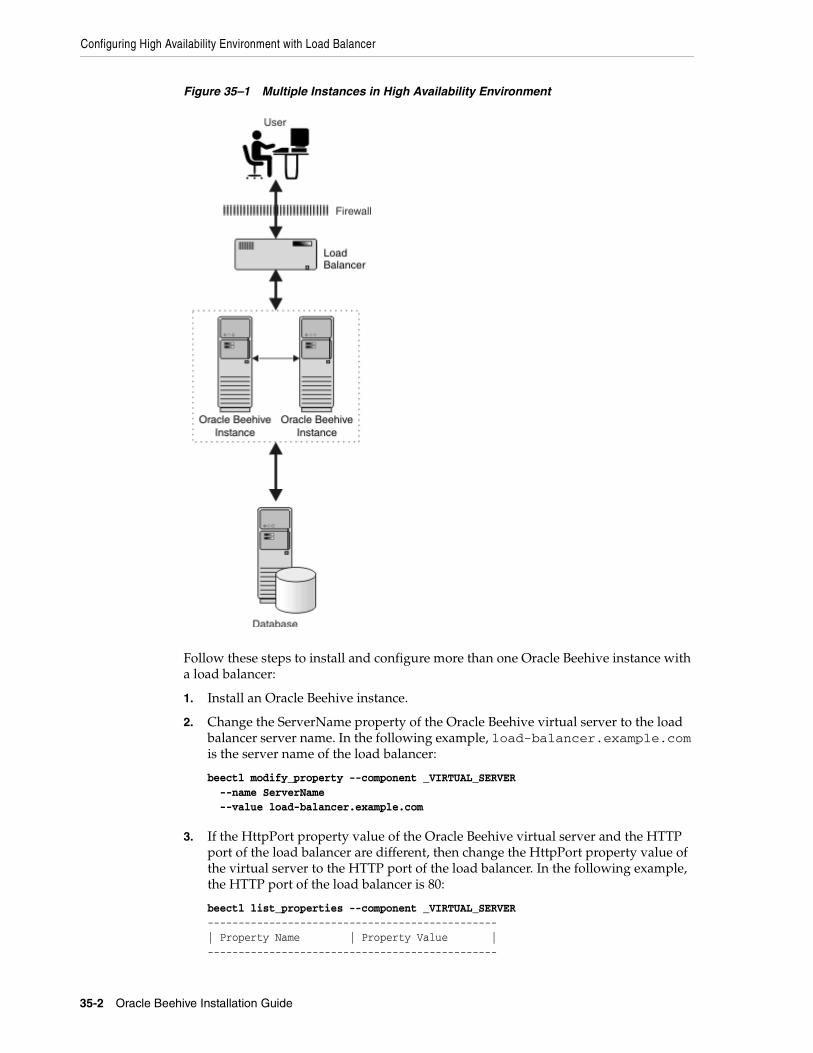
Configuring High Availability Environment with Load Balancer
35-2 Oracle Beehive Installation Guide
Figure 35–1 Multiple Instances in High Availability Environment
Follow these steps to install and configure more than one Oracle Beehive instance with a load balancer:
1. Install an Oracle Beehive instance.
2. Change the ServerName property of the Oracle Beehive virtual server to the load balancer server name. In the following example, load-balancer.example.com is the server name of the load balancer:
beectl modify_property --component _VIRTUAL_SERVER --name ServerName --value load-balancer.example.com
3. If the HttpPort property value of the Oracle Beehive virtual server and the HTTP port of the load balancer are different, then change the HttpPort property value of the virtual server to the HTTP port of the load balancer. In the following example, the HTTP port of the load balancer is 80:
beectl list_properties --component _VIRTUAL_SERVER-----------------------------------------------| Property Name | Property Value |-----------------------------------------------
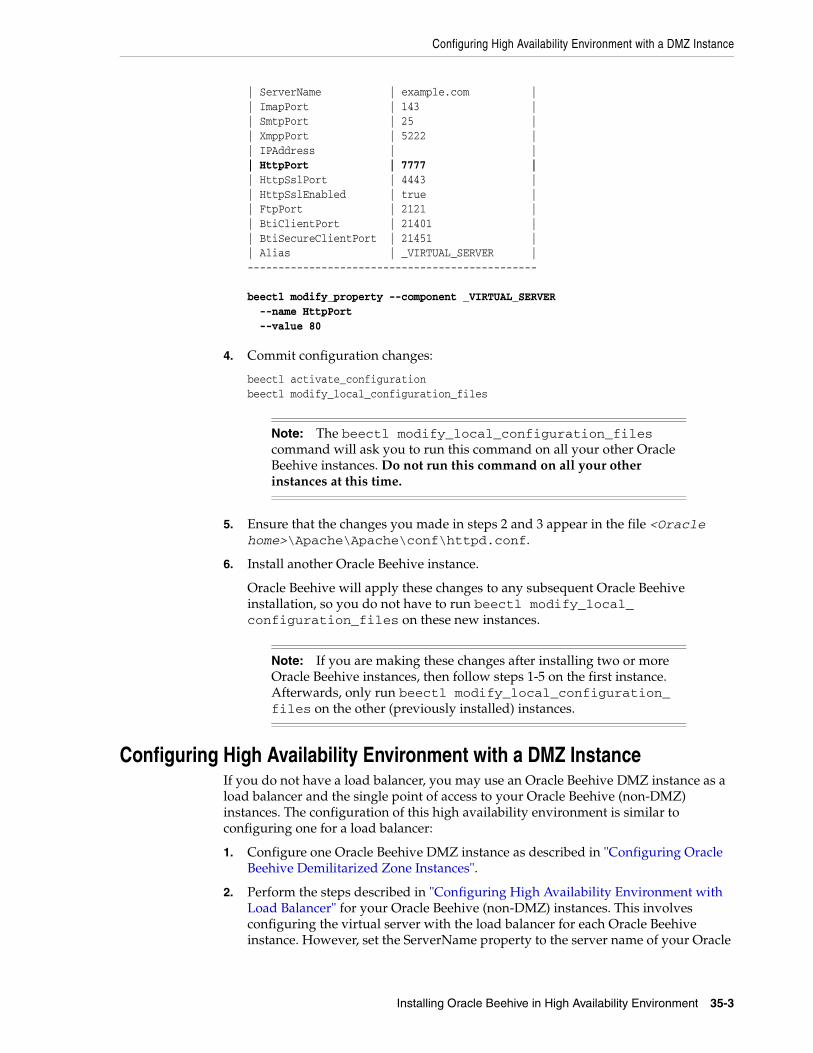
Configuring High Availability Environment with a DMZ Instance
Installing Oracle Beehive in High Availability Environment 35-3
| ServerName | example.com || ImapPort | 143 || SmtpPort | 25 || XmppPort | 5222 || IPAddress | || HttpPort | 7777 || HttpSslPort | 4443 || HttpSslEnabled | true || FtpPort | 2121 || BtiClientPort | 21401 || BtiSecureClientPort | 21451 || Alias | _VIRTUAL_SERVER |-----------------------------------------------
beectl modify_property --component _VIRTUAL_SERVER --name HttpPort --value 80
4. Commit configuration changes:
beectl activate_configurationbeectl modify_local_configuration_files
5. Ensure that the changes you made in steps 2 and 3 appear in the file <Oracle home>\Apache\Apache\conf\httpd.conf.
6. Install another Oracle Beehive instance.
Oracle Beehive will apply these changes to any subsequent Oracle Beehive installation, so you do not have to run beectl modify_local_configuration_files on these new instances.
Configuring High Availability Environment with a DMZ InstanceIf you do not have a load balancer, you may use an Oracle Beehive DMZ instance as a load balancer and the single point of access to your Oracle Beehive (non-DMZ) instances. The configuration of this high availability environment is similar to configuring one for a load balancer:
1. Configure one Oracle Beehive DMZ instance as described in "Configuring Oracle Beehive Demilitarized Zone Instances".
2. Perform the steps described in "Configuring High Availability Environment with Load Balancer" for your Oracle Beehive (non-DMZ) instances. This involves configuring the virtual server with the load balancer for each Oracle Beehive instance. However, set the ServerName property to the server name of your Oracle
Note: The beectl modify_local_configuration_files command will ask you to run this command on all your other Oracle Beehive instances. Do not run this command on all your other instances at this time.
Note: If you are making these changes after installing two or more Oracle Beehive instances, then follow steps 1-5 on the first instance. Afterwards, only run beectl modify_local_configuration_files on the other (previously installed) instances.
Configuring High Availability Environment with DMZ Instances and Load Balancer
35-4 Oracle Beehive Installation Guide
Beehive DMZ instance and the HttpPort property to the HTTP port of your Oracle Beehive DMZ instance.
Configuring High Availability Environment with DMZ Instances and Load Balancer
You may have a high availability environment with both a load balancer and DMZ instances. In this case, your Oracle Beehive instances will be load balanced on multiple levels.
The following diagram illustrates multiple DMZ instances and a load balancer in a high availability environment:
Note: If you are performing these steps after you have installed all your Oracle Beehive instances, run beectl modify_local_configuration_files only after configuring the virtual server for all your Oracle Beehive instances.
Note: If you are planning to install Oracle Beekeeper in a DMZ-based environment, then install Oracle Beekeeper in an Oracle Beehive application tier in a new Oracle home.
Oracle Beekeeper cannot be accessed from a DMZ instance. It should only be accessed from the computer in which you installed Oracle Beekeeper.
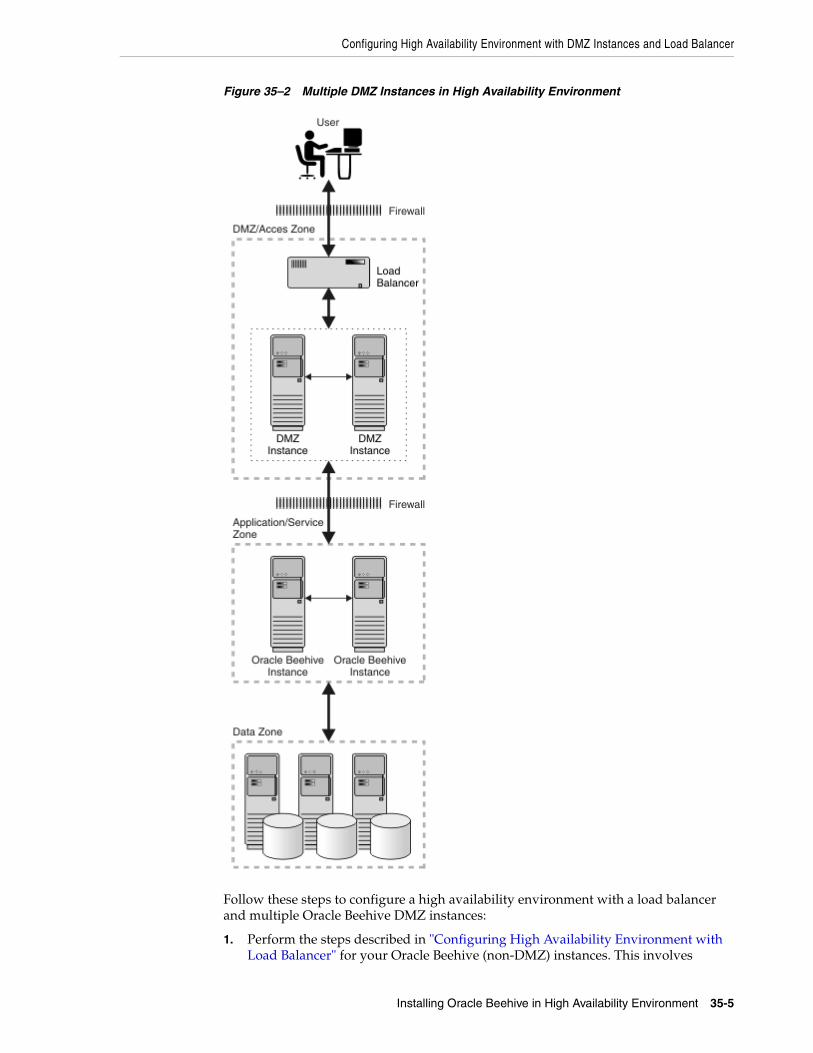
Configuring High Availability Environment with DMZ Instances and Load Balancer
Installing Oracle Beehive in High Availability Environment 35-5
Figure 35–2 Multiple DMZ Instances in High Availability Environment
Follow these steps to configure a high availability environment with a load balancer and multiple Oracle Beehive DMZ instances:
1. Perform the steps described in "Configuring High Availability Environment with Load Balancer" for your Oracle Beehive (non-DMZ) instances. This involves
Configuring SSL Termination at Load Balancer
35-6 Oracle Beehive Installation Guide
configuring the virtual server with the load balancer for each Oracle Beehive instance.
2. Edit the following directives in the file <Oracle Beehive DMZ home>\Apache\Apache\conf\httpd.conf:
ServerName <Domain name server (DNS) of the load balancer>Port <HTTP port of the load balancer>
For example, if load-balancer.example.com is the load balancer's DNS, and 80 is its HTTP port number, then edit the httpd.conf file as follows:
ServerName load-balancer.example.comPort 80
3. Perform this step only if you need to configure your DMZ instance with SSL.
Retrieve the location of the file ssl.conf from the file <Oracle home>\Apache\Apache\conf\httpd.conf. Edit the following directives in the ssl.conf file:
ServerName <Domain name server (DNS) of the load balancer>Port <HTTPS port of the load balancer>
For example, if load-balancer.example.com is the load balancer's DNS, and 4443 is its HTTP port number, then edit the ssl.conf file as follows:
ServerName load-balancer.example.comPort 4443
4. Restart the Oracle Beehive DMZ instance.
5. Repeat steps 2-3 for each of your Oracle Beehive DMZ instances.
Configuring SSL Termination at Load BalancerIf your load balancer supports SSL termination or offloading, you may offload SSL processing to your load balancer so that your Oracle Beehive instances do not have to decrypt SSL-encrypted data, thereby reducing the load of your Oracle Beehive instances.
You may offload SSL processing to your load balancer for any protocol supported by your load balancer, except if you wish to use the ability of BTP clients, such as Oracle Beehive Extensions for Outlook, to tunnel its connections through HTTPS. In that case, you cannot offload SSL for HTTPS to your load balancer, but you could offload any other protocol.
Note: If you are performing these steps after you have installed all your Oracle Beehive instances, run beectl modify_local_configuration_files only after configuring the virtual server for all your Oracle Beehive instances.
Configuring SSL Termination at Load Balancer
Installing Oracle Beehive in High Availability Environment 35-7
After configuring your load balancer with your Oracle Beehive deployment, follow these steps to configure Oracle Beehive for SSL termination:
1. Set the SslTerminatedByLoadBalancer property of the HttpServerCluster component to true:
beectl modify_property --component _current_site:HttpServerCluster --name SslTerminatedByLoadBalancer --value true --activate_configuration
2. Commit changes made to the configuration:
beectl modify_local_configuration_files
If your Oracle Beehive deployment is configured with SSL Termination at the load balancer, follow the steps below to enable HTTPS tunneling:
1. Register a new hostname (for example, beehive-mx.example.com)
2. Generate a Certificate Request to include the new hostname in the Beehive certificates. Refer "Configuring SSL" for more information on certificates.
3. Configure the load balancer to not SSL Terminate the traffic to port 443 of beehive-mx.example.com, instead redirect the traffic to the https port of the Beehive DMZ instance(s).
4. Adjust properties MxTunnelPort and MxTunnelHostName to point to the new hostname:
beectl modify_property --component _VIRTUAL_SERVER --name MxTunnelHostname --value beehive-mx.example.combeectl modify_property --component _VIRTUAL_SERVER --name MxTunnelPort --value 443beectl activate_configuration
Note: Tunneling is the encapsulation of one protocol with another different protocol. This is useful if you are using a BTP client behind a firewall that does not allow BTP(s) connections. In particular, tunneling allows Oracle Beehive Extensions for Outlook to connect through this firewall; Oracle Beehive Extensions for Outlook can encapsulate its BTP(s) session so that it appears to the firewall to be a regular HTTPS session.
Note: It is recommended that the primary common name on the certificate must match the primary client-facing server name. The certificate must match both the primary and MX tunneling hostnames. For example beehive.example.com and beehive-mx.example.com. The certificates must use the Subject Alternative Name field and specify both hostnames.

Configuring SSL Termination at Load Balancer
35-8 Oracle Beehive Installation Guide
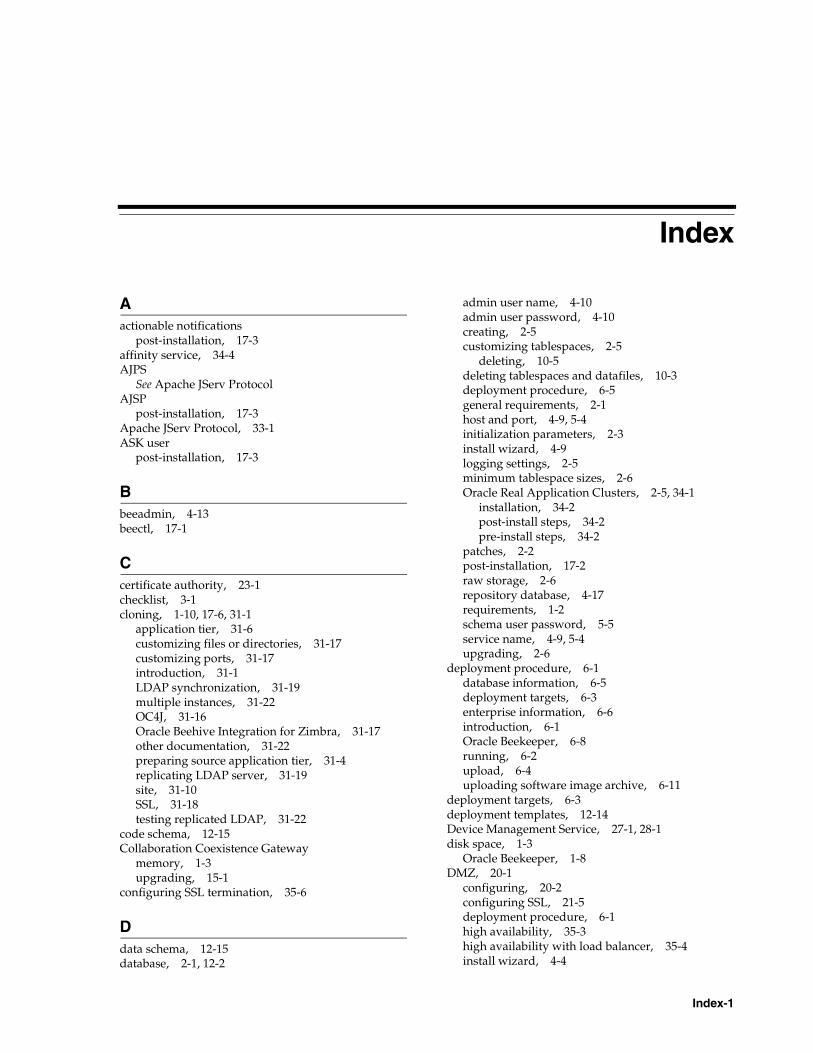
Index-1
Index
Aactionable notifications
post-installation, 17-3affinity service, 34-4AJPS
See Apache JServ ProtocolAJSP
post-installation, 17-3Apache JServ Protocol, 33-1ASK user
post-installation, 17-3
Bbeeadmin, 4-13beectl, 17-1
Ccertificate authority, 23-1checklist, 3-1cloning, 1-10, 17-6, 31-1
application tier, 31-6customizing files or directories, 31-17customizing ports, 31-17introduction, 31-1LDAP synchronization, 31-19multiple instances, 31-22OC4J, 31-16Oracle Beehive Integration for Zimbra, 31-17other documentation, 31-22preparing source application tier, 31-4replicating LDAP server, 31-19site, 31-10SSL, 31-18testing replicated LDAP, 31-22
code schema, 12-15Collaboration Coexistence Gateway
memory, 1-3upgrading, 15-1
configuring SSL termination, 35-6
Ddata schema, 12-15database, 2-1, 12-2
admin user name, 4-10admin user password, 4-10creating, 2-5customizing tablespaces, 2-5
deleting, 10-5deleting tablespaces and datafiles, 10-3deployment procedure, 6-5general requirements, 2-1host and port, 4-9, 5-4initialization parameters, 2-3install wizard, 4-9logging settings, 2-5minimum tablespace sizes, 2-6Oracle Real Application Clusters, 2-5, 34-1
installation, 34-2post-install steps, 34-2pre-install steps, 34-2
patches, 2-2post-installation, 17-2raw storage, 2-6repository database, 4-17requirements, 1-2schema user password, 5-5service name, 4-9, 5-4upgrading, 2-6
deployment procedure, 6-1database information, 6-5deployment targets, 6-3enterprise information, 6-6introduction, 6-1Oracle Beekeeper, 6-8running, 6-2upload, 6-4uploading software image archive, 6-11
deployment targets, 6-3deployment templates, 12-14Device Management Service, 27-1, 28-1disk space, 1-3
Oracle Beekeeper, 1-8DMZ, 20-1
configuring, 20-2configuring SSL, 21-5deployment procedure, 6-1high availability, 35-3high availability with load balancer, 35-4install wizard, 4-4
Index-2
installing, 1-5, 4-19installing in silent mode, 8-4manually deleting, 20-6memory, 1-3Oracle Wallet, 20-1post-installation, 17-2troubleshooting, 20-5
Domino foreign domain name, 7-9Domino user account, 7-9
Ee-mail
configuring e-mail client, 24-6configuring with SSL, 24-1post-installation, 17-3
end usersOracle Beehive Extensions for Outlook
verifying availability, 27-24enterprise, 4-11exporting configuration data, 11-1, 12-4
FFTP, 19-1
enabling active mode FTP, 19-1opening ports, 19-2passive mode FTP, 19-4setting parameters, 19-6
GGrid Control
installing provisioning application, 1-4requirements, 1-3
Hhigh availability, 35-1
configuring with load balancer, 35-1DMZ, 35-3DMZ and load balancer, 35-4
host name, 1-3HTTP
configure Apache HTTP server for WebDAV folders, 23-3
Iinstall wizard, 4-1
configuration assistants, 4-15, 4-20, 5-6database information, 4-9, 5-4enterprise definition information, 4-11existing enterprise information, 4-12Oracle Beekeeper, 5-1Oracle Coexistence Connector for Lotus Domino
Server, 7-6Oracle Collaboration Coexistence Gateway, 7-1prerequisite checks, 4-6, 4-20, 5-3select installation type, 4-7software image archive, 4-17
software library configuration, 4-17starting, 1-9template information, 4-10upgrading, 14-1
installationscenarios, 1-4verifying, 8-5
installingnon-SSL site, 21-8Oracle Beehive Conferencing client, 29-1Oracle Beehive Extensions for Explorer, 28-1Oracle Beehive Extensions for Outlook, 27-1Oracle Beekeeper, 5-1scenarios
against existing database, 1-4DMZ, 1-5, 4-19high availability environment, 1-8, 35-1more than one instance on the same
machine, 1-8Oracle Beehive Integration for Zimbra, 1-4Oracle Beekeeper, 1-8Oracle Collaboration Coexistence
Gateway, 1-6provisioning application, 1-4, 4-16silent mode, 1-8standard, 1-4, 4-4
verifying, 8-3, 8-5instance name, 4-12Internet Protocol version 6, 1-3inventory location, 4-2, 9-2
clones, 31-18IPv6, 1-3
Jjob system, 6-2
LLDAP
post-installation, 17-2LDAP synchronization
cloning, 31-19configuring SSL, 23-1testing replicated LDAP in cloned instance, 31-22troubleshooting replicated LDAP, 31-22
load balancer, 35-1, 35-6
Mmemory, 1-3
Oracle Beekeeper, 1-8Microsoft Active Directory
installing Oracle Beehive Extensions for Outlookverifying availability for end users, 27-24
mobile device management serviceupgrading, 12-18
multiple instances, 1-8, 22-3Oracle Real Application Clusters, 34-4
Index-3
Ooc4jadmin, 4-13, 7-4, 7-8operating system group, 4-3Oracle Application Server Certificate
Authority, 23-1Oracle Beehive
deployment procedure, 6-1restarting OC4J, 32-8virtual host, 32-7
Oracle Beehive Coexistence Connectorprovisioning application, 6-9
Oracle Beehive Coexistence Service, 7-4partnership key, 7-4
Oracle Beehive Conferencing client, 29-1installing
Device Management Service based, 29-3remote downloader, 29-3system requirements, 29-1uninstalling, 29-6updating, 29-5
Oracle Beehive Extensions for Explorer, 28-1, 28-2installing
desktop based, 28-9Device Management Service based, 28-2
language pack, 28-7system requirements, 28-1uninstalling, 28-8, 28-13updating, 28-6upgrading, 28-11
Oracle Beehive Extensions for Outlook, 27-1, 27-2configuration wizard, 27-17configuring, 27-6customizing
installation settings, 27-10installing
Active Directory, 27-22desktop based, 27-14Device Management Service based, 27-2
language pack, 27-7lockdown systems, 27-15migration tool, 27-24system requirements, 27-1uninstalling, 27-14, 27-22updating, 27-6upgrading, 27-21
Oracle Beehive Integration for Zimbra, 1-4, 12-4, 30-1
cloning, 31-17HTTP port, 30-2performance, improving, 30-3post-installation, 17-5, 30-1screen resolution, 30-1SSL, 30-1
Oracle Beekeeper, 1-8changing port, 32-3changing RMI port, 32-3deployment procedure, 6-8environment variables, 32-1extending Java Single Sign-On session
timeout, 32-4
installing, 5-1LDAP-based authentication, 32-4Oracle Wallet, 32-2post-installation, 17-6, 32-1software image archive, 4-18SSL, 32-1upgrading, 12-11, 14-1
Oracle Coexistence Connector for Lotus Domino Server, 7-2
Domino foreign domain name, 7-9Domino user account, 7-9install wizard, 7-6
Oracle Coexistence Connector for Microsoft Exchange Server, 7-2
Windows user account, 7-5Oracle Collaboration Coexistence Gateway
install wizard, 4-4, 7-1installing, 1-6installing in silent mode, 8-5Microsoft Exchange Server 2007, deploying
on, 1-7Oracle home, 4-5Oracle Management Service, 4-17Oracle RAC
enabling affinity service, 34-4Oracle Real Application Clusters, 2-5, 34-1
installation, 34-2multiple instances, 34-4post-install steps, 34-2pre-install steps, 34-2
Oracle uninstallingBeehive Extensions for Outlook, 27-22
Oracle Wallet, 22-3auto-login, 22-1changing password, 22-2configuring, 22-2configuring TLS, 22-1configuring with Oracle Beekeeper, 32-2creating CA-signed certificate and importing
it, 21-7creating self-signed certificate, 21-7creating self-signed certificate and importing
it, 21-6DMZ, 20-1multiple instances, 22-3ORMIS (ORMI over SSL), 22-3
disable, 22-4enable with default SSL, 22-4enable with password protection, 22-4
oraInventory, 4-2, 9-2organization, 4-11Outlook-post-installation, 17-4
Ppartnership key, 7-4, 7-8ports
adding endpoint, 24-3, 24-5creating and configuring endpoint, 24-5customizing ports in cloned instance, 31-17
Index-4
enabling non-SSL and SSL ports, 24-2FTP, 19-2HTTP port, Oracle Beehive Integration for
Zimbra, 30-2modifying endpoint, 24-2, 24-5
post_upgrade_db_actions.pl, 12-12post-installation, 1-9, 17-1
actionable notifications, 17-3AJPS, 17-3ASK user, 17-3certificate authority, 23-1cloning, 31-1configuring e-mail with SSL, 24-1configuring Oracle Beehive Integration for
Zimbra, 30-1database, 17-2DMZ, 17-2, 20-1e-mail, 17-3enabling AJPS, 33-1LDAP, 17-2Oracle Beehive Integration for Zimbra, 17-5Oracle Beekeeper, 17-6, 32-1Oracle Wallet, 22-1Outlook, 17-4remote media server, 17-5Secure Enterprise Search
Secure Enterprise Searchpost-installation, 17-4
Single Sign-On, 17-4SMS notifications, 17-4SSL, 17-2, 21-1TLS, 17-3, 22-1XMPP, 17-3
preparing for upgrade, 12-4prerequisites, 1-1preview mode, 4-2provisioning advisor framework, 6-1provisioning application, 1-4
install wizard, 4-4installing in silent mode, 8-4Oracle Beehive Coexistence Connector, 6-9
RRAC
See Oracle Real Application Clustersremote downloader, 27-2, 28-2remote media server
post-installation, 17-5requirements, 1-1
database, 1-2, 2-1general requirements, 2-1initialization parameters, 2-3logging settings, 2-5patches, 2-2
hardware, 1-3host name resolution, 1-3operating system, 1-2Oracle Beekeeper, 1-8Oracle Collaboration Coexistence Gateway, 1-7
Oracle Enterprise Manager Grid Control, 1-3response file, 8-1, 8-2, 8-3, 9-1, 9-2
creating, 8-2, 8-3
Sschema password, 4-13silent mode, 1-8, 8-1
DMZ, 8-4Oracle Collaboration Coexistence Gateway, 8-5provisioning application, 8-4uninstalling, 8-6upgrading, 8-5
Single Sign-On, 26-1post-installation, 17-4
site, 4-11site key, 4-12, 5-5SMS notifications
post-installation, 17-4software image archive, 4-17software library, 6-2software library location, 4-17SSL, 22-1
checklist, 21-1cloning, 31-18configuring, 21-1
Apache HTTP server for WebDAV, 23-3DMZ, 21-5LDAP integration, 23-1self-signed certificates, 21-3, 21-4test certificates, 21-2
configuring termination at load balancer, 35-6configuring with Oracle Beekeeper, 32-1installing non-SSL Oracle Beehive site, 21-8LDAP, configure for, 23-1post-installation, 17-2
swap space, 1-3
Ttemplates, 4-10, 6-7TLS, 22-1
post-installation, 17-3tnsnames.ora file, 12-3troubleshooting, 11-1
automated failover, 34-6DMZ configuration, 20-5exporting configuration data, 11-1recovering from failed configuration, 8-5replicated LDAP, 31-22
Uuninstall, 10-1
command-line option, 9-3deleting customized tablespaces and
datafiles, 10-5deleting tablespaces and datafiles, 10-3multiple instances, 10-3Oracle Beekeeper, 5-6
uninstall wizard, 5-6
Index-5
uninstalling, 1-10corrupted installation, 10-5Oracle Beehive Conferencing client, 29-6Oracle Beehive Extensions for Explorer, 28-8,
28-13Oracle Beehive Extensions for Outlook, 27-14Oracle Collaboration Coexistence Gateway, 1-7provisioning application, 10-2silent mode, 8-6
upgrading, 1-9, 12-1, 12-2, 12-3, 13-1analyzing application tiers, 12-3applying deployment template, 12-14before you start, 12-2clone patching, 16-1
types, 16-2Collaboration Coexistence Gateway, 15-1database, 2-6, 12-2gathering statistics, 12-15mobile device management service, 12-18multiple application tiers, 12-10Oracle Beehive Integration for Zimbra, 12-4Oracle Beekeeper, 12-11, 14-1post_upgrade_db_actions.pl, 12-12rolling back Application Server Critical Patch
Update, 12-3sequence, 12-9shutting down instances, 12-9silent mode, 8-5user directory services, 12-17User Directory Services synchronization
enabling, 12-17voicemail, 12-16XmppTimerKeepAliveTime, 12-2Zero Downtime Upgrade, 12-6
user directory servicesupgrading, 12-17
WWindows user account
Oracle Coexistence Connector for Microsoft Exchange Server, 7-5
XXMPP
post-installation, 17-3
ZZero Downtime Upgrade, 12-6

Index-6