Embed Size (px)
Citation preview
OOrraaccllee EEnntteerrpprriissee MMaannaaggeerr CCoonnffiigguurraattiioonn GGuuiiddee ffoorr OOnn--PPrreemmiisseessVVeerrssiioonn 1177
JJuullyy 22001177

3
Contents
Introduction............................................................................................. 5
Prerequisites for Using Enterprise Manager with Your Primavera Applications ........... 5
Installing and Configuring Oracle Enterprise Manager .............................................. 5
Installing Primavera Applications...................................................................... 6
Enabling Monitoring for Primavera Applications .................................................... 6
Setting Arguments for Primavera Applications in WebLogic ....................................... 6
Managing Plug-in Deployments ...................................................................... 8
Downloading the Plug-in ................................................................................ 8
Deploying the Plug-in ................................................................................... 8
Upgrading the Plug-in ................................................................................... 8
Undeploying the Plug-in ................................................................................ 8
Viewing Target Metrics ............................................................................... 9
Viewing Target Metrics in Enterprise Manger ........................................................ 9
Creating Primavera Targets ......................................................................... 10
Primavera Metrics Reference ....................................................................... 10
P6 EPPM Metrics ........................................................................................ 10
Primavera Unifier Metrics ............................................................................ 14
Primavera Analytics Metrics .......................................................................... 14
Primavera Gateway Metrics .......................................................................... 14
Patching Primavera Applications .................................................................. 15
Patching P6 EPPM ...................................................................................... 15
Patching Primavera Unifier ........................................................................... 17
Patching Using Library Job Templates .............................................................. 19
Legal Notices .......................................................................................... 21

5
Introduction
Scope
This guide contains the necessary information and procedures to use the Enterprise Manager for Oracle Construction and Engineering plug-in.
Topics include:
Plug-in maintenance and management
Viewing application-specific metrics
Audience
This guide is intended to be used by system and network administrators.
Using this Guide
If you are using this guide for the first time and haven't installed Enterprise Manager before, consider the following workflow:
1) Complete all of the prerequisite steps that are described in Prerequisites for Using Enterprise Manager with Your Primavera Applications (on page 5).
2) Deploy your plug-in using the information in Managing Plug-in Deployments (on page 8).
After you have Enterprise Manager installed and your plug-ins deployed, you can view the metrics for your Primavera applications by using the steps described in Viewing Target Metrics (on page 9).
Prerequisites for Using Enterprise Manager with Your Primavera Applications
The following prerequisites must be completed before you can use the Enterprise Manager for Oracle Construction and Engineering plug in.
Installing and Configuring Oracle Enterprise Manager
To install and configure Oracle Enterprise Manager, refer to the 13c version of the Oracle Enterprise Manager Cloud Control Online Documentation Library at http://www.oracle.com/technetwork/oem/enterprise-manager/documentation/index.html:
Cloud Control Basic Installation Guide
Cloud Control Advanced Installation and Configuration Guide
Oracle Enterprise Manager Configuration Guide for On-Premises
6
Installing Primavera Applications
Install the most recent version of your Primavera applications. For more information about installing each of the Primavera products, refer to the installation and configuration documents from the relevant product libraries on Oracle Technical Network.
Enabling Monitoring for Primavera Applications
Unmanaged hosts are hosts that do not have an agent. If you do not have an agent on a host, you cannot monitor your Primavera applications on that host. Therefore, to enable Oracle Enterprise Manager to monitor your Primavera applications, you must first convert unmanaged hosts to managed hosts by installing a management agent (agent) and then adding that host as a target in Enterprise Manager. Targets are entities such as host machines, databases, and Fusion Middleware components that can be managed and monitored in Cloud Control. Managed targets are entities that are actively being monitored and managed by Oracle Enterprise Manager.
For more information about adding agents to unmanaged hosts and creating targets, refer to the Enterprise Manager Cloud Control Administrator's Guide at http://docs.oracle.com/cd/E63000_01/EMADM/toc.htm.
Setting Arguments for Primavera Applications in WebLogic
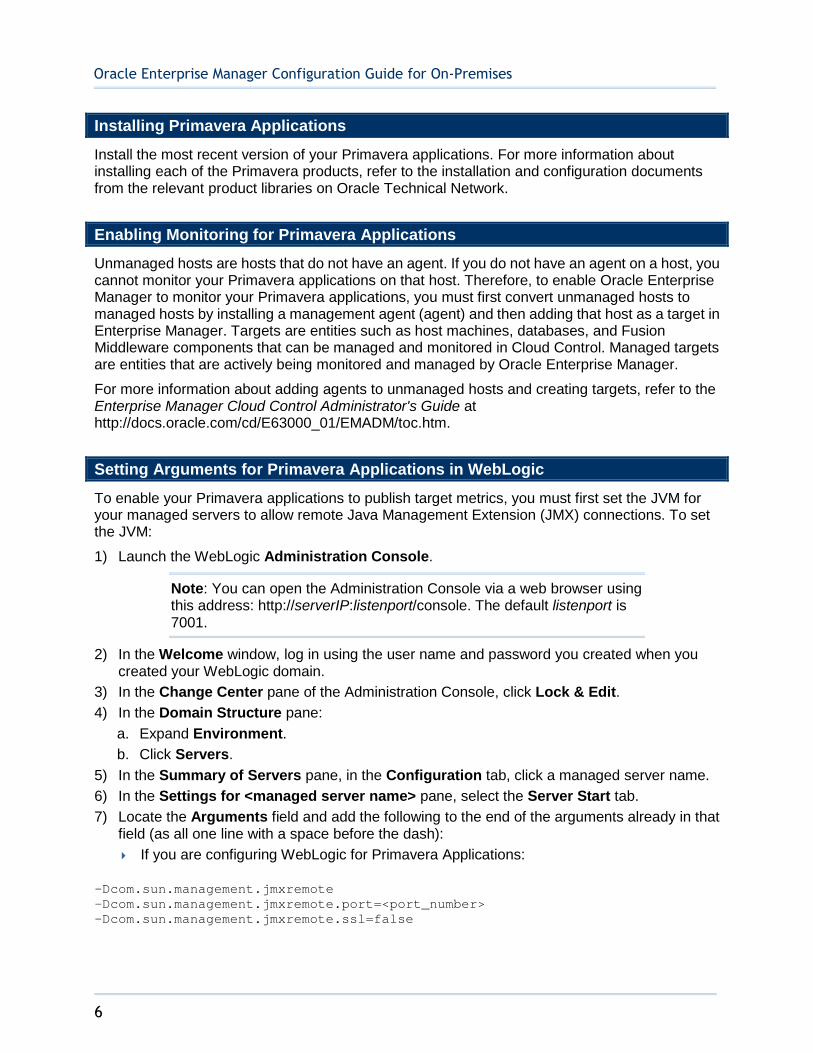
To enable your Primavera applications to publish target metrics, you must first set the JVM for your managed servers to allow remote Java Management Extension (JMX) connections. To set the JVM:
1) Launch the WebLogic Administration Console.
Note: You can open the Administration Console via a web browser using this address: http://serverIP:listenport/console. The default listenport is 7001.
2) In the Welcome window, log in using the user name and password you created when you created your WebLogic domain.
3) In the Change Center pane of the Administration Console, click Lock & Edit.
4) In the Domain Structure pane:
a. Expand Environment.
b. Click Servers.
5) In the Summary of Servers pane, in the Configuration tab, click a managed server name.
6) In the Settings for <managed server name> pane, select the Server Start tab.
7) Locate the Arguments field and add the following to the end of the arguments already in that field (as all one line with a space before the dash):
If you are configuring WebLogic for Primavera Applications:
-Dcom.sun.management.jmxremote -Dcom.sun.management.jmxremote.port=<port_number> -Dcom.sun.management.jmxremote.ssl=false
Prerequisites for Using Enterprise Manager with Your Primavera Applications
7
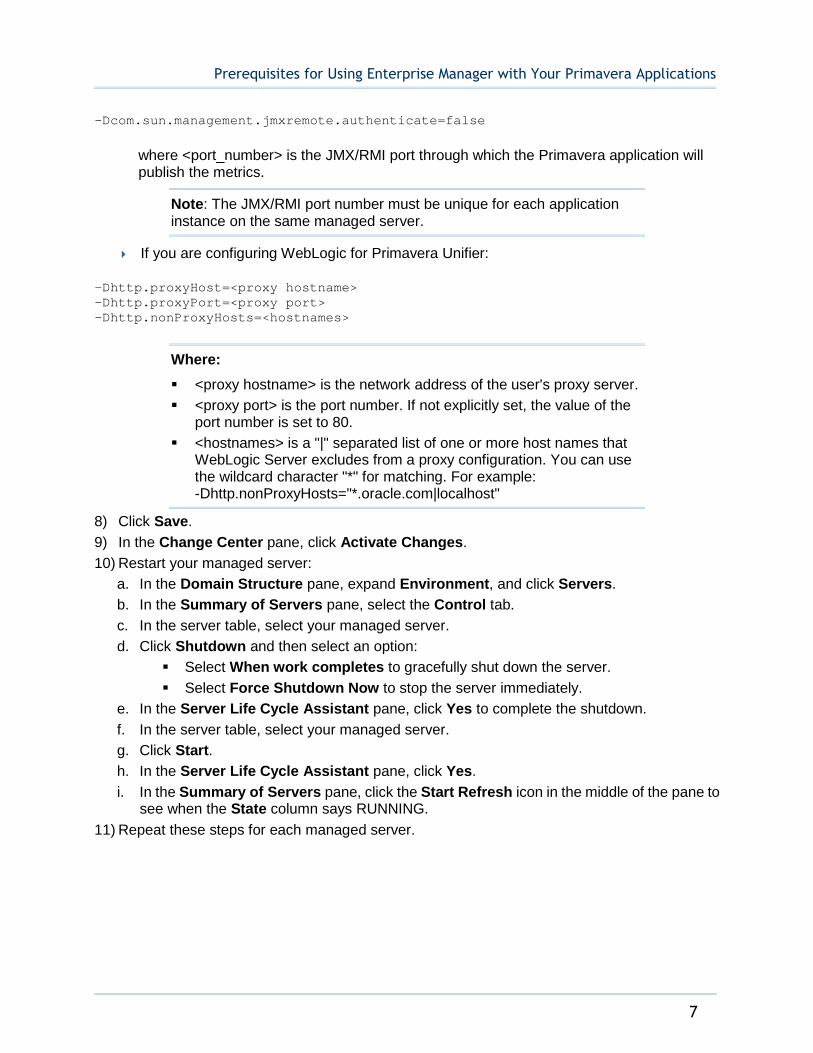
-Dcom.sun.management.jmxremote.authenticate=false
where <port_number> is the JMX/RMI port through which the Primavera application will publish the metrics.
Note: The JMX/RMI port number must be unique for each application instance on the same managed server.
If you are configuring WebLogic for Primavera Unifier:
-Dhttp.proxyHost=<proxy hostname> -Dhttp.proxyPort=<proxy port> -Dhttp.nonProxyHosts=<hostnames>
Where:
<proxy hostname> is the network address of the user's proxy server.
<proxy port> is the port number. If not explicitly set, the value of the port number is set to 80.
<hostnames> is a "|" separated list of one or more host names that WebLogic Server excludes from a proxy configuration. You can use the wildcard character "*" for matching. For example: -Dhttp.nonProxyHosts="*.oracle.com|localhost"
8) Click Save.
9) In the Change Center pane, click Activate Changes.
10) Restart your managed server:
a. In the Domain Structure pane, expand Environment, and click Servers.
b. In the Summary of Servers pane, select the Control tab.
c. In the server table, select your managed server.
d. Click Shutdown and then select an option:
Select When work completes to gracefully shut down the server.
Select Force Shutdown Now to stop the server immediately.
e. In the Server Life Cycle Assistant pane, click Yes to complete the shutdown.
f. In the server table, select your managed server.
g. Click Start.
h. In the Server Life Cycle Assistant pane, click Yes.
i. In the Summary of Servers pane, click the Start Refresh icon in the middle of the pane to see when the State column says RUNNING.
11) Repeat these steps for each managed server.

Oracle Enterprise Manager Configuration Guide for On-Premises
8
Managing Plug-in Deployments
Managing plug-in deployments refers to the tasks of downloading, deploying, upgrading, and undeploying your Enterprise Manager plug-in.
To deploy the Enterprise Manager for Oracle Construction and Engineering plug-in, refer to the following topics:
Downloading the Plug-in (on page 8)
Deploying the Plug-in (on page 8)
Upgrading the Plug-in (on page 8)
Undeploying the Plug-in (on page 8)
Downloading the Plug-in
You can download Enterprise Manager for Oracle Construction and Engineering in online or offline mode.
Online mode refers to an environment where you have Internet connectivity, and can download the plug-in directly through Enterprise Manager from My Oracle Support.
Offline mode refers to an environment where you do not have Internet connectivity, or where the plug-in is not available from My Oracle Support.
See the Managing Plug-ins section in the Oracle Enterprise Manager Cloud Control Administrator's Guide for details on how to download the plug-in in either mode.
Deploying the Plug-in
You can deploy plugins to an Oracle Management Service instance using the Enterprise Manager Cloud Control console or using the Enterprise Manager Command Line Interface.
See the Managing Plug-ins chapter in the Oracle Enterprise Manager Cloud Control Administrator's Guide for instructions on how to deploy plugins.
Upgrading the Plug-in
Oracle periodically provides new functionality and updates for existing features in plug-ins. The Self Update page allows you to receive notifications and view, download, and apply updates for plug-ins. While the updates on the Self Update page are retrieved automatically, a manual check can be made at any time.
See the Updating Cloud Control chapter in the Oracle Enterprise Manager Cloud Control Administrator's Guide for instructions on how to deploy plug-ins.
Undeploying the Plug-in
See the Managing Plug-ins chapter in the Oracle Enterprise Manager Cloud Control Administrator's Guide for instructions on how to undeploy plug-ins.
Viewing Target Metrics
9
Viewing Target Metrics
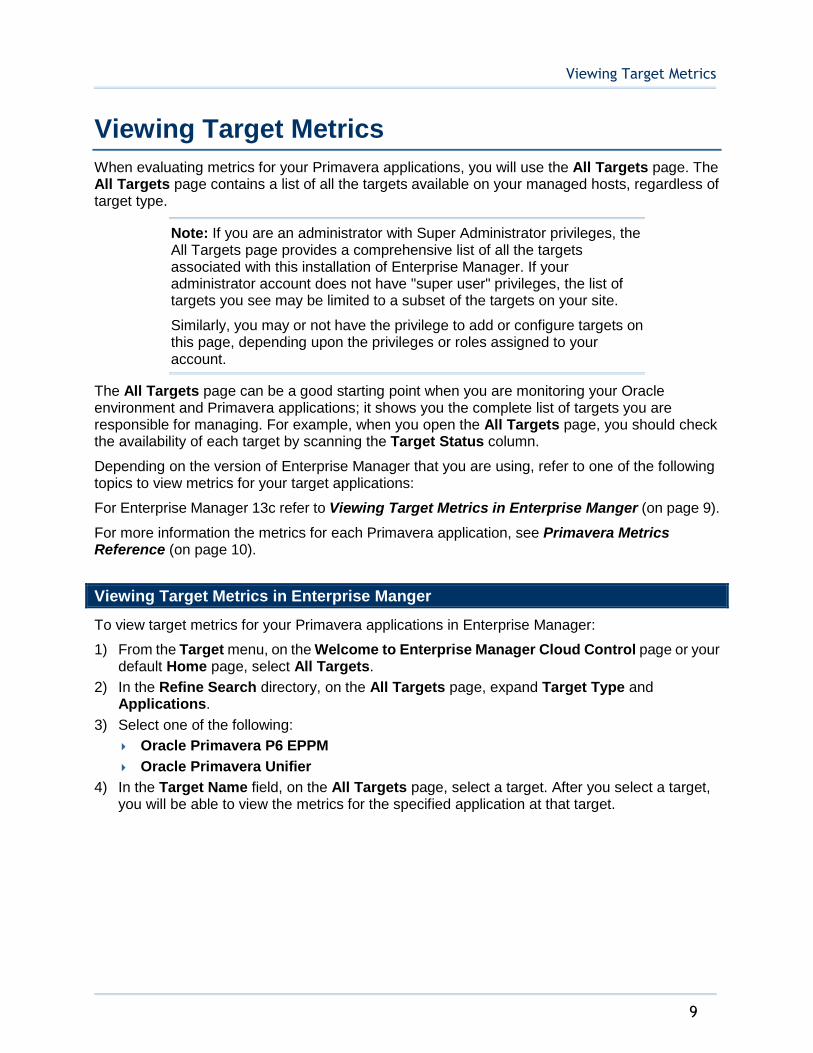
When evaluating metrics for your Primavera applications, you will use the All Targets page. The All Targets page contains a list of all the targets available on your managed hosts, regardless of target type.
Note: If you are an administrator with Super Administrator privileges, the All Targets page provides a comprehensive list of all the targets associated with this installation of Enterprise Manager. If your administrator account does not have "super user" privileges, the list of targets you see may be limited to a subset of the targets on your site.
Similarly, you may or not have the privilege to add or configure targets on this page, depending upon the privileges or roles assigned to your account.
The All Targets page can be a good starting point when you are monitoring your Oracle environment and Primavera applications; it shows you the complete list of targets you are responsible for managing. For example, when you open the All Targets page, you should check the availability of each target by scanning the Target Status column.
Depending on the version of Enterprise Manager that you are using, refer to one of the following topics to view metrics for your target applications:
For Enterprise Manager 13c refer to Viewing Target Metrics in Enterprise Manger (on page 9).
For more information the metrics for each Primavera application, see Primavera Metrics Reference (on page 10).
Viewing Target Metrics in Enterprise Manger
To view target metrics for your Primavera applications in Enterprise Manager:
1) From the Target menu, on the Welcome to Enterprise Manager Cloud Control page or your default Home page, select All Targets.
2) In the Refine Search directory, on the All Targets page, expand Target Type and Applications.
3) Select one of the following:
Oracle Primavera P6 EPPM
Oracle Primavera Unifier
4) In the Target Name field, on the All Targets page, select a target. After you select a target, you will be able to view the metrics for the specified application at that target.
Oracle Enterprise Manager Configuration Guide for On-Premises
10
Creating Primavera Targets
Primavera Metrics Reference
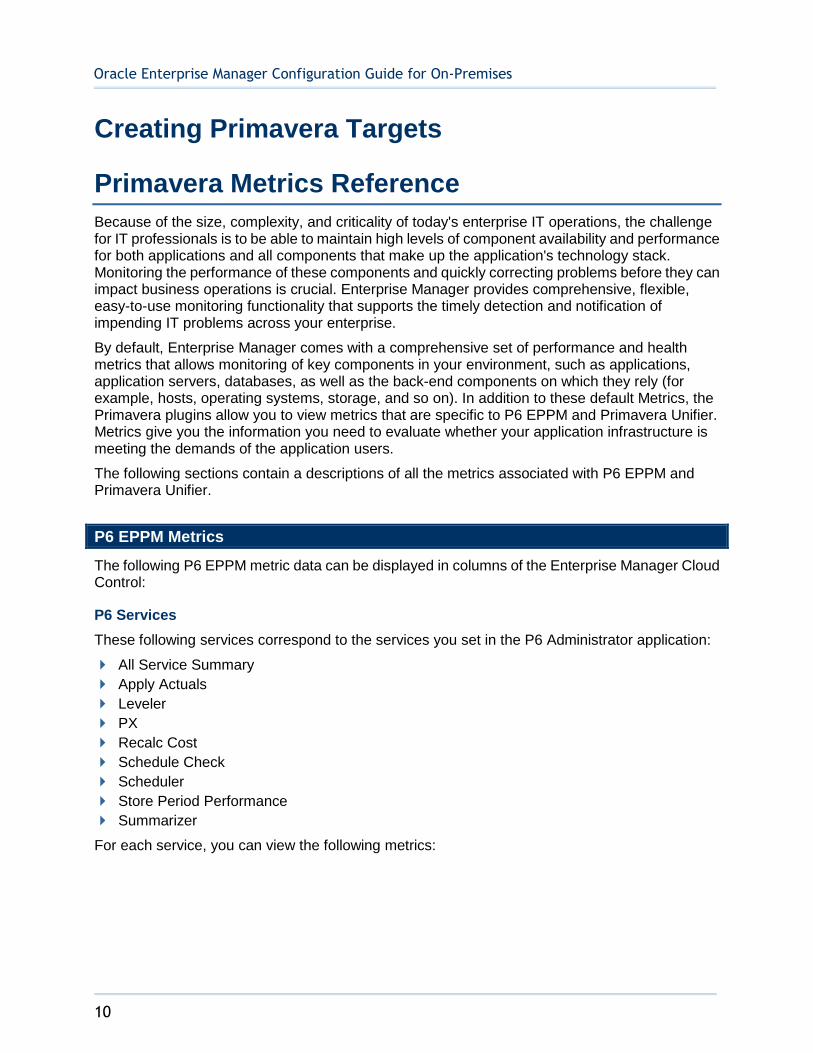
Because of the size, complexity, and criticality of today's enterprise IT operations, the challenge for IT professionals is to be able to maintain high levels of component availability and performance for both applications and all components that make up the application's technology stack. Monitoring the performance of these components and quickly correcting problems before they can impact business operations is crucial. Enterprise Manager provides comprehensive, flexible, easy-to-use monitoring functionality that supports the timely detection and notification of impending IT problems across your enterprise.
By default, Enterprise Manager comes with a comprehensive set of performance and health metrics that allows monitoring of key components in your environment, such as applications, application servers, databases, as well as the back-end components on which they rely (for example, hosts, operating systems, storage, and so on). In addition to these default Metrics, the Primavera plugins allow you to view metrics that are specific to P6 EPPM and Primavera Unifier. Metrics give you the information you need to evaluate whether your application infrastructure is meeting the demands of the application users.
The following sections contain a descriptions of all the metrics associated with P6 EPPM and Primavera Unifier.
P6 EPPM Metrics
The following P6 EPPM metric data can be displayed in columns of the Enterprise Manager Cloud Control:
P6 Services
These following services correspond to the services you set in the P6 Administrator application:
All Service Summary
Apply Actuals
Leveler
PX
Recalc Cost
Schedule Check
Scheduler
Store Period Performance
Summarizer
For each service, you can view the following metrics:
Primavera Metrics Reference
11
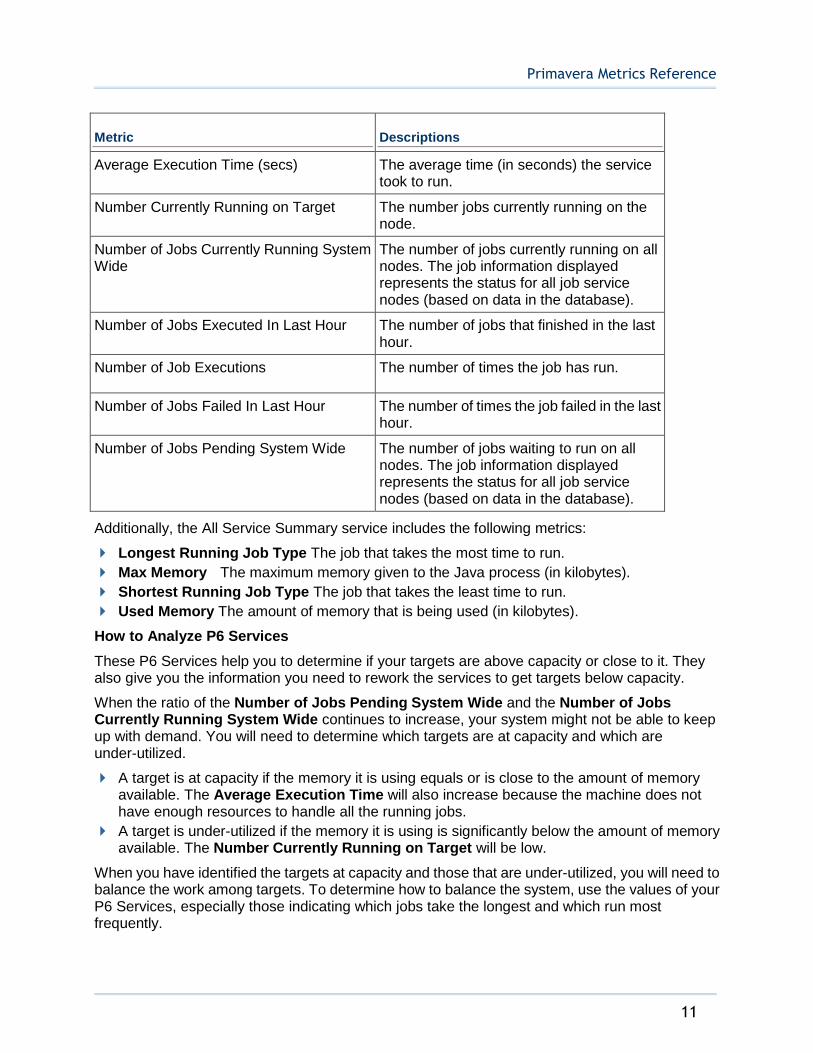
Metric Descriptions
Average Execution Time (secs) The average time (in seconds) the service took to run.
Number Currently Running on Target The number jobs currently running on the node.
Number of Jobs Currently Running System Wide
The number of jobs currently running on all nodes. The job information displayed represents the status for all job service nodes (based on data in the database).
Number of Jobs Executed In Last Hour The number of jobs that finished in the last hour.
Number of Job Executions The number of times the job has run.
Number of Jobs Failed In Last Hour The number of times the job failed in the last hour.
Number of Jobs Pending System Wide The number of jobs waiting to run on all nodes. The job information displayed represents the status for all job service nodes (based on data in the database).
Additionally, the All Service Summary service includes the following metrics:
Longest Running Job Type The job that takes the most time to run.
Max Memory The maximum memory given to the Java process (in kilobytes).
Shortest Running Job Type The job that takes the least time to run.
Used Memory The amount of memory that is being used (in kilobytes).
How to Analyze P6 Services
These P6 Services help you to determine if your targets are above capacity or close to it. They also give you the information you need to rework the services to get targets below capacity.
When the ratio of the Number of Jobs Pending System Wide and the Number of Jobs Currently Running System Wide continues to increase, your system might not be able to keep up with demand. You will need to determine which targets are at capacity and which are under-utilized.
A target is at capacity if the memory it is using equals or is close to the amount of memory available. The Average Execution Time will also increase because the machine does not have enough resources to handle all the running jobs.
A target is under-utilized if the memory it is using is significantly below the amount of memory available. The Number Currently Running on Target will be low.
When you have identified the targets at capacity and those that are under-utilized, you will need to balance the work among targets. To determine how to balance the system, use the values of your P6 Services, especially those indicating which jobs take the longest and which run most frequently.
Oracle Enterprise Manager Configuration Guide for On-Premises
12
If all of your machines are at capacity, you must add new targets.
Connection Pool
Each connection pool type has two sections: information and performance.
Long-Running SQL Connection Pool Information
Long-Running SQL Connection Pool Performance
Regular SQL Connection Pool Information
Regular SQL Connection Pool Performance
Transactional SQL Connection Pool Information
Transactional SQL Connection Pool Performance
The SQL Connection Pool types represent pools of database connections which are used for the following types of database access:
Long-Running SQL Connection Pool Used for long running transactions, which includes all job services (scheduling, summarizing, apply actuals).
Regular SQL Connection Pool Used for normal, short-lived transactions, typical of loading data in a web page.
Transactional SQL Connection Pool Used for transactional operations that usually involve inserting or updating more than 2 tables, and includes all P6 Integration API operations that involve updating data. Used for long delete operations within P6, including deleting projects and EPS objects.
The information section will display your settings as you have set them in the P6 Administrator application. The performance section will tell you how long it takes each service to run.
The performance sections will display the following information:
Average Lease Time (secs) The average time a user keeps a lease to a connection. If the average lease time over a period of a few days is close to the Maximum Lease Duration setting (for the particular connection pool type), then it may be necessary to increase the Maximum Lease Duration setting to avoid getting database connection lease timeout errors. The user will see these errors as a failure to load a web page or complete an API transaction. These errors will also be seen in the P6WebAccess logs.
Average Lease Wait Time (secs) The average time a user must wait for a lease to a connection to become available. If the average lease wait time over a period of a few days is close to the Lease Request Wait Timeout setting (30 seconds is the default for all connection pool types), then it may be necessary to increase the Maximum Connections setting to allow more connections to be available for leasing on a busy system. Another possible cause of a Lease Request Wait Timeout is database connections are being held due to database locks; your database administrator should investigate these locks.
Average SQL Times (secs) The average time to execute SQL queries.
Connections Allocated The number of connections available to users.
Connections In Use The number of leased connections that are actively involved in database transactions. If the Connections in Use value is close to the Maximum Connections setting for more than 1 minute, you are exceeding the capacity of your database connection pool, and you are most likely overloading your server with requests. Another possible cause of server overload is database locking; your database administrator should investigate.
Primavera Metrics Reference
13
Connections Leased The number of database connections that have been reserved by active user transactions.
Connections Recycled The number of previously leased connections that have been forcibly returned to the connection pool due to lease timeout while the connection was not in use.
Connections Revoked The number of previously leased connections that have been forcibly returned to the connection pool due to lease timeout during a database transaction.
Denied Lease Request The number of database connection lease requests that were denied due to insufficient free database connections. If 'Denied Lease Request' count increases by more than one per day, your database administrator should investigate the database load as it indicates that user transactions are failing due to insufficient number of free database connections for an extended period of time (see Average Lease Wait Time above).
SQL Queries the number of SQL queries executed.
Succeeded Lease Requests The number of users who received a lease request.
Waiting for a Lease The number of users waiting for a lease.
User Session Information
Historical Unique Total Logins: Total number of unique logins
This is the total historic count of unique P6 EPPM users that have logged into the system. This count will never exceed the total number of users in the user dictionary. For each unique user who has logged into the system, you will have only one entry to show they logged in. The purpose is to show how many users in your user dictionary have logged into the system.
Session Counts
These values refer to the number of P6 EPPM sessions currently logged in, based on module access permissions. For example, if a user logs in and has been assigned module access to both Resources and Projects, both the Projects session count and the Resources session count will increment by one. OEM collects counts for the number of:
API Sessions
Concurrent Users
Enterprise Reports Sessions
Logged in Users
P6 Analytics Sessions
P6 Professional Sessions
Portfolios Sessions
Projects Sessions
Resources Sessions
Team Member Interfaces Sessions
Team Member Sessions
Timesheet Sessions
Total User Sessions
Web Services Sessions
Oracle Enterprise Manager Configuration Guide for On-Premises
14
Primavera Unifier Metrics
The following Primavera Unifier metric data can be displayed in columns of the Enterprise Manager:
Login session count: shows the number of users currently signed in.
Free database connection count: shows the number of free database connections available.
Long locked database connection count: shows the number of database connections that are locked for 60 seconds or longer.
Active background job count: shows how many background jobs are currently running or the scheduled time already passed.
Active project count: shows the number of unique projects accessed by users.
Active web service count: shows the number of web services that are in processing state.
Other measurements: displays web request information, including max request time, average request time, and how many requests for each.
Primavera Analytics Metrics
The following Primavera Analytics metric data can be displayed in columns of the Enterprise Manager:
Number of Projects: shows how many projects are in the Primavera Data Warehouse.
Number of Resources: show the number of resources in Primavera Data Warehouse.
Number of Rows in Spread Fact tables: shows the row count for all Fact tables.
Number of Rows in History tables: shows the row count for all Historical tables.
Number of Rows in SCD tables: shows the row count for all SCD tables.
Number of projects marked for Activity level: shows the number of projects that have been assigned a history level in P6.
OBI queries > 1 min: shows the number of times in which OBI queries take longer than one minute to process.
# of partitions: shows the number of database partitions.
Primavera Gateway Metrics
The following Primavera Gateway metric data can be displayed in columns of the Enterprise Manager.
Average job completion time: shows the average completion time of all the jobs that were completed in the last 24 hours.
Average synchronization completion time: shows the average completion time of synchronizations that have become complete in the last 24 hours.
Average synchronization completion time per pair of providers: shows the average completion time of all the synchronizations that are executed between two providers in the last 24 hours.
Executed synchronization count: shows the number of executed synchronizations in the last 24 hours.

Patching Primavera Applications
15
Executed synchronization count per status of the execution: shows the numbers of executed synchronization in last 24 hours for an execution status.
Active job count: shows the number of currently active jobs.
Executed job count: shows the number of executed jobs in last 24 hours
Executed job count per status of the execution: shows the numbers of executed jobs in last 24 hours for an execution status.
Login session count: shows the number of users currently signed-in.
Free database connection count: shows the number of free database connections available.
Long locked database connection count: shows the number of database connections that are locked for 60 seconds or longer.
Active background job count: shows how many background jobs are currently running.
Max job time: shows the time of the longest job that has run last 24 hours
Max synchronization time: shows the time of the longest synchronization that has been executed in last 24 hours
Scheduled synchronization count: shows the current number of enabled, scheduled synchronizations.
Patching Primavera Applications
Rather than using the Patch Utility to manually patch your Primavera Unifier and P6 EPPM deployments, you can use Oracle Enterprise Manager to create an automated job to apply a patch to them.
A job is a unit of work that you define to automate commonly-run tasks. Scheduling flexibility is one of the advantages of jobs. You can schedule a job to start immediately or start at a later date and time. You can also store previously created and executed jobs in the job library. Later, you can develop new jobs using jobs from the job library as templates. For example, if you created a job to patch P6 EPPM 15 R2 to 15 R2.3 and later wanted to patch 15 R2.3 to 15 R2.6, you could create a "copy" of the job used to patch 15 R2 to 15 R2.3 and update the script that contains patch-specific details for the target patch.
Patching P6 EPPM
Use the following instructions to create a job in Oracle Enterprise Manager to patch P6 EPPM. After you create a job, you can use that job as a template to patch other P6 EPPM instances that you might have on any additional machines.
For more information about patching using previously run jobs, see Patching Using Library Job Templates (on page 19).
To create a job to patch P6 EPPM:
1) Log in to Enterprise Manager Cloud Control.
Oracle Enterprise Manager Configuration Guide for On-Premises
16
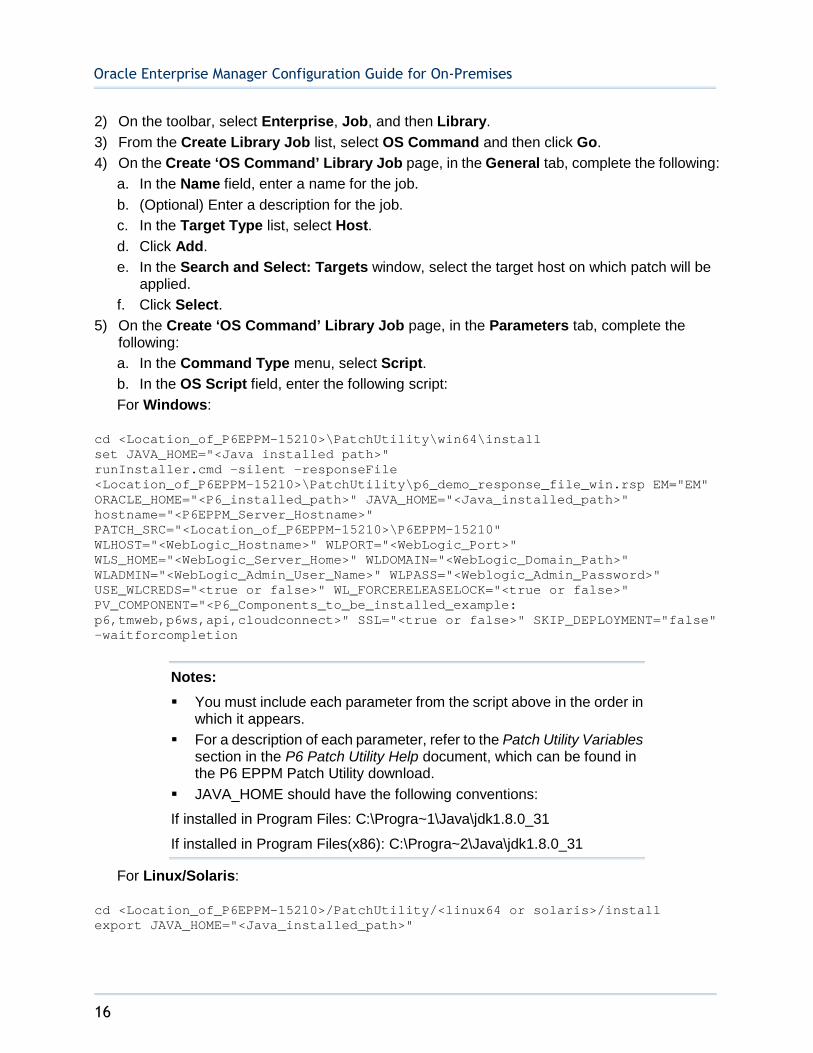
2) On the toolbar, select Enterprise, Job, and then Library.
3) From the Create Library Job list, select OS Command and then click Go.
4) On the Create ‘OS Command’ Library Job page, in the General tab, complete the following:
a. In the Name field, enter a name for the job.
b. (Optional) Enter a description for the job.
c. In the Target Type list, select Host.
d. Click Add.
e. In the Search and Select: Targets window, select the target host on which patch will be applied.
f. Click Select.
5) On the Create ‘OS Command’ Library Job page, in the Parameters tab, complete the following:
a. In the Command Type menu, select Script.
b. In the OS Script field, enter the following script:
For Windows:
cd <Location_of_P6EPPM-15210>\PatchUtility\win64\install set JAVA_HOME="<Java installed path>" runInstaller.cmd -silent -responseFile <Location_of_P6EPPM-15210>\PatchUtility\p6_demo_response_file_win.rsp EM="EM" ORACLE_HOME="<P6_installed_path>" JAVA_HOME="<Java_installed_path>" hostname="<P6EPPM_Server_Hostname>" PATCH_SRC="<Location_of_P6EPPM-15210>\P6EPPM-15210" WLHOST="<WebLogic_Hostname>" WLPORT="<WebLogic_Port>" WLS_HOME="<WebLogic_Server_Home>" WLDOMAIN="<WebLogic_Domain_Path>" WLADMIN="<WebLogic_Admin_User_Name>" WLPASS="<Weblogic_Admin_Password>" USE_WLCREDS="<true or false>" WL_FORCERELEASELOCK="<true or false>" PV_COMPONENT="<P6_Components_to_be_installed_example: p6,tmweb,p6ws,api,cloudconnect>" SSL="<true or false>" SKIP_DEPLOYMENT="false" -waitforcompletion
Notes:
You must include each parameter from the script above in the order in which it appears.
For a description of each parameter, refer to the Patch Utility Variablessection in the P6 Patch Utility Help document, which can be found in the P6 EPPM Patch Utility download.
JAVA_HOME should have the following conventions:
If installed in Program Files: C:\Progra~1\Java\jdk1.8.0_31
If installed in Program Files(x86): C:\Progra~2\Java\jdk1.8.0_31
For Linux/Solaris:
cd <Location_of_P6EPPM-15210>/PatchUtility/<linux64 or solaris>/install export JAVA_HOME="<Java_installed_path>"
Patching Primavera Applications
17
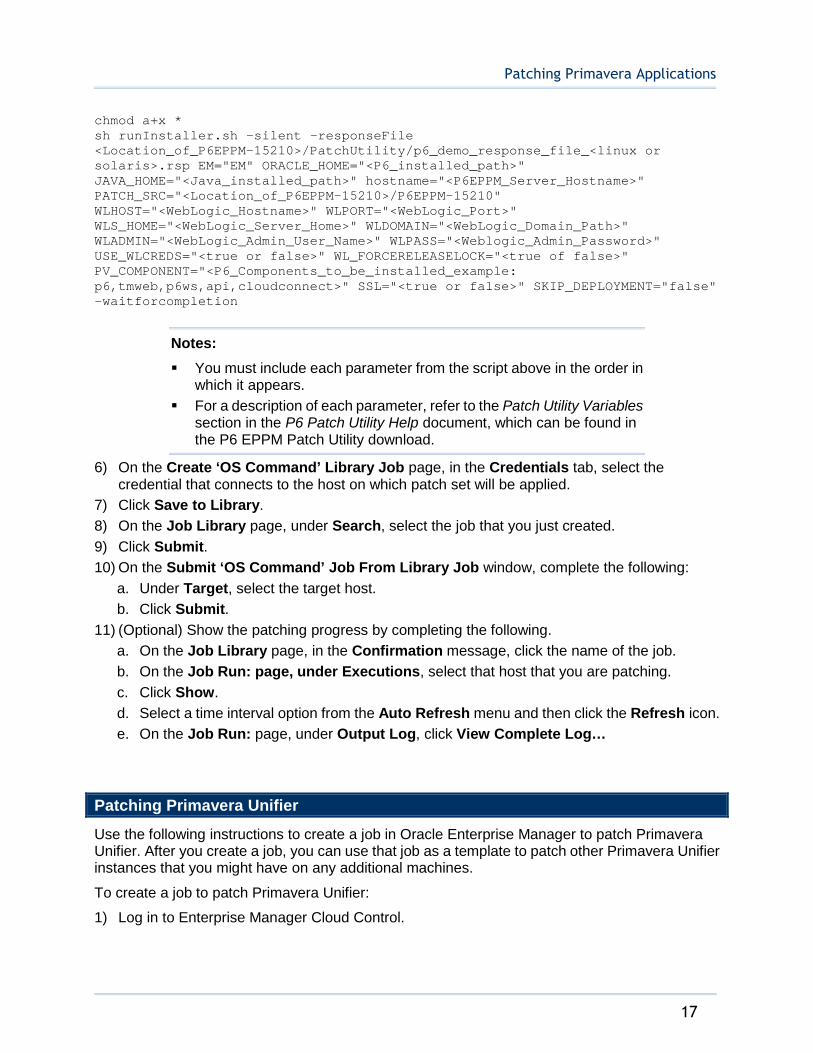
chmod a+x * sh runInstaller.sh -silent -responseFile <Location_of_P6EPPM-15210>/PatchUtility/p6_demo_response_file_<linux or solaris>.rsp EM="EM" ORACLE_HOME="<P6_installed_path>" JAVA_HOME="<Java_installed_path>" hostname="<P6EPPM_Server_Hostname>" PATCH_SRC="<Location_of_P6EPPM-15210>/P6EPPM-15210" WLHOST="<WebLogic_Hostname>" WLPORT="<WebLogic_Port>" WLS_HOME="<WebLogic_Server_Home>" WLDOMAIN="<WebLogic_Domain_Path>" WLADMIN="<WebLogic_Admin_User_Name>" WLPASS="<Weblogic_Admin_Password>" USE_WLCREDS="<true or false>" WL_FORCERELEASELOCK="<true of false>" PV_COMPONENT="<P6_Components_to_be_installed_example: p6,tmweb,p6ws,api,cloudconnect>" SSL="<true or false>" SKIP_DEPLOYMENT="false" -waitforcompletion
Notes:
You must include each parameter from the script above in the order in which it appears.
For a description of each parameter, refer to the Patch Utility Variablessection in the P6 Patch Utility Help document, which can be found in the P6 EPPM Patch Utility download.
6) On the Create ‘OS Command’ Library Job page, in the Credentials tab, select the credential that connects to the host on which patch set will be applied.
7) Click Save to Library.
8) On the Job Library page, under Search, select the job that you just created.
9) Click Submit.
10) On the Submit ‘OS Command’ Job From Library Job window, complete the following:
a. Under Target, select the target host.
b. Click Submit.
11) (Optional) Show the patching progress by completing the following.
a. On the Job Library page, in the Confirmation message, click the name of the job.
b. On the Job Run: page, under Executions, select that host that you are patching.
c. Click Show.
d. Select a time interval option from the Auto Refresh menu and then click the Refresh icon.
e. On the Job Run: page, under Output Log, click View Complete Log…
Patching Primavera Unifier
Use the following instructions to create a job in Oracle Enterprise Manager to patch Primavera Unifier. After you create a job, you can use that job as a template to patch other Primavera Unifier instances that you might have on any additional machines.
To create a job to patch Primavera Unifier:
1) Log in to Enterprise Manager Cloud Control.
Oracle Enterprise Manager Configuration Guide for On-Premises
18
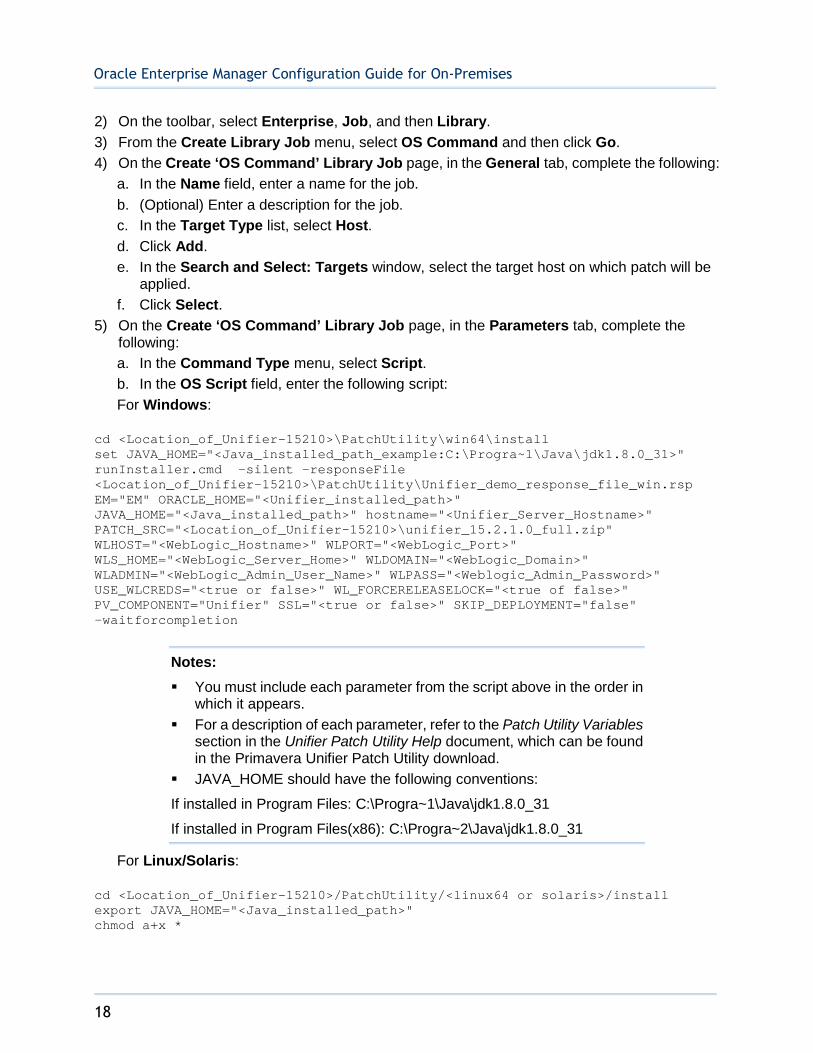
2) On the toolbar, select Enterprise, Job, and then Library.
3) From the Create Library Job menu, select OS Command and then click Go.
4) On the Create ‘OS Command’ Library Job page, in the General tab, complete the following:
a. In the Name field, enter a name for the job.
b. (Optional) Enter a description for the job.
c. In the Target Type list, select Host.
d. Click Add.
e. In the Search and Select: Targets window, select the target host on which patch will be applied.
f. Click Select.
5) On the Create ‘OS Command’ Library Job page, in the Parameters tab, complete the following:
a. In the Command Type menu, select Script.
b. In the OS Script field, enter the following script:
For Windows:
cd <Location_of_Unifier-15210>\PatchUtility\win64\install set JAVA_HOME="<Java_installed_path_example:C:\Progra~1\Java\jdk1.8.0_31>" runInstaller.cmd -silent -responseFile <Location_of_Unifier-15210>\PatchUtility\Unifier_demo_response_file_win.rsp EM="EM" ORACLE_HOME="<Unifier_installed_path>" JAVA_HOME="<Java_installed_path>" hostname="<Unifier_Server_Hostname>" PATCH_SRC="<Location_of_Unifier-15210>\unifier_15.2.1.0_full.zip" WLHOST="<WebLogic_Hostname>" WLPORT="<WebLogic_Port>" WLS_HOME="<WebLogic_Server_Home>" WLDOMAIN="<WebLogic_Domain>" WLADMIN="<WebLogic_Admin_User_Name>" WLPASS="<Weblogic_Admin_Password>" USE_WLCREDS="<true or false>" WL_FORCERELEASELOCK="<true of false>" PV_COMPONENT="Unifier" SSL="<true or false>" SKIP_DEPLOYMENT="false" -waitforcompletion
Notes:
You must include each parameter from the script above in the order in which it appears.
For a description of each parameter, refer to the Patch Utility Variablessection in the Unifier Patch Utility Help document, which can be found in the Primavera Unifier Patch Utility download.
JAVA_HOME should have the following conventions:
If installed in Program Files: C:\Progra~1\Java\jdk1.8.0_31
If installed in Program Files(x86): C:\Progra~2\Java\jdk1.8.0_31
For Linux/Solaris:
cd <Location_of_Unifier-15210>/PatchUtility/<linux64 or solaris>/install export JAVA_HOME="<Java_installed_path>" chmod a+x *
Patching Primavera Applications
19
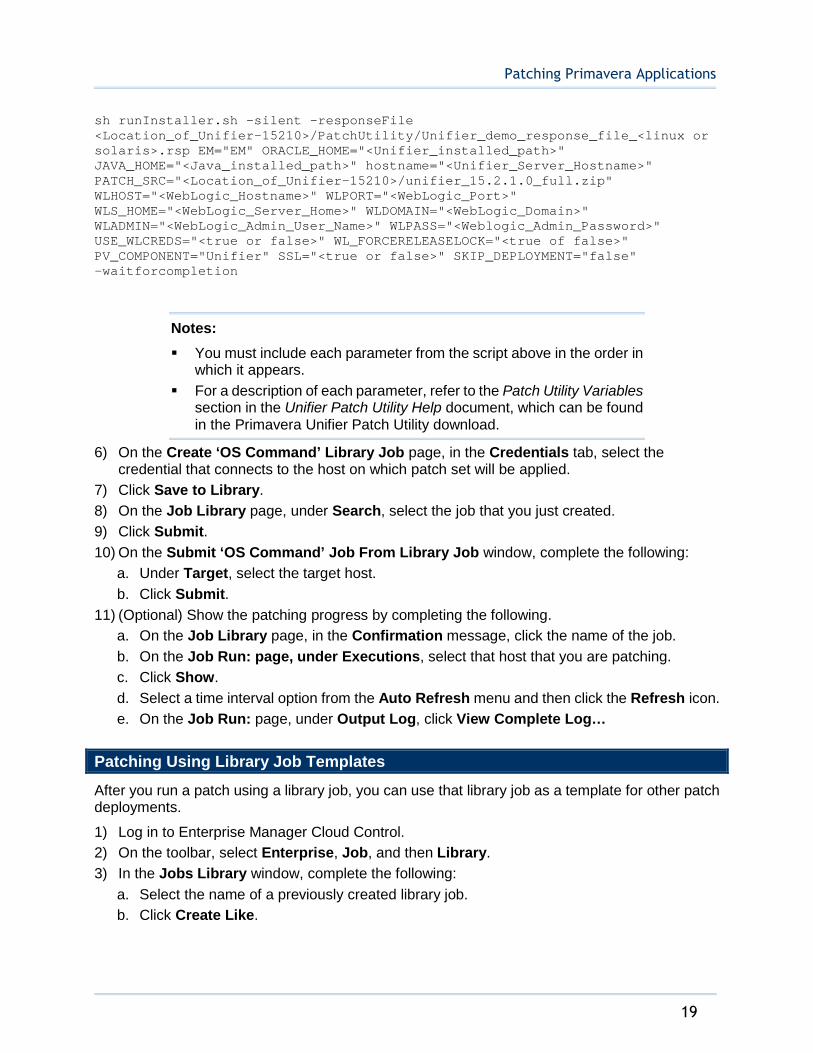
sh runInstaller.sh -silent -responseFile <Location_of_Unifier-15210>/PatchUtility/Unifier_demo_response_file_<linux or solaris>.rsp EM="EM" ORACLE_HOME="<Unifier_installed_path>" JAVA_HOME="<Java_installed_path>" hostname="<Unifier_Server_Hostname>" PATCH_SRC="<Location_of_Unifier-15210>/unifier_15.2.1.0_full.zip" WLHOST="<WebLogic_Hostname>" WLPORT="<WebLogic_Port>" WLS_HOME="<WebLogic_Server_Home>" WLDOMAIN="<WebLogic_Domain>" WLADMIN="<WebLogic_Admin_User_Name>" WLPASS="<Weblogic_Admin_Password>" USE_WLCREDS="<true or false>" WL_FORCERELEASELOCK="<true of false>" PV_COMPONENT="Unifier" SSL="<true or false>" SKIP_DEPLOYMENT="false" -waitforcompletion
Notes:
You must include each parameter from the script above in the order in which it appears.
For a description of each parameter, refer to the Patch Utility Variablessection in the Unifier Patch Utility Help document, which can be found in the Primavera Unifier Patch Utility download.
6) On the Create ‘OS Command’ Library Job page, in the Credentials tab, select the credential that connects to the host on which patch set will be applied.
7) Click Save to Library.
8) On the Job Library page, under Search, select the job that you just created.
9) Click Submit.
10) On the Submit ‘OS Command’ Job From Library Job window, complete the following:
a. Under Target, select the target host.
b. Click Submit.
11) (Optional) Show the patching progress by completing the following.
a. On the Job Library page, in the Confirmation message, click the name of the job.
b. On the Job Run: page, under Executions, select that host that you are patching.
c. Click Show.
d. Select a time interval option from the Auto Refresh menu and then click the Refresh icon.
e. On the Job Run: page, under Output Log, click View Complete Log…
Patching Using Library Job Templates
After you run a patch using a library job, you can use that library job as a template for other patch deployments.
1) Log in to Enterprise Manager Cloud Control.
2) On the toolbar, select Enterprise, Job, and then Library.
3) In the Jobs Library window, complete the following:
a. Select the name of a previously created library job.
b. Click Create Like.
Oracle Enterprise Manager Configuration Guide for On-Premises
20
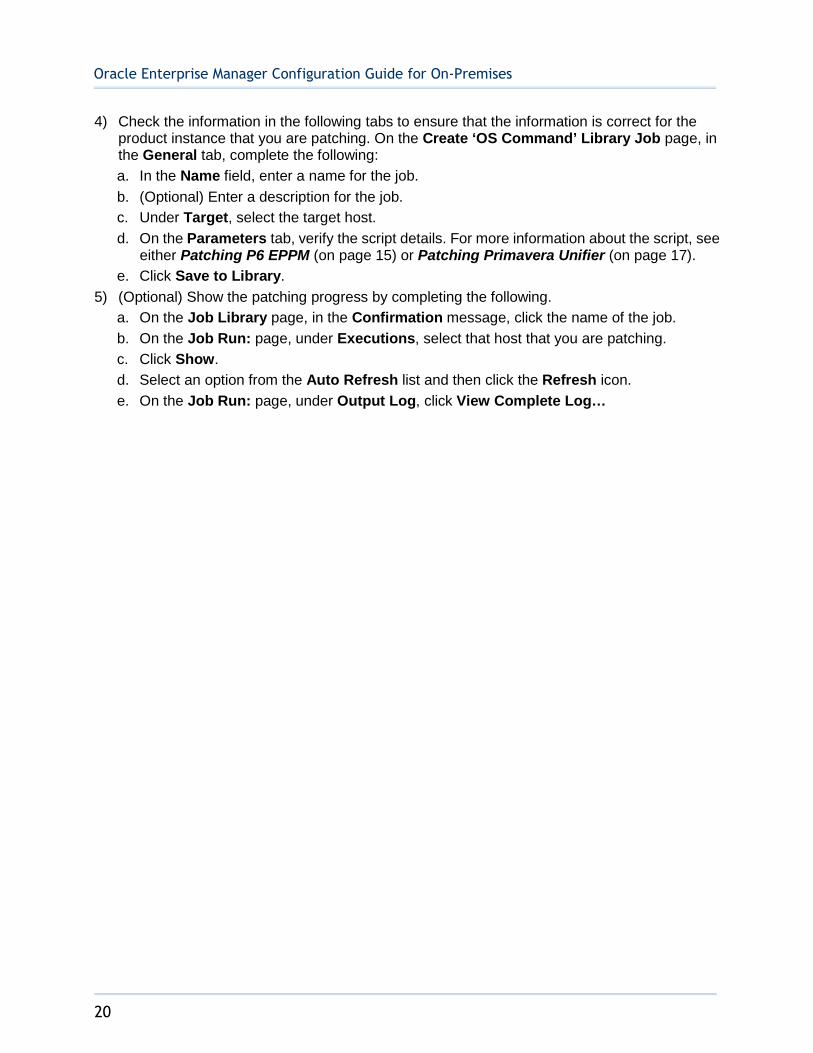
4) Check the information in the following tabs to ensure that the information is correct for the product instance that you are patching. On the Create ‘OS Command’ Library Job page, in the General tab, complete the following:
a. In the Name field, enter a name for the job.
b. (Optional) Enter a description for the job.
c. Under Target, select the target host.
d. On the Parameters tab, verify the script details. For more information about the script, see either Patching P6 EPPM (on page 15) or Patching Primavera Unifier (on page 17).
e. Click Save to Library.
5) (Optional) Show the patching progress by completing the following.
a. On the Job Library page, in the Confirmation message, click the name of the job.
b. On the Job Run: page, under Executions, select that host that you are patching.
c. Click Show.
d. Select an option from the Auto Refresh list and then click the Refresh icon.
e. On the Job Run: page, under Output Log, click View Complete Log…

21
Oracle Primavera Oracle Enterprise Manager Configuration Guide for On-Premises
Copyright © 2014, 2017, Oracle and/or its affiliates. All rights reserved. Oracle and Java are registered trademarks of Oracle and/or its affiliates. Other names may be trademarks of their respective owners.
Intel and Intel Xeon are trademarks or registered trademarks of Intel Corporation. All SPARC trademarks are used under license and are trademarks or registered trademarks of SPARC International, Inc. AMD, Opteron, the AMD logo, and the AMD Opteron logo are trademarks or registered trademarks of Advanced Micro Devices. UNIX is a registered trademark of The Open Group.
This software and related documentation are provided under a license agreement containing restrictions on use and disclosure and are protected by intellectual property laws. Except as expressly permitted in your license agreement or allowed by law, you may not use, copy, reproduce, translate, broadcast, modify, license, transmit, distribute, exhibit, perform, publish or display any part, in any form, or by any means. Reverse engineering, disassembly, or decompilation of this software, unless required by law for interoperability, is prohibited.
The information contained herein is subject to change without notice and is not warranted to be error-free. If you find any errors, please report them to us in writing.
If this is software or related documentation that is delivered to the U.S. Government or anyone licensing it on behalf of the U.S. Government, the following notice is applicable:
U.S. GOVERNMENT END USERS: Oracle programs, including any operating system, integrated software, any programs installed on the hardware, and/or documentation, delivered to U.S. Government end users are “commercial computer software" pursuant to the applicable Federal Acquisition Regulation and agency-specific supplemental regulations. As such, use, duplication, disclosure, modification, and adaptation of the programs, including any operating system, integrated software, any programs installed on the hardware, and/or documentation, shall be subject to license terms and license restrictions applicable to the programs. No other rights are granted to the U.S. Government.
This software or hardware is developed for general use in a variety of information management applications. It is not developed or intended for use in any inherently dangerous applications, including applications that may create a risk of personal injury. If you use this software or hardware in dangerous applications, then you shall be responsible to take all appropriate failsafe, backup, redundancy, and other measures to ensure its safe use. Oracle Corporation and its affiliates disclaim any liability for any damages caused by use of this software or hardware in dangerous applications.
This software or hardware and documentation may provide access to or information on content, products and services from third-parties. Oracle Corporation and its affiliates are not responsible for and expressly disclaim all warranties of any kind with respect to third-party content, products, and services. Oracle Corporation and its affiliates will not be responsible for any loss, costs, or damages incurred due to your access to or use of third-party content, products, or services.
Legal Notices