Embed Size (px)
Citation preview

Oracle® Enterprise Performance Management System
Deployment Options Guide
Release 11.1.2.3
Updated: August 2013

EPM System Deployment Options Guide, 11.1.2.3
Copyright © 2013, Oracle and/or its affiliates. All rights reserved.
Authors: EPM Information Development Team
Oracle and Java are registered trademarks of Oracle and/or its affiliates. Other names may be trademarks of their respectiveowners.
This software and related documentation are provided under a license agreement containing restrictions on use anddisclosure and are protected by intellectual property laws. Except as expressly permitted in your license agreement orallowed by law, you may not use, copy, reproduce, translate, broadcast, modify, license, transmit, distribute, exhibit,perform, publish, or display any part, in any form, or by any means. Reverse engineering, disassembly, or decompilationof this software, unless required by law for interoperability, is prohibited.
The information contained herein is subject to change without notice and is not warranted to be error-free. If you findany errors, please report them to us in writing.
If this is software or related documentation that is delivered to the U.S. Government or anyone licensing it on behalf ofthe U.S. Government, the following notice is applicable:
U.S. GOVERNMENT RIGHTS:
Programs, software, databases, and related documentation and technical data delivered to U.S. Government customersare "commercial computer software" or "commercial technical data" pursuant to the applicable Federal AcquisitionRegulation and agency-specific supplemental regulations. As such, the use, duplication, disclosure, modification, andadaptation shall be subject to the restrictions and license terms set forth in the applicable Government contract, and, tothe extent applicable by the terms of the Government contract, the additional rights set forth in FAR 52.227-19, CommercialComputer Software License (December 2007). Oracle America, Inc., 500 Oracle Parkway, Redwood City, CA 94065.
This software or hardware is developed for general use in a variety of information management applications. It is notdeveloped or intended for use in any inherently dangerous applications, including applications that may create a risk ofpersonal injury. If you use this software or hardware in dangerous applications, then you shall be responsible to take allappropriate fail-safe, backup, redundancy, and other measures to ensure its safe use. Oracle Corporation and its affiliatesdisclaim any liability for any damages caused by use of this software or hardware in dangerous applications.
This software or hardware and documentation may provide access to or information on content, products, and servicesfrom third parties. Oracle Corporation and its affiliates are not responsible for and expressly disclaim all warranties of anykind with respect to third-party content, products, and services. Oracle Corporation and its affiliates will not be responsiblefor any loss, costs, or damages incurred due to your access to or use of third-party content, products, or services.

Documentation Accessibility . . . . . . . . . . . . . . . . . . . . . . . . . . . . . . . . . . . . . . . . . . . . . . . . . . . . . . . . . . . 7
Chapter 1. About Deployment Options . . . . . . . . . . . . . . . . . . . . . . . . . . . . . . . . . . . . . . . . . . . . . . . . . . . . . 9
Chapter 2. Scaling EPM System Products . . . . . . . . . . . . . . . . . . . . . . . . . . . . . . . . . . . . . . . . . . . . . . . . . 11
Vertically Scaling EPM System Components . . . . . . . . . . . . . . . . . . . . . . . . . . . . . . . . . . 11
Assumptions and Prerequisites . . . . . . . . . . . . . . . . . . . . . . . . . . . . . . . . . . . . . . . . 12
Vertically Scaling . . . . . . . . . . . . . . . . . . . . . . . . . . . . . . . . . . . . . . . . . . . . . . . . . . 12
Validating the Vertical Scaling . . . . . . . . . . . . . . . . . . . . . . . . . . . . . . . . . . . . . . . . . 13
Clustering Java Web Applications . . . . . . . . . . . . . . . . . . . . . . . . . . . . . . . . . . . . . . . . . 13
Prerequisites . . . . . . . . . . . . . . . . . . . . . . . . . . . . . . . . . . . . . . . . . . . . . . . . . . . . . . 13
Clustering Java Web Applications Using EPM System Configurator . . . . . . . . . . . . . . 14
Clustering Java Web Applications in a WebLogic Manual Deployment . . . . . . . . . . . . 15
Extending a WebSphere Deployment . . . . . . . . . . . . . . . . . . . . . . . . . . . . . . . . . . . . 16
Scaling Out a Single Managed Server . . . . . . . . . . . . . . . . . . . . . . . . . . . . . . . . . . . . 18
Clustering Foundation Services . . . . . . . . . . . . . . . . . . . . . . . . . . . . . . . . . . . . . . . . . . . 18
Performance Management Architect Dimension Server Clustering and Failover . . . . . 18
Scaling Reporting and Analysis Framework and Interactive Reporting . . . . . . . . . . . . . . . 24
Assumptions and Prerequisites . . . . . . . . . . . . . . . . . . . . . . . . . . . . . . . . . . . . . . . . 24
Scaling Reporting and Analysis Framework and Interactive Reporting . . . . . . . . . . . . 25
Validating the Scaling . . . . . . . . . . . . . . . . . . . . . . . . . . . . . . . . . . . . . . . . . . . . . . . 26
Clustering Financial Management Servers . . . . . . . . . . . . . . . . . . . . . . . . . . . . . . . . . . . 26
Load Balancing Financial Management, Strategic Finance, or FDM IIS Web Applicationson IIS . . . . . . . . . . . . . . . . . . . . . . . . . . . . . . . . . . . . . . . . . . . . . . . . . . . . . . . . . . . . . . 26
Clustering Data Management . . . . . . . . . . . . . . . . . . . . . . . . . . . . . . . . . . . . . . . . . . . . 27
FDM Clusters . . . . . . . . . . . . . . . . . . . . . . . . . . . . . . . . . . . . . . . . . . . . . . . . . . . . . 27
Data Relationship Management Clusters . . . . . . . . . . . . . . . . . . . . . . . . . . . . . . . . . 28
Configuring Essbase Clusters . . . . . . . . . . . . . . . . . . . . . . . . . . . . . . . . . . . . . . . . . . . . . 29
Configuring Active-Passive Essbase Clusters (Windows) . . . . . . . . . . . . . . . . . . . . . . 30
Configuring Active-Passive Essbase Clusters (UNIX) . . . . . . . . . . . . . . . . . . . . . . . . . 32
Configuring Active-Active Essbase Clusters . . . . . . . . . . . . . . . . . . . . . . . . . . . . . . . 36
Vertically Scaling Essbase . . . . . . . . . . . . . . . . . . . . . . . . . . . . . . . . . . . . . . . . . . . . . 42
Connections to Essbase Clusters . . . . . . . . . . . . . . . . . . . . . . . . . . . . . . . . . . . . . . . 43
OPMN Service Failover for Essbase Server . . . . . . . . . . . . . . . . . . . . . . . . . . . . . . . . 44
Configuring Financial Close Management to work with SOA Clusters . . . . . . . . . . . . . . . 49
Assumptions and Prerequisites . . . . . . . . . . . . . . . . . . . . . . . . . . . . . . . . . . . . . . . . 49
Setting up the Load Balancer . . . . . . . . . . . . . . . . . . . . . . . . . . . . . . . . . . . . . . . . . . 50
Configuring Financial Close Management . . . . . . . . . . . . . . . . . . . . . . . . . . . . . . . . 50
Validating the Financial Close Management Setup for SOA High Availability . . . . . . . 51
Contents iii

Chapter 3. Configuring Oracle Web Services Manager for EPM System Products . . . . . . . . . . . . . . . . . . . . . . 53
Configuring Oracle Web Services Manager . . . . . . . . . . . . . . . . . . . . . . . . . . . . . . . . . . . 53
Enabling Oracle Web Services Policy Manager to Service Requests . . . . . . . . . . . . . . . . . . 55
Setting Up the Keystore for Message Protection . . . . . . . . . . . . . . . . . . . . . . . . . . . . . . . 55
Configuring the WebLogic Domain to OID, MSAD, SunOne . . . . . . . . . . . . . . . . . . . . . . 56
Financial Close Management Configuration Options . . . . . . . . . . . . . . . . . . . . . . . . . . . 57
Configuring Financial Close Management for OAM . . . . . . . . . . . . . . . . . . . . . . . . . 57
Specifying the Language for E-Mail Notifications . . . . . . . . . . . . . . . . . . . . . . . . . . . 58
Configuring JMS Event Monitoring . . . . . . . . . . . . . . . . . . . . . . . . . . . . . . . . . . . . . 58
FDMEE Configuration Options . . . . . . . . . . . . . . . . . . . . . . . . . . . . . . . . . . . . . . . . . . . 60
Configuring an Initial Security Policy . . . . . . . . . . . . . . . . . . . . . . . . . . . . . . . . . . . . 60
Using FDMEE with PeopleSoft . . . . . . . . . . . . . . . . . . . . . . . . . . . . . . . . . . . . . . . . . . . 62
Chapter 4. Changing a Deployment . . . . . . . . . . . . . . . . . . . . . . . . . . . . . . . . . . . . . . . . . . . . . . . . . . . . . 63
Changing Ports . . . . . . . . . . . . . . . . . . . . . . . . . . . . . . . . . . . . . . . . . . . . . . . . . . . . . . . 63
Changing Database Passwords . . . . . . . . . . . . . . . . . . . . . . . . . . . . . . . . . . . . . . . . . . . 63
Assumptions and Prerequisites . . . . . . . . . . . . . . . . . . . . . . . . . . . . . . . . . . . . . . . . 64
Changing the Shared Services Registry Database Password . . . . . . . . . . . . . . . . . . . . 64
Changing EPM System Component Repository Database Passwords . . . . . . . . . . . . . 65
Changing the Planning Applications Repository Password . . . . . . . . . . . . . . . . . . . . 65
Changing the Performance Management Architect Interface Datasource Password . . . 65
Changing the FDM Repository Password . . . . . . . . . . . . . . . . . . . . . . . . . . . . . . . . . 66
Changing the Data Relationship Management Repository Password . . . . . . . . . . . . . . 66
Validating the Database Password Changes . . . . . . . . . . . . . . . . . . . . . . . . . . . . . . . . 67
Rehosting a Database . . . . . . . . . . . . . . . . . . . . . . . . . . . . . . . . . . . . . . . . . . . . . . . . . . 67
Assumptions and Prerequisites . . . . . . . . . . . . . . . . . . . . . . . . . . . . . . . . . . . . . . . . 67
Updating the Connection to a Rehosted Shared Services Database . . . . . . . . . . . . . . . 68
Updating the Connection to a Rehosted EPM System Database . . . . . . . . . . . . . . . . . 68
Validating the Rehosted Database . . . . . . . . . . . . . . . . . . . . . . . . . . . . . . . . . . . . . . 69
Rehosting Foundation Services . . . . . . . . . . . . . . . . . . . . . . . . . . . . . . . . . . . . . . . . . . . 69
Changing Hosts . . . . . . . . . . . . . . . . . . . . . . . . . . . . . . . . . . . . . . . . . . . . . . . . . . . . . . 70
Reconfiguring EPM System Components to Use Separate Database Schemas . . . . . . . . . . 70
Assumptions and Prerequisites . . . . . . . . . . . . . . . . . . . . . . . . . . . . . . . . . . . . . . . . 70
Reconfiguring EPM System Components to Use Separate Database Schemas . . . . . . . 71
Validating the Database Configuration Changes . . . . . . . . . . . . . . . . . . . . . . . . . . . . 72
Reconfiguring EPM System Components to Use a Single Database Schema . . . . . . . . . . . . 72
Assumptions and Prerequisites . . . . . . . . . . . . . . . . . . . . . . . . . . . . . . . . . . . . . . . . 72
Reconfiguring EPM System Components to Use a Single Shared Services RegistryDatabase Schema . . . . . . . . . . . . . . . . . . . . . . . . . . . . . . . . . . . . . . . . . . . . . . . . . . 73
Validating the Database Configuration Changes . . . . . . . . . . . . . . . . . . . . . . . . . . . . 73
iv Contents
Reconfiguring for SSL . . . . . . . . . . . . . . . . . . . . . . . . . . . . . . . . . . . . . . . . . . . . . . . . . . 74
Chapter 5. Updating the Shared Services Registry . . . . . . . . . . . . . . . . . . . . . . . . . . . . . . . . . . . . . . . . . . . 75
Understanding the Shared Services Registry Component Hierarchy . . . . . . . . . . . . . . . . . 75
Editing the Shared Services Registry . . . . . . . . . . . . . . . . . . . . . . . . . . . . . . . . . . . . . . . . 76
Viewing the Components in the Shared Services Registry . . . . . . . . . . . . . . . . . . . . . . 76
Deleting a Component Instance . . . . . . . . . . . . . . . . . . . . . . . . . . . . . . . . . . . . . . . . 77
Updating a Component Property . . . . . . . . . . . . . . . . . . . . . . . . . . . . . . . . . . . . . . . 77
Viewing Host Entries in the Shared Services Registry . . . . . . . . . . . . . . . . . . . . . . . . . 78
Chapter 6. Using Enterprise Manager to Monitor EPM System Java Web Applications . . . . . . . . . . . . . . . . . . . 79
Chapter 7. Removing an EPM Oracle Instance and Uninstalling EPM System . . . . . . . . . . . . . . . . . . . . . . . . . 81
Removing an EPM Oracle Instance . . . . . . . . . . . . . . . . . . . . . . . . . . . . . . . . . . . . . . . . 81
Assumptions and Prerequisites . . . . . . . . . . . . . . . . . . . . . . . . . . . . . . . . . . . . . . . . 82
Removing an Instance . . . . . . . . . . . . . . . . . . . . . . . . . . . . . . . . . . . . . . . . . . . . . . . 82
Validating the Instance Removal . . . . . . . . . . . . . . . . . . . . . . . . . . . . . . . . . . . . . . . 83
Uninstalling EPM System Products . . . . . . . . . . . . . . . . . . . . . . . . . . . . . . . . . . . . . . . . 84
Performing a Silent Product Uninstallation . . . . . . . . . . . . . . . . . . . . . . . . . . . . . . . 85
Uninstalling EPM System Clients . . . . . . . . . . . . . . . . . . . . . . . . . . . . . . . . . . . . . . . . . . 86
Default Installation Directories and Notes . . . . . . . . . . . . . . . . . . . . . . . . . . . . . . . . 86
Performing a Silent Client Uninstallation . . . . . . . . . . . . . . . . . . . . . . . . . . . . . . . . . 87
Chapter 8. Performing Custom Configurations . . . . . . . . . . . . . . . . . . . . . . . . . . . . . . . . . . . . . . . . . . . . . . 89
Optimizing Performance by Changing the Heap Size . . . . . . . . . . . . . . . . . . . . . . . . . . . . 89
Assumptions and Prerequisites . . . . . . . . . . . . . . . . . . . . . . . . . . . . . . . . . . . . . . . . 89
Changing the Heap Size . . . . . . . . . . . . . . . . . . . . . . . . . . . . . . . . . . . . . . . . . . . . . 90
Validating the Heap Size . . . . . . . . . . . . . . . . . . . . . . . . . . . . . . . . . . . . . . . . . . . . . 91
Installing and Configuring Online Help . . . . . . . . . . . . . . . . . . . . . . . . . . . . . . . . . . . . . 91
Assumptions and Prerequisites . . . . . . . . . . . . . . . . . . . . . . . . . . . . . . . . . . . . . . . . 92
Configuring Online Help to Run Locally . . . . . . . . . . . . . . . . . . . . . . . . . . . . . . . . . 92
Customizing Essbase Configurations . . . . . . . . . . . . . . . . . . . . . . . . . . . . . . . . . . . . . . . 93
Designating a Specific Installation of JRE for use with Essbase . . . . . . . . . . . . . . . . . . 93
Managing Memory with JvmModuleLocation . . . . . . . . . . . . . . . . . . . . . . . . . . . . . . 94
Configuring the 32-bit Runtime Client on a 64-bit Windows Platform . . . . . . . . . . . . 94
(UNIX) Configuring the Environment for Essbase and Oracle BI EE Integration . . . . . . . . 94
Integrating Oracle BI EE and BI Publisher with EPM Workspace . . . . . . . . . . . . . . . . . . . 96
Integrating EPM Workspace with Oracle BI EE Release 10g . . . . . . . . . . . . . . . . . . . . 96
Integrating EPM Workspace with Oracle BI EE Release 11g . . . . . . . . . . . . . . . . . . . . 98
Configuring the Environment for Financial Management and Oracle BI EE Integration . . . 99
Configuring Fonts for Interactive Reporting (UNIX) . . . . . . . . . . . . . . . . . . . . . . . . . . . 101
Contents v

Chapter 9. Disaster Recovery . . . . . . . . . . . . . . . . . . . . . . . . . . . . . . . . . . . . . . . . . . . . . . . . . . . . . . . . . 103
General Information About Disaster Recovery . . . . . . . . . . . . . . . . . . . . . . . . . . . . . . . 103
Disaster Recovery Architecture . . . . . . . . . . . . . . . . . . . . . . . . . . . . . . . . . . . . . . . . . . 104
Disaster Recovery for EPM System Components . . . . . . . . . . . . . . . . . . . . . . . . . . . . . . 105
Environment Configuration . . . . . . . . . . . . . . . . . . . . . . . . . . . . . . . . . . . . . . . . . 105
Host Name Requirements . . . . . . . . . . . . . . . . . . . . . . . . . . . . . . . . . . . . . . . . . . . 105
Database Recommendations . . . . . . . . . . . . . . . . . . . . . . . . . . . . . . . . . . . . . . . . . 106
Disaster Recovery Without File System and Database Replication . . . . . . . . . . . . . . . . . . 106
Additional Information . . . . . . . . . . . . . . . . . . . . . . . . . . . . . . . . . . . . . . . . . . . . . . . . 107
Index . . . . . . . . . . . . . . . . . . . . . . . . . . . . . . . . . . . . . . . . . . . . . . . . . . . . . . . . . . . . . . . . . . . . . . . . . 109
vi Contents

Documentation Accessibility
For information about Oracle's commitment to accessibility, visit the Oracle Accessibility Program website athttp://www.oracle.com/pls/topic/lookup?ctx=acc&id=docacc.
Access to Oracle SupportOracle customers have access to electronic support through My Oracle Support. For information, visit http://www.oracle.com/pls/topic/lookup?ctx=acc&id=info or visit http://www.oracle.com/pls/topic/lookup?ctx=acc&id=trs if you are hearing impaired.
7

8 Documentation Accessibility

1About Deployment Options
This guide provides procedures for additional optional deployment options. Use the proceduresin this guide only after you have completed an initial installation and configuration of OracleEnterprise Performance Management System products, using a standard or custom deployment.
Check the Oracle Documentation Library (http://www.oracle.com/technology/documentation/epm.html) on Oracle® Technology Network to see whether an updated version of this guide isavailable.
9

10 About Deployment Options

2Scaling EPM System Products
In This Chapter
Vertically Scaling EPM System Components ... . . . . . . . . . . . . . . . . . . . . . . . . . . . . . . . . . . . . . . . . . . . . . . . . . . . . . . . . .11
Clustering Java Web Applications ... . . . . . . . . . . . . . . . . . . . . . . . . . . . . . . . . . . . . . . . . . . . . . . . . . . . . . . . . . . . . . . . . . . . . .13
Clustering Foundation Services ... . . . . . . . . . . . . . . . . . . . . . . . . . . . . . . . . . . . . . . . . . . . . . . . . . . . . . . . . . . . . . . . . . . . . . . . .18
Scaling Reporting and Analysis Framework and Interactive Reporting .. . . . . . . . . . . . . . . . . . . . . . . . . . . . . .24
Clustering Financial Management Servers.. . . . . . . . . . . . . . . . . . . . . . . . . . . . . . . . . . . . . . . . . . . . . . . . . . . . . . . . . . . . . .26
Load Balancing Financial Management, Strategic Finance, or FDM IIS Web Applications on IIS... . . . . . . . . . . . . . . . . . . . . . . . . . . . . . . . . . . . . . . . . . . . . . . . . . . . . . . . . . . . . . . . . . . . . . . . . . . . . . . . . . . . . . . . . . . . . . . . . . . . . . . . . . . . .26
Clustering Data Management .. . . . . . . . . . . . . . . . . . . . . . . . . . . . . . . . . . . . . . . . . . . . . . . . . . . . . . . . . . . . . . . . . . . . . . . . . . . .27
Configuring Essbase Clusters .. . . . . . . . . . . . . . . . . . . . . . . . . . . . . . . . . . . . . . . . . . . . . . . . . . . . . . . . . . . . . . . . . . . . . . . . . . . .29
Configuring Financial Close Management to work with SOA Clusters .. . . . . . . . . . . . . . . . . . . . . . . . . . . . . . . .49
Most EPM System components support clustering in active-active configurations to removesingle points of failure from the architecture, maintain consistent performance through loadbalancing, or both.
When you are deploying Java web applications on a machine other than the machine hostingOracle Hyperion Foundation Services, WebLogic Server Administration Server must be runningon the Foundation Services host machine. If you are deploying on the same machine asFoundation Services, WebLogic Server Administration Server does not need to be running.
Vertically Scaling EPM System ComponentsYou can vertically scale EPM System components. When you vertically scale, you configure oneor more additional instances on the machine hosting an existing instance of an EPM Systemcomponent.
EPM System components support vertical scaling as follows:
l Windows-based Java web applications except for Oracle Hyperion Financial Managementand Oracle Hyperion Strategic Finance Java web applications
l Oracle Essbase Server
l UNIX-based components
The following components do not support vertical scaling:
Vertically Scaling EPM System Components 11
l Oracle HTTP Server
l Oracle Hyperion EPM Architect Dimension Server
l All Financial Management components
l Oracle Hyperion Financial Close Management and Account Reconciliation Manager
l Oracle Hyperion Disclosure Management
l All Strategic Finance components
l All Oracle Hyperion Financial Data Quality Management components
l Oracle Essbase Integration Services components
To vertically scale Oracle Hyperion Reporting and Analysis, see “Scaling Reporting and AnalysisFramework and Interactive Reporting ” on page 24.
To vertically scale Essbase, see “Vertically Scaling Essbase” on page 42.
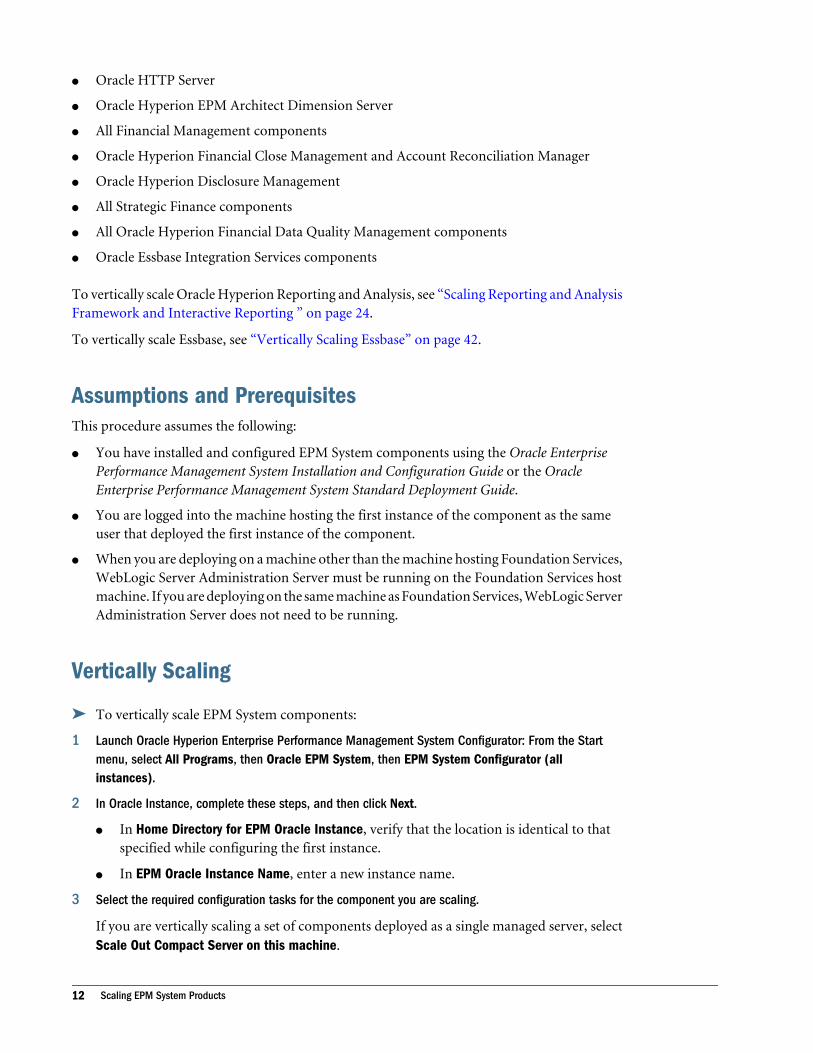
Assumptions and PrerequisitesThis procedure assumes the following:
l You have installed and configured EPM System components using the Oracle EnterprisePerformance Management System Installation and Configuration Guide or the OracleEnterprise Performance Management System Standard Deployment Guide.
l You are logged into the machine hosting the first instance of the component as the sameuser that deployed the first instance of the component.
l When you are deploying on a machine other than the machine hosting Foundation Services,WebLogic Server Administration Server must be running on the Foundation Services hostmachine. If you are deploying on the same machine as Foundation Services, WebLogic ServerAdministration Server does not need to be running.
Vertically Scaling
ä To vertically scale EPM System components:
1 Launch Oracle Hyperion Enterprise Performance Management System Configurator: From the Startmenu, select All Programs, then Oracle EPM System, then EPM System Configurator (allinstances).
2 In Oracle Instance, complete these steps, and then click Next.
l In Home Directory for EPM Oracle Instance, verify that the location is identical to thatspecified while configuring the first instance.
l In EPM Oracle Instance Name, enter a new instance name.
3 Select the required configuration tasks for the component you are scaling.
If you are vertically scaling a set of components deployed as a single managed server, selectScale Out Compact Server on this machine.
12 Scaling EPM System Products
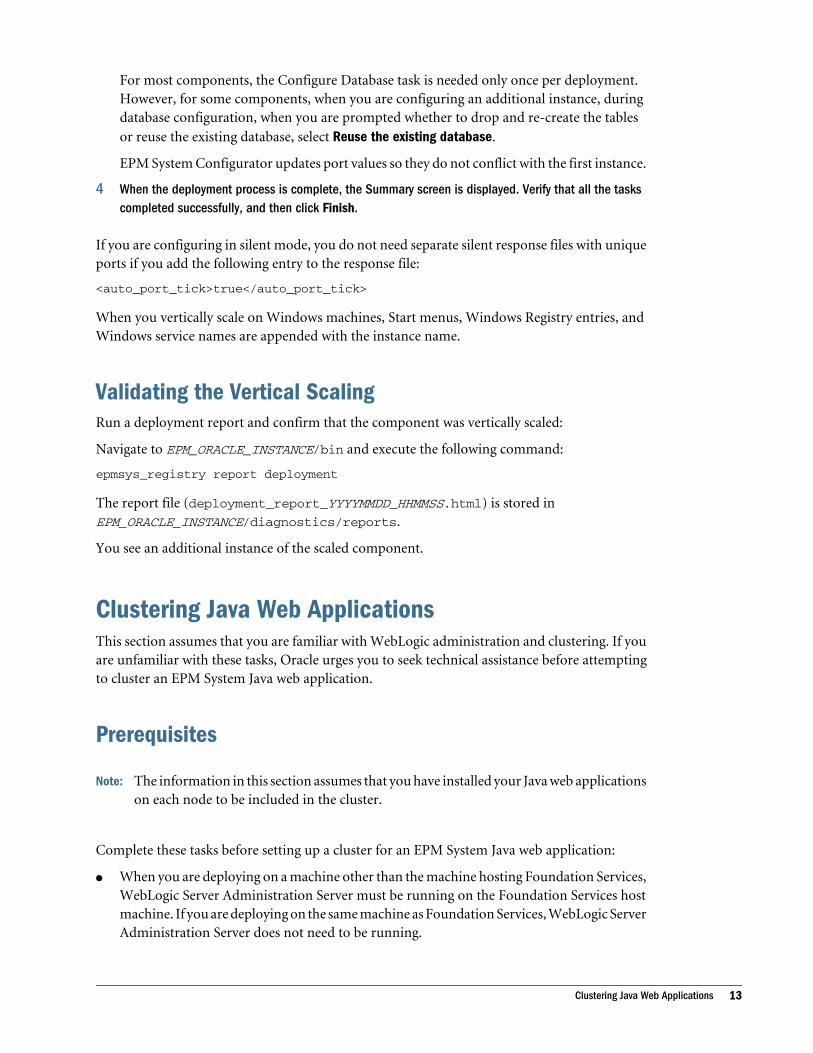
For most components, the Configure Database task is needed only once per deployment.However, for some components, when you are configuring an additional instance, duringdatabase configuration, when you are prompted whether to drop and re-create the tablesor reuse the existing database, select Reuse the existing database.
EPM System Configurator updates port values so they do not conflict with the first instance.
4 When the deployment process is complete, the Summary screen is displayed. Verify that all the taskscompleted successfully, and then click Finish.
If you are configuring in silent mode, you do not need separate silent response files with uniqueports if you add the following entry to the response file:
<auto_port_tick>true</auto_port_tick>
When you vertically scale on Windows machines, Start menus, Windows Registry entries, andWindows service names are appended with the instance name.
Validating the Vertical ScalingRun a deployment report and confirm that the component was vertically scaled:
Navigate to EPM_ORACLE_INSTANCE/bin and execute the following command:
epmsys_registry report deployment
The report file (deployment_report_YYYYMMDD_HHMMSS.html) is stored inEPM_ORACLE_INSTANCE/diagnostics/reports.
You see an additional instance of the scaled component.
Clustering Java Web ApplicationsThis section assumes that you are familiar with WebLogic administration and clustering. If youare unfamiliar with these tasks, Oracle urges you to seek technical assistance before attemptingto cluster an EPM System Java web application.
Prerequisites
Note: The information in this section assumes that you have installed your Java web applicationson each node to be included in the cluster.
Complete these tasks before setting up a cluster for an EPM System Java web application:
l When you are deploying on a machine other than the machine hosting Foundation Services,WebLogic Server Administration Server must be running on the Foundation Services hostmachine. If you are deploying on the same machine as Foundation Services, WebLogic ServerAdministration Server does not need to be running.
Clustering Java Web Applications 13

l Enable either session persistence or sticky sessions (which direct all requests for a specificsession to the same server) on the load balancer.
l Ensure that all the computers to be included in the cluster use either Windows or UNIX butnot both.
l Install the EPM System product on each node that the cluster will include. Install to the samefile system location on each machine. Using the same file system path on each physicalmachine in a cluster is important so that these environment variables can be set once for theentire cluster, rather than set and customized for each node in the cluster:
m All OS—CLASSPATH and PATH
m UNIX—LD_LIBRARY_PATH, LIBPATH, or SHLIB_PATH
Clustering Java Web Applications Using EPM SystemConfiguratorYou can cluster EPM System Java web applications during configuration with EPM SystemConfigurator. Use the following general configuration sequence. This procedure assumes thatthe Oracle HTTP Server installed by Oracle Hyperion Enterprise Performance ManagementSystem Installer is the logical host.
ä To cluster EPM System Java web applications during configuration with EPM SystemConfigurator:
1 Install EPM System Java web applications on each machine in your environment.
2 Configure the Java web application on the first machine, selecting “Deploy to Application Server” onthe EPM System Configurator Task Selection page.
During deployment, EPM System Configurator creates a cluster for each managed server inWebLogic.
3 Configure the Java web application on the next machine, selecting “Deploy to Application Server” onthe EPM System Configurator Task Selection page.
During deployment, EPM System Configurator adds the server to the cluster in WebLogic.
Repeat this step for any additional machines in the deployment.
4 Configure the Web server last, selecting “Configure Web Server” from the Foundation tasks on the EPMSystem Configurator Task Selection page. Then, restart the Web server and Oracle Hyperion EnterprisePerformance Management Workspace.
Considerations about clustering Java web applications:
l EPM System Configurator configures a cluster for each managed server.
l You should have only one cluster for each EPM System product. Note that EPM SystemConfigurator creates a cluster for each managed server.
14 Scaling EPM System Products

If you are manually deploying Java web applications, see “Clustering Java Web Applications ina WebLogic Manual Deployment” on page 15 for information on clustering with OracleWebLogic Server.
Clustering Java Web Applications in a WebLogic ManualDeploymentYou can cluster a manually deployed Java web application using WebLogic. This section providesa general overview of clustering Java web applications. See the WebLogic documentation formore details on this procedure.
Note: If you deployed Java web applications using EPM System Configurator, EPM SystemConfigurator creates the cluster and adds servers to the cluster. You need not performadditional tasks in WebLogic. See “Clustering Java Web Applications Using EPM SystemConfigurator” on page 14.
ä To cluster Java web applications:
1 Start the WebLogic Administration Console.
2 If you manually deployed the Java web applications, in the Domain Structures pane, click Clusters andcreate a cluster.
If you deployed the Java web applications with EPM System Configurator and clicked Setupto specify the logical address for the Java web application, this step is not necessary, becauseEPM System Configurator created the cluster for you.
3 If you manually deployed the Java web applications, select the cluster, click the HTTP tab, and forFrontend Host, enter the host name and port of the load balancer.
If you deployed the Java web applications with EPM System Configurator and clicked Setupto specify the logical address for the Java web application, this step is not necessary, becauseEPM System Configurator entered this information during configuration.
4 Click the Servers tab, click Add, and on the Add a Server to Cluster page, select a server from the list,and then click Finish.
5 Click the Deployments tab, select an EPM System Java web application, click the Targets tab, and forthe cluster this Java web application is deployed to, select All Servers in the Cluster.
Repeat this step for all EPM System Java web applications.
In a distributed environment, the Node Manager propagates changes to all the machines inthe cluster.
6 To add another server to the cluster to scale out the deployment:
a. Select the server and select Clone.
b. Select the server that you just cloned, and change the machine on which the server isrunning.
Clustering Java Web Applications 15

c. You must use the same name scheme for newly created serves. For example, allFoundationServices0 must be cloned as FoundationServices1 or FoundationServices2.This allows you to use startManagedWebLogic.* and the Administration Console tostart servers.
7 Repeat step 2 - step 6 as needed.
8 Start the servers from WebLogic Administration Console.
9 Launch EPM System Configurator and perform the “Configure Web Server” task.
Extending a WebSphere DeploymentTo extend the deployment to other machines, use the WebSphere configuration wizard.
ä To extend the deployment to other machines:
1 On the first machine, if you have not yet deployed any Java web applications, perform the followingsteps. If you have already deployed Java web applications to the first machine, skip this step.
a. Open the WebSphere configuration wizard by running EPM_ORACLE_INSTANCE/bin/was_config_epm.bat|sh.
b. Select Create and Configure Cell.
c. After the profile is created, click Exit.
2 On the first machine, run WAS_HOME/profiles/DM_PROFILE_NAME/bin/startManager.bat|sh and WAS_HOME/profiles/PROFILE_NAME/bin/startNode.bat|sh.
3 On the second machine:
a. Open the WebSphere configuration wizard by running EPM_ORACLE_INSTANCE/bin/was_config_epm.bat|sh.
b. Select Federate Machine and Configure Cell.
c. Insert a unique profile and node name (for example, EPMSystemProfile2,EPMSystemAppNode2).
d. Insert the deployment manager host name (from the first machine), SOAP port (8879by default, see WAS_HOME/profiles/DM_PROFILE_NAME/properties/portdef.props, SOAP_CONNECTOR_ADDRESS), and the username and passwordused for the first machine.
e. After the profile is created, click Exit.
f. Run WAS_HOME/profiles/PROFILE_NAME/bin/startNode.bat|sh.
4 On the first machine:
a. Open the WebSphere configuration wizard by running EPM_ORACLE_INSTANCE/bin/was_config_epm.bat|sh.
b. Select the existing profile.
c. Select the EPM System Java web applications to deploy to extend the deployment.
16 Scaling EPM System Products
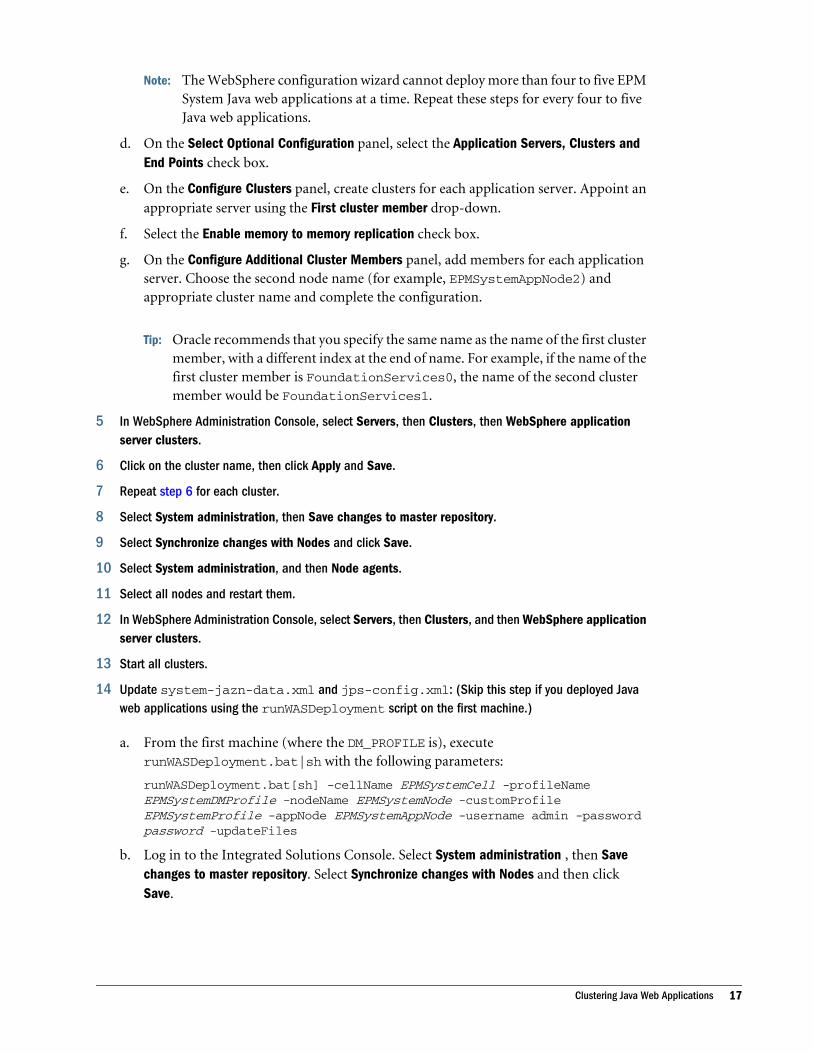
Note: The WebSphere configuration wizard cannot deploy more than four to five EPMSystem Java web applications at a time. Repeat these steps for every four to fiveJava web applications.
d. On the Select Optional Configuration panel, select the Application Servers, Clusters andEnd Points check box.
e. On the Configure Clusters panel, create clusters for each application server. Appoint anappropriate server using the First cluster member drop-down.
f. Select the Enable memory to memory replication check box.
g. On the Configure Additional Cluster Members panel, add members for each applicationserver. Choose the second node name (for example, EPMSystemAppNode2) andappropriate cluster name and complete the configuration.
Tip: Oracle recommends that you specify the same name as the name of the first clustermember, with a different index at the end of name. For example, if the name of thefirst cluster member is FoundationServices0, the name of the second clustermember would be FoundationServices1.
5 In WebSphere Administration Console, select Servers, then Clusters, then WebSphere applicationserver clusters.
6 Click on the cluster name, then click Apply and Save.
7 Repeat step 6 for each cluster.
8 Select System administration, then Save changes to master repository.
9 Select Synchronize changes with Nodes and click Save.
10 Select System administration, and then Node agents.
11 Select all nodes and restart them.
12 In WebSphere Administration Console, select Servers, then Clusters, and then WebSphere applicationserver clusters.
13 Start all clusters.
14 Update system-jazn-data.xml and jps-config.xml: (Skip this step if you deployed Javaweb applications using the runWASDeployment script on the first machine.)
a. From the first machine (where the DM_PROFILE is), executerunWASDeployment.bat|sh with the following parameters:
runWASDeployment.bat[sh] -cellName EPMSystemCell -profileName EPMSystemDMProfile -nodeName EPMSystemNode -customProfile EPMSystemProfile -appNode EPMSystemAppNode -username admin -password password -updateFiles
b. Log in to the Integrated Solutions Console. Select System administration , then Savechanges to master repository. Select Synchronize changes with Nodes and then clickSave.
Clustering Java Web Applications 17

Scaling Out a Single Managed Server
ä To scale out the single managed server on subsequent machines:
1 Using EPM System Installer, install the same set of Java web applications on any additional machinesin the environment. Note that you cannot add or remove Java web applications when you scale out.
2 Run EPM System Configurator from each machine to which you are scaling out.
3 On the Task Selection panel under Hyperion Foundation, select Scale out compact server on thismachine.
The Scale out compact server on this machine option is only available when the followingare true:
l The WebLogic Administration Server is not installed on the current machine.
l The single managed server is deployed on the WebLogic Administration Server.
l The single managed server is not already scaled out on the machine.
4 Click Next to scale out the server.
Clustering Foundation ServicesThis section provides information about configuring Oracle Hyperion Enterprise PerformanceManagement System Lifecycle Management for Oracle Hyperion Shared Services highavailability and setting up Performance Management Architect Dimension Server for failover.For information about clustering Foundation Services Java web applications through EPMSystem Configurator, see “Clustering Java Web Applications Using EPM System Configurator”on page 14.
Performance Management Architect Dimension ServerClustering and FailoverYou use Oracle Clusterware to cluster Performance Management Architect Dimension Serverfor failover in an active-passive configuration. Oracle Clusterware documentation is availableat http://www.oracle.com/pls/db112/portal.portal_db?selected=16&frame=#oracle_clusterware.
For information about clustering Performance Management Architect Java web application andPerformance Management Architect Data Synchronizer Java web application, see “ClusteringJava Web Applications Using EPM System Configurator” on page 14.
This procedures assumes that you have installed Performance Management ArchitectDimension Server component in the Oracle Clusterware shared folder on a clustered disk, or ina subfolder of that folder, and configured it using EPM System Configurator.
Clustering Performance Management Architect Dimension Server for failover involves this tasksequence:
1. Creating and registering a virtual Internet protocol (VIP) resource with Oracle Clusterware.
18 Scaling EPM System Products

See “VIP Resources” on page 19.
2. Creating an action script.
See “Action Scripts” on page 20.
3. Creating and registering an application resource with Oracle Clusterware.
See “Application Resources” on page 21.
4. Setting the Performance Management Architect Dimension Server logical Web address.
See “Editing EPMA_CreateAndStartAppResource.bat” on page 22.
VIP Resources
Subtopics
l Editing EPMA_CreateAndStartVIPResource.bat
l Stopping and Unregistering VIP Resources
l Checking VIP Resource Status
You run EPMA_CreateAndStartVIPResource.bat, in EPM_ORACLE_HOME/products/Foundation/BPMA/AppServer/DimensionServer/ServerEngine/Failover, to create,register, and start a VIP resource. The VIP resource is paired with an application resource toprovide a single point of access. The batch file runs in a command window and pauses whenfinished. Pressing any key closes the command window.
Before running EPMA_CreateAndStartVIPResource.bat, you can edit it to conform withyour environment. You use a different batch file to stop and delete the VIP resource after deletingthe application resource.
If clients access the application through a network, and failover to another node is enabled, youmust register a VIP address for the application. Oracle Clusterware provides a standard VIPagent for application VIPs. Basing any new application VIPs on the VIP type that is referencedin EPMA_CreateAndStartVIPResource.bat ensures consistent behavior among all VIPsdeployed in a cluster.
Editing EPMA_CreateAndStartVIPResource.bat
You can edit EPMA_CreateAndStartVIPResource.bat to specify values for these variables,which are listed at the top of the script:
l ACTION_SCRIPT–Full path and file name for usrvip.bat, which is in the OracleClusterware installation folder
This batch file is the action script that Oracle Clusterware uses to manage the VIP resource.
l VIP_IP–A cluster VIP, registered in DNS
l START_TIMEOUT–Number of seconds that Oracle Clusterware waits for the VIP resourceto start before declaring a failed start
l STOP_TIMEOUT–Number of seconds that Oracle Clusterware waits for the VIP resource tostop before declaring a failed stop
Clustering Foundation Services 19

l CHECK_INTERVAL–Number of seconds between repeated checks
Shortening intervals for more-frequent checks increases resource consumption if you usethe script agent. To reduce resource consumption, use an application-specific agent.
l SCRIPT_TIMEOUT–Maximum time in seconds for an action to run
Oracle Clusterware returns an error message if the action script does not finish within thespecified time. The timeout applies to all actions (start, stop, check, and clean).
l RESTART_ATTEMPTS–Number of times Oracle Clusterware attempts to restart a resourceon the resource's current server before attempting to relocate it
For example, if the value is 1, Oracle Clusterware attempts to relocate the resource after asecond failure. A value of 0 indicates that there is no attempt to restart, but OracleClusterware always attempts to fail the resource over to another server.
l CRS_HOME–Full path to the BIN folder for your Oracle Clusterware installation
Stopping and Unregistering VIP Resources
After you unregister an application resource, you can stop and delete the associated VIP resource,which unregisters the resource. Deleting a VIP resource does not affect the PerformanceManagement Architect installation.
ä To stop and unregister a VIP resource, runEPMA_StopAndDeleteVIPResource.bat, in EPM_ORACLE_HOME/products/Foundation/BPMA/AppServer/DimensionServer/ServerEngine/Failover. The batch file runs in a command window and pauses when finished. Pressingany key closes the command window.
Checking VIP Resource Status
After running EPMA_CreateAndStartVIPResource.bat orEPMA_StopAndDeleteVIPResource.bat, you can run this command from the command lineto check the status of the VIP resource:
crsctl status resource epmavip -v
A status of STATE=ONLINE indicates that the resource is running correctly. After you runEPMA_StopAndDeleteVIPResource.bat, the VIP resource should no longer exist.
Action ScriptsOracle Clusterware calls an action script to stop or start an application resource (for example,Performance Management Architect Dimension Server) or to check the status of the application.You can run the action script from Oracle Clusterware or from the command line. The actionscript logs the date, time, action being performed (start, stop, clean, or check), and action result(success or failure).
20 Scaling EPM System Products

You create the action script by editing EPMA_ActionScript.bat, in EPM_ORACLE_HOME/products/Foundation/BPMA/AppServer/DimensionServer/ServerEngine/
Failover, to conform to your environment.
You can edit EPMA_ActionScript.bat to specify these variables, which are listed at the top ofthe script:
l LOG_PATH–Full path to a local folder where the application resource action script logsinformation
Example: set LOG_PATH=C:/CRS_ACTION/EPMA
Assuming that you provide a path with a valid drive letter, the action script creates the pathat runtime if the path does not exist.
l LOGSCR–A concatenation of the LOG_PATH value and a valid file name for the environment
Example: set LOGSCR=%LOG_PATH%/ClusterActionEPMA.log
l SECONDS_TO_WAIT_FOR_START–Number of seconds that the action script waits for theapplication resource to start before declaring a failed start and returning a 0 to the callingprocess (Oracle Clusterware)
Example: set SECONDS_TO_WAIT_FOR_START=180
l SECONDS_TO_WAIT_FOR_STOP–Number of seconds that the action script waits for theapplication resource to stop before declaring a failed stop and returning a 0 to the callingprocess (Oracle Clusterware)
Example: set SECONDS_TO_WAIT_FOR_STOP=60
Note: If your Performance Management Architect release is 11.1.2.2, the two sections labeledEPMA pre-11.1.2.2 section should be commented out.
Application Resources
Subtopics
l Editing EPMA_CreateAndStartAppResource.bat
l Stopping and Unregistering Application Resources
l Checking Application Resource Status
You run EPMA_CreateAndStartAppResource.bat, in EPM_ORACLE_HOME/products/Foundation/BPMA/AppServer/DimensionServer/ServerEngine/Failover, to create,register, and start an application resource. The VIP resource is paired with a VIP resource toprovide a single point of access.
Before running EPMA_CreateAndStartAppResource.bat, you can edit it to conform withyour environment. You use a different batch file to stop and delete the application resource.
If you stop the application resource by running crsctl stop resource EPMAServer -f orby shutting down the Hyperion EPMA Server service directly using the Windows Services applet,Oracle Clusterware automatically attempts to restart it on another node in the cluster. For theapplication resource to stay idle, you must run EPMA_StopAndDeleteAppResource.bat. To
Clustering Foundation Services 21

restart an application resource after deleting it withEPMA_StopAndDeleteAppResource.bat, you must runEPMA_CreateAndStartAppResource.bat to recreate and start it. Deleting the VIP andapplication resources has no effect on the Performance Management Architect installation.
Caution! After running EPMA_CreateAndStartAppResource.bat, which registers theapplication with Oracle Clusterware as a resource, use Oracle Clusterwarecommands to start and stop the Performance Management Architect server. Do notstop or start the application resource directly (for example, in the Windows servicesapplet).
Editing EPMA_CreateAndStartAppResource.bat
You can edit EPMA_CreateAndStartAppResource.bat to specify values for these variables,which are listed at the top of the script:
l ACTION_SCRIPT–Full path and file name for the EPMA_ActionScript.bat file providedwith your Performance Management Architect installation
This batch file is the action script that Oracle Clusterware uses to manage the applicationresource (for example, Performance Management Architect Server).
l FAILOVER_DELAY–Number of seconds to wait before starting the failover process after afailure is detected
l FAILURE_THRESHOLD–Number of failures detected within a specified failure interval for aresource before Oracle Clusterware marks the resource as unavailable and stops monitoringit
If a resource fails the specified number of times, then Oracle Clusterware stops the resource.If the value is 0, then failure tracking is disabled. The maximum value is 20.
l FAILURE_INTERVAL–Interval, in seconds, during which Oracle Clusterware applies theFAILURE_THRESHOLD attribute
If the value is 0, failure tracking is disabled.
l START_TIMEOUT–Number of seconds that Oracle Clusterware waits for the applicationresource to start before declaring a failed start
l STOP_TIMEOUT–Number of seconds that Oracle Clusterware waits for the applicationresource to stop before declaring a failed stop
l CHECK_INTERVAL–Number of seconds between repeated checks
Shortening intervals for more-frequent checks increases resource consumption if you usethe script agent. To reduce resource consumption, use an application-specific agent.
l RESTART_ATTEMPTS–Number of times Oracle Clusterware attempts to restart a resourceon the resource's current server before attempting to relocate it
For example, if the value is 1, Oracle Clusterware attempts to relocate the resource after asecond failure. A value of 0 indicates that there is no attempt to restart, but OracleClusterware always attempts to fail the resource over to another server.
22 Scaling EPM System Products

l CRS_HOME–Full path to the BIN folder for your Oracle Clusterware installation
Stopping and Unregistering Application Resources
ä To stop and unregister an application resource, runEPMA_StopAndDeleteAppResource.bat. The batch file runs in a command windowand pauses when finished. Pressing any key closes the command window.
Checking Application Resource Status
After running EPMA_CreateAndStartAppResource.bat, you can run these commands fromthe command line one at a time, to display the status of your application resources:
l crsctl status resource epmavip -v
l crsctl status resource EPMAServer -v
Tip: Instead of running the commands individually, you can run EPMA_Status.bat, inEPM_ORACLE_HOME/products/Foundation/BPMA/AppServer/DimensionServer/
ServerEngine/Failover, which runs both commands.
When the resources are running correctly, their status is STATE=ONLINE.
Oracle Clusterware runs the action script EPMA_ActionScript.bat with the check parameterat the check interval that is set when the application resource is created. If the action script returnsa 1, indicating that the application is not running, it attempts to start the application on anothernode in the cluster.
After running EPMA_StopAndDeleteAppResource.bat, you can run this command from thecommand line to ensure that the resource no longer exists and that the Hyperion EPMA Serverservice is not running on any node in the cluster:
crsctl status resource EPMAServer -v
Setting the Performance Management Architect Server Logical Web AddressYou use EPM System Configurator to set the Performance Management Architect Server logicalWeb address for the Hyperion EPMA Web Tier – Web Application service to the cluster addressor name.
ä To set the logical Web address in EPM System Configurator:
1 Select the EPM Oracle instance to configure, and then click Next.
2 Click Uncheck All.
3 Expand the tree.
4 Select Hyperion Foundation, then Configure Logical Address for Web Applications, and then clickNext.
Clustering Foundation Services 23

5 For each Java web application:
a. Select Set the logical web address.
b. For the Product Component: DimensionServer, double-click the value in the Host column.
c. Change the value to specify one of these items:
l SCAN (Single Client Access Name) if your RAC is Oracle 11g Release 2 or later
l Application VIP
l Host name alias that points to the application VIP
d. Click Next.
6 Click Next to finish the configuration.
7 Start the Hyperion EPMA Web Tier - Web Application service.
8 Wait a few minutes, and then log on to EPM Workspace.
Scaling Reporting and Analysis Framework andInteractive Reporting This section describes how to scale (cluster) service-tier components of Reporting and Analysis.
For information about clustering Reporting and Analysis Java web applications using EPMSystem Configurator, see “Clustering Java Web Applications Using EPM System Configurator”on page 14.
Assumptions and Prerequisitesl You have installed and configured EPM System products using the Oracle Enterprise
Performance Management System Standard Deployment Guide or the Oracle EnterprisePerformance Management System Installation and Configuration Guide.
l EPM System services are running.
l During configuration of Reporting and Analysis on the first host machine, on the “ConfigureReporting and Analysis Framework Services” page of EPM System Configurator, youspecified a repository location that is a shared file system location. On Windows machines,this must have been specified as a UNC path.
l On Windows platforms, the Oracle Hyperion Reporting and Analysis Framework Windowsservice is running under a user account with sufficient privileges for the network sharedfolder (not under a Local System account).
You can do this in EPM System Configurator. On the Common Settings panel, select RunWindows Services as non-local system account and specify a user with access to the sharedfolder.
24 Scaling EPM System Products

Scaling Reporting and Analysis Framework and InteractiveReportingYou can scale Reporting and Analysis service tier components to additional host machines orvertically scale on a single host machine. The steps are the same whether you are scalinghorizontally or vertically. Install only one instance of Reporting and Analysis Framework servicesand Oracle Hyperion Interactive Reporting services on each host.
Complete this procedure on each host machine onto which Reporting and Analysis Frameworkor Interactive Reporting is to be scaled.
ä To scale Reporting and Analysis Framework and Interactive Reporting:
1 For horizontal scaling: Install Reporting and Analysis Framework or Interactive Reporting on a anotherhost machine.
2 Launch EPM System Configurator: From the Start menu, select All Programs, then Oracle EPMSystem, then EPM System Configurator (all instances).
3 In Oracle Instance, complete these steps, and then click Next.
a. In Home directory for EPM Oracle instance, verify that the location of EPM Oracle Homedirectory is identical to that specified while configuring Foundation Services.
b. In EPM Oracle instance name, enter a new instance name.
4 On the Oracle Hyperion Shared Services Registry database configuration screen, complete these steps:
a. Select Connect to a previously configured Shared Services database.
b. Enter database connection information for Shared Services Registry and the user nameand password of the database account to use for accessing the database. This informationmust be identical to the information you entered while deploying Foundation Services.
c. Click Next.
If you are scaling on the same machine as Foundation Services, or on a machine on whichthe Shared Services Registry is already configured, you do not see the Configure SharedServices Registry screen.
5 In EPM System Configurator, select Configure Framework Services. Additionally, if you are alsoconfiguring Interactive Reporting, select Configure Reporting and Analysis Services, and then clickNext.
Do not select the Configure Database task. Database configuration for Reporting and Analysisis only required once for the first instance.
6 On the Configure Reporting and Analysis Framework Services page, make the following changes:
l Specify the same shared file system location that you specified during configuration ofthe first host. If you are running this service as a Windows service, specify a UNC pathinstead of a mapped drive. (This prevents potential permissions errors than can occurwhen Windows attempts to create a mapped drive at startup.)
You must specify this same shared file system location on all machines.
l Specify the range of ports to use, or click Next to keep the default port ranges.
Scaling Reporting and Analysis Framework and Interactive Reporting 25

7 If you are configuring Oracle Hyperion Interactive Reporting, on the Configure Reporting and AnalysisServices page, specify the range of ports to use, or click Next to keep the default port ranges.
8 On the Configure Reporting and Analysis Framework Agent Ports, specify the ports to use, or clickNext to keep the default ports.
9 Click Next to configure, and then click Finish when configuration is complete.
Validating the ScalingRun a deployment report and confirm that the component was scaled:
Navigate to EPM_ORACLE_INSTANCE/bin and execute the following command:
epmsys_registry report deployment
The report file (deployment_report_YYYYMMDD_HHMMSS.html) is stored inEPM_ORACLE_INSTANCE/diagnostics/reports.
You see an additional instance of the scaled component.
Clustering Financial Management ServersThe following procedure is an overview of the recommended process for adding servers to theFinancial Management environment, defining clusters, and adding servers to the clusters.
ä To cluster servers in your Financial Management environment:
1 After you install Financial Management on a new server or servers, run EPM System Configurator on allnew servers and select the “Configure Application Server” task and the “Configure Database” task.
2 Run EPM System Configurator on any one application server and select the “Configure ApplicationClusters” task to define clusters and to add servers to or remove servers from clusters.
3 Restart the Foundation Services Java web application and the Web server.
4 In EPM Workspace, register each application against the preferred cluster. See “ReregisteringApplications in EPM Workspace” in the Oracle Enterprise Performance Management System Installationand Configuration Guide.
Load Balancing Financial Management, StrategicFinance, or FDM IIS Web Applications on IISYou can configure Oracle HTTP Server to provide load balancing support to two or moreFinancial Management, Strategic Finance, or FDM IIS web applications. You set up a loadbalancer in front of the Web server using EPM System Configurator.
26 Scaling EPM System Products

ä To set up Oracle HTTP Server as a load balancer for Financial Management, StrategicFinance, or FDM IIS Web applications:
1 Install EPM System products including Financial Management, Strategic Finance, or FDM IIS Webapplications on two or more machines.
2 Configure EPM System products using EPM System Configurator.
3 Configure Financial Management, Strategic Finance, or FDM on each machine in the environment.
4 On one machine, select Update Logical Addresses for Web Applications from the Foundation tasksand for Host, enter the URL of the load balancer or Oracle HTTP Server.
You need to perform this task on only one machine in the environment.
5 Configure the Web server last. (Select Configure Web Server from the Foundation tasks.) Then, restartthe Web server and EPM Workspace.
Clustering Data ManagementThis section discusses clustering Data Management product components outside EPM SystemConfigurator. See “Clustering Java Web Applications Using EPM System Configurator” on page14 for information about clustering Oracle Hyperion Financial Data Quality Management,Enterprise Edition.
FDM ClustersFDM Application Server can be clustered with the FDM proprietary load balancer. Forinstructions on configuring the load balancer, see the Oracle Hyperion Financial Data QualityManagement, Fusion Edition Configuration Guide.
You can set up Oracle HTTP Server as a load balancer for FDM IIS Web applications. Forinstructions, see “Load Balancing Financial Management, Strategic Finance, or FDM IIS WebApplications on IIS” on page 26.
Using EPM System Configurator, you can cluster FDM Web applications for high availabilitywith either Oracle HTTP Server or third-party load balancers. For instructions, see “LoadBalancing Financial Management, Strategic Finance, or FDM IIS Web Applications on IIS” onpage 26. For instructions on clustering the FDM relational database, see the documentation forthe database software.
Figure 1 on page 28 shows a scenario with an FDM relational database clustered for failoverand high availability on proprietary EPM System application servers.
Clustering Data Management 27

Figure 1 FDM Clustered for Failover and High Availability
Data Relationship Management ClustersYou can cluster Oracle Data Relationship Management Web applications with either OracleHTTP Server or third-party load balancers. For instructions on clustering with Oracle HTTPServer, see “Configuring Load Balancing for Data Relationship Management Web Applications”in the Oracle Data Relationship Management Installation Guide.
Data Relationship Management Server applications can be clustered for load-balancing only,using a primary-secondary machine configuration. Long-running read-only operations can beprocessed on secondary application servers, to reduce the processing load on the primaryapplication server that is handling write operations. For instructions on configuring DataRelationship Management Server applications for load-balancing, see “Configuring HostMachines” in the Oracle Data Relationship Management Installation Guide.
28 Scaling EPM System Products

Note: The processing of requests by application servers may not be distributed evenly amongthe machines in the cluster. Routing to a specific machine is based on the data beingaccessed and the type of operation being performed.
With Data Relationship Management installed in a clustered database environment, you canselect Generate scripts to be run by a database administrator when creating a database from theRepository Wizard in the Data Relationship Management Configuration Console. Two scriptsare generated: one for creating the schema owner, or database, and one for creating the databaseschema objects. For instructions on clustering the Data Relationship Management repository,see the documentation for the database software being used.
Configuring Essbase ClustersThis section discusses active-active and active-passive clustering of Essbase Server. Forinformation about clustering Oracle Essbase Administration Services Java web application andOracle Hyperion Provider Services Java web application, see “Clustering Java Web ApplicationsUsing EPM System Configurator” on page 14.
Active-passive clustering (Windows): On Windows, Oracle recommends using MicrosoftCluster Services. This is because NTFS is not a clustered file system and CIFS-based file systemscan have a negative impact on Essbase performance. To configure active-passive Essbase Serverclusters using Microsoft Cluster Service, see “Configuring Active-Passive Essbase Clusters(Windows)” on page 30.
Active-passive clustering (Linux/UNIX): On Linux/UNIX systems, Oracle recommends usingOPMN-based failover with a shared file system. For best performance, Oracle recommends asymmetric enterprise-grade solution using a Storage Area Network. The shared storage shouldbe accessible for read and write on both active and passive systems during the normal operationsof the server. An active-passive Essbase cluster can contain only two Essbase servers. See“Configuring Active-Passive Essbase Clusters (UNIX)” on page 32.
Active-active clustering: You can configure active-active Essbase clusters using Provider Services.Active-active Essbase clusters support high availability and load balancing. An active-activeEssbase cluster supports read-only operations on the databases and should be used only forreporting. Because active-active Essbase clusters do not support data write-back or outlinemodification, and they do not manage database replication tasks such as synchronizing thechanges in one database across all databases in the cluster, they do not support Oracle HyperionPlanning. When Planning is configured to use Essbase in cluster mode as a data source, it doesnot support the ability to launch business rules with Oracle Hyperion Calculation Manager asthe rules engine. See “Configuring Active-Active Essbase Clusters” on page 36.
You can implement active-passive failover using EPM System Configurator, or active-activefailover using Provider Services, but not both.
Configuring Essbase Clusters 29

Table 1 Essbase Server Clustering Configurations
Capability Active-Passive (Windows) Active-Passive (UNIX) Active-Active
Write-back Yes Yes No
Failover Yes Yes Yes
Load balancing No No Yes
High availability Yes Yes Yes
Configuring Active-Passive Essbase Clusters (Windows)Use Microsoft Cluster Service to set up an active-passive cluster in Essbase.
First, configure Essbase, then configure Microsoft Cluster Service.
ä To configure Essbase so that failover can be managed by an external failover mechanism:
1 On the first machine (Node1), use EPM System Configurator to set up the first Essbase instance in thecluster:
l For Essbase Cluster Name, specify the name for the cluster.
2 On the second machine (Node2), use EPM System Configurator to make this Essbase Server join thecluster you created on the first machine:
l On the “Configure Essbase Server” page, for Full path to application location(ARBORPATH), the location must match the location you specified on the first machinein the cluster.
l Click Assign to Existing Cluster, select the cluster, and then click OK to make this EssbaseServer join the cluster you created on the first machine.
During cluster setup on the second machine, EPM System Configurator updatesessbase.cfg (in ARBORPATH/bin) to specify failovermode=true.
3 Open ABRORPATH/bin/essbase.cfg on the shared drive and ensure that:
l FAILOVERMODE is set to TRUE
l ESSBASESERVERHOSTNAME is set to the virtual hostname
4 Configure the Virtual IP.
Microsoft Cluster Service requires that virtual IPs are configured in the hardware cluster forbinding to failover processes. Because Essbase does not support VIP binding directly, thishas to be done indirectly:
a. Update the Shared Services Registry to have the Essbase HOST property point to the VIP.Run the following command three times, once for each Essbase instance and once forthe cluster:
epmsys_registry.bat updateproperty #<guid>/@host<Virtual hostname>
30 Scaling EPM System Products

where GUID is the unique ID of each Essbase instance in the cluster (for example,essbasecluster-inst1 and essbasecluster-inst2), and the unique ID of thecluster you defined, for example EssbaseCluster-1.
b. Update the hosts file to ensure that the VIP hostname is the first name that comes upfor name resolution on the machine, or that it is appropriately aliased to the primaryphysical IP on the box.
Perform this task on both nodes in the cluster.
5 Set up OPMN as the service to be managed by Microsoft Cluster Service. See “Configuring MicrosoftCluster Service” on page 31.
Essbase is not directly managed by Microsoft Cluster Service; it is already managed byOPMN, which starts, stops, and restarts the Essbase Agent process on the local node. Essbaseapplication processes are not managed by OPMN and therefore are not automatically startedup and shut down. These server processes are managed by the Essbase Agent.
6 Optionally, create start, stop, and check status scripts for Essbase processes.
Because Essbase is not managed directly by Microsoft Cluster Service but rather by OPMN,there may be a slight time delay during which OPMN cannot stop Essbase gracefully.
There is logic built into OPMN so that a failure to bring down the Essbase Agent normallycauses OPMN to abortively stop it. Once the Essbase Agent is terminated, there is also logicin Essbase Servers while running in failover mode to terminate themselves within the leaseexpiration window (<= 20 seconds, by default).
This is important to know because there may be a scenario where Microsoft Cluster Servicestops OPMN, which in turn stops the Essbase Agent, but there are Essbase applications stillrunning. From a cluster services perspective, however, a failover can occur and OPMN cancome up on the standby node. OPMN could also bring up the Essbase Agent on the standbynode, but there may be server processes that do not start unless they have all terminated onthe source node.
You can write custom status check scripts to alleviate this problem. For example, you couldwrite custom status check scripts that could run as a post-STOP operation of OPMN toensure that no Essbase Server processes are running after a certain time, for example, 20seconds.
There are no client-side changes required.
Because Essbase Server is configured in FAILOVERMODE, it publishes active node information tothe Shared Services Registry database, which stores Essbase high availability state-managementtables.
Both Provider Services and the Shared Services Registry API have built-in logic to determine theactive Essbase Server by querying the Essbase high availability state-management tables.
Configuring Microsoft Cluster ServicePrerequisites to configure Microsoft Cluster Service:
Configuring Essbase Clusters 31

l Static IP address for Node1 and Node2
l IP address for the cluster
l Virtual hostname aliased to the physical IP of the nodes
l Cluster nodes exist as an object in AD
l Domain service account that will be used to manage the service
l Quorum disk available for Microsoft Cluster Service configuration
l Shared drive available to both cluster nodes
ä To configure Microsoft Cluster Service:
1 In the Microsoft Cluster Service Cluster Administrator (in the Microsoft cluster), select ConfigureApplication to configure OPMN as a shared resource to be managed by Microsoft Cluster Service.
2 Create a generic service.
3 Configure the generic service with the service name. (Use the same service name configured on thecluster nodes.)
For example, ensure that the OPMN service is configured on each node of the cluster.
4 For ease of manageability, move the shared disk and the configured service to a new group.
Configuring Active-Passive Essbase Clusters (UNIX)You can cluster Essbase Server to provide active-passive failover with write-back capability.Essbase failover clusters use the service failover functionality of the Oracle Process Manager andNotification Server server. A single Essbase installation is run in an active-passive deployment,and one host runs the Essbase agent and two servers. Oracle Process Manager and NotificationServer stops, starts, and monitors the agent process.
Note the following information about Essbase clusters:
l An active-passive Essbase cluster can contain only two Essbase servers. To install additionalEssbase servers, you must install an additional instance of Essbase. The ARBORPATH andapplication location must be the same for both servers. The application must be on a shareddrive, and the cluster name must be unique within the deployment environment.
l Active-passive Essbase clusters support failover with write-back to databases.
l Active-passive Essbase clusters do not support load-balancing.
l When you set up an Essbase cluster, the application location must be a shared drive or aUNC path. Oracle recommends that you specify a UNC path if you are configuring Essbasefor high availability. The location must reside on a file system that all Essbase servers in thecluster can reach.
l If you are adding the second Essbase Server to a cluster, EPM System Configurator changesits ARBORPATH application location to that of the first Essbase Server.
l For a given physical Essbase server that Administration Services is administering,Administration Services displays only the name of the cluster to which that Essbase serverbelongs.
32 Scaling EPM System Products

l If you have been working in a nonclustered environment and want to change to a clusteredenvironment, and the Essbase applications are not in a shared location, you must migratethe applications to a shared location. See “Copying or Migrating Applications” in the OracleEssbase Database Administrator's Guide.
Clustering Essbase with Oracle Process Manager and Notification (OPMN)ServerOracle Process Manager and Notification server (OPMN) enables you to monitor and controlthe Essbase Agent process. You add Essbase Agent information to opmn.xml to enable OPMNto start, stop, and restart the agent using the OPMN command line interface. OPMN canautomatically restart the Essbase Agent when it becomes unresponsive, terminates unexpectedly,or becomes unreachable as determined by ping and notification operations. Additionally, youcan use the failover functionality available in OPMN to provide high availability of Essbaseclusters.
The following table describes an overview of the process of installing, configuring, and managingEssbase with OPMN.
Table 2 Installing, configuring, and managing Essbase with OPMN
Task Reference
Install EPM System products, including Essbase. Install Essbase locally on each node.
During installation, EPM System Installer also installs OPMN on the Essbase Server machine.
Note: Oracle recommends that the Shared Services Registry database be on a different machine thanEssbase.
“Installing EPM System Products”in the Oracle EnterprisePerformance ManagementSystem Installation andConfiguration Guide
Configure EPM System products, including Essbase. By default EPM System Configurator sets upEssbase to be managed by OPMN.
If you are implementing Essbase clustering (active-passive only), during configuration with EPM SystemConfigurator, do the following:
1. On the first machine, use EPM System Configurator to set up the cluster:
l On the “Configure Essbase Server” page, for Full path to application location(ARBORPATH), the location you specify must be a shared drive. The location must reside ona file system that is reachable by all Essbase servers in the cluster.
l For Essbase Cluster Name, specify the name for the cluster.
2. On the second machine, use EPM System Configurator to make this Essbase Server join the clusteryou created on the first machine:
l On the “Configure Essbase Server” page, for Full path to application location(ARBORPATH), the location must match the location you specified on the first machine in thecluster.
l Click Assign to Existing Cluster, select the cluster, and then click OK to make this EssbaseServer join the cluster you created on the first machine.
During cluster setup on the second machine, EPM System Configurator updates essbase.cfg (inARBORPATH/bin) to specify failovermode=true.
“Configuring EPM SystemProducts” in the Oracle EnterprisePerformance ManagementSystem Installation andConfiguration Guide
Configuring Essbase Clusters 33

Task Reference
If you set up an active-passive Essbase cluster using EPM System Configurator, you must performadditional steps to set up Essbase failover on both nodes of the cluster.
“Editing OPMN.XML for Active-Passive Essbase Clusters” onpage 34
Optionally, learn more about OPMN service failover and the required elements and attributes inopmn.xml for configuring Essbase for failover.
“OPMN Service Failover forEssbase Server” on page 44
Start Essbase using OPMN. “Starting and Stopping EPMSystem Products” in the OracleEnterprise PerformanceManagement System Installationand Configuration Guide
Diagnose problems by reviewing the OPMN logs. The “Essbase” chapter of OracleEnterprise PerformanceManagement System Installationand ConfigurationTroubleshooting Guide
Manage Essbase using OPMN, which enables you to monitor and control the Essbase Agent process. Oracle Essbase DatabaseAdministrator's Guide,“Managing Essbase Using OPMN.”
Editing OPMN.XML for Active-Passive Essbase ClustersIf you set up an active-passive Essbase cluster using EPM System Configurator, you must performadditional steps to set up Essbase failover on both cluster nodes.
ä To complete the setup of the Essbase active-passive cluster:
1 Update EPM_ORACLE_INSTANCE/config/OPMN/opmn/opmn.xml to specify the OPMNservice failover network topology. In the <notification-server interface> section, add the<topology> section. For example:
<notification-server interface="any"> <ipaddr remote="hostName" /> <port local="portNumber" remote="portNumber" /> <ssl enabled="true" wallet-file="\Oracle\Middleware\user_projects\epmsystem1\config\OPMN\opmn\wallet"/> <topology> <nodes list="nodeName1:nodeRemotePort1,nodeName2:nodeRemotePort2"/> </topology></notification-server>
2 In the same section of the file, update hostName to match the nodeName for this machine.
Oracle recommends using a fully qualified name.
3 In the same section of the file, enable or disable SSL communication as the communication mechanismbetween the OPMN servers in the failover nodes. By default, the ssl enabled parameter is True.
To enable SSL , you must also recreate the wallet file on both nodes of the cluster. The walletfile parameters must be the same on both machines.
34 Scaling EPM System Products

To disable SSL communication, change the ssl enabled parameter to False. Forexample:
<notification-server interface="any"> <ipaddr remote="hostName" /> <port local="portNumber" remote="portNumber" /> <ssl enabled="false" wallet-file="\Oracle\Middleware\user_projects\epmsystem1\config\OPMN\opmn\wallet"/> <topology> <nodes list="nodeName1:nodeRemotePort1,nodeName2:nodeRemotePort2"/> </topology></notification-server>
where nodePort1 and nodePort2 are the remote ports of OPMN on each machine in thecluster.
4 Update opmn.xml to enable service failover for Essbase. In the <ias-componentid="Essbase"> section, add service-failover="1". For example:
<ias-component id="Essbase"> <process-type id="EssbaseAgent" module-id="ESS" service-failover="1" service-weight="100">
5 In the <ias-component id="Essbase"> section of opmn.xml, for the first node, changeservice-weight="100" to service-weight="101" . For the second node, keep the valueat 100.
6 Update opmn.xml to reflect the name of the cluster. In the <ias-componentid="Essbase"> section, change id="Essbase" from “Essbase” to the name of the cluster.For example, change:
<ias-component id="Essbase">
to
<ias-component id="EssbaseClusterName">
7 In opmn.xml, remove "numprocs" from the process set definition and change the restart-on-death value to “true”. For example edit the following section:
<process-set id="AGENT" numprocs="1" restart-on-death="false">
as follows:
<process-set id="AGENT" restart-on-death="true">
After Essbase is up and running, OPMN periodically sends a TCP-based forward ping to theagent. If a ping attempt fails, OPMN retries up to three times to contact the agent. If all pingattempts fail, OPMN stops the agent. OPMN attempts to restart the agent for these scenarios:
l restart-on-death (in opmn.xml) is set to TRUE.
In a production environment, restart-on-death should always be set to TRUE. Oraclerecommends trying to restart a process on the local node first, before attempting failover.When restart-on-death is set to TRUE, OPMN first attempts to restart Essbase on thelocal node for the number of restarts that are configured in opmn.xml (the first start andthe number of restarts). If all restart attempts fail, then failover to the standby node occurs.
Configuring Essbase Clusters 35

In development and test environments, you can set restart-on-death to FALSE to testfailover.
In non-failover mode, which is the default mode, the default setting for restart-on-death isFALSE.
l Failover mode is on, which supersedes the restart-on-death value. If restart-on-death is FALSE and failover mode is on, OPMN may bring up Essbase on the active orpassive node.
Configuring Active-Active Essbase ClustersUsing Provider Services, you can create active-active cluster of identical databases belonging toone Essbase server, to multiple Essbase servers on the same computer, or to Essbase serversdistributed across multiple computers over the network.
Note: Essbase servers may be subject to licensing restrictions.
Provider Services clients include Oracle Hyperion Smart View for Office clients, custom Javaapplication programming interface (API) clients, and XML for Analysis (XMLA) clients.Provider Services distributes client requests to database instances belonging to the cluster. Anactive-active Essbase cluster supports read-only operations on the databases; it does not supportdata write-back or outline modification. An active-active Essbase cluster does not managedatabase replication capabilities, such as synchronizing the changes in one database across alldatabases in the cluster.
After configuring a set of Essbase servers for active-active clustering, you must define and enablethe cluster under the Provider Services node in the Enterprise View of Administration ServicesConsole. See “Enabling Clustered Database Components” on page 38.
Configuring Active-Active Clusters with Provider ServicesIf Essbase is clustered with Provider Services and no third-party tool:
l Essbase has no write-back capability and should be used for reporting only; therefore,Planning is not supported.
l Nodes must be loaded and calculated individually.
Adding Servers to Active-Active Essbase ClustersYou must specify which servers a cluster includes.
ä To add servers to an Essbase cluster, from Administration Services Console:
1 From Enterprise View or a custom view, select Essbase Servers.
2 For each server to be added:
a. Right-click, and select Add Essbase Servers.
36 Scaling EPM System Products

b. In Add Essbase Server, enter the Essbase server name, user name, and password.
c. Confirm the password that you entered in the preceding step.
3 From Enterprise View or a custom view, under the Provider Services node, select a provider.
4 Right-click and select Create, then Create Essbase Cluster.
5 Select Add Essbase Cluster, then Cluster name, and then enter a name for the cluster; for example,East Coast Sales.
6 Enter a short description; for example, East Coast sales databases.
7 Click Add to add servers to the cluster.
8 In Select Cluster Component Database, specify the Essbase server, application, and database names,and then click OK.
The Essbase server and associated application and database names are displayed under thecluster component list; for example, localhost.Demo.Basic. A cluster componentcomprises the Essbase server, application, and database name.
9 Repeat step 7 and step 8 to add any other components.
10 In Add Cluster, click OK.
The new cluster name is displayed under Essbase Clusters.
Removing Active-Active Essbase Clusters
ä To remove an active-active Essbase cluster:
1 From Enterprise View or a custom view in Administration Services Console, under the ProviderServices node, select a provider.
2 Under the provider node, select Essbase Clusters.
3 Under Essbase Clusters, select a cluster.
4 Right-click, and select Remove.
5 In Remove Essbase Cluster, click Yes.
The removal takes effect when you restart Provider Services.
Adding Components to Active-Active Essbase ClustersWhen creating an Essbase cluster, specify associated Essbase servers, applications, databases.
ä To add components to a cluster, from Administration Services Console:
1 From Enterprise View or a custom view, under the Provider Services node, select a provider.
2 Under the provider node, select the Essbase Clusters node.
3 Under the Essbase Clusters node, select the cluster.
4 Right-click, and select Edit.
Configuring Essbase Clusters 37

5 In the Essbase Cluster panel, click Add.
6 In Select Cluster Component Database, specify the Essbase server, application, and database names.
7 Click OK.
The database component is listed in the Essbase Cluster panel.
8 To add more components, repeat step 5 through step 7 for each component.
9 Click Apply.
10 Click Close.
Removing Database Components
ä To remove a database component from a active-active cluster, from Administration ServicesConsole:
1 From Enterprise View or a custom view, under the Provider Services node, select a provider.
2 Under the Provider node, select the Analytic Clusters node.
3 Under the Analytic Clusters node, select a cluster.
4 Right-click, and select Edit.
5 For each database component to be removed, in the Analytic Cluster panel, select the component, andclick Remove.
6 Click Apply.
7 Click Close.
Enabling Clustered Database ComponentsYou can re-enable a database component after disabling it.
Note: Components that were part of the cluster definition when Provider Services was startedcan be enabled and disabled dynamically with no need to restart Provider Services.However, if you add a component to a cluster or create a cluster, you must restart ProviderServices for the new cluster definition to take effect. You can enable or disable the newlyadded components after restarting Provider Services.
ä To enable clustered database components, from Administration Services Console:
1 From Enterprise View or a custom view, under the Hyperion Provider Services node, select a provider.
2 Under the Provider node, select the Analytic Clusters node.
3 Under the Analytic Clusters node, select a cluster.
4 Right-click, and select Edit.
5 For each database component to be enabled, in the Analytic Cluster panel, select the component, andclick Enable.
38 Scaling EPM System Products
The status of the database component changes to Enabled.
6 Click Close.
Note: Components that were part of the cluster definition when Provider Services was startedcan be enabled and disabled dynamically without restarting Provider Services. However,if you add a component to an existing cluster or create a cluster, you must restart ProviderServices for the new cluster definition to take effect. You cannot enable or disable thenewly added cluster components until you restart Provider Services.
Disabling Cluster ComponentsYou can disable individual database components in a cluster. For example, you can take thecomponent offline to update the database.
ä To disable a database component in a cluster, from Administration Services Console:
1 From Enterprise View or a custom view, under the Hyperion Provider Services node, select a provider.
2 Under the provider node, select the Essbase Clusters node.
3 Under the Essbase Clusters node, select a cluster.
4 Right-click, and select Edit.
5 For each component to be disabled, in the Essbase Cluster panel, select the component, and clickDisable.
6 Click Close.
Active-Active Essbase Clustering ExamplesFor simplicity, all examples in this section use Smart View.
Essbase Server Clusters
Provider Services enables you to group sets of Essbase servers running applications with identicaldatabases and use them as one resource.
Note: When adding or deleting an Essbase server in a cluster, restart the server to reflect changesto the group. You can enable or disable components in the group without restarting theserver.
Essbase Database Clusters
Clustering Essbase databases enables load balancing and failover support. Provider Servicesprovides parallel clustering, in which a series of active, duplicate databases respond to userrequests. Which database is accessed is transparent to users, who connect to and retrieve datafrom one data source. Provider Services facilitates the routing of connections between databasesin a cluster, based on availability and precedence rules.
Configuring Essbase Clusters 39

Figure 2 Essbase Database Clustering with Provider Services
In Figure 2, Smart View users connect to Essbase through Provider Services.
Each user connection is assigned to a server during the Essbase session. Provider Services usessession-level load balancing. For example, in Figure 2, User 1’s connection is mapped to DataSource A. User 2’s connection is mapped to Data Source B. User 3’s connection is mapped todata source C. All requests from User 1 are handled by Data Source A for the duration of theconnection.
If data source A fails:
l User 1 times out at Data Source A.
l User 1 is rerouted to the next available data source, which is Data Source C in Figure 3.
Figure 3 illustrates what happens when Data Source A goes offline.
40 Scaling EPM System Products

Figure 3 Database Cluster with One Data Source Offline
In Figure 3, the state of query 1 is maintained at the middle tier and rerouted. Provider Servicesalso provides load balancing across servers.
Figure 4 depicts clustered databases deployed on one server.
Figure 4 Essbase Database Cluster on One Server
Configuring Essbase Clusters 41

In Figure 4, two servers contain Essbase databases. Server 1 has four processors and 8 GB ofRAM. Server 2 has eight processors and 16 GB of RAM. Because Server 2 has more resources, itcontains Data Sources B and C. Therefore, Server 2 can handle both connections.
Failover support also applies for database clusters on one server. In Figure 5, Server 2 goes offline.User 2 and User 3 are then rerouted to the next available server, Server 1.
Figure 5 Failover for Database Cluster on One Server
Vertically Scaling Essbase
Configuring and Starting Additional Instances of Essbase ServerYou can install Essbase Server once and configure multiple additional Essbase instances.Configure the first Essbase instance as usual using EPM System Configurator. For subsequentEssbase instances, specify a new EPM Oracle instance during configuration.
ä To configure an additional instance of Essbase Server on the same machine:
1 After you have configured the first instance of Essbase Server, launch EPM System Configurator on thesame machine.
2 On the “Configure a New or Existing EPM Oracle Instance” page, specify the EPM Oracle instance locationfor the additional instance of Essbase Server.
The default location for a subsequent instance is MIDDLEWARE_HOME/user_projects/epmsystemN, where N is the number of the EPM Oracle instance.
3 On the Essbase Server Configuration page, specify the following information:
42 Scaling EPM System Products

l A unique port range. The range of ports used by one Essbase Server instance must notoverlap the range of ports used by any other products.
The port numbers for the additional instance of Essbase Server are stored in theessbase.cfg file for this installation.
l For ARBORPATH: If this Essbase instance is in a cluster with another instance, thisEssbase instance must have the same application location as the first Essbase instance.If this Essbase instance is not in a cluster with anotherEssbase instance, theARBORPATH can be different.
4 Complete configuration with EPM System Configurator.
Each instance of Essbase Server has its own OPMN and its own startup script. To start anadditional instance of Essbase Server, use the startEssbase.bat|.sh script for this Essbaseinstance, in EssbaseInstanceLocation/bin.
Each Essbase instance has its own log file in EssbaseInstanceLocation/diagnostics/logs/essbase.
Modifying Ports for Multiple Instances of EssbaseIf you configured more than one instance of Essbase Server on a single machine, each Essbaseinstance has its own OPMN, its own start scripts, and its own log files. If you need to changeEssbase ports, update each Essbase instance's copy of opmn.xml so that each OPMN has uniqueports for communication.
ä To modify OPMN for an additional instance of Essbase:
1 Open EPM_ORACLE_INSTANCE/config/OPMN/opmn/opmn.xml in a text editor.
2 In the <notification-server interface> section of the file, update the two port values(port local="portNumber and remote="portNumber") for this instance of OPMN so itdoes not conflict with other instances of OPMN, and then save the file. For example:
<notification-server interface="any"> <ipaddr remote="hostName" /> <port local="portNumber" remote="portNumber" /> <ssl enabled="false" wallet-file="\Oracle\Middleware\user_projects\epmsystem1\config\OPMN\opmn\wallet"/></notification-server>
3 Perform this step on each instance of opmn.xml.
Connections to Essbase ClustersEssbase clients and servers can connect to an Essbase cluster by way of a URL in this format:
http(s)://host:port/aps/Essbase?ClusterName=clusterName.
You can also connect to an Essbase cluster using only the cluster name, but you must first enablethis by modifying a configuration file to specify the Provider Services server that resolves thecluster name in the URL. The Provider Services server is specified in these configuration files:
Configuring Essbase Clusters 43

l For server-to-server communication–essbase.cfg
Use this format:
ApsResolver http(s)://host:port/aps
You can specify several Provider Services servers in essbase.cfg, using a semicolon (;)between server names.
l For client-to-server communication–essbase.properties
Use this format:
ApsResolver=http(s)://host:port/aps
Restart Essbase after updating these files.
To connect to a Provider Services active-active Essbase cluster using Oracle Hyperion FinancialReporting or Oracle Hyperion Web Analysis, you must configure Financial Reporting or WebAnalysis for three-tier mode.
To configure Financial Reporting for three-tier mode:
1. Start MIDDLEWARE_HOME/EPMSystem11R1/products/financialreporting/bin/FRConfig.cmd.
2. Select the MBeans tab and browse to com.hyperion/Financial Reporting/Attributes/EssbaseJAPIServer.
3. Confirm that EssbaseJAPIServer is set as the Provider Services server.
4. Enter the Provider Services cluster name as the Server Name in the Attribute value Value boxand then click Refresh.
5. Exit and restart Financial Reporting.
To configure Web Analysis for three-tier mode:
1. Log on to EPM Workspace as an admin user.
2. Select Navigate, then Administer, then Reporting and Analysis, and then Web Applications.
3. Right-click WebAnalysis Web-Application, and select Properties.
4. On the Essbase Configuration tab, set these properties and then click OK:
l EESEmbeddedMode=false (The default setting is true.)
l EESServerName=Provider Services server name (The default setting islocalhost.)
l Click OK.
5. Restart the Web Analysis server to put the changes into effect.
OPMN Service Failover for Essbase ServerThis section provides an overview of OPMN service failover concepts and lists the elements andattributes in the opmn.xml file that are required for configuring Essbase for failover. This file
44 Scaling EPM System Products

contains many other elements and attributes; see the Oracle Process Manager and NotificationServer Administrator's Guide.
Service FailoverService failover is a mechanism to specify a critical process that must be run somewhere in anEssbase cluster if service is disrupted on a processing server. This enables you to preferentiallyselect which processes must be kept running. Any process-type opmn.xml file element may beconfigured as a service failover such that, once started, OPMN ensures that the configurednumber of processes for the service are running on Essbase instances somewhere in the cluster.You can configure which Essbase instances participate in the service failover on an instance-by-instance basis. You can configure each Essbase instance for preferential selection of running theprocess on available Essbase instances. Only one process-set may be defined for eachprocess-type configured as a service failover. Only one process is run for each service failoverinstance.
In the following diagram, a service failover process has been started in a cluster where all Essbaseinstances are configured to participate in the service failover.
As shown in the diagram below, if the Essbase instance on which the service failover process isrunning goes down, such as for maintenance or an unprotected power outage or network failure,OPMN selects another participating Essbase instance on which to run the process. All of theEssbase instances shown in the diagram are participating in the service failover.
Configuring Essbase Clusters 45

opmn.xml Common Configuration
Subtopics
l <port>
l <topology>
l <nodes>
l service-failover="num"
l service-weight="value"
l restart-on-death
l start/stop/restart timeout
This section provides descriptions of elements and attributes in the opmn.xml file that arerequired to configure Essbase for failover. In the opmn.xml file, all elements are within the<ias_component> configuration element. (This entry represents the system component.)
<port>
Parents: notification-server
Attributes: local, remote, request
The port element contains configuration information for ONS listener threads host and portbindings.
Example:
<ias-component id="<Essbase-Cluster-Name>"> <process-type id="EssbaseAgent" module-id="ESS" service-failover="1" service-weight="101"> <environment> ... </environment> <port id="essbase-port-range" range="32768-33768"/> </process-type></ias-component>
<topology>
Parents: notification-server
Attributes: none
The topology element contains the configuration information for the ONS topology within acluster.
Example:
<topology> <nodes list="adc2170731:6712,dadvmn0429:6712"/></topology>
46 Scaling EPM System Products

<nodes>
Parents: topology
Attributes: list
The nodes element provides a list of specific addresses for OPMN servers in the same cluster asthe local OPMN server. The local OPMN server is included in the list. Multiple nodes elementsmay be configured.
Example:
<topology> <nodes list="adc2170731:6712,dadvmn0429:6712"/></topology>
service-failover="num"
Valid Values: An integer value > 0
A process-type may be configured as a service-failover (if num is not zero), whichrepresents a process that exists num times somewhere in the cluster when it is up. Theimplementation is limited such that only one process of this type runs on a single service instance,and so the maximum number of processes for a specific service-failover in the cluster cannever be more than the number of participating service instances in the cluster. If the value ofnum is greater than the number of service instances participating in this service-failover inthe cluster and the service-failover is active (it has been started), then each participantadded to the cluster automatically starts its service-failover process until the total numbercluster wide is num.
A service-failover process can run on any instance participating in the service, which meanseach instance must have the service configured with the same ias-component id, process-type id and process-set id. To target the service itself, a request must specify both theias-component and the process-type (it can also include the process-set).
A service-failover process-type can have only one process-set. Because the numberof processes for a failover service is always 1, this process-set cannot specify numprocs,minprocs, or maxprocs.
A service-failover can be specified as a dependency (like any managed-process) or canspecify dependencies. If specified as a dependency, the dependency check for a service-failover evaluates true as soon as one process of this type is active anywhere in the cluster,regardless of the configured value for num.
Example:
<ias-component id="<Essbase-Cluster-Name>"> <process-type id="EssbaseAgent" module-id="ESS" service-failover="1" service-weight="101"> <environment> <variable id="EPM_ORACLE_HOME" value="<Oracle Home-Location>”> </environment> ... </process-type></ias-component>
Configuring Essbase Clusters 47
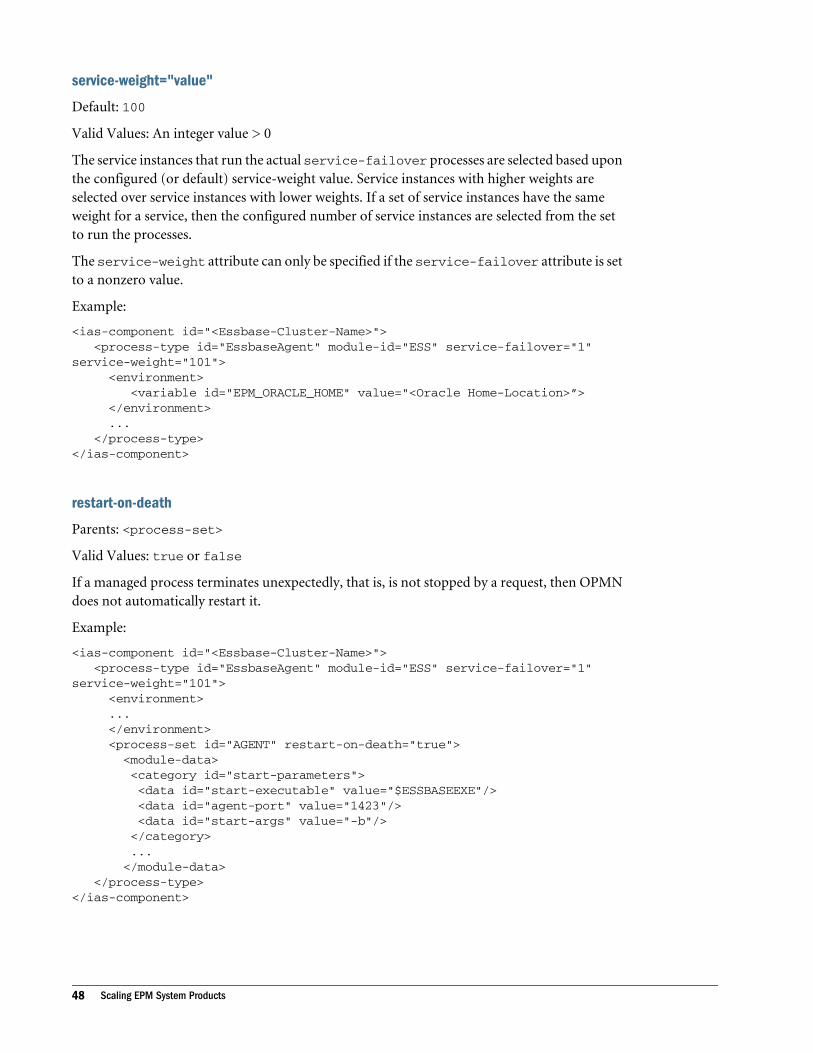
service-weight="value"
Default: 100
Valid Values: An integer value > 0
The service instances that run the actual service-failover processes are selected based uponthe configured (or default) service-weight value. Service instances with higher weights areselected over service instances with lower weights. If a set of service instances have the sameweight for a service, then the configured number of service instances are selected from the setto run the processes.
The service-weight attribute can only be specified if the service-failover attribute is setto a nonzero value.
Example:
<ias-component id="<Essbase-Cluster-Name>"> <process-type id="EssbaseAgent" module-id="ESS" service-failover="1" service-weight="101"> <environment> <variable id="EPM_ORACLE_HOME" value="<Oracle Home-Location>”> </environment> ... </process-type></ias-component>
restart-on-death
Parents: <process-set>
Valid Values: true or false
If a managed process terminates unexpectedly, that is, is not stopped by a request, then OPMNdoes not automatically restart it.
Example:
<ias-component id="<Essbase-Cluster-Name>"> <process-type id="EssbaseAgent" module-id="ESS" service-failover="1" service-weight="101"> <environment> ... </environment> <process-set id="AGENT" restart-on-death="true"> <module-data> <category id="start-parameters"> <data id="start-executable" value="$ESSBASEEXE"/> <data id="agent-port" value="1423"/> <data id="start-args" value="-b"/> </category> ... </module-data> </process-type></ias-component>
48 Scaling EPM System Products

start/stop/restart timeout
Parents: <process-set>
Valid Values: An integer > 0 and < 3600
A timeout value can be configured for each action.
Example:
<ias-component id="<Essbase-Cluster-Name>"> <process-type id="EssbaseAgent" module-id="ESS" service-failover="1" service-weight="101"> <environment> ... </environment> <start timeout="600" retry="2" /> <stop timeout="600"/> <restart timeout="600" retry="2" /> </process-type></ias-component>
Configuring Financial Close Management to work withSOA Clusters
Subtopics
l Assumptions and Prerequisites
l Setting up the Load Balancer
l Configuring Financial Close Management
l Validating the Financial Close Management Setup for SOA High Availability
If you have installed and configured Oracle SOA Suite and Financial Close Management, and ifyou have configured SOA clusters, you must configure Financial Close Management to workwith the SOA clusters. See “Configuring High Availability for Oracle Fusion Middleware SOASuite” in the Oracle® Fusion Middleware High Availability Guide for information aboutconfiguring SOA clusters.
Assumptions and Prerequisitesl Oracle SOA Suite and Financial Close Management are installed and configured as described
in the Oracle Enterprise Performance Management System Installation and ConfigurationGuide.
l Oracle SOA Suite is configured for high availability.
l You are using the Oracle HTTP Server installed with EPM System Installer, and this webserver is used for both EPM System and Oracle SOA Suite.
Configuring Financial Close Management to work with SOA Clusters 49

Setting up the Load BalancerTo configure Financial Close Management to work with SOA Clusters, you enable load balancingfor SOA clusters using the Oracle HTTP Server installed with EPM System Installer.
ä To enable load balancing for SOA clusters:
1 Open EPM_ORACLE_INSTANCE\httpConfig\ohs\config\OHS\ohs_component/mod_wl_ohs.conf in a text editor and add the following entries:
# The admin URLs should only be accessible via the admin virtual host<Location /console> SetHandler weblogic-handler WebLogicHost <ADMIN Server Virtual DNS name > WeblogicPort 7001</Location>
<Location /consolehelp> SetHandler weblogic-handler WebLogicHost <ADMIN Server Virtual DNS name > WeblogicPort 7001</Location>
<Location /em> SetHandler weblogic-handler WebLogicHost <ADMIN Server Virtual DNS name > WeblogicPort 7001</Location>
# Virtual host entry for external https URL configured at the Load Balancer# WSM-PM<Location /wsm-pm> SetHandler weblogic-handler WebLogicCluster <SOASERVER1>:<WSM_PORT>,<SOASERVER2>:<WSM_PORT># WLProxySSL ON# WLProxySSLPassThrough ON</Location>
<Location /soa-infra> SetHandler weblogic-handler WebLogicCluster <SOASERVER1>:<SOA_PORT>,<SOASERVER2>:<SOA_PORT># WLProxySSL ON# WLProxySSLPassThrough ON</Location>
2 Restart Oracle HTTP Server.
Configuring Financial Close ManagementAfter setting up the load balancer, run EPM System Configurator again to finish theconfiguration with the SOA clusters.
ä To complete the Financial Close Management configuration with the SOA cluster:
1 Launch EPM System Configurator and in the Task Selection panel, select Uncheck All, expand HyperionFoundation and select Configure Logical Address for Web Applications.
50 Scaling EPM System Products

2 In Update the logical address for the Web applications, specify the web server fronting SOA and EPMSystem.
3 Complete the configuration, and on the Summary panel, click Task Panel.
4 On the Task Selection panel, for Close Manager select Deploy to SOA and for Account ReconciliationManager select Deploy to SOA and Deploy to SOA for FDMEE.
5 When the deployment process is complete, the Summary screen is displayed. Verify that all the taskscompleted successfully, and then click Finish.
Validating the Financial Close Management Setup for SOAHigh Availability
ä To validate the high availability setup, open the following URLs in a browser:
http://<Admin Virtual Host name>:<OHS_PORT>/console
http://<Admin Server Virtual Host name>:<OHS_PORT>/em
http://<SOA Server1 Virtual Host name>:<OHS_PORT>/wsm-pm/validator
http://<SOA Server2 Virtual Host name>:<OHS_PORT>/wms-pm/validator
http://<SOA Server1 Virtual Host name>:<OHS_PORT>/soa-infra
http://<SOA Server2 Virtual Host name>:<OHS_PORT>/soa-infra
Configuring Financial Close Management to work with SOA Clusters 51

52 Scaling EPM System Products

3Configuring Oracle Web
Services Manager for EPMSystem Products
In This Chapter
Configuring Oracle Web Services Manager .. . . . . . . . . . . . . . . . . . . . . . . . . . . . . . . . . . . . . . . . . . . . . . . . . . . . . . . . . . . . .53
Enabling Oracle Web Services Policy Manager to Service Requests .. . . . . . . . . . . . . . . . . . . . . . . . . . . . . . . . .55
Setting Up the Keystore for Message Protection ... . . . . . . . . . . . . . . . . . . . . . . . . . . . . . . . . . . . . . . . . . . . . . . . . . . . . .55
Configuring the WebLogic Domain to OID, MSAD, SunOne ... . . . . . . . . . . . . . . . . . . . . . . . . . . . . . . . . . . . . . . . . .56
Financial Close Management Configuration Options ... . . . . . . . . . . . . . . . . . . . . . . . . . . . . . . . . . . . . . . . . . . . . . . . .57
FDMEE Configuration Options ... . . . . . . . . . . . . . . . . . . . . . . . . . . . . . . . . . . . . . . . . . . . . . . . . . . . . . . . . . . . . . . . . . . . . . . . . .60
Using FDMEE with PeopleSoft . . . . . . . . . . . . . . . . . . . . . . . . . . . . . . . . . . . . . . . . . . . . . . . . . . . . . . . . . . . . . . . . . . . . . . . . . . . .62
If you will be using Oracle Web Services Manager for use with Financial Close Management,Oracle Hyperion Profitability and Cost Management, FDMEE, Financial Management, ProviderServices or Data Relationship Management, perform the following steps, in order:
l Configure Oracle Web Services Manager (OWSM).
This step is not required for Financial Close Management; it is performed duringconfiguration. If you have previously configured Financial Close Management, these stepshave already been performed automatically and you can skip this section.
l Set up the keystore for message protection.
l Set up the Oracle Web Services Policy Manager to service requests.
This step is performed automatically for Financial Close Management during Oracle SOASuite configuration and during configuration with EPM System Configurator.
l Configure the WebLogic domain, or for Financial Close Management the SOA Server, toconnect to Oracle Internet Directory, Microsoft Active Directory (MSAD), or SunOne.
After performing these steps, restart managed servers.
Configuring Oracle Web Services ManagerOracle Web Services Manager is automatically installed, but not configured, with EPMWorkspace.
You must configure OWSM before you can use Web Services. Ensure that you have alreadyinstalled the Repository Creation Utility before you perform this step. See “Creating
Configuring Oracle Web Services Manager 53

Infrastructure Schemas Using Repository Creation Utility” in the Oracle Enterprise PerformanceManagement System Installation and Configuration Guide.
Note: This step is not required for Financial Close Management; it is performed duringconfiguration. If you have previously configured Financial Close Management, these stepshave already been performed automatically and you can skip this section.
ä To configure OWSM:
1 From the WebLogic Administration Services machine, select All Programs, then Oracle WebLogic, thenWebLogic Server 11gR1, then Tools, and then Configuration Wizard.
2 On the Welcome page, select Extend an Existing WebLogic domain to add new components to theexisting EPM domain, and modify configuration settings.
3 Click Next.
4 On the Select a WebLogic Domain Directory page, select user_projects, then domains, andthen EPMSystem, and then click Next.
If you specified a different domain name when you configured EPM System products, selectthat domain.
5 On the Select Extension Source page, select Extend my domain automatically to support the followingproducts, select Oracle WSM Policy Manager, and then click Next.
6 On the Configure JDBC Data Sources page, modify the details for the JDBC data sources, as required,providing the password that you entered during RCU configuration, and then click Next.
7 On the Test Data Sources page, select the data sources to be tested, and then click TestConnections.
If the connections are working, a check mark is displayed under Status. If the connectionsare not working, go back to correct the JDBC data source details, and rerun the test.
8 Click Next.
9 On the Configure the JDBC Component Schema page, enter details for the OWSM _mds schema, andthen click Next.
10 On the Test JDBC Component Schema page, select the component schema to be tested, and then clickTest Connections.
If the connections are working, a check mark is displayed under Status. If the connectionsare not working, go back to correct the JDBC data source details, and rerun the test.
11 Click Next through the remaining pages.
12 Restart the server machine, stop all EPM System services, and then start WebLogic Administration ServerConsole.
54 Configuring Oracle Web Services Manager for EPM System Products

Enabling Oracle Web Services Policy Manager toService RequestsThis step is not required for Financial Close Management; it is performed during configuration.
ä To set up Oracle Web Services Policy Manager to service requests:
1 Log in to the Weblogic Administration Console using WebLogic administrator credentials. (http://WebLogic_Admin_Host:WebLogic_Admin_Port/console).
2 Navigate to Servers, FoundationServices0, Deployments, wsm-pm, Control.
3 Under Start/Stop, select wsm-pm and select Start - Servicing All Requests and then select Yes.
Setting Up the Keystore for Message Protection
ä To set up the keystore for message protection:
1 First, create a keystore using the keytool command:
Go to /Oracle/Middleware/user_projects/$DOMAIN_HOME/config/fmwconfig inthe server running the WebLogic Administration Server hosting your EPM System domainand execute the following command:
keytool -genkeypair -keyalg RSA -alias aliasName -keypass password -keystore keystoreName.jks -storepass password -validity 3600
Note: If the keytool command is not recognized, the Path environmental variable mightnot include JDK. Add the JDK to the Path variable using the following command:set PATH=%PATH%;C:\Oracle\Middleware\JDK160_35\bin\;.;.
For additional information, see “How to Create and Use a Java Keystore” in the “Setting upthe Keystore for Message Protection” section of the Oracle Fusion Middleware Security andAdministrator's Guide for Web Services 11g Release 1 (11.1.1). (http://download.oracle.com/docs/cd/E14571_01/web.1111/b32511/setup_config.htm#BABJHIBI).
2 Next, set up message protection for Web Services:
a. Log in to Enterprise Manager (http://WebLogicAdminServerHost:7001/em)using WebLogic administrator credentials.
b. Expand WebLogic Domain and then select EPMSystem (or the domain name used for theEPM System deployment).
c. Right-click EPMSystem, select Security, and then select Security Provider Configuration.
d. Scroll to the Keystore section, expand the section, and then click Configure.
e. For Keystore Path, enter the path and name for the keystore that you created, forexample ./EPMKeystore.jks).
f. Enter the keystore password that you used when creating the keystore and confirm it.
Enabling Oracle Web Services Policy Manager to Service Requests 55

g. Enter an alias and password for both Signature Key and Encryption Key, using the aliasand password that you used when creating the keystore. Confirm the passwords, andthen click OK. The alias and password for the signature and encryption keys define thestring alias and password used to store and retrieve the keys.
3 Log out and restart Oracle Enterprise Manager Fusion Middleware Control so the changes take effect,and then restart EPM System managed servers.
Note:
For details about setting up message protection, see http://docs.oracle.com/cd/E17904_01/web.1111/b32511/setup_config.htm#BABHIBHA in the Oracle® Fusion Middleware Security andAdministrator's Guide for Web Services 11g Release 1 (11.1.1).
Configuring the WebLogic Domain to OID, MSAD,SunOneThis procedure is required to configure the WebLogic domain, or in the case of Financial CloseManagement the SOA Server, to communicate with an external provider, such as OID, MSAD,or SunOne. Shared Services must also be configured to work with this external provider. Followthe sections specific to your provider.
Note: Financial Close Management does not support Shared Services Native Directory. TheWeb services features of Profitability and Cost Management, Oracle Hyperion ProviderServices, FDMEE, and Financial Management do not work with Shared Services NativeDirectory. See the Oracle Hyperion Enterprise Performance Management System User andRole Security Guide for more information.
ä To connect OID, MSAD, or SunOne to the SOA Server:
1 Log in to the WebLogic Administration Console if you are not already logged in.
2 Click Security Realms on the left, click myrealm, and then click the Providers tab.
3 Click Add, enter the following details, and then click OK.
For OID:
l Name - OID
l Type - OracleIntenetDirectoryAuthenticator
For MSAD:
l Name - MSAD
l Type - ActiveDirectoryAuthenticator
For SunOne:
56 Configuring Oracle Web Services Manager for EPM System Products

l Name - SunOne
You can ignore the prompt to restart the server; you will be restarting at the end of thisprocedure.
4 Click the provider you just added, click the Provider Specific tab, enter the following details for yourprovider, and then click OK.
l Host
l Port
l Principal
l Credential
l User Base DB
l Group Base DB
l User from Name Filter (MSAD only)
l User Name Attribute (MSAD only)
You can leave the rest of the default values unchanged.
5 Click OID, MSAD,or SunOne, and for Control Flag, select SUFFICIENT.
6 Restart WebLogic Server.
Financial Close Management Configuration Options
Subtopics
l Configuring Financial Close Management for OAM
l Specifying the Language for E-Mail Notifications
l Configuring JMS Event Monitoring
Configuring Financial Close Management for OAM
ä If you are using Microsoft SQL Server or Oracle Database and OAM for single sign-on,perform the following procedure:
1 Log in to the Weblogic Administration Console using WebLogic administrator credentials.(http://WebLogic_Admin_Host:WebLogic_Admin_Port/console).
2 In the Domain Structure portlet, click Security Realms.
3 From the available realms, click the realm name with Default Realm status True.
Tip: Click the realm name, not the check box.
4 Click the Providers tab to list all configured Authentication/Assertion providers.
5 Under Authentication Providers, click New.
Financial Close Management Configuration Options 57

6 Select OAMIdentityAsserter from the list of supported Authentication/Assertion providers, then in theCreate a New Authentication Provider panel, specify a name for the provider, such asOAMIdentityAsserter, and then click OK.
OAMIdentityAsserter is now listed in the list of configured providers.
7 Reorder the providers in the following order:
l MSAD, OID, or SunOne, depending on which provider you are using
l OAM IdentityAsserter
l Default Authenticator
l Default IdentityAsserter
Specifying the Language for E-Mail NotificationsTo receive e-mail notifications in a language different from the default language specified on theSOA server, specify the user's language preference in the identity store.
For example, with an LDAP-based identity store:
1. Connect to the identity store.
2. Navigate to the user entry.
3. Add or set the preferredLanguage attribute.
Configuring JMS Event MonitoringYou can use Financial Close Management to monitor JMS-based events in external applications.Financial Close Management’s JMS Event Monitoring uses a Java Connection Architecture(JCA) based adapter called Oracle JMS Adapter. This adapter supports both Oracle-basedmessage queuing providers as well as third party queuing providers such as Tibco JMS or IBMWebSphere MQSeries. Additional details about the Oracle JMS Adapter and configuration isprovided in Fusion Middleware documents available at: http://fmwdocs.us.oracle.com/doclibs/fmw/E10285_01/integration.1111/e10231/toc.htm.
ä To configure the JMS Adapter:
1 Stop all managed servers.
2 From a command prompt, navigate to MIDDLEWARE_HOME/wlserver_10.3/server/bin andrun setWLSEnv.cmd|.sh.
3 Execute the following command:
For Windows:
java weblogic.WLST %EPM_ORACLE_HOME%\products\FinancialClose\wlscripts\FCM_JMSConfig_WLS_Script.py
For Linux:
58 Configuring Oracle Web Services Manager for EPM System Products

java weblogic.WLST $EPM_ORACLE_HOME/products/FinancialClose/wlscripts/FCM_JMSConfig_WLS_Script.py
4 When prompted, provide the following details:
Table 3
Property Value
Queue name <QUEUE_NAME>
Queue JNDI name <QUEUE_JNDI_NAME>
Connection Factory name <CONNECTION_FACTORY_NAME>
Connection Factory JNDI name <CONNECTON_FACTORY_JNDI_NAME>
5 Verify the entries in WebLogic after configuring the JMS Adapter:
a. Log on to the WebLogic console.
b. Navigate to Services, then Messaging, and then Modules.
c. Under JMS Modules table, click SOAJMSModule to see all the resources.
The Summary of Resources table contains the Queue and Connection Factory entries.
If you have not already configured the database adapter, perform the following steps.
ä To configure the database adapter:
1 Ensure all managed servers are started.
2 From a command prompt, navigate to MIDDLEWARE_HOME/wlserver_10.3/server/bin andrun setWLSEnv.cmd|.sh.
3 Execute the following command:
For Windows:
java weblogic.Deployer -adminurl t3://adminURL:adminServerPort -user adminUser -password password -update -name DbAdapter -plan dbPlanLocation\FCM_DBAdapter_Plan.xml
For Linux:
java weblogic.Deployer -adminurl t3://adminURL:adminServerPort -user adminUser -password password -update -name DbAdapter -plan dbPlanLocation/FCM_DBAdapter_Plan.xml
This command creates the DbAdapter connection factory "eis/DB/financialclose" inthe DbAdapter deployment.
Financial Close Management Configuration Options 59

FDMEE Configuration Options
Configuring an Initial Security PolicyFDMEE provides scripts to configure Web Services with a set of default policies. If PeopleSoftor Fusion Financials use a different set of polices, use Enterprise Manager to configure thepolicies.
Before you run the scripts, ensure the following:
l You performed the steps to configure Oracle Web Services Manager.
l FDMEE and WebLogic Administration Server are running.
ä To configure security policies:
1 For all products except Account Reconciliation Manager:
a. Open EPM_ORACLE_HOME/products/FinancialDataQuality/bin/wls-infra.properties in a text editor, and then update the properties that are requiredfor your environment. Leave all other properties as is, and then save the file. See Table 4on page 61 for a list of properties.
b. Run wlsConfigMDS.bat or wlsConfigMDS.sh and ensure that the script completessuccessfully and displays no errors.
c. Restart FDMEE.
d. When FDMEE is running, run wlsConfigOWSM.bat or wlsConfigOWSM.sh andensure that the script completes successfully and displays no errors.
e. Restart FDMEE.
2 For integration with Account Reconciliation Manager:
a. Open EPM_ORACLE_HOME/products/FinancialDataQuality/bin/wls-ARM.properties in a text editor, and update the properties that are required for yourenvironment. Leave all other properties as is, and then save the file. See Table 5 on page62 for a list of properties.
b. From a command prompt, navigate to EPM_ORACLE_HOME/products/FinancialDataQuality/bin, run wlsConfigARM.bat or wlsConfigARM.sh andensure that the script runs successfully.
c. Restart FDMEE and the Oracle WebLogic Server.
Note: You must re-run wlsConfigMDS.bat|.sh script whenever you patch or redeployaif.ear if you are using FDMEE with Peoplesoft or Fusion Financials.
60 Configuring Oracle Web Services Manager for EPM System Products
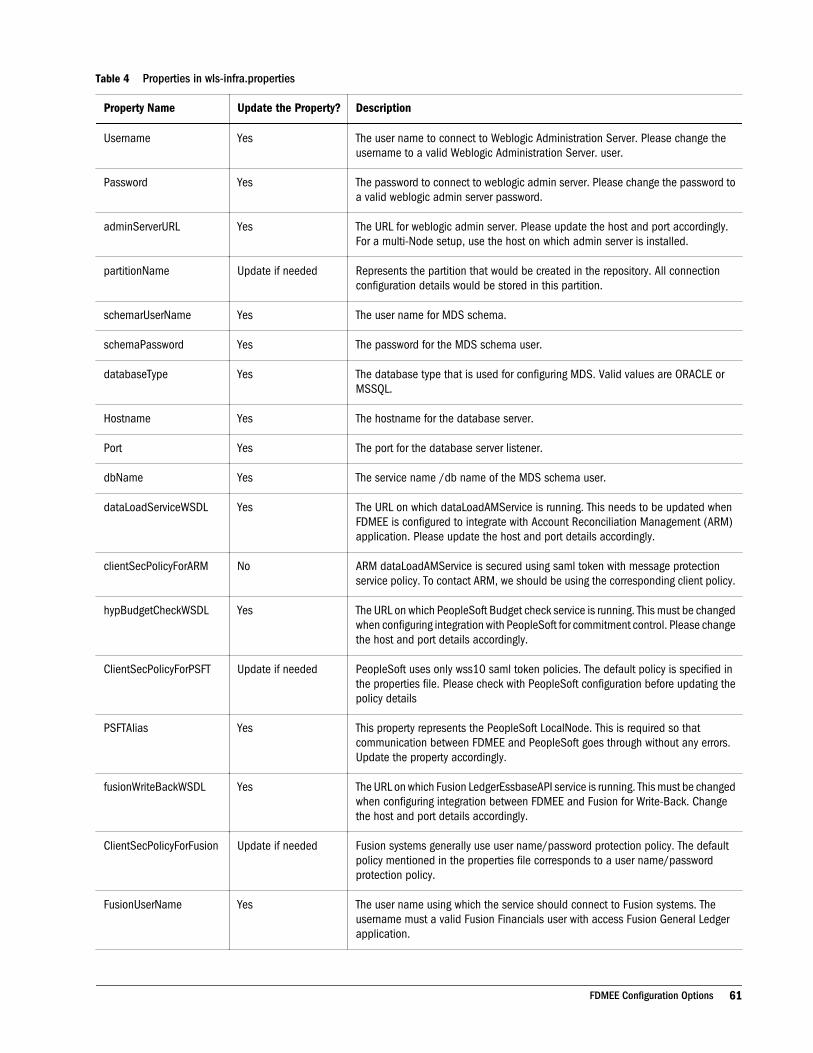
Table 4 Properties in wls-infra.properties
Property Name Update the Property? Description
Username Yes The user name to connect to Weblogic Administration Server. Please change theusername to a valid Weblogic Administration Server. user.
Password Yes The password to connect to weblogic admin server. Please change the password toa valid weblogic admin server password.
adminServerURL Yes The URL for weblogic admin server. Please update the host and port accordingly.For a multi-Node setup, use the host on which admin server is installed.
partitionName Update if needed Represents the partition that would be created in the repository. All connectionconfiguration details would be stored in this partition.
schemarUserName Yes The user name for MDS schema.
schemaPassword Yes The password for the MDS schema user.
databaseType Yes The database type that is used for configuring MDS. Valid values are ORACLE orMSSQL.
Hostname Yes The hostname for the database server.
Port Yes The port for the database server listener.
dbName Yes The service name /db name of the MDS schema user.
dataLoadServiceWSDL Yes The URL on which dataLoadAMService is running. This needs to be updated whenFDMEE is configured to integrate with Account Reconciliation Management (ARM)application. Please update the host and port details accordingly.
clientSecPolicyForARM No ARM dataLoadAMService is secured using saml token with message protectionservice policy. To contact ARM, we should be using the corresponding client policy.
hypBudgetCheckWSDL Yes The URL on which PeopleSoft Budget check service is running. This must be changedwhen configuring integration with PeopleSoft for commitment control. Please changethe host and port details accordingly.
ClientSecPolicyForPSFT Update if needed PeopleSoft uses only wss10 saml token policies. The default policy is specified inthe properties file. Please check with PeopleSoft configuration before updating thepolicy details
PSFTAlias Yes This property represents the PeopleSoft LocalNode. This is required so thatcommunication between FDMEE and PeopleSoft goes through without any errors.Update the property accordingly.
fusionWriteBackWSDL Yes The URL on which Fusion LedgerEssbaseAPI service is running. This must be changedwhen configuring integration between FDMEE and Fusion for Write-Back. Changethe host and port details accordingly.
ClientSecPolicyForFusion Update if needed Fusion systems generally use user name/password protection policy. The defaultpolicy mentioned in the properties file corresponds to a user name/passwordprotection policy.
FusionUserName Yes The user name using which the service should connect to Fusion systems. Theusername must a valid Fusion Financials user with access Fusion General Ledgerapplication.
FDMEE Configuration Options 61
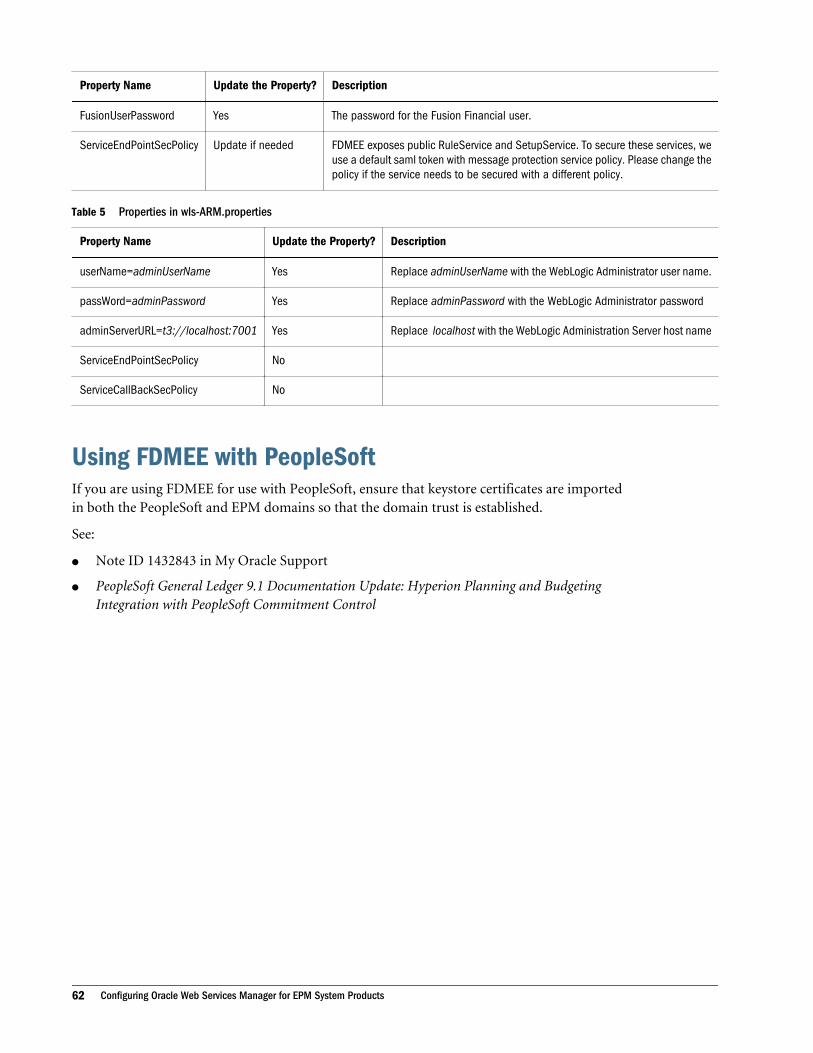
Property Name Update the Property? Description
FusionUserPassword Yes The password for the Fusion Financial user.
ServiceEndPointSecPolicy Update if needed FDMEE exposes public RuleService and SetupService. To secure these services, weuse a default saml token with message protection service policy. Please change thepolicy if the service needs to be secured with a different policy.
Table 5 Properties in wls-ARM.properties
Property Name Update the Property? Description
userName=adminUserName Yes Replace adminUserName with the WebLogic Administrator user name.
passWord=adminPassword Yes Replace adminPassword with the WebLogic Administrator password
adminServerURL=t3://localhost:7001 Yes Replace localhost with the WebLogic Administration Server host name
ServiceEndPointSecPolicy No
ServiceCallBackSecPolicy No
Using FDMEE with PeopleSoftIf you are using FDMEE for use with PeopleSoft, ensure that keystore certificates are importedin both the PeopleSoft and EPM domains so that the domain trust is established.
See:
l Note ID 1432843 in My Oracle Support
l PeopleSoft General Ledger 9.1 Documentation Update: Hyperion Planning and BudgetingIntegration with PeopleSoft Commitment Control
62 Configuring Oracle Web Services Manager for EPM System Products

4Changing a Deployment
In This Chapter
Changing Ports .. . . . . . . . . . . . . . . . . . . . . . . . . . . . . . . . . . . . . . . . . . . . . . . . . . . . . . . . . . . . . . . . . . . . . . . . . . . . . . . . . . . . . . . . . . . .63
Changing Database Passwords .. . . . . . . . . . . . . . . . . . . . . . . . . . . . . . . . . . . . . . . . . . . . . . . . . . . . . . . . . . . . . . . . . . . . . . . . .63
Rehosting a Database .. . . . . . . . . . . . . . . . . . . . . . . . . . . . . . . . . . . . . . . . . . . . . . . . . . . . . . . . . . . . . . . . . . . . . . . . . . . . . . . . . . .67
Rehosting Foundation Services .. . . . . . . . . . . . . . . . . . . . . . . . . . . . . . . . . . . . . . . . . . . . . . . . . . . . . . . . . . . . . . . . . . . . . . . . .69
Changing Hosts .. . . . . . . . . . . . . . . . . . . . . . . . . . . . . . . . . . . . . . . . . . . . . . . . . . . . . . . . . . . . . . . . . . . . . . . . . . . . . . . . . . . . . . . . . . .70
Reconfiguring EPM System Components to Use Separate Database Schemas .. . . . . . . . . . . . . . . . . . . .70
Reconfiguring EPM System Components to Use a Single Database Schema.... . . . . . . . . . . . . . . . . . . . .72
Reconfiguring for SSL... . . . . . . . . . . . . . . . . . . . . . . . . . . . . . . . . . . . . . . . . . . . . . . . . . . . . . . . . . . . . . . . . . . . . . . . . . . . . . . . . . . .74
EPM System Configurator enables you to reconfigure products to incorporate changes in yourenvironment.
To reconfigure, launch EPM System Configurator on the computer hosting the product, andfollow the procedures in “Configuring EPM System Products” in the Oracle EnterprisePerformance Management System Installation and Configuration Guide.
If you are reconfiguring the Java web application server for Foundation Services, you must alsoreconfigure the relational database.
Changing PortsFor most EPM System components, you change the port using EPM System Configurator. Seethe “Ports” appendix in Oracle Enterprise Performance Management System Installation andConfiguration Guide for details.
If you reconfigure to change a port or server, you must also reconfigure the Web server (underthe Foundation Services tasks in EPM System Configurator).
Changing Database Passwords For EPM System products that require a database repository, when you change a databasepassword, for example to comply with your company's password change policy, you must updatethe Shared Services Registry so that EPM System components can connect to the database usingthe new password.
Changing Ports 63

Assumptions and Prerequisitesl You installed and configured EPM System products using the Oracle Enterprise Performance
Management System Standard Deployment Guide or the Oracle Enterprise PerformanceManagement System Installation and Configuration Guide.
l You made a backup of the database.
l Using the database administration console, you changed the password of the user accountthat was used to configure the Shared Services Registry or product repository database.
l If it is a single-machine deployment, or if it is a distributed deployment and you run EPMSystem Configurator from the Foundation Services machine, WebLogic AdministrationServer must be stopped.
l In a distributed environment, when you run EPM System Configurator from a machineother than the Foundation Services machine, WebLogic Administration Server must berunning.
l In a mixed deployment of UNIX and Windows, when you run EPM System Configuratorfrom a Windows machine, WebLogic Administration Server must be running on the UNIXmachine. When you run EPM System Configurator from the UNIX machine, WebLogicAdministration Server must be running on the Windows machine.
Changing the Shared Services Registry Database Password
ä To update the database password for the Shared Services Registry database:
1 Stop EPM System Java web applications, services, and processes.
2 On the machine hosting Shared Services, change to EPM_ORACLE_INSTANCE/bin and launchconfigtool.bat|.sh.
3 On the “Shared Services and Registry Database Configuration” page, select Connect to a previouslyconfigured Shared Services database and enter the new database password.
4 On the Task Selection page, if other products use the Shared Services database, select the ConfigureDatabase tasks for those products.
5 If you selected any other products, on the “Database Configuration” page, enter the new databasepassword.
6 If you are prompted to choose whether to Drop and recreate tables or Reuse the existing database,select Reuse the existing database.
7 Continue the configuration, and click Finish when you are done.
8 Restart WebLogic Administration Server if it is down, the Java web applications, services, and processes.
9 If you are working in a distributed environment, repeat the steps to configure the Shared Services Registrydatabase on each machine in the deployment.
64 Changing a Deployment

Changing EPM System Component Repository DatabasePasswords
ä To change the database password for EPM System components other than Shared Services:
1 Stop EPM System Java web applications, services and processes.
2 From the machine hosting the component whose database password changed, change toEPM_ORACLE_INSTANCE/bin and launch configtool.bat|.sh.
3 On the Task Selection page, select Configure Database for all the products in this instance whosedatabase password has changed.
4 Enter the new password.
5 When you are prompted to choose whether to Drop and recreate tables or Reuse the existingdatabase, select Reuse the existing database.
6 Continue the configuration, and click Finish when you are done.
7 Restart WebLogic Administration Server if it is down, the database, the Java web applications, services,and processes.
Note: For FDMEE registered with Performance Management Architect, if you change thepassword for the FDMEE database schema, then do the same for the FDMEE data source.
Changing the Planning Applications Repository PasswordUse Edit Datasource in the Planning Application wizard to change the Applications repositorypassword. You can also use the “Update Data Sources” page in the Planning Upgrade Wizard.See Oracle Hyperion Planning Administrator's Guide.
Changing the Performance Management Architect InterfaceDatasource PasswordPerform the following procedure if you are using the Interface Data Source configuration withPerformance Management Architect applications.
ä To change the Performance Management Architect Interface Data Source password:
1 In the database, change the password.
2 Log in to EPM Workspace and select Navigate, then Administer, and then Configure Interface DataSource.
3 Right-click the required Interface Data Source definition, and then select Edit.
4 On the Database Details page of the Interface Data Source Wizard, enter the new password, clickTest to ensure that the connection is successful, and then click Next.
5 On the Data Source Details page, clear Create Tables and then click Finish.
Changing Database Passwords 65

6 On the Database Details page of the Interface Data Source Wizard, enter the new password, clickTest to ensure that the connection is successful.
Changing the FDM Repository Password
ä To change the FDM repository password using FDM Workbench:
1 In the database, change the password.
2 From FDM Workbench, choose Add Application and log in.
3 Choose the application for which you want to change the repository and select Modify.
4 Select the Database tab and replace the existing password with the new password.
5 Click OK.
6 Click OK on the Application screen.
7 Ensure that you can log in to the application.
ä To change the FDM repository password using FDM Web:
1 In the database, change the password.
2 From the Oracle Hyperion Financial Data Quality Management Web logon screen, choose AddApplication and log in.
3 Choose the application for which you want to change the repository password and select Modify.
4 Click OK.
5 Click Close.
6 Ensure that you can log in to the application.
Changing the Data Relationship Management RepositoryPassword
ä To change the Data Relationship Management repository password for an application:
1 Stop Data Relationship Management.
2 In the database, change the password.
3 Open the Data Relationship Management console.
4 Go to Configuration.
5 Select the appropriate application using the arrow controls.
6 In Repository Configuration, enter the new password.
7 To test the new password, click Test Connection.
You should see a message, “Connection Succeeded!”
66 Changing a Deployment

8 Click Save Configuration to commit the new password, in encrypted form, to the configuration file.
9 Restart the application or the Oracle Data Relationship Management service.
Validating the Database Password Changes
ä To validate the database configuration changes:
1 Launch Oracle Hyperion Enterprise Performance Management System Diagnostics using one of thefollowing methods:
l (Windows) In EPM_ORACLE_INSTANCE/bin, double-click validate.bat.
l From the Start Menu, choose Programs, then Oracle EPM System, then FoundationServices, then instanceName, and then EPM System Diagnostics.
l (UNIX) From a console, change to EPM_ORACLE_INSTANCE/bin, and then entervalidate.sh.
Progress is shown in the command window.
2 To view results, navigate to EPM_ORACLE_INSTANCE/diagnostics/reports and openvalidation_report_date_time.html.
Rehosting a Database For EPM System products that require a database repository, when a database has been rehostedon another server, make changes in EPM System to recognize the rehosted database.
Assumptions and Prerequisitesl You installed and configured EPM System products using the Oracle Enterprise Performance
Management System Standard Deployment Guide or the Oracle Enterprise PerformanceManagement System Installation and Configuration Guide.
l After shutting down EPM System components, you made a backup of the database, andthen restored the database on the target machine.
l If it is a single-machine deployment, or if it is a distributed deployment and you run EPMSystem Configurator from the Foundation Services machine, WebLogic AdministrationServer must be stopped.
l In a distributed environment, when you run EPM System Configurator from a machineother than the Foundation Services machine, WebLogic Administration Server must berunning.
l In a mixed deployment of UNIX and Windows, when you run EPM System Configuratorfrom a Windows machine, WebLogic Administration Server must be running on the UNIXmachine. When you run EPM System Configurator from the UNIX machine, WebLogicAdministration Server must be running on the Windows machine.
Rehosting a Database 67

Updating the Connection to a Rehosted Shared ServicesDatabase
ä To update the database connection information for the Shared Services Registry database:
1 Stop EPM System Java web applications, services, and processes, and stop the database.
2 On the machine hosting Shared Services, change to EPM_ORACLE_INSTANCE/bin and launchconfigtool.bat|.sh.
3 On the “Shared Services and Registry Database Configuration” page, select Connect to a previouslyconfigured Shared Services database and enter the new database connection information.
4 On the Task Selection page, if other products use the Shared Services database, select the ConfigureDatabase tasks for those products.
5 If you selected any other products, on the “Database Configuration” page, enter the new databaseconnection information.
6 If you are prompted to choose whether to Drop and recreate tables or Reuse the existing database,select Reuse the existing database.
7 Continue the configuration, and click Finish when you are done.
8 Restart WebLogic Administration Server if it is down, the database, the Java web applications, services,and processes.
9 If you are working in a distributed environment, repeat the steps to configure the Shared Services Registrydatabase on each machine in the deployment.
Updating the Connection to a Rehosted EPM SystemDatabase
ä To update the database connection information for EPM System components other thanShared Services:
1 Stop EPM System Java web applications, services and processes, and stop the database.
2 From the machine hosting the component whose database connection information changed, change toEPM_ORACLE_INSTANCE/bin and launch configtool.bat|.sh.
3 On the Task Selection page, select Configure Database for all the products in this instance whosedatabase connection information has changed.
4 Enter the new database connection information.
5 When you are prompted to choose whether to Drop and recreate tables or Reuse the existingdatabase, select Reuse the existing database.
6 Continue the configuration, and click Finish when you are done.
7 Restart WebLogic Administration Server if it is down, the database, the Java web applications, services,and processes.
68 Changing a Deployment

Validating the Rehosted Database
ä To validate the database configuration changes:
1 Launch EPM System Diagnostics using one of the following methods:
l (Windows) In EPM_ORACLE_INSTANCE/bin, double-click validate.bat.
l From the Start Menu, choose Programs, then Oracle EPM System, then FoundationServices, then instanceName, and then EPM System Diagnostics.
l (UNIX) From a console, change to EPM_ORACLE_INSTANCE/bin, and then entervalidate.sh.
Progress is shown in the command window.
2 To view results, navigate to EPM_ORACLE_INSTANCE/diagnostics/reports and openvalidation_report_date_time.html.
Rehosting Foundation Services To rehost the Foundation Services Java web application on a new machine, you use EPM SystemConfigurator to create a cluster, update the Web Server, then update the logical Java webapplication for Foundation Services to point to the Web Server, relying on the Oracle HTTPServer clustering.
This procedure assumes that you have already installed and configured Foundation Serviceson Node 1. During configuration with EPM System Configurator, you have already created anew Shared Services database, created a new WebLogic domain, and configured the Web server.
ä To rehost the Foundation Services Java web application on Node 2:
1 Start the WebLogic Administration Server on Node 1.
2 Install and configure Foundation Services on Node 2. During configuration with EPM SystemConfigurator:
l Create a new EPM_ORACLE_INSTANCE.
l During database configuration for Shared Services, select Connect to a previouslyconfigured Shared Services database, and specify the Shared Services database that youconfigured for Node 1.
l Deploy to the same WebLogic domain.
l Configure the Web Server.
3 Reconfigure the Web server again on Node 1 using EPM System Configurator.
4 Stop WebLogic Admininstration Server on Node 1.
5 Start WebLogic Node Manager on both Node 1 and Node 2. For example, runstartNodeManager.cmd in MIDDLEWARE_HOME/wlserver_10.3/server/bin.
6 Start WebLogic Admininstration Server on Node 1.
Rehosting Foundation Services 69
7 From the WebLogic Admininstration Server Console, start the Shared Services managed server on Node1 and Node 2.
Note: Oracle recommends that you start and stop Shared Services on Node 2 using theWebLogic Administration Server Console to avoid Shared Services startup failureson Node 2.
8 Start the Web Server on Node 1 only.
9 Access Shared Services using the following URL: http://Node1:19000/interop/index.jsp.
10 To test that high availability is working, stop Shared Services on Node 1 and launch Shared Servicesagain using the following URL: http://Node1:19000/interop/index.jsp.
WebLogic redirects and launches Shared Services from Node 2.
Changing HostsIf a host name has changed, you must update the host value in the Shared Services Registry.
ä To update the host name value in the Shared Services Registry:
1 From EPM_ORACLE_INSTANCE/bin, run epmsys_registry.bat|.sh updatehostoldHostName newHostName.
2 Restart all EPM System components on all machines.
Reconfiguring EPM System Components to UseSeparate Database Schemas If all EPM System components are configured to use a single database schema, you canreconfigure so that each component uses a separate database schema. Consider performance,roll-back procedures for a single application or product, and disaster recovery plans in makingthe decision.
Assumptions and Prerequisitesl You have installed and configured EPM System products using the Oracle Enterprise
Performance Management System Standard Deployment Guide or the Oracle EnterprisePerformance Management System Installation and Configuration Guide.
l All EPM System components are configured to use a single database schema.
70 Changing a Deployment

Reconfiguring EPM System Components to Use SeparateDatabase Schemas
ä To reconfigure EPM System components to use separate database schemas:
1 Stop all processes running on the Foundation Services machine (where the WebLogic AdministrationServer is running) and on all machines hosting a component whose database you want to reconfigure.
2 Use standard database vendor mechanisms to extract the database tables for each component.
For example, with an Oracle database, use the Export Utility.
Extract the tables for each component using the patterns in Table 6:
Table 6 Prefixes for Components
Products Prefixes
Account Reconciliation Management ARM%
Oracle Hyperion Financial Data Quality Management, EnterpriseEdition
AIF%
Oracle Hyperion Calculation Manager CALC%
Disclosure Management DISCMAN%
EPM Workspace WKS%
Essbase Server ESS%
Financial Close Management FCC%, S_ROW_ID%
Financial Management HFM%, HSV%, LINSCRIPT%
Financial Reporting FR%
Performance Management Architect DS%, JM%, OR%, SM% and a single table named PRODUCT
Oracle Hyperion Performance Scorecard HPS%
Planning HSPSYS%, HSP% for applications
Oracle Hyperion Profitability and Cost Management HPM%
Oracle Hyperion Reporting and Analysis Framework V8% + ANNOT% for annotations, BRIOSECG%, BRIOSECP%,BRIOSECR%
Shared Services CSS%, CES%, QRTZ%, LCM%, HSS%, SMA%, HDB%
Web Analysis ATF%, HYA%, OJB%
3 Use standard database vendor mechanisms to create a new database schema for each component andthen import the tables for each component into the new, separate database schemas.
For example, with an Oracle database, use the Import Utility.
Reconfiguring EPM System Components to Use Separate Database Schemas 71

4 Start EPM System Configurator on one of the machines hosting a component whose database you arereconfiguring, select the “Configure Database” and “Deploy to Application Server” tasks for one of thecomponents, and click Next.
5 On the Configure Database panel, enter the credentials for the new separate database, and selectReuse the existing database.
6 Click Next on the remaining panels, and on the Summary panel, click Finish.
7 Exit EPM System Configurator.
8 Repeat step 4 through step 7 for each component whose database you want to reconfigure.
9 Restart all processes on all machines.
10 Run a query tool against the Shared Services Registry database and delete the tables for the componentsthat were separated.
Drop tables, views, procedures, and sequences that have the prefixes noted in Table 6.
Validating the Database Configuration Changes
ä To validate the database configuration changes:
1 Launch EPM System Diagnostics using one of the following methods:
l (Windows) In EPM_ORACLE_INSTANCE/bin, double-click validate.bat.
l From the Start Menu, choose Programs, then Oracle EPM System, then FoundationServices, then instanceName, and then EPM System Diagnostics.
l (UNIX) From a console, change to EPM_ORACLE_INSTANCE/bin, and then entervalidate.sh.
Progress is shown in the command window.
2 To view results, navigate to EPM_ORACLE_INSTANCE/diagnostics/reports and openvalidation_report_date_time.html.
Reconfiguring EPM System Components to Use aSingle Database SchemaWhen EPM System components are configured to use separate database schemas, you cansimplify by reconfiguring so that the tables for all components are consolidated in a singledatabase schema.
Assumptions and Prerequisitesl You have installed and configured EPM System products using the Oracle Enterprise
Performance Management System Installation and Configuration Guide.
l All EPM System components are configured to use separate database schemas.
72 Changing a Deployment

Reconfiguring EPM System Components to Use a SingleShared Services Registry Database Schema
ä To reconfigure EPM System components to use a single database schema:
1 Stop all processes running on the Foundation Services machine (where the WebLogic AdministrationServer is running) and on all machines hosting a component whose database you want to reconfigure.
2 For each database, use standard database vendor mechanisms to extract the database tables for eachcomponent.
For example, with an Oracle database, use the Export Utility.
3 Use standard database vendor mechanisms to import the tables into the Shared Services Registrydatabase.
For example, with an Oracle database, use the Import Utility.
4 Start EPM System Configurator on one of the machines hosting a component whose database you arereconfiguring, select the “Configure Database” and “Deploy to Application Server” tasks for one of thecomponents, and click Next.
5 On the Configure Database panel, enter the credentials for the Shared Services Registry database, andselect Reuse the existing database.
6 Click Next on the remaining panels, and on the Summary panel, click Finish.
7 Exit EPM System Configurator.
8 Repeat step 4 through step 7 for each component whose database you want to reconfigure.
9 Restart all processes on all machines.
Validating the Database Configuration Changes
ä To validate the database configuration changes:
1 Launch EPM System Diagnostics using one of the following methods:
l (Windows) In EPM_ORACLE_INSTANCE/bin, double-click validate.bat.
l From the Start Menu, choose Programs, then Oracle EPM System, then FoundationServices, then instanceName, and then EPM System Diagnostics.
l (UNIX) From a console, change to EPM_ORACLE_INSTANCE/bin, and then entervalidate.sh.
Progress is shown in the command window.
2 To view results, navigate to EPM_ORACLE_INSTANCE/diagnostics/reports and openvalidation_report_date_time.html.
Reconfiguring EPM System Components to Use a Single Database Schema 73

Reconfiguring for SSLIf you deployed to a a non-SSL enabled environment and want to enable SSL, see the OracleEnterprise Performance Management System Security Configuration Guide.
74 Changing a Deployment

5Updating the Shared Services
Registry
In This Chapter
Understanding the Shared Services Registry Component Hierarchy ... . . . . . . . . . . . . . . . . . . . . . . . . . . . . . . .75
Editing the Shared Services Registry .. . . . . . . . . . . . . . . . . . . . . . . . . . . . . . . . . . . . . . . . . . . . . . . . . . . . . . . . . . . . . . . . . . . .76
You can edit the Shared Services Registry using a command line utility. Use this utility only ifyou are unable to make the required changes to the Shared Services Registry using EPM SystemConfigurator.
Tip: You can make most changes using EPM System Configurator. For example, to makechanges to a deployed Java web application, you can select the “Configure Logical Addressfor Web Applications” task in EPM System Configurator to make changes without havingto redeploy the Java web application. See the Oracle Enterprise Performance ManagementSystem Installation and Configuration Guide.
You use the epmsys_registry.bat utility (epmsys_registry.sh on UNIX) to make anyrequired changes to the Shared Services Registry.
Understanding the Shared Services RegistryComponent HierarchyTo make corrections to the Shared Services Registry, you have to understand its structure. Duringconfiguration of 11.1.x products, EPM System Configurator automatically updates the SharedServices Registry with components for each product. Components also have child components,creating a hierarchy. Each component of the hierarchy has its own component properties. Youneed to know both the component names and the component property names to update theShared Services Registry.
For example, the ESSBASE_PRODUCT component includes the following component properties:
l host
l agent_PortNumber
Understanding the Shared Services Registry Component Hierarchy 75

To find the component property names and child components for any component, you can usea command to view the component in the Shared Services Registry. See “Viewing theComponents in the Shared Services Registry” on page 76.
Editing the Shared Services Registry
ä To edit the Shared Services Registry:
1 Back up the Shared Services Registry.
2 On a machine hosting the 11.1.x EPM System software, go to EPM_ORACLE_INSTANCE/bin andrun the following command:
epmsys_registry view componentType
You need to view the component hierarchy to get the component property names thatrequired to delete a component or update a component property.
For information see “Viewing the Components in the Shared Services Registry” on page76.
3 Depending on the required changes, refer to the following commands:
To delete a component, see “Deleting a Component Instance” on page 77.
To update a component property, see “Updating a Component Property” on page 77.
Note: When you run epmsys_registry commands on UNIX platforms, all # must bepreceded by \.
4 If you changed the LOGICAL_WEB_APP property for any product, run EPM System Configurator andconfigure the Web Server again. (On the Task Selection page, select the Foundation Services Web ServerConfiguration task.)
Viewing the Components in the Shared Services RegistryBefore you can delete a component or update a component property, you need to view thecomponent hierarchy to get the component property names and values.
ä To view the component hierarchy:
1 Go to EPM_ORACLE_INSTANCE/bin and use the following command:
epmsys_registry view componentType
where componentType is the name of the component in the Shared Services Registry.
This command displays all the components in the specified hierarchy, displaying only theimmediate children of the component. The information is displayed in the console.
For example, to view all the components in the PLANNING_PRODUCT hierarchy, run:
epmsys_registry view SYSTEM9/PLANNING_PRODUCT
76 Updating the Shared Services Registry

2 If needed, repeat the command to get the property names for a subcomponent.
For example, LOGICAL_WEB_APP is a child of PLANNING_PRODUCT. To view the propertiesfor LOGICAL_WEB_APP for Planning , enter the following command:
epmsys_registry view SYSTEM9/PLANNING_PRODUCT/LOGICAL_WEB_APP
3 From the display, note the following information about components you want to delete or update:
l Component ID for any components you want to delete or update
l Component property names and values for any components you want to update
For example, the LOGICAL_WEB_APP for Planning has several properties, includingcontext, port, and host.
Deleting a Component InstanceYou delete a component instance by referring to the component's ID that is displayed when youview the component hierarchy.
ä To delete a component from the component hierarchy, go to EPM_ORACLE_INSTANCE/bin and run the following command:
epmsys_registry deletecomponent #componentID
where componentID is the component's ID that you found when you viewed the componenthierarchy.
On UNIX, run:
epmsys_registry.sh deletecomponent \#componentID
Deleting a node does not delete its children.
Tip: If you are deleting a product node, first delete all the children of the node and then deletethe product node.
Caution! Ensure that you delete the correct component.
Updating a Component PropertyYou update a component property by referring to the component ID and the componentproperty name that are displayed when you view the component hierarchy.
ä To update a component property, go to EPM_ORACLE_INSTANCE/bin and run thefollowing command:
epmsys_registry updateproperty #componentID/@componentProperty value
Editing the Shared Services Registry 77

where componentID is the component's ID you found when you viewed the componenthierarchy, componentProperty is the component property name you want to update, andvalue is the new value for the component property.
On UNIX, run:
epmsys_registry.sh updateproperty \#componentID/@componentProperty value
Component property names are case sensitive.
Tip: Look for the component property names in the section called “Properties” when you viewthe component hierarchy. In addition, you can update the host a component is running onusing the property name “host.”
For example, to change the port number for the Essbase Server with the component ID 99999to port number 1425, enter the following command:
epmsys_registry updateproperty #99999/@agent_PortNumber 1425
Viewing Host Entries in the Shared Services RegistryYou can view the host entries in the Shared Services Registry.
You can use this command for a number of purposes. For example, use the command to:
l Simplify the rehosting process
l Simplify the process of changing server names to alias names
l Debug server communication issues
ä To view the host entries in the Shared Services Registry, go to EPM_ORACLE_INSTANCE/bin and run the following command:
epmsys_registry viewhosts
The displays shows the server names for this machine as they are stored in the Shared ServicesRegistry in one column and the hostname as resolved by the DNS in another column
Tip: If the names in the columns do not match, either resolve the DNS entries or create a hostsfile to match the resolved names.
78 Updating the Shared Services Registry

6Using Enterprise Manager to
Monitor EPM System Java WebApplications
EPM System Configurator deploys Oracle Enterprise Manager automatically when it deploysthe first Java web application.
Oracle Enterprise Manager Fusion Middleware Control can be used to manage the WebLogicdomain. You can use this embedded Enterprise Manager to manage all the Java web applicationsin EPM System out of the box. The full version of Oracle Enterprise Manager with Grid Controladds functionality on top of the Fusion Middleware Control, including historical informationof the metrics.
l Status of the servers and Java web applications running
l Servers the Java web applications are running on and the ports they are listening on
l Health and performance of Java web applications and managed servers (select the serveryou want to monitor and navigate to WebLogic Server and then Performance Summary toview the available categories of metrics)
Documentation related to the Fusion Middleware Control can be found at http://download.oracle.com/docs/cd/E14571_01/core.1111/e10105/monitor.htm. Documentationrelated to Enterprise Manager can be found at http://download.oracle.com/docs/cd/E11857_01/nav/overview.htm.
ä To launch Enterprise Manager, go to http://WebLogicAdminServerHost:port/em.
79

80 Using Enterprise Manager to Monitor EPM System Java Web Applications

7Removing an EPM Oracle
Instance and Uninstalling EPMSystem
In This Chapter
Removing an EPM Oracle Instance... . . . . . . . . . . . . . . . . . . . . . . . . . . . . . . . . . . . . . . . . . . . . . . . . . . . . . . . . . . . . . . . . . . . .81
Uninstalling EPM System Products .. . . . . . . . . . . . . . . . . . . . . . . . . . . . . . . . . . . . . . . . . . . . . . . . . . . . . . . . . . . . . . . . . . . . . .84
Uninstalling EPM System Clients .. . . . . . . . . . . . . . . . . . . . . . . . . . . . . . . . . . . . . . . . . . . . . . . . . . . . . . . . . . . . . . . . . . . . . . . .86
To uninstall this release of EPM System products, follow this workflow:
1. Remove any instances related to the deployment. See “Removing an Instance” on page82.
2. Use EPM System Uninstaller to remove binaries. “Uninstalling EPM System Products” onpage 84. You can also silently uninstall EPM System components.
3. Uninstall EPM System clients. See “Uninstalling EPM System Clients” on page 86.
4. If you are not using the remaining content in Middleware Home for other products, runthe uninstallers for Oracle HTTP Server, WebLogic Server, oracle_common, and OracleDatabase clients by using Add/Remove programs, or use the product uninstallationshortcuts.
Removing an EPM Oracle InstanceYou use EPM System Configurator to remove an EPM Oracle instance as part of uninstallingan EPM System component or deployment.
Additionally, you can remove an instance for the following reasons (in these cases you removethe instance but do not uninstall):
l You have scaled out the deployment by configuring an additional EPM Oracle instance, andnow you want to scale down the deployment by removing the instance.
l You incorrectly configured an EPM Oracle instance and want to remove the instance fromthe deployment.
Removing an EPM Oracle Instance 81

Assumptions and Prerequisitesl You have installed and configured EPM System products using the Oracle Enterprise
Performance Management System Standard Deployment Guide or the Oracle EnterprisePerformance Management System Installation and Configuration Guide.
l You have run a deployment report to confirm the instance to be removed.
l If you deployed Java web applications to WebSphere Application Server, stop thedeployment manager, the node agent, and all applications. Back up all databases, and backup profiles using the manageprofiles command.
l WebLogic Administration Server must be stopped if you are removing an instance from themachine hosting the WebLogic Administration Server. WebLogic Administration Servermust be running if you are removing an instance from a machine other than the one hostingthe WebLogic Administration Server.
l For products that work with Oracle SOA Suite, the SOA Server must be running.
Removing an Instance
ä To remove an instance:
1 Launch EPM System Configurator from the machine hosting the instance to be removed using one ofthese methods:
l Change to EPM_ORACLE_INSTANCE/bin and then launch:
configtool.bat (.sh) -remove
l From the Start menu, select Programs, then Oracle EPM System, then EPM Oracleinstance name, then Foundation Services, then EPM System Configurator RemoveInstance.
EPM System Configurator stops required services.
2 At the warning prompt, click Yes to proceed.
If you are removing the last remaining instance of Foundation Services, all other EPM Systemproducts will no longer work, because the Shared Services Registry is removed.
3 Review the progress and completion of the removal tasks on the console.
4 If you deployed Java web applications to WebSphere Application Server, run the following script fromthe machine hosting the instance that you are removing:
EPM_ORACLE_INSTANCE/bin/deployment/runWASDeployment.bat[sh] – remove
The script prompts you for the required parameters.
EPM System Configurator performs the following tasks during instance removal for thecomponents in this instance:
l Removes the Java web applications from the cluster. If it is the last Java web application inthe cluster, removes the cluster.
82 Removing an EPM Oracle Instance and Uninstalling EPM System

l Removes the configuration for IIS web applications.
l Removes files from EPM_ORACLE_INSTANCE.
l Removes Oracle Hyperion Shared Services Registry entries.
l Removes Windows Start Menu entries.
l Removes Windows Services entries.
l Removes Windows Registry entries.
l For Oracle Hyperion Financial Close Management, removes composites.
EPM System Configurator retains the following information during instance removal for thecomponents in this instance:
l Binary files in EPM_ORACLE_HOME.
l The contents of EPM_ORACLE_INSTANCE/diagnostics.
l Product data.
l Product repositories.
If you are removing an instance where you deployed to a single managed server, remove theinstance on the Administration Server machine (where the single managed server was firstdeployed) last.
Validating the Instance RemovalAfter removing an EPM Oracle instance, if there are instances remaining in the deployment,perform the following validation steps.
ä To validate that an instance was successfully removed:
1 Run a deployment report and confirm that the instance was removed:
Navigate to EPM_ORACLE_INSTANCE/bin and execute the following command:
epmsys_registry report deployment
The report file (deployment_report_YYYYMMDD_HHMMSS.html) is stored inEPM_ORACLE_INSTANCE/diagnostics/reports.
2 Launch Oracle Hyperion Enterprise Performance Management System Diagnostics using one of thefollowing methods:
l (Windows) In EPM_ORACLE_INSTANCE/bin, double-click validate.bat.
l From the Start Menu, choose Programs, then Oracle EPM System, then FoundationServices, then instanceName, and then EPM System Diagnostics.
l (UNIX) From a console, change to EPM_ORACLE_INSTANCE/bin, and then entervalidate.sh.
Progress is shown in the command window.
Removing an EPM Oracle Instance 83

3 To view results, navigate to EPM_ORACLE_INSTANCE/diagnostics/reports and openvalidation_report_date_time.html.
Uninstalling EPM System ProductsWhen you uninstall EPM System products, EPM System Uninstaller removes the binaries fromthe installation location. Use uninstall when you want to completely remove components thatare not in use any more in any instance in the deployment.
Caution! When you uninstall EPM System products, EPM System Uninstaller removeseverything from the installation directory. Before you uninstall, be sure to back upany files you want to keep. For information about backing up files, see OracleEnterprise Performance Management System Backup and Recovery Guide.
ä To uninstall EPM System products:
1 Ensure that no EPM System processes are running.
2 Choose a method to launch the uninstaller:
l (Windows) In EPM_ORACLE_HOME/uninstall, double-click uninstall.cmd.
l (Windows) In the Windows Control Panel, select Oracle EPM System to remove/uninstall.
l (Windows) From a Windows console, change to EPM_ORACLE_HOME/uninstall/,and then enter uninstall.cmd.
l From the Start menu, select Programs, then Oracle EPM System, and then Uninstall EPMSystem.
l (UNIX) Change to the EPM_ORACLE_HOME/uninstall directory and enter ./uninstall.sh.
l (UNIX) Change to the EPM_ORACLE_HOME/uninstall directory and enter ./uninstall.sh —console.
3 Exit other programs before you continue, and then click or select Next.
4 Select the products to uninstall, and then click or select Next. All components on the same tier of theselected products are uninstalled.
For example, if you uninstall any Financial Management web component, EPM SystemUninstaller uninstalls all Financial Management web components.
All installed products are selected by default. Select “Uncheck all” to clear the selections forall products, and then select only the products you want to uninstall.
If you uninstall any Reporting and Analysis component, all other Oracle Hyperion Reportingand Analysis components are disabled.
5 Specify whether you want to delete all the files and directories in the EPM Oracle Home directory.
If you select this option, data and customized files are deleted.
84 Removing an EPM Oracle Instance and Uninstalling EPM System

6 Confirm the products to uninstall, and then click or select Next.
EPM System Uninstaller displays progress incrementally as each assembly's uninstallationis complete.
Note: To cancel the uninstallation, click or select Cancel. When you select Cancel, EPMSystem Uninstaller stops the uninstallation of the current assembly and rolls thatassembly back to an installed state. It does not undo uninstallations for assembliesthat were already uninstalled.
EPM System Uninstaller indicates the success or failure of the uninstallation. If any part ofthe uninstallation failed, EPM System Uninstaller notes which assembly failed to uninstall.Check the log files for more information about the errors. You can find the log files inEPM_ORACLE_HOME/diagnostics/logs/install. There is a log file for each assembly,named product-install.log; for example, hss-install.log.
7 Click or select Finish to close EPM System Uninstaller.
8 On Windows, if you uninstalled Oracle HTTP Server, you must reboot to completely remove theinstallation. This step is required if you plan to reinstall.
9 Reboot after uninstalling EPM System products.
When uninstalling a client, select Delete common components in the Setup Type window only ifyou are deleting all EPM System clients that are installed on a machine. If multiple EPM Systemclients are installed on the same machine and you are deleting only one client, deselect Deletecommon components.
Performing a Silent Product UninstallationSilent uninstallations automate the process so that you can uninstall EPM System products onmultiple computers without manually specifying uninstallation settings on each machine.
To uninstall EPM System products on multiple computers using the same uninstallation options,record a response file during installation. You can then run a silent uninstallation from thecommand line, using the options that were saved in the response file.
ä To run a silent uninstallation:
1 Copy the response file that you created during installation to the machine on which you want to run theuninstallation. You can also copy the file to a network drive that is accessible from the machines onwhich you want to uninstall.
For information about recording a response file during installation, see “Performing SilentInstallations” in the Oracle Enterprise Performance Management System Installation andConfiguration Guide.
2 From the command line, enter a command:
uninstall.cmd -silent filename
Uninstalling EPM System Products 85

for Windows or
uninstall.sh -silent filename
for UNIX.
The uninstallation runs in the background.
Uninstalling EPM System ClientsYou can uninstall EPM System clients using the uninstall option in the client installers.
ä To uninstall EPM System clients:
1 From the client installer folder, open the subfolder for the client installer and then double-click the client installer file name. See “Default Installation Directories and Notes” on page 86.
2 Proceed through the installation wizard, selecting Remove, and then click Finish when the uninstallationis complete.
Note: If you are uninstalling multiple clients that are installed on the same machine, or if a clientis installed on the same machine as an EPM System server product, launch the uninstallerusing the DELETE_COMMONS=false command line parameter. See “Performing a SilentClient Uninstallation” on page 87.
Default Installation Directories and NotesThe information in the following table applies to installations performed from EPM Workspaceor with EPM System client installers and to silent installations.
Table 7 Client Installer Installation Directories
Client Default Installation Directory
Administration Services Console EPM_ORACLE_HOME/products/Essbase/eas/console
Essbase Client EPM_ORACLE_HOME/products/Essbase/EssbaseClient
Oracle Essbase Studio Console EPM_ORACLE_HOME/products/Essbase/EssbaseStudio/console
Financial Management EPM_ORACLE_HOME/products/FinancialManagement/Client/Client32/HFM.exe
Financial Reporting Studio EPM_ORACLE_HOME/products/FinancialReportingStudio
Oracle Hyperion EPM Architect EPM_ORACLE_HOME/products/Foundation/BPMA/EPMAFileGenerator
Planning Offline EPM_ORACLE_HOME/products/OfflinePlanning.
Predictive Planning C:/Program Files/Oracle/Crystal Ball
Smart View C:/Oracle/SmartView
86 Removing an EPM Oracle Instance and Uninstalling EPM System

Client Default Installation Directory
Strategic Finance EPM_ORACLE_HOME/products/hsf/Client
Disclosure Management c:/Program Files/Oracle Hyperion Disclosure Management
Performing a Silent Client UninstallationYou use the EPM System client installers with the command line parameter /x to uninstall EPMSystem clients other than Oracle Hyperion Disclosure Management.
ä To perform silent uninstallation of an EPM System client other than Essbase Client, EssbaseStudio Console, Administration Services Console, or Disclosure Management, use thiscommand:
installer file name /x /s /v"/qn /l*v log file path and name"
For example, this command uninstalls Oracle Hyperion Smart View for Office and creates thelog c:/temp/SilentInstall.log:
SmartView.exe /x /s /v"/qn /l*v c:/temp/SilentInstall.log”
ä To perform a silent uninstallation of Essbase Client, Essbase Studio Console, AdministrationServices Console, or Strategic Finance Client, use this command:
installer file name /x /s /v"/qn DELETE_COMMONS=value /l*v log file
path and name"
where value is true or false.
Essbase Client, Essbase Studio Console, Oracle Essbase Administration Services Console, andOracle Hyperion Strategic Finance share some common components. With the parameterDELETE_COMMONS=true, the uninstaller removes these common components. If multipleclients are installed on the same machine, or if the client is installed on the same machine as anEPM System server product, you must use DELETE_COMMONS=false if you want to delete onlyone of the clients.
ä To perform a silent uninstallation of Disclosure Management, run this command from thefolder that contains DiscManSetup.msi:
msiexec /uninstall DiscManSetup.msi /qn /l*v log file path and name"
Uninstalling EPM System Clients 87

88 Removing an EPM Oracle Instance and Uninstalling EPM System

8Performing Custom
Configurations
In This Chapter
Optimizing Performance by Changing the Heap Size ... . . . . . . . . . . . . . . . . . . . . . . . . . . . . . . . . . . . . . . . . . . . . . . . .89
Installing and Configuring Online Help ... . . . . . . . . . . . . . . . . . . . . . . . . . . . . . . . . . . . . . . . . . . . . . . . . . . . . . . . . . . . . . . . .91
Customizing Essbase Configurations ... . . . . . . . . . . . . . . . . . . . . . . . . . . . . . . . . . . . . . . . . . . . . . . . . . . . . . . . . . . . . . . . . . .93
(UNIX) Configuring the Environment for Essbase and Oracle BI EE Integration ... . . . . . . . . . . . . . . . . . . .94
Integrating Oracle BI EE and BI Publisher with EPM Workspace ... . . . . . . . . . . . . . . . . . . . . . . . . . . . . . . . . . . .96
Configuring the Environment for Financial Management and Oracle BI EE Integration... . . . . . . . . . . .99
Configuring Fonts for Interactive Reporting (UNIX).. . . . . . . . . . . . . . . . . . . . . . . . . . . . . . . . . . . . . . . . . . . . . . . . . . . 101
This chapter describes additional custom configurations you can make to your EPM Systemdeployment.
Optimizing Performance by Changing the Heap SizeDepending on your environment, you might need to change the heap size for your Java webapplication server. For example, if you see “OutOfMemory” errors in WebLogic, increase theheap size. If you need to reduce the memory requirement of the WebLogic Server, decrease theheap size.
By default, if you deploy Java web applications to a single managed server, EPM SystemConfigurator sets the default heap size for the single managed server based on the machine'smemory:
l 12 GB or more on machine, sets heap size at 8 GB
l 6 GB or more, up to but not including 12 GB, sets heap size at 4 GB
l Under 6 GB on a 32-bit machine, sets heap size at 750 MB
l Under 6 GB on a 64-bit machine, sets heap size at 1.536 MB
Assumptions and PrerequisitesThis procedure assumes the following:
l You have installed and configured EPM System products using the Oracle EnterprisePerformance Management System Standard Deployment Guide or the Oracle EnterprisePerformance Management System Installation and Configuration Guide.
Optimizing Performance by Changing the Heap Size 89

l If you manually deployed the Java web application, the managed server must be running.
Changing the Heap Size
ä To change the heap size of a managed server:
1 For Windows machines, use Windows Registry Editor to change the heap size of the Windows service:
a. On the machine hosting the product whose managed server you want to modify, openWindows Registry Editor: Select Start and then Run, type regedit, and then click OK.
b. In Registry Editor, select HKEY_LOCAL_MACHINE, then SOFTWARE, then HyperionSolutions, then ManagedServerName, and then WindowsServiceName_InstanceName.
For example, if you deployed a single managed server, select HKEY_LOCAL_MACHINE,then SOFTWARE, then Hyperion Solutions, then EPMServer0, and thenHyS9EPMServer_InstanceName.
If you scaled out a single managed server, on the scaleout machine, selectHKEY_LOCAL_MACHINE, then SOFTWARE, then Hyperion Solutions, then EPMServer1, andthen HyS9EPMServer_InstanceName.
For example if you deployed Oracle Hyperion Planning, select HKEY_LOCAL_MACHINE,then SOFTWARE, then Hyperion Solutions, then Planning0, and thenHyS9Planning_InstanceName.
If you need a complete list of managed servers in your deployment, run a deploymentreport:
Navigate to EPM_ORACLE_INSTANCE/bin and execute the following command:
epmsys_registry report deployment
The report file (deployment_report_YYYYMMDD_HHMMSS.html) is stored inEPM_ORACLE_INSTANCE/diagnostics/reports.
c. Right-click JVMOptionX (where X is 1, 2, ...) whose value starts with -Xmx, and thenselect Modify.
d. In Value data, change the value to a value appropriate for your environment.
-XmxValuem
For example, to set the heap size to 8GB, enter the following:
-Xmx8000m
e. Click OK.
f. Close Registry Editor.
g. Start EPM System by selecting Start, then All Programs, then Oracle EPM System, thenFoundation Services, and then Start EPM System.
h. Complete these steps for each managed server on each machine in the deployment.
90 Performing Custom Configurations

2 For UNIX machines or as an alternate method for Windows machine, change the heap size of a managedserver in the product start script:
a. On the machine hosting the product whose managed server you want to modify, openthe product's custom start script in a text editor:
EPM_ORACLE_INSTANCE/bin/deploymentScripts/setCustomParamsManagedServerName.bat|.sh
For example, to change the heap size for the Foundation Services managed server, openEPM_ORACLE_INSTANCE/bin/deploymentScripts/
setCustomParamsFoundationServices.bat|.sh.
b. Modify the entry that looks like this:
set USER_MEM_ARGS=-Xms128m -XX:PermSize=64m -XX:MaxPermSize=256m -Xmx512m
and edit the value for –XmxValuem to a value appropriate for your environment.
c. Save the file.
d. Rerun the script for the product after making changes.
e. Complete these steps for each managed server on each machine in the deployment.
Validating the Heap Size
ä To validate that the heap size is set correctly:
1 Log in to the WebLogic Administration Console using WebLogic administrator credentials. (http://WebLogic_Admin_Host:WebLogic_Admin_Port/console, for example: http://FNDHOST1:7001/console (or select Start, then All Programs, then Oracle WebLogic, then UserProjects, then EPMSystem, and then Admin Server Console).
2 In the Domain Structure, expand Environment, and then select Servers.
3 In Summary of Servers, select ManagedServerName.
4 Click the Monitoring tab, and then the Performance tab.
5 In Java Virtual Machine Memory Utilization Statistics, review the Heap Size Max setting.
Installing and Configuring Online HelpOnline Help content for EPM System products is served from a central Oracle downloadlocation, which reduces the download and installation time for EPM System. You can accessonline Help automatically after configuring the Web server with EPM System Configurator ifyou are using Oracle HTTP Server or the embedded WebLogic HTTP Server installed withFoundation Services. Launch online Help in one of the following ways:
l From EPM Workspace.
Installing and Configuring Online Help 91

l From a Web-based product. In this case, the URL you use to launch the product must bethrough the Web Server. For example: launch Oracle Hyperion Web Analysis usinghttp://webServerHost:webServerPort/WebAnalysis.
l Directly from a desktop client product such as Oracle Hyperion Financial Reporting Studio.
If you are using IBM HTTP Server for use with WebSphere Application Server, you mustmanually configure the Web server to enable online Help. See “Configuring IBM HTTP Server”in the Oracle Enterprise Performance Management System Installation and Configuration Guide.
Online Help served from the central Oracle download location is not supported if you are usingIIS as your Web server.
You can also install and configure online Help to run locally.
Note: If you require accessible online Help that is Section 508 compliant, or if you are usingOracle User Productivity Kit (UPK), you must install and configure Help to run locally.
Note: If you reconfigure the Web server for any reason, restore epm_online_help.conf.
Assumptions and PrerequisitesIf you plan to configure online Help to run locally:
l You have installed and configured EPM System components.
Configuring Online Help to Run Locally
ä To install and configure online Help to run locally instead of from the hosted Oracle server:
1 After installing and configuring EPM System products, download epm11123.zip from http://docs.oracle.com/cds/epm11123.zip.
2 On the machine hosting the HTTP server, extract the epmstatic folder under EPM_ORACLE_HOME/common. (If you are using the embedded WebLogic HTTP Server, the HTTP server is hosted on themachine on which you deployed Oracle Hyperion Foundation Services.) The folder structure should lookas follows, for example, with a folder for each product:
epmstatic/wspace/docs/*epmstatic/planning/docs/*epmstatic/raframework/docs/*epmstatic/raframework/docs/*
3 If you have a load-balanced environment, unzip epm11123.zip on each machine on which youinstalled an HTTP server.
4 If you are using Oracle HTTP Server or IBM HTTP Server, after configuring the Web server with EPM SystemConfigurator, open httpd.conf (or ssl.conf if you are using SSL) inEPM_ORACLE_INSTANCE/httpdConfig/ohs/config/OHS/ohs_component/, search forInclude conf/epm_online_help.conf, and then comment it by preceding it with #. For example:
92 Performing Custom Configurations

#Include conf/epm_online_help.conf
In addition, ensure that the following line is in httpd.conf:
Alias /epmstatic "EPM_ORACLE_HOME/common/epmstatic"
5 If you are using the embedded WebLogic HTTP Server, after configuring the Web server with EPM SystemConfigurator, open EPM_ORACLE_HOME/common/epmstatic/WEB_INF/web.xml andcomment the filter and filter-mapping sections. For example:
<!-- <filter> ... </filter> <filter-mapping> ... </filter-mapping>-->
6 Restart the FoundationServices managed server (WebLogic) and the HTTP Server.
Customizing Essbase ConfigurationsThis section describes additional configuration settings you might need for Essbase.
Designating a Specific Installation of JRE for use withEssbaseTo designate a specific installation of JRE for use with Essbase, update theJVMMODULELOCATION setting in essbase.cfg.
The JVMMODULELOCATION setting in the essbase.cfg file (in ARBORPATH/bin) enables youto designate a specific installation of JRE for use with Essbase, and is required to enable DataMining, Shared Services, custom defined functions, triggers, and external authentication.
This setting is particularly useful if you have multiple versions of Java installed on the EssbaseServer computer.
During Essbase Server configuration, the correct setting for JVMMODULELOCATION isautomatically added to essbase.cfg.
To change the JVMMODULELOCATION parameters, you must specify the full path and file nameof the Java Virtual Machine (JVM) library. The location and name of the library varies, dependingon the operating system that you are using. EPM System Installer installs JRE inEPM_ORACLE_HOME/JDK160_35/jre.
Note: To run 64–bit Essbase on any 64–bit operating system requires a 64–bit JVM.
Customizing Essbase Configurations 93
Managing Memory with JvmModuleLocationIf you are not using Data Mining, Shared Services, custom defined functions, triggers, or externalauthentication, you can reduce the amount of memory used by editing essbase.cfg and settingJvmModuleLocation to null (empty).
If you are using these features, and need to reduce the amount of memory used, then you canreduce the JVM heap size by setting the following environment variables:
ESS_JVM_OPTION1=-Xmx16m
Because the default minimum and maximum for JVM heap size are different for differentplatforms and versions, set the correct value for your environment. For example, see thefollowing as a reference: http://publib.boulder.ibm.com/infocenter/wasinfo/v4r0/index.jsp?topic=/com.ibm.support.was.doc/html/Java_SDK/1132680.html.
Configuring the 32-bit Runtime Client on a 64-bit WindowsPlatformEPM System Installer installs both 32-bit and 64-bit Essbase Client on a machine with a 64-bitoperating system.
If you want to use 32-bit and 64-bit client applications on the same machine, and you don't wantto have to recompile applications, use the following procedure.
ä To use the 32-bit Runtime Client on a 64-bit Microsoft Windows machine:
On the 64-bit machine, run the precompiled 32-bit client program from a command promptor from a shell window on which ESSBASEPATH is set to the installation directory of the 32-bitRuntime Client and PATH is set to include the bin subdirectory under the ESSBASEPATHdirectory.
For example, on Windows AMD64 set the following:
ESSBASEPATH=%EPM_ORACLE_HOME%\common\EssbaseRTC\11.1.2.0PATH=%ESSBASEPATH%\bin;%PATH%
For information on Application Programming Interface and Runtime Client, see the OracleEssbase API Reference.
(UNIX) Configuring the Environment for Essbase andOracle BI EE IntegrationIf you are using Oracle Business Intelligence Enterprise Edition as the data source for Essbase,you must set additional environment variables for the Oracle BI EE driver before launchingEssbase.
94 Performing Custom Configurations

Note: Essbase Release 11.1.2 integrates with Oracle BI EE Release 10g (10.1.3.4 and later) onUNIX.
ä To configure the environment for Essbase and Oracle BI EE integration:
1 Install the Oracle BI EE ODBC driver.
Oracle BI EE ODBC driver components are installed in their own Home directory. Ensurethat the UNIX users who have access/execute privileges to Essbase have the same privilegesto the Oracle BI EE ODBC driver components.
2 Modify odbc.ini (for Essbase) and odbcinst.ini (for Oracle Essbase Studio) to add the OracleBI EE ODBC driver. These files are in EPM_ORACLE_HOME/common/ODBC/Merant/6.0. Modifythe files by editing the DSN (for odbc.ini) or the driver descriptor (for odbcinst.ini) to includethe absolute path for the Oracle BI EE ODBC driver.
Use the following example for the DSN entry for odbc.ini:
[ODBC Data Sources]:OBI Paint=Oracle BI Server [DSN for OBI driver]
[ODBC]IANAAppCodePage=4InstallDir=/EPM_ORACLE_HOME/common/ODBC/Merant/6.0Trace=1TraceFile=/EPM_ORACLE_HOME/common/ODBC/Merant/6.0/odbctrace.outTraceDll=/EPM_ORACLE_HOME/common/ODBC/Merant/6.0/lib/odbctrac.so
[OBI Paint] [DSN entry]Driver=/.../OracleBI/server/Bin/libnqsodbc.so [path to load OBI driver]Description=Oracle BI ServerServerMachine=qtflnx10.us.oracle.comRepository=Catalog=UID=Administrator PWD=AdministratorPort=9703
Use the following example for the {driver descriptor} entry for odbcinst.ini:
[ODBC Drivers]Oracle BI Server=Installed [driver descriptor. same as the one in essbase.cfg]
[Oracle BI Server] [driver descriptor entry]Driver=/.../OracleBI/server/Bin/libnqsodbc.so [path to load OBI driver]APILevel=3ConnectFunctions=YYNDriverODBCVer=3.52FileUsage=0SQLLevel=2
3 Add the following environment variables to the opmn.xml file:
<variable append="true" id="LD_LIBRARY_PATH" value="/vol1/prod1/OracleBI/server/Bin"/><variable append="true" id="LD_LIBRARY_PATH" value="/vol1/prod1/OracleBI/web/Bin"/>
(UNIX) Configuring the Environment for Essbase and Oracle BI EE Integration 95

<variable id="SATEMPDIR" value="/vol1/prod1/OracleBIData/tmp"/><variable id="SAROOTDIR" value="/vol1/prod1/OracleBI"/><variable id="SA_ROOTDIR" value="/vol1/prod1/OracleBI"/><variable id="SADATADIR" value="/vol1/prod1/OracleBIData"/>
Integrating Oracle BI EE and BI Publisher with EPMWorkspace
Subtopics
l Integrating EPM Workspace with Oracle BI EE Release 10g
l Integrating EPM Workspace with Oracle BI EE Release 11g
Integrating EPM Workspace with Oracle BI EE Release 10gTo integrate Oracle BI EE and Oracle Business Intelligence Publisher Release with 10.1.3.4.2+EPM Workspace, perform the following tasks:
1. Meet prerequisites. See “Prerequisites for Integrating Oracle BI EE and BI Publisher Release10.1.3.4.2+ with EPM Workspace Release 11.1.2.3” on page 96.
2. Use EPM System Configurator to set up the connection between Oracle BI EE and EPMWorkspace. Then, configure the Web Server. See “Set up Connection to Oracle BI EE andPublisher” on page 97.
3. Perform manual configuration tasks. See “Manual Configuration for Integrating Oracle BIEE and BI Publisher Release 10.1.3.4.2+ with EPM Workspace Release 11.1.2.3” on page98.
Prerequisites for Integrating Oracle BI EE and BI Publisher Release10.1.3.4.2+ with EPM Workspace Release 11.1.2.3Before you can integrate Oracle BI EE and BI Publisher Release 10.1.3.4.2+ with EPM WorkspaceRelease 11.1.2.3, you must install and configure Shared Services Release 11.1.1.4 on a machineother than the machine used for EPM System Release 11.1.2.3. Then, perform the followingsteps:
l Before you can integrate BI Publisher Release 10.1.3.4.2+ with EPM Workspace 11.1.2.3,you must complete the prerequisite steps described in the Oracle Business IntelligencePublisher Administrator's and Developer's Guide Release 10.1.3.4.2, available at http://download.oracle.com/docs/cd/E10415_01/doc/index.htm. Note the following caveats:
m In the section “Configuring Oracle BI Publisher with EPM Workspace,” the step“Configure the EPM Workspace Web server” is not required because Web Server isconfigured during configuration of EPM System Release 11.1.2.3.
m All references to the Registry Properties file (reg.properties) in the “Prerequisitesfor Integration with EPM Workspace” refer to the Registry Properties file
96 Performing Custom Configurations

(reg.properties) that was created during the installation and configuration ofShared Services Release 11.1.1.4.
l Before you can integrate Oracle BI EE Release 10.1.3.4.2+ with EPM Workspace 11.1.2.3,you must complete the prerequisite steps described in the Oracle Business IntelligencePublisher New Features Guide Release 10.1.3.4.2+, available at http://download.oracle.com/docs/cd/E10415_01/doc/index.htm. Note the following caveats:
m In the section “Installing and Configuring Oracle BI Presentation Services with EPMWorkspace,” the steps “Configuring the Web Server for EPM Workspace” and“Verifying the Web Server Configuration” are not carried out using EPM WorkspaceRelease 11.1.1.4 but on EPM System Release 11.1.2.3.
m All references in the document to the Registry Properties file (reg.properties) referto the Registry Properties file (reg.properties) that is created during the installationand configuration of Shared Services Release 11.1.1.4.
Next, proceed with configuration of EPM System Release 11.1.2.3 using EPM SystemConfigurator, selecting the task “Set up Connection to Oracle BI EE and Publisher.” Configurethe Web server last.
In this scenario, you must have an installation of Shared Services Release 11.1.1.4 along with theinstallation of EPM System Release 11.1.2.3.
Caveats for working in this environment:
l Native users are not supported.
l You must install and configure EPM System Release 11.1.2.3 and EPM System Release11.1.1.4 on different servers. Configuration on a single server is not supported.
Set up Connection to Oracle BI EE and Publisher
ä Specify the configuration information for EPM Workspace to work with Oracle BI EE andBI Publisher.
You must reconfigure the Web server after you perform this task. If the Web server is on thismachine, select Configure Web Server at the same time you select Set up Connection to Oracle BIEE and Publisher.
The following table describes options for configuring EPM Workspace to work with Oracle BIEE and BI Publisher.
EPM System ConfiguratorFields
Description Your Information
Set up Oracle BI EE
Host Specify the host where Oracle BI EE is installed.
Port Specify the port on which Oracle BI EE listens.
Integrating Oracle BI EE and BI Publisher with EPM Workspace 97

EPM System ConfiguratorFields
Description Your Information
SSL Port If you are using SSL, specify the SSL port.
URL Context Review or update the context path. The context path is the part of the URL that accessesthe deployed Java web application. The default value is /analytics.
Set up Oracle BI Publisher
Host Specify the host where BI Publisher is installed.
Port Specify the port on which BI Publisher listens.
SSL Port If you are using SSL, specify the SSL port.
URL Context Review or update the context path. The context path is the part of the URL that accessesthe deployed Java web application. The default value is /xmlpserver.
Manual Configuration for Integrating Oracle BI EE and BI Publisher Release10.1.3.4.2+ with EPM Workspace Release 11.1.2.3If you are integrating EPM Workspace with Oracle BI EE or BI Publisher, perform an additionaltask to create compatible single sign-on tokens. Because Shared Services Release 11.1.1.3 and11.1.1.4 uses a different encryption method than Release 11.1.2.x, you must generate a new singlesign-on token encryption key.
You can select either Reset to default or Generate a new key. If you generate a new key, you needto replace css-9_5_0.jar in oraclebi/web/javahostt/lib/obiscustomauth on theOracle BI EE machine with the same file from the 11.1.1.3 or 11.1.1.4 installation, which is inHYPERION_HOME/common/css/9.5.0.0/lib.
1. If Oracle BI EE or BI Publisher Release 10.1.3.4.1 are installed on a machine other than themachine hosting Shared Services Release 11.1.1.3.00 or 11.1.1.4, perform the followingadditional steps:
l On the machine hosting Oracle BI EE or BI Publisher, create a folder forHYPERION_HOME and then create a new environment variable, HYPERION_HOME,pointing to this location.
l Create the following directory structure under HYPERION_HOME: /common/CSS.
2. Copy ssHandlerTK key to HYPERION_HOME/common/CSS.
See “Regenerating Encryption Keys” and “Setting Encryption Options” in the OracleEnterprise Performance Management System User Security Administration Guide for details.
3. Restart Oracle BI EE and Oracle Business Intelligence Publisher services.
Integrating EPM Workspace with Oracle BI EE Release 11gTo integrate EPM Workspace Release 11.1.2.3 with Oracle BI EE Release 11.1.1.7, see“Configuring for Integration with EPM Workspace” in the Oracle® Fusion Middleware System
98 Performing Custom Configurations

Administrator's Guide for Oracle Business Intelligence Enterprise Edition (http://docs.oracle.com/cd/E28280_01/bi.1111/e10541/toc.htm). If you used the EPM Workspace integration withOracle BI EE Release 10g, then you can upgrade to Oracle BI EE Release 11.1.1.7, but theintegration with EPM Workspace is not upgraded. You must reconfigure for the integrationusing the procedures that are described in Oracle® Fusion Middleware System Administrator'sGuide for Oracle Business Intelligence Enterprise Edition.
Configuring the Environment for FinancialManagement and Oracle BI EE IntegrationFor Oracle BI EE integration with Financial Management, after installing Oracle BI EE, beforeyou can import from or set up a connection to Financial Management data sources, you mustensure that the Financial Management ADM driver is installed on the system running the OracleBI JavaHost process.
Perform the following tasks:
1. Using EPM System Installer, install the Financial Management ADM driver on the machinerunning the Oracle BI JavaHost process.
2. Using Oracle Hyperion Enterprise Performance Management System Configurator, providedatabase connection details for Oracle Hyperion Shared Services and for FinancialManagement. In the Configure DCOM page, provide a domain user that is the userconnecting to the Financial Management server.
3. After configuration, edit opmn.xml on each system running the Oracle BI JavaHost processto include environment variables required by Financial Management. See the followingprocedure.
Note that the JavaHost process must be running to import from Financial Management datasources, for both offline and online imports. You can use Financial Management data sourceswith Oracle BI EE only when Oracle Business Intelligence Enterprise Edition is running in aWindows-only deployment.
ä To configure the environment for Financial Management and Oracle BI EE integration:
1 Open ORACLE_INSTANCE/config/OPMN/opmn/opmn.xml in a text editor.
2 Locate the ias-component tag for the JavaHost process. For example:
<ias-component id="coreapplication_obijh1">
3 Within the environment tag, add new variables required for Financial Management, using the followingexample as a guide. Update the actual values as appropriate for your installation.
<variable id="HYPERION_HOME" value="C:/oracle/Middleware/EPMSystem11R1"/><variable id="EPM_HOME"value="C:/MW_Home/Oracle_BI1/common/jlib/11.1.2.0"/><variable id="ADM_HOME"value="C:/MW_Home/Oracle_BI1/common/ADM/11.1.2.0"/><variable id="HFM_HOME"value="$HYPERION_HOME/products/FinancialManagement/Client"/><variable id="ADM_ESS_NATIVE_HOME" value="$ADM_HOME/"/>
Configuring the Environment for Financial Management and Oracle BI EE Integration 99

<variable id="CSS_HOME"value="c:/MW_Home/Oracle_BI1/common/CSS/11.1.2.0"/>
4 Update the PATH variable to include ADM_HOME/bin and the client and common subdirectoriesof HYPERION_HOME. For example:
<variable id="PATH" value="C:\oracle\product\10.2.0\db_1\BIN$:$ADM_HOME/bin$:$HYPERION_HOME/products/FinancialManagement/Common$:$HYPERION_HOME/products/FinancialManagement/Client$:$ORACLE_HOME/common/ODBC/Merant/5.3/lib$:$ORACLE_HOME/bifoundation/server/bin$:$ORACLE_HOME/bifoundation/web/bin$:$ORACLE_HOME/common/ODBC/Merant/5.3/lib$:$ORACLE_INSTANCE$:$ORACLE_HOME/lib" append="true"/>
5 Locate the data id="start-args" tag and update the classpath attribute to include thelocation of required jar files. For example:
<data id="start-args" value="-Xmx1024M -Djava.security.manager=default -DXDO_FONT_DIR=$ORACLE_HOME/common/fonts -Djava.security.policy=$ORACLE_INSTANCE/config/$COMPONENT_TYPE/$COMPONENT_NAME/java.policy-Djava.util.logging.config.class=oracle.core.ojdl.logging.LoggingConfiguration-Doracle.core.ojdl.logging.config.file=$ORACLE_INSTANCE/config/$COMPONENT_TYPE/$COMPONENT_NAME/logging-config.xml -Doracle.home=$ORACLE_HOME-Doracle.instance=$ORACLE_INSTANCE -Doracle.component.type=$COMPONENT_TYPE-Doracle.component.name=$COMPONENT_NAME -classpath $COMMON_COMPONENTS_HOME/modules/oracle.odl_11.1.1/ojdl.jar$:$ORACLE_HOME/bifoundation/javahost/lib/core/sautils.jar$:$ORACLE_HOME/bifoundation/javahost/lib/core/mad.jar$:$ORACLE_HOME/bifoundation/javahost/lib/core/sawconnect.jar$:$ORACLE_HOME/bifoundation/javahost/lib/core/javahost.jar$:$COMMON_COMPONENTS_HOME/modules/oracle.xdk_11.1.0/xmlparserv2.jar$:$ORACLE_HOME/opmn/lib/ons.jar$:$COMMON_COMPONENTS_HOME/modules/oracle.jps_11.1.1/jps-manifest.jar$:$COMMON_COMPONENTS_HOME/modules/oracle.jps_11.1.1/jps-api.jar$:$COMMON_COMPONENTS_HOME/modules/oracle.jps_11.1.1/jps-common.jar$:$COMMON_COMPONENTS_HOME/modules/oracle.jps_11.1.1/jps-internal.jar$:$COMMON_COMPONENTS_HOME/modules/oracle.nlsrtl_11.1.0/orai18n.jar$:$COMMON_COMPONENTS_HOME/modules/oracle.nlsrtl_11.1.0/orai18ncollation.jar$:$COMMON_COMPONENTS_HOME/modules/oracle.nlsrtl_11.1.0/orai18n-mapping.jar$:$COMMON_COMPONENTS_HOME/modules/oracle.dms_11.1.1/dms.jar$:$EPM_HOME/epm.jar$:$ADM_HOME/lib/adm.jar$:$ADM_HOME/lib/ap.jar$:$CSS_HOME/lib/css.jar$:$CSS_HOME/lib/common-model.jar$com.siebel.analytics.javahost.standalone.Main"/>
6 Save and close the file.
7 Go to ORACLE_HOME/bifoundation/javahost/lib/obisintegration/adm and deleteall jar files except for admintegration.jar and admimport.jar.
8 Restart the JavaHost process.
9 Repeat these steps on each computer that runs the Oracle BI JavaHost process. If you are runningmultiple JavaHost instances on the same computer, be sure to update the iascomponent tagappropriately for each instance in opmn.xml (for example, ias-componentid="coreapplication_obijh1", ias-componentid="coreapplication_obijh2", and so on).
100 Performing Custom Configurations

You should run more than one JavaHost process to ensure that JavaHost is not a single point offailure for Oracle Hyperion Financial Management access. To do this, scale out the JavaHostprocess using Fusion Middleware Control. See "Scaling Your Deployment" in Oracle FusionMiddleware System Administrator's Guide for Oracle Business Intelligence Enterprise Edition(http://docs.oracle.com/cd/E28280_01/bi.1111/e10541/toc.htm for more information aboutscaling out processes.
Configuring Fonts for Interactive Reporting (UNIX)Perform these procedures if you want to improve the quality of the fonts.
Interactive Reporting Service must be configured with appropriate fonts to ensure that BQYdocuments in Oracle Hyperion Enterprise Performance Management Workspace have aconsistent look and feel with the Web Client. You must make Type1, TrueType, or OpenTypefonts available to Interactive Reporting Service. The configured fonts must support charactersfor all intended languages.
Oracle Hyperion Enterprise Performance Management System Installer installs Andale WT fontin EPM_ORACLE_HOME/products/biplus/fonts directory and configures InteractiveReporting Service to use it. This font supports most characters from Western Europeanlanguages, as well as Chinese, Japanese, and Korean.
Customers must use fonts appropriate for their usage. For example, when using WesternEuropean languages, for a Windows-like look and feel, you could download Microsoft’sTrueType Web fonts and configure as below:
ä To make Microsoft’s TrueType Web fonts available to EPM Workspace:
1 Download the Microsoft TrueType Web fonts from:
http://sourceforge.net/projects/corefonts/ or other source.
2 Create a directory for the font files.
3 If you are using downloaded Microsoft fonts, extract each file (*.exe) into the newly created directoryusing the cabextract utility:
downloadLocation/cabextract -d directory CAB file
Tip: Cabextract is an open-source tool that enables you to extract font files. You candownload it from the Web.
4 Using the ttmkfdir utility, create a fonts.dir file in the directory containing the font files.
Tip: You can download the ttmkfdir utility from the following URL: http://packages.debian.org/stable/x11/ttmkfdir.
5 Add the fonts.dir directory to environment variable FONT_PATH, or add it to theBQ_FONT_PATH environment variable inside EPM_ORACLE_HOME/common/raframeworkrt/11.1.2.0/bin/set_common_env.sh.
6 Restart Interactive Reporting Service.
Configuring Fonts for Interactive Reporting (UNIX) 101

102 Performing Custom Configurations

9Disaster Recovery
In This Chapter
General Information About Disaster Recovery.. . . . . . . . . . . . . . . . . . . . . . . . . . . . . . . . . . . . . . . . . . . . . . . . . . . . . . . . 103
Disaster Recovery Architecture ... . . . . . . . . . . . . . . . . . . . . . . . . . . . . . . . . . . . . . . . . . . . . . . . . . . . . . . . . . . . . . . . . . . . . . . 104
Disaster Recovery for EPM System Components... . . . . . . . . . . . . . . . . . . . . . . . . . . . . . . . . . . . . . . . . . . . . . . . . . . . 105
Disaster Recovery Without File System and Database Replication ... . . . . . . . . . . . . . . . . . . . . . . . . . . . . . . 106
Additional Information... . . . . . . . . . . . . . . . . . . . . . . . . . . . . . . . . . . . . . . . . . . . . . . . . . . . . . . . . . . . . . . . . . . . . . . . . . . . . . . . . 107
General Information About Disaster RecoveryThis chapter contains information that is specific to EPM System Disaster Recoveryconfigurations. The Oracle Fusion Middleware Disaster Recovery Guide ( http://download.oracle.com/docs/cd/E14571_01/doc.1111/e15250/toc.htm) is the primary referencefor design considerations, recommendations, setup procedures, troubleshooting steps, andother information that you need to deploy and manage the Oracle Fusion Middleware DisasterRecovery solution.
General Information About Disaster Recovery 103

Disaster Recovery Architecture
Figure 6 EPM System Disaster Recovery Architecture
Note: Although the deployment shown in Figure 6 uses symmetric topology, with the samenumber of servers at the production and standby sites, deployment using asymmetrictopology (with fewer servers at the standby site than at the production site) is also possible.Deployment with asymmetric topology requires a server at the standby site for each logicalserver cluster at the production site.
Use of a shared or replicated disk requires a common share across machines; for example,the share can be under /user_projects/data.
104 Disaster Recovery

Disaster Recovery for EPM System Components
Subtopics
l Environment Configuration
l Host Name Requirements
l Database Recommendations
Environment ConfigurationConfiguring a Disaster-Recovery environment requires these steps:
1. Install and configure EPM System at the production site.
Runtime executables and data should be on a replicatable partition.
Distributed services must be clustered to form a logical service.
2. If the host names at the standby site differ from the host names at the production site, setup host name aliases at the standby site. See “Host Name Requirements” on page 105.
3. When the EPM System configuration at the production site is complete, install and configureEPM System at the standby site.
4. Set up database replication.
Note: You can use a backup and restoration procedure for replication.
5. Enable the standby site.
l Disable mirroring between the production and standby sites.
l Run the crash-recovery procedure for each application to recover Oracle Essbase. SeeChapter 4,“ Essbase Components,” in the Oracle Enterprise Performance ManagementSystem Backup and Recovery Guide.
l Start the services on the standby hosts.
Host Name RequirementsAn Oracle Enterprise Performance Management System Disaster Recovery deployment requiresa means of resolving host references between the production and standby sites. Ensure that yourconfiguration uses one of these options, listed in order of preference:
l Production and standby sites are on separate networks.
The fully qualified host names can be the same in both sites.
l Production and standby sites have different DNS that resolve the host names to the correctIP address in their network.
The standby site can have a standby DNS that is activated when a disaster occurs.
l Production host names are resolved to a local IP address at the standby site by means ofan /etc/hosts file.
Disaster Recovery for EPM System Components 105

If the host names must differ between the production and standby sites and there is no separateDNS for the standby site, set up an alias for the production site servers in the standby site asshown below, so that the main server is the first entry in the alias.
Figure 7 Host Name Alias Setup
Database RecommendationsDatabase recommendations for a Disaster Recovery environment:
l Use the database host name alias on the standby site.
l Use Oracle Data Guard configuration for data repositories.
l For planned configuration changes , force database synchronization with Oracle DataGuard.
See the Oracle Data Guard documentation at http://www.oracle.com/technology/deploy/availability/htdocs/DataGuardOverview.html.
Disaster Recovery Without File System and DatabaseReplicationYou can set up Disaster Recovery using backup instead of file system and database replication.With replication, any changes made on the production site are also applied to the standby site.Backup is less costly than replication but enables you to recover only backed-up data. For
106 Disaster Recovery

example, if data was last backed up on Friday and the production site is damaged on the followingThursday, data changes that occurred between the two dates are lost. More-frequent backupsenable you to recover more data.
The file system backup and the database backup must be synchronized. Backing up the file systemand the database at approximately the same time, when there is relatively little activity, ensuresthat they are synchronized.
For Disaster Recovery without file systems and database replication, take one of these steps:
l Replicate the installation image to ensure that all patches applied to the production site afterthe initial setup are also applied to the standby site.
l Promptly manually apply all patches at the production site to the standby site.
Additional InformationFor more information about setting up a Disaster Recovery environment, see these documents:
l The Oracle Fusion Middleware Disaster Recovery Guide (http://download.oracle.com/docs/cd/E14571_01/doc.1111/e15250/intro.htm#BABHCEJJ)
l The Oracle Data Guard documentation at http://www.oracle.com/technology/deploy/availability/htdocs/DataGuardOverview.html
l Oracle Fusion Middleware DR Solution Using NetApp Storage at http://www.netapp.com/us/library/technical-reports/tr-3672.html
l The Disaster Recovery guide for the RDBMS that you use
Additional Information 107

108 Disaster Recovery

Index
Aarchitecture for Disaster Recovery, 104
Cclustering
Essbase, 33action scripts, 20application resources, 21Essbase, 32, 34logical Web address, 23Essbase Server, 29task sequence, 18VIP resources, 19Web applications, 14, 15
configuringEssbase multiple instances, 42
Ddatabase passwords, 63databases
reconfiguring, 70, 73rehosting, 67
Disaster Recoveryarchitecture, 104database recommendations, 106environment configuration, 105general Information (not specific to EPM System),
103host name requirements, 105without file system and database replication, 106
EEPM Oracle instance
removing, 81epmsys_registry utility, 75error logs
uninstalling, 85Essbase
clustering, 32, 34Essbase Server
clustering, 29, 33OPMN overview, 33
Essbase Serverconfiguring multiple instances, 42
Ffailover
Essbase Server, 29FDM
load balancing, 26Financial Close Management
e-mail notificationslanguage settings, 58
event monitoring, 58Financial Management
load balancing, 26
Hhelp, installing and configuring, 91host name changes, 70
Iinstance
removing, 81Interactive Reporting
scaling, 24
JJVMMODULELOCATION, 93
A C D E F H I J L M O R S U V W
Index 109

Lload balancing
FDM, 26Financial Management, 26
logsuninstalling, 85
MMicrosoft Cluster Service, 29, 30
Oonline help, installing and configuring, 91OPMN
failover for Essbase, 34overview and roadmap, 33
Oracle Enterprise Manager deployment, 79Oracle Web Services Manager, 53
Rreconfiguring, 63
databases, 70, 73SSL, 74
rehostingShared Servicesdatabase, 67Shared Services Web application, 69
removing an instance, 81Reporting and Analysis Framework
scaling, 24repository passwords, 63
Sscaling
Reporting and Analysis Framework and InteractiveReporting, 24
vertical, 11Essbase Server
failover, 29starting multiple instances, 42
Shared Servicesrehosting, 69
Shared Services databaserehosting, 67
Shared Services Registryediting, 75
silent uninstallation, 85
SSLOPMN, 34reconfiguring, 74
Uunconfiguring, 81undeploying, 81uninstalling, 81
clients, 86silent, 85
Vvertical scaling, 11
WWeb application clusters
prerequisites, 13Web applications
clustering in a manual deployment, 15clustering in an automatic deployment, 14
WebSphereextending a deployment, 16
A C D E F H I J L M O R S U V W
110 Index