Embed Size (px)
Citation preview
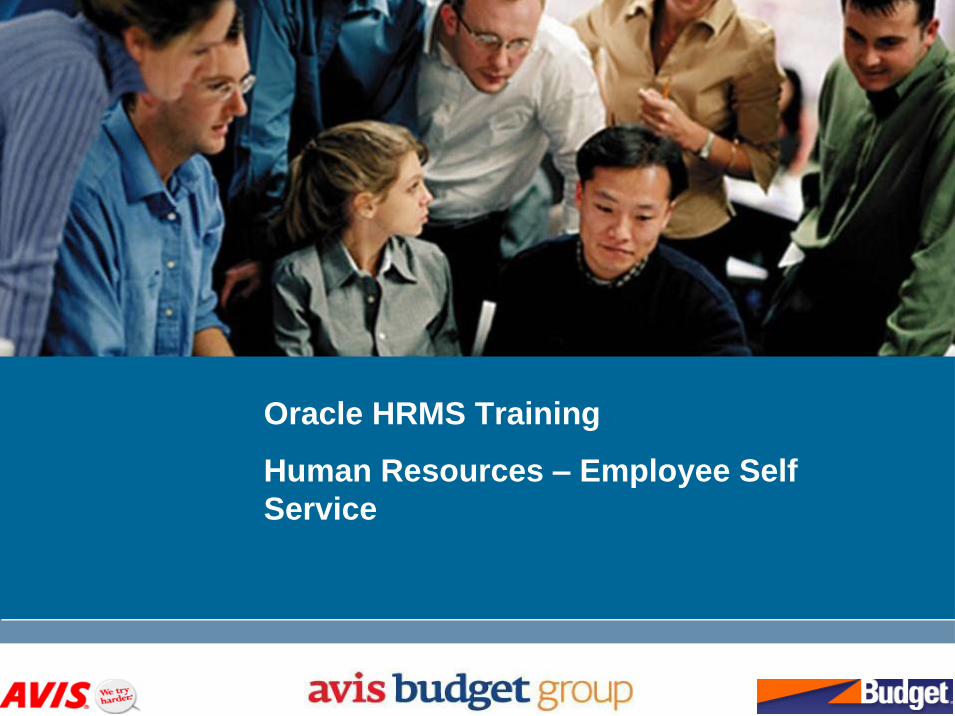
Oracle HRMS Training
Human Resources – Employee Self
Service
Oracle Employee Self Service
2
Oracle Employee Self Service (ESS) gives you access to view, update or maintain
personal or professional information. The information includes such things as
address, emergency contact, financial profile and historical data.
This is a self-paced course broken into four (4) modules which are designed to walk you
through the functions available to employees through the Oracle Employee Self Service.
Oracle Employee Self Service
3
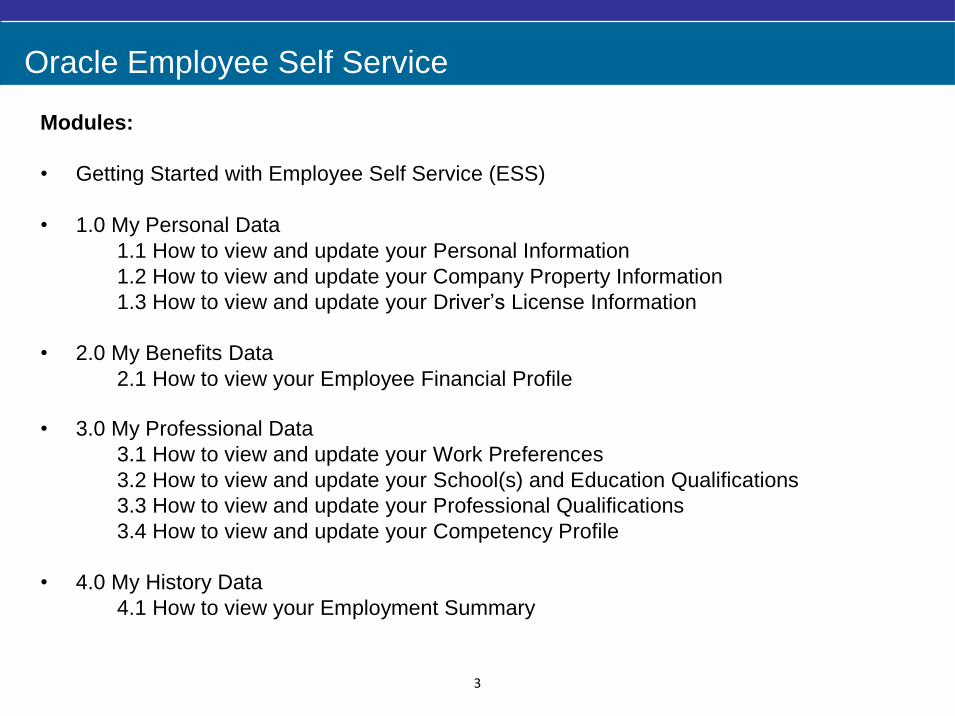
Modules:
• Getting Started with Employee Self Service (ESS)
• 1.0 My Personal Data
1.1 How to view and update your Personal Information
1.2 How to view and update your Company Property Information
1.3 How to view and update your Driver’s License Information
• 2.0 My Benefits Data
2.1 How to view your Employee Financial Profile
• 3.0 My Professional Data
3.1 How to view and update your Work Preferences
3.2 How to view and update your School(s) and Education Qualifications
3.3 How to view and update your Professional Qualifications
3.4 How to view and update your Competency Profile
• 4.0 My History Data
4.1 How to view your Employment Summary
Getting Started
4
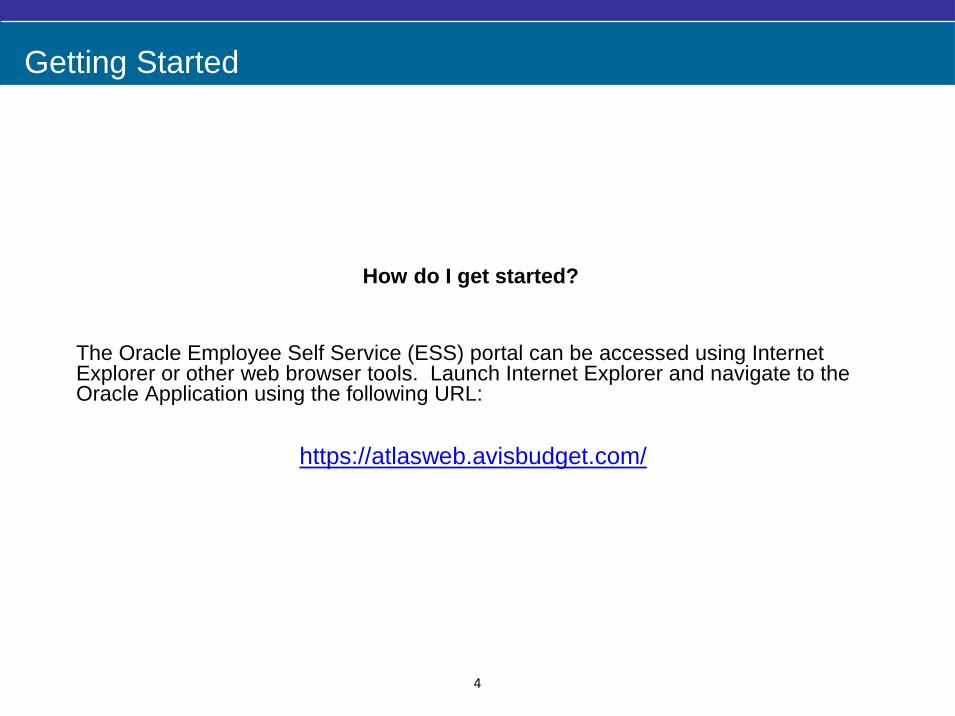
How do I get started?
The Oracle Employee Self Service (ESS) portal can be accessed using Internet Explorer or other web browser tools. Launch Internet Explorer and navigate to the Oracle Application using the following URL:
https://atlasweb.avisbudget.com/
Oracle Employee Self Service
5
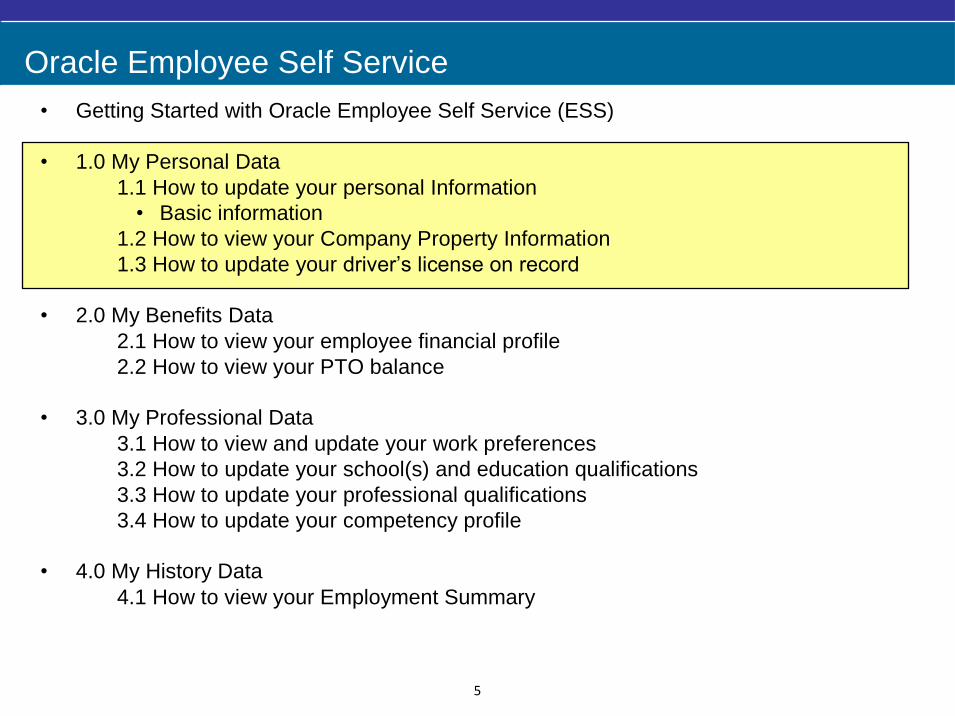
• Getting Started with Oracle Employee Self Service (ESS)
• 1.0 My Personal Data
1.1 How to update your personal Information
• Basic information
1.2 How to view your Company Property Information
1.3 How to update your driver’s license on record
• 2.0 My Benefits Data
2.1 How to view your employee financial profile
2.2 How to view your PTO balance
• 3.0 My Professional Data
3.1 How to view and update your work preferences
3.2 How to update your school(s) and education qualifications
3.3 How to update your professional qualifications
3.4 How to update your competency profile
• 4.0 My History Data
4.1 How to view your Employment Summary
Oracle Employee Self Service
6
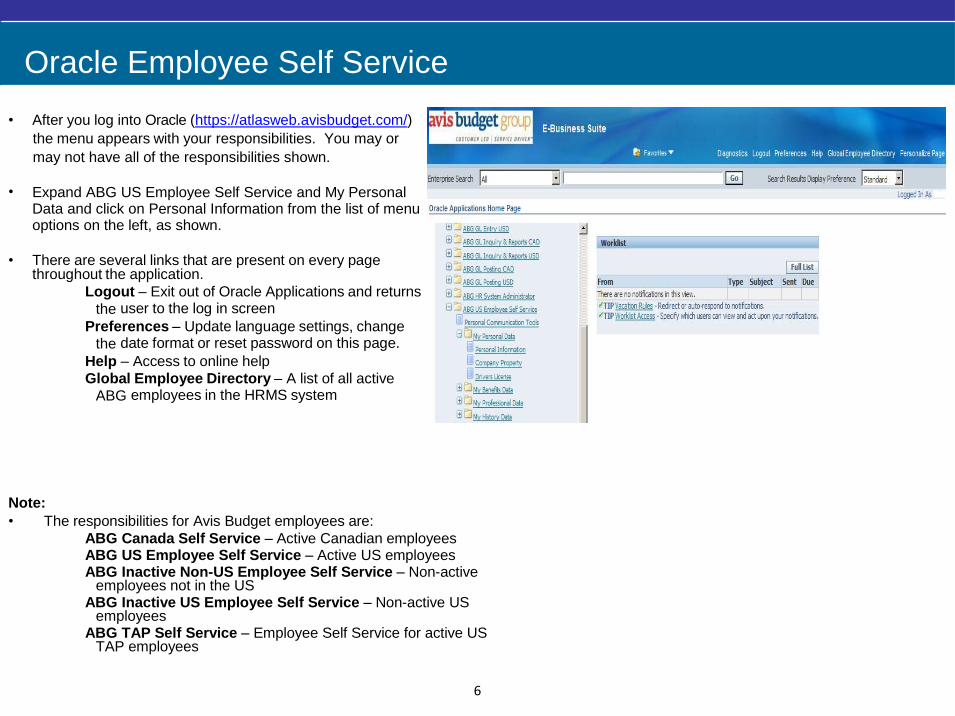
• After you log into Oracle (https://atlasweb.avisbudget.com/)
the menu appears with your responsibilities. You may or
may not have all of the responsibilities shown.
• Expand ABG US Employee Self Service and My Personal
Data and click on Personal Information from the list of menu options on the left, as shown.
• There are several links that are present on every page
throughout the application.
Logout – Exit out of Oracle Applications and returns
the user to the log in screen
Preferences – Update language settings, change
the date format or reset password on this page.
Help – Access to online help
Global Employee Directory – A list of all active
ABG employees in the HRMS system
Note:
• The responsibilities for Avis Budget employees are:
ABG Canada Self Service – Active Canadian employees
ABG US Employee Self Service – Active US employees
ABG Inactive Non-US Employee Self Service – Non-active employees not in the US
ABG Inactive US Employee Self Service – Non-active US employees
ABG TAP Self Service – Employee Self Service for active US TAP employees

My Personal Data
7
• After selecting your ESS responsibility, the following menu items appear in the Navigator screen:
My Personal Data
• Personal Information
• Company Property
• Drivers License
My Benefits Data
• Employee Financial Profile
My Professional Data
• Work Preferences
• Schools and Education
• Professional Data
My History Data
• Personal Details
My Personal Data
8
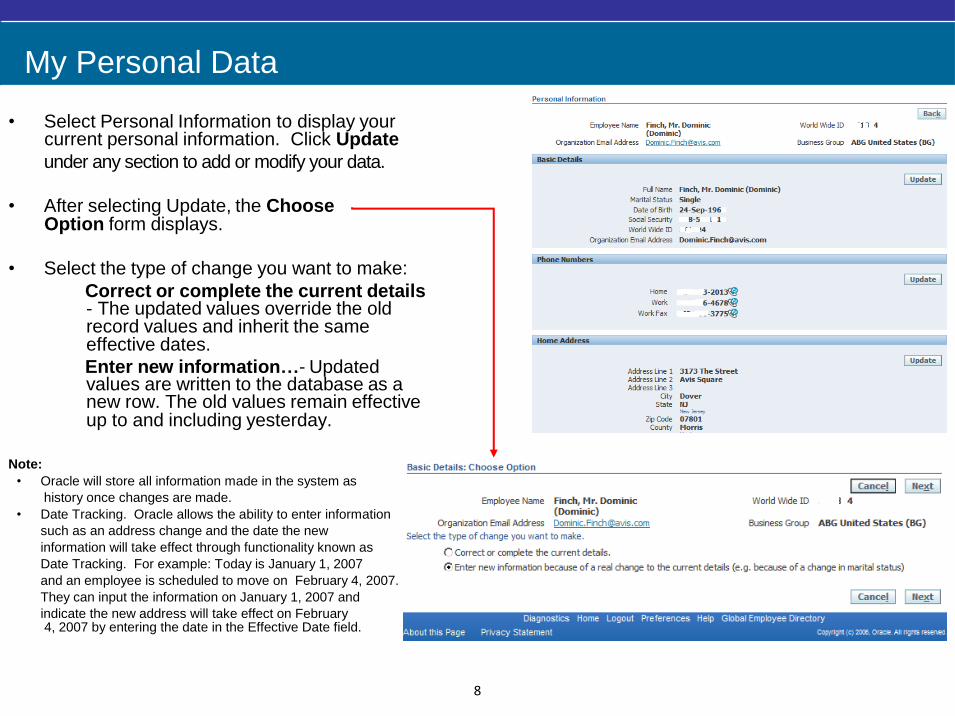
• Select Personal Information to display your current personal information. Click Update
under any section to add or modify your data.
• After selecting Update, the Choose Option form displays.
• Select the type of change you want to make:
Correct or complete the current details - The updated values override the old record values and inherit the same effective dates.
Enter new information…- Updated values are written to the database as a new row. The old values remain effective up to and including yesterday.
Note:
• Oracle will store all information made in the system as
history once changes are made.
• Date Tracking. Oracle allows the ability to enter information
such as an address change and the date the new
information will take effect through functionality known as
Date Tracking. For example: Today is January 1, 2007
and an employee is scheduled to move on February 4, 2007.
They can input the information on January 1, 2007 and
indicate the new address will take effect on February 4, 2007 by entering the date in the Effective Date field.
My Personal Data
9
“I”
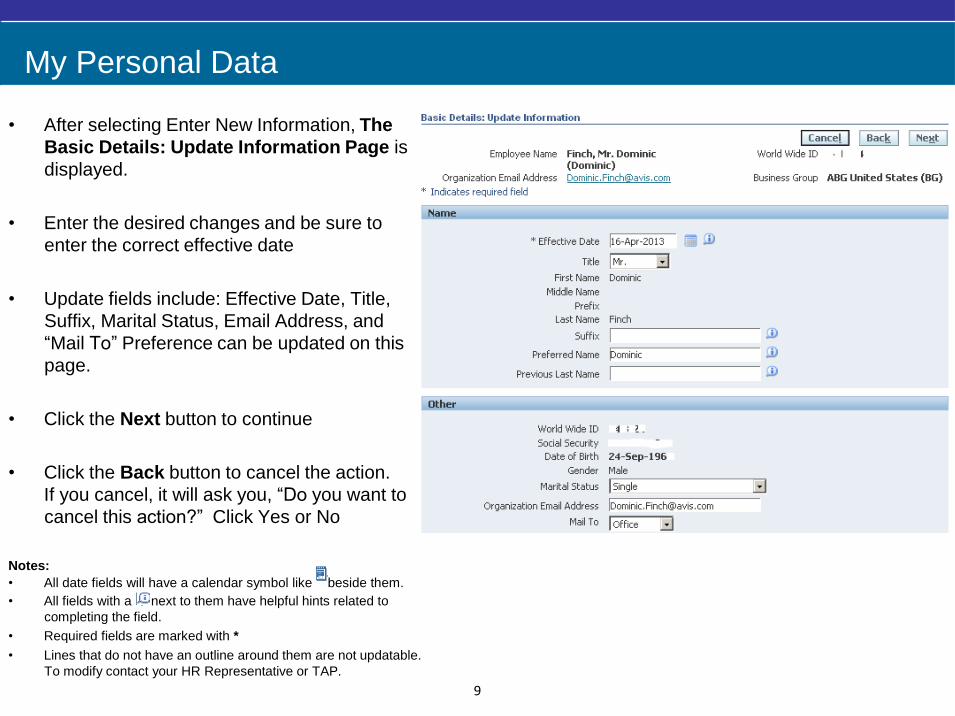
• After selecting Enter New Information, The
Basic Details: Update Information Page is
displayed.
• Enter the desired changes and be sure to
enter the correct effective date
• Update fields include: Effective Date, Title,
Suffix, Marital Status, Email Address, and
“Mail To” Preference can be updated on this
page.
• Click the Next button to continue
• Click the Back button to cancel the action.
If you cancel, it will ask you, “Do you want to
cancel this action?” Click Yes or No
Notes:
• All date fields will have a calendar symbol like beside them.
• All fields with a next to them have helpful hints related to
completing the field.
• Required fields are marked with *
• Lines that do not have an outline around them are not updatable.
To modify contact your HR Representative or TAP.
My Personal Data
10
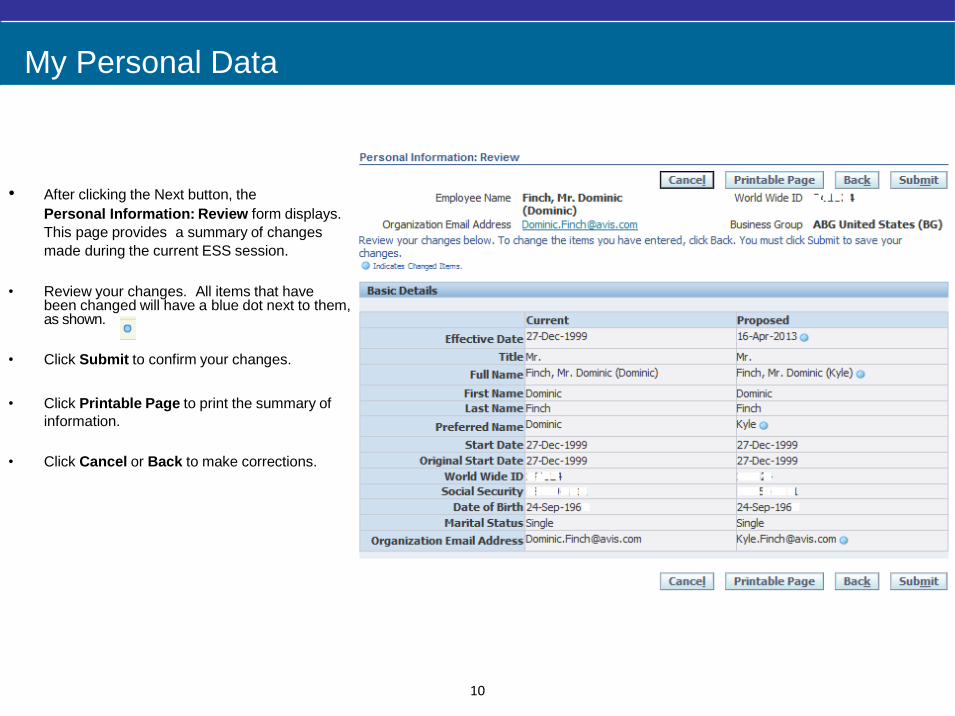
• After clicking the Next button, the
Personal Information: Review form displays.
This page provides a summary of changes
made during the current ESS session.
• Review your changes. All items that have been changed will have a blue dot next to them, as shown.
• Click Submit to confirm your changes.
• Click Printable Page to print the summary of
information.
• Click Cancel or Back to make corrections.
My Personal Data
11
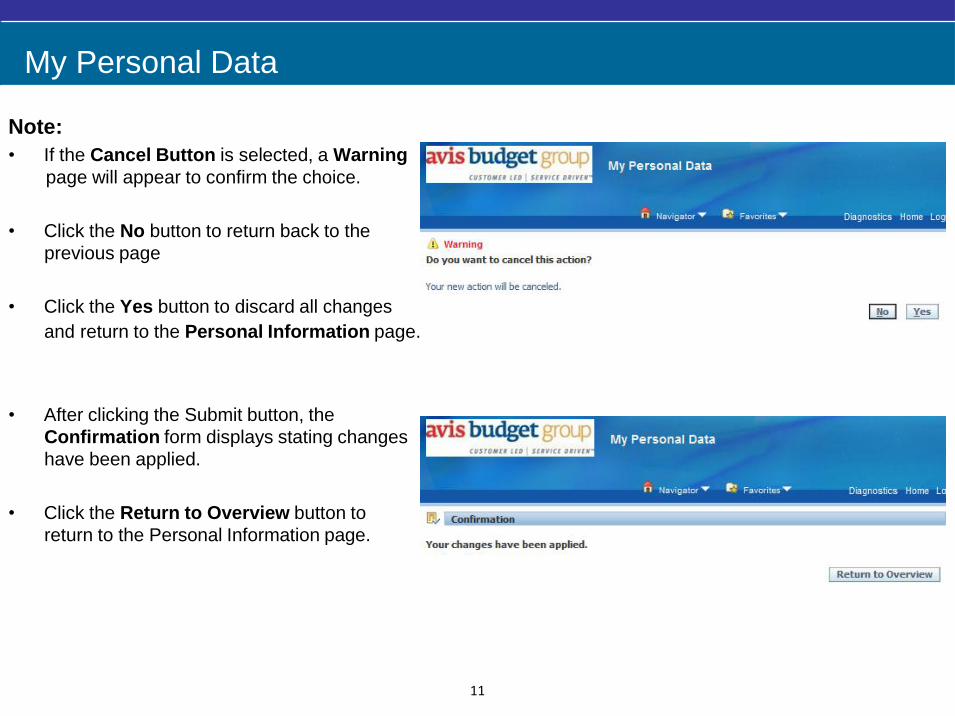
Note:
• If the Cancel Button is selected, a Warning
page will appear to confirm the choice.
• Click the No button to return back to the
previous page
• Click the Yes button to discard all changes
and return to the Personal Information page.
• After clicking the Submit button, the
Confirmation form displays stating changes
have been applied.
• Click the Return to Overview button to
return to the Personal Information page.
My Personal Data
12 ESS Module
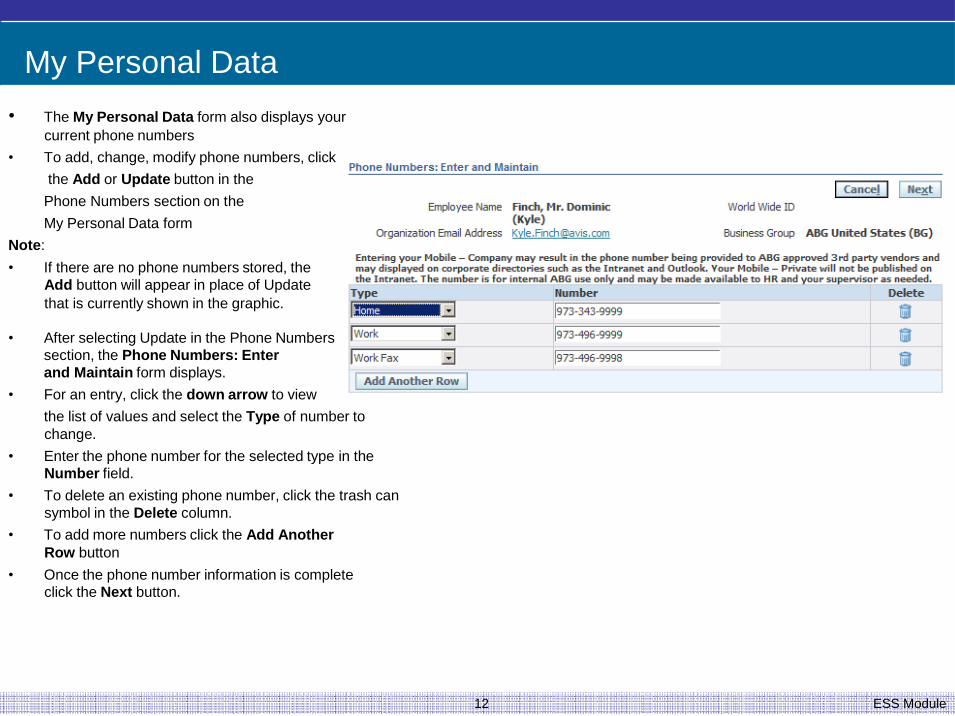
• The My Personal Data form also displays your
current phone numbers
• To add, change, modify phone numbers, click
the Add or Update button in the
Phone Numbers section on the
My Personal Data form
Note:
• If there are no phone numbers stored, the
Add button will appear in place of Update
that is currently shown in the graphic.
• After selecting Update in the Phone Numbers
section, the Phone Numbers: Enter
and Maintain form displays.
• For an entry, click the down arrow to view
the list of values and select the Type of number to
change.
• Enter the phone number for the selected type in the
Number field.
• To delete an existing phone number, click the trash can
symbol in the Delete column.
• To add more numbers click the Add Another
Row button
• Once the phone number information is complete
click the Next button.
My Personal Data
13 ESS Module
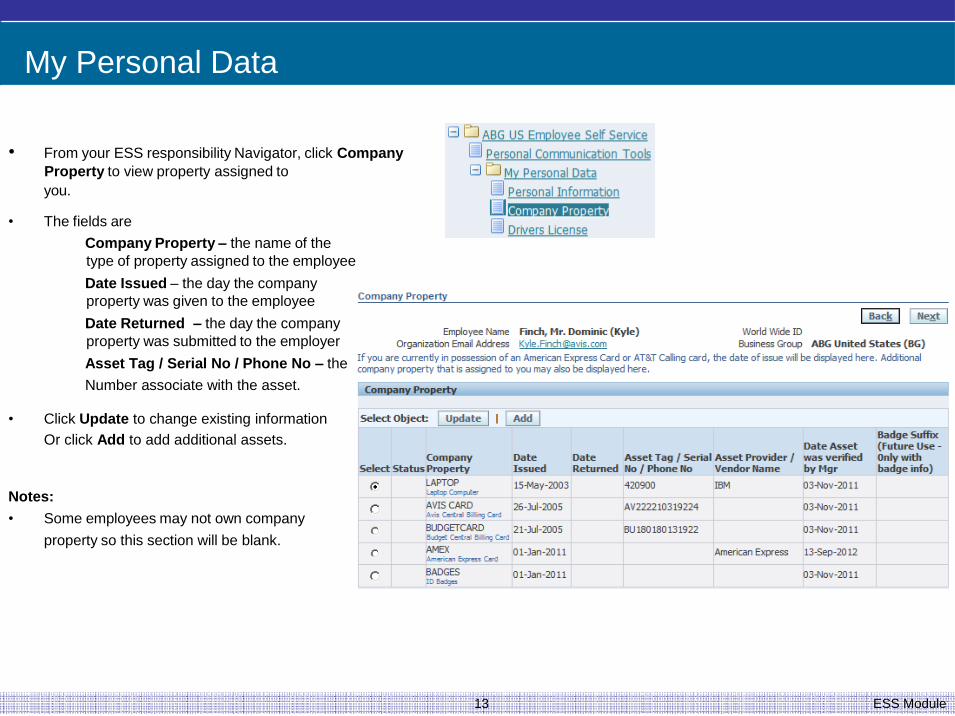
• From your ESS responsibility Navigator, click Company
Property to view property assigned to
you.
• The fields are
Company Property – the name of the
type of property assigned to the employee
Date Issued – the day the company
property was given to the employee
Date Returned – the day the company
property was submitted to the employer
Asset Tag / Serial No / Phone No – the
Number associate with the asset.
• Click Update to change existing information
Or click Add to add additional assets.
Notes:
• Some employees may not own company
property so this section will be blank.
My Personal Data
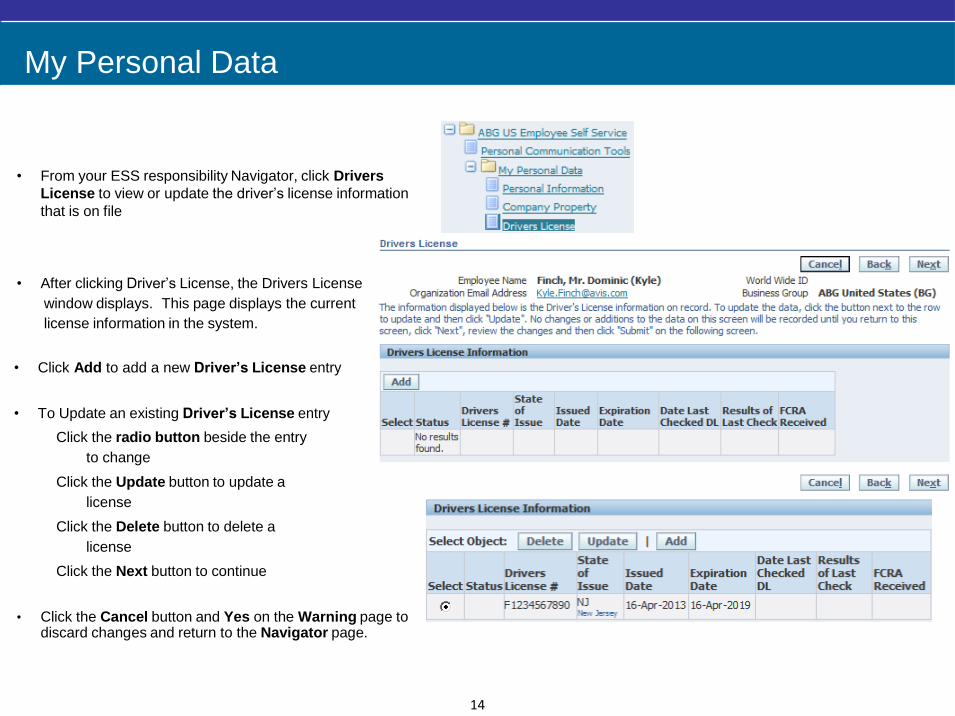
14
• From your ESS responsibility Navigator, click Drivers
License to view or update the driver’s license information
that is on file
• After clicking Driver’s License, the Drivers License
window displays. This page displays the current
license information in the system.
• Click Add to add a new Driver’s License entry
• To Update an existing Driver’s License entry
Click the radio button beside the entry
to change
Click the Update button to update a
license
Click the Delete button to delete a
license
Click the Next button to continue
• Click the Cancel button and Yes on the Warning page to discard changes and return to the Navigator page.