Embed Size (px)
Citation preview

Original Recipe can be found at www.modabakeshop.com
Original Recipe
Sunkissed Aprons by LeAnne Ballard Hi there Moda Bake Shop Bakers, it is LeAnne over at {EverydayCelebrate.blogspot.com}. With all the baking going on around here, it is about time to make some aprons! The great thing about this project is you can pick whatever fabric line you love to make aprons that fit your personality. One layer cake will yield at least four aprons. Or, since only 10 squares are needed, use some leftover layer cake squares from a previous project. Whatever layer cake you decide to use will result in a darling apron that will make you want to get baking in the kitchen or the sewing room!
{Absolutely loving the color combo of gray and yellow!}
Original Recipe can be found at www.modabakeshop.com
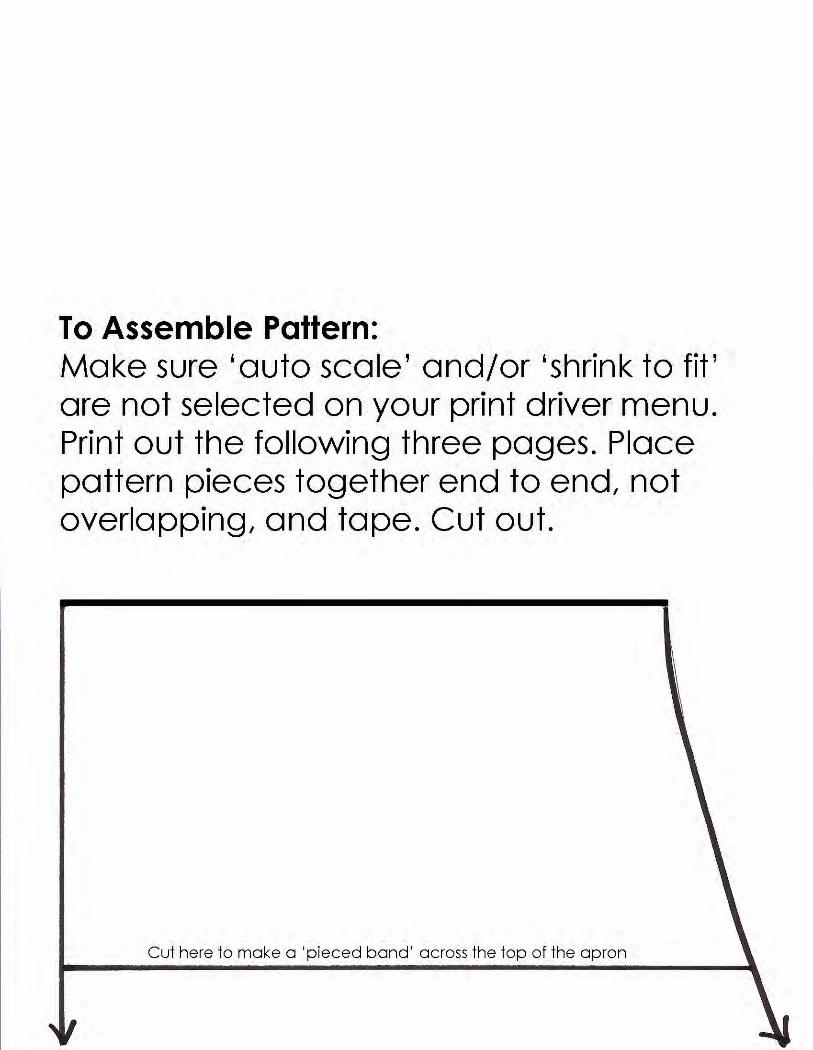
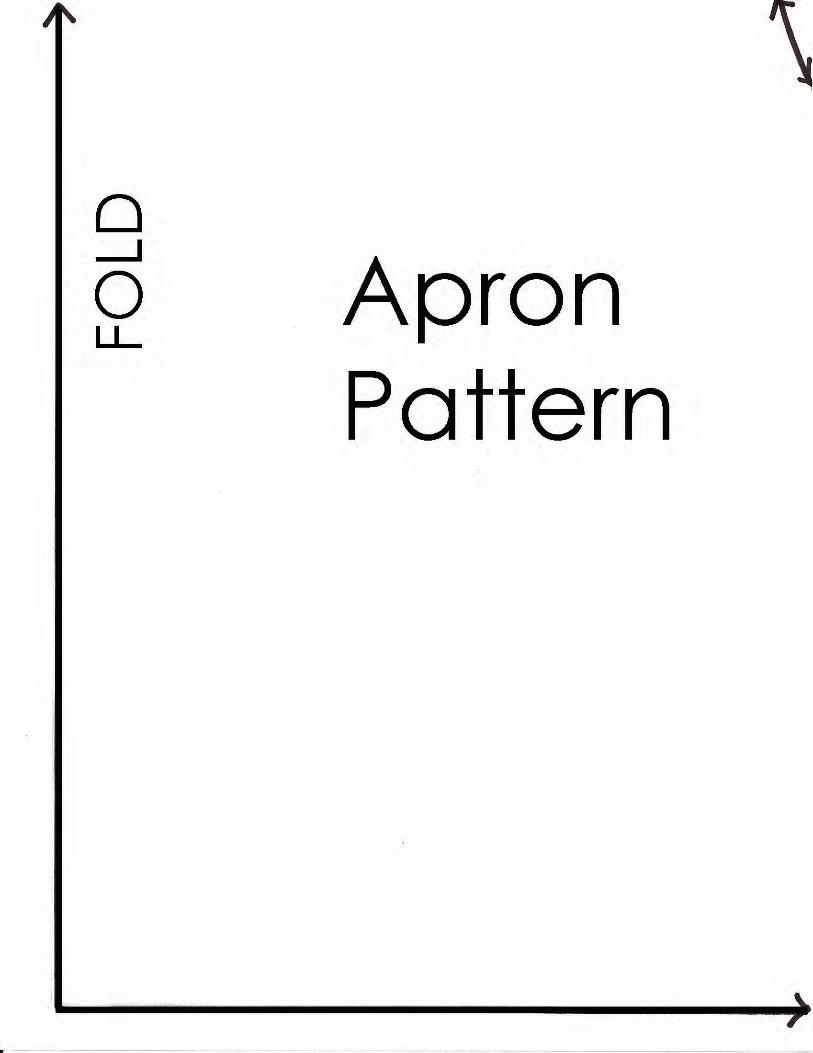
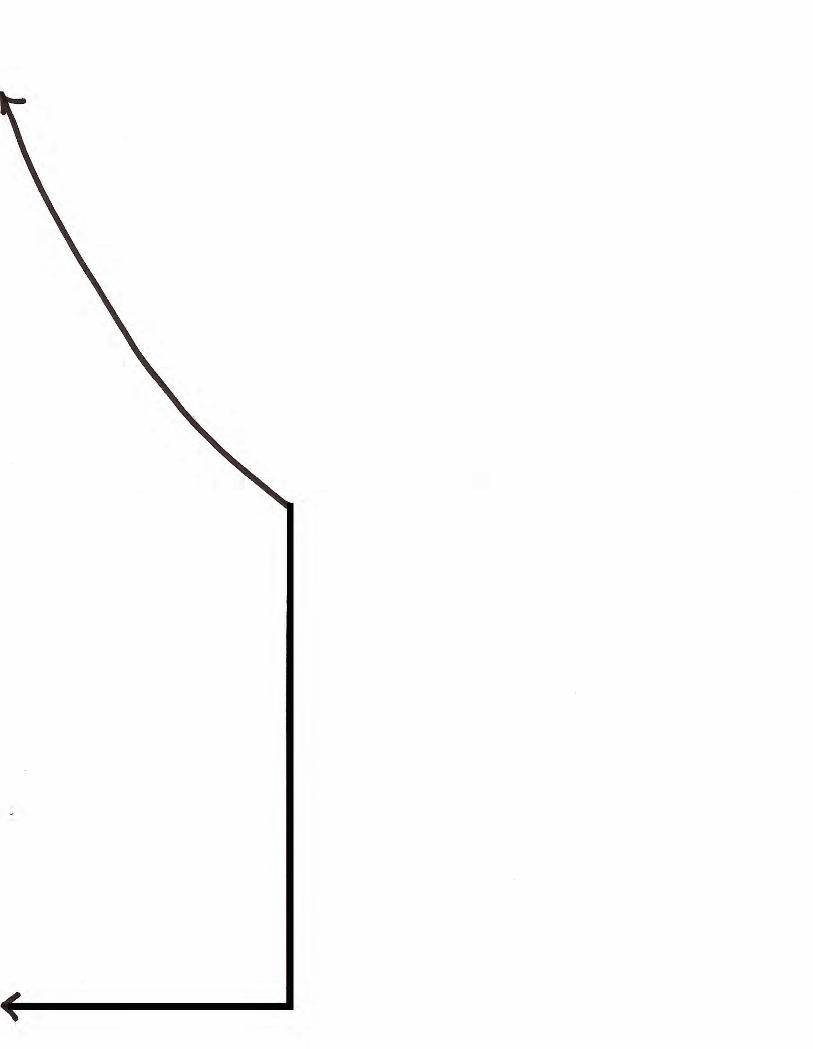
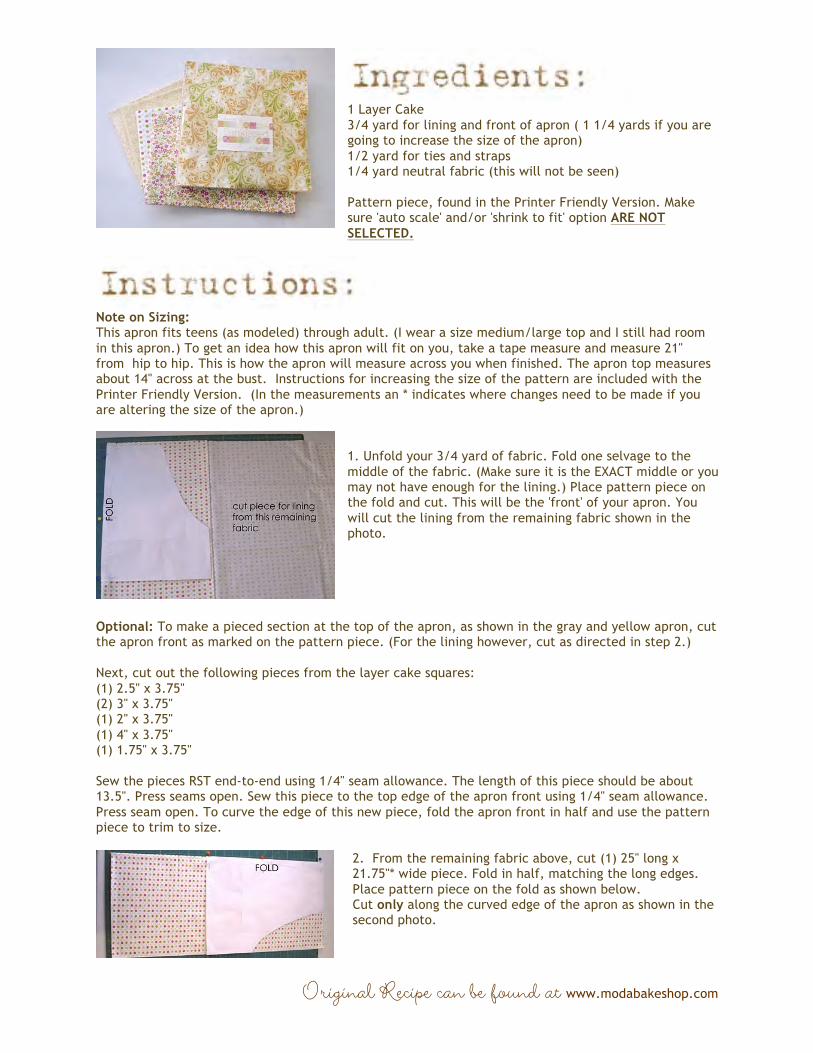
1 Layer Cake 3/4 yard for lining and front of apron ( 1 1/4 yards if you are going to increase the size of the apron) 1/2 yard for ties and straps 1/4 yard neutral fabric (this will not be seen) Pattern piece, found in the Printer Friendly Version. Make sure 'auto scale' and/or 'shrink to fit' option ARE NOT SELECTED.
Note on Sizing: This apron fits teens (as modeled) through adult. (I wear a size medium/large top and I still had room in this apron.) To get an idea how this apron will fit on you, take a tape measure and measure 21" from hip to hip. This is how the apron will measure across you when finished. The apron top measures about 14" across at the bust. Instructions for increasing the size of the pattern are included with the Printer Friendly Version. (In the measurements an * indicates where changes need to be made if you are altering the size of the apron.)
1. Unfold your 3/4 yard of fabric. Fold one selvage to the middle of the fabric. (Make sure it is the EXACT middle or you may not have enough for the lining.) Place pattern piece on the fold and cut. This will be the 'front' of your apron. You will cut the lining from the remaining fabric shown in the photo.
Optional: To make a pieced section at the top of the apron, as shown in the gray and yellow apron, cut the apron front as marked on the pattern piece. (For the lining however, cut as directed in step 2.) Next, cut out the following pieces from the layer cake squares: (1) 2.5" x 3.75" (2) 3" x 3.75" (1) 2" x 3.75" (1) 4" x 3.75" (1) 1.75" x 3.75" Sew the pieces RST end-to-end using 1/4" seam allowance. The length of this piece should be about 13.5". Press seams open. Sew this piece to the top edge of the apron front using 1/4" seam allowance. Press seam open. To curve the edge of this new piece, fold the apron front in half and use the pattern piece to trim to size.
2. From the remaining fabric above, cut (1) 25" long x 21.75"* wide piece. Fold in half, matching the long edges. Place pattern piece on the fold as shown below. Cut only along the curved edge of the apron as shown in the second photo.
Original Recipe can be found at www.modabakeshop.com
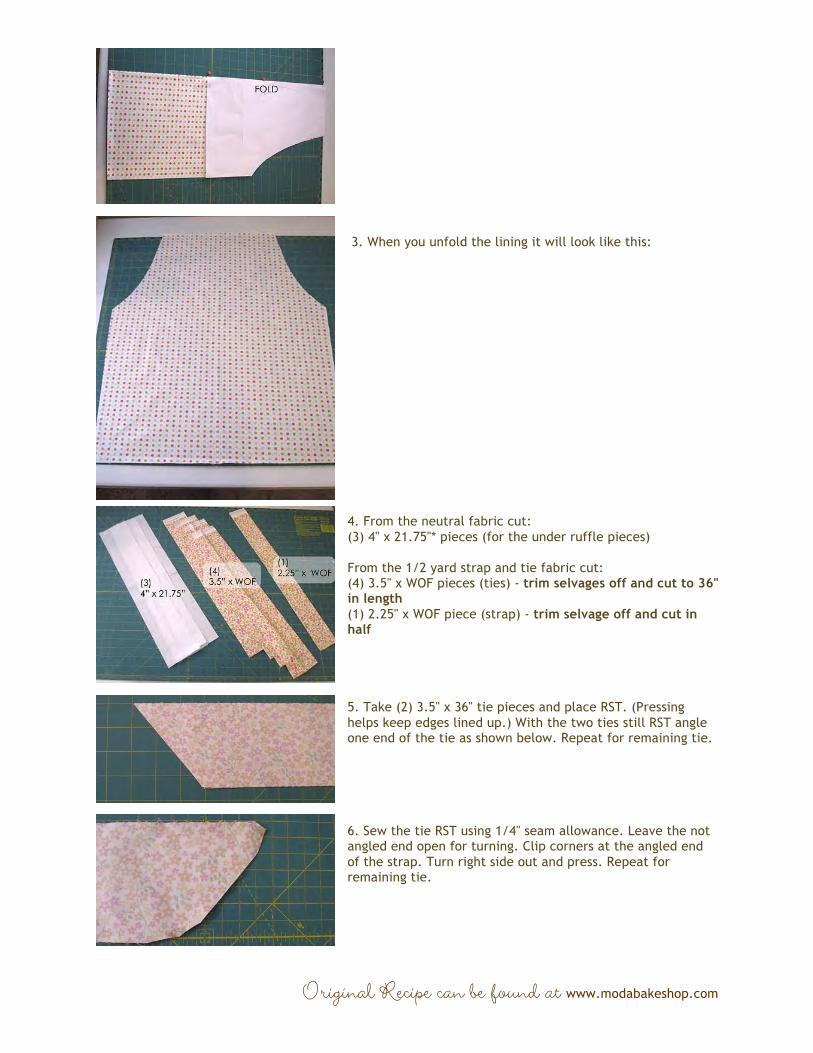
3. When you unfold the lining it will look like this:
4. From the neutral fabric cut: (3) 4" x 21.75"* pieces (for the under ruffle pieces) From the 1/2 yard strap and tie fabric cut: (4) 3.5" x WOF pieces (ties) - trim selvages off and cut to 36" in length (1) 2.25" x WOF piece (strap) - trim selvage off and cut in half
5. Take (2) 3.5" x 36" tie pieces and place RST. (Pressing helps keep edges lined up.) With the two ties still RST angle one end of the tie as shown below. Repeat for remaining tie.
6. Sew the tie RST using 1/4" seam allowance. Leave the not angled end open for turning. Clip corners at the angled end of the strap. Turn right side out and press. Repeat for remaining tie.
Original Recipe can be found at www.modabakeshop.com
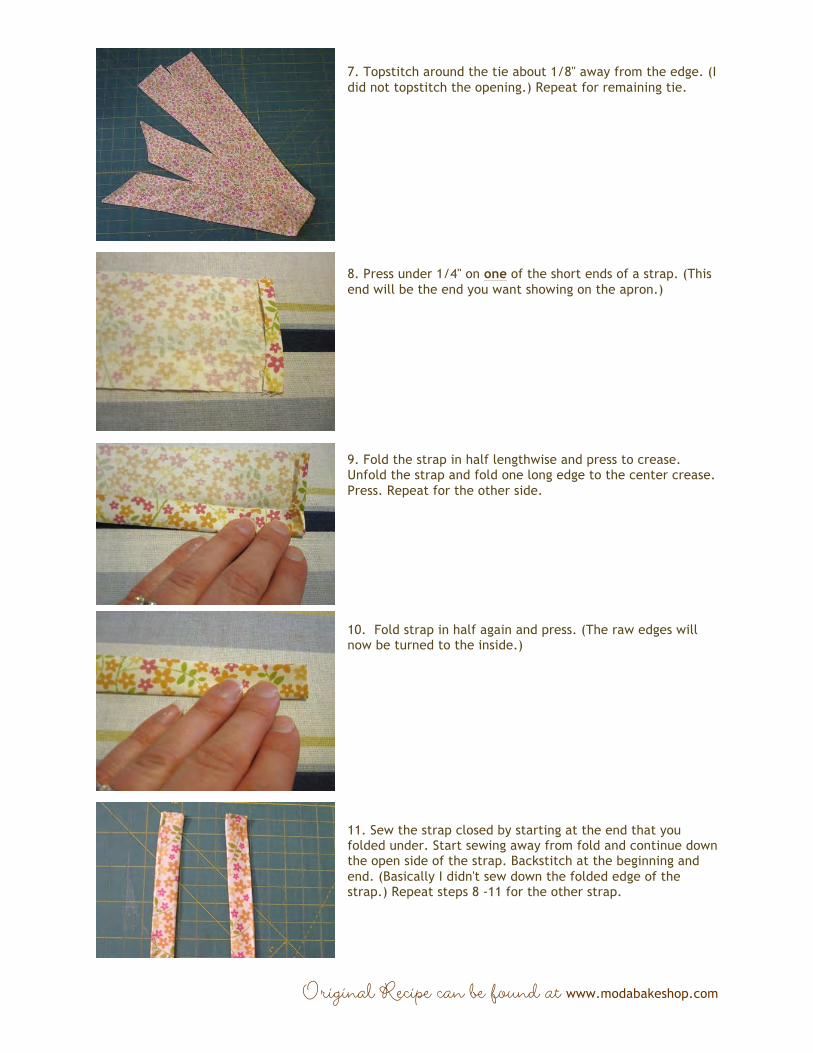
7. Topstitch around the tie about 1/8" away from the edge. (I did not topstitch the opening.) Repeat for remaining tie.
8. Press under 1/4" on one of the short ends of a strap. (This end will be the end you want showing on the apron.)
9. Fold the strap in half lengthwise and press to crease. Unfold the strap and fold one long edge to the center crease. Press. Repeat for the other side.
10. Fold strap in half again and press. (The raw edges will now be turned to the inside.)
11. Sew the strap closed by starting at the end that you folded under. Start sewing away from fold and continue down the open side of the strap. Backstitch at the beginning and end. (Basically I didn't sew down the folded edge of the strap.) Repeat steps 8 -11 for the other strap.
Original Recipe can be found at www.modabakeshop.com
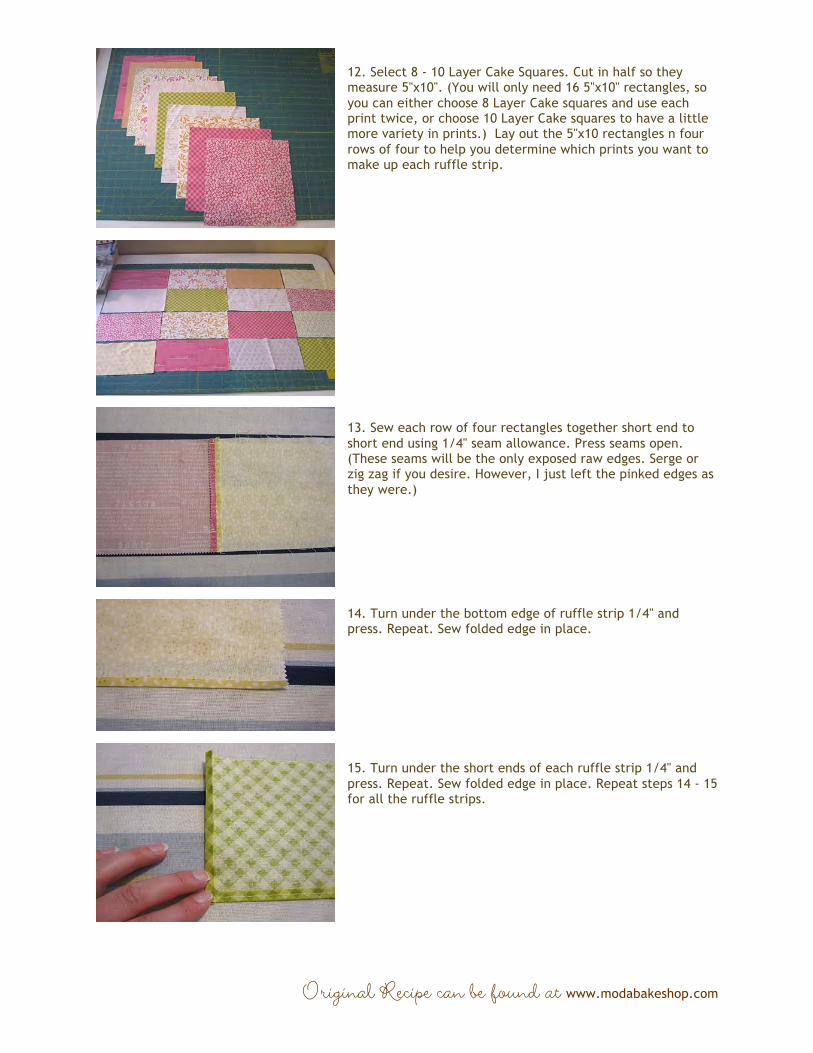
12. Select 8 - 10 Layer Cake Squares. Cut in half so they measure 5"x10". (You will only need 16 5"x10" rectangles, so you can either choose 8 Layer Cake squares and use each print twice, or choose 10 Layer Cake squares to have a little more variety in prints.) Lay out the 5"x10 rectangles n four rows of four to help you determine which prints you want to make up each ruffle strip.
13. Sew each row of four rectangles together short end to short end using 1/4" seam allowance. Press seams open. (These seams will be the only exposed raw edges. Serge or zig zag if you desire. However, I just left the pinked edges as they were.)
14. Turn under the bottom edge of ruffle strip 1/4" and press. Repeat. Sew folded edge in place.
15. Turn under the short ends of each ruffle strip 1/4" and press. Repeat. Sew folded edge in place. Repeat steps 14 - 15 for all the ruffle strips.
Original Recipe can be found at www.modabakeshop.com
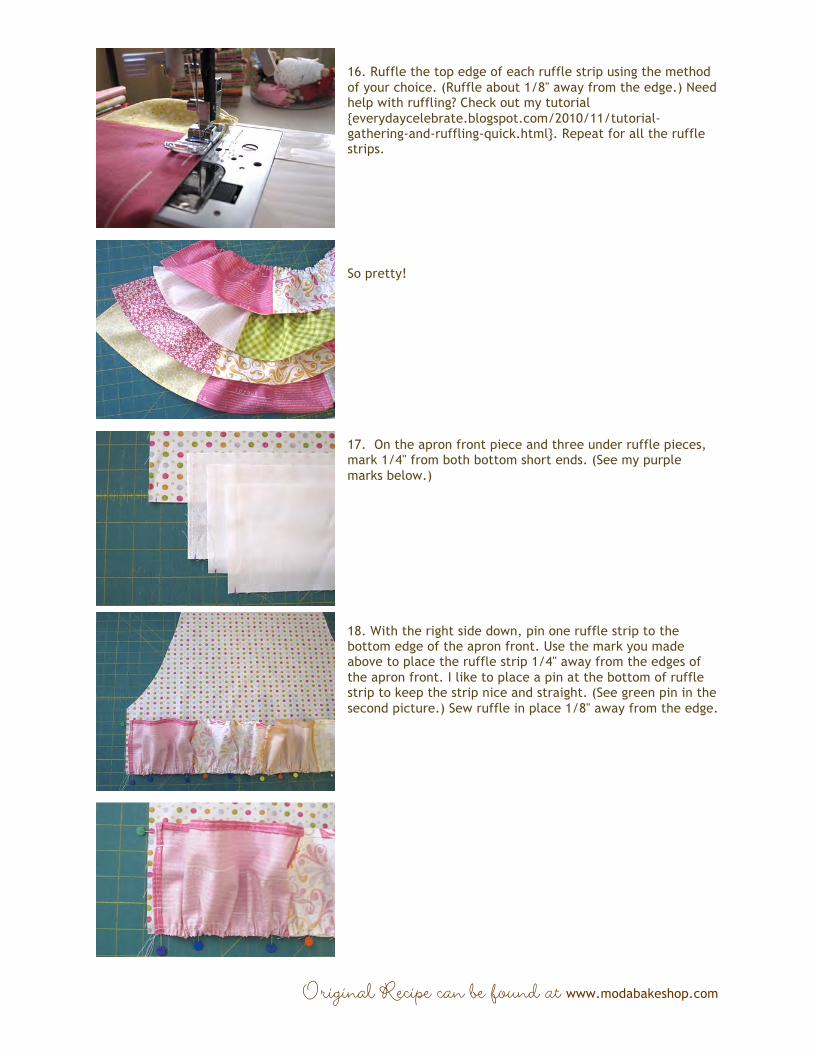
16. Ruffle the top edge of each ruffle strip using the method of your choice. (Ruffle about 1/8" away from the edge.) Need help with ruffling? Check out my tutorial {everydaycelebrate.blogspot.com/2010/11/tutorial-gathering-and-ruffling-quick.html}. Repeat for all the ruffle strips.
So pretty!
17. On the apron front piece and three under ruffle pieces, mark 1/4" from both bottom short ends. (See my purple marks below.)
18. With the right side down, pin one ruffle strip to the bottom edge of the apron front. Use the mark you made above to place the ruffle strip 1/4" away from the edges of the apron front. I like to place a pin at the bottom of ruffle strip to keep the strip nice and straight. (See green pin in the second picture.) Sew ruffle in place 1/8" away from the edge.

Original Recipe can be found at www.modabakeshop.com
19. With the ruffle strip still right side down, place one under ruffle piece on top of the ruffle strip. (Make sure the edge with the purple mark is at the top. See outlined black circle.)
20. Flip over the apron to the back and pin under ruffle piece in place. (I pin from the back because I will be sewing on the back.)
21. Sew just beyond the stitching line from sewing on the ruffle, about 3/8" from the edge. Backstitch at beginning and end. Press seam up towards the top of the apron. Topstitch the seam in place.
22. Turn the ruffle to the top of the apron. You will now see the under ruffle piece. Place another ruffle strip right side down and repeat steps 18 - 21 for remaining ruffle strips/under ruffle pieces except for the very last ruffle strip.
23. When you add the last ruffle strip, you will only repeat step 18.
Original Recipe can be found at www.modabakeshop.com
24. Mark 1/4" from the bottom of the curve on the apron front. Place a tie below the mark and pin as shown. Baste tie in place with 1/8" seam allowance. Repeat on the other side. (Keep tie pinned down in the middle of the apron.)
25. Mark 1/4" in along the top edge of the apron. Line up the edge of a strap with the mark and pin. Baste strap in place with 1/8" seam allowance. Repeat on the other side.
26. Since this apron is lined, pin the straps to the middle of the apron to keep in place.
27. Using basting pins, pin the ruffles away from the edges and to the center of the apron.
28. Place the lining and the apron RST and pin from the back. (Again, I like to sew from the back so I can watch my stitching lines.) Sew the apron together using 1/4" seam allowance. Leave an opening along the bottom for turning. After sewing, press, clip corners, and turn. Remove all pins.
Original Recipe can be found at www.modabakeshop.com
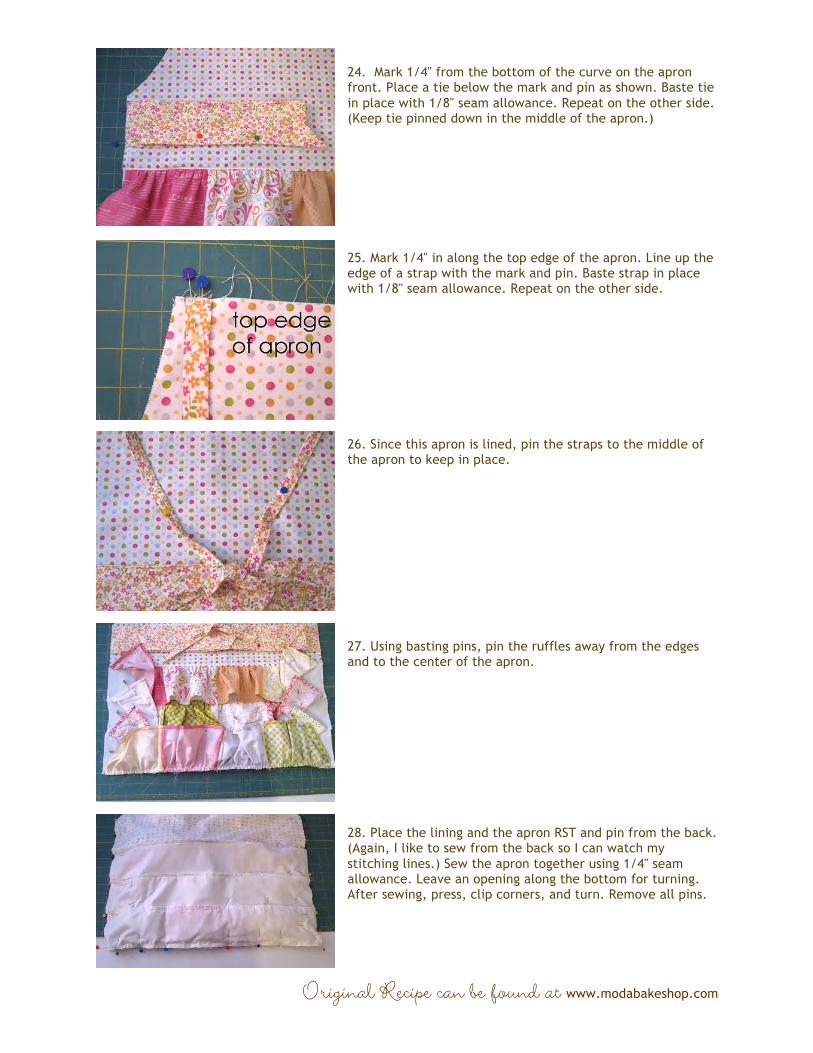
29. Topstitch beginning along the bottom edge, making sure to close the opening. Continue topstitching around the rest of the apron. When you get to a ruffle, backstitch, stop sewing then remove apron from machine. Clip threads, return apron to the machine, and begin sewing after the ruffle.
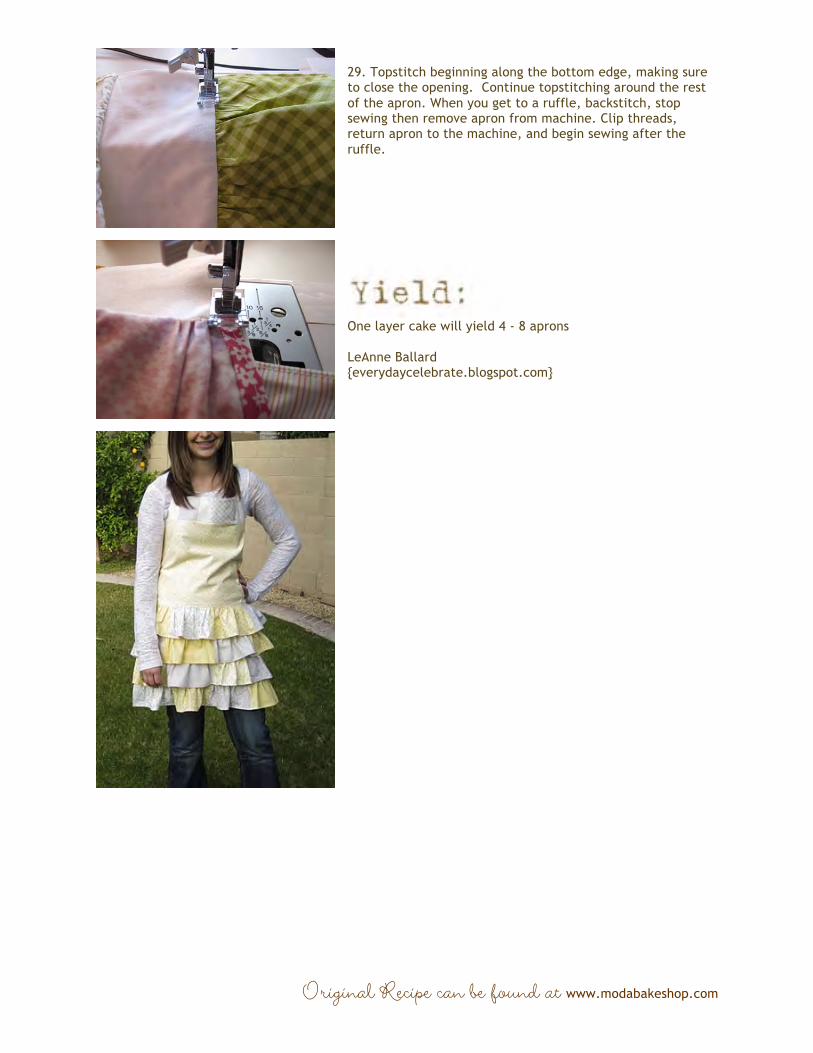
One layer cake will yield 4 - 8 aprons LeAnne Ballard {everydaycelebrate.blogspot.com}
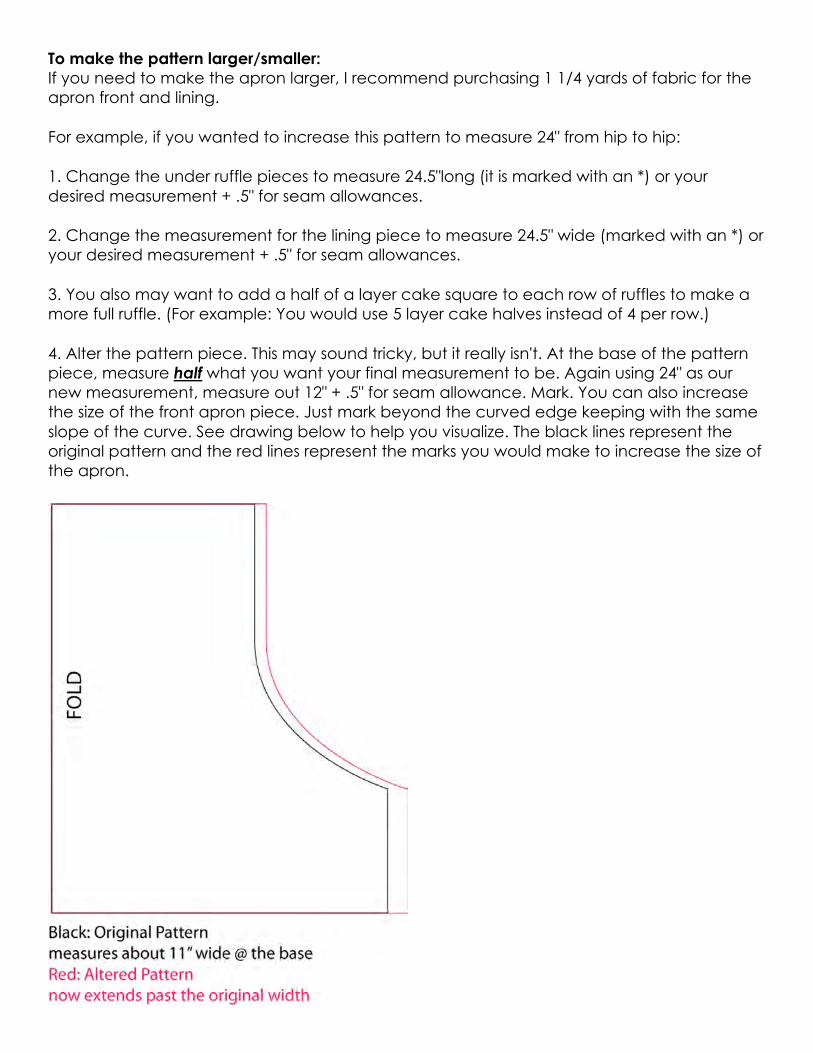
To make the pattern larger/smaller: If you need to make the apron larger, I recommend purchasing 1 1/4 yards of fabric for the apron front and lining. For example, if you wanted to increase this pattern to measure 24" from hip to hip: 1. Change the under ruffle pieces to measure 24.5"long (it is marked with an *) or your desired measurement + .5" for seam allowances. 2. Change the measurement for the lining piece to measure 24.5" wide (marked with an *) or your desired measurement + .5" for seam allowances. 3. You also may want to add a half of a layer cake square to each row of ruffles to make a more full ruffle. (For example: You would use 5 layer cake halves instead of 4 per row.) 4. Alter the pattern piece. This may sound tricky, but it really isn't. At the base of the pattern piece, measure half what you want your final measurement to be. Again using 24" as our new measurement, measure out 12" + .5" for seam allowance. Mark. You can also increase the size of the front apron piece. Just mark beyond the curved edge keeping with the same slope of the curve. See drawing below to help you visualize. The black lines represent the original pattern and the red lines represent the marks you would make to increase the size of the apron.