Embed Size (px)
Citation preview
Build your own oval Beetle
out of paper!
Simply print out the following pages onto a stiff paper, cut out the parts with scissors, thenglue together! Below are some simple assembly instructions, use some white wood glue forfast results and a strong final model.
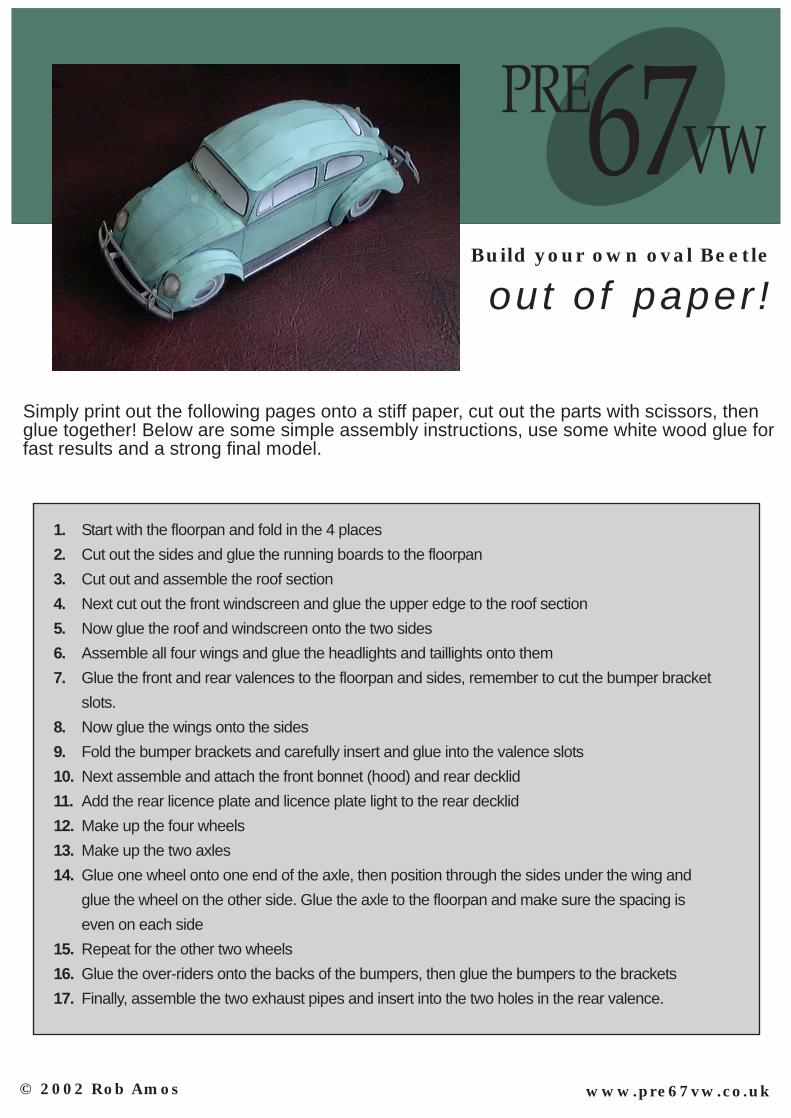
1. Start with the floorpan and fold in the 4 places2. Cut out the sides and glue the running boards to the floorpan3. Cut out and assemble the roof section4. Next cut out the front windscreen and glue the upper edge to the roof section5. Now glue the roof and windscreen onto the two sides6. Assemble all four wings and glue the headlights and taillights onto them7. Glue the front and rear valences to the floorpan and sides, remember to cut the bumper bracket
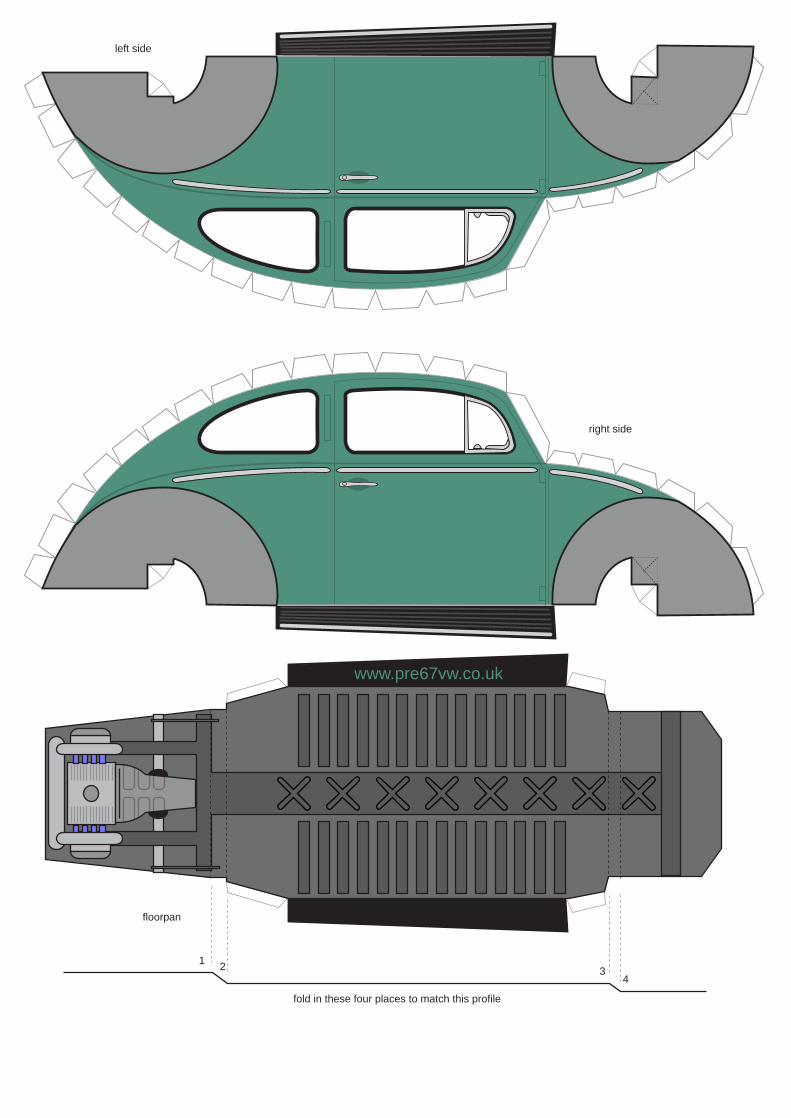
slots.8. Now glue the wings onto the sides9. Fold the bumper brackets and carefully insert and glue into the valence slots10. Next assemble and attach the front bonnet (hood) and rear decklid11. Add the rear licence plate and licence plate light to the rear decklid12. Make up the four wheels13. Make up the two axles14. Glue one wheel onto one end of the axle, then position through the sides under the wing and
glue the wheel on the other side. Glue the axle to the floorpan and make sure the spacing is even on each side
15. Repeat for the other two wheels16. Glue the over-riders onto the backs of the bumpers, then glue the bumpers to the brackets17. Finally, assemble the two exhaust pipes and insert into the two holes in the rear valence.
© 2002 Rob Amos www.pre67vw.co.uk
www.pre67vw.co.uk
left side
right side
floorpan
fold in these four places to match this profile
1 2 34
www.pre67vw.co.uk
57OVAL
front wing
front wing
front headlights
licence plate light
rear licence plate
decklid
rear valence
front valence
rear wing
rear wingrear tail lights
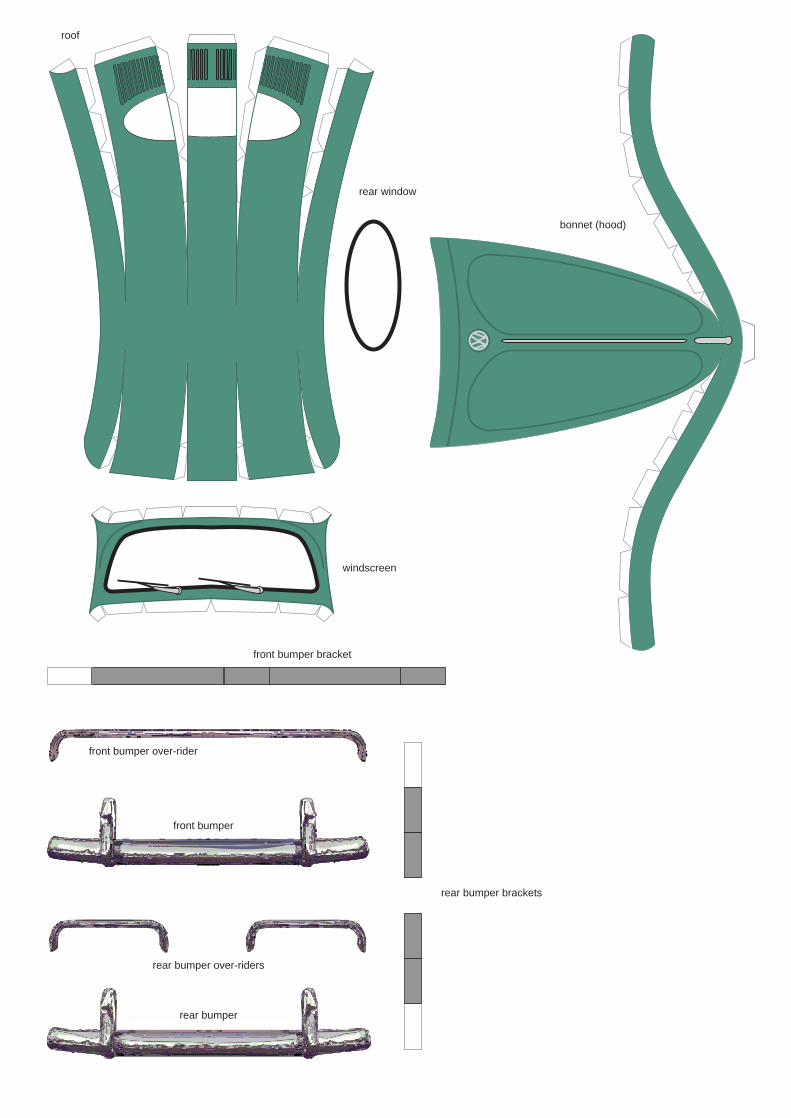
roof
rear window
windscreen
bonnet (hood)
front bumper bracket
front bumper over-rider
rear bumper over-riders
front bumper
rear bumper
rear bumper brackets
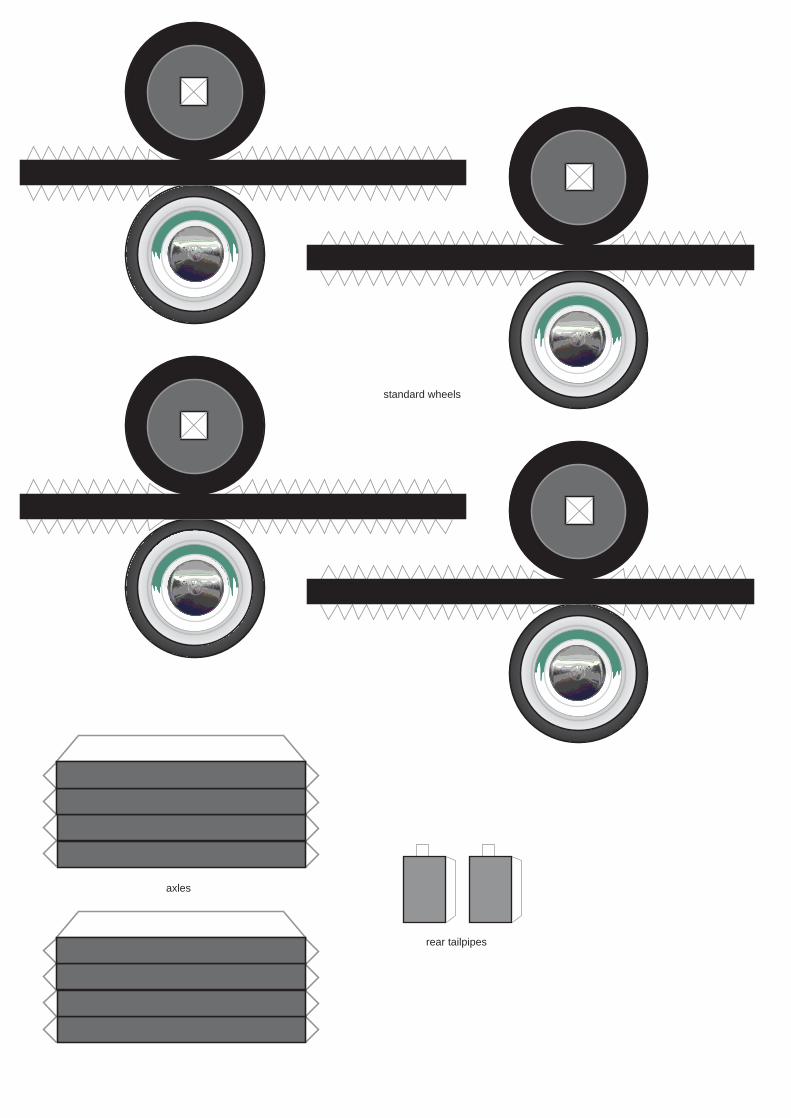
standard wheels
axles
rear tailpipes