Embed Size (px)
Citation preview
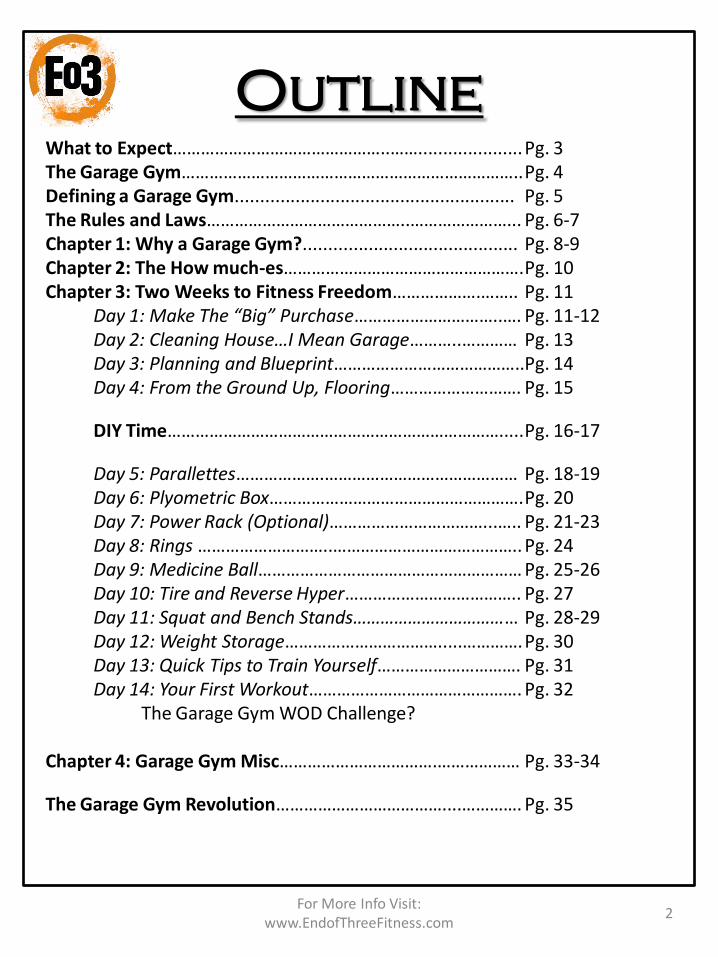
Outline
What to Expect………………………………………..……..................... Pg. 3 The Garage Gym……………………………………………………………….. Pg. 4 Defining a Garage Gym........................................................ Pg. 5 The Rules and Laws……………………………………..…………………... Pg. 6-7 Chapter 1: Why a Garage Gym?........................................... Pg. 8-9 Chapter 2: The How much-es……………………………………………. Pg. 10 Chapter 3: Two Weeks to Fitness Freedom……………….…….. Pg. 11
Day 1: Make The “Big” Purchase…………………………..…. Pg. 11-12 Day 2: Cleaning House…I Mean Garage………..………… Pg. 13 Day 3: Planning and Blueprint…………………………………..Pg. 14 Day 4: From the Ground Up, Flooring………………………. Pg. 15
DIY Time………………………………………………………………..... Pg. 16-17
Day 5: Parallettes……………….…………………………………… Pg. 18-19 Day 6: Plyometric Box………………………………………………. Pg. 20 Day 7: Power Rack (Optional)……………………………...….. Pg. 21-23 Day 8: Rings ………………………..………………………………….. Pg. 24 Day 9: Medicine Ball………………………………………………… Pg. 25-26 Day 10: Tire and Reverse Hyper……………………………….. Pg. 27 Day 11: Squat and Bench Stands……………………………… Pg. 28-29 Day 12: Weight Storage…………………………….....…………. Pg. 30 Day 13: Quick Tips to Train Yourself…………………………. Pg. 31 Day 14: Your First Workout………………………………………. Pg. 32
The Garage Gym WOD Challenge?
Chapter 4: Garage Gym Misc…………………………….……………… Pg. 33-34
The Garage Gym Revolution………………………………....…………. Pg. 35
2
For More Info Visit: www.EndofThreeFitness.com
My Story in a nutshell: I started working out in my garage in 2010 with very minimal equipment. The first six months I only had a plyometric box, rings, a barbell, and some weights. I managed to implement some very intense and effective training with those few items. This book will give you more than that. It will show you how to have a fully operational garage gym in two weeks. It will take some work and dedication, but it is only two weeks. Dedicate yourself and find your way to fitness freedom. It’s more than a short eBook. It’s a community…
“14 Days to Fitness Freedom: The Garage Gym” • You can expect to have a minimalist garage gym that
will help you achieve maximal results. • Access to a free community that is growing everyday
at End of Three Fitness. – Community Forums – Challenges – Workout Programs – Weekly Articles – And Much more!!
For More Info Visit: www.EndofThreeFitness.com
3
What to Expect
The Garage Gym Training and getting in shape can be a chore, at times. However a little observation, or maybe some self-analysis, and you will find that the chore is not training itself. Of course, most people don’t “love” to exercise, but is it really that bad? NO! The worst part about fitness is all that comes with it: a long commute, overcrowded rooms, judgmental eyes, what to wear, cleanliness, and a lot more. You have your job, family, and life’s chores and tasks to worry about. Who wants to start or end their day with what feels like another chore? You don’t mind lifting weight or running. But that involves changing in to appropriate clothes, driving, waiting, and more driving, and….I think you get the picture. Not to mention everyday that you “just don’t feel like it” costs you money! Gyms today are designed for the masses. TVs and isolation machines that are getting you nowhere closer to your goals. It may make you feel better to have “gone to the gym today” but wouldn’t you rather train effectively and efficiently? Of course you would! Or maybe mediocrity is cool with you; if that’s the case maybe a Garage Gym isn’t for you. Garage Gym…Less = More The first thought that comes to mind for many just starting to think about a Garage Gym is, “How on earth can I make my garage look like a gym?”. Well this is where the less = more principle comes in to play. We are not making an LA Fitness in your garage. At End of Three Fitness we are making an effective and efficient world class training facility. Big difference between that and your commercialized gym. A garage gym is built to suit your performance, it is not built to give you just enough to pay monthly and shut up. This isn’t theory or a cool idea. Many of the world’s top athletes and fittest people in the world already train with the less = more principle. Less equipment, less isolation exercises, less crap but more efficient training. The Garage Gym Revolution It is time to tell all the supplement companies that sell products that don’t work, the gyms with memberships that don’t matter, and the fitness magazines that push useless products and programs that WE’RE DONE!!!!!! We are not taking this crap anymore. We are not going to sit and be spoon fed marketing and advertisements that tell us what fitness should be. It is time to start making some decisions for yourself, and decisions on your health should be seen as a pretty big decision. Thomas Jefferson put it this way, “Leave all the afternoon for exercise and recreation, which are as necessary as reading. I will rather say more necessary because health is worth more than learning.” Garage Gym Fears It is too expensive. I don’t know how to train myself. I’m not very handy. I don’ have enough space. I don’t have a garage…
Welcome to a community of people of people doing it all in their Garages. In fact some people have used spare bedrooms and small spaces to create their “garage gym”. Not handy? There are very easy to follow tutorials. Too Expensive? It’s really not; I’ll show you how to do it for way cheaper than any gym membership. Don’t know how to train yourself? I’ll teach you. It is all here and the information is growing every day. It is time to stop hiding behind any excuse you may have. The revolution has begun! Let’s start your Garage Gym!!!
4 For More Info Visit:
www.EndofThreeFitness.com
The Garage Gym
Defining Garage Gym I feel I have to attack this. Someone has to. A firm solid definition of a Garage Gym, doesn’t exist. An attempt at meshing the definition of each separate word into one definition will give you something along the lines of “a building or shed for housing a motor vehicle or vehicles in which place you can host a membership organization that provides a range of facilities designed to improve and maintain physical fitness and health.” Not quite what we are looking for, and not quite what it stands for. A garage gym is a movement more than it is a place. A mindset more than it is tangible. Sometimes it is easiest to start by stating the facts, what it is, and what it is not. A garage gym can house the elite or a beginner. A garage gym does not have to be in a garage. A garage gym does not have to cost money, but it does not have to be free. A garage gym is not a place for fitness robots. A garage gym does not need that much space, but it can be as big as is necessary. A garage gym can be for 1 person or 100 people. A garage gym can be sheltered by a roof top or a tree limb. A garage gym can be stained with oil, sweat, or blood. A garage gym is for those who are resolute. In a garage gym amenities do not equal necessities. A garage gym is only limited by your own creativity and imagination. A garage gym proves the minimalist can achieve maximum results. You may be a “Garage-gymer”, but not be in a Garage Gym A Garage-Gymer is not necessarily someone working out in their garage. It is someone who understands the basic principles above. They understand that fitness can be done anywhere and that there are no real secrets. If you can agree with this Fight Club-esque statement you are a garage gymer at heart even if you are not in a garage gym: Fitness is not your gym location. Fitness is not your body fat percentage. Fitness is not your iPod and latest playlist. It is not the type of shoe you wear or color shirt you have on. Fitness IS NOT EASY! Fitness can break you or define you, either way, it will help you get through tomorrow.
5 For More Info Visit:
www.EndofThreeFitness.com
Defining Garage Gym
Garage Gym Laws
1. A Garage Gymer may not allow a human being to become injured or, through a sedentary lifestyle, allow a human being to come to harm.
2. A Garage Gymer must do everything in his/her power to become a complete badass, except where such efforts would conflict with the First Law.
3. A Garage Gymer must protect the existence of the garage gym at all costs as long as such protection does not conflict with the First or Second Laws.
1.) Clean It I must admit that I come to fault on this one. You are now the “gym owner”. Pick up your weights, sweep the floors, and don’t let it look trashy. 2.) Equipment Checks I recommend equipment checks every 6 weeks, especially if you have a lot of DIY equipment. You need to make sure your equipment is safe and ready for use. Every six weeks I like to check that all bolts are tightened and that there are no loose screws. Also check that you equipment is not rusting and do what you have to, to make sure it is protected from the elements. 3.) Avoid Precarious Situations I developed this rule after I was laying under 285lbs held by one screw on top of my plyometric box, ready to do floor press. I realized that if I failed to unrack the weight properly or if that screw gave out I would most likely end up with a crushed skull. Be safe and don’t put yourself in any questionable situations with a lot of weight and crappy rigs. 4.) Invite Friends, but don’t charge them Invite your friends to workout in your garage gym, but never try to get their money. Unless you don’t want friends anymore. I know a few stories of people, aspiring to own their own gym, have 5-6 friends working out in their garage so they want to charge a little bit for extra equipment. Dumb. Having a garage gym and starting a CrossFit Box are totally different. Decide what you want to do.
The 8 Garage Gym Rules
6 For More Info Visit:
www.EndofThreeFitness.com
The 8 Garage Gym Rules
5.) Hold Yourself Accountable You are going to need something to help you train. You need to track your movements by recording yourself to identify your weaknesses. You will also need to track your progress. I am in the process of developing the ultimate tool to help you do just that. I will let you know when it is ready for release. Make a workout schedule and stick to it. Try to plan at least 6 weeks out. 6.) No 1 Rep Maxes Alone!! Don’t do it! Working out with a barbell alone is kind of like flying an airplane; 99.9% of the time you are going to be just fine, but if you encounter that .1%…the result will be catastrophic. Don’t put yourself in a situation where you are more likely to find the .1%. 7.) Learn to be a minimalist While you should not break the “Avoid Precarious Situations” rule you need to learn that you do not need a lot of equipment to be successful in a garage gym. For almost 6 months all I had was a barbell and some weight and I still managed to be pretty fit. I then decided to expand a little, but only because I wanted to. You don’t need fancy equipment or the latest shoe to be good at what you do. Don’t let the marketing of a brand tell you what to buy. 8.) Become an Expert This is a personal rule but it may help you too. Become an expert, learn, read, grow…You have to know what to do to make yourself better. If you even want to think about inviting someone in your garage gym to workout you should know what you are talking about. Always know the why, about everything that interests you.
7 For More Info Visit:
www.EndofThreeFitness.com
Chapter 1
Why a Garage Gym?
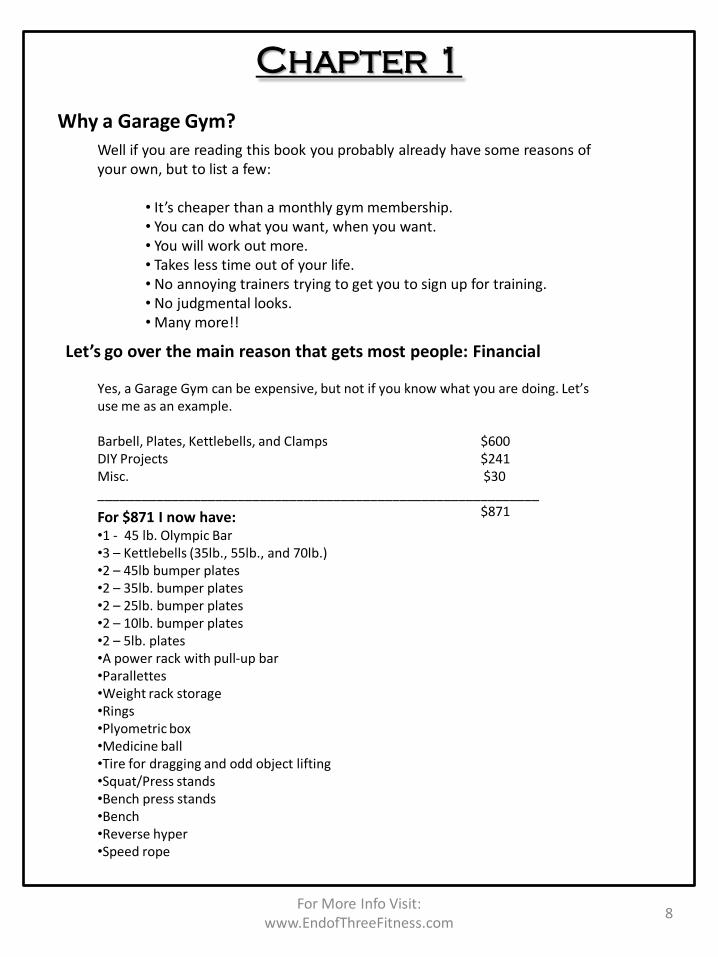
Well if you are reading this book you probably already have some reasons of your own, but to list a few:
• It’s cheaper than a monthly gym membership. • You can do what you want, when you want. • You will work out more. • Takes less time out of your life. • No annoying trainers trying to get you to sign up for training. • No judgmental looks. • Many more!!
Let’s go over the main reason that gets most people: Financial
Yes, a Garage Gym can be expensive, but not if you know what you are doing. Let’s use me as an example. Barbell, Plates, Kettlebells, and Clamps $600 DIY Projects $241 Misc. $30 ____________________________________________________________ $871 For $871 I now have: •1 - 45 lb. Olympic Bar •3 – Kettlebells (35lb., 55lb., and 70lb.) •2 – 45lb bumper plates •2 – 35lb. bumper plates •2 – 25lb. bumper plates •2 – 10lb. bumper plates •2 – 5lb. plates •A power rack with pull-up bar •Parallettes •Weight rack storage •Rings •Plyometric box •Medicine ball •Tire for dragging and odd object lifting •Squat/Press stands •Bench press stands •Bench •Reverse hyper •Speed rope
8 For More Info Visit:
www.EndofThreeFitness.com

Math Time
Let’s do some math. Say my craftsmanship is mediocre and all of this stuff will only last me 5 years. That would be an average of $4/month for the equipment. This is excluding weights. If you really take care of your weights and bar, there is no real expiration. That is what we call, in the biz, a sunk cost. I don’t know about you but I haven’t found a gym membership for $4/month. Also, I have everything I need to train at a high level. There will always be things I need want, but the list above will get you through just about anything.
The funny thing is, I didn’t even go the cheapest route!!!
When I started a Garage Gym a few years ago I was naive. I shopped around a little bit but not as much as I should have. I could have gotten my costs way down on the weights. We will talk more about this in the following chapters. First, we have a more important topic to cover…how much.
9 For More Info Visit:
www.EndofThreeFitness.com
Chapter 2: The How “Much-es”
How Much?
This is on everyone’s mind so let’s just get it out of the way now. How much will it cost? How much space do I need? How much time will it take to setup/build? How much equipment do I actually need?
Money, space, time, and equipment
How much will it cost? •In my example above I spent $871. It is possible for you to do it cheaper than that if you shop around on the weights. The range is going to be (with DIY Projects) $500-$1500. •For some of you, money is no object. In this case reference “The Big Boy” on page 12.
How much space do I need?
•Minimum space is going to be a 10x10 area, or 100 square feet. This is as small as you want to get and still be comfortable.
•Generally garages are much larger than this so most of you are good to go.
How much time will it take to setup/build?
•This book is about doing it in 14 days. If you can devote a few hours a day for 14 days to making your garage gym then it will take on average 2-3 hours a day for 14 days.
•Not all of us have that kind of time. If you don’t have the time, do what you can when you can. Maybe Saturdays work for you. Do as much as you can on Saturdays.
•The idea is not to have your Garage Gym be an “I’ll get around to it” project. Dedicate yourself to it and have an awesome gym for yourself in 2 weeks.
How much equipment do I actually need?
•You can always have more or less equipment than what I recommend. What I have outlined in my “14 Days to Fitness Freedom: The Garage Gym” is what you need to train efficiently and effectively. It has worked for me extremely well and is a good setup for beginners to advanced.
•This book is geared more towards minimalist training. No bicep machines.
Short chapter, but I hope most of your “how-much” questions have been answered.
10 For More Info Visit:
www.EndofThreeFitness.com
Chapter 3: 14 Days to a Garage Gym
Day 1: Make the big purchase
This has to be the first thing you do when you are starting a serious Garage Gym. It means you are fully committed and the large purchase will help keep you accountable. Another reason the large purchase is what we do first is because it can take on average two weeks for the order to come in. This will give us time to set up shop in your garage and get ready for some serious training once the weight is delivered. First, we have to decide what you need. My list above works really well for most needs. Do you want bumper plates? Do you want only iron plates? Do you care if you have new or used? Like I said earlier, I didn’t go the cheapest route when I first started my Garage Gym. I bought all new and I bought the colored plates. If you buy plain black or go the used route you can get it all for way cheaper. You don’t need ALL bumper plates for a garage. What is a bumper plate good for?? Overhead lifts and quick CrossFit workouts in which speed is of the essence. This way you can drop the weight. You really only need two 45lb. Bumper plates as a base and you can add smaller iron weights that don’t touch the ground for everything else. When squatting or dead lifting…USE IRON!! I recommend getting more than just two 45lb plates, depending on your strength level. If you are really strong you will need a combination of bumpers and iron. If you are not as strong some of the plain bumper package deals will be perfect for you.
Where do I make the large purchase? 4 options.
Craigslist Craigslist is full of people who thought they may enjoy a garage gym at one point in their life, but now it is just junk that clutters their garage(Don’t be that guy!). The deals you can find on craigslist are insane, people selling $1,000’s worth of weights for pennies on the dollar. It is crazy and good for you and me. If you live in a big city or near a big city you will have a ton of good deals. The only thing I have found is that bumper plates are not easy to come by these days. I think the type of people who buy bumper plates are relatively serious about working out and are less likely to get rid of them. If you find anyone selling bumper plates below industry average…DON’T HESITATE!!
11 For More Info Visit:
www.EndofThreeFitness.com
Day 1 Continued
I have found that some people sell their weight sets cheap and almost treat you like a trash haul away service. I made the mistake of not taking a great deal because I didn’t want a lot of this guy’s “other crap”, but he wouldn’t sell any of it individually. If it is a good deal, be the trash service, and throw other stuff away and keep what you came for. Tips for Craigslist:
•Don’t get murdered (be safe) •Always negotiate (low ball ‘em) •Be patient
In Store There are two stores that you can go check out, or you can even order from them online, Academy and Dick’s Sporting Goods. I mention these options mainly for the plates. They have good package deals that come with a lot of iron plates and a barbell and it is very affordable. However, I recommend even if you get one of these package deals only use the barbell as your “extra”. I think you should order a good barbell from one of the options above or below. They have very high quality barbells at competitive prices. A barbell is the nucleus for the Garage Gym, you don’t want it to be a piece of crap.
Amazon or Amazon Garage Gym Amazon has a lot of good deals, but they are not always available. I like to shop around for sets of bumper plates. I have found that to buy individually (individual plates) on Amazon is just like buying anywhere else. However, they do have a lot of good deals on sets of bumper plates. Also their bars are pretty affordable. I know you want the amazing eleiko barbell that can hold 10,000 lbs. and is guaranteed to never break. But chances are you just don’t need that yet. Hell, some power lifters don’t even need that. You will be fine with a medium quality bar from Amazon.
The Big Boy: Rogue Fitness Rogue Fitness. Rogue fitness has extremely high quality products made in the USA. To buy all of your equipment here would be a little pricy, but certainly worth it with their guarantees and quality products. If you can afford it, go for it. If you cannot afford it, I would recommend at least getting your barbell from here. They have a wide variety of barbells to choose from. Their “beater bar” is a great product to get started with and is very affordable. Hopefully I have pointed you in a good direction. Now order your weight, package, barbell, or whatever it is today where we can move on and start Day Two.
12 For More Info Visit:
www.EndofThreeFitness.com
Day 2 Time to Clean
When it comes to Garage Gyms there are two options. You can have a garage with a gym in it, or you can have a gym that is in the shell of a garage. Meaning you can either maintain a garage for storage and all your household items, or you can fully dedicate your garage to being a gym and nothing else. The more viable option for most will be option one. Either way we are probably going to have to declutter.
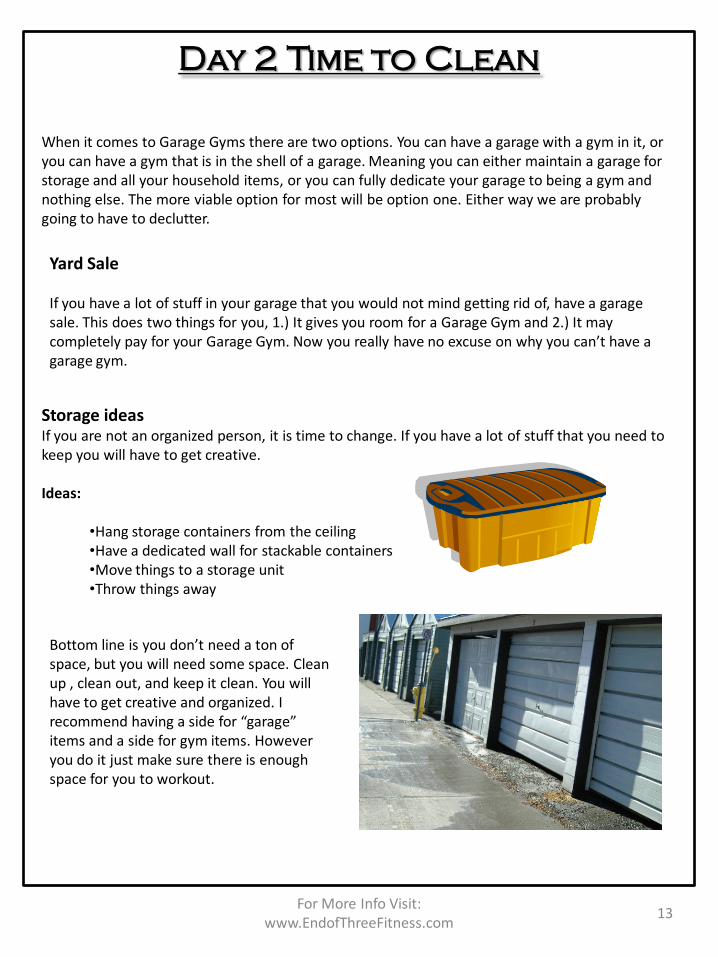
Storage ideas If you are not an organized person, it is time to change. If you have a lot of stuff that you need to keep you will have to get creative. Ideas:
•Hang storage containers from the ceiling •Have a dedicated wall for stackable containers •Move things to a storage unit •Throw things away
Yard Sale If you have a lot of stuff in your garage that you would not mind getting rid of, have a garage sale. This does two things for you, 1.) It gives you room for a Garage Gym and 2.) It may completely pay for your Garage Gym. Now you really have no excuse on why you can’t have a garage gym.
13 For More Info Visit:
www.EndofThreeFitness.com
Bottom line is you don’t need a ton of space, but you will need some space. Clean up , clean out, and keep it clean. You will have to get creative and organized. I recommend having a side for “garage” items and a side for gym items. However you do it just make sure there is enough space for you to workout.
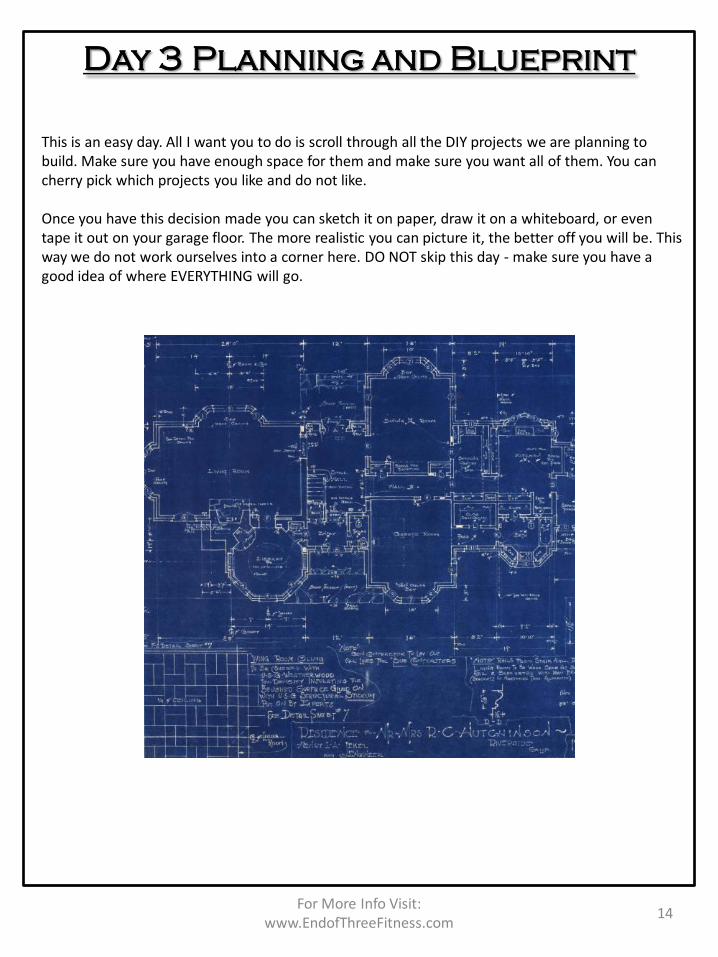
Day 3 Planning and Blueprint
This is an easy day. All I want you to do is scroll through all the DIY projects we are planning to build. Make sure you have enough space for them and make sure you want all of them. You can cherry pick which projects you like and do not like. Once you have this decision made you can sketch it on paper, draw it on a whiteboard, or even tape it out on your garage floor. The more realistic you can picture it, the better off you will be. This way we do not work ourselves into a corner here. DO NOT skip this day - make sure you have a good idea of where EVERYTHING will go.
14 For More Info Visit:
www.EndofThreeFitness.com
Day 4 Flooring
You do not need to completely re-do your garage gym with a specific type of flooring. All you need is enough to where your weights would hit the rubber and not the concrete, or just enough for you to stand on. Buying it one piece at a time is perfectly fine. Flooring will make lifting safer and it will protect your garage floor and your weights. Both of which we do not want damaged.
1.) Academy / Amazon (same quality) If you prefer to buy in store and you have a local Academy around you can get cheap flooring (mats) there. It is pretty cheap and you can expect about the same on the quality, but it is great for the price If you like to order online, Amazon carries just about everything. They will have the same stuff Academy has AND they have horse stall mats which I will introduce in the next option. Even if you go to Academy for your mats I would check out the Amazon reviews. There are some good reviews posted with pictures, complaints, and praises. Academy Options: CAP Barbell Puzzle Mat 6-Pack Amazon Options: Horse Stall Mats or Cap Barbell Mat 2.) Tractor Supply This option really only works if you have a Tractor Supply Co. in your local area, but a lot of people do. You can check out their website Tractor Supply Co. and type in your zip code to find a store near you. You are looking for horse stall mats. They are a little bit more expensive than the Academy/Amazon option, but they are certainly more durable.
Flooring Options
3.) Rogue Fitness This comes down to how much money you are willing to spend, just like everything in a garage gym. Rogue Fitness has the mats/flooring that will last forever. I have not owned any, but I have worked out on it: very durable, practically indestructible, but you will pay for it, and then you will pay for the shipping too. Do a search on their site for flooring and mats. They are different. One, you will have to contact them for pricing and the other price is listed, just expensive.
15 For More Info Visit:
www.EndofThreeFitness.com
Now We DIY
• All the equipment below is part of the two week process to creating a Garage Gym, however they are DIY-optional.
• Each day should not be construed as a mandatory build or DIY day. On each day you could hire a professional to build the project for you, or you could purchase the said product from a trusted equipment manufacturer. Each day is about procuring the equipment, not necessarily building it.
• There is always room for more or less depending on your needs. Building your own equipment is optional and should be based off of your known skills.
For More Info Visit: www.EndofThreeFitness.com
16
DIY DISCLAIMER
As with any do-it-yourself project, unfamiliarity with the tools and process can be dangerous. Projects below should be construed as theoretical advice. End of Three Fitness and the creators, will not be held responsible for any injury due to the misuse or misunderstanding of any DIY project. All DIY projects are purely "at your own risk". If you are at all uncomfortable or inexperienced working on projects yourself (especially projects involving dangerous tools), please reconsider doing the job yourself. It is very possible on any DIY to damage your property, create a hazardous condition, or harm or even kill yourself or others.
17 For More Info Visit:
www.EndofThreeFitness.com
DIY DISCLAIMER
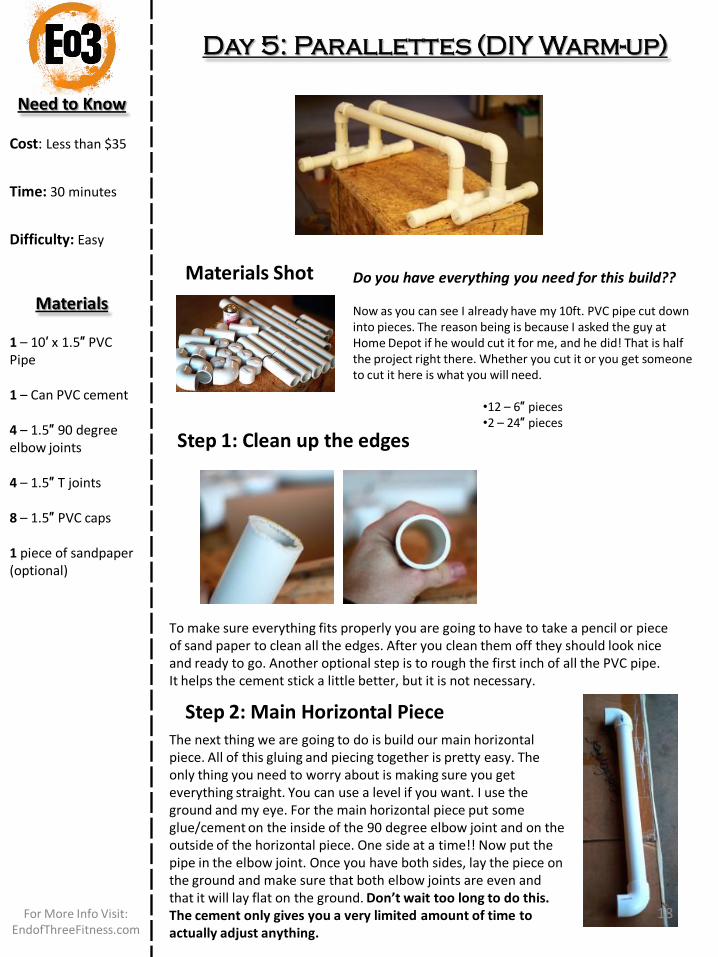
Day 5: Parallettes (DIY Warm-up)
Need to Know Cost: Less than $35
Time: 30 minutes
Difficulty: Easy
Materials 1 – 10′ x 1.5″ PVC Pipe 1 – Can PVC cement 4 – 1.5″ 90 degree elbow joints 4 – 1.5″ T joints 8 – 1.5″ PVC caps 1 piece of sandpaper (optional)
Materials Shot Do you have everything you need for this build?? Now as you can see I already have my 10ft. PVC pipe cut down into pieces. The reason being is because I asked the guy at Home Depot if he would cut it for me, and he did! That is half the project right there. Whether you cut it or you get someone to cut it here is what you will need.
•12 – 6″ pieces •2 – 24″ pieces
Step 1: Clean up the edges
To make sure everything fits properly you are going to have to take a pencil or piece of sand paper to clean all the edges. After you clean them off they should look nice and ready to go. Another optional step is to rough the first inch of all the PVC pipe. It helps the cement stick a little better, but it is not necessary.
Step 2: Main Horizontal Piece The next thing we are going to do is build our main horizontal piece. All of this gluing and piecing together is pretty easy. The only thing you need to worry about is making sure you get everything straight. You can use a level if you want. I use the ground and my eye. For the main horizontal piece put some glue/cement on the inside of the 90 degree elbow joint and on the outside of the horizontal piece. One side at a time!! Now put the pipe in the elbow joint. Once you have both sides, lay the piece on the ground and make sure that both elbow joints are even and that it will lay flat on the ground. Don’t wait too long to do this. The cement only gives you a very limited amount of time to actually adjust anything.
18 For More Info Visit: EndofThreeFitness.com
Day 5: Parallettes Continued….
Need to Know Cost: Less than $35
Time: 30 minutes
Difficulty: Easy
Materials 1 – 10′ x 1.5″ PVC Pipe 1 – Can PVC cement 4 – 1.5″ 90 degree elbow joints 4 – 1.5″ T joints 8 – 1.5″ PVC caps 1 piece of sandpaper (optional)
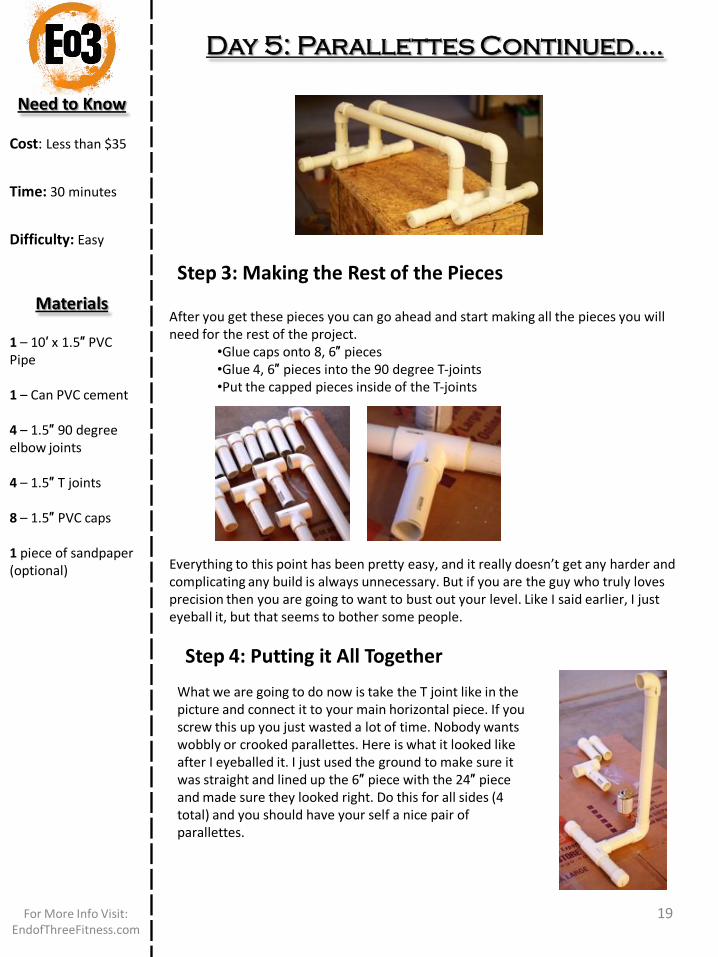
Step 3: Making the Rest of the Pieces
Everything to this point has been pretty easy, and it really doesn’t get any harder and complicating any build is always unnecessary. But if you are the guy who truly loves precision then you are going to want to bust out your level. Like I said earlier, I just eyeball it, but that seems to bother some people.
Step 4: Putting it All Together
What we are going to do now is take the T joint like in the picture and connect it to your main horizontal piece. If you screw this up you just wasted a lot of time. Nobody wants wobbly or crooked parallettes. Here is what it looked like after I eyeballed it. I just used the ground to make sure it was straight and lined up the 6″ piece with the 24″ piece and made sure they looked right. Do this for all sides (4 total) and you should have your self a nice pair of parallettes.
After you get these pieces you can go ahead and start making all the pieces you will need for the rest of the project.
•Glue caps onto 8, 6″ pieces •Glue 4, 6″ pieces into the 90 degree T-joints •Put the capped pieces inside of the T-joints
19 For More Info Visit: EndofThreeFitness.com
Day 6: Plyometric Box
Need to Know Cost: Around $20
Time: 30 minutes
Difficulty: Medium
Materials 1 Piece of Plywood (I got the cheap plywood for flooring because it is tough. Get any plywood you want, so long as it is 3/4″ x 4ft x 8ft)
1 box of screws 1 Bottle of Gorilla Wood Glue
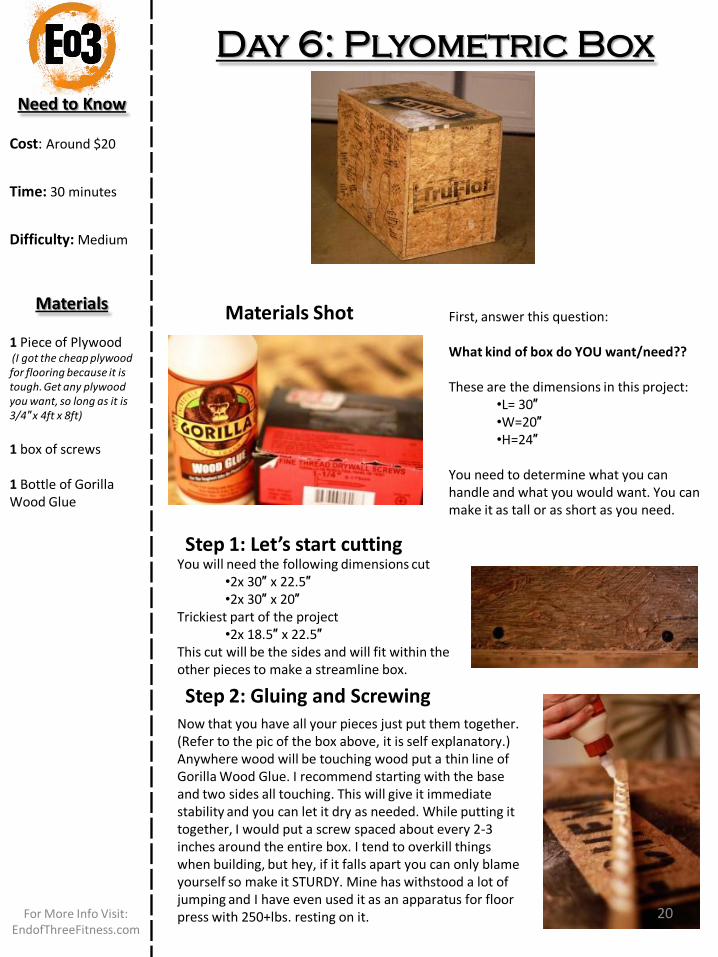
Materials Shot First, answer this question: What kind of box do YOU want/need?? These are the dimensions in this project:
•L= 30″ •W=20″ •H=24″
You need to determine what you can handle and what you would want. You can make it as tall or as short as you need.
Step 1: Let’s start cutting You will need the following dimensions cut
•2x 30″ x 22.5″ •2x 30″ x 20″
Trickiest part of the project •2x 18.5″ x 22.5″
This cut will be the sides and will fit within the other pieces to make a streamline box. Step 2: Gluing and Screwing
Now that you have all your pieces just put them together. (Refer to the pic of the box above, it is self explanatory.) Anywhere wood will be touching wood put a thin line of Gorilla Wood Glue. I recommend starting with the base and two sides all touching. This will give it immediate stability and you can let it dry as needed. While putting it together, I would put a screw spaced about every 2-3 inches around the entire box. I tend to overkill things when building, but hey, if it falls apart you can only blame yourself so make it STURDY. Mine has withstood a lot of jumping and I have even used it as an apparatus for floor press with 250+lbs. resting on it. 20 For More Info Visit:
EndofThreeFitness.com
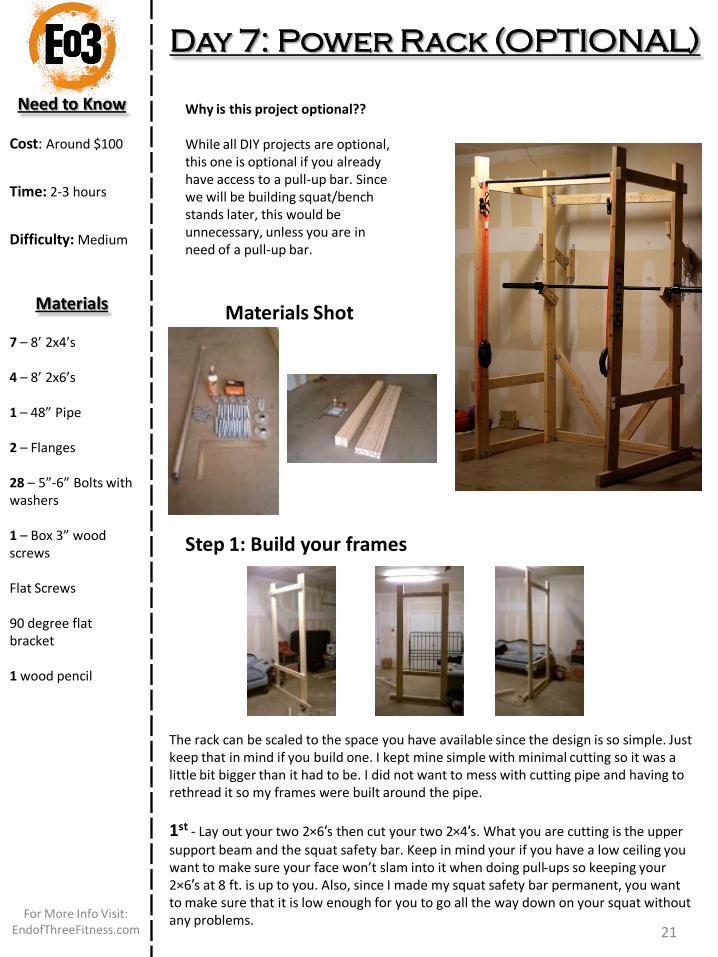
Day 7: Power Rack (OPTIONAL)
Need to Know Cost: Around $100
Time: 2-3 hours
Difficulty: Medium
Materials 7 – 8’ 2x4’s 4 – 8’ 2x6’s 1 – 48” Pipe 2 – Flanges 28 – 5”-6” Bolts with washers 1 – Box 3” wood screws Flat Screws 90 degree flat bracket 1 wood pencil
Materials Shot
Why is this project optional?? While all DIY projects are optional, this one is optional if you already have access to a pull-up bar. Since we will be building squat/bench stands later, this would be unnecessary, unless you are in need of a pull-up bar.
Step 1: Build your frames
The rack can be scaled to the space you have available since the design is so simple. Just keep that in mind if you build one. I kept mine simple with minimal cutting so it was a little bit bigger than it had to be. I did not want to mess with cutting pipe and having to rethread it so my frames were built around the pipe.
1st - Lay out your two 2×6′s then cut your two 2×4′s. What you are cutting is the upper
support beam and the squat safety bar. Keep in mind your if you have a low ceiling you want to make sure your face won’t slam into it when doing pull-ups so keeping your 2×6′s at 8 ft. is up to you. Also, since I made my squat safety bar permanent, you want to make sure that it is low enough for you to go all the way down on your squat without any problems.
21 For More Info Visit:
EndofThreeFitness.com

Day 7: Power Rack Continued…
Need to Know Cost: Around $100
Time: 2-3 hours
Difficulty: Medium
Materials 7 – 8’ 2x4’s 4 – 8’ 2x6’s 1 – 48” Pipe 2 – Flanges 28 – 5”-6” Bolts with washers 1 – Box 3” wood screws Flat Screws 90 degree flat bracket 1 wood pencil
Step 1: Continued -I cut my top support beam and squat safety bar at 43″. -My top support beam is secured by two bolts drilled through on each end at 45 degree angels. -My squat beam is only secured by one bolt at each end.
2nd - Cut your bottom support beam. Mine extends well beyond each side of the rack.
They were cut at 56″. The extra length adds support during normal and kipping pull-ups -These too are secured by two bolts on each ends at 45 degree angles from one another. At this point your frames should be built…and you’re almost done.
3rd - Your basic frame should be built. You may want to stand them up and see EXACTLY
where you want to place your flanges for the pull up bar. I determined I wanted them pretty close to the top with just enough space for my chest to be above the bar and still have about 5 inches before my head would hit the ceiling. -After you determine this you can add your flanges. My suggestion is secure a flange to one side then screw in the pipe. Then screw the flange on the other side of the pipe THEN secure it to your second frame. If you do it in any other order you are adding unnecessary work.
Step 2: Put the frames together
Put the structure together on the ground starting with the pipe as stated above. After you have done this you can add the back support beam as seen in the picture. It should be cut to whatever length measures between the two 56″ bottom support beams. Has your spectacular piece of equipment come to life!?!?! I know what you want to do….DO NOT do pull-ups on this structure yet. It is not ready. At this point you should have your basic structure erected and all the basic framing done. All that is done from here is a few extra support and brace beams for added structure support.
22 For More Info Visit:
EndofThreeFitness.com
Day 7: Power Rack Continued…
Need to Know Cost: Around $100
Time: 2-3 hours
Difficulty: Medium
Materials 7 – 8’ 2x4’s 4 – 8’ 2x6’s 1 – 48” Pipe 2 – Flanges 28 – 5”-6” Bolts with washers 1 – Box 3” wood screws Flat Screws 90 degree flat bracket 1 wood pencil
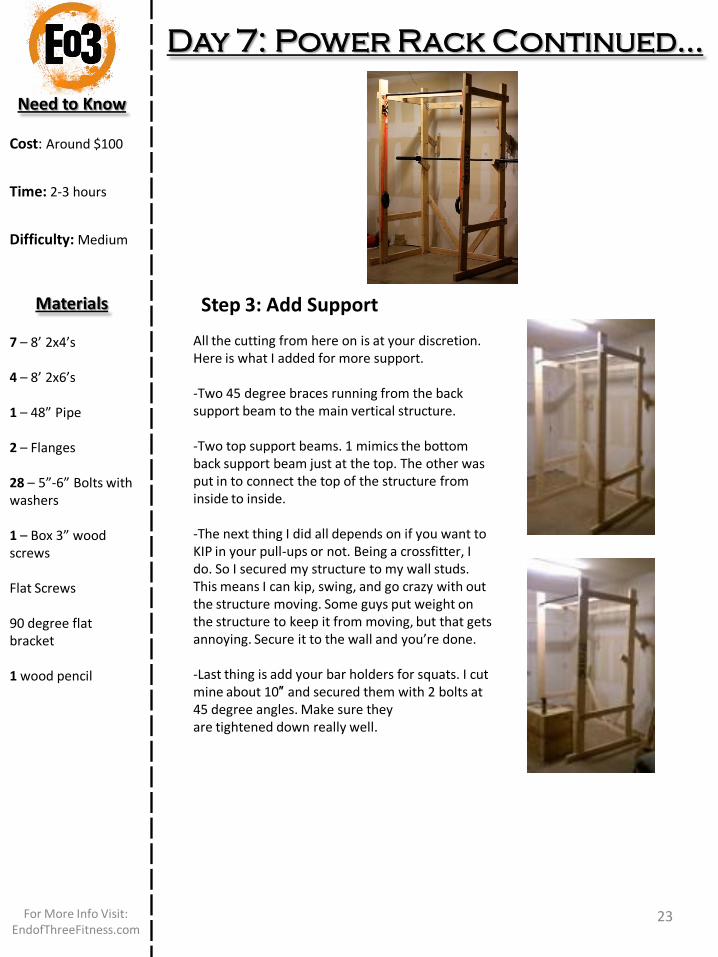
Step 3: Add Support
All the cutting from here on is at your discretion. Here is what I added for more support. -Two 45 degree braces running from the back support beam to the main vertical structure. -Two top support beams. 1 mimics the bottom back support beam just at the top. The other was put in to connect the top of the structure from inside to inside. -The next thing I did all depends on if you want to KIP in your pull-ups or not. Being a crossfitter, I do. So I secured my structure to my wall studs. This means I can kip, swing, and go crazy with out the structure moving. Some guys put weight on the structure to keep it from moving, but that gets annoying. Secure it to the wall and you’re done. -Last thing is add your bar holders for squats. I cut mine about 10″ and secured them with 2 bolts at 45 degree angles. Make sure they are tightened down really well.
23 For More Info Visit: EndofThreeFitness.com
Day 8: Rings
Need to Know Cost: Less than $35
Time: 30-40 min
Difficulty: Easy
Materials 16 – 1/2″ 45 degree elbow joints 1 – 5′ PVC pipe 1/2″ diameter 1 roll of gorilla tape 1 can of PVC cement 3 canisters of heavy duty liquid nails (optional)
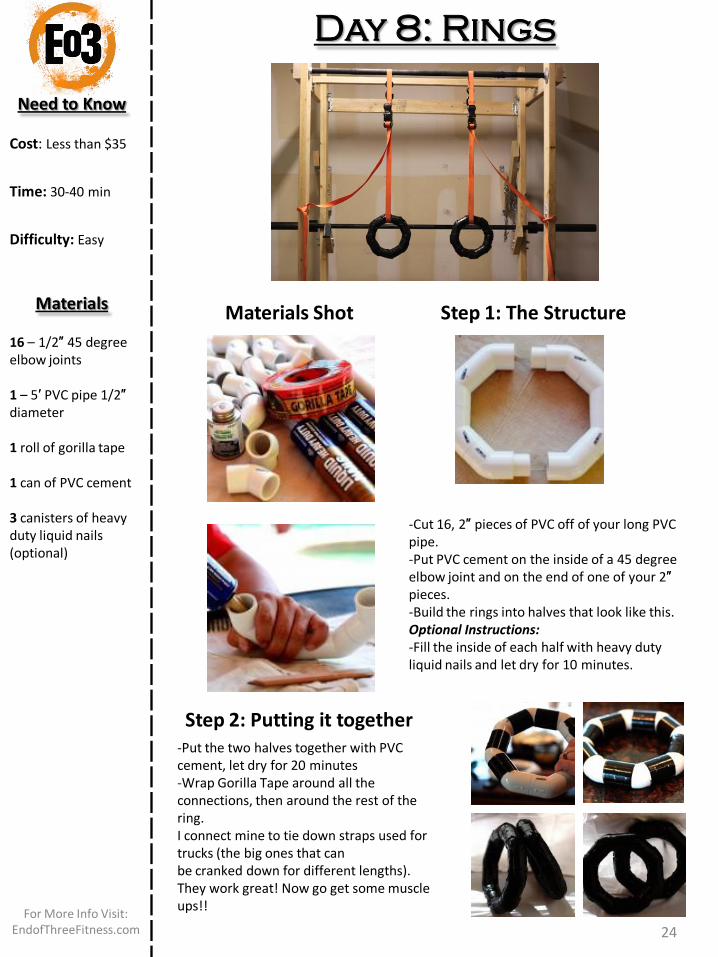
Materials Shot Step 1: The Structure
-Cut 16, 2″ pieces of PVC off of your long PVC pipe. -Put PVC cement on the inside of a 45 degree elbow joint and on the end of one of your 2″ pieces. -Build the rings into halves that look like this. Optional Instructions: -Fill the inside of each half with heavy duty liquid nails and let dry for 10 minutes.
Step 2: Putting it together -Put the two halves together with PVC cement, let dry for 20 minutes -Wrap Gorilla Tape around all the connections, then around the rest of the ring. I connect mine to tie down straps used for trucks (the big ones that can be cranked down for different lengths). They work great! Now go get some muscle ups!!
24 For More Info Visit:
EndofThreeFitness.com
Day 9: Medicine Ball
Need to Know Cost: $12
Time: 20 min.
Difficulty: Easy
Materials •Rubber Indoor/Outdoor Basketball
•Tire Patch Kit
•40lb of salt pellets
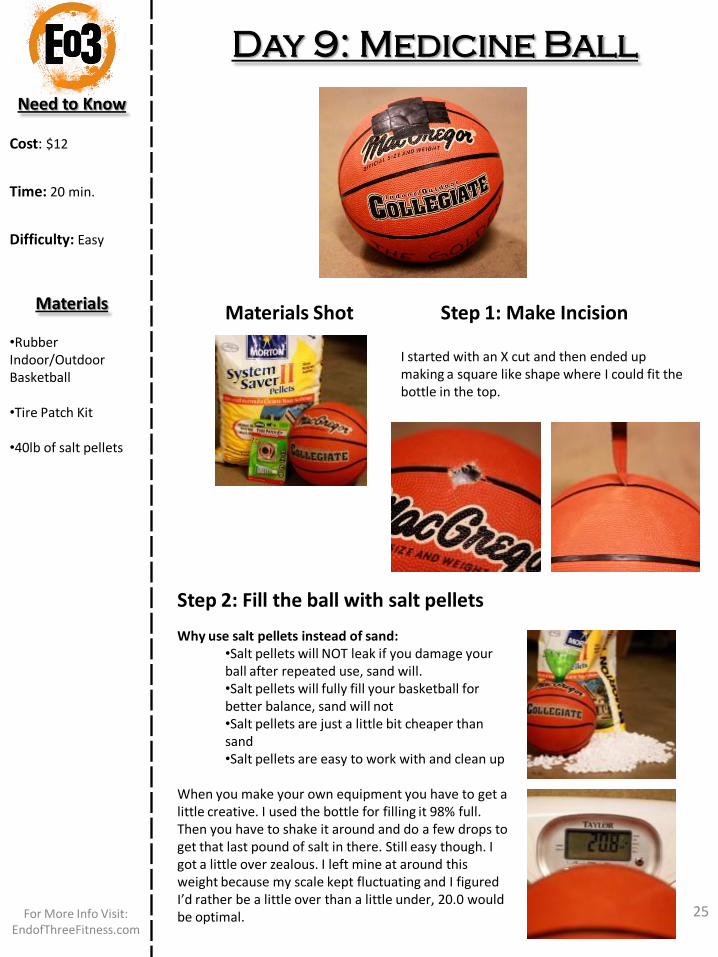
Materials Shot Step 1: Make Incision
I started with an X cut and then ended up making a square like shape where I could fit the bottle in the top.
Step 2: Fill the ball with salt pellets
Why use salt pellets instead of sand: •Salt pellets will NOT leak if you damage your ball after repeated use, sand will. •Salt pellets will fully fill your basketball for better balance, sand will not •Salt pellets are just a little bit cheaper than sand •Salt pellets are easy to work with and clean up
When you make your own equipment you have to get a little creative. I used the bottle for filling it 98% full. Then you have to shake it around and do a few drops to get that last pound of salt in there. Still easy though. I got a little over zealous. I left mine at around this weight because my scale kept fluctuating and I figured I’d rather be a little over than a little under, 20.0 would be optimal.
25 For More Info Visit: EndofThreeFitness.com
Day 9: Medicine Ball Continued
Need to Know Cost: $12
Time: 20 min.
Difficulty: Easy
Materials •Rubber Indoor/Outdoor Basketball
•Tire Patch Kit
•40lbs of salt pellets
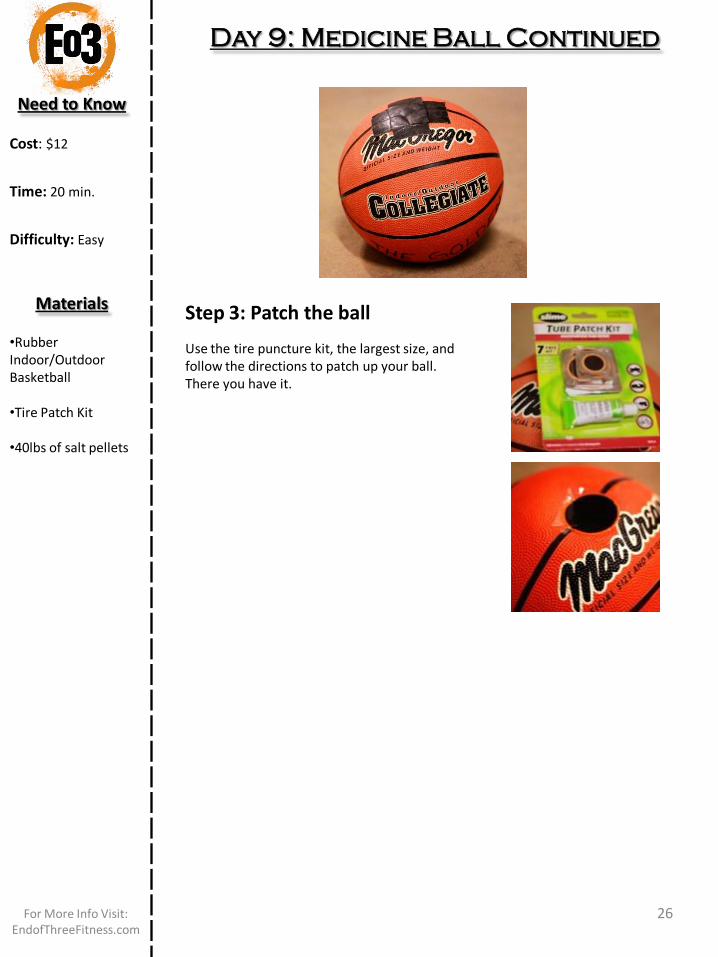
Step 3: Patch the ball
Use the tire puncture kit, the largest size, and follow the directions to patch up your ball. There you have it.
26 For More Info Visit: EndofThreeFitness.com
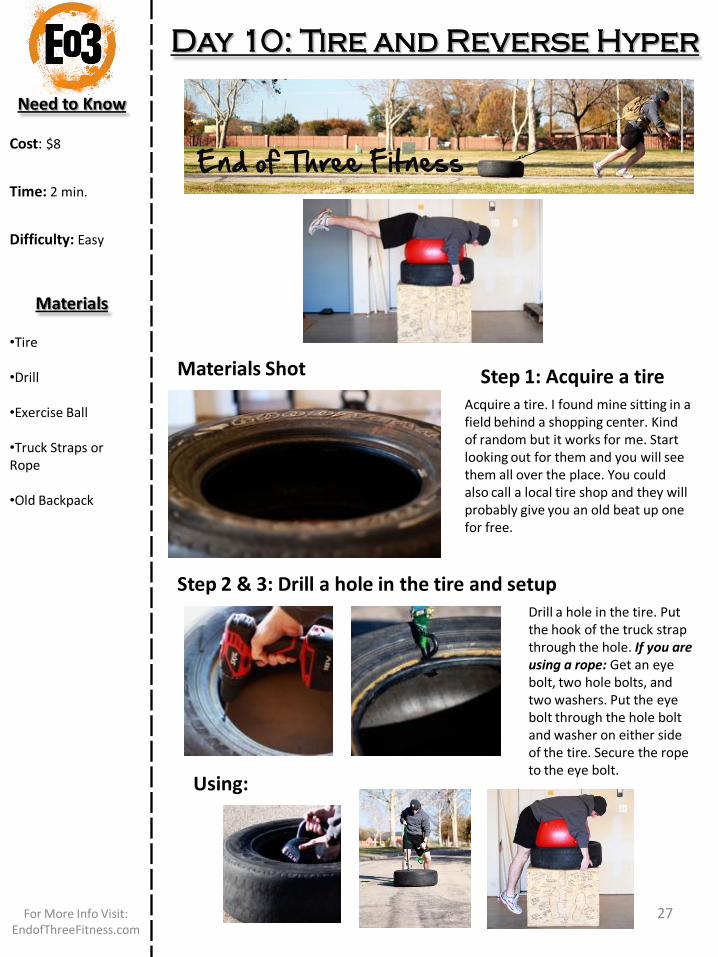
Day 10: Tire and Reverse Hyper
Need to Know Cost: $8
Time: 2 min.
Difficulty: Easy
Materials •Tire
•Drill
•Exercise Ball
•Truck Straps or Rope
•Old Backpack
Materials Shot
Step 2 & 3: Drill a hole in the tire and setup
Step 1: Acquire a tire Acquire a tire. I found mine sitting in a field behind a shopping center. Kind of random but it works for me. Start looking out for them and you will see them all over the place. You could also call a local tire shop and they will probably give you an old beat up one for free.
Drill a hole in the tire. Put the hook of the truck strap through the hole. If you are using a rope: Get an eye bolt, two hole bolts, and two washers. Put the eye bolt through the hole bolt and washer on either side of the tire. Secure the rope to the eye bolt.
Using:
27 For More Info Visit: EndofThreeFitness.com
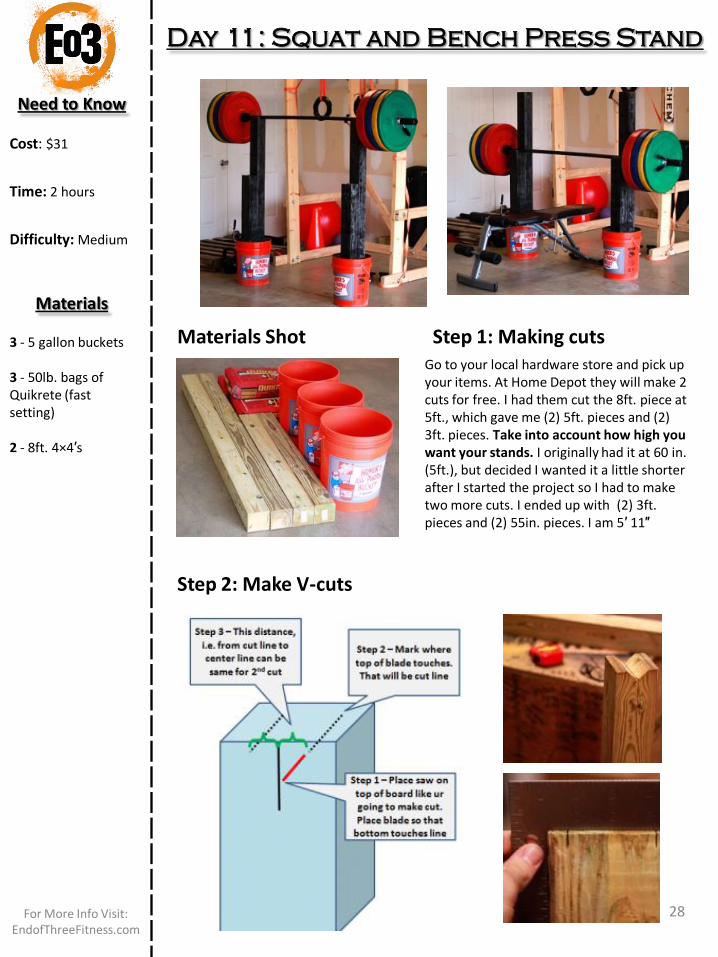
Day 11: Squat and Bench Press Stand
Need to Know Cost: $31
Time: 2 hours
Difficulty: Medium
Materials 3 - 5 gallon buckets 3 - 50lb. bags of Quikrete (fast setting) 2 - 8ft. 4×4′s
Materials Shot
Step 2: Make V-cuts
Step 1: Making cuts Go to your local hardware store and pick up your items. At Home Depot they will make 2 cuts for free. I had them cut the 8ft. piece at 5ft., which gave me (2) 5ft. pieces and (2) 3ft. pieces. Take into account how high you want your stands. I originally had it at 60 in. (5ft.), but decided I wanted it a little shorter after I started the project so I had to make two more cuts. I ended up with (2) 3ft. pieces and (2) 55in. pieces. I am 5′ 11″
28 For More Info Visit: EndofThreeFitness.com
Day 11: Squat and Bench Press Stand
Need to Know Cost: $31
Time: 2 hours
Difficulty: Medium
Materials 3 - 5 gallon buckets 3 - 50lb. bags of Quikrete (fast setting) 2 - 8ft. 4×4′s
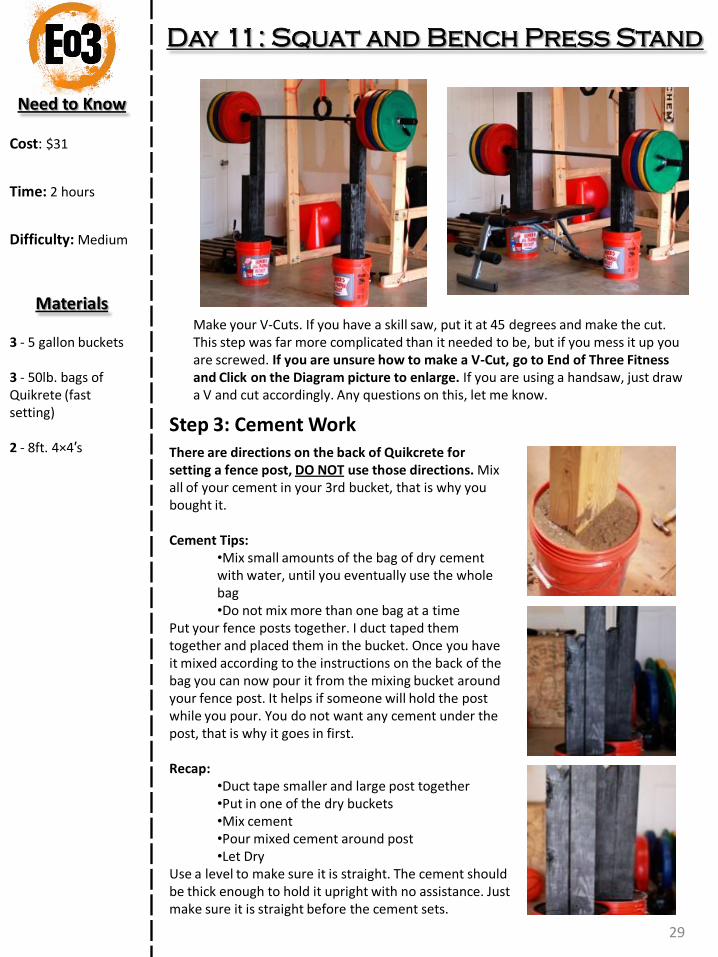
Step 3: Cement Work
Make your V-Cuts. If you have a skill saw, put it at 45 degrees and make the cut. This step was far more complicated than it needed to be, but if you mess it up you are screwed. If you are unsure how to make a V-Cut, go to End of Three Fitness and Click on the Diagram picture to enlarge. If you are using a handsaw, just draw a V and cut accordingly. Any questions on this, let me know.
There are directions on the back of Quikcrete for setting a fence post, DO NOT use those directions. Mix all of your cement in your 3rd bucket, that is why you bought it. Cement Tips:
•Mix small amounts of the bag of dry cement with water, until you eventually use the whole bag •Do not mix more than one bag at a time
Put your fence posts together. I duct taped them together and placed them in the bucket. Once you have it mixed according to the instructions on the back of the bag you can now pour it from the mixing bucket around your fence post. It helps if someone will hold the post while you pour. You do not want any cement under the post, that is why it goes in first. Recap:
•Duct tape smaller and large post together •Put in one of the dry buckets •Mix cement •Pour mixed cement around post •Let Dry
Use a level to make sure it is straight. The cement should be thick enough to hold it upright with no assistance. Just make sure it is straight before the cement sets. 29
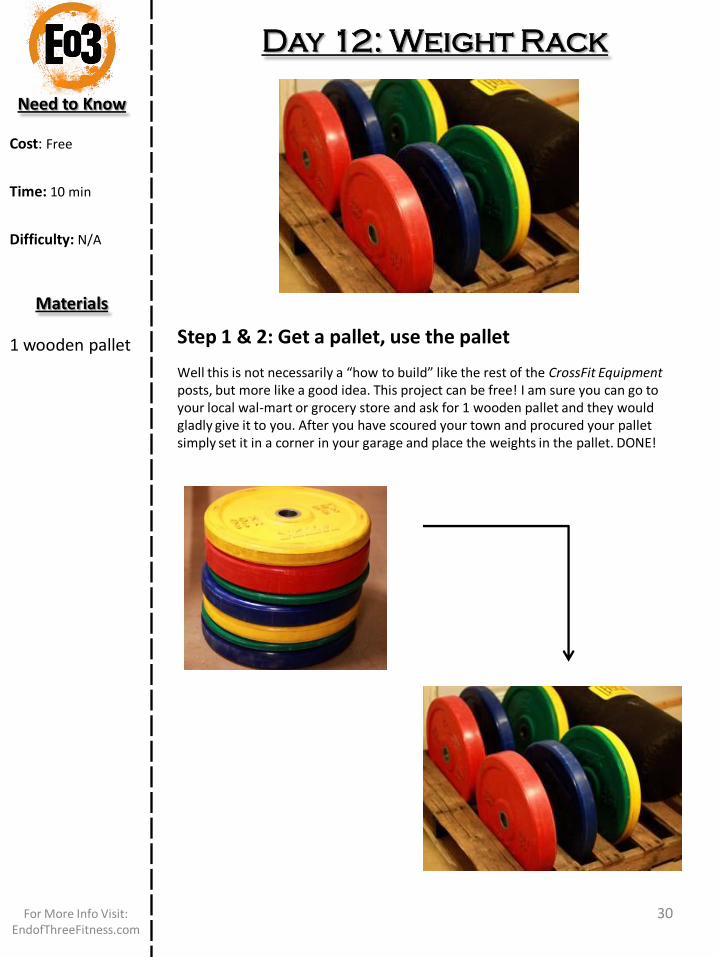
Day 12: Weight Rack
Need to Know Cost: Free
Time: 10 min
Difficulty: N/A
Materials
1 wooden pallet Step 1 & 2: Get a pallet, use the pallet
Well this is not necessarily a “how to build” like the rest of the CrossFit Equipment posts, but more like a good idea. This project can be free! I am sure you can go to your local wal-mart or grocery store and ask for 1 wooden pallet and they would gladly give it to you. After you have scoured your town and procured your pallet simply set it in a corner in your garage and place the weights in the pallet. DONE!
30 For More Info Visit: EndofThreeFitness.com
Day 13 Training Yourself
This is one of the major appeals to having a Garage Gym. Nobody can tell you to do anything. However, if you are not accustomed to training yourself the idea can be a bit daunting.
• Video camera is a must, especially if you are just starting out. A flip cam or even a good smart phone will work for this. Lifting movements are complicated. You could watch an instructional video 100 times and go do what seems and feels right, but after you watch yourself on video you realize you are doing a lot of it incorrectly. • Workout log. You HAVE to keep track of your progress. I use an online blogging platform for my workout journal/log. It helps because you can use the search function and find out how you did on workout XYZ two years ago. You can also make blogs completely private even though it’s on the internet. But I also use a good ole pen and paper. • Goals. Being your own trainer is just that. You are your trainer. If you and a trainer stepped into a gym everyday and you asked your trainer “what are we doing today?”, and he said “ehhh let’s play it by ear.”…what would you say? Set short and long term goals and hold yourself accountable. • If you cannot tell yourself you suck then getting better is going to be difficult for you. If you take a video and you say “Well it’s not TOO bad” and you think you’re finished, you’re wrong. You need to critique every little thing you do right and wrong.
1. Video Camera 2. Workout Log 3. Goals 4. Ability to tell yourself you suck
Items you’ll need to train yourself:
For More Info Visit: www.EndofThreeFitness.com
31
Day 14 Your First Workout
Hopefully your Garage Gym is turning out just the way you wanted it, and your weights should be arriving any day now (if not already). Now the question arises; What will be your first workout? It cannot be some average joe workout. You need to start with the Crucible of workouts. That way you will always remember when and what your first workout was.
•CrossFit.com •CrossFitEndurance.com •CrossFitFootball.com •Or you could go to the End of Three Fitness Community Forums and try out “The Garage Gym WOD Challenge”.
Workout Resources:
For More Info Visit: www.EndofThreeFitness.com
32
5 Essential Garage Gym Items
Radio/Stereo System
Chalk
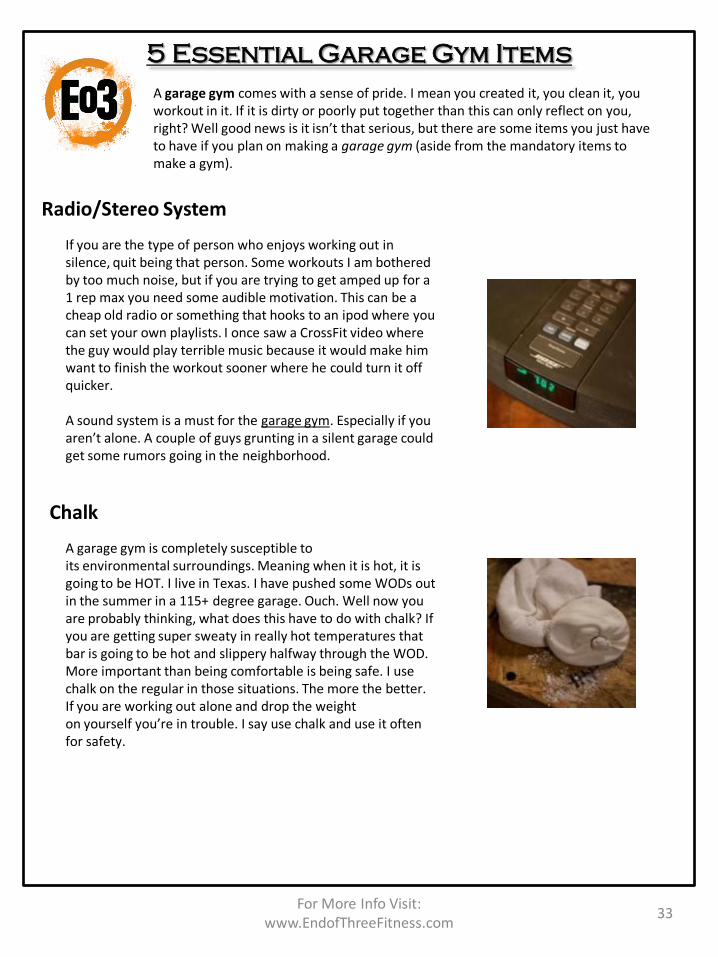
If you are the type of person who enjoys working out in silence, quit being that person. Some workouts I am bothered by too much noise, but if you are trying to get amped up for a 1 rep max you need some audible motivation. This can be a cheap old radio or something that hooks to an ipod where you can set your own playlists. I once saw a CrossFit video where the guy would play terrible music because it would make him want to finish the workout sooner where he could turn it off quicker. A sound system is a must for the garage gym. Especially if you aren’t alone. A couple of guys grunting in a silent garage could get some rumors going in the neighborhood.
A garage gym comes with a sense of pride. I mean you created it, you clean it, you workout in it. If it is dirty or poorly put together than this can only reflect on you, right? Well good news is it isn’t that serious, but there are some items you just have to have if you plan on making a garage gym (aside from the mandatory items to make a gym).
A garage gym is completely susceptible to its environmental surroundings. Meaning when it is hot, it is going to be HOT. I live in Texas. I have pushed some WODs out in the summer in a 115+ degree garage. Ouch. Well now you are probably thinking, what does this have to do with chalk? If you are getting super sweaty in really hot temperatures that bar is going to be hot and slippery halfway through the WOD. More important than being comfortable is being safe. I use chalk on the regular in those situations. The more the better. If you are working out alone and drop the weight on yourself you’re in trouble. I say use chalk and use it often for safety.
For More Info Visit: www.EndofThreeFitness.com
33
5 Essential Garage Gym Items
Concentration Dot
Cardboard
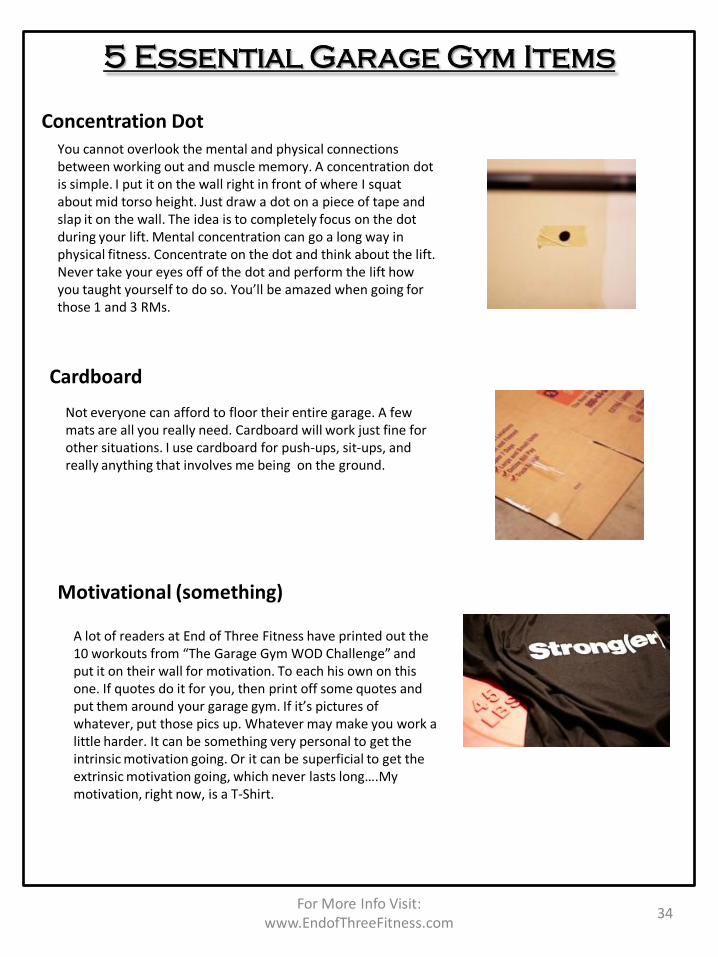
You cannot overlook the mental and physical connections between working out and muscle memory. A concentration dot is simple. I put it on the wall right in front of where I squat about mid torso height. Just draw a dot on a piece of tape and slap it on the wall. The idea is to completely focus on the dot during your lift. Mental concentration can go a long way in physical fitness. Concentrate on the dot and think about the lift. Never take your eyes off of the dot and perform the lift how you taught yourself to do so. You’ll be amazed when going for those 1 and 3 RMs.
Not everyone can afford to floor their entire garage. A few mats are all you really need. Cardboard will work just fine for other situations. I use cardboard for push-ups, sit-ups, and really anything that involves me being on the ground.
Motivational (something)
A lot of readers at End of Three Fitness have printed out the 10 workouts from “The Garage Gym WOD Challenge” and put it on their wall for motivation. To each his own on this one. If quotes do it for you, then print off some quotes and put them around your garage gym. If it’s pictures of whatever, put those pics up. Whatever may make you work a little harder. It can be something very personal to get the intrinsic motivation going. Or it can be superficial to get the extrinsic motivation going, which never lasts long….My motivation, right now, is a T-Shirt.
For More Info Visit: www.EndofThreeFitness.com
34

The Garage Gym Revolution
You will be able to stay home, brother.
You will not be able to plug in, turn on and cop out.
You will not be able to lose yourself in a sea of fitness machines
Skip out on real work by talking to your friends,
Because the revolution will not be televised.
The revolution will not be televised.
The revolution will not be brought to you by Nike
In 4 parts without commercial interruptions.
The revolution will not show you pictures of professionals
Drinking a protein shake while wearing “their” shoe.
The revolution will not be televised.
The revolution will not be brought to you by the
Producers of “easy” trying to make fitness what it is not.
There will not be a night and day time vitamin ad showing
A picture of life that is non-existent.
There will be no television screens attached to robots
Producing an endless cycle of repetitions.
The revolution will not use a cream to get rid of love handles.
The revolution will not be bottled and taken twice daily, because
The revolution will not be televised, Brother.
There will be no secrets and “authority figures” pushing
Jillian Michaels latest DVD, P90X will fall on deaf ears.
The will be no television network telling us who is the winner
And who is the loser, reported nationally to 50 million viewers.
The revolution will not be televised.
The revolution will not be held on cables and pulleys, yet
Rather by stones and cast iron shapes.
You will not have to worry about who was there before you
A sweat stain, or a disinfectant wipe.
The revolution will not go better with your favorite TV show.
The revolution will not be programmed into your heart rate monitor.
The revolution will not have a share button.
The revolution will put you in the driver’s seat.
The revolution will not be televised, will not be televised,
will not be televised, will not be televised.
The revolution will be no re-run brothers;
The revolution will be live.
35 For More Info Visit:
www.EndofThreeFitness.com