Embed Size (px)
Citation preview

3269
Overhead Crane Safety
Leader’s Guide
Overhead Crane Safety – Instructor Guide
Table Of Contents
Page #
Introduction 1
Topic Overview 2
Putting On The Training Program 11
Program Preparation 13
Delivery: Classroom Session 15
Delivery: Field Session 43
Training Tips 47
Learning Exercise 50
Overhead Crane Training Record Form 55
Overhead Crane Operator Evaluation Form 56
© 2002 Comprehensive Loss Management, Inc., and NHCC

The information contained in this program has been developed in good faith and is believed to present good safety principles. CLMI and all other participatingorganizations make no representations or warranties as to the completeness oraccuracy thereof. Persons using this information must make their own determinationas to its suitability for their purposes in support of their own safety programs. CLMIand all other participating organizations are in no way responsible for damages of anynature resulting from the use of this information.
Funding for development of this program has been provided by the Minnesota JobSkills Partnership through the collaborative efforts of Caterpillar Paving Products, Inc.,and The Center for Training and Development.
Overhead Crane Safety – Instructor Guide
© 2002 Comprehensive Loss Management, Inc., and NHCC
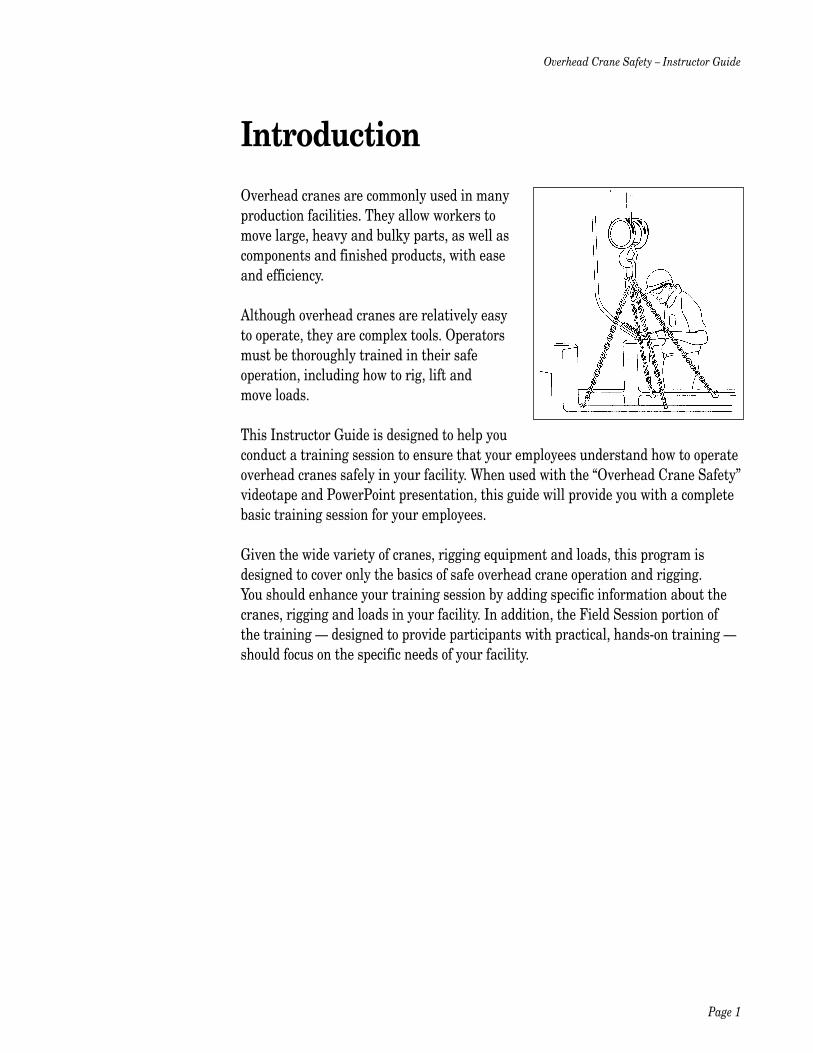
IntroductionOverhead cranes are commonly used in manyproduction facilities. They allow workers tomove large, heavy and bulky parts, as well ascomponents and finished products, with easeand efficiency.
Although overhead cranes are relatively easyto operate, they are complex tools. Operatorsmust be thoroughly trained in their safeoperation, including how to rig, lift and move loads.
This Instructor Guide is designed to help you conduct a training session to ensure that your employees understand how to operateoverhead cranes safely in your facility. When used with the “Overhead Crane Safety”videotape and PowerPoint presentation, this guide will provide you with a completebasic training session for your employees.
Given the wide variety of cranes, rigging equipment and loads, this program isdesigned to cover only the basics of safe overhead crane operation and rigging. You should enhance your training session by adding specific information about thecranes, rigging and loads in your facility. In addition, the Field Session portion of the training — designed to provide participants with practical, hands-on training —should focus on the specific needs of your facility.
Page 1
Overhead Crane Safety – Instructor Guide
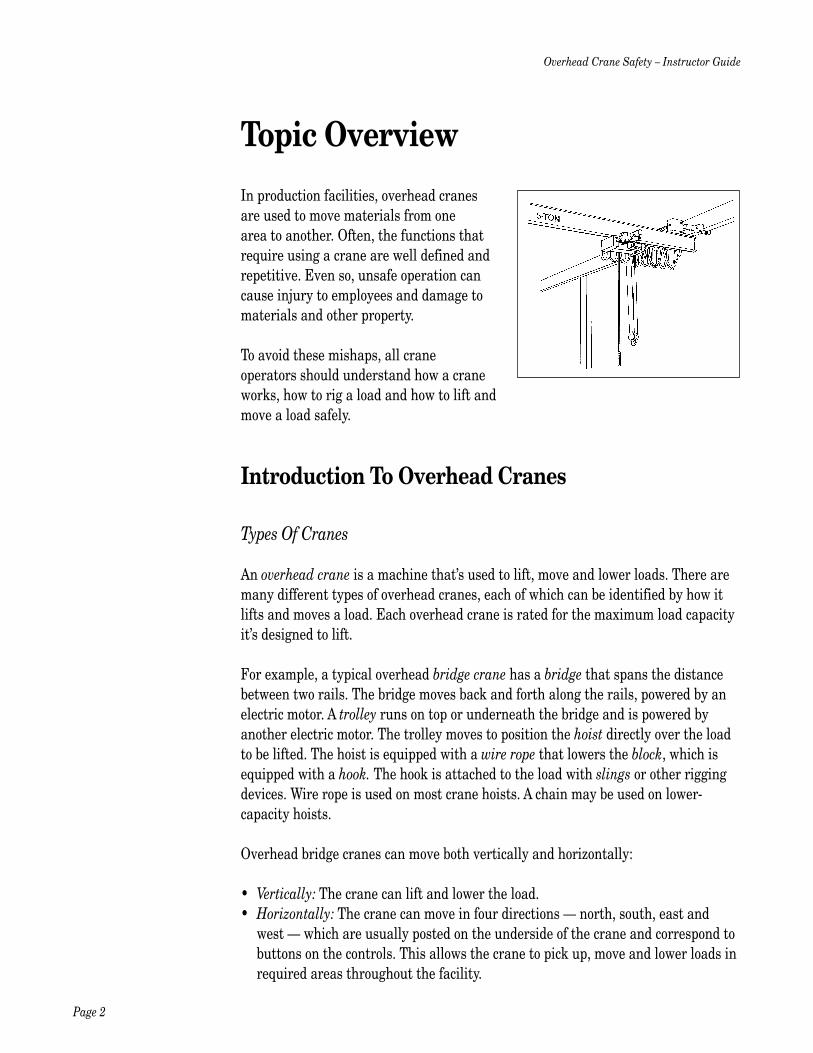
Topic OverviewIn production facilities, overhead cranesare used to move materials from one area to another. Often, the functions thatrequire using a crane are well defined andrepetitive. Even so, unsafe operation cancause injury to employees and damage tomaterials and other property.
To avoid these mishaps, all craneoperators should understand how a craneworks, how to rig a load and how to lift and move a load safely.
Introduction To Overhead Cranes
Types Of Cranes
An overhead crane is a machine that’s used to lift, move and lower loads. There aremany different types of overhead cranes, each of which can be identified by how itlifts and moves a load. Each overhead crane is rated for the maximum load capacityit’s designed to lift.
For example, a typical overhead bridge crane has a bridge that spans the distancebetween two rails. The bridge moves back and forth along the rails, powered by anelectric motor. A trolley runs on top or underneath the bridge and is powered byanother electric motor. The trolley moves to position the hoist directly over the loadto be lifted. The hoist is equipped with a wire rope that lowers the block, which isequipped with a hook. The hook is attached to the load with slings or other riggingdevices. Wire rope is used on most crane hoists. A chain may be used on lower-capacity hoists.
Overhead bridge cranes can move both vertically and horizontally:
• Vertically: The crane can lift and lower the load.• Horizontally: The crane can move in four directions — north, south, east and
west — which are usually posted on the underside of the crane and correspond tobuttons on the controls. This allows the crane to pick up, move and lower loads inrequired areas throughout the facility.
Page 2
Overhead Crane Safety – Instructor Guide
A second type of crane, the monorail crane, has a hoist suspended from a singlegirder or I-beam. This type of crane is limited to a single plane of horizontalmovement.
The jib hoist is another common type of overhead crane. It’s smaller than the rail-type cranes and generally has a lower lifting capacity. A jib hoist consists of a singlevertical support column and a cantilevered I-beam that supports the hoist unit. A jibhoist can swing horizontally in an arc, which is defined by the length of the I-beam.
All these types of cranes are operated by a control pendant that hangs from thehoist. Buttons on the panel control the movement of the crane. In some cases, largeoverhead cranes have a cab in which the operator sits to operate the controls.
Overhead Crane Inspection
Overhead cranes must be inspected before each use or at the beginning of each shiftto make sure the controls and operating mechanisms are in proper working order.This inspection should cover these elements:
• Check the hoist upper-limit switch/device to make sure it’s operating properly. To do so, raise the block to its highest position, and then make sure the hoistshuts down before the block reaches the hoist.
• If the crane is so equipped, inspect all lines, valves and other parts of air systemsfor leakage.
• Check hooks for cracks, deformation and damage.• If the hoist uses wire rope, inspect the hoist rope for kinking, crushing, corrosion
and other damage, including broken wires in the wire hoist ropes.• Inspect the hoist chain for nicks, gouges, distortion, wear, corrosion and other
damage.
All wire ropes and chains should be inspected monthly by lowering the hook block to its lowest attainable position and then inspecting the rope or chain for anydamage that might cause a loss of strength.
If the inspection reveals damage of any kind or that the crane is not operatingproperly, the problem must be reported immediately to the facility maintenancedepartment or supervisor. In addition, the crane cannot be operated until theproblem has been resolved.
Page 3
Overhead Crane Safety – Instructor Guide
Overhead Crane Operation
The operator is responsible for the safe operation of the crane. This means that he orshe must be aware of the potential hazards — both to people and equipment — thatmay result from crane operation. The operator must be alert and aware of the crane,the rigging, the load and the surrounding area. The crane must be operated in thesafest manner possible at all times.
Some facilities have more than one bridge crane on a single set of girder rails. It’s very important for operators to know where each crane on the rails is locatedprior to the lift. In some cases, two operators may unknowingly move loads towardeach other, resulting in a collision. In other cases, a crane may be moved quicklyfrom one end of the shop to the other and directly into another operator’s pathwithout warning.
To pick up a load, the crane operator uses the buttons on the control pendant tomove the crane into location directly over the load and then to operate the hoist andlower the block. The load is then attached to the hook, which hangs from the block.Once it’s securely attached, the load is lifted, moved to the desired location, loweredand then unhooked.
A variety of methods can be used to attach the load to the hook, depending on the size, weight and center of gravity of the load. (See the “Rigging” section on pages 7–10.)
Before attaching a load, the operator must make sure that it doesn’t exceed therated capacity of the crane — that is, the maximum weight the crane is intended tolift. The rated capacity of the crane can be found on the bridge or control pendant ofa rail-type crane and on the I-beam of a jib hoist.
If the operator doesn’t know the weight of the load to be lifted, he or she should use a dynamometer to measure it. First, the identification tag of the lifting deviceshould be checked for its Working Load Limit (WLL), and then the indicator on thedynamometer should be carefully watched. If the weight of the load approaches theWLL of the rigging, the load must be set down and a sling or other lifting devicewith a higher load limit must be used. The operator should never risk overloadingthe crane.
The terms rated capacity and Working Load Limit (WLL) both refer to the maximumweight that should be lifted. The difference between the two is that rated capacityrefers to the crane itself, whereas WLL refers to the rigging.
Page 4
Overhead Crane Safety – Instructor Guide
The operator also needs to make sure that the load is stable before lifting. Forinstance, the load must not be likely to collapse or to drop any materials when liftedor moved. Also, the load must be stable enough not to collapse or tip when it’s setdown and the slings are removed.
Before attaching the load, the operator should check out where it will be moved andplaced. The path the load will travel must be clear, and the area where the load willbe placed must be prepared for it.
When attaching a load, the operator should make sure the hoist rope or chain is freeof kinks and twists and that it isn’t wrapped around the load. The load can then beattached to the hook using slings or other lifting devices. (Again, see the “Rigging”section on pages 7–10.)
Once it’s been attached, the load must be secured and properly balanced. The hookshould be positioned above the center of gravity of the load to minimize swinging.The operator should make sure that there is no slack in and no jerking of the hoistrope/chain at the start of the lift. He or she should also make sure that no people orobstacles are in the path of the load.
Finally, the operator can start to lift the load smoothly and slowly. He or she shouldapply power steadily to avoid jerking the load.
A load should always be lifted vertically — never pulled from the side. Moreover, aload should be raised only high enough to clear any items in the path of travel — nothigher. Doing so will reduce the likelihood of damage to materials on the ground, inthe event that an equipment failure causes the load to fall.
A lifted load should never be left unattended. Also, a load must be unhooked after it’sbeen lowered into position. A load that remains on the hook might tip if anothercrane bumps into the crane the load is attached to.
The operator must be aware of how much the crane will travel after the controlbutton has been released — in other words, how far it will move after the operatorhas hit the button to stop it. The amount of travel can vary greatly from crane tocrane, and the weight of the load and the amount of rope suspending the load mustbe considered in each case.
In sum, the crane should always be operated slowly and smoothly, and the operatormust allow enough time and space to stop and bring the load safely into the desiredposition for lowering.
Page 5
Overhead Crane Safety – Instructor Guide
Once the crane has come to a stop and the load has been stabilized, the operatorshould slowly lower the load. Once the load has reached the ground, the liftingdevices should be removed. Finally, the hoist (including the hook attached to thehoist) should be lifted high enough off the ground so that no one will run into it.
The buttons on the control pendant usually include the following:
• On• Off• Up• Down• North• South• East• West
The directions indicated on the control buttons may not necessarily correspondexactly to the compass directions in your facility. That means it’s important for theoperator to know the actual direction the crane will move when each button ispushed. Since each crane may be different, the operator should take the time tobecome familiar with each crane and its controls before lifting a load.
Some cranes have two-speed motors, which allows them to start out slowly and thenpick up speed. In addition, some cranes have a button that will operate them at twospeeds. Pushing the button slightly will allow for a slower speed, and pushing thebutton down all the way will allow for a faster speed.
Because of the potential danger in lifting and moving loads, crane operators muststay alert and focused on the crane’s operation at all times. In addition, they shouldfollow these guidelines for safe operation:
• Never move a crane until the following have been determined:— No other cranes will come into contact with the crane being operated.— No obstacles are in the path of the crane and/or load.— No personnel are in the path of the load or will be under the load when
it’s raised.— The area in which the load is to be placed is clear and prepared to receive
the load.— The crane and rigging have been inspected.
• Never use the crane for side-pulling a load. A load must always be lifted andlowered vertically.
• Never exceed the crane’s rated capacity.• Inspect the crane before use and at the beginning of each shift.
Page 6
Overhead Crane Safety – Instructor Guide
• Use only certified and tested lifting devices.• Raise and secure the crane and its hoist/hook well above head level when leaving
it unattended so as to prevent people from bumping their heads on it.• Never leave a load suspended during a work break.• Never operate a crane if a “DO NOT OPERATE” tag is attached to it.• Don’t allow anyone to ride on a crane.• Always leave the control pendant in a safe place when not using it. If it’s left in a
traffic aisle, it might be damaged by a forklift or other equipment.• Know the specific location of the power disconnect for the crane, in the event that
an emergency shutdown is required.
Rigging
Rigging refers to how the load is attached to the hook of the crane. The mostcommon type of rigging is a sling, which can be made of chain, nylon, wire rope orwire mesh.
A sling must be rated to hold the weight of the load. The Working Load Limit (WLL)of a sling can be found on the identification tag attached to it by the manufacturer.The WLL takes into consideration the normal wear of the sling and lifting hardware.
The standard chain sling configuration usually consists of two or more legs that areaffixed on one end to a master link or ring with some type of attachment, usually ahook, affixed to the opposite end.
A nylon sling consists of a length of nylon fabric with fittings or loops on both ends. A continuous nylon sling is a single sewn loop that can be configured in avariety of ways.
A wire rope sling is sometimes used when lifting sharp or abrasive materials.
A wire mesh sling is made up of a length of wire mesh with openings forattachments at both ends.
Engineered lifting devices are specialized types of equipment designed to simplifythe rigging of equipment, parts and fixtures. Typically, the lifting device isspecifically designed to attach to a known part in a manufacturing operation, sousing it can speed up the rigging process and improve rigging safety.
Page 7
Overhead Crane Safety – Instructor Guide
An engineered lifting device must be designed by a competent individual who cancertify that it will not fail under the anticipated load and working conditions. Inaddition, any such device must be prooftested with a weight that equals 125% of the WLL. Many manufacturers prooftest their devices to 2 times the WLL.
Shop-made lifting devices — made out of bolts, mild steel, scrap and the like — areoften introduced into work facilities. Workers with good intentions may use thesedevices to solve immediate rigging needs. But these devices often fail without notice,resulting in falling loads, damaged parts and equipment and potentially severeinjuries.
Whenever a shop-made device is discovered in the work area, it must be removedfrom service. Additionally, workers who are tempted to make or use these devicesmust be advised of the potential dangers of rigging with them.
Slings must be inspected before use to check on the following:
• Chain Slings— Before inspecting, clean chains with a nonacid/noncaustic solvent so as to
make marks, nicks, wear and other defects clearly visible.— Inspect chains for these problems:
– Twists or bends– Nicks or gouges – Excessive wear at bearing points – Stretching– Distorted or damaged master links, coupling links or attachments,
especially spread in the throat openings of hooks— Mark any damage plainly with a tag, and remove the chain from service until
it’s been properly repaired.• Nylon Slings
— Inspect them for these problems:– Holes, tears, cuts, burns, snags or embedded particles – Any exposure of red warning yarn (Red yarn is woven through the core of
the sling material, and it is exposed when the sling becomes damaged orworn. If it’s visible, the sling must be removed from service.)
– Broken or worn stitching in load-bearing splices – Excessive wear or elongation exceeding the amount recommended by the
manufacturer – Knots in any part of the sling – Distortion, excessive pitting, corrosion or broken fittings – Other apparent defects that cause doubt as to the strength of the sling
Page 8
Overhead Crane Safety – Instructor Guide
• Wire Rope Slings— Inspect them for these problems:
– Broken wires, kinks or distortion of the rope– Welding damage or burns– Any other apparent defects that cause doubt as to the strength of the sling
• Wire Mesh Slings— Inspect wire mesh slings for these problems:
– A broken weld or a broken brazed joint along the sling edge– Wear as shown by nicks, cracks, breaks, gouges, stretch, bends or weld
spatter on the chain or attachments – A broken wire in any part of the mesh– Reduction in wire diameter of 25% due to abrasion or 15% due to corrosion– Lack of flexibility due to distortion of the mesh– Visible distortion or cracks in the end fittings– Chain links and attachments that don’t hinge freely with adjacent links– A 15% reduction of the original cross-sectional area of metal at any point
around the hook opening or end fitting– Discoloration from excessive temperature
Many other devices can be used to attach the load to the crane:
• Eyebolts attach directly to the load.• Foundry hooks are used to attach a sling to a load.• Hoist rings can be attached to a load to allow the attachment of hooks.• Lift magnets can be used with loads made of low-carbon steel.• Lifting beams and spreader bars provide safer rigging alternatives by reducing
sling angles or by providing better rigging to attachment points on the load.Lifting beams can also be used to distribute the weight of a large load to multiple cranes.
• Plate clamps are clamped to the load and provide an attachment for the hook.• Shackles are used to attach two or more slings to the hook.
Safety is the major factor when rigging a load. The first step is to determine theweight of the load and to use rigging that’s rated for that weight. The Working LoadLimit (WLL) can be found on the identification tag of a sling or other lifting device.
Next, the center of gravity of the load must be determined. This is the point on the load at which it will balance properly when lifted. The center of gravity is notnecessarily at the center of the load. When a load is lifted from any point other thanthe center of gravity, additional stress is placed on the sling and the crane, and theload might shift when being raised.
Page 9
Overhead Crane Safety – Instructor Guide
If the center of gravity is unknown, the operator should make a good estimate.Based on that estimate, he or she should attach the appropriate lifting device. Thenext step is to slowly lift the load. If the load starts to swing in any direction, it isn’tin balance. If that’s the case, it should be lowered and the slings should be adjustedto center the load accurately on the crane.
The sling angle refers to how much the sling varies to horizontal. If the sling isstraight up and down, it is 90° to horizontal. The lower the sling angle, the higherthe tension in the sling. A good operating practice is to keep the sling angle above45°; sling angles of 60° to 90° are preferred.
Specific safety precautions must be taken when using lifting devices:
• Slings— Use a sling rated for the expected load. (In some rigging situations, the load
may place increased stress on the rigging. If that’s the case, slings and riggingdevices rated for higher capacities should be used.)
— Use a sling that lifts the load high enough to clear obstructions on the ground.— Make sure the sling hooks have safety latches installed.— When using a nylon sling, make sure it grips the load. Put the sling around
the load so it won’t slip.— When using a wire mesh sling, don’t let the sling twist or bend.
• Eyebolts— Never used bent, damaged, worn or rusted eyebolts.— Make sure the angle of the pull on an eyebolt is vertical so as to avoid bending
or breaking it.— Make sure the eyebolt is completely seated into the part.
• Lift Magnets— Make sure the working face of the magnet is in good condition.— Make sure the lifting face and the load are free of any debris (such as metal
chips, scrap, etc.) or excessive oil.— Make sure the lift magnet is properly seated on the load.
• Lifting Beams— Use a lifting beam with a rated capacity that’s adequate for the load.— Make sure the load is rigged as evenly as possible by placing the hooks
in the correct locations on the beam.• Plate Clamps
— Make sure the load can be inserted all the way into the throat opening of the clamp.
— Never attach a plate clamp to an oily surface.— Never lift more than one sheet of material at a time; doing so can cause
material to be dropped from the clamp.— Use as many clamps as necessary to balance the load.— Don’t bump the load during lifting or moving, as it could cause the clamps
to release.— Never remove a clamp until the load is at rest and fully supported.
Page 10
Overhead Crane Safety – Instructor Guide

Putting On The Training ProgramIf you have never put on a training program before, there are some helpful hints nearthe end of this guide (see pages 47–49).
Training is an important way to make sure all crane operators understand how tosafely operate the cranes and lifting devices in your facility and how to preventaccidents and injuries.
Upon completion of the program, participants will be able to do these things:
• Understand the types of cranes and lifting devices in your facility• Safely operate cranes and lifting devices• Safely rig loads for lifting
Everyone learns in a different way. Some of your employees may learn quickly fromthe videotape, classroom discussion and Field Session. Others may need more timeand attention. Take time to answer all questions and clarify the information.
Be sure to keep accurate records of all overhead crane training. For eachparticipant, identify the date of training, the instructor and the information covered.
Using This Instructor Guide
This Instructor Guide will allow you to present two training sessions:
• A 1- to 2-hour Classroom Session with the “Overhead Crane Safety” videotape.The videotape presents information on the following topics:— Overview of overhead cranes — How to inspect overhead cranes and lifting devices— How to safely operate overhead cranes— How to rig loads safely
• A Field Session designed to provide participants with these experiences:— Hands-on practice in crane operation, inspection and rigging— Familiarity with the specific equipment, loads and requirements in your
facility
These sessions may be combined or presented separately. However, the Field Session is best conducted on an individual or small-group basis in order to reducethe amount of down time for employees.
Page 11
Overhead Crane Safety – Instructor Guide
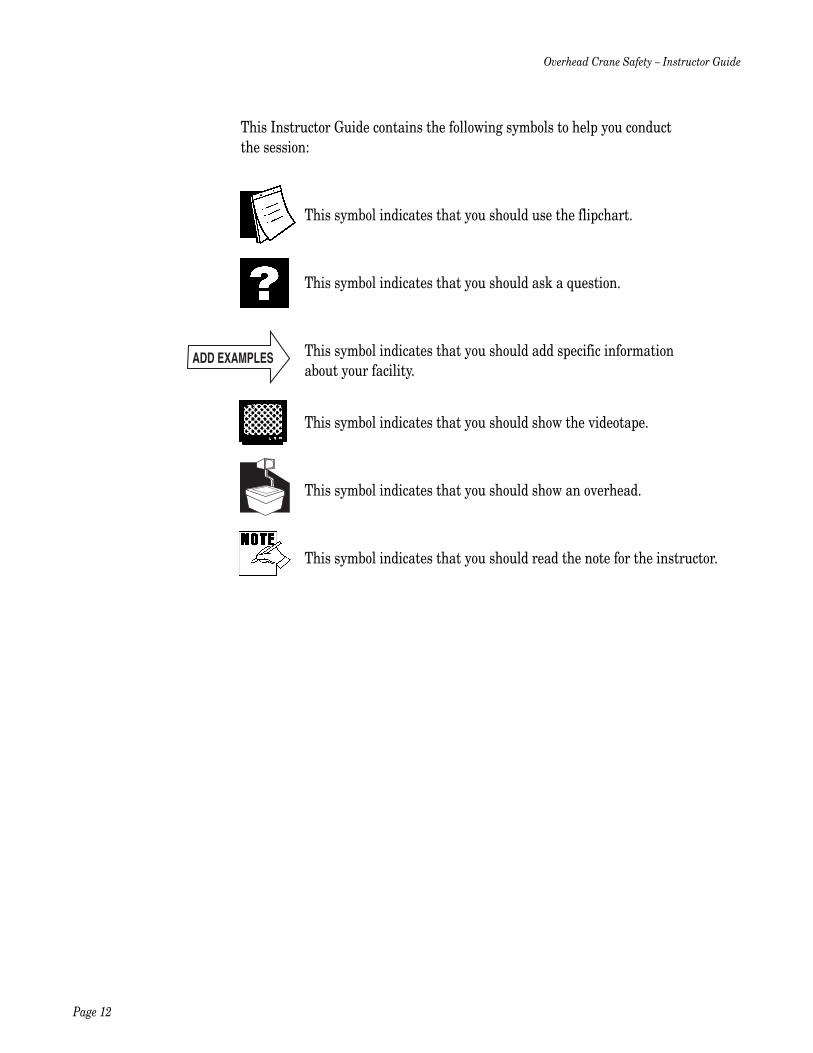
This Instructor Guide contains the following symbols to help you conduct the session:
This symbol indicates that you should use the flipchart.
This symbol indicates that you should ask a question.
This symbol indicates that you should add specific information about your facility.
This symbol indicates that you should show the videotape.
This symbol indicates that you should show an overhead.
This symbol indicates that you should read the note for the instructor.
Page 12
Overhead Crane Safety – Instructor Guide
ADD EXAMPLES
Program PreparationThe best way to ensure that you will conduct a successful training session is to befully prepared. Here are some important preparation steps for the two sessions:
Classroom Session
1. Identify the location of the room in which you will conduct the training. Ideally,the room should be quiet, well ventilated and well lit.
2. Schedule the session, and send out notices to managers and participants.
3. Assemble the following materials (some will be optional, depending on yourpresentation plans):• TV and VCR• Videotape• OPTIONAL: Computer, PowerPoint presentation, projector and screen• Pencils, flipchart, markers• Samples of rigging used in your facility (e.g., slings)• Copies of the Learning Exercise (found at the end of this guide)
4. Review all program materials thoroughly. Make notes of examples or discussionquestions that pertain to your situation. Anticipate questions that participantsare likely to ask.
5. Read through the Learning Exercise. You may want to add additional questionsto verify that participants understand the unique hazards and procedures inyour facility.
6. Consider how you want to present the Learning Exercise. The purpose of the exercise is to check for understanding. It can be used as part of a groupdiscussion, completed in small groups or filled out by individuals. It is notrecommended that the exercise be used as a test.
7. Practice presenting the program.
Page 13
Overhead Crane Safety – Instructor Guide
Here are some final steps to help you prepare for conducting the Classroom Session:
1. Prepare all materials, and test the TV and VCR equipment with the videotape atleast 1 hour before the session. This will allow time for any last-minutemaintenance of the equipment.
2. Cue up the program so it’s at the start point.3. Have the words “Overhead Crane Safety” displayed on a flipchart. This will focus
participants on the topic to be discussed.4. Write the session agenda on a flipchart. This will help participants follow along.
Field Session
1. Identify the area in the workplace where you will conduct the Field Session.Select an area that provides enough room and privacy to conduct the sessionwithout distractions yet is realistic enough to allow participants to practice in anactual work situation. If your facility has multiple types of overhead cranes, youmay want to conduct parts of the Field Session at the various crane areas.
2. Schedule the session, and send out notices to managers and participants.
3. Assemble the following materials (some will be optional, depending on yourpresentation plans):• Lifting devices• Sample loads for practice• Samples of damaged equipment for inspection practice
4. Review all program materials thoroughly. Make notes of examples or discussionquestions that pertain to your situation. Anticipate questions that participantsare likely to ask.
5. Practice presenting the Field Session.
Page 14
Overhead Crane Safety – Instructor Guide
Delivery: Classroom Session
Welcome & Introduction
Welcome participants to the training session.
Show Overhead #1, “Overhead Crane Safety” (or write the session title on a flipchart).
Introduce the topic “Overhead Crane Safety.”
Show Overhead #2, “Agenda” (or write the agenda on a flipchart).
Describe the agenda for the session:
• Introduction• “Overhead Crane Safety” Video:
— Part 1: Overhead Crane Overview— Part 2: Overhead Crane Inspection— Part 3: Overhead Crane Operation— Part 4: Rigging— Part 5: Review
• Review Of Operator Responsibilities• Learning Exercise• Close
A discussion section follows presentation of each part of the video.
Post the agenda so participants can follow along during the session.
Explain that although overhead cranes are relatively easy to operate, they arecomplex tools. Operators must be thoroughly trained in their safe operation,including how to rig, lift and move loads. By knowing how to inspect and safelyoperate cranes and lifting devices, we can all prevent injuries and accidents in our workplace.
Page 15
Overhead Crane Safety – Instructor Guide
ASK: How do we use cranes in our workplace?
Listen to responses.
“Overhead Crane Safety” Video,Part 1: Overhead Crane Overview
Explain that we will now watch Part 1 of a videotape on overhead crane safety. As they watch, ask participants to look for the following topics:
• How overhead cranes work• The parts of an overhead crane• How an overhead crane moves
Show Part 1 of the videotape.
ASK: Does anyone have any questions?
Respond to questions.
Discussion Of Overhead Crane Overview
ASK: What are overhead cranes used for?
Listen to responses.
Show Overhead #3, “Uses Of Overhead Cranes.”
Explain the following:
• Overhead cranes are used to lift, move and lower loads.• There are many different types of overhead cranes, each of which can be
identified by how it lifts and moves a load.• Each overhead crane is rated for the maximum load capacity it’s designed to lift.
Explain the following about the overhead cranes in your facility:
• The specific types used• How they are used• What types of loads they are used for
Page 16
Overhead Crane Safety – Instructor Guide
ADD EXAMPLES
Show Overhead #4, “Overhead Bridge Crane Components.”
Explain the following:
• A typical overhead bridge crane has a bridge that spans the distance between two rails.
• The bridge moves back and forth along the rails, powered by an electric motor.• A trolley runs on top or underneath the bridge and is powered by another
electric motor.
Show Overhead #5, “Overhead Bridge Crane Components (cont.).”
Explain the following:
• The trolley moves to position the hoist directly over the load to be lifted.• The hoist is equipped with a wire rope that lowers the block, which is equipped
with a hook.• The hook is attached to the load with slings or other rigging devices.• Wire rope is used on most crane hoists; a chain may be used on
lower-capacity hoists.
ASK: In what directions can an overhead bridge crane move?
Listen to responses.
Show Overhead #6, “Overhead Bridge Crane Movement.”
Explain the following:
• Overhead bridge cranes can move both vertically and horizontally:— Vertically: The crane can lift and lower the load— Horizontally: The crane can move in four directions — north, south, east and
west — which are usually posted on the underside of the crane and correspondto buttons on the controls.
— This allows the crane to pick up, move and lower loads in required areasthroughout the facility.
Page 17
Overhead Crane Safety – Instructor Guide
Show Overhead #7, “Overhead Monorail Cranes.”
Explain the following:
• A monorail crane has a hoist suspended from a single girder or I-beam.• This type of crane is limited to a single plane of horizontal movement.
Show Overhead #8, “Jib Hoists.”
Explain the following:
• Another type of crane is the jib hoist.• It’s smaller than the rail-type cranes and generally has a lower lifting capacity.• A jib hoist consists of a single vertical support column and a cantilevered I-beam
that supports the hoist unit.• Jib hoists can swing horizontally in an arc, which is defined by the length of the
I-beam.
Explain the specific movements of the different types of cranes used in your facility.
Show Overhead #9, “Control Pendant.”
Explain the following:
• All of these types of cranes are operated by a control pendant that hangs from the hoist.
• Buttons on the panel control the movement of the crane.• In some cases, large overhead cranes have a cab in which the operator sits to
operate the controls.
Explain the specific elements of the overhead cranes in your facility (especially howthey differ from the above description).
“Overhead Crane Safety” Video,Part 2, Overhead Crane Inspection
Explain that we will now watch Part 2 of the videotape. As they watch, askparticipants to look for the following topics:
• When overhead cranes must be inspected• What should be inspected• What problems to look for
Page 18
Overhead Crane Safety – Instructor Guide
ADD EXAMPLES
ADD EXAMPLES
Show Part 2 of the videotape.
ASK: Does anyone have any questions?
Respond to questions.
Discussion Of Overhead Crane Inspection
ASK: When should overhead cranes be inspected?
Listen to responses.
Show Overhead #10, “Overhead Crane Inspection.”
Explain that overhead cranes must be inspected before use or at the beginning of each shift to make sure the controls and operating mechanisms are in properworking order.
Show Overhead #11, “Inspection Items.”
Explain that an inspection must cover these elements:
• Check the hoist upper-limit switch/device to make sure it’s operating properly.— To do so, raise the block to its highest position.— Then make sure the hoist shuts down before the block reaches the hoist.
• If the crane is so equipped, inspect all lines, valves and other parts of air systemsfor leakage.
Show Overhead #12, “Inspection Items (cont.).”
Explain that an inspection must also cover these elements:
• Check hooks for cracks, deformation and damage.• If the hoist uses wire rope, inspect the hoist rope for kinking, crushing, corrosion
and other damage, including broken wires in the wire hoist ropes.• Inspect the hoist chain for nicks, gouges, distortion, wear, corrosion and other
damage.
Show Overhead #13, “Wire Rope And Chain Inspection.”
Explain that all wire ropes and chains should be inspected monthly by lowering thehook block to its lowest attainable position and then inspecting the rope or chain forany damage that might cause a loss of strength.
Page 19
Overhead Crane Safety – Instructor Guide
Show Overhead #14, “If You Find A Problem.”
Explain the following:
• If the inspection reveals damage of any kind or that the crane is not operatingproperly, the problem must be reported immediately to the facility maintenancedepartment or supervisor.
• In addition, the crane cannot be operated until the problem has been resolved.
Explain any specific inspection requirements for overhead cranes in your facility,including the following:
• Required daily, weekly, monthly and annual inspections• Specific items that must be inspected• Specific problems to look for• Procedures for reporting damage
“Overhead Crane Safety” Video,Part 3, Overhead Crane Operation
Explain that we will now watch Part 3 of the videotape. As they watch, askparticipants to look for the following topics:
• Steps for safely moving a load with a crane• Guidelines for safe crane operation
Show Part 3 of the videotape.
ASK: Does anyone have any questions?
Respond to questions.
Page 20
Overhead Crane Safety – Instructor Guide
ADD EXAMPLES
Discussion Of Overhead Crane Operation
ASK: Who is responsible for the safe operation of the crane?
Listen to responses.
Show Overhead #15, “Operator Responsibility.”
Explain the following:
• The operator is responsible for the safe operation of the crane.• This means the operator must be aware of the potential hazards to equipment
and people that may result from the crane’s operation.• The operator must be alert and aware of the crane, the rigging, the load and the
surrounding area.• The crane must be operated in the safest manner possible at all times.
Show Overhead #16, “Multiple Cranes.”
Explain the following:
• Some facilities have more than one bridge crane on a single set of girder rails.• It’s very important for operators to know where each crane on the rails is located
prior to the lift.
ASK: What are the potential hazards of multiple crane use?
Listen to responses.
Explain the following:
• In some cases, two operators may unknowingly move loads toward each other,resulting in a collision.
• In other cases, a crane may be moved quickly from one end of the shop to theother and directly into another operator’s path without warning.
Show Overhead #17, “Basic Steps Of Crane Operation.”
Explain the following:
• To pick up a load, the crane operator uses the buttons on the control pendant tomove the crane into location directly over the load and then to operate the hoistand lower the block.
• The load is then attached to the hook, which hangs from the block.• Once it’s securely attached, the load is lifted, moved to the desired location,
lowered and then unhooked.
Page 21
Overhead Crane Safety – Instructor Guide
Show Overhead #18, “Before Attaching A Load.”
Explain the following:
• Before attaching a load, the operator must make sure that it doesn’t exceed therated capacity of the crane — that is, the maximum weight the crane is intendedto lift.
• The rated capacity of the crane can be found on the bridge or control pendant of arail-type crane and on the I-beam of a jib hoist.
Show Overhead #19, “Using A Dynamometer.”
Explain the following:
• If the operator doesn’t know the weight of the load to be lifted, he or she shoulduse a dynamometer to measure it. — First, the identification tag of the lifting device should be checked for its
Working Load Limit (WLL).— Then, the indicator on the dynamometer should be carefully watched.— If the weight of the load approaches the WLL of the rigging, the load must
be set down and a sling or other lifting device with a higher load limit must be used.
• The operator should never risk overloading the crane.
It might be useful to clarify the difference between rated capacity and Working LoadLimit (WLL). Both identify the maximum weight that should be lifted. Ratedcapacity refers to the crane itself, whereas WLL refers to the rigging.
Explain the following specific information about the cranes in your facility:
• The rated capacity of each overhead crane • Where to find the rated capacity on each crane• Where to find dynamometers • Specific instructions for operating dynamometers
Show Overhead #20, “Load Stability.”
Explain the following:
• The operator also needs to make sure that the load is stable before lifting.
Page 22
Overhead Crane Safety – Instructor Guide
ADD EXAMPLES
ASK: What are the potential hazards of not having a stable load?
Listen to responses.
Explain the following:
• The load may collapse or drop materials when lifted or moved.• The load may collapse or tip when it’s set down and the slings are removed.
Show Overhead #21, “Travel Concerns.”
Explain the following:
• Before attaching the load, the operator should check out where it will be movedand placed.— The path the load will travel must be clear.— The area where the load will be placed must be prepared for it.
Show Overhead #22, “Attaching A Load.”
Explain the following:
• When attaching a load, the operator should make sure the hoist rope or chain is free of kinks and twists and that it isn’t wrapped around the load.
• The load can then be attached to the hook using slings or other lifting devices.
Show Overhead #23, “Attaching A Load (cont.).”
Explain the following:
• Once it’s been attached, the load must be secured and properly balanced.• The hook should be positioned above the center of gravity of the load to
minimize swinging.• The operator should make sure that there is no slack in and no jerking of the
hoist rope/chain at the start of the lift. • He or she should also make sure that no people or obstacles are in the path
of the load.
Page 23
Overhead Crane Safety – Instructor Guide
Show Overhead #24, “Lifting And Moving A Load.”
Explain the following:
• The operator should start to lift the load smoothly and slowly.• He or she should apply power steadily to avoid jerking the load.• A load should always be lifted vertically — never pulled from the side.• Moreover, a load should be raised only high enough to clear any items in the path
of travel — never higher.
ASK: Why should the load be raised only as high as necessary?
Listen to responses.
Explain the following:
• Doing so will reduce the likelihood of damage to materials on the ground, in theevent that an equipment failure causes the load to fall.
Show Overhead #25, “Lifting And Moving A Load (cont.).”
Explain the following:
• A lifted load should never be left unattended.• Also, a load must be unhooked after it’s been lowered into position.• A load that remains on the hook might tip if another crane bumps into the crane
the load is attached to.
Explain that the operator must be aware of how much the crane will travel afterthe control button has been released — in other words, how far it will move after theoperator has hit the button to stop it.
ASK: Why is this important?
Listen to responses.
Show Overhead #26, “Stopping A Load.”
Explain the following:
• The amount of travel can vary greatly from crane to crane. • The weight of the load and the amount of rope suspending the load must be
considered in each case.• The crane should always be operated slowly and smoothly.• The operator should allow enough time and space to stop and bring the load
safely into the desired position for lowering.
Page 24
Overhead Crane Safety – Instructor Guide
Show Overhead #27, “Lowering A Load.”
Explain the following:
• Once the crane has come to a stop and the load has been stabilized, the operatorshould slowly lower the load.
• Once the load has reached the ground, the lifting devices should be removed.• Finally, the hoist (including the hook attached to the hoist) should be lifted high
enough off the ground so that no one will run into it.
Show Overhead #28, “Control Buttons.”
Explain that the buttons on the control pendant usually include the following:
• On• Off• Up• Down• North• South• East• West
ASK: Why is it important to know the actual direction the crane will move wheneach button is pushed?
Listen to responses.
Explain the following:
• The directions indicated on the control buttons may not necessarily correspondexactly to the compass directions in your facility.
Show Overhead #29, “Control Buttons (cont.).”
Explain the following:
• The operator must know the actual direction the crane will move when eachbutton is pushed.
• Since each crane may be different, the operator should take the time to becomefamiliar with each crane and its controls before lifting a load.
Page 25
Overhead Crane Safety – Instructor Guide
Show Overhead #30, “Two-Speed Cranes.”
Explain the following:
• Some cranes have two-speed motors, which allows them to start out slowly andthen pick up speed.
• In addition, some cranes have a button that will operate them at two speeds.• Pushing the button slightly will allow for a slower speed, and pushing the button
down all the way will allow for a faster speed.
Explain any specific information about safe crane operation in your facility.
Show Overhead #31, “Guidelines For Safe Crane Operation.”
Explain that because of the potential danger in lifting and moving loads, craneoperators must stay alert and focused on the crane’s operation at all times. Inaddition, they should follow these guidelines for safe operation:
• Never move a crane until the following have been determined:— No other cranes will come into contact with the crane being operated.— No obstacles are in the path of the crane and/or load.— No personnel are in the path of the load or will be under the load when
it’s raised.— The area in which the load is to be placed is clear and prepared to receive
the load.— The crane and rigging have been inspected.
Show Overhead #32, “Guidelines For Safe Crane Operation (cont.).”
Explain the following:
• Never use the crane for side-pulling a load. A load must always be lifted and lowered vertically.
• Never exceed the crane’s rated capacity.• Inspect the crane before use or at the beginning of each shift.• Use only certified and tested lifting devices.
Page 26
Overhead Crane Safety – Instructor Guide
ADD EXAMPLES
Show Overhead #33, “Guidelines For Safe Crane Operation (cont.).”
Explain the following:
• Raise and secure the crane and its hoist/hook well above head level when leavingit unattended so as to prevent people from bumping their heads on it.
• Never leave a load suspended during a work break.• Never operate a crane if a “DO NOT OPERATE” tag is attached to it.
Show Overhead #34, “Guidelines For Safe Crane Operation (cont.).”
Explain the following:
• Don’t allow anyone to ride on a crane.• Always leave the control pendant in a safe place when not using it. If it’s left in a
traffic aisle, it might be damaged by a forklift or other equipment.• Know the specific location of the power disconnect for the crane, in the event that
an emergency shutdown is required.
Explain any other guidelines for safe crane operation that apply to your facility.
“Overhead Crane Safety” Video,Part 4, Rigging
Explain that we will now watch Part 4 of the videotape. As they watch, askparticipants to look for the following topics:
• Common types of rigging• Rigging inspection• Safety precautions when rigging a load
Show Part 4 of the videotape.
ASK: Does anyone have any questions?
Respond to questions.
Page 27
Overhead Crane Safety – Instructor Guide
ADD EXAMPLES
Discussion Of Rigging
ASK: What is rigging?
Listen to responses.
Explain that rigging refers to how the load is attached to the hook of the crane.
Show Overhead #35, “Slings.”
Explain the following:
• The most common type of rigging is a sling.• A sling can be made of chain, nylon, wire rope or wire mesh.
ASK: What should every sling be rated for?
Listen to responses and expect the following:
• A sling must be rated to hold the weight of the load.
Show Overhead #36, “Slings (cont.).”
Explain the following:
• The Working Load Limit (WLL) of a sling can be found on the identification tagattached to it by the manufacturer.
• The WLL takes into consideration the normal wear of the sling and liftinghardware.
Show Overhead #37, “Chain Slings.”
Explain the following:
• The standard chain sling configuration usually consists of two or more legs thatare affixed on one end to a master link or ring with some type of attachment,usually a hook, affixed to the opposite end.
Page 28
Overhead Crane Safety – Instructor Guide
Show Overhead #38, “Nylon Slings.”
Explain the following:
• A nylon sling consists of a length of nylon fabric with fittings or loops on both ends. • A continuous nylon sling is a single sewn loop that can be configured in a variety
of ways.
Show Overhead #39, “Wire Rope Slings.”
Explain the following:
• A wire rope sling is sometimes used when lifting sharp or abrasive materials.
Show Overhead #40, “Wire Mesh Slings.”
Explain the following:
• A wire mesh sling is made up of a length of wire mesh with openings forattachments at both ends.
ASK: What are engineered lifting devices?
Listen to responses.
Show Overhead #41, “Engineered Lifting Devices.”
Explain the following:
• Engineered lifting devices are specialized types of equipment designed to simplifythe rigging of equipment, parts and fixtures.
Show Overhead #42, “Engineered Lifting Devices (cont.).”
Explain the following:
• Typically, the lifting device is specifically designed to attach to a known part in amanufacturing operation, so using it can speed up the rigging process andimprove rigging safety.
• An engineered lifting device must be designed by a competent individual who cancertify that it will not fail under the anticipated load and working conditions.
• In addition, any such device must be prooftested with a weight that equals 125%of the WLL.
• Many manufacturers prooftest their devices to 2 times the WLL.
Page 29
Overhead Crane Safety – Instructor Guide
ASK: What are shop-made lifting devices?
Listen to responses.
Show Overhead #43, “Shop-Made Lifting Devices.”
Explain the following:
• Shop-made lifting devices — made out of bolts, mild steel, scrap and the like —are often introduced into work facilities.
• Workers with good intentions may use these devices to solve immediate riggingneeds.
• This is a very dangerous practice!
ASK: What are the potential hazards of shop-made lifting devices?
Listen to responses.
Show Overhead #44, “Shop-Made Lifting Devices (cont.).”
Explain the following:
• These devices often fail without notice, resulting in falling loads, damaged partsand equipment and potentially severe injuries.
• Whenever a shop-made device is discovered in the work area, it must be removedfrom service.
• Additionally, workers who are tempted to make or use these devices must beadvised of the potential dangers of rigging with them.
Show samples of the types of slings used in your facility.
Page 30
Overhead Crane Safety – Instructor Guide
ADD EXAMPLES
ASK: Why is it important to inspect all slings prior to using them?
Listen to responses.
Show Overhead #45, “Chain Sling Inspection.”
Explain that chain slings must be inspected before use to check on the following:
• Before inspecting, clean chains with a nonacid/noncaustic solvent so as to makemarks, nicks, wear and other defects clearly visible.
• Inspect chains for these problems:— Twists or bends— Nicks or gouges — Excessive wear at bearing points — Stretching— Distorted or damaged master links, coupling links or attachments, especially
spread in the throat openings of hooks
Show Overhead #46, “Chain Sling Inspection (cont.).”
Explain the following:
• Mark any damage plainly with a tag, and remove the chain from service until it’sbeen properly repaired.
Show Overhead #47, “Nylon Sling Inspection.”
Explain that before using nylon slings, they must be inspected for these problems:
• Holes, tears, cuts, burns, snags or embedded particles • Any exposure of red warning yarn
— Red yarn is woven through the core of the sling material, and it is exposedwhen the sling becomes damaged or worn.
— If it’s visible, the sling must be removed from service.
Show Overhead #48, “Nylon Sling Inspection (cont.).”
Explain that nylon slings must also be inspected for these problems:
• Broken or worn stitching in load-bearing splices • Excessive wear or elongation exceeding the amount recommended by the
manufacturer • Knots in any part of the sling • Distortion, excessive pitting, corrosion or broken fittings • Other apparent defects that cause doubt as to the strength of the sling
Page 31
Overhead Crane Safety – Instructor Guide
Show Overhead #49, “Wire Rope Sling Inspection.”
Explain that before using wire rope slings, they must be inspected for these problems:
• Broken wires, kinks or distortion of the rope• Welding damage or burns• Any other apparent defects that cause doubt as to the strength of the sling
Show Overhead #50, “Wire Mesh Sling Inspection.”
Explain that before using wire mesh slings, they must be inspected for theseproblems:
• A broken weld or a broken brazed joint along the sling edge• Wear as shown by nicks, cracks, breaks, gouges, stretch, bends or weld spatter
on the chain or attachments • A broken wire in any part of the mesh• Reduction in wire diameter of 25% due to abrasion or 15% due to corrosion• Lack of flexibility due to distortion of the mesh
Show Overhead #51, “Wire Mesh Sling Inspection (cont.).”
Explain that wire mesh slings must also be inspected for these problems:
• Visible distortion or cracks in the end fittings• Chain links and attachments that don’t hinge freely with adjacent links• A 15% reduction of the original cross-sectional area of metal at any point around
the hook opening or end fitting• Discoloration from excessive temperature
Explain any specific inspection requirements for slings in your facility, includingthe following:
• Required daily, weekly, monthly and annual inspections• Specific items that must be inspected• Specific problems to look for• Procedures for reporting damage
Page 32
Overhead Crane Safety – Instructor Guide
ADD EXAMPLES
ASK: What other types of lifting devices were mentioned in the video?
Listen to responses.
Explain the following:
• Eyebolts• Foundry hooks• Hoist rings• Lift magnets• Lifting beams and spreader bars• Plate clamps• Shackles
Show Overhead #52, “Other Types Of Lifting Devices.”
Explain that these types of lifting devices can be used to attach the load to the crane:
• Eyebolts attach directly to the load.• Foundry hooks are used to attach a sling to a load.• Hoist rings can be attached to a load to allow the attachment of hooks.• Lift magnets can be used with loads made of low-carbon steel.
Show Overhead #53, “Other Types Of Lifting Devices (cont.).”
Explain that these lifting devices can also be used:
• Lifting beams and spreader bars provide safer rigging alternatives by reducingsling angles or by providing better rigging to attachment points on the load.Lifting beams can also be used to distribute the weight of a large load to multiple cranes.
• Plate clamps are clamped to the load and provide an attachment for the hook.• Shackles are used to attach two or more slings to the hook.
Explain the specific types of lifting devices used in your facility, including this information:
• What they are used for• How to use them properly• How to inspect them
Page 33
Overhead Crane Safety – Instructor Guide
ADD EXAMPLES
ASK: According to the video, what is the major factor when rigging a load?
Listen to responses and expect the following:
• Safety is the major factor when rigging a load.
Show Overhead #54, “Determining Load Weight.”
Explain the following:
• The first step is to determine the weight of the load and to use rigging that’s ratedfor that weight.
• The Working Load Limit (WLL) can be found on the identification tag of a sling orother lifting device.
Explain that the next step is to determine the load’s center of gravity.
ASK: What is a load’s center of gravity?
Listen to responses and expect the following:
• This is the point on the load at which it will balance properly when lifted.
Show Overhead #55, “Center Of Gravity.”
Explain the following:
• The center of gravity is not necessarily at the center of the load. • When a load is lifted from any point other than the center of gravity, additional
stress is placed on the sling and the crane, and the load might shift when being raised.
Show Overhead #56, “Determining The Center Of Gravity.”
Explain that if the center of gravity is unknown, the operator should do these things:
• Make a good estimate.• Based on that estimate, attach the appropriate lifting device.• Next, slowly lift the load.• If the load starts to swing in any direction, it isn’t in balance.• If that’s the case, it should be lowered and the slings should be adjusted to center
the load accurately on the crane.
Page 34
Overhead Crane Safety – Instructor Guide
ASK: What does the term sling angle refer to?
Listen to responses.
Explain the following:
• The sling angle refers to how much the sling varies to horizontal.
Show Overhead #57, “Sling Angles.”
Explain the following:
• If the sling is straight up and down, it is 90° to horizontal.• The lower the sling angle, the higher the tension in the sling.
Show Overhead #58, “Sling Angles (cont.).”
Explain the following:
• A good operating practice is to keep the sling angle above 45°. • Sling angles of 60° to 90° are preferred.
Explain that safety precautions must be taken when using any lifting device.
Show Overhead #59, “Sling Safety Precautions.”
Explain the following:
• Use a sling rated for the expected load.• In some rigging situations, the load may place increased stress on the rigging.• If that’s the case, slings and rigging devices rated for higher capacities should
be used.
Show Overhead #60, “Sling Safety Precautions (cont.).”
Explain the following:
• Use a sling that lifts the load high enough to clear obstructions on the ground.• Make sure the sling hooks have safety latches installed.• When using a nylon sling, make sure it grips the load; put the sling around the
load so it won’t slip.• When using a wire mesh sling, don’t let the sling twist or bend.
Page 35
Overhead Crane Safety – Instructor Guide
Show Overhead #61, “Safety Precautions For Eyebolts.”
Explain the following:
• Never used bent, damaged, worn or rusted eyebolts.• Make sure the angle of the pull on an eyebolt is vertical so as to avoid bending or
breaking it.• Make sure the eyebolt is completely seated into the part.
Show Overhead #62, “Safety Precautions For Lift Magnets.”
Explain the following:
• Make sure the working face of the magnet is in good condition.• Make sure the lifting face and the load are free of any debris (such as metal chips,
scrap, etc.) and excessive oil.• Make sure the lift magnet is properly seated on the load.
Show Overhead #63, “Safety Precautions For Lifting Beams.”
Explain the following:
• Use a lifting beam with a rated capacity that’s adequate for the load.• Make sure the load is rigged as evenly as possible by placing the hooks in the
correct locations on the beam.
Show Overhead #64, “Safety Precautions For Plate Clamps.”
Explain the following:
• Make sure the load can be inserted all the way into the throat opening of the clamp.
• Never attach a plate clamp to an oily surface.
Page 36
Overhead Crane Safety – Instructor Guide
Show Overhead #65, “Safety Precautions For Plate Clamps (cont.).”
Explain the following:
• Never lift more than one sheet of material at a time; doing so can cause materialto be dropped from the clamp.
• Use as many clamps as necessary to balance the load.• Don’t bump the load during lifting or moving, as it could cause the clamps
to release.• Never remove a clamp until the load is at rest and fully supported.
Explain any other safety precautions for the specific types of lifting devices used inyour facility.
“Overhead Crane Safety” Video,Part 5, Review
Explain that we will now watch Part 5 of the videotape. As they watch, askparticipants to look for the following topics:
• Responsibilities of the operator
Show Part 5 of the videotape.
ASK: Does anyone have any questions?
Respond to questions.
Review Of Operator Responsibilities
Show Overhead #66, “Operator Responsibilities.”
Explain the following:
• The operator is responsible for the safe operation of the crane.• This means the operator must be aware of the potential hazards both to people
and equipment that may result from crane operation.• The crane must be operated in the safest manner possible at all times. • The operator must be alert and aware of the crane, the rigging, the load and the
surrounding area.
Page 37
Overhead Crane Safety – Instructor Guide
ADD EXAMPLES
Show Overhead #67, “Before Operating The Crane.”
Explain the following:
• Inspect the crane and all rigging before moving a load.• Determine the weight and center of gravity of the load.• Make sure the load is stable.• Make sure the pathway is clear of other cranes, personnel, equipment and
other obstacles.
Show Overhead #68, “When Operating The Crane.”
Explain the following:
• Always operate the crane slowly and smoothly.• Never exceed the rated capacity of the crane.• Always lift and lower loads vertically; never side-pull loads.• Never move loads over the heads of personnel.• Never leave a raised load unattended.
Learning Exercise
Hand out the Learning Exercise (found at the end of this Instructor Guide).
Explain that this is an exercise, not a test.
Explain that it should take about 10 minutes to complete.
Provide answers to the Learning Exercise after all participants have completed it.Have participants self-grade their exercises and turn them in. Keep the exercises ina file for future reference.
Participants who answered less than 80% of the questions correctly may not havecomprehended the training. Additional one-on-one training may be necessary.
Page 38
Overhead Crane Safety – Instructor Guide
Answers To Learning Exercise
1. All cranes are exactly the same and are operated in exactly the same manner.False. There are many different types of overhead cranes, depending on how the crane lifts and moves a load, and each may have different operatingcharacteristics.
2. The operator must be alert and aware of the crane, the rigging, the load and the surrounding area.True.
3. An overhead crane must be inspected before use or at the beginning of each shift.True.
4. It’s OK to use rigging that’s rated for slightly less than the weight of the load.False. Rigging should be used that’s rated for more than the weight of the load.In some rigging situations, the load may place increased stress on the rigging.When this is the case, slings and rigging devices rated for higher Work LoadLimits must be used.
5. Side-loading a crane is a safe way to move a heavy load.False. The load should always be lifted vertically — never pulled from the side.
6. A crane will often travel some distance after the control button has beenreleased.True.
7. Once the crane has come to a stop and the load has been stabilized, the operatorcan slowly lower the load.True.
8. Pressing the control button labeled “North” will always make the crane movetoward the earth’s magnetic North Pole.False. The directions indicated on the control buttons may not necessarilycorrespond to actual directions within the facility, depending on the crane’slocation and orientation to the compass.
9. The operator should never leave a lifted load unattended.True.
10. A load can be lifted over people as long as it’s high enough to clear them.False. A load should never be moved over people.
Page 39
Overhead Crane Safety – Instructor Guide
11. What should you determine before moving a crane?• No other cranes will come into contact with the crane being operated.• No obstacles are in the path of the crane and/or load.• No personnel are in the path of the load or will be under the load when
it’s raised.• The area where the load is to be placed is clear and prepared to receive it.• The crane and rigging have been inspected.
12. What are three types of rigging used in your facility?Check answers against the types of rigging used in your facility. Answers mayinclude any three of the following:• Slings (chain, nylon, wire mesh)• Eyebolts• Foundry hooks• Hoist rings• Lift magnets• Lifting beams• Plate clamps• Shackles
13. What are three things you should inspect before using a crane?Check answers against the types of cranes used in your facility. Answers mayinclude any three of the following:• The controls and operating mechanisms are in proper working order.• The hoist upper-limit switch/device is operating properly.• If so equipped, all lines, valves and other parts of air systems are properly
sealed and free of leakage.• Hooks contain no cracks, deformation or other damage.• Hoist ropes are free from kinking, crushing, bird caging, corrosion and other
damage, and wire hoist ropes have no broken wires.• The hoist chain has no nicks, gouges, distortion, wear, corrosion or other damage.
14. What are three things you should inspect before using a sling?Check answers against the types of rigging used in your facility. Answers mayinclude any three of the following:• Chain Slings
— Before inspecting, clean chains with a nonacid/noncaustic solvent so as tomake marks, nicks, wear and other defects clearly visible.
— Inspect chains for these problems:— Twists or bends— Nicks or gouges — Excessive wear at bearing points — Stretching— Distorted or damaged master links, coupling links or attachments,
especially spread in the throat openings of hooks— Mark any damage plainly with a tag, and remove the chain from service
until it’s been properly repaired.Page 40
Overhead Crane Safety – Instructor Guide
• Nylon Slings— Holes, tears, cuts, burns, snags or embedded particles — Any exposure of red warning yarn (Red yarn is woven through the core of
the sling material, and it is exposed when the sling becomes damaged orworn. If it’s visible, the sling must be removed from service.)
— Broken or worn stitching in load-bearing splices — Excessive wear or elongation exceeding the amount recommended by the
manufacturer — Knots in any part of the sling — Distortion, excessive pitting, corrosion or broken fittings — Other apparent defects that cause doubt as to the strength of the sling
• Wire Rope Slings— Broken wires, kinks or distortion of the rope— Welding damage or burns— Any other apparent defects that cause doubt as to the strength of the sling
• Wire Mesh Slings— A broken weld or a broken brazed joint along the sling edge— Wear as shown by nicks, cracks, breaks, gouges, stretch, bends or weld
spatter on chain or attachments — A broken wire in any part of the mesh— Reduction in wire diameter of 25% due to abrasion or 15% due to corrosion— Lack of flexibility due to distortion of the mesh— Visible distortion or cracks in the end fittings— Chain links and attachments that don’t hinge freely with adjacent links— A 15% reduction of the original cross-sectional area of metal at any point
around the hook opening or end fitting— Discoloration from excessive temperature
15. What steps should you follow for determining a load’s center of gravity?• If the center of gravity is unknown, you should make a good estimate.• Based on that estimate, attach the appropriate lifting device.• Slowly lift the load.• If the load starts to swing in any direction, it isn’t in balance.• If that’s the case, lower the load and adjust the slings to center the load
accurately on the crane.
Page 41
Overhead Crane Safety – Instructor Guide
Close
Discuss any issues about overhead crane safety in your workplace.
Discuss any follow-up activities you have planned.
Thank participants for their attention, and remind them that it’s theirresponsibility to do the following:
• Know how to operate overhead cranes safely• Know how to inspect cranes and rigging• Know how to rig loads safely
End the session.
Following the session, make sure that the Overhead Crane Safety Training Record isbrought up to date, noting participants’ names, job titles, training type, training dateand instructor’s name.
Page 42
Overhead Crane Safety – Instructor Guide

Delivery: Field Session This session is best conducted on an individual or small-group basis. Use theOverhead Crane Operator Evaluation Checklist, found at the end of this guide, tocheck each participant’s skill level as you conduct the Field Session.
Each participant should repeat each activity until you are satisfied that he or sheunderstands it and can perform it safely.
Also see the suggestions for conducting this session on pages 44–45.
Demonstrate the proper inspection of the cranes in your facility.
Instruct participants to practice the inspection procedures.
Demonstrate the proper operation of the cranes in your facility.
Instruct the participant to practice identifying and operating the controls for each crane.
Ensure that each participant understands these topics:
• The specific control buttons for each crane• The directional control buttons for each crane • Potential hazards in the area of each crane:
— Other cranes— Structural obstacles— Equipment and other obstacles— Areas where personnel may be working— The specific location of the power disconnect to be used in the event of an
emergency shutdown of the crane
Demonstrate how to locate the rated capacity of each crane and how to determinethe weight of each load.
Ensure that each participant knows the following:
• Where to find the rated capacity on each crane• Where to find dynamometers in your facility• Specific instructions for operating dynamometers in your facility
Page 43
Overhead Crane Safety – Instructor Guide
Demonstrate the proper procedures for rigging a load and using the riggingequipment found in your workplace, including the following:
• Selecting the proper rigging for different loads• Inspecting rigging equipment• Determining the weight of the load• Finding the center of gravity• Testing the rigging before lifting
Instruct the participant to practice rigging loads.
Demonstrate the proper procedures for moving a load, including the following:
• Moving the crane into place• Attaching the load to the crane• Lifting the load• Moving the load• Lowering the load• Disconnecting the load from the crane
End the session.
Following the session, make sure that the Overhead Crane Safety Training Record isbrought up to date, noting participants’ names, job titles, training type, training dateand instructor’s name.
Suggestions For ConductingA Successful Field Session
When conducting a Field Session, your goal is to make sure participants can safelydo these things:
• Operate the cranes required for their jobs• Select and use all rigging equipment required for their jobs• Rig, lift, move and lower loads
The more realistic the practice scenarios you provide, the better participants will beable to practice and learn what they need to know to do their jobs safely.
Page 44
Overhead Crane Safety – Instructor Guide
Keep the following in mind when creating practice scenarios:
• Have sample loads available to simulate the loads participants will be required towork with in their jobs.
• Use or set up areas that are similar to actual areas in the workplace whereparticipants will be required to rig or set down loads, including these:— Pallets— Frames— Platforms
• For Practice In Inspecting— Have samples of cranes and rigging equipment with typical damage.— These can be collected during the normal course of operations and made
available for training.• For Practice In Stopping
— Set up two cones to identify the area where the load will be stopped andlowered.
— Mark off the area with tape on the floor.— Leave ample room beyond the designated area to allow for making mistakes
without causing damage.• For Practice In Rigging
— Have available all types of rigging that participants will use in their jobs,including options (where appropriate).
— Make different types of loads available.— Set up a scenario in which participants can practice setting up proper
sling angles.• For Practice In Determining Center Of Gravity
— Provide a sample load that has a center of gravity that is off center or that canbe adjusted to move the center of gravity.
— Then have participants practice the proper procedures for determining thecenter of gravity before lifting and moving a load.
Page 45
Overhead Crane Safety – Instructor Guide
Creating And Using Training Devices
Operators who are participating in the Field Session of the Overhead Crane Safetycourse will need to have samples of equipment, materials and loads that are typicalof what they will move during their work activities.
Depending on the types of materials that are moved — and the potential costs ofdamage to those materials — it may not be possible to conduct a Field Session usingactual products, equipment and materials. For example, it may be difficult to havean operator practice a move such as turning over a part if doing so will increase thechance for damaging the crane or rigging should the part be allowed to “shock load”the equipment. Other operations or rigging situations may require the use ofspecialized rigging equipment that isn’t used very often; even so, operators shouldstill know how to use it safely.
If these situations exist in your workplace, you may need to create a training device that simulates the types of materials that will be moved with overheadcranes. A training device is a designated tool that simulates the types of lifts, rigging or operations that will be part of the operator’s daily activities.
The training device doesn’t need to be elaborate; it can be built of lumber or metal. It should be substantially lighter than the Working Load Limits of the slings andother rigging devices, as well as the crane, to allow for learning errors by classparticipants. It’s much easier to learn with a weight that’s 10% to 20% of theWorking Load Limit than with actual load limits.
The training device should also be equipped with multiple attachment points to give the participant practice in balancing loads and simulating odd-shaped parts. If a variety of rigging devices are available in your facility — such as plate clamps,magnets and spreader bars — they can all be incorporated into the training deviceas alternative attachments.
If you build a training device, it’s strongly encouraged that you have a competentengineer review the design of the device to make sure that it won’t fail during use.It’s also recommended that you prooftest all attachment points to 125% of theWorking Load Limit before putting the training device in service.
Page 46
Overhead Crane Safety – Instructor Guide
Training Tips
Conducting A Successful Training Session
When conducting a training session, your goal is to communicate the informationand have participants understand and apply the information to their jobs. In orderto help you reach this goal, here are some suggestions for conducting a successfultraining session:
• Recognize and allow for differences in participants, backgrounds, needs andlearning abilities.
• Make sure participants understand the training objectives.• Allow participants to take an active role in their learning.• Use guiding comments such as “That’s a good point,” “What do the rest of you
think?” “Can you tell me more?” and “Who has a different point of view?” toprovide opportunities for interaction and to avoid lecturing.
• Relate the information in the training session to real-life experiences. Useexamples from your workplace to help participants connect the information totheir activities.
• Proceed from simple concepts to more complex.• Review and summarize at the end of the session using the session objectives.• Set a time schedule, and monitor it throughout the session. Discussions and
practice may make the session longer, depending on the number of participants.• If you are asked a question that you can’t answer, don’t be afraid to say “I don’t
know, but I will find out the answer for you.”
Using Questions
One of the most effective training tools you can use is a question. You can usequestions to do these things:
• Kick off a discussion.• Start the group thinking about a topic.• Determine participants’ knowledge of a topic.• Collect data from participants.• Get all participants involved.• Change the direction of the discussion.• Identify conclusions and summarize a discussion.
Page 47
Overhead Crane Safety – Instructor Guide
The following types of questions can be used to direct and stimulate groupdiscussions:
• Overhead: This type of question is usually used after any introductory remarksand is directed to the entire group. Its purpose is to provoke discussion and elicitresponses from as many members as possible.
• Direct: This type of question is the opposite of the overhead question. It’s aimed ata specific individual, such as someone who appears timid or inattentive, to drawhim or her into the discussion. This type of question can also be used to bring arambling discussion back to the point or to draw out special information from aparticular group member.
• Reverse: This type of question allows you to avoid giving a personal opinion inresponse to a group member’s question. For example, if a participant asks you aquestion to which you don’t want to give your personal opinion, you may turn thequestion around by asking a question like one of these:— “What does that term mean to you?”— “How does that make you feel?”— “What would you do?”Reverse questions elicit background and promote group discussion.
• Follow-Up: This type of question is designed to expand the discussion or lead thegroup forward toward the session’s objectives.
Handling A Difficult Group
Occasionally, you’ll get a group that’s difficult to handle. Here are a few ideas on how to work with this type of group and help them understand and apply the information:
• If your group is quiet or unresponsive, allow time for participants to “warm up.”In this case, ask nonthreatening questions that are easy to answer.
• If your group won’t stop discussing, commend participants for their high level of participation and then tell them that it’s time to move on.
• If you have a group of “fighters,” encourage those participants who stronglydisagree on an issue to think of ways to resolve the disagreement.
Page 48
Overhead Crane Safety – Instructor Guide
Handling Difficult Participants
To keep the session productive and on target, here are a few methods for dealingwith some types of difficult participants:
• An overly helpful participant who jumps in with a response to every question mayprevent others from becoming involved. Make a special effort to engage otherparticipants in the exercise or discussion.
• A participant who won’t be budged from his or her opinion can be asked to acceptthe group consensus for the moment and then assured that you will be glad todiscuss his or her point of view later.
• A participant who points out the worst in every idea but seldom offers analternative can be acknowledged politely but passed over for other opinions.
• An overly talkative participant can be put back on track by restating the relevantpoints or by pointing out (with a smile) that the person is a bit “off the subject.”
• A reserved participant can be drawn out by asking a direct question and thenfollowing the response with a sincere compliment.
• A daydreamer in the group can be brought back to attention by asking an easyquestion or restating earlier remarks and asking for his or her opinion.
Page 49
Overhead Crane Safety – Instructor Guide
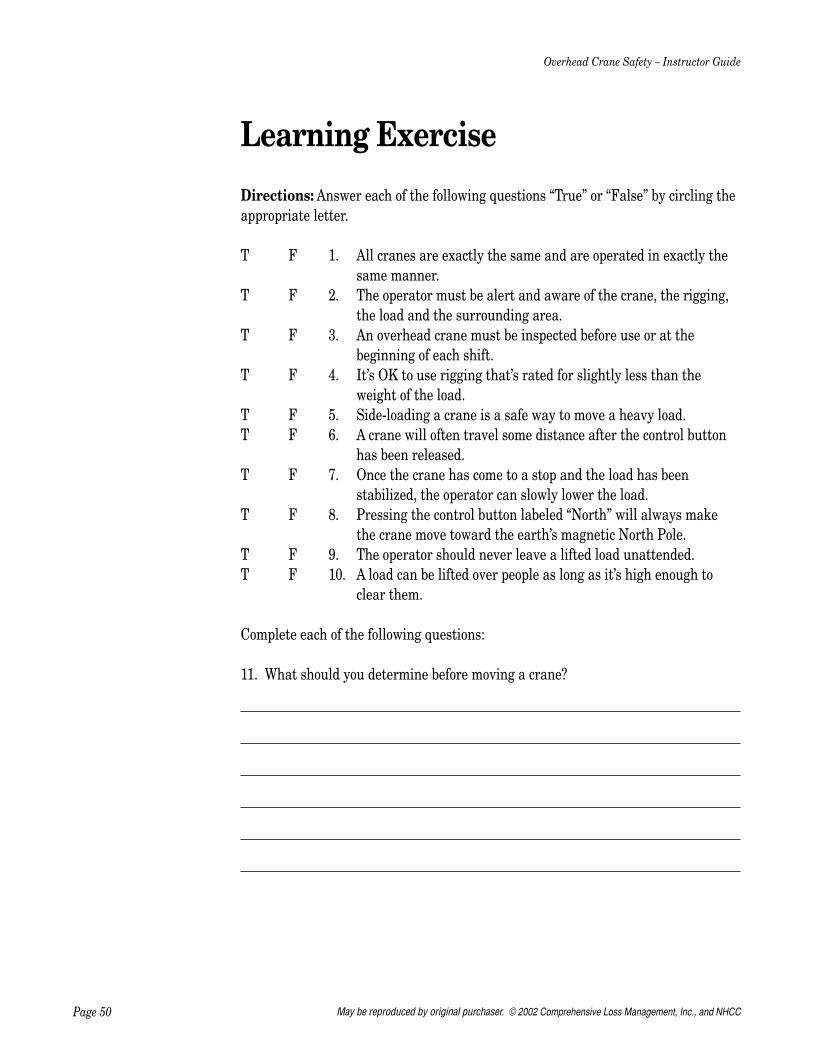
Learning ExerciseDirections: Answer each of the following questions “True” or “False” by circling theappropriate letter.
T F 1. All cranes are exactly the same and are operated in exactly thesame manner.
T F 2. The operator must be alert and aware of the crane, the rigging,the load and the surrounding area.
T F 3. An overhead crane must be inspected before use or at thebeginning of each shift.
T F 4. It’s OK to use rigging that’s rated for slightly less than theweight of the load.
T F 5. Side-loading a crane is a safe way to move a heavy load.T F 6. A crane will often travel some distance after the control button
has been released.T F 7. Once the crane has come to a stop and the load has been
stabilized, the operator can slowly lower the load.T F 8. Pressing the control button labeled “North” will always make
the crane move toward the earth’s magnetic North Pole.T F 9. The operator should never leave a lifted load unattended.T F 10. A load can be lifted over people as long as it’s high enough to
clear them.
Complete each of the following questions:
11. What should you determine before moving a crane?
Page 50
Overhead Crane Safety – Instructor Guide
May be reproduced by original purchaser. © 2002 Comprehensive Loss Management, Inc., and NHCC
12. What are three types of rigging used in your facility?
13. What are three things you should inspect before using a crane?
14. What are three things you should inspect before using a sling?
15. What steps should you follow for determining a load’s center of gravity?
Page 51
Overhead Crane Safety – Instructor Guide
Name: ____________________________________________________________________________ Date: ________________________
Employee Identification #: __________________________________________________________________________________________
Company: ______________________________________________________________________________________________________
Trainer’s Name:__________________________________________________________________________________________________
May be reproduced by original purchaser. © 2002 Comprehensive Loss Management, Inc., and NHCC

Answers To Learning Exercise
1. False. There are many different types of overhead cranes, depending on how the crane lifts and moves a load, and each may have different operatingcharacteristics.
2. True.
3. True.
4. False. Rigging should be used that’s rated for more than the weight of the load.In some rigging situations, the load may place increased stress on the rigging.When this is the case, slings and rigging devices rated for higher Work LoadLimits must be used.
5. False. The load should always be lifted vertically — never pulled from the side.
6. True.
7. True.
8. False. The directions indicated on the control buttons may not necessarilycorrespond to actual directions within the facility, depending on the crane’slocation and orientation to the compass.
9. True.
10. False. A load should never be moved over people.
11. • No other cranes will come into contact with the crane being operated.• No obstacles are in the path of the crane and/or load.• No personnel are in the path of the load or will be under the load when
it’s raised.• The area where the load is to be placed is clear and prepared to receive it.• The crane and rigging has been inspected.
12. Check answers against the types of rigging used in your facility. Answers mayinclude any three of the following:• Slings (chain, nylon, wire mesh)• Eyebolts• Foundry hooks• Hoist rings• Lift magnets• Lifting beams• Plate clamps• Shackles
Page 52
Overhead Crane Safety – Instructor Guide
May be reproduced by original purchaser. © 2002 Comprehensive Loss Management, Inc., and NHCC
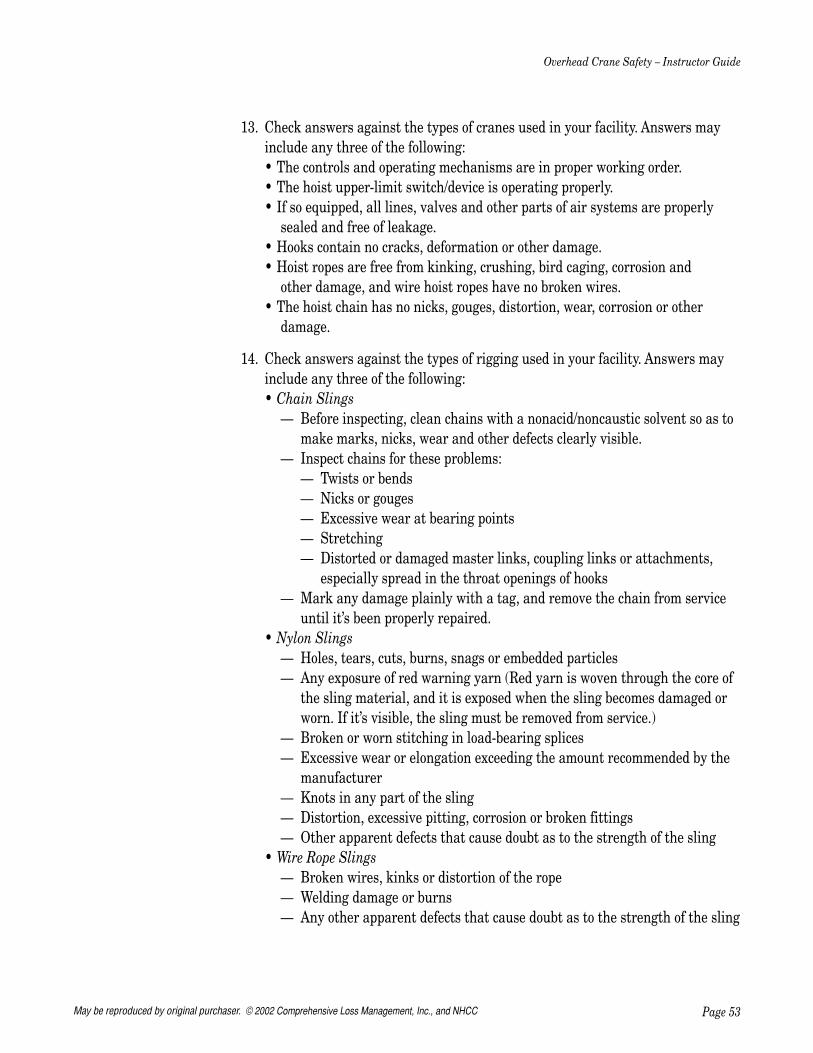
13. Check answers against the types of cranes used in your facility. Answers mayinclude any three of the following:• The controls and operating mechanisms are in proper working order.• The hoist upper-limit switch/device is operating properly.• If so equipped, all lines, valves and other parts of air systems are properly
sealed and free of leakage.• Hooks contain no cracks, deformation or other damage.• Hoist ropes are free from kinking, crushing, bird caging, corrosion and
other damage, and wire hoist ropes have no broken wires.• The hoist chain has no nicks, gouges, distortion, wear, corrosion or other
damage.
14. Check answers against the types of rigging used in your facility. Answers mayinclude any three of the following:• Chain Slings
— Before inspecting, clean chains with a nonacid/noncaustic solvent so as tomake marks, nicks, wear and other defects clearly visible.
— Inspect chains for these problems:— Twists or bends— Nicks or gouges — Excessive wear at bearing points — Stretching— Distorted or damaged master links, coupling links or attachments,
especially spread in the throat openings of hooks— Mark any damage plainly with a tag, and remove the chain from service
until it’s been properly repaired.• Nylon Slings
— Holes, tears, cuts, burns, snags or embedded particles — Any exposure of red warning yarn (Red yarn is woven through the core of
the sling material, and it is exposed when the sling becomes damaged orworn. If it’s visible, the sling must be removed from service.)
— Broken or worn stitching in load-bearing splices — Excessive wear or elongation exceeding the amount recommended by the
manufacturer — Knots in any part of the sling — Distortion, excessive pitting, corrosion or broken fittings — Other apparent defects that cause doubt as to the strength of the sling
• Wire Rope Slings— Broken wires, kinks or distortion of the rope— Welding damage or burns— Any other apparent defects that cause doubt as to the strength of the sling
Page 53
Overhead Crane Safety – Instructor Guide
May be reproduced by original purchaser. © 2002 Comprehensive Loss Management, Inc., and NHCC
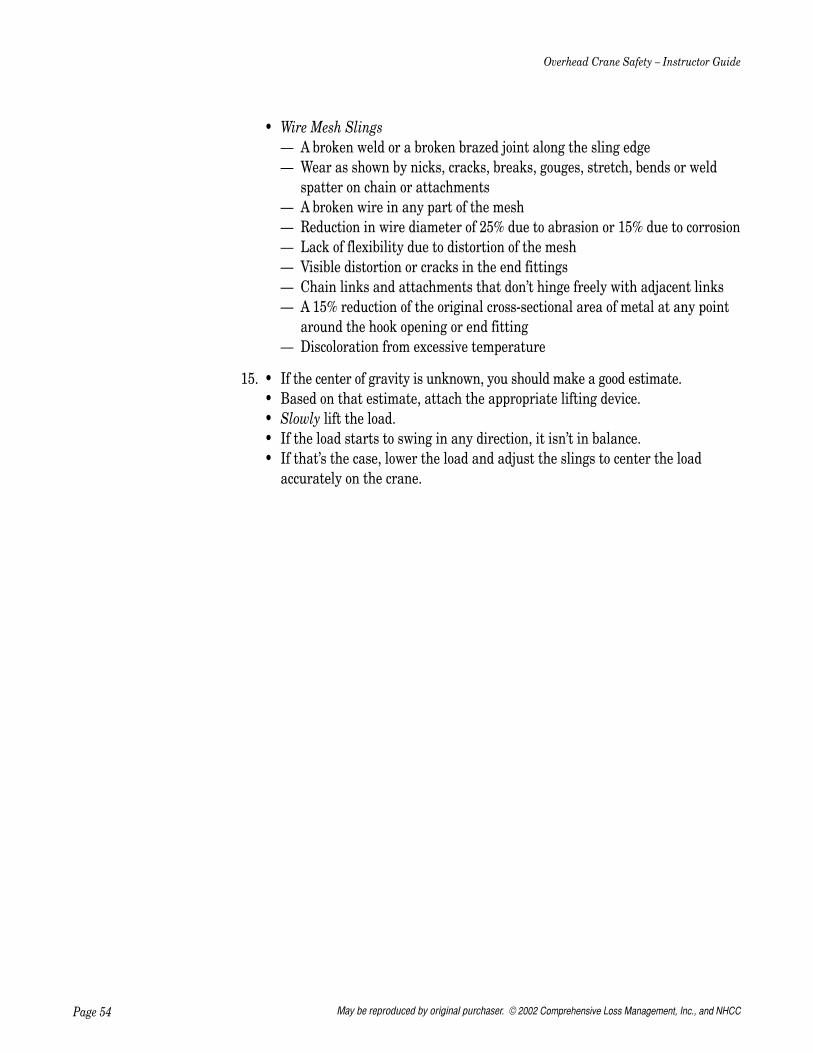
• Wire Mesh Slings— A broken weld or a broken brazed joint along the sling edge— Wear as shown by nicks, cracks, breaks, gouges, stretch, bends or weld
spatter on chain or attachments — A broken wire in any part of the mesh— Reduction in wire diameter of 25% due to abrasion or 15% due to corrosion— Lack of flexibility due to distortion of the mesh— Visible distortion or cracks in the end fittings— Chain links and attachments that don’t hinge freely with adjacent links— A 15% reduction of the original cross-sectional area of metal at any point
around the hook opening or end fitting— Discoloration from excessive temperature
15. • If the center of gravity is unknown, you should make a good estimate.• Based on that estimate, attach the appropriate lifting device.• Slowly lift the load.• If the load starts to swing in any direction, it isn’t in balance.• If that’s the case, lower the load and adjust the slings to center the load
accurately on the crane.
Page 54
Overhead Crane Safety – Instructor Guide
May be reproduced by original purchaser. © 2002 Comprehensive Loss Management, Inc., and NHCC
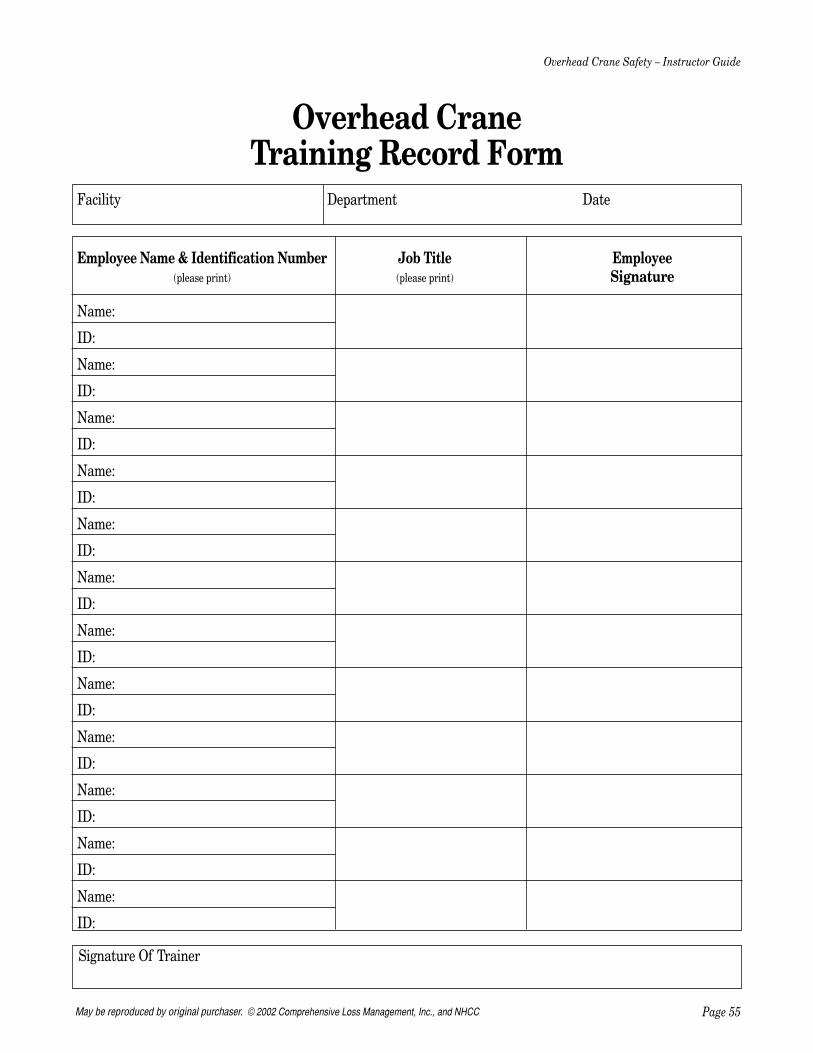
Page 55
Overhead Crane Safety – Instructor Guide
Overhead CraneTraining Record Form
Facility Department Date
Employee Name & Identification Number Job Title Employee(please print) (please print) Signature
Name:
ID:
Name:
ID:
Name:
ID:
Name:
ID:
Name:
ID:
Name:
ID:
Name:
ID:
Name:
ID:
Name:
ID:
Name:
ID:
Name:
ID:
Name:
ID:
Signature Of Trainer
May be reproduced by original purchaser. © 2002 Comprehensive Loss Management, Inc., and NHCC

Overhead Crane Operator Evaluation Form Instructions: Use this checklist during the field session to evaluate operator proficiency. It can also be used for periodic evaluation to ensure that operators are continuing to operate overhead cranes properly.
Operator Name
Evaluator Name
Date Of Evaluation
Equipment Operated
Operator Behaviors Good Fair Poor N/A Comments
Crane and Rigging Inspection 1. Controls 2. Operating Mechanisms 3. Hoist upper limit switch 4. Air systems (if so equipped) 5. Hooks 6. Hoist ropes/chains 7. Slings 8. Other lifting devices Crane Movement Without Load 1. Operator alert and focused on crane
operation at all times
2. Operator looks for other cranes in the area 3. Looks for obstacles the path of the crane 4. Demonstrates correct operation of controls 5. Starts and stops crane smoothly Rigging 1. Verifies load weight and crane rated
capacity
2. Uses dynamometer to weigh load if load weight is unknown
3. Hoist rope is free from kinks/twists and is not wrapped around load
4. Selects proper rigging for load 5. Properly secures rigging to load 6. Properly checks for center of gravity and
balances load
7. Takes up slack in hoist rope Lifting and Moving a Load 1. Checks path for obstacles/personnel 2. Slow, smooth vertical lift of load 3. Load raised high enough to clear obstacles 4. Avoids contacting obstacles while moving
load
5. Demonstrates correct operation of controls
May be reproduced by original purchaser © 2002 Comprehensive Loss Management, Inc. and NHCC Page 1 of 2
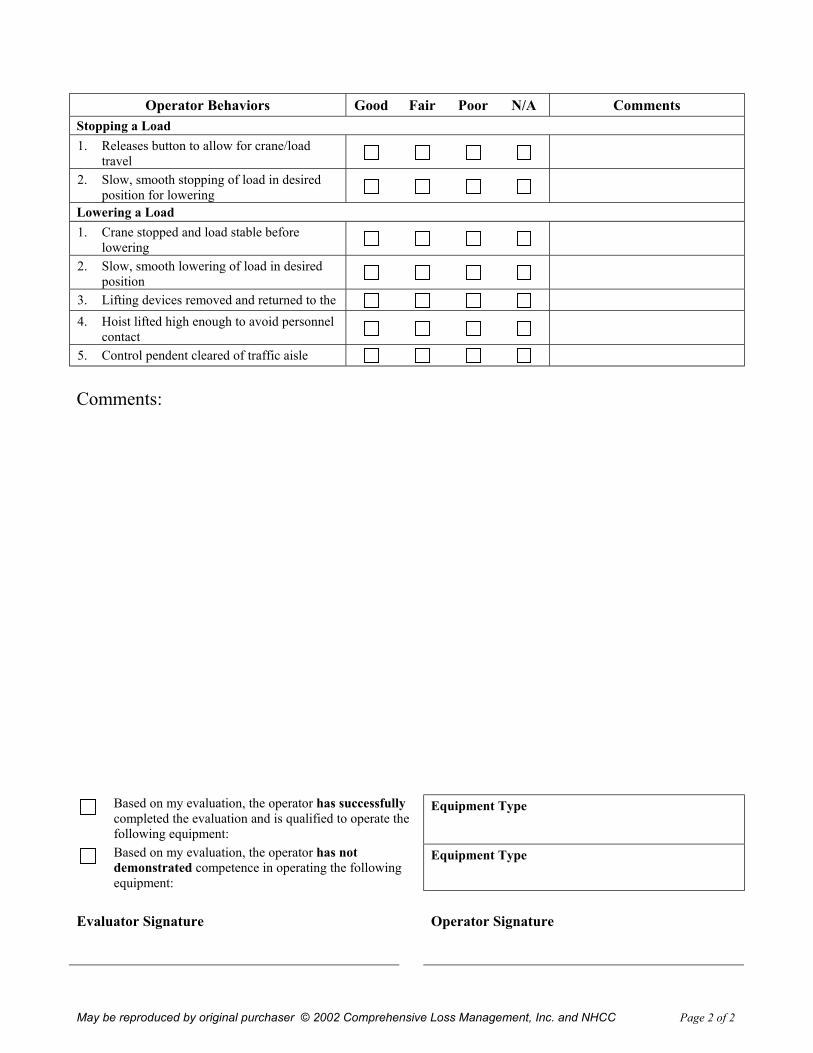
May be reproduced by original purchaser © 2002 Comprehensive Loss Management, Inc. and NHCC Page 2 of 2
Operator Behaviors Good Fair Poor N/A Comments
Stopping a Load 1. Releases button to allow for crane/load
travel
2. Slow, smooth stopping of load in desired position for lowering
Lowering a Load 1. Crane stopped and load stable before
lowering
2. Slow, smooth lowering of load in desired position
3. Lifting devices removed and returned to the 4. Hoist lifted high enough to avoid personnel
contact
5. Control pendent cleared of traffic aisle Comments:
Based on my evaluation, the operator has successfully completed the evaluation and is qualified to operate the following equipment:
Equipment Type
Based on my evaluation, the operator has not demonstrated competence in operating the following equipment:
Equipment Type
Evaluator Signature
Operator Signature


Overhead Crane Safety – Mentor Guide
Overhead Crane Safety
Self-Study Mentor Guide
OVERHEAD CRANE SAFETY SELF-STUDY MENTOR GUIDE

OVER
HEAD
CRA
NE S
AFET
Y SE
LF-S
TUDY
MEN
TOR
GUID
E
Table Of Contents
Page #
The Mentor’s Role M-1
Meet With The Participant M-2
Conduct The Field Session M-2
Answer Key M-6
Overhead Crane Operator Evaluation Form M-8
Overhead Crane Safety – Mentor Guide
© 2002 Comprehensive Loss Management, Inc., and NHCC

The information contained in this program has been developed in good faith and is believed to present good safety principles. CLMI and all other participatingorganizations make no representations or warranties as to the completeness oraccuracy thereof. Persons using this information must make their own determinationas to its suitability for their purposes in support of their own safety programs. CLMIand all other participating organizations are in no way responsible for damages of anynature resulting from the use of this information.
Funding for development of this program has been provided by the Minnesota JobSkills Partnership through the collaborative efforts of Caterpillar Paving Products, Inc.,and The Center for Training and Development.
Overhead Crane Safety – Mentor Guide
© 2002 Comprehensive Loss Management, Inc., and NHCC
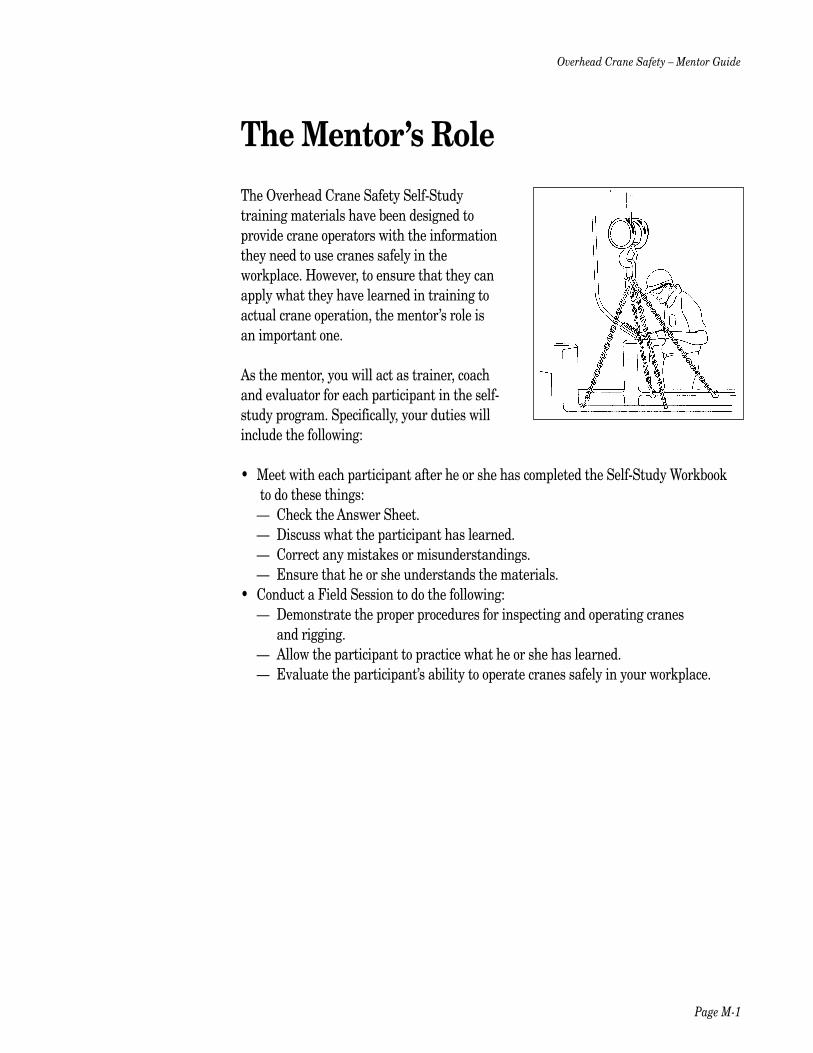
The Mentor’s RoleThe Overhead Crane Safety Self-Studytraining materials have been designed toprovide crane operators with the informationthey need to use cranes safely in theworkplace. However, to ensure that they canapply what they have learned in training toactual crane operation, the mentor’s role is an important one.
As the mentor, you will act as trainer, coachand evaluator for each participant in the self-study program. Specifically, your duties willinclude the following:
• Meet with each participant after he or she has completed the Self-Study Workbookto do these things:— Check the Answer Sheet.— Discuss what the participant has learned.— Correct any mistakes or misunderstandings.— Ensure that he or she understands the materials.
• Conduct a Field Session to do the following:— Demonstrate the proper procedures for inspecting and operating cranes
and rigging.— Allow the participant to practice what he or she has learned.— Evaluate the participant’s ability to operate cranes safely in your workplace.
Page M-1
Overhead Crane Safety – Mentor Guide
Meet With The ParticipantThe self-study program is a 1- to 2-hour session for individual participants, and it usesa workbook and a videotape on the safe operation of overhead cranes. The participantwill watch the videotape, and then or she will write answers to the workbook questions.The participant should write his or her answers on the Answer Sheet provided in theSelf-Study Workbook.
When you meet with the participant, review his or her Answer Sheet. (The correctanswers can be found in the Answer Key at the end of this guide.) If you are satisfiedthat the participant understands the materials, you can schedule and conduct the FieldSession. If you have doubts or concerns about the participant’s understanding at thispoint, instruct him or her to review the workbook and videotape, and then have him or her complete another Answer Sheet for your review.
You should not proceed with the Field Session until the participant has sufficientlymastered the video and workbook materials.
Conduct The Field SessionIn the Field Session, you will demonstrate and provide the opportunity for participantsto practice using the cranes and rigging equipment they will use in their jobs. Inaddition, you will evaluate participants’ performance to ensure that they can safelyoperate cranes in your workplace.
This session is best conducted on an individual or small-group basis. Use the OverheadCrane Operator Evaluation Checklist, found at the end of this guide, to check eachparticipant’s skill level as you conduct the Field Session.
Each participant should repeat each activity until you are satisfied that he or sheunderstands it and can perform it safely.
Also see the suggestions for conducting this session on page M-4.
Page M-2
Overhead Crane Safety – Mentor Guide
The following should be part of your Field Session:
• Demonstrate the proper inspection of the cranes in your facility, and haveparticipants practice the inspection procedures.
• Demonstrate the operation of the cranes in your facility, and have participantspractice identifying and operating the controls for each crane. Make sure thatparticipants understand these concepts:— The specific control buttons for each crane— The directional control buttons for each crane and how the crane moves
when each button is pushed— Potential hazards in the area of each crane:
– Other cranes– Structural obstacles– Equipment and other obstacles– Areas where personnel may be working– The specific location of the power disconnect to be used in the event of an
emergency shutdown of the crane• Demonstrate how to locate the rated capacity of each crane and how to determine
the weight of each load. Make sure participants know this information:— Where to find the rated capacity on each crane— Where to find dynamometers in your facility— Specific instructions for operating dynamometers in your facility
• Demonstrate the proper procedures for rigging a load using the rigging equipment in your workplace, and then have participants practice rigging loads. Include thefollowing steps:— Selecting the proper rigging for different loads— Inspecting rigging equipment— Determining the weight of the load— Finding the center of gravity— Testing the rigging before lifting
• Demonstrate the proper procedures for moving a load, including the following:— Moving the crane into place— Attaching the load to the crane— Lifting the load— Moving the load— Lowering the load— Disconnecting the load from the crane
Page M-3
Overhead Crane Safety – Mentor Guide
How To Conduct A Successful Field Session
When conducting a Field Session, your goal is to make sure participants can safely do these things:
• Operate the cranes required for their jobs• Select and use all rigging equipment required for their jobs• Rig, lift, move and lower loads
The more realistic the practice scenarios you provide, the better participants will be able to practice and learn what they need to know to do their jobs safely.
Keep the following in mind when creating practice scenarios:
• Have sample loads available to simulate the loads participants will be required to work with in their jobs.
• Use or set up areas that are similar to actual areas in the workplace whereparticipants will be required to rig or set down loads, including these:— Pallets— Frames— Platforms
• For Practice In Inspecting— Have samples of cranes and rigging equipment with typical damage.— These can be collected during the normal course of operations and made
available for training.• For Practice In Stopping
— Set up two cones to identify the area where the load will be stopped and lowered.— Mark off the area with tape on the floor.— Leave ample room beyond the designated area to allow for making mistakes
without causing damage.• For Practice In Rigging
— Have available all types of rigging that participants will use in their jobs,including options (where appropriate).
— Make different types of loads available.— Set up a scenario in which participants can practice setting up proper
sling angles.• For Practice In Determining Center Of Gravity
— Provide a sample load that has a center of gravity that is off center or that can be adjusted to move the center of gravity.
— Then have participants practice the proper procedures for determining the centerof gravity before lifting and moving a load.
Page M-4
Overhead Crane Safety – Mentor Guide
How To Create And Use Training Devices
Operators who are participating in the Field Session of the Overhead Crane Safetycourse will need to have samples of equipment, materials and loads that are typical of what they will move during their work activities.
Depending on the types of materials that are moved — and the potential costs ofdamage to those materials — it may not be possible to conduct a Field Session usingactual products, equipment and materials. For example, it may be difficult to have anoperator practice a move such as turning over a part if doing so will increase the chancefor damaging the crane or rigging should the part be allowed to “shock load” theequipment. Other operations or rigging situations may require the use of specializedrigging equipment that isn’t used very often; even so, operators should still know howto use it safely.
If these situations exist in your workplace, you may need to create a training devicethat simulates the types of materials that will be moved with overhead cranes. Atraining device is a designated tool that simulates the types of lifts, rigging oroperations that will be part of the operator’s daily activities.
The training device doesn’t need to be elaborate; it can be built of lumber or metal. Itshould be substantially lighter than the Working Load Limits of the slings and otherrigging devices, as well as the crane, to allow for learning errors by class participants.It’s much easier to learn with a weight that’s 10% to 20% of the Working Load Limitthan with actual load limits.
The training device should also be equipped with multiple attachment points to givethe participant practice in balancing loads and simulating odd-shaped parts. If avariety of rigging devices are available in your facility — such as plate clamps, magnetsand spreader bars — they can all be incorporated into the training device as alternativeattachments.
If you build a training device, it’s strongly encouraged that you have a competentengineer review the design of the device to make sure that it won’t fail during use. It’salso recommended that you prooftest all attachment points to 125% of the WorkingLoad Limit before putting the training device in service.
Page M-5
Overhead Crane Safety – Mentor Guide

Answer KeyDirections: Use this key to score the participant’s answers to the questions in the Self-Study Workbook.
Part 1: Overhead Crane Overview1. b2. a3. c4. d
Part 2: Overhead Crane Inspection5. d6. a7. b8. d9. b
Part 3: Overhead Crane Operation10. d11. e12. b13. d14. b15. d 16. c17. c18. d19. a20. d21. b22. c23. a
Page M-6
Overhead Crane Safety – Mentor Guide

Part 4: Rigging24. c25. a26. c27. d28. c29. e30. a31. b32. a33. d34. c35. d36. b37. c38. f39. e
Part 5: Review40. b41. c42. f43. d44. a45. c
Page M-7
Overhead Crane Safety – Mentor Guide
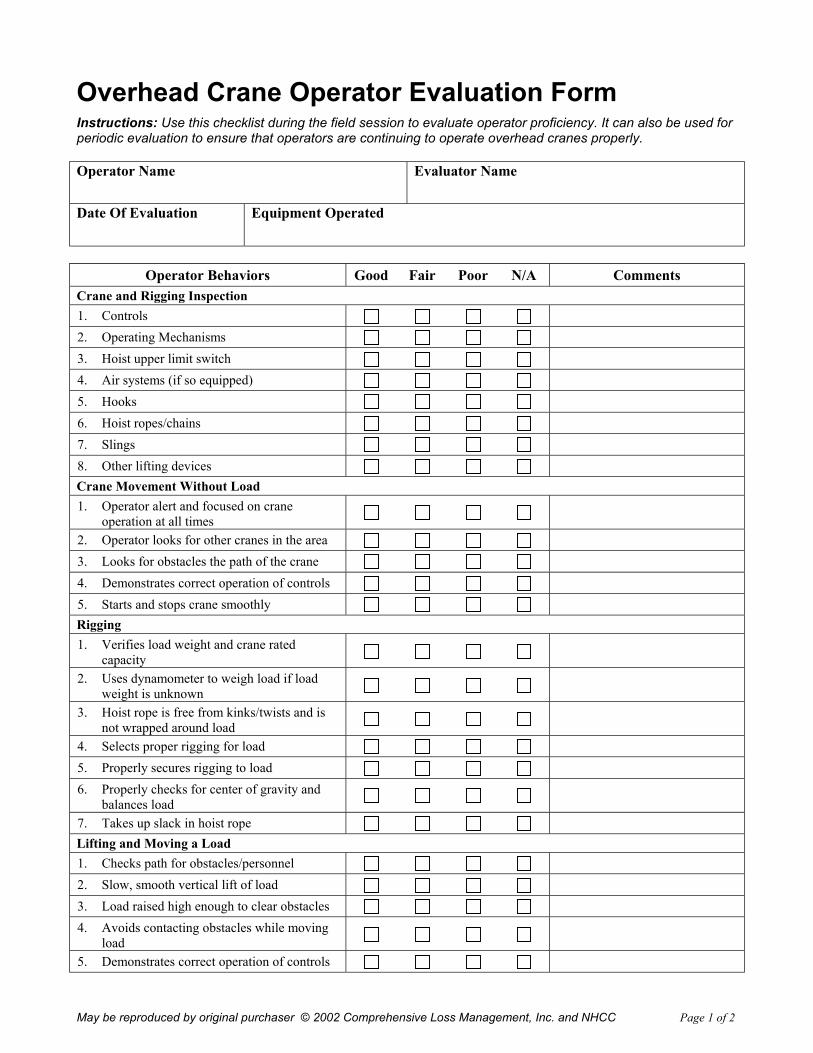
Overhead Crane Operator Evaluation Form Instructions: Use this checklist during the field session to evaluate operator proficiency. It can also be used for periodic evaluation to ensure that operators are continuing to operate overhead cranes properly.
Operator Name
Evaluator Name
Date Of Evaluation
Equipment Operated
Operator Behaviors Good Fair Poor N/A Comments
Crane and Rigging Inspection 1. Controls 2. Operating Mechanisms 3. Hoist upper limit switch 4. Air systems (if so equipped) 5. Hooks 6. Hoist ropes/chains 7. Slings 8. Other lifting devices Crane Movement Without Load 1. Operator alert and focused on crane
operation at all times
2. Operator looks for other cranes in the area 3. Looks for obstacles the path of the crane 4. Demonstrates correct operation of controls 5. Starts and stops crane smoothly Rigging 1. Verifies load weight and crane rated
capacity
2. Uses dynamometer to weigh load if load weight is unknown
3. Hoist rope is free from kinks/twists and is not wrapped around load
4. Selects proper rigging for load 5. Properly secures rigging to load 6. Properly checks for center of gravity and
balances load
7. Takes up slack in hoist rope Lifting and Moving a Load 1. Checks path for obstacles/personnel 2. Slow, smooth vertical lift of load 3. Load raised high enough to clear obstacles 4. Avoids contacting obstacles while moving
load
5. Demonstrates correct operation of controls
May be reproduced by original purchaser © 2002 Comprehensive Loss Management, Inc. and NHCC Page 1 of 2

May be reproduced by original purchaser © 2002 Comprehensive Loss Management, Inc. and NHCC Page 2 of 2
Operator Behaviors Good Fair Poor N/A Comments
Stopping a Load 1. Releases button to allow for crane/load
travel
2. Slow, smooth stopping of load in desired position for lowering
Lowering a Load 1. Crane stopped and load stable before
lowering
2. Slow, smooth lowering of load in desired position
3. Lifting devices removed and returned to the 4. Hoist lifted high enough to avoid personnel
contact
5. Control pendent cleared of traffic aisle Comments:
Based on my evaluation, the operator has successfully completed the evaluation and is qualified to operate the following equipment:
Equipment Type
Based on my evaluation, the operator has not demonstrated competence in operating the following equipment:
Equipment Type
Evaluator Signature
Operator Signature