Embed Size (px)
Citation preview
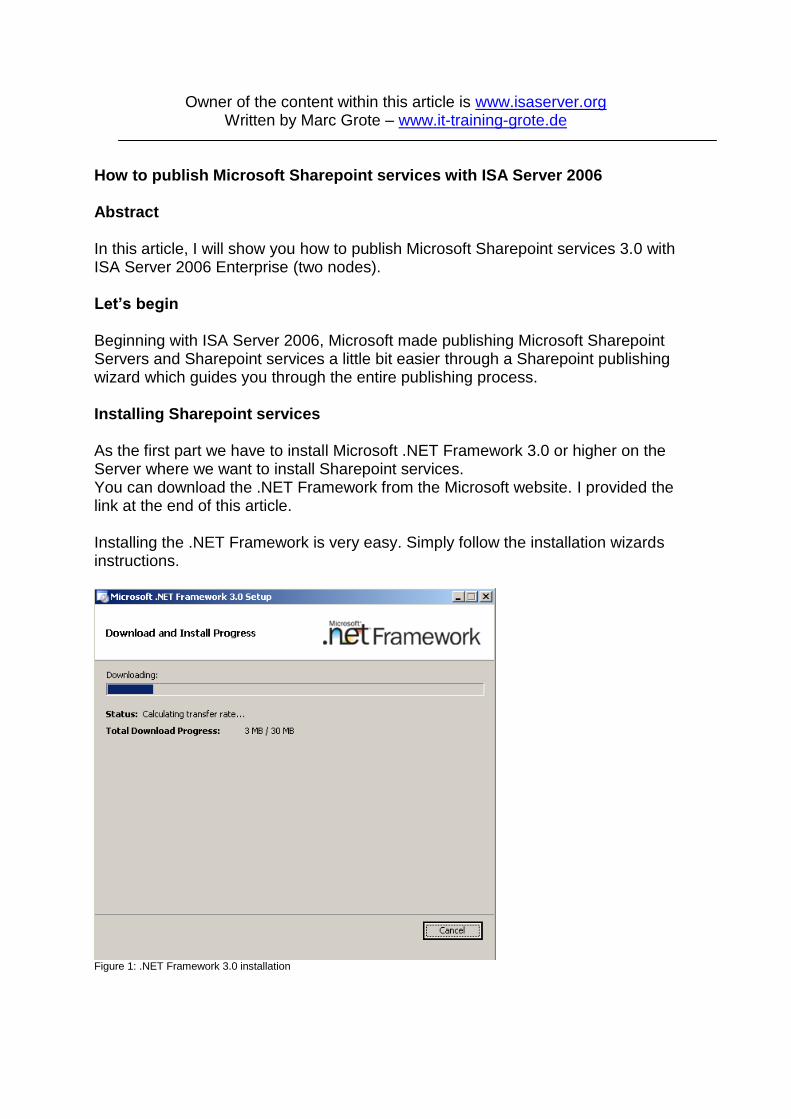
Owner of the content within this article is www.isaserver.org Written by Marc Grote – www.it-training-grote.de
How to publish Microsoft Sharepoint services with ISA Server 2006 Abstract In this article, I will show you how to publish Microsoft Sharepoint services 3.0 with ISA Server 2006 Enterprise (two nodes). Let’s begin Beginning with ISA Server 2006, Microsoft made publishing Microsoft Sharepoint Servers and Sharepoint services a little bit easier through a Sharepoint publishing wizard which guides you through the entire publishing process. Installing Sharepoint services As the first part we have to install Microsoft .NET Framework 3.0 or higher on the Server where we want to install Sharepoint services. You can download the .NET Framework from the Microsoft website. I provided the link at the end of this article. Installing the .NET Framework is very easy. Simply follow the installation wizards instructions.
Figure 1: .NET Framework 3.0 installation
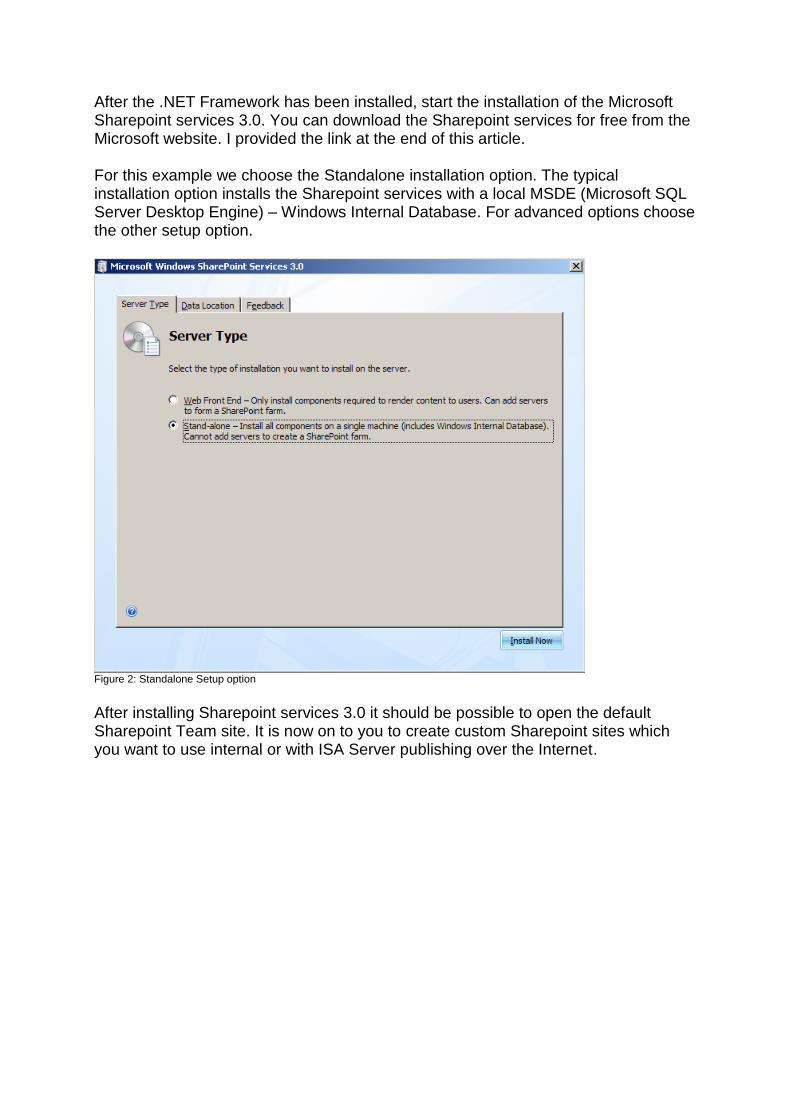
After the .NET Framework has been installed, start the installation of the Microsoft Sharepoint services 3.0. You can download the Sharepoint services for free from the Microsoft website. I provided the link at the end of this article. For this example we choose the Standalone installation option. The typical installation option installs the Sharepoint services with a local MSDE (Microsoft SQL Server Desktop Engine) – Windows Internal Database. For advanced options choose the other setup option.
Figure 2: Standalone Setup option After installing Sharepoint services 3.0 it should be possible to open the default Sharepoint Team site. It is now on to you to create custom Sharepoint sites which you want to use internal or with ISA Server publishing over the Internet.
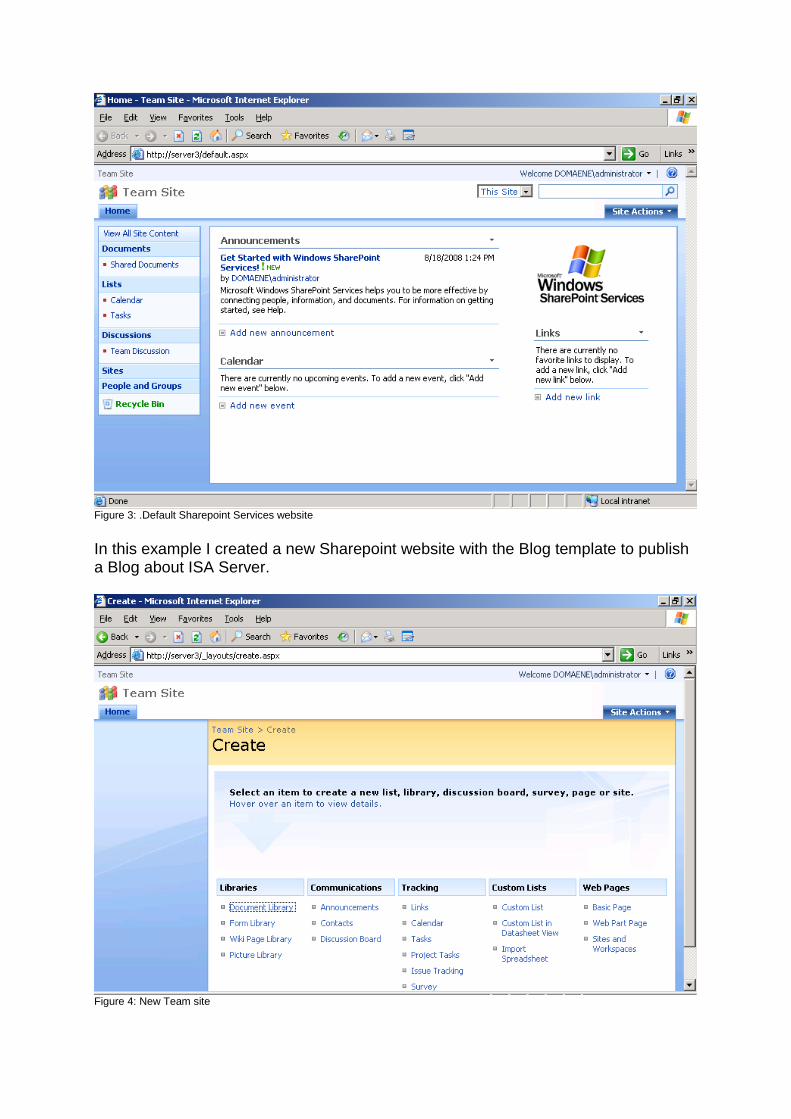
Figure 3: .Default Sharepoint Services website In this example I created a new Sharepoint website with the Blog template to publish a Blog about ISA Server.
Figure 4: New Team site
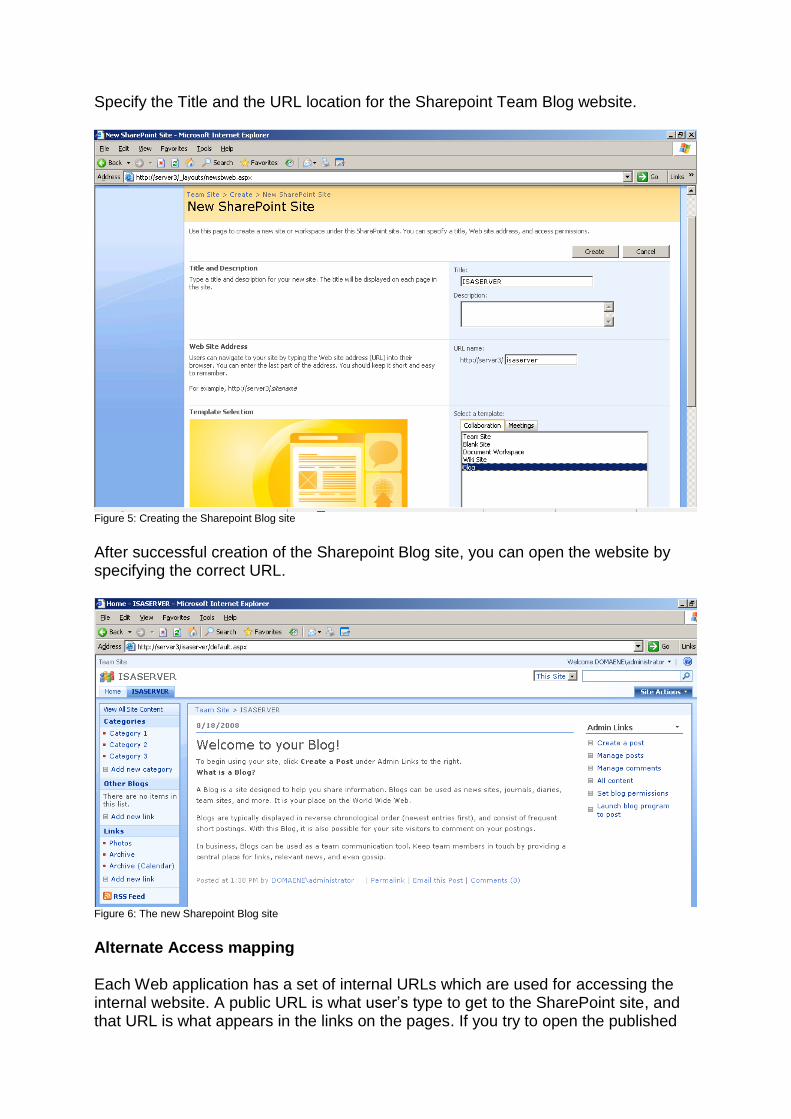
Specify the Title and the URL location for the Sharepoint Team Blog website.
Figure 5: Creating the Sharepoint Blog site After successful creation of the Sharepoint Blog site, you can open the website by specifying the correct URL.
Figure 6: The new Sharepoint Blog site Alternate Access mapping Each Web application has a set of internal URLs which are used for accessing the internal website. A public URL is what user’s type to get to the SharePoint site, and that URL is what appears in the links on the pages. If you try to open the published
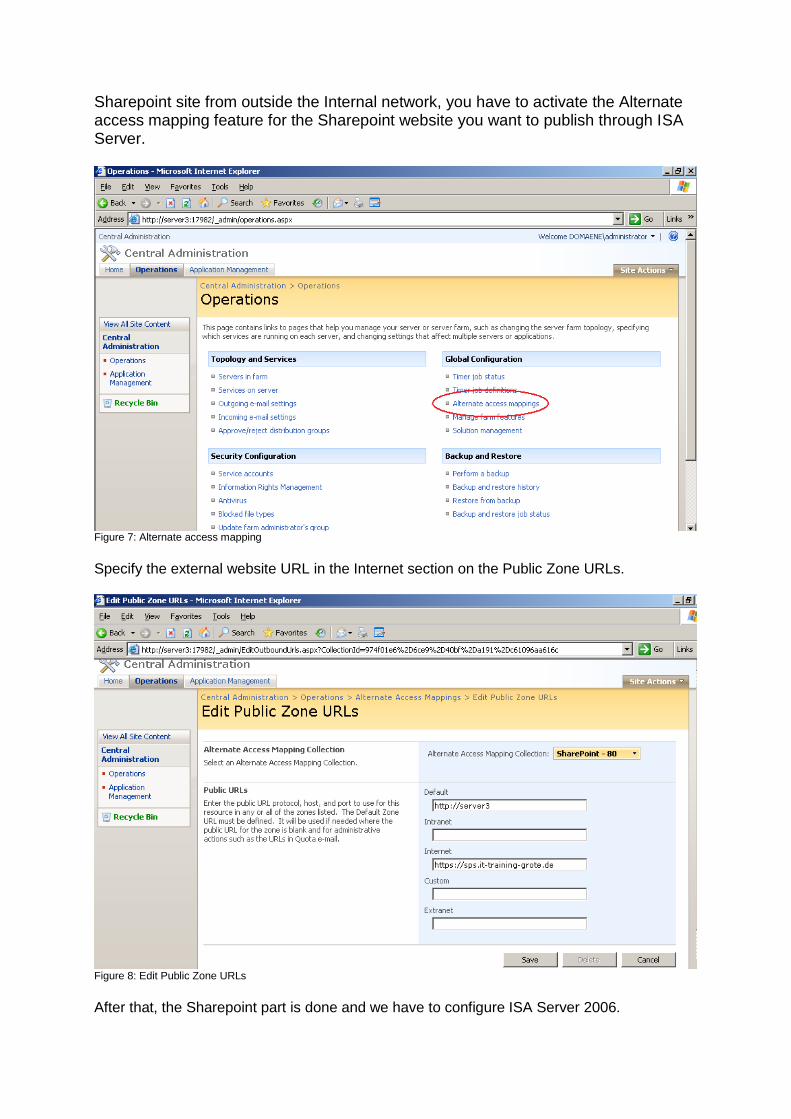
Sharepoint site from outside the Internal network, you have to activate the Alternate access mapping feature for the Sharepoint website you want to publish through ISA Server.
Figure 7: Alternate access mapping Specify the external website URL in the Internet section on the Public Zone URLs.
Figure 8: Edit Public Zone URLs After that, the Sharepoint part is done and we have to configure ISA Server 2006.
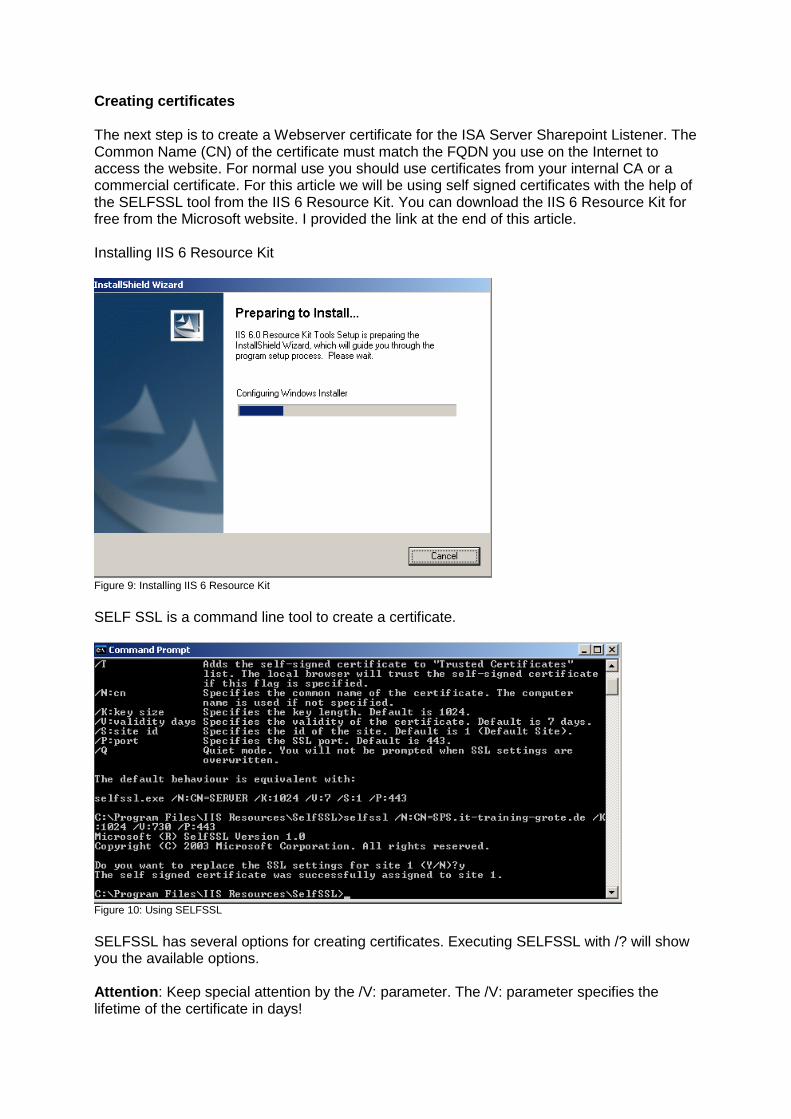
Creating certificates The next step is to create a Webserver certificate for the ISA Server Sharepoint Listener. The Common Name (CN) of the certificate must match the FQDN you use on the Internet to access the website. For normal use you should use certificates from your internal CA or a commercial certificate. For this article we will be using self signed certificates with the help of the SELFSSL tool from the IIS 6 Resource Kit. You can download the IIS 6 Resource Kit for free from the Microsoft website. I provided the link at the end of this article. Installing IIS 6 Resource Kit
Figure 9: Installing IIS 6 Resource Kit SELF SSL is a command line tool to create a certificate.
Figure 10: Using SELFSSL SELFSSL has several options for creating certificates. Executing SELFSSL with /? will show you the available options. Attention: Keep special attention by the /V: parameter. The /V: parameter specifies the lifetime of the certificate in days!
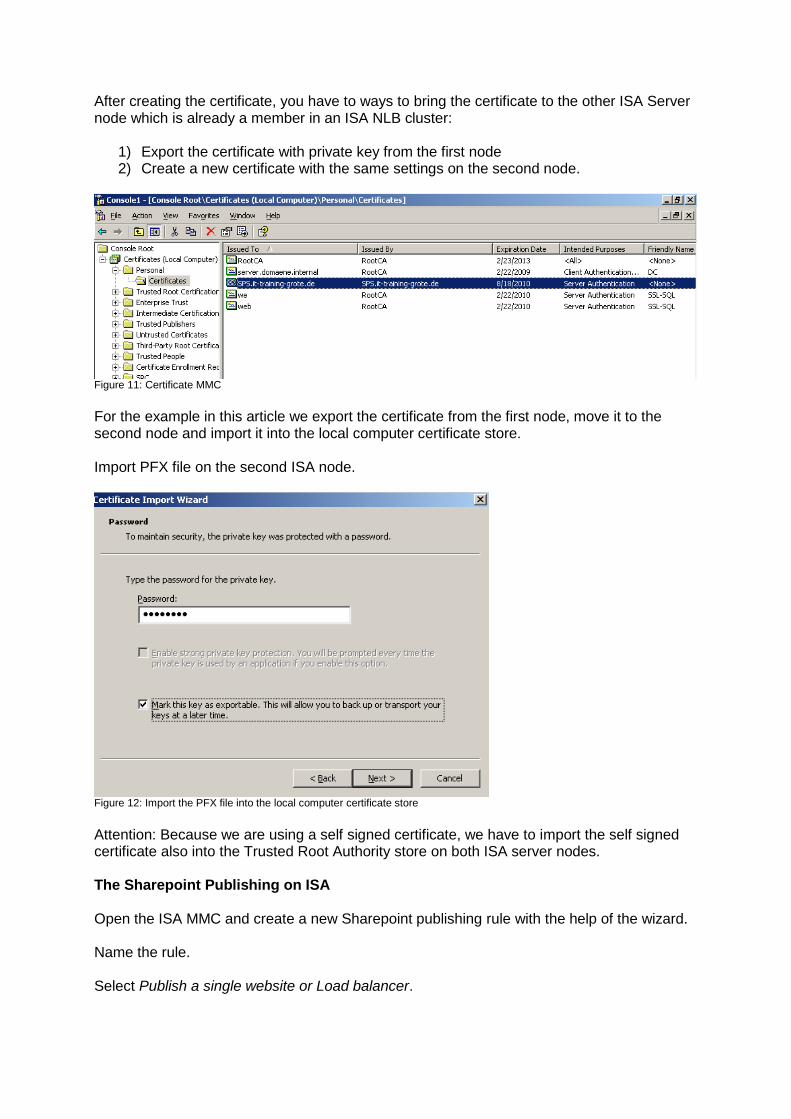
After creating the certificate, you have to ways to bring the certificate to the other ISA Server node which is already a member in an ISA NLB cluster:
1) Export the certificate with private key from the first node 2) Create a new certificate with the same settings on the second node.
Figure 11: Certificate MMC For the example in this article we export the certificate from the first node, move it to the second node and import it into the local computer certificate store. Import PFX file on the second ISA node.
Figure 12: Import the PFX file into the local computer certificate store Attention: Because we are using a self signed certificate, we have to import the self signed certificate also into the Trusted Root Authority store on both ISA server nodes. The Sharepoint Publishing on ISA Open the ISA MMC and create a new Sharepoint publishing rule with the help of the wizard. Name the rule. Select Publish a single website or Load balancer.
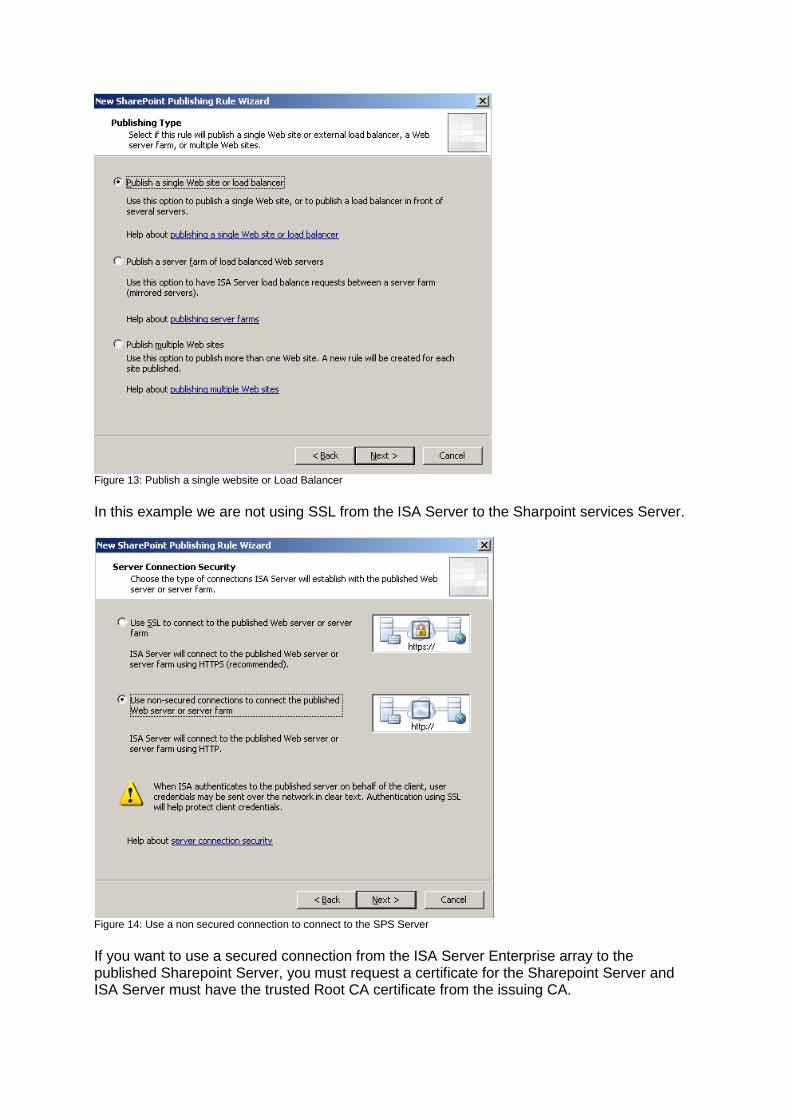
Figure 13: Publish a single website or Load Balancer In this example we are not using SSL from the ISA Server to the Sharpoint services Server.
Figure 14: Use a non secured connection to connect to the SPS Server If you want to use a secured connection from the ISA Server Enterprise array to the published Sharepoint Server, you must request a certificate for the Sharepoint Server and ISA Server must have the trusted Root CA certificate from the issuing CA.
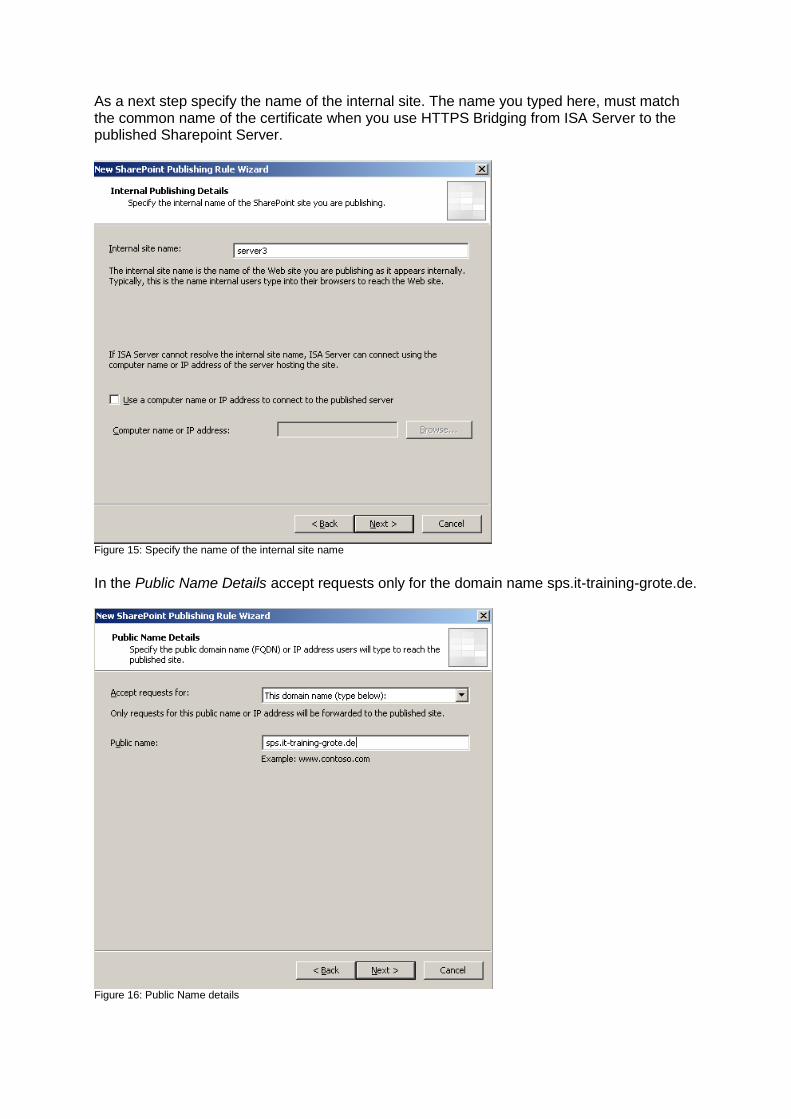
As a next step specify the name of the internal site. The name you typed here, must match the common name of the certificate when you use HTTPS Bridging from ISA Server to the published Sharepoint Server.
Figure 15: Specify the name of the internal site name In the Public Name Details accept requests only for the domain name sps.it-training-grote.de.
Figure 16: Public Name details
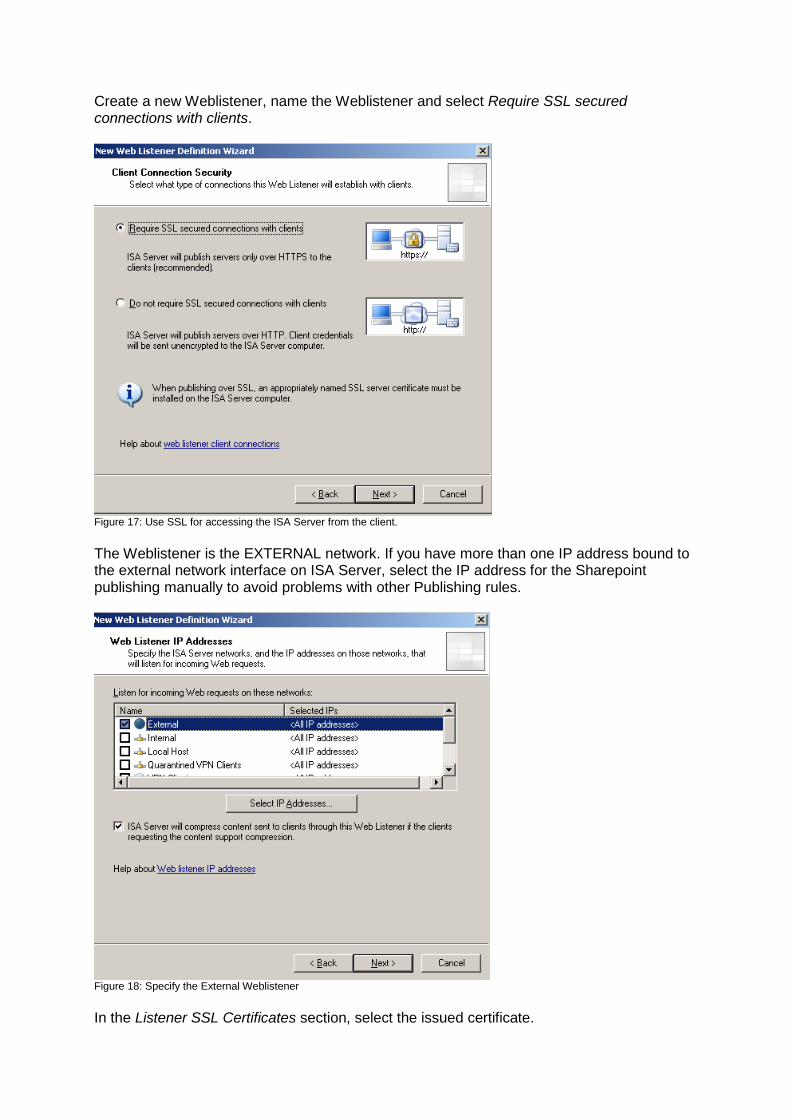
Create a new Weblistener, name the Weblistener and select Require SSL secured connections with clients.
Figure 17: Use SSL for accessing the ISA Server from the client. The Weblistener is the EXTERNAL network. If you have more than one IP address bound to the external network interface on ISA Server, select the IP address for the Sharepoint publishing manually to avoid problems with other Publishing rules.
Figure 18: Specify the External Weblistener In the Listener SSL Certificates section, select the issued certificate.
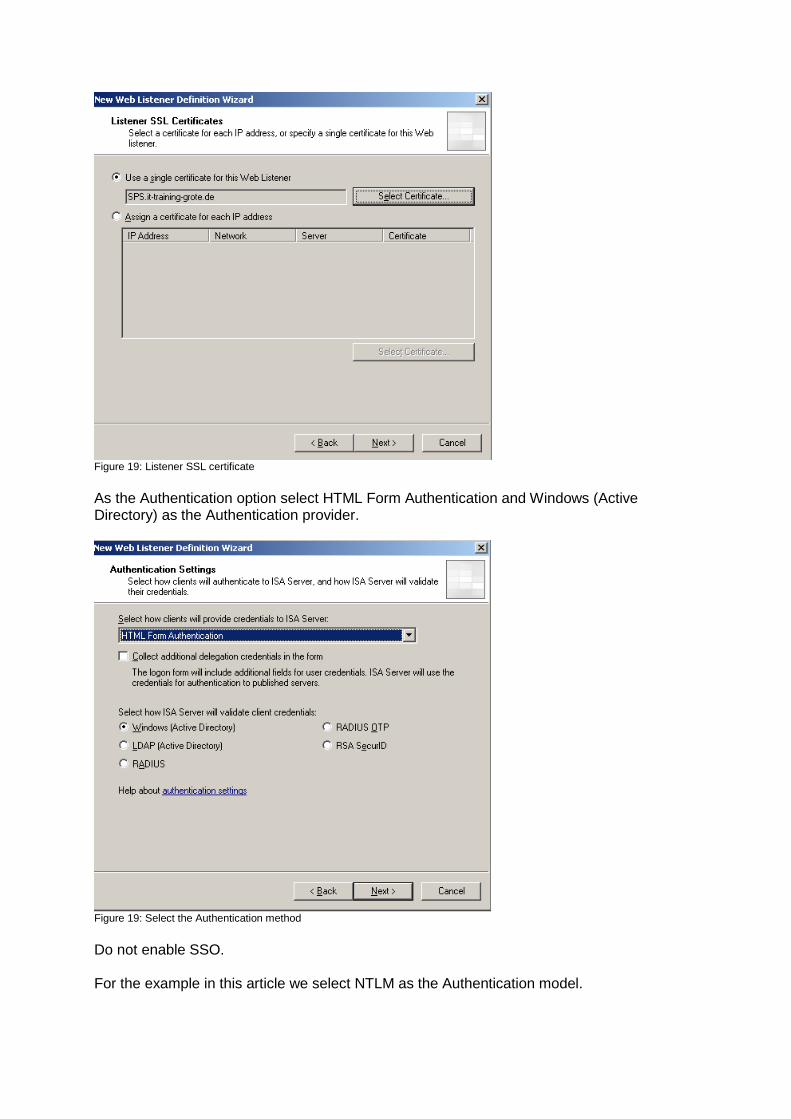
Figure 19: Listener SSL certificate As the Authentication option select HTML Form Authentication and Windows (Active Directory) as the Authentication provider.
Figure 19: Select the Authentication method Do not enable SSO. For the example in this article we select NTLM as the Authentication model.
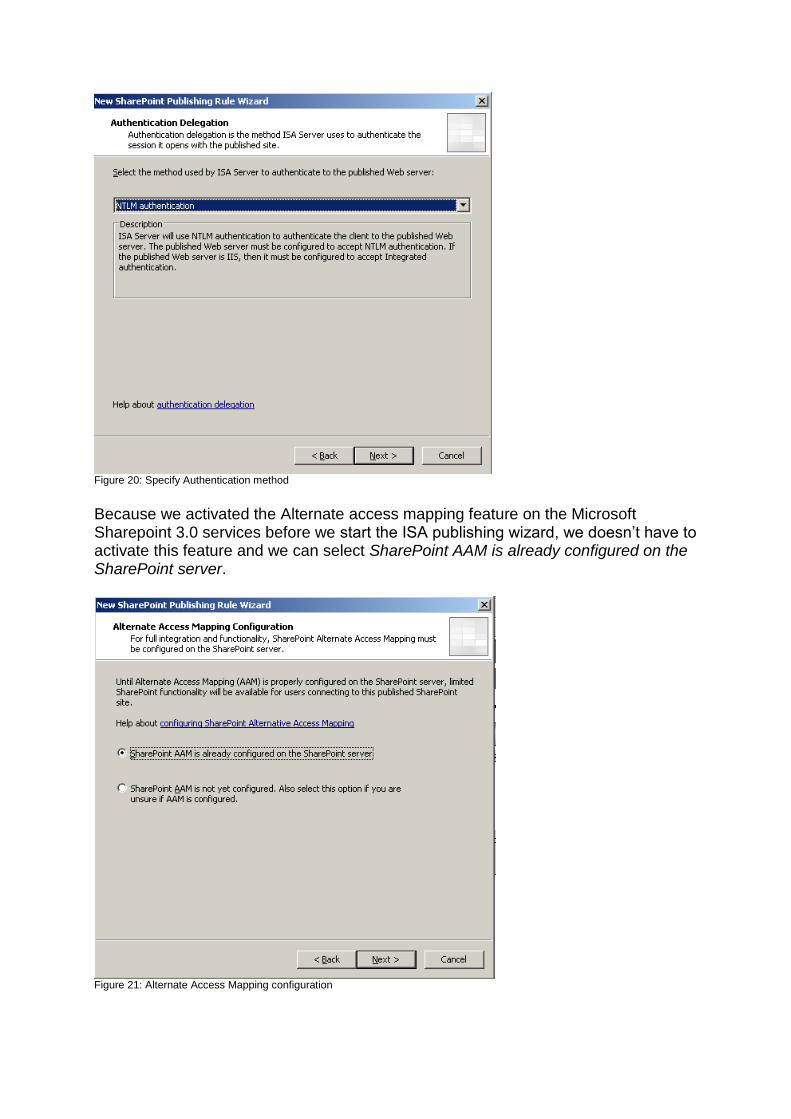
Figure 20: Specify Authentication method Because we activated the Alternate access mapping feature on the Microsoft Sharepoint 3.0 services before we start the ISA publishing wizard, we doesn’t have to activate this feature and we can select SharePoint AAM is already configured on the SharePoint server.
Figure 21: Alternate Access Mapping configuration
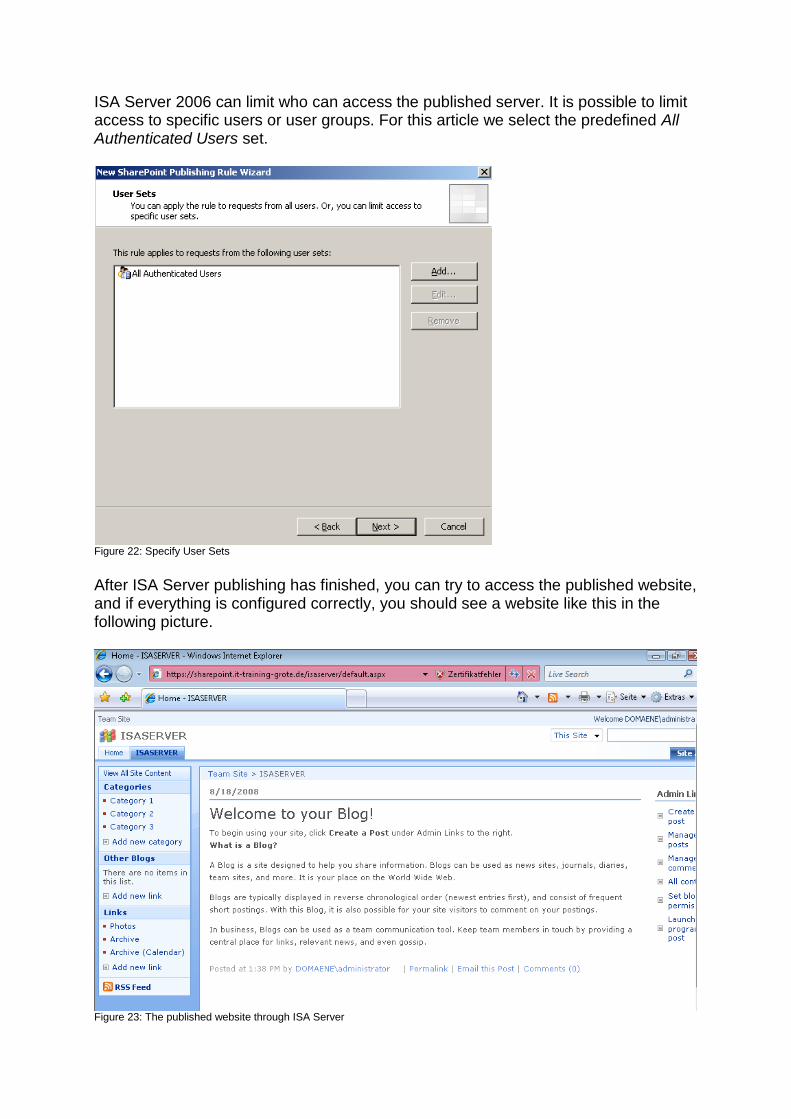
ISA Server 2006 can limit who can access the published server. It is possible to limit access to specific users or user groups. For this article we select the predefined All Authenticated Users set.
Figure 22: Specify User Sets After ISA Server publishing has finished, you can try to access the published website, and if everything is configured correctly, you should see a website like this in the following picture.
Figure 23: The published website through ISA Server
Conclusion In this article I showed you how to publish Microsoft Sharepoint services 3.0 through two ISA Server 2006 Enterprise servers. With the help of ISA Server 2006 it is very easy to publish a Sharepoint Server with the built in Sharepoint publishing wizard which will take the most work for you. The only thing you have to configure on the Sharepoint Server is to activate the Alternate Access Mapping feature. Related links Secure Application Publishing http://technet.microsoft.com/en-us/library/bb794854.aspx ISA Server 2006 overview http://www.isaserver.org/articles/isa-server-2006-overview.html Microsoft .NET Framework 3.0 Download http://www.microsoft.com/downloads/details.aspx?FamilyID=10cc340b-f857-4a14-83f5-25634c3bf043&DisplayLang=de Microsoft Sharepoint Services 3.0 Download http://www.microsoft.com/downloads/details.aspx?displaylang=de&FamilyID=D51730B5-48FC-4CA2-B454-8DC2CAF93951 IIS 6 Resource Kit download http://www.microsoft.com/downloads/details.aspx?familyid=56FC92EE-A71A-4C73-B628-ADE629C89499