Embed Size (px)
Citation preview
Copyright Mark D Segal V6
1
The Key Things People Ask About Scanning Photos (and Where This Book Deals With Them)
Should I scan prints or the film originals of the prints? If you have the film, always prefer the film. The prints don’t contain nearly the amount of resolution and tonal quality you can reproduce from the film, whether positive or negative. OK, but then what scanner do I need – a flatbed or a dedicated film scanner? You can use either. The quality of the scanner is a foremost consideration – its actual resolving capability, the quality of the lens, the quality of the assembly, the quality of the sensor. These days, there are surprisingly good scanners on the market at surprisingly low cost. Generally speaking, a very good dedicated film scanner will deliver better image quality from film than a very good flatbed scanner. As this book is about using software and not a guide to buying equipment, please do your own research from reputable sources on current equipment offerings. I discuss the resolution of several scanner models in Chapter Five. What’s Changed Between SilverFast 6 and SilverFast 8? A lot – both application engineering and the user interface. The WorkflowPilot is a major innovation providing a speedy and easy workflow from start to finish. This is covered in Chapter One, and in detail in Chapter Ten. Before I Start Scanning Anything, SilverFast Offers Three Versions – How Do I Know Which to Buy? It depends on which features you think you need or can do without. This is also covered in Chapter One. How Do I Navigate the User Interface, Set It Up and Use It the Way I Like? Also covered in Chapter One. I Understand I Can Use SilverFast to Scan and Edit Photos, but I Can Also Edit Photos in Lightroom and Photoshop. What’s Best to do Where? This is one of the most frequently asked and debated questions in web forum discussions about editing scans. It is covered extensively in this book. Needless to say, it is best to know what you intend to do where before you do anything; there are things you must do in the scanner software, things you are well –advised to do in the scanner software, and other things that are totally optional. This is covered extensively right up-‐front in Chapter Two, and with worked examples in Chapter Ten, Appendix 4 and Appendix 5.

Copyright Mark D Segal V6
2
SilverFast Has Quite a Few “Preferences” Users Can Fine-Tune to Their Needs. Should I Set My Preferences Before Scanning, and If So, How? Yes – it’s best to set these preferences before you scan, so this is covered up-‐front in Chapter Three. Unfortunately, there are concepts of digital image editing that you should understand in order to make informed choices about some of these settings; therefore as needed, forward references are provided to the Chapters where these concepts are covered. I’ve Heard About SilverFast HDR, but I Have No Idea What It Does or Why I Should Have It – Can You Explain? Yes -‐ “HDR” is SilverFast’s answer to those who want an “archive scan” that they can store in a steady state indefinitely, and edit and re-‐edit at will without degrading any image information and without needing to rescan the image – much like the philosophy of the raw image from a camera as treated in Lightroom or Adobe Camera Raw. The use of HDR is described in the workflow options in Chapters Two and Ten. It’s Very Important that What I See on My Monitor is What Emerges from the Scanning Process. How Can I be Assured of That? Getting predictable tone and colour between monitor, scanner and printer is the subject of “Colour Management”. Certain settings and procedures are necessary for colour management to work properly. SilverFast does much of this “under the hood”, but there are concepts and steps you the user should understand and implement before making scans. Hence, this is also covered up-‐front in Chapter Three and further in Chapter Ten for hybrid workflows. OK, Now that I’m Ready to Start Scanning, I Need to Load the Photo and Get It into the Format I Like – How Do I Do That? Several things are needed at this stage to prepare the photo for scanning: selecting the media you are scanning (is it film or paper?), making sure that its orientation is correct (Portrait or Landscape, managed by rotating, flipping if back-‐to-‐front), and deciding what material from the photo you wish to include in the scan (cropping). All of this should be done before you scan, and best before you perform edits on tone and colour (so that the tone and colour edits are focused only on the material you will retain). All these adjustments are explained in Chapter Four. I Hear All Kinds of Things About How Much Resolution I Need – or Don’t Need, What Bit Depth the Images Should Have, What File Sizes I’ll End-Up With? How Do I Know What It All Means and What to Choose?
Copyright Mark D Segal V6
3
I explain all that in Chapter Five, including how to configure these options in SilverFast. I’ve Heard that Cleaning Photos of Dust, Scratches, Other Debris and Reducing Grain is Tedious and Degrades Image Quality – Is That True and How Do I Deal With It? No, it’s not necessarily true and it’s not hard to deal with. If your scanner has an infrared channel, SilverFast has a wonderful tool called iSRD for identifying and eliminating dust, scratches and other debris. SilverFast also has a grain mitigation tool; but for this you have options to use other tools in Lightroom or Photoshop. All grain mitigation causes some loss of acuity, but it needn’t be much and it can be compensated with well-‐controlled sharpening. This is all covered in Chapter Six. My Photo is Formatted and Cleaned-Up, But I Don’t Like How it Looks – How Do I Improve Brightness and Contrast? SilverFast has a number of tools for doing this, each with their own purposes. These are all explained and illustrated in Chapter Seven. You may also make these types of adjustments in Lightroom or Photoshop. Some of it is nonetheless worthwhile doing in the scanning application before scanning. This is all explained in Chapter Seven. Even with Colour Management Properly Set-Up, My Photos Have a Colour Cast, or Certain Colours are Wrong. Why Is This, and How Do I Fix It? If your colour management is properly set-‐up, you should see colour that is wrong in the original media faithfully reproduced on your monitor, in the scan and in a print. This is a job for colour correction, not colour management. SilverFast and other applications have great tools for global and selective colour correction. These are explained in Chapter Eight. What’s the Easiest Way of Getting a Colour Negative Converted to a Good Colour Positive for Scanning? Colour negatives can be tricky to deal with because there are so many emulsions each with its own characteristics, including the tone and hue of the “orange mask” that need to be dealt with. Fortunately, SilverFast has an excellent solution for this called NegaFix, which is the easiest and best way I know of for converting and scanning negatives. This is one subject of Chapter Nine and Appendix 4. It does a great deal “under the hood”, but for those curious to know how one makes these conversions successfully without using NegaFix, several ways of doing that are also explained in Chapter Nine. My recommendation is to use NegaFix.
Copyright Mark D Segal V6
4
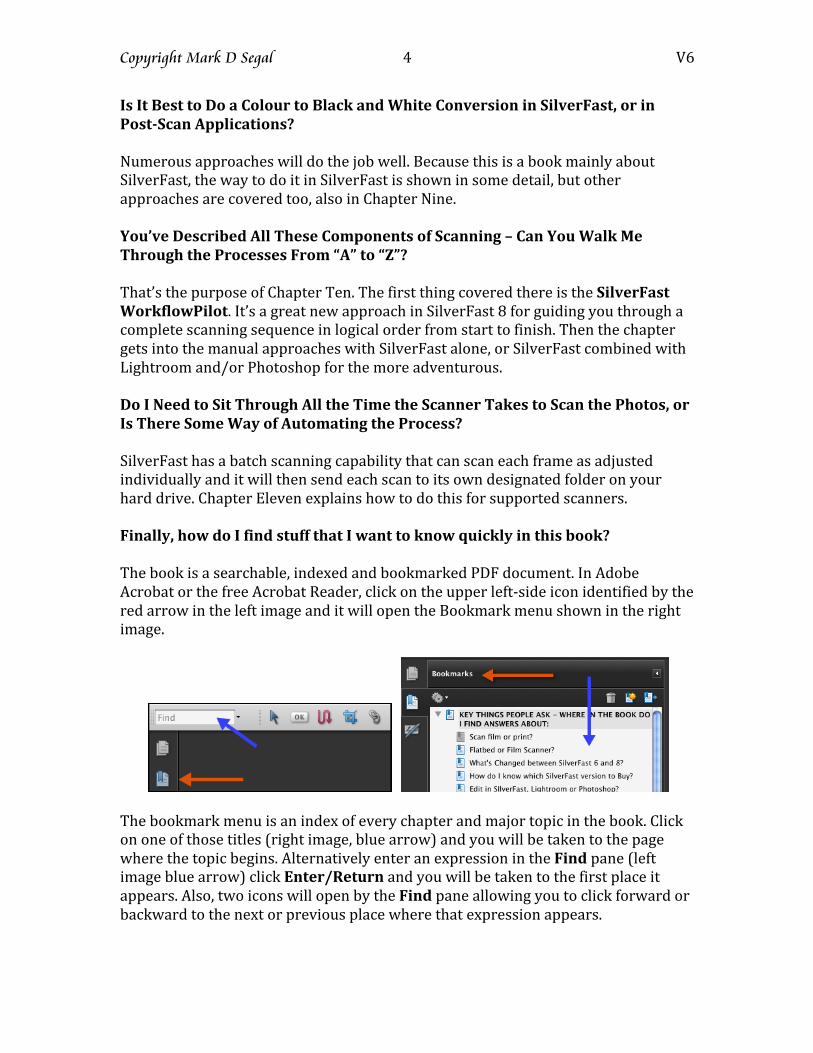
Is It Best to Do a Colour to Black and White Conversion in SilverFast, or in Post-Scan Applications? Numerous approaches will do the job well. Because this is a book mainly about SilverFast, the way to do it in SilverFast is shown in some detail, but other approaches are covered too, also in Chapter Nine. You’ve Described All These Components of Scanning – Can You Walk Me Through the Processes From “A” to “Z”? That’s the purpose of Chapter Ten. The first thing covered there is the SilverFast WorkflowPilot. It’s a great new approach in SilverFast 8 for guiding you through a complete scanning sequence in logical order from start to finish. Then the chapter gets into the manual approaches with SilverFast alone, or SilverFast combined with Lightroom and/or Photoshop for the more adventurous. Do I Need to Sit Through All the Time the Scanner Takes to Scan the Photos, or Is There Some Way of Automating the Process? SilverFast has a batch scanning capability that can scan each frame as adjusted individually and it will then send each scan to its own designated folder on your hard drive. Chapter Eleven explains how to do this for supported scanners. Finally, how do I find stuff that I want to know quickly in this book? The book is a searchable, indexed and bookmarked PDF document. In Adobe Acrobat or the free Acrobat Reader, click on the upper left-‐side icon identified by the red arrow in the left image and it will open the Bookmark menu shown in the right image.
The bookmark menu is an index of every chapter and major topic in the book. Click on one of those titles (right image, blue arrow) and you will be taken to the page where the topic begins. Alternatively enter an expression in the Find pane (left image blue arrow) click Enter/Return and you will be taken to the first place it appears. Also, two icons will open by the Find pane allowing you to click forward or backward to the next or previous place where that expression appears.

Copyright Mark D Segal V6
5
NOTICES
For Readers in a Hurry to Start Scanning with Minimum Fuss and Bother
Please click this link: SilverFast Workflow Pilot.
It will take you directly to Chapter Ten, where you may follow the step-by-step procedure for guided scanning. I do, however, recommend that you first read Chapter One to get an overview of features and the application interface. However, if you wish to fully understand the “whys” and “wherefores” as well as the full richness of all the possibilities this software offers, please start from here.
“Basic” and “Advanced”
Users will approach scanning with different needs and different levels of knowledge about the field of digital imaging. This book is meant to be useful to a broad audience, including those who wish to optimally integrate the use of SilverFast with other image editing applications – Adobe Photoshop and Adobe Photoshop Lightroom, for which additional considerations apply. Rather than trying to strike “balances” that involve compromises, I am addressing a wide range of needs and interests, based on my knowledge of the software and of the issues that people raise over and over again with Customer Support and in various web forums. Hence, there are topics covered here that will interest mainly advanced users with more demanding requirements, and which other users may prefer to skip. I preface such sections with a statement in blue: “Only if you need to know……”, and I indicate the start and end of such sections with an icon that looks like this: . Furthermore, the “step-by-step” sections are titled and bookmarked for your convenience. Click on the appropriate bookmark and you will be taken there.
There are features under development This book was being developed while SilverFast 8 (SF8) and SilverFast HDR were in pre-‐release or initial release status. It is up-‐to-‐date with the software as of April 2012. As the software evolves through “dot-‐releases” with added features and improvements, this book will be up-‐dated accordingly. Your purchase of the book entitles you to a free download of each up-‐dated version. For example, the software now includes a print utility called PrinTao. It existed in SilverFast 6 and is under re-‐development for SF8. You may access it in the current version of the application; however it is not described in this version of the book because it is being improved. For now I recommend printing your scans from an external image editor. Likewise, “lamp control” for Nikon film scanners is under redevelopment and it too will be covered in an update when the feature ships.
Copyright Mark D Segal V6
6
Introduction
This book is for anyone seeking to learn efficient workflows for maximizing image quality from scanned media. I concentrate most on film scanning, because scanning film enables far higher resolution, better tonal rendition and better colour quality than obtainable from scanning prints of the same photographs. The techniques discussed for film scanning are largely applicable to print scanning, but I note the differences where they occur. In the application, film media are called “Transparency” and prints and other paper media are called “Reflective”. Unless they informed themselves, today’s children could go through life never knowing that film dominated photography until about a decade ago, so rapid, pervasive and successful the digital revolution has been. Yet there remain devotees to film technologies always interested in improving the quality of their scanned images. As well, countless numbers of people have archives of negatives and prints. They should seriously consider scanning these collections before they deteriorate to a state where expensive or time-‐consuming restoration could be needed to bring them back to acceptable quality for enjoyable viewing. This book is aimed primarily at these audiences. The alternative to doing the scanning oneself is to send all the media to a commercial scanning service. The basic product the good providers deliver is acceptable to many people and the cost of their basic service packages can be surprisingly reasonable. For people with little time to spare, this may be the obvious solution to their scanning needs. However, for those who can commit the time and wish to control the processes for maximizing image quality themselves, mastering good scanning workflows is the preferable approach. I demonstrate workflows in this book delivering results that could require costly custom services if obtained from commercial providers, and probably require considerable iteration between the client and the service provider. Why a new book on scanning now? This book accompanies the introduction of SilverFast 8 (SF8). SilverFast has millions of users worldwide. SilverFast Ai6 was introduced back in 2002, the company decided to be eclectic and by-‐pass SilverFast 7, hence we now have SilverFast 8, which needs its own documentation. LaserSoft Imaging (LSI) has been listening to its customers’ issues and suggestions, and computer operating systems have changed. Therefore it became necessary to completely change the application’s code and structure “under the hood” and to rebuild it from the bottom-‐up. This provided an opportunity to much improve its user interface and operating efficiency and to create the framework for more easily adding new features. Having worked with this renewed application from its beta phases through commercial release, I believe SilverFast 8 is the most comprehensive, efficient and user-‐friendly scanning application on the market.
Copyright Mark D Segal V6
7
As well, since SilverFast Ai6 was introduced, there have been major changes in Adobe Photoshop, and the introduction of Adobe Photoshop Lightroom. Some aspects of these complementary applications introduced new possibilities for scanning workflows, described in this book. In this volume, I provide clear, detailed instruction, complemented with copious illustrations (that you can enlarge by zooming in Acrobat Reader), on how to use SF8. (I do this from the Mac version, but mention Windows-‐based examples where they differ substantially.) The most pervasive systemic difference between Mac and PC relevant to the material in this book is that the CMD key on a Mac is the CTRL key on Windows, and the OPT key on a Mac is the ALT key on Windows. I use the Mac terminology for convenience. Windows users should simply translate CMD for CTRL and OPT for ALT wherever they arise. Another systemic difference is the name of the colour management module in the computer’s operating system. In Mac it is called Colorsync, in Windows it is called ICM. For Windows users, when I mention Colorsync, think ICM. I also provide step-by-step instruction (bookmarked by subject) on how to implement alternative workflows within SF8 and between SF8, SilverFast HDR, Adobe Photoshop and Adobe Photoshop Lightroom. There are three versions of SilverFast and some features are not supported in every scanner. All instruction in this book is feasible in the Ai Studio version for all features your scanner supports. The details of some instruction may need adaptation with respect to some features in SF8 SE and SE+, but the underlying principles are common to all versions. This book is not only about “what” and “how”, but also “why”. I explain some factors underlying the processes described, to the extent necessary for better using them. I think it important that you understand why you make particular settings, and why various settings have the impacts they exhibit. This helps you make more intelligent choices in how you use the software. I emphasize, however, that this book is directed primarily at operations rather than theory. If you are in a hurry to start scanning without reading all this stuff, I recommend nonetheless that you read Chapters One, Two and Three, then skip directly to Chapter Ten. A word on how the book was written: this is a rather unique collaborative undertaking between LaserSoft Imaging and me, a long-‐time SilverFast user and reviewer, and the first external tester of SF8. There’s been lots of dialogue between us and I hope this has strengthened the book; but I am responsible for the content. The PDF-‐download version of this book will be amended and up-‐dated in a timely manner, as needed. Once you buy your personal download, it entitles you to all future book up-‐dates at no additional cost. You may download it to two of your own devices. If you need to transfer your copy to yet another computer or device, please contact LaserSoft Imaging and please respect my copyright – this was a lot of work.

Copyright Mark D Segal V6
8
A word about how the book is organized: I address a number of objectives in this volume. First and foremost is how to use SF8. Next is giving you a conceptual understanding of the scanning and editing choices you can make, explaining alternative ways of scanning and editing that place varying degrees of emphasis on the use of SF8 complemented by Photoshop and Lightroom. There are many angles to scanning and editing a scan because there are a variety of approaches and applications from which to select, each having their own relative merits. With all of this in mind, the organization of such a book is necessarily “non-‐linear”; but basically, both the key tasks needed for scanning and the corresponding organization of the book are logically sequenced like this:
1. The SilverFast concept and application version differences. 2. Understanding and managing the application interface. 3. Understanding what items and tasks are more or less scanner-‐related. 4. Deciding up-‐front what you will do in which application. 5. Setting up the workflow structures enabling those decisions. 6. Choosing your SF8 scan Preferences. 7. Choosing your SF8 colour management options. 8. Loading the image into the scanner and adjusting the scan preview to suit. 9. Dealing with resolution, bit-‐depth, print size, linear dimensions and file size. 10. Image grain reduction, clean-‐up and sharpening. 11. Making adjustments to image tonality (brightness and contrast) 12. Making adjustments to colour (colour balance and selective colour
adjustments) 13. Handling Conversions: Colour to Grayscale (Black and White) and Negative
to Positive. 14. Workflow strategies step-‐by-‐step from A to Z 15. Automation (batch scanning).
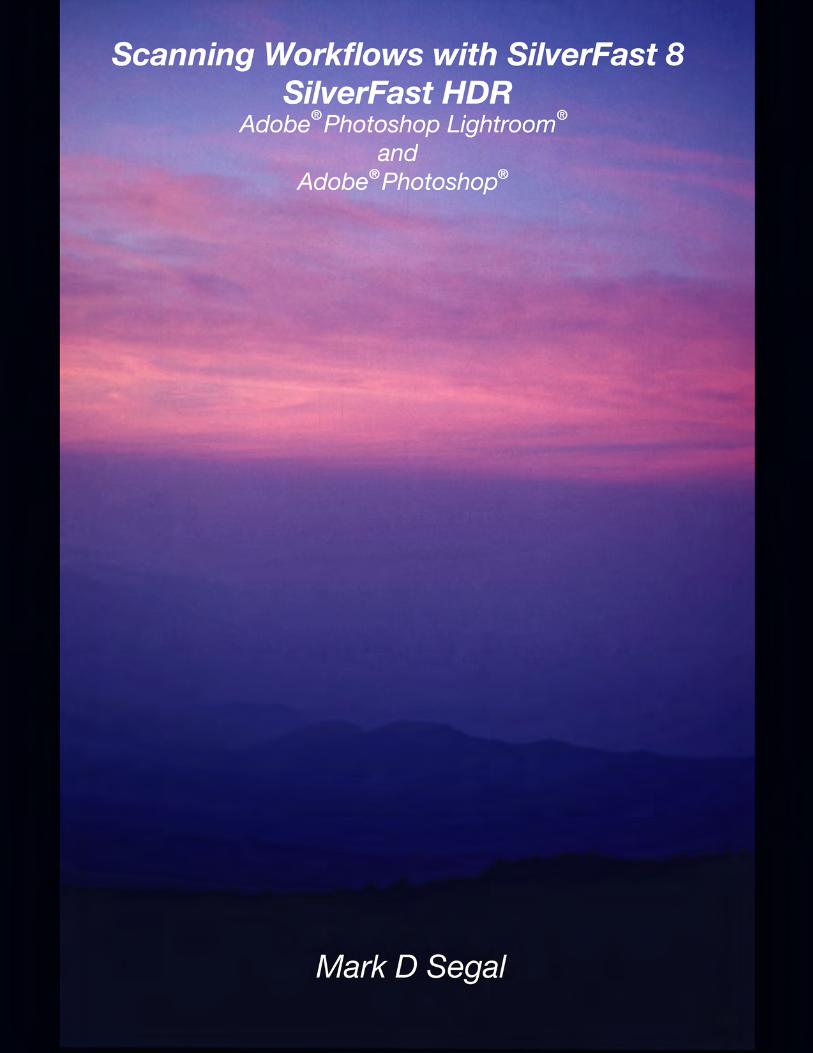
I hope this book will help you derive maximum benefit from using SF8. I wish you all happy reading and successful scanning. Mark D. Segal May 2012 Cover Photo © Mark D Segal View from Mount Kilimanjaro, January 1971, sunrise. Kodachrome. Scanned in a Nikon Super Coolscan 5000 ED scanner with SilverFast 8, August 2011.
Copyright Mark D Segal V6
9
Acknowledgements and Legal Stuff
This project would not have been possible without the active collaboration of key team members at LaserSoft Imaging who devoted considerable time and advice to assist with the technical aspects of the material in this book. Firstly, a very big thank-‐you to Mr. Karl-‐Heinz Zahorsky, CEO of LaserSoft Imaging, who provided much needed comment on previous drafts and put his company’s resources at my disposition to both advise the company on SilverFast 8 during its beta-‐testing phase and to write this book. I thank Mr. Boris Bischof, Director of LSI’s USA office, for initiating the intellectual collaboration between LSI and me some years ago. Staff members of LaserSoft Imaging gave freely of their time and expertise to help make this book possible. I note in particular, Mr. Zahorsky himself, Mr. Jan-‐Willem Rossée, Product Manager for SF8, who served as the vital liaison between LSI and me from the inception of the idea to write this book, through to its completion. Thank you Jan-‐Willem. I thank the engineering team at LSI, in particular Mr. Nils Heidorn and Mr. Martin Muenier who contributed valuable time to advising on certain technical matters, when they were also racing the clock to complete the release versions of SF8. Ms. Helga Bischof, Mr. Jan Rossée, Mr. Alejandro Morales, Mr. Soenke Noack, Mr. Christian Gregoire, Mr. Philipp Haarlaender and Mr. Alexander Sievers-‐Horn, all of LSI, formed a review team and made many very useful suggestions included here. Notwithstanding advice and assistance I received from LaserSoft Imaging, it is more than usually important to clarify that all the demonstrations of procedures, opinions, findings and observations expressed in this book are mine and mine alone, regardless of whether LaserSoft Imaging supports them or not, and there is no implied concurrence from LaserSoft Imaging for any of this content. I am intellectually responsible for the content. Given that SilverFast 8 exists in several versions and the multiplicity of scanners, processes, media and operating systems in use, neither I nor LaserSoft Imaging accept any responsibility or liability whatsoever for the accuracy or usability of the material in this book. Copyright Mark D Segal, May 2012 THIS PRODUCT IS NOT ENDORSED OR SPONSORED BY ADOBE SYSTEMS INCORPORTED, PUBLISHER OF ADOBE PHOTOSHOP AND ADOBE PHOTOSHOP LIGHTROOM. “Adobe Photoshop” and “Adobe Photoshop Lightroom” are registered trademarks of Adobe Systems Incorporated. Where those designations appear in this book, and LaserSoft Imaging was aware of a trademark claim, the designations appear as requested by the owner of the trademark. Photokit Sharpener is a registered trademark of PixelGenius LLC. SilverFast 8 and SilverFast HDR are registered trademarks of LaserSoft Imaging A.G. Topaz DeNoise is a registered trademark of Topaz Labs LLC. All product names, processes and services identified in this book are used in editorial fashion only and for the benefit of such companies with no intention of infringement of the trademark. No such use is intended to convey endorsement of or other affiliation with this book.

Copyright Mark D Segal V6
10
Chapter One Background Information about SilverFast 8
1.1 The SilverFast Concept of Scanning Software
The basic philosophy underlying SilverFast is that it should be a comprehensive, customized and efficient set of tools for digitizing film and reflective media to the highest achievable quality for supported scanners. I discuss below how SilverFast 8 is Comprehensive, Customized and Efficient, in that order. Comprehensive This means that the SilverFast approach gives users all the basic tools needed within this one application for digitizing the media to a high standard of quality without recourse to an external editor. Amongst others that I mention in their appropriate context, SilverFast incorporates a number of especially powerful tools that are very useful in a scanning workflow: Multi-Exposure is a tool that increases the dynamic range of the scanner by making two scans at different exposures and blending them, such that as much detail with as little noise as achievable is rendered in the shadow areas of positive media or the highlight areas of negative media (Chapter Seven). The Neutral Pipette is a highly effective tool for correcting colour casts in one to four clicks depending on your version of the software. It is by far the easiest and often sufficient way to colour-‐balance a scan (Chapter Eight). The Descreening tool is used to mitigate the visibility of the printing screen that often interferes with clear scans of pages from newspapers and magazines that all require such screens for laying down ink on paper (Chapter Six). Selective Color to Gray (SC2G) provides for flexible and attractive brightness and contrast adjustments to scans of colour media being converted to black and white. It works by allowing the user to adjust the individual brightness of each of six colour groups that underlie a black and white image (Chapter Eight). Treatment of Kodachrome: Getting good results easily from scanning Kodachrome has always been a challenge because of the unique chemical properties of this emulsion. Scans often tend to emerge with a bluish cast and the film is known to resist certain traditional tools for dust and scratch clean-‐up. SilverFast deals with both of these problems by providing scanner profiles specifically tailored for colour interpretation of Kodachrome (Chapter Three), the ability to make custom Kodachrome profiles (Ai Studio) , and with the iSRD tool (Chapter Six), which provides very efficient infrared detection of dust and scratches on Kodachrome.
Copyright Mark D Segal V6
11
Use with Other Applications: SF8 can be used cooperatively with Photoshop and Lightroom1, so that those applications’ tools can be deployed quite seamlessly on completion of the scan. Lightroom can be used as a complementary editor for a SilverFast scan; however, because there is no direct link between SilverFast and Lightroom, migrating images from SF8 to Lightroom requires a bit of setting-‐up, which I explain in Chapters Two and Ten. Of course, many of the image-‐editing tools in SF8 also exist in other applications, including Photoshop, Lightroom and third-‐party Photoshop plugins. This often raises questions about which edits are best performed in which application, a subject to which I devote much attention from Chapter Two onward. Hence, this book is much more than a manual for using SF8; it is that, but it extends beyond SF8 to explain the structuring of alternative workflows for scanning and editing images. Customized This means that SilverFast maximizes the image quality any supported scanner can deliver, by customizing certain tools for each scanner model as appropriate. For those people trying to optimize image quality at the scan stage this is important, because each scanner model has different performance characteristics and technical specifications, such that various image-‐editing functions need to be adjusted to the requirements of the specific scanner model for achieving optimal outcomes. Four key examples of customization within SF8 are lamp control, dirt and scratch removal, scanning colour negatives and colour management of the scanner. Lamp Control is one of the very few image-‐editing adjustments actually managing the performance of the illumination system hardware in certain scanners allowing it. This adjusts image brightness by either varying lamp brightness or the amount of time the lamp exposes the film to the scanner sensor, or a combination the two. Because each scanner model is constructed differently, the scanner’s response to a Lamp Control setting will not necessarily be the same from one model to another. SilverFast is customized to enable use of lamp control for scanners allowing it. (At time of writing, Lamp Control is not yet enabled in SF8 for the Nikon scanners supporting it; but it will be.) All luminosity controls are discussed in Chapter Seven.
1 Whenever I talk about “Photoshop” and “Lightroom”, I mean Adobe Photoshop and Adobe Photoshop Lightroom, both registered trademarks of Adobe Inc.
Copyright Mark D Segal V6
12
Dust and Scratch removal is a particular strength of SilverFast, especially for all supported scanners providing an infrared channel. The iSRD tool, for detection of dust, dirt and scratches, is fine-‐tuned for each scanner model to ensure optimal separation of dust and scratches from image detail. Colour negatives are difficult to scan into good colour positives because it is not possible to make a satisfactory standard conversion profile2 from negative to positive for all brands, qualities and speeds of colour negative films. They each have unique characteristics and “orange mask” (the masks are not always orange and for those that are orange, the hue varies between films), which means that a separate conversion profile is needed for each film type; otherwise users could spend much time editing the luminance and colours of their scans. Because of technical differences between scanner models, these negative profiles need to be fine-‐tuned separately for each supported scanner model. At present, for each supported scanner, SF8 NegaFix provides 127 customized profiles and additional customization tools for converting colour and black and white negatives, as I describe in Chapter Nine on conversions. Colour Management is a key area for maximizing the efficiency and quality of the scanning process. The objective of colour management, covered in Chapter Three, is to achieve systematically consistent and predictable image tone and colour between the output of the scanner, the image view on a calibrated and profiled display, the image appearance in a colour-‐managed external image-‐editing application, and the final output, be it on the internet or in a print. Achieving this consistency and predictability between applications and devices requires, amongst other things, the use of scanner profiles to characterize how these devices render tone and colour. Each scanner model renders image tone and colour differently, hence each model needs to be characterized and profiled to put their tone and colour rendering into a known and repeatable state, and to allow for consistent tone and colour rendition between the devices used to create the image. SilverFast provides profiles for Kodachrome, other transparencies and reflective media customized for each supported scanner model. For even greater accuracy, SilverFast’s Auto IT8 Calibration tool (Ai Studio version) creates bespoke profiles for the user’s own scanners at the push of a button. SilverFast IT8 targets are needed for this process. No other software known to me at time of writing provides such a customized, convenient and automated approach to scanner profiling.
2 A profile is a mathematical characterization of how a device reproduces the tone and colour values for each pixel in an image. I discuss this in Chapter Three.
Copyright Mark D Segal V6
13
Efficient SF8 makes the scanning process efficient in numerous ways.
All editing is done in Preview mode, which allows immediate feedback between editing adjustments and results. With appropriate colour management of scanner, display and printer, the feedback in the preview is a reliable predictor of results, even up to softproofing3 the image for print.
SilverFast embeds highly efficient ways of seeing full image and detailed
partial image previews without the need to redo time-‐consuming pre-‐scans for each situation. HiRePP -‐ High Resolution Picture Performance embeds a lower resolution preview file within a high-‐resolution image, so when opening, for example, a 2 GB file in SilverFast HDR, only the lower resolution preview file is opened, which happens very quickly because there is no need to read the huge amount of data in the high-‐resolution file. Once you finish any image editing with the aid of that preview, the final image processing is done with the full high-‐resolution data.
Further on Previews, there are five tools for cleaning and sharpening images
that require a 1:1 preview (meaning one image pixel per one screen pixel) to be used correctly. In SilverFast, once this preview is triggered for one filter, it remains available for viewing any section of the image for any of the five filters without needing to repeat pre-‐scans. This is a huge time-‐saver.
SF8s 16bit Histogram feature is rather unique. Instead of displaying the
usual 256 levels of brightness available in an 8-‐bit representation, with 16-‐bit representation all 65,536 levels of brightness are represented in each colour channel, allowing for a very refined graphic view of the distribution of image tonal information, made more informative by the fact that the histogram can be floated and stretched across your display.
The settings for any one image can remain “sticky” from image to image, such
that editing similar images in a series is either not required, or needs only marginal “tweaks”.
A batch scan of a series of images can be set-‐up and launched with no
further user intervention, discussed in Chapter Eleven.
3 Softproofing is a utility in SilverFast and Photoshop allowing one to preview the appearance of the image on paper, taking into account the brightness and hue of the paper, the tonal range of the paper/printer being used, and the fact that photos seen by reflected light look less contrasted and saturated than the same photos seen on a display. Chapter Three describes how to implement it in SilverFast.
Copyright Mark D Segal V6
14
SilverFast HDR saves “raw” scans in that state, allowing indefinite, essentially non-‐destructive re-‐editing of the image, without the need to rescan the originals. This is discussed in Chapters Two and Ten. One particularly attractive feature of the HDR application is that when using it in HDRi mode for infrared -‐capable supported scanners, one scans the infrared channel into the HDR scan, allowing post-‐scan dust and scratch detection with the aid of the infrared channel and no need to rescan each time one changes the settings; this cannot be done in Lightroom or Photoshop, as these applications do not see the infrared channel. Gamma Synchronization provides for predictable tone and colour between scanner, SF8 and SilverFast HDR. The advantages and use of HDR are woven into the treatment of many operations throughout the book, but HDR gets a special focus in Chapters Two and Ten on workflow structures.
The new WorkflowPilot (demonstrated extensively as the first workflow
option in Chapter Ten) provides a quick and easy trip through all the stages of setting up a scan, for those who prefer a guided workflow covering all the bases and basics.
Finally, the checklist feature (found in the i tool – first item in the SF8 tool
column) lets the user review all settings before launching a scan to make sure everything is set as intended, and to store a record of these settings for future reference.
1.2 Major Application Improvements Since SilverFast 6 (SF6) The user interface is completely revamped. It is now very much more user-‐friendly. All the program controls are placed in logical sequence, the size of the tool icons has been enlarged to make them more accessible and their operational status more easily seen, the application preferences have become more accessible and simplified, the clarity of context help is improved, and the user workspace is now much more easily customized with the introduction of floating tool panels that can be placed anywhere you wish, or easily re-‐docked. The whole interface is scalable, which is a huge assist to those working with several related applications at once. The application code is completely re-‐written in a programming framework allowing for compatibility with the latest computer operating systems and much easier introduction of new features in future “dot releases” of SF8. While the user will see little evidence of this last change during normal use, the consumer benefit will become apparent as new features are more readily introduced and “dot release” upgrades provided for all supported scanners in the future. The above-‐mentioned WorkflowPilot is a much expanded and more user-‐friendly version of the Scan Pilot in SF6. Its interface sports larger controls and intuitive operation, and it allows the user to migrate between a lesser and larger array of
Copyright Mark D Segal V6
15
image editing adjustments within each tool, while maintaining an easy and seamless logical progression through all the steps to a final scan. A number of tools have much improved process efficiency; for example, image preview generation at 1:1 resolution, the use of iSRD and batch scanning require fewer steps than previously needed. The checklist feature is much enhanced and more accessible in SF8.
1.3 Support to Legacy Products A number of important manufacturers (for example Nikon and Minolta) have ceased to produce scanners and are no longer supporting them with updated drivers and editing software. As well, computer operating systems have changed, such that the original drivers for these scanners no longer work with the newer operating systems. These factors started to become problematic for the use of legacy scanners with the migration from Power PC to Intel PC for Mac OX and, left unattended, could create further problems for the migration from Snow Leopard to Lion in the Mac environment. Likewise, certain drivers working in 32-‐bit Windows XP do not work in 64-‐bit Windows 7. Both Mac and PC operating systems now allow 64-‐bit computing, provided that the device drivers also support it. SilverFast 6 (SF6) had already up-‐graded the drivers of legacy scanners to manage the transition from Power PC to Intel-‐based Macs and from Windows XP/Vista to Windows 7. SF6 also has 64-‐bit versions. LSI provided these application up-‐grades as free “dot releases” within SF6 to registered customers. SF8 includes all the modifications needed to run the application on Mac Lion, Windows 7 and several versions back for each system, as well as scanner drivers for selected supported models needing new drivers that the manufacturers no longer provide.
1.4 Version Differences You may chose between three SilverFast versions – from richest to the most basic -‐ Ai Studio, SE+ and SE. The feature list in SF8 is long, so rather than reciting each and every feature in each version, I note the features NOT available in SE relative to SE+, and NOT available in SE+ relative to Ai Studio. All the features listed below are available in the Ai Studio version. Features that are NOT available in SE+ are also NOT available in SE. Complete precision here is not feasible, because some features vary from scanner to scanner. I recommend that you read both lists below before deciding on which version is right for you.
Copyright Mark D Segal V6
16
SF8 features included in SE+, but not included in SE:
1. Midtone toggle normal/logarithmic 2. Saturation Toggle Adaptive C 3. AACO (Auto Adaptive Contrast Optimization) 4. Multi-‐Exposure 5. Selective Color Correction Hue Slider 6. Unsharp Mask Full Dialog 7. Kodachrome Profile Embedded 8. Support for JPEG2000 file format 9. PrinTao
For scanners offering all three levels of the software (most of them, excluding the Nikon 4000/5000/8000/9000 models for which only the Ai Studio version is available), you need to decide whether the feature differences are worth the price differences. I provide brief explanations of these differences.
1. Mid-tone toggle – normal or logarithmic: The ability to toggle the mid-‐tone slider between normal and logarithmic adds a small amount of flexibility to the impact of mid-‐tone brightness adjustment.
2. Saturation Toggle Adaptive C: In the Picture Settings panel, there is a
Saturation slider that alters the colour intensity of the photo (I discuss saturation in Chapter Eight). As you move the slider from left to right the saturation increases. In the SE+ and Ai Studio versions, there is a switch that toggles between two strengths of impact from adjusting this slider: A, which is normal, and C, which can put saturation on steroids. In the SE version you have the normal impact A option. C can come in handy for special effects or for dealing with very badly faded photos.
3. AACO (Auto-Adaptive Contrast Optimization): This tool is somewhat
similar to Photoshop’s Highlight/Shadow adjustment layer, in terms of its ability to control the luminosity of shadow areas, while in principle not much affecting mid-‐tones and highlights. It is available in the SE+ and Ai Studio versions, but not the SE version. There are other ways of opening shadows in SE, using the Gradation Curve discussed in Chapter Seven.
4. Multi-Exposure: Multi-‐Exposure is intended to open shadow detail not
otherwise visible by giving the media a second scanning pass at greater exposure and then blending the two exposures into one composite automatically (Chapter Seven). It has the added benefit of reducing scanner noise when active. This feature is not available in the SE version.
5. Selective Color Correction Hue Slider: This is a convenient method for
altering the hue of a primary colour. Let us take red for example. Red is a
Copyright Mark D Segal V6
17
combination of yellow and magenta (Chapter Eight and Appendix 1). The hue slider allows one to alter the balance between the yellow and magenta components of red, so that the red varies from magenta, through red to orange and to yellow. The slider can be used to the same effect for altering the balance between the components of any of the other primaries. This slider is not available in the SE version, but there are other slightly less convenient ways within the tool of achieving the same results.
6. Unsharp Mask Full Dialog: The Unsharp mask is a filter used for sharpening
the image. The SE version offers fewer refinements over the impact of sharpening, but the basic controls are of course available.
7. Kodachrome Profile Embedded: There is no Kodachrome scan mode
available in the SE version. You may still scan Kodachrome transparencies in the SE version; however, it is likely that more colour correction will be needed than necessary if the scan were produced in the SE+ or Ai Studio versions, which do have scanner-‐specific Kodachrome profiles that automatically load when the Kodachrome scan mode is selected.
8. High bit formats: If you need the JPEG 2000 format, the SE version would
not be sufficient; but if you don’t use the JPEG 2000 format, the absence of this feature wouldn’t matter to you. JPEG 2000 is a variant of the JPEG format that provides smaller file sizes than the TIFF format; it does so by using a compression technology that does not sacrifice useful data (called “lossless compression”) and it supports 16-‐bit depth rather than only 8-‐bit depth (the JPEG standard). Because of these features, a JPEG 2000 file is ideal for storing large images and for transmitting them over the internet at their full quality. (More information on bit-‐depth is in Chapter Five.)
9. PrinTao: This is a printing utility that communicates with your printer and
allows for custom image layouts. The selected scan frames appear in the print interface, where they can be sized and positioned. You can add text to the layout. When you click Print, the scanner software automatically scans the image with correct colour management and resolution, then hands the result over to the printer driver for printing. The version of PrinTao in SE+ does not include the text creation and layout capability available in the Ai Studio version. At time of writing, it is possible that improvement of PrinTao communication with your printer may yet be forthcoming.
SF8 features included in Ai Studio, but not included in SE+ or in SE: Because there is a price difference between the SE+ and Ai Studio versions of SF8, you may wish to decide how important these differences are relative to your requirements. I provide here an annotated list of differences between the two versions, which may help you decide.

Copyright Mark D Segal V6
18
1. Additive/Transparent/Separate switchable display modes: In Ai Studio
you have access to three different views of the histogram (Figure 1.1):
Figure 1.1 Histogram Display Modes
The histogram, fully discussed in Chapter Seven, is a graph of all the tone values in your photo, distributed from the darkest (left) to the lightest (right). It shows you the distribution and concentration of tones along the tonal scale. It is enormously useful for understanding the structure of the photo, the editing it may need, and what happens to it technically as you perform edits. As a colour photo is made of three channels in a Red-‐Green-‐Blue (RGB) colour system, the histogram of each channel can be displayed for a yet fuller understanding of the distribution of the three primaries along the tone scale. In the SE and SE+ versions you get the Additive view (Figure 1.1, left) or each individual R, G, or B channel, one visible at a time; in the Ai Studio version you also get the Transparent and Separate views (Figure 1.1, middle and right), showing the individual colour channels overlaid or separated. I often prefer using the Separate view to verify whether or not I am clipping away information from the highlight and shadow ends in any of the colour channels while making edits.
2. Two-level user interface: In the SE+ version, some options for a number of
the editing tools are not available. Generally, the ones not available in SE+ are the additional controls provided in the Expert dialogs of the basic tools that are provided in both versions. More detail is provided below.
3. RGB-CMY switchable channels (see also CMY Gradation Curve): This
option allows you to edit images using the CMY (Cyan, Magenta, and Yellow) channels rather than the RGB channels. You will miss this option if you scan for pre-‐press or to a print path using a CMYK raster image processor (RIP), or if you prefer a 0% to 100% tone scale rather than an RGB 0-‐255 scale.
4. Color Space compression: This feature fades the image so that you can use
it as background on which to overlay text.
Copyright Mark D Segal V6
19
5. Adjustment of Histogram Width: This is a convenience feature that lets you expand the width of the histogram to better view the distribution of tones across the range. Histogram is discussed in detail in Chapter 7.
6. 16-bit histogram: It allows for a more granular reading of luminosity levels
in the Expert Dialog, because in 16-‐bit it reports luminosity values in discrete steps of 0 to 65,535 levels per channel rather than the 0-‐255 levels of 8-‐bit. This feature, combined with the one just above, is handy for graphically visualizing the impact of certain image adjustments, for example – the effects of using Multi-Exposure.
7. Densitometer: One point instead of four: The Densitometer is a tool allowing you to read the colour and tonal values of any point in the image (Chapter Seven). The Ai Studio version allows the user to set four of these in the same image, while the SE+ version allows for one point.
8. Densitometer: Available channels: The SE+ version gives you the RGB
channels. The Ai Studio version allows you to select whether you wish to view the colour information as CMYK, HSL, LCH or Lab values. CMYK is the Cyan-‐Magenta-‐Yellow-‐Black colour model, HSL is the Hue-‐Saturation-‐Lightness colour model, LCH is the Lightness-‐Chroma-‐ Hue model and Lab is the Lightness*a*b* model (wherein a* is the colour value along the green-‐magenta axis and b* is the colour value along the blue-‐yellow axis). Chapter Eight and Appendix 1 say more about these colour models.
9. Output Histogram Display Modes: The display modes here are the same as the ones in Figure 1s-‐1 above. All three are available in the Ai Studio version, but only the left-‐most one in SE+.
10. Shift-click adds measurement point for reading in the Densitometer: This feature, not available in SE+, is helpful for identifying and remembering points of particular interest when making image edits.
11. Descreening with USM: scalable dialog with previews: This is an Expert feature providing more granularity of control than the presets available in SE+.
12. Expert settings: In the Ai Studio version the editing tools panels have a
button sporting the icon of a university graduate’s grad-‐cap. When you click on it, this opens the Expert dialogs, where you find the additional control features of the Ai Studio version. The SE+ version does not have these added controls. I mention those where they arise in the explanation of these tools, below. The one exception is in the Scan Dimensions panel, where all settings (for setting custom image dimensions) are available in SE and SE+.
Copyright Mark D Segal V6
20
13. GANE controls not included: Power, Threshold and Dark Limit are not available, leaving you with three basic choices in SE+: Light, Medium or Heavy grain mitigation. While you have the basic tool, the adjustments you can make in SE+ are less granular – no pun intended.
14. Global Colour Correction controls not included: The three sliders for shifting the colour balance between the six primaries are not available, but the same adjustments can be made using the provided colour wheel.
15. CMY Gradation Curve: In the Ai Studio version you can make tonal and colour balance adjustments (Chapters Seven and Eight) in either the RGB or CMY colour spaces. In the SE+ version, you have the RGB colour space. You will only miss the CMY option if you intend to scan to a pre-‐press print path or a print path using a CMYK raster image processor (RIP).
16. iSRD functions: in SE+ it is not possible to add layers for isolating the detection and removal of debris and scratches to certain parts of the image. In the Ai Studio version you have up to four layers for this purpose.
17. Selective Colour Correction - Layering and Masking: In the Ai Studio version the Expert Settings gives you a choice between six and twelve colour groups available for selective correction, and you may create up to four separate layers of corrections on the same image. In the SE+ version you have the one image layer and six colour groups with which to work.
18. MidPip Neutralizing Pipette: This is one of SilverFast’s most powerful and useful features, allowing you to “white-‐balance” an image (meaning removing colour casts) in one click or several click operation, provided the image contains pixels that are supposed to be truly neutral gray (Chapter Eight). In the Ai Studio version you may set four such points to fine-‐tune the white balance for near-‐gray pixels in different areas of the image that you wish to neutralize, whereas in the SE+ version you have one such point.
19. Adjustable NegaFix Profiles: In the Ai Studio version you may create and save custom variants from the negative film presets available for converting colour negatives to positive. This customization is not available in the SE+ version, but the SE+ version does include LSI’s prepared film presets.
20. Selective Color to Gray (SC2G) Full Dialog: You may convert a colour photo
to Grayscale (Chapter Nine) in SilverFast (Ai Studio and SE+) by selecting 8 or 16 bit depth, then in the Selective Color to Gray (SC2G) tool, you can alter the tonality of the photo by adjusting the brightness of each of the six underlying colour groups. The Ai Studio version in addition provides for balancing the tone of the grayscale between the R, G and B colour channels underlying the image.
Copyright Mark D Segal V6
21
21. Layering and Masking in SRD: SRD is the tool for removing dust and scratches without the aid of the infrared channel (Chapter Six). In the Ai Studio version you may implement different kinds of settings on up to four layers, whereas in the SE+ version there is only the base layer.
22. Controls for Unsharp Masking (USM): With the basic controls available in SE+, you may adjust the Power, Radius and Threshold of the Unsharp-‐mask. However, in the Ai Studio version, you have added features to exclude dark areas from sharpening, soften the sharpening of shadows, or emphasize the light or dark contour of the sharpening mask, used for fine-‐tuning the sharpening effect.
23. Colour Management and ICC workflow: In SE+ you are limited to sRGB or
ARGB(98) colour spaces (Chapter Three), whereas in the Ai Studio version all the working space profiles in your computer are available. Also, printer calibration and RGB/CMYK softproofing are available in the Ai Studio version but not the SE+ version. These two features would be of interest to those who wish to prepare an image that is colour-‐managed for print from SilverFast alone.
24. Auto IT8 Scanner Calibration: A major feature of the Ai Studio edition is that you can create profiles for scanning positive transparencies and reflective media customized to the specific tone and colour rendition of your own scanner at the push of a button, using the SilverFast IT8 target. In the SE+ version, instead you would use the generic profile LSI provides in the application version for your scanner model. The performance of a generic profile is better than having no profile, but not as good as a custom profile which takes into account the behaviour of your particular scanner. Scanner image rendition can vary from unit to unit, depending on manufacturing tolerances. Some scanner models exhibit more inter-‐unit consistency than others.
25. PrinTao Options: SilverFast includes a print utility for those who wish to print directly from SilverFast. The Ai Studio version includes layout and text placement capabilities not available in the SE+ version.
26. CMYK outputs: In the Ai Studio version you can produce a final scan with RGB and CMYK colour spaces embedded, whereas in SE+ the RGB option is available, suitable for most purposes.
27. Hi-Res Prescan: Hi-‐Res prescan creates a higher resolution image preview that offers enough resolution to fill the whole preview area with the image of one 35mm slide from a group in the flat-‐bed scanner frame. Without this, the hardware would do a re-‐scan when you zoom the slide from its 35mm size in order to fill the preview space.

Copyright Mark D Segal V6
22
28. Individual Adjustment of all defaults: This works in combination with Preferences, Frames and Framesets. Chose any settings done in the Preview area and make it the default setting for each frame that is drawn.
29. Display and editing of IPTC data. IPTC data is information about the
photographer and the photograph you may wish to be stored with the image file. This is possible with the Ai Studio version but not the SE+ version.
30. Job-Manager: The Ai Studio Job Manager allows you to quickly port the
edits of one image to any number of other images being group-‐scanned in the same job. This procedure is not available in the SE+ version. However, batch scanning is available in all three versions, allowing you to set individual edits for each image in the frame and then batch-‐scan them.
31. Custom settings for Frames and Framesets: In the Ai Studio version you
can create, save and store groups of settings for the image or a group of images in a frameset (Chapter Four). This is not possible in the SE+ version.
32. Save Custom Defaults: Enabling this option allows you to save a group of program settings you create as your new default.
33. Exportable file formats: In SE+ it is not possible to export image files
formatted in 48 Bit RGB TIFF, 32 BIT CMYK TIFF, 16 Bit grayscale TIFF and 1 Bit Black/White TIFF. Being able to save and export images in one or more of these formats is important for all those who wish to retain scans in high-‐bit mode, as it helps to assure quality results from further editing and printing in applications such as Lightroom and Photoshop.
Unless you have prior familiarity with scanning processes in general and SilverFast in particular, it may be hard to appreciate whether these feature differences may be important to you. In this case I recommend that you read the sections of this book where the features are discussed in detail, so that you can better evaluate whether or not these differences matter to you.
1.5 Arranging and Navigating the SF8 Desktop Here are the two default versions of the SF8 desktop, top for the WorkflowPilot (Figure 1.2; cyan icon in upper left corner to the left of SilverFast Ai Studio), bottom for the Manual mode (Figure 1.3; red icon, same location). Tools and locations are the same for both and the whole interface is scalable by dragging the lower right corner in both, but the scan dimensions options are more limited in the WorkflowPilot.