Embed Size (px)
Citation preview
PART A:CHAPTER 4Applied Finishes
PART A Chapter 4Applied FinishesThis chapter describes the finishes that are available for use with concrete masonry.
Contents4.1 RendeR And PlAsTeR
4.2 PlAsTeRboARd
4.3 CeRAmiC wAll Tiles
4.4 PAinTs And PRoTeCTive CoATings
PART A:CHAPTER 4Applied Finishes
4.1 RendeR And PlAsTeR
geneRAlPortland cement- and gypsum-based renders and plasters are commonly used with concrete masonry as surface coatings. Gypsum plasters are limited to internal use but portland cement plasters may be used both externally and internally. As well as their decorative and protective functions, renders and plasters can contribute to the fire resistance and acoustic performance of concrete masonry walls.
Many types of external finishes and colours are available. Smooth finishes are not recommended for external walls since they tend to become unevenly discoloured and weathered after a very short period of exposure. Textured finishes, which are inherently uneven do not show the effects of dirt fallout and weathering to the same degree. However, when the time comes for maintenance, they are more difficult to clean and repaint than smooth surfaces.
suRfACe PRePARATionSurface preparation is of the utmost importance. For satisfactory durability and performance of the render or plaster, a good bond must be obtained between the base surface being treated and the coating. Bond depends on a mechanical key and on suction between the base and the coating. The problem of obtaining satisfactory bond between plaster and a base surface is similar to that of bond between mortar and masonry units. Surface preparation requirements for the application of plaster coatings to new and old concrete masonry structures are discussed below.
new ConsTRuCTion Fresh concrete masonry surfaces are usually suitable for the direct application of render or plaster after the removal of dust and loose material by brushing and water spraying. The exceptions are surfaces with extremely coarse or extremely fine textures. Different approaches to surface preparation and to plaster mix design will be needed for extremes of texture.
Very fine textured surfaces will usually have lower suction properties. This will have to be compensated, either by preliminary surface treatment or by designing the first render coat for low water retention, or a combination of both.
Preliminary surface treatment involves the application to the surface of a “dash coat” primer consisting of a rich mix of portland cement and sand, ranging from one part by volume of cement to one to two parts of sand. This is applied by a throwing or ‘dashing’ action using a long fibre brush, to an uneven appearance. This primer coat tends to improve mechanical bond. Bonding agents or adhesives may be used before application of the first plaster coat.
Extremely coarse textured surfaces will usually have high suction properties, which vary from point to point on the surface. Compensation is either by preliminary surface treatment using a ‘dash coat’ similar to that described above to reduce suction and make it more uniform, or by designing the first render coat to have high water retention, or a combination of both. In less
extreme cases it may be possible to control suction by light fog spraying.
For normal masonry surfaces, the only treatment required will be the design of the first render coat to have water retention properties compatible with the suction of the masonry surface and, depending on weather conditions, light fog spraying.
In all cases, marked colour differences will result from uneven suction. Excess suction will make the render or plaster coating stiffen prematurely and difficult to work to achieve a satisfactory finish.
old ConsTRuCTion Where old surfaces are to receive render or plaster, they must be examined carefully before determining the appropriate treatment. Paint, dust, grease, oil and loose or deteriorated surface material and other deleterious substances are likely to reduce both mechanical and suction bond. Such undesirable substances should be removed before applying render. Dust and loose or deteriorated surface material will usually respond to brushing and/or washing. Deteriorated render or plaster should be removed completely (by chipping) to leave a sound base. Paint should be removed by sandblasting or water blasting. If this is not possible, solvents should be used with great care. Grease and oil are unlikely to respond to any treatment other than with detergents or solvents.
The surface should be checked again after cleaning to determine suction, soundness and mechanical bond and may be treated as for new work of corresponding properties. If, on the other hand, detrimental surface substances cannot be removed satisfactorily, the plaster will have to be applied over metal reinforcing mesh furred out from the surface and mechanically-attached.
numbeR of CoATsFor internal work, its consistency of dimensions and texture will usually make only a single coat necessary, provided this gives the required thickness and provided the masonry has been laid correctly. There is the risk that some of the masonry joints may ‘read’ on the surface, but as these will normally be covered by paint this will not be particularly important.
At least two coasts should be used for external work. In extreme exposure conditions, three coats are necessary. Thicknesses should not exceed 10 mm for undercoats and 3 mm for finished coats.
Even in hot, dry weather, at least 24 hours curing time should elapse between each coat. Coats should be kept damp after application, by reducing air circulation in the vicinity and by using fog spray combined with covering. Work should be carried out in the shade whenever possible.
The first coat should be scarified before hardening to act as a scratch coat to provide mechanical bonding for the second or final coat.
PART A:CHAPTER 4Applied Finishes
Sand should be sharp, well-graded and free from salts, vegetable matter and impurities. A blend of beach sand and pit sand is often considered suitable.
On smooth surfaces, such as concrete beams, an epoxy resin should be added to the scratch coat to improve bond. Fix a metal lath by power nailing over the scratch coat, with a 3 to 5 mm clearance from the concrete surface.
sTRengTh of CoATsThe first undercoat should not be stronger than the base material itself. Each succeeding coat should not be stronger that the coat before it. Excessively strong mixes have caused many failures. With such renders and plasters, shrinkage and structural movement cause comparatively few widely spaced cracks of considerable width. On the other hand, weak mixes tend to crack in a pattern with a large number of closely spaced cracks so small as to be almost imperceptible. In the first case, stress development will disrupt bond between the coat and its base but with the weaker mixes, the closer spacing of cracks will provide sufficient stress relief to reduce the risk of bond failure. Recommendations for mixes for various exposure conditions are given below.
ReCommended RendeR mixesThe three recommended mix types (all proportions are by volume) are:
Types of mix recommended for given exposure conditions are set out in Table 4.1.
ConTRol JoinTs
Control joints in render and plaster coatings should be formed in the same planes as the control joints, construction joints or any material interfaces in the base material.
deTAilingFor best resistance to weather and to reduce the effects of weathering discolouration, careful detailing of sills, copings, drip grooves, flashing and other features is most important.
Type 1 1 part portland cement : 1⁄2 part lime : 4 to 41⁄2 parts sand
Type 2 1 part portland cement : 1 part lime : 5 to 6 parts sand
Type 3 1 part portland cement : 2 parts lime : 8 to 9 parts sand
Table 4.1 Recommended Mix Type for Various Exposure Conditions
First and subsequent undercoats, Final coat, for following exposures for following exposures
Base material Severe Moderate Sheltered Severe Moderate Sheltered
Dense, strong materials Type 1 Type 1 Type 2 Type 2 Type 2 Type 2 or 3
Moderately strong porous materials Type 1 Type 2 Type 2 Type 2 Type 2 or 3 Type 2 or 3
Moderately weak porous materials Type 2 Type 2 Type 2 Type 2 Type 2 or 3 Type 2 or 3
PART A:CHAPTER 4Applied Finishes
4.2 PlAsTeRboARd
geneRAlAs an alternative to wet render and plaster, plasterboard may be fixed to masonry walls to provide an internal lining.
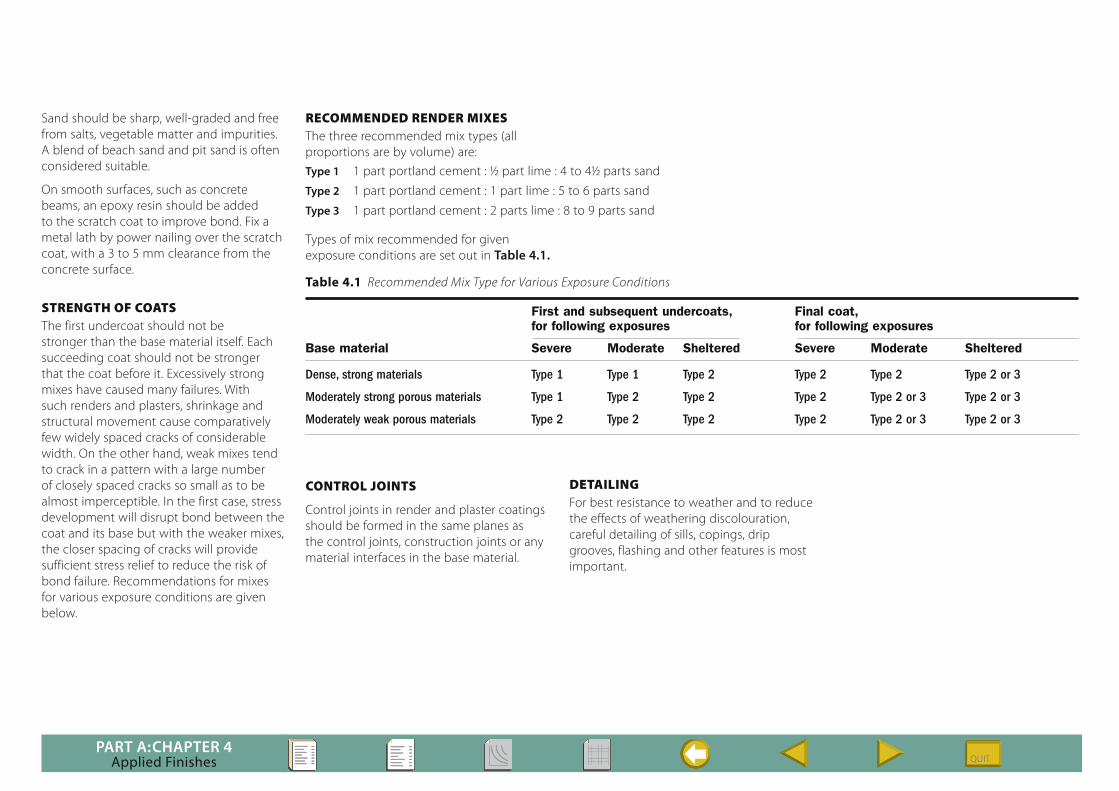
fixing PRoCeduResFixing to masonry using plaster cement – fixing methods for true or irregular surfaces are illustrated in Figures 4.1 and 4.2.
Special Fixing Requirements
■ All new masonry surfaces should be allowed to dry out to normal levels before plasterboard is installed.
■ A gap approximately 13 mm wide should be left at the top and bottom of the plasterboard to ensure adequate ventilation of the cavity. As an alternative to leaving a gap, suitable vents should be installed in the wall to maintain a net free-ventilating area of 8000 mm2 per10 m2 of wall.
■ Control joints incorporated in the building and masonry walls should be carried through all areas lined with plasterboard. Suitable details are illustrated in Figure 4.3.
■ Where heavy objects are to be fixed to the wall, spacers should be provided between the masonry and the plasterboard so that fixings can be made direct to the masonry.
■ Further information should be obtained from plasterboard manufacturers.
Plasterboard
10 mm high ribs of cornice cementapplied to back of plasterboard
Masonry withtrue surface
25
25
600max
600max
1200max
1200max
600max
Plasterboard
Plaster daub
600max
75 x 50 x 10 mmplasterboard alignment pad
NOTE:On true surfaces delete alignment pads and useminimum 10-mm-thick plaster daubs
Masonry control joint
Plasterboard Control joint bead
Figure 4.1 Plasterboard Fixing to Masonry with True Surface
Figure 4.2 Plasterboard Fixing to Masonry with True or Irregular Surface
Figure 4.3 Plasterboard Fixing at Masonry Control Joint
PART A:CHAPTER 4Applied Finishes
4.3 CeRAmiC wAll Tiles
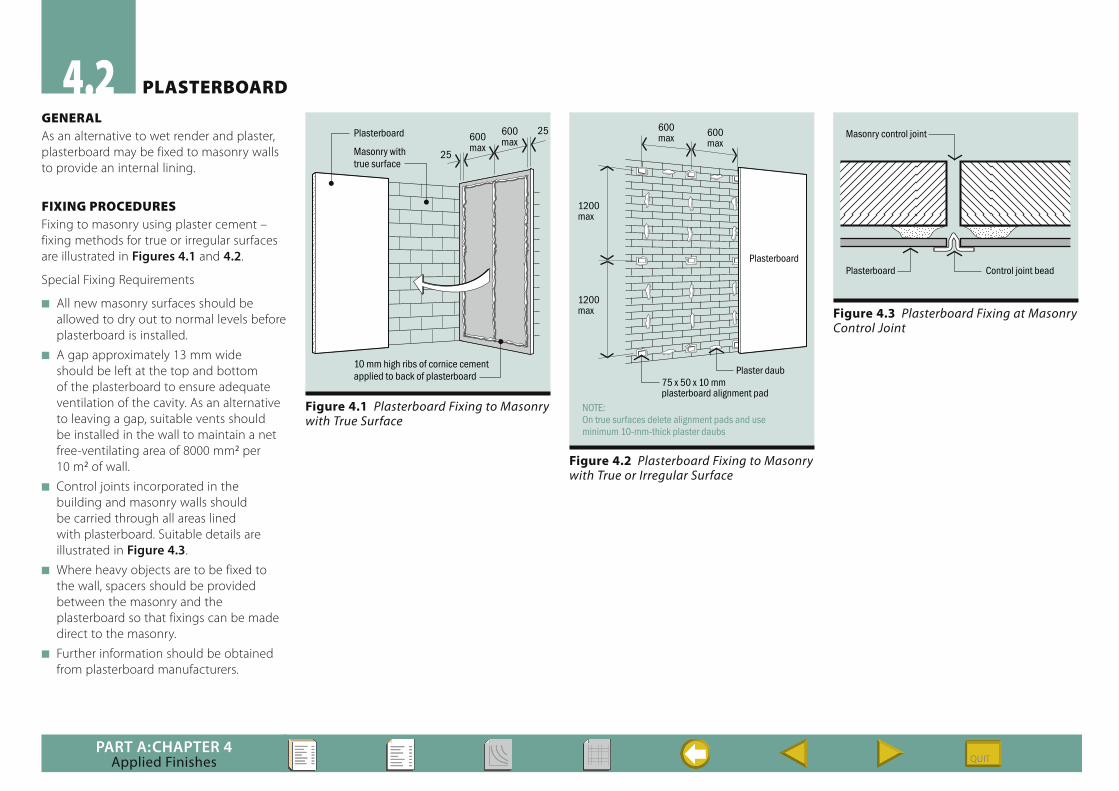
geneRAlCeramic wall tiles may be fixed to concrete masonry block and brick walls either directly to the masonry surface or to a render background coat.
CAuses of fAiluRe Differential movement between tiles and the backing is the principal cause of failure. Tiles, in common with other fired clay products, expand with age as a result of long-term chemical and physical changes after firing. In this context, moisture movement is a less significant problem.
Concrete and concrete masonry both tend to have long-term shrinkage, ie the tiling and the background material are moving in opposite directions or shink at different rates. Shear stresses are thus set up at the interface, and bond will be broken unless stresses can be absorbed or otherwise contained.
A second effect of differential movement is the setting up of compressive stresses in abutting tiles by failure to accommodate tile expansion. This causes them to bow and lift off the bedding. A similar problem can occur where tile surfaces tightly abut other materials. Provision must be made for expansion in the gaps between tiles and also by providing expansion joints in large tiled areas and at junctions with other materials.
fixing meThods To overcome problems of differential movement when fixing to plain or rendered concrete masonry walls, tiles are fixed using flexible adhesives rather than cement mortar. Adhesives allow relative movement between tiles and the wall without cracking or bowing. The dimensional accuracy of concrete masonry units provides true wall surfaces, which make possible the fixing of tiles with very thin coats of adhesive provided the units have been laid accurately. If not, a thin rectifying render coat should be applied before applying the adhesive and fixing the tiles.
Adhesive TyPes Both cement base and organic adhesives may be used, many types are available for different uses and service conditions. It is therefore impracticable to suggest detailed fixing methods other than to say that the adhesive manufacturer’s instructions should be followed exactly.
JoinTsJoints between tiles should not be less than 2 mm wide for tiles up to 100 x 100 mm and proportionately wider for larger tiles. They should be filled with flexible material or a crushable tile grout. These are readily available from manufacturers of sealants.
Provision for movement must be made by expansion joints at not more than 5 m spacing horizontally and vertically and at internal corners. Expansion joints should be at least 5 mm wide and filled with compressible material. Where the wall itself has a structural control, expansion or contraction joint, such joint should extend to the outer surface of the tiles through any intermediate coatings. Tiles should not abut or interlock with any adjoining construction or material and expansion joints must be provided at such junctions.
PRePARATion foR TilingWalls should be reasonably dry before tiling or using adhesives. They should be free of contamination such as deteriorated surfaces, loose material, dust, oil, paints, etc. Where tiles are to be applied directly to wall surfaces, walls should be completed at least two weeks before tiling starts. Where tiles are being applied to render coatings, render should be applied as long as possible after the wall is completed, and left at least seven days to cure and dry before tiles are applied.
PART A:CHAPTER 4Applied Finishes
4.4 PAinTs And PRoTeCTive CoATings
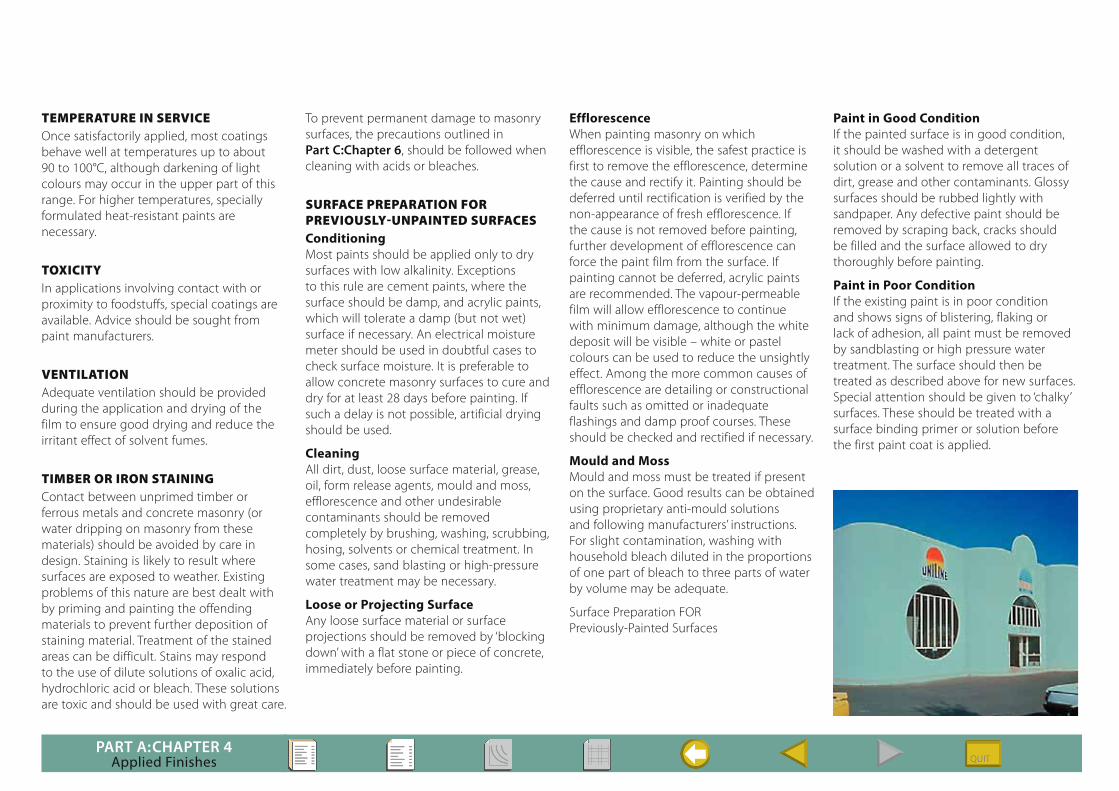
geneRAlPaints and protective coatings are applied to concrete masonry surfaces for decoration or increased resistance to weather penetration, soiling, other forms of environmental hazards, chemical attack, wear and abrasion under extreme service conditions. Reducing interior temperature of the building by the application of white or pale coloured coatings is another common reason for their use.
The selection of a coating system should be based on the following considerations:
■ The function that the coating is expected to perform.
■ The conditions under which it will be applied, such as dampness, alkalinity and temperature.
■ The environmental conditions to which the coating will be subjected in service.
■ The required life of the coating.
At all stages from selection through specification to application, the recommendations of the manufacturer of the selected coating should be followed exactly. In particular, such matters as selection of the coating system, surface preparation, the condition of the surface during application, the sequence and method of application and the ambient conditions during and immediately after application, should be considered.
wATeR ResisTAnCe Where resistance to rain and water penetration is the only requirement and the natural appearance of the surface is to be retained, this may be achieved by using clear water-repellent coatings. However, care must be taken to ensure that the masonry does not crack and therefore leak.
deCoRATion Conventional acrylic and solvent-thinned paints not only perform a decorative function but also promote water resistance provided they are properly applied to fill the surface. Ingress of water from behind the coating must be prevented.
PRoTeCTion Many environments are aggressive, particularly in coastal locations and in areas exposed to industrial atmospheric pollution. Careful selection of the coating system and close attention to manufacturers’ recommendations will give maximum protection against such environments.
Correction of Surface Irregularities
If the surface is irregular or open, it is essential to treat all parts of the surface voids. Small uncoated areas will act as drains for water collected over much larger surface areas, and local water penetration could result.
enviRonmenTAl CondiTionsOf major importance is the selection of a paint system and its likely interaction with the environment, both during application and throughout its service life. Some of the factors involved are discussed below.
All paint films exposed to the weather gradually erode under the combined effects of ultra-violet radiation and moisture, resulting in a chalky surface. Films of acrylic paint erode more slowly than conventional solvent-based paints. They offer the further advantage of permeability to water vapour, allowing surfaces to dry without causing paint flaking.
Interior surfaces may pose special problems of chemical attack or soiling from handling. Illumination may also be critical when gloss uniformity of the painted surface becomes important. In such cases, a flat finish is preferred.
Exposure to chemical fumes such as ammonia may cause yellowing of oil-based paint films.
The most common chemical exposure problem encountered in concrete masonry is alkalinity, contained either in the masonry or in the mortar. Acrylic paints have excellent resistance to alkali attack and, as mentioned above, allow passage of water vapour so that the surface can dry.
Under the most severe conditions of chemical attack, heavy-duty chemical-resistant coatings, for example, chlorinated rubber, epoxy or polyurethane, may be necessary. These are ‘barrier’ coatings and require a dry surface for application.
Chemical curing systems such as epoxies or polyurethanes tend to become very hard and require sanding, solvent washing or blasting to allow satisfactory recoating.
weAR And AbRAsion Water and abrasion may present problems on surfaces subjected to passing traffic, special conditions of mechanical abuse and general wear and tear. Thick coatings of vinyl solution paint, chlorinated rubber paint or hard two-pack epoxy or polyurethane may be necessary to cope with the most extreme conditions
TemPeRATuRe of APPliCATion Painting is not recommended, at temperatures below 10°C or above 35°C. Below 10°C, chemically-cured coatings harden very slowly and many acrylic paints will not form a coherent film. At high temperatures, application can be difficult. It is generally good practice to hose down the wall and apply acrylic paint to the cool, damp (but not wet) surface.
PART A:CHAPTER 4Applied Finishes
TemPeRATuRe in seRviCe Once satisfactorily applied, most coatings behave well at temperatures up to about 90 to 100°C, although darkening of light colours may occur in the upper part of this range. For higher temperatures, specially formulated heat-resistant paints are necessary.
ToxiCiTy In applications involving contact with or proximity to foodstuffs, special coatings are available. Advice should be sought from paint manufacturers.
venTilATion Adequate ventilation should be provided during the application and drying of the film to ensure good drying and reduce the irritant effect of solvent fumes.
TimbeR oR iRon sTAining Contact between unprimed timber or ferrous metals and concrete masonry (or water dripping on masonry from these materials) should be avoided by care in design. Staining is likely to result where surfaces are exposed to weather. Existing problems of this nature are best dealt with by priming and painting the offending materials to prevent further deposition of staining material. Treatment of the stained areas can be difficult. Stains may respond to the use of dilute solutions of oxalic acid, hydrochloric acid or bleach. These solutions are toxic and should be used with great care.
To prevent permanent damage to masonry surfaces, the precautions outlined in Part C:Chapter 6, should be followed when cleaning with acids or bleaches.
suRfACe PRePARATion foR PReviously-unPAinTed suRfACesConditioningMost paints should be applied only to dry surfaces with low alkalinity. Exceptions to this rule are cement paints, where the surface should be damp, and acrylic paints, which will tolerate a damp (but not wet) surface if necessary. An electrical moisture meter should be used in doubtful cases to check surface moisture. It is preferable to allow concrete masonry surfaces to cure and dry for at least 28 days before painting. If such a delay is not possible, artificial drying should be used.
CleaningAll dirt, dust, loose surface material, grease, oil, form release agents, mould and moss, efflorescence and other undesirable contaminants should be removed completely by brushing, washing, scrubbing, hosing, solvents or chemical treatment. In some cases, sand blasting or high-pressure water treatment may be necessary.
Loose or Projecting SurfaceAny loose surface material or surface projections should be removed by ‘blocking down’ with a flat stone or piece of concrete, immediately before painting.
EfflorescenceWhen painting masonry on which efflorescence is visible, the safest practice is first to remove the efflorescence, determine the cause and rectify it. Painting should be deferred until rectification is verified by the non-appearance of fresh efflorescence. If the cause is not removed before painting, further development of efflorescence can force the paint film from the surface. If painting cannot be deferred, acrylic paints are recommended. The vapour-permeable film will allow efflorescence to continue with minimum damage, although the white deposit will be visible – white or pastel colours can be used to reduce the unsightly effect. Among the more common causes of efflorescence are detailing or constructional faults such as omitted or inadequate flashings and damp proof courses. These should be checked and rectified if necessary.
Mould and MossMould and moss must be treated if present on the surface. Good results can be obtained using proprietary anti-mould solutions and following manufacturers’ instructions. For slight contamination, washing with household bleach diluted in the proportions of one part of bleach to three parts of water by volume may be adequate.
Surface Preparation FOR Previously-Painted Surfaces
Paint in Good ConditionIf the painted surface is in good condition, it should be washed with a detergent solution or a solvent to remove all traces of dirt, grease and other contaminants. Glossy surfaces should be rubbed lightly with sandpaper. Any defective paint should be removed by scraping back, cracks should be filled and the surface allowed to dry thoroughly before painting.
Paint in Poor ConditionIf the existing paint is in poor condition and shows signs of blistering, flaking or lack of adhesion, all paint must be removed by sandblasting or high pressure water treatment. The surface should then be treated as described above for new surfaces. Special attention should be given to ‘chalky’ surfaces. These should be treated with a surface binding primer or solution before the first paint coat is applied.