Embed Size (px)
Citation preview
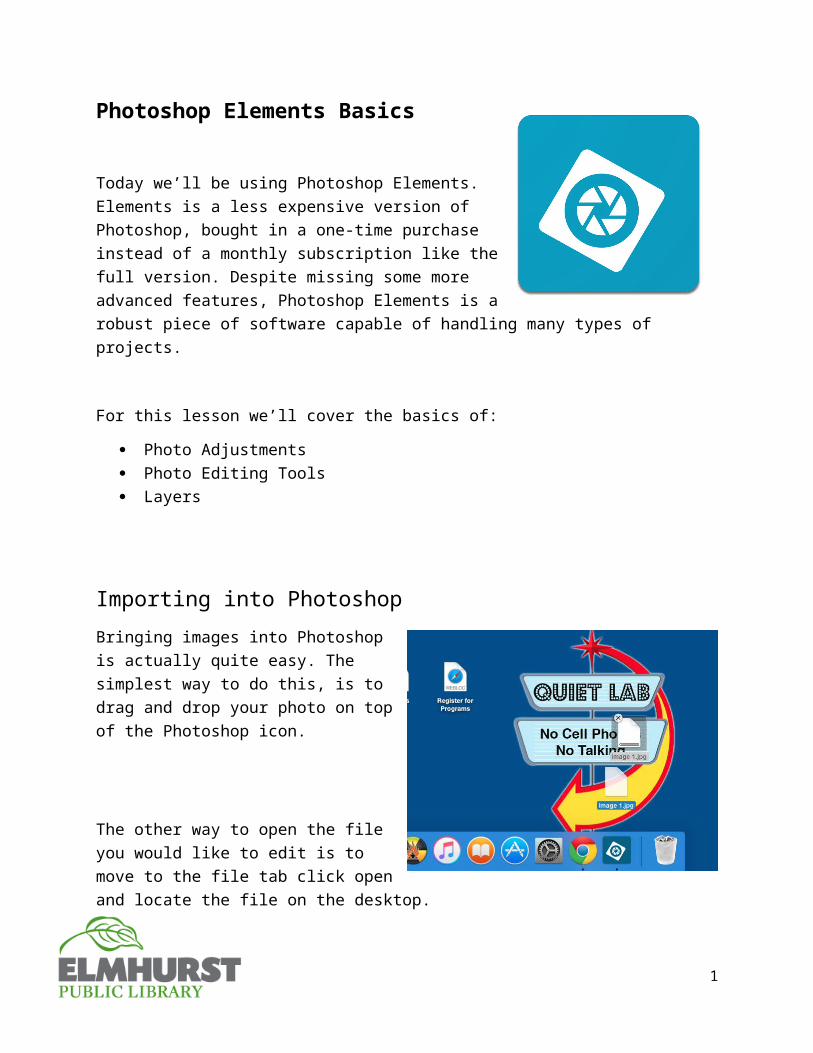
Photoshop Elements Basics
Today we’ll be using Photoshop Elements. Elements is a less expensive version of Photoshop, bought in a one-time purchase instead of a monthly subscription like the full version. Despite missing some more advanced features, Photoshop Elements is a robust piece of software capable of handling many types of projects.
For this lesson we’ll cover the basics of:
Photo Adjustments Photo Editing Tools Layers
Importing into Photoshop Bringing images into Photoshop is actually quite easy. The simplest way to do this, is to drag and drop your photo on top of the Photoshop icon.
The other way to open the file you would like to edit is to move to the file tab click open and locate the file on the desktop.
1
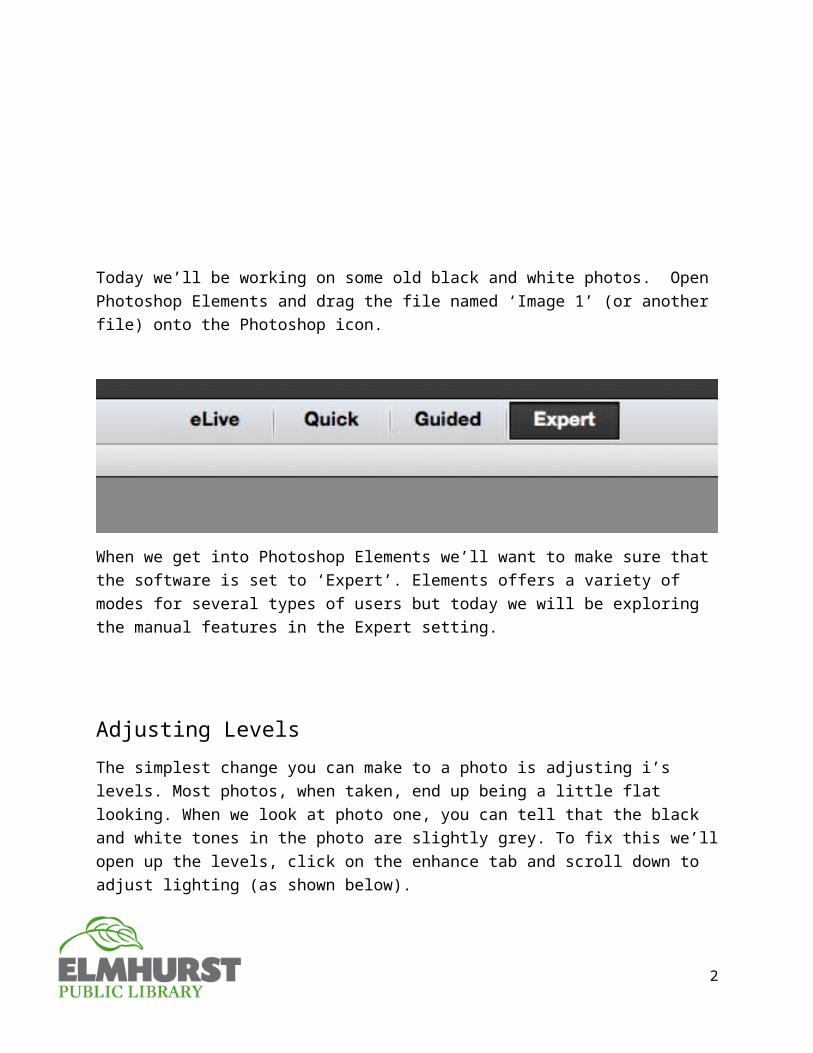
Today we’ll be working on some old black and white photos. Open Photoshop Elements and drag the file named ‘Image 1’ (or another file) onto the Photoshop icon.
When we get into Photoshop Elements we’ll want to make sure that the software is set to ‘Expert’. Elements offers a variety of modes for several types of users but today we will be exploring the manual features in the Expert setting.
Adjusting LevelsThe simplest change you can make to a photo is adjusting i’s levels. Most photos, when taken, end up being a little flat looking. When we look at photo one, you can tell that the black and white tones in the photo are slightly grey. To fix this we’ll open up the levels, click on the enhance tab and scroll down to adjust lighting (as shown below).
2
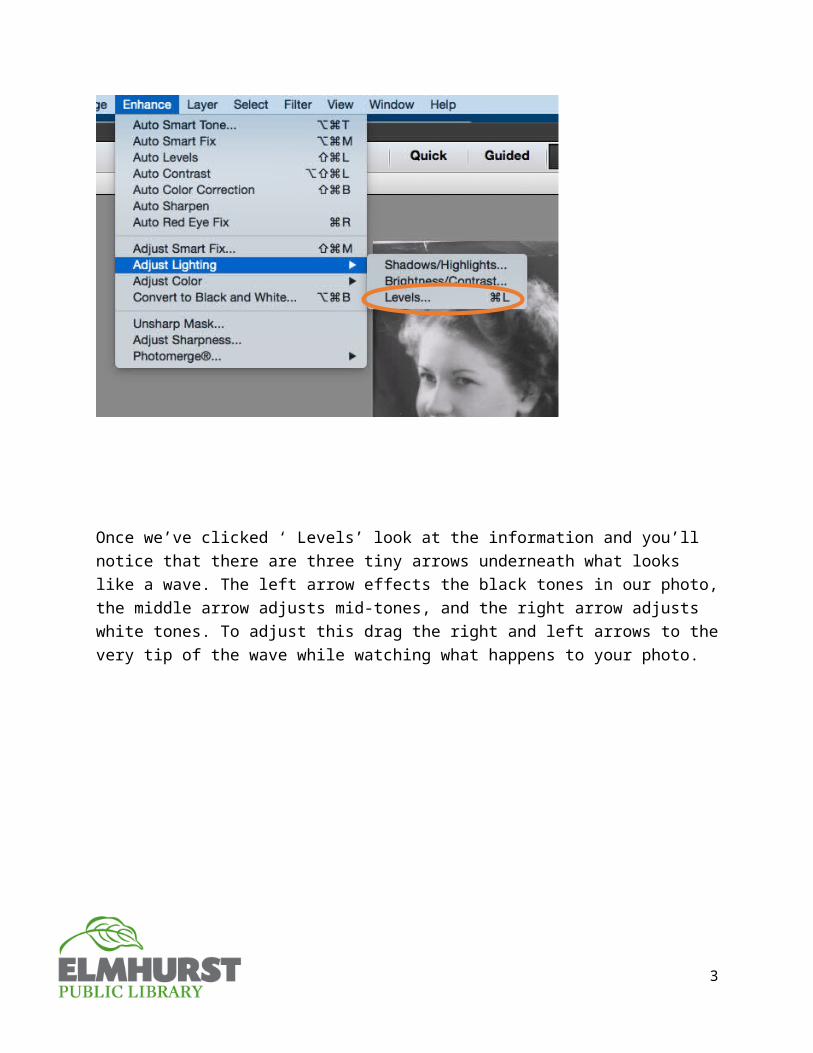
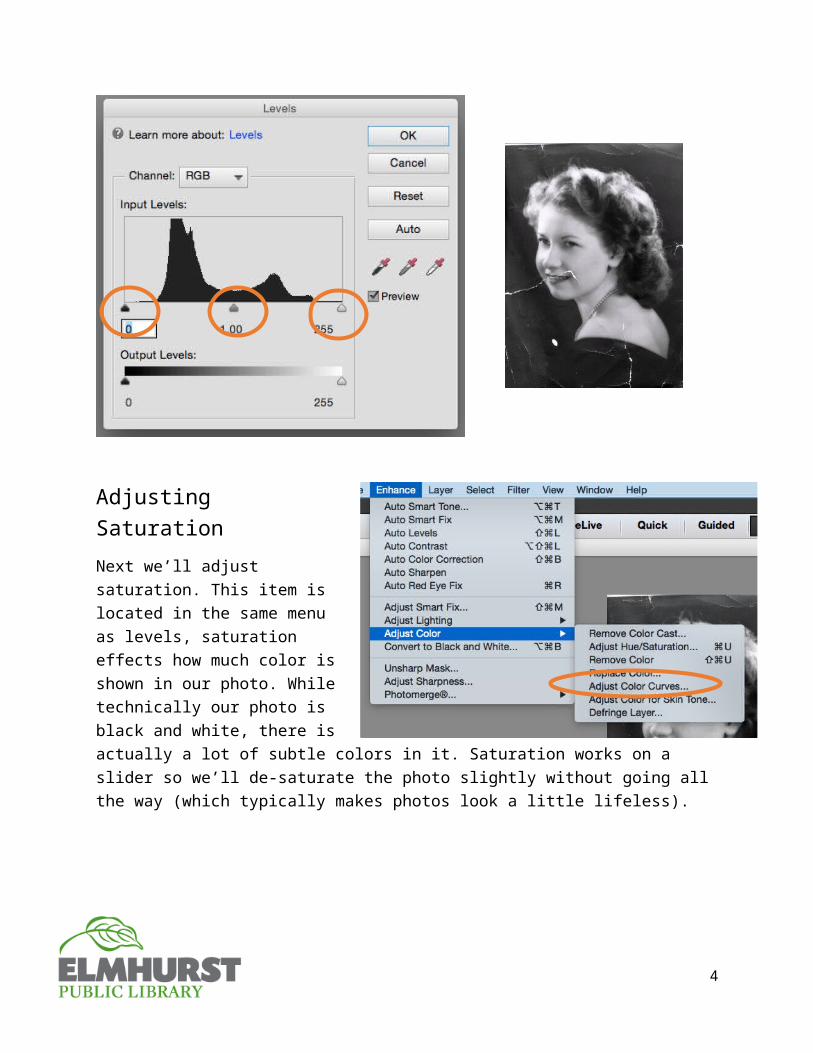
Once we’ve clicked ‘ Levels’ look at the information and you’ll notice that there are three tiny arrows underneath what looks like a wave. The left arrow effects the black tones in our photo, the middle arrow adjusts mid-tones, and the right arrow adjusts white tones. To adjust this drag the right and left arrows to the very tip of the wave while watching what happens to your photo.
Adjusting SaturationNext we’ll adjust saturation. This item is located in the same menu as levels, saturation effects how much color is shown in our photo. While technically our photo is black and white, there is actually a lot of subtle colors in it. Saturation works on a slider so we’ll de-saturate the photo slightly without going all the way (which typically makes photos look a little lifeless).
3
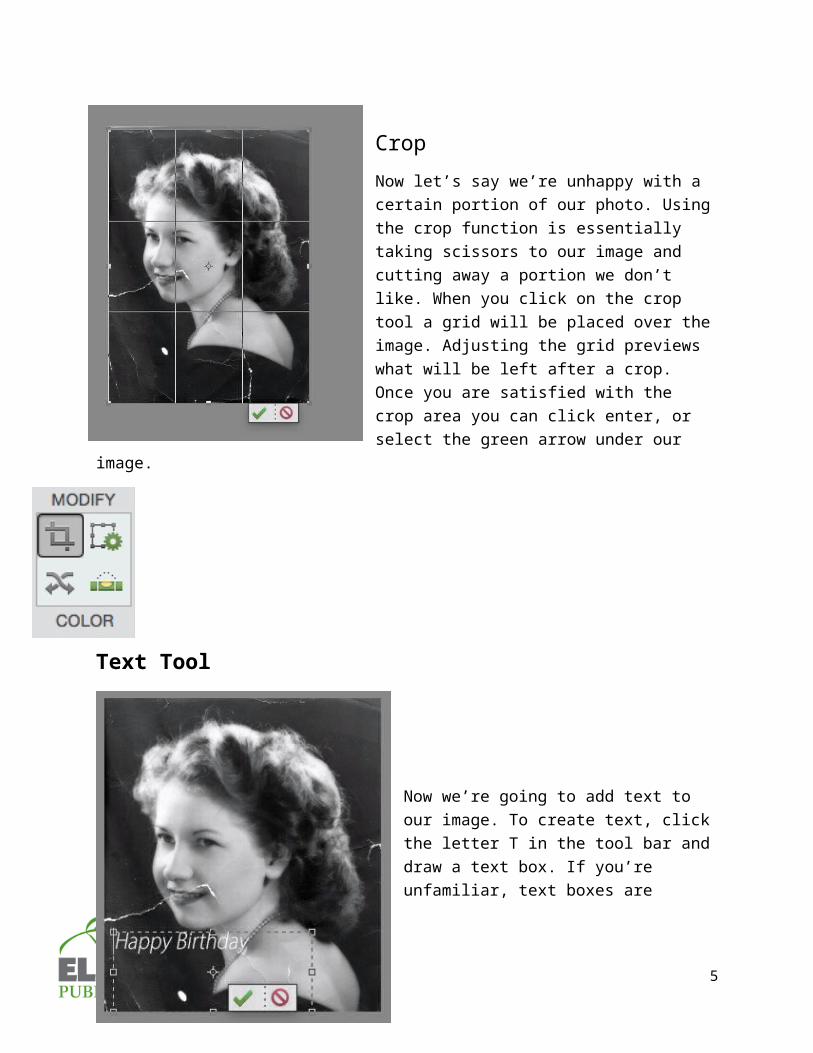
CropNow let’s say we’re unhappy with a certain portion of our photo. Using the crop function is essentially taking scissors to our image and cutting away a portion we don’t like. When you click on the crop tool a grid will be placed over the image. Adjusting the grid previews what will be left after a crop. Once you are satisfied with the crop area you can click enter, or select the green arrow under our image.
Text Tool
Now we’re going to add text to our image. To create text, click the letter T in the tool bar and draw a text box. If you’re unfamiliar, text boxes are spaces where text can be added. So let’s draw a text box and write something in it.
4
We can then adjust the font, font size, style, and orientation in the bar below the image
Adding LayersYou’ll notice now in the right hand corner that there are more layers. Layers are essentially different pieces of paper on top of one another. The highest layers are the most visible while layers underneath may be invisible or slightly covered.
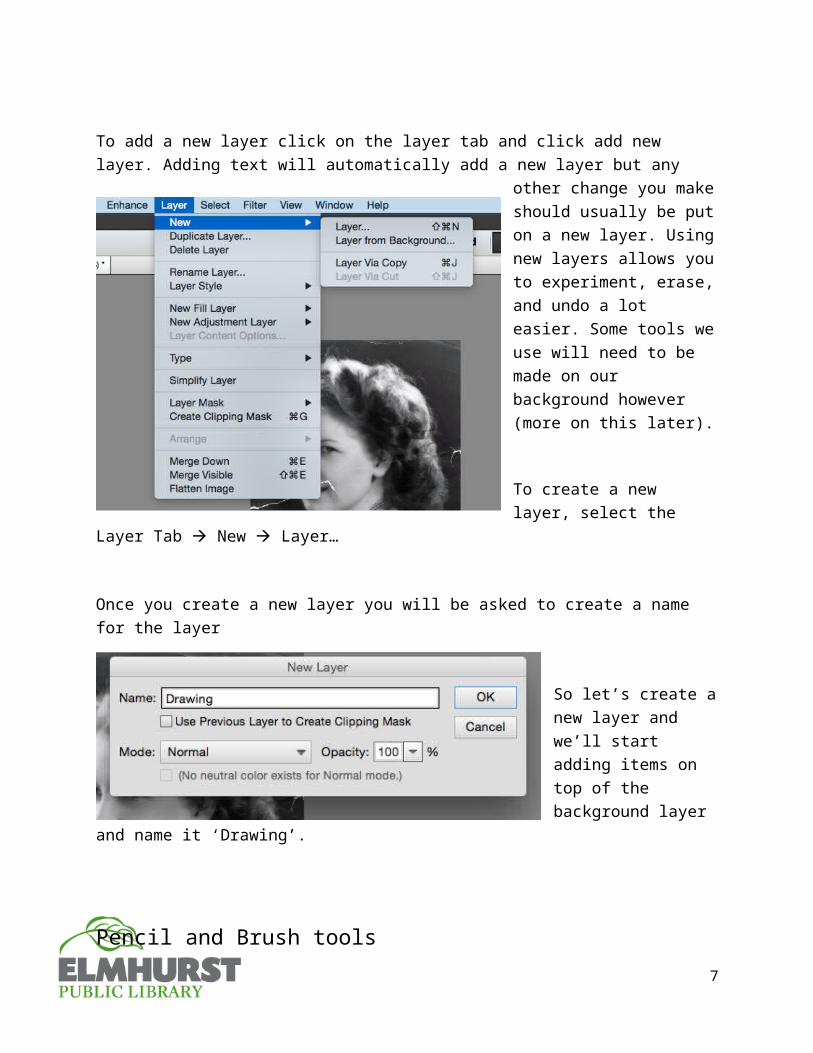
To add a new layer click on the layer tab and click add new layer. Adding text will automatically add a new layer but any other change you make should usually be put on a new layer. Using new layers allows you to experiment, erase, and undo a lot easier. Some tools we use will need to be made on our background however (more on this later).
To create a new layer, select the Layer Tab New Layer…
Once you create a new layer you will be asked to create a name for the layer
5

So let’s create a new layer and we’ll start adding items on top of the background layer and name it ‘Drawing’.
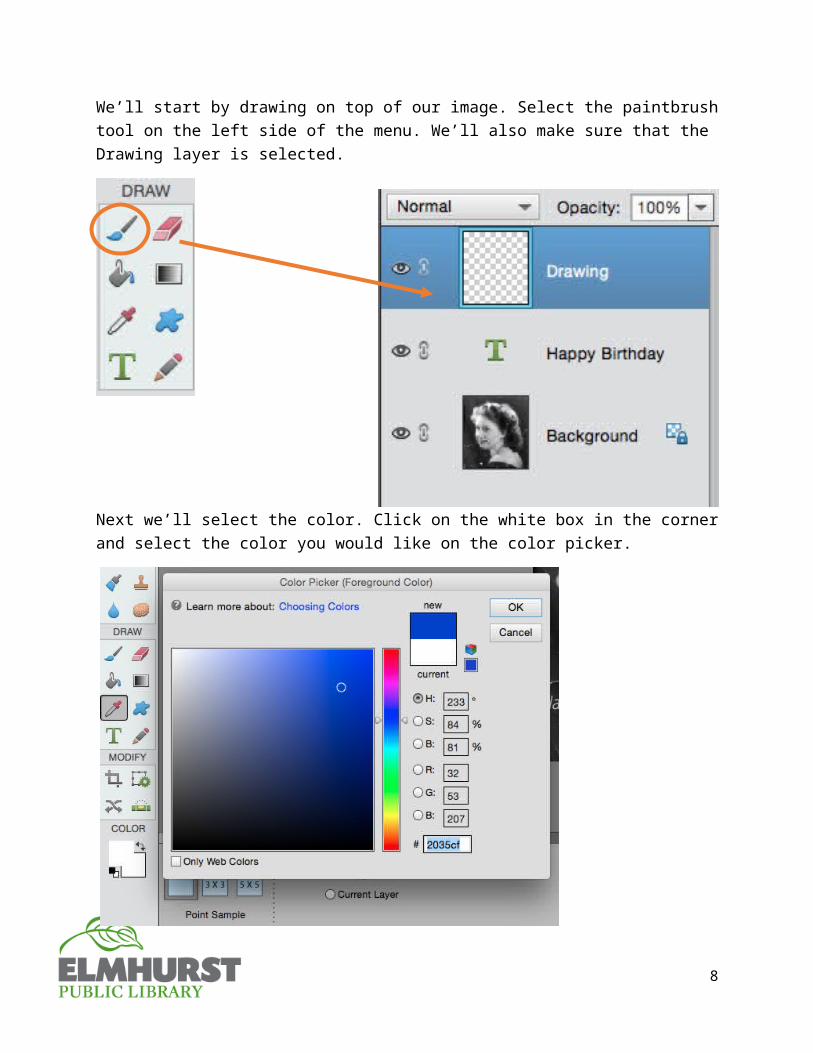
Pencil and Brush toolsWe’ll start by drawing on top of our image. Select the paintbrush tool on the left side of the menu. We’ll also make sure that the Drawing layer is selected.
Next we’ll select the color. Click on the white box in the corner and select the color you would like on the color picker.
6
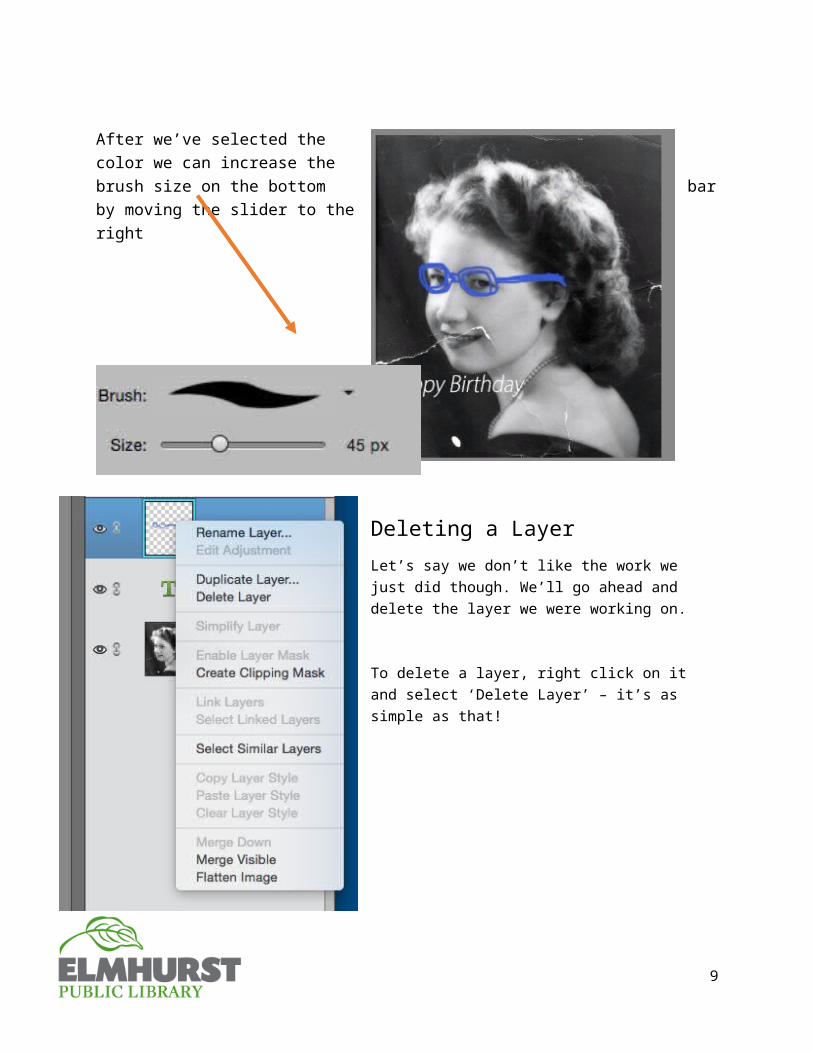
After we’ve selected the color we can increase the brush size on the bottom bar by moving the slider to the right
Deleting a LayerLet’s say we don’t like the work we just did though. We’ll go ahead and delete the layer we were working on.
To delete a layer, right click on it and select ‘Delete Layer’ – it’s as simple as that!
7
Healing Brush Now we’ll talk about one of the most exciting tools of Photoshop, the magic healing brush. Using the healing brush erases blemishes on a photo. Using a software algorithm, the healing brush takes the input from the surrounding area around the brush and fills it in.
This works quite well on single shade items but can cause some errors when working on detailed portions -- remember to decrease the brush size around these areas!
Now Let’s Try it!
8
Using Image 2:
1. Bring the image into Photoshop 2. Adjust the levels3. Adjust Saturation4. Crop the Photo5. Use the magic healing brush to remove damaged portions
9