Embed Size (px)
Citation preview
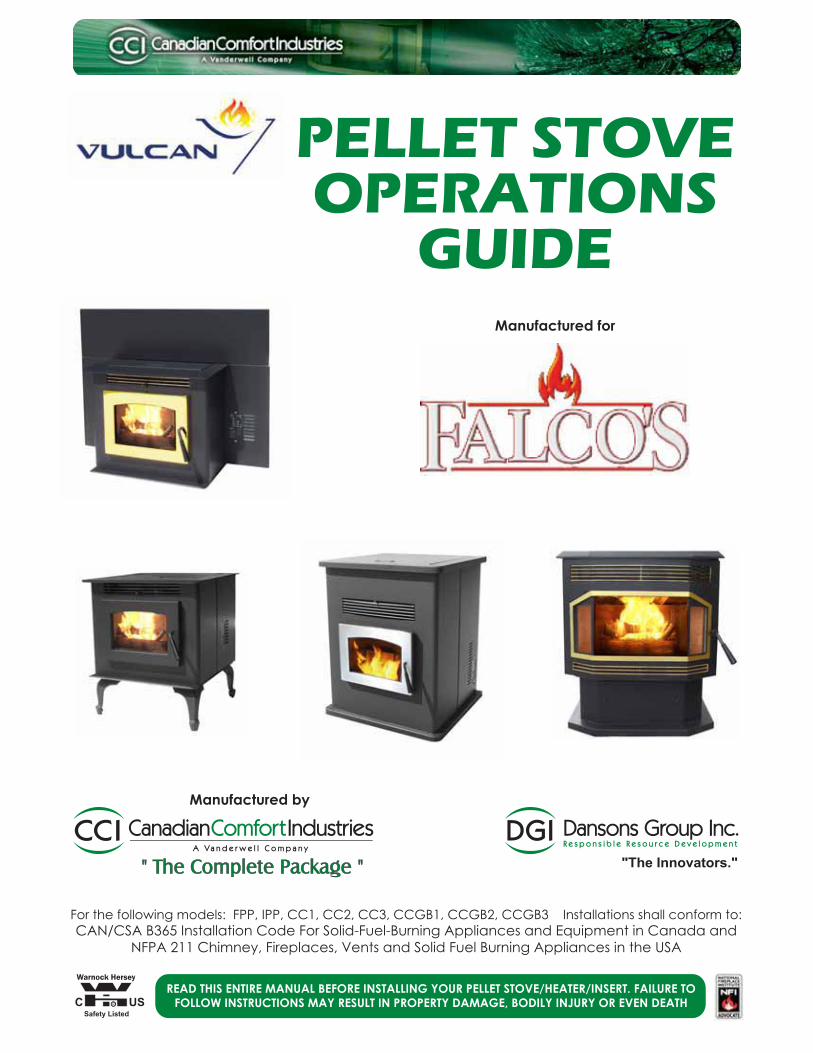
PELLET STOVEOPERATIONS
GUIDE
CAN/CSA B365 Installation Code For Solid-Fuel-Burning Appliances and Equipment in Canada andNFPA 211 Chimney, Fireplaces, Vents and Solid Fuel Burning Appliances in the USA
Manufactured by
READ THIS ENTIRE MANUAL BEFORE INSTALLING YOUR PELLET STOVE/HEATER/INSERT. FAILURE TOFOLLOW INSTRUCTIONS MAY RESULT IN PROPERTY DAMAGE, BODILY INJURY OR EVEN DEATH
For the following models: FPP, IPP, CC1, CC2, CC3, CCGB1, CCGB2, CCGB3 Installations shall conform to:
Manufactured for
Dear Pellet Appliance Owner,
UPDATESUpdated manuals, product registration and warranty information can be found on our website:
Thank you for selecting our wood pellet stove!
2
Sincerely,Dansons Group Inc. and Canadian Comfort Industries
www.dansons.com/support
FOREWORD TONEW OWNERS
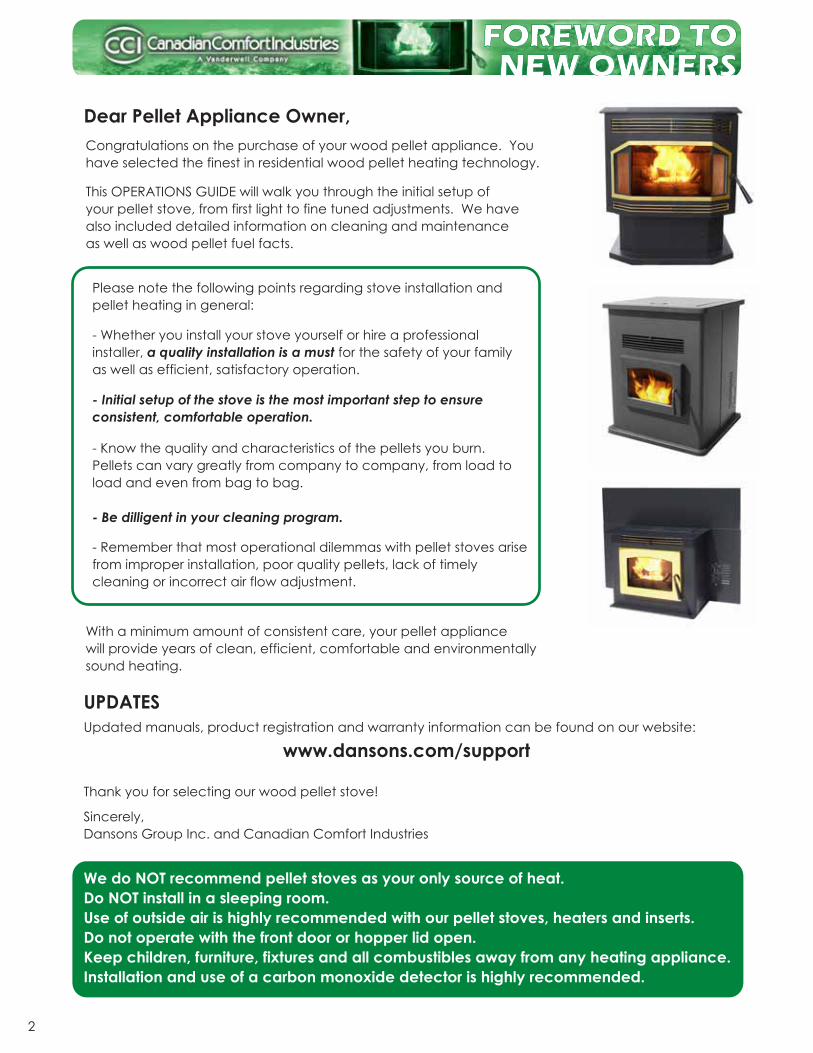
Congratulations on the purchase of your wood pellet appliance. Youhave selected the finest in residential wood pellet heating technology.
This OPERATIONS GUIDE will walk you through the initial setup ofyour pellet stove, from first light to fine tuned adjustments. We havealso included detailed information on cleaning and maintenanceas well as wood pellet fuel facts.
Please note the following points regarding stove installation andpellet heating in general:
- Whether you install your stove yourself or hire a professionalinstaller, a quality installation is a must for the safety of your familyas well as efficient, satisfactory operation.
- Initial setup of the stove is the most important step to ensureconsistent, comfortable operation.
- Know the quality and characteristics of the pellets you burn.Pellets can vary greatly from company to company, from load toload and even from bag to bag.
- Be dilligent in your cleaning program.
- Remember that most operational dilemmas with pellet stoves arisefrom improper installation, poor quality pellets, lack of timelycleaning or incorrect air flow adjustment.
With a minimum amount of consistent care, your pellet appliancewill provide years of clean, efficient, comfortable and environmentallysound heating.
We do NOT recommend pellet stoves as your only source of heat.Do NOT install in a sleeping room.Use of outside air is highly recommended with our pellet stoves, heaters and inserts.Do not operate with the front door or hopper lid open.Keep children, furniture, fixtures and all combustibles away from any heating appliance.Installation and use of a carbon monoxide detector is highly recommended.
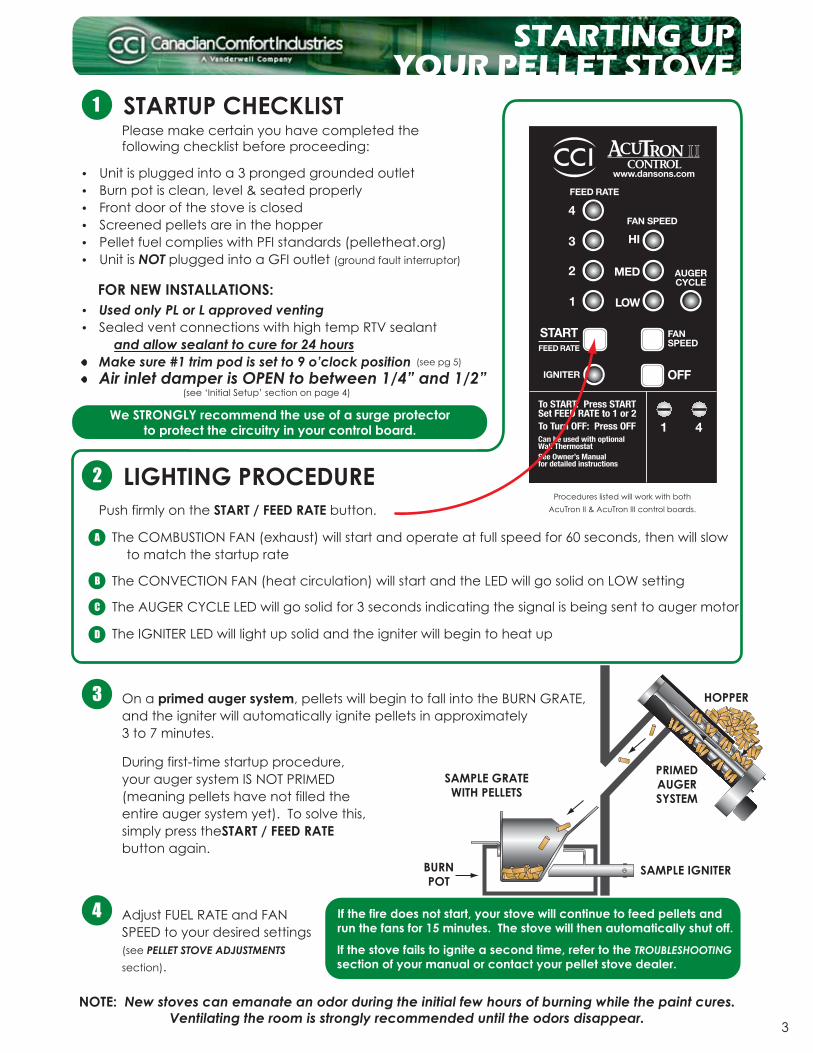
LIGHTING PROCEDURE
STARTUP CHECKLIST
2
A
B
C
D
1
3
The COMBUSTION FAN (exhaust) will start and operate at full speed for 60 seconds, then will slow to match the startup rate
On a primed auger system, pellets will begin to fall into the BURN GRATE,and the igniter will automatically ignite pellets in approximately3 to 7 minutes.
During first-time startup procedure,your auger system IS NOT PRIMED(meaning pellets have not filled theentire auger system yet). To solve this,simply press theSTART / FEED RATEbutton again.
Please make certain you have completed thefollowing checklist before proceeding:
Unit is plugged into a 3 pronged grounded outletBurn pot is clean, level & seated properlyFront door of the stove is closedScreened pellets are in the hopperPellet fuel complies with PFI standards (pelletheat.org)Unit is NOT plugged into a GFI outlet (ground fault interruptor)
......
..
..
Used only PL or L approved ventingSealed vent connections with high temp RTV sealant and allow sealant to cure for 24 hoursMake sure #1 trim pod is set to 9 o’clock positionAir inlet damper is OPEN to between 1/4” and 1/2”
4 Adjust FUEL RATE and FANSPEED to your desired settings(see PELLET STOVE ADJUSTMENTSsection).
NOTE: New stoves can emanate an odor during the initial few hours of burning while the paint cures.Ventilating the room is strongly recommended until the odors disappear.
SAMPLE GRATEWITH PELLETS
BURNPOT
SAMPLE IGNITER
HOPPER
PRIMEDAUGERSYSTEM
If the fire does not start, your stove will continue to feed pellets andrun the fans for 15 minutes. The stove will then automatically shut off.
STARTING UPYOUR PELLET STOVE
If the stove fails to ignite a second time, refer to the TROUBLESHOOTINGsection of your manual or contact your pellet stove dealer.
We STRONGLY recommend the use of a surge protectorto protect the circuitry in your control board.
(see ‘Initial Setup’ section on page 4)
(see pg 5)
FOR NEW INSTALLATIONS:
Push firmly on the START / FEED RATE button.Procedures listed will work with both
AcuTron II & AcuTron III control boards.
The CONVECTION FAN (heat circulation) will start and the LED will go solid on LOW setting
The AUGER CYCLE LED will go solid for 3 seconds indicating the signal is being sent to auger motor
The IGNITER LED will light up solid and the igniter will begin to heat up
3
INITIAL SETUP
1
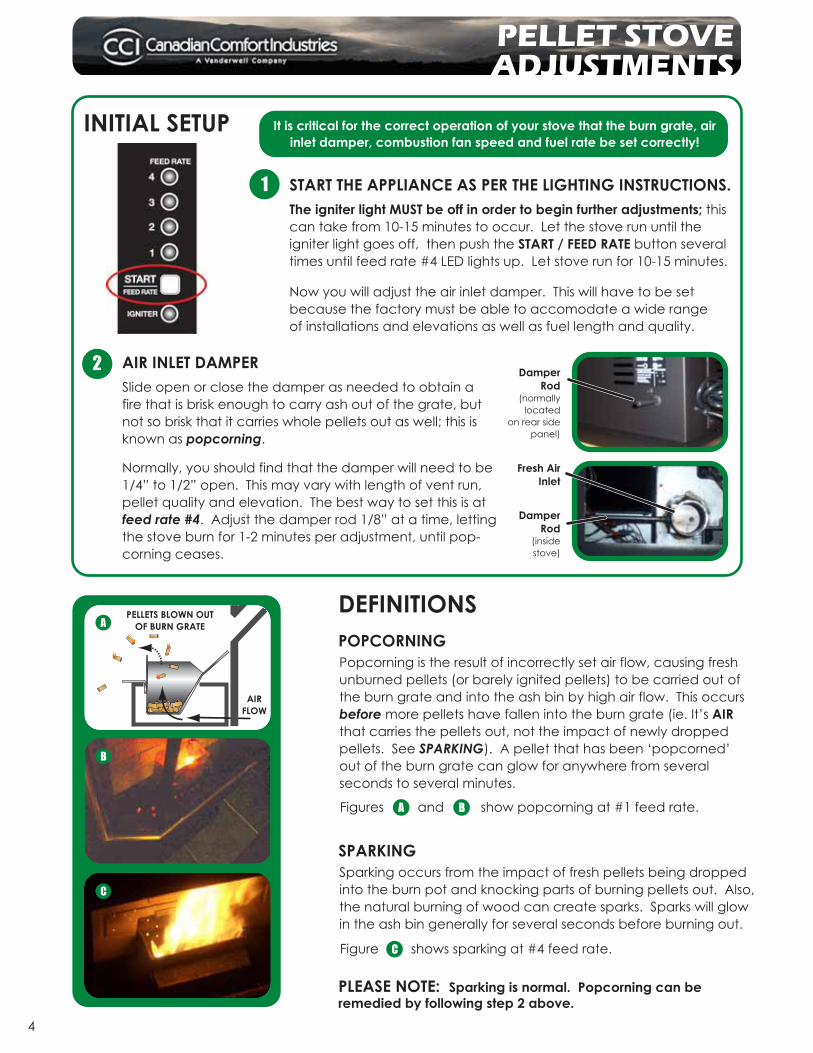
2Slide open or close the damper as needed to obtain afire that is brisk enough to carry ash out of the grate, butnot so brisk that it carries whole pellets out as well; this isknown as popcorning.
Normally, you should find that the damper will need to be1/4” to 1/2” open. This may vary with length of vent run,pellet quality and elevation. The best way to set this is atfeed rate #4. Adjust the damper rod 1/8” at a time, lettingthe stove burn for 1-2 minutes per adjustment, until pop-corning ceases.
Popcorning is the result of incorrectly set air flow, causing freshunburned pellets (or barely ignited pellets) to be carried out ofthe burn grate and into the ash bin by high air flow. This occursbefore more pellets have fallen into the burn grate (ie. It’s AIRthat carries the pellets out, not the impact of newly droppedpellets. See SPARKING). A pellet that has been ‘popcorned’out of the burn grate can glow for anywhere from severalseconds to several minutes.
andFigures
DamperRod
(normallylocated
on rear sidepanel)
DamperRod
(insidestove)
Fresh AirInlet
show popcorning at #1 feed rate.
AIR INLET DAMPER
DEFINITIONSPOPCORNING
Sparking occurs from the impact of fresh pellets being droppedinto the burn pot and knocking parts of burning pellets out. Also,the natural burning of wood can create sparks. Sparks will glowin the ash bin generally for several seconds before burning out.
SPARKING
PLEASE NOTE: Sparking is normal. Popcorning can beremedied by following step 2 above.
It is critical for the correct operation of your stove that the burn grate, airinlet damper, combustion fan speed and fuel rate be set correctly!
START THE APPLIANCE AS PER THE LIGHTING INSTRUCTIONS.The igniter light MUST be off in order to begin further adjustments; thiscan take from 10-15 minutes to occur. Let the stove run until theigniter light goes off, then push the START / FEED RATE button severaltimes until feed rate #4 LED lights up. Let stove run for 10-15 minutes.
Now you will adjust the air inlet damper. This will have to be setbecause the factory must be able to accomodate a wide rangeof installations and elevations as well as fuel length and quality.
PELLET STOVEADJUSTMENTS
A
A
shows sparking at #4 feed rate.Figure C
B
B
C
4
AIRFLOW
PELLETS BLOWN OUTOF BURN GRATE
3
A
B
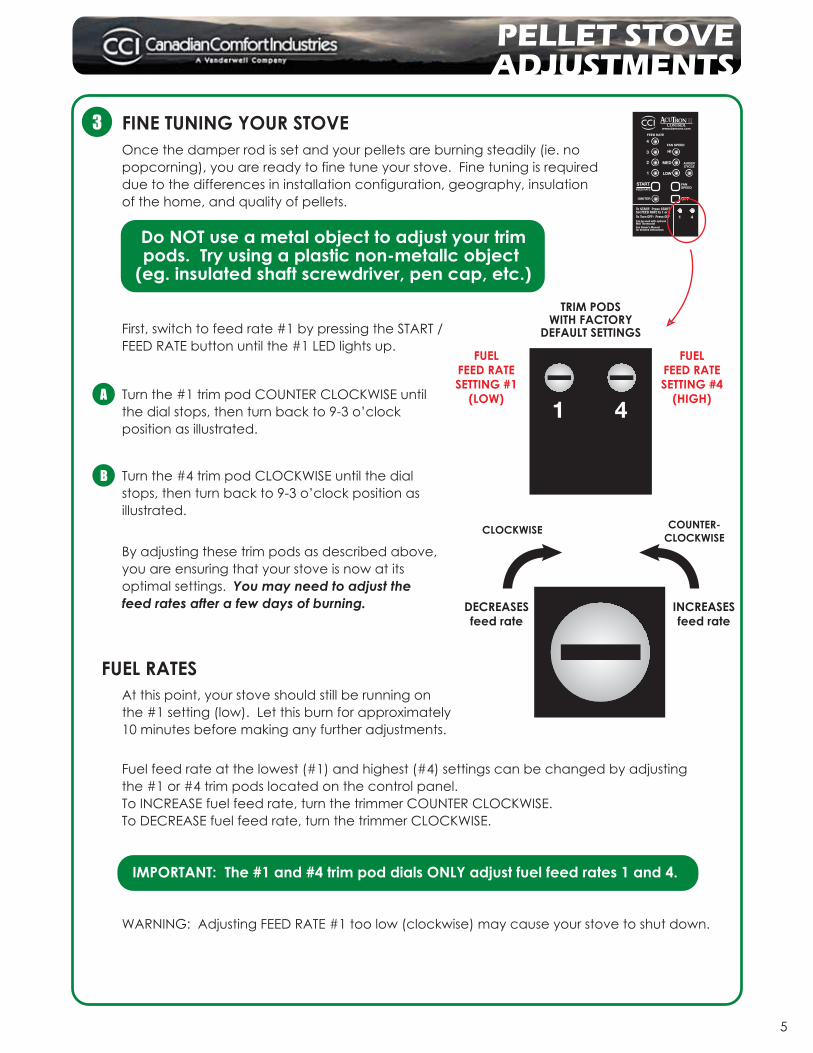
FINE TUNING YOUR STOVE
FUELFEED RATESETTING #1
(LOW)
FUELFEED RATESETTING #4
(HIGH)
INCREASESfeed rate
DECREASESfeed rate
Do NOT use a metal object to adjust your trimpods. Try using a plastic non-metallc object
(eg. insulated shaft screwdriver, pen cap, etc.)
Fuel feed rate at the lowest (#1) and highest (#4) settings can be changed by adjustingthe #1 or #4 trim pods located on the control panel.To INCREASE fuel feed rate, turn the trimmer COUNTER CLOCKWISE.To DECREASE fuel feed rate, turn the trimmer CLOCKWISE.
WARNING: Adjusting FEED RATE #1 too low (clockwise) may cause your stove to shut down.
PELLET STOVEADJUSTMENTS
Once the damper rod is set and your pellets are burning steadily (ie. nopopcorning), you are ready to fine tune your stove. Fine tuning is requireddue to the differences in installation configuration, geography, insulationof the home, and quality of pellets.
First, switch to feed rate #1 by pressing the START /FEED RATE button until the #1 LED lights up.
Turn the #1 trim pod COUNTER CLOCKWISE untilthe dial stops, then turn back to 9-3 o’clockposition as illustrated.
By adjusting these trim pods as described above,you are ensuring that your stove is now at itsoptimal settings. You may need to adjust thefeed rates after a few days of burning.
Turn the #4 trim pod CLOCKWISE until the dialstops, then turn back to 9-3 o’clock position asillustrated.
TRIM PODSWITH FACTORY
DEFAULT SETTINGS
COUNTER-CLOCKWISE
CLOCKWISE
FUEL RATESAt this point, your stove should still be running onthe #1 setting (low). Let this burn for approximately10 minutes before making any further adjustments.
IMPORTANT: The #1 and #4 trim pod dials ONLY adjust fuel feed rates 1 and 4.
5

The performance of your pellet appliance is greatly affected by the type andquality of wood pellets burned. As the heat output of various brands of pellets
differs, so will the performance and heat output of your appliance.
We recommend the use of screened pellet fuel in order toreduce the amount of fines your stove will have to cope with.
PELLET QUALITY
WOODWOODPELLET FUEL
Your pellet stove is designed to burn APFI/FFI ‘Premium’or ‘Standard’ quality wood pellets. Pellets that are softcontain excessive amounts of loose sawdust, have beenor are wet, and produce clinkers or heavy ash will resultin reduced performance and may actually cause thefire to go out.
PELLET CONSUMPTIONFuel consumption will vary somewhat between fuel brands and stoves. The following ‘roughguide’ to pellet usage may be useful in assessing your stove’s operation, for ordering fueland in providing information to your authorized pellet stove dealer.
FACTORS AFFECTING PELLET FEED RATESGenerally, the smaller, harder and cleaner (free from fines) the pellets are, the faster they will feed at a given setting and vice versa.
The extremes in pellet size and quality can cause several hours of difference in burn time for a 40 lb bag of pellets.
Heat production is directly related to the pounds of fuel burned per hour. As fuel consumption goes down so will heat output and vice versa.
Pellet feed rate, at the same fuel settings, may vary greatly from brand to brand and may vary somewhat from batch to batch within the same brand.
Setting
1
Fuel flow and burn times quoted are approximate and may vary with type of fuel used.
2
3
4
40 - 80 hours
35 - 48 hours
27 - 35 hours
22 - 30 hours
100 - 200 hours
86 - 120 hours
67 - 86 hours
55 - 75 hours
1.5 - 3 lbs per hour
2.5 - 3.5 lbs per hour
3.5 - 4.5 lbs per hour
4 - 5.5 lbs per hour
Amount of Pellets BurnedApproximate Burn Times120 lb Hopper 300 lb Hopper
6

NOTE: It is much easier to remove fines from pellets before they are placed in the stovethan it is to service your stove for a plugged hopper, jammed auger or plugged exhaustsystem. Pellets with excessive sawdust may be screened to remove most of the fines.
Pellet screeners may be built or purchased from most pellet stove dealers.
NOTE: Because Dansons Group Inc. and Canadian Comfort Industries have no control over the qualityof pellets that you use, we assume no liability caused by issues relating to the quality of chosen pellets.
DEFINITIONS
ASHAsh is a natural product of burning wood. As the amount of ash in the wood increases, theamount of ash left behind after burning high-ash wood pellets will increase.High quality pellets will produce less ash and fewer clinkers than lower quality pellets.
PFI PELLET STANDARDSFor the Pellet Fuel Institute (PFI), standards for residential quality pellets are as follows:
Find out more atwww.pelletheat.org
Length:Diameter:
Fines:Salts:
Ash Content: - Premium Quality
- Standard Quality
1.5 inches maximum0.235 to 0.350 inches (approx. 1/4” to 3/8”).2 lb maximum per 40 lb bag0.005% by weight maximum
0.75% by weight maximum (0.3 lb per 40 lb of pellets)2.5% by weight maximum (1 lb per 40 lb of pellets)
CLINKERClinkers are solid, glassy or porous accumulations of incombustible matter that may resultfrom burning some types of wood pellets. Clinkers are formed at the bottom of the burngrate and, if left undisturbed, will build up and cut off combustion air. As clinkers grow, thefire becomes orange/brown and ‘lazy’. Pellets may build up in the burn grate, the firebox& window may become sooty, and exhaust gases may become smoky.
FINESFines are pieces of sawdust that were not properly formed or are the result of pelletsbreaking down during handling, transporting and storage. Fines adversely affect theoperation and heat production of pellet appliances, and they greatly increase therequirements for general cleaning and maintenance. Fines cause pellets to feed moreslowly, thus reducing the amount of heat produced at any given heat setting.
WOODWOODPELLET FUEL
7

ASH TRAPS - Remove the rear burn plate from thefirebox area. This will expose the 2 ash traps and thepellet fuel drop chute. Fly ash may be removed by vacuuming inside the trap area with an approvedash vacuum (A HOME SHOP VAC MAY BE USED TO REMOVE ASH FROM YOUR STOVE *ONLY* WHEN THEASHES HAVE COOLED). A bottle cleaning brush can help remove build-up inside the traps. S
HEAT TUBES - With your stove’s main door closed,pull the HEAT TUBE SCRAPER ROD forward and back-ward a few times. As different types of pelletsproduce different amounts of ash, cleaning thetubes enables the heat exchange to operateefficiently. CAUTION: On a burning stove, the scraperrod is HOT or may not move due to metal expansion.
WEEKLY(or every2-3 days)
W S
ASH BIN - Monitor the ash level on a weekly basis. Ash content is a good indication of fuel efficiencyand quality. A HOME SHOP VAC MAY BE USED TOREMOVE ASH FROM YOUR STOVE *ONLY* WHEN THE ASHES HAVE COOLED. Refer to your TECHNICAL GUIDEfor more information on the safe disposal of ash.
SEASONALLY(or every 1-2 tons
of fuel burned)
RECOMMENDED MAINTENANCE SCHEDULE
W
BURN GRATE - Clean as needed, scraping off anyresidue that may stick to the grate bottom or sides.Ensure the holes are clean and unrestricted.CAUTION: When replacing the grate, make sure itis properly seated in the burn pot (ie. sitting level,front to back, left to right).
W
BURN POT - Remove the burn grate. Clean out theburn pot as needed. Do not push the ash to theback of the pot as this will restrict the air flow andaffect the performance of this appliance.
W
WINDOW CLEANING - Clean your window as needed with an approved wood appliance glasscleaner to remove heavy build-up on the window. Do NOT use abrasive chemical cleaners. A 000steel wool pad may be used to scour any hard-to-remove creosote and carbon accumulation. Finishyour cleaning procedure by washing down the glass with vinegar & water to remove cleaner residue. DO NOT OPERATE YOUR STOVE WITH BROKEN GLASS!
W
W
WARNING: Disconnect the electrical cord prior to opening the sides of your stove or opening theexhaust system for any inspection, cleaning, maintenance or service work. NEVER perform anyinspection, cleaning, maintenance or service on a HOT STOVE or when the cord is plugged in.
Proper care of your pellet stove or heater is required for peak, sustained performance. The need forfrequent cleaning depends upon:
HEATTUBES
SCRAPERROD
WINDOW
BURNGRATE
BURNPOT
ASH BIN
- amount of pellets burned- pellet quality
REQUIREDROUTINE CLEANING
HEATTUBES
SCRAPERROD
HOPPER
AUGER
AUGERMOTOR
FANMOTOR
EXHAUST
AIRINTAKE
WINDOW
BURNGRATE
REARBURN PLATE
BURNPOT
ASH BIN
FREESTANDING STOVE
SHOP HEATER
REARBURN PLATE
HOPPER
AUGER
AUGERMOTOR
FAN MOTOR
EXHAUST
AIRINTAKE
- length of time since the previous cleaning- quality of the fire
8
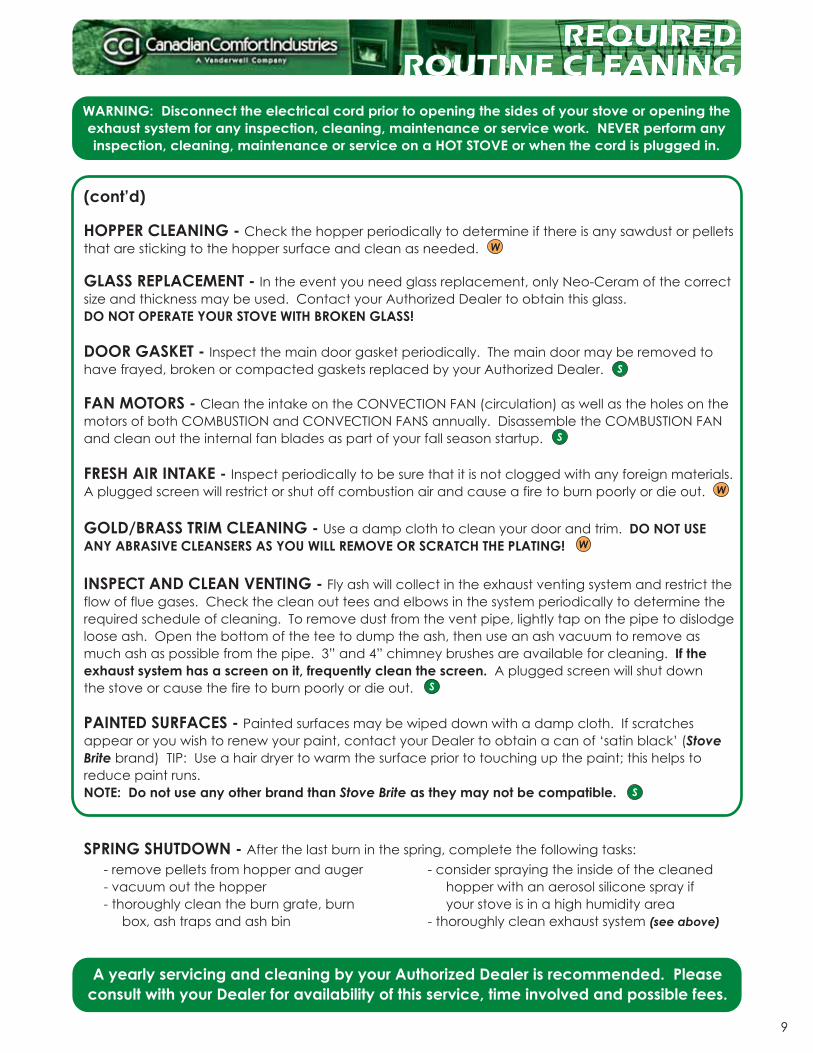
INSPECT AND CLEAN VENTING - Fly ash will collect in the exhaust venting system and restrict theflow of flue gases. Check the clean out tees and elbows in the system periodically to determine therequired schedule of cleaning. To remove dust from the vent pipe, lightly tap on the pipe to dislodgeloose ash. Open the bottom of the tee to dump the ash, then use an ash vacuum to remove asmuch ash as possible from the pipe. 3” and 4” chimney brushes are available for cleaning. If theexhaust system has a screen on it, frequently clean the screen. A plugged screen will shut downthe stove or cause the fire to burn poorly or die out.
GOLD/BRASS TRIM CLEANING - Use a damp cloth to clean your door and trim. DO NOT USEANY ABRASIVE CLEANSERS AS YOU WILL REMOVE OR SCRATCH THE PLATING!
FAN MOTORS - Clean the intake on the CONVECTION FAN (circulation) as well as the holes on themotors of both COMBUSTION and CONVECTION FANS annually. Disassemble the COMBUSTION FANand clean out the internal fan blades as part of your fall season startup.
(cont’d)
REQUIREDROUTINE CLEANING
WARNING: Disconnect the electrical cord prior to opening the sides of your stove or opening theexhaust system for any inspection, cleaning, maintenance or service work. NEVER perform anyinspection, cleaning, maintenance or service on a HOT STOVE or when the cord is plugged in.
W
GLASS REPLACEMENT - In the event you need glass replacement, only Neo-Ceram of the correctsize and thickness may be used. Contact your Authorized Dealer to obtain this glass.DO NOT OPERATE YOUR STOVE WITH BROKEN GLASS!
S
S
DOOR GASKET - Inspect the main door gasket periodically. The main door may be removed tohave frayed, broken or compacted gaskets replaced by your Authorized Dealer.
S
PAINTED SURFACES - Painted surfaces may be wiped down with a damp cloth. If scratchesappear or you wish to renew your paint, contact your Dealer to obtain a can of ‘satin black’ (StoveBrite brand) TIP: Use a hair dryer to warm the surface prior to touching up the paint; this helps toreduce paint runs.NOTE: Do not use any other brand than Stove Brite as they may not be compatible.
SPRING SHUTDOWN - After the last burn in the spring, complete the following tasks:
A yearly servicing and cleaning by your Authorized Dealer is recommended. Pleaseconsult with your Dealer for availability of this service, time involved and possible fees.
- remove pellets from hopper and auger- vacuum out the hopper- thoroughly clean the burn grate, burn box, ash traps and ash bin
- consider spraying the inside of the cleaned hopper with an aerosol silicone spray if your stove is in a high humidity area- thoroughly clean exhaust system (see above)
S
FRESH AIR INTAKE - Inspect periodically to be sure that it is not clogged with any foreign materials.A plugged screen will restrict or shut off combustion air and cause a fire to burn poorly or die out.
W
WHOPPER CLEANING - Check the hopper periodically to determine if there is any sawdust or pelletsthat are sticking to the hopper surface and clean as needed.
9

GUIDE TOTROUBLESHOOTING
Proper cleaning, maintenance and use of quality pellets will prevent common operational issues withyour pellet stove. However, when your appliance is simply operating poorly or not at all, the followingtroubleshooting tips may be helpful.
Orange, lazy flame - clean out burn grate and burn pot- examine ash traps, clean as needed- check exhaust system, clean as needed- refer to PELLET STOVE ADJUSTMENTS section of this manual
Sooty window - check outside air and exhaust screens, unplug if necessary- make sure main door and (if applicable to your model) ash bin cover are tightly closed- refer to PELLET STOVE ADJUSTMENTS section of this manual
Pellets build up in the burn grate - check main and (if applicable to your model) ash door gaskets, replace if worn- check pellet fuel; replace if moist, wet, dirty or high in fines- refer to PELLET STOVE ADJUSTMENTS section of this manual- contact with your Authorized Dealer for service
Fire goes outFans will not run when START /FEED RATE button is pushed
- verify that the appliance is plugged in and electricity is running to that outlet; verify that the outlet is NOT GFI (ground fault indicator)- refer to PELLET STOVE ADJUSTMENTS section of this manual- contact your Authorized Dealer for service
Pellets will not feed - hopper is empty; fill the hopper with fresh, clean, dry pellets- fuel switch has not been pushed to ‘ON’ (some models)- auger system or controls need service- exhaust system is plugged; clean venting- refer to PELLET STOVE ADJUSTMENTS section of this manual- contact with your Authorized Dealer for service
Stove runs 15 minutes, thenshuts off
- startup fire did not catch; light a new fire by pressing the START / FEED RATE button again- contact with your Authorized Dealer for service
Fans do not shut off when stovecools down
- contact with your Authorized Dealer for service
CAUTION: The electrical, auger and digital control components of your stove are not owner serviceable. Call your Authorized Dealer for proper diagnosis of problems and service for those components.
For more detailed troubleshooting tips, please visit www.dansons.com/support
Ash and/or pellet dust isaccumulating in the house, orthe smell of smoke is detected
- check for and correct any leaks in the exhaust system- take greater care in handling ashes, cleaning window glass, opening the doors more slowly and in filling the hopper- contact with your Authorized Dealer for service
TROUBLESHOOTING
PROBLEM SOLUTION
WARNING: Disconnect the electrical cord prior to opening the sides of your stove or opening theexhaust system for any inspection, cleaning, maintenance or service work. NEVER perform anyinspection, cleaning, maintenance or service on a HOT STOVE or when the cord is plugged in.
10

LIMITEDWARRANTY
CANADIAN COMFORT INDUSTRIES (CCI) LIMITED WARRANTYCCI wood pellet and corn appliances carry a one (1) year -parts only- on electrical componentsand a five (5) year limited warranty from the date of sale to the original owner against defectsand workmanship on all steel parts (excluding the burn grate and the heat tube scraper / rod).If defective in material or workmanship, during the warranty period, CCI will, at its option, repairor replace the product as described below.
There specifically is NO warranty on paint or plated surfaces, glass, burn grate, fire brick and allgaskets or against damage caused by corrosion. There is no warranty coverage for variances infuel feed rates. BTU heat rating will vary with different fuel conditions and is not considered adefect if the unit does not feed a constant amount of fuel.
The warranty above constitutes the entire warranty with respect to Canadian Comfort Industries.CCI MAKES NO OTHER WARRANTY, EXPRESSED OR IMPLIED, INCLUDING “ANY” WARRANTY OFMERCHANTABILITY, OR WARRANTY OF FITNESS FOR A PARTICULAR PURPOSE. No employee, agent,dealer, or other person is authorized to give any warranty on behalf of CCI. This warranty does notapply if the product has been altered in any way after leaving the factory. CCI and its agentsassume no liability for “resultant damages of any kind” arising from the use of its products. Inaddition, the manufacturer and its warranty administrator shall be held free and harmless fromliability from damage to property related to the operation, proper or improper, of the equipment.
THERE ARE NO WARRANTIES WHICH EXTEND BEYOND THE DESCRIPTION ON THE FACE HEREOF.
THESE WARRANTIES APPLY only if the device is installed and operated as recommended in theuser’s manual.
THESE WARRANTIES WILL NOT APPLY if abuse, accident, improper installation, negligence, or usebeyond rated capacity causes damage.
HOW TO MAKE A CLAIM – Any claim under this warranty should be made to the dealer from whomthis appliance was purchased. Then contact is made with the manufacturer, giving the modeland serial numbers, the date of purchase, your dealer’s name and address, plus a simpleexplanation of the nature of the defect.
THIS WARRANTY IS LIMITED TO DEFECTIVE PARTS – REPAIR AND/OR REPLACEMENT AT CCI’s OPTIONAND EXCLUDES ANY INCIDENTAL AND CONSEQUENTIAL DAMAGES CONNECTED THEREWITH. ADEFECTIVE PART DOES NOT WARRANT THE REPLACEMENT OF THE ENTIRE UNIT.
WARRANTY EXCLUSIONS: Failure due, but not limited to, fire, lightning, acts of God, power failuresand/or surges, rust, corrosion and venting problems are not covered.AUGER JAMS ARE NOT COVERED UNDER WARRANTY.Damage and/or repairs including but not limited to; knobs, handles, door gaskets, log sets, paintand plated surfaces – trim, baffles, louvers or handles. Additional exclusions for corn stoves areburnpot housing weldment and burnpot warpage (corn or pellet). Additional or unusual utilitybills incurred due to any malfunction or defect in equipment are not covered.
REMOVAL OR REINSTALLATION COSTS ARE NOT COVERED BY THIS WARRANTY.
CCI LIABILITY IS LIMITED TO THE WHOLESALE COST OF THE STOVE.
Some states do not allow the exclusion or limitation of incidental or consequential damages, orlimitations of implied warranties; therefore the limitations of exclusions set forth in this warranty maynot apply to you. This warranty gives you specific legal rights, and you may have other rights,which vary from state to state. All disputes relating to this warranty shall be tried before the courtsof Alberta, Canada.
Your purchase must be registered with Canadian Comfort Industries. This can be done at:www.dansons.com/support or by faxing your proof of purchase to us at: 1-877-303-3135.
11

COPYRIGHTCopyright 2006, Canadian Comfort Industries. All rights reserved.No part of this manual may be copied, transmitted, transcribed, stored in a retrieval system in anyform or by any means without the expressed written permission of:Canadian Comfort Industries 26319 Twp Rd 531 Acheson, AB Canada T7X 5A3 1-877-303-3134
To register your purchase, visit www.dansons.com/support
My local dealer is:
Technical Support Toll Free
or Monday to Friday, 9 am to 8 pm EST
Saturday, 11 am to 7 pm EST
1-877-303-3134
Monday to Friday, 11 am to 7 pm EST 1-888-470-7011
1-866-456-9269