Embed Size (px)
Citation preview

PHOTOSHOP 4
Masks
What is a mask and how does it work? Think of a mask as a superhero mask, like Batman or Spiderman. The mask for Batman for example, is black. The areas of his face that are unseen are protected. The areas cut out reveal the skin of his face and expose his eyes.
1. Take a photograph like this one: 2. Create a new layer and fill the layer completely with Black (to do this try
pushing Alt/Option on your keyboard and DELETE and you’ll get all black.) Then switch colors, and use a paintbrush to draw the sockets where the eyes would be:

Now, use your magic wand tool and select the eye sockets and press delete on the keyboard. All of a sudden you can see through your image to the trees behind the mask.
Drawing a Mask using Alpha Channels. Now delete the black layer, and you can try to do the same thing using channels.
1. Select the Channels panel. Note the CMYK or RGB Channels. Create a New Channel button to create an Alpha Layer.
2.

An Alpha layer basically is a mask channel that is used to show things or hide things. Black is going to be hidden, it’s going to be opaque, and white areas are going to be transparent. Any areas that are gray are half and half. So select a brush and draw two new eye sockets on the Alpha layer.
3. Load this channel: Press the Command/Control key on your computer and you can see this little icon appear; a little dotted square on top of the hand.
Click once to load the mask. (Make sure ALL the “eyes” are selected for each channel.
4. Return to the CMYK or RGB mode.
You see that the areas in red represent the mask, and the eyesockets you brushed in are now seethrough. That’s how a mask works.
5. Delete this channel again. Create another New Alpha Mask (it’ll be black again) 6. Then select the Gradient tool and move it across the image like this;

(make sure you make it largely black) In the bottom right quadrant, that’s where the area that will be hidden will be…the whiter the gradient, the more the image will pop through. 7. Load the mask (so it is tinted red) Clipping masks A clipping mask is one of the helpful tools in photoshop where you can use one shape to become another. 1. Go to File/New. Make sure in your Background Contents you have Transparent selected and not White or Background color selected. Click OK 2. On this layer, draw a shape…whatever shape you want. Try the Polygon Marquee tool and draw a star, for instance. 3. Fill in this shape with black. It doesn’t really matter what color you fill this in with since it’s going to act as your mask. Make sure you NAME your layer (after the shape) so you won’t get confused.
3. Create a NEW layer and draw a new shape on this layer, using the rectangular
Marguee tool.

Now dissect and grab paintbrush tool and add some squiggly lines and paint like so:
Now when you put your mouse on the line between your layers and you push Option Alt,
you’ll notice that your hand turns into a little symbol, and when you click, it’ll use the burst shape

to mask out the areas of the other layer, so you can see the colors within the burst only.
You can continue to add new layers to this effect.
4. Now add another layer. And draw another rectangular shape and fill it in with another
color like dark green. Now grab your paint brush and draw a bunch of spots all over your layer.

Now again, hold down Alt or Option between the two layers, and click. 5. Now we want to reduce the opacity of this layer. So go to the Opacity dialogue box
in the Layers panel and drop the opacity down, experimenting:
A clipping mask is really cool when you want to create special effects such as wood or metal because you can create a shape such as wood or a screw and bolt, and you make a very precise shape, and you go on a layer above it and you add your metallic effect. Then when you clip it you have your metallic bolt. Then you can use an editing tool such as dodge or burn and add a shadow. You can darket portions of it to make it more realisitic. Masks are also really great b/c they allow you to be really sloppy outside the mask, and draw outside the layers. Quick Masks ANOTHER way to create a mask in Photoshop: Paint a mask using Quick Mask Mode.

These two round buttons down toward the bottom of the toolbox are the Regular Mode and Quick Mask Mode buttons. 1. Import a photograph. 2. Click on the button on the right and you’re in the Quick Mask Mode. Now you have a painting tool for creating a mask. 3. Grab the paintbrush and draw a shape on top of the photo. Make sure your
background/foreground color chips are Black and White.
4. Exit quickmask Mode ( ) Now when you paint with your paintbrush tool, you’re unable to touch the area where the mask was b/c that area was protected:
Undo the scribble and the Quick Mask.
4. Now let’s see how we can put a little bit of transparency into a new Quick Mask.
5. Go back to Quick Mask mode and bump down your color in the Color Palette:

Paint again around the area you were painting before. And Exit Quick Mask Mode.
6. When you paint around the masked area you’ll notice that this time, a little bit of the paint color will seep through.
7. Step backwards again to get rid of the Quick Mask. 8. Create a New Quick Mask on the photograph. Now Select WHITE and notice
that with white selected you paint away the mask. With Black selected you paint ON the mask.
9. Experiment with the Opacity of the mask you put on, and with WHITE and with BLACK brushing.
NOTE: A quick way to swap between Black and White is to press X on the keyboard. Q on the Keyboard is a shorthand to exit Quick Mask mode. When you DOUBLE click on the Quick Mask icon you get this Option box:
You can inverse your selection by painting. If you don’t want to see red with a brush you can change the color.
Layer Masks You can use Layer masks all the time b/c they give you lots of flexibility and are especially helpful when you want to combine 2 or more layers. 1. Take 2 photographs with elements that you’d like to combine.

2. Click on the Layer Mask button one time,
3. and it adds this white mask area which is linked to your image:
4. The way a layer mask works is like every other mask: it’s based on values of gray,
black or white. If you have your colors set to 100% and you paint on the layer mask (make sure you paint on the layer mask) what happens is it starts to hide or get rid of portions of the image that you’re painting. Look at the Layer panel and see how the image is changing.
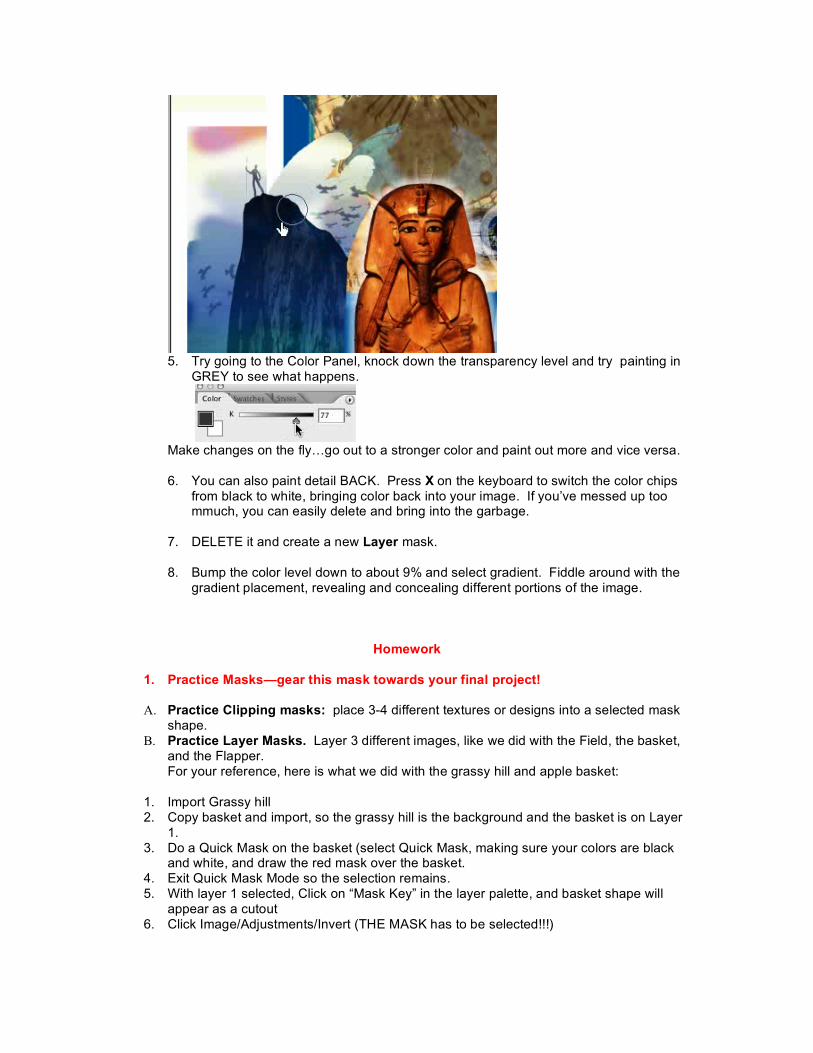
5. Try going to the Color Panel, knock down the transparency level and try painting in
GREY to see what happens.
Make changes on the fly…go out to a stronger color and paint out more and vice versa. 6. You can also paint detail BACK. Press X on the keyboard to switch the color chips
from black to white, bringing color back into your image. If you’ve messed up too mmuch, you can easily delete and bring into the garbage.
7. DELETE it and create a new Layer mask.
8. Bump the color level down to about 9% and select gradient. Fiddle around with the
gradient placement, revealing and concealing different portions of the image.
Homework
1. Practice Masks—gear this mask towards your final project!
A. Practice Clipping masks: place 3-4 different textures or designs into a selected mask shape.
B. Practice Layer Masks. Layer 3 different images, like we did with the Field, the basket, and the Flapper. For your reference, here is what we did with the grassy hill and apple basket:
1. Import Grassy hill 2. Copy basket and import, so the grassy hill is the background and the basket is on Layer
1. 3. Do a Quick Mask on the basket (select Quick Mask, making sure your colors are black
and white, and draw the red mask over the basket. 4. Exit Quick Mask Mode so the selection remains. 5. With layer 1 selected, Click on “Mask Key” in the layer palette, and basket shape will
appear as a cutout 6. Click Image/Adjustments/Invert (THE MASK has to be selected!!!)

7. IF MASK is still selected, note that you can click Click on White color and paintbrush: show that you can bring basket back. OR you can click on BLACK and bring background back
8. If you click on the Image icon in Layer 1, you’ll just paint White or BLACK Now add a third layer mask using the Mask Button in the Layer palette
1. Make sure your Background image is NOT LOCKED . Create a selection on your Background image (maybe using the polygonal lasso tool). 2. Select the mask button in the Layers palette 3. Everything but your selection will be hidden. (Do this just to familiarize yourself with the mask button. You really don’t want this! 4. Go back (Control Z) 5. Now Select the Alt/option button AS you click on the Mask button: it will select everything BUT the selection. Wow! 6. Add a new layer, and paste an image into it . Put that layer as your bottom-most layer, the image will peep through the selected mask hole.