Embed Size (px)
Citation preview

1
Physical AssessmentChapter 13
Sonia Green
Physical Assessment
• One method of gathering health data
• First step in the nursing process
• Performed on every patient to gather
objective data
Purposes
• Purposes
-
-
-
-

2
Techniques
• Techniques
-
-
-
-
Inspection
• Inspection (purposeful observation)
– -
– -
– -
– -

3
Percussion
• Percussion (striking or tapping a part of the body)
– Least used nursing assessment
– Fingertips are used to produce vibratory sounds
– Discomfort should not be felt if it is done correctly
– Pain may indicate disease process of tissue injury
Palpation
• Palpation (lightly touching the body or
applying pressure)
– Light Palpation
– Deep Palpation
Light Palpation
• Light Palpation
– Use fingertips
– Back of hand
– Palm of the hand
– Used on surface of skin
– Used to feel surface of the skin

4
Deep Palpation
• Deep Palpation
Performed by depressing tissue approx 1”
using forefingers of one or both
Auscultation
• Auscultation (listening to body sounds)
Requires stethoscope
Requires repeated practice

5
Equipment
• Equipment
Gloves
Examination gown
Cloth or paper drapes
Scale
Stethoscope
Sphygmomanometer
Thermometer
Pen light/ Flashlight
Tongue blade
Assessment form and pen
Environment
• Environment
Provide privacy
Warm
Padded/adjustable table/bed
Sufficient Room
Adequate lighting
Facilities for hand washing
Clean counter or surface
Lined receptacle for soiled articles
Physical Assessment
• PERFORMING A PHYSICAL ASSESSMENT
Gathering General Data
Draping and Positioning
Systematic Approach
Examining the Client
6
Gathering General Data
• Gathering General Data
Physical appearance
Level of consciousness
Body size
Posture
Gait
Mood & emotional tone
Use of ambulatory aids
Data Collection Approach
• Head-to-toe approach
• Body Systems Approach
Physical Assessment
• Data Collection
– Body Systems
Divided into six general area
Head & Neck
Chest
Extremities
Abdomen
Genitalia
Anus
Rectum

7
Physical Assessment
• Head & Neck
– Assess mental status
– Assess symmetry of craniofacial structures (eyes,
ears, nose, mouth) function
– Skin
– Oral & Nasal mucous membranes
– Hair & Scalp
Mental Status Assessment
• Mental Status Assessment
– Cognitive Level
– Attention
– Concentration
– Memory
– Abstract Thinking
Assessment Equipment
• Eyes
Appearance
Color
Size

8
Visual Acuity
• Visual Acuity
– Contacts
– Glasses
– False Eye
Snellen Eye Chart
• Snellen Eye Chart
– _
– _
– _
– _

9
Pupil Size
• Pupil Size
– Estimated in millimeters in normal light conditions
– Normal round and equal in size
– Consensual response
– Accommodation
– Documentation
Extraocular Movements
• Extraocular Movements
– Instruct pt to focus on & track the nurse’s finger
– Object should be moved six different positions
– Eyes should have coordinated movement
– See Figure 13-10 ; page 235
Visual Field Examinations
• Visual Field Examination (assessment of
peripheral vision and continuity in the visual
field).

10
Ears
• Ears
– External ears examined
– Inspect & Palpate
– Otoscope
• Used to examine the tympanic membrane
• Used to examine the eardrum
Voice Test
• Voice Test
– Stand 2 ft behind & to the side of the pt
– Instruct the pt two cover the ear on the opposite side
– Whisper a color, number, or name into the uncovered ear
– Instruct the pt to repeat the whispered word
– Continue with the same pattern increasing the volume
– Repeat the test in the opposite ear
Weber Test
• Weber Test
– Performed by striking tuning fork on nurse’s palm
– Place vibrating stem in the center of head
– Ask the pt is sound is hear equally
See Figure 13-13 page 237

11
Rinne Test
• Rinne Test
– Performed with tuning fork
– First strike the tuning fork
– Place stem behind the ear (mastoid area)
– Instruct pt to report when sounds stops
– Move vibrating tuning fork near the ear canal
Audiometry
• Audiometry (measurement of hearing acuity
at various sound frequencies)
-Done by audiologist
-Exact pitch & volume deficits are
measured
-Hearing is measured in decibels
Nose
• Nose
-Inspect the nose & the nasal passages
-Septum should be midline
-Nasal passage equal in size
-Assess smelling acuity

12
Mouth & Oral Membranes
• Mouth & Oral Membranes
– Mouth, tongue, teeth
– Inspect
-tongue should be midline (normal)
-note unusual breath odors
-note normal color of mucous membrane
-assess pt’s smile
Skin Assessment
• Facial Skin
– Smooth
– Uniform
Review TABLE 13-3 Page 238
Review TABLE 13-4 page 239
Skin Assessment
• Alteration in skin integrity
– Wound
– Ulcer
– Abrasion
– Laceration
– Fissure
– Scar

13
Hair
• Hair
– Scalp hair
– Eyebrows
– Eyelashes
-color
-texture
-distribution
Scalp
• Scalp
– Assess by separating the hair
• Inspect the skin
• Palpate for any unusual contour
Skin Assessment
Turgor (resiliency of the skin)
14
Neck
• Neck
– Support the head in midline position
– Assess
Trachea
ROM
-Palpate
Carotid arteries
Physical Assessment
• Chest & Spine
– Assess
• Shape of Chest
• How it moves during breathing
• Note curved appearance of spine
• Skin turgor, breast, heart sounds & lung sounds
Chest Shape
• Chest Shape & Movement
– Alters with abnormalities
– Expands equally with normal breathing
15
Spine
• Spine
– Normal
• Shoulders equal height
• Midline
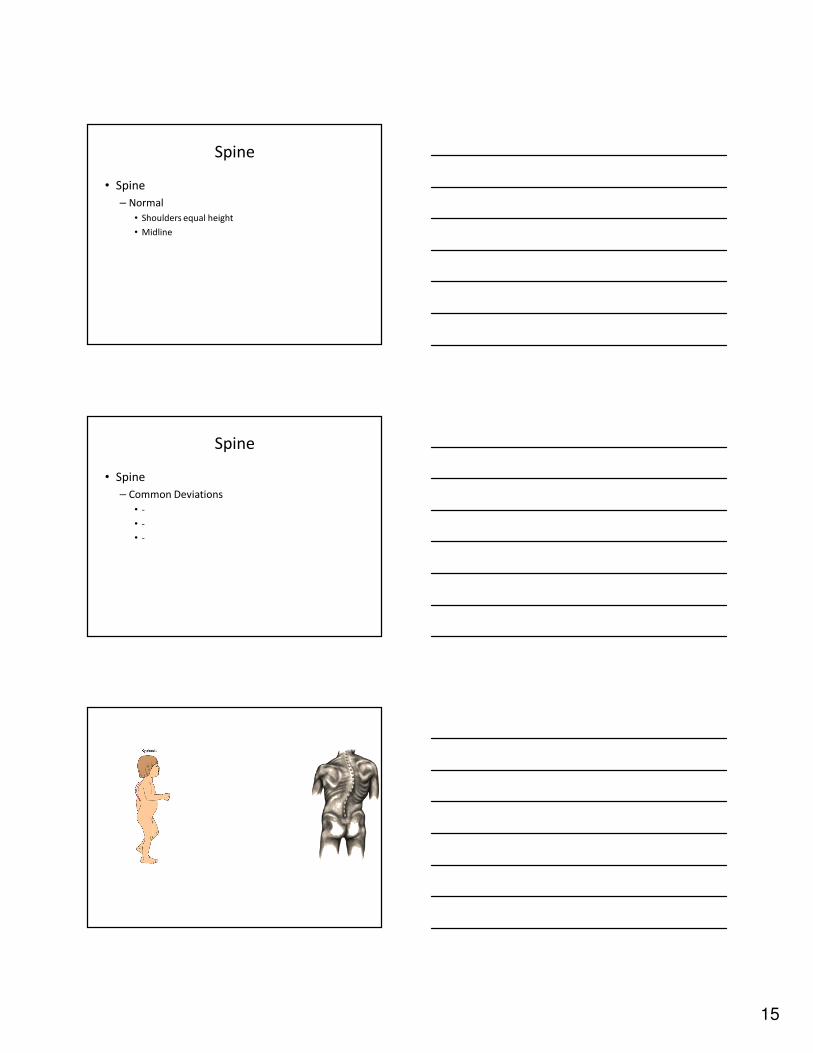
Spine
• Spine
– Common Deviations
• -
• -
• -

16
Physical Assessment
• Breast
– Examination
• Teaching
Figure 13-19 page 242
Breast Examination
Heart Sounds
• Heart Sounds
– Normal Heart Sounds
– Abnormal Heart Sounds

17
Heart Sounds
• Normal Heart Sounds
– S1 & S2
– S1 is the lub
– S2 is the dub
Heart Sounds
• Abnormal Heart Sounds
– S3 & S4
– S3 normal for children
– S3 abnormal for adults

18
Lung Sounds
• Lung Sounds
– Normal Lung Sounds
• Tracheal sounds
• Bronchial sounds
• Bronchovesicular sounds
• Vesicular sounds
Lung Sounds
• Lung Sounds
– Abnormal Lung Sounds
• -
• -
• -
• -

19
Extremities
• Extremities
– Assess
• Alignment
• Mobility
• Strength
• Compare size
• Skin temperature
• Nails
Extremities
• Extremities
– Assess
• Capillary refill time
• Palpate local peripheral pulses
• Check for edema
Fingernails and Toenails
• Assess
– -
– -
– -

20
Capillary Refill Time
• Observe the color in the nail bed.
• Depress the nail bed, displacing capillary
blood.
• Release the pressure
• Note how many seconds it takes for color to
come back.
Edema
• Evidenced by:
– Weight gain
– Tight rings
– Patterns in skin
Edema
• Determining presence of edema
– Press thumb or finger into the tissue
– If indentation remains (pitting edema)
21
Skin Sensation
–Assess
»Light touch
»Warmth
»Cold
»Sharp
»Dull
»Vibration
Abdomen
• Assessment
-
-
-
-
Bowels Sounds
• Assessed
– Admission
– Every shift
– Sounds
-
-
-
-

22
Abdominal Girth
• Measured if abdomen enlarged
• Measured daily
– Use a tape measure
– Measure around largest diameter
– Measure from same location
– Ensure by marking on the skin
Genitalia
• Don Gloves
• Inspection
Anus & Rectum
• Assessment
– Gloves
– Position pt on side
– Knees bent
– Separate buttocks
– Observe external orifice
23
REVIEW SKILLS
• Skill 13-1 page 250-251
Questions
WEBSITES
• www.medicine.osu.edu/exam
• www.thepoint.lww.com
• www.wilkes.med.ucla.edu/intro.html
• www.blaufuss.org
• www.sci.sdsu.edu/multimedia/heartsounds