Embed Size (px)
DESCRIPTION
Pink spot hat pattern construction photos
Citation preview
www.mchats.etsy.com pink spot hat pattern Page 1
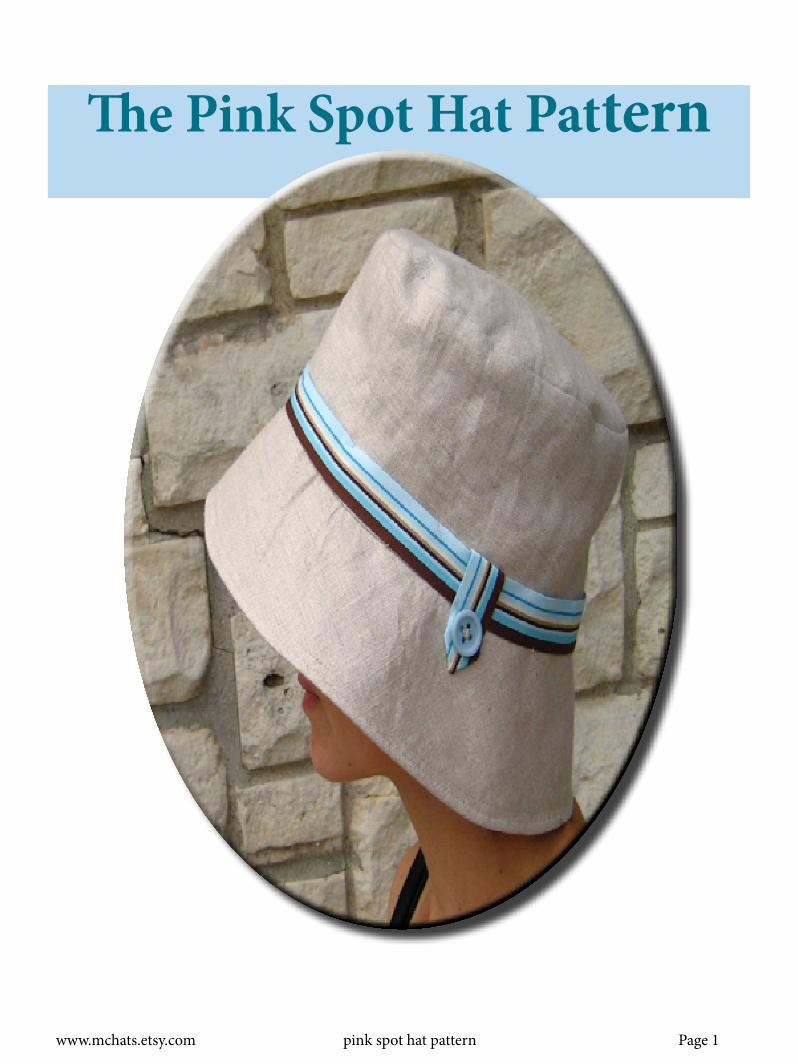
The Pink Spot Hat Pattern
www.mchats.etsy.com pink spot hat pattern Page 2
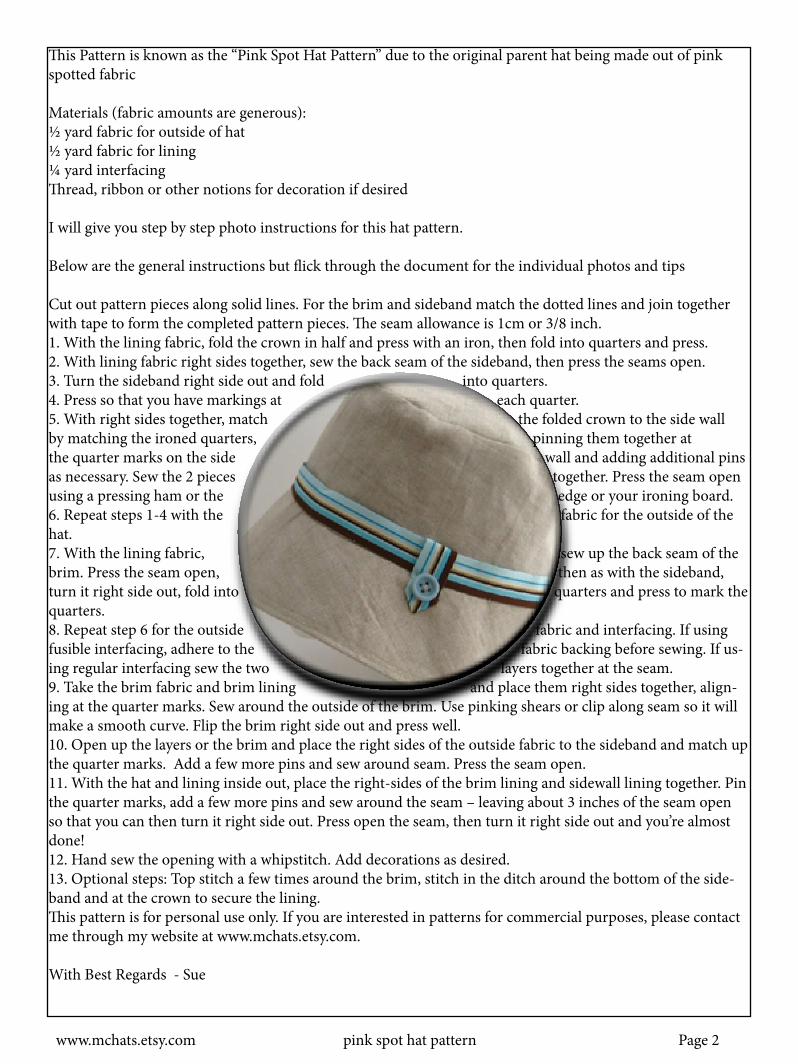
This Pattern is known as the “Pink Spot Hat Pattern” due to the original parent hat being made out of pink spotted fabric
Materials (fabric amounts are generous):½ yard fabric for outside of hat½ yard fabric for lining¼ yard interfacingThread, ribbon or other notions for decoration if desired
I will give you step by step photo instructions for this hat pattern.
Below are the general instructions but flick through the document for the individual photos and tips
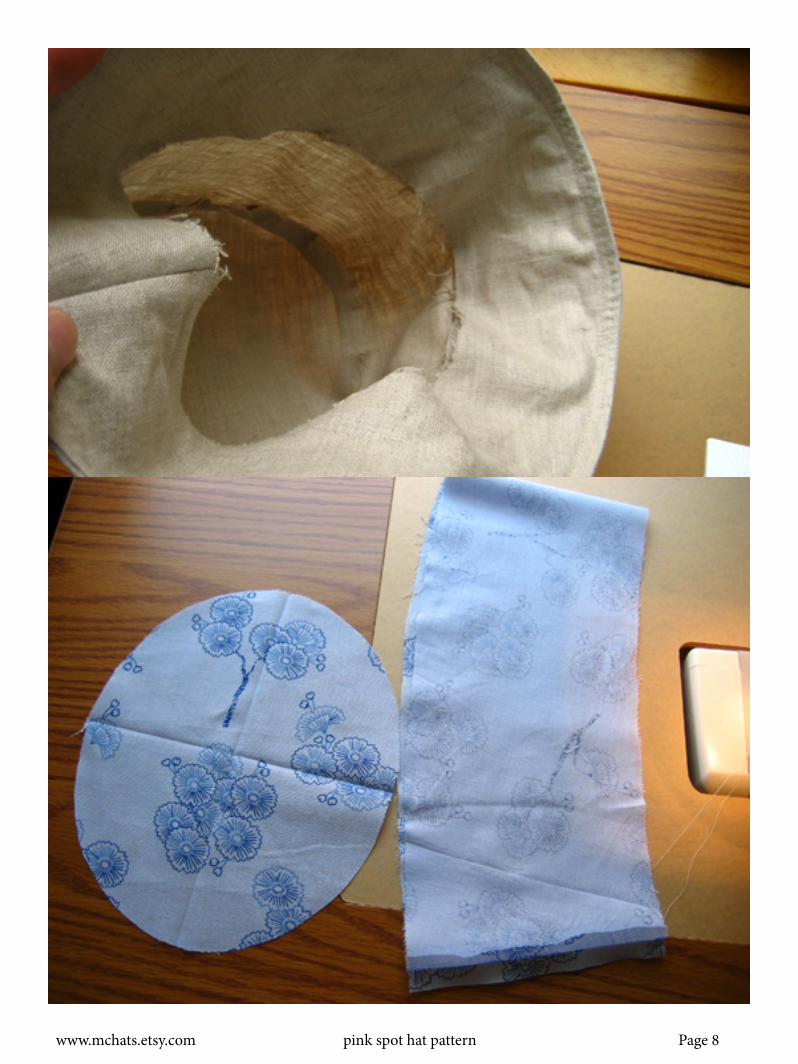
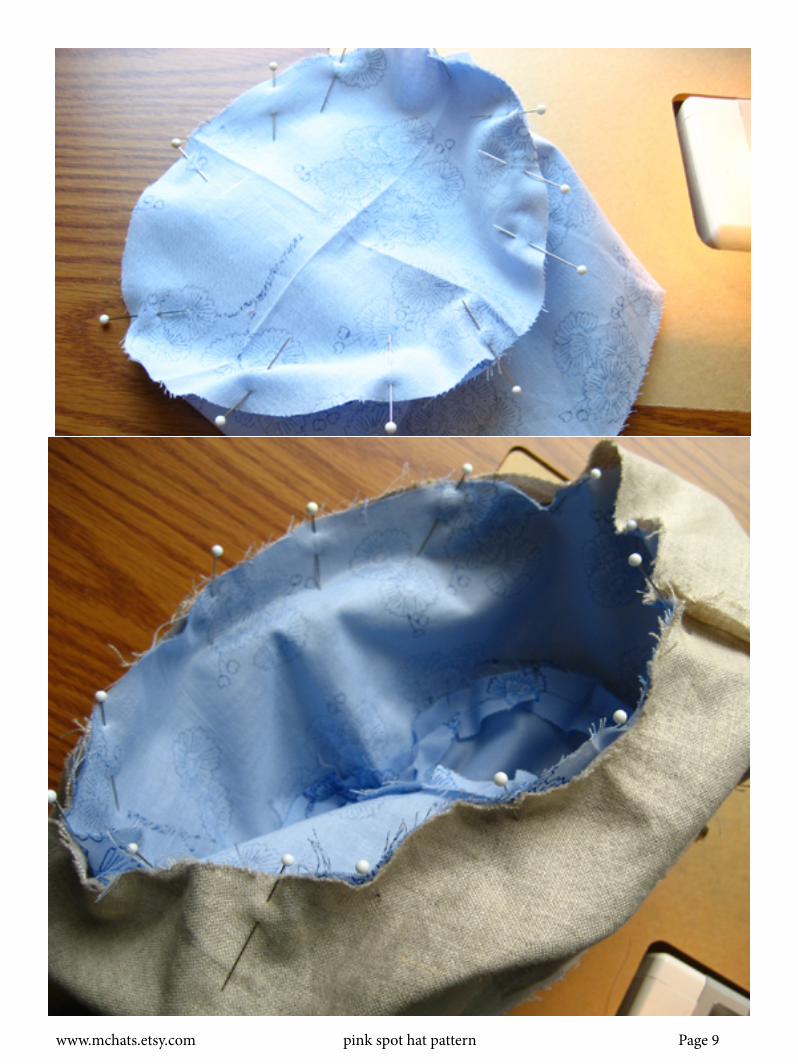
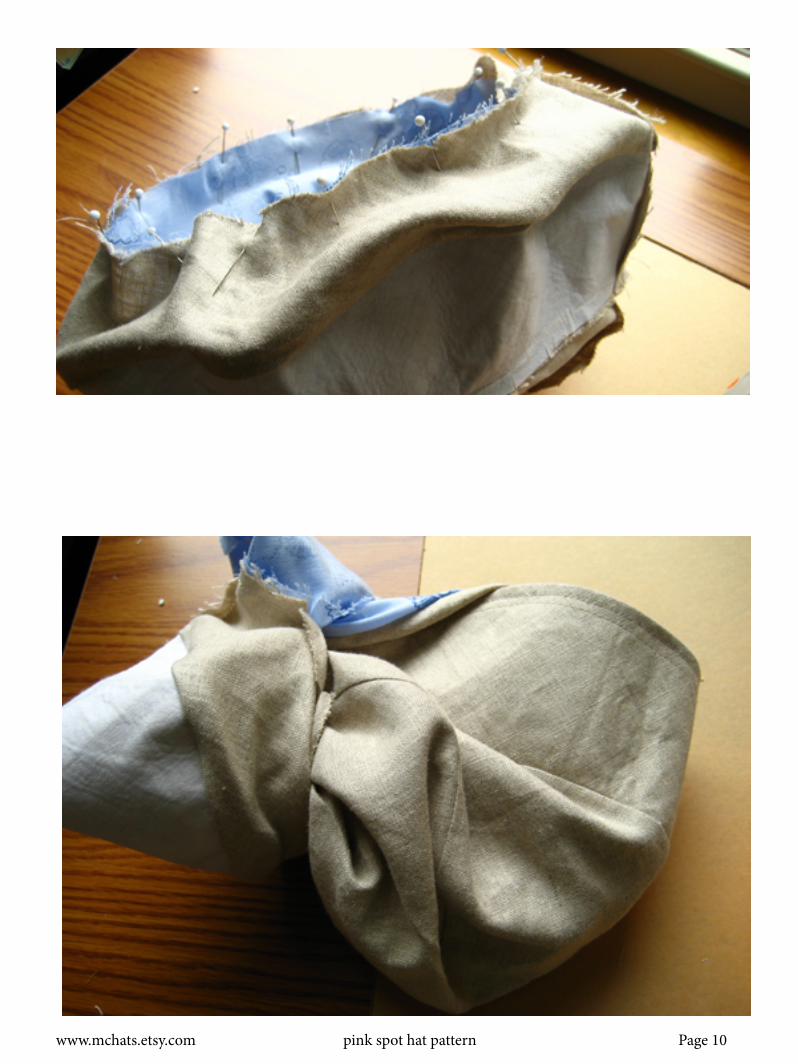
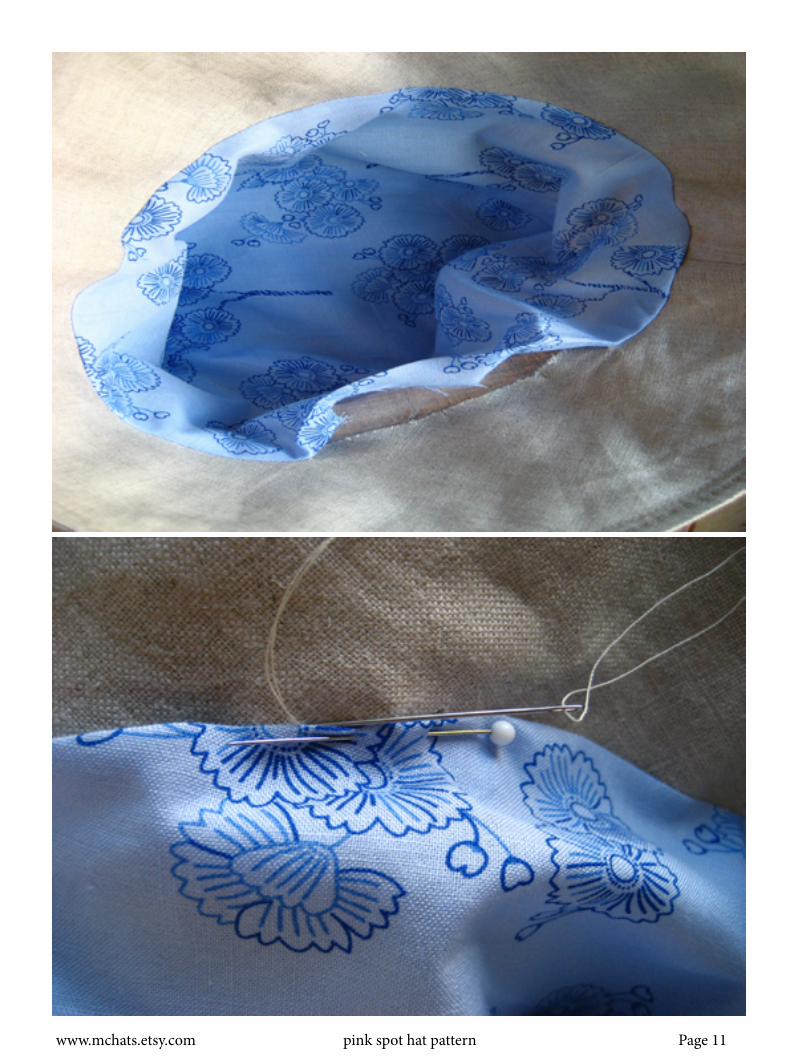
Cut out pattern pieces along solid lines. For the brim and sideband match the dotted lines and join together with tape to form the completed pattern pieces. The seam allowance is 1cm or 3/8 inch.1. With the lining fabric, fold the crown in half and press with an iron, then fold into quarters and press.2. With lining fabric right sides together, sew the back seam of the sideband, then press the seams open.3. Turn the sideband right side out and fold into quarters. 4. Press so that you have markings at each quarter.5. With right sides together, match the folded crown to the side wall by matching the ironed quarters, pinning them together atthe quarter marks on the side wall and adding additional pins as necessary. Sew the 2 pieces together. Press the seam openusing a pressing ham or the edge or your ironing board.6. Repeat steps 1-4 with the fabric for the outside of the hat.7. With the lining fabric, sew up the back seam of the brim. Press the seam open, then as with the sideband, turn it right side out, fold into quarters and press to mark the quarters.8. Repeat step 6 for the outside fabric and interfacing. If using fusible interfacing, adhere to the fabric backing before sewing. If us-ing regular interfacing sew the two layers together at the seam.9. Take the brim fabric and brim lining and place them right sides together, align-ing at the quarter marks. Sew around the outside of the brim. Use pinking shears or clip along seam so it will make a smooth curve. Flip the brim right side out and press well.10. Open up the layers or the brim and place the right sides of the outside fabric to the sideband and match up the quarter marks. Add a few more pins and sew around seam. Press the seam open.11. With the hat and lining inside out, place the right-sides of the brim lining and sidewall lining together. Pin the quarter marks, add a few more pins and sew around the seam – leaving about 3 inches of the seam open so that you can then turn it right side out. Press open the seam, then turn it right side out and you’re almost done!12. Hand sew the opening with a whipstitch. Add decorations as desired.13. Optional steps: Top stitch a few times around the brim, stitch in the ditch around the bottom of the side-band and at the crown to secure the lining.This pattern is for personal use only. If you are interested in patterns for commercial purposes, please contact me through my website at www.mchats.etsy.com. With Best Regards - Sue
www.mchats.etsy.com pink spot hat pattern Page 3
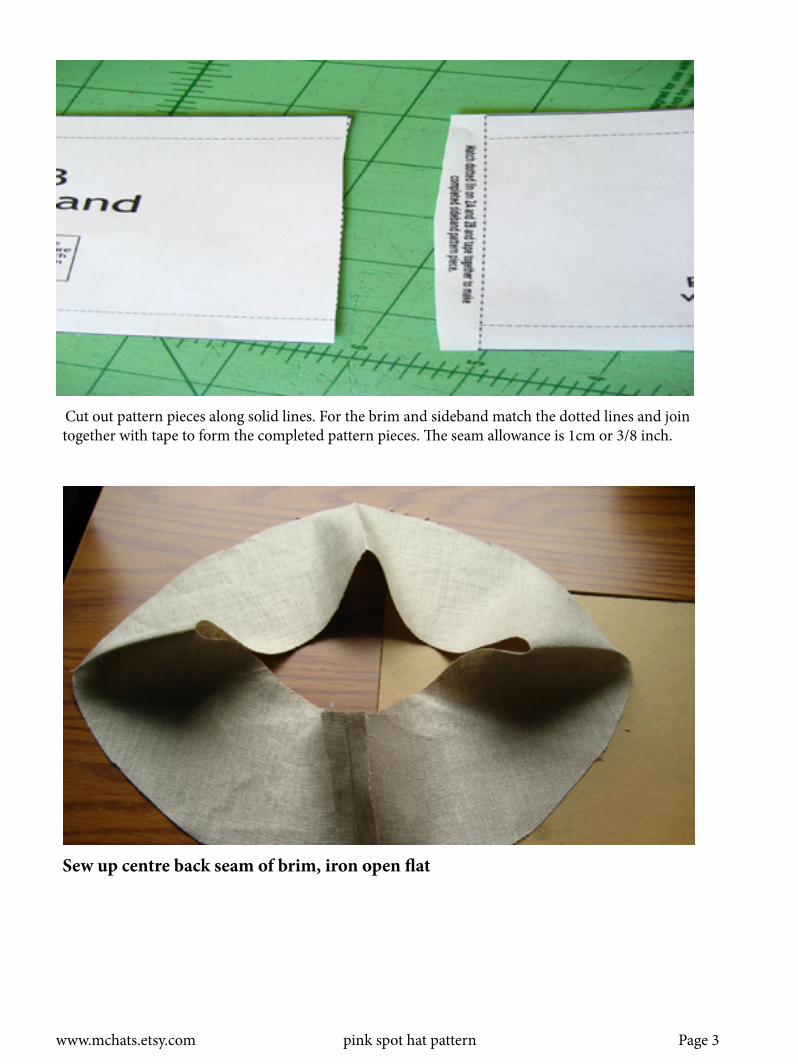
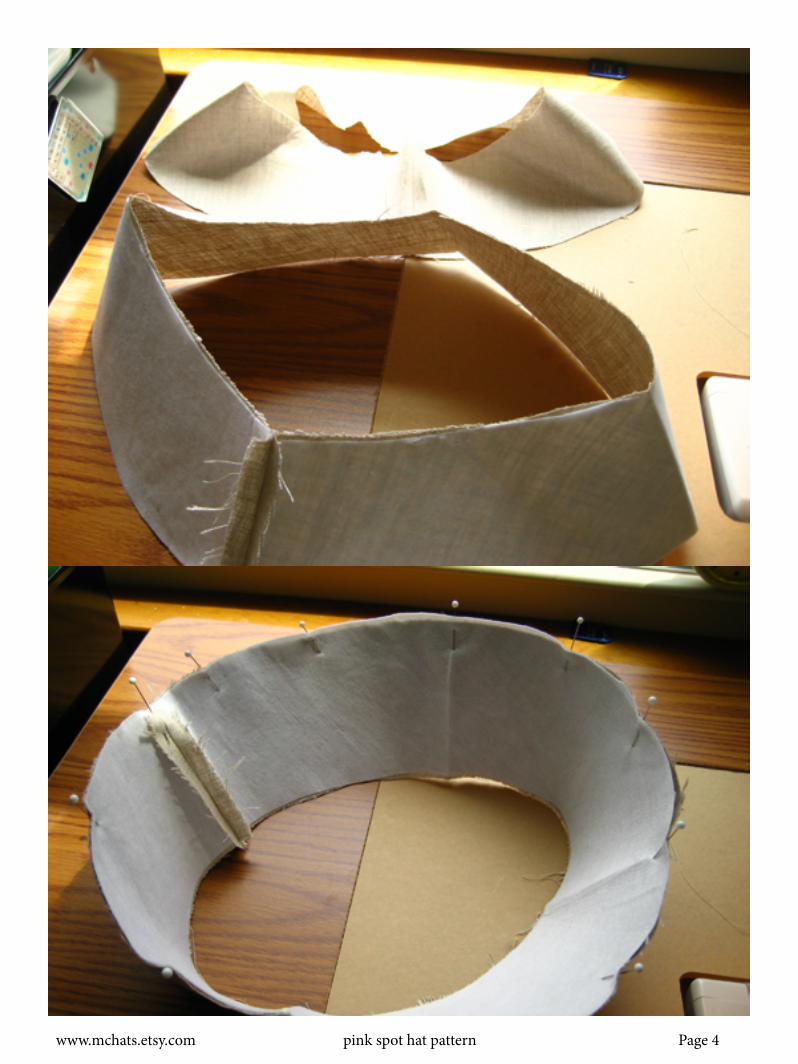
Cut out pattern pieces along solid lines. For the brim and sideband match the dotted lines and join together with tape to form the completed pattern pieces. The seam allowance is 1cm or 3/8 inch.
Sew up centre back seam of brim, iron open flat
www.mchats.etsy.com pink spot hat pattern Page 4
www.mchats.etsy.com pink spot hat pattern Page 5
www.mchats.etsy.com pink spot hat pattern Page 6
www.mchats.etsy.com pink spot hat pattern Page 7
www.mchats.etsy.com pink spot hat pattern Page 8
www.mchats.etsy.com pink spot hat pattern Page 9
www.mchats.etsy.com pink spot hat pattern Page 10
www.mchats.etsy.com pink spot hat pattern Page 11
www.mchats.etsy.com pink spot hat pattern Page 12
www.mchats.etsy.com pink spot hat pattern Page 13
www.mchats.etsy.com pink spot hat pattern Page 14
Copyright ©2008 Sue McArthur Page 1
Pink Spot Hat Pattern
Materials (fabric amounts are generous):
½ yard fabric for outside of hat
½ yard fabric for lining
¼ yard interfacing
Thread, ribbon or other notions for decoration if desired
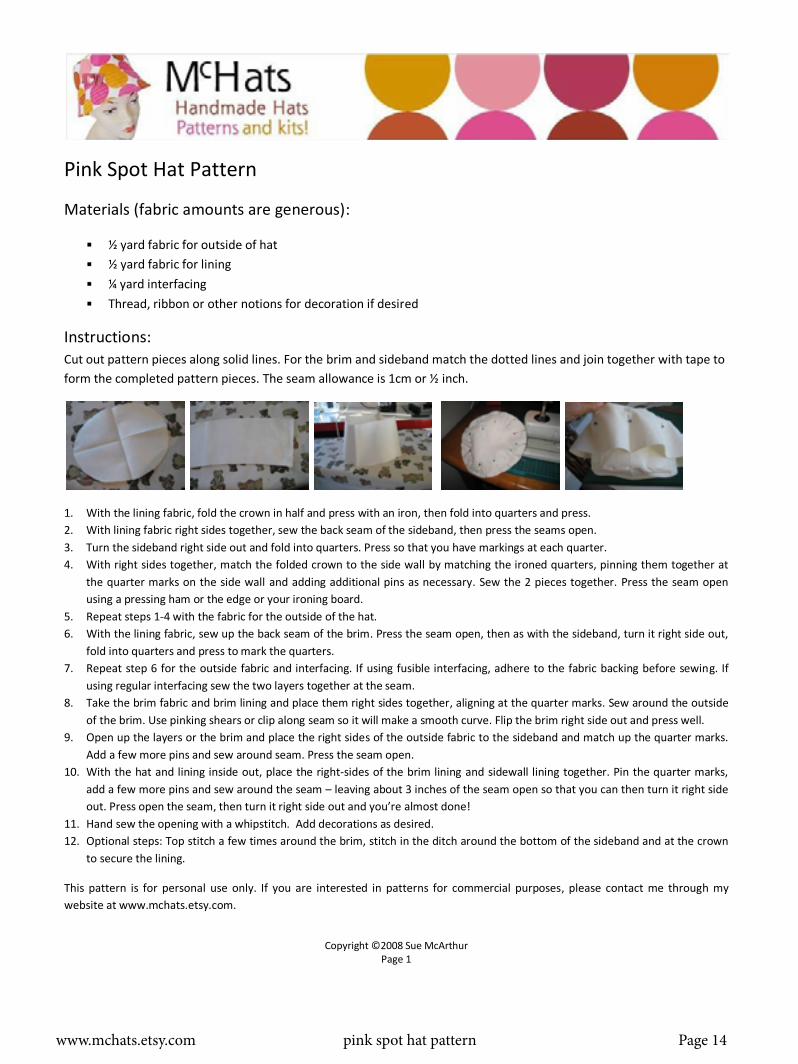
Instructions: Cut out pattern pieces along solid lines. For the brim and sideband match the dotted lines and join together with tape to form the completed pattern pieces. The seam allowance is 1cm or ½ inch.
1. With the lining fabric, fold the crown in half and press with an iron, then fold into quarters and press. 2. With lining fabric right sides together, sew the back seam of the sideband, then press the seams open. 3. Turn the sideband right side out and fold into quarters. Press so that you have markings at each quarter. 4. With right sides together, match the folded crown to the side wall by matching the ironed quarters, pinning them together at
the quarter marks on the side wall and adding additional pins as necessary. Sew the 2 pieces together. Press the seam open using a pressing ham or the edge or your ironing board.
5. Repeat steps 1-4 with the fabric for the outside of the hat. 6. With the lining fabric, sew up the back seam of the brim. Press the seam open, then as with the sideband, turn it right side out,
fold into quarters and press to mark the quarters. 7. Repeat step 6 for the outside fabric and interfacing. If using fusible interfacing, adhere to the fabric backing before sewing. If
using regular interfacing sew the two layers together at the seam. 8. Take the brim fabric and brim lining and place them right sides together, aligning at the quarter marks. Sew around the outside
of the brim. Use pinking shears or clip along seam so it will make a smooth curve. Flip the brim right side out and press well. 9. Open up the layers or the brim and place the right sides of the outside fabric to the sideband and match up the quarter marks.
Add a few more pins and sew around seam. Press the seam open. 10. With the hat and lining inside out, place the right-sides of the brim lining and sidewall lining together. Pin the quarter marks,
add a few more pins and sew around the seam – leaving about 3 inches of the seam open so that you can then turn it right side out. Press open the seam, then turn it right side out and you’re almost done!
11. Hand sew the opening with a whipstitch. Add decorations as desired. 12. Optional steps: Top stitch a few times around the brim, stitch in the ditch around the bottom of the sideband and at the crown
to secure the lining.
This pattern is for personal use only. If you are interested in patterns for commercial purposes, please contact me through my website at www.mchats.etsy.com.
www.mchats.etsy.com pink spot hat pattern Page 15
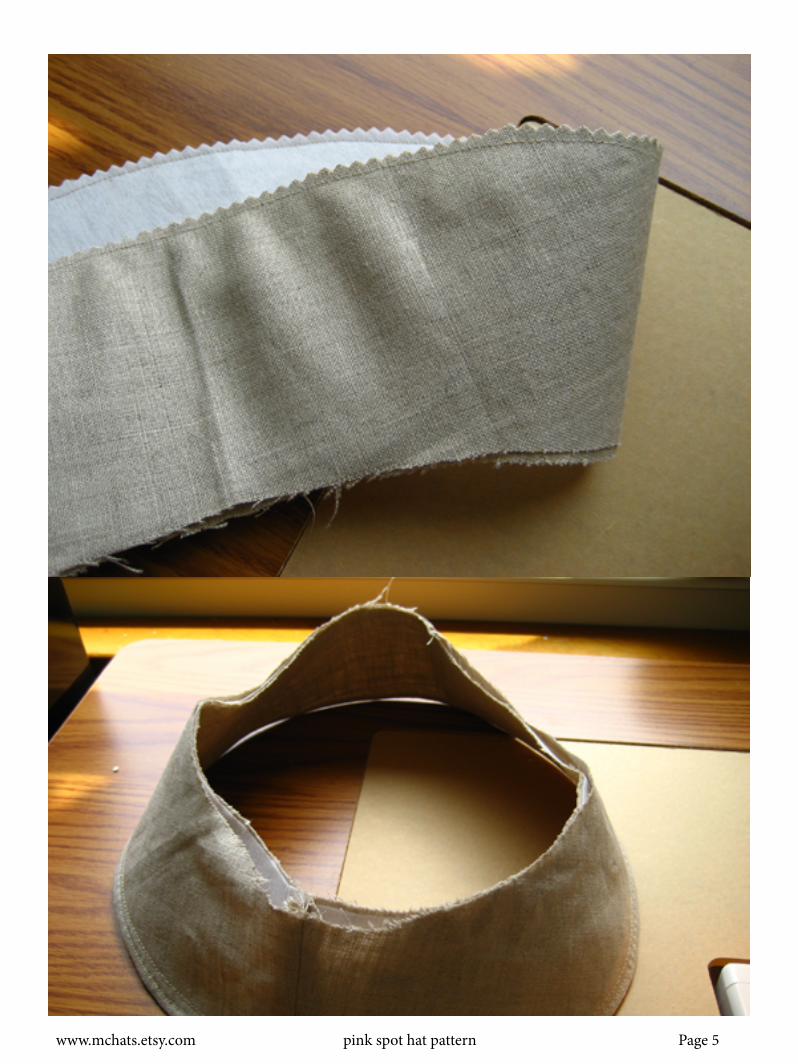
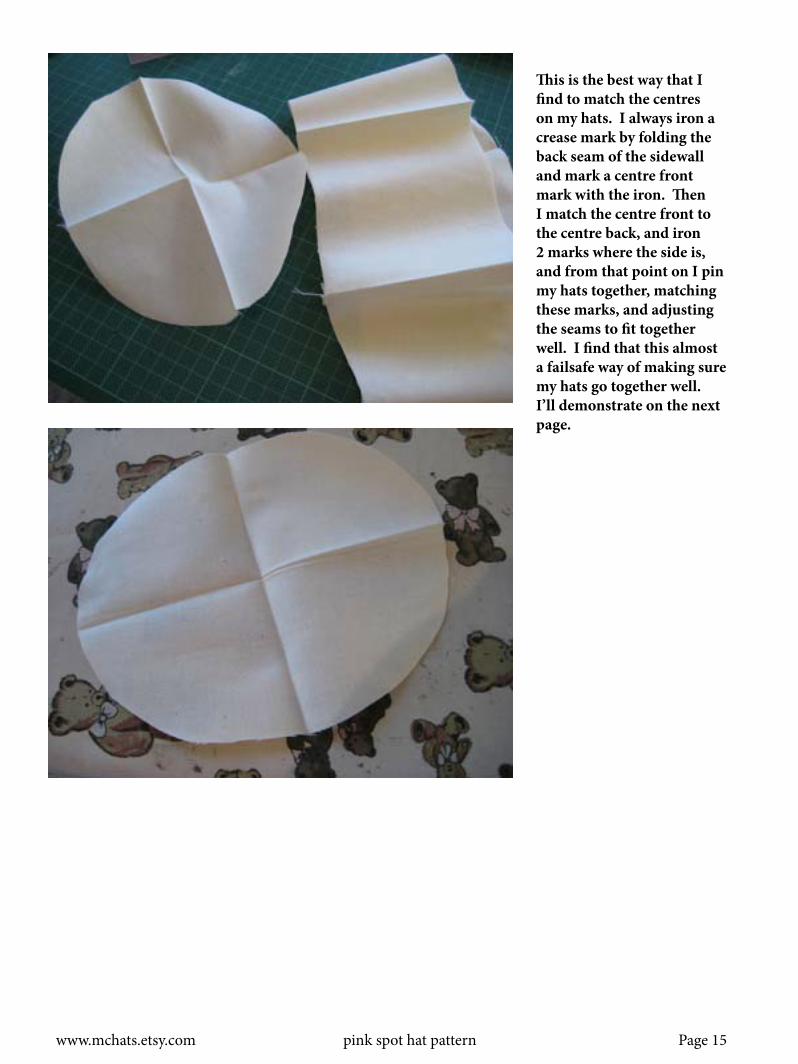
This is the best way that I find to match the centres on my hats. I always iron a crease mark by folding the back seam of the sidewall and mark a centre front mark with the iron. Then I match the centre front to the centre back, and iron 2 marks where the side is, and from that point on I pin my hats together, matching these marks, and adjusting the seams to fit together well. I find that this almost a failsafe way of making sure my hats go together well.I’ll demonstrate on the next page.
www.mchats.etsy.com pink spot hat pattern Page 16
This is how I make a toile 1st of all to see if the hat will fit me. Because head sizes differ, and you find this hat “too tall” for you, make your seam where you attach the brim to the sidewalls, a little bigger than specified on the pattern, to make the depth shorter. It fits me, but people with heads that aren’t as deep, like the crown shorter.
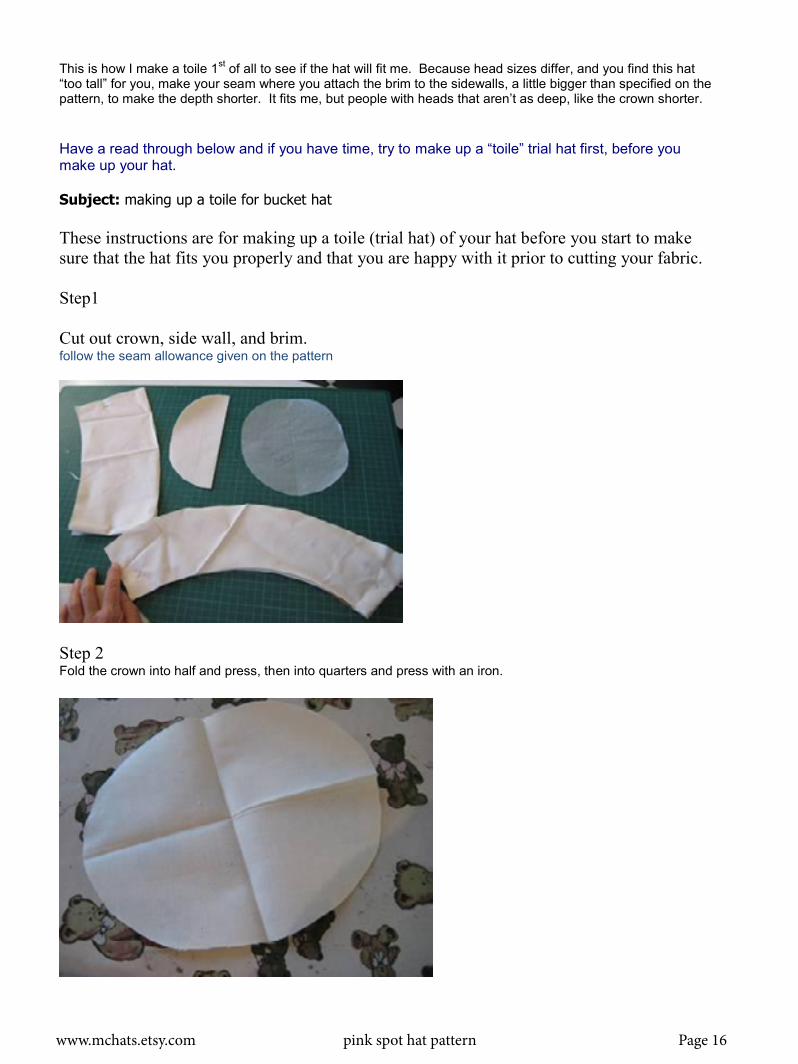
Have a read through below and if you have time, try to make up a “toile” trial hat first, before you make up your hat. Subject: making up a toile for bucket hat These instructions are for making up a toile (trial hat) of your hat before you start to make sure that the hat fits you properly and that you are happy with it prior to cutting your fabric. Step1 Cut out crown, side wall, and brim. follow the seam allowance given on the pattern
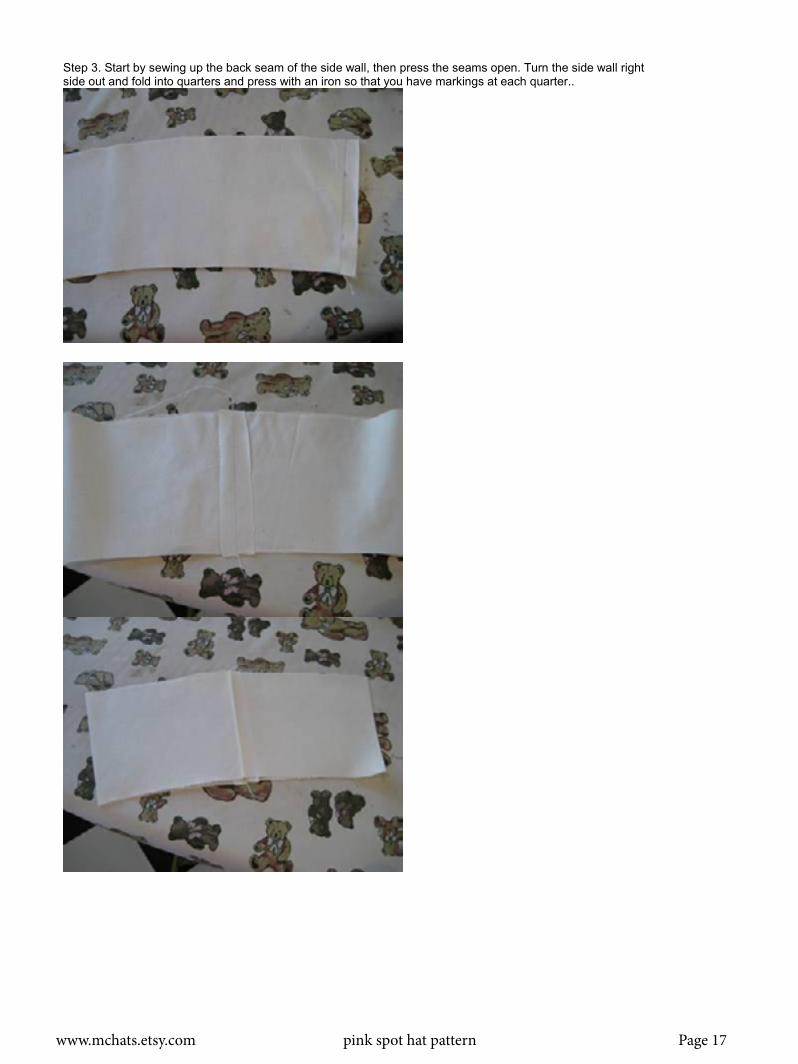
Step 2 Fold the crown into half and press, then into quarters and press with an iron.
www.mchats.etsy.com pink spot hat pattern Page 17
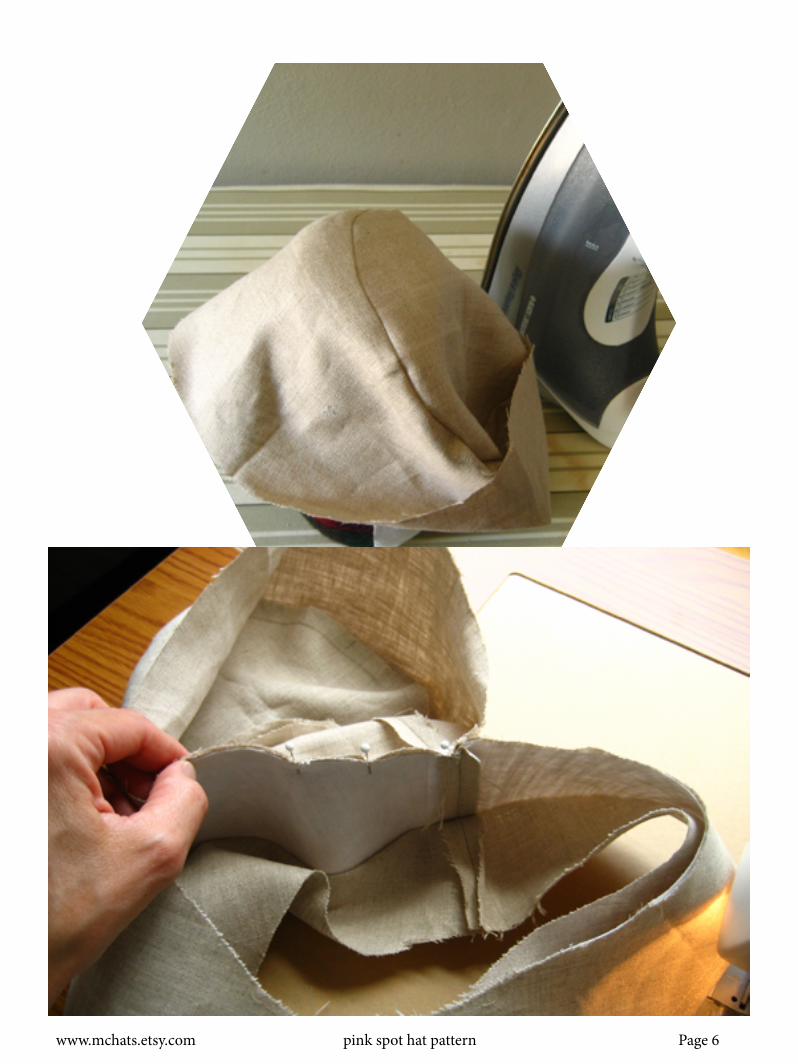
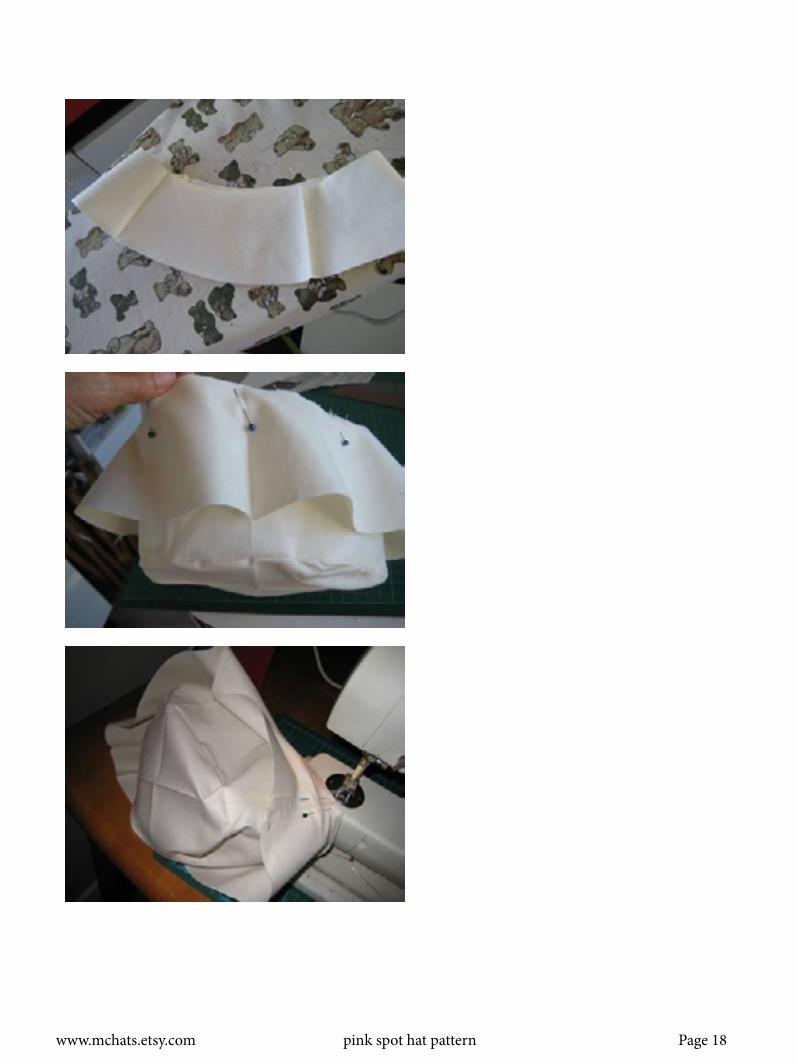
Step 3. Start by sewing up the back seam of the side wall, then press the seams open. Turn the side wall right side out and fold into quarters and press with an iron so that you have markings at each quarter..
www.mchats.etsy.com pink spot hat pattern Page 18
www.mchats.etsy.com pink spot hat pattern Page 19
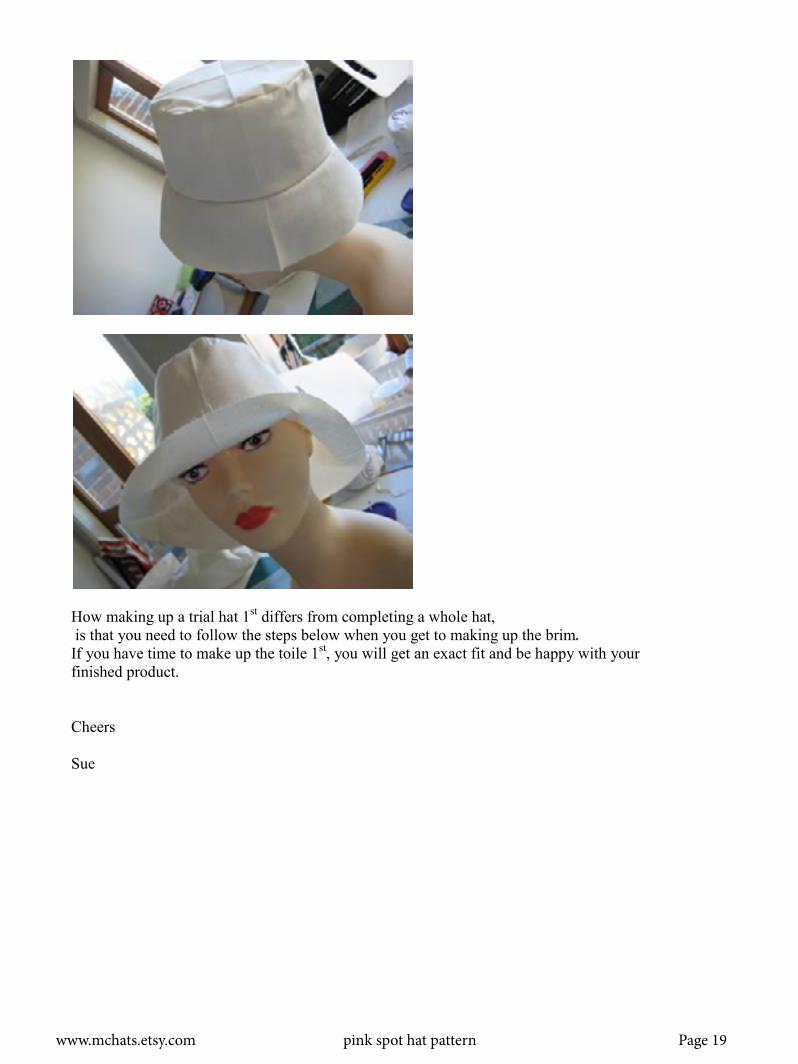
How making up a trial hat 1st differs from completing a whole hat, is that you need to follow the steps below when you get to making up the brim. If you have time to make up the toile 1st, you will get an exact fit and be happy with your finished product. Cheers Sue
www.mchats.etsy.com pink spot hat pattern Page 20
I found these instructions on the simplicity website, they do it a little differently from myself, but this method of construction may suit you as well
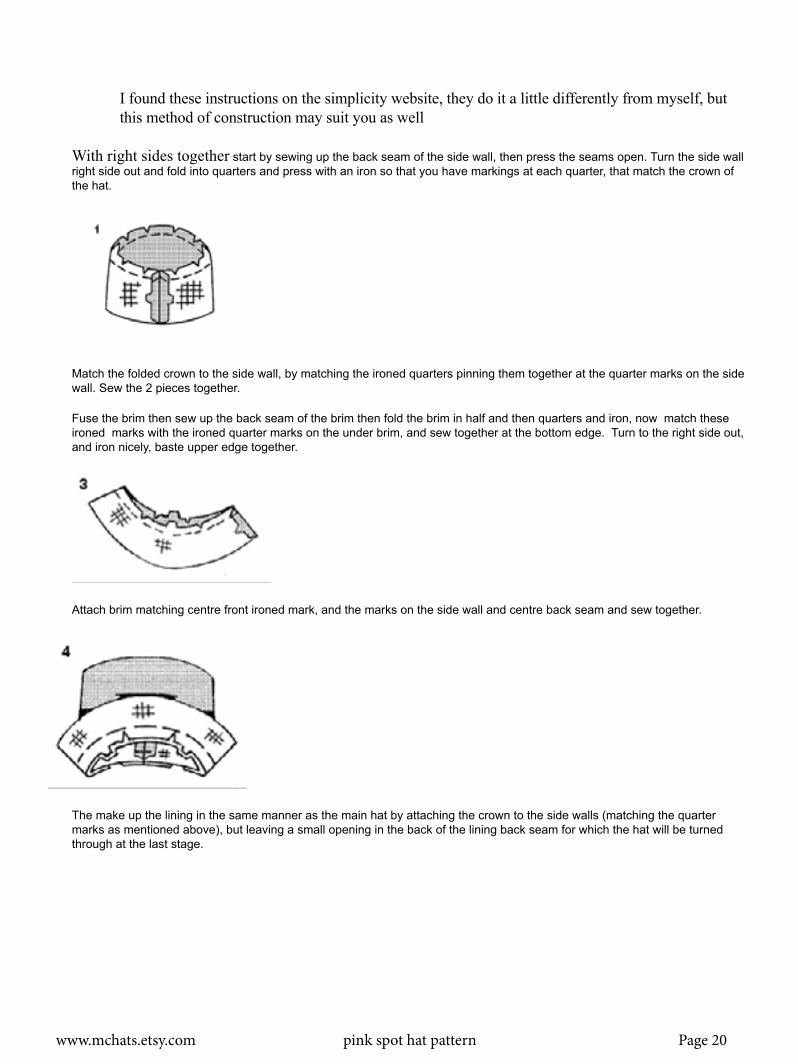
With right sides together start by sewing up the back seam of the side wall, then press the seams open. Turn the side wall right side out and fold into quarters and press with an iron so that you have markings at each quarter, that match the crown of the hat.
Match the folded crown to the side wall, by matching the ironed quarters pinning them together at the quarter marks on the side wall. Sew the 2 pieces together.
Fuse the brim then sew up the back seam of the brim then fold the brim in half and then quarters and iron, now match these ironed marks with the ironed quarter marks on the under brim, and sew together at the bottom edge. Turn to the right side out, and iron nicely, baste upper edge together.
Attach brim matching centre front ironed mark, and the marks on the side wall and centre back seam and sew together.
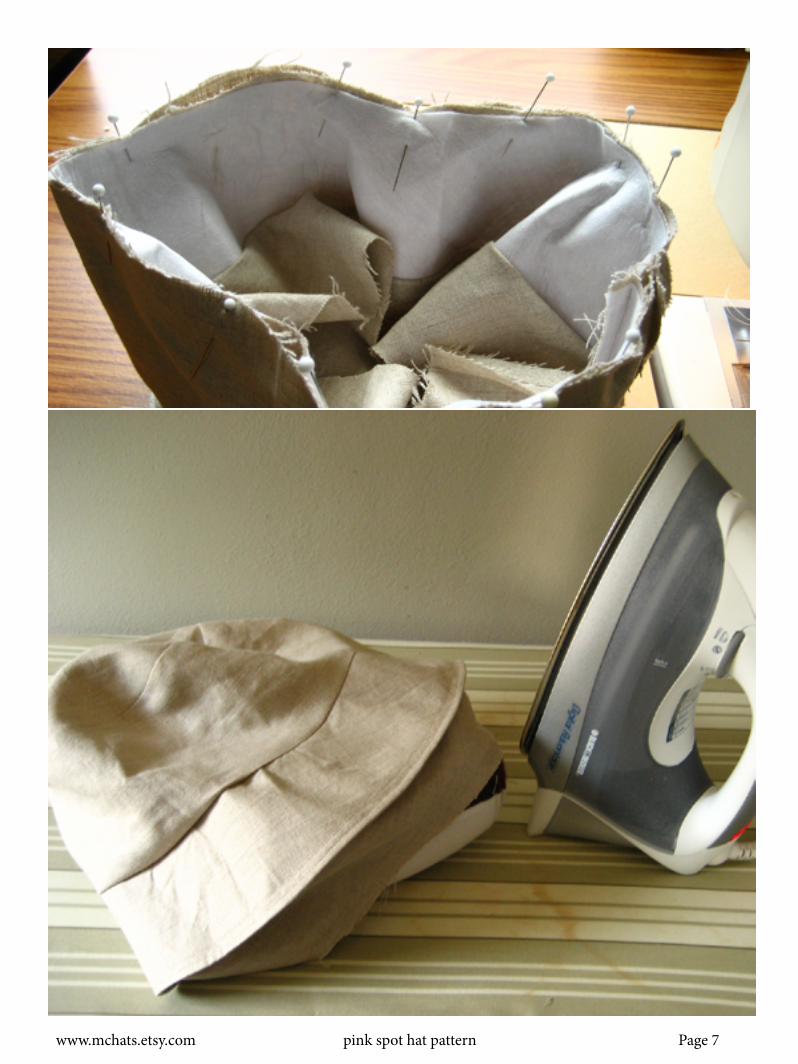
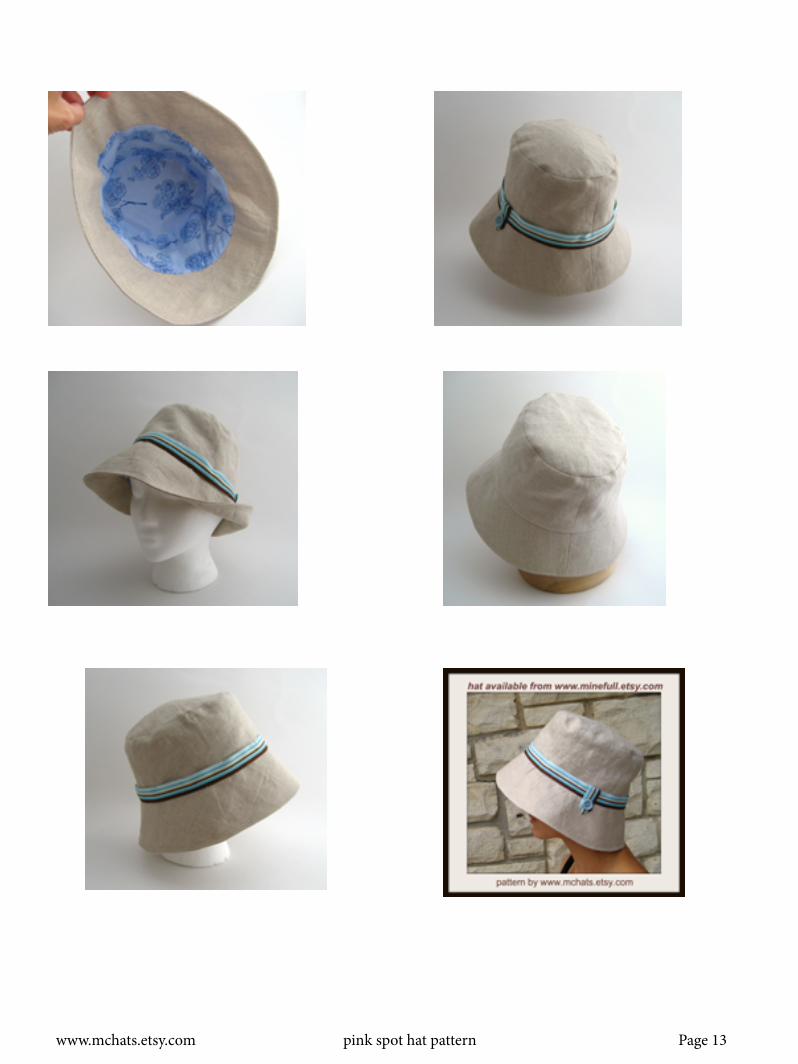
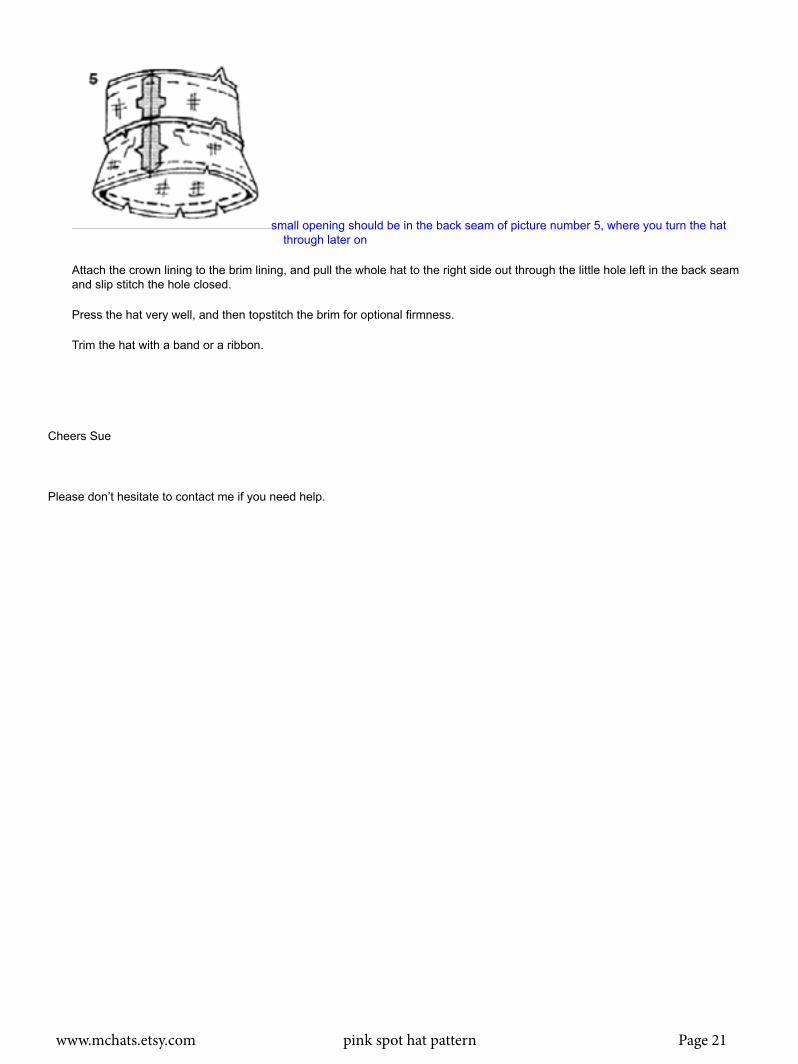
The make up the lining in the same manner as the main hat by attaching the crown to the side walls (matching the quarter marks as mentioned above), but leaving a small opening in the back of the lining back seam for which the hat will be turned through at the last stage.
www.mchats.etsy.com pink spot hat pattern Page 21
small opening should be in the back seam of picture number 5, where you turn the hat through later on
Attach the crown lining to the brim lining, and pull the whole hat to the right side out through the little hole left in the back seam and slip stitch the hole closed.
Press the hat very well, and then topstitch the brim for optional firmness.
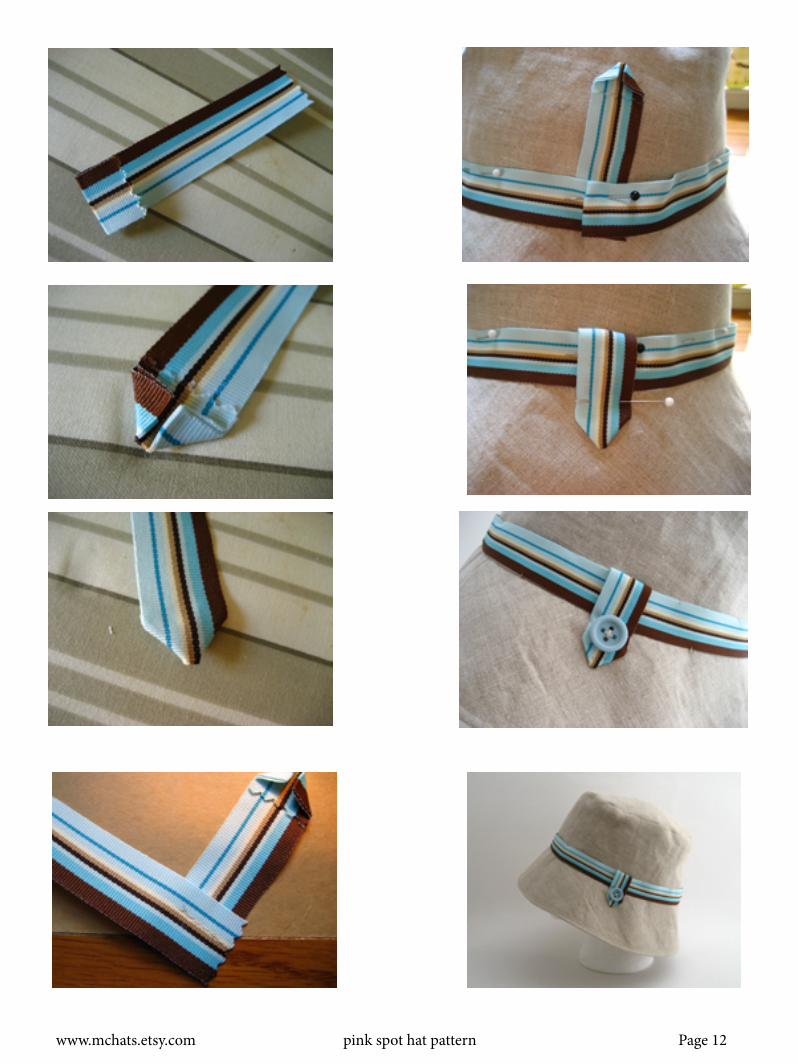
Trim the hat with a band or a ribbon.
Cheers Sue
Please don’t hesitate to contact me if you need help.