Embed Size (px)
Citation preview

© SAPS/FSC 2016
Plants for primary pupils 6
© SAPS/FSC 2016
Science and Plants for Schools (SAPS)
works with teachers to:
• Develop new resources to support
plant science in schools and colleges
• Promote exciting teaching of plant
science
• Interest young people in plants
We hope that our approach will help
young people to become more aware
of the importance of plants in the
global economy, and to encourage
more of them to follow careers in
plant science.
Science and Plants for Schools
Cambridge University Botanic Garden
Cambridge CB2 1JE
Email: [email protected]
www.saps.org.uk

Plants for primary pupils 6
Plants in their natural environment
The activities in this booklet have been developed by SAPS (Science and Plants for Schools) in collaboration with
FSC (Field Studies Council).
Science and Plants for Schools Cambridge University Botanic Garden
Cambridge CB2 1JEEmail: [email protected]
www.saps.org.uk
Field Studies Council Preston Montford, Shrewsbury
Shropshire SY4 1HWwww.field-studies-council.org
i© SAPS/FSC 2016

aSafetyTeachers using these activities with classes of Primary pupils are advised to refer to the SAPSSafety Notice on the SAPS website, and to undertake their own risk assessment where appropriate.
Further information on safety may be found from the sources listed in the SAPS Safety Notice.
Please remember...
• When working with plants, pupils and teachers should ALWAYS wash their hands afterhandling plants (including seeds), soils, composts, manures, equipment and otherrelated materials.
• Plants (or parts of plants) can be poisonous, cause allergic reactions in some people ormay have been treated with chemicals (such as pesticides).
• It is particularly important that pupils understand that they must NEVER eat plants foundin the wild or in the school grounds, unless given instructions that they may do so.
• Children with very sensitive skin or allergies should wear gloves when handling plantmaterial.
• Wild flowers should not be picked and it is illegal for anyone (without the permissionof the landowner or occupier) to uproot any wild plant.
ii© SAPS/FSC 2016
This resource is part of a series written to support learning with and about plants as part of the PrimaryCurriculum in England, Wales, Northern Ireland and Scotland. This and the other booklets in the seriesare also available on the SAPS website (www.saps.org.uk) and can be downloaded freely foreducational purposes.
This material is copyright Science and Plants for Schools and Field Studies Council. It isavailable under the Creative Commons Attribution-NonCommercial 3.0 license.
For further details about re-using these materials, please contact :
Science and Plants for Schools, Cambridge University Botanic Garden, 1 Brookside, Cambridge CB2 1JE.
email: [email protected]
Some of the materials used in this booklet have been obtained from individuals andorganisations. In such cases every effort has been made to ensure that the necessarypermissions to reproduce copyright material have been obtained. However, should anyomissions be noticed we should be grateful if they could be brought to SAPS’ attention.
AcknowledgmentsThe cartoons used in ‘Comparing two habitats’ (page 13), and Background information ‘Where shouldour plants go?’ (page 31) were inspired by the Concept Cartoons™ used by Brenda Keogh and StuartNaylor (Millgate House Publishing; www.conceptcartoons.com).
Science and Plants for Schools and the Field Studies Council are grateful for permission to include thefollowing copyright material:
Photographs. All photographs are by John Bebbington FRPS.
Artwork. All artwork, including cartoons, is by Anne Bebbington.
Illustrations used in Figure 3 are reproduced by courtesy of The Cavendish School, London.
SAPS would also like to thank the following people for reviewing the draft text and offering a varietyof comments, many of which were then incorporated into the final version of the booklet: JennyClarke and Teresa McErlean.
Members of the Writing Group: Anne Bebbington, Ruth Thomas, Judy Vincent and Erica Clark, editor,with contributions from Colin Bielby and Chris Millican.
iii© SAPS/FSC 2016

iv© SAPS/FSC 2016

ContentsIntroduction 2
Plants in their habitats 4Activity 1: The fight for survival – will it grow?Activity 2: Why so many seeds?Activity 3: How are plants suited to their habitat?Activity 4: Design and make a plant ... suitable for a particular habitatActivity 5: Comparing two habitatsActivity 6: What happens if we cut the grass?Activity 7: Where does this plant live? – a card game
Soil, microorganisms and recycling 20Activity 1: Finding out about soilActivity 2: Making compost in a bottleActivity 3: Oh what a waste ... but can we reduce, reuse and recycle?
Feeding relationships 28Activity 1: Yummy – a food chain card game
Background information for teachers 31Factors that influence organisms in their environmentFeeding relationships – food chains, food webs and energy transferSecrets of the soil – how soil is formed
Supporting material on the SAPS website
Additional material to support activities in this booklet can be found on the SAPS websitewww.saps.org.uk. Follow the links from the home page of the SAPS website to the ‘Plants for PrimaryPupils’ series.
The Pupil Sheets are provided so that you can use them as they are or adapt them for your class.
Full-sized versions of templates for the card games (pages 17 and 28) are also included. Usually itwould be appropriate to make these items out of lightweight card. To do this, print out the templateand photocopy onto appropriately coloured card or paper. Alternatively you may be able to printdirectly onto the card. You can then make good durable sheets by laminating the pages and then, ifneeded, cut out the parts for your class. The website material also includes interactive versions of thecartoons (pages 13 and 31).
There is also a PowerPoint presentation ‘Adaptation’, which can be used to encourage children to thinkmore widely about adaptations shown by plants in their habitats.
© SAPS/FSC 20161 Plants in their natural environment
© SAPS/FSC 2016
IntroductionThis series of activities aims to cover work that must be undertaken with plants as part of the PrimaryCurriculum (e.g. in Key Stages 1 and 2 in England, Wales and Northern Ireland, and Scottish PrimaryP1 to P7 or equivalent). The activities have been developed by SAPS in collaboration with FSC (FieldStudies Council).
The activities are being developed under a number of themes, each of which is published in a separatebooklet and is also presented as website material (see the SAPS website).
• The parts of a plant and their functions
• Reproduction and life cycles – Part 1: Parts of a flower and Part 2: Pollination,
fertilisation, fruits and seed dispersal
• Living processes and what plants need to grow
• Grouping and classification
• Plants in their natural environment
Within each set of topics, you will find different types of activities. Some are based in the classroomwhile others involve growing plants outside (say in tubs in a school yard or in a school garden) ormaking observations of plants growing in the wider environment. Teachers are encouraged to letchildren explore links between classroom and outdoor fieldwork activities.
The activities give emphasis to the growing of plants so that children can make first-handobservations, often on their own plant, and become familiar with plants and how they grow. This issupported by a range of activities such as making models of plants, card games that reinforce learningand simple investigations that help children find out more about how plants work. You may not wishto use all the activities in a set, but you will find a good range to choose from, to suit your class andcurriculum requirements.
Each topic includes a description of the activity and appropriate information for teachers. There mayalso be ‘pupil worksheets’, particularly with the activities intended for older children. An importantfeature in this series is the inclusion of ‘Background information for teachers’, written to give adviceand guidance to teachers less familiar with botanical jargon or who lack confidence in their teachingon plant topics. In some cases, these notes indicate further sources of information that may be helpfulto teachers, including other publications and useful websites.
The illustrations have usually been drawn from living plant material, so they are fresh, botanicallyaccurate and show what a child is realistically likely to see. The activities are also generously supportedby photographs – again many taken specially for this series.
2Plants for primary pupils 6
3 Plants in their natural environment© SAPS/FSC 2016
Plants in their natural environmentThis is the fifth and final theme in the series. In looking at the natural environment and more closelyat plants in their habitats, children are encouraged to look beyond a single plant, its life cycle and whatit needs to grow, and to consider groups of different plants living together in an area, known as thehabitat. Children begin to notice that different plants grow in different habitats – that a sand dunelooks different from a wet heathland, from an old apple orchard or a grassy roadside verge. Childrenhave opportunities to compare two or more habitats and note differences in the plants in each and howthey grow. They may start to ask questions as to how and why the habitats are different and the factorsthat influence the plants that are able to grow there. The children may look at features that help plantsto grow in a particular habitat and they begin to understand how certain adaptations contribute tomaking a plant suitable for the habitat. Finally, children consider the feeding relationships betweenplants and animals and the other ways that they are linked with each other in the habitat.
As in earlier booklets in the series, this final booklet includes a range of approaches to encouragelearning. Several activities rely on observations and then children are encouraged to seek explanationsfor differences that they have seen or other observations they have made. There are card games thatare fun, but at the same time help development of vocabulary and matching written clues with theirvisual observations. There is an opportunity for creativity in the now familiar ‘Design a plant’ activity...on this occasion showing adaptations for a particular habitat. Teachers should also be aware ofopportunities offered in the different activities for development of skills in literacy and numeracy. (Seenote below: Reference to literacy, numeracy, assessment and investigative skills.)
Remember, you can use Curriculum Links (on the SAPS website) to find more material to give supportwithin your teaching programme.
Reference to literacy, numeracy, assessment andinvestigative skillsFor literacy, including development of vocabulary and use of speaking and listening skills, usefulactivities include the habitat card game, opportunities to write poems (‘Secrets of the soil’), ‘Reducereuse and recycle’ and in ‘Yummy’.
For numeracy, ‘Why so many seeds?’ lets children make reliable estimates of the enormous numberof seeds in certain plants.
There are opportunities for formative and summative assessment – a good example is provided by theconcept cartoons linked to ‘Comparing two habitats’ and ‘Where should our plants go?’
Generally, the activities in this booklet encourage children to use science enquiry skills rather thandoing formal investigations. In particular, the activities provide opportunities for observing plants in awider context and understanding the features that help make plants suited to their habitat.Opportunities are also provided for links with ICT.

L
© SAPS/FSC 20164Plants for primary pupils 6
Plants in their habitats Ú Teacher Guidance
The activities in this section help children to appreciate that some plants grow better than others in aparticular area. The children can question why some seeds never germinate and grow in the placewhere they land. They then begin to recognise features that may help plants grow, survive andreproduce in their habitat. The children look at different habitats and make comparisons. Thisencourages them to consider factors that influence which plants grow in the different habitats.
Activity 1: The fight for survival – will it grow?Many plants produce very large numbers of seeds but only a small proportion of these seeds succeedin growing into mature plants. So what happens to all of the seeds? Why don’t they grow into matureplants? What problems do seeds and young plants meet in the habitats they grow in? We can call thisthe ‘fight for survival’. This activity helps raise some of the issues involved and encourages children toapply their knowledge of plants and what they need to grow successfully. It can be linked to theactivity on page 6 (‘Why so many seeds?’), which is suitable for older children, and also to link it towork on dispersal of fruits and seeds (see booklet 3, Reproduction and life cycles, part 2: Pollination,fertilisation, fruits and seed dispersal).
This activity can be used to promote discussion about seed germination and growth into healthy plantsin different types of terrain. It can be carried out in the classroom or outside in the playground.References to germination and growth of plants can be linked to activities in booklet 4, Living processesand what plants need to grow.
Preparation for the activity
Use part of the classroom floor or playground for this activity. Draw a grid on the ground. Label eachsquare, so that there is a mixture of places where plants might be expected to grow well (such as aflower bed or lawn) and places where plants might not be expected to grow well (such as a tarmacpath or a paved patio). You can adapt the labels to include familiarplaces within the school grounds or local area. If you do not want todraw on the ground, you can use large sheets of paper, an old sheet orhoops instead.
You also need something to represent the seeds (approximately 50).Winged fruits of sycamore or ash with their seeds would be ideal, butotherwise you can use about 50 pieces of paper, 1 cm square. If playingoutside, use large seeds (such as sunflower) as these can then be eatenby birds.
Sycamore fruits

5 Plants in their natural environment© SAPS/FSC 2016
The activity
Gather the children around the grid. Select one child to be a plant, about to disperse its seeds. The childholds the ‘seeds’ (e.g. small bits of paper) and throws them up into the air. The children observe wherethe ‘seeds’ (bits of paper) go and count the number that land in each area of the grid. Tell the childrenthat any seeds that didn’t land on the labelled areas have been eaten by birds or other animals.
The children can then discuss what they think will happen to the seeds that landed in each area andwhether they are likely to grow into healthy plants. An important outcome is that the children realisethat a lot of the seeds land in places where they are not likely to grow into plants.
L
© SAPS/FSC 20166Plants for primary pupils 6
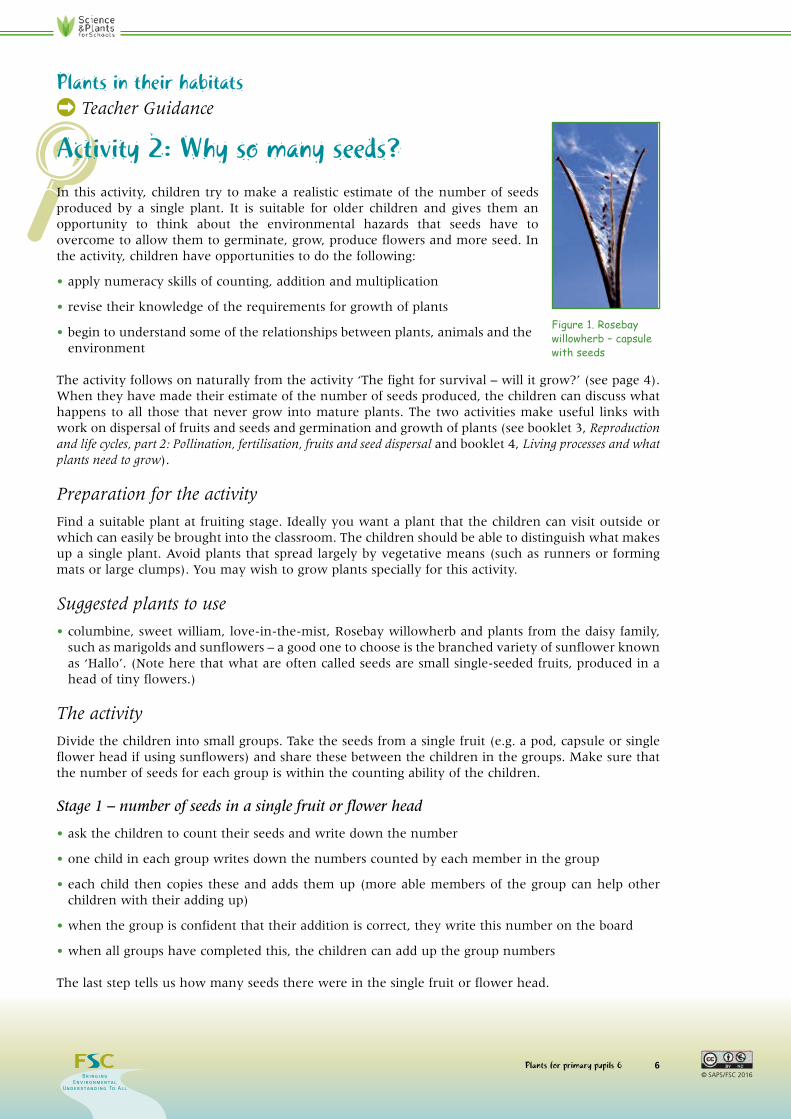
In this activity, children try to make a realistic estimate of the number of seedsproduced by a single plant. It is suitable for older children and gives them anopportunity to think about the environmental hazards that seeds have toovercome to allow them to germinate, grow, produce flowers and more seed. Inthe activity, children have opportunities to do the following:
• apply numeracy skills of counting, addition and multiplication
• revise their knowledge of the requirements for growth of plants
• begin to understand some of the relationships between plants, animals and theenvironment
The activity follows on naturally from the activity ‘The fight for survival – will it grow?’ (see page 4).When they have made their estimate of the number of seeds produced, the children can discuss whathappens to all those that never grow into mature plants. The two activities make useful links withwork on dispersal of fruits and seeds and germination and growth of plants (see booklet 3, Reproductionand life cycles, part 2: Pollination, fertilisation, fruits and seed dispersal and booklet 4, Living processes and whatplants need to grow).
Preparation for the activity
Find a suitable plant at fruiting stage. Ideally you want a plant that the children can visit outside orwhich can easily be brought into the classroom. The children should be able to distinguish what makesup a single plant. Avoid plants that spread largely by vegetative means (such as runners or formingmats or large clumps). You may wish to grow plants specially for this activity.
Suggested plants to use
• columbine, sweet william, love-in-the-mist, Rosebay willowherb and plants from the daisy family,such as marigolds and sunflowers – a good one to choose is the branched variety of sunflower knownas ‘Hallo’. (Note here that what are often called seeds are small single-seeded fruits, produced in ahead of tiny flowers.)
The activity
Divide the children into small groups. Take the seeds from a single fruit (e.g. a pod, capsule or singleflower head if using sunflowers) and share these between the children in the groups. Make sure thatthe number of seeds for each group is within the counting ability of the children.
Stage 1 – number of seeds in a single fruit or flower head
• ask the children to count their seeds and write down the number
• one child in each group writes down the numbers counted by each member in the group
• each child then copies these and adds them up (more able members of the group can help otherchildren with their adding up)
• when the group is confident that their addition is correct, they write this number on the board
• when all groups have completed this, the children can add up the group numbers
The last step tells us how many seeds there were in the single fruit or flower head.
Plants in their habitatsÚ Teacher Guidance
Activity 2: Why so many seeds?
Figure 1. Rosebaywillowherb – capsulewith seeds

7 Plants in their natural environment© SAPS/FSC 2016
Stage 2 – number of seeds in the whole plant
• the children next examine the whole plant and count the number of fruits that have been produced
• they multiply the number of seeds in a single fruit by this number to estimate the number of seedsproduced by a single plant.
Ask the children why this is only an estimate. You canthen discuss with them the fact that the plant may goon to produce more fruits. They also shouldunderstand that in many plants, fruits may containdifferent numbers of seeds. (They probably haveevidence for this from the counts that they made.)
Discuss with the children reasons why many plantsproduce large numbers of seeds. How might this helpmake the plant successful? What might prevent a seedfrom germinating and growing and then producingmore flowers and seeds? Some of the things you mightdiscuss are listed in the boxes below.
Seeds may not germinate successfully because
• many seeds land where environmental conditions are unsuitable for germination
• seeds lying too close to the parent plant or other seeds may be affected by substances (from theparent plant) that inhibit germination
• seeds are an important source of food for birds and other animals so many of them are eaten
Seedlings may not grow into plants that flower and produce fruits because
• at any stage they may be eaten or damaged (trampled on) by animals
• they cannot compete successfully with other plants for water, light, nutrients or space
• they may not grow well or produce flowers because general environmental conditions are not right
• extreme weather conditions (such as cold, heat or drought) weaken or kill them
• pollination does not occur or fertilisation does not happen. (Remember that many plants rely on insectsfor pollination, so environmental conditions need to be right for the insects as well as the flowers.)
Further activities
1. For older children you could make a link to the ‘Seeds and chaffinches’ game (see booklet 4, Livingprocesses and what plants need to grow). This makes the point that many seeds are eaten and thatcompetition for water, light and mineral salts can affect survival.
2. Linked to the FSC fold-out chart Gardening for Primary Schools, there are a number of investigationsthat would be relevant to this activity. Examples are ‘What happens if the weeds are not taken out?’and ‘What happens if seedlings are not thinned?’
Figure 2. Rosebay willowherb produces large numbersof seeds and can be found forming large stands ondisturbed ground
t
8Plants for primary pupils 6© SAPS/FSC 2016
LPlants are found in many different habitats. To be successful in their habitat, plants need to be able togrow, reproduce and complete their life cycle. In their habitats, plants are affected by a wide range ofenvironmental factors. Conditions in the habitat may, for example, be wet or dry, light or dark,trampled, grazed or undisturbed. Although it may be possible to pick out one or two factors that areparticularly important, the children should understand that it is the combination of factors thatdetermine whether or not particular plants can survive in the habitat.
In this activity, children look closely at a selection of plants. They consider whether the plants have anyfeatures that help them survive in their habitat and be suited to any particular conditions found there.Often we describe these features as ‘adaptations’. The activity is suitable for upper primary children.
A PowerPoint presentation called ‘Adaptation’, linked to this activity, is available on the SAPS website(www.saps.org.uk). You could use this PowerPoint either as a way of introducing the topic or as anend-of-topic activity to stimulate discussion on what they have done and help consolidate some of theideas developed by the children.
Resources and preparation for the activity
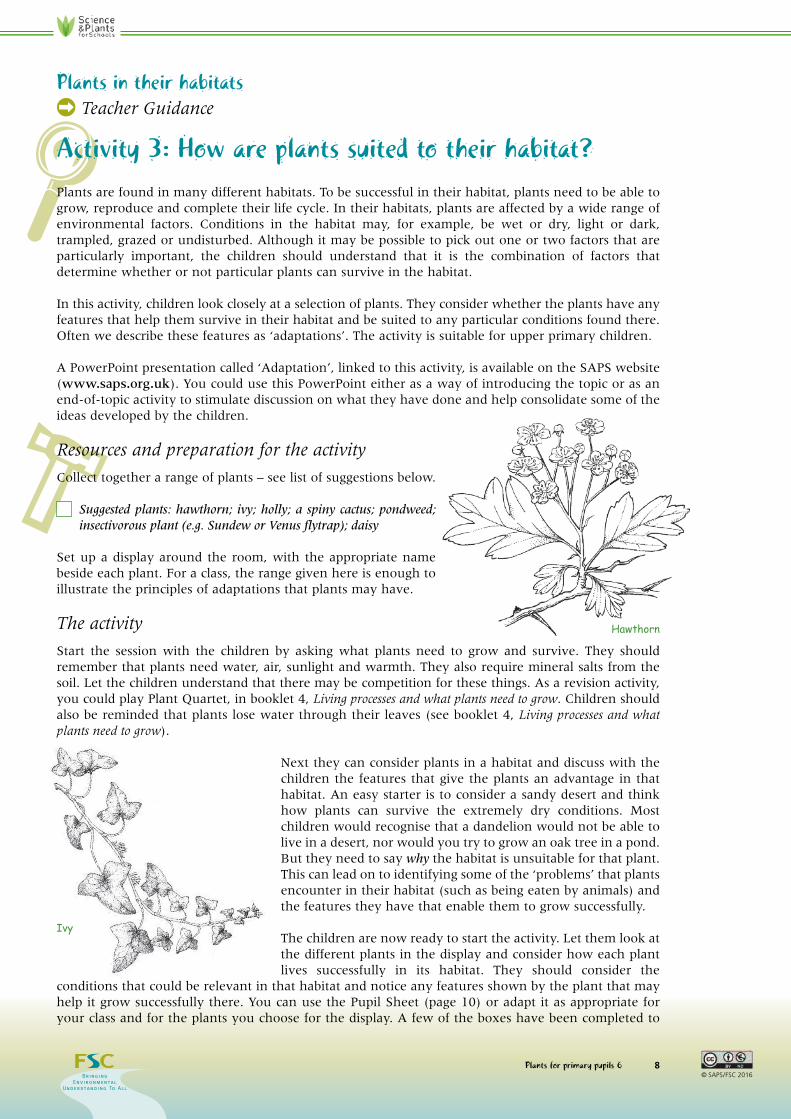
Collect together a range of plants – see list of suggestions below.
Suggested plants: hawthorn; ivy; holly; a spiny cactus; pondweed;insectivorous plant (e.g. Sundew or Venus flytrap); daisy
Set up a display around the room, with the appropriate namebeside each plant. For a class, the range given here is enough toillustrate the principles of adaptations that plants may have.
The activity
Start the session with the children by asking what plants need to grow and survive. They shouldremember that plants need water, air, sunlight and warmth. They also require mineral salts from thesoil. Let the children understand that there may be competition for these things. As a revision activity,you could play Plant Quartet, in booklet 4, Living processes and what plants need to grow. Children shouldalso be reminded that plants lose water through their leaves (see booklet 4, Living processes and whatplants need to grow).
Next they can consider plants in a habitat and discuss with thechildren the features that give the plants an advantage in thathabitat. An easy starter is to consider a sandy desert and thinkhow plants can survive the extremely dry conditions. Mostchildren would recognise that a dandelion would not be able tolive in a desert, nor would you try to grow an oak tree in a pond.But they need to say why the habitat is unsuitable for that plant.This can lead on to identifying some of the ‘problems’ that plantsencounter in their habitat (such as being eaten by animals) andthe features they have that enable them to grow successfully.
The children are now ready to start the activity. Let them look atthe different plants in the display and consider how each plantlives successfully in its habitat. They should consider the
conditions that could be relevant in that habitat and notice any features shown by the plant that mayhelp it grow successfully there. You can use the Pupil Sheet (page 10) or adapt it as appropriate foryour class and for the plants you choose for the display. A few of the boxes have been completed to
Plants in their habitatsÚ Teacher Guidance
Activity 3: How are plants suited to their habitat?
�
Hawthorn
Ivy

9 Plants in their natural environment© SAPS/FSC 2016
give some clues. Children write their suggestions in the boxes, but the discussion that goes on isprobably as important as the completed box.
The Extension activity (see below) includes a fuller table in the form of ‘Teacher guidance’. This isavailable on the SAPS website and may help you guide children into appropriate answers for bothversions of the activity. The PowerPoint presentation (Adaptation) also gives help with some answers.
When doing this activity, it should be emphasised that a single feature on its own is not responsible forthe survival of the plant. Rather it is a combination of features found in the plant that enables it tocompete successfully with other plants in the area and survive the particular conditions in the habitat.However, looking at single features may help children understand what is important to the plant in itsenvironment.
Further activities
1. Look at the school playing field and work out how plants growing there might survive regularmowing and trampling.
2. Compare the size of leaf in the same kind of plants (i.e. same species) growing in the shade and inthe sun. Brambles and nettles often show clear differences, as do some tree species (e.g. compareinner and outer canopy leaves). For further information see http://fua.field-studies-council.org/teaching-resources.aspx
3. Consider the adaptations that plants might show if growing in very windy or shady places.
Extension activity
A more complex version of this activity is available on the SAPS website (www.saps.org.uk). It usesa wider range of plants and helps children become aware of different features shown by plants thathelp them survive conditions in different habitats. It may be suitable for older children, or you maywish to select a few more plants to add to the list in the activity as given above. The complete ‘Teacherguidance’ table (on the SAPS website) gives information that can be useful for both versions of theactivity.

10Plants for primary pupils 6© SAPS/FSC 2016
Plants in their habitatsÚ Pupil Sheet
How
are plants suited to their habitat?
Look at the plant and describe any special feature(s) that it shows. Find out where the plant lives (its habitat), then work out how the
features you see may help the plant survive in that habitat. Write your answers in the boxes. Some have been done for you.
Plant
Feature (adaptation) shown
by the plant
How
this feature helps the plant survive
hawthorn
less likely to be eaten (by large herbivores –
e.g. deer, cattle)
ivy
1. uses special roots on stems to climb up tree
trunks, walls and fences
2. has thick leathery leaves
holly
1. 2.prevent tree losing too much water, especially in
winter
a spiny cactus
a pondweed
insectivorous plant
can grow in habitats where soils are low in mineral
(e.g. Sundew)
salts (e.g. acid bogs)
daisy
11 Plants in their natural environment© SAPS/FSC 2016
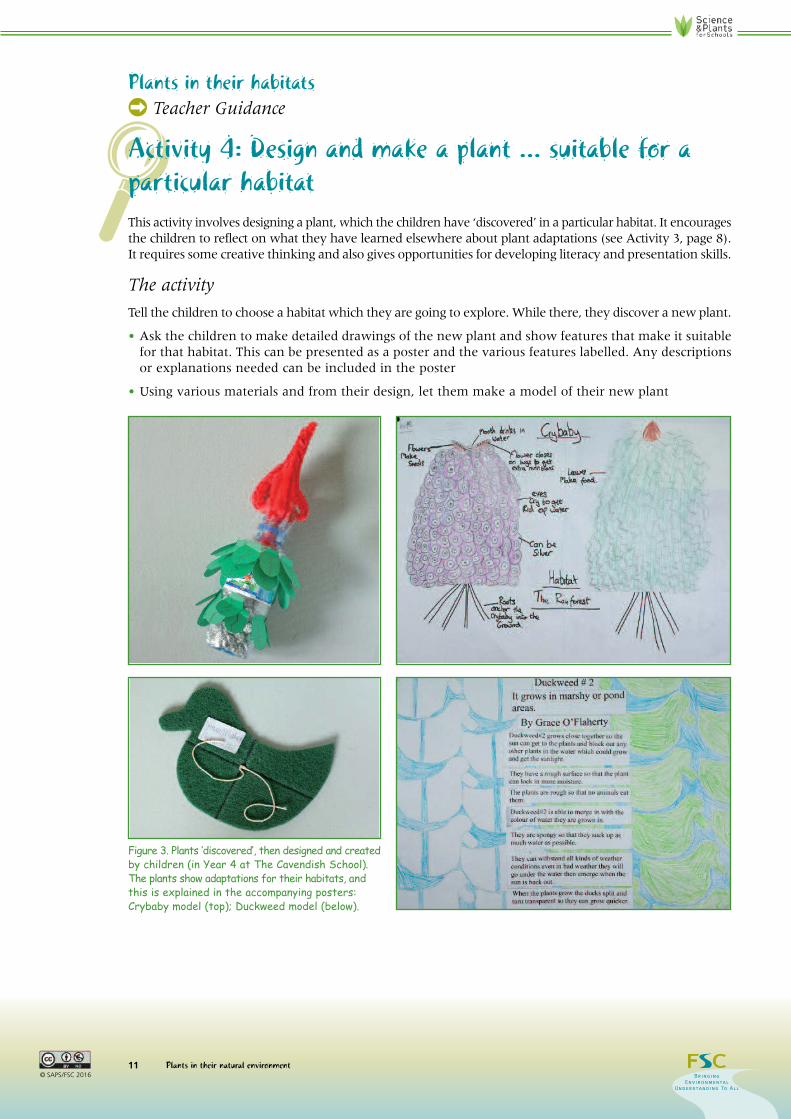
LThis activity involves designing a plant, which the children have ‘discovered’ in a particular habitat. It encouragesthe children to reflect on what they have learned elsewhere about plant adaptations (see Activity 3, page 8).It requires some creative thinking and also gives opportunities for developing literacy and presentation skills.
The activity
Tell the children to choose a habitat which they are going to explore. While there, they discover a new plant.
• Ask the children to make detailed drawings of the new plant and show features that make it suitablefor that habitat. This can be presented as a poster and the various features labelled. Any descriptionsor explanations needed can be included in the poster
• Using various materials and from their design, let them make a model of their new plant
Plants in their habitatsÚ Teacher Guidance
Activity 4: Design and make a plant ... suitable for a particular habitat
Figure 3. Plants ‘discovered’, then designed and createdby children (in Year 4 at The Cavendish School).The plants show adaptations for their habitats, andthis is explained in the accompanying posters:Crybaby model (top); Duckweed model (below).

12Plants for primary pupils 6© SAPS/FSC 2016
t
LPlants in their habitats Ú Teacher Guidance
Activity 5: Comparing two habitatsThis activity provides an opportunity for children to compare different habitats. They are able to buildup some idea of how the habitats are different and the effect these differences may have on the plantsand animals that are found there. Examples of possible pairs of habitats that the children couldcompare include: a grassy area out in the open and a grassy area under a tree; a playing field parttrampled and part not trampled; a grassy area two metres away from a wall and a grassy area close toa wall.
�
�
�
�
Figure 4. Examples of grassy areas that can be compared: in the open (left) and under a tree (right).
Young children enjoy looking closely at a small area and talking about what they see, especially if theyare given a magnifying glass. For older children, you can make the activity a little more formal, in theway described below. Some teachers may wish to introduce the activity with the cartoon (see page 13),while others may prefer to use the cartoon in the discussion. (The cartoon is also available on the SAPSwebsite.)
Resources and preparation for the activity
‘Quadrats’ i.e. something to mark out an area of ground approximately 50 x 50 cm. It does not have to be squareor even straight-sided. A plastic hoop works well. You need two per group of children, labelled with their names�Some magnifying glasses (optional)�Clipboard and pencil, for the teacher (and useful to take with you the notes in the box on page 14)�Digital camera, for the teacher
Choose two habitats that are close to each other but show obvious differences, in which the childrencan work easily. A suitable example would be an area of short grass with trees, where you can comparethe habitat under the trees and out in the open. Make sure there are no nettles or prickly plants. Avoidsites where the vegetation is easily damaged (e.g. flower meadows). If it is not possible to go outside,you may wish to use photographs (some examples are given on the SAPS website) but you mustappreciate that photographs cannot replace the fun of first hand observation and discovery.

13 Plants in their natural environment© SAPS/FSC 2016
The activity
Children can work in small groups. Take the children to one of the habitats and ask each group to finda place for themselves. They should not be in touching distance of other groups. Ask them to put theirquadrat down on the ground and look closely at their own little patch.
Encourage them to talk in their own words about what they can see inside their patch and anythingthat happens in it. Allow about 5 minutes for this part of the activity, discussing with the children whatthey see as you go around to different groups. They need not write anything down, but rather let themtell the teacher what they find in their quadrat. Next they go to the second habitat, put down theirsecond quadrat and make observations in a similar way. They should leave the first quadrat where itis, in case they want to come back and have another look. It can also be useful to keep a record of bothquadrats using a digital camera or tablet (but remember to label them clearly).
Discussion with the class
Now you are ready to work with the children as a class. Ask them what they saw in each of the twohabitats and explore with them what the differences were. Discuss why there might have been thesedifferences. The cartoon is a good way to stimulate discussion. Look at the notes in the box (page 14) andhelp the children focus their observations. Listen carefully to what the children say and explore theirideas. Remember that often there are no simple answers. Several factors may contribute to determiningwhich plants and animals are found in a particular habitat, hence any differences that the children haveobserved between the two habitats. To have some useful discussion, it is not essential to name the plantsand animals but it is more interesting if you can name at least some of them. The Field Studies Councilfold-out identification charts provide useful help (www.field-studies-council.org/publications).
Encourage them to think about some of the following.
• How the plants and animals that they saw in their quadrat could be suited to their habitat (adaptation)
• How plants and animals affect each other (e.g. animals feed on plants, plants provide shelter for animals)
• Remember the possible effects of people in the area
This area must have been plantedbefore the other
one
I think rabbits have eaten all theplants here
This area getsmore sun and
rain
This one’s prettier. Someonemust be looking
after itI think the tree
takes all the nutrientsso the plants can’t
grow
Perhaps peopleshelter under thetree so the plants get trampled
Comparing two habitats
14Plants for primary pupils 6© SAPS/FSC 2016
Further activities
1. Think about a plant that occurred in both habitats. Did it occur in the same quantity in both? Askthe children to suggest how they might measure and record the differences in quantity. (They couldeither count the individual plants or use a subjective assessment scale – e.g. a very large amount; alot; not very many; one or two; none.)
2. Follow the ideas given in ‘Dandelions ... across the curriculum at KS2’ on the SAPS website. Thisactivity looks at the angle of growth of dandelion leaves in grass of different length (because ofdifferent frequency of cutting during the year). This gives a good opportunity to collect data andapply numeracy skills as well as understanding how plants may grow in different habitats.
Here are some points that you can use as the basis for questions that help the children with theirdiscussions. They may need to go back to their two quadrats to answer them. You could link thisinto the suggestions given on the cartoon.
• any differences in the kinds of plants present
• any differences in the size of the plants present
• did they see any animals or signs of animals?
Signs of animals include tufts of hair or droppings or anything to suggest animals are eatingthe plants. Remember that ‘animals’ includes small invertebrates, such as caterpillars.
• any indication that large animals are having an effect on this habitat. (Large animals wouldinclude deer or rabbits. Their effects might, for example, be the result of grazing or trampling.)
• any effects of people in the two habitats
• any differences in the soil in the two habitats
Think about - moisture content (e.g. a large tree may stop rain reaching the soil)
- nutrient content (e.g. fertiliser may have been added to the soil)
- texture (e.g. trampling may compact the soil)
• any difference in the amount of light reaching the ground (maybe one habitat is more shadythan the other)
• any difference in the wind in the two habitats
• any difference in temperature in the two areas
Ask for suggestions as to how they could measure this. Point out that the highest (maximum)and lowest (minimum) temperature during a day may be important.

15 Plants in their natural environment© SAPS/FSC 2016
t
LPlants in their habitats Ú Teacher Guidance
Activity 6: What happens if we cut the grass?If environmental conditions change, this may affect the habitat and the plants and animals that livethere. In other activities, we look at the effect of different environmental conditions in two habitatsclose to each other (e.g. in the open and under a tree – page 12), but here you have an opportunity tochange something and investigate what happens. It is a small-scale investigation, which can be donein the classroom, and simulates the widespread and familiar activity of cutting the grass. Ideally, theclassroom activity can be complemented by observations on the effects of cutting grass, say in an areaof the school grounds or playing field.
The children cut out some discs of grass turf and grow them in flower pots. They compare the effectof ‘cutting the grass’ for one turf disc, but not cutting the other. It encourages the children tounderstand how they can devise their own investigations, the results of which may have widerimplications in the field. Once the investigation has been set up, observations are taken over a seriesof weeks, but it takes only a few minutes each week to do the observations. The best time of year todo this is early in the summer term – growth is likely to be very slow over the winter months. Theactivity is suitable for older children.
Resources and preparation for the activity
Some flower pots – the plastic shallow ones are suitable (e.g. about 14 cm diameter and 9 cm depth). You needtwo pots for each group of children or you may wish to do this as a class activity
An area of turf (that you are allowed to dig up!). It is good if this has already been mown fairly recently. Cutout two discs of turf, to fit into the flower pots. The depth of the turf should be about 4 cm and identical inappearance as far as possible
Compost (see notes on compost in booklet 4, Living processes and what plants need to grow)
Saucers or tray with some gravel, to stand the flower pots on
Scissors (for cutting the grass)
�
�
�
�
�
The activity
• Put some compost in each of the pair of flower pots, then place one turf disc on top of the compostin each pot. The level of the top of the turf should be roughly in line with the top of the flower pot.This then allows the children to ‘cut the grass’ easily, with scissors.
• Stand the pot on a saucer or in a tray with some gravel, and keep this moist.
• In one of the pair of pots, cut the grass with scissors.
• Label the pots – one as ‘cut grass’ and the other as ‘uncut grass’. (This one is not cut at all during theinvestigation.)
• Place the pots side by side in good light. They can be left outside or in a glasshouse if available.
• Keep the pots adequately watered – approximately the same amount of water should be given toeach pot.
• Once a week, make observations on the turf in each pot – how it is growing (perhaps makemeasurements of height) and any other changes that can be seen in the plants in the turf.
• Once a week, after making the observations, cut the grass in one pot. It must be the same pot eachtime.

16Plants for primary pupils 6© SAPS/FSC 2016
Each week, the children make a record of their observations – a visual image with a digital camera ortablet can be useful, but they should also try to put their descriptions into words. The children continuemaking observations over a period of four weeks – or longer if possible.
In the discussions about what is happening, it is useful to link this with other observations made inhabitats. Generally, children should get the idea that grass responds well to being cut short andcontinues to grow (so is useful in lawns), whereas growth of other plants begins to suffer if frequentlycut close to the ground. They may also notice differences in the length of leaves and make somemeasurements to support their observations. This can be followed through in the ideas given in‘Dandelions ... across the curriculum at KS2’ on the SAPS website.
Figure 5. Effect of ‘cutting’ the grass – two turf discs flower pots and their appearance after 5 weeks. The disc on theleft had been cut once a week (for 5 weeks), but the disc on the right had not been cut at all.

17 Plants in their natural environment© SAPS/FSC 2016
LPlants in their habitats Ú Teacher Guidance
Activity 7: Where does this plant live? – a card gameThis card game provides a useful way of exploring children’s understanding of plants in their habitatsand learning about the features that make the plants suited to different places. It can be used tointroduce children to a range of habitats and plants as well as encourage discussion. It is also useful asa summative activity. It is suitable for older children, in upper primary. The game can be played in twoways – first as a matching activity, then as a memory exercise to help consolidate what they havelearnt. The reading involved helps to develop literacy skills. The game encourages children to work andcooperate in groups. It can be adapted for a class activity by playing on an interactive whiteboard andoffers an opportunity to develop ICT skills.
There are 24 cards in a pack, made up of 12 habitats and 12 different plants (see Figure 6). Each cardhas sufficient information on it to enable the children to work out the most likely habitat for the plant.Children read the information on the cards and look for clues, then try to match a plant with its mostappropriate habitat.
Preparation for the game
First you need to make a pack of cards (one pack for each group of children). Follow the instructionsin the caption to Figure 6 on page 18. Finally, cut out the individual cards to make the pack of 24.
Playing the game
The matching activityThe game is for two to four players. Give each group a pack of 24 cards. Ask the children to spread outthe cards (face upwards). It is useful to arrange the habitats in one group on the table and the plantsin another. Each child then takes it in turn to select a plant and then choose a habitat that would besuitable for this plant. The child uses evidence provided on the cards and justifies the choice to the restof the group. Others in the group should be encouraged to agree or disagree with whether the plantwould live in the chosen habitat. The pair of cards that has been chosen is then placed on the side. Theactivity concludes when all the plants have been matched with a habitat. At the end, often there aresome cards that have not been paired so the group can try to sort out which have been wronglymatched. This promotes discussion and encourages the children to be more critical when reading theinformation on the card. Sometimes teachers may need to give help in promoting the discussion.
Pairs memory gameThis can also be played in groups, of two to four children. Spread out the cards. Turn the habitat cardsover so that they are all face down and leave the plant cards face up. In turn, each child picks up aplant card and one from the habitats to see if it matches. If they make a suitable pair, these cards areremoved, but if they don’t match, both cards are put back on the table. The next child picks up anotherplant card and then a habitat card to see if it matches the first. Gradually the children memorise wherethe matching habitat card was placed. The game is completed when all the plants have been matchedwith a habitat. The player with the highest number of correct pairs is the winner.

18Plants for primary pupils 6© SAPS/FSC 2016
Plants in their habitats
Mistletoe is a parasitic plant.It grows on trees, often onapple or lime trees in parks,gardens or old orchards
Navelwort is often foundgrowing on cliffs, sandy hedgebanks and in stone crevices onrocky slopes and old walls
White water-lily is a plant thathas large floating leaves. Itgrows well in slow moving or stillwater, which is rich in nutrientsand has a muddy bottom
Greater plantain grows inalmost any soil and is oftenfound as a weed in grassyplaces. It can survive beingtrampled
HABITATAn old apple orchard
HABITATAn old stone wall with lots ofcracks and crevices
HABITATA large pond with a muddybottom
HABITATA school playing field. Bare patchesof ground, particularly around thegoal posts, show the effect ofchildren running and playing games
Duckweed is a small floatingplant. It grows well in slow-moving or still water. It isoften found in ponds, evensmall ones
Marram is a strong quick-growing grass with longunderground runners thatproduce upright shoots. It growsin sand dunes, near the sea
HABITATA small garden pond
HABITATSand dunes, near the sea
Figure 6. Reduced size versions of cards for the card game ‘Where does this plant live?’ (continued on page 19). Full-sizedversions are provided on the SAPS website. To make the cards, you can either photocopy enlarged versions of these pages or download a set of templates from thewebsite. Use card or suitable paper and you may wish to laminate the sheets to make them more durable.

19 Plants in their natural environment© SAPS/FSC 2016
Plants in their habitats
Purple saxifrage grows on soil-covered ledges, damp rocks andsteep slopes. In Britain, it isonly found in the mountains ofthe north and west
Primrose is often found onhedge banks and in woodlandclearings especially where thesoil is heavy and damp
HABITATMountains in north Wales. Ifyou look closely, you can seerocky ledges on the steepslopes
HABITATA clearing in an oak woodland.The soil here is a damp heavyclay
HABITATA salt marsh, near the sea.On most days at high tide,the plants that live here arecovered by salty muddy water
HABITATGrassland on a south-facingslope in southern England. Herethe soil is chalky. The grass iskept short by grazing sheep
HABITATA busy main road, with grassyverges
HABITATA wet heathland with boggypools. The soil contains onlylow levels of mineral nutrients
Thrift is a seaside plantoften found on salty muddymarshes
Large thyme has leaves witha pleasant smell. It growsbest in short grass on south-facing slopes, especiallywhere the soil is chalky
Danish scurvygrass is a seasideplant and can survive saltyconditions. Sometimes it is foundat the edge of roads where salthas been used to stop ice forming
Round-leaved sundew growsbest in wet acid soils. It canget extra mineral nutrientsby catching insects in itssticky leaves

20Plants for primary pupils 6© SAPS/FSC 2016
tL
Soil, microorganisms and recycling Ú Teacher Guidance
The activities in this section introduce children to the living processes that take place in the soil andwhere soil comes from. The children get a hint of the importance of microorganisms in the naturalcycling of nutrients and their contribution to making compost. The section provides a usefulopportunity to link into the wider issues of decay of materials and disposal of waste.
Activity 1 can be used with young children as a way of starting to get them interested in the world thatlies within the soil and the fascination it holds. Alternatively, it can be used as an introduction toActivity 2, which is suitable for older children. In Activity 3, children investigate the process ofdecomposition in more detail. Parts of the activities give useful opportunities to link with thedevelopment of literacy skills.
Secrets of the soilIn the natural world, large numbers of plants and other living organisms depend on the soil. So whatis it? Where does soil come from and what lives in it? The following activities suggest ways of capturingchildren’s interest and helping them to understand the importance of soil. In particular, they shouldunderstand that soil is a place where the roots can anchor the plant and that it provides the water andmineral salts needed by plants. Soil also provides food, water and shelter for animals that live in it. Itmay also be appropriate to make links with what plants need to grow (see booklet 4, Living processesand what plants need to grow). Lastly, plants and animals in the soil are important in food chains,including those that include human beings.
Activity 1: Finding out about soilThis starts with a blind exploration of what is in a box (which actually contains some soil) and leadson to taking a closer look at some of the different components. Children can use magnifying glasses,microscopes or some sort of visualiser or webcam if available, linking this for all to view on awhiteboard or equivalent.
Resources and preparation for the activity
A stout cardboard box. Make a hole in the top of the box, just large enough for a child’s hand to go through�Some soil in a polythene bag, about half filling the box. The top of the bag comes out through the hole, allowingthe children to put their hands inside without seeing what is in there. It is best to use soil from a garden as thisis likely to contain a good variety of things for the children to feel and see. Store the soil in a cool, dark placeand place it in the box just before the lesson�Plastic teaspoons, one for each child�Petri dishes or other small containers with transparent lids, one for each child�Magnifying glasses and, if available, a low-power microscope (magnification x 10 or x 20) and / or webcam�Paper towels�A measuring cylinder or tall jar (you can use a transparent drinks bottle or jam jar)
Make sure the soil is from a clean area of the garden and not used by cats or dogs. Cover allopen wounds. Wash hands with hot water and soap after the activity.
�
�
�
�
�
�
�
a

21 Plants in their natural environment© SAPS/FSC 2016
The activity
Tell the children that you have put something interesting in the box and you want them to find outwhat it is. Ask for a few volunteers, one at a time, to put their hands in the box and describe what isin there. They may realise there is some soil in the box, but probably dismiss it as they look forsomething they think is ‘interesting’. Encourage them to describe what they can feel and collect theirwords together, exploring their vocabulary (e.g. soil, mud, dirt, damp, gritty, rough).
After a few minutes, open the box. Let the whole class see what was in it. Ask them if they can thinkof any more words that could be added to the list, such as colours and other words for soil (e.g. dirt).
Now it is time to have a closer look. Give each child a small amount of soil – 2 teaspoons of soil in adish with a lid should be sufficient. The children could use magnifying glasses or microscopes. Using avisualiser or webcam would give the class an opportunity to view the things in the soil together andshare their discoveries.
At first, most children may not realise that soil contains water and air as well as the solid particles. Askthem to press a small amount of soil onto a sheet of absorbent paper (such as a paper towel). Theyshould be able to see a damp patch, showing there is water in the soil. Then let the children put somesoil into a measuring cylinder or tall jar and pour some water into the jar. As they watch, they arelikely to see bubbles coming off as air is pushed out of the soil by the water.
To finish the activity, it is a good idea to introduce the Pupil Sheet ‘I spy in the soil’ (see page 22).
Extension activities
For younger childrenAsk the children to imagine something that is happening in the bit of soil they have just been lookingat. Ask them to draw a picture, or write a story or a poem about it. This gives a good opportunity todevelop ideas for creative writing.
Doug
Inside the soil there lived a bugHe had six legs, his name was DougIn dirt and mud he scurried aroundUntil his favourite food he foundIt wasn’t chips or even beefJust a crunchy rotten leaf
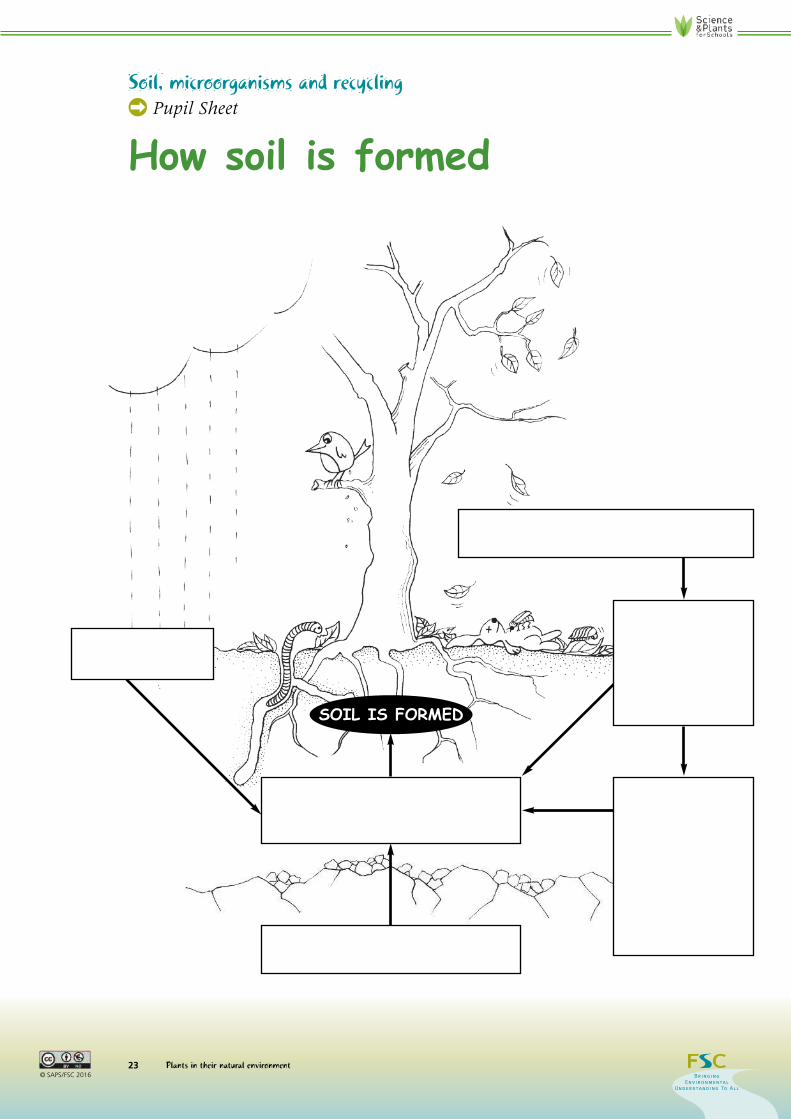
For older childrenThe Pupil Sheet ‘How soil is formed’ (page 23) illustrates some of the processes involved in theformation of soil (the guidance for this sheet can be found on page 35). You can use this to discuss theimportance of soil to plants and animals and help you assess the children’s understanding of soilformation. Ask the children to write suitable words in the boxes to describe what is happening.

22Plants for primary pupils 6© SAPS/FSC 2016
Soil, microorganisms and recyclingÚ Pupil Sheet
I spy in the soil
whole dead leaves seedlings or small living plants
bits of dead leaves very small animals
twigs bits of dead animals
bits of bark from trees pebbles
plant roots small bits of rock
seeds and fruits grains of sand
Write down anything else you have found (e.g. paper)
Can you think of anything else that 1.might be in the soil? There are two things that all plants and animals need
2.(but you can’t actually see them).
Here is a list of things you might be able to find in your soil.
Have a good look at the soil and put a tick beside anything that you can see.
23 Plants in their natural environment© SAPS/FSC 2016
Soil, microorganisms and recyclingÚ Pupil Sheet
How soil is formed
SOIL IS FORMED

t
24Plants for primary pupils 6© SAPS/FSC 2016
LSoil, microorganisms and recyclingÚ Teacher Guidance
Activity 2: Making compost in a bottleThis activity uses clear plastic bottles to make a compost column. The column is then filled with avariety of materials to illustrate the principles of composting. The children observe the changes thattake place over time.
Some teachers may wish to let all the children make their own compost column, whereas others mayprefer to make one or two only for the class and use them as demonstration columns. In the simplemethod described here (on the Pupil Sheet, page 25), the teacher MUST make the initial cut with sharpscissors, so that the children then continue safely and do the rest themselves. It is a good idea for youto make one yourself beforehand, so that you see where problems might arise.
Meat, fish and cheese must NOT be used in the column. The liquid that forms must be discardedsafely. It could be a good idea to put it on a compost heap if available. Make sure you follow good
hygiene practice, such as careful hand washing with soap and water after handling any of the solids orliquids. It is important that there is no transfer of such liquids from hands to mouth or eyes.
Resources and preparation for the activity
Two 2-litre bottles for each compost column Labels and some string
Scissors Some newspaper
Small pieces of net (old tights) and some elastic Dead plant material to put into the column. Suitablebands materials include grass cuttings, lettuce leaves,
carrot tops, apple cores, potato peelings, vegetablesthat are past their best
To make the column, follow the instructions on the Pupil Sheet (page 25). It is important that there issome flow of air through the column – hence the use of net or tights as a cover.
Activities with the compost column
Children should observe the column over a period of time and keep a record of the changes that takeplace. For the first week, they should make observations daily, but after that about once a week for about6 weeks. Observations take only a few minutes each time. They could measure changes in height of thematerial, and describe any changes in texture or note the appearance of liquid at the bottom. It is alsouseful to take photographs and utilise ICT skills.
Discuss with the children what may be causing the changes. They should understand that themicroorganisms that decompose waste plant material are beneficial. These microorganisms are toosmall to be seen with the naked eye. Other larger organisms are involved in the recycling process –these include springtails, woodlice and worms (see further information in Background information forteachers, page 32).
More extensive activities can be done with older children. See, for example, ‘taking temperatures in acompost heap’ on the SAPS website.
This can be an appropriate time to link in to a discussion about compost made from waste plantmaterial, collected by local authorities all over the country.
�
�
�
�
�
�
a

25 Plants in their natural environment© SAPS/FSC 2016
Soil, microorganisms and recyclingÚ Pupil Sheet
How
to make a compost colum
nYou need:
•two 2-litre plastic
bottles with their
labels removed
•scissors
•small pieces of net
(old tights)
•elastic bands
•labels and string
•newspaper
•dead plant material
(see suggestions)
1.Carefully cut
one bottle in
half, keeping
the line as level
as possible.
Trim the edge
so that it is
smooth
2.Cut a small piece of
net and fix it over
the end of the bottle
with an elastic band
3.Push this top half
of the bottle into
the bottom half to
form a funnel
4.Add two
tablespoons of
soil or compost to
the funnel. Fungi
and small animals
in this start the
composting
process
5.On top of this add a layer of chopped
leaves and other material to be
composted
6. Take the second bottle and cut off the
top. Push it onto the bottle that you
have already assembled. Don’t worry if
the middle section crumples a bit
7. Fix a piece of net over the top of the
bottle with an elastic band. Write your
name on a label and hang it round the
neck
8. Wrap the column in a sleeve of newspaper
to keep the contents dark. Remove it when
you want to observe the rotting process
9. Spray the material inside the bottle
about once a week to keep it just moist
and record any changes that you see
Notes:discard the bottom half of the
second bottle. You can recycle it.
Once the columns have been filled, it is
best to keep them out of direct sunlight
and heat
t
26Plants for primary pupils 6© SAPS/FSC 2016
LSoil, microorganisms and recyclingÚ Teacher Guidance
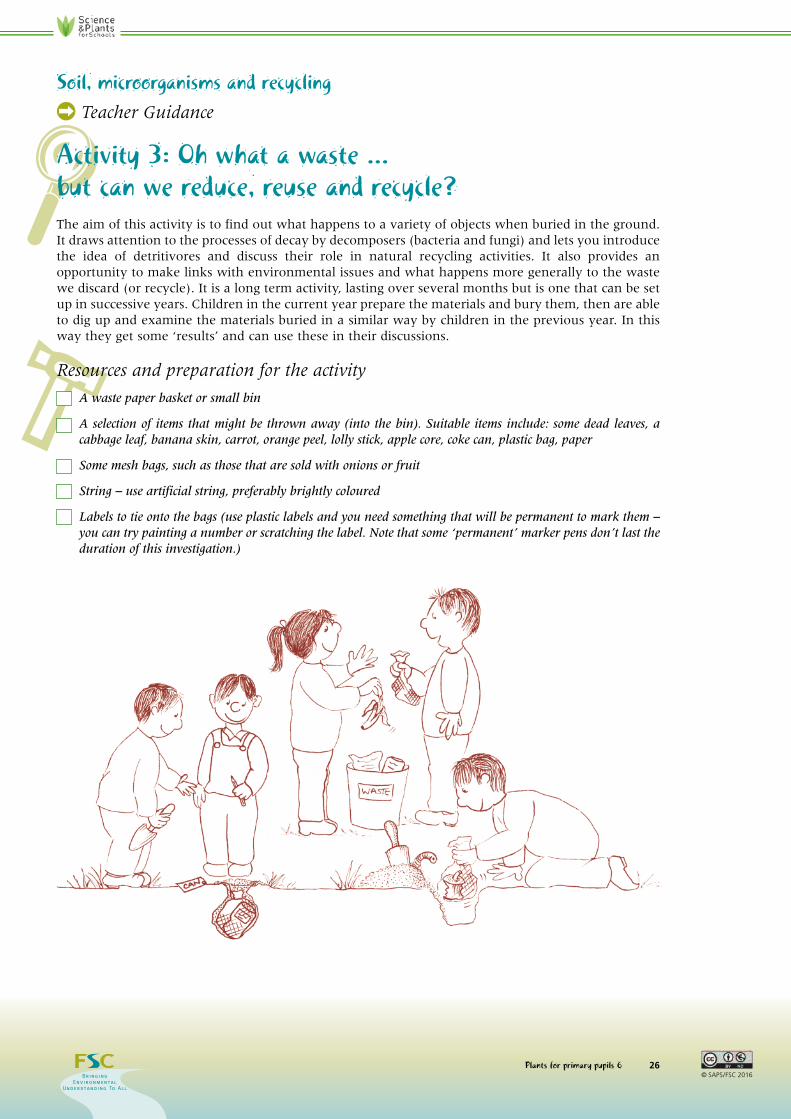
Activity 3: Oh what a waste ... but can we reduce, reuse and recycle?The aim of this activity is to find out what happens to a variety of objects when buried in the ground.It draws attention to the processes of decay by decomposers (bacteria and fungi) and lets you introducethe idea of detritivores and discuss their role in natural recycling activities. It also provides anopportunity to make links with environmental issues and what happens more generally to the wastewe discard (or recycle). It is a long term activity, lasting over several months but is one that can be setup in successive years. Children in the current year prepare the materials and bury them, then are ableto dig up and examine the materials buried in a similar way by children in the previous year. In thisway they get some ‘results’ and can use these in their discussions.
Resources and preparation for the activity
A waste paper basket or small bin
A selection of items that might be thrown away (into the bin). Suitable items include: some dead leaves, acabbage leaf, banana skin, carrot, orange peel, lolly stick, apple core, coke can, plastic bag, paper
Some mesh bags, such as those that are sold with onions or fruit
String – use artificial string, preferably brightly coloured
Labels to tie onto the bags (use plastic labels and you need something that will be permanent to mark them –you can try painting a number or scratching the label. Note that some ‘permanent’ marker pens don’t last theduration of this investigation.)
�
�
�
�
�

27 Plants in their natural environment© SAPS/FSC 2016
The activity
Set up the waste paper basket (small bin) with a variety of objects, such as those suggested above.
Discuss with the children whether these are waste and where they will go after they have been‘thrown away’. Will they go into a bigger bin and eventually to landfill? What could we do with thedifferent objects? We might be able to reuse the paper by writing on the other side. The coke can couldbe ‘recycled’ and made into a new can. The apple core could go on the compost heap. However, if allthese end up in landfill, what do the children think might happen to them? How could we find out?
We could set up an investigation as described below.
• Photograph each object and place them in separate mesh bags.
• Tie the bag at the top with string and attach a label to record what is inside.
• Bury each bag in the ground, just below the surface. Make sure the label comes above the surface sothat it can be found at a later date.
• Six weeks later, retrieve the bags and photograph the objects inside them.
• Let the children note the changes that have occurred.
• Bury the bags again with the objects inside and leave until the following year.
The discussion, particularly when looking at results after one year, can help children understand howany plant material begins to disappear, because it is being decomposed by the activities ofmicroorganisms (bacteria and fungi). This is part of the natural process of decay, whereas relativelylittle happens to the coke can, so it would remain in the soil, without breaking down and disappearing.
Extension
For older children you can take the activity a stage further by using bags with different size mesh.Collect two of each object and place one of each in a mesh bag, as above. Place the second in a finermesh bag, such as the ‘foot’ part of a pair of tights. Bury the bags as before and dig them up andexamine both after a period of time. It is likely that the objects in the finer mesh bag will not have‘broken down’ as much as those in the bag with larger holes. The children may suggest that smallanimals can get in and eat some of the dead material. This lets you introduce the idea of ‘detritivores’(see Background information for teachers, page 32) and come back to a wider view of food chains andfeeding relationships.
28Plants for primary pupils 6© SAPS/FSC 2016
L
Feeding relationships Ú Teacher Guidance
The activity in this section looks at the complex relationships between living organisms and illustratestheir dependence on each other through feeding relationships.
Activity 1: Yummy - a food chain card gameThis card game provides a useful way of bringing together children’s knowledge and understanding offood chains (see Background information for teachers, page 32). They should understand that a typicalfood chain consists of a green plant, a primary consumer and a secondary consumer. In some foodchains, the ‘starting’ organism is dead plant material rather than a living plant. Throughout the game,it should be emphasised that the feeding relationships provide a means of passing on energy from oneorganism to another. In the food chains, the arrows are used to show the direction of energy flow. Theorigin of the energy is nearly always sunlight. The game is suitable for upper primary children and canhelp reinforce understanding of what plants need for growth as well as develop understanding offeeding relationships.
Preparation for the game
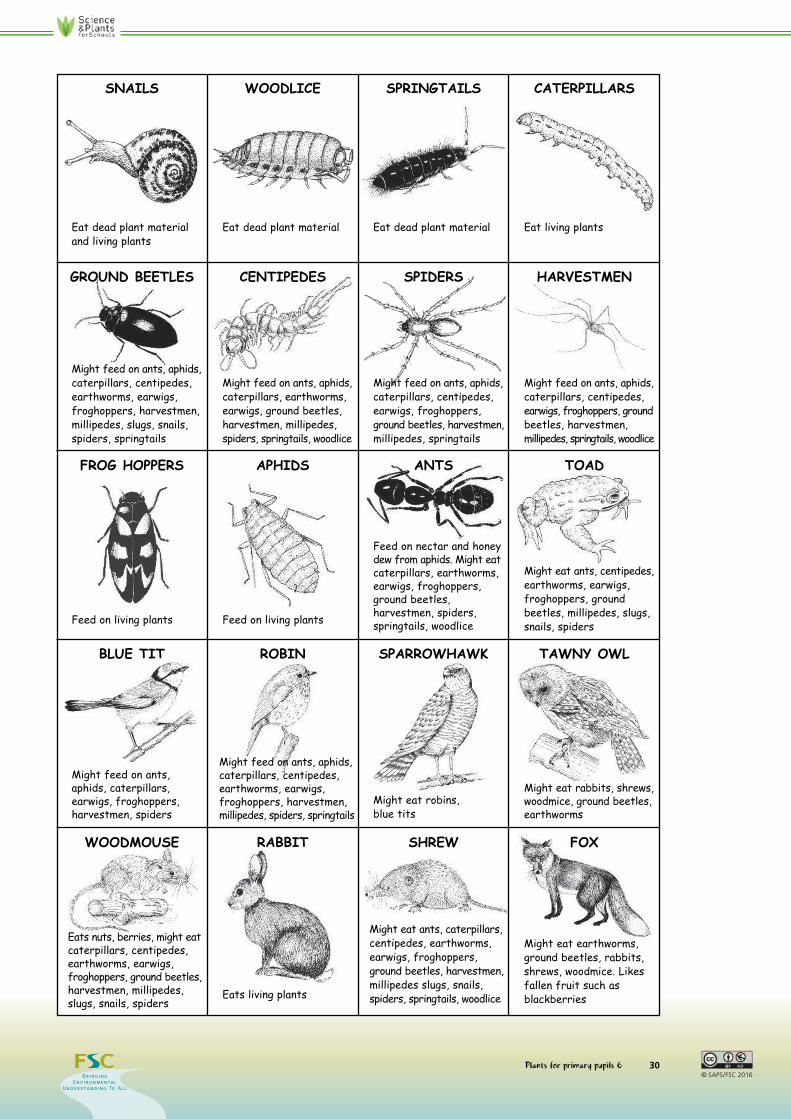
For this card game, there are 40 cards in a pack – 28 animal cards, 9 plant cards, one sun card and twoweedkiller cards (known as DOOM). To make a set of cards, follow the instructions in the caption toFigure 7 on page 29. In addition, make one ‘sun card’ – this looks good on yellow card or paper. Eachcard has sufficient information on it to enable the children to work out where the plant or animalcould fit in a food chain.
Playing the game
The game is for 2 to 3 players. The idea is for the players to get rid of all the cards by making 3-cardfood chains, made up of a producer, a primary consumer and secondary consumer. An example couldbe a plant, a slug and a toad. Each chain should start with a plant. The sun card is included toemphasise the importance of having a source of energy. The weedkiller cards get children thinkingabout the wider effects of using weedkillers.
• Place the sun card on the table.
• Shuffle the cards and deal nine cards to each child.
• Place the remaining cards face down on the table as a stockpile. Turn over the top card, face up andplace this beside the stockpile. This card becomes the first of the ‘discard pile’.
• The player to the left of the dealer starts by picking up a card either from the stockpile or they canchoose the card from the top of the discard pile. If this player has a food chain, they put down thesethree cards, in the correct order, extending out from the sun. If this player does not have a foodchain, they then get rid of one of their unwanted cards face up onto the discard pile.
• This is repeated by each of the players in turn.
• Any player who picks up the weedkiller card must put it at the bottom of the stockpile and thenmisses a turn.
The first player to make three food chains and get rid of all their cards is the winner. If all the cards inthe stockpile are used up and no player can put down any more food chains, the player with thesmallest number of cards in their hand wins. At the end of the game, children could lay out the foodchains on a large piece of paper and add arrows to show the direction of energy flow.
In the discussions with the children, you can emphasise the importance of energy from the sun andthe direction of energy flow through the food chain. This helps them to understand the essential role

29 Plants in their natural environment© SAPS/FSC 2016
that plants play in the living world. The children can also try to see what happens if weedkiller issprayed onto a plant. Cover the plant with a weedkiller card and then predict what might happen tothe rest of the food chain.
Extension activities
1. Children could now work in groups and make more food chains or extend existing chains, perhapsto 4-card chains. This would bring in some of the cards that have not yet been used so far (e.g. asparrowhawk). Alternatively, they could add to other people’s food chains.
2. Ask the children to add arrows between the different food chains. This would introduce the idea ofbuilding up food webs. (See Background information for teachers, page 32.)
3. A further activity on food webs, in the form a Pupil Sheet, is available on the SAPS website.
Green plants and deadplant material
Green plants and deadplant material
WEED KILLER
Doomkills all plants
Eat dead plant materialand living plants
Eat dead plant material Eat dead plant materialand living plants
Eat dead plant materialand living plants
Green plants and deadplant material
Green plants and deadplant material
Green plants and deadplant material
MILLIPEDESSLUGS EARTHWORMS EARWIGS
Figure 7. Reduced size versions of the cards for thecard game ‘Yummy’ (continued on page 30). Full-sizedversions are provided on the SAPS website.
To make the cards, you can either photocopy thesepages or download a set of templates from the website.You need two copies of the cards on page 29 but onlyone copy of the cards on page 30. Use card or suitablepaper and you may wish to laminate the sheets to makethem more durable.
30Plants for primary pupils 6© SAPS/FSC 2016
GROUND BEETLES CENTIPEDES
Eat dead plant materialand living plants
Eat dead plant material Eat dead plant material Eat living plants
SPRINGTAILSSNAILS WOODLICE CATERPILLARS
Feed on living plants Feed on living plants
Might eat ants, centipedes,earthworms, earwigs,froghoppers, groundbeetles, millipedes, slugs,snails, spiders
FROG HOPPERS APHIDS TOAD
Might feed on ants,aphids, caterpillars,earwigs, froghoppers,harvestmen, spiders
Might eat robins,blue tits
Might eat rabbits, shrews,woodmice, ground beetles,earthworms
SPARROWHAWKBLUE TIT ROBIN TAWNY OWL
Eats living plants
SHREWWOODMOUSE RABBIT FOX
SPIDERS HARVESTMEN
Might feed on ants, aphids,caterpillars, centipedes,earthworms, earwigs,froghoppers, harvestmen,millipedes, slugs, snails,spiders, springtails
Might feed on ants, aphids,caterpillars, earthworms,earwigs, ground beetles,harvestmen, millipedes,spiders, springtails, woodlice
Might feed on ants, aphids,caterpillars, centipedes,earwigs, froghoppers, ground beetles, harvestmen,millipedes, springtails
Might feed on ants, aphids,caterpillars, centipedes,earwigs, froghoppers, groundbeetles, harvestmen,millipedes, springtails, woodlice
Feed on nectar and honeydew from aphids. Might eatcaterpillars, earthworms,earwigs, froghoppers,ground beetles,harvestmen, spiders,springtails, woodlice
ANTS
Might feed on ants, aphids,caterpillars, centipedes,earthworms, earwigs,froghoppers, harvestmen,millipedes, spiders, springtails
Eats nuts, berries, might eatcaterpillars, centipedes,earthworms, earwigs,froghoppers, ground beetles,harvestmen, millipedes,slugs, snails, spiders
Might eat ants, caterpillars,centipedes, earthworms,earwigs, froghoppers,ground beetles, harvestmen,millipedes slugs, snails,spiders, springtails, woodlice
Might eat earthworms,ground beetles, rabbits,shrews, woodmice. Likesfallen fruit such asblackberries

31 Plants in their natural environment© SAPS/FSC 2016
Background information for teachers These notes are provided to give teachers the background they may need when teachingthese topics on plants. The vocabulary and words used are botanically correct. It is alwaysadvisable to keep closely to the standard terminology so that pupils have a firm foundationto build on and don’t have to ‘undo’ their learning and vocabulary at a later stage.However, it is not intended that you pass these notes on to pupils in the form presented here.
Factors that influence organisms in their environmentIf we look at a pond or woodland, sand dune or even a sandy desert, we recognise very different plants andanimals making up the communities of living organisms in these different areas. We may look first tosee what the different organisms are (in other words name or identify them), but soon we may ask thequestions ‘Why are the organisms different?’ and ‘What factors influence organisms in their environment?’.
Plants and animals show adaptations that enable them to live well in their particular habitat. A plantfrom a pond would be unlikely to survive in a sandy desert and typical desert plants would be unsuitedfor life in a pond.
A number of factors influence the organisms found in a particular habitat. These include:
• non-living (‘abiotic’) factors – such as light (shady or bright light), temperature, water, wind, pH (acidor alkaline soil), soil characteristics, amount of oxygen (e.g. in a wet habitat).
• living (‘biotic’) factors – such as the effect of other plantsgrowing nearby (hence competition for light, nutrients inthe soil), effects of other animals(including humans).
Any living organism is affected by a variety of factors in its habitat. Even though we look at particularfeatures that help a plant to survive in a habitat, it is important that children understand that manyfactors contribute. It may be relatively easy to tease out features that help survival in extreme habitats(such as the desert or pond referred to above), but it is often harder to become aware of adaptationsin the less extreme habitats that children are likely to become familiar with. At this level, the teacheris not expected to be able to give all the answers, but rather help children to become aware of theinteraction of different factors, both living and non-living.
Look, it’s gottendrils. If we putit by the wall it can
climb up
This needs sun –let’s put it in the
field
But the rabbitswill eat it there
This is all floppy. It needs proppingup to reach the
sun
We can guard it if we put it closerto the classroom
Why don’t we put it by the stream under
the trees
Have you decided where toput your plants,
children
But it will sink! And there’s no
shade
Ferns like shady wet places, let’s putit in the pond
Where should our plants go? This cartoon helps draw attention to ways children might discuss various factors and featuresand come to realise that different plants have different requirements. (This cartoon is available on the SAPS website.)

32Plants for primary pupils 6© SAPS/FSC 2016
Background information for teachersFeeding relationships - food chains, food webs andenergy transferLet’s start with the food on a plate for a typical meal. There is likely to be some vegetable (such ascarrots, peas, lettuce, potatoes). Vegetables come from plants. There’s probably also some meat (orfish). The meat comes from an animal and the animal almost certainly ate plants. Even if the animalhad been fed on artificial ‘feed’, the origin of this would have included plant material.
So we can write down a ‘food chain’ for some of the food on this plate.
Example A grass chicken human
Children easily grasp the idea of a food chain. Here is a familiar example from a garden.
Example B cabbage snail thrush (bird)
The bird may be eaten by a larger animal (say a sparrowhawk), so we can add one more stage to thisfood chain.
Example C plant snail thrush sparrowhawk (bird)
In the natural environment, there are many food chains, and these form the basis of feedingrelationships of different organisms, plants and animals.
In the examples above, note the direction of the arrows. For the children, they understand that thearrows mean ‘is eaten by’, but it is important to understand that the arrows show the direction ofenergy flow.
Most food chains start either with a (green) plant or with dead plant material. We know that plantsuse energy from sunlight to build up food (starting with carbohydrate) (see booklet 4: Living processesand what plants need to grow). So when an animal feeds on a plant, some of the energy is transferredfrom the plant to the animal. Similarly, when an animal (e.g. a fox) eats another animal (e.g. a bird),energy is transferred from the bird to the fox. This energy came through the chain from the plant (andoriginally from sunlight).
At each stage along a food chain, some energy is lost and not transferred to the next animal in thechain. Energy is lost for various reasons – sometimes only part of the plant or animal is eaten (woodyparts or bones cannot be digested), some energy is lost through movement or as heat, some is lost inexcretory materials. This helps explain why food chains are rarely longer than four or five organisms– by the fifth organism, there would be very little energy to pass on to another one.
Sometimes a food chain does not start with a living plant, but with dead material (from plant or animalorigin). It may be ‘eaten’ by animals, such as earthworms, which can digest the material and obtainenergy from it. This energy then gets passed along a food chain when an animal eats the earthworm.Such organisms are described as detritivores and they play an important part in the stages ofbreakdown of material and formation of soil. Other examples of detritivores include woodlice andspringtails.
This dead material may decay – i.e. be decomposed – by the feeding activities of, for example, fungi orbacteria. These microorganisms are known as decomposers and they play a very important part inreleasing nutrients (including mineral salts) from the materials in the soil. The microorganisms candigest and absorb food materials from the dead remains, and so some energy is passed on, from thedead material to the microorganisms. The mineral salts then become available in the soil and can betaken up by plants and used for growth of the plant.
Ë Ë
Ë Ë
Ë Ë Ë

33 Plants in their natural environment© SAPS/FSC 2016
Let’s go back to example C and look at another similar example of a food chain. This time we arrangeit vertically, as shown below. This helps us see the ‘feeding levels’ (also known as ‘trophic levels’) forthe different organisms. The arrows again represent the direction of energy flow.
The diagram introduces other terms that can be used to describe the feeding relationships of particularorganisms. Some of these are already familiar to children. They probably know the terms herbivoresfor animals that eat plants and carnivores for animals that eat other animals. Other less familiar termsare that plants are known as producers because they produce food (by photosynthesis); animals areknown as consumers because they consume (eat) other organisms – either plants or other animals.These terms are summarised below.
ËË
Ë
Feeding (trophic) level
tertiary consumer
secondary consumer
primary consumer
producer
Description
(top) carnivore
carnivore
herbivore
producer
Food chain C
robin eats spider
spider eats grasshopper
grasshopper eats grass
grass (produces food by photosynthesis)

34Plants for primary pupils 6© SAPS/FSC 2016
In the real world, a simple food chain gives only part of the story. Each animal may feed on more thanone type of plant and each animal may also be eaten by several different animals. The food chainsintermingle and link with each other. They can then be represented by what is known as a ‘food web’.An example of a food web is shown in Figure 8.
Figure 8. A simplified food web.
Beetle
Owl
Shrew
Caterpillar
Worm
Earwig
Living and dead plants

35 Plants in their natural environment© SAPS/FSC 2016
Background information for teachersSecrets of the soilThis diagram is linked to the Pupil Sheet on page 23 and provides guidance to teachers when discussinghow soil is formed.
SOIL IS FORMED
Animal and plant material falls ontothe soil surface
Animals in thesoil and leaflitter help tobreak up thismaterial intosmaller pieces
Rocky material under the soilbreaks up into smaller pieces
Animals and plant roots burrowthrough the soil, mixing up allthe ingredients
Bacteria andfungi(decomposers)in the soilrelease mineralsalts from plantand animalmaterial
How soilis formed
Rain water soaksinto the soil

36Plants for primary pupils 6© SAPS/FSC 2016

© SAPS/FSC 2016
The FSC (Field Studies Council) is
an independent educational charity
formed in 1943 to help people
discover, explore, understand and be
inspired by the natural environment…
‘bringing environmental understanding
to all’.
Over the last 60 years the FSC has
touched the hearts and minds of
individuals of all ages through
fieldwork and courses at our network
of Field Centres throughout the UK,
work overseas and the
production of
publications and
educational resources.
The FSC
also offers a
programme of
leisure
learning for
adults and
families.
For general enquiries and details of
FSC courses please contact:
FSC Head Office
Preston Montford, Montford Bridge,
Shrewsbury, Shropshire SY4 1HW, UK
T 01743 852 100
W www.field-studies-council.org
FSC Publications
Unit C1, Stafford Park 15, Telford
TF3 3BB, UK
T 0845 345 4072
W www.field-studies-council.org

© SAPS/FSC 2016
Plants in the natural environment is thefifth and final theme in a series ofbooklets developed to support primarypupils learning with and about plants inEngland, Wales, Northern Ireland andScotland. In this booklet, children areencouraged to look at groups of plantsliving together in a habitat. Childrenmake observations that help them tounderstand how and why the habitatsare different, how the plants aredifferent, which factors influence theplants that are growing there and theways that plants and animals aredependent on each other. There areactivities in the booklet that provideopportunities for development of skillsin numeracy, ICT and literacy and itincludes some that are fun but at thesame time reinforce pupil learning andhelp them to be ready to move on tothe next stage.
Field Studies CouncilPreston Montford, ShrewsburyShropshire SY4 1HWwww.field-studies-council.org
Science and Plants for Schools Cambridge University Botanic GardenCambridge CB2 1JEEmail: [email protected]
www.saps.org.uk