Embed Size (px)
Citation preview
POINT CLOUD PROCESSING
August 19-20 Northern California Bentley Bash 2011
UC Berkeley Taught by:
Berkeley, CA Mike Lazear
Point Cloud Processing
Page 1
Point Cloud Processing N O R T H E R N C A L I F O R N I A B E N T L E Y BA S H 2 0 1 1
Contents
ABOUT POINT CLOUDS ............................................................................................................ 3
FILE HANDLING ........................................................................................................................ 4
Using Project Files .............................................................................................................................. 4
Importing Cloud/Scan Data.............................................................................................................. 4
POINTOOLS EDIT INTERFACE AND TOOLS............................................................................. 5
Menus................................................................................................................................................... 5
Toolbars .............................................................................................................................................. 5
Object Browser ................................................................................................................................... 5
Selection Tab ...................................................................................................................................... 5
Painting Tab........................................................................................................................................ 5
Stack .................................................................................................................................................... 5
NAVIGATING THE INTERFACE ................................................................................................ 6
Using the Mouse ................................................................................................................................. 6
Hotkeys ................................................................................................................................................ 6
View Controls...................................................................................................................................... 6
Configurations .................................................................................................................................... 7
Settings/Display Options .................................................................................................................. 7
Exercise 1 ......................................................................................................................................... 8
RECOLORING THE POINT CLOUD ......................................................................................... 10
Brushes ............................................................................................................................................... 10
Color Picker ...................................................................................................................................... 10
Blending Options .............................................................................................................................. 10
Exercise 2 ....................................................................................................................................... 10
VISUALIZING THE POINT CLOUD .......................................................................................... 11
Measuring ......................................................................................................................................... 11
Annotations ....................................................................................................................................... 11
Snapshots .......................................................................................................................................... 11
Exercise 3 ....................................................................................................................................... 11
Point Cloud Processing
Page 2
Exercise 4 ....................................................................................................................................... 11
ANIMATING THE POINT CLOUD............................................................................................ 12
Animations ......................................................................................................................................... 12
Rendering .......................................................................................................................................... 12
Timeline and Graph Editor.............................................................................................................. 12
Exercise 5 ....................................................................................................................................... 12
SEGMENTING THE POINT CLOUD .......................................................................................... 13
Working with Layers........................................................................................................................ 13
Clip Box ............................................................................................................................................. 13
Editing the Clipbox........................................................................................................................ 13
Grid ................................................................................................................................................... 14
Exporting ........................................................................................................................................... 14
Exercise 6 ....................................................................................................................................... 14
Exercise 7 ....................................................................................................................................... 14
REUSING THE POINT CLOUD ................................................................................................. 15
MicroStation ...................................................................................................................................... 15
Pointools Plug-ins .............................................................................................................................. 15
AutoCAD ......................................................................................................................................... 15
Revit ................................................................................................................................................ 15
Rhino................................................................................................................................................ 15
SketchUp......................................................................................................................................... 15
Point Cloud Processing
Page 3
ABOUT POINT CLOUDS A point cloud is a set of points that each has corresponding coordinates in 3D space. With millions or billions of points, the point cloud takes the form of a 3D model without having any actual solid geometry. It is an extremely useful way to capture existing conditions of a building or area of land without taking the time to model or survey it.
Point clouds are getting a lot of recognition in the CAD world with all of the major CAD software now incorporating point clouds into their software. However, all of the CAD programs act only as viewers of the point cloud. There needs to be some way to process the point cloud prior to bringing it into those programs and work with it. That is where Pointools comes into play. Pointools handles all major file formats for scan data and has plug-ins to CAD programs to offer incredible performance of the point cloud in the CAD software.
A typical workflow with point clouds is a 5-step process that includes capture, convert, process, reuse and collaborate. There are many different 3D laser scanner types (and even more manufacturers) that can be used to capture the data. Phase-based and time-of-flight are the two different types of static (or stationary) scanners. There are also mobile scanners like StreetMapper or MobileMapping, where the scan is taken while driving along a road. LiDAR data is collected by flying over an area of land.
Pointools does not deal with the capturing of data, but from that point on Pointools is involved in the point cloud workflow. Each manufacturer has its own data file format and each one is limited in the number of programs that can read that file. If you wish to use the scan data in a different program (like a CAD program for instance), you would need to convert that file for each program so that you can use it. These files are GB’s in size and take hours to translate. Thankfully, Pointools reads in all the major scan data file formats so you only need to convert to the POD file once.
Once you have your data in a usable file format, it’s time to process the point cloud. Processing is the major topic that this class will cover. It is the editing, segmenting and recoloring of the point cloud that gets it ready to be used by the CAD technicians. Pointools Edit is responsible for all of the point cloud processing done by Pointools.
The major benefit to using Pointools is that you can then reuse that same point cloud (in the same format) in the different CAD software from Bentley, Autodesk, Rhino and SketchUp. Pointools’ plug-ins for these software programs allow you to use your POD file in more applications than any other file format available. Not only can you use it in more places, but bringing the point cloud into the CAD program you already know means you don’t have to spend time learning new tools and interface just to incorporate point clouds into your workflow.
Finally, when all is said and done, you want to collaborate on projects with other project team members and show them your point cloud and/or 3D model. You can show them either, or both, using Pointools Edit to visualize and animate your point cloud scene with 3D geometry imported in as well.
Point Cloud Processing
Page 4
FILE HANDLING
Using Project Files
Pointools stores the current project settings, configurations, tool states and animation setup in project files. This includes all cameras and references to all loaded objects as well as some user interface settings.
Impor ting Cloud/Scan Data
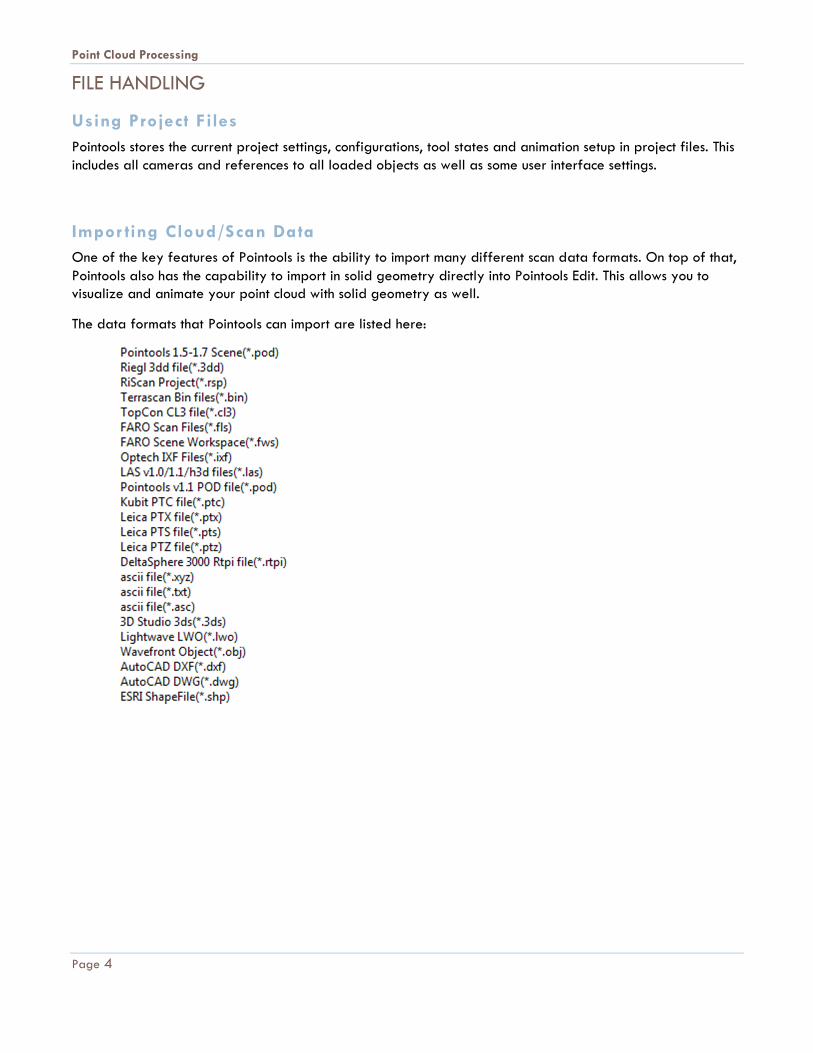
One of the key features of Pointools is the ability to import many different scan data formats. On top of that, Pointools also has the capability to import in solid geometry directly into Pointools Edit. This allows you to visualize and animate your point cloud with solid geometry as well.
The data formats that Pointools can import are listed here:
Point Cloud Processing
Page 5
POINTOOLS EDIT INTERFACE AND TOOLS
Menus
The menus along the top of the interface are very typical Windows-style menus. All of your tools can be found under these menu items as well as the standard file options and properties.
Toolbars
The toolbar just below the menus is a categorized icon-based toolbar. If you click on any of the headings (File, View, Zoom, Align, Tools, Clip, Shader, Points, Grid, Notes or Settings), you will collapse/expand that set of tools.
Object Browser
Objects in the workspace are managed via the objects browser. The interface is docked on the left side of the screen. The entire panel can be collapsed and expanded using the collapse icon on the top right of the panel and the vertical bar to expand. It can also be resized by dragging it in or out from its right edge. This can be useful to give a larger viewport area.
Selection Tab
The selection tab is always docked on the right side of the screen and houses all of the selection brushes, modes and visibility options. The selection tools allow you to segment the point cloud into usable parts or clean up scan noise from the data.
Painting Tab
The painting tab is also docked on the right of the screen and has all the tools for recoloring the point cloud. Many point clouds contain RGB data that correspond with the real-world color of those points. Pointools Edit enables you to recolor those points. All of the tools to do that, including brushes, blending options, a color picker and color palette, are all found on the painting tab.
Stack
The stack is the history of edits you have made to your project. You can undo edits by deleting them from the stack.
Point Cloud Processing
Page 6
NAVIGATING THE INTERFACE
Using the Mouse
Pointools' controls have been designed to give you full navigation using the mouse only (if you have a three button mouse). If you have a 3 button mouse:
� The Left Mouse Button (LMB) Rotates the view around the target
� The Middle Mouse Button (MMB) Pans the view
� The LMB+RMB Zooms in or out
� The mouse scroll wheel zooms in and out.
If you have a 2 button mouse:
� The LMB Rotates the view around the target
� The LMB+RMB Zooms in or out
� To Pan, switch into pan mode by clicking on the Pan icon in the View toolbar or press 8 and use the
LMB. You can switch back to Free Navigation mode by pressing 0.
The Right Mouse Button (RMB) will drop whatever tool you are currently in.
Hotkeys
The first hotkey you should learn is F2. This brings up a list of the hotkeys so that’s really the only one you need to remember.
Other hotkeys that are extremely useful are x and Alt. Pressing x will set your center of rotation to the location of your cursor. This is very handy because Pointools does not zoom in and out based on the location of your cursor. It uses a fixed center of rotation that can only be changed by using the x hotkey or by using the pan tool to move your location.
Alt is used while you are in a command or tool. If you need to navigate around the point cloud while you are in a command, holding down the Alt key will allow you to navigate freely while still being in that command.
View Controls
In the top left corner of the view window there are two drop down menus that are responsible for different view controls. The left menu (which defaults to Perspective) has options for Perspective, Orthographic and all the pre-defined views. It also has options to set the camera position and target position.
The right menu has three viewing options: Examine, Explore and Light Direction.
The default mode is Examine. Viewing in Examine mode allows you to rotate the camera about the target point. It is equivalent to rotating the scene around in your hand to look at it from different angles.
In Explore mode, however, the camera is rotated instead of the scene around the target. The effect is more like a first-person view so when you rotate with your mouse you are rotating your view. This is useful when you
Point Cloud Processing
Page 7
want to get the feeling of ‘walking’ or exploring the scene as a viewer. Light Direction mode just allows you to set which direction the light is shining for viewing the scene and/or models with shadows.
Configura tions
The configuration manager enables sets of configurations to be stored in the project file. A configuration is the combination of the following components:
� All settings under the Point Cloud tab of the Settings dialog � Clip-box settings � Camera settings � Light settings
The configuration manager is found on the toolbar under the Settings heading or on the menu bar under Tools.
Settings/Display Options
There are several different options available for viewing the point cloud. Most of them deal with the colors that are displayed on screen.
The RGB filter displays all the points along with their RGB values. The RGB data is collected by the 3D laser scanner, although not all scanners have this functionality. It allows you to view the point cloud as it is seen in reality.
The Intensity filer displays the points along with their intensity values. The intensity value is based upon the reflectance of the laser that is captured by the scanner.
The Blending option can be used when both RGB and Intensity data are available. The blending filter displays a blend of the two shading models. This may be used to enhance the visual quality of the data.
For your basic viewing needs, the Points toolbar allows you to toggle all of the display options. It not only toggles between RGB/Intensity, but there are also toggles for the height shader and point size.
Pressing S brings up the settings menu where, under the Point Cloud tab, all of these settings can be found.
Point Cloud Processing
Page 8
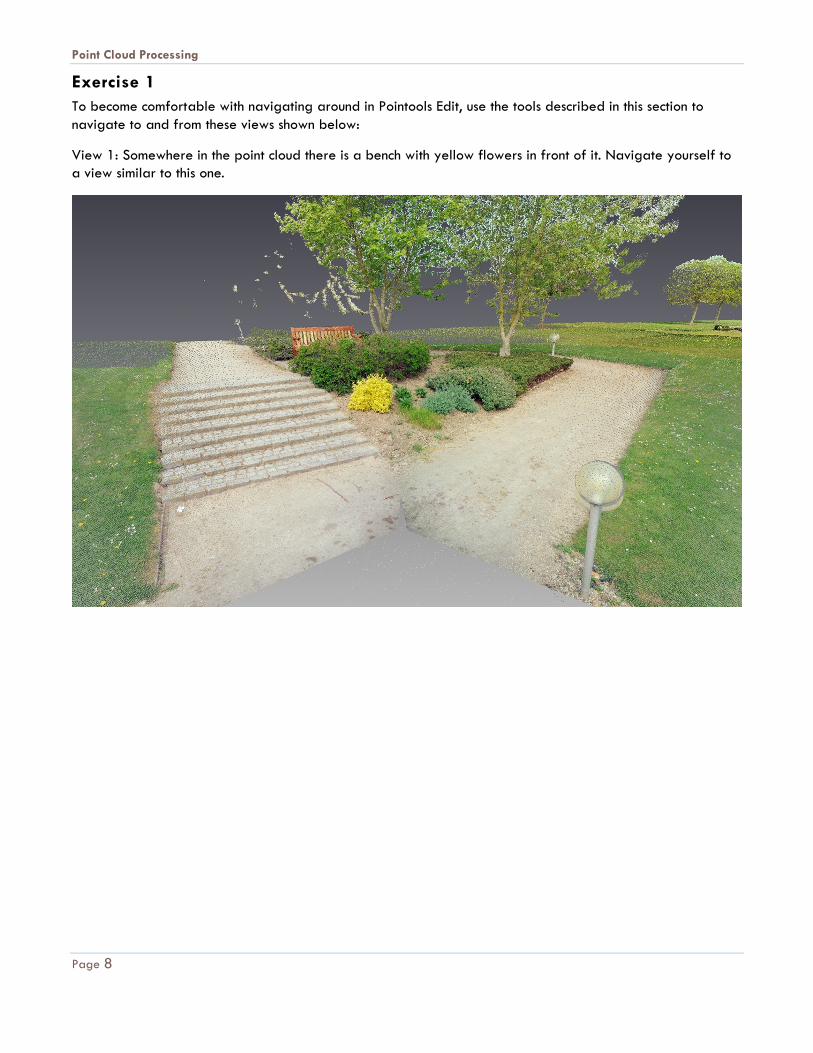
Exercise 1
To become comfortable with navigating around in Pointools Edit, use the tools described in this section to navigate to and from these views shown below:
View 1: Somewhere in the point cloud there is a bench with yellow flowers in front of it. Navigate yourself to a view similar to this one.
Point Cloud Processing
Page 9
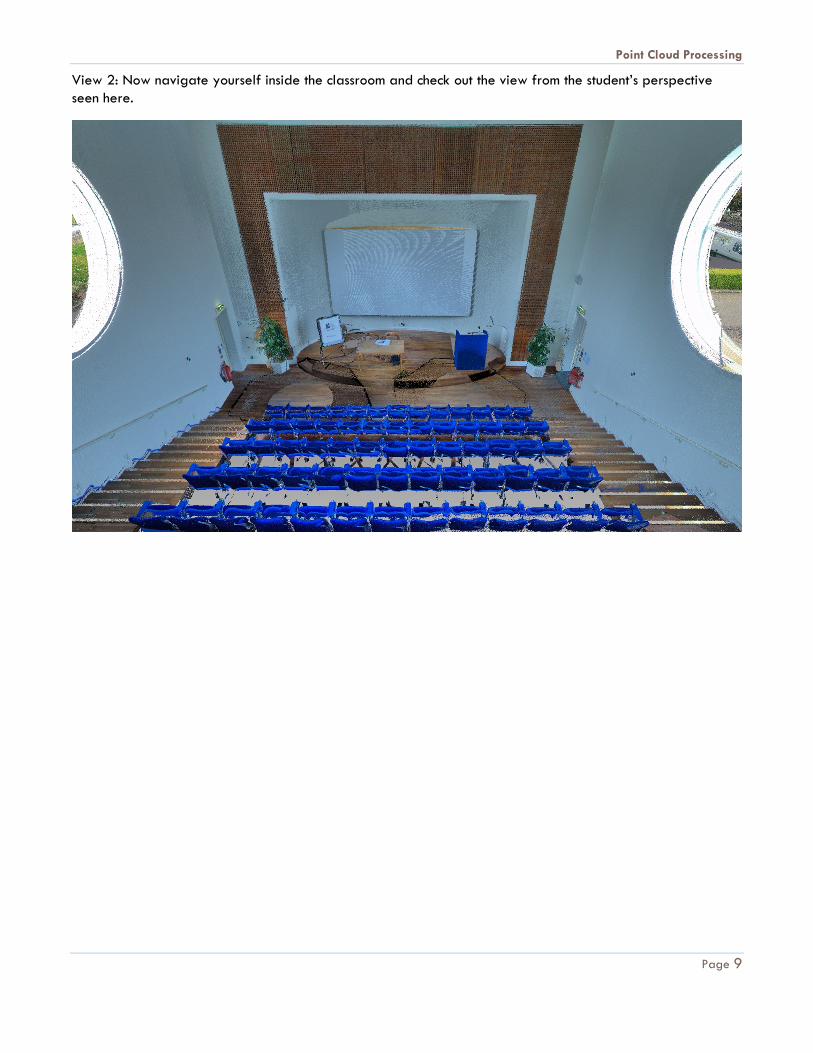
View 2: Now navigate yourself inside the classroom and check out the view from the student’s perspective seen here.
Point Cloud Processing
Page 10
RECOLORING THE POINT CLOUD
Brushes
There are a couple options for brushes to paint with: the 3D cube brush and 3D ball brush. The 3D ball brush is typically the most used brush. Both are very intelligent brushes because the first click you make when you start to paint sets the depth of your brush. You are then only painting on that depth so you don’t recolor points that may be behind the object you are recoloring.
Color Picker
The color picker can be used when you want to use a color that is already in the scene as your painting color. Once you select the color picker, you will notice that as you mouse over the points in the scene, the color picker will change colors to match the point you are currently hovering over.
Blending Options
The blending options allow you to blend the colors of the RGB data with your new paint color in various ways. These options are very similar to Photoshop’s blending tools.
Exercise 2
1. Navigate to the bench and the yellow bushes or use the Configurations manager and apply the bench configuration.
2. Using the 3D ball paint brush, recolor the yellow bushes to your favorite color. 3. On the painting tab, click Reset RGB Editing to set the bushes back to yellow. 4. Use the color picker to select a color from the green bushes next to the yellow and use that color to
repaint the yellow bushes. 5. The bushes should now all blend in together.
Point Cloud Processing
Page 11
VISUALIZING THE POINT CLOUD
Measuring
There are two measure tools available, point information and point to point measure. You can access these tools from the toolbar, the menu or by using the keyboard shortcuts. Pointools currently allows measurement operations to use points of point clouds and endpoints of drawing entities.
Annotations
Notes can be attached to objects within the workspace providing a convenient way to annotate a scene. A note can also include a hyperlink making it possible to link web pages, files or configuration settings into a project. Notes can be exported as a text (CSV) or HTML file with an embedded image.
Snapshots
You can take a snapshot of your current view (or a specified location) in Pointools Edit and save it out as an image file. There are a host of options that you can alter in order to get the resolution, file type, and other effects that you desire. Make sure to name your snapshot something in the Tools > Snapshot Options dialog before actually taking the snapshot.
Exercise 3
1. Use the Measure distance between 2 points tool (under the Tools toolbar), and calculate the length of the building.
Hint: Remember to hold Alt while in a command to navigate around.
Exercise 4
2. Navigate to the backside of the building, with a good view of the white tower. 3. Click on the Add Note tool on the Notes toolbar. 4. Place the note somewhere on the exterior wall of the white tower. 5. Add a caption and/or description to your note. 6. Click the … to the right of the hyperlink line. This should bring up another dialog to create the
hyperlink. 7. Where it says Internet URL, select File (relative) and then click on … to the right of File. 8. Navigate to the Point Cloud Processing folder on your CD. There should be a .jpg image named
Moller Centre Tower. 9. Open the image and click OK on the Create Hyperlink dialog. 10. The file path should now show up next to Hyperlink in the Add Note dialog. Click OK.
Point Cloud Processing
Page 12
ANIMATING THE POINT CLOUD
Animations
The animation system in Pointools Edit is based on interpolation between keys placed on a Timeline. If you've worked with Timelines in other animation software you'll find the Pointools' animation system intuitive and easy to get to grips with since most of the key concepts are the same.
If this is the first time you've attempted setting up Timeline based animation, the interface may look a little daunting at first but with some understanding of the basic principles it shouldn't take a long time to start producing movies.
Using the Animation Wizard, you can very easily set up animations of your point cloud. Pointools utilizes key framing, meaning you select the series of key frames that you would like the animation to go through and it automatically generates a smooth camera path for the animation. You can then modify the camera path and key frames to create the desired animation.
Rendering
There are many different rendering and animation options for you to create high-quality animations. You can set the resolution to almost any resolution you want and that includes high-definition (1920x1080). You may also use many different codecs including ones already installed on your computer.
Timeline and Graph Editor
Below the layers tab, the Timeline represents the time over which various parameters can change i.e. be
animated. To animate a parameter, let’s say the camera's Z position from 2m to 12m over 10secs we would
place two keys on the Timeline, 10 seconds apart and representing the values 2m and 12m. The animation
system then interpolates between the two keys to produce a smooth animation of the parameter value. This is the basis of key frame animation.
Note that the values along the Timeline are frame numbers and not seconds. The translation into time will
depend on the current Frames per Second (fps) setting of the animation. Fortunately you don't have to be continuously doing this calculation yourself as the current frame and time code are shown in the bottom left
corner of the Timeline.
Exercise 5
1. Set up an animation using the Animation Wizard. 2. Navigate to the key frames you wish to use, or use the configurations manager to also use those saved
views. Enter those positions. Then click Next. 3. You can choose to change the fps or the duration. Then click Next. 4. Choose Try to keep speed constant in the Animation Wizard. 5. Select Finish and Create Keys.
Point Cloud Processing
Page 13
SEGMENTING THE POINT CLOUD
Working with Layers
Pointools utilizes a layers approach where you can move points onto 7 separate layers. However, these are not exactly like CAD layers with one type of object or geometry on each layer. The layering in Pointools is more similar to “working layers” in a CAD application.
Clip Box
When viewing large or complex point cloud scenes, it can be helpful to isolate the area (or volume) of interest. Pointools enables this via the editable clip box tools. Points that fall outside the clip box are hidden.
The clip toolbar contains all icons for the clip box commands.
Editing the Clip box
To edit the clipping box position and size:
1. Start the clip box tool. Select the Edit clip box command from the Clip toolbar.
2. This displays the clipping box as a transparent box. If this is the first time the tool has been activated in the current session, the box will expand to fit the area of point cloud.
3. Click and hold the round handles to drag the sides of the box to isolate the area of interest.
Note that clipping is not yet in effect.
4. You can rotate the clip box in the Z axis by using the outer orbit handle.
5. To turn on clipping use the Clip icon in the Clipping toolbar or the Toggle clipping button. Point data outside the box is now clipped out.
6. You can adjust the box further, point data will be clipped out in real-time.
7. Alternatively use the input boxes on the clip box dialog to enter the Range or Size of the box.
8. Right click or click OK to drop the Edit Clip Box tool once the clip box is set.
Use the Extents button to reset the clip box to the extents of the data.
The Align 2 Points button enables rotational alignment of the clip box to a line defined by 2 points. Simply select the start and end points of the line you want to align to and the clip box will be rotated accordingly. These points can be cloud points or endpoints of drawing objects.
Note that the alignment is unaffected by the Z position of the points since the rotation itself is in the Z axis.

Point Cloud Processing
Page 14
Grid
The grid feature enables you to grid up the point cloud into sections using a fixed-sized bounding box. This is useful to keep track of which portion of the point cloud you want to work with. The grid works in the x and y directions, and the size and number of grid sections can be set manually.
Expor ting
Exporting is useful when you grid your point cloud or segment it onto different layers. You can export any of these sets of points as their own point cloud for reuse within CAD applications. You also have the option to change the density of the exported cloud and the spacing between points. For this tutorial, I used both of those options to decrease the size of the POD file.
You can also export the notes in your project as either a .txt file or an .html file.
Exercise 6
1. Follow the steps under the Editing the Clip Box section in this chapter to create a clip box. 2. Create the clip box around the classroom (the one with the interior also scanned). 3. Use your selection tools to select all the points that make up the classroom. 4. Click on Layer 3 on the Layers tab. 5. Click Move Points to move the selected points to the 3rd layer. 6. Click where it says Layer 3 to rename it to “Classroom.”
Exercise 7
1. Open MicroStation V8i SS2. 2. Create a new file and name it whatever you like.
Note: Make sure that you are using a 3D seed file. 3. Under the File menu, click on Point Clouds. This will open the point cloud manager. 4. Click on Attach to attach a point cloud. 5. In the Open dialog box, navigate to the tutorial folder on your desktop. 6. Select the classroom.pod file and click Open. 7. Fit your view and you should see the point cloud in MicroStation.
Point Cloud Processing
Page 15
REUSING THE POINT CLOUD
MicroSta tion
Bentley has licensed Pointools’ Vortex platform, so all of the point cloud handling within Bentley products utilizes Pointools’ point cloud engine. This also means that all of the tools associated with point clouds are integrated directly within the Bentley software.
Pointools Plug-ins
On the flip side of having Pointools integrated into Bentley products, Pointools has created their own plug-ins for various CAD applications including AutoCAD, Revit, Rhino and SketchUp. Pointools either adds or enhances the capability to handle point clouds to all of the major 3D CAD applications.
AutoCAD
With AutoCAD 2011 and forward, Autodesk has added the capability to handle point clouds natively using their PCG point cloud engine. It is currently limited to displaying 1.5 million points on screen at any given time and also decimates the point cloud greatly when you navigate around.
Pointools’ plug-in for AutoCAD utilizes their Vortex engine, which allows you to see all the points all the time no matter how large the file. This is extremely useful when you are working with larger datasets and need to be able to visualize the entire point cloud.
Revit
The plug-in for Revit is currently in the final development phase and is scheduled to be out later this year. Revit 2012 (much like AutoCAD) now handles point clouds natively but again is using the same engine that AutoCAD is currently using. Pointools enhances your point cloud capability by using its own engine.
Rhino
The combination of Rhino and Pointools is perfect for many 3D CAD users who also work with point clouds. Having Pointools to handle the large amounts of data associated with point clouds and Rhino to mesh point clouds or create 3D geometry, it’s a no-brainer that so many people are using these tools together to streamline their workflow.
SketchUp
Google SketchUp is a free, 3D modeling software that is very simple to use and great for new 3D users. Pointools adds the capability for SketchUp to handle point clouds with their plug-in as well as sectioning tools to help you visualize only what you want to see.