Embed Size (px)
Citation preview


POLYGON // CREDITS
SOFTWARE DEVELOPMENT:
Thomas Hennebert : WEBSITE
Ivo Ivanov : WEBSITE
SOUND DESIGN AND SAMPLE CONTENT:Ivo Ivanov : WEBSITE
PRESET DESIGN & BETA TESTING:
Thomas Hennebert : WEBSITEIvo Ivanov : WEBSITEDaed : WEBSITE Nicholas Yochum : WEBSITESubjex (Matt Debliqui) : WEBSITEValance Drakes : WEBSITE
AUDIO DEMOS AND TUTORIAL VIDEOS:
Ivo Ivanov : WEBSITE
PRODUCT GRAPHICS:
Valentin Rodriguez
This symbol refers to important technical info
This symbol refers to a tip, idea or side note
GLITCHMACHINES ® POLYGON 1.3

LEGAL:
Piracy directly affects us! We need your support to be able to continue to bring you new products - please do not share our plugins and packs illegally.
For full Terms & Conditions, please refer to the EULA (End User License Agreement) located in the DOCS folder with this product or visit the Legal page on our website.
Glitchmachines ® https://glitchmachines.com
SETUP:1. Unpack the GM_POLYGON .zip file
2. Via the POLYGON_INSTALLERS folder, run the installer for your system.
a) Windows Users : please take care to ensure that you’ve chosen the proper options during the installation dialog, where you’ll be prompted to choose the destination folders for the 32bit and 64bit versions of the plugin. In the event that the plugin does not appear in your DAW, it’s highly likely that you put both versions in the same folder in which case one of the files will overwrite the other. To correct this, run the installer again and carefully select the appropriate folders for each architecture.
b) Mac Users: Note that there is a separate installer for the factory presets, which you should run if you wish to install the presets on your system. A system restart may be necessary before the plugin appears in your D.A.W.
3. Manually place the entire GM_POLYGON folder in any location of your choosing such as an internal or external hard drive where you store your samples.
4. Launch your VST or AU D.A.W. and load POLYGON on an Instrument Track.
5. Follow the prompt and point to the location of the GM_POLYGON folder.
a) Upon first launch, you will see a popup that prompts you to point to the GM_POLYGON folder in your system. Polygon will remember this path so that your presets & samples can load properly. Should the folder ever need to be moved, simply navigate to the Global Configuration Menu (M button in the Global Section) and use the “change polygon path” command to point to the folder in its new location.
6. Load and trigger (via MIDI - i.e. with your keyboard controller or equivalent) some of the factory presets in order to confirm you’re hearing audio.
If you require tech support, you may reach us at: [email protected]
GLITCHMACHINES ® POLYGON 1.3

POLYGON DESCRIPTION:Polygon is a new sampler plugin designed to facilitate the creation of stunning composite sound effects. Co-developed by Ivo Ivanov and Thomas Hennebert, Polygon was conceived from the ground up with unconventional attributes and a fast, forward-thinking workflow.
Layering samples is only the beginning. Polygon’s unique granular mode will bend your samples into fresh material while its clean and logical interface, extensive modulation options and distinctive sonic fingerprint make it an invaluable tool for creative sound design.
At the heart of Polygon, you will find 4 Sampler modules featuring a granular mode and various play and loop modes with focus and loop range sliders. The modules are supported by 8 LFOs, 4 modulation envelopes with variable slopes, two multi-mode filters, three effects processors, a sub oscillator and various global parameters. All of Polygon’s components work in conjunction with its modulation matrix to allow you to achieve extremely dynamic results with relative ease.
The sub oscillator is effectively Polygon’s 5th voice. It was implemented to reinforce Polygon’s final output with the often needed mass and impact of low frequency content. To increase flexibility, this oscillator can operate in either sine and square wave mode with pulse width modulation, offers filter and effects routing options and is fully integrated into the modulation matrix. As with any of the sampler modules, the sub oscillator can easily be deactivated when needed.
Polygon’s sound set was compiled to facilitate the broadest possible range of sonic flexibility. Its core is driven by a 1.2 GB sample pack comprised of brand new material and previously unreleased alternate edits from our entire range of sound ware products. To get you started, we included factory presets from Ivo Ivanov, Thomas Hennebert, Nicholas Yochum, Daed and Subjex. Load any of your existing samples and listen as Polygon takes things in exciting new directions.
Whether you are a music producer or sound designer, Polygon will yield interesting results each time you work with it, thanks to its creative workflow and comprehensive modulation options. Use it to create shape-shifting synth patches, heavily modulated basslines, vivid atmospheres, glitchy percussive elements, cinematic drones and virtually anything else you can imagine. Let Polygon breathe new life into your samples and take your sound design to the next level.
GLITCHMACHINES ® POLYGON 1.3

SAMPLE CONTENT OVERVIEW:
We have included a 1.2 GB sample pack with Polygon. This pack consists of a wealth of brand new material, of which a particular highlight are the completely raw field and Foley recordings in the “Raw” folder. This is the first time we’ve ever included a collection of fully unprocessed sounds for you to work with.
Polygon’s sample collection is also packed with previously unreleased alternate versions of sound effects from our entire range of sample pack products! This not only makes Polygon’s sound set extremely versatile, but it’s also a great way to experience our sound effects if you’re unfamiliar with the rest of our products.
The Polygon sample pack is comprised of 4 sound categories:
• COMPOSITE: Composite sound effects • HYBRID: Processed Foley and field recordings• RAW: Unprocessed Foley and field recordings• SYNTHETIC: Software and hardware synth sound effects
In the context of Polygon, we like to think of samples as a collection of ingredients from which you can craft your patches. As such, when you are designing sounds, it is helpful to take things like texture, frequency content, energy and motion into consideration. Polygon makes it easy to focus on specific portions of samples, so it’s important to consider that even a fraction of a sample could be useful for an element in your patch.
Of course this extends well beyond the included pack; you can load any of your existing samples into Polygon. To take you even further, take a look at our many FREE and paid sample pack products.
We generally choose not to put our final sounds through a mastering process, leaving their dynamic range intact. This effectively makes them vastly more pliable and adaptable to your productions. This is particularly relevant inside Polygon, as you will find that even the full composite sounds can be manipulated beyond recognition with plenty of room for further processing and experimentation.
You may wish to use the samples in Polygon’s library inside your DAW or other devices. We fully encourage this, as Polygon’s library is perfectly suitable to stand on its own.
GLITCHMACHINES ® POLYGON 1.3

POLYGON PLUGIN OVERVIEW:
With Polygon, we set out to create a software instrument with a distinctive character and a fast, creative workflow. From the beginning of the development cycle, we ignored trends to pursue our own vision of how the plugin should look, sound and work. Because we prefer minimal aesthetics and a tidy, symmetrically balanced design, we decided on a clean 2D interface we feel looks attractive without getting in the way.
To compliment this design choice, we’ve used minimal yet intuitive naming conventions throughout the plugin. For this reason alone, we highly recommend that you read through the entirety of this User Guide, so that you may fully understand the functionality of each of Polygon’s parameters.
GLITCHMACHINES ® POLYGON 1.3

PARAMETER DISPLAY:
This display has two sections: top section shows parameter name, bottom section shows parameter value. Hold down Control/Command (Mac/Win) for much finer knob/slider resolution. Double click parameters to return them to default.
TOOL TIPS: when the mouse stays over a knob or focus/loop slider for 2 seconds, the value of the parameter will appear in a tooltip. This allows you to view the current value without having to move the knob/slider.
COLOR CODING:
BLUE: Samplers, Sub Osc, Filters and all associated parametersGREEN: Effects and all associated parametersYELLOW: Modulators and all associated parametersFUCHSIA : All parameters that are being modulated
Double-clicking a knob will return its value to default
Holding the Control/Command (Mac/Win) key will give you fine control over a knob
Active modulation targets will have inner knob/slider indicators highlighted in fuchsia:
GLITCHMACHINES ® POLYGON 1.3

SAMPLER MODULES:
Each Sampler Module allows you to load one sample at a time via the Sample Load cell. Simply click on the cell to open the dialog that will allow you to access your sample files.
By default, you will be asked to link the plugin with its factory sample library. You can easily import samples from any destination by using the same cell and locating the files accordingly.
Note that the factory samples need to be located in the main GM_POLYGON folder. You may place the entire folder anywhere on your hard drive, but the folder structure needs to be retained or the presets will not work correctly. See the SETUP section for more detail.
Upon loading a sample, you may wish to continue auditioning new samples. You can do this either by clicking on the cell, or by clicking on the navigational arrows next to each cell. These arrows will allow you to increment/decrement through the files in a folder, making it easy to audition samples within the context of your patch.
You can drag & drop files from your Finder/Explorer to a module’s file name display
GLITCHMACHINES ® POLYGON 1.3
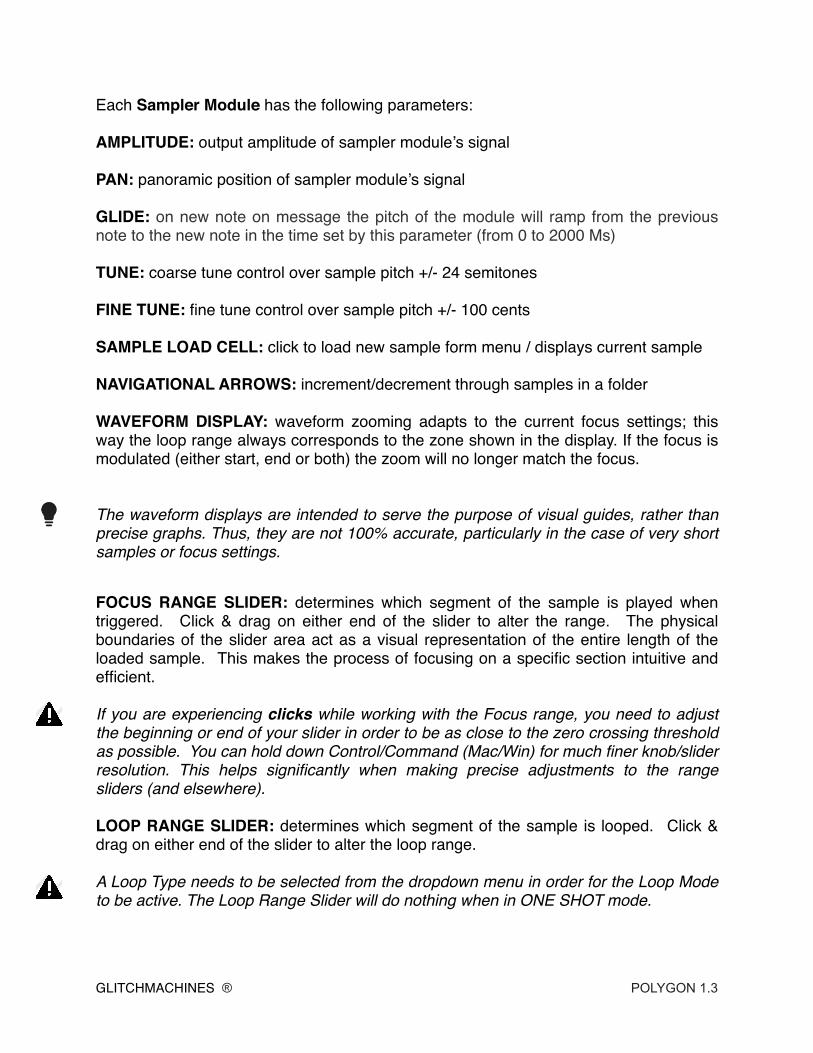
Each Sampler Module has the following parameters:
AMPLITUDE: output amplitude of sampler module’s signal
PAN: panoramic position of sampler module’s signal
GLIDE: on new note on message the pitch of the module will ramp from the previous note to the new note in the time set by this parameter (from 0 to 2000 Ms)
TUNE: coarse tune control over sample pitch +/- 24 semitones
FINE TUNE: fine tune control over sample pitch +/- 100 cents
SAMPLE LOAD CELL: click to load new sample form menu / displays current sample
NAVIGATIONAL ARROWS: increment/decrement through samples in a folder
WAVEFORM DISPLAY: waveform zooming adapts to the current focus settings; this way the loop range always corresponds to the zone shown in the display. If the focus is modulated (either start, end or both) the zoom will no longer match the focus.
The waveform displays are intended to serve the purpose of visual guides, rather than precise graphs. Thus, they are not 100% accurate, particularly in the case of very short samples or focus settings.
FOCUS RANGE SLIDER: determines which segment of the sample is played when triggered. Click & drag on either end of the slider to alter the range. The physical boundaries of the slider area act as a visual representation of the entire length of the loaded sample. This makes the process of focusing on a specific section intuitive and efficient.
If you are experiencing clicks while working with the Focus range, you need to adjust the beginning or end of your slider in order to be as close to the zero crossing threshold as possible. You can hold down Control/Command (Mac/Win) for much finer knob/slider resolution. This helps significantly when making precise adjustments to the range sliders (and elsewhere).
LOOP RANGE SLIDER: determines which segment of the sample is looped. Click & drag on either end of the slider to alter the loop range.
A Loop Type needs to be selected from the dropdown menu in order for the Loop Mode to be active. The Loop Range Slider will do nothing when in ONE SHOT mode.
GLITCHMACHINES ® POLYGON 1.3

PLAY/LOOP MODES: the default mode is ONE SHOT which plays the sample in its entirety once per trigger.
The three loop modes are:
1. --> FORWARD: once the loop range is reached, it will loop continually in the forward direction until the sampler is no longer receiving a trigger.
2. <-- BACKWARD: once the loop range is reached, it will loop continually in the backward direction until the sampler is no longer receiving a trigger.
3. <-> PING PONG: once the loop range is reached, it will loop continually in the forward & backward direction until the sampler is no longer receiving a trigger.
• GRANULAR MODE: the GRAINS button activates Polygon’s Granular Mode.
• GRAIN SIZE: this allows you to select the size of 1 "base" grain. This is also smoothed using an amplitude envelope.
• GRAIN STRETCH: the stretch parameter determines the speed at which the grain will scan through the sample.
• GRAIN FEEDBACK: the base grain is passed through several delay lines whose delay times are proportional to the grain size. These delay lines have feedback (set using the feed control).
Granular mode adapts to the current loop mode and playback direction
ATTACK/RELEASE ENVELOPE: this is the amplitude envelope of the sampler module.
Attack: determines how quickly after being triggered the sample will play at maximum amplitude.
(turn A clockwise for more gradual rise in amplitude when sample is triggered)
Release: determines how long it will take for the sample’s amplitude to fall to minimum value after it is triggered.
(turn R clockwise for more gradual fall in amplitude when trigger is released)
GLITCHMACHINES ® POLYGON 1.3

REVERSE MODE: plays the loaded sample in reverse.
FILTER DESTINATION: determines whether the module is routed to filter 1 or 2.
CHROMATIC MODE: the sampler modules are in chromatic mode by default.
Deactivating this box places the module in FIXED MODE and the sample will be triggered at it’s root pitch across the entire key range.
You can use FIXED MODE in conjunction with KEYTRACK to set up some interesting modulations.
For example, you could set up Keytrack to modulate the rate of an LFO, while it is also assigned to open up the cutoff frequency of a filter.
Taking things a step further, you can invert the MIN/MAX values in the Modulation Matrix to reverse the “direction” in which Keytrack will affect a source:
Invert the modulation MIN/MAX on any matrix assignment to yield powerful results.
MUTE: de-activates the output signal coming from the sampler module.
SOLO: when this setting is enabled for one module (sampler or sub osc) it will bypass the output of all other modules. This is an exclusive solo : enabling it on a module will disable it on all others.
GLITCHMACHINES ® POLYGON 1.3

SUB OSCILLATOR:
The SUB OSCILLATOR is an important part of Polygon’s anatomy. We like to think of it as Polygon’s 5th voice.
We incorporated this oscillator to allow you to add low frequency content to your patch. Often when designing Composite (layered) sound effects, it is helpful to incorporate a source of low frequency content to help “round out” your sound and “glue” things together.
This means that you don’t need to sacrifice one of your Sampler Modules to get the extra layer in your patch.
More than just a low frequency source, this oscillator also has a square wave mode and it is fully modulatable. This makes it relatively flexible since you can effectively use it as another synthesizer voice to add to your patch.
For example, by routing the Sub Osc to a Band Pass Filter, modulating the Pulse Width and running it through effects, you can completely change its character.
• PULSE WIDTH: alters the symmetry of the square wave to produce new harmonics.
• SQUARE / SINE SWITCH: puts the OSC in either square wave or sine wave mode.
See the Sampler Module section for descriptions of the other parameters
GLITCHMACHINES ® POLYGON 1.3

FILTER SECTION:
The filter section was designed with optimum flexibility in mind. Aside from the multi-mode filters, this section also features a small sub-mixer section with FX sends.
For example, the output toggle prevents the filter output from going to the master but it can still go through the effects or to filter 2 in the case of filter 1.
• FILTER CUTOFF: alters the cutoff frequency of the filter
• FILTER RESONANCE: adds emphasis to the cutoff frequency of the filter
• FILTER MODES: changes the filter type: Low Pass, High Pass, Band Pass, Notch
• FILTER OUTPUT AMPLITUDE: alters output amplitude of filter. When filter is bypassed, this can be used as a stand-alone gain stage.
• FILTER OUTPUT TOGGLE: prevents filter output from going to the master.
• PARALLEL/SERIAL TOGGLE: alters the symmetry of the square wave to produce new harmonics.
• FX SENDS 1-3: send filter’s signal to the Metalizer, Stutter and Ring Mod effects.
TIP: the effects sends can be modulated via the mod matrix
GLITCHMACHINES ® POLYGON 1.3

GLOBAL SECTION:
In the Global section, you will find the Preset (Patch) Management System and Global Menu (M).
Clicking on the Save (S) button will open a dialog box that will let you save the current preset on your hard drive using the extension “.plp”.
Only the presets saved in the default preset folder (where the dialog box opens by default) will appear in the menu. You can load a preset stored somewhere else by clicking on the Load (L) button.
You can navigate through the presets either by accessing the drop-down menu, or by using the navigational arrows to increment/decrement though the list.
The Global Menu allows you to initialize all controls, open the presets folder and change Polygon’s sample path.
The "HQ" button under the preset menu is enabled by default. Disabling it will save some CPU power on presets with lots of modulations. It may affect the sound as the modulations are no longer acting at audio rate (so high speed LFOs and short envelopes won't sound like they should) but for low modulation rates the results should be adequate.
This setting is saved per preset and we generally advise against using it unless you are experiencing severe CPU stress.
GLITCHMACHINES ® POLYGON 1.3

GLOBAL MENU:
The Global Menu gives you access to several useful options that affect various important settings:
INIT ALL CONTROLS: initializes all parameters back to default settings
OPEN PRESETS FOLDER: This option will pull up your OS file browser, from where you need to navigate to the correct folder in your system. This is helpful when you want to easily locate the correct Convex presets folder in your system.
CHANGE POLYGON PATH: use this option to re-link the presets to the factory samples
If you move the Factory Sample Library to a new location, you must use this menu option to navigate to that location on your hard drive.
See SETUP section for more detail.
SAVE CONSOLIDATED PRESET: when saving a preset this way, it will copy the samples used by the preset to a special folder (created by the plugin if needed) called "USER_SAMPLES" and located in the "POLYGON_SAMPLES" folder.
The preset file itself can be saved anywhere else but it will reference the samples in this special folder. Presets saved this way can easily be moved to another computer by moving the USER_SAMPLES folder too.
SHOW LOG FILE: In the event of a crash, you can provide us with this log in order to give us a more detailed impression of what may have gone wrong. Simply attach this log file to an email and send it to us along with a brief description of the problem:
LOAD SAMPLES WITH PRESETS: this option allows you to keep the same samples when switching presets. This is a particularly handy feature when you want to hear settings from various presets applied to a specific group of loaded samples. Note that the option is checked by default, so you’ll want to un-check it in order to keep the same samples. Check this option again to return to the standard behavior.
GLITCHMACHINES ® POLYGON 1.3

MASTER SECTION:
The Master Section has four crucial parameters:
MASTER AMPLITUDE: The master amplitude (volume) of Polygon
MASTER TUNE: The master pitch of Polygon. This is useful when you need to increase/decrease the pitch without going to each individual module.
MASTER GLIDE: the master glide control allows to offset the glide settings for all modules (from -500 to +500 Ms).
MASTER RELEASE: The master release of the output envelope. This is useful when you need to increase/decrease the release time without going to each individual module.
METALIZER EFFECT:
GLITCHMACHINES ® POLYGON 1.3

The Metalizer effect is a delay line with very short delay times designed to achieve metallic effects. . This effect can also be used to create chorus/flanger type effects when the delay time is modulated.
TIME: the delay time (CCW for shorter delay, CW for longer delay)
FEEDBACK: the feedback amount of the delay
DAMP: reduces the high frequencies
AMPLITUDE: the output amplitude of the Metalizer effect going to the Master
STUTTER EFFECT:
The stutter module grabs a small portion of its input signal and loops it a user-defined number of times at variable speed. This effect can produce very interesting glitchy artifacts and is especially complimentary when the parameters are modulated.
SIZE: the length of the loop in milliseconds
REPEATS: the number of times the loop will be played before sampling a new one
RATIO: the playback speed of the looped audio
AMPLITUDE: the output amplitude of the Stutter effect going to the Master
The stutter effect will keep looping after the samplers and/or sub oscillator release has ended. You can mute it by setting the size and repeats to their minimum values and/or turning the “stutter sends” in the filter modules to 0.
GLITCHMACHINES ® POLYGON 1.3

RING MOD EFFECT:
The Ring Mod’s input amplitude is modulated by a high frequency sine oscillator (OSC1) whose frequency is modulated by another sine oscillator (OSC2).
FREQUENCY: determines the frequency of the carrier wave (OSC1)
FM FREQUENCY: determines the frequency of the modulator wave (OSC2)
FM DEPTH: controls the amount of modulation applied to the carrier
AMPLITUDE: the output amplitude of the Ring Mod effect going to the Master
Try de-activating the global output of a filter and turn its ringmod send all the way up
You can chain the metalizer output to the stutter input and/or the stutter output to the ringmod input using the dedicated buttons on the interface. When an effect is routed to another its output, it will no longer go directly to the master output.
GLITCHMACHINES ® POLYGON 1.3

LFOs:
The Low Frequency Oscillators have some useful features that maximize their potential when it comes to complex modulation.
RATE: the frequency at which the LFO cycles (0.01Hz - 20.00 Hz)
RATE MULT: multiplies/divides the frequency (rate) of the LFO (0.01X - 10X)
ATTACK: increases the LFO depth by ramping from 0 to 100% in the given time
WAVE: selects the wave: Sine, Square, Saw Up, Saw Down, Triangle, Sample & Hold
SYNC: synchronizes the LFO with your host’s clock. This turns the RATE knob into another mode that displays beat divisions.
RETRIG: restarts the LFO’s cycle upon each trigger
Modulating the LFO rate will only work on FREE RATE range, not the SYNCED one
GLITCHMACHINES ® POLYGON 1.3
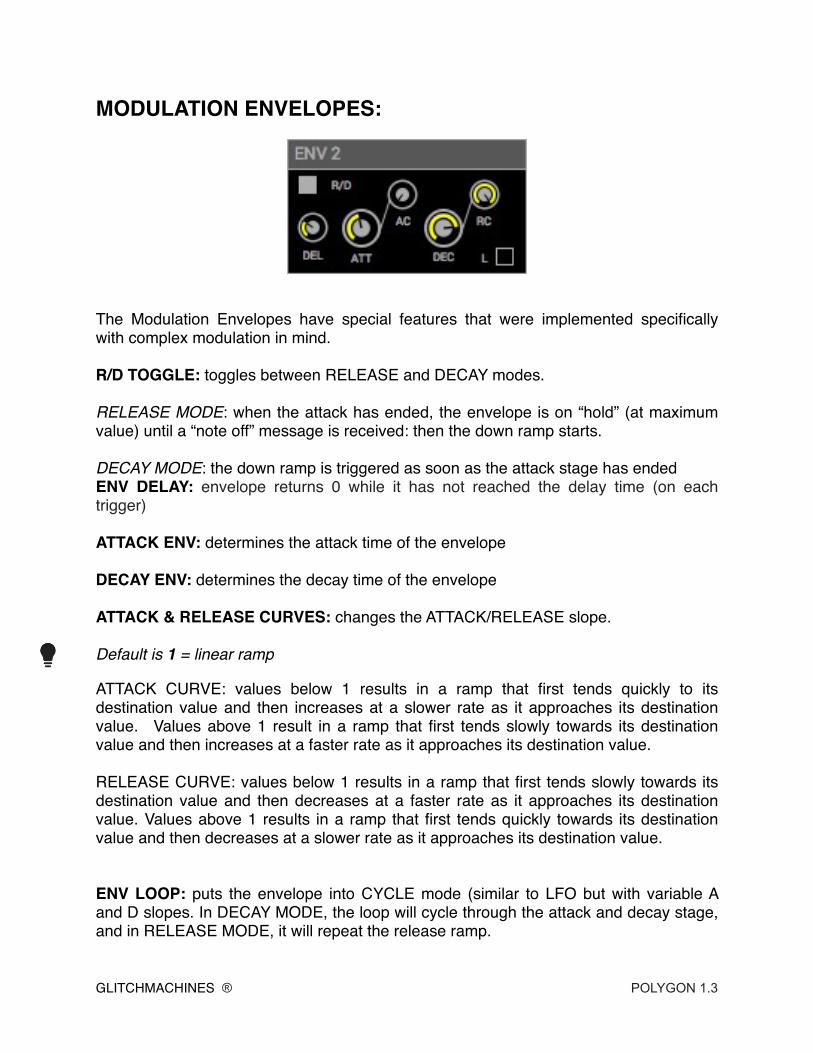
MODULATION ENVELOPES:
The Modulation Envelopes have special features that were implemented specifically with complex modulation in mind.
R/D TOGGLE: toggles between RELEASE and DECAY modes.
RELEASE MODE: when the attack has ended, the envelope is on “hold” (at maximum value) until a “note off” message is received: then the down ramp starts.
DECAY MODE: the down ramp is triggered as soon as the attack stage has endedENV DELAY: envelope returns 0 while it has not reached the delay time (on each trigger)
ATTACK ENV: determines the attack time of the envelope
DECAY ENV: determines the decay time of the envelope
ATTACK & RELEASE CURVES: changes the ATTACK/RELEASE slope.
Default is 1 = linear ramp
ATTACK CURVE: values below 1 results in a ramp that first tends quickly to its destination value and then increases at a slower rate as it approaches its destination value. Values above 1 result in a ramp that first tends slowly towards its destination value and then increases at a faster rate as it approaches its destination value.
RELEASE CURVE: values below 1 results in a ramp that first tends slowly towards its destination value and then decreases at a faster rate as it approaches its destination value. Values above 1 results in a ramp that first tends quickly towards its destination value and then decreases at a slower rate as it approaches its destination value.
ENV LOOP: puts the envelope into CYCLE mode (similar to LFO but with variable A and D slopes. In DECAY MODE, the loop will cycle through the attack and decay stage, and in RELEASE MODE, it will repeat the release ramp.
GLITCHMACHINES ® POLYGON 1.3

FOOTER:
The Footer section gives you access to the MIDI Learn functions, the Modulation Matrix, and the Random Functions.
MIDI LEARN: to assign a knob to a MIDI controller, click on «Learn». Then once learn mode is active (while the button is on), move the control you wish to assign on the plugin interface, then move a control on your MIDI controller and the parameter will be bound to that control.
MIDI UNLEARN: to unlearn a parameter, toggle the «Unlearn» switch on, move the parameter you wish to disconnect on the plugin and it will no longer respond to MIDI CCs.
MIDI CLEAR: you can unlearn all parameters at once using the «Clear» button.
MIDI mappings are saved in a preferences file when the plugin is closed, so they will still be present when relaunching it, but they can be overridden if you open a project in your host with different mappings as they are also saved in the project state.
PROGRAM CHANGES:
Polygon will respond to MIDI program changes by triggering the corresponding preset according to their order in the preset menu. Presets are sorted alphabetically, so to prepare a set of presets to be recalled by program changes you can rename the desired presets by adding a prefix like «01» and save them again to sort them in the correct order.
GLITCHMACHINES ® POLYGON 1.3

MODULATION MATRIX:
The Modulation Matrix is a crucial aspect of Polygon’s functionality. This is where you can assign Polygon’s numerous modulators (LFO, ENV, KEYTRACK, etc.) to a comprehensive list of destinations in order to add motion and depth to your patches.
The Matrix features two identical SECTORS (A & B) where you will find rows/columns of SOURCE and DESTINATION cells. Clicking in any cell opens the dropdown menu of possible source/dest options.
SOURCE: the modulation source assignment (i.e. LFO, ENVELOPE, etc.)
DESTINATION: the modulation destination assignment (i.e. PAN, SAMPLER PITCH, LFO RATE, etc.)
TIP: since you can assign any number of LFOs to cross-modulate each other, you can set up some extremely powerful assignments that will yield evolving and pseudo self-generating patches.
MIN: the minimum range value (percentage) of the modulation assignment
MAX: the maximum range value (percentage) of the modulation assignment
INVERSION: you can invert the MIN/MAX percentages, allowing for even more complex modulations (see example in Chromatic Mode section earlier in this guide)
GLITCHMACHINES ® POLYGON 1.3

RND ISO SUITE:
The Random Isolate Suite was designed to offer you maximum flexibility when it comes to parameter randomization. Every section of the plugin is represented in a group. Upon selection of a group, a list of all of the parameters in that group will appear in the lower section of the panel. Here you can select/deselect any parameter to include/exclude it as a randomization target.
This is helpful because there are times when you are looking for some alternate results in your patch, while still wanting to retain the general architecture of your sound. With the RND ISO SUITE, you can isolate certain parameters so that only they will be affected by the RANDOM function.
Although we included every possible parameter, there are certain parameters you may rarely wish to randomize such as the Master Amplitude and Sampler Module Amplitude parameters
By default, all parameters are de-selected, meaning that the RANDOM function will not affect anything. You must first select at least one parameter in order to activate it.
At the top of the RND ISO page, you will find a few buttons that make it easy to carry out certain functions with a single click:
FILL: fills (selects) every parameter across all groups/lists
CLEAR ALL: clears (de-selects) every parameter across all groups/lists
To quickly fill all of the parameters listed under a group, simply click on the small square button next to the group’s label.
GLITCHMACHINES ® POLYGON 1.3

RANDOM: the footer button between the Matrix and RND Config buttons activates the randomizer according to your RND ISO SUITE assignments. Once your assignments have been made in the RND ISO SUITE, you may exit back to the standard interface.
At this point, you can simply click the RANDOM button to randomize the values of all of the assigned parameters.
Thanks for purchasing POLYGON!
Please check out the rest of our products at our website: https://glitchmachines.com
GLITCHMACHINES ® POLYGON 1.3