Embed Size (px)
DESCRIPTION
Portfolio Prac Year 2
Citation preview

7539 CERTIFICATE 4 PRACTICAL
Acknowledgementto the teacherJohn Nolan
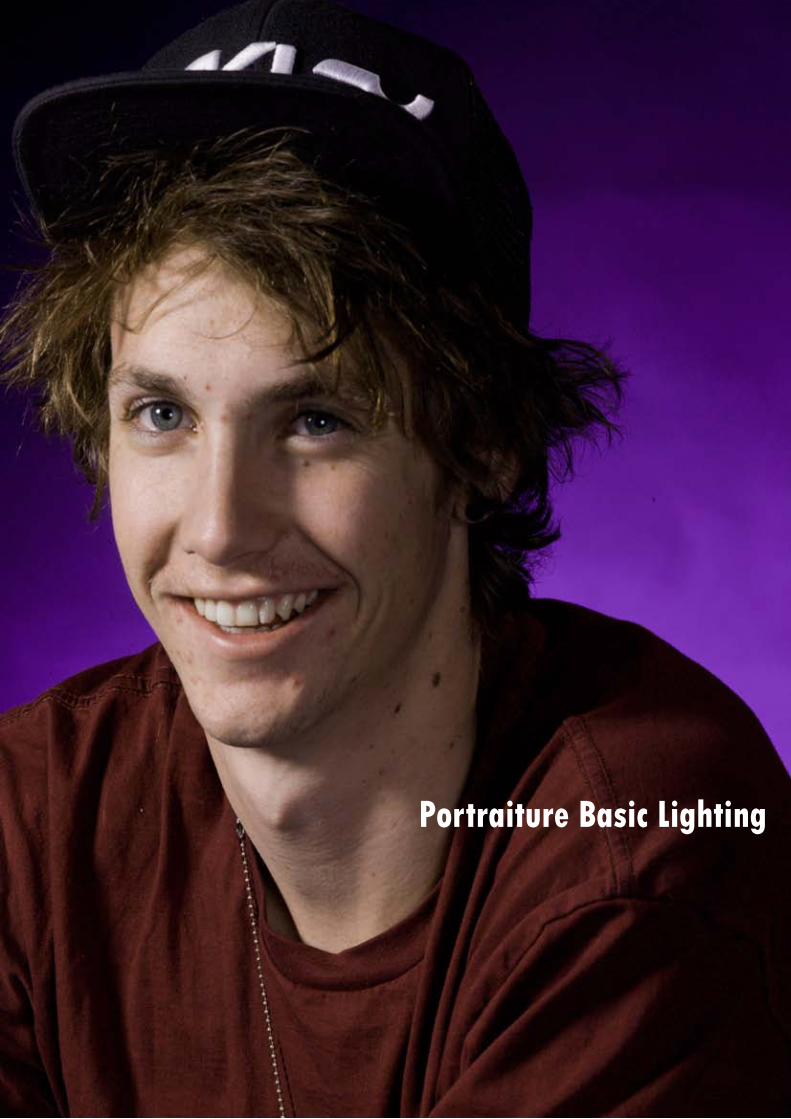
Portraiture Basic Lighting
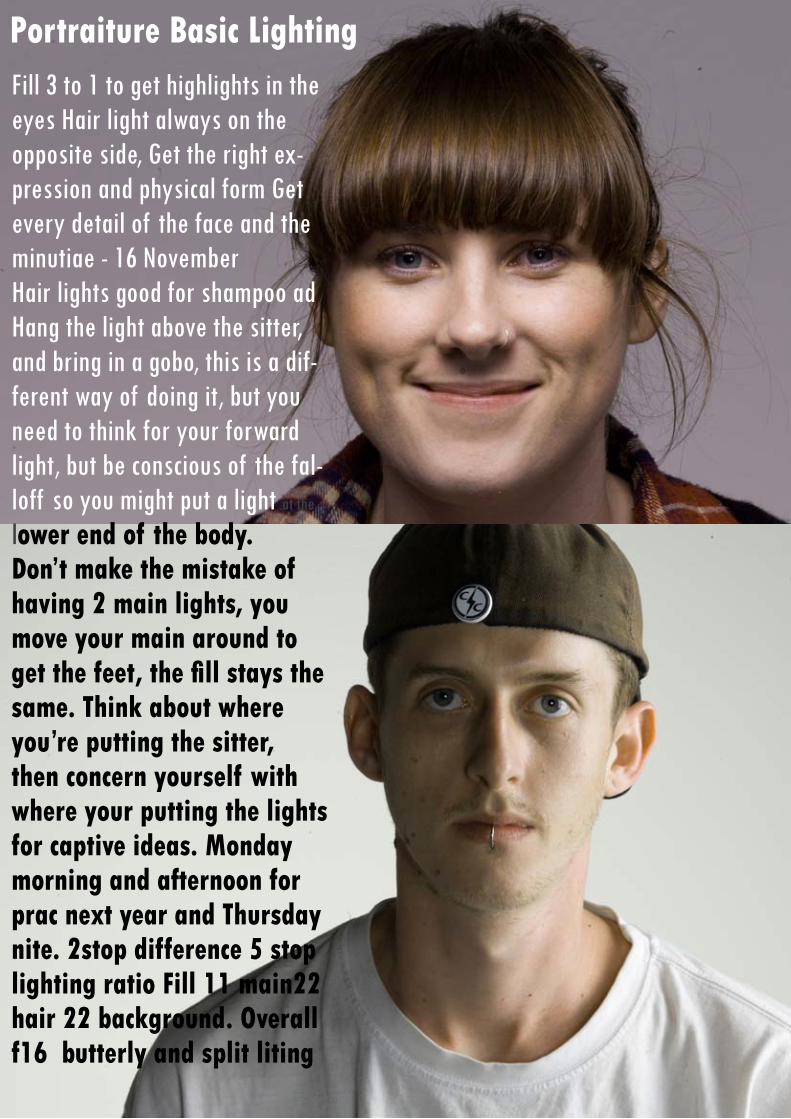
Portraiture Basic LightingFill 3 to 1 to get highlights in the eyes Hair light always on the opposite side, Get the right ex-pression and physical form Get every detail of the face and the minutiae - 16 NovemberHair lights good for shampoo adHang the light above the sitter, and bring in a gobo, this is a dif-ferent way of doing it, but you need to think for your forward light, but be conscious of the fal-loff so you might put a light at the
lower end of the body. Don’t make the mistake of having 2 main lights, you move your main around to get the feet, the fill stays the same. Think about where you’re putting the sitter, then concern yourself with where your putting the lights for captive ideas. Monday morning and afternoon for prac next year and Thursday nite. 2stop difference 5 stop lighting ratio Fill 11 main22 hair 22 background. Overall f16 butterly and split liting
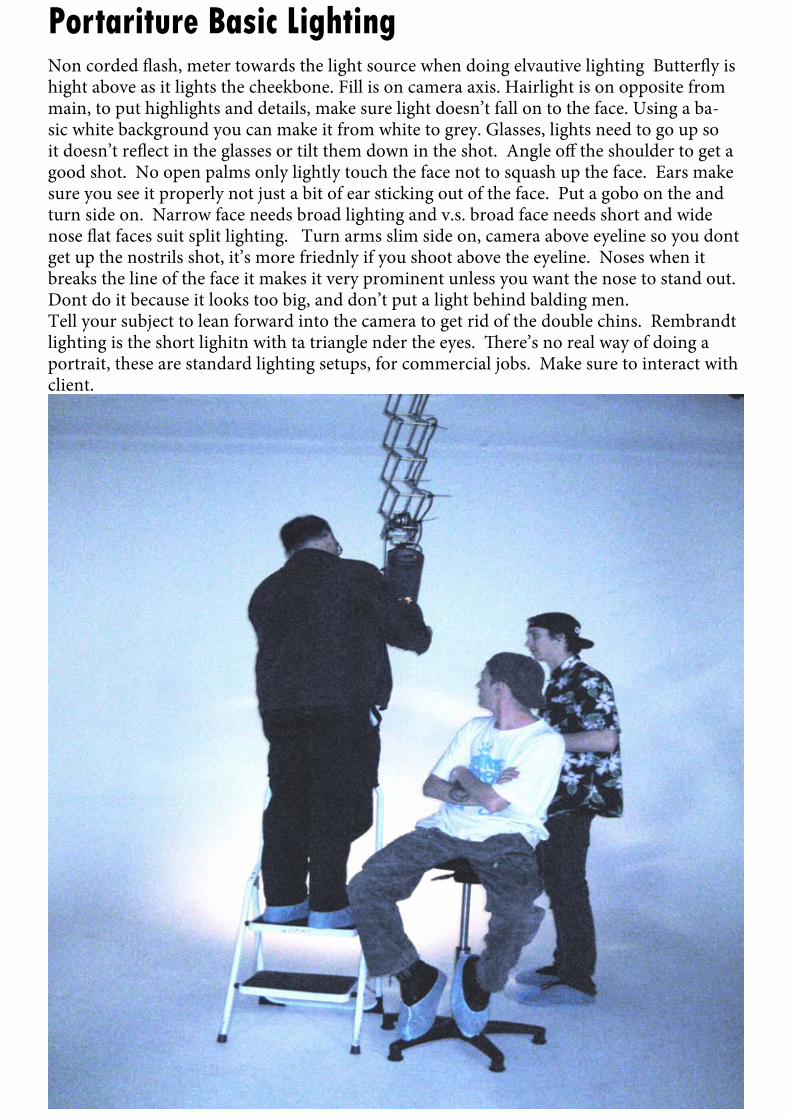
Portariture Basic LightingNon corded flash, meter towards the light source when doing elvautive lighting Butterfly is hight above as it lights the cheekbone. Fill is on camera axis. Hairlight is on opposite from main, to put highlights and details, make sure light doesn’t fall on to the face. Using a ba-sic white background you can make it from white to grey. Glasses, lights need to go up so it doesn’t reflect in the glasses or tilt them down in the shot. Angle off the shoulder to get a good shot. No open palms only lightly touch the face not to squash up the face. Ears make sure you see it properly not just a bit of ear sticking out of the face. Put a gobo on the and turn side on. Narrow face needs broad lighting and v.s. broad face needs short and wide nose flat faces suit split lighting. Turn arms slim side on, camera above eyeline so you dont get up the nostrils shot, it’s more friednly if you shoot above the eyeline. Noses when it breaks the line of the face it makes it very prominent unless you want the nose to stand out. Dont do it because it looks too big, and don’t put a light behind balding men.Tell your subject to lean forward into the camera to get rid of the double chins. Rembrandt lighting is the short lighitn with ta triangle nder the eyes. There’s no real way of doing a portrait, these are standard lighting setups, for commercial jobs. Make sure to interact with client.
Portariture Basic Lighting

Portariture Basic Lighting
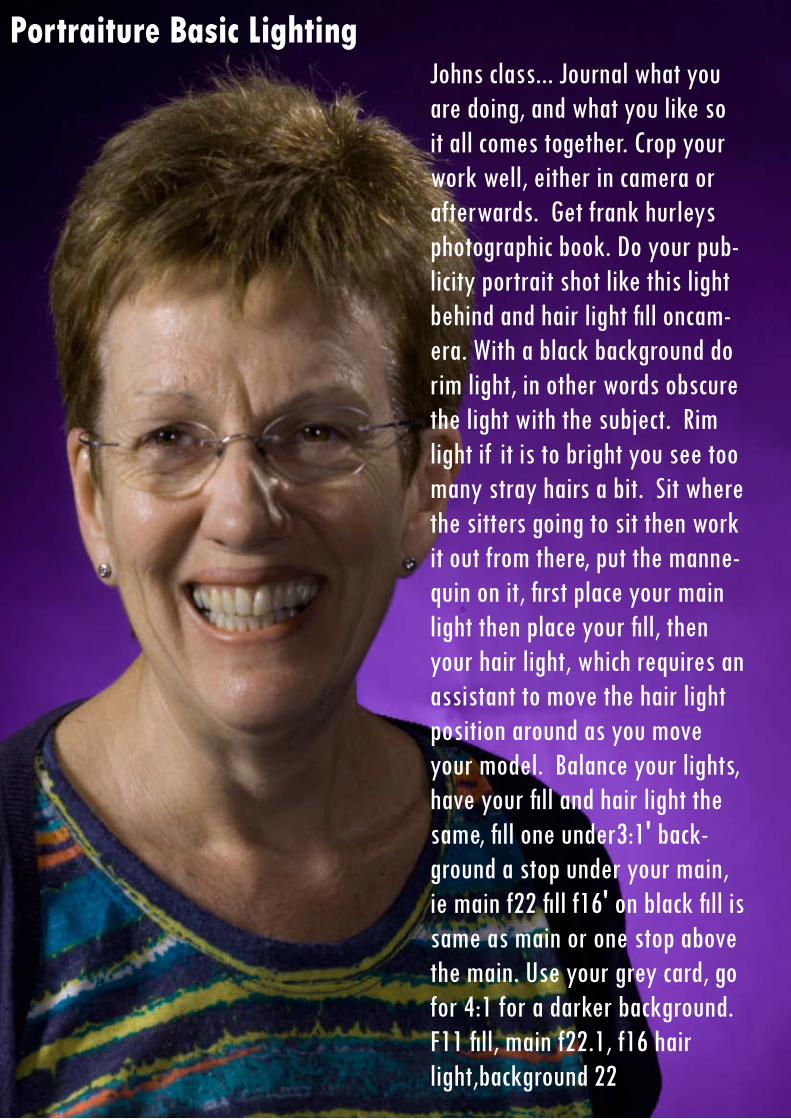
Portraiture Basic LightingJohns class... Journal what you are doing, and what you like so it all comes together. Crop your work well, either in camera or afterwards. Get frank hurleys photographic book. Do your pub-licity portrait shot like this light behind and hair light fill oncam-era. With a black background do rim light, in other words obscure the light with the subject. Rim light if it is to bright you see too many stray hairs a bit. Sit where the sitters going to sit then work it out from there, put the manne-quin on it, first place your main light then place your fill, then your hair light, which requires an assistant to move the hair light position around as you move your model. Balance your lights, have your fill and hair light the same, fill one under3:1' back-ground a stop under your main, ie main f22 fill f16' on black fill is same as main or one stop above the main. Use your grey card, go for 4:1 for a darker background. F11 fill, main f22.1, f16 hair light,background 22
Portariture Basic Lighting
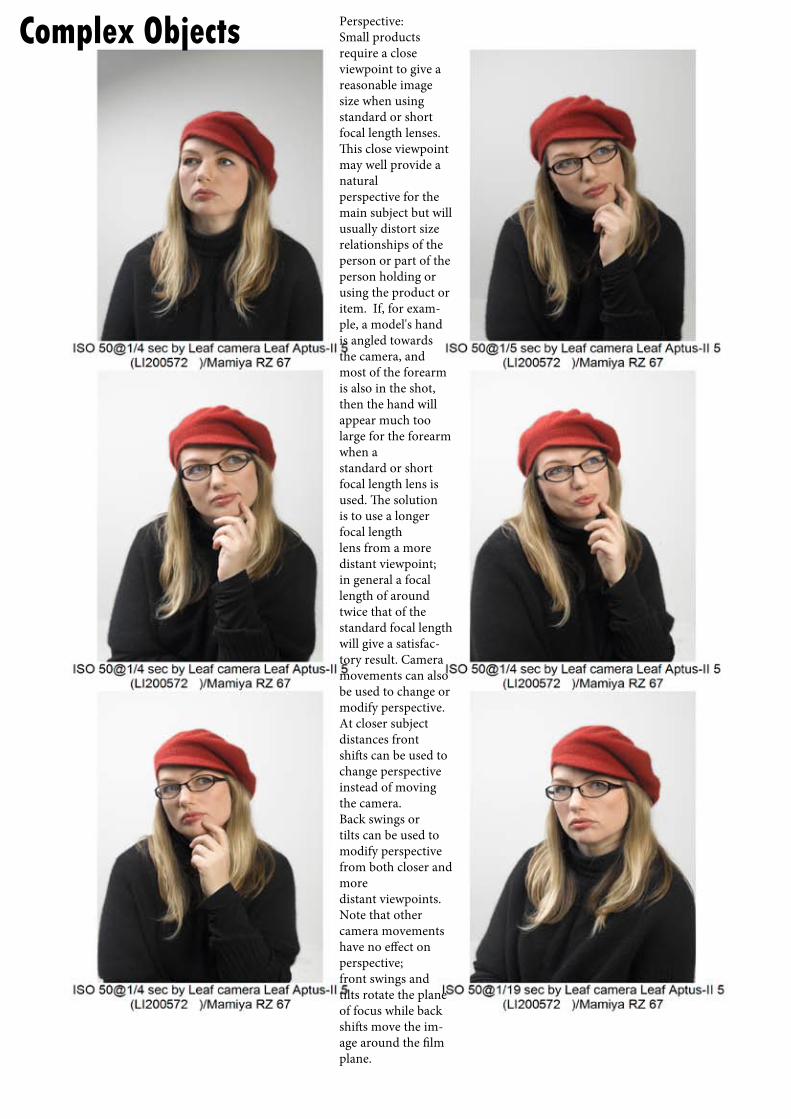
Complex Objects Perspective:Small products require a close viewpoint to give a reasonable image size when using standard or short focal length lenses. This close viewpoint may well provide a natural perspective for the main subject but will usually distort size relationships of the person or part of the person holding or using the product or item. If, for exam-ple, a model's hand is angled towards the camera, and most of the forearm is also in the shot, then the hand will appear much too large for the forearm when a standard or short focal length lens is used. The solution is to use a longer focal length lens from a more distant viewpoint; in general a focal length of around twice that of the standard focal length will give a satisfac-tory result. Camera movements can also be used to change or modify perspective. At closer subject distances front shifts can be used to change perspective instead of moving the camera. Back swings or tilts can be used to modify perspective from both closer and more distant viewpoints. Note that other camera movements have no effect on perspective; front swings and tilts rotate the plane of focus while back shifts move the im-age around the film plane.
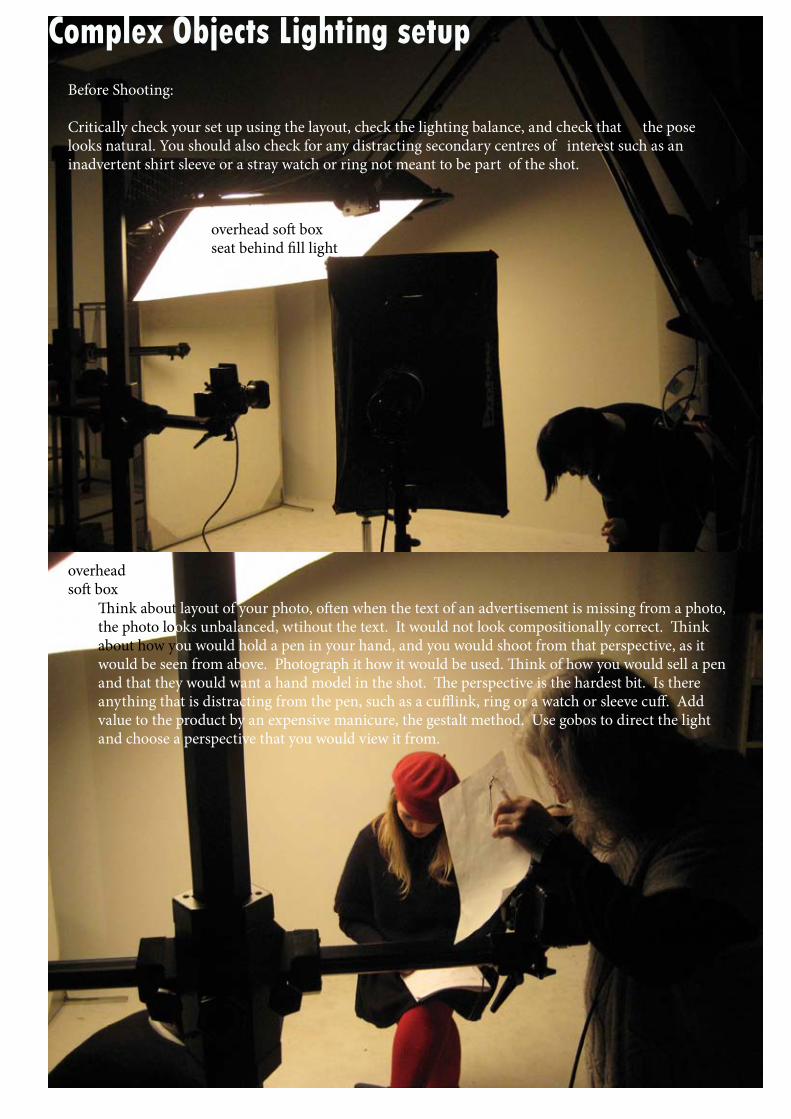
Complex Objects Lighting setupBefore Shooting:
Critically check your set up using the layout, check the lighting balance, and check that the pose looks natural. You should also check for any distracting secondary centres of interest such as an inadvertent shirt sleeve or a stray watch or ring not meant to be part of the shot.
Think about layout of your photo, often when the text of an advertisement is missing from a photo, the photo looks unbalanced, wtihout the text. It would not look compositionally correct. Think about how you would hold a pen in your hand, and you would shoot from that perspective, as it would be seen from above. Photograph it how it would be used. Think of how you would sell a pen and that they would want a hand model in the shot. The perspective is the hardest bit. Is there anything that is distracting from the pen, such as a cufflink, ring or a watch or sleeve cuff. Add value to the product by an expensive manicure, the gestalt method. Use gobos to direct the light and choose a perspective that you would view it from.
overhead soft boxseat behind fill light
overhead soft box
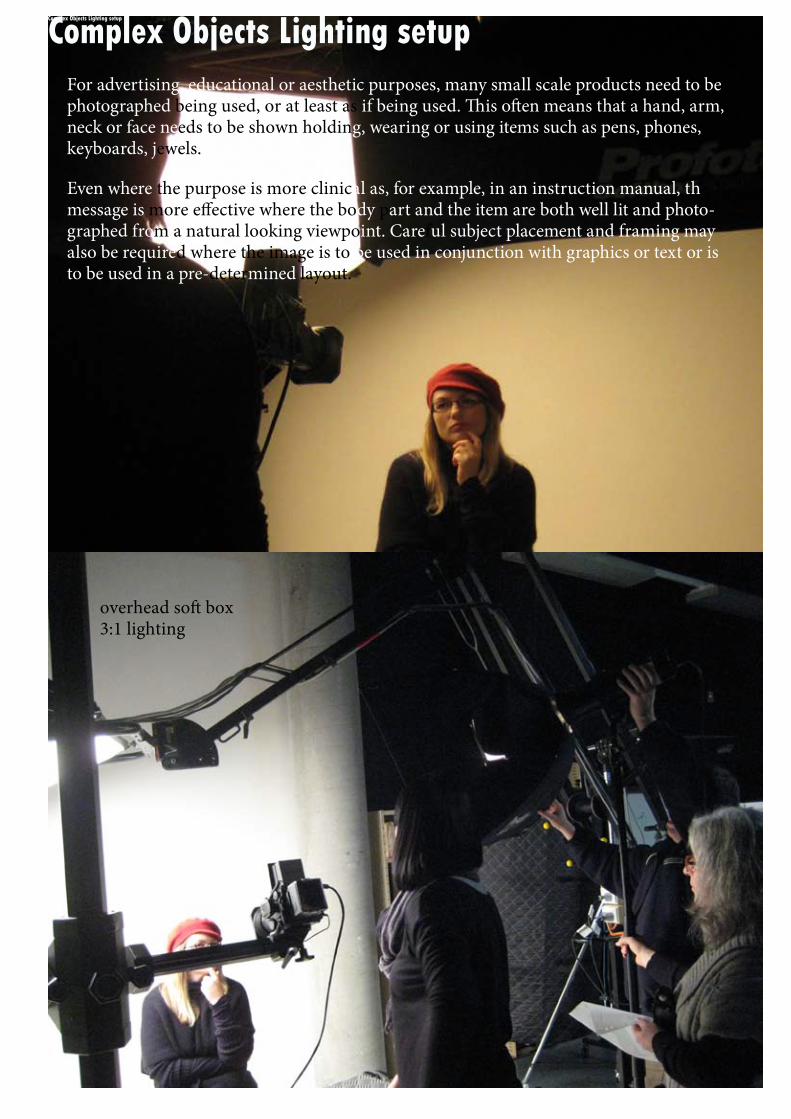
Complex Objects Lighting setupComplex Objects Lighting setupFor advertising, educational or aesthetic purposes, many small scale products need to be photographed being used, or at least as if being used. This often means that a hand, arm, neck or face needs to be shown holding, wearing or using items such as pens, phones, keyboards, jewels.
Even where the purpose is more clinical as, for example, in an instruction manual, the message is more effective where the body part and the item are both well lit and photo-graphed from a natural looking viewpoint. Careful subject placement and framing may also be required where the image is to be used in conjunction with graphics or text or is to be used in a pre-determined layout.
overhead soft box3:1 lighting

Complex Objects
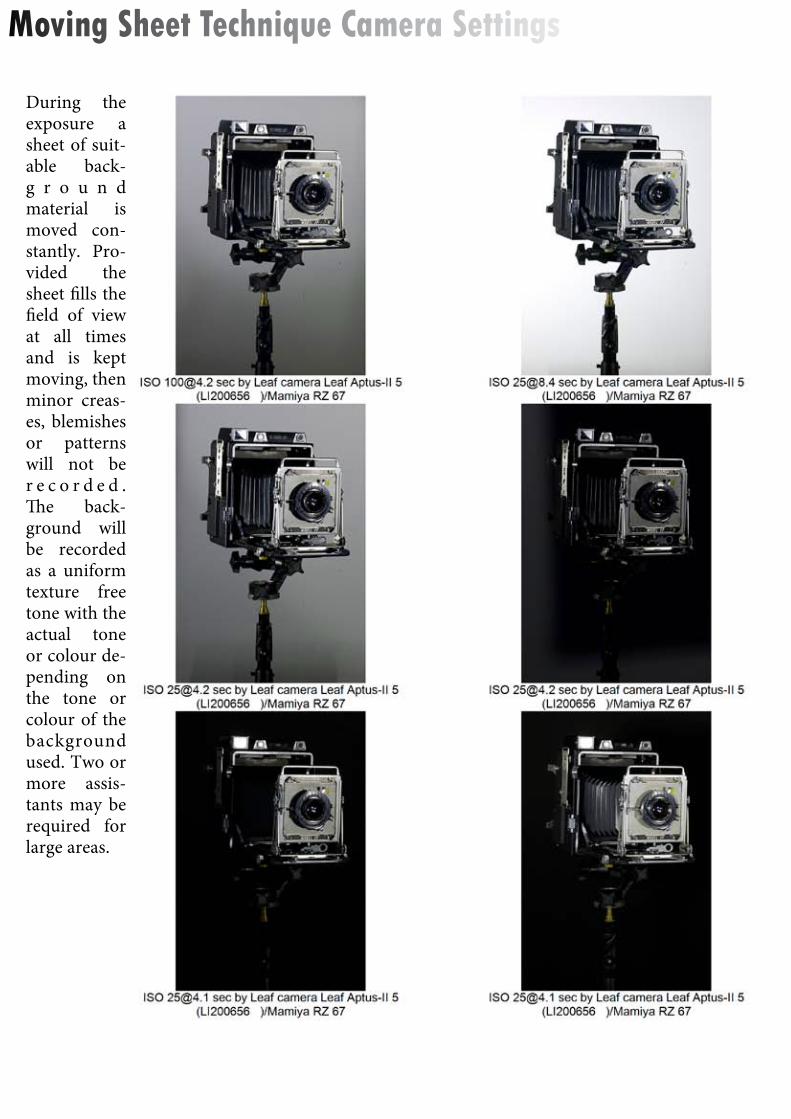
Moving Sheet Technique Camera Settings
During the exposure a sheet of suit-able back-g r o u n d material is moved con-stantly. Pro-vided the sheet fills the field of view at all times and is kept moving, then minor creas-es, blemishes or patterns will not be r e c o r d e d . The back-ground will be recorded as a uniform texture free tone with the actual tone or colour de-pending on the tone or colour of the background used. Two or more assis-tants may be required for large areas.
Moving Sheet Tech-niqueSeparately lit back-ground. Control the intensity of the light and you get the background you want. Jiggle the background to get a smooth finish. You can make the back-ground black white or grey simply by the intensity of the light. Light the subject first, and determine the exposure and see the fuzzy back-ground first, then white background by increases the light 2 stops above the ex-posure of the subject it will appear white. If you go over by 2 stops you will get halation and flare. To get a mid grey background, have the same exposure as the overall subject, eg if the subject is lit at F16, then the back-ground is lit at F16.
Moving Sheet Technique
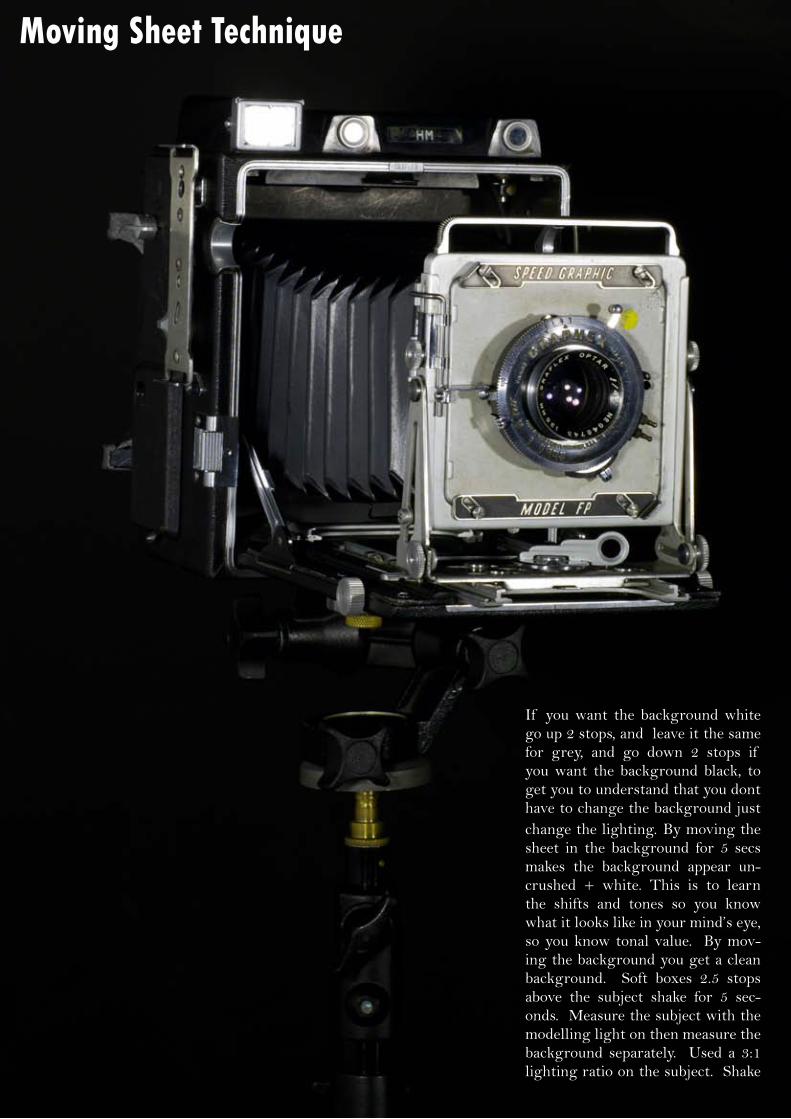
If you want the background white go up 2 stops, and leave it the same for grey, and go down 2 stops if you want the background black, to get you to understand that you dont have to change the background just change the lighting. By moving the sheet in the background for 5 secs makes the background appear un-crushed + white. This is to learn the shifts and tones so you know what it looks like in your mind’s eye, so you know tonal value. By mov-ing the background you get a clean background. Soft boxes 2.5 stops above the subject shake for 5 sec-onds. Measure the subject with the modelling light on then measure the background separately. Used a 3:1 lighting ratio on the subject. Shake
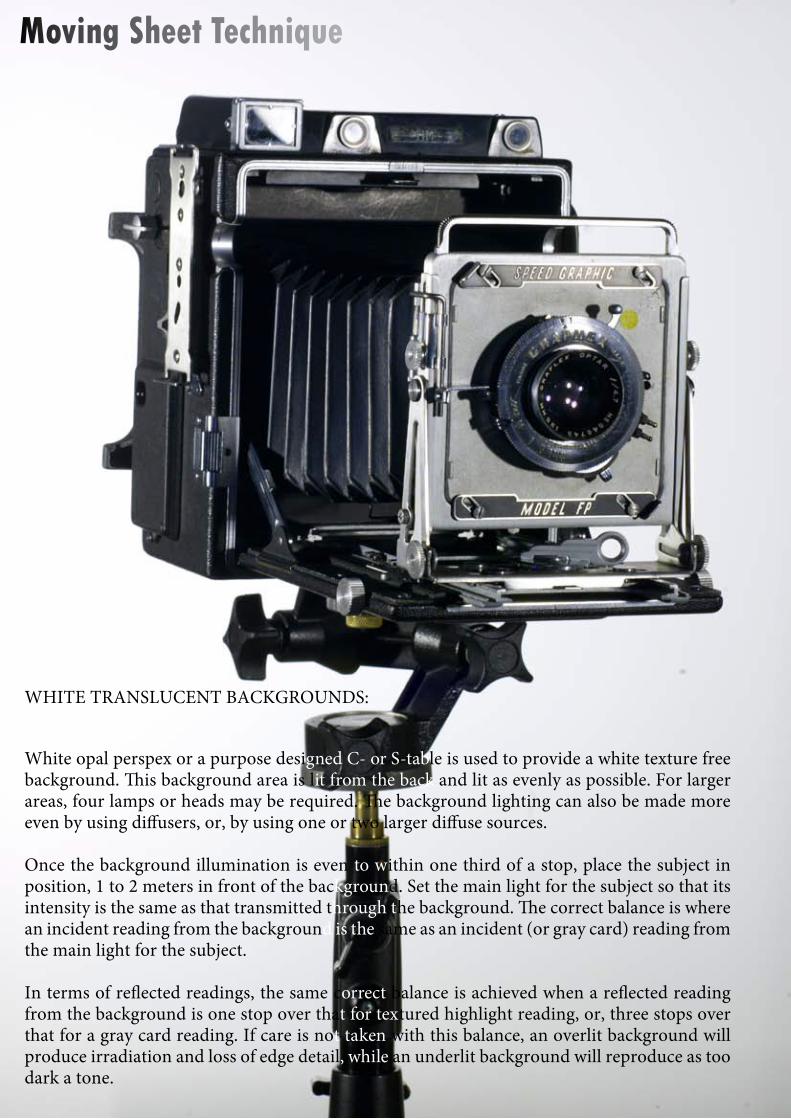
WHITE TRANSLUCENT BACKGROUNDS:
White opal perspex or a purpose designed C- or S-table is used to provide a white texture free background. This background area is lit from the back and lit as evenly as possible. For larger areas, four lamps or heads may be required. The background lighting can also be made more even by using diffusers, or, by using one or two larger diffuse sources.
Once the background illumination is even to within one third of a stop, place the subject in position, 1 to 2 meters in front of the background. Set the main light for the subject so that its intensity is the same as that transmitted through the background. The correct balance is where an incident reading from the background is the same as an incident (or gray card) reading from the main light for the subject.
In terms of reflected readings, the same correct balance is achieved when a reflected reading from the background is one stop over that for textured highlight reading, or, three stops over that for a gray card reading. If care is not taken with this balance, an overlit background will produce irradiation and loss of edge detail, while an underlit background will reproduce as too dark a tone.
Moving Sheet Technique
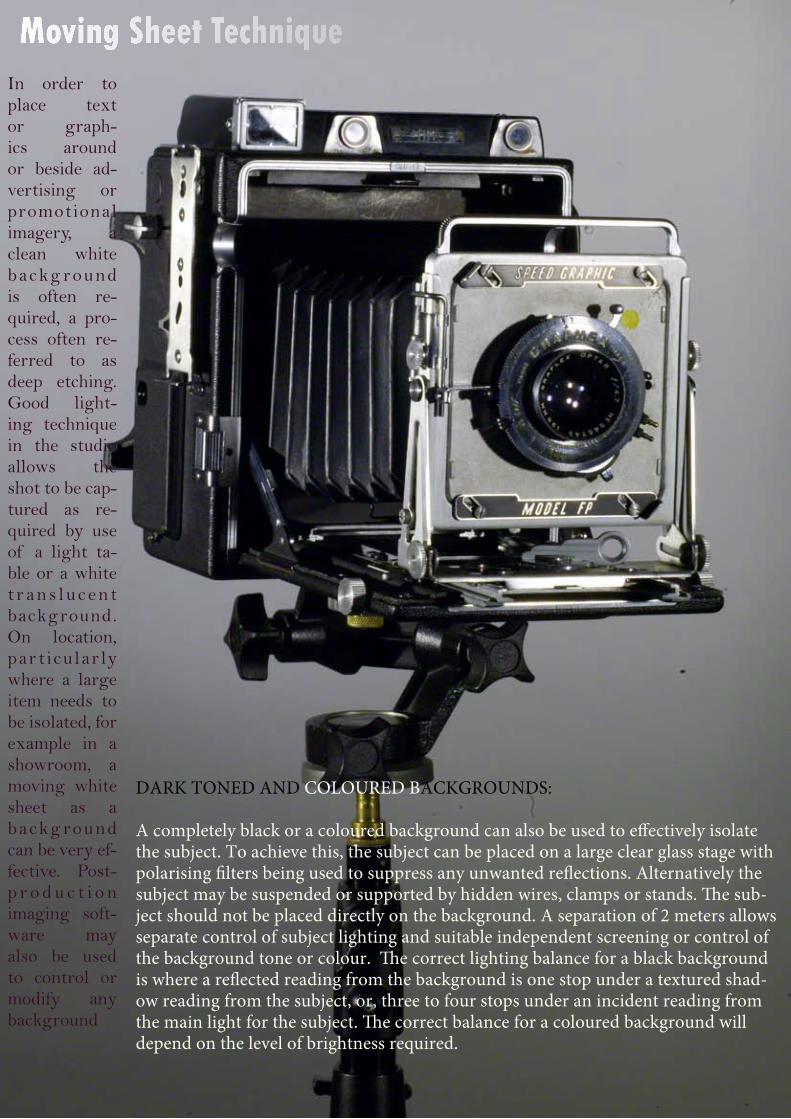
In order to place text or graph-ics around or beside ad-vertising or promotional imagery, a clean white backg round is often re-quired, a pro-cess often re-ferred to as deep etching. Good light-ing technique in the studio allows the shot to be cap-tured as re-quired by use of a light ta-ble or a white t r ans lucen t background. On location, par t icular ly where a large item needs to be isolated, for example in a showroom, a moving white sheet as a backg round can be very ef-fective. Post-p r o d u c t i o n imaging soft-ware may also be used to control or modify any background
DARK TONED AND COLOURED BACKGROUNDS:
A completely black or a coloured background can also be used to effectively isolate the subject. To achieve this, the subject can be placed on a large clear glass stage with polarising filters being used to suppress any unwanted reflections. Alternatively the subject may be suspended or supported by hidden wires, clamps or stands. The sub-ject should not be placed directly on the background. A separation of 2 meters allows separate control of subject lighting and suitable independent screening or control of the background tone or colour. The correct lighting balance for a black background is where a reflected reading from the background is one stop under a textured shad-ow reading from the subject, or, three to four stops under an incident reading from the main light for the subject. The correct balance for a coloured background will depend on the level of brightness required.
Moving Sheet Technique
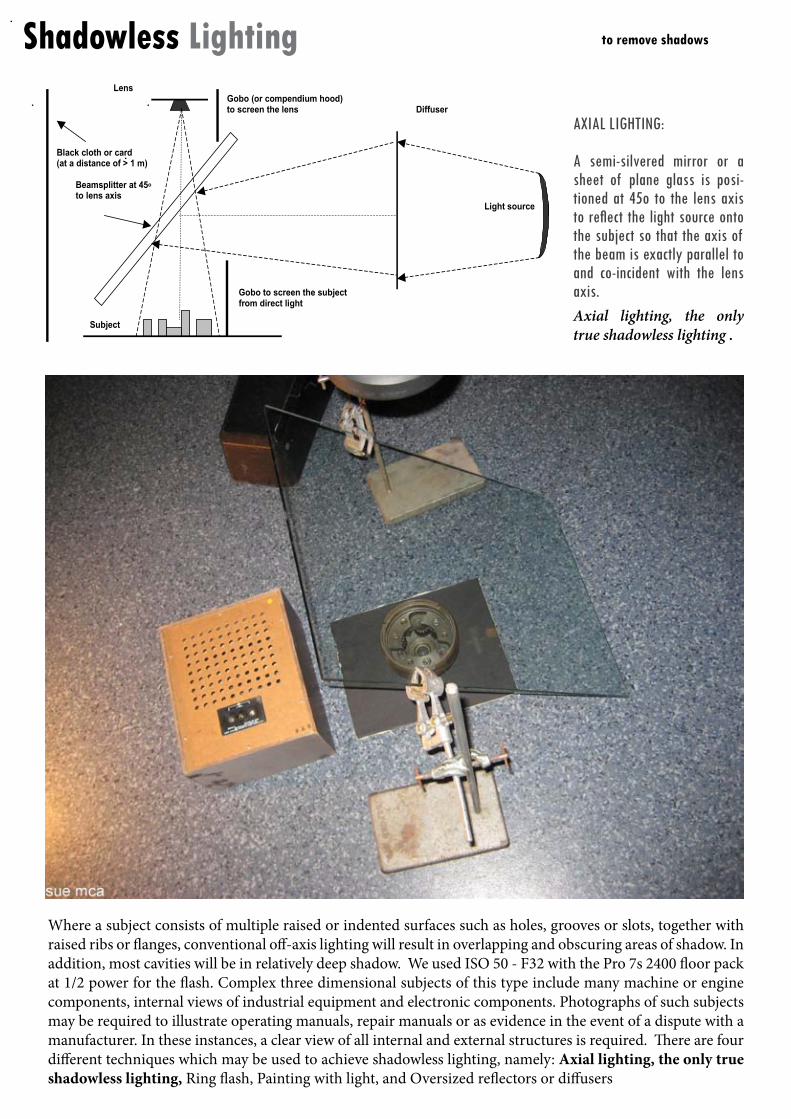
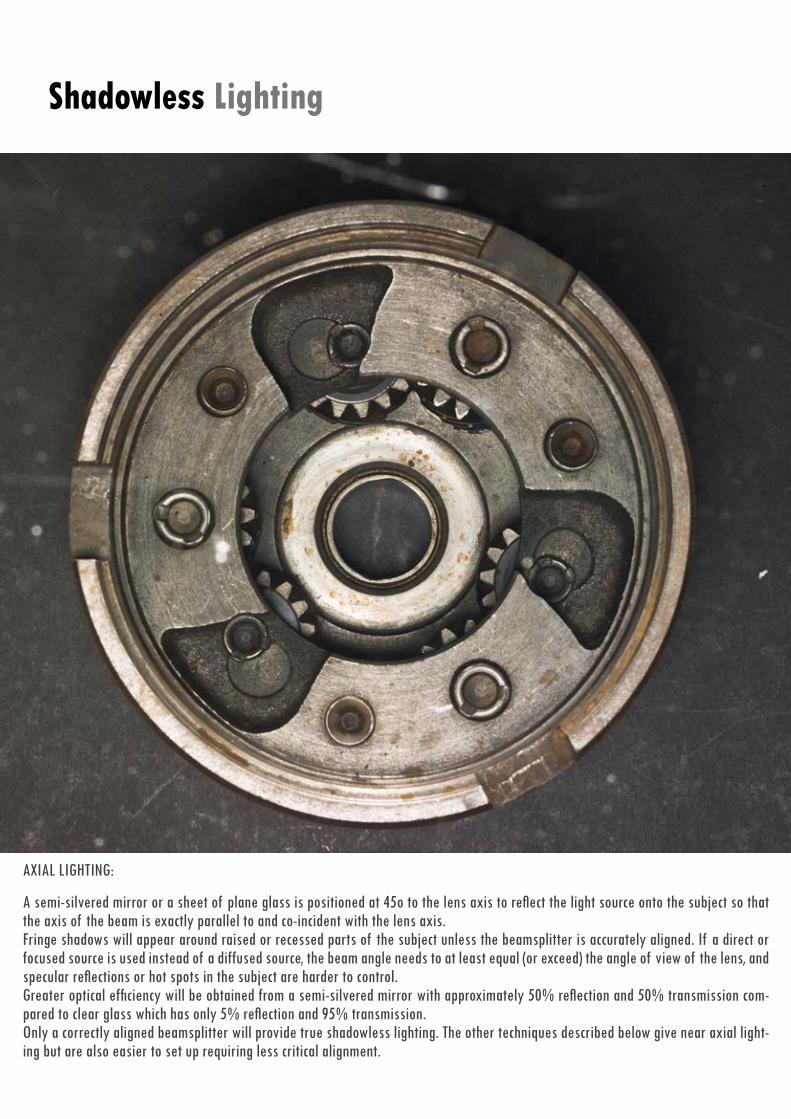
Where a subject consists of multiple raised or indented surfaces such as holes, grooves or slots, together with raised ribs or flanges, conventional off-axis lighting will result in overlapping and obscuring areas of shadow. In addition, most cavities will be in relatively deep shadow. We used ISO 50 - F32 with the Pro 7s 2400 floor pack at 1/2 power for the flash. Complex three dimensional subjects of this type include many machine or engine components, internal views of industrial equipment and electronic components. Photographs of such subjects may be required to illustrate operating manuals, repair manuals or as evidence in the event of a dispute with a manufacturer. In these instances, a clear view of all internal and external structures is required. There are four different techniques which may be used to achieve shadowless lighting, namely: Axial lighting, the only true shadowless lighting, Ring flash, Painting with light, and Oversized reflectors or diffusers
to remove shadowsShadowless LightingLens
Gobo (or compendium hood)to screen the lens Diffuser
Black cloth or card (at a distance of > 1 m)
Beamsplitter at 45o
to lens axis Light source
Gobo to screen the subject from direct light
Subject
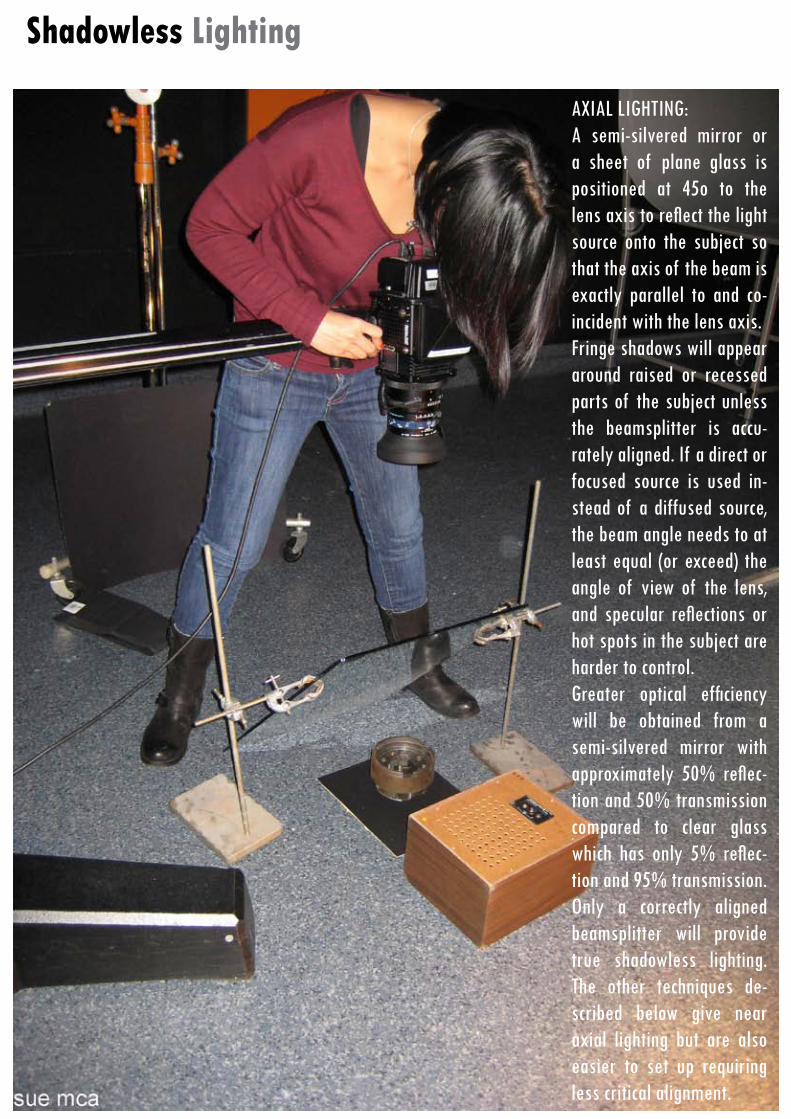
AXIAL LIGHTING:
A semi-silvered mirror or a sheet of plane glass is posi-tioned at 45o to the lens axis to reflect the light source onto the subject so that the axis of the beam is exactly parallel to and co-incident with the lens axis. Axial lighting, the only true shadowless lighting .
Shadowless Lighting
AXIAL LIGHTING:A semi-silvered mirror or a sheet of plane glass is positioned at 45o to the lens axis to reflect the light source onto the subject so that the axis of the beam is exactly parallel to and co-incident with the lens axis.Fringe shadows will appear around raised or recessed parts of the subject unless the beamsplitter is accu-rately aligned. If a direct or focused source is used in-stead of a diffused source, the beam angle needs to at least equal (or exceed) the angle of view of the lens, and specular reflections or hot spots in the subject are harder to control. Greater optical efficiency will be obtained from a semi-silvered mirror with approximately 50% reflec-tion and 50% transmission compared to clear glass which has only 5% reflec-tion and 95% transmission. Only a correctly aligned beamsplitter will provide true shadowless lighting. The other techniques de-scribed below give near axial lighting but are also easier to set up requiring less critical alignment.
Shadowless Lighting
AXIAL LIGHTING:
A semi-silvered mirror or a sheet of plane glass is positioned at 45o to the lens axis to reflect the light source onto the subject so that the axis of the beam is exactly parallel to and co-incident with the lens axis.Fringe shadows will appear around raised or recessed parts of the subject unless the beamsplitter is accurately aligned. If a direct or focused source is used instead of a diffused source, the beam angle needs to at least equal (or exceed) the angle of view of the lens, and specular reflections or hot spots in the subject are harder to control. Greater optical efficiency will be obtained from a semi-silvered mirror with approximately 50% reflection and 50% transmission com-pared to clear glass which has only 5% reflection and 95% transmission. Only a correctly aligned beamsplitter will provide true shadowless lighting. The other techniques described below give near axial light-ing but are also easier to set up requiring less critical alignment.
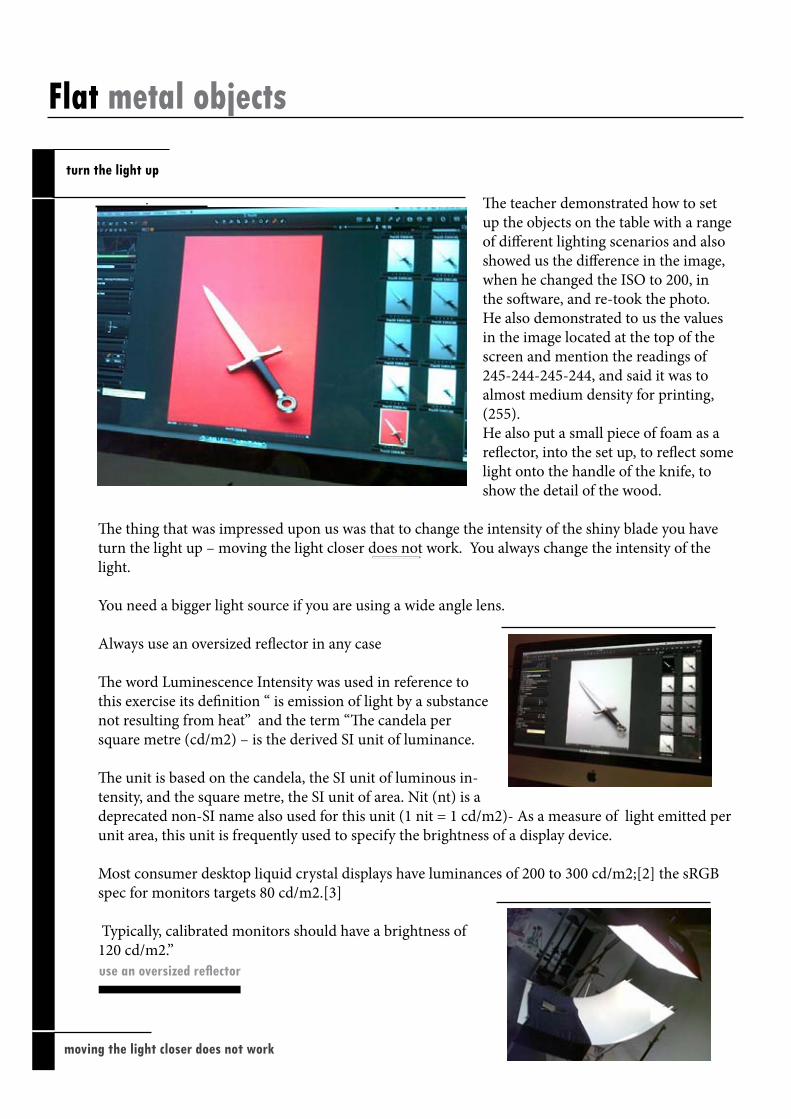
The teacher demonstrated how to set up the objects on the table with a range of different lighting scenarios and also showed us the difference in the image, when he changed the ISO to 200, in the software, and re-took the photo. He also demonstrated to us the values in the image located at the top of the screen and mention the readings of 245-244-245-244, and said it was to almost medium density for printing, (255). He also put a small piece of foam as a reflector, into the set up, to reflect some light onto the handle of the knife, to show the detail of the wood.
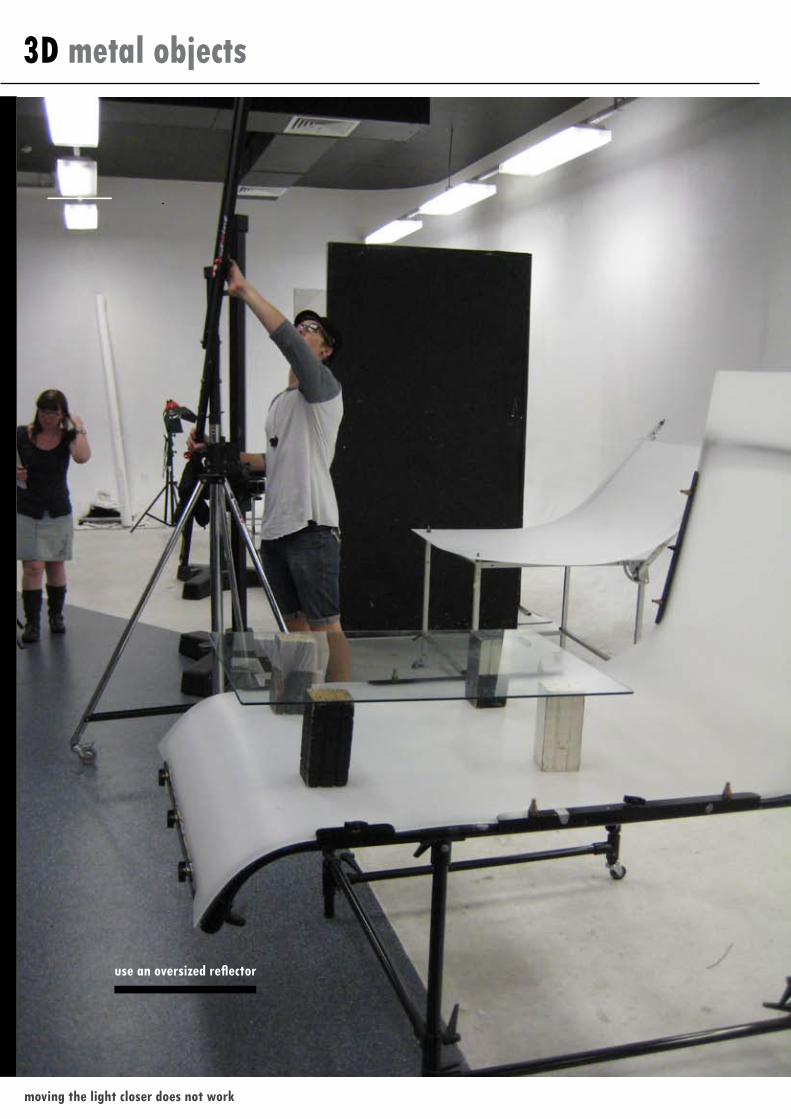
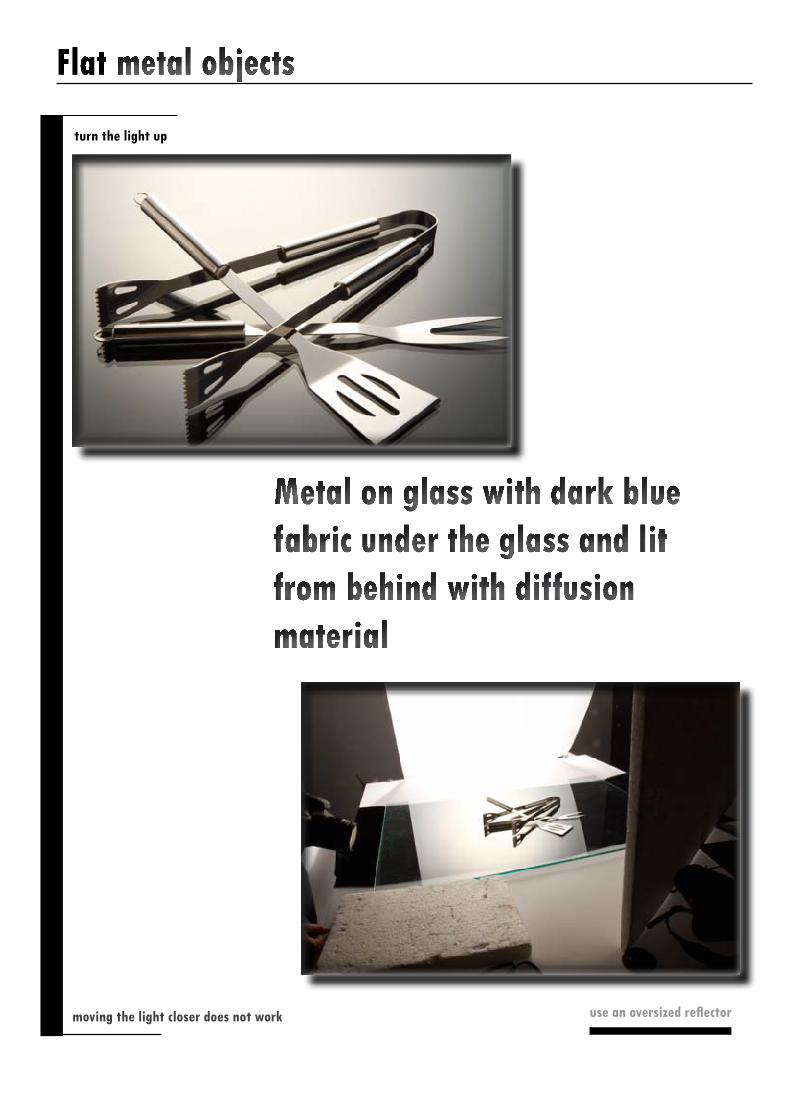
The thing that was impressed upon us was that to change the intensity of the shiny blade you have turn the light up – moving the light closer does not work. You always change the intensity of the light.
You need a bigger light source if you are using a wide angle lens.
Always use an oversized reflector in any case
The word Luminescence Intensity was used in reference to this exercise its definition “ is emission of light by a substance not resulting from heat” and the term “The candela per square metre (cd/m2) – is the derived SI unit of luminance.
The unit is based on the candela, the SI unit of luminous in-tensity, and the square metre, the SI unit of area. Nit (nt) is a deprecated non-SI name also used for this unit (1 nit = 1 cd/m2)- As a measure of light emitted per unit area, this unit is frequently used to specify the brightness of a display device.
Most consumer desktop liquid crystal displays have luminances of 200 to 300 cd/m2;[2] the sRGB spec for monitors targets 80 cd/m2.[3]
Typically, calibrated monitors should have a brightness of 120 cd/m2.”
turn the light up
Flat metal objects
moving the light closer does not work
use an oversized reflector
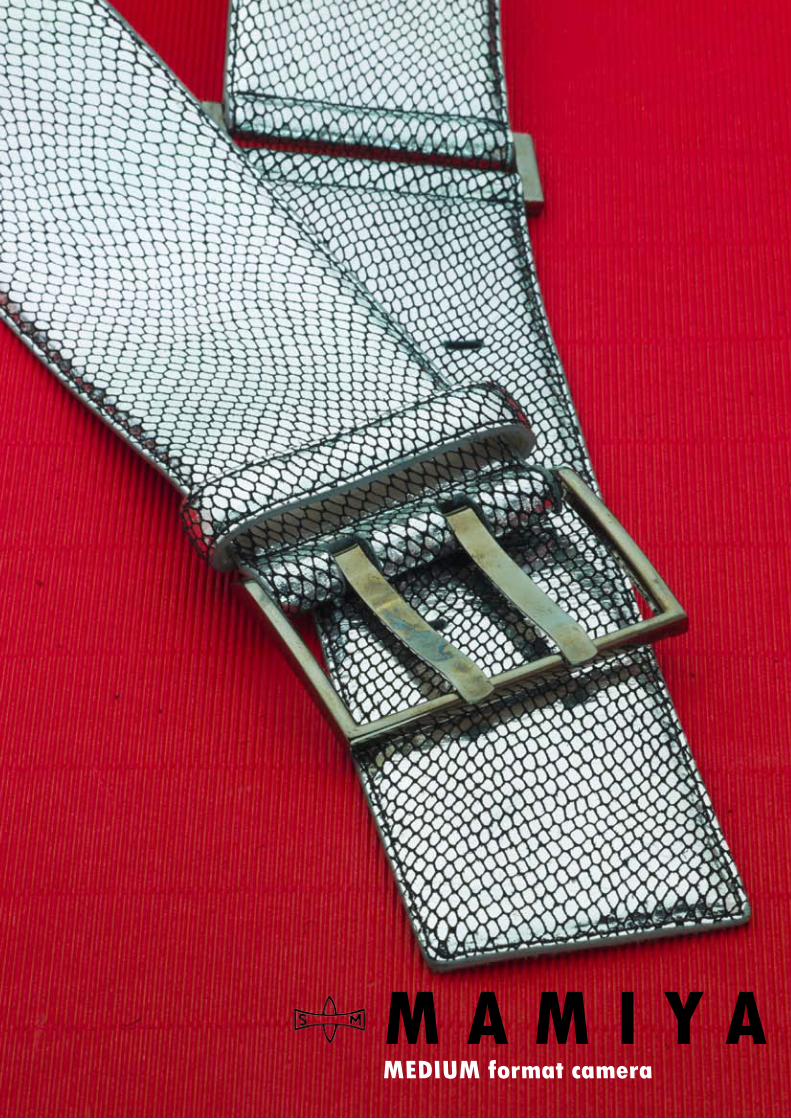
M A M I Y AMEDIUM format camera
turn the light up
3D metal objects
moving the light closer does not work
use an oversized reflector
turn the light up
3D metal objects
moving the light closer does not workuse an oversized reflector
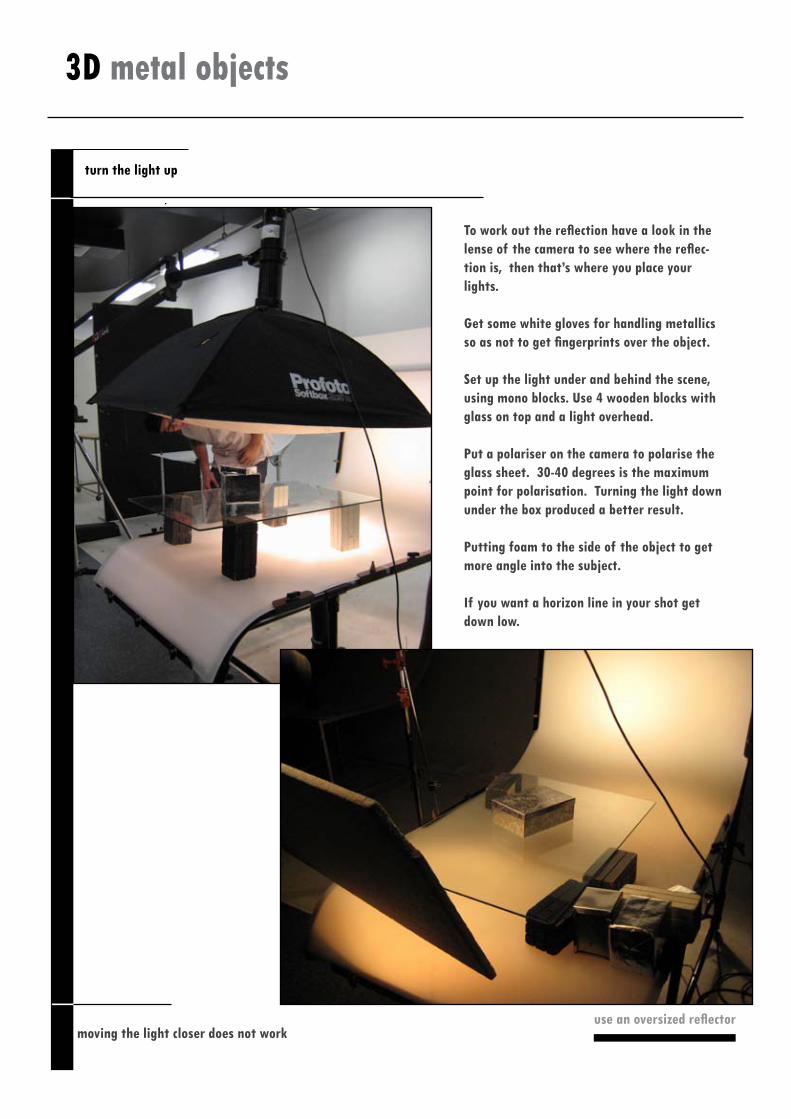
To work out the reflection have a look in the lense of the camera to see where the reflec-tion is, then that’s where you place your lights.
Get some white gloves for handling metallics so as not to get fingerprints over the object.
Set up the light under and behind the scene, using mono blocks. Use 4 wooden blocks with glass on top and a light overhead.
Put a polariser on the camera to polarise the glass sheet. 30-40 degrees is the maximum point for polarisation. Turning the light down under the box produced a better result.
Putting foam to the side of the object to get more angle into the subject.
If you want a horizon line in your shot get down low.
turn the light up
3D metal objects
moving the light closer does not work
use an oversized reflector
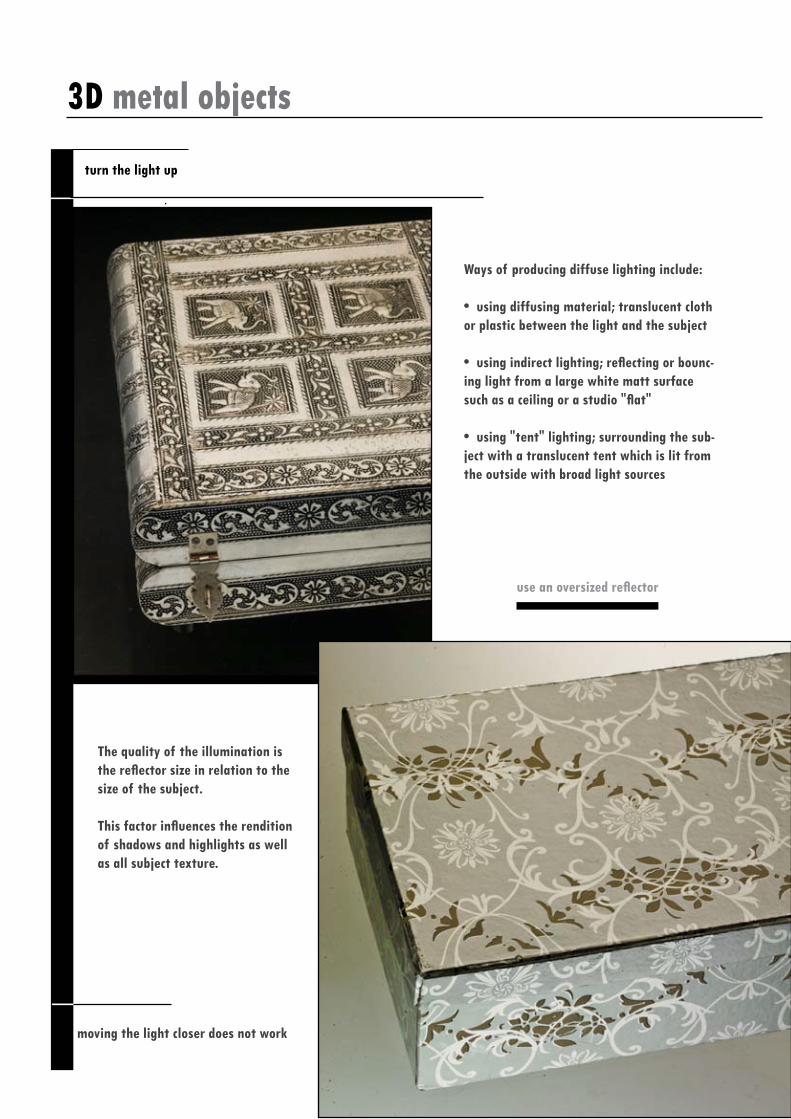
Ways of producing diffuse lighting include:
• using diffusing material; translucent cloth or plastic between the light and the subject
• using indirect lighting; reflecting or bounc-ing light from a large white matt surface such as a ceiling or a studio "flat"
• using "tent" lighting; surrounding the sub-ject with a translucent tent which is lit from the outside with broad light sources
The quality of the illumination is the reflector size in relation to the size of the subject.
This factor influences the rendition of shadows and highlights as well as all subject texture.
turn the light up
3D metal objects
moving the light closer does not work
use an oversized reflector
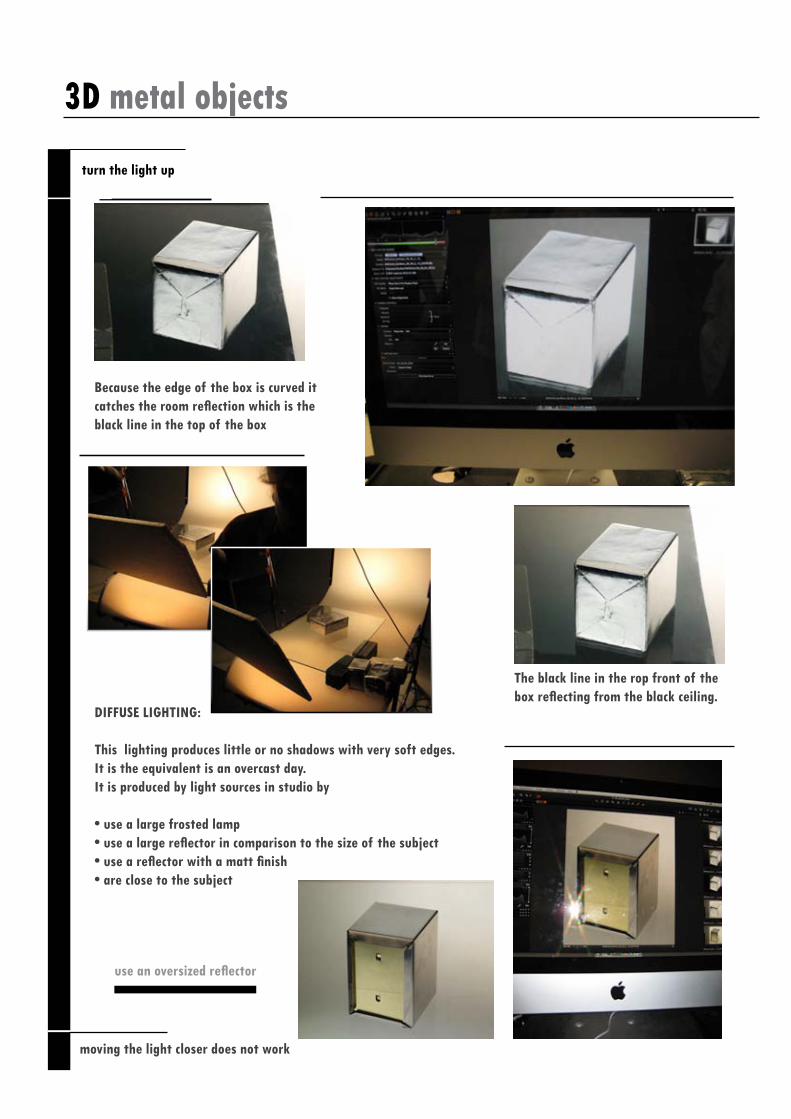
Because the edge of the box is curved it catches the room reflection which is the black line in the top of the box
The black line in the rop front of the box reflecting from the black ceiling.
DIFFUSE LIGHTING:
This lighting produces little or no shadows with very soft edges. It is the equivalent is an overcast day. It is produced by light sources in studio by
• use a large frosted lamp• use a large reflector in comparison to the size of the subject• use a reflector with a matt finish• are close to the subject
CURVED REFLECTIVE SURFACES
Tent Lighting:
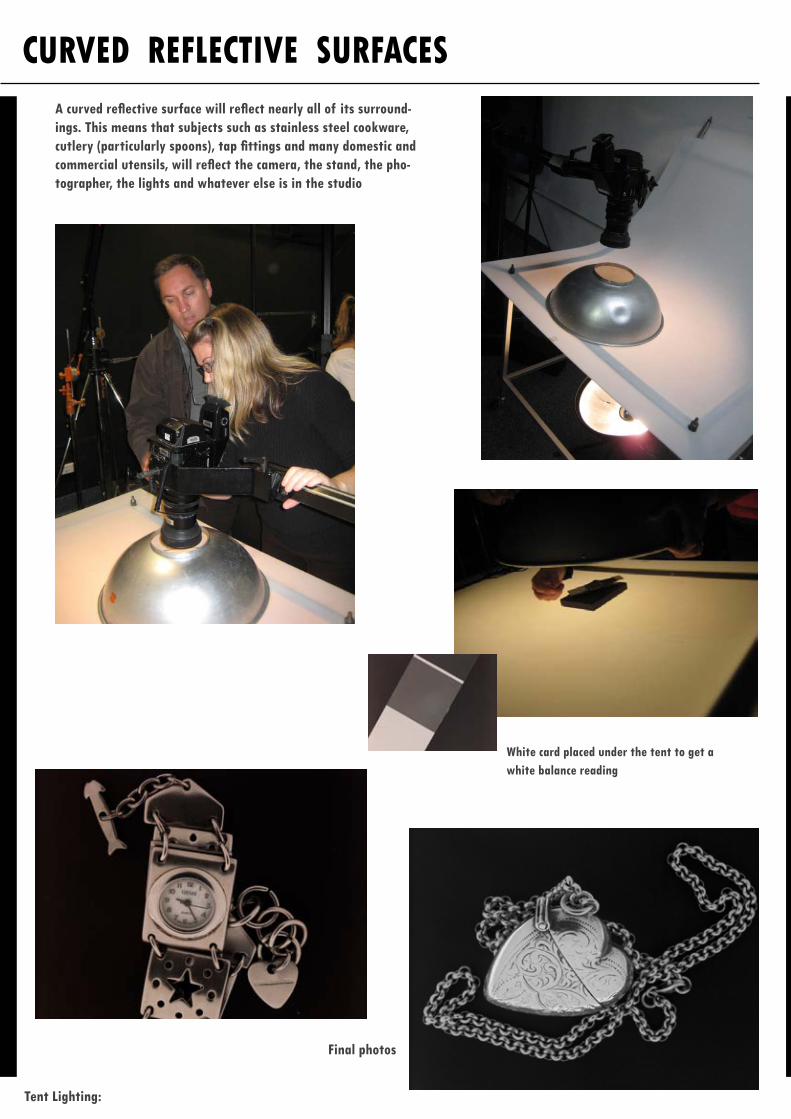
Final photos
A curved reflective surface will reflect nearly all of its surround-ings. This means that subjects such as stainless steel cookware, cutlery (particularly spoons), tap fittings and many domestic and commercial utensils, will reflect the camera, the stand, the pho-tographer, the lights and whatever else is in the studio
White card placed under the tent to get a white balance reading
CURVED REFLECTIVE SURFACES
Tent Lighting:
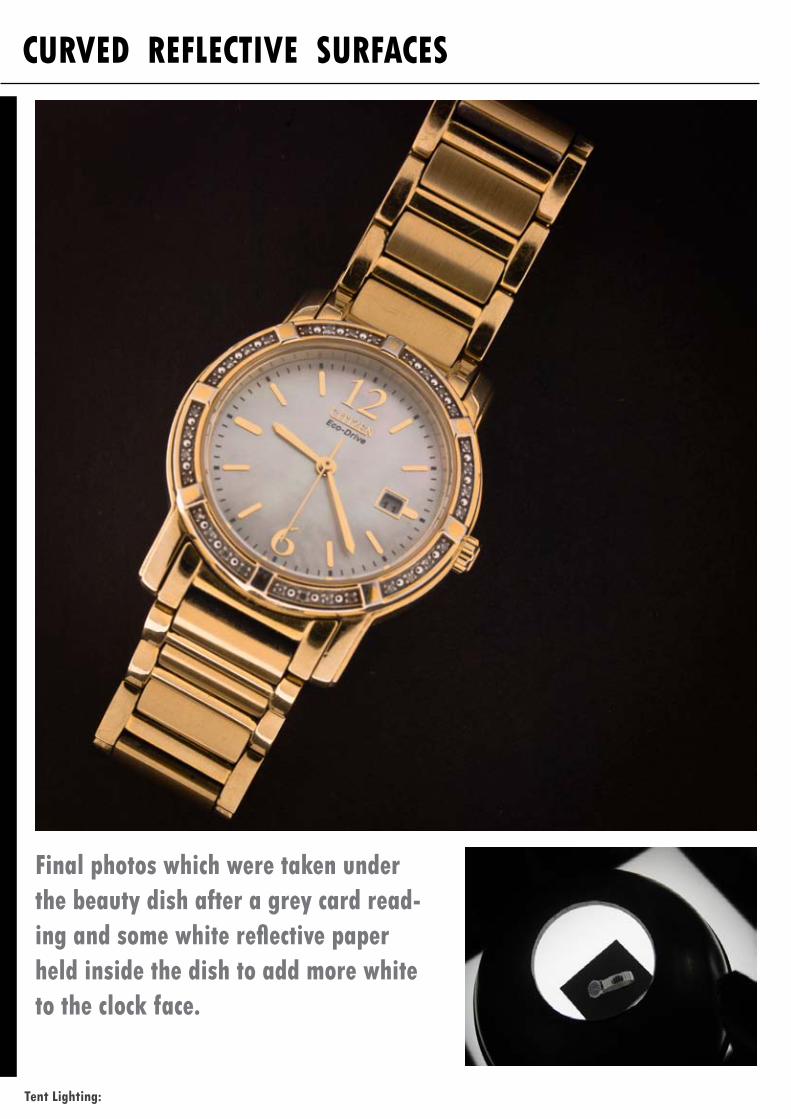
Final photos which were taken under the beauty dish after a grey card read-ing and some white reflective paper held inside the dish to add more white to the clock face.
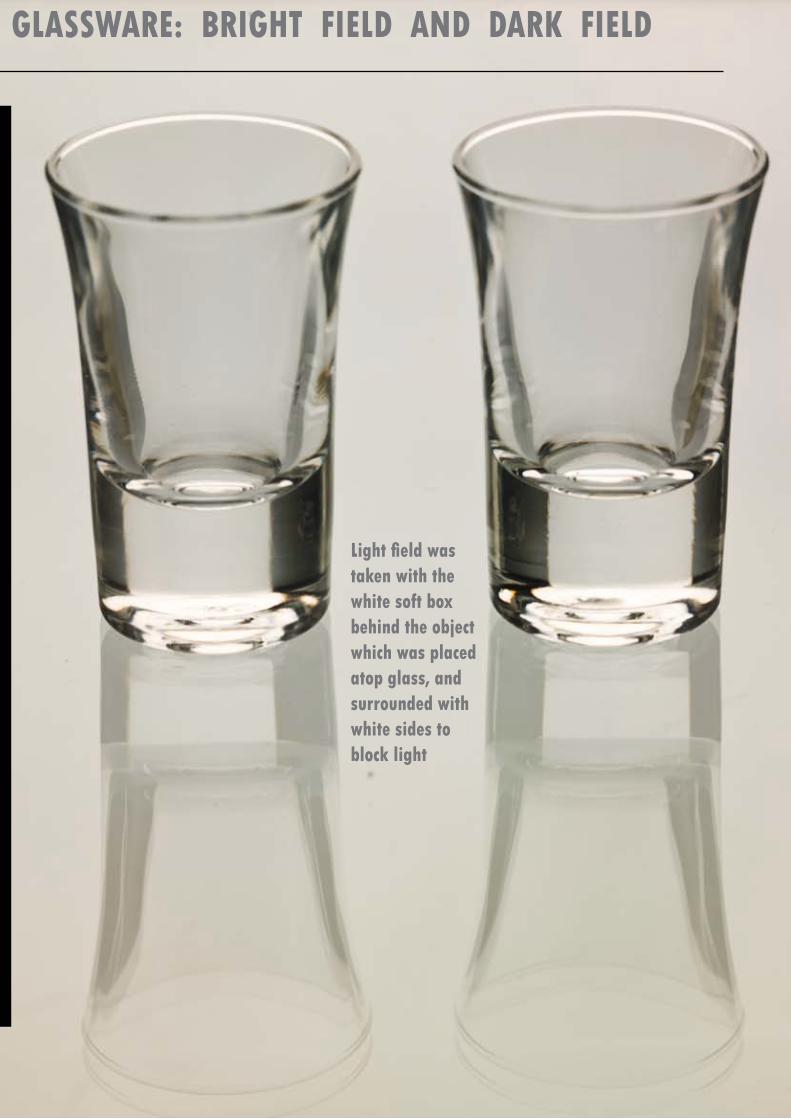
GLASSWARE: BRIGHT FIELD AND DARK FIELD
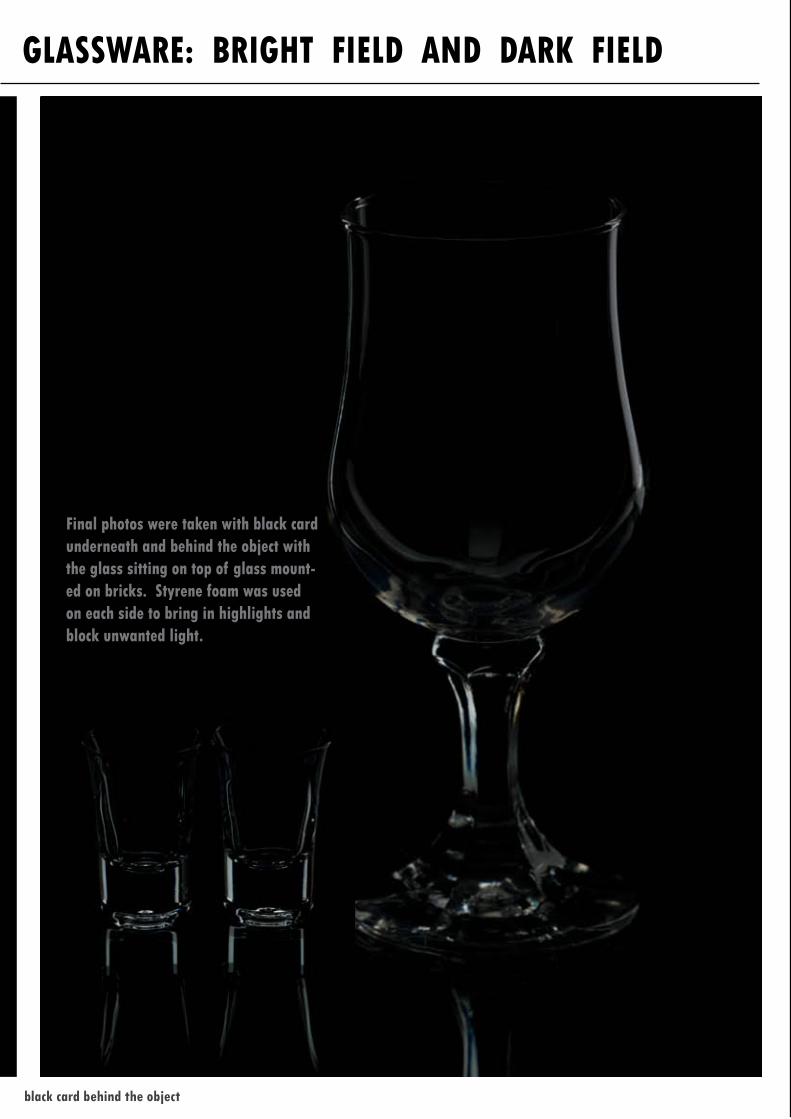
black card behind the object
Final photos were taken with black card underneath and behind the object with the glass sitting on top of glass mount-ed on bricks. Styrene foam was used on each side to bring in highlights and block unwanted light.
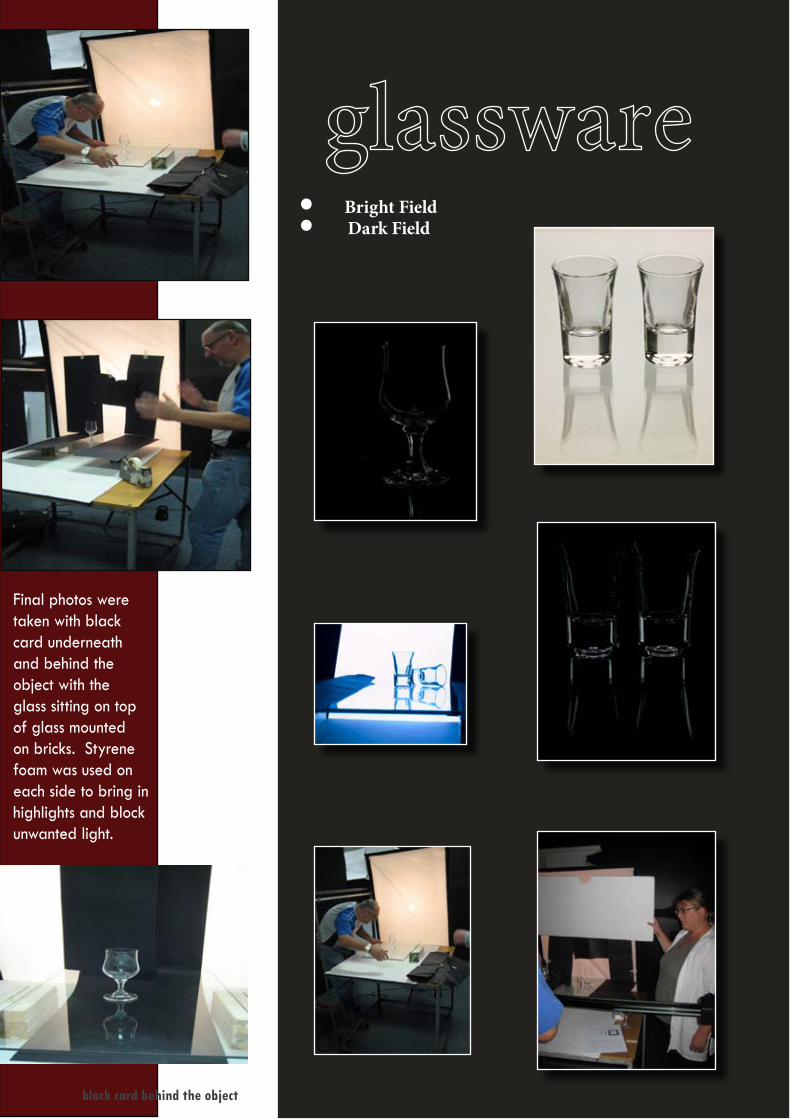
• BrightField• DarkField
black card behind the object
Final photos were taken with black card underneath and behind the object with the glass sitting on top of glass mounted on bricks. Styrene foam was used on each side to bring in highlights and block unwanted light.
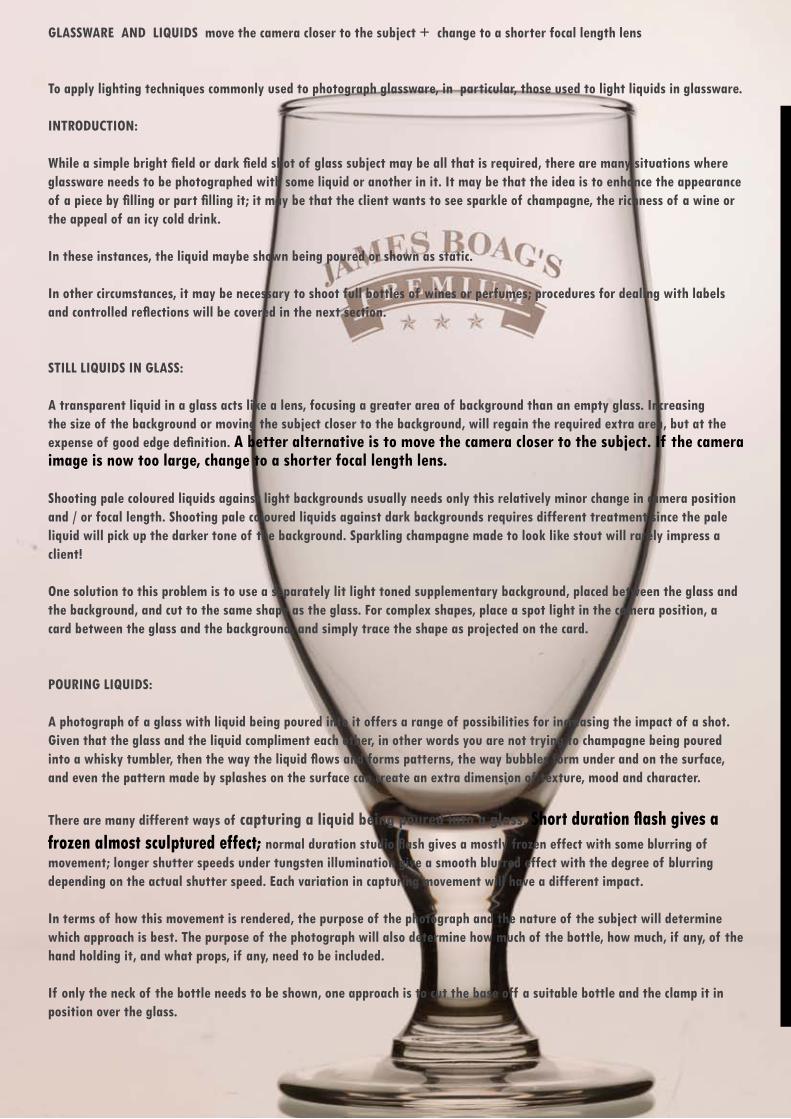
GLASSWARE AND LIQUIDS move the camera closer to the subject + change to a shorter focal length lens
To apply lighting techniques commonly used to photograph glassware, in particular, those used to light liquids in glassware.
INTRODUCTION:
While a simple bright field or dark field shot of glass subject may be all that is required, there are many situations where glassware needs to be photographed with some liquid or another in it. It may be that the idea is to enhance the appearance of a piece by filling or part filling it; it may be that the client wants to see sparkle of champagne, the richness of a wine or the appeal of an icy cold drink.
In these instances, the liquid maybe shown being poured or shown as static.
In other circumstances, it may be necessary to shoot full bottles of wines or perfumes; procedures for dealing with labels and controlled reflections will be covered in the next section.
STILL LIQUIDS IN GLASS:
A transparent liquid in a glass acts like a lens, focusing a greater area of background than an empty glass. Increasing the size of the background or moving the subject closer to the background, will regain the required extra area, but at the expense of good edge definition. A better alternative is to move the camera closer to the subject. If the camera image is now too large, change to a shorter focal length lens.
Shooting pale coloured liquids against light backgrounds usually needs only this relatively minor change in camera position and / or focal length. Shooting pale coloured liquids against dark backgrounds requires different treatment since the pale liquid will pick up the darker tone of the background. Sparkling champagne made to look like stout will rarely impress a client!
One solution to this problem is to use a separately lit light toned supplementary background, placed between the glass and the background, and cut to the same shape as the glass. For complex shapes, place a spot light in the camera position, a card between the glass and the background, and simply trace the shape as projected on the card.
POURING LIQUIDS:
A photograph of a glass with liquid being poured into it offers a range of possibilities for increasing the impact of a shot. Given that the glass and the liquid compliment each other, in other words you are not trying to champagne being poured into a whisky tumbler, then the way the liquid flows and forms patterns, the way bubbles form under and on the surface, and even the pattern made by splashes on the surface can create an extra dimension of texture, mood and character.
There are many different ways of capturing a liquid being poured into a glass. Short duration flash gives a frozen almost sculptured effect; normal duration studio flash gives a mostly frozen effect with some blurring of movement; longer shutter speeds under tungsten illumination give a smooth blurred effect with the degree of blurring depending on the actual shutter speed. Each variation in capturing movement will have a different impact. In terms of how this movement is rendered, the purpose of the photograph and the nature of the subject will determine which approach is best. The purpose of the photograph will also determine how much of the bottle, how much, if any, of the hand holding it, and what props, if any, need to be included.
If only the neck of the bottle needs to be shown, one approach is to cut the base off a suitable bottle and the clamp it in position over the glass.
GLASSWARE: BRIGHT FIELD AND DARK FIELD
Light field was taken with the white soft box behind the object which was placed atop glass, and surrounded with white sides to block light
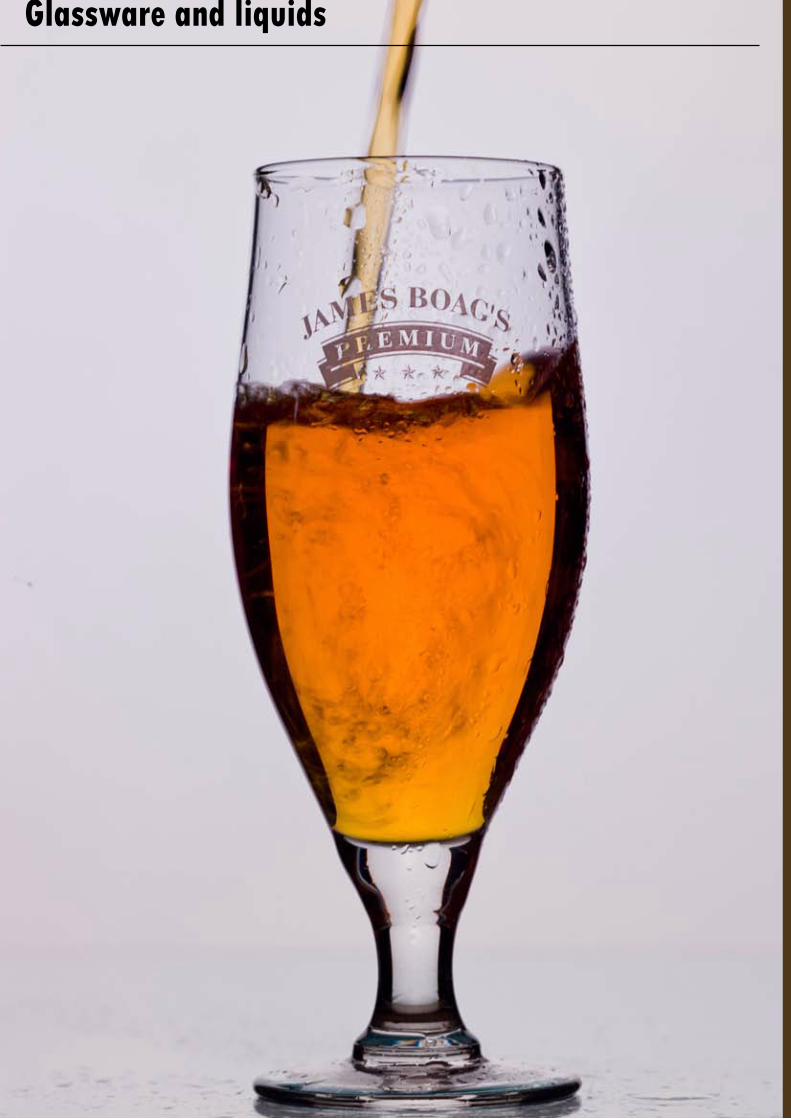
Glassware and liquidsGlassware and liquids
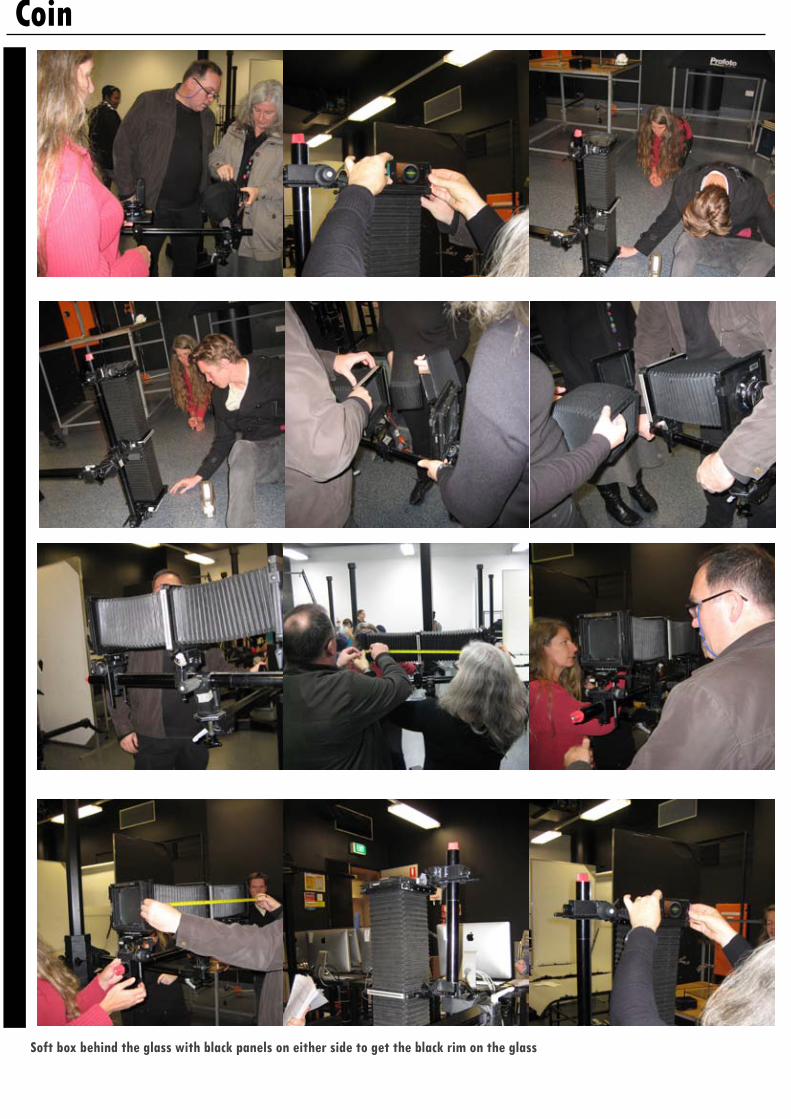
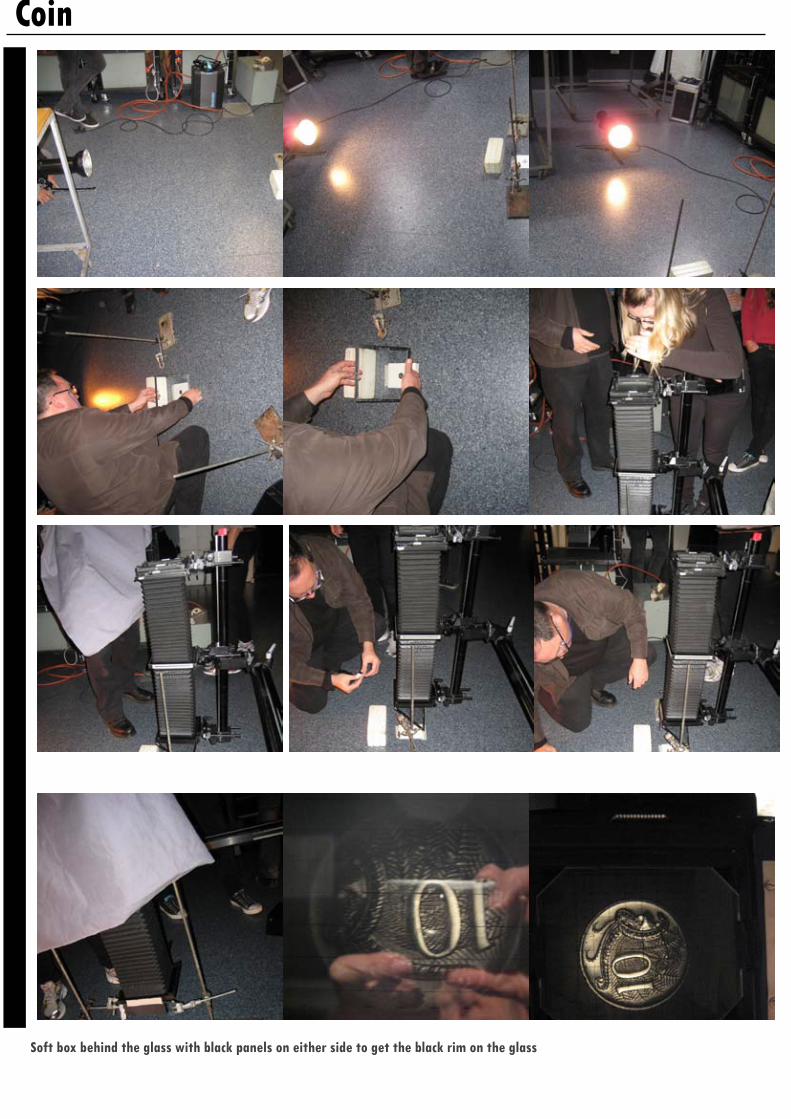
Soft box behind the glass with black panels on either side to get the black rim on the glass
Glassware and liquids
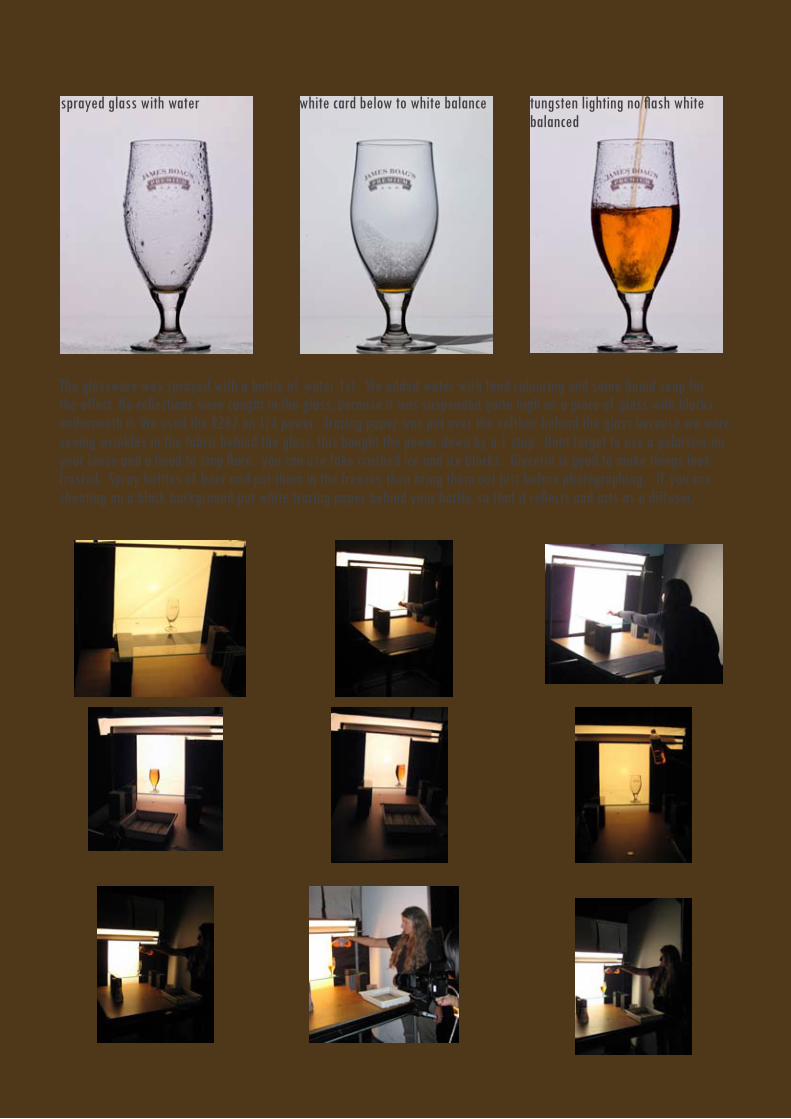
The glassware was sprayed with a bottle of water 1st. We added water with food colouring and some liquid soap for the effect. No reflections were caught in the glass, because it was suspended quite high on a piece of glass with blocks underneath it. We used the RZ67 on 1/4 power. Tracing paper was put over the softbox behind the glass because we were seeing wrinkles in the fabric behind the glass, this bought the power down by a 1 stop. Dont forget to use a polariser on your lense and a hood to stop flare. you can use fake crushed ice and ice blocks. Glycerin is good to make things look frosted. Spray bottles of beer and put them in the freezer, then bring them out just before photographing. If you are shooting on a black background put white tracing paper behind your bottle, so that it reflects and acts as a diffuser.
sprayed glass with water white card below to white balance tungsten lighting no flash white balanced
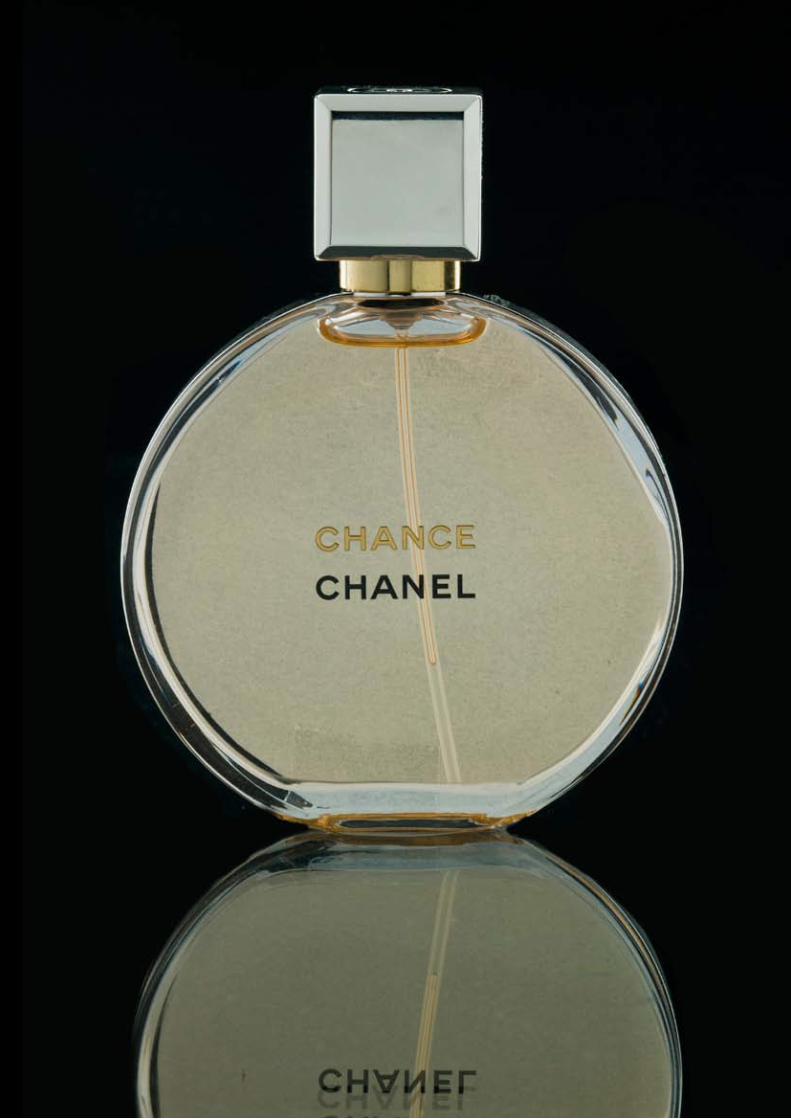
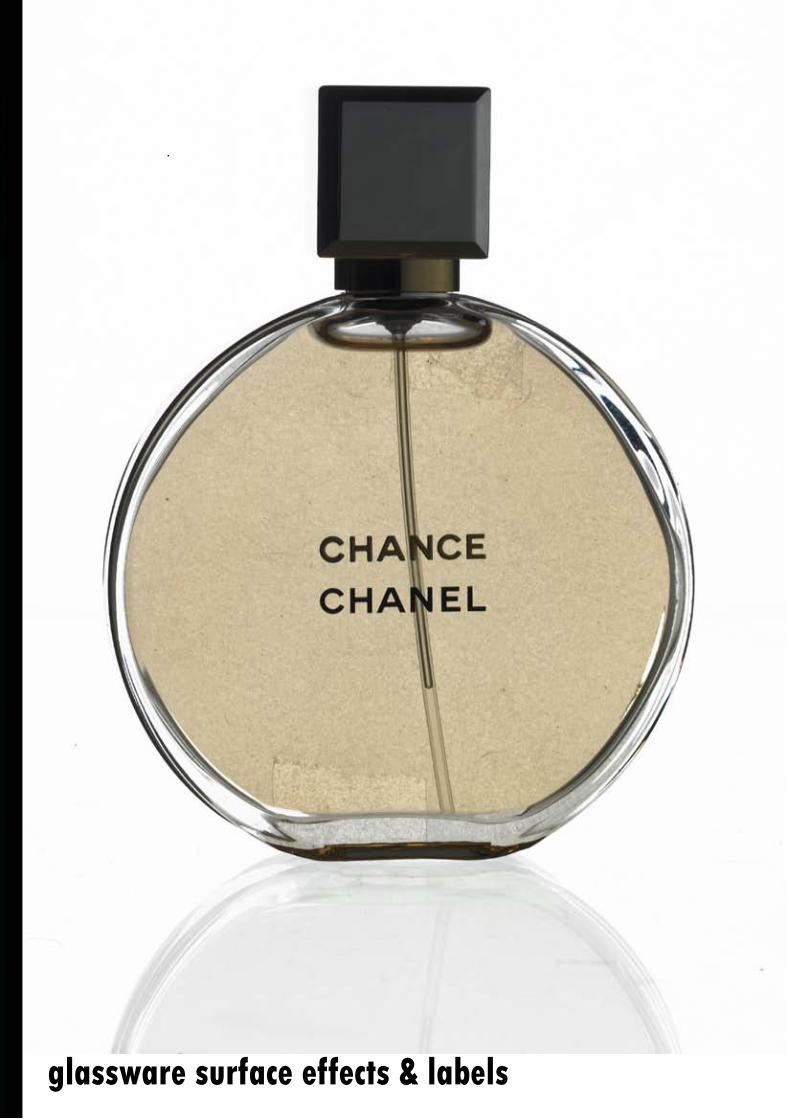
glassware surface effects & labels
glassware surface effects & labels
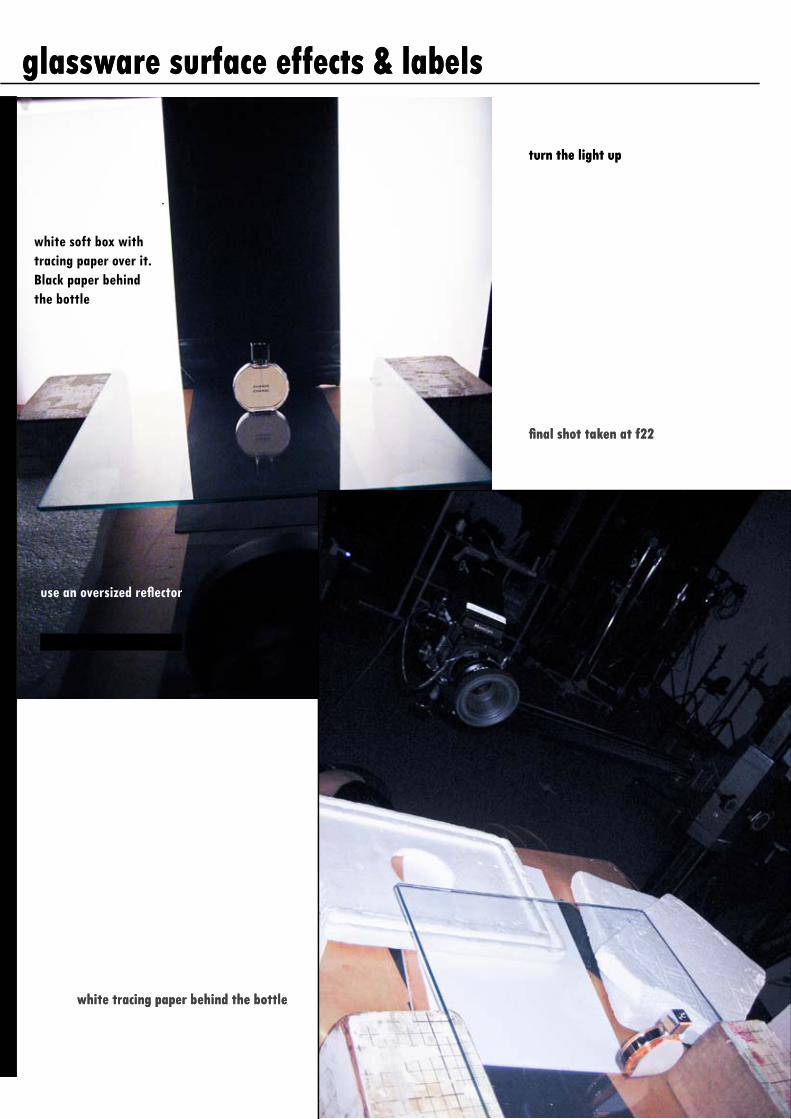
turn the light up
use an oversized reflector
white soft box with tracing paper over it. Black paper behind the bottle
white tracing paper behind the bottle
final shot taken at f22
glassware surface effects & labels
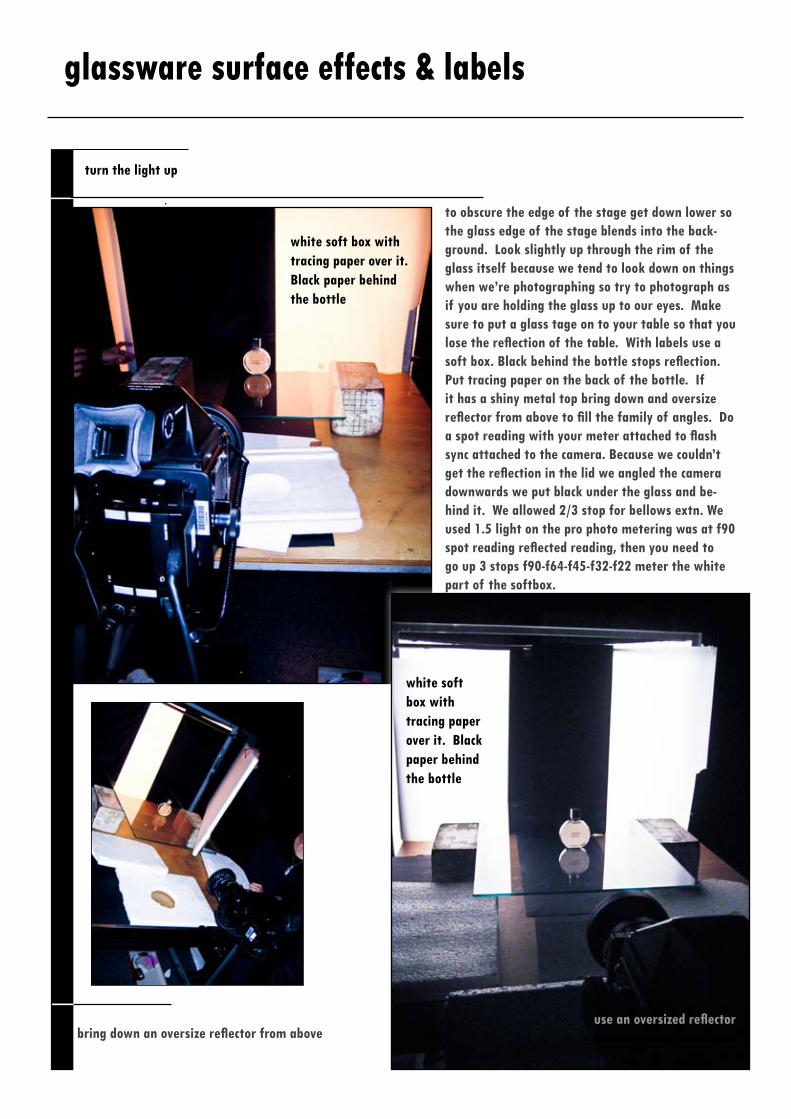
turn the light up
use an oversized reflector
white soft box with tracing paper over it. Black paper behind the bottle
white tracing paper behind the bottle
final shot taken at f22
turn the light up
white soft box with tracing paper over it. Black paper behind the bottle
white soft box with tracing paper over it. Black paper behind the bottle
glassware surface effects & labels
bring down an oversize reflector from aboveuse an oversized reflector
to obscure the edge of the stage get down lower so the glass edge of the stage blends into the back-ground. Look slightly up through the rim of the glass itself because we tend to look down on things when we’re photographing so try to photograph as if you are holding the glass up to our eyes. Make sure to put a glass tage on to your table so that you lose the reflection of the table. With labels use a soft box. Black behind the bottle stops reflection. Put tracing paper on the back of the bottle. If it has a shiny metal top bring down and oversize reflector from above to fill the family of angles. Do a spot reading with your meter attached to flash sync attached to the camera. Because we couldn’t get the reflection in the lid we angled the camera downwards we put black under the glass and be-hind it. We allowed 2/3 stop for bellows extn. We used 1.5 light on the pro photo metering was at f90 spot reading reflected reading, then you need to go up 3 stops f90-f64-f45-f32-f22 meter the white part of the softbox.
Coin
Soft box behind the glass with black panels on either side to get the black rim on the glass
Coin
Soft box behind the glass with black panels on either side to get the black rim on the glass
Coin Coin
Transillumination
Soft box behind the glass with black panels on either side to get the black rim on the glass
Coin
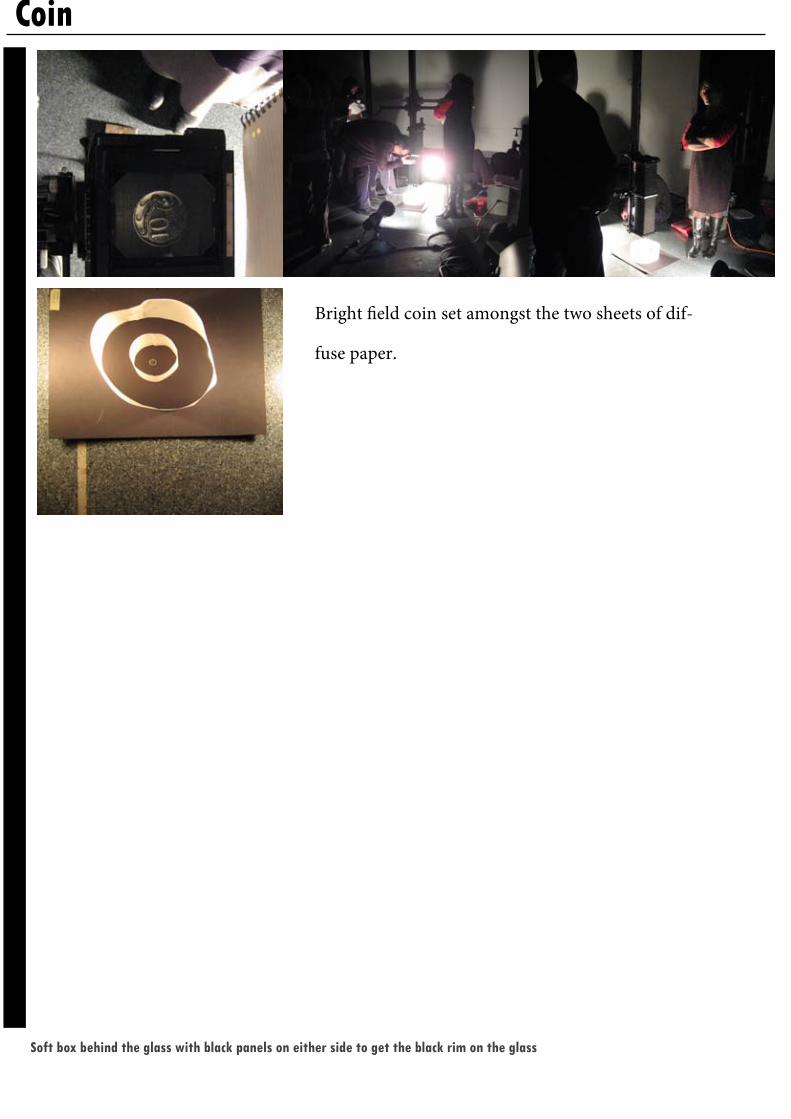
Bright field coin set amongst the two sheets of dif-
fuse paper.
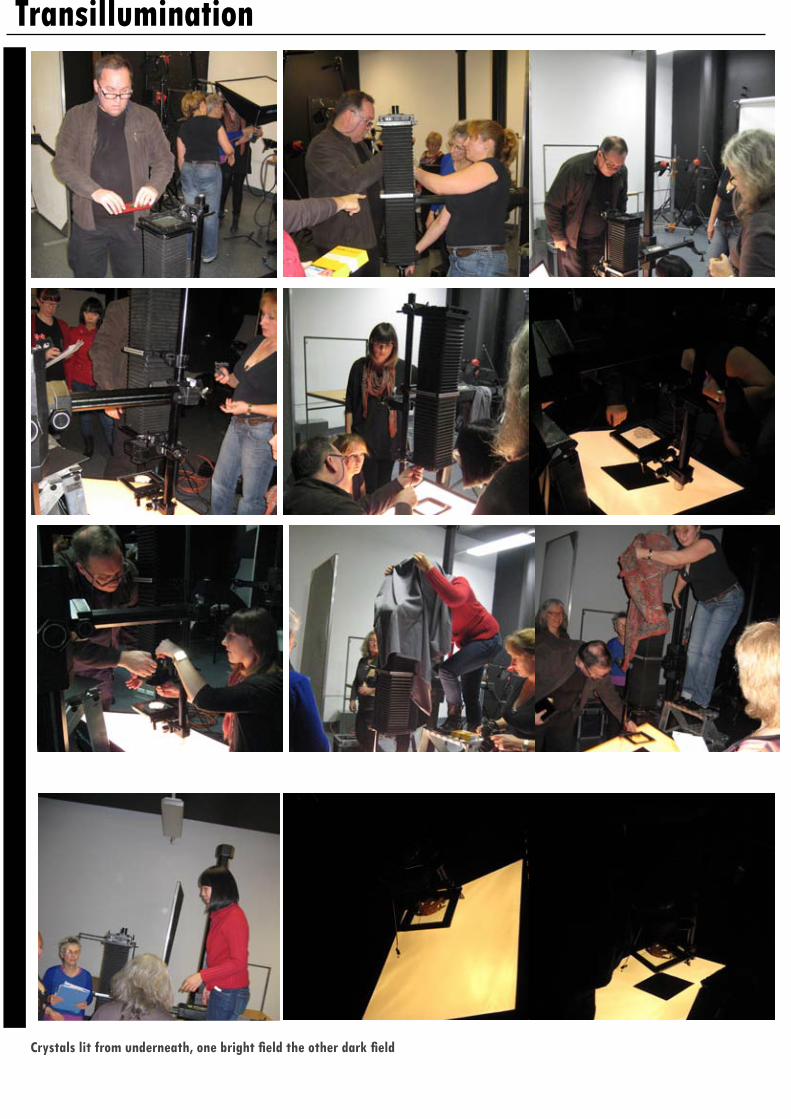
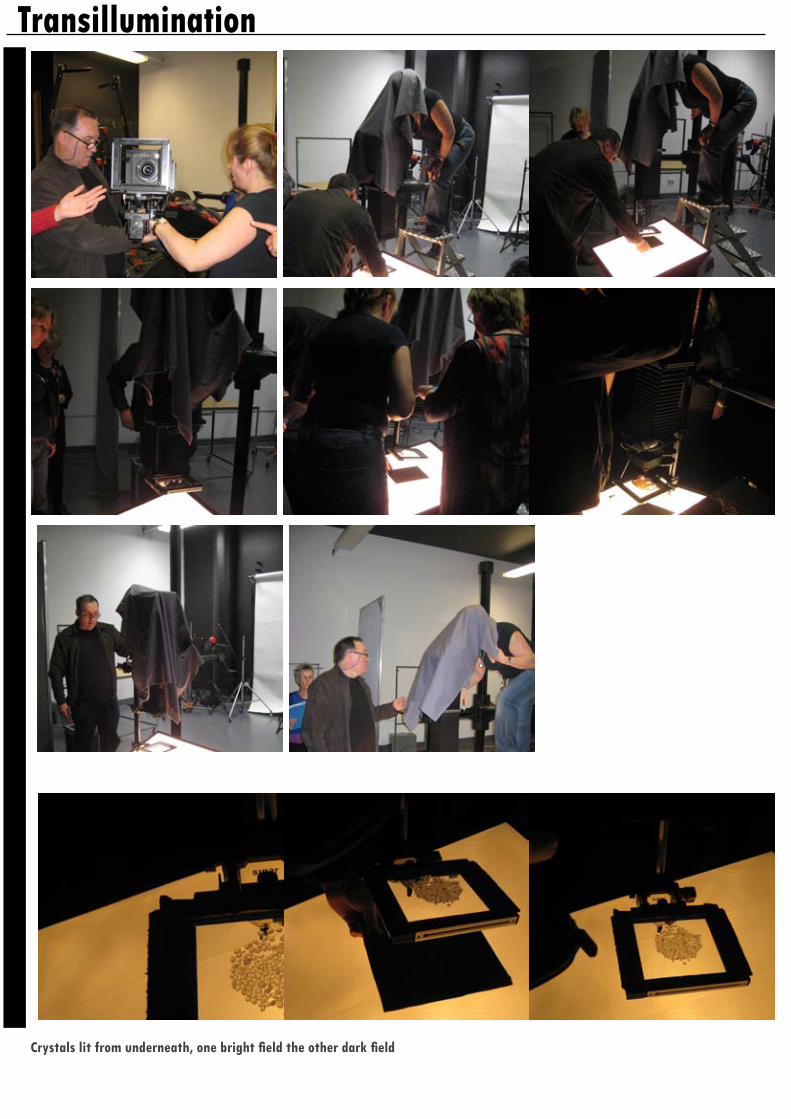
Crystals lit from underneath, one bright field the other dark field
Transillumination Coin
Crystals lit from underneath, one bright field the other dark field
Transillumination
turn the light up
metal objects
moving the light closer does not work use an oversized reflector
Metal on glass with dark blue fabric under the glass and lit from behind with diffusionmaterial
Transillumination
metal objectsturn the light up use an oversized reflector
moving the light closer does not work
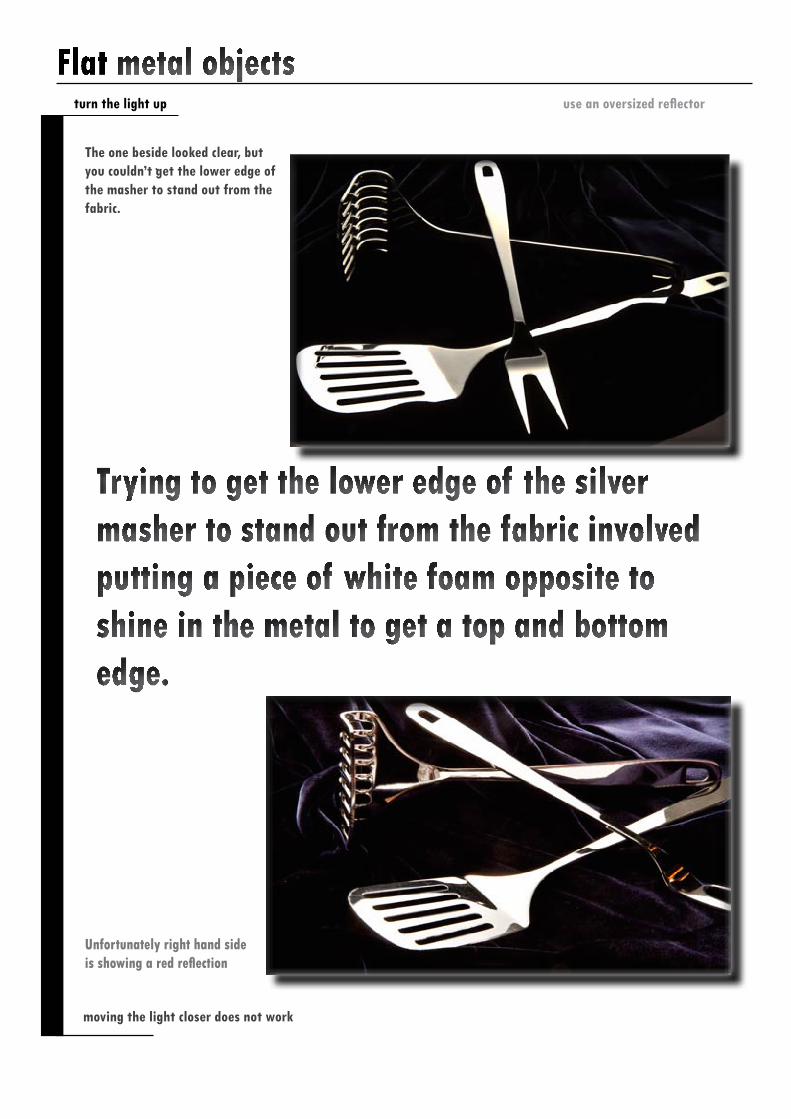
The one beside looked clear, but you couldn’t get the lower edge of the masher to stand out from the fabric.
Unfortunately right hand side is showing a red reflection
Trying to get the lower edge of the silver masher to stand out from the fabric involved putting a piece of white foam opposite to shine in the metal to get a top and bottom edge.

4 different settings on the flash unitsidelight flash
Directional lighting produces shadows with relatively hard edges.The studio equivalent of bright or hazy bright sunlight. It is produced by light sources such as• use a small lamp (e.g. a small tungsten halogen globe)• use a small reflector in comparison to the size of the subject• use a highly polished focused reflector• are distant from the subject
Portable Flash - Guide numbers can be used to compare output of portable flash and to calculate distancesand settings for using portable flash as fill in bright sunlight. Mainly designed for on-camera location use.
The guide number is a product of the f/number and the flash to subject distance,quoted for 100 ISO either in meters or feet.
A higher guide num-ber indicates a more powerful flash.
GN = distance x f-numberf-number = GN / distancedistance = guide number /f-stop
No flash Sun and full power flash
Sun and half power flash Sun and quarter power flash
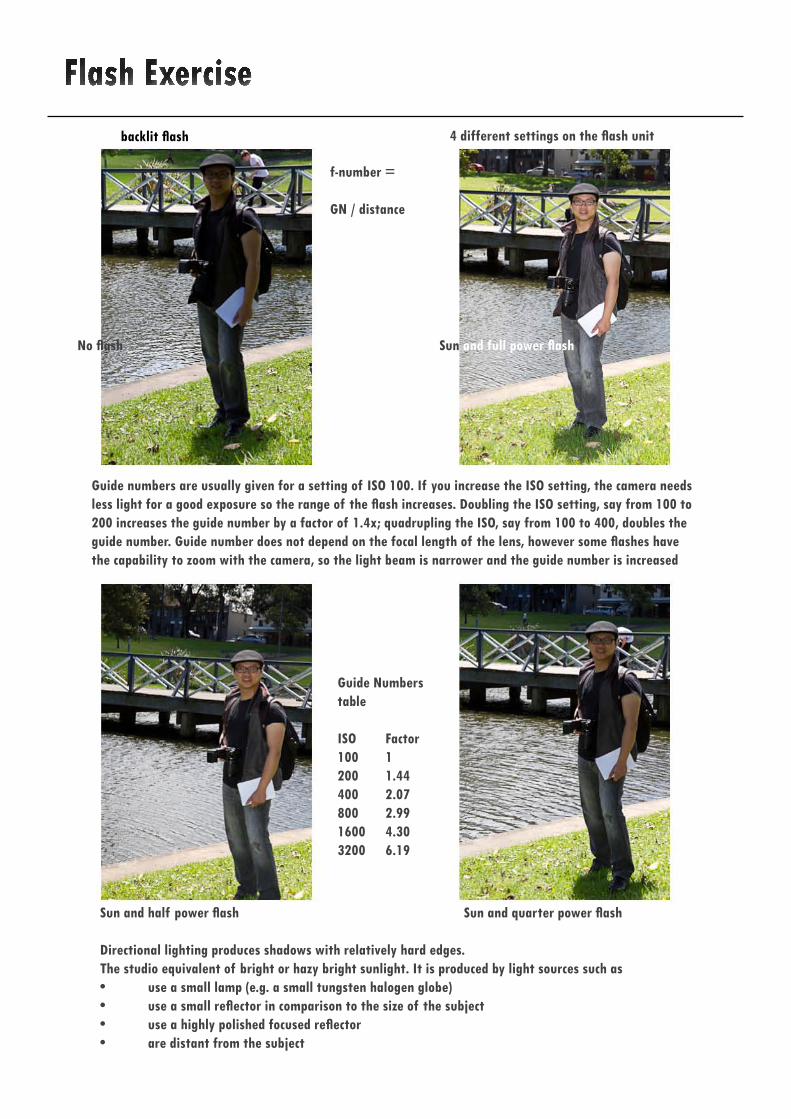
backlit flash 4 different settings on the flash unit
Directional lighting produces shadows with relatively hard edges.The studio equivalent of bright or hazy bright sunlight. It is produced by light sources such as• use a small lamp (e.g. a small tungsten halogen globe)• use a small reflector in comparison to the size of the subject• use a highly polished focused reflector• are distant from the subject
Guide numbers are usually given for a setting of ISO 100. If you increase the ISO setting, the camera needs less light for a good exposure so the range of the flash increases. Doubling the ISO setting, say from 100 to 200 increases the guide number by a factor of 1.4x; quadrupling the ISO, say from 100 to 400, doubles the guide number. Guide number does not depend on the focal length of the lens, however some flashes have the capability to zoom with the camera, so the light beam is narrower and the guide number is increased
f-number =
GN / distance
Guide Numbers table
ISO Factor100 1200 1.44400 2.07800 2.991600 4.303200 6.19
No flash Sun and full power flash
Sun and half power flash Sun and quarter power flash
Capture 1 exercise – digital back 13/3/12
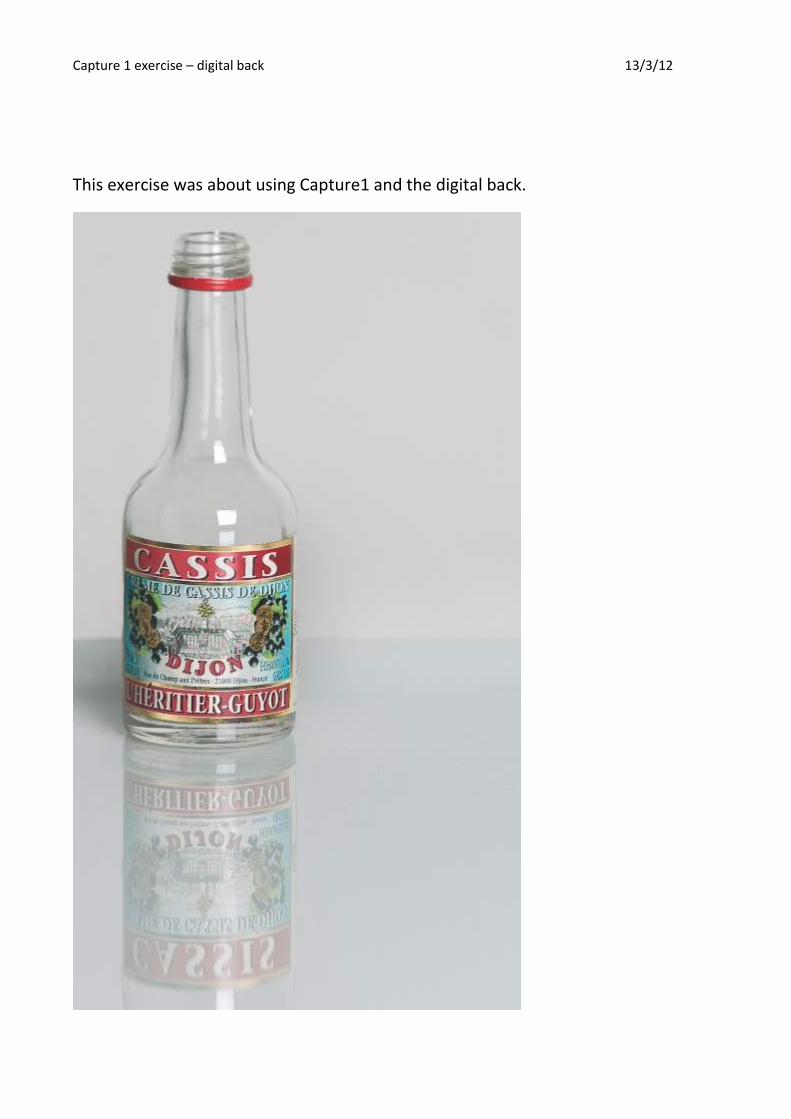
This exercise was about using Capture1 and the digital back.
Capture 1 exercise – digital back 13/3/12
Session>Camera>Save in DDrive>to drag over later
Everything goes in to the Capture1 folder automatically. Shoot in Capture1 and process into your DDrive folder.
Drop down to Data Drive to save
Name everything the same
ICC profile>phase1>h20>product flash>defaults
Camera control change after picture
Iso 100
Set dot to white on camera (relates to the format of the chip
Steps
1. Focus>white button>release blue lever, it’ll go across
2. Close lense before you cock shutter
3. Put cable in the lense in the C slot. Get the cable with the button on the lead.
4. On the photo get the colour picker on the photo and click set
5. Process>make sure to direct to the output folder
6. Processing recipe>type in name of file that you’ve named it
7. Set the scale to 100% - save as DNG
120 lens is standard lens – 65 lens you can go close but you get distortion – 210 lens is your telephoto lens.
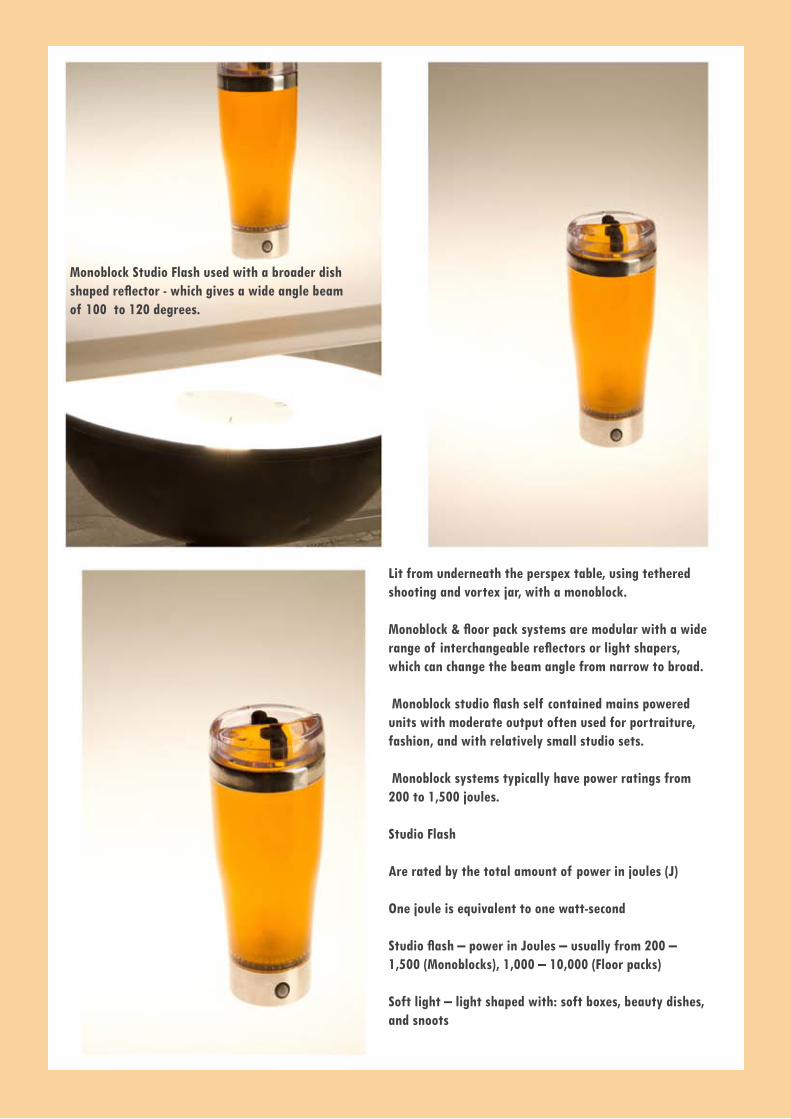
Monoblock Studio Flash
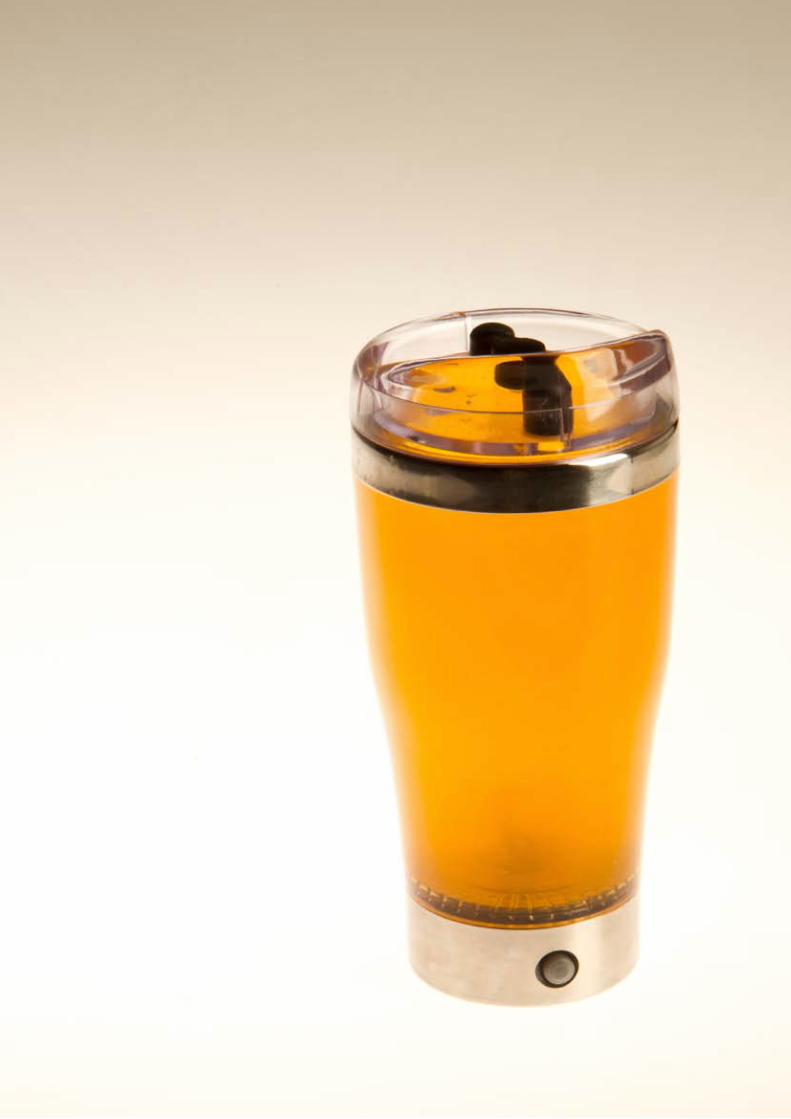
Lit from underneath the perspex table, using tethered shooting and vortex jar, with a monoblock.
Monoblock & floor pack systems are modular with a wide range of interchangeable reflectors or light shapers, which can change the beam angle from narrow to broad.
Monoblock studio flash self contained mains powered units with moderate output often used for portraiture, fashion, and with relatively small studio sets.
Monoblock systems typically have power ratings from 200 to 1,500 joules.
Studio Flash
Are rated by the total amount of power in joules (J)
One joule is equivalent to one watt-second
Studio flash – power in Joules – usually from 200 – 1,500 (Monoblocks), 1,000 – 10,000 (Floor packs)
Soft light – light shaped with: soft boxes, beauty dishes, and snoots
Monoblock Studio Flash used with a broader dish shaped reflector - which gives a wide angle beam of 100 to 120 degrees.
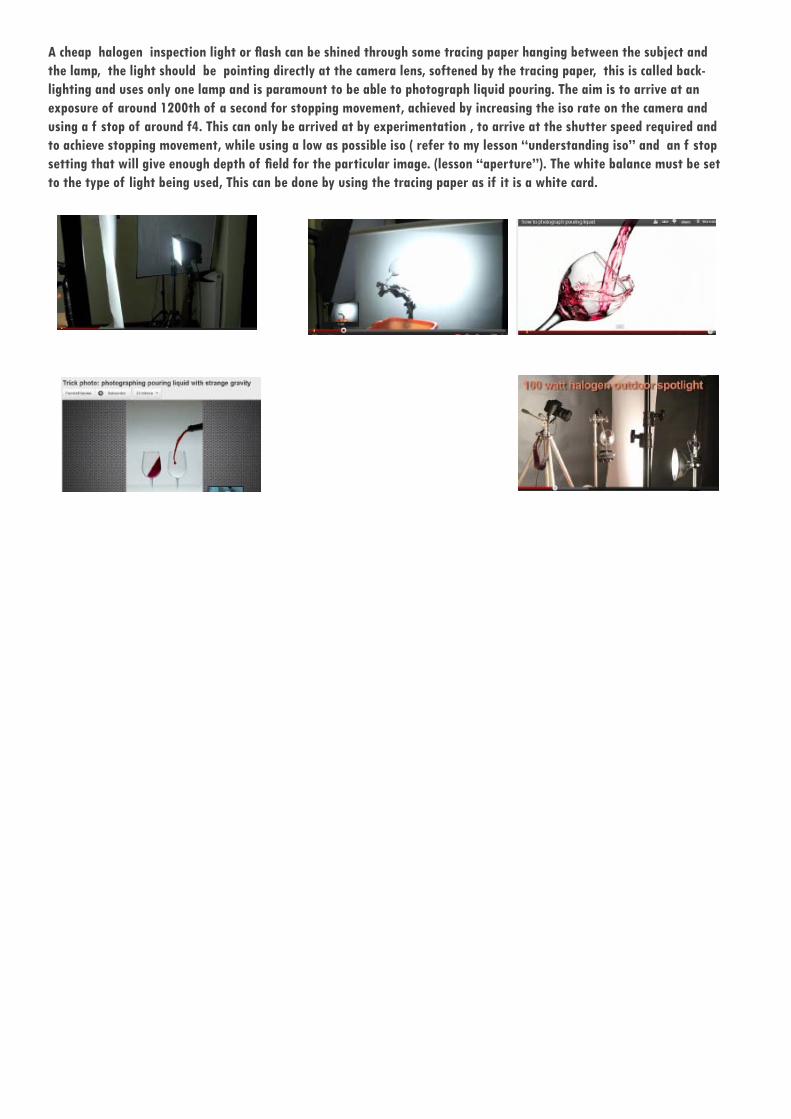
A cheap halogen inspection light or flash can be shined through some tracing paper hanging between the subject and the lamp, the light should be pointing directly at the camera lens, softened by the tracing paper, this is called back-lighting and uses only one lamp and is paramount to be able to photograph liquid pouring. The aim is to arrive at an exposure of around 1200th of a second for stopping movement, achieved by increasing the iso rate on the camera and using a f stop of around f4. This can only be arrived at by experimentation , to arrive at the shutter speed required and to achieve stopping movement, while using a low as possible iso ( refer to my lesson “understanding iso” and an f stop setting that will give enough depth of field for the particular image. (lesson “aperture”). The white balance must be set to the type of light being used, This can be done by using the tracing paper as if it is a white card.