Embed Size (px)
Citation preview
Postgres Plus Advanced Server JDBC Connector
April 19, 2009

Postgres Plus Advanced Server JDBC Connector
2
Postgres Plus Advanced Server JDBC Connector Guide Version 1.0 by EnterpriseDB Corporation Copyright © 2009 EnterpriseDB Corporation EnterpriseDB Corporation, 235 Littleton Rd, Westford, Mass 01866, USA T +1 978 589 5700 F +1 978 589 5701 E [email protected] www.enterprisedb.com
Postgres Plus Advanced Server JDBC Connector
3
Table of Contents TYPOGRAPHICAL CONVENTIONS USED IN THIS GUIDE .............................................................................. 4
ADVANCED SERVER JDBC CONNECTOR........................................................................................... 5 JDBC Driver Types ........................................................................................................................... 5 The JDBC Interface .......................................................................................................................... 6 JDBC Classes and Interfaces ........................................................................................................... 7 The JDBC DriverManager ................................................................................................................ 8
JDBC INSTALLATION .............................................................................................................................. 9 Installing Java ................................................................................................................................... 9 Installing the Advanced Server JDBC Connector ............................................................................. 9
USING THE ADVANCED SERVER JDBC CONNECTOR WITH JAVA APPLICATIONS....................................... 10 Loading the Advanced Server JDBC Connector ............................................................................ 12 Connecting to the Database ........................................................................................................... 13 Additional Connection Properties ................................................................................................... 14 Executing SQL Statements through Statement Objects ................................................................. 15 Retrieving Results from a ResultSet Object ................................................................................... 16 Freeing Resources ......................................................................................................................... 17 Handling Errors ............................................................................................................................... 18
EXECUTING SQL COMMANDS WITH EXECUTEUPDATE............................................................................ 19 Using executeUpdate to INSERT Data........................................................................................... 19
ADDING A GRAPHICAL INTERFACE TO A JAVA PROGRAM ........................................................................ 22 ADVANCED JDBC CONNECTOR FUNCTIONALITY .......................................................................... 26
REDUCING CLIENT-SIDE RESOURCE REQUIREMENTS............................................................................. 26 Modifying the Batch Size of a Statement Object ............................................................................ 27
USING PREPAREDSTATEMENTS TO SEND SQL COMMANDS ................................................................... 28 EXECUTING STORED PROCEDURES....................................................................................................... 30
Invoking Stored Procedures ........................................................................................................... 30 USING REF CURSORS WITH JAVA ...................................................................................................... 39
Using a REF CURSOR to retrieve a ResultSet .............................................................................. 39 USING BYTEA DATA WITH JAVA ........................................................................................................... 42
Inserting BYTEA Data into an Advanced Server database ............................................................ 43 Retrieving BYTEA Data from an Advanced Server database......................................................... 45
ASYNCHRONOUS NOTIFICATION HANDLING WITH NOTICELISTENER ........................................................ 47
Postgres Plus Advanced Server JDBC Connector
4
Typographical Conventions Used in this Guide Certain typographical conventions are used in this manual to clarify the meaning and usage of various commands, statements, programs, examples, etc. This section provides a summary of these conventions. In the following descriptions a term refers to any word or group of words which may be language keywords, user-supplied values, literals, etc. A term’s exact meaning depends upon the context in which it is used.
• Italic font introduces a new term, typically, in the sentence that defines it for the first time. • Fixed-width (mono-spaced) font is used for terms that must be given literally such as
SQL commands, specific table and column names used in the examples, programming language keywords, etc. For example, SELECT * FROM emp;
• Italic fixed-width font is used for terms for which the user must substitute values in actual usage. For example, DELETE FROM table_name;
• A vertical pipe | denotes a choice between the terms on either side of the pipe. A vertical pipe is used to separate two or more alternative terms within square brackets (optional choices) or braces (one mandatory choice).
• Square brackets [ ] denote that one or none of the enclosed term(s) may be substituted. For example, [ a | b ], means choose one of “a” or “b” or neither of the two.
• Braces {} denote that exactly one of the enclosed alternatives must be specified. For example, { a | b }, means exactly one of “a” or “b” must be specified.
• Ellipses ... denote that the proceeding term may be repeated. For example, [ a | b ] ... means that you may have the sequence, “b a a b a”.
Postgres Plus Advanced Server JDBC Connector
5
Advanced Server JDBC Connector Sun Microsystems created a standardized interface for connecting Java applications to databases known as Java Database Connectivity (JDBC). The Postgres Plus Advanced Server JDBC Connector connects a Java application to a Postgres database.
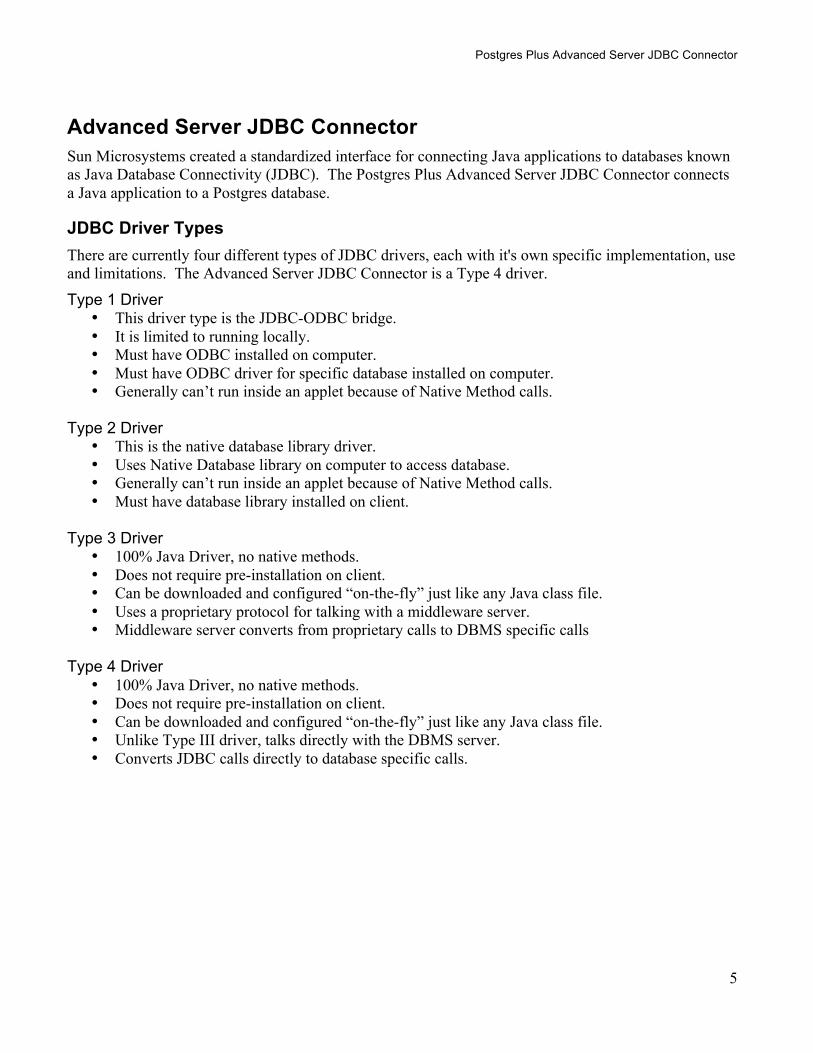
JDBC Driver Types There are currently four different types of JDBC drivers, each with it's own specific implementation, use and limitations. The Advanced Server JDBC Connector is a Type 4 driver.
Type 1 Driver • This driver type is the JDBC-ODBC bridge. • It is limited to running locally. • Must have ODBC installed on computer. • Must have ODBC driver for specific database installed on computer. • Generally can’t run inside an applet because of Native Method calls.
Type 2 Driver
• This is the native database library driver. • Uses Native Database library on computer to access database. • Generally can’t run inside an applet because of Native Method calls. • Must have database library installed on client.
Type 3 Driver
• 100% Java Driver, no native methods. • Does not require pre-installation on client. • Can be downloaded and configured “on-the-fly” just like any Java class file. • Uses a proprietary protocol for talking with a middleware server. • Middleware server converts from proprietary calls to DBMS specific calls
Type 4 Driver
• 100% Java Driver, no native methods. • Does not require pre-installation on client. • Can be downloaded and configured “on-the-fly” just like any Java class file. • Unlike Type III driver, talks directly with the DBMS server. • Converts JDBC calls directly to database specific calls.
Postgres Plus Advanced Server JDBC Connector
6
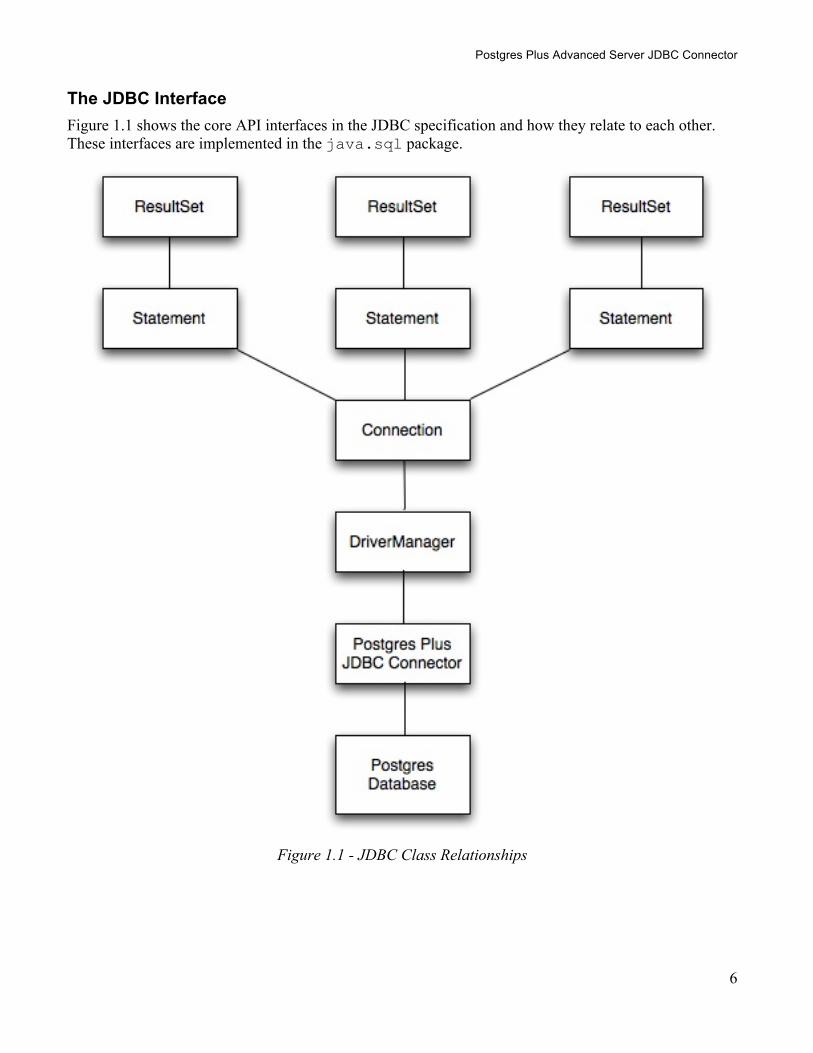
The JDBC Interface Figure 1.1 shows the core API interfaces in the JDBC specification and how they relate to each other. These interfaces are implemented in the java.sql package.
Figure 1.1 - JDBC Class Relationships
Postgres Plus Advanced Server JDBC Connector
7
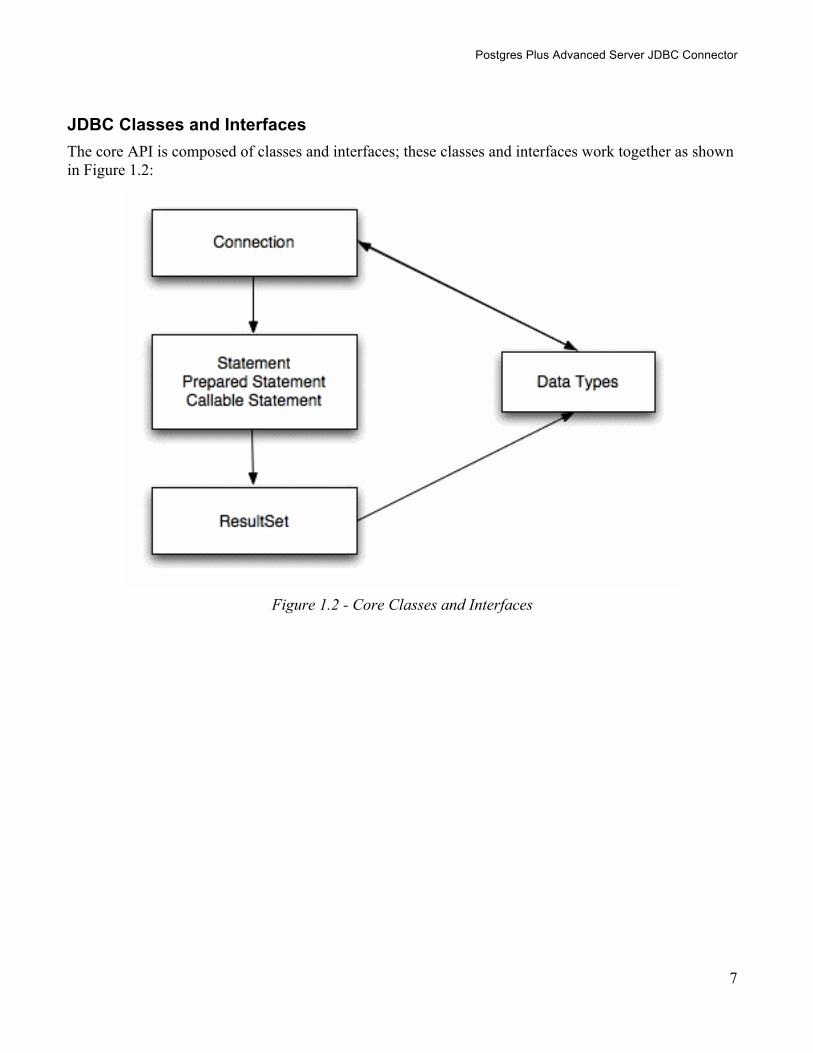
JDBC Classes and Interfaces The core API is composed of classes and interfaces; these classes and interfaces work together as shown in Figure 1.2:
Figure 1.2 - Core Classes and Interfaces

Postgres Plus Advanced Server JDBC Connector
8
The JDBC DriverManager Figure 1.3 depicts the role of the DriverManager class in a typical JDBC application. The DriverManager acts as the bridge between a Java application and the backend database and decides which JDBC driver to use for the target database.
Figure 1.3 - DriverManager/Drivers
Postgres Plus Advanced Server JDBC Connector
9
JDBC Installation The Advanced Server JDBC Connector is included with the Advanced Server installer. To use the JDBC Connector, you must have Java installed on your system (version 1.4 or newer).
Installing Java You can download the Java installer from the Sun Developer Network website. Please visit http://java.sun.com/javase/downloads/index.jsp for the Java installer that matches your environment – detailed installation instructions are available through the associated Docs link on the same page.
Installing the Advanced Server JDBC Connector To install the jar file that contains the JDBC driver:
• Edit the CLASSPATH environment variable and append the full path to the “edb-jdbc14.jar” file.
• Copy the “edb-jdbc14.jar” file to your $JAVA_HOME/jre/lib/ext directory.
Postgres Plus Advanced Server JDBC Connector
10
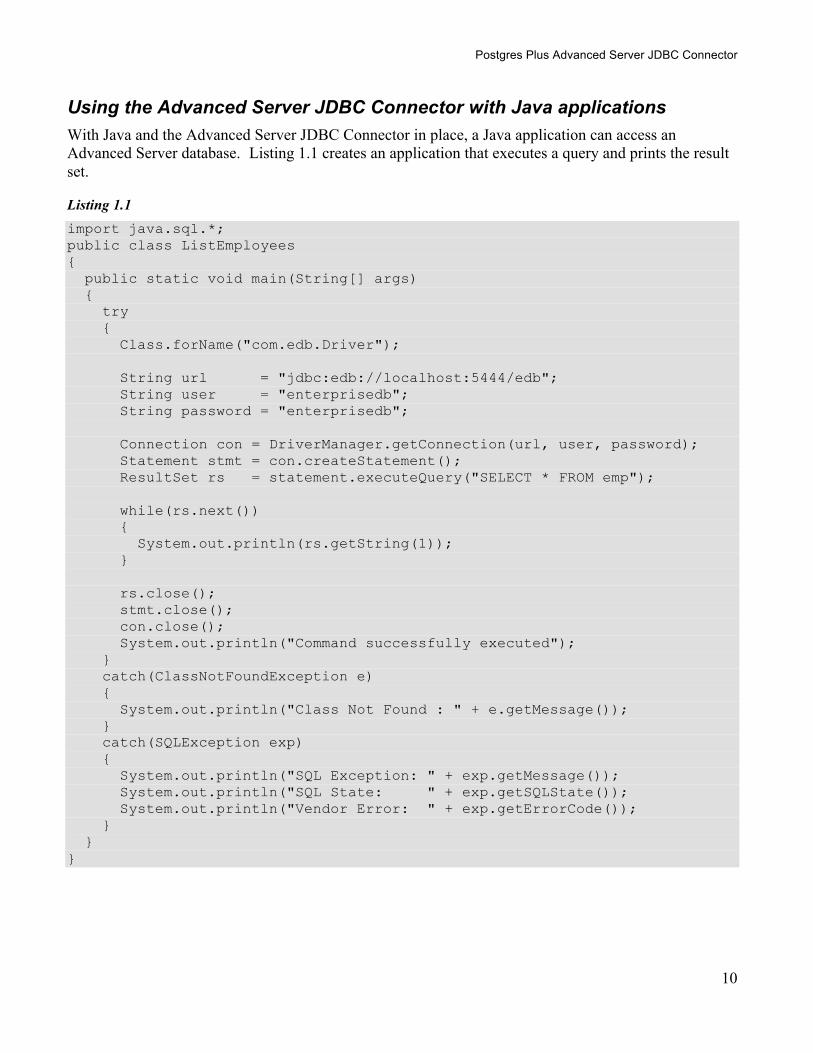
Using the Advanced Server JDBC Connector with Java applications With Java and the Advanced Server JDBC Connector in place, a Java application can access an Advanced Server database. Listing 1.1 creates an application that executes a query and prints the result set.
Listing 1.1 import java.sql.*; public class ListEmployees { public static void main(String[] args) { try { Class.forName("com.edb.Driver"); String url = "jdbc:edb://localhost:5444/edb"; String user = "enterprisedb"; String password = "enterprisedb"; Connection con = DriverManager.getConnection(url, user, password); Statement stmt = con.createStatement(); ResultSet rs = statement.executeQuery("SELECT * FROM emp"); while(rs.next()) { System.out.println(rs.getString(1)); } rs.close(); stmt.close(); con.close(); System.out.println("Command successfully executed"); } catch(ClassNotFoundException e) { System.out.println("Class Not Found : " + e.getMessage()); } catch(SQLException exp) { System.out.println("SQL Exception: " + exp.getMessage()); System.out.println("SQL State: " + exp.getSQLState()); System.out.println("Vendor Error: " + exp.getErrorCode()); } } }
Postgres Plus Advanced Server JDBC Connector
11
This example is simple, but it demonstrates the fundamental steps required to interact with an Advanced Server database from a Java application:
• Load the JDBC driver
• Build connection properties • Connect to the database server
• Execute an SQL statement • Process the result set
• Clean up • Handle any errors that may occur
Postgres Plus Advanced Server JDBC Connector
12
Loading the Advanced Server JDBC Connector The Advanced Server JDBC driver is written in Java and is distributed in the form of a compiled JAR (Java Archive) file. Use the Class.forName() method to load the driver. The forName() method dynamically loads a Java class at runtime. When an application calls the forName() method, the JVM (Java Virtual Machine) attempts to find the compiled form (the bytecode) that implements the requested class.
The Advanced Server JDBC driver is named com.edb.Driver: Class.forName("com.edb.Driver");
After loading the bytecode for the driver, the driver registers itself with another JDBC class (named DriverManager) that is responsible for managing all the JDBC drivers installed on the current system. If the JVM is unable to locate the named driver, it throws a ClassNotFound exception (which is intercepted with a catch block near the end of the program). The DriverManager is designed to handle multiple JDBC driver objects. You can write a Java application that connects to more than one database system via JDBC. The next section explains how to select a specific driver.
Postgres Plus Advanced Server JDBC Connector
13
Connecting to the Database After the driver has loaded and registered itself with the DriverManager, the ListEmployees class can try to connect to the database server, as shown in the following code fragment: String url = "jdbc:edb://localhost:5444/edb"; String user = "enterprisedb"; String password = "enterprisedb"; Connection con = DriverManager.getConnection(url, user, password);
All JDBC connections start with the DriverManager. The DriverManager class offers a static method called getConnection() that is responsible for creating a connection to the database. When you call the getConnection() method, the DriverManager must decide which JDBC driver to use in order to connect to the database and that decision is based on a URL (Uniform Resource Locator) that you pass to getConnection().
A JDBC URL takes the following general format: jdbc:<driver>:<connection parameters>
The first component in a JDBC URL is always “jdbc”. When using the Advanced Server JDBC Connector, the second component (the driver) is “edb”.
The Advanced Server JDBC URL takes one of the following forms: jdbc:edb://<database> jdbc:edb://<host>/<database> jdbc:edb://<host>:<port>/<database>
Table 1.1 shows the various connection parameters:
Table 1.1 - Connection Parameters
Name Description host The host name of the server. Defaults to localhost. port The port number the server is listening on. Defaults to the Advanced Server standard
port number (5444). database The database name.
Postgres Plus Advanced Server JDBC Connector
14
Additional Connection Properties In addition to the standard connection parameters, the Advanced Server JDBC drivers supports connection properties that control behavior specific to EnterpriseDB. You can specify these properties in the connection URL or as a Properties object parameter passed to DriverManager.getConnection().
Listing 1.2 demonstrates how to use a Properties object to specify additional connection properties:
Listing 1.2 String url = "jdbc:edb://localhost/edb"; Properties props = new Properties(); props.setProperty("user", "enterprisedb"); props.setProperty("password", "enterprisedb"); props.setProperty("ssl", "true"); Connection con = DriverManager.getConnection(url, props);
To specify additional connection properties in the URL, add a question mark and an ampersand-separated list of keyword-value pairs: String url = "jdbc:edb://localhost/edb?user=enterprisedb&ssl=true";
Some of the additional connection properties are shown in Table 1.2:
Table 1.2 - Additional Connection Properties
Name Type Description user String The database user on whose behalf the connection is being made. password String The database user’s password. ssl Boolean
(true/false) Requests an authenticated, encrypted SSL connection
loglevel Integer The value of loglevel determines the amount of detail printed to the DriverManager’s current value for LogStream or LogWriter. It currently supports values of:
com.edb.Driver.DEBUG com.edb.Driver.INFO
Set the value of loglevel to INFO to include sparse log information or to DEBUG to produce significant detail.
charSet String The value of charSet determines the character set used for data sent to or received from the database.
prepareThreshold Integer The value of prepareThreshold determines the number of PreparedStatement executions required before switching to server side prepared statements. The default is five.
Postgres Plus Advanced Server JDBC Connector
15
Executing SQL Statements through Statement Objects After loading the Advanced Server JDBC Connector driver and connecting to the server, the code in the sample application builds a JDBC Statement object, executes an SQL query, and displays the results.
A Statement object sends SQL statements to a database. There are three kinds of Statement objects. Each is specialized to send a particular type of SQL statement:
• A Statement object is used to execute a simple SQL statement with no parameters.
• A PreparedStatement object is used to execute a pre-compiled SQL statement with or without IN parameters.
• A CallableStatement object is used to execute a call to a database stored procedure.
You must construct a Statement object before executing an SQL statement. The Statement object offers a way to send a SQL statement to the server (and gain access to the result set). Each Statement object belongs to a Connection; use the createStatement() method to ask the Connection to create the Statement object.
A Statement object defines several methods to execute different types of SQL statements. In the sample application, the executeQuery() method executes a SELECT statement: Statement stmt = con.createStatement(); ResultSet rs = stmt.executeQuery("SELECT * FROM emp");
The executeQuery() method expects a single argument: the SQL statement that you want to execute. executeQuery() returns data from the query in a ResultSet object. If the server encounters an error while executing the SQL statement provided, it throws an SQLException (and does not return a ResultSet).
Postgres Plus Advanced Server JDBC Connector
16
Retrieving Results from a ResultSet Object A ResultSet object is the primary storage mechanism for the data returned by an SQL statement. Each ResultSet object contains both data and metadata (in the form of a ResultSetMetaData object). ResultSetMetaData includes useful information about results returned by the SQL command: column names, column count, row count, column length, and so on. To access the row data stored in a ResultSet object, an application calls one or more getter methods. A getter method retrieves the value in particular column of the current row. There are many different getter methods; each method returns a value of a particular type. For example, the getString() method returns a String; the getDate() method returns a Date, and the getInt() method returns an int. When an application calls a getter method, JDBC tries to convert the value into the requested type. Each ResultSet keeps an internal pointer that points to the current row. When the executeQuery() method returns a ResultSet, the pointer is positioned before the first row; if an application calls a getter method before moving the pointer, the getter method will fail. To advance to the next (or first) row, call the ResultSet’s next() method. ResultSet.next() is a boolean method; it returns true if there is another row in the ResultSet or false if you have moved past the last row. After moving the pointer to the first row, the sample application uses the getString() getter method to retrieve the value in the first column and then prints that value. Since ListEmployees calls rs.next() and rs.getString() in a loop, it processes each row in the result set. ListEmployees exits the loop when rs.next() moves the pointer past the last row and returns false. while(rs.next()) { System.out.println(rs.getString(1)); }
When using the ResultSet interface, remember:
• You must call next()before reading any values. next() returns true if another row is available and prepares the row for processing.
• Under the JDBC specification, an application should access each row in the ResultSet only once. It is safest to stick to this rule, although at the current time, the Advanced Server JDBC driver will allow you to access a field as many times as you want.
• When you've finished using a ResultSet, call the close()method to free the resources held by that object.

Postgres Plus Advanced Server JDBC Connector
17
Freeing Resources Every JDBC object consumes some number of resources. A ResultSet object, for example, may contain a copy of every row returned by a query; a Statement object may contain the text of the last command executed, and so forth. It’s usually a good idea to free up those resources when the application no longer needs them. The sample application releases the resources consumed by the Result, Statement, and Connection objects by calling each object’s close() method: rs.close(); stmt.close(); con.close();
You should not use a JDBC object after closing it; the object will throw an error.
Postgres Plus Advanced Server JDBC Connector
18
Handling Errors When connecting to an external resource (such as a database server), errors are bound to occur; your code should include a way to handle these errors. Both JDBC and the Advanced Server JDBC Connector provide various types of error handling. The ListEmployees class (Listing 1.1) demonstrates how to handle an error using try/catch blocks.
When a JDBC object throws an error (an object of type SQLException or of a type derived from SQLException), the SQLException object exposes three different pieces of error information. These are:
1. An error message. 2. The SQL State. 3. A vendor-specific error code.
In the example, the following code displays the value of these components should an error occur: System.out.println("SQL Exception: " + exp.getMessage()); System.out.println("SQL State: " + exp.getSQLState()); System.out.println("Vendor Error: " + exp.getErrorCode());
For example, if the server tries to connect to a database that does not exist on the specified host, the following error message is displayed: SQL Exception: Backend start-up failed: FATAL: database "dummy" does not exist Server SQLState: 3D000. SQL State: 3D000 Vendor Error: 0
Postgres Plus Advanced Server JDBC Connector
19
Executing SQL Commands with executeUpdate In the previous example ListEmployees executed a SELECT statement using the Statement.executeQuery() method. executeQuery() was designed to execute query statements so it returns a ResultSet that contains the data returned by the query. The Statement class offers a second method that you should use to execute other types of commands (UPDATE, INSERT, DELETE, an so forth). Instead of returning a collection of rows, the executeUpdate() method returns the number of rows affected by the SQL command it executes.
The signature of the executeUpdate() method is: int executeUpdate(String sqlStatement)
This method takes a single parameter of type String, that contains the SQL command that you want to execute.
Using executeUpdate to INSERT Data Listing 1.3 demonstrates using the executeUpdate() method to add a row to the emp table.
NOTE: the following example is not a complete application, only a method – for the remainder of this document the samples won't include the code required to set up and tear down a Connection. To try out the example, just provide a class that invokes the sample code.
Listing 1.3 public void updateEmployee(Connection con) { try { Console console = System.console(); Statement stmt = con.createStatement(); String empno = console.readLine("Employee Number :"); String ename = console.readLine("Employee Name :"); int rowcount = stmt.executeUpdate("INSERT INTO emp(empno, ename) VALUES("+empno+",'"+ename+"')"); System.out.println(""); System.out.println("Success - "+rowcount+" rows affected."); } catch(Exception err) { System.out.println("An error has occurred."); System.out.println("See full details below."); err.printStackTrace(); } }
The updateEmployee() method expects a single argument from the caller, a Connection object that must be connected to a Postgres Plus Advanced Server database.: public void updateEmployee(Connection con)
Postgres Plus Advanced Server JDBC Connector
20
Next, updateEmployee() prompts the user for an employee name and number: String empno = console.readLine("Employee Number :"); String ename = console.readLine("Employee Name :");
updateEmployee() concatenates the values returned by console.readline() into an INSERT statement and pass the result to the executeUpdate() method. int rowcount = stmt.executeUpdate("INSERT INTO emp(empno, ename) VALUES("+empno+",'"+ename+"')");
For example, if the user enters an employee number of 6000 and a name of “Jones”, the INSERT statement passed to executeUpdate() will look like this: INSERT INTO emp(empno, ename) VALUES(6000, 'Jones');
The executeUpdate() method returns the number of rows affected by the SQL statement (an INSERT typically affects one row, but an UPDATE or DELETE statement can affect more). If executeUpdate() returns without throwing an error, the call to System.out.println displays a message to the user that shows the number of rows affected. System.out.println(""); System.out.println("Success - "+rowcount+" rows affected.");
The catch block displays an appropriate error message to the user if the program encounters an exception: { System.out.println("An error has occurred."); System.out.println("See full details below."); err.printStackTrace(); }
executeUpdate() Syntax Examples
You can use executeUpdate() with any SQL command that does not return a result set. Some simple syntax examples using executeUpdate() with SQL commands follow:
To use the UPDATE command with executeUpdate() to update a row: stmt.executeUpdate("UPDATE emp SET ename='"+ename+"' WHERE empno="+empno);
To use the DELETE command with executeUpdate()to remove a row from a table: stmt.executeUpdate("DELETE FROM emp WHERE empno="+empno);
To use the DROP TABLE command with executeUpdate() to delete a table from a database: stmt.executeUpdate("DROP TABLE tablename");
To use the CREATE TABLE command with executeUpdate() to add a new table to a database: stmt.executeUpdate("CREATE TABLE tablename (fieldname NUMBER(4,2), fieldname2 VARCHAR2(30))");

Postgres Plus Advanced Server JDBC Connector
21
To use the ALTER TABLE command with executeUpdate() to change the attributes of a table: stmt.executeUpdate("ALTER TABLE tablename ADD COLUMN colname BOOLEAN");
Postgres Plus Advanced Server JDBC Connector
22
Adding a Graphical Interface to a Java Program With a little extra work, you can add a Graphical User Interface to a program – the next example (Listing 1.4) demonstrates how to write a Java application that creates a JTable (a spreadsheet-like graphical object) and copies the data returned by a query into that JTable.
NOTE: The following sample application is a method, not a complete application; you can provide an appropriate main() function and wrapper class to call this method.
Listing 1.4 import java.sql.*; import java.util.Vector; import javax.swing.JFrame; import javax.swing.JScrollPane; import javax.swing.JTable; ... public void showEmployees(Connection con) { try { Statement stmt = con.createStatement(); ResultSet rs = stmt.executeQuery("SELECT * FROM emp"); ResultSetMetaData rsmd = rs.getMetaData(); Vector labels = new Vector(); for(int column = 0; column < rsmd.getColumnCount(); column++) { labels.addElement(rsmd.getColumnLabel(column + 1)); } Vector rows = new Vector(); while(rs.next()) { Vector rowValues = new Vector(); for(int column = 0; column < rsmd.getColumnCount(); column++) rowValues.addElement(rs.getString(column + 1)); rows.addElement(rowValues); } JTable table = new JTable(rows, labels); JFrame jf = new JFrame("Browsing table: EMP (from EnterpriseDB)"); jf.getContentPane().add(new JScrollPane(table)); jf.setSize(400, 400); jf.setVisible(true); jf.setDefaultCloseOperation(JFrame.EXIT_ON_CLOSE); System.out.println("Command successfully executed”); }
Postgres Plus Advanced Server JDBC Connector
23
catch(Exception err) { System.out.println("An error has occurred."); System.out.println("See full details below."); err.printStackTrace(); } }
Before writing the showEmployees() method, you must import the definitions for a few JDK-provided classes: import java.sql.*; import java.util.Vector; import javax.swing.JFrame; import javax.swing.JScrollPane; import javax.swing.JTable;
The showEmployees() method expects a Connection object to be provided by the caller; the Connection object must be connected to a Postgres Plus Advanced Server: public void showEmployees(Connection con)
showEmployees() creates a Statement and uses the executeQuery() method to execute an SQL query that generates an employee list: Statement stmt = con.createStatement(); ResultSet rs = stmt.executeQuery("SELECT * FROM emp");
As you would expect, executeQuery() returns a ResultSet object. The ResultSet object contains the metadata that describes the shape of the result set (that is, the number of rows and columns in the result set, the data type for each column, the name of each column, and so forth). You can extract the metadata from the ResultSet by calling the getMetaData() method: ResultSetMetaData rsmd = rs.getMetaData();
Next, showEmployees() creates a Vector (a one dimensional array) to hold the column headers and then copies each header from the ResultMetaData object into the vector: Vector labels = new Vector(); for(int column = 0; column < rsmd.getColumnCount(); column++) { labels.addElement(rsmd.getColumnLabel(column + 1)); }
With the column headers in place, showEmployees() extracts each row from the ResultSet and copies it into a new Vector (named rows). The rows Vector is actually a Vector of Vectors: each entry in the rows Vector contains a Vector which contains the data values in that row. This combination forms the two-dimensional array that you will need to build a JTable. After creating the rows Vector, the program reads through each row in the ResultSet (by calling rs.next()). For each column in each row, a getter method extracts the value at that row/column and adds the value to the rowValues Vector. Finally, showEmployee() adds each rowValues Vector to the rows Vector:
Postgres Plus Advanced Server JDBC Connector
24
Vector rows = new Vector(); while(rs.next()) { Vector rowValues = new Vector(); for(int column = 0; column < rsmd.getColumnCount(); column++) rowValues.addElement(rs.getString(column + 1)); rows.addElement(rowValues); }
At this point, the Vector (labels) contains the column headers, and a second two-dimensional Vector (rows) contains the data for the table. Now you can create a JTable from those Vectors and a JFrame to hold the JTable: JTable table = new JTable(rows, labels); JFrame jf = new JFrame("Browsing table: EMP (from EnterpriseDB)"); jf.getContentPane().add(new JScrollPane(table)); jf.setSize(400, 400); jf.setVisible(true); jf.setDefaultCloseOperation(JFrame.EXIT_ON_CLOSE); System.out.println("Command successfully executed”);
The showEmployees() method includes a catch block to intercept any errors that may occur and display an appropriate message to the user: catch(Exception err) { System.out.println("An error has occurred."); System.out.println("See full details below."); err.printStackTrace(); }
The result of calling the showEmployees() method is shown in Figure 1.4:

Postgres Plus Advanced Server JDBC Connector
25
Figure 1.4 - showEmployees Window
Postgres Plus Advanced Server JDBC Connector
26
Advanced JDBC Connector Functionality The previous example created a graphical user interface that displayed a result set in a JTable. Now we will switch gears and show you some of the more advanced features of the Advanced Server JDBC Connector.
To avoid unnecessary clutter, the rest of the code samples in this document will use the console to interact with the user instead of creating a graphical use interface.
Reducing Client-side Resource Requirements The Advanced Server JDBC driver retrieves the results of a SQL query as a ResultSet object. If a query returns a large number of rows, using a batched ResultSet will:
• Reduce the amount of time it takes to retrieve the first row.
• Save time by retrieving only the rows that you need. • Reduce the memory requirement of the client.
When you reduce the fetch size of a ResultSet object, the driver doesn't copy the entire ResultSet across the network (from the server to the client). Instead, the driver requests a small number of rows at a time; as the client application moves through the result set, the driver fetches the next batch of rows from the server. Batched result sets cannot be used in all situations. Not adhering to the following restrictions will make the driver silently fall back to fetching the whole ResultSet at once:
• The client application must disable autocommit.
• The Statement must be created with a ResultSet. TYPE_FORWARD_ONLY type. This is the default. With the TYPE_FORWARD_ONLY option, you may only step forward through the ResultSet.
• The query must be a single SQL statement.
Postgres Plus Advanced Server JDBC Connector
27
Modifying the Batch Size of a Statement Object Limiting the batch size of a ResultSet object can speed the retrieval of data and reduce the resources needed by a client-side application. Listing 1.5 creates a Statement object with a batch size limited to five rows.
Listing 1.5 // Make sure autocommit is off conn.setAutoCommit(false); Statement stmt = conn.createStatement(); // Set the Batch Size. stmt.setFetchSize(5); ResultSet rs = stmt.executeQuery("SELECT * FROM emp"); while (rs.next()) { System.out.println("a row was returned."); } rs.close(); stmt.close();
The call to conn.setAutoCommit(false) ensures that the server won't close the ResultSet before you have a chance to retrieve the first row. Once you have prepared the Connection, you can construct a Statement object: Statement stmt = db.createStatement();
The following code sets the batch size to five (rows) before executing the query: stmt.setFetchSize(5); ResultSet rs = stmt.executeQuery("SELECT * FROM emp");
For each row in the ResultSet object, the call to println() prints "a row was returned". System.out.println("a row was returned.");
Remember, the ResultSet contains all of the rows in the table but they are only fetched from the server five rows at a time. From the client’s point of view, the only difference between a batched result set and an unbatched result set is that a batched result may return the first row in less time. Next, we will look at another feature (the PreparedStatement) that you can use to increase the performance of certain JDBC applications.
Postgres Plus Advanced Server JDBC Connector
28
Using PreparedStatements to Send SQL Commands Many applications execute the same SQL statement over and over again, changing one or more of the data values in the statement between each iteration. If you use a Statement object to repeatedly execute a SQL statement, the server must parse, plan, and optimize the statement every time. JDBC offers another Statement derivative, the PreparedStatement to reduce the amount of work required in such a scenario. Listing 1.6 demonstrates invoking a PreparedStatement that accepts an employee ID and employee name and inserts that employee information in the emp table:
Listing 1.6 public void AddEmployee(Connection con) { try { Console c = System.console(); String command = "INSERT INTO emp(empno,enam) VALUES(?,?)"; PreparedStatement stmt = con.prepareStatement(command); stmt.setObject(1,new Integer(c.readLine("ID:"))); stmt.setObject(2,c.readLine("Name:")); stmt.execute(); System.out.println("The procedure successfully executed."); } catch(Exception err) { System.out.println("An error has occurred."); System.out.println("See full details below."); err.printStackTrace(); } }
Instead of hard-coding data values in the SQL statement, you insert placeholders to represent the values that will change with each iteration. Listing 1.6 shows an INSERT statement that includes two placeholders (each represented by a question mark): String command = "INSERT INTO emp(empno,enam) VALUES(?,?)";
With the parameterized SQL statement in hand, the AddEmployee() method can ask the Connection object to prepare that statement and return a PreparedStatement object: PreparedStatement stmt = con.prepareStatement(command);
At this point, the PreparedStatement has parsed and planned the INSERT statement, but it does not know what values to add to the table. Before executing the PreparedStatement, you must supply a value for each placeholder by calling a setter method. setObject() expects two arguments: a parameter number (parameter number one corresponds to the the first question mark, parameter
Postgres Plus Advanced Server JDBC Connector
29
number two corresponds to the second question mark, and so on), and the value that to substitute for the placeholder.
The AddEmployee() method prompts the user for an employee ID and name and calls setObject() with the values supplied by the user: stmt.setObject(1,new Integer(c.readLine("ID:"))); stmt.setObject(2, c.readLine("Name:"));
And then asks the PreparedStatement object to execute the statement: stmt.execute();
If the SQL statement executes as expected, AddEmployee() displays a message that confirms the execution. If the server encounters an exception, the error handling code displays an error message.
Postgres Plus Advanced Server JDBC Connector
30
Executing Stored Procedures A stored procedure is a module that is written in EnterpriseDB’s SPL and stored in the database. A stored procedure may define input parameters to supply data to the procedure and output parameters to return data from the procedure. Stored procedures execute within the server and consist of database access commands (SQL), control statements, and data structures that manipulate the data obtained from the database.
Stored procedures are especially useful when extensive data manipulation is required before storing data from the client. It is also efficient to use a stored procedure to manipulate data in a batch program.
Invoking Stored Procedures The CallableStatement class provides a way for a Java program to call stored procedures. A CallableStatement object can have a variable number of parameters used for input (IN parameters), output (OUT parameters), or both (IN OUT parameters).
The syntax for invoking a stored procedure in JDBC is shown below. Note that the square brackets indicate optional parameters; they are not part of the command syntax. {call procedure_name([?, ?, ...])}
The syntax to invode a procedure that returns a result parameter is: {? = call procedure_name([?, ?, ...])}
Each question mark serves as a placeholder for a parameter. The stored procedure determines if the placeholders represent IN, OUT, or IN OUT parameters and the Java code must match. We will show you how to supply values for IN (or IN OUT) parameters and how to retrieve values returned in OUT (or IN OUT) parameters in a moment.
Postgres Plus Advanced Server JDBC Connector
31
Executing a Simple Stored Procedure Listing 1.7-a shows a stored procedure that increases the salary of each employee by 10% - increaseSalary expects no arguments from the caller and does not return any information:
Listing 1.7-a CREATE OR REPLACE PROCEDURE increaseSalary IS BEGIN UPDATE emp SET sal = sal * 1.10; END;
Listing 1.7-b demonstrates how to invoke the increaseSalary procedure:
Listing 1.7-b public void SimpleCallSample(Connection con) { try { CallableStatement stmt = con.prepareCall("{call increaseSalary()}”); stmt.execute(); System.out.println("Stored Procedure executed successfully”); } catch(Exception err) { System.out.println("An error has occurred.”); System.out.println("See full details below.”); err.printStackTrace(); } }
To invoke a stored procedure from a Java application, use a CallableStatement object. The CallableStatement class is derived from the Statement class and, like the Statement class, you obtain a CallableStatement object by asking a Connection object to create one for you. To create a CallableStatement from a Connection, use the prepareCall() method: CallableStatement stmt = con.prepareCall("{call LIST_DEPT10()}”);
As the name implies, the prepareCall() method prepares the statement, but does not execute it. As you will see in the next example, an application typically binds parameter values between the call to prepareCall() and the call to execute(). To invoke the stored procedure on the server, call the execute() method. stmt.execute();
This stored procedure (increaseSalary) did not expect any IN parameters and did not return any information to the caller (using OUT parameters) so invoking the procedure is simply a matter of creating a CallableStatement object and then calling that object’s execute() method.

Postgres Plus Advanced Server JDBC Connector
32
The next section demonstrates how to invoke a stored procedure that requires data (IN parameters) from the caller.
Postgres Plus Advanced Server JDBC Connector
33
Executing Stored Procedures with IN parameters The code in the next example first creates and then invokes a stored procedure named empInsert that requires a few IN parameters (employee name, job, salary, ...). It then inserts that information into the emp table.
Listing 1.8-a creates the stored procedure in the Advanced Server database:
Listing 1.8-a CREATE OR REPLACE PROCEDURE empInsert( pEname IN VARCHAR, pJob IN VARCHAR, pSal IN FLOAT4, pComm IN FLOAT4, pDeptno IN INTEGER, pMgr IN INTEGER ) AS DECLARE CURSOR getMax IS SELECT MAX(empno) FROM emp; max_empno INTEGER := 10; BEGIN OPEN getMax; FETCH getMax INTO max_empno; INSERT INTO emp(empno, ename, job, sal, comm, deptno, mgr) VALUES(max_empno+1, pEname, pJob, pSal, pComm, pDeptno, pMgr); CLOSE getMax; END;
Listing 1.8-b demonstrates how to invoke the stored procedure from Java:
Listing 1.8-b public void CallExample2(Connection con) { try { Console c = System.console(); String commandText = "{call empInsert(?,?,?,?,?,?)}"; CallableStatement stmt = con.prepareCall(commandText); stmt.setObject(1, new String(c.readLine("Employee Name :"))); stmt.setObject(2, new String(c.readLine("Job :"))); stmt.setObject(3, new Float(c.readLine("Salary :"))); stmt.setObject(4, new Float(c.readLine("Commission :"))); stmt.setObject(5, new Integer(c.readLine("Department No :"))); stmt.setObject(6, new Integer(c.readLine("Manager")));
Postgres Plus Advanced Server JDBC Connector
34
stmt.execute(); } catch(Exception err) { System.out.println("An error has occurred.”); System.out.println("See full details below.”); err.printStackTrace(); } }
Each placeholder (?) in the command (commandText) represents a point in the command that is later replaced with data: String commandText = "{call EMP_INSERT(?,?,?,?,?,?)}"; CallableStatement stmt = con.prepareCall(commandText);
The setObject() method binds a value to an IN or IN OUT placeholder. Each call to setObject() specifies a parameter number and a value to bind to that parameter: stmt.setObject(1, new String(c.readLine("Employee Name :"))); stmt.setObject(2, new String(c.readLine("Job :"))); stmt.setObject(3, new Float(c.readLine("Salary :"))); stmt.setObject(4, new Float(c.readLine("Commission :"))); stmt.setObject(5, new Integer(c.readLine("Department No :"))); stmt.setObject(6, new Integer(c.readLine("Manager")));
After supplying a value for each placeholder, this method executes the statement by calling the execute() method.
Postgres Plus Advanced Server JDBC Connector
35
Executing Stored Procedures with OUT parameters The next example creates and invokes an SPL stored procedure called deptSelect. This procedure requires one IN parameter (department number) and returns two OUT parameters (the department name and location) corresponding to the department number. The code in Listing 1.9-a creates the deptSelect procedure:
Listing 1.9-a CREATE OR REPLACE PROCEDURE deptSelect( p_deptno IN INTEGER, p_dname OUT VARCHAR, p_loc OUT VARCHAR ) AS DECLARE CURSOR deptCursor IS SELECT dname, loc FROM dept WHERE deptno=p_deptno; BEGIN OPEN deptCursor; FETCH deptCursor INTO p_dname, p_loc; CLOSE deptCursor; END;
Listing 1.9-b shows the Java code required to invoke the deptSelect stored procedure:
Listing 1.9-b public void GetDeptInfo(Connection con) { try { Console c = System.console(); String commandText = "{call deptSelect(?,?,?)}"; CallableStatement stmt = con.prepareCall(commandText); stmt.setObject(1, new Integer(c.readLine("Dept No :"))); stmt.registerOutParameter(2, Types.VARCHAR); stmt.registerOutParameter(3, Types.VARCHAR); stmt.execute(); System.out.println("Dept Name: " + stmt.getString(2)); System.out.println("Location : " + stmt.getString(3)); } catch(Exception err) { System.out.println("An error has occurred.”); System.out.println("See full details below.”); err.printStackTrace(); } }
Postgres Plus Advanced Server JDBC Connector
36
Each placeholder (?) in the command (commandText) represents a point in the command that is later replaced with data: String commandText = "{call deptSelect(?,?,?)}"; CallableStatement stmt = con.prepareCall(commandText);
The setObject() method binds a value to an IN or IN OUT placeholder. When calling setObject() you identify a placeholder (by its ordinal number) and provide a value to substitute in place of that placeholder: stmt.setObject(1, new Integer(c.readLine("Dept No :")));
The JDBC type of each OUT parameter must be registered before the CallableStatement object can be executed. Registering the JDBC type is done with the registerOutParameter() method. stmt.registerOutParameter(2, Types.VARCHAR); stmt.registerOutParameter(3, Types.VARCHAR);
After executing the statement , the CallableStatement’s getter method retrieves the OUT parameter values: to retrieve a VARCHAR value, use the getString() getter method. stmt.execute(); System.out.println("Dept Name: " + stmt.getString(2)); System.out.println("Location : " + stmt.getString(3));
In the current example GetDeptInfo() registers two OUT parameters and (after executing the stored procedure) retrieves the values returned in the OUT parameters. Since both OUT parameters are defined as VARCHAR values, GetDeptInfo() uses the getString() method to retrieve the OUT parameters.
Postgres Plus Advanced Server JDBC Connector
37
Executing Stored Procedures with IN OUT parameters The code in the next example creates and invokes a stored procedure named empQuery that takes one IN parameter (department number), two IN OUT parameters (employee number and employee name) and three OUT parameters. empQuery then returns information about the employee in the two IN OUT parameters and three OUT parameters.
Listing 1.10-a creates a stored procedure named empQuery:
Listing 1.10-a CREATE OR REPLACE PROCEDURE empQuery( p_deptno IN NUMBER, p_empno IN OUT NUMBER, p_ename IN OUT VARCHAR2, p_job OUT VARCHAR2, p_hiredate OUT DATE, p_sal OUT NUMBER ) IS BEGIN SELECT empno, ename, job, hiredate, sal INTO p_empno, p_ename, p_job, p_hiredate, p_sal FROM emp WHERE deptno = p_deptno AND (empno = p_empno OR ename = UPPER(p_ename)); END;
Listing 1.10-b demonstrates how to invoke the empQuery procedure, how to provide values for the IN parameters, and how to handle the OUT and IN OUT parameters:
Listing 1.10-b public void CallSample4(Connection con) { try { Console c = System.console(); String commandText = "{call emp_query(?,?,?,?,?,?)}"; CallableStatement stmt = con.prepareCall(commandText); stmt.setInt(1, new Integer(c.readLine("Department No:"))); stmt.setInt(2, new Integer(c.readLine("Employee No:"))); stmt.setString(3, new String(c.readLine("Employee Name:"))); stmt.registerOutParameter(2, Types.INTEGER); stmt.registerOutParameter(3, Types.VARCHAR); stmt.registerOutParameter(4, Types.VARCHAR); stmt.registerOutParameter(5, Types.TIMESTAMP); stmt.registerOutParameter(6, Types.NUMERIC); stmt.execute();
Postgres Plus Advanced Server JDBC Connector
38
System.out.println("Employee No: " + stmt.getInt(2)); System.out.println("Employee Name: " + stmt.getString(3)); System.out.println("Job : " + stmt.getString(4)); System.out.println("Hiredate : " + stmt.getTimestamp(5)); System.out.println("Salary : " + stmt.getBigDecimal(6)); } catch(Exception err) { System.out.println("An error has occurred.”); System.out.println("See full details below.”); err.printStackTrace(); } }
Each placeholder (?) in the command (commandText) represents a point in the command that is later replaced with data: String commandText = "{call emp_query(?,?,?,?,?,?)}"; CallableStatement stmt = con.prepareCall(commandText);
The setInt() method is a type-specific setter that binds an Integer value to an IN or IN OUT placeholder. The call to setInt() specifies a parameter number and provides a value to substitute in place of that placeholder: stmt.setInt(1, new Integer(c.readLine("Department No:"))); stmt.setInt(2, new Integer(c.readLine("Employee No:")));
The setString() method binds a String value to an IN or IN OUT placeholder: stmt.setString(3, new String(c.readLine("Employee Name:")));
Before executing the CallableStatement, you must register the JDBC type of each OUT parameter by callin the registerOutParameter() method. stmt.registerOutParameter(2, Types.INTEGER); stmt.registerOutParameter(3, Types.VARCHAR); stmt.registerOutParameter(4, Types.VARCHAR); stmt.registerOutParameter(5, Types.TIMESTAMP); stmt.registerOutParameter(6, Types.NUMERIC);
Remember, before calling a procedure with an IN parameter, you assign a value to that parameter with a setter method. Before calling a procedure with an OUT parameter, you register the type of that parameter; then you can retrieve the value returned by calling a getter method. When calling a procedure that defines an IN OUT parameter, you need to perform all three actions: assign a value to the parameter, register the type of the parameter, and then retrieve the value returned with a getter method.
Postgres Plus Advanced Server JDBC Connector
39
Using REF CURSORS with Java A REF CURSOR is a cursor variable that contains a pointer to a query result set returned by an OPEN statement. Unlike a static cursor, a REF CURSOR is not tied to a particular query. You may open the same REF CURSOR variable any number of times with the OPEN statement containing different queries; each time, a new result set is created for that query and made available via the cursor variable. REF CURSORs can also pass a result set from one procedure to another.
Advanced Server supports the declaration of both strongly-typed and weakly-typed REF CURSORs. A strongly-typed cursor must declare the shape (the type of each column) of the expected result set. You can only use a strongly-typed cursor with a query that returns the declared columns; opening the cursor with a query that returns a result set with a different shape will cause the server to throw an exception. On the other hand, a weakly-typed cursor can work with a result set of any shape. To declare a strongly-typed REF CURSOR: TYPE <cursor_type_name> IS REF CURSOR RETURN <return_type>;
To declare a weakly-typed REF_CURSOR: name SYS_REFCURSOR;
Using a REF CURSOR to retrieve a ResultSet The stored procedure shown in Listing 1.11-a (getEmpNames) builds two REF CURSORs on the server; the first REF CURSOR contains a list of commissioned employees in the emp table, the second REF CURSOR contains a list of salaried employees in the emp table:
Listing 1.11-a CREATE OR REPLACE PROCEDURE getEmpNames( commissioned IN OUT SYS_REFCURSOR, salaried IN OUT SYS_REFCURSOR) IS BEGIN OPEN commissioned FOR SELECT ename FROM emp WHERE comm is NOT NULL; OPEN salaried FOR SELECT ename FROM emp WHERE comm is NULL; END;
The RefCursorSample() method (see Listing 1.11-b) invokes the getEmpName() stored procedure and displays the names returned in each of the two REF CURSOR variables:
Listing 1.11-b public void RefCursorSample(Connection con) { try { con.setAutoCommit(false); String commandText = "{call getEmpNames(?,?)}"; CallableStatement stmt = con.prepareCall(commandText);
Postgres Plus Advanced Server JDBC Connector
40
stmt.setNull(1, Types.REF); stmt.registerOutParameter(1, Types.REF); stmt.setNull(2, Types.REF); stmt.registerOutParameter(2, Types.REF); stmt.execute(); ResultSet commissioned = (ResultSet)st.getObject(1); System.out.println("Commissioned employees:"); while(commissioned.next()) { System.out.println(commissioned.getString(1)); } ResultSet salaried = (ResultSet)st.getObject(2); System.out.println("Salaried employees:"); while(salaried.next()) { System.out.println(salaried.getString(1)); } } catch(Exception err) { System.out.println("An error has occurred.”); System.out.println("See full details below.”); err.printStackTrace(); } }
A CallableStatement prepares the REF CURSORs (commissioned and salaried). Each cursor is returned as an IN OUT parameter of the stored procedure, getEmpNames(): String commandText = "{call getEmpNames(?,?)}"; CallableStatement stmt = con.prepareCall(commandText);
The call to registerOutParameter() registers the parameter type (Types.REF) of the first REF CURSOR (commissioned) : stmt.setNull(1, Types.REF); stmt.registerOutParameter(1, Types.REF);
Another call to registerOutParameter() registers the second parameter type (Types.REF) of the second REF CURSOR (salaried) :
stmt.setNull(2, Types.REF); stmt.registerOutParameter(2, Types.REF);
A call to stmt.execute() executes the statement: stmt.execute();
Postgres Plus Advanced Server JDBC Connector
41
The getObject() method retrieves the values from the first parameter and casts the result to a ResultSet. Then, RefCursorSample iterates through the cursor and prints the name of each commissioned employee: ResultSet commissioned = (ResultSet)st.getObject(1); while(commissioned.next()) { System.out.println(commissioned.getString(1)); }
The same getter method retrieves the ResultSet from the second parameter and RefCursorExample iterates through that cursor, printing the name of each salaried employee: ResultSet salaried = (ResultSet)st.getObject(2); while(salaried.next()) { System.out.println(salaried.getString(1)); }

Postgres Plus Advanced Server JDBC Connector
42
Using BYTEA Data with Java The BYTEA data type stores a binary string in a sequence of bytes; digital images and sound files are often stored as binary data. Postgres Plus Advanced Server can store and retrieve binary data via the BYTEA data type.
The following Java sample stores BYTEA data in an Advanced Server database and then demonstrates how to retrieve that data. The example requires a bit of setup; Listings 1.12-a, 1.12-b, and 1.12-c create the server-side environment for the Java example.
Listing 1.12-a creates a table (emp_detail) that stores BYTEA data. emp_detail contains two columns: the first column stores an employee’s ID number (type INT) and serves as the primary key for the table; the second column stores a photograph of the employee in BYTEA format.
Listing 1.12-a CREATE TABLE emp_detail ( empno INT4 PRIMARY KEY, pic BYTEA );
Listing 1.12-b creates a procedure (ADD_PIC) that inserts a row into the emp_detail table:
Listing 1.12-b CREATE OR REPLACE PROCEDURE ADD_PIC(p_empno IN int4, p_photo IN bytea) AS BEGIN INSERT INTO emp_detail VALUES(p_empno, p_photo); END;
And finally, Listing 1.12-c creates a function (GET_PIC) that returns the photograph for a given employee:
Listing 1.12-c CREATE OR REPLACE FUNCTION GET_PIC(p_empno IN int4) RETURN BYTEA IS DECLARE photo BYTEA; BEGIN SELECT pic INTO photo from EMP_DETAIL WHERE empno = p_empno; RETURN photo; END;
Postgres Plus Advanced Server JDBC Connector
43
Inserting BYTEA Data into an Advanced Server database Listing 1.13 shows a Java method that invokes the ADD_PIC procedure (see Listing 1.12-b) to copy a photograph from the filesystem (on the client) to the emp_detail table (on the server).
Listing 1.13 public void InsertPic(Connection con) { try { Console c = System.console(); int empno = Integer.parseInt(c.readLine("Employee No :")); String fileName = c.readLine("Image filename :"); File f = new File(fileName); if(!f.exists()) { System.out.println("Image file not found. Terminating...”); return; } CallableStatement stmt = con.prepareCall("{call ADD_PIC(?, ?)}”); stmt.setInt(1, empno); stmt.setBinaryStream(2, new FileInputStream(f), f.length()); stmt.execute(); System.out.println("Added image for Employee ”+empno); } catch(Exception err) { System.out.println("An error has occurred.”); System.out.println("See full details below.”); err.printStackTrace(); } }
InsertPic() prompts the user for an employee number and the name of an image file: int empno = Integer.parseInt(c.readLine("Employee No :")); String fileName = c.readLine("Image filename :");
If the requested file does not exist, InsertPic() displays an error message and terminates: File f = new File(fileName); if(!f.exists()) { System.out.println("Image file not found. Terminating...”); return; }

Postgres Plus Advanced Server JDBC Connector
44
Next, InsertPic() prepares a CallableStatement object (stmt) that calls the ADD_PIC procedure. The first placeholder (?) represents the first parameter expected by ADD_PIC (p_empno); the second placeholder represents the second parameter (p_photo). To provide actual values for those placeholders, InsertPic() calls two setter methods. Since the first parameter is of type INTEGER, InsertPic() calls the setInt() method to provide a value for p_empno. The second parameter is of type BYTEA, so InsertPic() uses a binary setter method; in this case, the method is setBinaryStream(): CallableStatement stmt = con.prepareCall("{call ADD_PIC(?, ?)}”); stmt.setInt(1, empno); stmt.setBinaryStream(2 ,new FileInputStream(f), f.length());
Now that the placeholders are bound to actual values, InsertPic() executes the CallableStatement: stmt.execute();
If all goes well, InsertPic() displays a message verifying that the image has been added to the table. If an error occurs, the catch block displays a message to the user: System.out.println("Added image for Employee \""+empno); catch(Exception err) { System.out.println("An error has occurred."); System.out.println("See full details below."); err.printStackTrace(); }
Postgres Plus Advanced Server JDBC Connector
45
Retrieving BYTEA Data from an Advanced Server database Now that you know how to insert BYTEA data from a Java application, Listing 1.14 demonstrates how to retrieve BYTEA data from the server.
Listing 1.14 public static void GetPic(Connection con) { try { Console c = System.console(); int empno = Integer.parseInt(c.readLine("Employee No :")); CallableStatement stmt = con.prepareCall("{?=call GET_PIC(?)}”); stmt.setInt(2, empno); stmt.registerOutParameter(1, Types.BINARY); stmt.execute(); byte[] b = stmt.getBytes(1); String fileName = c.readLine("Destination filename :"); FileOutputStream fos = new FileOutputStream(new File(fileName)); fos.write(b); fos.close(); System.out.println("File saved at \””+fileName+”\””); } catch(Exception err) { System.out.println("An error has occurred.”); System.out.println("See full details below.”); err.printStackTrace(); } }
GetPic() starts by prompting the user for an employee ID number: int empno = Integer.parseInt(c.readLine("Employee No :"));
Next, GetPic() prepares a CallableStatement with one IN parameter and one OUT parameter. The first parameter is the OUT parameter that will contain the photograph retrieved from the database. Since the photograph is BYTEA data, GetPic() registers the parameter as a Type.BINARY. The second parameter is the IN parameter that holds the employee number (an INT), so GetPic() uses the setInt() method to provide a value for the second parameter. CallableStatement stmt = con.prepareCall("{?=call GET_PIC(?)}”); stmt.setInt(2, empno); stmt.registerOutParameter(1, Types.BINARY);
Postgres Plus Advanced Server JDBC Connector
46
Next, GetPic() uses the getBytes getter method to retrieve the BYTEA data from the CallableStatement: stmt.execute(); byte[] b = stmt.getBytes(1);
The program prompts the user for the name of the file where it will store the photograph: String fileName = c.readLine("Destination filename :");
The FileOutputStream object writes the binary data that contains the photograph to the destination filename: FileOutputStream fos = new FileOutputStream(new File(fileName)); fos.write(b); fos.close();
Finally, GetPic() displays a message confirming that the file has been saved at the new location: System.out.println("File saved at \””+fileName+”\””);
Postgres Plus Advanced Server JDBC Connector
47
Asynchronous Notification Handling with NoticeListener The Advanced Server JDBC Connector provides asynchronous notification handling functionality. A notification is a message generated by the server when an SPL (or PL/pgSQL) program executes a RAISE NOTICE statement. Each notification is sent from the server to the client application. To intercept a notification in a JDBC client, an application must create a NoticeListener object (or, more typically, an object derived from NoticeListener).
It is important to understand that a notification is sent to the client as a result of executing an SPL (or PL/pgSQL) program. To generate a notification, you must execute an SQL statement that invokes a stored procedure, function, or trigger: the notification is delivered to the client as the SQL statement executes. Notifications work with any type of statement object; CallableStatement objects, PreparedStatement objects, or simple Statement objects. A JDBC program intercepts a notification by associating a NoticeListener with a Statement object. When the Statement object executes an SQL statement that raises a notice, JDBC invokes the noticeReceived() method in the associated NoticeListener.
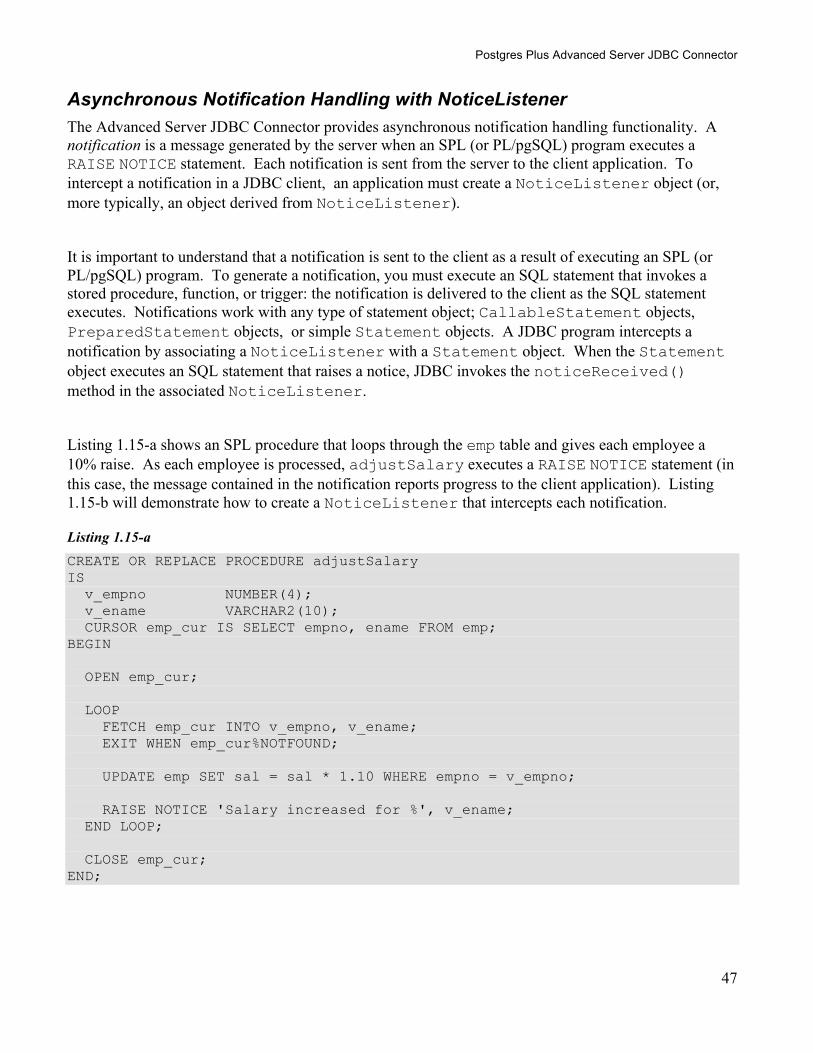
Listing 1.15-a shows an SPL procedure that loops through the emp table and gives each employee a 10% raise. As each employee is processed, adjustSalary executes a RAISE NOTICE statement (in this case, the message contained in the notification reports progress to the client application). Listing 1.15-b will demonstrate how to create a NoticeListener that intercepts each notification.
Listing 1.15-a CREATE OR REPLACE PROCEDURE adjustSalary IS v_empno NUMBER(4); v_ename VARCHAR2(10); CURSOR emp_cur IS SELECT empno, ename FROM emp; BEGIN OPEN emp_cur; LOOP FETCH emp_cur INTO v_empno, v_ename; EXIT WHEN emp_cur%NOTFOUND; UPDATE emp SET sal = sal * 1.10 WHERE empno = v_empno; RAISE NOTICE 'Salary increased for %', v_ename; END LOOP; CLOSE emp_cur; END;
Postgres Plus Advanced Server JDBC Connector
48
Listing 1.15-b shows how to intercept notifications in a JDBC application.
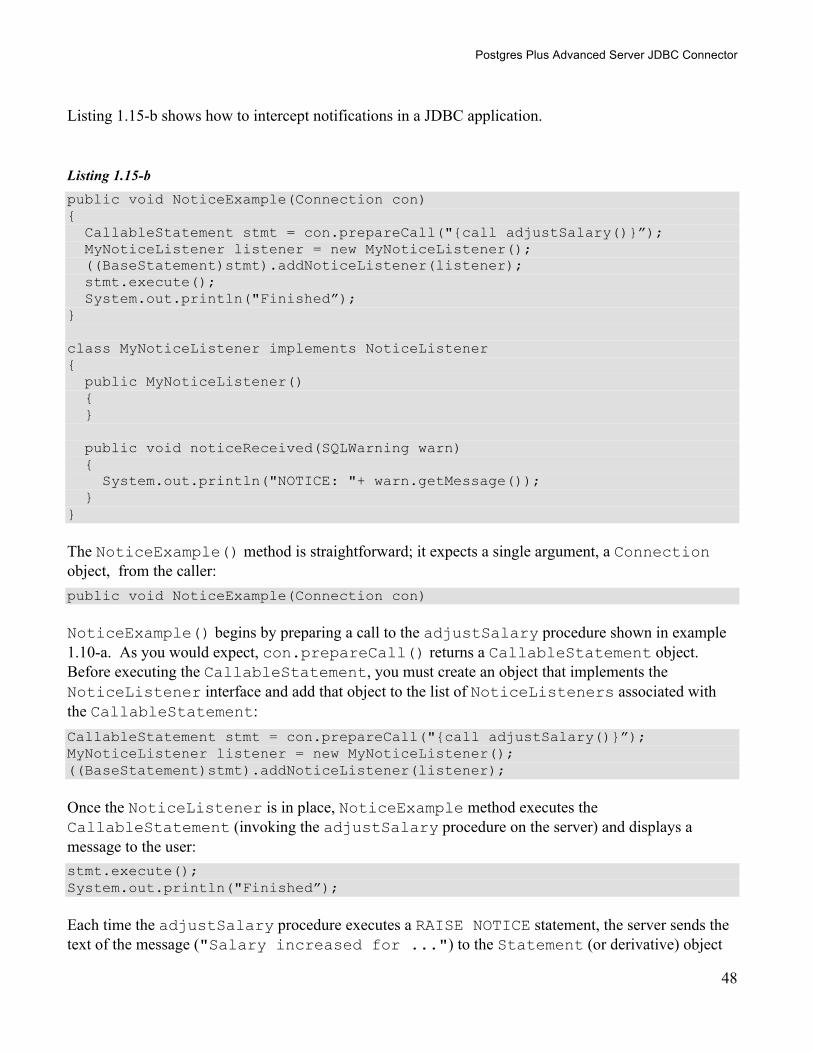
Listing 1.15-b public void NoticeExample(Connection con) { CallableStatement stmt = con.prepareCall("{call adjustSalary()}”); MyNoticeListener listener = new MyNoticeListener(); ((BaseStatement)stmt).addNoticeListener(listener); stmt.execute(); System.out.println("Finished”); } class MyNoticeListener implements NoticeListener { public MyNoticeListener() { } public void noticeReceived(SQLWarning warn) { System.out.println("NOTICE: "+ warn.getMessage()); } }
The NoticeExample() method is straightforward; it expects a single argument, a Connection object, from the caller: public void NoticeExample(Connection con)
NoticeExample() begins by preparing a call to the adjustSalary procedure shown in example 1.10-a. As you would expect, con.prepareCall() returns a CallableStatement object. Before executing the CallableStatement, you must create an object that implements the NoticeListener interface and add that object to the list of NoticeListeners associated with the CallableStatement: CallableStatement stmt = con.prepareCall("{call adjustSalary()}”); MyNoticeListener listener = new MyNoticeListener(); ((BaseStatement)stmt).addNoticeListener(listener);
Once the NoticeListener is in place, NoticeExample method executes the CallableStatement (invoking the adjustSalary procedure on the server) and displays a message to the user: stmt.execute(); System.out.println("Finished”);
Each time the adjustSalary procedure executes a RAISE NOTICE statement, the server sends the text of the message ("Salary increased for ...") to the Statement (or derivative) object
Postgres Plus Advanced Server JDBC Connector
49
in the client application. JDBC invokes the noticeReceived() method (possibly many times) before the call to stmt.execute() completes. class MyNoticeListener implements NoticeListener { public MyNoticeListener() { } public void noticeReceived(SQLWarning warn) { System.out.println("NOTICE: "+ warn.getMessage()); } }
When JDBC calls the noticeReceived() method, it creates an SQLWarning object that contains the text of the message generated by the RAISE NOTICE statement on the server.
Notice that each Statement object keeps a list of NoticeListeners. When the JDBC driver receives a notification from the server, it consults the list maintained by the Statement object. If the list is empty, the notification is saved in the Statement object (you can retrieve the notifications by calling stmt.getWarnings() once the call to execute() completes). If the list is not empty, the JDBC driver delivers an SQLWarning to each listener, in the order in which the listeners were added to the Statement.