Embed Size (px)
Citation preview
NEXT
Cappe
lla A
rchi
ve L
imite
d Edi
tions
Practical PostScript 1 Cappella Archive
PRACTICAL POSTSCRIPT
A Guide to Digital Typesetting
David Byram−Wigfield
The book that printed itself!
The following pages explain the basic techniques of Direct PostScript typesetting. This electronic version includes some new material and additional references to the Adobe Portable Document Format. No previous knowledge of computer languages is required by the reader.
Cappella ArchiveBook on Demand Limited Editions
NEXT
FIRST
BACK
Practical PostScript 2 Cappella Archive
First Printed Edition : 1995Portable Document Format : 2000
Copyright 2000 David Byram−WigfieldAll rights reserved.
PostScript is a trademark of Adobe Systems Inc.,which may be registered in certain jurisdictions.
All product names referred to are trademarks of their respective companies.
The PostScript procedures may be copied for non−commercial use, provided that the above copyright notice appears in all copies and any supporting documents. The author makes no representations about the suitability of the described procedures for any purpose and no responsibility is assumed for any errors or inaccuracies therein.
British Library Cataloguing−in−Publication DataA catalogue record for the book isavailable from the British Library
ISBN 0–9525308–0–5
COPIES OF THE ORIGINAL BOOK ARE AVAILABLE FROM [email protected]
Cappella ArchiveThe Steps : Foley Terrace : Great Malvern : England
WR14 4RQ
NEXT
FIRST
BACK
Practical PostScript 3 Cappella Archive
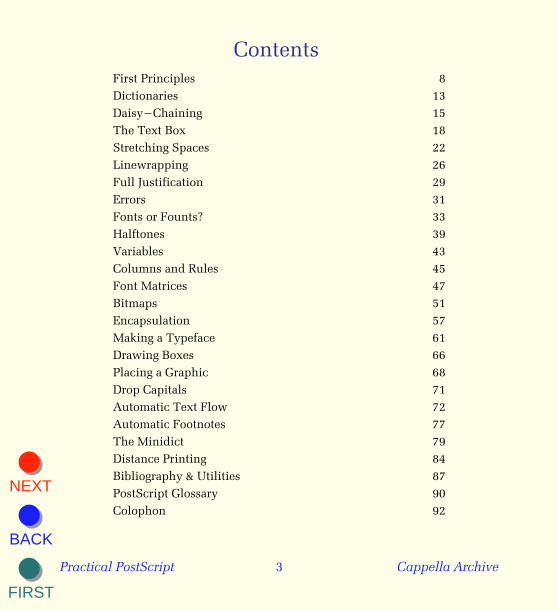
Contents First Principles 8Dictionaries 13Daisy−Chaining 15The Text Box 18Stretching Spaces 22Linewrapping 26Full Justification 29Errors 31Fonts or Founts? 33Halftones 39Variables 43Columns and Rules 45Font Matrices 47Bitmaps 51Encapsulation 57Making a Typeface 61Drawing Boxes 66Placing a Graphic 68Drop Capitals 71Automatic Text Flow 72Automatic Footnotes 77The Minidict 79Distance Printing 84Bibliography & Utilities 87PostScript Glossary 90Colophon 92
NEXT
FIRST
BACK
Practical PostScript 4 Cappella Archive
Acknowledgements
The Engineering Support Group of Adobe Systems Europefor patient responses to elementary questions.
The Editor of the Small Printer, the Journal of the British Printing Society where several of these PostScript discussions first appeared.
PostScript Levels 1, 2, and PostScript 3
Level 2 PostScript was an extension of the original level 1 commands. Most of the additions were to do with colour printing; sophisticated methods of manipulating fonts and graphics; printer operators such as two−sided printing; or Display PostScript instructions for NeXT computers. The examples in this book are nearly all written in the less complex PostScript level 1.
PostScript 3 is a Dantesque higher level which creates more compact PostScript files and may also include device specific instructions for enhanced imaging, page collation, duplexing, faxing, internet trans− mission, and even paper folding and stapling.
Despite their variety, all these bells and whistles are secondary to the actual business of typesetting script, and the procedures described here should distill into the Portable Document Format or proof print on any PostScript laser printer.
These pages have been typeset entirely in Direct PostScript and distilled into the Portable Document Format for on−screen viewing. The TinyDict Typesetter and associated resources may be downloaded from:
http://www.cappella.demon.co.uk
NEXT
FIRST
BACK
Practical PostScript 5 Cappella Archive
Introduction PostScript was developed in 1985 by John Warnock and Chuck Geschke of Adobe Systems Inc. as a written description of a printed page interpreted by a computer chip placed inside a laser printer. This converted the scripted instructions into tiny specks of toner on the paper. Previous methods of printing had relied on the computer converting the low definition screen display into a series of printed squares known as bitmaps.
Desktop printing software, like PageMaker and Quark XPress, was then designed to convert the bitmapped images drawn or typed on the screen automatically into PostScript recipies. The result was so successful that PostScript rapidly became the universal professional printing language that it is today.
However, the increasingly complex software barrier between the computer screen and the printer, makes many users unaware of the elegance, accuracy and efficiency of PostScript as a scripted printing language; requiring as it does only the simplest of text editors to communicate directly with the printer interpreter.
This unawareness is compounded by a shortage of manuals suitable for novices, so in an effort to improve my own knowledge, I originally wrote some of these examples for the Small Printer, the journal of the British Printing Society.
The procedures illustrated do not pretend to be the most efficient use of the PostScript language, but they do try to be easy to understand. Many shortcuts have been avoided in the interests of clarity and the text and illustrations were typeset using similar procedures to those described.
NEXT
FIRST
BACK
Practical PostScript 6 Cappella Archive
Direct PostScript Computer desktop printing has many advantages over traditional methods, such as clean hands, composition speed, cut and paste duplication, and, not least, the avoidance of 'dissing' inky letterpress typefaces back into cases according to their character and fount; all the time 'minding one's p's and q's'.
During the late nineteen−eighties, in the early days of computerized newspaper printing, a coded mark−up was frequently used to format the copy. The marks were of two kinds; a generalized command, which chose a pre−determined editorial format (such as Style1), or a succession of formatting codes specified by the house style of body text, typeface, linespacing and column width. These were often grouped into a single macro for swifter keying.
Nowadays, the generalized macro is still used by some mark−up languages such as TeX and LaTeX for typesetting scientific papers and an author merely has to type '\chapter' or '\footnote' at the relevant point in the text for it to be automatically set. On the other hand, the HyperText Mark−up Language used for internet web pages has specific typesetting codes such as <H1>.....</H1> even though the actual typeface read on screen is usually determined by the recipient.
The Direct PostScript procedures described in the following pages daisy−chain various instructions together to form a typesetting mark− up method for any operating system. The advantages are that the codes are simple; the typeset files are always editable, and easily distilled into the Portable Document Format for commercial printing or internet transmission.
NEXT
FIRST
BACK
Practical PostScript 7 Cappella Archive
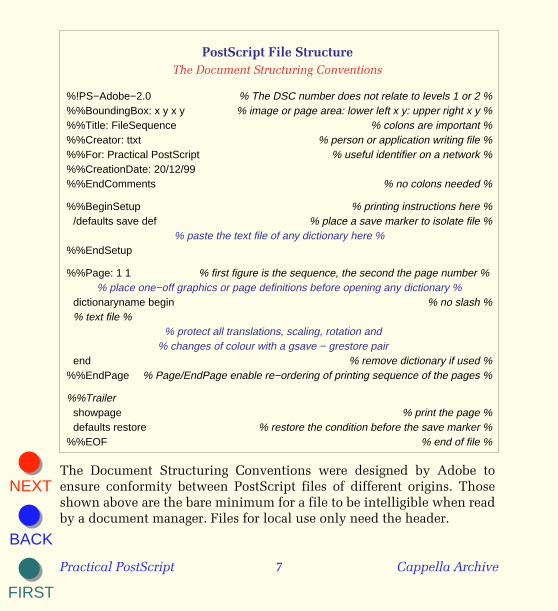
PostScript File Structure The Document Structuring Conventions
%!PS−Adobe−2.0 % The DSC number does not relate to levels 1 or 2 %%%BoundingBox: x y x y % image or page area: lower left x y: upper right x y %%%Title: FileSequence % colons are important %%%Creator: ttxt % person or application writing file %%%For: Practical PostScript % useful identifier on a network %%%CreationDate: 20/12/99%%EndComments % no colons needed %
%%BeginSetup % printing instructions here %/defaults save def % place a save marker to isolate file %
% paste the text file of any dictionary here % %%EndSetup
%%Page: 1 1 % first figure is the sequence, the second the page number % % place one−off graphics or page definitions before opening any dictionary %
dictionaryname begin % no slash %% text file %
% protect all translations, scaling, rotation and % changes of colour with a gsave − grestore pair
end % remove dictionary if used %%%EndPage % Page/EndPage enable re−ordering of printing sequence of the pages %
%%Trailershowpage % print the page %defaults restore % restore the condition before the save marker %
%%EOF % end of file %
The Document Structuring Conventions were designed by Adobe to ensure conformity between PostScript files of different origins. Those shown above are the bare minimum for a file to be intelligible when read by a document manager. Files for local use only need the header.
NEXT
FIRST
BACK
Practical PostScript 8 Cappella Archive
First Principles PostScript is the printing language universally applied to most laser printers and imagesetters. It was developed in the early eighties by Adobe Systems Inc. as a command language to provide a written description of a page of text or graphic images. Because early computers were of limited processing power, the PostScript interpreter was put inside a laser printer to convert the script into drawn, not bitmapped, lines on the page. The interpreter contains very wide−ranging arithmetical, graphical and typographical instructions, and desktop printing applications like Page− Maker were designed to convert the bitmap on−screen images auto− matically into the PostScript language. However, few people realize that fully typeset pages may also be marked−up by hand using a text editor and printed on any PostScript laser printer or imagesetter. One of the problems with PostScript is that the manuals and text books are written in American Computer Speak, an abstract, unintelligible and jargon−ridden Humpty−Dumpty language that hinders understanding. In addition, as users may create their own recipes for every definition, there is even more scope for confusion. PostScript instructions originate from the zero co−ordinate at the bottom left hand corner of every page. If you get confused, remember the old army map−reading adage that 'yer wipes yer feet before yer goes upstairs'. In other words x is always the horizontal co−ordinate and comes before the vertical y. Before we can write the script for an image, our PostScript file has to have a Header. The %! command wakes up the laser printer and the Creator identifies the origin of the file. The Prolog holds the save − restore isolators that protect the normal page defaults, as well as any permanent definitions we may place in our own files.
NEXT
FIRST
BACK
Practical PostScript 9 Cappella Archive
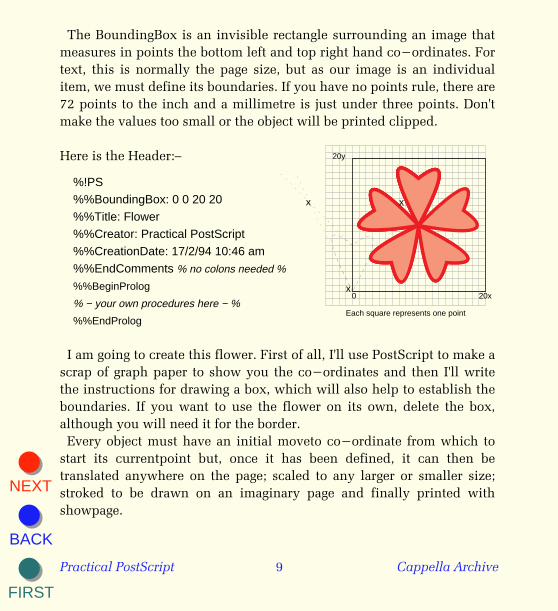
The BoundingBox is an invisible rectangle surrounding an image that measures in points the bottom left and top right hand co−ordinates. For text, this is normally the page size, but as our image is an individual item, we must define its boundaries. If you have no points rule, there are 72 points to the inch and a millimetre is just under three points. Don't make the values too small or the object will be printed clipped.
0 20x
20y
Each square represents one point
x
xx
Here is the Header:–
%!PS%%BoundingBox: 0 0 20 20%%Title: Flower%%Creator: Practical PostScript %%CreationDate: 17/2/94 10:46 am%%EndComments % no colons needed %
%%BeginProlog
% − your own procedures here − %
%%EndProlog
I am going to create this flower. First of all, I'll use PostScript to make a scrap of graph paper to show you the co−ordinates and then I'll write the instructions for drawing a box, which will also help to establish the boundaries. If you want to use the flower on its own, delete the box, although you will need it for the border. Every object must have an initial moveto co−ordinate from which to start its currentpoint but, once it has been defined, it can then be translated anywhere on the page; scaled to any larger or smaller size; stroked to be drawn on an imaginary page and finally printed with showpage.
NEXT
FIRST
BACK
Practical PostScript 10 Cappella Archive
/box { newpath 0 0 moveto % start new line: page lower left hand xy %0 20 lineto 20 20 lineto 20 0 lineto closepathgsave 0 setgray fill grestore % black: gs/gr preserve co−ordinates %0.1 setlinewidth 0 setgray stroke % for use by the stroke instruction %
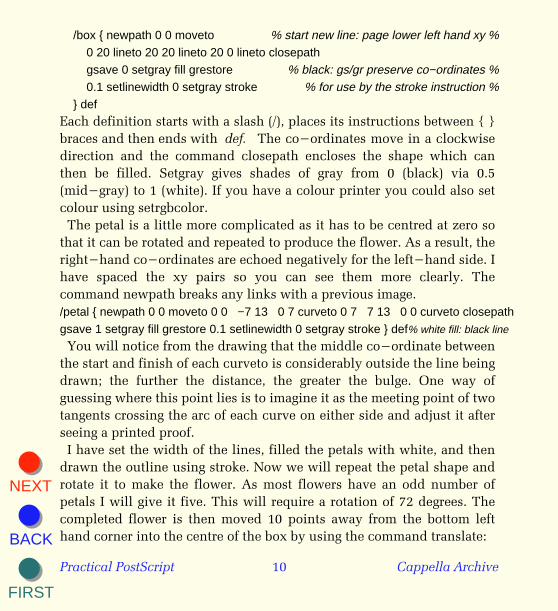
} defEach definition starts with a slash (/), places its instructions between { } braces and then ends with def. The co−ordinates move in a clockwise direction and the command closepath encloses the shape which can then be filled. Setgray gives shades of gray from 0 (black) via 0.5 (mid−gray) to 1 (white). If you have a colour printer you could also set colour using setrgbcolor. The petal is a little more complicated as it has to be centred at zero so that it can be rotated and repeated to produce the flower. As a result, the right−hand co−ordinates are echoed negatively for the left−hand side. I have spaced the xy pairs so you can see them more clearly. The command newpath breaks any links with a previous image. /petal { newpath 0 0 moveto 0 0 −7 13 0 7 curveto 0 7 7 13 0 0 curveto closepathgsave 1 setgray fill grestore 0.1 setlinewidth 0 setgray stroke } def% white fill: black line
You will notice from the drawing that the middle co−ordinate between the start and finish of each curveto is considerably outside the line being drawn; the further the distance, the greater the bulge. One way of guessing where this point lies is to imagine it as the meeting point of two tangents crossing the arc of each curve on either side and adjust it after seeing a printed proof. I have set the width of the lines, filled the petals with white, and then drawn the outline using stroke. Now we will repeat the petal shape and rotate it to make the flower. As most flowers have an odd number of petals I will give it five. This will require a rotation of 72 degrees. The completed flower is then moved 10 points away from the bottom left hand corner into the centre of the box by using the command translate:
NEXT
FIRST
BACK
Practical PostScript 11 Cappella Archive
/flower { 10 10 translate 5 { petal 72 rotate } repea t} def I can put the various elements of flower and box together to make a border and translate the border to the position on the page where I want it; indicate the eight boxed flowers I need and translate each one 20 points horizontally (x axis remember!) to sit beside its neighbour.
/border { box flower } def gsave 50 90 translate 8 {border 20 0 translate} repeat grestore
Finally, we can print the border using the command showpage and then restore the page defaults. This Trailer section, as it is sometimes called, can also include running items that carry over from page to page, such as footers, logos and page numbers.
showpage defaults restore A PostScript laser printer assumes that the user will want normal co−ordinates and black ink. If these are changed for any reason, there has to be a mechanism for reverting to the normal default settings. This is achieved by the mysterious duo gsave and grestore. They hunt in pairs, like Rosencrantz and Guildenstern or Marks & Spencer, and it is best if you think of them as a high fence that prevents anything outside the definition from climbing in, or worse, something nasty crawling out. Accordingly, there is a graphic state gsave at the beginning of our little procedure and a graphic state grestore at the end which do precisely this. Otherwise, if one definition conflicted with another; the printer could get its shoelaces tied together, or go into an endless loop and sulk. Secondly, whenever a line is stroked or a shape filled with colour, its co−ordinates are 'used up', so that if we wish to do both of these things to an object like our box, a gsave and grestore pair has to be placed around anything likely to be used more than once.
NEXT
FIRST
BACK
Practical PostScript 12 Cappella Archive
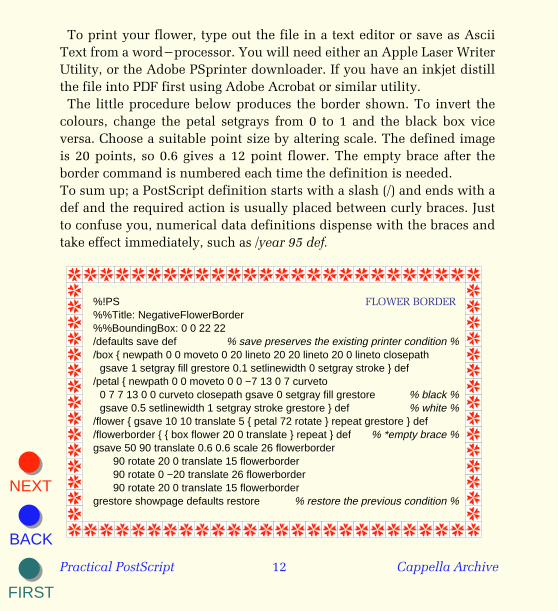
To print your flower, type out the file in a text editor or save as Ascii Text from a word−processor. You will need either an Apple Laser Writer Utility, or the Adobe PSprinter downloader. If you have an inkjet distill the file into PDF first using Adobe Acrobat or similar utility. The little procedure below produces the border shown. To invert the colours, change the petal setgrays from 0 to 1 and the black box vice versa. Choose a suitable point size by altering scale. The defined image is 20 points, so 0.6 gives a 12 point flower. The empty brace after the border command is numbered each time the definition is needed. To sum up; a PostScript definition starts with a slash (/) and ends with a def and the required action is usually placed between curly braces. Just to confuse you, numerical data definitions dispense with the braces and take effect immediately, such as /year 95 def.
%!PS FLOWER BORDER %%Title: NegativeFlowerBorder%%BoundingBox: 0 0 22 22/defaults save def % save preserves the existing printer condition %/box { newpath 0 0 moveto 0 20 lineto 20 20 lineto 20 0 lineto closepath
gsave 1 setgray fill grestore 0.1 setlinewidth 0 setgray stroke } def /petal { newpath 0 0 moveto 0 0 −7 13 0 7 curveto
0 7 7 13 0 0 curveto closepath gsave 0 setgray fill grestore % black %gsave 0.5 setlinewidth 1 setgray stroke grestore } def % white %
/flower { gsave 10 10 translate 5 { petal 72 rotate } repeat grestore } def/flowerborder { { box flower 20 0 translate } repeat } def % *empty brace %gsave 50 90 translate 0.6 0.6 scale 26 flowerborder
90 rotate 20 0 translate 15 flowerborder90 rotate 0 −20 translate 26 flowerborder90 rotate 20 0 translate 15 flowerborder
grestore showpage defaults restore % restore the previous condition %

NEXT
FIRST
BACK
Practical PostScript 13 Cappella Archive
Dictionaries You may remember that I have explained that one problem with PostScript is that it is often difficult to decipher the procedures you see written down, because anyone can compile their own variations of the PostScript definitions. However, it is this ability to redefine that makes it such a flexible and effective printing language. An instruction like lineto when reduced to 'li', or even a single letter, will be executed faster because there are fewer bytes to transmit, but the shorthand makes the file more difficult to interpret. Secondly, you are able to place all your personal redefinitions in your own dictionary. This may be placed on the top of the PostScript interpreter dictionary stack whenever you use it and, once the original commands have been dug out of the printer's own voluminous system dictionary the first time round, it keeps them on hand, and all succeeding calls are made very quickly. Whilst such speed increases in our small files are largely theoretical, the advantage our own dictionary has for us is that it saves typing repetitive commands and makes our little procedures much more compact and less wordy. Furthermore, because we intend to talk directly to the printer in its own language, there is no longer the three−fold inefficiency of recompiling the PostScript language into the graphics or DTP application dictionaries that convert the bitmapped images drawn on the screen back into PostScript. So, our first venture is to make a shorthand dictionary. This is a useful exercise which gives a list of the most common graphical commands. All the abbreviations are reasonably mnemonic, and single letter codes are avoided, except for those used for typesetting the text.
NEXT
FIRST
BACK
Practical PostScript 14 Cappella Archive
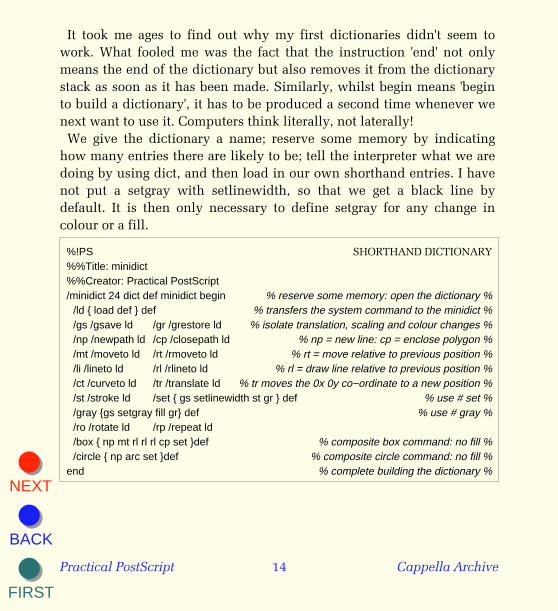
It took me ages to find out why my first dictionaries didn't seem to work. What fooled me was the fact that the instruction 'end' not only means the end of the dictionary but also removes it from the dictionary stack as soon as it has been made. Similarly, whilst begin means 'begin to build a dictionary', it has to be produced a second time whenever we next want to use it. Computers think literally, not laterally! We give the dictionary a name; reserve some memory by indicating how many entries there are likely to be; tell the interpreter what we are doing by using dict, and then load in our own shorthand entries. I have not put a setgray with setlinewidth, so that we get a black line by default. It is then only necessary to define setgray for any change in colour or a fill.
%!PS SHORTHAND DICTIONARY%%Title: minidict%%Creator: Practical PostScript/minidict 24 dict def minidict begin % reserve some memory: open the dictionary %
/ld { load def } def % transfers the system command to the minidict %/gs /gsave ld /gr /grestore ld % isolate translation, scaling and colour changes %/np /newpath ld /cp /closepath ld % np = new line: cp = enclose polygon %/mt /moveto ld /rt /rmoveto ld % rt = move relative to previous position %/li /lineto ld /rl /rlineto ld % rl = draw line relative to previous position %/ct /curveto ld /tr /translate ld % tr moves the 0x 0y co−ordinate to a new position %/st /stroke ld /set { gs setlinewidth st gr } def % use # set %/gray {gs setgray fill gr} def % use # gray %/ro /rotate ld /rp /repeat ld /box { np mt rl rl rl cp set }def % composite box command: no fill %/circle { np arc set }def % composite circle command: no fill %
end % complete building the dictionary %
NEXT
FIRST
BACK
Practical PostScript 15 Cappella Archive
Daisy−Chaining Another method of increasing efficiency is to place frequently used instructions under one definition. A box could be defined as:
/box { newpath moveto lineto lineto lineto closepath setlinewidth stroke } def You will also notice that there are no co−ordinate or setlinewidth values and these must be provided in reverse order when you wish to make a box. Imagine you are writing your instructions on separate pieces of paper and throwing them into the wastepaper basket. When you look at them in a pile, the last, setlinewidth, is on top and the first, newpath, at the bottom, and this is the way the printer sees them. A 20 point square box with a border one point wide, placed 72 points (one inch) from the bottom left hand corner of the page will have values typed in reverse:
1 72 92 92 92 92 72 72 72 box Adding co−ordinates together whilst walking backwards makes for accidents, and we could use the instruction rlineto instead. Each clockwise corner of the box becomes zero in turn, so that the bottom right hand corner is minus relative to the top right hand corner, like this:
/box { newpath moveto rlineto rlineto rlineto closepath setlinewidth stroke } def1 0 −20 20 0 0 20 72 72 box
Fortunately these rather tedious level one processes have been super− seded by the later level two commands, rectfill and rectstroke, which extract all the movements from the lower left and upper right hand pairs of co−ordinates. The box may now read as:
/box { 1 setlinewidth 0 0 20 20 rectstroke } def
NEXT
FIRST
BACK
Practical PostScript 16 Cappella Archive
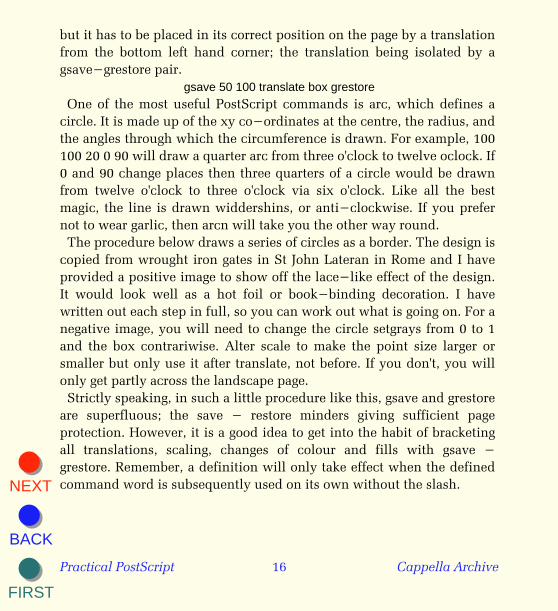
but it has to be placed in its correct position on the page by a translation from the bottom left hand corner; the translation being isolated by a gsave−grestore pair.
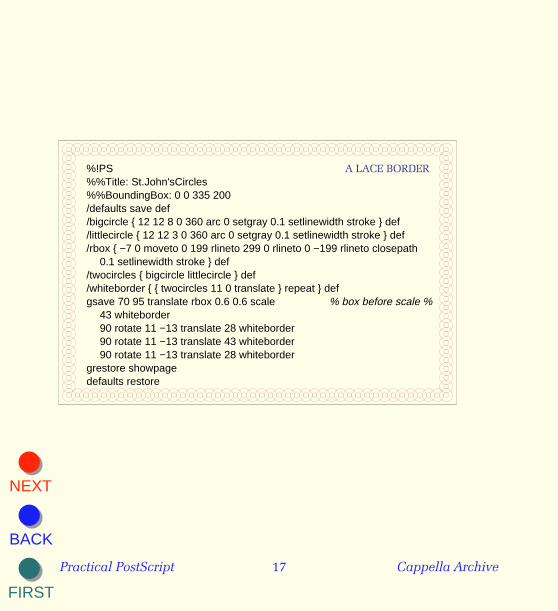
gsave 50 100 translate box grestore One of the most useful PostScript commands is arc, which defines a circle. It is made up of the xy co−ordinates at the centre, the radius, and the angles through which the circumference is drawn. For example, 100 100 20 0 90 will draw a quarter arc from three o'clock to twelve oclock. If 0 and 90 change places then three quarters of a circle would be drawn from twelve o'clock to three o'clock via six o'clock. Like all the best magic, the line is drawn widdershins, or anti−clockwise. If you prefer not to wear garlic, then arcn will take you the other way round. The procedure below draws a series of circles as a border. The design is copied from wrought iron gates in St John Lateran in Rome and I have provided a positive image to show off the lace−like effect of the design. It would look well as a hot foil or book−binding decoration. I have written out each step in full, so you can work out what is going on. For a negative image, you will need to change the circle setgrays from 0 to 1 and the box contrariwise. Alter scale to make the point size larger or smaller but only use it after translate, not before. If you don't, you will only get partly across the landscape page. Strictly speaking, in such a little procedure like this, gsave and grestore are superfluous; the save − restore minders giving sufficient page protection. However, it is a good idea to get into the habit of bracketing all translations, scaling, changes of colour and fills with gsave − grestore. Remember, a definition will only take effect when the defined command word is subsequently used on its own without the slash.
NEXT
FIRST
BACK
Practical PostScript 17 Cappella Archive
%!PS A LACE BORDER %%Title: St.John'sCircles%%BoundingBox: 0 0 335 200/defaults save def/bigcircle { 12 12 8 0 360 arc 0 setgray 0.1 setlinewidth stroke } def/littlecircle { 12 12 3 0 360 arc 0 setgray 0.1 setlinewidth stroke } def/rbox { −7 0 moveto 0 199 rlineto 299 0 rlineto 0 −199 rlineto closepath
0.1 setlinewidth stroke } def/twocircles { bigcircle littlecircle } def/whiteborder { { twocircles 11 0 translate } repeat } defgsave 70 95 translate rbox 0.6 0.6 scale % box before scale %
43 whiteborder90 rotate 11 −13 translate 28 whiteborder90 rotate 11 −13 translate 43 whiteborder90 rotate 11 −13 translate 28 whiteborder
grestore showpagedefaults restore
NEXT
FIRST
BACK
Practical PostScript 18 Cappella Archive
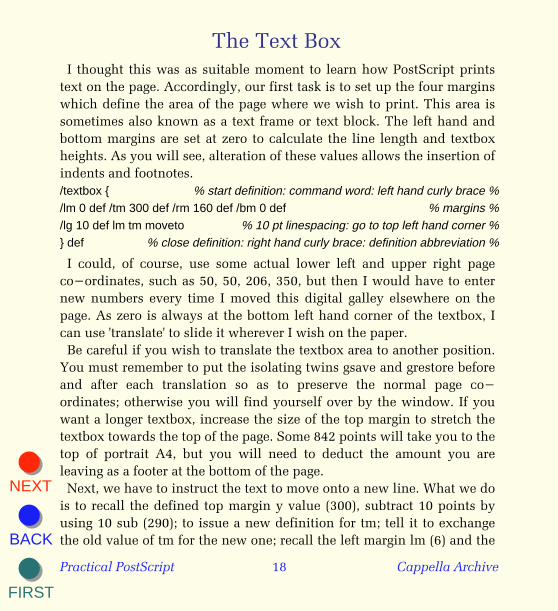
The Text Box I thought this was as suitable moment to learn how PostScript prints text on the page. Accordingly, our first task is to set up the four margins which define the area of the page where we wish to print. This area is sometimes also known as a text frame or text block. The left hand and bottom margins are set at zero to calculate the line length and textbox heights. As you will see, alteration of these values allows the insertion of indents and footnotes. /textbox { % start definition: command word: left hand curly brace %/lm 0 def /tm 300 def /rm 160 def /bm 0 def % margins %/lg 10 def lm tm moveto % 10 pt linespacing: go to top left hand corner %} def % close definition: right hand curly brace: definition abbreviation %
I could, of course, use some actual lower left and upper right page co−ordinates, such as 50, 50, 206, 350, but then I would have to enter new numbers every time I moved this digital galley elsewhere on the page. As zero is always at the bottom left hand corner of the textbox, I can use 'translate' to slide it wherever I wish on the paper. Be careful if you wish to translate the textbox area to another position. You must remember to put the isolating twins gsave and grestore before and after each translation so as to preserve the normal page co− ordinates; otherwise you will find yourself over by the window. If you want a longer textbox, increase the size of the top margin to stretch the textbox towards the top of the page. Some 842 points will take you to the top of portrait A4, but you will need to deduct the amount you are leaving as a footer at the bottom of the page. Next, we have to instruct the text to move onto a new line. What we do is to recall the defined top margin y value (300), subtract 10 points by using 10 sub (290); to issue a new definition for tm; tell it to exchange the old value of tm for the new one; recall the left margin lm (6) and the
NEXT
FIRST
BACK
Practical PostScript 19 Cappella Archive
new tm (290) and ask the printer to use these new co−ordinates with the moveto command.
/newline { tm lg sub /tm exch def lm tm moveto } def Notice that it is very important to use the textbox command before you start typing any text, otherwise the printer does not know where to pitch camp until it gets the first moveto command incorporated in the definition. Eventually, we shall include the default typeface and make a page command that will open the first textbox automatically, as well as find an easier method of varying the margins. To persuade the printer to find an 8 point Times Roman, we either issue the level one command: /Times−Roman findfont 8 scalefont or the level two: /Times−Roman 8 Because this instruction is for immediate use, it does not require def or any braces around it. Printing text is now very easy. Having already got our initial moveto, all we do is write our text between ordinary brackets. The command show paints the text on the page, as stroke does for graphics, and the document is finally printed by the command show− page, as usual. I have redefined newline as L for linespacing because I often need to advance some lines without any text, and the printer would blow me a raspberry if it found no text to print. Typing may also be made simpler by abbreviating the system command 'show' and loading it into our own dictionary.
/s /show load def /L { newline } def /n { s L } def One of the most tedious letterpress jobs used to be the centering of text. Fortunately, by using PostScript, little electrons will rush about doing all our calculations. There is a magical PostScript command called stringwidth. It takes a length of text, compares it with the character widths of the chosen font and then trots back with a points measurement of the line.
NEXT
FIRST
BACK
Practical PostScript 20 Cappella Archive
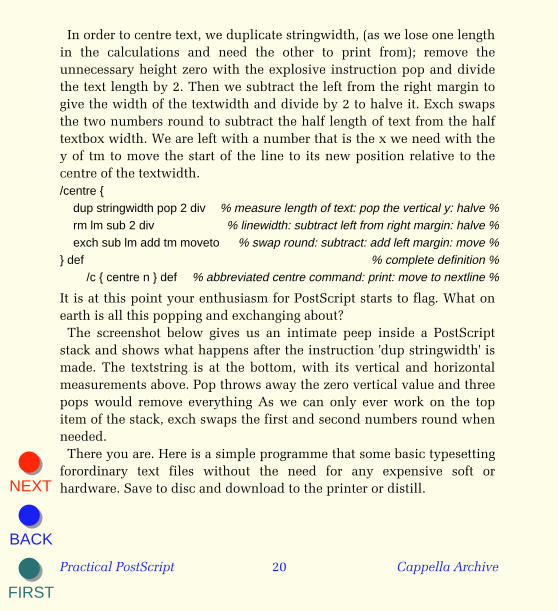
In order to centre text, we duplicate stringwidth, (as we lose one length in the calculations and need the other to print from); remove the unnecessary height zero with the explosive instruction pop and divide the text length by 2. Then we subtract the left from the right margin to give the width of the textwidth and divide by 2 to halve it. Exch swaps the two numbers round to subtract the half length of text from the half textbox width. We are left with a number that is the x we need with the y of tm to move the start of the line to its new position relative to the centre of the textwidth. /centre {
dup stringwidth pop 2 div % measure length of text: pop the vertical y: halve %rm lm sub 2 div % linewidth: subtract left from right margin: halve %exch sub lm add tm moveto % swap round: subtract: add left margin: move %
} def % complete definition %/c { centre n } def % abbreviated centre command: print: move to nextline %
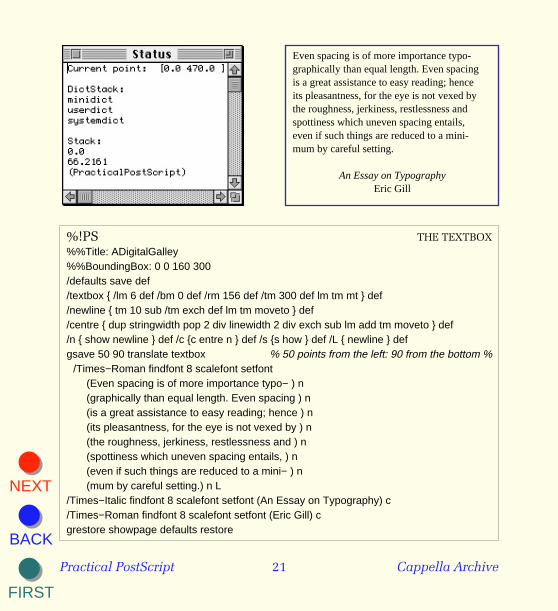
It is at this point your enthusiasm for PostScript starts to flag. What on earth is all this popping and exchanging about? The screenshot below gives us an intimate peep inside a PostScript stack and shows what happens after the instruction 'dup stringwidth' is made. The textstring is at the bottom, with its vertical and horizontal measurements above. Pop throws away the zero vertical value and three pops would remove everything As we can only ever work on the top item of the stack, exch swaps the first and second numbers round when needed. There you are. Here is a simple programme that some basic typesetting forordinary text files without the need for any expensive soft or hardware. Save to disc and download to the printer or distill.
NEXT
FIRST
BACK
Practical PostScript 21 Cappella Archive
%!PS THE TEXTBOX%%Title: ADigitalGalley%%BoundingBox: 0 0 160 300/defaults save def/textbox { /lm 6 def /bm 0 def /rm 156 def /tm 300 def lm tm mt } def/newline { tm 10 sub /tm exch def lm tm moveto } def/centre { dup stringwidth pop 2 div linewidth 2 div exch sub lm add tm moveto } def/n { show newline } def /c {c entre n } def /s {s how } def /L { newline } defgsave 50 90 translate textbox % 50 points from the left: 90 from the bottom %
/Times−Roman findfont 8 scalefont setfont(Even spacing is of more importance typo− ) n(graphically than equal length. Even spacing ) n (is a great assistance to easy reading; hence ) n (its pleasantness, for the eye is not vexed by ) n(the roughness, jerkiness, restlessness and ) n(spottiness which uneven spacing entails, ) n(even if such things are reduced to a mini− ) n(mum by careful setting.) n L
/Times−Italic findfont 8 scalefont setfont (An Essay on Typography) c/Times−Roman findfont 8 scalefont setfont (Eric Gill) cgrestore showpage defaults restore
Even spacing is of more importance typo- graphically than equal length. Even spacing is a great assistance to easy reading; hence its pleasantness, for the eye is not vexed by the roughness, jerkiness, restlessness and spottiness which uneven spacing entails, even if such things are reduced to a mini- mum by careful setting.
An Essay on TypographyEric Gill
NEXT
FIRST
BACK
Practical PostScript 22 Cappella Archive
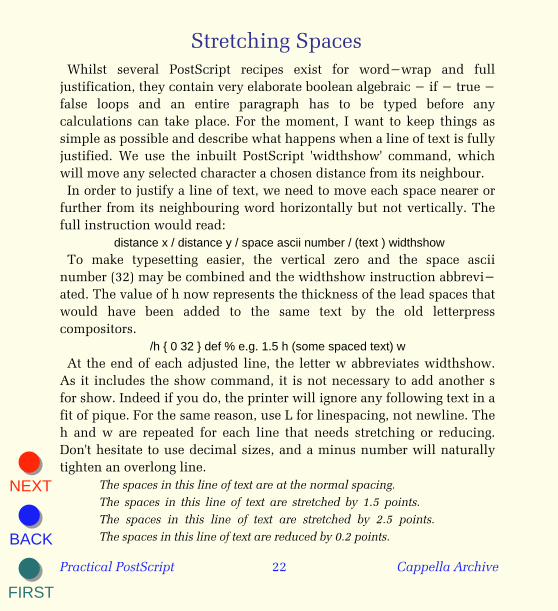
Stretching Spaces Whilst several PostScript recipes exist for word−wrap and full justification, they contain very elaborate boolean algebraic − if − true − false loops and an entire paragraph has to be typed before any calculations can take place. For the moment, I want to keep things as simple as possible and describe what happens when a line of text is fully justified. We use the inbuilt PostScript 'widthshow' command, which will move any selected character a chosen distance from its neighbour. In order to justify a line of text, we need to move each space nearer or further from its neighbouring word horizontally but not vertically. The full instruction would read:
distance x / distance y / space ascii number / (text ) widthshow To make typesetting easier, the vertical zero and the space ascii number (32) may be combined and the widthshow instruction abbrevi− ated. The value of h now represents the thickness of the lead spaces that would have been added to the same text by the old letterpress compositors.
/h { 0 32 } def % e.g. 1.5 h (some spaced text) w At the end of each adjusted line, the letter w abbreviates widthshow. As it includes the show command, it is not necessary to add another s for show. Indeed if you do, the printer will ignore any following text in a fit of pique. For the same reason, use L for linespacing, not newline. The h and w are repeated for each line that needs stretching or reducing. Don't hesitate to use decimal sizes, and a minus number will naturally tighten an overlong line.
The spaces in this line of text are at the normal spacing. The spaces in this line of text are stretched by 1.5 points. The spaces in this line of text are stretched by 2.5 points. The spaces in this line of text are reduced by 0.2 points.
NEXT
FIRST
BACK
Practical PostScript 23 Cappella Archive
Book page justification is a skilled art in itself and compositors of old could avoid starting a paragraph at the bottom of a page and bring back carried−over single words, (otherwise known as 'orphans' and 'widows' respectively) by adjusting the spacing of a previous paragraph some− times three pages beforehand. Magazines and newspapers justify by altering the space between the letters as well as the distance between the words. This is a process known as 'tracking' and concertina−ing see−saw lines like the next one are common, especially when hyphenation is turned off. Except for headlines, such a practice was never used in letterpress printing and Eric Gill's strictures are still relevant today. To use the galley, type the Minidict into SimpleText, or a similar text editor, and save to disc. Then, select your newline and textbox sizes; translate the textbox where you want, remembering to use the twins gsave and grestore each time to preserve the default co−ordinates. Type in your text, using n at the end of each line, for the moment guessing when to word−wrap on to the next line. If you alter the margin distances, do the same to the box, if you want to rule round the text. Download with the LaserWriter Utility or distill into PDF. PostScript printers are notorious sticklers for accuracy and will throw Courier at you with the slightest provocation. To persuade them to get the correct typeface out of the basement, you must type the correct PostScript name, beginning with a slash, even if it is the digitized version of Melior used here called /ZapfElliptical711BT−Roman
NEXT
FIRST
BACK
Practical PostScript 24 Cappella Archive
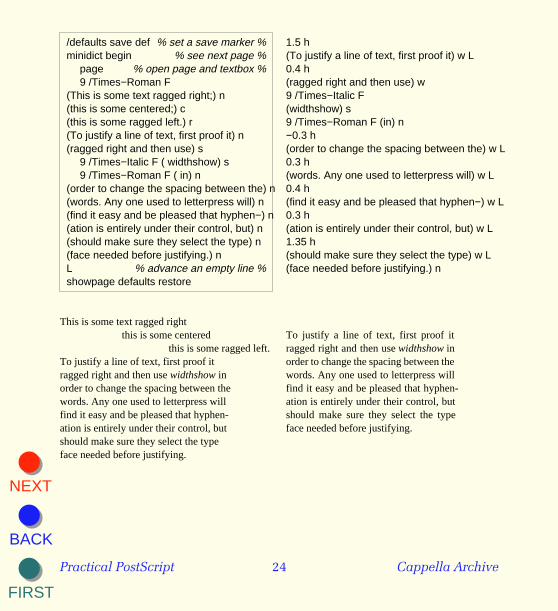
/defaults save def % set a save marker %minidict begin % see next page %
page % open page and textbox %9 /Times−Roman F
(This is some text ragged right;) n(this is some centered;) c (this is some ragged left.) r (To justify a line of text, first proof it) n(ragged right and then use) s
9 /Times−Italic F ( widthshow) s 9 /Times−Roman F ( in) n
(order to change the spacing between the) n(words. Any one used to letterpress will) n(find it easy and be pleased that hyphen−) n(ation is entirely under their control, but) n(should make sure they select the type) n(face needed before justifying.) nL % advance an empty line %showpage defaults restore
This is some text ragged rightthis is some centered
this is some ragged left. To justify a line of text, first proof itragged right and then use widthshow inorder to change the spacing between thewords. Any one used to letterpress willfind it easy and be pleased that hyphen-ation is entirely under their control, butshould make sure they select the typeface needed before justifying.
1.5 h (To justify a line of text, first proof it) w L0.4 h (ragged right and then use) w9 /Times−Italic F (widthshow) s 9 /Times−Roman F (in) n −0.3 h (order to change the spacing between the) w L0.3 h (words. Any one used to letterpress will) w L0.4 h (find it easy and be pleased that hyphen−) w L0.3 h (ation is entirely under their control, but) w L1.35 h (should make sure they select the type) w L(face needed before justifying.) n
To justify a line of text, first proof itragged right and then use widthshow inorder to change the spacing between thewords. Any one used to letterpress willfind it easy and be pleased that hyphen-ation is entirely under their control, butshould make sure they select the typeface needed before justifying.
NEXT
FIRST
BACK
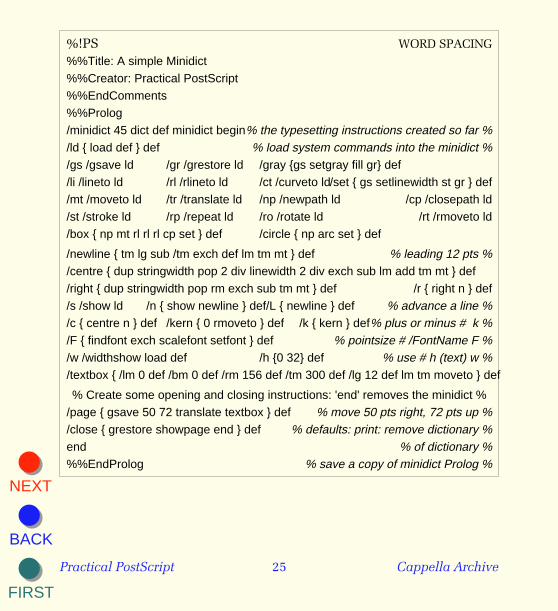
Practical PostScript 25 Cappella Archive
%!PS WORD SPACING%%Title: A simple Minidict %%Creator: Practical PostScript%%EndComments %%Prolog/minidict 45 dict def minidict begin% the typesetting instructions created so far %/ld { load def } def % load system commands into the minidict %/gs /gsave ld /gr /grestore ld /gray {gs setgray fill gr} def /li /lineto ld /rl /rlineto ld /ct /curveto ld/set { gs setlinewidth st gr } def/mt /moveto ld /tr /translate ld /np /newpath ld /cp /closepath ld/st /stroke ld /rp /repeat ld /ro /rotate ld /rt /rmoveto ld/box { np mt rl rl rl cp set } def /circle { np arc set } def
/newline { tm lg sub /tm exch def lm tm mt } def % leading 12 pts %/centre { dup stringwidth pop 2 div linewidth 2 div exch sub lm add tm mt } def /right { dup stringwidth pop rm exch sub tm mt } def /r { right n } def/s /show ld /n { show newline } def/L { newline } def % advance a line %/c { centre n } def /kern { 0 rmoveto } def /k { kern } def% plus or minus # k %/F { findfont exch scalefont setfont } def % pointsize # /FontName F %/w /widthshow load def /h {0 32} def % use # h (text) w %/textbox { /lm 0 def /bm 0 def /rm 156 def /tm 300 def /lg 12 def lm tm moveto } def
% Create some opening and closing instructions: 'end' removes the minidict %/page { gsave 50 72 translate textbox } def % move 50 pts right, 72 pts up %/close { grestore showpage end } def % defaults: print: remove dictionary %end % of dictionary %%%EndProlog % save a copy of minidict Prolog %
NEXT
FIRST
BACK
Practical PostScript 26 Cappella Archive
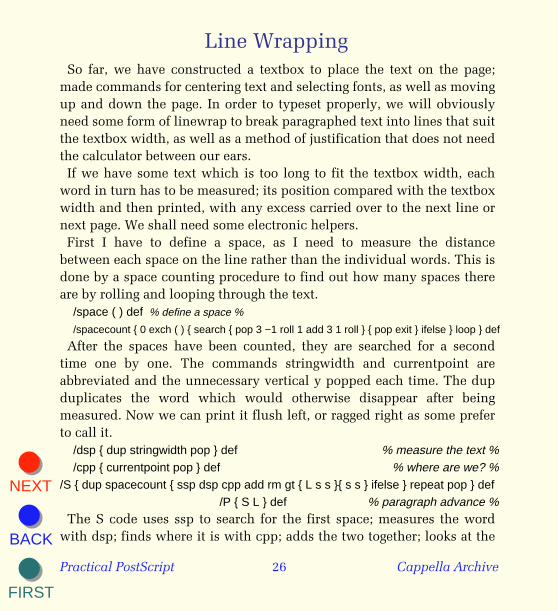
Line Wrapping So far, we have constructed a textbox to place the text on the page; made commands for centering text and selecting fonts, as well as moving up and down the page. In order to typeset properly, we will obviously need some form of linewrap to break paragraphed text into lines that suit the textbox width, as well as a method of justification that does not need the calculator between our ears. If we have some text which is too long to fit the textbox width, each word in turn has to be measured; its position compared with the textbox width and then printed, with any excess carried over to the next line or next page. We shall need some electronic helpers. First I have to define a space, as I need to measure the distance between each space on the line rather than the individual words. This is done by a space counting procedure to find out how many spaces there are by rolling and looping through the text.
/space ( ) def % define a space %
/spacecount { 0 exch ( ) { search { pop 3 −1 roll 1 add 3 1 roll } { pop exit } ifelse } loop } def
After the spaces have been counted, they are searched for a second time one by one. The commands stringwidth and currentpoint are abbreviated and the unnecessary vertical y popped each time. The dup duplicates the word which would otherwise disappear after being measured. Now we can print it flush left, or ragged right as some prefer to call it.
/dsp { dup stringwidth pop } def % measure the text %/cpp { currentpoint pop } def % where are we? %
/S { dup spacecount { ssp dsp cpp add rm gt { L s s }{ s s } ifelse } repeat pop } def /P { S L } def % paragraph advance %
The S code uses ssp to search for the first space; measures the word with dsp; finds where it is with cpp; adds the two together; looks at the
NEXT
FIRST
BACK
Practical PostScript 27 Cappella Archive
textwidth rm; and makes a boolean true or false with a gt 'greater than'. If the answer is false, the word and its accompanying space are placed on the line by the two s abbreviations for show. If the reply is true, then an advance is made to the next line and the process repeated until there are no more spaces left. A line advance is combined with the linewrap to form the flush left paragraph command P. Add a space at the end of a paragraph otherwise the last word will disappear into a digital limbo and not be printed. Later, a page jump will carry out another 'greater than' boolean, this time to start a new page when the bottom line of the textbox is reached.
% paste the minidict here %minidict begin
page % open a page and textbox %9 /Times−Bold F % specify bold typeface %(Wordwrap) c L % centre: advance a line %9 /Times−Italic F % size /FontName F %
(The minidict page command moves the textbox to the place chosen by the translation values. Change your typeface and pointsize as you wish. Use a space − backslash − return at the end of each line if your text editor does not automatically wordwrap on screen. The paragraph is typed between parentheses, otherwise known as brackets. ) S L showpage end % prints: removes dictionary %
Linewrap
The minidict page command moves the textbox to the place chosen by the translation values. Change your typeface and pointsize as you wish. Use a space - backslash - return at the end of each line if your text editor does not automatically linewrap on screen. The paragraph is typed between parentheses, otherwise known as brackets.
Notice the space before the closing bracket; this is important before P or J codes. The linewrapping calculations are based on the number of words plus adjoining space. If a final space is not present the previous word will disappear into digital limbo.
NEXT
FIRST
BACK
Practical PostScript 28 Cappella Archive
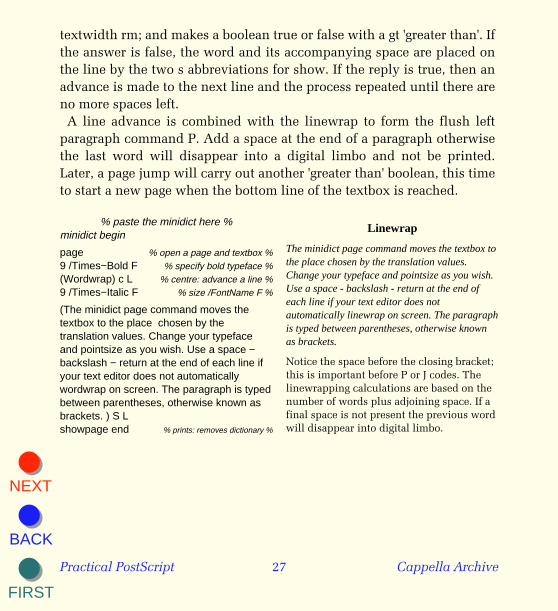
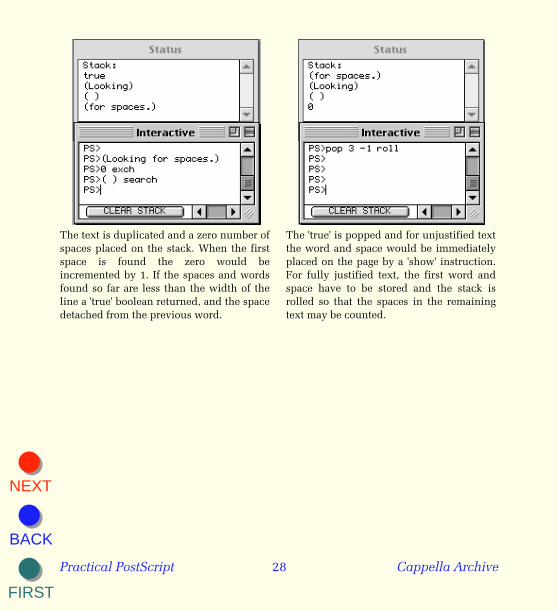
The text is duplicated and a zero number of spaces placed on the stack. When the first space is found the zero would be incremented by 1. If the spaces and words found so far are less than the width of the line a 'true' boolean returned, and the space detached from the previous word.
The 'true' is popped and for unjustified text the word and space would be immediately placed on the page by a 'show' instruction. For fully justified text, the first word and space have to be stored and the stack is rolled so that the spaces in the remaining text may be counted.
NEXT
FIRST
BACK
Practical PostScript 29 Cappella Archive
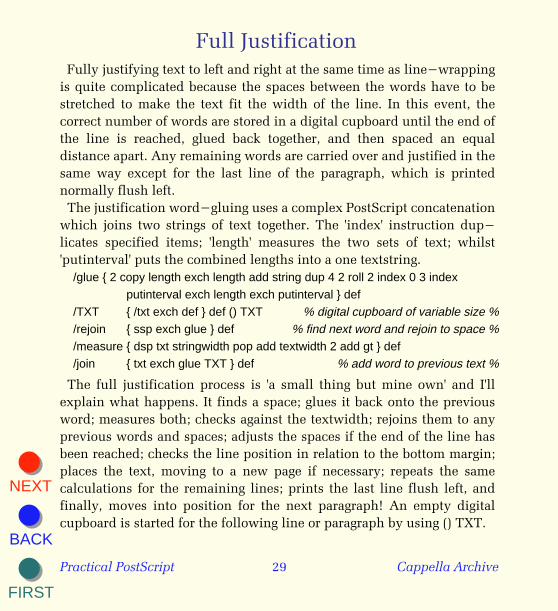
Full Justification Fully justifying text to left and right at the same time as line−wrapping is quite complicated because the spaces between the words have to be stretched to make the text fit the width of the line. In this event, the correct number of words are stored in a digital cupboard until the end of the line is reached, glued back together, and then spaced an equal distance apart. Any remaining words are carried over and justified in the same way except for the last line of the paragraph, which is printed normally flush left. The justification word−gluing uses a complex PostScript concatenation which joins two strings of text together. The 'index' instruction dup− licates specified items; 'length' measures the two sets of text; whilst 'putinterval' puts the combined lengths into a one textstring.
/glue { 2 copy length exch length add string dup 4 2 roll 2 index 0 3 index putinterval exch length exch putinterval } def
/TXT { /txt exch def } def () TXT % digital cupboard of variable size %/rejoin { ssp exch glue } def % find next word and rejoin to space %/measure { dsp txt stringwidth pop add textwidth 2 add gt } def /join { txt exch glue TXT } def % add word to previous text %
The full justification process is 'a small thing but mine own' and I'll explain what happens. It finds a space; glues it back onto the previous word; measures both; checks against the textwidth; rejoins them to any previous words and spaces; adjusts the spaces if the end of the line has been reached; checks the line position in relation to the bottom margin; places the text, moving to a new page if necessary; repeats the same calculations for the remaining lines; prints the last line flush left, and finally, moves into position for the next paragraph! An empty digital cupboard is started for the following line or paragraph by using () TXT.
NEXT
FIRST
BACK
Practical PostScript 30 Cappella Archive
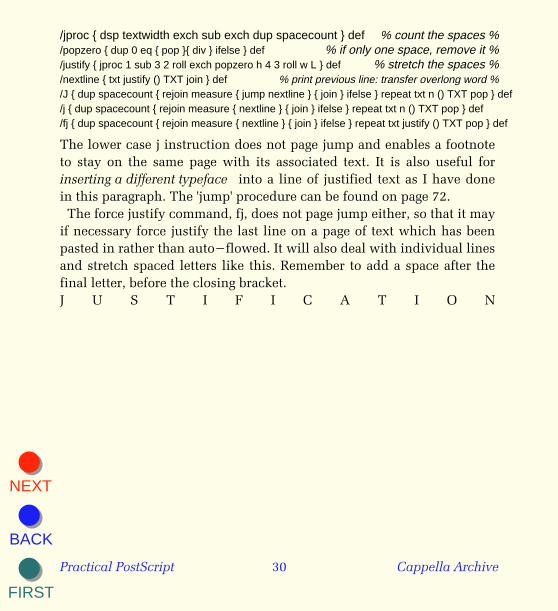
/jproc { dsp textwidth exch sub exch dup spacecount } def % count the spaces %/popzero { dup 0 eq { pop }{ div } ifelse } def % if only one space, remove it %/justify { jproc 1 sub 3 2 roll exch popzero h 4 3 roll w L } def % stretch the spaces %/nextline { txt justify () TXT join } def % print previous line: transfer overlong word %/J { dup spacecount { rejoin measure { jump nextline } { join } ifelse } repeat txt n () TXT pop } def /j { dup spacecount { rejoin measure { nextline } { join } ifelse } repeat txt n () TXT pop } def /fj { dup spacecount { rejoin measure { nextline } { join } ifelse } repeat txt justify () TXT pop } def
The lower case j instruction does not page jump and enables a footnote to stay on the same page with its associated text. It is also useful for inserting a different typeface into a line of justified text as I have done in this paragraph. The 'jump' procedure can be found on page 72. The force justify command, fj, does not page jump either, so that it may if necessary force justify the last line on a page of text which has been pasted in rather than auto−flowed. It will also deal with individual lines and stretch spaced letters like this. Remember to add a space after the final letter, before the closing bracket. J U S T I F I C A T I O N
NEXT
FIRST
BACK
Practical PostScript 31 Cappella Archive
Errors I find it helps to think of a PostScript interpreter as containing a series of Chinese boxes, one inside the other. The innermost box contains the System dictionary holding most of the PostScript operating commands as well as subsidiary built−in dictionaries for such things as error procedures and switch−on status. A second box holds the User dictionary where printer specific instructions such as the number of copies may be user−defined, as well as space for dictionaries of our own. Definitions affecting page layout are also placed here, which may be such things as the paper orientation; automatic page numbering, and tiling translations for, say, the top right hand quarter of a folded broadsheet. If we build our own dictionary, as we do with the Minidict, then we can create a third box. As well as out own typesetting definitions, this may copntain abbreviations for frequently used system instructions to speed up the interpreter thinking process and avoid constant searching throught the lengthy System dictionary. We can, of course, place another dictionary within, or after another dictionary, to separate different procedures for graphics or typesetting. A fourth box holds the interpreter stack that contains whatever is typed on screen. The printer interpreter tries to send it somewhere else, either as data, an instruction, or as a textstring. If the interpreter has been given inadequate or inaccurate instructions, then it will pout, fold its arms and do nothing. The most common error is a human one; with such infelicities as a misspelling, an unbalanced bracket, or a missing backslash. This is usually the reason for the word 'typecheck' or 'get' on the interactive screen or feedback window. A 'stringwidth' error suggests either no chosen font or an unused number is sitting on top of a line of text; a
NEXT
FIRST
BACK
Practical PostScript 32 Cappella Archive
'show' error that there is no text to be measured. The solution to most stack problems is to type the word 'pop' to get rid of the offender. If that does not work, 'clear cleardictstack' will empty the box and 'grestoreall' should allow a fresh start. The fifth box contains the moveto, translation and scaling co−ordinates and these are usually removed by a restore or a grestore. It is for this reason that I carefully insulated textboxes and pages from each other with a gsave − grestore pair to avoid any conflict of movement. There is actually a sixth box which holds all the typeface and font information, but for the moment, the less said about that one the better.
NEXT
FIRST
BACK
Practical PostScript 33 Cappella Archive
Fonts or Founts? I suppose one definition of a fount would be sized sets of individual letters of the alphabet, cast from typemetal, that are collectively very heavy and only available from a diminishing number of devoted typefounders. A fount, once it has been typeset, has to be redistributed into its upper and lower cases, with everyone minding their p's and q's. A font, on the other hand, is a digital reconstruction of an historic or contemporary typeface, with its protective creator breathing litigious copyright fire in all directions like a dragon with halitosis. Some people collect fonts or founts as others do stamps; not so much in the hope of ever using them, but in the desire to hug them to a proprietorial bosom. Antique dealers break up wooden elephant poster founts for the decoration of lounge bars, whilst over−imaginative desktop publishers create increasingly distorted fonts with the zeal of Victorian circus promoters. So, how do you make your very own font? The answer, in general, is don't bother, unless you have unlimited time and access to such software as Font Studio or Fontographer, which take the hard work out of creating the sidebearing values. In the hand punchcutting days, it used to take nine months² to give birth to a set of punches for a typeface. Monotype maintain that it still takes the same length of time to create a 150 character electronic alphabet, with its full complement of roman, italic and bold families. Nevertheless, there are rare occasions when existing typefaces are neither suitable nor available. I have had to make a Gregorian font to print medieval Plainsong.
NEXT
FIRST
BACK
Practical PostScript 34 Cappella Archive
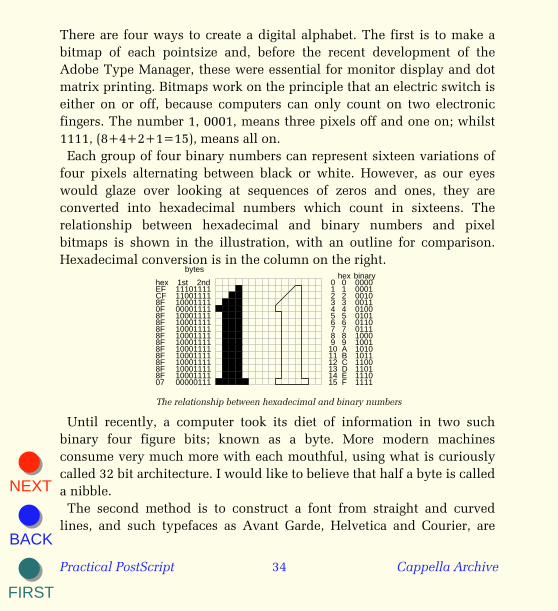
There are four ways to create a digital alphabet. The first is to make a bitmap of each pointsize and, before the recent development of the Adobe Type Manager, these were essential for monitor display and dot matrix printing. Bitmaps work on the principle that an electric switch is either on or off, because computers can only count on two electronic fingers. The number 1, 0001, means three pixels off and one on; whilst 1111, (8+4+2+1=15), means all on. Each group of four binary numbers can represent sixteen variations of four pixels alternating between black or white. However, as our eyes would glaze over looking at sequences of zeros and ones, they are converted into hexadecimal numbers which count in sixteens. The relationship between hexadecimal and binary numbers and pixel bitmaps is shown in the illustration, with an outline for comparison. Hexadecimal conversion is in the column on the right.
bytes
hex 1st 2ndhex binary
0 0 0000EF 11101111 1 1 0001CF 11001111 2 2 00108F 10001111 3 3 00110F 00001111 4 4 01008F 10001111 5 5 01018F 10001111 6 6 01108F 10001111 7 7 01118F 10001111 8 8 10008F 10001111 9 9 10018F 10001111 10 A 10108F 10001111 11 B 10118F 10001111 12 C 11008F 10001111 13 D 11018F 10001111 14 E 111007 00000111 15 F 1111
The relationship between hexadecimal and binary numbers
Until recently, a computer took its diet of information in two such binary four figure bits; known as a byte. More modern machines consume very much more with each mouthful, using what is curiously called 32 bit architecture. I would like to believe that half a byte is called a nibble. The second method is to construct a font from straight and curved lines, and such typefaces as Avant Garde, Helvetica and Courier, are
NEXT
FIRST
BACK
Practical PostScript 35 Cappella Archive
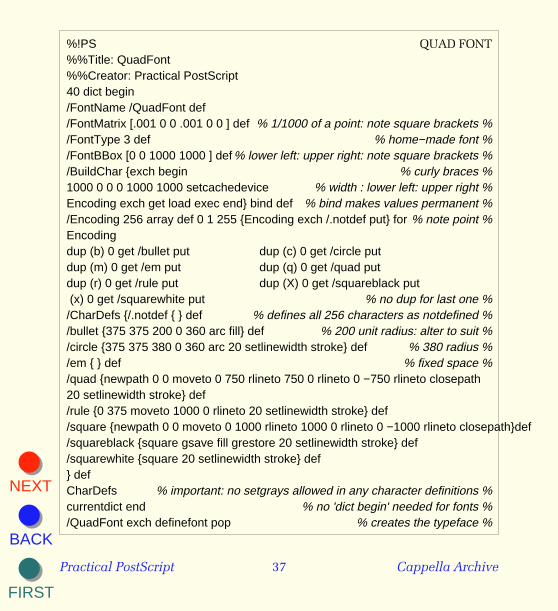
typical examples. It is not usually possible to convert these into an outline font on the page. Outline fonts, like the example shown, are a series of lines and curves drawn round the outside of a letter which is then subsequently filled with black. This can be changed to any other colour or shade of gray. Each letter is treated as an individual graphic shape. There are some problems; the bowl of a p or g must avoid being filled by the creation of a circle or oval. The fourth method is a recent variation of the third. Instead of creating a complete outline for each character, constructional items, such as stems and serifs, are held in a library of shapes and combined to form different letters or even typefaces. It is helpful to think of the PostScript programming language as a series of boxes, one inside the other, and the font cache is such a box. It contains all the font information about a particular typeface, including its character widths, its kerning co−ordinates and so on, and has the virtue of processing such information extremely quickly. If we can convert logos and frequently used graphic objects into a font character, they can be placed with a keystroke and scaled in size just like a proper font. So, as a start, our simple QuadFont will contain the following characters: a bullet; a circle; an em fixed space; a quad square box; a rule and two crossword squares. The em space is very useful for indents and accurate spacing; the rule will always keep its place in the text; the quad box is useful for check lists; the bullet is a popular emphasis and the crossword squares are something different. First, we create a font dictionary and give our typeface a name. It is defined as a type 3 font because it is a home−made one, unlike type 1 which are the professional ones. A matrix measures the xy coordinates, which in this instance are one thousandth of a point. Oh, yes they are! The Font Bounding Box covers the area of all the characters placed on
NEXT
FIRST
BACK
Practical PostScript 36 Cappella Archive
top of each other. If we were creating letters with long descenders and swashes then the 0 0 left hand co−ordinates would become minus numbers, such as −150 −140. All 256 characters are first encoded as not defined, but we change our minds and code the letter b as a bullet, c as a circle, m as the fixed space, and so on. Each time we do so, we have to duplicate the coding sequence except, please note, for the last time. Next, we write the PostScript procedures to define the characters and specify the remaining 248 notdefined characters as fresh air. I apologise for the jargon of the Build Char section. Think of it as an incantation putting everything we have constructed inside the font cache, using the word setcachedevice. Normally a unique matrix has to be built for each character. However, as all our characters occupy an identical quad space, a square of one thousand units will suit them all. The first pair of matrix numbers determines how close the letters are together. As we are operating in a one thousand unit square, 800 by 800 is an average character body size to avoid crashes between the descenders and ascenders of adjoining lines. The x horizontal distance of 1000 units allows a clearance of 200 units between each character. If the number was only 375, each successive 750 quad box would be printed halfway over the previous one. However, the crossword squares naturally occupy the full thousand unit area. The line /QuadFont exch definefont pop creates the font so that we can use it. If you get an error message here, the font dictionary may have too many entries, if so, increase the dict value at the beginning. The line itself will invariably be correct.
NEXT
FIRST
BACK
Practical PostScript 37 Cappella Archive
%!PS QUAD FONT%%Title: QuadFont%%Creator: Practical PostScript40 dict begin/FontName /QuadFont def/FontMatrix [.001 0 0 .001 0 0 ] def % 1/1000 of a point: note square brackets %/FontType 3 def % home−made font %/FontBBox [0 0 1000 1000 ] def % lower left: upper right: note square brackets %/BuildChar {exch begin % curly braces %1000 0 0 0 1000 1000 setcachedevice % width : lower left: upper right %Encoding exch get load exec end} bind def % bind makes values permanent %/Encoding 256 array def 0 1 255 {Encoding exch /.notdef put} for % note point %Encodingdup (b) 0 get /bullet put dup (c) 0 get /circle putdup (m) 0 get /em put dup (q) 0 get /quad putdup (r) 0 get /rule put dup (X) 0 get /squareblack put (x) 0 get /squarewhite put % no dup for last one %/CharDefs {/.notdef { } def % defines all 256 characters as notdefined %/bullet {375 375 200 0 360 arc fill} def % 200 unit radius: alter to suit %/circle {375 375 380 0 360 arc 20 setlinewidth stroke} def % 380 radius %/em { } def % fixed space %/quad {newpath 0 0 moveto 0 750 rlineto 750 0 rlineto 0 −750 rlineto closepath20 setlinewidth stroke} def/rule {0 375 moveto 1000 0 rlineto 20 setlinewidth stroke} def/square {newpath 0 0 moveto 0 1000 rlineto 1000 0 rlineto 0 −1000 rlineto closepath}def/squareblack {square gsave fill grestore 20 setlinewidth stroke} def/squarewhite {square 20 setlinewidth stroke} def} defCharDefs % important: no setgrays allowed in any character definitions %currentdict end % no 'dict begin' needed for fonts %/QuadFont exch definefont pop % creates the typeface %
NEXT
FIRST
BACK
Practical PostScript 38 Cappella Archive
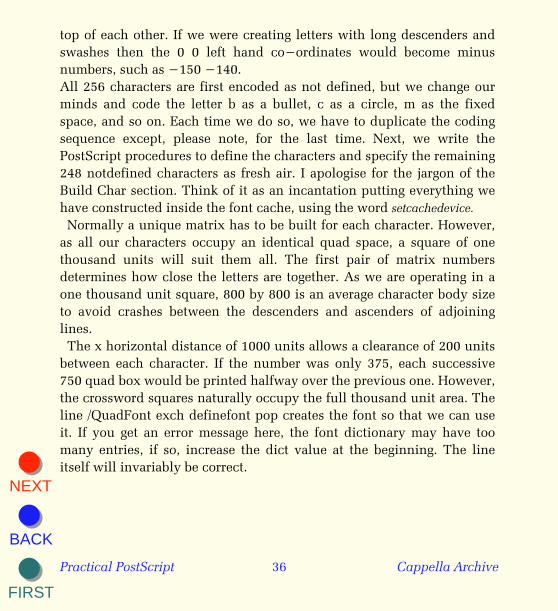
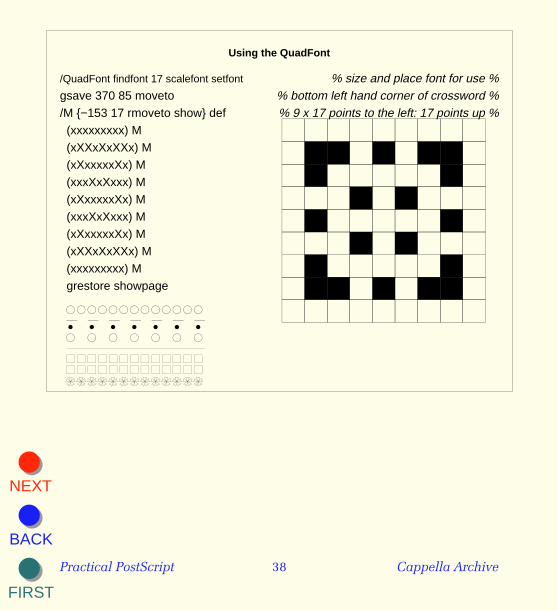
Using the QuadFont
/QuadFont findfont 17 scalefont setfont % size and place font for use %gsave 370 85 moveto % bottom left hand corner of crossword %/M {−153 17 rmoveto show} def % 9 x 17 points to the left: 17 points up %(xxxxxxxxx) M(xXXxXxXXx) M(xXxxxxxXx) M(xxxXxXxxx) M(xXxxxxxXx) M(xxxXxXxxx) M(xXxxxxxXx) M(xXXxXxXXx) M(xxxxxxxxx) Mgrestore showpage
○○○○○○○○○○○○○r r r r r r r• • • • • • •○ ○ ○ ○ ○ ○ ○rrrrrrrrrrrrrqqqqqqqqqqqqqqqqqqqqqqqqqqppppppppppppp
xxxxxxxxxxXXxXxXXxxXxxxxxXxxxxXxXxxxxXxxxxxXxxxxXxXxxxxXxxxxxXxxXXxXxXXxxxxxxxxxx
NEXT
FIRST
BACK
Practical PostScript 39 Cappella Archive
Halftones So far, our discussions on PostScript have dealt with the creation of text and graphics which some may feel might be more easily achieved by using visual on−screen software, like PageMaker or Illustrator. These avoid the chore of creating the necessary PostScript code, or the need to print several proofs to assess any changes. On the other hand, after a few months of experimentation, most of us settle down to a house style of half a dozen templates of layout and type face. Consequently, if we can create our own PostScript procedures, a screen display for text becomes irrelevant and the hard and software money saved put to better use in a higher definition printer! For those who like self−sufficiency, two further advantages of working directly in PostScript are the improvement of the default halftone settings of some software and, for letterpress enthusiasts, the ability to produce their own half−tone blocks. A PostScript halftone screen is made up of a grid of tiny rectangular cells each containing a number of pixels that can be turned from black to white according to the intensity of the gray required. All on; black; all off, white; half on, mid−gray. If you imagine the page covered with microscopic one−sided dice, then you get the idea. The pixels in each cell are switched on in a particular sequence according to whether a spot, line or elliptical screen has been chosen. The cells can be spaced relatively widely at a frequency of 75 cells (lines) per inch to compensate for ink spread, as on newsprint, or much more closely for higher definition on coated paper. I used to get confused too. Dots are the maximum number of tiny single pixels the laser printer can lay down in an inch on the page; lines are the number of rows of rectangular cells of those pixels that the printer is told to provide.
NEXT
FIRST
BACK
Practical PostScript 40 Cappella Archive
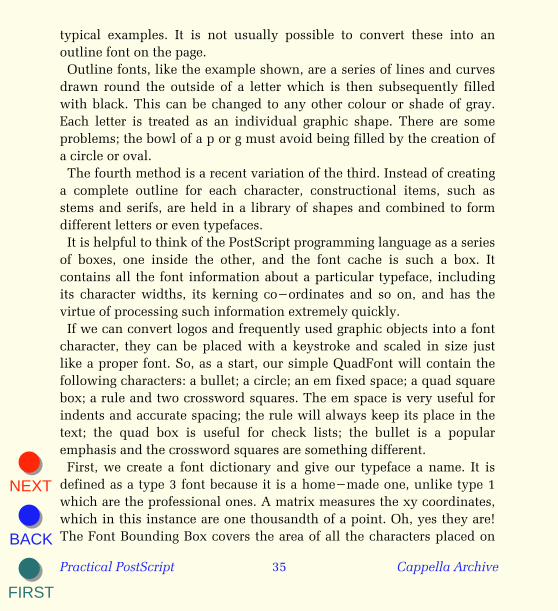
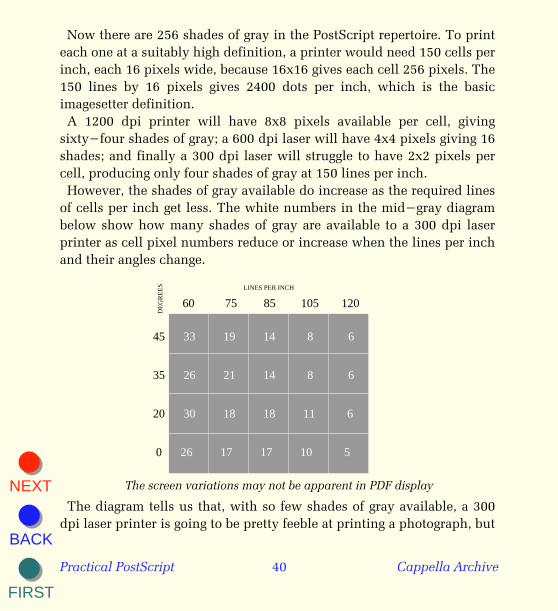
Now there are 256 shades of gray in the PostScript repertoire. To print each one at a suitably high definition, a printer would need 150 cells per inch, each 16 pixels wide, because 16x16 gives each cell 256 pixels. The 150 lines by 16 pixels gives 2400 dots per inch, which is the basic imagesetter definition. A 1200 dpi printer will have 8x8 pixels available per cell, giving sixty−four shades of gray; a 600 dpi laser will have 4x4 pixels giving 16 shades; and finally a 300 dpi laser will struggle to have 2x2 pixels per cell, producing only four shades of gray at 150 lines per inch. However, the shades of gray available do increase as the required lines of cells per inch get less. The white numbers in the mid−gray diagram below show how many shades of gray are available to a 300 dpi laser printer as cell pixel numbers reduce or increase when the lines per inch and their angles change.
LINES PER INCH
60 75 85 105 120
DE
GR
EE
S
45 33 19 14 8 6
35 26 21 14 8 6
20 30 18 18 11 6
0 26 17 17 10 5
The screen variations may not be apparent in PDF display
The diagram tells us that, with so few shades of gray available, a 300 dpi laser printer is going to be pretty feeble at printing a photograph, but
NEXT
FIRST
BACK
Practical PostScript 41 Cappella Archive
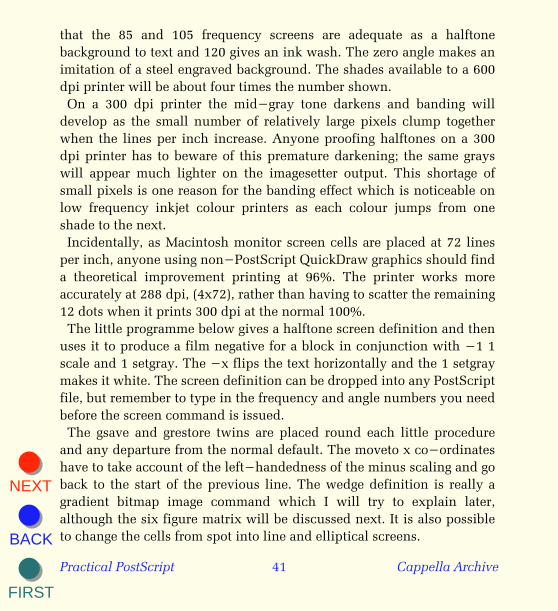
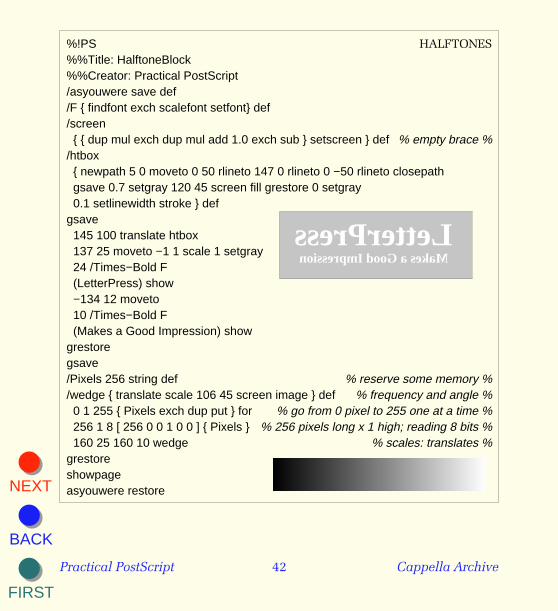
that the 85 and 105 frequency screens are adequate as a halftone background to text and 120 gives an ink wash. The zero angle makes an imitation of a steel engraved background. The shades available to a 600 dpi printer will be about four times the number shown. On a 300 dpi printer the mid−gray tone darkens and banding will develop as the small number of relatively large pixels clump together when the lines per inch increase. Anyone proofing halftones on a 300 dpi printer has to beware of this premature darkening; the same grays will appear much lighter on the imagesetter output. This shortage of small pixels is one reason for the banding effect which is noticeable on low frequency inkjet colour printers as each colour jumps from one shade to the next. Incidentally, as Macintosh monitor screen cells are placed at 72 lines per inch, anyone using non−PostScript QuickDraw graphics should find a theoretical improvement printing at 96%. The printer works more accurately at 288 dpi, (4x72), rather than having to scatter the remaining 12 dots when it prints 300 dpi at the normal 100%. The little programme below gives a halftone screen definition and then uses it to produce a film negative for a block in conjunction with −1 1 scale and 1 setgray. The −x flips the text horizontally and the 1 setgray makes it white. The screen definition can be dropped into any PostScript file, but remember to type in the frequency and angle numbers you need before the screen command is issued. The gsave and grestore twins are placed round each little procedure and any departure from the normal default. The moveto x co−ordinates have to take account of the left−handedness of the minus scaling and go back to the start of the previous line. The wedge definition is really a gradient bitmap image command which I will try to explain later, although the six figure matrix will be discussed next. It is also possible to change the cells from spot into line and elliptical screens.
NEXT
FIRST
BACK
Practical PostScript 42 Cappella Archive
%!PS HALFTONES%%Title: HalftoneBlock%%Creator: Practical PostScript/asyouwere save def /F { findfont exch scalefont setfont} def /screen{ { dup mul exch dup mul add 1.0 exch sub } setscreen } def % empty brace %
/htbox { newpath 5 0 moveto 0 50 rlineto 147 0 rlineto 0 −50 rlineto closepathgsave 0.7 setgray 120 45 screen fill grestore 0 setgray 0.1 setlinewidth stroke } def
gsave 145 100 translate htbox 137 25 moveto −1 1 scale 1 setgray24 /Times−Bold F(LetterPress) show −134 12 moveto10 /Times−Bold F(Makes a Good Impression) show
grestoregsave/Pixels 256 string def % reserve some memory %/wedge { translate scale 106 45 screen image } def % frequency and angle %0 1 255 { Pixels exch dup put } for % go from 0 pixel to 255 one at a time %256 1 8 [ 256 0 0 1 0 0 ] { Pixels } % 256 pixels long x 1 high; reading 8 bits %160 25 160 10 wedge % scales: translates %
grestore showpageasyouwere restore
LetterPressMakes a Good Impression
NEXT
FIRST
BACK
Practical PostScript 43 Cappella Archive
Variables To make our PostScript typesetting as flexible as possible, we need to alter at any time such things as page sizes, margins, fontsizes, and linespacing. One method is to provide a default value that is auto− matically assumed whenever a new page is started and then to exchange that value for another when needed.
/PG { /pg exch def } def 1 PG % default first page number A variable instruction has two definitions, one inside the other and 'exch' will pass on to the inner one whatever value is given to the outer. In this example, the current page number may be changed at any time by typing, say, 29 PG. Notice that the descriptive letters have to be different, as a definition cannot redefine itself in the same definition as it does not yet know what it is meant to be! Traditionally, variables are given upper case letters in a PostScript file so that they are more easily identified.
/number { pg pg 1 add PG 4 string cvs } def % increment by 1 When this numbering procedure is used for the first page, the printer is given the default pg page value 1 twice. The first is used to increment the second pg by 1 which is passed to PG to increase pg by 1 for the next page. The other is stored in 4 bytes of memory and is converted into a textstring and drawn on the page by cvs. A numbering definition is included in a footer or header procedure to place it where needed. The textbox margins are all variables, although, strictly speaking, they do not measure the width of margins but set the boundaries of the text area. Calling them margins is easier to understand. The left and bottom margins are set at zero so the textbox can be translated into any position on the paper. Changing the left margin value creates indents or outdents, whilst raising the bottom margin gives more room for footnotes.

NEXT
FIRST
BACK
Practical PostScript 44 Cappella Archive
/LM {/lm exch def} def 0 LM % left textbox margin/TM {/tm exch def} def 470 TM % top margin = 6.5" textbox height/RM {/rm exch def} def 300 RM % right margin = 4.125" textlength/BM {/bm exch def} def 0 BM % textbox bottom margin /LG {/lg exch def} def 12 LG % default linespacing
A textbox definition should include these variables, as well as the typeface and size, but may also contain such elements as headers or footers, or a company logo. The textbox is recalled at the start of each new page so that the defaults are reset.
/textbox {0 BM 0 LM 468 TM 300 RM 12 LG 10 rom lm tm moveto} def Alternative textbox values can act as stylesheets, and any changes will apply to succeeding pages until a different textbox is applied.
NEXT
FIRST
BACK
Practical PostScript 45 Cappella Archive
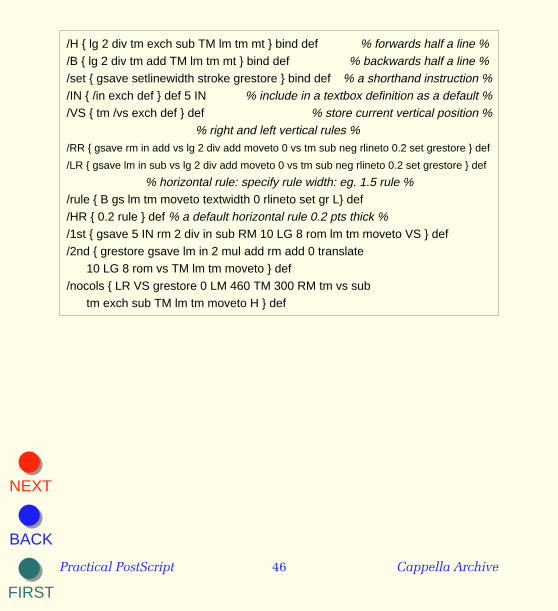
Columns and Rules Ist
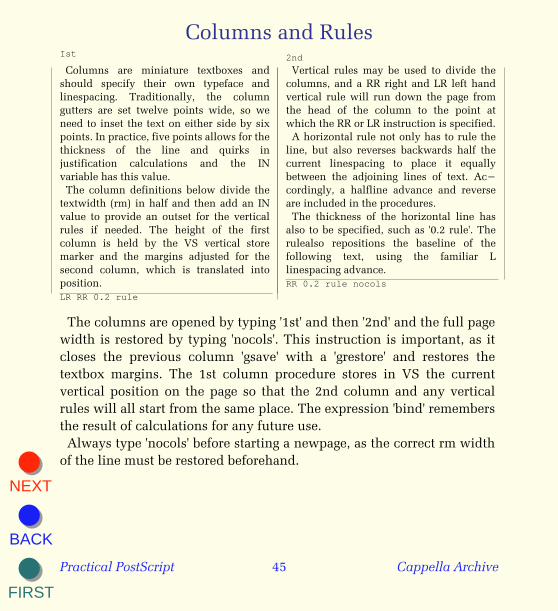
Columns are miniature textboxes and should specify their own typeface and linespacing. Traditionally, the column gutters are set twelve points wide, so we need to inset the text on either side by six points. In practice, five points allows for the thickness of the line and quirks in justification calculations and the IN variable has this value. The column definitions below divide the textwidth (rm) in half and then add an IN value to provide an outset for the vertical rules if needed. The height of the first column is held by the VS vertical store marker and the margins adjusted for the second column, which is translated into position. LR RR 0.2 rule
2nd
Vertical rules may be used to divide the columns, and a RR right and LR left hand vertical rule will run down the page from the head of the column to the point at which the RR or LR instruction is specified. A horizontal rule not only has to rule the line, but also reverses backwards half the current linespacing to place it equally between the adjoining lines of text. Ac− cordingly, a halfline advance and reverse are included in the procedures. The thickness of the horizontal line has also to be specified, such as '0.2 rule'. The rulealso repositions the baseline of the following text, using the familiar L linespacing advance. RR 0.2 rule nocols
The columns are opened by typing '1st' and then '2nd' and the full page width is restored by typing 'nocols'. This instruction is important, as it closes the previous column 'gsave' with a 'grestore' and restores the textbox margins. The 1st column procedure stores in VS the current vertical position on the page so that the 2nd column and any vertical rules will all start from the same place. The expression 'bind' remembers the result of calculations for any future use. Always type 'nocols' before starting a newpage, as the correct rm width of the line must be restored beforehand.
NEXT
FIRST
BACK
Practical PostScript 46 Cappella Archive
/H { lg 2 div tm exch sub TM lm tm mt } bind def % forwards half a line % /B { lg 2 div tm add TM lm tm mt } bind def % backwards half a line % /set { gsave setlinewidth stroke grestore } bind def % a shorthand instruction %/IN { /in exch def } def 5 IN % include in a textbox definition as a default %/VS { tm /vs exch def } def % store current vertical position %
% right and left vertical rules % /RR { gsave rm in add vs lg 2 div add moveto 0 vs tm sub neg rlineto 0.2 set grestore } def
/LR { gsave lm in sub vs lg 2 div add moveto 0 vs tm sub neg rlineto 0.2 set grestore } def
% horizontal rule: specify rule width: eg. 1.5 rule %/rule { B gs lm tm moveto textwidth 0 rlineto set gr L} def /HR { 0.2 rule } def % a default horizontal rule 0.2 pts thick % /1st { gsave 5 IN rm 2 div in sub RM 10 LG 8 rom lm tm moveto VS } def/2nd { grestore gsave lm in 2 mul add rm add 0 translate
10 LG 8 rom vs TM lm tm moveto } def/nocols { LR VS grestore 0 LM 460 TM 300 RM tm vs sub
tm exch sub TM lm tm moveto H } def
NEXT
FIRST
BACK
Practical PostScript 47 Cappella Archive
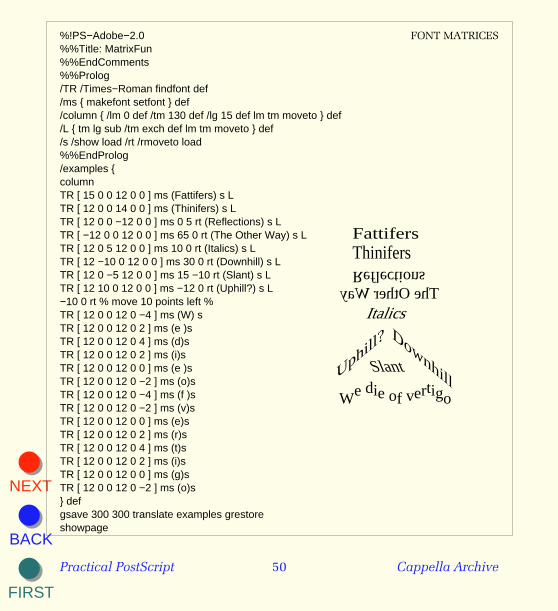
Font Matrices
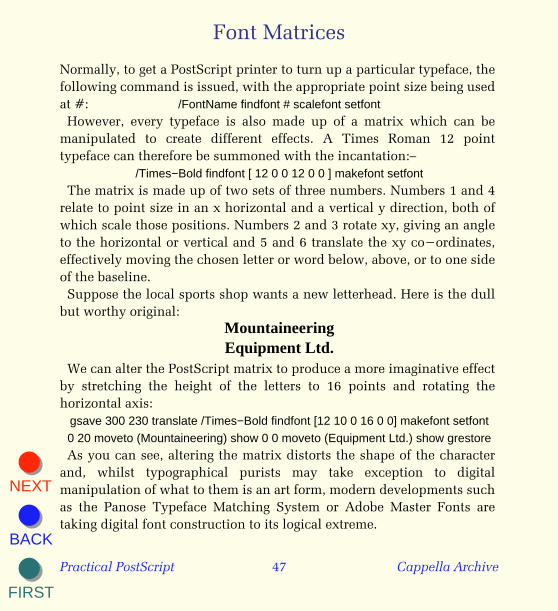
Normally, to get a PostScript printer to turn up a particular typeface, the following command is issued, with the appropriate point size being used at #: /FontName findfont # scalefont setfont However, every typeface is also made up of a matrix which can be manipulated to create different effects. A Times Roman 12 point typeface can therefore be summoned with the incantation:–
/Times−Bold findfont [ 12 0 0 12 0 0 ] makefont setfont The matrix is made up of two sets of three numbers. Numbers 1 and 4 relate to point size in an x horizontal and a vertical y direction, both of which scale those positions. Numbers 2 and 3 rotate xy, giving an angle to the horizontal or vertical and 5 and 6 translate the xy co−ordinates, effectively moving the chosen letter or word below, above, or to one side of the baseline. Suppose the local sports shop wants a new letterhead. Here is the dull but worthy original:
MountaineeringEquipment Ltd.
We can alter the PostScript matrix to produce a more imaginative effect by stretching the height of the letters to 16 points and rotating the horizontal axis:
gsave 300 230 translate /Times−Bold findfont [12 10 0 16 0 0] makefont setfont0 20 moveto (Mountaineering) show 0 0 moveto (Equipment Ltd.) show grestore
As you can see, altering the matrix distorts the shape of the character and, whilst typographical purists may take exception to digital manipulation of what to them is an art form, modern developments such as the Panose Typeface Matching System or Adobe Master Fonts are taking digital font construction to its logical extreme.
NEXT
FIRST
BACK
Practical PostScript 48 Cappella Archive
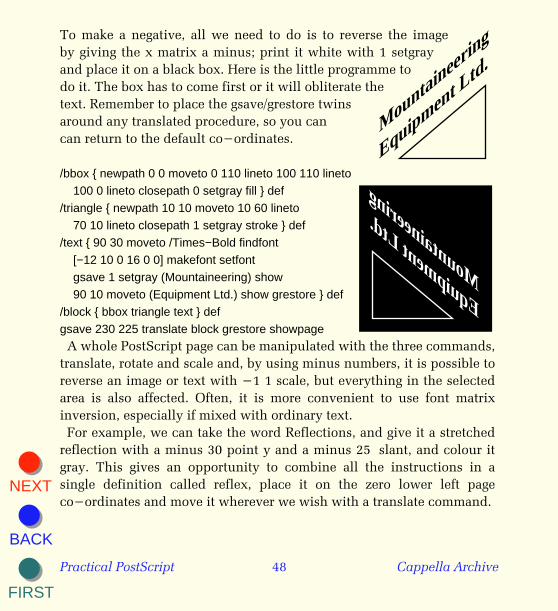
To make a negative, all we need to do is to reverse the imageby giving the x matrix a minus; print it white with 1 setgrayand place it on a black box. Here is the little programme todo it. The box has to come first or it will obliterate thetext. Remember to place the gsave/grestore twinsaround any translated procedure, so you cancan return to the default co−ordinates.
Mountaineer
ing
Equipment L
td.
/bbox { newpath 0 0 moveto 0 110 lineto 100 110 lineto100 0 lineto closepath 0 setgray fill } def
/triangle { newpath 10 10 moveto 10 60 lineto70 10 lineto closepath 1 setgray stroke } def
/text { 90 30 moveto /Times−Bold findfont[−12 10 0 16 0 0] makefont setfontgsave 1 setgray (Mountaineering) show90 10 moveto (Equipment Ltd.) show grestore } def
/block { bbox triangle text } defgsave 230 225 translate block grestore showpage
Mountaineer
ing
Equipment L
td.
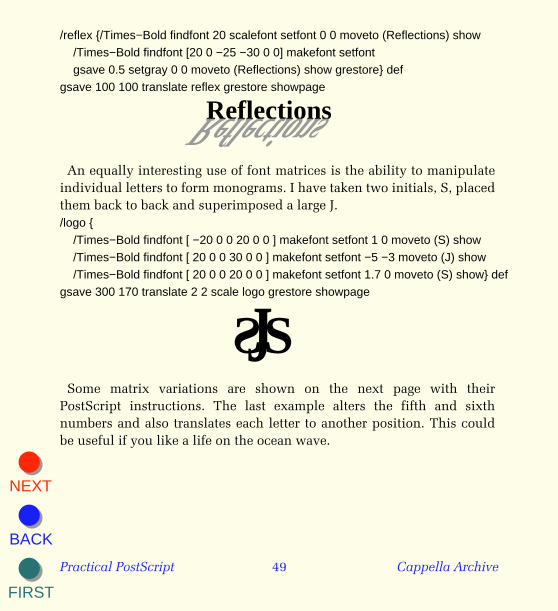
A whole PostScript page can be manipulated with the three commands, translate, rotate and scale and, by using minus numbers, it is possible to reverse an image or text with −1 1 scale, but everything in the selected area is also affected. Often, it is more convenient to use font matrix inversion, especially if mixed with ordinary text. For example, we can take the word Reflections, and give it a stretched reflection with a minus 30 point y and a minus 25 slant, and colour it gray. This gives an opportunity to combine all the instructions in a single definition called reflex, place it on the zero lower left page co−ordinates and move it wherever we wish with a translate command.
NEXT
FIRST
BACK
Practical PostScript 49 Cappella Archive
/reflex {/Times−Bold findfont 20 scalefont setfont 0 0 moveto (Reflections) show/Times−Bold findfont [20 0 −25 −30 0 0] makefont setfontgsave 0.5 setgray 0 0 moveto (Reflections) show grestore} def
gsave 100 100 translate reflex grestore showpage
ReflectionsReflections An equally interesting use of font matrices is the ability to manipulate individual letters to form monograms. I have taken two initials, S, placed them back to back and superimposed a large J. /logo {
/Times−Bold findfont [ −20 0 0 20 0 0 ] makefont setfont 1 0 moveto (S) show/Times−Bold findfont [ 20 0 0 30 0 0 ] makefont setfont −5 −3 moveto (J) show/Times−Bold findfont [ 20 0 0 20 0 0 ] makefont setfont 1.7 0 moveto (S) show} def
gsave 300 170 translate 2 2 scale logo grestore showpage
SJS Some matrix variations are shown on the next page with their PostScript instructions. The last example alters the fifth and sixth numbers and also translates each letter to another position. This could be useful if you like a life on the ocean wave.
NEXT
FIRST
BACK
Practical PostScript 50 Cappella Archive
%!PS−Adobe−2.0 FONT MATRICES%%Title: MatrixFun%%EndComments%%Prolog/TR /Times−Roman findfont def /ms { makefont setfont } def/column { /lm 0 def /tm 130 def /lg 15 def lm tm moveto } def /L { tm lg sub /tm exch def lm tm moveto } def/s /show load /rt /rmoveto load%%EndProlog/examples {columnTR [ 15 0 0 12 0 0 ] ms (Fattifers) s LTR [ 12 0 0 14 0 0 ] ms (Thinifers) s LTR [ 12 0 0 −12 0 0 ] ms 0 5 rt (Reflections) s LTR [ −12 0 0 12 0 0 ] ms 65 0 rt (The Other Way) s LTR [ 12 0 5 12 0 0 ] ms 10 0 rt (Italics) s LTR [ 12 −10 0 12 0 0 ] ms 30 0 rt (Downhill) s L TR [ 12 0 −5 12 0 0 ] ms 15 −10 rt (Slant) s LTR [ 12 10 0 12 0 0 ] ms −12 0 rt (Uphill?) s L −10 0 rt % move 10 points left %TR [ 12 0 0 12 0 −4 ] ms (W) sTR [ 12 0 0 12 0 2 ] ms (e )sTR [ 12 0 0 12 0 4 ] ms (d)sTR [ 12 0 0 12 0 2 ] ms (i)sTR [ 12 0 0 12 0 0 ] ms (e )sTR [ 12 0 0 12 0 −2 ] ms (o)sTR [ 12 0 0 12 0 −4 ] ms (f )sTR [ 12 0 0 12 0 −2 ] ms (v)sTR [ 12 0 0 12 0 0 ] ms (e)sTR [ 12 0 0 12 0 2 ] ms (r)sTR [ 12 0 0 12 0 4 ] ms (t)sTR [ 12 0 0 12 0 2 ] ms (i)sTR [ 12 0 0 12 0 0 ] ms (g)sTR [ 12 0 0 12 0 −2 ] ms (o)s} defgsave 300 300 translate examples grestoreshowpage
FattifersThinifersReflections
The Other WayItalics
Dow
nhillSlantU
phill?
We die of vertigo
NEXT
FIRST
BACK
Practical PostScript 51 Cappella Archive
Bitmaps
The great advantage PostScript has over earlier forms of computer printing is that it actually paints very fine lines across the page and does not rely on reproducing a bitmap of the screen pixels on paper. However, when PostScript interprets a scanned photograph, or line drawing, it has to be able to reproduce the bitmaps of the image. Scanners record information in either a PICT bitmapped or TIFF tagged image file format. The PICT files are smaller than TIFF ones, which usually have a higher resolution. One bit scanning produces a black and white image; each bit being examined in turn by the printer to see which of the two colours it has to be, and printed accordingly. A screen pixel, by the way, is the same as a one point square of 1¤72 of an inch, which results in a jagged image if scaled upwards in size. If you glance back at the bitmapped figure on page 34, you may recall that the black and white pixels are represented by the zeros and ones of each byte. You also need to notice that each row has to be in multiples of four bits, and it is for this reason that the empty zeros are added to the right of the completed image, producing two four bit bytes. There are two important PostScript commands that we need for printing a bitmapped file. The first is the command image, which also paints the background on which the bitmapped graphic sits. The second is imagemask, which can be thought of as a kind of electronic silkscreening whereby the background can remain the same and only a foreground colour applied. In other words, imagemask allows over− printing an existing graphic, whereas image does not. For ease of interpretation the binary bites are converted into hexadecimal numbers and, taking each row of two bytes in turn from the top, the figure one on page 34 can be represented in hexadecimal by:–
{ <EF CF 8F 0F 8F 8F 8F 8F 8F 8F 8F 8F 8F 8F 07> }
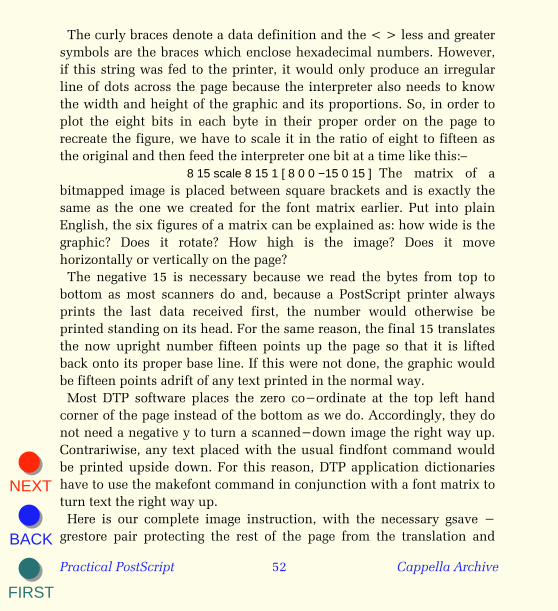
NEXT
FIRST
BACK
Practical PostScript 52 Cappella Archive
The curly braces denote a data definition and the < > less and greater symbols are the braces which enclose hexadecimal numbers. However, if this string was fed to the printer, it would only produce an irregular line of dots across the page because the interpreter also needs to know the width and height of the graphic and its proportions. So, in order to plot the eight bits in each byte in their proper order on the page to recreate the figure, we have to scale it in the ratio of eight to fifteen as the original and then feed the interpreter one bit at a time like this:–
8 15 scale 8 15 1 [ 8 0 0 −15 0 15 ] The matrix of a bitmapped image is placed between square brackets and is exactly the same as the one we created for the font matrix earlier. Put into plain English, the six figures of a matrix can be explained as: how wide is the graphic? Does it rotate? How high is the image? Does it move horizontally or vertically on the page? The negative 15 is necessary because we read the bytes from top to bottom as most scanners do and, because a PostScript printer always prints the last data received first, the number would otherwise be printed standing on its head. For the same reason, the final 15 translates the now upright number fifteen points up the page so that it is lifted back onto its proper base line. If this were not done, the graphic would be fifteen points adrift of any text printed in the normal way. Most DTP software places the zero co−ordinate at the top left hand corner of the page instead of the bottom as we do. Accordingly, they do not need a negative y to turn a scanned−down image the right way up. Contrariwise, any text placed with the usual findfont command would be printed upside down. For this reason, DTP application dictionaries have to use the makefont command in conjunction with a font matrix to turn text the right way up. Here is our complete image instruction, with the necessary gsave − grestore pair protecting the rest of the page from the translation and
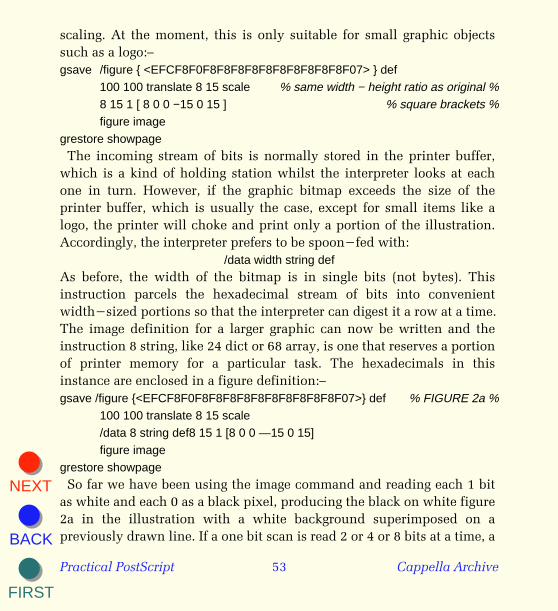
NEXT
FIRST
BACK
Practical PostScript 53 Cappella Archive
scaling. At the moment, this is only suitable for small graphic objects such as a logo:– gsave /figure { <EFCF8F0F8F8F8F8F8F8F8F8F8F8F07> } def
100 100 translate 8 15 scale % same width − height ratio as original %8 15 1 [ 8 0 0 −15 0 15 ] % square brackets %figure image
grestore showpage The incoming stream of bits is normally stored in the printer buffer, which is a kind of holding station whilst the interpreter looks at each one in turn. However, if the graphic bitmap exceeds the size of the printer buffer, which is usually the case, except for small items like a logo, the printer will choke and print only a portion of the illustration. Accordingly, the interpreter prefers to be spoon−fed with:
/data width string defAs before, the width of the bitmap is in single bits (not bytes). This instruction parcels the hexadecimal stream of bits into convenient width−sized portions so that the interpreter can digest it a row at a time. The image definition for a larger graphic can now be written and the instruction 8 string, like 24 dict or 68 array, is one that reserves a portion of printer memory for a particular task. The hexadecimals in this instance are enclosed in a figure definition:– gsave /figure {<EFCF8F0F8F8F8F8F8F8F8F8F8F8F07>} def % FIGURE 2a %
100 100 translate 8 15 scale /data 8 string def8 15 1 [8 0 0 —15 0 15]figure image
grestore showpage So far we have been using the image command and reading each 1 bit as white and each 0 as a black pixel, producing the black on white figure 2a in the illustration with a white background superimposed on a previously drawn line. If a one bit scan is read 2 or 4 or 8 bits at a time, a
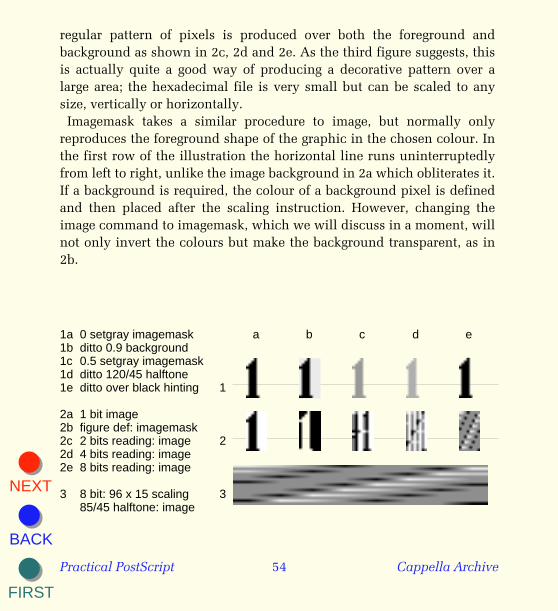
NEXT
FIRST
BACK
Practical PostScript 54 Cappella Archive
regular pattern of pixels is produced over both the foreground and background as shown in 2c, 2d and 2e. As the third figure suggests, this is actually quite a good way of producing a decorative pattern over a large area; the hexadecimal file is very small but can be scaled to any size, vertically or horizontally. Imagemask takes a similar procedure to image, but normally only reproduces the foreground shape of the graphic in the chosen colour. In the first row of the illustration the horizontal line runs uninterruptedly from left to right, unlike the image background in 2a which obliterates it. If a background is required, the colour of a background pixel is defined and then placed after the scaling instruction. However, changing the image command to imagemask, which we will discuss in a moment, will not only invert the colours but make the background transparent, as in 2b.
1a 0 setgray imagemask a b c d e1b ditto 0.9 background1c 0.5 setgray imagemask1d ditto 120/45 halftone1e ditto over black hinting 1
2a 1 bit image2b figure def: imagemask2c 2 bits reading: image 22d 4 bits reading: image2e 8 bits reading: image
3 8 bit: 96 x 15 scaling 385/45 halftone: image
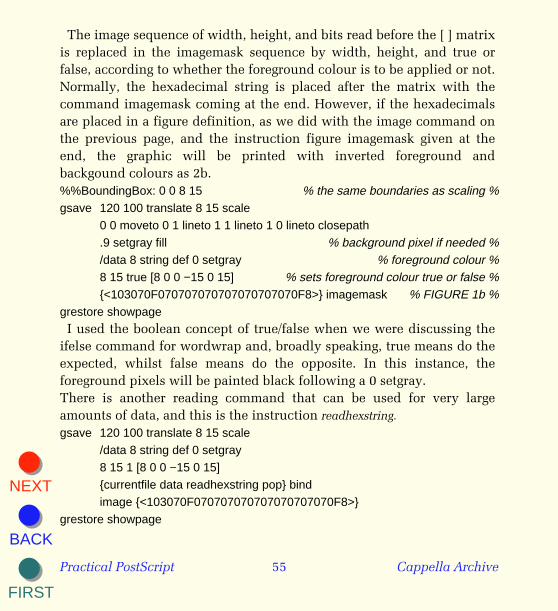
NEXT
FIRST
BACK
Practical PostScript 55 Cappella Archive
The image sequence of width, height, and bits read before the [ ] matrix is replaced in the imagemask sequence by width, height, and true or false, according to whether the foreground colour is to be applied or not. Normally, the hexadecimal string is placed after the matrix with the command imagemask coming at the end. However, if the hexadecimals are placed in a figure definition, as we did with the image command on the previous page, and the instruction figure imagemask given at the end, the graphic will be printed with inverted foreground and backgound colours as 2b. %%BoundingBox: 0 0 8 15 % the same boundaries as scaling %gsave 120 100 translate 8 15 scale
0 0 moveto 0 1 lineto 1 1 lineto 1 0 lineto closepath .9 setgray fill % background pixel if needed %/data 8 string def 0 setgray % foreground colour %8 15 true [8 0 0 −15 0 15] % sets foreground colour true or false %{<103070F070707070707070707070F8>} imagemask % FIGURE 1b %
grestore showpage I used the boolean concept of true/false when we were discussing the ifelse command for wordwrap and, broadly speaking, true means do the expected, whilst false means do the opposite. In this instance, the foreground pixels will be painted black following a 0 setgray. There is another reading command that can be used for very large amounts of data, and this is the instruction readhexstring. gsave 120 100 translate 8 15 scale
/data 8 string def 0 setgray8 15 1 [8 0 0 −15 0 15]{currentfile data readhexstring pop} bind image {<103070F070707070707070707070F8>}
grestore showpage
NEXT
FIRST
BACK
Practical PostScript 56 Cappella Archive
This can have its hazards, because the width and length of the data parcel when multiplied together must have an exact relationship with the total number of bits being scanned. The instruction pops a boolean true or false according to the result. If there are any lines too short or left over, then the printer will read the rest of the file as hexadecimal data; the letter ees of any following grestore would be read twice as 1110 bytes. The hexadecimal string can no longer be included in an earlier definition and there must be no return made between the image instruction and the string itself, or the interpreter will read it as an End of File and everything will grind to a halt.
NEXT
FIRST
BACK
Practical PostScript 57 Cappella Archive
Encapsulation
An Encapsulated PostScript File is one in which the PostScript code for either a whole page or a single image is saved as an ASCII text file. This is often done from a graphics programme, like FreeHand, with an Export command, or from others, like PhotoShop, from the Save As command. Its main characteristics are that the normal Header is augmented by an EPSF instruction and it can imported into most other DTP applications as an illustration or picture. Just as the early engineers created their own sizes of nuts and bolts to prevent anyone else repairing their machinery, DTP software designers invent their own idiosyncratic interpretations of the PostScript code to suit their own applications. To resolve this difficulty of importing and exporting drawings and text from one alien application to another, Adobe devised the Encapsulated PostScript file. If you examine an exported EPS file, by changing the file Type from EPSF to TEXT, and open it with a large file text editor like Plain Text, you will find that most of the file is occupied by the PostScript dictionary of the application that created it, irrespective of how few of those commands are actually required. This dictionary has to accompany the image so that the application into which it is imported can stop using its own variations of the PostScript commands, draw the imported image, and then resume its own dictionary to interpret the rest of the page. Because of this intrusion into a world of different definitions and page defaults, an EPS file has to be isolated by a save ± restore pair, and any dictionary we may make has to be inserted into the user dictionary of the printer by the command:–
userdict /minidict 140 dict dup begin put

NEXT
FIRST
BACK
Practical PostScript 58 Cappella Archive
If we started instead with the usual 'minidict begin' instruction, our dictionary would be placed inside the DTP application dictionary. This could produce a clash between our shorthand definitions and those of the parent application and the rest of the page may not be printed. Remember that dict, array and string are simply instructions that reserve some printer memory, and the value shown here should be the same as that at the head of our own dictionary file. The duplication is necessary because the begin command uses up one dictionary instruction by starting the dictionary and another by putting it into memory. It is perfectly possible to make our own EPS files to import into professional software. If we take the little Reflections procedure as an example, all we need to do is to provide a Header, an accurate Bounding Box, and make sure that the image is constructed on the zero x and y co−ordinates at the bottom left hand corner. The Bounding Box size can be found by previously downloading the file to the printer and measuring the printed result. For anyone without a typesetting ruler, a centimetre is about 28 points, but always add a couple of points in each direction to prevent the image being printed clipped. There are two variations of the first line of the EPSF Header. The first will import into older software and the second 3.0 version is more recent; if one does not work, try the other. It is a good idea to place the Bounding Box measurements as soon as possible in the Header. This lets the host application draw the Bounding Box rectangle and then write in the Title afterwards. The placing of colons is important and any dictionary should be placed in the Prolog. The EPS file should not contain any translation, rotation or scaling commands to place it elsewhere on the page. These are provided by the importing file or application. Neither should there be a showpage command as this will lead to the printing of two pages; one with the EPS graphic and the other with the rest of the page. Another point to watch is
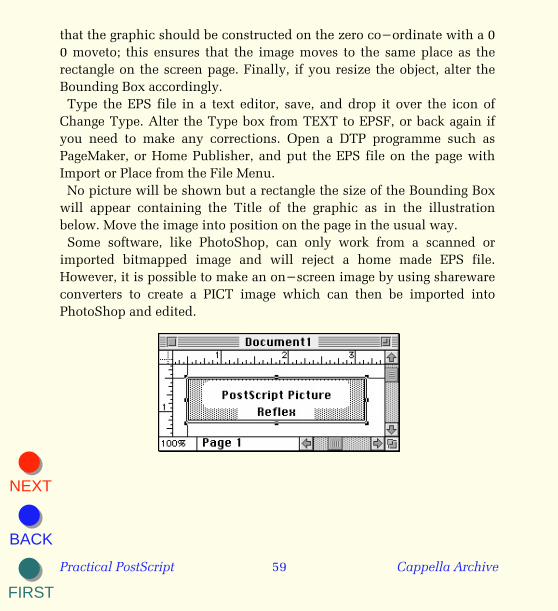
NEXT
FIRST
BACK
Practical PostScript 59 Cappella Archive
that the graphic should be constructed on the zero co−ordinate with a 0 0 moveto; this ensures that the image moves to the same place as the rectangle on the screen page. Finally, if you resize the object, alter the Bounding Box accordingly. Type the EPS file in a text editor, save, and drop it over the icon of Change Type. Alter the Type box from TEXT to EPSF, or back again if you need to make any corrections. Open a DTP programme such as PageMaker, or Home Publisher, and put the EPS file on the page with Import or Place from the File Menu. No picture will be shown but a rectangle the size of the Bounding Box will appear containing the Title of the graphic as in the illustration below. Move the image into position on the page in the usual way. Some software, like PhotoShop, can only work from a scanned or imported bitmapped image and will reject a home made EPS file. However, it is possible to make an on−screen image by using shareware converters to create a PICT image which can then be imported into PhotoShop and edited.
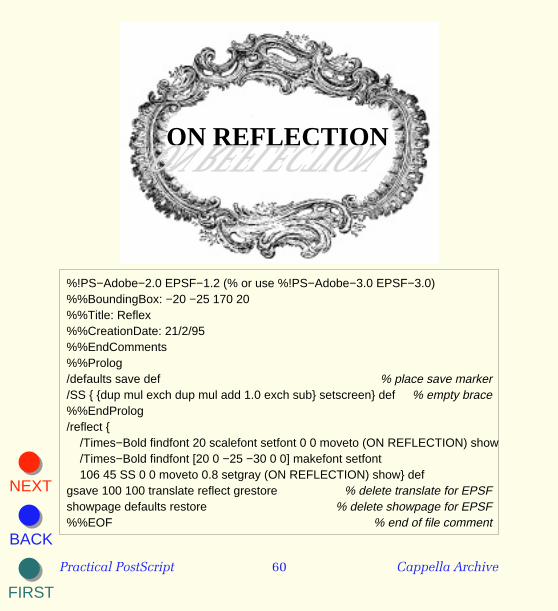
NEXT
FIRST
BACK
Practical PostScript 60 Cappella Archive
ON REFLECTIONON REFLECTION
%!PS−Adobe−2.0 EPSF−1.2 (% or use %!PS−Adobe−3.0 EPSF−3.0)%%BoundingBox: −20 −25 170 20 %%Title: Reflex%%CreationDate: 21/2/95%%EndComments %%Prolog /defaults save def % place save marker/SS { {dup mul exch dup mul add 1.0 exch sub} setscreen} def % empty brace%%EndProlog/reflect {
/Times−Bold findfont 20 scalefont setfont 0 0 moveto (ON REFLECTION) show/Times−Bold findfont [20 0 −25 −30 0 0] makefont setfont 106 45 SS 0 0 moveto 0.8 setgray (ON REFLECTION) show} def
gsave 100 100 translate reflect grestore % delete translate for EPSFshowpage defaults restore % delete showpage for EPSF%%EOF % end of file comment
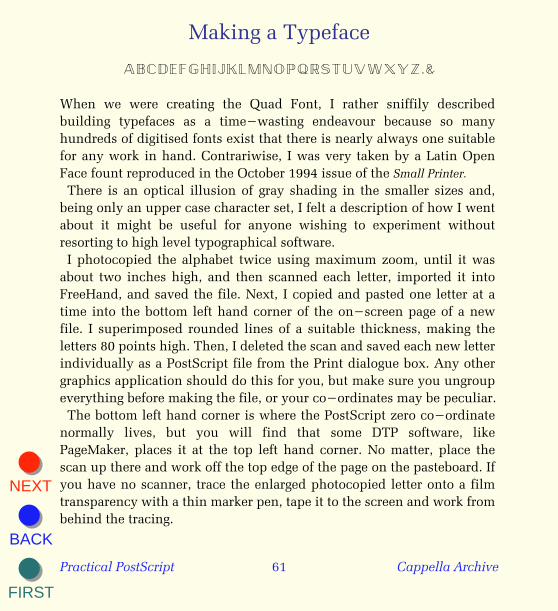
NEXT
FIRST
BACK
Practical PostScript 61 Cappella Archive
Making a Typeface
ABCDEFGHIJKLMNOPQRSTUVWXYZ.&
When we were creating the Quad Font, I rather sniffily described building typefaces as a time−wasting endeavour because so many hundreds of digitised fonts exist that there is nearly always one suitable for any work in hand. Contrariwise, I was very taken by a Latin Open Face fount reproduced in the October 1994 issue of the Small Printer. There is an optical illusion of gray shading in the smaller sizes and, being only an upper case character set, I felt a description of how I went about it might be useful for anyone wishing to experiment without resorting to high level typographical software. I photocopied the alphabet twice using maximum zoom, until it was about two inches high, and then scanned each letter, imported it into FreeHand, and saved the file. Next, I copied and pasted one letter at a time into the bottom left hand corner of the on−screen page of a new file. I superimposed rounded lines of a suitable thickness, making the letters 80 points high. Then, I deleted the scan and saved each new letter individually as a PostScript file from the Print dialogue box. Any other graphics application should do this for you, but make sure you ungroup everything before making the file, or your co−ordinates may be peculiar. The bottom left hand corner is where the PostScript zero co−ordinate normally lives, but you will find that some DTP software, like PageMaker, places it at the top left hand corner. No matter, place the scan up there and work off the top edge of the page on the pasteboard. If you have no scanner, trace the enlarged photocopied letter onto a film transparency with a thin marker pen, tape it to the screen and work from behind the tracing.
NEXT
FIRST
BACK
Practical PostScript 62 Cappella Archive
The next task is to open the lengthy PostScript file with Plain Text or BBEdit. These are shareware text editors that will open the very large text files that Teach and Simple Text are unable to do. (They can also remove all the dross from imported Word and Word Perfect PC files). Having done this, go to the bottom, copy all the measurements into a new file and examine them. For example, one of the measurements for the point (full stop) may look something like this:–
newpath 15.7 8 moveto 6.7 8 lineto closepath gsave 0.1 setlinewidth 0 setlinecap 0 setlinejoin 3.863693 setmiterlimit [ 1 4 ] setcolor { stroke } fp grestore
These longwinded commands may be reduced by using the minidict shorthand versions. However, you will need to increase the sizes tenfold by moving the decimal point one place to the right or adding a zero if there isn't one, thus:–
np 157 80 mt 67 80 M Building the typeface is very similar to the QuadFont, the main difference being that each character has its individual Metrics and BoundingBox measurements and the illustration should explain the differences between them. To save tedious repetition, I have only given the sequence for the letter A and a point to give an idea of the order of events. As the typeface is constructed from straight lines, it cannot be converted into an outline font. To be able to do so would mean constructing each letter by plotting the succession of lines around the edges of the character shape and using the fill (inside) or eofill (outside) commands to paint the appropriate enclosed areas.
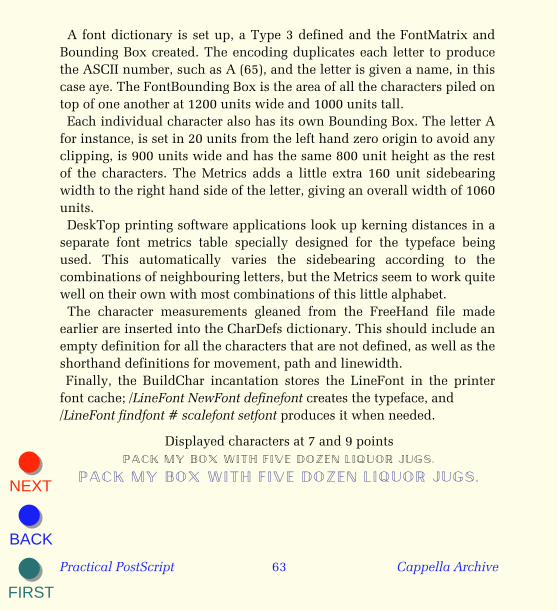
NEXT
FIRST
BACK
Practical PostScript 63 Cappella Archive
A font dictionary is set up, a Type 3 defined and the FontMatrix and Bounding Box created. The encoding duplicates each letter to produce the ASCII number, such as A (65), and the letter is given a name, in this case aye. The FontBounding Box is the area of all the characters piled on top of one another at 1200 units wide and 1000 units tall. Each individual character also has its own Bounding Box. The letter A for instance, is set in 20 units from the left hand zero origin to avoid any clipping, is 900 units wide and has the same 800 unit height as the rest of the characters. The Metrics adds a little extra 160 unit sidebearing width to the right hand side of the letter, giving an overall width of 1060 units. DeskTop printing software applications look up kerning distances in a separate font metrics table specially designed for the typeface being used. This automatically varies the sidebearing according to the combinations of neighbouring letters, but the Metrics seem to work quite well on their own with most combinations of this little alphabet. The character measurements gleaned from the FreeHand file made earlier are inserted into the CharDefs dictionary. This should include an empty definition for all the characters that are not defined, as well as the shorthand definitions for movement, path and linewidth. Finally, the BuildChar incantation stores the LineFont in the printer font cache; /LineFont NewFont definefont creates the typeface, and /LineFont findfont # scalefont setfont produces it when needed.
Displayed characters at 7 and 9 points PACK MY BOX WITH FIVE DOZEN LIQUOR JUGS.
PACK MY BOX WITH FIVE DOZEN LIQUOR JUGS.
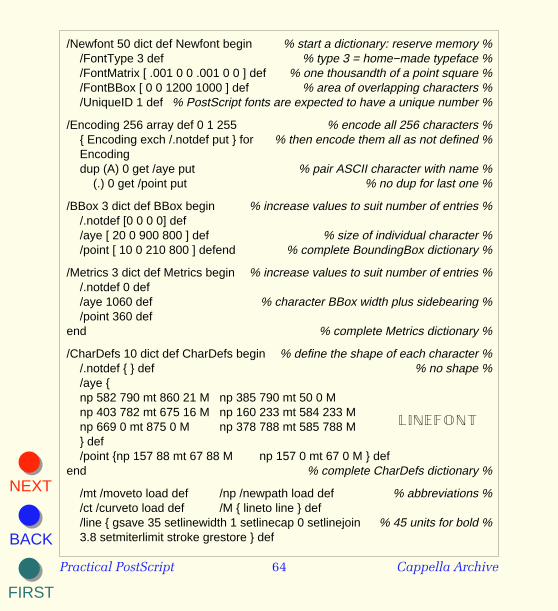
NEXT
FIRST
BACK
Practical PostScript 64 Cappella Archive
LINEFONT
/Newfont 50 dict def Newfont begin % start a dictionary: reserve memory %/FontType 3 def % type 3 = home−made typeface %/FontMatrix [ .001 0 0 .001 0 0 ] def % one thousandth of a point square %/FontBBox [ 0 0 1200 1000 ] def % area of overlapping characters %/UniqueID 1 def % PostScript fonts are expected to have a unique number %
/Encoding 256 array def 0 1 255 % encode all 256 characters %{ Encoding exch /.notdef put } for % then encode them all as not defined %Encodingdup (A) 0 get /aye put % pair ASCII character with name %
(.) 0 get /point put % no dup for last one %
/BBox 3 dict def BBox begin % increase values to suit number of entries %/.notdef [0 0 0 0] def/aye [ 20 0 900 800 ] def % size of individual character %/point [ 10 0 210 800 ] defend % complete BoundingBox dictionary %
/Metrics 3 dict def Metrics begin % increase values to suit number of entries %/.notdef 0 def/aye 1060 def % character BBox width plus sidebearing %/point 360 def
end % complete Metrics dictionary %
/CharDefs 10 dict def CharDefs begin % define the shape of each character %/.notdef { } def % no shape %/aye { np 582 790 mt 860 21 M np 385 790 mt 50 0 Mnp 403 782 mt 675 16 M np 160 233 mt 584 233 Mnp 669 0 mt 875 0 M np 378 788 mt 585 788 M} def/point {np 157 88 mt 67 88 M np 157 0 mt 67 0 M } def
end % complete CharDefs dictionary %
/mt /moveto load def /np /newpath load def % abbreviations %/ct /curveto load def /M { lineto line } def/line { gsave 35 setlinewidth 1 setlinecap 0 setlinejoin % 45 units for bold %3.8 setmiterlimit stroke grestore } def
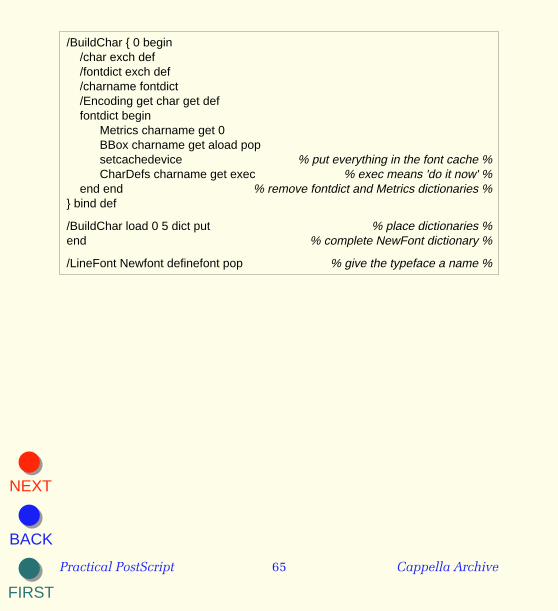
NEXT
FIRST
BACK
Practical PostScript 65 Cappella Archive
/BuildChar { 0 begin /char exch def /fontdict exch def /charname fontdict/Encoding get char get def fontdict begin
Metrics charname get 0 BBox charname get aload popsetcachedevice % put everything in the font cache %CharDefs charname get exec % exec means 'do it now' %
end end % remove fontdict and Metrics dictionaries %} bind def
/BuildChar load 0 5 dict put % place dictionaries %end % complete NewFont dictionary %
/LineFont Newfont definefont pop % give the typeface a name %
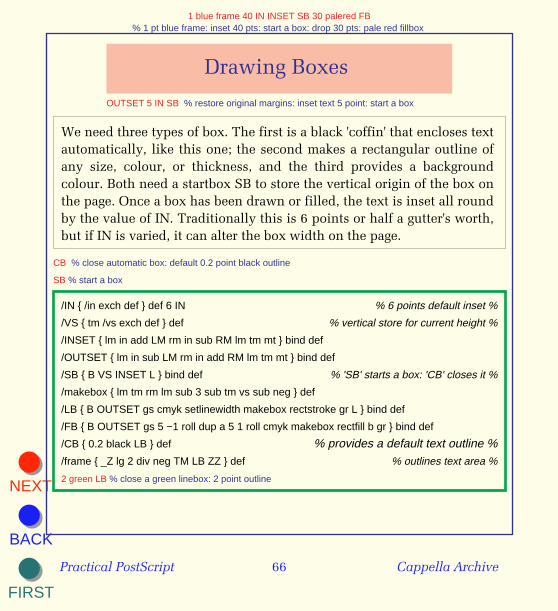
NEXT
FIRST
BACK
Practical PostScript 66 Cappella Archive
1 blue frame 40 IN INSET SB 30 palered FB % 1 pt blue frame: inset 40 pts: start a box: drop 30 pts: pale red fillbox
Drawing Boxes
OUTSET 5 IN SB % restore original margins: inset text 5 point: start a box
We need three types of box. The first is a black 'coffin' that encloses text automatically, like this one; the second makes a rectangular outline of any size, colour, or thickness, and the third provides a background colour. Both need a startbox SB to store the vertical origin of the box on the page. Once a box has been drawn or filled, the text is inset all round by the value of IN. Traditionally this is 6 points or half a gutter's worth, but if IN is varied, it can alter the box width on the page.
CB % close automatic box: default 0.2 point black outline
SB % start a box
/IN { /in exch def } def 6 IN % 6 points default inset %
/VS { tm /vs exch def } def % vertical store for current height %
/INSET { lm in add LM rm in sub RM lm tm mt } bind def
/OUTSET { lm in sub LM rm in add RM lm tm mt } bind def
/SB { B VS INSET L } bind def % 'SB' starts a box: 'CB' closes it %
/makebox { lm tm rm lm sub 3 sub tm vs sub neg } def
/LB { B OUTSET gs cmyk setlinewidth makebox rectstroke gr L } bind def
/FB { B OUTSET gs 5 −1 roll dup a 5 1 roll cmyk makebox rectfill b gr } bind def
/CB { 0.2 black LB } def % provides a default text outline %/frame { _Z lg 2 div neg TM LB ZZ } def % outlines text area %
2 green LB % close a green linebox: 2 point outline
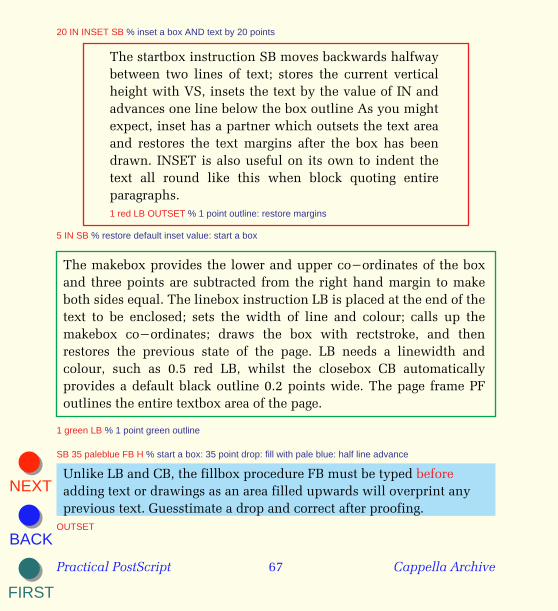
NEXT
FIRST
BACK
Practical PostScript 67 Cappella Archive
20 IN INSET SB % inset a box AND text by 20 points
The startbox instruction SB moves backwards halfway between two lines of text; stores the current vertical height with VS, insets the text by the value of IN and advances one line below the box outline As you might expect, inset has a partner which outsets the text area and restores the text margins after the box has been drawn. INSET is also useful on its own to indent the text all round like this when block quoting entire paragraphs. 1 red LB OUTSET % 1 point outline: restore margins
5 IN SB % restore default inset value: start a box
The makebox provides the lower and upper co−ordinates of the box and three points are subtracted from the right hand margin to make both sides equal. The linebox instruction LB is placed at the end of the text to be enclosed; sets the width of line and colour; calls up the makebox co−ordinates; draws the box with rectstroke, and then restores the previous state of the page. LB needs a linewidth and colour, such as 0.5 red LB, whilst the closebox CB automatically provides a default black outline 0.2 points wide. The page frame PF outlines the entire textbox area of the page.
1 green LB % 1 point green outline
SB 35 paleblue FB H % start a box: 35 point drop: fill with pale blue: half line advance
Unlike LB and CB, the fillbox procedure FB must be typed before adding text or drawings as an area filled upwards will overprint any previous text. Guesstimate a drop and correct after proofing.
OUTSET
NEXT
FIRST
BACK
Practical PostScript 68 Cappella Archive
Placing a Graphic
There are two ways of placing a graphic. An image that appears on every page, such as a logo, may be locked permanently into position by a header or footer definition in the typesetting dictionary, very much like page numbers. However, when a photograph or line drawing is inserted into the text on the page, we need to know its height and width so that the succeeding text can jump downwards the correct distance to start a new line, or wrap itself to one side or the other. Once the dimensions are known, the image may be translated to a centered position, shifted to either side; or scaled to a more convenient size. However, the existing page and textbox information must be protected by a save marker and the minidict removed to avoid its being over−filled with foreign definitions. After the graphic has been printed, the typesetting dictionary and previous co−ordinates are restored and the text moved into position for the next paragraph. It is also useful to apply a halftone screen, although this may be overriden by any screening applied in the EPS file itself. There are also two types of Encapsulated PostScript File. The first contains a normal recipe of PostScript curveto's and moveto's, whilst the second holds a PICT or TIFF illustration which has been rasterised into its bitmapped pixels by the scanner. In either event, there is a Bounding Box defining the dimensions of the image in the normal lower left and upper right hand order, like the flower described on page 10. The Bounding Box measurements are printed at the top of the EPS file, or may found by measuring a proof; one millimetre being 2.8 points. The upper right hand y height of the image is subtracted from the current text top margin to give the amount of drop required below any text. Remember that TM diminishes in value as the text moves down the page. Similarly the upper right hand x is used to calculate its horizontal

NEXT
FIRST
BACK
Practical PostScript 69 Cappella Archive
placing. To do this, we need some friendly variables: /URX { /urx exch def } def 0 URX % EPSF BoundingBox width /URY { /ury exch def } def 0 URY % EPSF BoundingBox height /SC { /sc exch def } def 1 SC % default scaling: 1 = 100 percent/SS { 106 45 { dup mul exch dup mul add 1 exch sub } setscreen } def
The screen is set here for gray halftones of 106 lpi at 45 degrees and the suggested lines per inch may be altered as required. Similar screens may be set for coloured images with the angles for each colour customarily set at successive 30 degree intervals to avoid the moire effect.
/newsize { SC sc mul URY sc mul URX } def % resize if necessary /middle { rm lm add urx sub 2 div LM } def % centre the graphic on page /down { tm ury sub TM } def % move down graphic height /up { tm ury add TM } def % move up graphic height
The newsize instruction stores the scaling value SC, which is then used to re−calculate the upper right x and y width and height Bounding Box dimensions. The image is centred by subtracting the urx width from the width of the textbox; the distance is then halved, and the left hand margin of the textbox moves inwards that amount to position the lower left hand corner of the image. The down instruction subtracts the height of the image from the position of the most recent line of text and TM is given a new value ready to resume printing the text below the graphic. The up instruction is a convenient way of returning to the top of the image so that some text may be placed to the right or left. Typographical pedants may like to make the ury measurement a multiple of the linespacing so that the lines of text following the graphic co−incide with those on the facing and reverse pages. If the left margin LM is resized before the graphic is placed then it will no longer be centered but shifted to the right or left according to the value given. A minus figure will move the image towards the left hand
NEXT
FIRST
BACK
Practical PostScript 70 Cappella Archive
side of the textbox and a plus conversely towards the right. To make life easier, we can combine all the previous instructions into a place command which also removes the minidict typesetting dictionary for safety and places a save command to preserve the existing co−ordinates. Similarly the instructions to re−open the typesetting dictionary are put together in a text command. The text definition has to be placed in the userdict so that it can re−introduce the minidict.
/place { newsize middle down _Z lm tm translate sc dup scale SS end } bind def /text { ZZ minidict begin 0 LM lm tm mt L } def 235 35 0.8 place (return) . . . paste the EPS or image name . . . text like this:
Some bitmapped EPS images are too large to be opened by a normal text editor. They may be imported by making a copy of the page file; splitting it at the relevant point, typing the placing values and then using a file merging utility to insert the EPS graphic. An easier method is to use a document manager and the Level Two %%IncludeResource facility.
NEXT
FIRST
BACK
Practical PostScript 71 Cappella Archive
Drop Capitals
DROP caps can be very effective, but the paragraph will have to be proofed ragged right first to allocate the correct number of words to the first three lines. This is because the full justify
paragraph command assumes the newly indented left margin to be constant until it reaches the final point. After proofing, use the force justify command fj at the end of the three lines and then issue the instruction 0 LM followed by a tiny advance such as '0.1 a' to return the left margin to its correct place ready for the remainder of the paragraph. The font matrices are used to produce an upper case letter that is 3.7 times the linespacing in size and drops downwards twice the linespacing to bring the bottom of the letter level with the third line of text. The exact value may vary between typefaces, so a little variation in values may be necessary.
USING the linespacing command in this way, resizes any letter to suit the baselines of the text. The instruction '2 string cvs' will allow the chosen letter to be placed before the definition
command using (U) dc, but type in the font name unless you install it permanently in front of findfont in the definition. You will also need to remember to reset the paragraph font size immediately
/dc { findfont lm tm moveto [ lg 3.7 mul 0 0 lg 3.7 mul 0 lg 2 mul neg ]makefont setfont 2 string cvs show currentpoint pop LM } def % notice the square brackets: insert the correct /FontName before 'dc' %
% remember to restore the current body text size at the end % % e.g. 12 LG (U) /Palatino−Roman dc10 rom (SING ) green CS L %
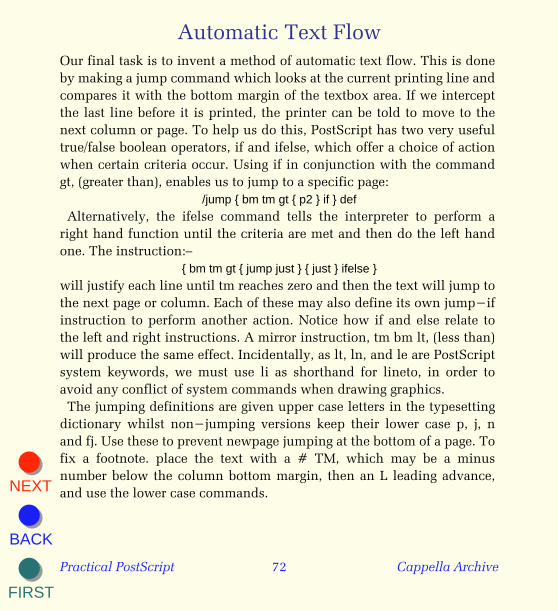
NEXT
FIRST
BACK
Practical PostScript 72 Cappella Archive
Automatic Text Flow Our final task is to invent a method of automatic text flow. This is done by making a jump command which looks at the current printing line and compares it with the bottom margin of the textbox area. If we intercept the last line before it is printed, the printer can be told to move to the next column or page. To help us do this, PostScript has two very useful true/false boolean operators, if and ifelse, which offer a choice of action when certain criteria occur. Using if in conjunction with the command gt, (greater than), enables us to jump to a specific page:
/jump { bm tm gt { p2 } if } def Alternatively, the ifelse command tells the interpreter to perform a right hand function until the criteria are met and then do the left hand one. The instruction:–
{ bm tm gt { jump just } { just } ifelse }will justify each line until tm reaches zero and then the text will jump to the next page or column. Each of these may also define its own jump−if instruction to perform another action. Notice how if and else relate to the left and right instructions. A mirror instruction, tm bm lt, (less than) will produce the same effect. Incidentally, as lt, ln, and le are PostScript system keywords, we must use li as shorthand for lineto, in order to avoid any conflict of system commands when drawing graphics. The jumping definitions are given upper case letters in the typesetting dictionary whilst non−jumping versions keep their lower case p, j, n and fj. Use these to prevent newpage jumping at the bottom of a page. To fix a footnote. place the text with a # TM, which may be a minus number below the column bottom margin, then an L leading advance, and use the lower case commands.
NEXT
FIRST
BACK
Practical PostScript 73 Cappella Archive
automatic page numbering
This is simpler than it looks. The PG variable is given the number 1 as a default and then the definition adds +1 each time the command is used, rather as the linespacing value is subtracted from the top margin when a line is printed. The number definition reserves three bytes of memory with the instruction 3 string which will allow page numbers in the hundreds. Alternatively, numbering may start from any chosen figure by simply typing for example, 29 PG, before the opening or newpage command. The mysterious cvs converts the page number from numerical data into text, which is then printed by s for show in the normal way. The numbering instruction will place them on the page and any text typed in the title and chapter text brackets will miraculously reappear as running footer comments on every page. Needless to say, they may be removed by leaving the numbering procedure empty. This method of automatic counting is useful for other purposes. Examples might be the shingling of column positions to compensate for section creep; the numbering of consecutive invoices or, in combination with a jump command, multiple tickets on the same page for later cutting by guillotine.
preserving memory
So far we have been using gsave and grestore's big brothers, save and restore by placing the marker 'save' in a defaults definition at the beginning of a file to isolate the file from any previous or subsequent page defaults. Their purpose is to wield an electronic broom at the end of a file to clear the printer memory of accumulated digital rubbish between them. As it is tedious typing '/defaults save def' every time, we may create an abbreviated version by placing the definition within a definition:
NEXT
FIRST
BACK
Practical PostScript 74 Cappella Archive
/_Z {/defaults save def} def /ZZ {defaults restore} def Save and restore preserve our time an temper when things go wrong; typing ZZ is much quicker than restarting the printer. However, the use of save and restore is also important if an Encapsulated PostScript File is incorporated from another source, say FreeHand or PageMaker. If the previous condition is not restored, any succeeding text may not print correctly. The underscore before the save definition distinguishes it from the use of Z, which is often a common abbreviation in imported files.
scripting commands
To show how easy Direct PostScript is, I shall print the markup codes that typeset the following text. Macintosh text editors such as BBEdit or Simple Text only need paragraph codes, but most PC text software insists on a line feed at the end of each on−screen line. To avoid double spaces appearing in fully justified text use the sequence: space − backslash \ − return at the end of each line, as explained in the pages on linewrapping. Book pages have to be 'imposed' as facing pages so that the text jumps from page to page in a particular order. The '2upPP' imposition in the dictionary will create 'printer's pairs' of right and left reading pages. Typing 'newpage' will force a jump to the next page for such things as chapter headings. Type 'close' at the end of the script to print and close the file.
NEXT
FIRST
BACK
Practical PostScript 75 Cappella Archive
1upA4 9 bol ( printer commands) c 10 rom
( Now that we have made a Direct PostScript typesetting dictionary, we need to be able to exercise a little more control over the printer itself so that we may use it more efficiently. First, the typesetting dictionary can be loaded into the printer at the beginning of a session by using this command just after the Header of the dictionary file: ) J
8 ss ( serverdict begin 0 exitserver) c 10 rom
( This produces the very peculiar message 'permanent state may be changed' from the printer, suggesting that some irreversible indigestion has occurred. However, this means that the dictionary remains in the printer memory until it is switched off, and gives the advantage of its not having to be downloaded with each typeset file. )J
( Remove this instruction if you send anyone a disc or email file with the dictionary accompanying its associated text. The dictionary will only need to be used once, and the printer may not print any pages at all. ) J
( The ability to switch to and from the manual feed may be found in the PostScript File Sequence on page 8, as well as a useful command for increasing the number of copies. These commands may be included either at the head of the file script or in a Trailer before any 'close' instruction. Howewver, do not include either if you are using a PostScript emulator or Distiller. ) J
( One problem which does occur with PostScript is that the text formatting may be affected if a different typeface is substituted for the one that created the original proofed typeset file. This will almost certainly produce a different stringwidth for each letter and carefully placed hyphens or fully justified last lines on the page may be thrown into disarray. ) J
NEXT
FIRST
BACK
Practical PostScript 76 Cappella Archive
( This difficulty also arises when using professional DTP software and even the same typeface by a different manufacturer may have some unfortunate effects. On the other hand, the use of automatic text flow has the advantage of allowing one size of typeface or linespacing to be substituted for another and the columns and pages will re−arrange and re−number themselves to compensate automatically for such changes. ) J
( To recap. Start the typeset script with a %!PS header followed by '1upA4' to open the typesetting dictionary. Leave a space before the closing bracket of the paragraph S, P, and J codes or the last word will disappear into a digital limbo. A space is not needed before the single line codes, s, c, n, and r, and adding one may slightly alter the centering and right justification of the line. Use 'close' to print the last page and close the file. ) J
close
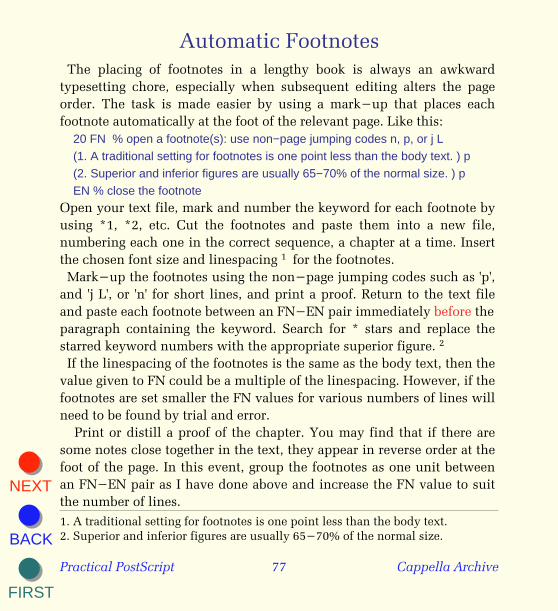
NEXT
FIRST
BACK
Practical PostScript 77 Cappella Archive
Automatic Footnotes The placing of footnotes in a lengthy book is always an awkward typesetting chore, especially when subsequent editing alters the page order. The task is made easier by using a mark−up that places each footnote automatically at the foot of the relevant page. Like this:
20 FN % open a footnote(s): use non−page jumping codes n, p, or j L (1. A traditional setting for footnotes is one point less than the body text. ) p (2. Superior and inferior figures are usually 65−70% of the normal size. ) p EN % close the footnote
1. A traditional setting for footnotes is one point less than the body text. 2. Superior and inferior figures are usually 65−70% of the normal size.
Open your text file, mark and number the keyword for each footnote by using *1, *2, etc. Cut the footnotes and paste them into a new file, numbering each one in the correct sequence, a chapter at a time. Insert the chosen font size and linespacing 1 for the footnotes. Mark−up the footnotes using the non−page jumping codes such as 'p', and 'j L', or 'n' for short lines, and print a proof. Return to the text file and paste each footnote between an FN−EN pair immediately before the paragraph containing the keyword. Search for * stars and replace the starred keyword numbers with the appropriate superior figure. 2
If the linespacing of the footnotes is the same as the body text, then the value given to FN could be a multiple of the linespacing. However, if the footnotes are set smaller the FN values for various numbers of lines will need to be found by trial and error. Print or distill a proof of the chapter. You may find that if there are some notes close together in the text, they appear in reverse order at the foot of the page. In this event, group the footnotes as one unit between an FN−EN pair as I have done above and increase the FN value to suit the number of lines.
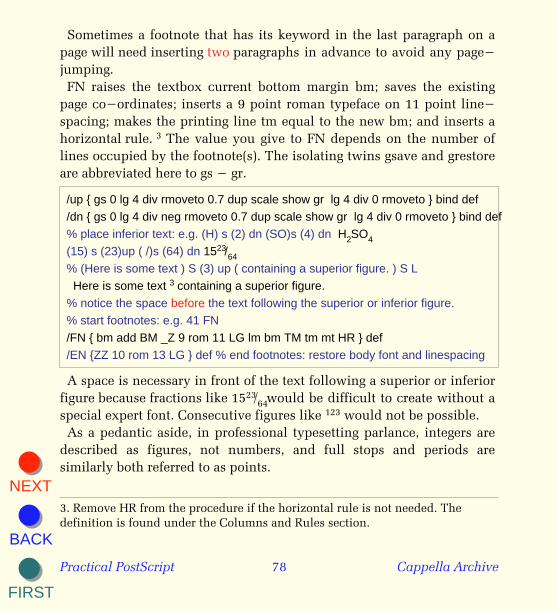
NEXT
FIRST
BACK
Practical PostScript 78 Cappella Archive
Sometimes a footnote that has its keyword in the last paragraph on a page will need inserting two paragraphs in advance to avoid any page− jumping. FN raises the textbox current bottom margin bm; saves the existing page co−ordinates; inserts a 9 point roman typeface on 11 point line− spacing; makes the printing line tm equal to the new bm; and inserts a horizontal rule. 3 The value you give to FN depends on the number of lines occupied by the footnote(s). The isolating twins gsave and grestore are abbreviated here to gs − gr.
3. Remove HR from the procedure if the horizontal rule is not needed. The definition is found under the Columns and Rules section.
/up { gs 0 lg 4 div rmoveto 0.7 dup scale show gr lg 4 div 0 rmoveto } bind def /dn { gs 0 lg 4 div neg rmoveto 0.7 dup scale show gr lg 4 div 0 rmoveto } bind def % place inferior text: e.g. (H) s (2) dn (SO)s (4) dn H2SO4
(15) s (23)up ( /)s (64) dn 1523 /64
% (Here is some text ) S (3) up ( containing a superior figure. ) S L Here is some text 3 containing a superior figure.
% notice the space before the text following the superior or inferior figure. % start footnotes: e.g. 41 FN /FN { bm add BM _Z 9 rom 11 LG lm bm TM tm mt HR } def /EN {ZZ 10 rom 13 LG } def % end footnotes: restore body font and linespacing
A space is necessary in front of the text following a superior or inferior figure because fractions like 1523 /64 would be difficult to create without a special expert font. Consecutive figures like 123 would not be possible. As a pedantic aside, in professional typesetting parlance, integers are described as figures, not numbers, and full stops and periods are similarly both referred to as points.
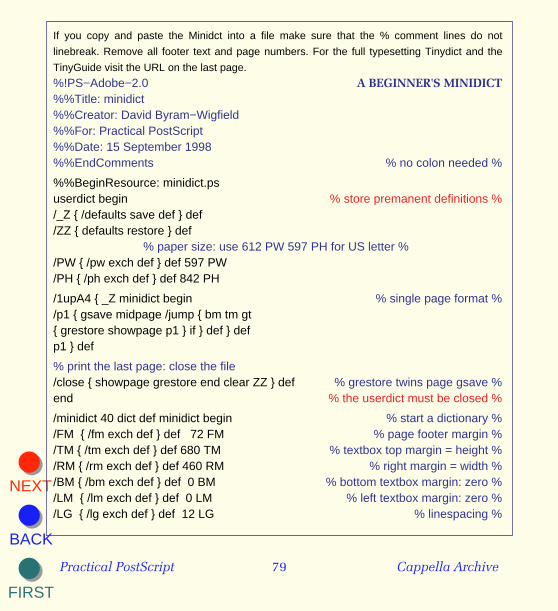
NEXT
FIRST
BACK
Practical PostScript 79 Cappella Archive
If you copy and paste the Minidct into a file make sure that the % comment lines do not
linebreak. Remove all footer text and page numbers. For the full typesetting Tinydict and the
TinyGuide visit the URL on the last page.
%!PS−Adobe−2.0 A BEGINNER'S MINIDICT %%Title: minidict %%Creator: David Byram−Wigfield %%For: Practical PostScript%%Date: 15 September 1998 %%EndComments % no colon needed %
%%BeginResource: minidict.ps userdict begin % store premanent definitions % /_Z { /defaults save def } def /ZZ { defaults restore } def
% paper size: use 612 PW 597 PH for US letter % /PW { /pw exch def } def 597 PW /PH { /ph exch def } def 842 PH
/1upA4 { _Z minidict begin % single page format % /p1 { gsave midpage /jump { bm tm gt { grestore showpage p1 } if } def } def p1 } def
% print the last page: close the file /close { showpage grestore end clear ZZ } def % grestore twins page gsave % end % the userdict must be closed %
/minidict 40 dict def minidict begin % start a dictionary % /FM { /fm exch def } def 72 FM % page footer margin % /TM { /tm exch def } def 680 TM % textbox top margin = height % /RM { /rm exch def } def 460 RM % right margin = width % /BM { /bm exch def } def 0 BM % bottom textbox margin: zero % /LM { /lm exch def } def 0 LM % left textbox margin: zero % /LG { /lg exch def } def 12 LG % linespacing %
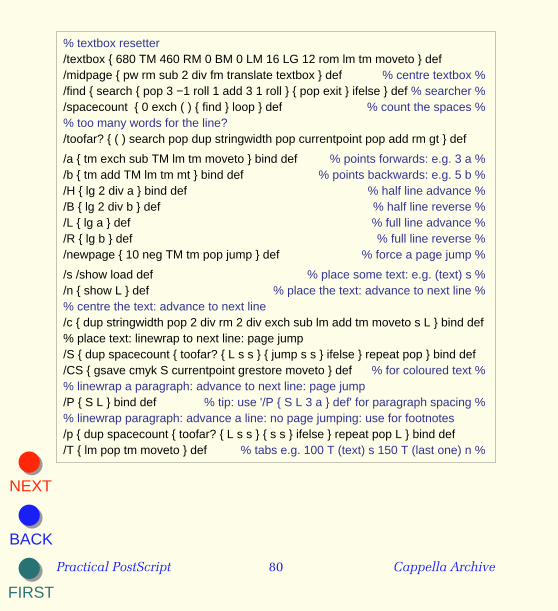
NEXT
FIRST
BACK
Practical PostScript 80 Cappella Archive
% textbox resetter /textbox { 680 TM 460 RM 0 BM 0 LM 16 LG 12 rom lm tm moveto } def /midpage { pw rm sub 2 div fm translate textbox } def % centre textbox % /find { search { pop 3 −1 roll 1 add 3 1 roll } { pop exit } ifelse } def % searcher % /spacecount { 0 exch ( ) { find } loop } def % count the spaces % % too many words for the line? /toofar? { ( ) search pop dup stringwidth pop currentpoint pop add rm gt } def
/a { tm exch sub TM lm tm moveto } bind def % points forwards: e.g. 3 a % /b { tm add TM lm tm mt } bind def % points backwards: e.g. 5 b % /H { lg 2 div a } bind def % half line advance % /B { lg 2 div b } def % half line reverse % /L { lg a } def % full line advance % /R { lg b } def % full line reverse % /newpage { 10 neg TM tm pop jump } def % force a page jump %
/s /show load def % place some text: e.g. (text) s % /n { show L } def % place the text: advance to next line % % centre the text: advance to next line /c { dup stringwidth pop 2 div rm 2 div exch sub lm add tm moveto s L } bind def % place text: linewrap to next line: page jump /S { dup spacecount { toofar? { L s s } { jump s s } ifelse } repeat pop } bind def /CS { gsave cmyk S currentpoint grestore moveto } def % for coloured text % % linewrap a paragraph: advance to next line: page jump /P { S L } bind def % tip: use '/P { S L 3 a } def' for paragraph spacing % % linewrap paragraph: advance a line: no page jumping: use for footnotes /p { dup spacecount { toofar? { L s s } { s s } ifelse } repeat pop L } bind def /T { lm pop tm moveto } def % tabs e.g. 100 T (text) s 150 T (last one) n %
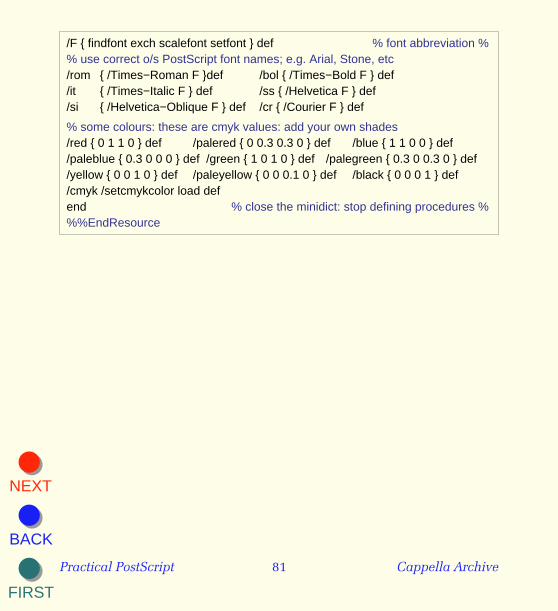
NEXT
FIRST
BACK
Practical PostScript 81 Cappella Archive
/F { findfont exch scalefont setfont } def % font abbreviation % % use correct o/s PostScript font names; e.g. Arial, Stone, etc /rom { /Times−Roman F }def /bol { /Times−Bold F } def /it { /Times−Italic F } def /ss { /Helvetica F } def /si { /Helvetica−Oblique F } def /cr { /Courier F } def
% some colours: these are cmyk values: add your own shades /red { 0 1 1 0 } def /palered { 0 0.3 0.3 0 } def /blue { 1 1 0 0 } def /paleblue { 0.3 0 0 0 } def /green { 1 0 1 0 } def /palegreen { 0.3 0 0.3 0 } def /yellow { 0 0 1 0 } def /paleyellow { 0 0 0.1 0 } def /black { 0 0 0 1 } def /cmyk /setcmykcolor load def end % close the minidict: stop defining procedures % %%EndResource
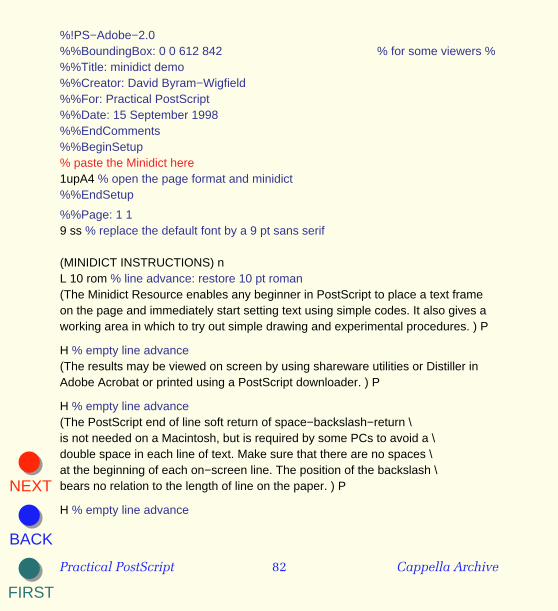
NEXT
FIRST
BACK
Practical PostScript 82 Cappella Archive
%!PS−Adobe−2.0 %%BoundingBox: 0 0 612 842 % for some viewers % %%Title: minidict demo%%Creator: David Byram−Wigfield %%For: Practical PostScript%%Date: 15 September 1998 %%EndComments %%BeginSetup % paste the Minidict here 1upA4 % open the page format and minidict %%EndSetup
%%Page: 1 1 9 ss % replace the default font by a 9 pt sans serif
(MINIDICT INSTRUCTIONS) n L 10 rom % line advance: restore 10 pt roman (The Minidict Resource enables any beginner in PostScript to place a text frame on the page and immediately start setting text using simple codes. It also gives a working area in which to try out simple drawing and experimental procedures. ) P
H % empty line advance (The results may be viewed on screen by using shareware utilities or Distiller in Adobe Acrobat or printed using a PostScript downloader. ) P
H % empty line advance (The PostScript end of line soft return of space−backslash−return \is not needed on a Macintosh, but is required by some PCs to avoid a \double space in each line of text. Make sure that there are no spaces \at the beginning of each on−screen line. The position of the backslash \bears no relation to the length of line on the paper. ) P
H % empty line advance
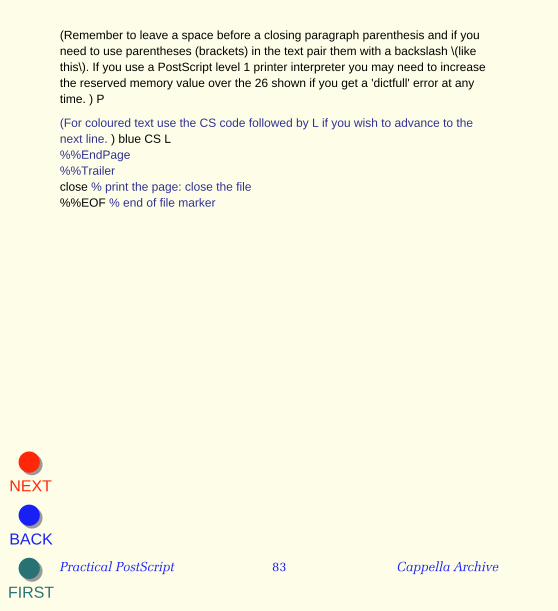
NEXT
FIRST
BACK
Practical PostScript 83 Cappella Archive
(Remember to leave a space before a closing paragraph parenthesis and if you need to use parentheses (brackets) in the text pair them with a backslash \(like this\). If you use a PostScript level 1 printer interpreter you may need to increase the reserved memory value over the 26 shown if you get a 'dictfull' error at any time. ) P
(For coloured text use the CS code followed by L if you wish to advance to the next line. ) blue CS L %%EndPage %%Trailer close % print the page: close the file %%EOF % end of file marker
NEXT
FIRST
BACK
Practical PostScript 84 Cappella Archive
Distance Printing
The electronic mail services provided by the Internet are increasingly popular for the rapid exchange of information and ideas. However, large amounts of data, such as printing files, have to be compressed and sent by a method known as the File Transfer Protocol. The wide variety of software and operating systems in use means that the recipient has to possess not only a similar application but also an armoury of software translators, convertors and decompressors able to unscramble the incoming data. One way round these difficulties is to download an Encapsulated PostScript file, but, as these contain the entire working PostScript dictionary of the originating application, the files can be very large indeed. They do have the capability of being opened by a different application from that which created them, but usually they cannot be edited in any way, unless converted to be read by Illustrator. Apart from software incompatibility, another difficulty with sending typeset documents is the fact that the recipient is unlikely to possess the same typefaces as the original document, and, even if they are available, they may not be from the same manufacturer. Consequently, page formatting will be thrown into disarray, as discussed earlier. One solution has been the invention of HyperText, which uses paragraph and graphics codings specifically designed for the electronic publishing of on−screen news sheets and magazines, irrespective of the make of computer or printer. HyperText provides a cheerful and colourful presentation on the monitor screen and at the same time the transmitted text and graphics may be printed by using HyperText codes. There are two interesting points here. The first is that the interpretation of the file is no longer dependent on the software that created it; the second is that recipients can set up a menu of their own available
NEXT
FIRST
BACK
Practical PostScript 85 Cappella Archive
typefaces to suit the codings of the incoming HyperText. A development by Adobe, called Acrobat, uses the Portable Document Format, which is more sophisticated than HyperText, and provides inter−application translation and Multiple Master Font substitution. If the typefaces required by the incoming document are unavailable on the host machine, the software will attempt to match the missing fonts by producing a digital facsimile, thus maintaining the existing format of the incoming document. A PDF Reader is needed to print the documents if no other receptive application is available. The Minidict we have built produces application−independent typseset files that can be printed on a PostScript printer anywhere, irrespective of the available software. Once the Minidict has been sent to a recipient, it obviously need not be sent again and merely has to be pasted at the head of any subsequent incoming coded files. Font substitutions may be easily made by grouping alternative typefaces together in the Minidict, although the default set must be left unenclosed. This is over−ridden when a grouped set is called up at any time, or included in the textbox. All coding abbreviations should remain the same as this allows for instant global changes of style throughout the document, whether for headers, subheadings or body text.
/GaraGillSet { /rom { /Garamond−Roman F } def /bol { /Garamond−Bold F } def /it { /Garamond−Italic F } def /bolit { /Garamond−BoldItalic F } def/ss { /GillSans F } def /sb { /GillSans−Bold F } def /si { /GillSans−Italic F } def /sibol{ /GillSans−BoldItalic F } def } def
/textbox { 0 LM 460 TM 300 RM 0 BM GaraGillSet 11 LG 8 rom lm tm mt } def Whilst the font and linespacing defaults may be varied at any time, do remember that the default typeface in the dictionary textbox will always open at the top of a new page unless countermanded beforehand by an
NEXT
FIRST
BACK
Practical PostScript 86 Cappella Archive
alternative textbox definition, like this: /textbox { 0 LM 460 TM 300 RM 0 BM GaraGillSet 11 LG 10 rom lm tm mt } def
Although primarily intended for typesetting ascii text files, the Minidict codes also provide an easy method of converting text files into the Portable Document Format, using Adobe Acrobat Distiller. This is probably the best way of proofing the typeset text on the monitor screen and it has the added advantage of enabling the pages to be printed on a non−PostScript printer such as an inkjet.
'He who first shortened the labour of copyists by device of Moveable Types was . . . creating a whole new democratic world: he had invented the Art of printing.'
Thomas Carlyle: Sartor Desatus
NEXT
FIRST
BACK
Practical PostScript 87 Cappella Archive
BibliographyPostScript Tutorial & Cookbook (Blue Book) Addison−Wesley ISBN 0 201 10179 3PostScript Reference Manual (Red Book) Addison−Wesley ISBN 0 202 18127 4PostScript Program Design (Green Book) Addison−Wesley ISBN 0 201 14396 8
PostScript by Example − Addison−Wesley ISBN 0 201 63228 4PostScript Hands−on (Spring) Haydon Book Co. ISBN 0 672 30185 7PostScript Illustrations (Gosney) Prentice−Hall ISBN 0 13 683 624 0
Software suitable for Direct PostScriptWeb sites: See: /usenet/comp.lang.postscript. FAQs are available from: http://www.cis.ohio−state.edu/hypertext/faq/usenet/postscript/top.html http://www.lib.ox.ac.uk/internet/news/faq/comp.lang.postscript.html http://www.geocities.com/siliconvalley/5682/postscript.html
Text Editors: Macintosh BBEdit Lite 4.0: Mac sites: or http://www.tiac.net/biz/bbsw/ This editor has a useful 'Send PostScript' Extension with error reporting.
Text Editors: PC NoteTab Pro 4.5: http://www.notetab.ch: $19.95 Eric G.V. Fookes. Spell checker, thesaurus, text<−>HTML, sort lines, indent, join. TextCon v1.73: http://www.src.doc.ic.ac.uk/packages/simtel−msdos: $25
Viewing and conversion: Macintosh PS2EPS+: Mirror sites or http://hem1.passagen.se/ptlerup Very fast PS display with MacEPSF, PICT, TIFF, PCX, PCEPSF conversion. EPStoPICT 1.2.1: Mac mirror sites: or http://users.aol.com/ArtAge/ Will convert to PICT and TIFF, rasterising from 72 to 360 dpi.
Viewing and conversion: PC PSalter: http://ds.dial.pipex.com/quite/: A Windows viewer and editing utility. PrintFile: http://hem1.passagen.se/ptlerup : Freeware printing utility Preview Lite: Liberty Systems http://www.primenet.com/~liberty
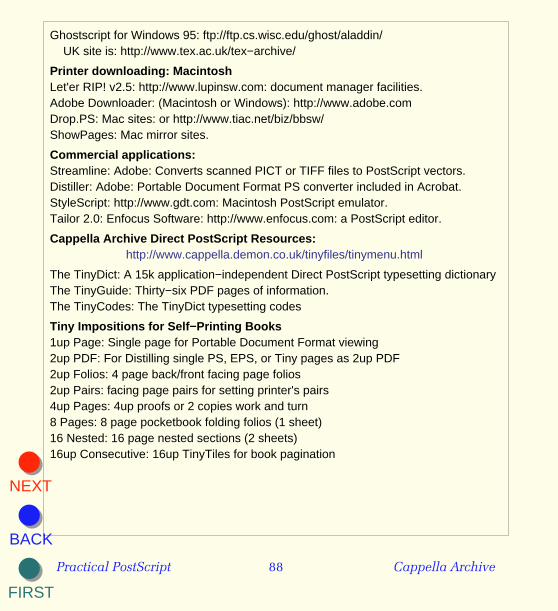
NEXT
FIRST
BACK
Practical PostScript 88 Cappella Archive
Ghostscript for Windows 95: ftp://ftp.cs.wisc.edu/ghost/aladdin/ UK site is: http://www.tex.ac.uk/tex−archive/
Printer downloading: Macintosh Let'er RIP! v2.5: http://www.lupinsw.com: document manager facilities. Adobe Downloader: (Macintosh or Windows): http://www.adobe.comDrop.PS: Mac sites: or http://www.tiac.net/biz/bbsw/ ShowPages: Mac mirror sites.
Commercial applications: Streamline: Adobe: Converts scanned PICT or TIFF files to PostScript vectors.Distiller: Adobe: Portable Document Format PS converter included in Acrobat. StyleScript: http://www.gdt.com: Macintosh PostScript emulator. Tailor 2.0: Enfocus Software: http://www.enfocus.com: a PostScript editor.
Cappella Archive Direct PostScript Resources: http://www.cappella.demon.co.uk/tinyfiles/tinymenu.html
The TinyDict: A 15k application−independent Direct PostScript typesetting dictionary The TinyGuide: Thirty−six PDF pages of information. The TinyCodes: The TinyDict typesetting codes
Tiny Impositions for Self−Printing Books 1up Page: Single page for Portable Document Format viewing 2up PDF: For Distilling single PS, EPS, or Tiny pages as 2up PDF 2up Folios: 4 page back/front facing page folios 2up Pairs: facing page pairs for setting printer's pairs 4up Pages: 4up proofs or 2 copies work and turn 8 Pages: 8 page pocketbook folding folios (1 sheet) 16 Nested: 16 page nested sections (2 sheets) 16up Consecutive: 16up TinyTiles for book pagination
NEXT
FIRST
BACK
Practical PostScript 89 Cappella Archive
Tiny Resources The Colour Resource: For creating colour PDF pages and/or inkjet printing The Columns Resource: For 2, 3, or 4 column brochures or news sheets Encoding Resource: Re−encodes Macintosh fonts for ISO Latin−1, smart quotes, etc. The TinyTables Resource: Plain or boxed fields with vat and total calculation The Tables Demo: A demonstration using the Minidict
TinyHelps for Self−Printing Book Production Some of the TinyHelps fold up into an 8 page pocketbook. Open in the Adobe Reader; print , fold, and staple as directed. The files will print on either A4 or letter size paper. TinyHelp 1: Self−Printing Book Production TinyHelp 2: Laser Printing Books TinyHelp 3: Sewn and Thermal Binding TinyHelp 4: Covering and Guillotining TinyHelp 5: Printing ISBN Barcodes TinyHelp 6: Making an Electronic Book More Help: Ascii: octals: FAQ: The TinyAski: An introduction to the PostScript coding of Ascii text Octal Encodings: PDF and ISO Latin−1 encoding table with octal numbers Direct PostScript FAQ: Some questions answered. A Tiny Test: Test the halftone quality of a printer
Revised April 2000
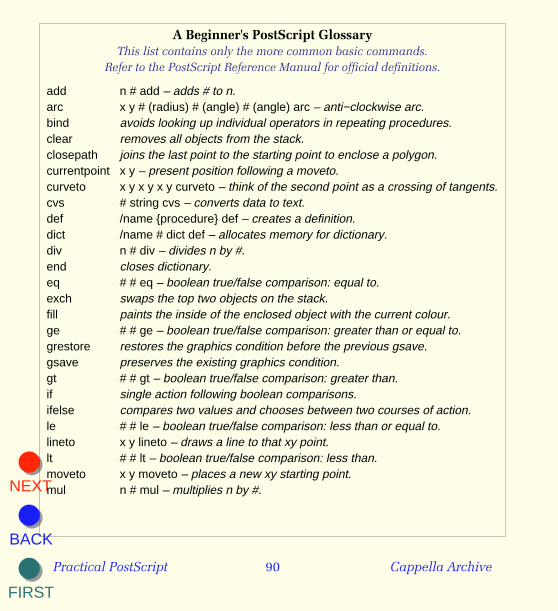
NEXT
FIRST
BACK
Practical PostScript 90 Cappella Archive
A Beginner's PostScript Glossary This list contains only the more common basic commands.
Refer to the PostScript Reference Manual for official definitions.
add n # add – adds # to n.arc x y # (radius) # (angle) # (angle) arc – anti−clockwise arc.bind avoids looking up individual operators in repeating procedures.clear removes all objects from the stack.closepath joins the last point to the starting point to enclose a polygon.currentpoint x y – present position following a moveto.curveto x y x y x y curveto – think of the second point as a crossing of tangents.cvs # string cvs – converts data to text.def /name {procedure} def – creates a definition.dict /name # dict def – allocates memory for dictionary.div n # div – divides n by #.end closes dictionary.eq # # eq – boolean true/false comparison: equal to.exch swaps the top two objects on the stack.fill paints the inside of the enclosed object with the current colour.ge # # ge – boolean true/false comparison: greater than or equal to.grestore restores the graphics condition before the previous gsave.gsave preserves the existing graphics condition.gt # # gt – boolean true/false comparison: greater than.if single action following boolean comparisons.ifelse compares two values and chooses between two courses of action.le # # le – boolean true/false comparison: less than or equal to.lineto x y lineto – draws a line to that xy point.lt # # lt – boolean true/false comparison: less than.moveto x y moveto – places a new xy starting point.mul n # mul – multiplies n by #.
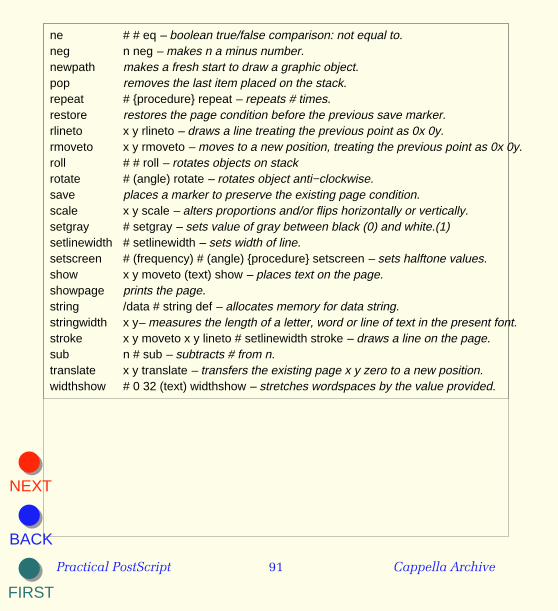
NEXT
FIRST
BACK
Practical PostScript 91 Cappella Archive
ne # # eq – boolean true/false comparison: not equal to.neg n neg – makes n a minus number.newpath makes a fresh start to draw a graphic object.pop removes the last item placed on the stack.repeat # {procedure} repeat – repeats # times.restore restores the page condition before the previous save marker.rlineto x y rlineto – draws a line treating the previous point as 0x 0y.rmoveto x y rmoveto – moves to a new position, treating the previous point as 0x 0y.roll # # roll – rotates objects on stack rotate # (angle) rotate – rotates object anti−clockwise.save places a marker to preserve the existing page condition.scale x y scale – alters proportions and/or flips horizontally or vertically.setgray # setgray – sets value of gray between black (0) and white.(1)setlinewidth # setlinewidth – sets width of line.setscreen # (frequency) # (angle) {procedure} setscreen – sets halftone values.show x y moveto (text) show – places text on the page.showpage prints the page.string /data # string def – allocates memory for data string.stringwidth x y– measures the length of a letter, word or line of text in the present font.stroke x y moveto x y lineto # setlinewidth stroke – draws a line on the page.sub n # sub – subtracts # from n.translate x y translate – transfers the existing page x y zero to a new position.widthshow # 0 32 (text) widthshow – stretches wordspaces by the value provided.

NEXT
FIRST
BACK
Practical PostScript 92 Cappella Archive
Cappella Archive Book on Demand Limited Editions
Foley Terrace : Great Malvern : WR14 4RQ : UK
Download Direct PostScript Self−Printing Book Resources from: http://www.cappella.demon.co.uk
Typeset in Direct PostScript by the Cappella TinyDict