Embed Size (px)
Citation preview

�Upper Primary / Secondary
Pre-visit Activities - page 2
Pre-visit activities are designed to help students enjoy the Djalkiri exhibition and assist them interpret and understand what they will see.
The Djalkiri Exhibition Catalogue and Djalkiri Education Kit Project Notes can provide information to help students and teachers learn about the Djalkiri project. Additional print and electronic resources are suggested to assist with student research.
Visiting the Exhibition• Students should come with a clipboard and pencil• Discuss the activities and exhibition upon arrival at the venue• Ask a Gallery person to introduce the exhibition• Provide copies of the activity for each student, where applicable• Encourage students to talk and share ideas about what they are seeing/hearing/learning and to ask questions.• Bring the class together towards the end of the visit to discussquestionsandfindings.
Post Visit Activities - page 3 - 11
These are suggested activities for the classroom that can be adapted for students of various ages and abilities and can be undertaken individually or as an ongoing unit of work.
Science ProjectsCreating an Herbarium 3Collecting Plants 3Pressing the Plants 4IdentificationandDisplay 5Finding the Key 5Making a Plant Database 5Botanical Illustration 6Seasonal Calendar 8Indigenous Knowledge 8
Art ProjectsBotanical Art 9Printmaking 10Nature Poems 11
PRE AND POST VISIT ACTIVITIES
CONTENTS
Rangers and artists on the Baniyala flood plain John Wolseley arrangng the composition of objects for his work Sea Wrack: Tide After Tide, Baniyala

�Upper Primary / Secondary
1. What is printmaking? Find out about different kinds of printmaking. How are they done? Find out about the etching (or intaglio) process. Describe the different types of intaglio printing.• Australian Print Workshophttp://www.australianprintworkshop.com/default.asp• Basil Hall Editions - print making studiohttp://www.basilhalleditions.com.au• Crown Point Press – About printmakinghttp://www.crownpoint.com/printmaking• MoMa the Museum of Modern Art, New Yorkhttp://www.moma.org/exhibitions/�00�/whatisaprint/print.html
2. Find out about the artists. Use a map to locate the Arnhem Land region. Find Blue Mud Bay. What does the word Yolngu mean? Find out about the Yolngu artists at Yirrkala Community. What is Buku Larrnggay Mulka? Usethefollowingwebsitetofindoutmore.• Yirrkala Art Centre - http://www.aboriginal art.org
Google the names of the Djalkiri artists: Djambawa Marawili, Marrnyula Mununggurr,Mulkun Wirrpanda, Fiona Hall, John Wolseley, Jorg Schmeisser and Judy Watson. What kind of artists are they? Write down something interesting about each one.
3. Find out about the ‘Top End’ of Australia. What is the climate like? What is the landscape like? How many seasons are there? What are the seasons called? As a starting point visit the following websites• Travel NThttp://en.travelnt.com/assets_static/seasons-of-kakadu/kakaduSeasons.swf• Bureau of Meteorologyhttp://www.bom.gov.au/iwk/climate_culture/Indig_seasons.shtml• Wetland Habitats Of The Top End - Michael Michiehttp://members.ozemail.com.au/~mmichie/habitat�.htm• Tropical Savannas Cooperative Research Centre http://www.savanna.org.au/nt/ah/alplants.html
4. Find out about plants and animals found in Arnhem Land. Make a list of some of the well known plants and animals from the Top End of Australia. The following websites can be used as a starting point.• Dhimurru Aboriginal Corporationhttp://www.dhimurru.com.au/default.html • Tropical Savannas Cooperative Research Centre http://www.savanna.org.au/nt/ah/alplants.html
5. Find out about the Djalkiri Project and the people involved. What is the project about? Visit the following websites as a starting point. • Nomad Art Productionshttp://www.nomadart.com.au• Basil Hall Editionshttp://www.basilhalleditions.com.au
6. Find out what an ethno-botanist and an anthropologist does. What does an ethno botanist do? What does an anthropologist do? Find out what a herbarium is. What do people do there? Use the following website as a starting point.• Northern Territory Herbariumhttp://www.nt.gov.au/nreta/wildlife/plants/index.html
7. Find out about Indigenous protocols. What kind of things should people be aware of when traveling to Indigenous lands and working with Indigenous Australian people? Use the following as a starting point for your investigation.• ABC National Broadcaster http://www.abc.net.au/message/proper/ethics.htm• NSW Board of Studieshttp://ab-ed.boardofstudies.nsw.edu.au/• Australia Council for the Arts http://www.australiacouncil.gov.au/publications/indigenous/visual_arts_protocols_for_producing_indigenous_australian_visual_arts
8 Find out about Arnhem LandWhat kind of place is it? Who lives there? What is the history of Arnhem Land?• East Arnhem Land Tourism Associationhttp://www.ealta.org/index.html
Web SearchDivide into small groups and explore the following subjects in a computer lab. Use the following websites as a starting point for researching the exhibition. Expand on the information by finding other relevant sites and making notes. Report back to the class with your findings.
PRE-VISIT ACTIVITY
�Upper Primary / Secondary
Creating a HerbariumThe activity involves gathering, identifying, researching andpreservinglocalplantsandcreatingascientific-styleherbarium. Plant pressings can be bound into booklets or designedasafieldguidetoyourlocalarea.Visityourlocalherbarium. Find out about the role of herbaria nationally.
Collecting plantsFirst decide on rules for collecting plants, these may include the following:• Never collect an endangered plant• Respect other people’s property when you are collecting• Do not pick a plant until 6 are seen, and never pull one up for the roots until �0 are found
Go on a bush walk or walk in the garden. Look at the plantsthataregrowinginthearea,compareflowers,leavesand other plant parts from different species. Note plants that are similar and plants that are different to each other. Usefieldguidestoidentifyplantsandspecies.
Make collection plan. A herbarium collection usually features plants that grow naturally in a region. Decide on your purpose for collecting and pressing plants, then discuss what types of plants to gather and where to go. Youcanformathematicstudybyfocusingonspecificplant categories such as bush foods and medicines, native trees or plants pollinated by bees for example.
Ifyouwanttocreateafieldguideofthelocalenvironmentorcollectflowersforanartproject,youneednotbelimitedtonativeplants.Flattenedflowersandinterestingleaves can be used for art projects.
Collect the plants. Usescissorstosnipflowers,leaves,orentireplants.Ifyouarecreatingascientificherbarium,youmay also want to collect some roots.
Flatflowerstendtopressbetterthanbulkyones.Youmayliketoexperimentwithdifferenttypesofflowersandplantparts(byremovingandpressingpetalsoflargerflowers,forinstance).Ifplantsareabundant,collectseveralflowersfroma species so they can display front, back, and side views. Collectingflowersatdifferentstagesofbloomcanalsomakea more interesting display.
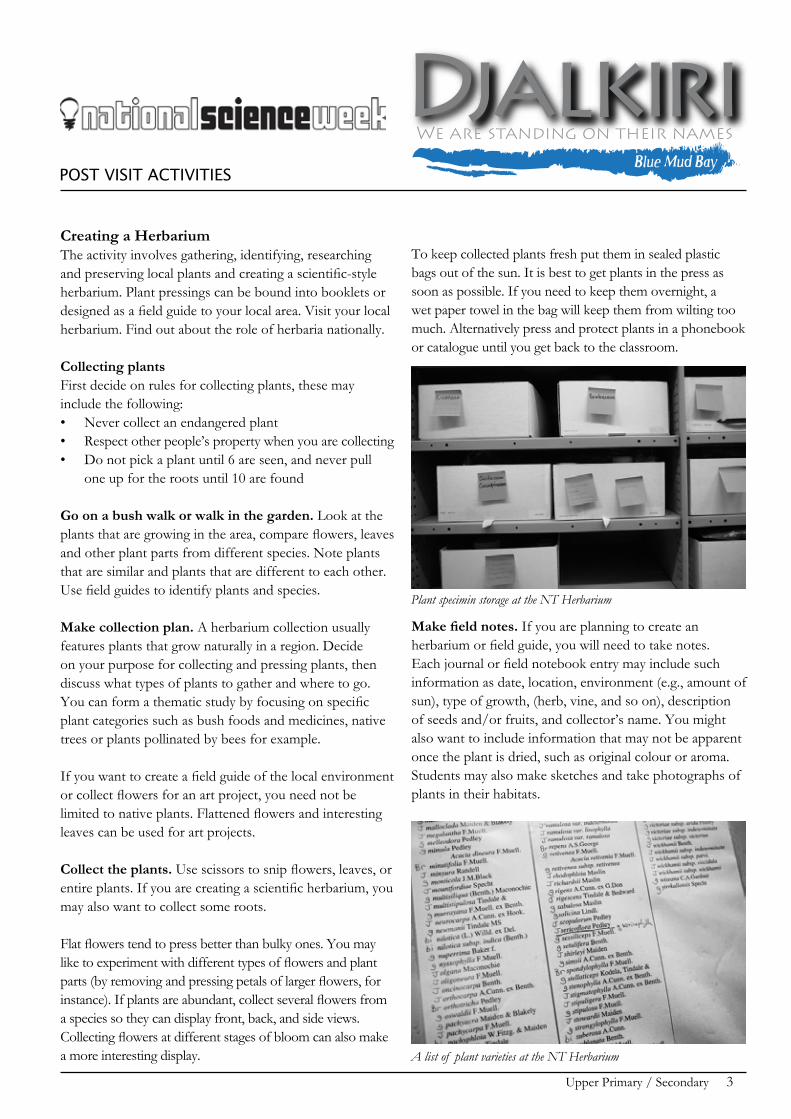
To keep collected plants fresh put them in sealed plastic bags out of the sun. It is best to get plants in the press as soon as possible. If you need to keep them overnight, a wet paper towel in the bag will keep them from wilting too much. Alternatively press and protect plants in a phonebook or catalogue until you get back to the classroom.
Make field notes. If you are planning to create an herbariumorfieldguide,youwillneedtotakenotes.Eachjournalorfieldnotebookentrymayincludesuchinformation as date, location, environment (e.g., amount of sun), type of growth, (herb, vine, and so on), description of seeds and/or fruits, and collector’s name. You might also want to include information that may not be apparent once the plant is dried, such as original colour or aroma. Students may also make sketches and take photographs of plants in their habitats.
POST VISIT ACTIVITIES
Plant specimin storage at the NT Herbarium
A list of plant varieties at the NT Herbarium

�Upper Primary / Secondary
Pressing the plantsMaterials for a plant press• Corrugated cardboard, sheets of newspaper, plywood or other boards, all cut to the same size• Something to bind the stack (belt, cord, or strap)• Weights (heavy books or bricks)
For mounting collections• Sheets of white paper • PVA glue• Clear contact paper (optional)
Miscellaneous• Scissors,fieldguides,bindersorfoldersforstudents’collections,journals,orfieldnotebooks.Ifyouplantomakepressedwildflowercards,you’llneedcardstockpaper and clear contact paper or plastic bags.
A plant press sandwiches the plants between layers of absorbent material so they will dry quickly. This is the best way to preserve specimens and colour. Although you can press plants in old phone books or catalogues, a method that enables air movement speeds up the drying process.
Arrange plants on a folded sheet or two of absorbent paper, like paper towel or newspaper. You can lay numerousflowersorplantsofthesamethicknessonthesame piece of paper, as long as they don’t touch. Try to arrangeflowersandotherplantpartsinanaturalway,sotheir parts will be visible when pressed.
Then place the absorbent paper onto cardboard. The cardboard enables air circulation so the plants dry more quickly. Finally, place wooden boards on either side of your layered pile. Next, you’ll need to bind or weight the stack to create pressure that will help the plants dry. You can tighten straps or belts around it or simply put something heavy on the stack. Some presses have screws and nuts in each corner that can be tightened to create pressure. Leave your press in a ventilated location.
Although many plants will dry adequately in a week, some may take longer. Check them each day or two and change at least the outer layer of newspaper, (delicate plants, when moist, may stick to the paper they’re touching.)
Identification classification and displayUnless your pressed plants are solely intended for an art project, you may want to identify what plants you havegatheredusingonlineorprintedfieldguides.Youmaywanttoextendinitialobservationstofindspecificcharacteristicslistedinthefieldguidekeys.(Forinstance,does the plant have opposite or alternate leaves?)
Before mounting the pressed collections, consider the end goal. If creating classic herbaria pages, give each plant its ownsheetofpaper.Ifcreatingfieldguides,organisepagesby plant families or characteristics such as colour or leaf type.
To mount the plants use PVA glue, a hot glue gun or archival tape to attach plant parts to a heavy paper.
The following websites may be helpful in this process.
• FieldGuidetoAustralianWildflowershttp://www.shop.nsw.gov.au/
• PlantScienceandBotanyIdentificationhttp://www.publish.csiro.au/nid/�0/bcid/�9.htm
• Field guide to eucalypts http://www.weedinfo.com.au/bk_fldgeuc.html
• Botanical Field Guide - Stefan Magerhttp://catalogue.nla.gov.au
• Fieldguides&gardeningresourcesspecifictotheACThttp://www.lifeinthesuburbs.net.au/content.php?id=��0
POST VISIT ACTIVITIES
Botanical illustration at the NT Herbarium

�Upper Primary / Secondary
Finding the keyMostfieldguidesusedichotomouskeys,whichincludea series of questions with only two possible answers to choose from for each question. If you want to try creating a dichotomous key, begin by dividing the plant collection into two groups based on observable characteristics (e.g., flowersornoflowers).Nexttakeeachgroupandchoosetwo new alternatives. If subjective qualities are selected, suchassmallorlarge,trytobespecific(e.g.leavessmallerthan �0cm and leaves larger than �0cm).
The group should continue in this fashion until there is only one plant left in each category. Once these keys have been created use your categories to write a series of questionsforthebeginningofthefieldguide(Doestheplanthaveflowers?Noflowers?)tohelptheuseridentifythe plants.
Making a plant databaseYou may like to create a computer database to catalogue theherbariaorfieldguideinformation.Thedatabasemightincludethefollowing:commonname,scientificname,family, student discoverer, habitat, unusual features etc. You can also scan sketches or import digital photos of the subjects into the computer. Add information based on observations made over time, such as how a plant moves fromflowerbudthroughseedandfruit.
Once the material is in the database, you can sort it in different ways, such as by plant family or native and exotic plants. Information from the database can be printed and bound and/or featured along with pressed specimens.
POST VISIT ACTIVITIES
Top and bottom - Dr Greg Leach showing artists Fiona Hall and Judy Watson pressed specimens from the Herbarium collection. Left Glenn Wightman showing specimens from the collection to visitors.

6Upper Primary / Secondary
Botanical IllustrationBotanical illustration is an exacting art form that emulates theanatomyofplantstoillustratescientificdescriptionsand is an artistic composition as well.Materials• Sketch paper, hard pencils, and eraser • Tracing paper • Watercolour paper, watercolours and brushes • Knife or razor blade to dissect plant material• Fresh plant material
Discusshowaccuratescientificdrawingsneedtobe.How can an artist achieve accuracy when drawing from live plant materials? Discuss how tools, such as rulers, compass, grids, photocopier and scanner can be used to help make an accurate drawing.
Collect plant materials and choose a plant for the illustration. Lay the plant or parts of the plant to form a composition. Measure and plan an arrangement of theplantmaterialsoallthepartsfitonthepaperwhilemaintaining a pleasing arrangement. Pay attention to the number and type of leaves, petals, length and girth of stems (internodes) and colours. Consult leaf type diagrams and anatomy graphics. It will not be possible to show all phases of the plant simultaneously (bud, bloom, fruit). It may not be possible to show roots if plant has been cut or is in the ground.
Begin the drawing process with a hard-lead pencil onto paper.Trydifferentdrawingmethodstorefinethedrawing. Use botanical sources for examples. Make all the necessary changes on this sheet until the drawing is satisfactory in scale, proportion, shape, and accuracy.
Use tracing paper to lightly transfer the drawing onto watercolour paper. Begin painting with light washes of watercolour with small brushes. Experiment with techniques for creating washes, shading, and textures. Consult botanical drawing references sources for examples.
Betweenthesketchandfinaldrawingphases,comparethedrawing of the plant to a written description, found either onlineorinafieldguide.Checkforaccuracy,scale,andproportion. This written description can be used as label
for a display. Display them with labels telling the name of the artist, name of plant (common and Latin names), medium, date, and text description.
Try a second version of the drawing using pen and black ink. Use lines, dots to create textures and tones. Try “blowing up” a section of the illustration as a separate drawing. Use a grid to enlarge the drawing to scale.
Thefollowingimagesarescientificillustrationsofsomeofthe plants found in the ‘Top End’ of Australia.
POST VISIT ACTIVITIES
Nelumbo nuciferaLotus lily
Nelumbo NuciferalLotus lily

�Upper Primary / Secondary
Cassytha filiformisCurly whitegrass
Dioscorea TransversaLong yam
Pandanus spiralisPandanus
Sarga intransSpear grass
Vitex glabrataBlack plum
Livistona humilis Sand palm
POST VISIT ACTIVITIES

�Upper Primary / Secondary
Seasonal Calendar
Start a seasonal diary in your classroom. Take some time each week to look around the school grounds. Make observations about what is occurring in your local environment. Make notes about:•treesthatarefloweringandfruiting,• birds that are nesting,• insects hatching, and• new plants germinating.
Collect feathers, skins, animal droppings, seeds etc. Make a list of the birds, animals and plants in your school environment. • Track the changes that occur. • Record your observations. • Make a poster showing the changes, include drawings, photographs and descriptions.
You may have access to equipment such as a rain gauge, thermometer and barometer. Record the readings each day and add the information to your data.
In Yolngu science we learn through observation. For example we observe the seasons and we see the changes in time. We watch the land and see changes in the weather patterns. In space we observe the sun and the morning star. The different stars and the moon tell us different things. Yolngu have been learning about how to read science through the moon. We’ve learnt to observe different cycles of the moon. It tells us when it’s a good time for hunting. In different seasons different food items are ready to be eaten, like different plants. Yolngu don’t just hunt for everything at once, but they go according to the different seasons. There are four seasons and Yolngu hunt according to these different seasons. Then each food source is found in abundance at the right time. We read the calendar to know for example when to go and get oysters, it also tells us when different fish is in season and when edible fruit and honey is available.
Also Yolngu sing about these different seasons. They sing about the different stars. They observe and see and learn. For generations and generations people have passed on this knowledge orally. It has never been written down. It has been orally passed down to the next generation through oral history; songs, chants and stories. Raymattja Marika, Yolngu teacher and linguist from Arnhem Land NT
Indigenous Knowledge - Web Site Research
Living KnowledgeIndigenous Knowledge in Science EducationThe Yolngu people have been living in Arnhem Land for thousands of years. They have a unique worldview that connects people to land and sea. Everything in the Yolngu world has a place in a system of relationships. Detailed knowledge of the natural world has been passed on from generation to generation through sacred clan names, songs, ceremony and designs. Today Yolngu have a rich heritage that they strive to maintain and share with other Australians.http://livingknowledge.anu.edu.au/index.htmhttp://livingknowledge.anu.edu.au/learningsites/seacountry/index.htm
Dhakiyarr vs the KingIn �9��, on Woodah Island in remote north-east Arnhem Land,Dhakiyarr speared a policeman, Constable McColl, who hadchained up his wife. This was Dhakiyarr’s land and that washis law. On the advice of missionaries, he went to Darwin toexplain his actions and his people’s ways to the NorthernTerritory Supreme Court. http://www.eniar.org/pdf/dhakiyarrnotes.pdf
12 CanoesWhat �� Canoes achieves in its breadth of knowledge, simplicity of education and seamless weaving of �0,000 years of cultural continuity with today’s technology is simply extraordinary. http://www.��canoes.com.au/
Sites of Conservation SignificanceBlue Mud Bay and associated coastalflood plainsNorthern Territory Department of Natural Resources, Environment, The Arts and Sporthttp://www.nt.gov.au/nreta/environment/conservation/pdf/��_bluemudbay.pdf
Blue Mud Bay Sea Rights - High Court DecisionOn �0 July the High Court of Australia made a decision on the matter known as the Blue Mud Bay Case. Research the history of the case and discuss its impact. http://www.fishing.nt.gov.au/index.html
Charles Darwin - voyages and ideas that shook the world - Australian National Maritime MuseumResearch the history and impact that Charles Darwin had on modern Biology. Think about these ideas in relation to Indigenous traditional knowledge. http://www.anmm.gov.au/site/page.cfm?u=���9
POST VISIT ACTIVITIES

9Upper Primary / Secondary
Art ProjectsBotanical ArtBotanical art can vary according to fashion and the intention of the drawings. At times they are purely scientificdepictionsofplantswithlittleconsiderationofaesthetics. At other times the emphasis has been on the artistic or cultural merit of the illustration. Artists can also combine these elements by balancing attention to detail with beauty of form and composition.
Discuss the difference between an artistic work and a botanical illustration. What makes a botanical illustration? Whatisthedifferencebetweenascientificdrawingandawork of art?
Using a plant specimen paint or draw two different representations of the same plant. Draw a botanical illustration,focusingonthefloweringandsexualpartsofthe plant (you may even want to dissect the plant to record it in greater detail). Using the same specimen, complete a more creative interpretation thinking about the beauty, geographic, historical or cultural associations of the plant.
POST VISIT ACTIVITIES
Fiona HallFiona Hall has drawn this image so accurately experienced botanists are able to identify it by its Latin name - Pandanus spiralis. Fiona also incorporates insect nests into her work, exploring the relationship of host and tenant.
Fiona Hall Pandanus
John Wolseley Baniyala - The Sand Palm Burns and Draws the Sea, frottage and etching
John Wolseley On the last days I took a number of sheets of etching paper to an area of recently burnt Sand palm and Stringy bark scrub. The papers were firmly clipped to a board and I moved them over the burnt stems and twigs of the charred trees. The black fingers and flanks of the trees drew themselves on the paper. They made grazings and stipplings, skid marks and staccato dots.
Each species made different marks – the little palmate hands of the sand palm made filigree versions of themselves; while the crocodile scales of the cycad stems caused more sonorous blotches.
Then I took the papers to Basil Hall’s amazing print workshop and we floated passages of my other etching onto them. The etched images of the sand palm bits and burnt cycad nuts I had picked up on the beach then found themselves next to the carbon marks they had unwittingly made further inland - and these combined to tell their own story without I hope too much interference from a discombobulated artist.
Plant RubbingsCollect leaves and plants from your garden or from the bush.Thickerleaves,workbest;manyflowersaretoodelicate, shapes such as pine needles work well. Flatten your selections in a phone book or between sheets of newsprint under a heavy object for a day or two.
Next place Japanese rice paper, or similar light weight paper on the specimen, and secure with tape or a bulldog clip. Rub one section at a time with crayon or pencil, holding paper with free hand. Fill in details, such as small flowersorinsects.

�0Upper Primary / Secondary
PrintmakingThere are many different ways to make prints including etching, screen prints and linocuts. The following is a simple method which can be applied in the classroom and does not need specialist equipment (although a printing press will result in better quality images).
CollographA collograph is a print made from a collage of items glued toasheetofcardboard,plywoodorsimilarflatmaterial.Pablo Picasso, Juan Gris and Georges Braque were famous for the collagraphs they made.
Materials Needed:• Masonite, plywood, mat board or any thin and durable material that can have items glued to its surface• Acrylic wood glue or craft glue• Water based varnish• Printers ink• Cloth• Print press (alternatively use a spoon or rolling pin)• Paper suitable for etching
Each student will need a piece of pre-cut masonite, ply wood or stiff cardboard that will be used for the plate. Make the plates around �0 cm x �� cm or smaller to facilitate ease of printing and to be in proportion to the plant material.
The collograph plates can be printed in relief (the ink is placed on the highest parts), or intaglio (the ink is placed in the lowest parts) or both. The collagraphs will work best if the materials used are an even thickness.
Making the collographArrange the leaf and plant material on a sheet of paper thesamesizeastheplate.PaintorpourafilmofPVAglue onto the printing plate. Transfer the objects onto the glued surface. Sand or other textured material can also be adhered to the surface of the collograph plate. Press downfirmlytomakesurethematerialsarepermanentlyandfirmlypressedontothegluedsurfaceandwaitforitto dry. Once the plate is dry, brush or roll a coat of shellac or PVA glue over the material you pasted on the plate to make a waterproof surface.
To print the image apply ink to the top surface with a roller or wipe on with a soft cloth or stiff brush. Wipe the edges and remove any excess ink.
Take the inked and wiped plate and place your printing paper on top of your printing plate. Or if using a press place it on the bed of the etching press face up. A sheet of clean newsprint under the plate will keep the bed of the printing press clean and help deter the spread of unwanted ink onto the print.
Apply pressure with a roller or spoon or run through the printing press. Remove the paper, by slowly peeling it from one side. You may need to adjust the printing pressure to achieve the desired result.
If you like your design, you can re-ink the collograph plate and make another print. You can add further detail to your print by hand painting or drawing designs.
Number the prints as described in the Printmaking section of the Project Notes.
POST VISIT ACTIVITIES
Basil Hall and Judy Watson running plant material through the press.

��Upper Primary / Secondary
Nature PoemsVisit a botanical garden or go to a national park or bush land. Find a place on your own to just sit and quietly observe the environment.
� Make two lists. One: list the things you see. Two: write down feelings and thoughts. Combine the two lists into a poem about the experience. Illustrate the poem by making a drawing of one of the observations.
2 Imagineyourselfassomethinginthegarden/bush:anant,abutterfly,acreeper,atree.Writewhatit’sliketobethat thing. What do you see? What do you do? What do you feel? What are the threats? Make an artwork from the same point of view.
POST VISIT ACTIVITIES