Embed Size (px)
Citation preview

SteaKguide
k

There are four major steak cuts that top the list of which steaks to buy – filet mignon, ribeye, New York strip and
T-Bone/Porterhouse. Here’s the lowdown on each cut:
This popular cut is also known as the tenderloin, which is the
perfect name because it is without a doubt the most tender cut of
beef available. The filet mignon is low in fat, mild in flavor and
buttery in texture. The melt-in-your-mouth texture is the calling
card of this steak.
WHICH STEAK SHOULD I BUY?
THE GUIDE TO THE PERFECT STEAK
F I L E T M I G N O N
You love steak with a pure, light beef flavor and
texture so tender you can cut it with a butter knife.
1
Steak is considered by many to be the ultimate meal. Fortunately,
preparing a spectacular steak dinner is easy by following a few
basic steps. The goal of this steak guide is to help anyone cook
up a perfect steak. We’ve included a few pro tips so even the
most proficient steak master might find a new trick or two.
For a memorable steak dinner, it’s critical to start with beef of
the highest quality, like any of the cuts from Snake River Farms.
Whether you choose our top-selling Filet Mignon or go for the
gusto with our Cap of Ribeye, you’ll be amazed at the delicious
difference.

For many, this is the very definition of “steak” due to its high level of
marbling. All that intramuscular fat makes ribeyes the most juicy and
flavorful steak. When cut in the traditional style, there is a savory layer of
fat and the intensely flavored cap. Ribeye filets are cut from the center
or “eye” of the ribeye section for a boneless steak that is easy to cut and
eat with minimal waste.
R I B E Y E
N E W Y O R K S T R I P
You want a steak that’s marbled, juicy and packed full of rich beef flavor.
The New York Strip is a steak house
classic and is known for good marbling
and strong beef flavor. This is a steak
with a definite grain that’s tender, but
pleasingly firm to the bite.
Your idea of a perfect steak is one with
beefy flavor and firm texture you can
really sink your teeth into.
These two well-loved cuts are two-steaks-in-one, with a New York strip on
one side and a tenderloin on the other. T-bones are the smaller of the two
steaks because they’re cut from the front end of the short loin. The
Porterhouse is cut from the larger end of the short loin and has a larger
tenderloin portion.
T - B O N E / P O R T E R H O U S E
You believe “variety is the spice of life” and enjoy having a filet mignon with
your strip steak.
2

OTHER STEAKS TO CONSIDER
F L A T I R O N
The flat iron steak is a favorite of butchers
and beef experts due to its uniform size and
delicious taste. It’s sometimes called a top
blade steak and comes from the shoulder or
chuck. The flat iron features intense marbling,
robust beef flavor and a tender texture but
costs less than other more well-known cuts.
You love well-marbled tender beef, but also
enjoy saving a few bucks on your steak.
The cap of ribeye, also known as deckle steak or spinalis dorsi, is in a
category all it’s own and just might be the best steak available. Look at a
ribeye steak and you’ll see the large eye of meat that’s the center of the cut.
Surrounding this center is cap of ribeye. This beautiful cut has the tenderness
of a filet mignon, the rich marbling of a rib steak and a mouthwatering flavor
and texture all its own.
C A P O F R I B E Y E
You must have the single most flavorful cut of beef available.
3
Steaks cut from the top sirloin are a great value due to their
excellent flavor and lower price relative to the “Big Four” steaks
listed previously. These boneless steaks have little fat and are
well known for their beefy flavor and moderate tenderness.
T O P S I R L O I N
You like a steak that’s lean, full-flavored with a nice chewy bite.

4
preparing your steak

5
D E F R O S T
The best way to thaw a frozen steak is to place it in the
refrigerator and allow to slowly defrost. Place your
packaged steaks on a plate or baking sheet to catch any
liquid that might escape during the thawing process.
Our steaks range in size from 6 ounces all the way up to
3 pounds. Small steaks can thaw in a matter of hours
and the large ones can take a couple days. While we
enjoy a good impromptu grill-fest, planning ahead will
ensure you get the best results possible.
S P E E D T H A W
OK, we get it. Sometimes you just need to eat now and
your steak is still frozen solid. Keep your steaks in their
package, place in a pot or large bowl and place in the
sink. Run a stream of cool water over the steak and fill
the container. Some folks like to keep the water running
to facilitate thawing, but we’ve had good results without
wasting our precious H2O.
Once your steak is fully thawed, remove it from the
packaging, pat dry with a paper towel, loosely cover and
allow to sit at room temperature for up to an hour.
While not critical, this is a great way to let your beef
warm slightly and improve the end results.

O I L
A neutral vegetable oil is highly recommended for any
steak preparation in a skillet. Canola is a common and
popular choice. We frequently use grape seed oil in our
kitchen because it has a light clean flavor and a high
smoke point of about 420 degrees.
S A L T & P E P P E R
A well-seasoned steak is a delicious steak. Kosher salt is
our standby for salt, although we like having a nice flakey
finishing salt on hand to shower on our steak before serv-
ing. There are many schools of thought on when to salt.
Our go-to method is to apply liberally right before placing
in the skillet or on the grill.
There’s only one kind of pepper in our book and that’s
fresh-ground. The fine, dried variety is not as flavorful.
You can add pepper when you salt your steaks. Perfec-
tionists wait to when their steak has been removed from
the grill or skillet to avoid any chance of imparting a burnt
flavor to the meat.
T H E R M O M E T E R
A good quality instant-read thermometer is a must for
cooking a perfect steak. There are numerous options
available, but we use and recommend the high quality
and accurate thermometers from Thermoworks.
The Thermapen (about $100) is the top pick by top
chefs and particular home cooks, but we’ve had
great results with the Thermopop which runs
about $30.
6

7
Steak Temperature Guide
Here are the magic numbers you’ll need to determine when your steak is cooked to the degree of doneness you most
prefer. The internal temp is when the steak should be removed from the heat. The steak will continue to cook so the
temperature will rise during the rest period.
P R E F E R E N C E D E S C R I P T I O N I N T E R N A L T E M P
Rare Red center, very cool 110°F
Medium Rare Red, warm center 120°F
Medium Pink throughout 130°F
Medium-Well Pink center 140°F
Well No pink Not recommended
Consuming raw or undercooked meats may increase your risk of food-borne illness. The USDA
recommends an internal temperature for beef of 145°F and as resting period of at least 3 minutes.
8
cooking in the kitchen
9
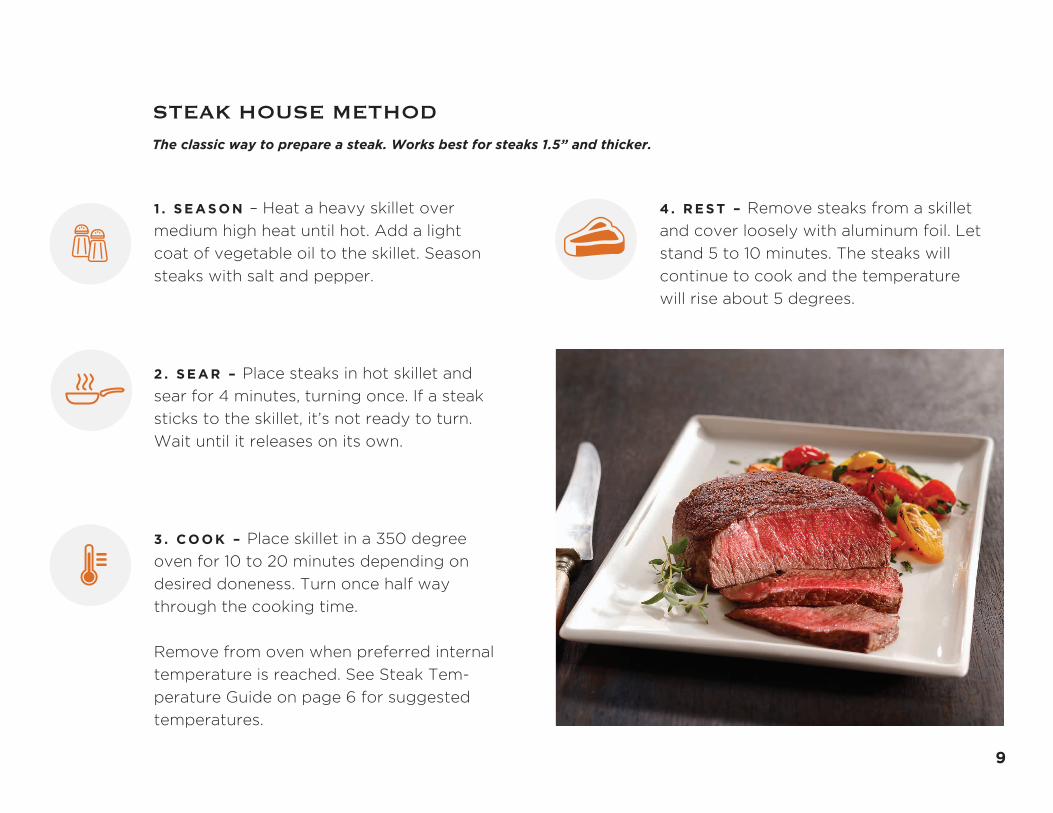
1 . S E A S O N – Heat a heavy skillet over
medium high heat until hot. Add a light
coat of vegetable oil to the skillet. Season
steaks with salt and pepper.
2 . S E A R – Place steaks in hot skillet and
sear for 4 minutes, turning once. If a steak
sticks to the skillet, it’s not ready to turn.
Wait until it releases on its own.
3 . C O O K – Place skillet in a 350 degree
oven for 10 to 20 minutes depending on
desired doneness. Turn once half way
through the cooking time.
Remove from oven when preferred internal
temperature is reached. See Steak Tem-
perature Guide on page 6 for suggested
temperatures.
STEAK HOUSE METHODThe classic way to prepare a steak. Works best for steaks 1.5” and thicker.
4 . R E S T – Remove steaks from a skillet
and cover loosely with aluminum foil. Let
stand 5 to 10 minutes. The steaks will
continue to cook and the temperature
will rise about 5 degrees.

10
1 . S E A S O N – Heat a heavy skillet (cast iron
is ideal) over medium heat until hot. Add a
light coat of vegetable oil to the skillet.
Season top side of steaks with salt and
pepper.
2 . S E A R – Place steaks, seasoned side
down, in skillet and sear 4 to 5 minutes until
nicely browned. Season the top side of the
steak with salt and pepper. If the steak
sticks to the skillet, it’s not ready to turn.
Wait until it releases on its own.
3 . F L I P – Turn steaks over and allow to
cook for an additional 3 to 5 minutes. After
2 to 3 minutes, use a thermometer to test
the thickest part of the steak. When the
temperature reaches the desired level,
remove from the skillet. Remove steaks
from a skillet and serve.
SEARINGA fast and easy way to cook steaks 1.25” or thinner.

11
1 . S E A S O N – Heat oven to 275 degrees.
Season steak with salt and pepper. Cover a
baking sheet with foil and place a metal rack
in the middle. The idea is to elevate the
steak from the pan.
2 . C O O K – Place the pan, grill and steak in
the oven. Bake until the steak reaches the
temperature that matches your preference.
See the chart for exact temperatures. For
medium rare, cook until 120 degrees. This
can take up to 60 minutes, but begin check-
ing the internal temperature at 30 minutes.
3 . R E S T – Remove steak from the oven,
loosely cover with foil and allow to rest for
10 to 15 minutes.
This method is the darling of many “how to cook a steak” tutorials. The Reverse Sear cooks a steak at low temp,
then adds a nice crust as the finishing step. This is a good technique for thicker steaks.
REVERSE SEAR
4 . S E A R – Add a light coating of vegetable
oil to a heavy skillet and heat over high
heat until hot. Sear steak on each side for
60 to 90 seconds to form a beautiful crust.
Serve.

1 . H E A T W A T E R – Place your immersion
circulator in a container with water and set
the temperature. See the chart to deter-
mine the best temperature to achieve the
results you desire.
2 . S E A S O N – Use a generous amount of
salt and pepper on both sides of the steak.
3 . P A C K A G E & S E A L – Use a vacuum
sealer to seal the steak in a bag. You can
also use a self-sealing plastic bag by placing
the bag in a container of water, being care-
ful to keep the lip above the water line. The
water pressure will displace the air as the
steak drops deeper into the water. Seal the
bag when all or most of the air has been
pushed out of the bag.
4 . C O O K – Place the sealed bag into the
water. We recommend cooking your steak
a minimum of one hour and no longer than
two hours.
P R E F E R E N C E T E M P E R A T U R E T I M E
Rare 125 to 129°F 60 to 120 min
Medium Rare 130 to 135°F 60 to 120 min
Medium 135 to 145°F 60 to 180 min
Medium-Well 145 to 155°F 60 to 180 min
Well Not recommended
12
Cook consistently perfect steak using a precision sous vide cooker or immersion circulator.
SOUS VIDE
5 . H E A T S K I L L E T – Add a light coat of
vegetable oil to a heavy skillet. Place on a
burner set to medium high heat.
6 . S E A R – Remove the steak from the
sealed bag. Pat the steak dry and place in
the hot pan. Cook about 1 to 2 minutes per
side to create a brown, crisp crust. Steaks
cooked sous vide do not require resting so
you can serve immediately.

outdoor cooking
13

14
1 . S E A S O N – Turn on grill to medium heat.
Season grill with a light coat of vegetable oil.
Season steaks with salt and pepper or your
favorite rub.
2 . S E A R – Place steak on hot grill, close lid
and allow to cook for 2 minutes. Lift steak
off the grill, turn 45 degrees and place back
on the grill. Allow to cook for 2 more min-
utes.
3 . F L I P – Turn steak over and cook for 2
minutes. Lift steak off the grill, turn 45
degrees and place back on the grill. Allow to
cook for 2 more minutes. For medium rare,
the total cook time is 8 minutes. Check the
temperature of the thickest part of the steak
to determine when it is done to your prefer-
ence. See chart for temperature guidelines.
DIRECT GRILLING – GAS GRILLA great way to cook steaks 1.5” or thinner in the great outdoors.
4 . R E S T – Remove steaks from a skillet and
cover loosely with aluminum foil. Let stand 5
minutes. The steaks will continue to cook and
the temperature will rise about 5 degrees.
Serve.

4 . C O O K – Turn off half of the burners on
the grill and place the steaks on the side so
they are not directly above flame. Close the
lid and allow to cook for 10 to 20 minutes,
depending on desired doneness. Turn once
half way through the cooking time. Remove
from the grill when preferred internal tem-
perature is reached. See chart for suggest-
ed temperatures.
5 . R E S T – Remove steaks from a skillet and
cover loosely with aluminum foil. Let stand
5 to 10 minutes. The steaks will continue to
cook and the temperature will rise about 5
degrees. Serve.
15
1 . S E A S O N – Turn on grill to medium heat
and allow to come to temperature. Season
grill with a light coat of vegetable oil to the
skillet. Season steaks with salt and pepper.
2 . S E A R – Place steak on hot grill, close lid
and allow to cook for 2 minutes. Lift steak
off the grill, turn 45 degrees and place back
on the grill. Allow to cook for 2 more min-
utes.
3 . F L I P – Turn steak over and cook for 2
minutes. Lift steak off the grill, turn 45
degrees and place back on the grill. Allow
to cook for 2 more minutes. Check the
temperature of the thickest part of the
steak.
INDIRECT GRILLING – GAS GRILL
Use your gas grill like an oven to cook thick, large steaks.

16
1 . S E A S O N – Spread coals under half the
surface area of your grill and leave the
other side empty. Spread cooking oil lightly
over the grill. Ignite the coals and keep the
grill lid closed. Season steak liberally with
salt and pepper or your favorite rub.
2 . S E A R – Place the steaks directly over
the coals and cook for about 4 minutes,
cooking two minutes per side. For the best
grill marks, rotate the steak 90 degrees
after the first minute on each side.
3 . C O O K – Move your steaks to the “cool”
side of the grill that does not have coals
directly under it. Cover the grill and let
them cook for 10 to 20 minutes, depending
on desired doneness. Remove from grill
when preferred internal temperature is
reached. See chart for suggested tempera-
tures.
Utilize the high heat generated by a charcoal grill to cook steaks 1.5” thick or less.
INDIRECT GRILLING – CHARCOAL GRILL
4 . R E S T – Cover steaks loosely with alumi-
num foil and let rest for 10 minutes, where
they will continue to cook, raising internal
temperature another 5 degrees. Serve.

17
1 . S E A S O N – Heat one section of your grill
while leaving an area that is not directly
heated by flame. Keep the grill lid closed to
create an oven-like atmosphere that reaches
350 degrees. Season steaks with salt and
pepper or your favorite rub.
2 . R O A S T – Place your steaks on the “cool”
side of the grill, away from the direct flame.
Close the lid and cook until within 5 degrees
of your desired doneness, 10 to 20 minutes.
See chart for suggested temperatures.
3 . S E A R – Remove Steaks and turn up the
heat on the grill to high heat. Return the
steaks to the “hot” side of the grill, with flame
directly underneath. Cook for three minutes,
flipping the steak over after one and a half
minutes.
Your charcoal grill is an excellent tool to prepare a steak with a beautifully charred crust and an even, pink warm center.
REVERSE SEAR – CHARCOAL GRILL
4 . R E S T – Remove the steak from the grill
and loosely tent with aluminum foil. Let
stand for 10 minutes. The steaks will contin-
ue to cook and the temperature will rise
about 5 degrees. Serve.

18
1 . S E A S O N – Liberally apply salt and pepper
or your favorite rub to the steak. Estranger
recommends pouring the seasoning onto the
palm of your hand and massaging it into the
meat.
2 . S M O K E – Fire up the grill, set to Smoke
and allow steak to take on the flavor for 25 to
30 minutes.
3 . P R E H E A T – After your steak has smoked,
remove it from the grill. Turn control to High
and let grill preheat for 10 to 15 minutes so it is
running at the highest possible temperature.
Your wood pellet grill is not just for smoking, it’s also great for cooking a steak.
TRAEGER GRILL
4 . R E S T – Return steak to the hot grill and
cook until it reaches the desired doneness.
Use a thermometer to determine the exact
time to remove from the grill. See the tem-
perature chart for specific details. Finish
with a pat of butter. Serve.

19
1 . S E A S O N - Spread coals under half the
surface area of your grill and leave the
other side empty. Spread cooking oil lightly
over the grill. Ignite the coals and keep the
grill lid closed. Season steak liberally with
salt and pepper or your favorite rub.
2 . S E A R – Place the steaks directly over
the coals and cook for about 4 minutes,
cooking two minutes per side. For the best
grill marks, rotate the steak 90 degrees
after the first minute on each side.
3 . C O O K – Move your steaks to the “cool”
side of the grill that does not have coals
directly under it. Cover the grill and let
them cook for 10 to 20 minutes, depending
on desired doneness. Remove from grill
Utilize the high heat generated by a charcoal grill to cook steaks 1.5” thick or less.
INDIRECT GRILLING – CHARCOAL GRILL
when preferred internal temperature is reached.
See chart for suggested temperatures.
4 . R E S T – Cover steaks loosely with aluminum
foil and let rest for 10 minutes, where they will
continue to cook, raising internal temperature
another 5 degrees. Serve.

WE hope youenjoy your steak!
cook.snakeriverfarms.com
VISIT OUR WEBSITE FOR MORE GUIDES AND RECIPES AT:


![SuperIso v3.0: A program for calculating flavor physics ... · arXiv:0808.3144v3 [hep-ph] 10 Sep 2009 SuperIso v3.0: A program for calculating flavor physics observables in 2HDM](https://img.pdfslide.net/doc/110x75/60d92156ffe186446e1e2fcb/superiso-v30-a-program-for-calculating-iavor-physics-arxiv08083144v3-hep-ph.jpg)