Embed Size (px)
Citation preview

W&M ScholarWorks W&M ScholarWorks
Undergraduate Honors Theses Theses, Dissertations, & Master Projects
5-2018
Procedural Generation and Rendering of Ink Bamboo Painting Procedural Generation and Rendering of Ink Bamboo Painting
Yangyang He
Follow this and additional works at: https://scholarworks.wm.edu/honorstheses
Part of the Asian Art and Architecture Commons, Chinese Studies Commons, Graphic Design
Commons, Graphics and Human Computer Interfaces Commons, Interdisciplinary Arts and Media
Commons, Other Computer Sciences Commons, and the Other Film and Media Studies Commons
Recommended Citation Recommended Citation He, Yangyang, "Procedural Generation and Rendering of Ink Bamboo Painting" (2018). Undergraduate Honors Theses. Paper 1177. https://scholarworks.wm.edu/honorstheses/1177
This Honors Thesis is brought to you for free and open access by the Theses, Dissertations, & Master Projects at W&M ScholarWorks. It has been accepted for inclusion in Undergraduate Honors Theses by an authorized administrator of W&M ScholarWorks. For more information, please contact [email protected].
Procedural Generation and Rendering
of Ink Bamboo Painting
Yangyang He
Computer Science Department
College of William and Mary,
Williamsburg, VA 23187-8795, USA
Email: [email protected]
Abstract
This thesis describes an algorithm that generates various ink
bamboo paintings. First, a completely procedural model is used
to generate the geometric shape of bamboos. The model uses a
grammar-like approach that recursively generates new parts of
the bamboo in a randomized manner. The random parameters
are bounded by rules that simulate the natural form of bamboo.
The structure of the bamboo is represented line segments with
directions. Various ink stroke sprites of stalk, branch, or leaf
shapes are mapped to line segments, using reverse mapping
and bilinear sampling to eliminate aliasing e↵ects. The sprites
are mapped in di↵erent degrees of transparency to simulate the
e↵ect of various shades of ink produced by changes in forces
when using an ink brush. Finally, a seal is applied to sign the
work and enhance the visual e↵ect.
The algorithm is implemented in Python 3 and can be run on
any computer with the imageio library installed. The output of
the program is saved in a PNG image file, which can be used
for various types of illustrations. This model is able to produce
unique images during every run, and would significantly reduce
human labor in painting stylistically similar artworks of ink bam-
boo paintings.
ii
Acknowledgment
This thesis could not be done without the support from my
advisor, my committee members, my family, and friends.
Foremost, I would like to express my sincere gratitude to my
honors advisor, Dr. Timothy Davis, for his patience, immense
knowledge, and continuous support during my project. His
guidance helped me in all time of my undergraduate study and
lead me into the field of computer graphics. I would like to thank
the rest of my thesis committee: Professor James Deverick and
Dr. Chun-yu Lu, for their encouragement, insightful comments,
and instructive feedback provided during my thesis defense.
Besides my committee, I would like to thank Dr. Pieter
Peers, for his informative lectures in Computer Graphics and
Game Design. Both of the courses provided me substantial
technical grounds to build up this model. I would also like
to thank Dr. Xin Conan-Wu. Her Chinese Art History class
inspired me to come up with this inter-disciplinary research topic.
Lastly, I am immeasurably grateful to my family and friends for
their patience and encouragement that fueled me throughout my
final year at College of William & Mary.
iii
Contents
1 Introduction 1
1.1 Art Background . . . . . . . . . . . . . . . . . . . . . . . . . . . . . . . . . 1
1.2 Related Work . . . . . . . . . . . . . . . . . . . . . . . . . . . . . . . . . . 2
2 Procedural Generation 4
2.1 Structural elements . . . . . . . . . . . . . . . . . . . . . . . . . . . . . . . 4
2.2 Quantity of Stalks . . . . . . . . . . . . . . . . . . . . . . . . . . . . . . . . 6
2.3 Positions of Stalks . . . . . . . . . . . . . . . . . . . . . . . . . . . . . . . . 7
2.4 Growth of Stalks . . . . . . . . . . . . . . . . . . . . . . . . . . . . . . . . . 8
2.5 Branches . . . . . . . . . . . . . . . . . . . . . . . . . . . . . . . . . . . . . 9
2.6 Leaves . . . . . . . . . . . . . . . . . . . . . . . . . . . . . . . . . . . . . . 10
2.7 Result of Generation . . . . . . . . . . . . . . . . . . . . . . . . . . . . . . 11
3 Rendering 12
3.1 Creation of Sprites . . . . . . . . . . . . . . . . . . . . . . . . . . . . . . . 12
3.2 Reverse Texture Mapping . . . . . . . . . . . . . . . . . . . . . . . . . . . 13
3.3 Applying Di↵erent Shades . . . . . . . . . . . . . . . . . . . . . . . . . . . 16
3.4 Signature Seal . . . . . . . . . . . . . . . . . . . . . . . . . . . . . . . . . . 17
3.5 Output . . . . . . . . . . . . . . . . . . . . . . . . . . . . . . . . . . . . . . 17
4 Results 19
iv
4.1 Structure Graph . . . . . . . . . . . . . . . . . . . . . . . . . . . . . . . . . 19
4.2 Rendered Image . . . . . . . . . . . . . . . . . . . . . . . . . . . . . . . . . 19
4.3 Structure Data . . . . . . . . . . . . . . . . . . . . . . . . . . . . . . . . . . 20
4.4 Performance Analysis . . . . . . . . . . . . . . . . . . . . . . . . . . . . . 22
4.5 Applications . . . . . . . . . . . . . . . . . . . . . . . . . . . . . . . . . . . 22
4.6 Future Work . . . . . . . . . . . . . . . . . . . . . . . . . . . . . . . . . . . 23
5 Conclusions 24
References 25
Appendices 27
A Code listings 28
v

vi
Chapter 1
Introduction
1.1 Art Background
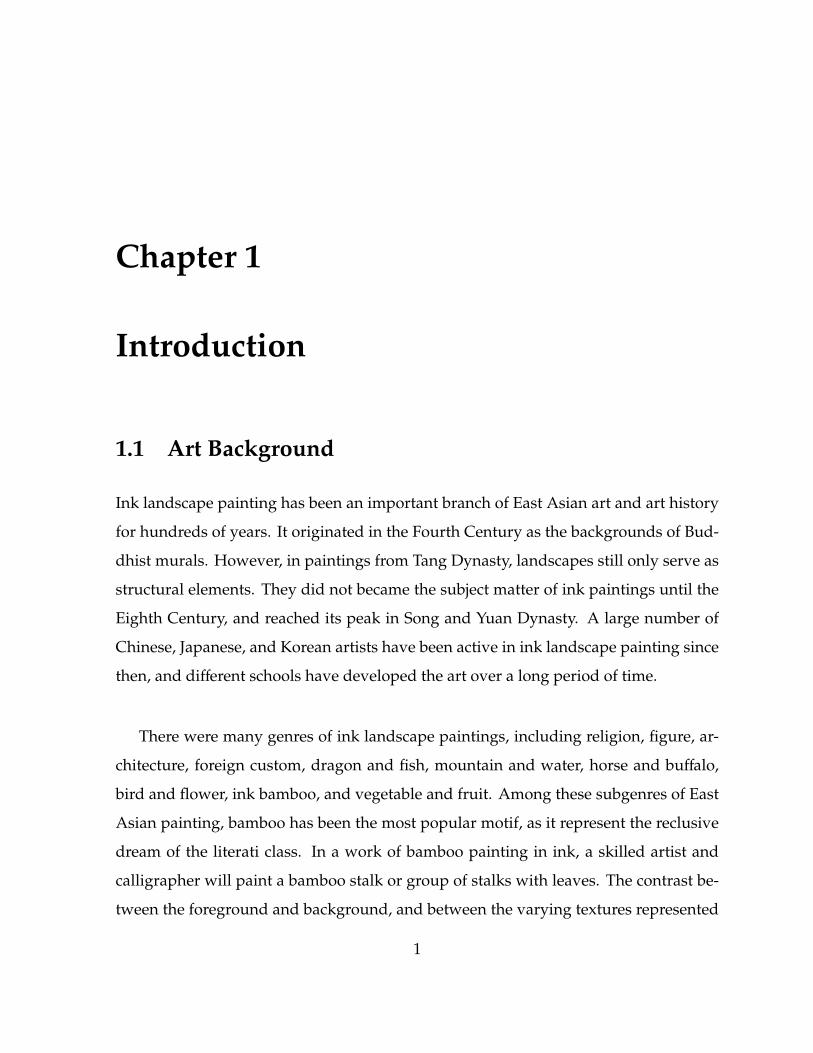
Ink landscape painting has been an important branch of East Asian art and art history
for hundreds of years. It originated in the Fourth Century as the backgrounds of Bud-
dhist murals. However, in paintings from Tang Dynasty, landscapes still only serve as
structural elements. They did not became the subject matter of ink paintings until the
Eighth Century, and reached its peak in Song and Yuan Dynasty. A large number of
Chinese, Japanese, and Korean artists have been active in ink landscape painting since
then, and di↵erent schools have developed the art over a long period of time.
There were many genres of ink landscape paintings, including religion, figure, ar-
chitecture, foreign custom, dragon and fish, mountain and water, horse and bu↵alo,
bird and flower, ink bamboo, and vegetable and fruit. Among these subgenres of East
Asian painting, bamboo has been the most popular motif, as it represent the reclusive
dream of the literati class. In a work of bamboo painting in ink, a skilled artist and
calligrapher will paint a bamboo stalk or group of stalks with leaves. The contrast be-
tween the foreground and background, and between the varying textures represented
1

Figure 1.1: A Page from Wu Zhen’s Ink Bamboo Album (Yuan Dynasty)
by the stalks and the leaves, gave scope to the painter to demonstrate his or her mastery
with an inkpot and a brush. [14]
Each famous bamboo painter developed his or her own style. For example, the work
of Wu Zhen (Yuan Dynasty), as seen in Figure 1.1, features lighter ink strokes, while
Zhen Banqiao (Qing Dynasty) preferred stronger contrasts (Figure 1.2). Because of the
volume of bamboo works painted over time, ink bamboo remains the most popular
landscape genre even in modern days, and the production of a work of ink bamboo
became one of the standard subjects to which an East Asian student could be set in a
competitive examination.
1.2 Related Work
In the digital era, the modeling and rendering on ink paintings has attracted much
attention from graphics researchers. Various research work has been done on the mod-
eling of trees and 2-D rendering of ink paintings (Chu and Tai 2005[1]; Huang et al.
2

Figure 1.2: A ink bamboo work by Zheng Banqiao (Qing Dynasty)
2003[2]; Wang and Wang 2007[4]; Way et al. 2002[6]; Xie et al. 2011[7]; Xu et al. 2002;
Yang et al. 2012[9]; Yu et al. 2002[11]; Yu et al. 2003[12]). Other researchers pushed
their work into three dimensional space (Zhang et al. 1999[13]; Li and Yu 2006[3]).
In terms of procedural generation, each species of vegetation would require a dif-
ferent model to generate. Wang et al. [5] developed a model in 2014 that does 3-D
renderings of oak and elm trees; however, despite bamboo being an important subject
in ink landscape painting, less work has been done on the modeling and rendering of
ink bamboo painting. This paper fills the vacancy in this field of research by intro-
ducing a new procedural method that generates 2-D bamboo models and renders the
structure by mapping various styles of ink strokes.
3
Chapter 2
Procedural Generation
Through observation of ink bamboo paintings from both ancient and contemporary
artists, I noticed that, although each bamboo looks di↵erent, the structure of the bamboo
follows certain patterns. Thus, a procedural algorithm, as opposed to a manual one,
could be used to generate the forms of the bamboo to produce structurally di↵erent,
yet visually similar, models. I set up a group of random parameters within certain a
bounding range, to determine the quantity, position, height, length, and orientation of
the bamboo stalks, branches, and leaves.
2.1 Structural elements
Bamboo features tree-like structures. With three levels of nodes: Stalk, Branch, and
Leaf, similar to the reported technique in [Wang et al. 2014]. These nodes are connected
by Joints and are grouped into lists.
A Joint is an innovative structure introduced by this paper, that connects di↵erent
parts of the bamboo. It has a position, which is a 2-D point, a parent, and two children.
Joints are represented by ”X”s in the structure graph. They are not visible in the ren-
4

Figure 2.1: An example of generated bamboo structure
dered image.
A Stalk represents one independent bamboo. It has a root and a top, both of
which are joints, that represent the bottom end and the top end of the current stalk,
respectively. Stalk has a list of line segments (representing stalk segments), a list of
joints, and a list of branches that grow out from the main stalk of the bamboo. Stalk
also has a direction field that stores a 2-D vector representing the upward direction of
the top segment of the current stalk. Stalks are represented by black line segments in
the structure graph, as shown in Figure 2.1.
A Branch is structurally very similar to a stalk, except that instead of having a list
of child branches, it has a list of leaves that grow from the current branch. Each Leaf is
represented by a line segment. Branches are represented by blue lines while leaves are
represented by green lines in the structure graph.
5
2 4 6 80
5
10
15
Computed by Wolfram|Alpha
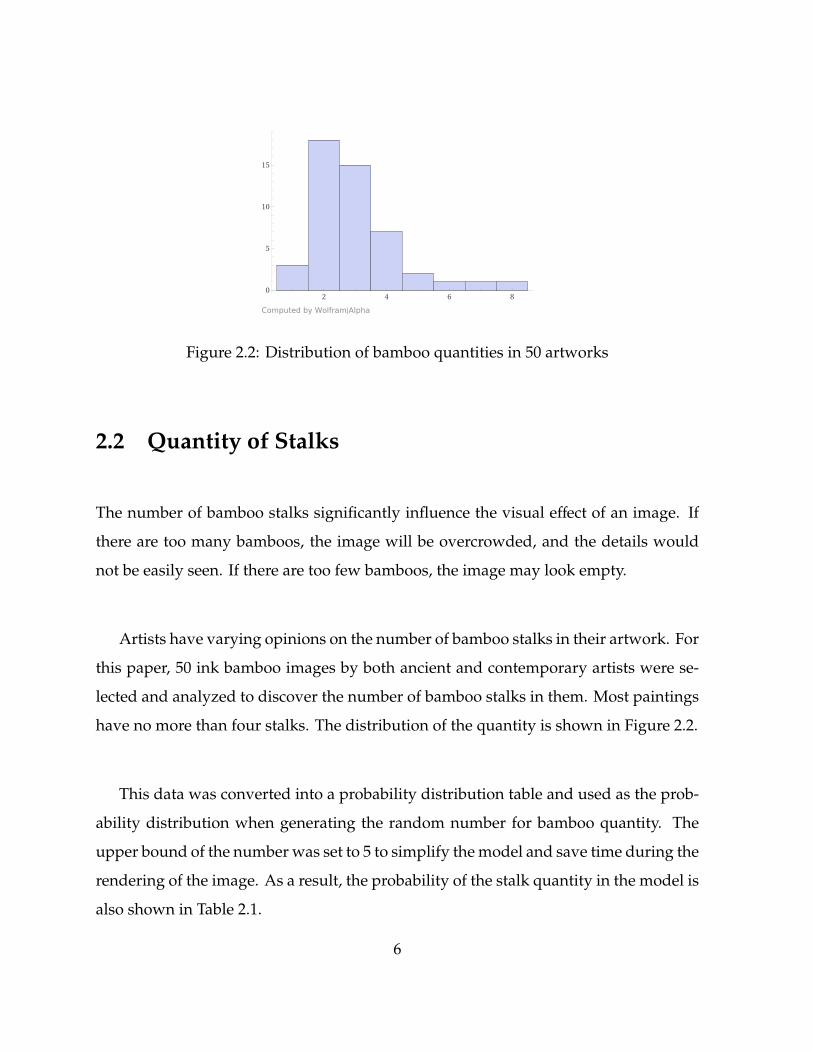
Figure 2.2: Distribution of bamboo quantities in 50 artworks
2.2 Quantity of Stalks
The number of bamboo stalks significantly influence the visual e↵ect of an image. If
there are too many bamboos, the image will be overcrowded, and the details would
not be easily seen. If there are too few bamboos, the image may look empty.
Artists have varying opinions on the number of bamboo stalks in their artwork. For
this paper, 50 ink bamboo images by both ancient and contemporary artists were se-
lected and analyzed to discover the number of bamboo stalks in them. Most paintings
have no more than four stalks. The distribution of the quantity is shown in Figure 2.2.
This data was converted into a probability distribution table and used as the prob-
ability distribution when generating the random number for bamboo quantity. The
upper bound of the number was set to 5 to simplify the model and save time during the
rendering of the image. As a result, the probability of the stalk quantity in the model is
also shown in Table 2.1.
6
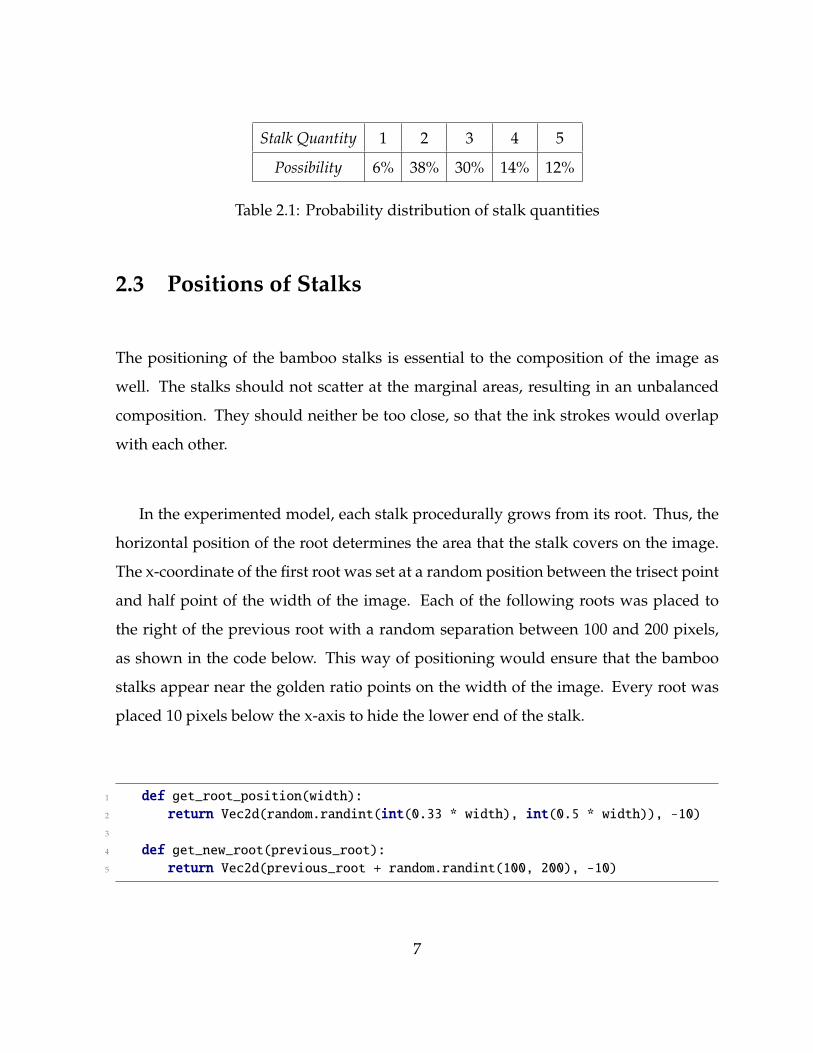
Stalk Quantity 1 2 3 4 5
Possibility 6% 38% 30% 14% 12%
Table 2.1: Probability distribution of stalk quantities
2.3 Positions of Stalks
The positioning of the bamboo stalks is essential to the composition of the image as
well. The stalks should not scatter at the marginal areas, resulting in an unbalanced
composition. They should neither be too close, so that the ink strokes would overlap
with each other.
In the experimented model, each stalk procedurally grows from its root. Thus, the
horizontal position of the root determines the area that the stalk covers on the image.
The x-coordinate of the first root was set at a random position between the trisect point
and half point of the width of the image. Each of the following roots was placed to
the right of the previous root with a random separation between 100 and 200 pixels,
as shown in the code below. This way of positioning would ensure that the bamboo
stalks appear near the golden ratio points on the width of the image. Every root was
placed 10 pixels below the x-axis to hide the lower end of the stalk.
1 def get_root_position(width):2 return Vec2d(random.randint(int(0.33 * width), int(0.5 * width)), -10)3
4 def get_new_root(previous_root):5 return Vec2d(previous_root + random.randint(100, 200), -10)
7

Figure 2.3: Growing process of a stalk
2.4 Growth of Stalks
For each root, a new stalk was constructed. A random integer between 3 and 5 was
chosen as the number of segments of that stalk. The grow() method of the stalk was
called the corresponding number of times.
During each call, a new segment of a random length grew upwards in a slightly
rotated direction from the current top of the stalk. The first segment rotated [0, 10]
degrees, and the proceeding segments rotated [0, 5] degrees in the same direction. The
length fell between that of the shortest and longest stalk texture obtained (in the range
[242, 335]). New segments of the same stalk rotated towards the same side to create
the bending form of the bamboo. A new Joint was constructed as the new top of the
stalk. This process is shown in the code below and illustrated in Figure 2.3.
1 def grow(self):2 rand_length = get_segment_length()
3 rand_angle = get_random_angle()
4 new_seg = Segment(self.top.position, \
5 self.direction.rotate(rand_angle * self.bend_side), rand_length)
6 self.top = Joint(new_seg.get_end().x, new_seg.get_end().y, new_seg)
8
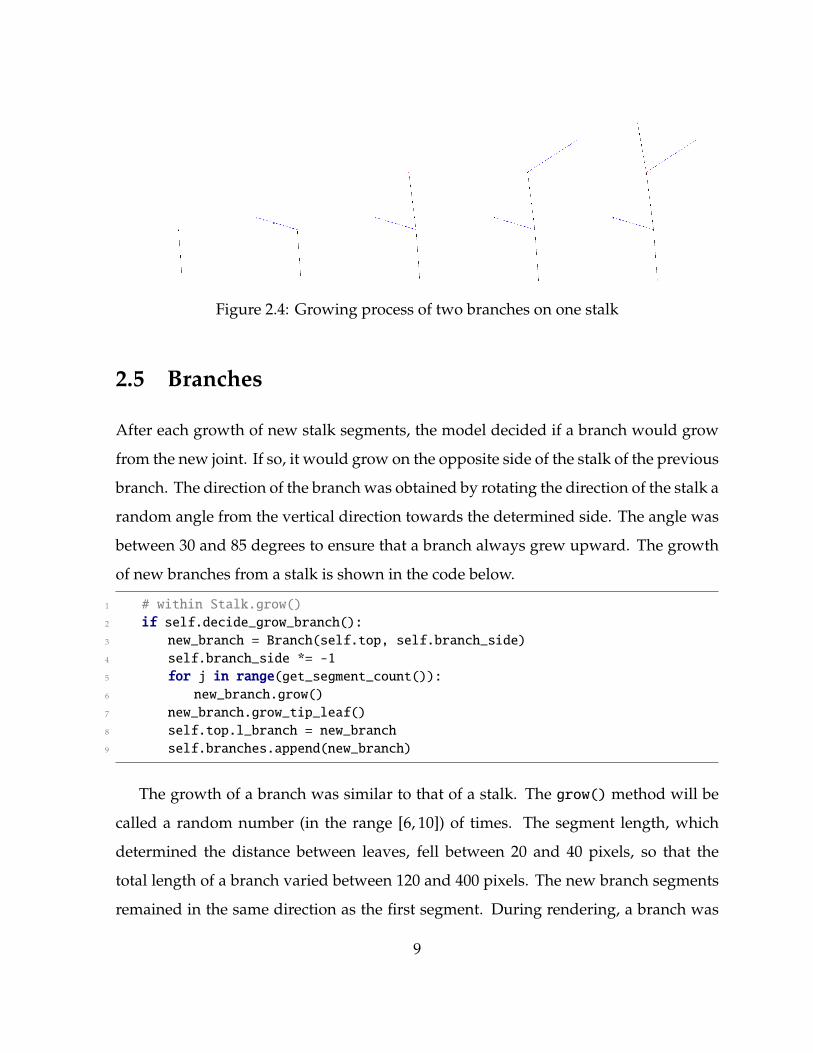
Figure 2.4: Growing process of two branches on one stalk
2.5 Branches
After each growth of new stalk segments, the model decided if a branch would grow
from the new joint. If so, it would grow on the opposite side of the stalk of the previous
branch. The direction of the branch was obtained by rotating the direction of the stalk a
random angle from the vertical direction towards the determined side. The angle was
between 30 and 85 degrees to ensure that a branch always grew upward. The growth
of new branches from a stalk is shown in the code below.
1 # within Stalk.grow()
2 if self.decide_grow_branch():3 new_branch = Branch(self.top, self.branch_side)
4 self.branch_side *= -1
5 for j in range(get_segment_count()):6 new_branch.grow()
7 new_branch.grow_tip_leaf()
8 self.top.l_branch = new_branch
9 self.branches.append(new_branch)
The growth of a branch was similar to that of a stalk. The grow() method will be
called a random number (in the range [6, 10]) of times. The segment length, which
determined the distance between leaves, fell between 20 and 40 pixels, so that the
total length of a branch varied between 120 and 400 pixels. The new branch segments
remained in the same direction as the first segment. During rendering, a branch was
9
considered as a single line segment, whose origin was at the joint with the stalk and
end was at the tip of the branch. The growth of a branch is shown in the code below.
Figure 2.4 shows the process of growing two branches on a single stalk.
1 def grow(self):2 seg_length = random_seg_length()
3 leaf_length = random_leaf_length()
4 new_seg = Segment(self.top.position, self.direction, seg_length)
5 self.top = Joint(new_seg.get_end().x, new_seg.get_end().y, new_seg)
2.6 Leaves
After each growth of new branch segments, one leaf of random length grew at alternate
sides of the branch to simulate the alternate leaf pattern of bamboo, as shown in the
left of Figure 2.5. The angle between the leaf direction and the branch direction was
between 30 and 45 degrees. This process is shown in the code below.
1 # within Branch.grow()
2 # grow one leaf to each side at the joint
3 leaf_angle = random_leaf_angle()
4 leaf = Segment(self.top.position, \
5 self.direction.static_rotate(leaf_angle * self.leaf_side), leaf_length)
6 self.leaf_side *= -1
7 self.top.l_branch = leaf
8 self.leaves.append(leaf)
9 self.joints.append(self.top)
10 self.segments.append(new_seg)
11 self.count = len(self.segments)
At the tip of each branch, one leaf facing toward the direction of the branch was
added, as shown below. The generated leaf pattern is shown in the right of Figure 2.5.
1 def grow_tip_leaf(self):2 leaf_length = random_leaf_length()
3 leaf = Segment(self.top.position, self.direction, leaf_length)
4 self.top.l_branch = leaf
5 self.leaves.append(leaf)
10
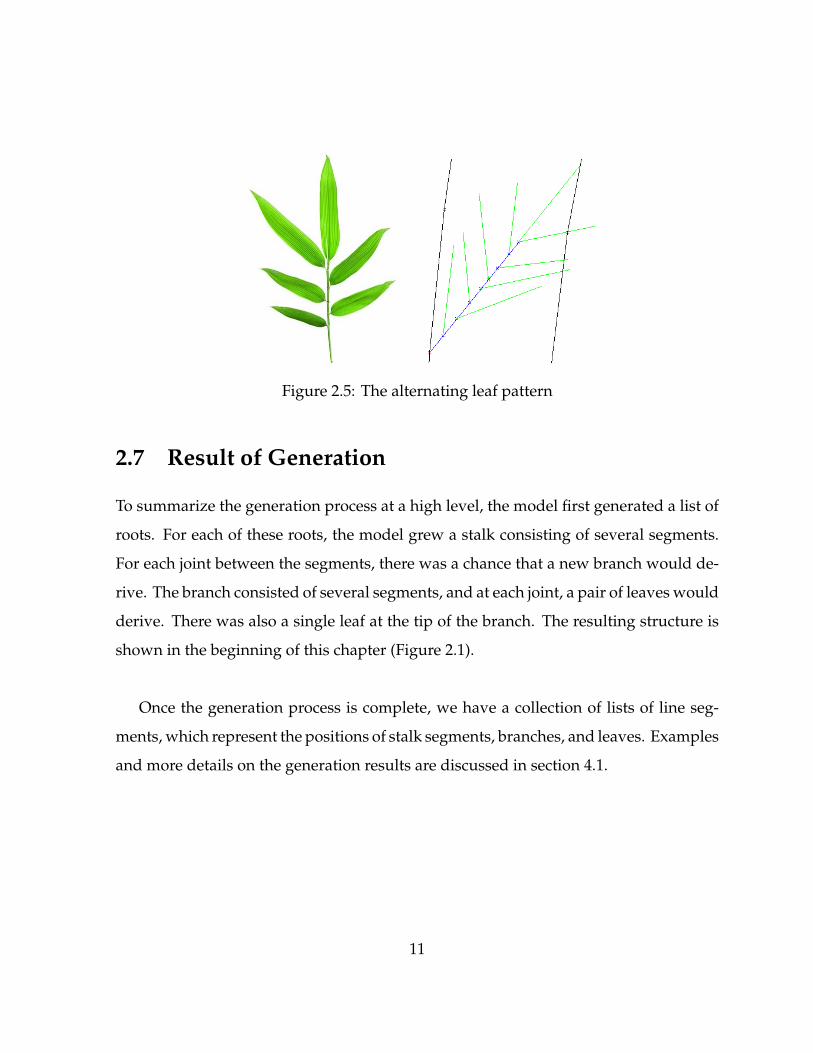
Figure 2.5: The alternating leaf pattern
2.7 Result of Generation
To summarize the generation process at a high level, the model first generated a list of
roots. For each of these roots, the model grew a stalk consisting of several segments.
For each joint between the segments, there was a chance that a new branch would de-
rive. The branch consisted of several segments, and at each joint, a pair of leaves would
derive. There was also a single leaf at the tip of the branch. The resulting structure is
shown in the beginning of this chapter (Figure 2.1).
Once the generation process is complete, we have a collection of lists of line seg-
ments, which represent the positions of stalk segments, branches, and leaves. Examples
and more details on the generation results are discussed in section 4.1.
11
Chapter 3
Rendering
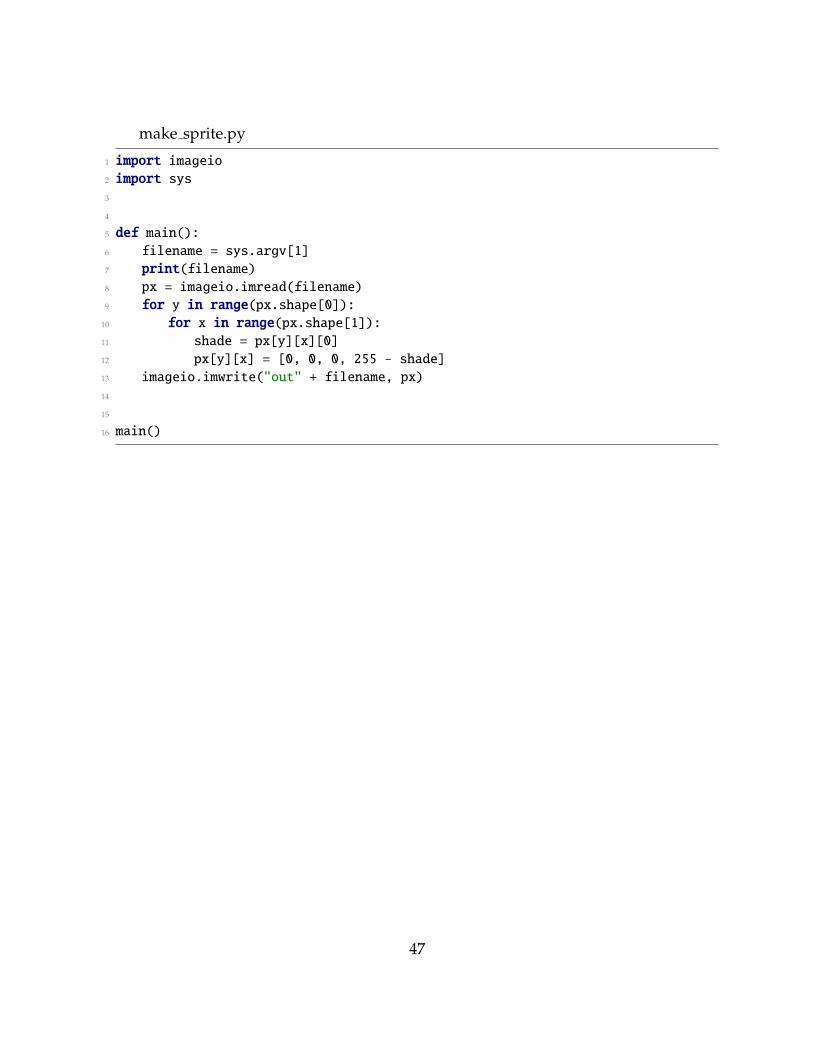
3.1 Creation of Sprites
The ink stroke sprites were created by cropping out single stalks segments, branches,
and leaves from Natali Myasnikova’s ”Japanese Bamboo Illustration”. They were then
rotated so that their local y-axes (the lines that connects the two ends of stalks and
branches or the bottom and tip of leaves) align vertically.
In order to prevent unwanted overlap during rendering, di↵erent shades of black
in the sprites needed to be changed to di↵erent degrees of transparency (or opacity),
and the white backgrounds of the sprites needed to be changed to transparent, as done
by the code below.
1 px = imageio.imread(filename)
2 for y in range(px.shape[0]):3 for x in range(px.shape[1]):4 shade = px[y][x][0]
5 px[y][x] = [0, 0, 0, 255 - shade]
6 imageio.imwrite("out" + filename, px)
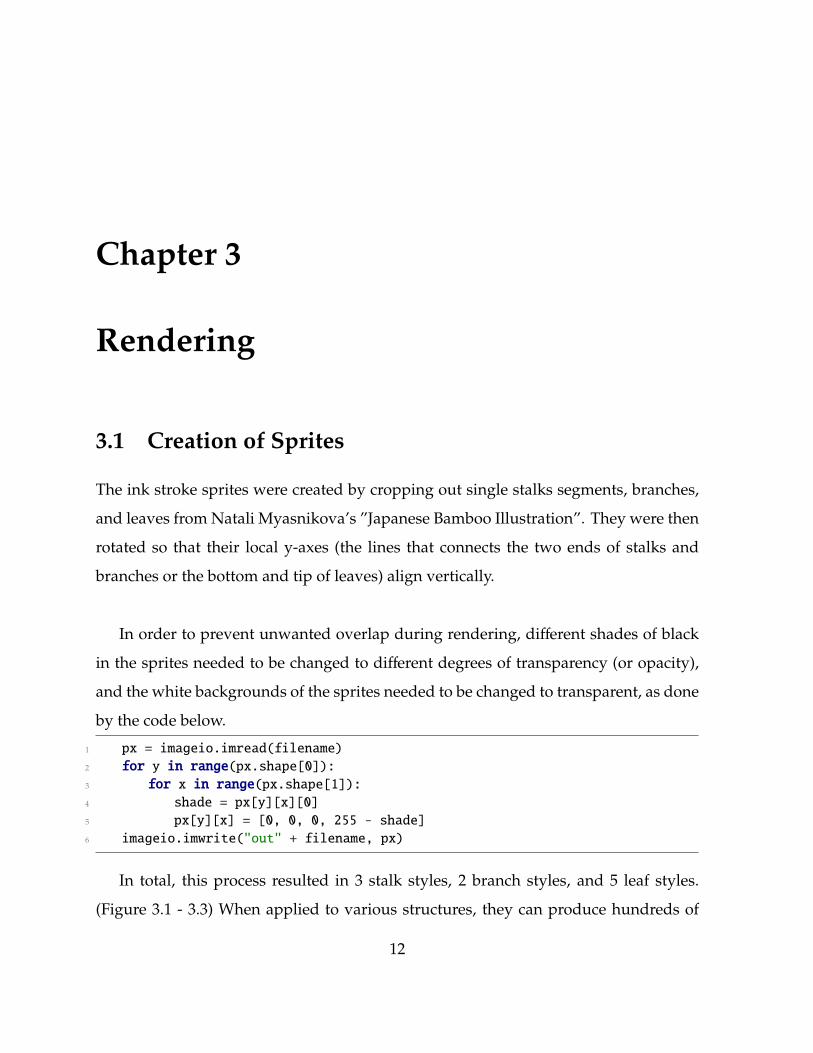
In total, this process resulted in 3 stalk styles, 2 branch styles, and 5 leaf styles.
(Figure 3.1 - 3.3) When applied to various structures, they can produce hundreds of
12

Figure 3.1: Ink strokes for stalk segments
Figure 3.2: Ink strokes for branches
di↵erent bamboo forms.
3.2 Reverse Texture Mapping
The traditional forward mapping method maps pixels from the source image onto the
destination image. For some cases, a pixel on the source image might be mapped
to several pixels on the destination image, creating aliasing e↵ects. In this model,
the sprites are mapped to the generated structure using a reverse mapping method
with bilinear sampling and alpha-compositing. First, every pixel on the canvas is
transformed to the coordinate plane of the sprite. The pixels are first rotated around
the origin of the line segment, so that the direction of that segment aligns with the y-
axis. This was accomplished by translating the points to the origin, rotating the points
13
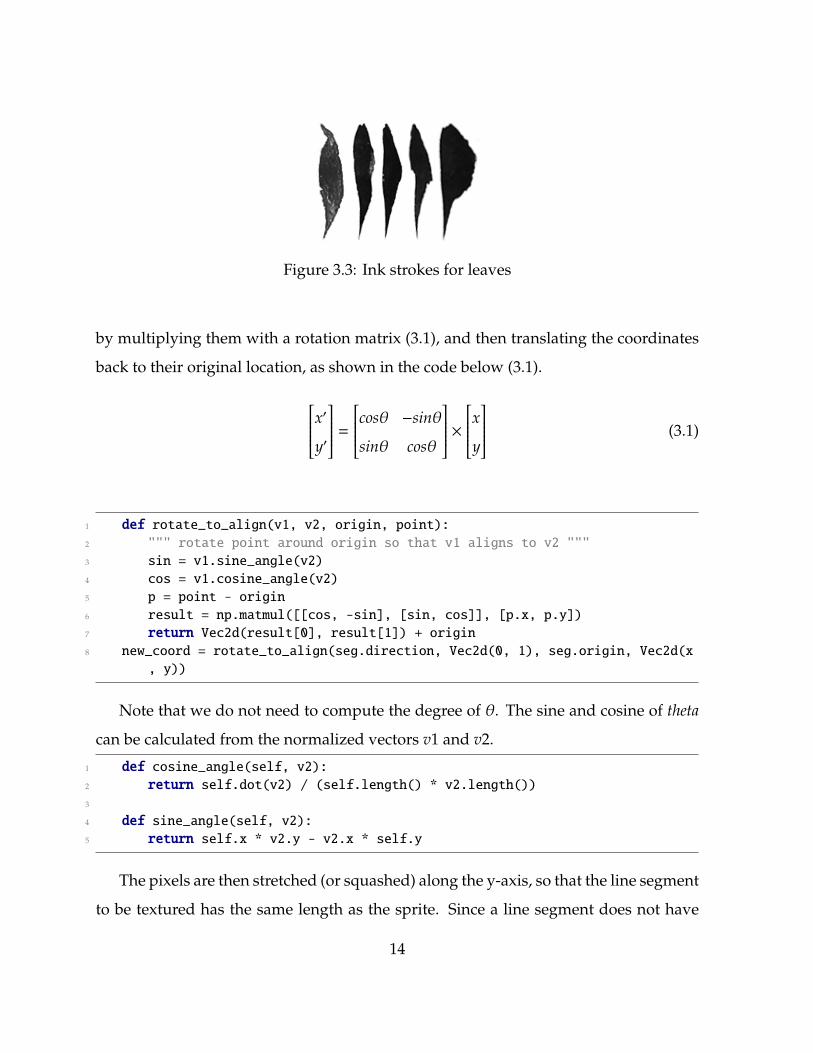
Figure 3.3: Ink strokes for leaves
by multiplying them with a rotation matrix (3.1), and then translating the coordinates
back to their original location, as shown in the code below (3.1).
26666664x0
y0
37777775 =
26666664cos✓ �sin✓
sin✓ cos✓
37777775 ⇥26666664x
y
37777775 (3.1)
1 def rotate_to_align(v1, v2, origin, point):2 """ rotate point around origin so that v1 aligns to v2 """
3 sin = v1.sine_angle(v2)
4 cos = v1.cosine_angle(v2)
5 p = point - origin
6 result = np.matmul([[cos, -sin], [sin, cos]], [p.x, p.y])
7 return Vec2d(result[0], result[1]) + origin8 new_coord = rotate_to_align(seg.direction, Vec2d(0, 1), seg.origin, Vec2d(x
, y))
Note that we do not need to compute the degree of ✓. The sine and cosine of theta
can be calculated from the normalized vectors v1 and v2.
1 def cosine_angle(self, v2):2 return self.dot(v2) / (self.length() * v2.length())3
4 def sine_angle(self, v2):5 return self.x * v2.y - v2.x * self.y
The pixels are then stretched (or squashed) along the y-axis, so that the line segment
to be textured has the same length as the sprite. Since a line segment does not have
14
Figure 3.4: Reverse mapping
Figure 3.5: Bilinear sampling
a width, the mapped area on the canvas is not proportional to that of the sprite. The
width of the sprite is preserved. This result is actually desirable, because segments of
di↵erent length should have the same width.
1 def stretch_y(point, seg, scale):2 dy = (point.y - seg.origin.y) * scale
3 y = seg.origin.y + dy
4 return Vec2d(point.x, y)5 new_coord = stretch_y(new_coord, seg, sprite.shape[0] / seg.length)
After this transformation, each pixel (x, y) on the canvas is mapped to a point (u, v)
in the sprite’s coordinate system (Figure 3.4). Because the referenced position (u, v)
does not usually have integer coordinates, the color from the four neighboring pixels
are sampled using bilinear interpolation, as shown in the code below and in Figure 3.5.
1 def bilinear_sample(point, sprite):2 """ get the target color using bilinear interpolation """
3 x1 = math.floor(point.x)
15
4 x2 = x1 + 1
5 y1 = math.floor(point.y)
6 y2 = y1 + 1
7 dx = point.x - x1
8 dy = point.y - y1
9 a = sprite[y1][x1] * (1 - dx) + sprite[y1][x2] * dx
10 b = sprite[y2][x1] * (1 - dx) + sprite[y2][x2] * dx
11 result = a * (1 - dy) + b * dy
12 return result
3.3 Applying Di↵erent Shades
In traditional ink paintings, di↵erent weights of ink strokes result in di↵erent shades
of black color on the image. Although this model could not simulate weights of ink
strokes in a dynamic manner, it can simulate the e↵ect by using alpha-composition
when applying colors onto the canvas.
During the rendering process, each stalk is assigned a di↵erent degree of shading,
ranging from 0.6 to 1.0. The number determines the opacity of the sprites applied to
that bamboo.
1 def composite(c1, c2, shade):2 """ alpha-composite color c1 and c2 """
3 a1 = c1[3] * shade / 255
4 a2 = c2[3] / 255
5 r = alpha_composite(c1[0], c2[0], a1, a2)
6 g = alpha_composite(c1[1], c2[1], a1, a2)
7 b = alpha_composite(c1[2], c2[2], a1, a2)
8 a = a1 + a2 * (1 - a1)
9 a = int(a * 255)10 return [r, g, b, a]11
12 def alpha_composite(ch1, ch2, a1, a2):13 """ alpha-composite on chanel c1 and c2 """
14 return int((ch1 * a1 + ch2 * a2 * (1 - a1)) / (a1 + a2 * (1 - a1)))
In the end, the color of pixel (x, y) on the canvas is obtained by
16
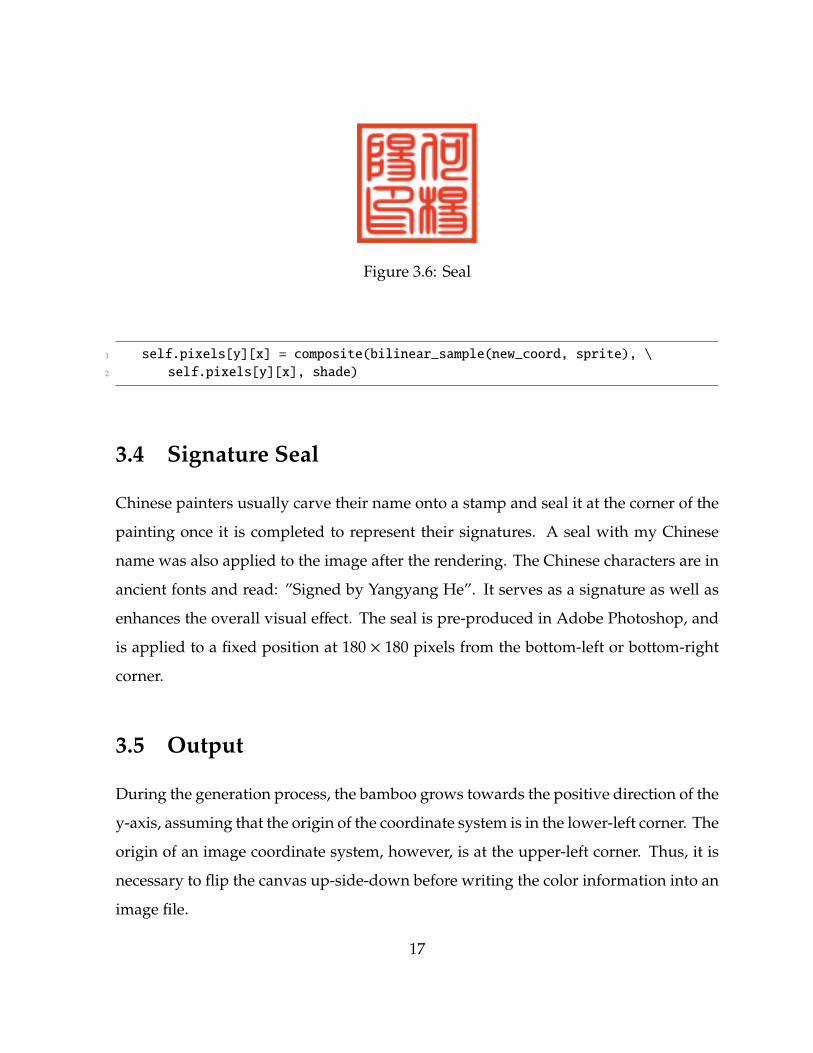
Figure 3.6: Seal
1 self.pixels[y][x] = composite(bilinear_sample(new_coord, sprite), \
2 self.pixels[y][x], shade)
3.4 Signature Seal
Chinese painters usually carve their name onto a stamp and seal it at the corner of the
painting once it is completed to represent their signatures. A seal with my Chinese
name was also applied to the image after the rendering. The Chinese characters are in
ancient fonts and read: ”Signed by Yangyang He”. It serves as a signature as well as
enhances the overall visual e↵ect. The seal is pre-produced in Adobe Photoshop, and
is applied to a fixed position at 180 ⇥ 180 pixels from the bottom-left or bottom-right
corner.
3.5 Output
During the generation process, the bamboo grows towards the positive direction of the
y-axis, assuming that the origin of the coordinate system is in the lower-left corner. The
origin of an image coordinate system, however, is at the upper-left corner. Thus, it is
necessary to flip the canvas up-side-down before writing the color information into an
image file.
17
The rendered image can be saved as a PNG file using theimageio library. Depending
on the complexity of the bamboo model and the size of the canvas, it may take several
minutes to render the image. Because the sizes of the models and the sprites are
independent of the size of the canvas, the model could be rendered in various sizes
and proportions. To obtain an appropriate field of view, the images were rendered as
portrait (vertical) images in a resolution of 480⇥720 and landscape (horizontal) images
in 1160 ⇥ 720.
18
Chapter 4
Results
Two PNG images are generated after each run of the model. The first shows the
structure of the bamboo, and the second is the rendered image. The structure data
of the bamboo models can also be saved in Python lists and dictionaries that can be
written into a JSON (JavaScript Object Notation) file for later access or re-rendering.
4.1 Structure Graph
The structure graph shows the skeletons of the bamboos’ structures. Figure 4.1(a),
4.2(a), 4.3(a) are some examples of structure graphs. In the picture, black lines represent
stalk segments, blue lines represent branches, and green lines represent leaves. The
crosses represent joints between di↵erent elements.
4.2 Rendered Image
The rendering result is written into PNG image files using the imageio library. Figure
4.1(b), 4.2(b), 4.3(b) are rendered images of the structures shown before them. Note
that Figure 4.1(a) is a vertical image of resolution 480⇥ 720, while the other two images
19
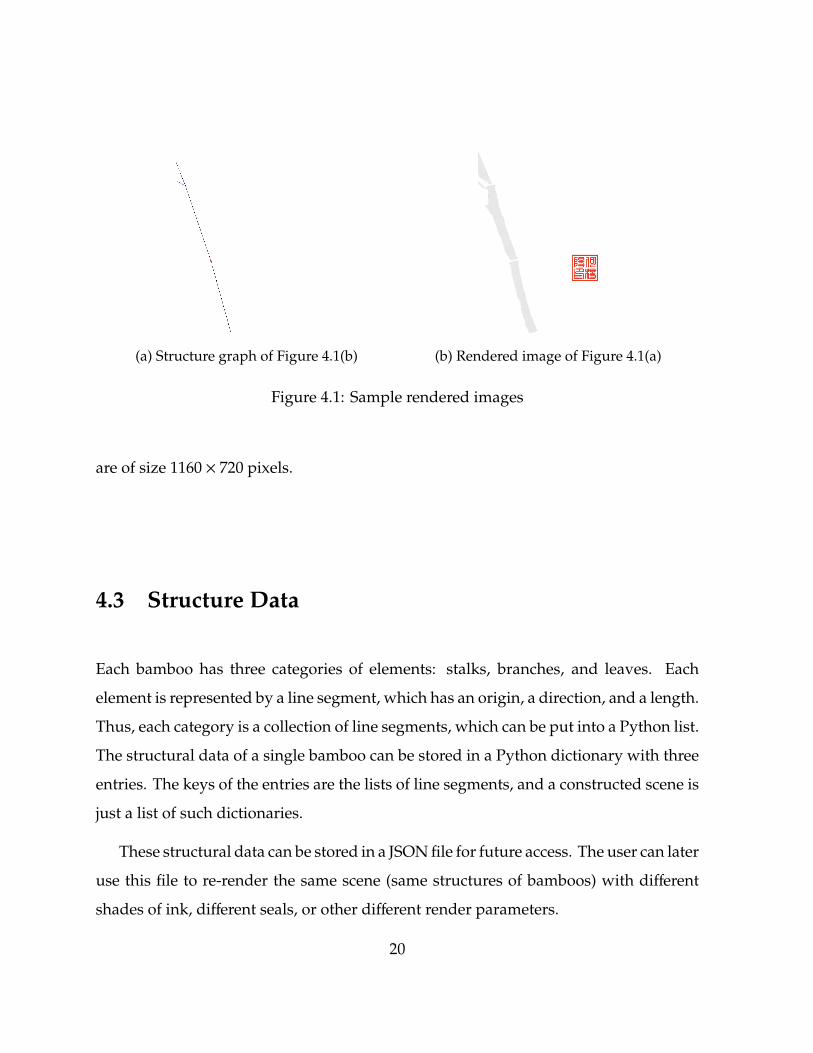
(a) Structure graph of Figure 4.1(b) (b) Rendered image of Figure 4.1(a)
Figure 4.1: Sample rendered images
are of size 1160 ⇥ 720 pixels.
4.3 Structure Data
Each bamboo has three categories of elements: stalks, branches, and leaves. Each
element is represented by a line segment, which has an origin, a direction, and a length.
Thus, each category is a collection of line segments, which can be put into a Python list.
The structural data of a single bamboo can be stored in a Python dictionary with three
entries. The keys of the entries are the lists of line segments, and a constructed scene is
just a list of such dictionaries.
These structural data can be stored in a JSON file for future access. The user can later
use this file to re-render the same scene (same structures of bamboos) with di↵erent
shades of ink, di↵erent seals, or other di↵erent render parameters.
20

(a) Structure graph of Figure 4.2(b) (b) Rendered image of Figure 4.2(a)
Figure 4.2: Sample rendered images
(a) Structure graph of Figure 4.3(b) (b) Rendered image of Figure 4.3(a)
Figure 4.3: Sample rendered images
21
4.4 Performance Analysis
The time needed to produce a single image depends largely on the complexity of the
structure (number of stalks, branches, and leaves) that was generated. Over 60 test
runs, the time consumed for each image varied from a couple of minutes to over ten
minutes. More testings show that the majority of the time was spent on the rendering
process. For example, in a case with 2 stalks (6 segments in total), 2 branches, and 19
leaves, the generation process took less than 0.001 seconds, while the rendering took
445 seconds.
The reverse texture mapping is the most time consuming component in this model.
The algorithm had to transform the coordinates of each pixels on the canvas to the
coordinate system of the texture for each segment to be mapped. This means that for an
1160 ⇥ 720 image, more than 800K transformations were performed for each segment
to be mapped. The limited performance of the Python programming language also
reduced the speed of rendering. As section 4.6 would discuss, the optimization of this
algorithm would significantly improve the performance of the model.
4.5 Applications
The model presented here could be used for application where basic ink artwork is
required to reduce the cost of human labor. Because of the randomness during the
construction and rendering process, each run of the model would produce di↵erent
images. The advantage of the model is that it can produce a large number of unique
works in a comparatively short amount of time to that of a human artist. For example,
the output of Figure 4.1(a) can be used as the background design of letter paper. As
the model is able to produce images of a variety of sizes and shapes, other usages may
include: wall decorations, gifts, illustrations, etc.
22
4.6 Future Work
As discussed in section 4.4, currently, the model takes several minutes to render one
image, depending on the quantity of segments in the scene. The reverse mapping
algorithm could be further optimized to save rendering time, if methods like bounding
boxes were used to reduce the number of unnecessary computations.
Altering the e↵ect of di↵erent degrees of shades by changing the alpha channel of
the image when compositing is not ideal. Since the structure of the bamboo consists of
directed line segments, such line segments can be used as the trajectory guidance of an
ink brush. A more realistic render could then be done by simulating a virtual ink brush
model that paints in di↵erent weights and speed along the generated trajectory. Yang
et al. [10] developed a model that could reproduce the writing process of calligraphic
artwork; similar method could be used in this model to produce dynamic simulation
of the brushwork. This would create animations of the painting process, which can be
used for the training of entry level painters.
23
Chapter 5
Conclusions
This paper proposes a procedural model that generates various ink bamboo paintings.
The model chooses random horizontal positions for the bamboo roots. Bamboo seg-
ments then grow out of the roots in a recursive manner: First, a stalk segment grows.
If there is a branch at the top joint of the segment, then a branch segment grows. A
leaf grows on top of the branch before another branch segment grows. When a branch
is constructed, the growth of the stalk continues. After a whole bamboo is completed,
another bamboo is generated following a similar procedure until the randomly deter-
mined quantity is reached. Each random parameter in the model is controlled by rules
observed through real ink bamboo paintings. The growth rule of the leaves simulates
the phyllotaxy (arrangement of leaves) of bamboo.
Stalk, branch, and leaf sprites are created from Natali Myasnikova’s artwork. They
are applied to the canvas using a reverse mapping method and bilinear interpolation.
This approach reduces the aliasing e↵ect that forward mapping might cause. Sprites
of di↵erent bamboo are applied with di↵erent degrees of shades, which is controlled
by the alpha channel when compositing the sprites and the images. Finally, a Chinese
seal is stamped to enhance the visual e↵ect and serve as a signature.
24
References
[1] CHU, N., AND TAI, C. L. 2005. Moxi:real-time ink dispersion in absorbent paper.
ACM Transactions on Graphics 24, 3 (Aug.), 504511.
[2] HUANG, S. W., WAY, D. L., AND SHIH, Z. C. 2003. Physical- based model of ink
di↵usion in Chinese ink paintings. Proceedings of the 11th International Con-
ference in Central Europe on Computer Graphics,Visualization and Computer
Vision, 520 527.
[3] LI, X. X., AND YU, L. 2006. Simulation of Chinese ink-wash painting based on
landscapes and trees. In: proceedings of Second International Symposium on
Plant Growth Modeling, Simulation, Visualization and Applications, 328333.
[4] WANG, C. M., AND WANG, R. J. 2007. Image-based color ink dif- fusion ren-
dering. IEEE Transactions on Visualization and Com- puter Graphic 13, 235246.
[5] WANG, Y., WANG, L., Hao W., Ning X., Shi, Z., Zhao M. 2014. A Stylization
Method of Chinese Ink Painting for 3D Tree. VRCAI 2014.
[6] WAY, D. L., LAY, Y. R., AND SHIH, Z. C. 2002. The synthesis of trees in chinese
landscape painting using silhouette and texture strokes. Journal of WSCG, 10,
3, 499507.
[7] XIE, N., HAMID, L., SUGURU, S., AND MASAYUKI, N. 2011. Contour-driven
sumi-e rendering of real photos. Computers and Graphics, 35, 1, 122134.
25
[8] XU, S., TANG, M., AND LAU, F. 2002. A solid model based virtual hairy brush.
Computer Graphics Forum, 21, 3, 299308.
[9] YANG, I. S., YU, Y. J., AND LEE, D. H. 2012. Ink-and-wash painting based on
the image of pine tree using mean curvature flow. In: Proceedings of the 11th
ACM SIGGRAPH Interna- tional Conference on Virtual-Reality Continuum and
its Appli- cations in Industry, 189194.
[10] Yang, L. J., Xu, T. C., Li, X. S., Wu, E. H. Feature-oriented Writing Process
Reproduction of Chinese Calligraphic Artwork. SIGGRAPH Asia 2014.
[11] YU, Y., LEE, Y. B., AND CHO, H. G. 2002. A model based technique for realistic
oriental painting. In Proceedings of Pacific Graphics, Beijing,, 452453.
[12] YU, J. H., LUO, G. M., AND PENG, Q. S. 2003. Image-based synthesis of chinese
landscape painting. Computer Science and Technology, 18, 1, 2228.
[13] ZHANG, Q., SATO, Y., TAKAHASHI, J., MURAOKA, K., AND CHIBA, N. 1999.
Simple cellular automaton-based simulation of ink behavior and its application
to suibokuga-like 3d rendering of trees. Journal of Visualization and Computer
Animation, 10, 2737.
[14] Bamboo Painting. Wikipedia, Wikimedia Foundation, 6 Mar. 2018.
26
Appendices
27
Appendix A
Code listings
main.py
1 import random2 import time3 import imageio4
5 from Painter import Painter6 from Canvas import Canvas7 from Vec2d import Vec2d8 from Stalk import Stalk9
10 IMAGE_WIDTH = 1160
11 IMAGE_HEIGHT = 720
12
13
14 def main():15 # Initializations
16 timestamp = str(int(time.time()))17 filename1 = "./sample_output/" + timestamp + "_sturcture.png"
18 filename2 = "./sample_output/" + timestamp + "_render.png"
19 canvas_struct = Canvas(IMAGE_WIDTH, IMAGE_HEIGHT)
20 canvas_render = Canvas(IMAGE_WIDTH, IMAGE_HEIGHT)
21 png_painter = Painter()
22
23 # Read sprites
24 stalk_sprite = [imageio.imread(’./sprite/stalk-1.png’), imageio.imread(’./
sprite/stalk-2.png’), imageio.imread(’./sprite/stalk-3.png’)]
25 branch_sprite = [imageio.imread(’./sprite/branch-1.png’), imageio.imread(’
28

./sprite/branch-2.png’)]
26 leaf_sprite = [imageio.imread(’./sprite/leaf-1.png’), imageio.imread(’./
sprite/leaf-2.png’), imageio.imread(’./sprite/leaf-3.png’), imageio.
imread(’./sprite/leaf-4.png’), imageio.imread(’./sprite/leaf-5.png’)]
27 seal_sprite = imageio.imread(’./sprite/seal-90.png’)
28
29 print("Constructing...")30 t0 = time.clock()
31
32 # start construction
33 quantity = get_bamboo_quantity()
34 newest_root = get_root_position(IMAGE_WIDTH)
35 roots = list()36 roots.append(newest_root)
37 for i in range(quantity - 1):38 newest_root = get_new_root(newest_root.x)
39 roots.append(newest_root)
40
41 stalks = list()42 for root in roots:43 length = get_segment_count()
44 new_stalk = Stalk(root, length)
45 for j in range(length):46 new_stalk.grow()
47 stalks.append(new_stalk)
48
49 t1 = time.clock() - t0
50 print("Construction time", t1, "seconds.")51
52 # start rendering
53 stalk_count = 1
54 stalk_total = len(stalks)55 for stalk in stalks:56 print("Rendering stalk", stalk_count, "/", stalk_total)57 shade = get_shade_degree()
58 for seg in stalk.segments:59 canvas_struct.paint_seg_black(seg)
60 canvas_render.paint_seg_sprite(seg, stalk_sprite[
get_stalk_sprite_index()], shade)
61
62 for branch in stalk.branches:63 seg = branch.get_segment()
64 canvas_struct.paint_seg_blue(seg)
65 canvas_render.paint_seg_sprite(seg, branch_sprite[
29
get_branch_sprite_index()], shade)
66 for joint in branch.joints:67 canvas_struct.paint_joint_blue(joint)
68 for leaf in branch.leaves:69 canvas_struct.paint_seg_green(leaf)
70 canvas_render.paint_seg_sprite(leaf, leaf_sprite[
get_leaf_sprite_index()], shade)
71 for joint in stalk.joints:72 canvas_struct.paint_joint_red(joint)
73 stalk_count += 1
74
75 canvas_render.paint_seal(seal_sprite)
76
77 print("Rendering time", time.clock() - t1, "seconds.")78 print("Saving images...")79 png_painter.paint_png(canvas_struct, filename1)
80 png_painter.paint_png(canvas_render, filename2)
81
82
83 def get_bamboo_quantity():84 i = random.randint(1, 100)
85 if i <= 6:86 return 187 elif 6 < i <= 44:88 return 289 elif 44 < i <= 74:90 return 391 elif 74 < i <= 88:92 return 493 elif 88 < i <= 100:94 return 595
96
97 def get_segment_count():98 return random.randint(3, 4)99
100
101 def get_root_position(width):102 return Vec2d(random.randint(int(0.33 * width), int(0.5 * width)), -10)103
104
105 def get_new_root(root):106 return Vec2d(root + random.randint(100, 200), -10)107
30
108
109 def get_stalk_sprite_index():110 return random.randint(0, 2)111
112
113 def get_branch_sprite_index():114 return random.randint(0, 1)115
116
117 def get_leaf_sprite_index():118 return random.randint(0, 4)119
120
121 def get_shade_degree():122 return random.choice([1.0, 0.9, 0.8, 0.6])123
124
125 main()
31
Branch.py
1 import random2 from Segment import Segment3 from Vec2d import Vec2d4 from Joint import Joint5
6
7 class Branch:8
9 def __init__(self, root, side):10 self.root = root
11 self.top = Joint(root.position.x, root.position.y, self)
12 self.segments = list()13 self.joints = list()14 self.leaves = list()15 self.count = 0
16 self.direction = Vec2d(0, 1)
17 self.leaf_side = 1
18 self.grow_first_seg(side)
19
20 def grow(self):21 seg_length = random_seg_length()
22 leaf_length = random_leaf_length()
23 new_seg = Segment(self.top.position, self.direction, seg_length)
24 self.top = Joint(new_seg.get_end().x, new_seg.get_end().y, new_seg)
25
26 # grow one leaf to each side at the joint
27 leaf_angle = random_leaf_angle()
28 leaf = Segment(self.top.position, self.direction.static_rotate(
leaf_angle * self.leaf_side), leaf_length)
29 self.leaf_side *= -1
30 # right_leaf = Segment(self.top.position, self.direction.static_rotate(-
leaf_angle), leaf_length)
31 self.top.l_branch = leaf
32 # self.top.r_branch = right_leaf
33 self.leaves.append(leaf)
34 # self.leaves.append(right_leaf)
35
36 self.joints.append(self.top)
37 self.segments.append(new_seg)
38 self.count = len(self.segments)39
40 def grow_first_seg(self, side):
32
41 seg_length = random_seg_length()
42 leaf_length = random_leaf_length()
43 seg_angle = random_branch_angle() * side
44 new_seg = Segment(self.top.position, self.direction.rotate(seg_angle),
seg_length)
45 self.top = Joint(new_seg.get_end().x, new_seg.get_end().y, new_seg)
46
47 # grow one leaf to each side at the joint
48 leaf_angle = random_leaf_angle()
49 leaf = Segment(self.top.position, self.direction.static_rotate(
leaf_angle * self.leaf_side), leaf_length)
50 self.leaf_side *= -1
51 # right_leaf = Segment(self.top.position, self.direction.static_rotate(-
leaf_angle), leaf_length)
52 self.top.l_branch = leaf
53 # self.top.r_branch = right_leaf
54 self.leaves.append(leaf)
55 # self.leaves.append(right_leaf)
56
57 self.joints.append(self.top)
58 self.segments.append(new_seg)
59 self.count = len(self.segments)60
61 def grow_tip_leaf(self):62 leaf_length = random_leaf_length()
63 leaf = Segment(self.top.position, self.direction, leaf_length)
64 self.top.l_branch = leaf
65 self.leaves.append(leaf)
66
67 def get_segment(self):68 length = (self.segments[len(self.segments)-1].get_end() - self.root.
position).length()
69 return Segment(self.root.position, self.direction, length)70
71
72 def random_branch_angle():73 return random.randint(30, 85)74
75
76 def random_leaf_angle():77 return random.randint(30, 45)78
79
80 def random_leaf_length():
33
81 return random.randint(120, 170)82
83
84 def random_seg_length():85 return random.randint(20, 40)
34
Canvas.py
1 import numpy as np2 import math3 from Vec2d import Vec2d4
5
6 SEAL_X = 180
7 SEAL_Y = 180
8
9
10 class Canvas:11
12 def __init__(self, width, height):13 self.width = width
14 self.height = height
15 self.pixels = np.ndarray(shape=(height, width, 4), dtype=np.uint8)
16 for i in range(height):17 for j in range(width):18 self.pixels[i][j].fill(255)
19 # print(self.pixels[0][0])
20
21 def paint_pixel(self, x, y, r, g, b, a):22 if x in range(0, self.width) and y in range(0, self.height):23 self.pixels[y][x] = [r, g, b, a]
24
25 def paint_pixel_black(self, x, y):26 self.paint_pixel(x, y, 0, 0, 0, 255)
27
28 def paint_pixel_red(self, x, y):29 self.paint_pixel(x, y, 255, 0, 0, 255)
30
31 def paint_pixel_blue(self, x, y):32 self.paint_pixel(x, y, 0, 0, 255, 255)
33
34 def paint_seg(self, seg, r, g, b, a):35 x0 = seg.origin.x
36 y0 = seg.origin.y
37 x1 = seg.get_end().x
38 y1 = seg.get_end().y
39 dx = abs(x1 - x0)40 dy = abs(y1 - y0)41 x, y = x0, y0
42 sx = -1 if x0 > x1 else 1
35

43 sy = -1 if y0 > y1 else 144 if dx > dy:45 err = dx / 2.0
46 while x != x1:47 self.paint_pixel(x, y, r, g, b, a)
48 err -= dy
49 if err < 0:50 y += sy
51 err += dx
52 x += sx
53 else:54 err = dy / 2.0
55 while y != y1:56 self.paint_pixel(x, y, r, g, b, a)
57 err -= dx
58 if err < 0:59 x += sx
60 err += dy
61 y += sy
62 self.paint_pixel(x, y, r, g, b, a)
63
64 def paint_seg_black(self, seg):65 self.paint_seg(seg, 0, 0, 0, 255)
66
67 def paint_seg_green(self, seg):68 self.paint_seg(seg, 0, 255, 0, 255)
69
70 def paint_seg_blue(self, seg):71 self.paint_seg(seg, 0, 0, 255, 255)
72
73 def paint_joint(self, joint, r, g, b, a):74 x = joint.position.x
75 y = joint.position.y
76 self.paint_pixel(x, y, r, g, b, a)
77 self.paint_pixel(x+1, y+1, r, g, b, a)
78 self.paint_pixel(x+1, y-1, r, g, b, a)
79 self.paint_pixel(x+2, y+2, r, g, b, a)
80 self.paint_pixel(x+2, y-2, r, g, b, a)
81 self.paint_pixel(x-1, y+1, r, g, b, a)
82 self.paint_pixel(x-1, y-1, r, g, b, a)
83 self.paint_pixel(x-2, y+2, r, g, b, a)
84 self.paint_pixel(x-2, y-2, r, g, b, a)
85
86 def paint_joint_red(self, joint):
36

87 self.paint_joint(joint, 255, 0, 0, 255)
88
89 def paint_joint_green(self, joint):90 self.paint_joint(joint, 0, 255, 0, 255)
91
92 def paint_joint_blue(self, joint):93 self.paint_joint(joint, 0, 0, 255, 255)
94
95 def paint_seg_sprite(self, seg, sprite, shade):96 x_bound = sprite.shape[1] - 1
97 y_bound = sprite.shape[0] - 1
98 for y in range(self.height):99 for x in range(self.width):
100 # transform every pixel to the coord of the sprite
101 new_coord = rotate_to_align(seg.direction, Vec2d(0, 1), seg.
origin, Vec2d(x, y))
102 # new_coord = stretch(new_coord, seg, sprite.shape[0]/abs(seg.
origin.y - seg.get_end().y))
103 new_coord = stretch_y(new_coord, seg, sprite.shape[0] / seg.
length)
104 # new_coord = stretch_x(new_coord, seg, 0.4)
105 new_coord.x -= seg.origin.x - sprite.shape[1] / 2
106 new_coord.y -= seg.origin.y
107
108 # bilinearly sample color and do alpha-composition
109 if new_coord.x < x_bound and new_coord.x > 0 and new_coord.y <y_bound and new_coord.y > 0:
110 self.pixels[y][x] = composite(bilinear_sample(new_coord,
sprite), self.pixels[y][x], shade)
111
112 def paint_seal(self, sprite):113 x = SEAL_X
114 y = SEAL_Y
115 for q in range(90):116 for p in range(90):117 self.pixels[y + q][x + p][0] = sprite[89 - q][p][0]
118 self.pixels[y + q][x + p][1] = sprite[89 - q][p][1]
119 self.pixels[y + q][x + p][2] = sprite[89 - q][p][2]
120
121
122 def rotate_to_align(v1, v2, origin, point):123 """ rotate point around origin so that v1 aligns to v2 """
124 sin = v1.sine_angle(v2)
125 cos = v1.cosine_angle(v2)
37
126 p = point - origin
127 result = np.matmul([[cos, -sin], [sin, cos]], [p.x, p.y])
128 return Vec2d(result[0], result[1]) + origin129
130
131 def stretch_y(point, seg, scale):132 dy = (point.y - seg.origin.y) * scale
133 y = seg.origin.y + dy
134 return Vec2d(point.x, y)135
136
137 def stretch_x(point, seg, scale):138 dx = (point.x - seg.origin.x) * scale
139 x = seg.origin.x + dx
140 return Vec2d(x, point.y)141
142
143 def composite(c1, c2, shade):144 """ alpha-composite color c1 and c2 """
145 a1 = c1[3] * shade / 255
146 a2 = c2[3] / 255
147 r = alpha_composite(c1[0], c2[0], a1, a2)
148 g = alpha_composite(c1[1], c2[1], a1, a2)
149 b = alpha_composite(c1[2], c2[2], a1, a2)
150 a = a1 + a2 * (1 - a1)
151 a = int(a * 255)152 return [r, g, b, a]153
154
155 def alpha_composite(ch1, ch2, a1, a2):156 """ alpha-composite on chanel c1 and c2 """
157 return int((ch1 * a1 + ch2 * a2 * (1 - a1)) / (a1 + a2 * (1 - a1)))158
159
160 def bilinear_sample(point, sprite):161 """ get the target color using bilinear interpolation """
162 x1 = math.floor(point.x)
163 x2 = x1 + 1
164 y1 = math.floor(point.y)
165 y2 = y1 + 1
166 dx = point.x - x1
167 dy = point.y - y1
168 a = sprite[y1][x1] * (1 - dx) + sprite[y1][x2] * dx
169 b = sprite[y2][x1] * (1 - dx) + sprite[y2][x2] * dx
38

170 result = a * (1 - dy) + b * dy
171 return result
39
Joint.py
1 from Vec2d import Vec2d2
3
4 class Joint:5
6 def __init__(self, x, y, parent):7 self.position = Vec2d(x, y)
8 self.parent = parent
9 self.stalk = None
10 self.l_branch = None
11 self.r_branch = None
40
Painter.py
1 import imageio2
3 class Painter:4
5 def __init__(self):6 pass7
8 def paint_p3(self, canvas, filename):9 file = open(filename, ’w’)
10 file.write("P3\n")11 file.write(str(canvas.width) + " " + str(canvas.height) + "\n")12 file.write(str(255) + "\n")13 for i in range(canvas.height - 1, -1, -1):14 for j in range(canvas.width):15 file.write(str(canvas.pixels[i][j][0]) + " ")16 file.write(str(canvas.pixels[i][j][1]) + " ")17 file.write(str(canvas.pixels[i][j][2]) + " ")18
19 file.close()20
21 def paint_p6(self, canvas, filename):22 file = open(filename, ’w’)23 file.write("P6\n")24 file.write(str(canvas.width) + " " + str(canvas.height) + "\n")25 file.write(str(255) + "\n")26 for i in range(canvas.height - 1, -1, -1):27 for j in range(canvas.width):28 file.write("%B" % canvas.pixels[i][j][0])29 file.write("%B" % canvas.pixels[i][j][1])30 file.write("%B" % canvas.pixels[i][j][2])31 file.write("\n")32
33 file.close()34
35 def paint_png(self, canvas, filename):36 # Reflect the image vertically
37 for i in range(canvas.height // 2):38 canvas.pixels[[i, canvas.height - 1 - i]] = canvas.pixels[[canvas.
height - 1 - i, i]]
39 imageio.imwrite(filename, canvas.pixels)
41
Segment.py
1 from Vec2d import Vec2d2
3
4 class Segment:5 """Line segment class"""
6
7 def __init__ (self, origin, direction, length):8 self.origin = Vec2d(origin.x, origin.y)
9 self.direction = Vec2d(direction.x, direction.y).normalize()
10 self.length = length
11
12 def get_end(self):13 return Vec2d(int(self.origin.x + self.direction.x * self.length), int(
self.origin.y + self.direction.y * self.length))
42
Stalk.py
1 import random2 from Segment import Segment3 from Vec2d import Vec2d4 from Joint import Joint5 from Branch import Branch6
7 class Stalk:8
9 def __init__(self, root, length):10 self.root = Joint(root.x, root.y, self)
11 self.top = Joint(root.x, root.y, self)
12 self.segments = list()13 self.joints = list()14 self.branches = list()15 self.count = 0
16 self.bend_side = random.choice([-1, 1])
17 self.direction = Vec2d(0, 1).rotate(get_initial_angle() * self.bend_side
)
18 self.length = length
19 self.branch_side = random.choice([-1, 1])
20
21 def grow(self):22 rand_length = get_segment_length()
23 rand_angle = get_random_angle()
24 new_seg = Segment(self.top.position, self.direction.rotate(rand_angle *
self.bend_side), rand_length)
25 self.top = Joint(new_seg.get_end().x, new_seg.get_end().y, new_seg)
26 if self.decide_grow_branch():27 new_branch = Branch(self.top, self.branch_side)
28 self.branch_side *= -1
29 for j in range(get_segment_count()):30 new_branch.grow()
31 new_branch.grow_tip_leaf()
32 self.top.l_branch = new_branch
33 self.branches.append(new_branch)
34 self.joints.append(self.top)
35 self.segments.append(new_seg)
36 self.count = len(self.segments)37
38 def decide_grow_branch(self):39 if len(self.segments) + 1 == self.length:40 return False
43

41 i = random.randint(1, 100)
42 if i <= 45:43 return True44 else:45 return False46
47
48 def get_segment_count():49 return random.randint(6, 10)50
51
52 def get_segment_length():53 return random.randint(242, 335)54
55
56 def get_random_angle():57 return random.randint(0, 5)58
59
60 def get_initial_angle():61 return random.randint(0, 10)
44
Vec2d.py
1 import math2
3 class Vec2d:4 """2D Vector/Point class"""
5
6 def __init__(self, x, y):7 self.x = x
8 self.y = y
9
10 def normalize(self):11 self.x = self.x / self.length()
12 self.y = self.y / self.length()
13 return self14
15 def rotate(self, angle):16 rad = angle * math.pi / 180
17 x = self.x * math.cos(rad) - self.y * math.sin(rad)
18 y = self.x * math.sin(rad) + self.y * math.cos(rad)
19 self.x = x
20 self.y = y
21 return self22
23 def static_rotate(self, angle):24 rad = angle * math.pi / 180
25 x = self.x * math.cos(rad) - self.y * math.sin(rad)
26 y = self.x * math.sin(rad) + self.y * math.cos(rad)
27 return Vec2d(x, y)28
29 def sqaured_length(self):30 return self.x * self.x + self.y * self.y31
32 def length(self):33 return math.sqrt(self.sqaured_length())34
35 def dot(self, v2):36 return self.x * v2.x + self.y * v2.y37
38 def cosine_angle(self, v2):39 return self.dot(v2) / (self.length() * v2.length())40
41 def sine_angle(self, v2):42 return self.x * v2.y - v2.x * self.y
45
43
44 # override methods
45 def __add__(self, other):46 return Vec2d(self.x + other.x, self.y + other.y)47
48 def __sub__(self, other):49 return Vec2d(self.x - other.x, self.y - other.y)
46
make sprite.py
1 import imageio2 import sys3
4
5 def main():6 filename = sys.argv[1]
7 print(filename)8 px = imageio.imread(filename)
9 for y in range(px.shape[0]):10 for x in range(px.shape[1]):11 shade = px[y][x][0]
12 px[y][x] = [0, 0, 0, 255 - shade]
13 imageio.imwrite("out" + filename, px)
14
15
16 main()
47


![[OS6-3] Tactile Paintbrush: A Procedural Method for ...€¦ · mathematical model rendering the element Fig. 1: Depiction of the space-frequency framework for tactile texture rendering](https://img.pdfslide.net/doc/110x75/5fa2005e59bbdc600716af17/os6-3-tactile-paintbrush-a-procedural-method-for-mathematical-model-rendering.jpg)