Embed Size (px)
Citation preview

PR
OD
UC
T
IN
FO
RM
AT
IO
N
FO
R
CU
ST
OM
ER
S
PICProduct Information For Customers
CONGRATULATIONS ON PURCHASINGYOUR PERSONALIZED PRINT ON DEMAND
PIC SHEETS!Steps To Print Properly
1) Using the table of contents, select the page or page numbers you wish to print. For example, to print the PIC Aerosol Therapy, you would print pages 5-7, to get the complete set.
2) Choose the printer you wish to print to and type in the page range of 5-7.
THE MED GROUP PERSONALIZED PIC SHEET LIBRARY
3223 South Loop 289, Suite 600 • Lubbock, Texas 79423800.825.5633 • medgroup.com
Partnering to Enhance Our Members’ Success
Licensed and Created by:
PIC SHEET AGREEMENT DATES9-01-07 through 9-30-08
Please send this CD and all copies of this CD back to The MED Group on Point of Surrender and Expiration agreement date to avoid additional fees.
Contact The MED Group for renegotiation of this product.
© Copyright The MED Group 2006
PR
OD
UC
T
IN
FO
RM
AT
IO
N
FO
R
CU
ST
OM
ER
S
PICProduct Information For Customers
Alternating Pressure Pads………………………………………………Print Page 4Aerosol Therapy………………………………………………………..Print Pages 5-7Apnea Monitors………………………………………………………...Print Pages 8-14Bath and Shower Seats…………………………………………………Print Page 15Bed Side Rail …………………………………………………………..Print Page 16Bedside Commodes ……………………………………………………Print Pages 17-18Canes and Quad Canes ………………………………………………...Print Pages 19-20Cervical Traction ………………………………………………………Print Page 21-22Continuous Passive Motion………....………………….............………Print Pages 23-24Chemotherapy ……………...…………………………………………..Print Pages 25-27Chemothrerapy – Side Effects …………………………………………Print Page 28Continuous Positive Airway Pressure …………………..............……...Print Pages 29-32Customer Information Checklist ……………………………………….Print Pages 33-36Dual Purpose Concentrator …………………………...........…………..Print Pages 37-38Enteral Feeding Pump …………………………………………………Print Pages 39-40Epidural and Intrathecal Pain Management …………………………...Print Pages 41-42Gravity Infusion ………………………………………………………..Print Pages 43-44Hand – Held Showers ………………………………………………….Print Pages 45-46Hospital Beds …………………………………………………………..Print Pages 47-48Infusion by Ambulatory or Pole-Mounted Pump ……………………...Print Pages 49-50Infusion: Catheter Care ………………………………………………...Print Pages 51-52Infusion: Complications ………………………………………………..Print Page 53IV Push Medications …………………………………………………...Print Pages 54-55Nasal Suction …………………………………………………………..Print Pages 56-57Non-Slip Bath Mats and Safety Treads ………………………………..Print Page 58Nutritional Supplement Storage and Handling ………………………...Print Page 59Oral Suction ……………………………………………………………Print Pages 60-61Oxygen Concentrators …………………………………………………Print Pages 62-63
TABLE OF CONTENTS
Table of Contents© Copyright The MED Group 2006
Page 1 of 2
1

© Copyright The MED Group 2006
PR
OD
UC
T
IN
FO
RM
AT
IO
N
FO
R
CU
ST
OM
ER
S
PICProduct Information For Customers
TABLE OF CONTENTS
Table of Contents© Copyright The MED Group 2006
Page 2 of 2
2
Oxygen Conserving Devise …………………………………………….Print Pages 64-65Oxygen Equipment: Liquid Systems …………………………………...Print Pages 66-68Oxygen Equipment: Large Cylinder …………………………………... Print Pages 69-70Oxygen Equipment: Portable Cylinder ………………………………...Print Pages 71-72Oxygen Therapy ………………………………………………………..Print Pages 73-76Patient Lifter: With One-Piece Sling …………………………………...Print Pages 77-80Patient Lifter: With U-Style Sling ……………………………………...Print Pages 81-84Pelvic Traction ………………………………………………………….Print Page 85Phototherapy (Bilirubin Light)…………………………………….........Print Pages 86-89Phototherapy (Fiberoptic Panel)…………………………………….…..Print Pages 90-93Portable Oxygen Concentrator …………………………............……....Print Pages 94-95Power Wheelchairs, Scooters, and Batteries …………………………...Print Pages 96-98Raised Toilet Seats ……………………………………………………...Print Page 99Storage of Infusion of Medication ……………………………………...Print Page 100-101Subcutaneous Infusion of Desferal ……………………………………..Print Page 102-103Suction Machines …………………………………………………….....Print Page 104-105Toilet Safety Rails…………………………………………………….....Print Page 106Total Parenteral Nutrition ……………………………………………....Print Page 107-111Tracheal Suction ……………………………………………………......Print Page 112-113Transfer Tub Benches ………………………………………………......Print Page 114Trapeze Bar …………………………………………………………......Print Page 115Tub Grab Bar …………………………………………………………...Print Page 116Underarm Crutches …………………………………………………......Print Page 117-118Walkers ……………………………………………………………….... Print Pages 119-120Wall Grab Bars ………………………………………………………....Print Pages 121-122Wheelchairs ………………………………………………………...…..Print Pages 123-124
© Copyright The MED Group 2006
PR
OD
UC
T
IN
FO
RM
AT
IO
N
FO
R
CU
ST
OM
ER
S
PICProduct Information For Customers
4
Alternating Pressure Pads are designed to automatically change the pressure points beneath a patient every two and a half to four minutes. This is accomplished by alternately filling and emptying adjacent cells in the pad. This constantly changing pressure greatly reduces the danger of decubitus ulcers or pressure sores. The caregiver should check this movement daily by placing his or her open hand on the pad for a period of time long enough to allow the system to cycle from full to empty.
The family or caregiver should also inspect the tubing from the pad to the pump daily. It should not be twisted, pinched or kinked. Particular attention should be given to the ends of the tubes where they attach to the pad. This area is usually hidden by the sheet and is the most likely location of restricted air flow.
An overall visual inspection of the pad should be made each time the bed linens are changed. If the pad is ever removed from the bed for any reason, care should be exercised to place it back on the bed with the proper side up. Pads with a “top” and “bottom” side will be marked “This Side Up.”
• No pins of any kind should be used in the bedding.
• Hot objects such as heating pads should not be placed on the alternating pressure pad.
• Heated under-blankets should not be used with the alternating pressure pad system.
• Solvents such as alcohol should not come into contact with the surface of the pad. A mild detergent and water should be used for cleaning.
• Caution must be exercised when providing bed care such as bathing the patient, so as not to expose the pump unit to accidental spills. The pump unit should not be exposed to liquids or moisture from open windows, aerosols or any other source.
• The power cord should not be allowed to come into contact with hot surfaces such as a heat register, and it should always be kept clear of the moving parts of the hospital bed.
• If unusual noises are heard coming from the pump unit, or if the pressure is not alternating properly, please discontinue use and call our office immediately.
© Copyright The MED Group 1994, 1997, 2001Alternating Pressure Pads
ALTERNATING PRESSURE PADS
1
Page 1 of 1

© Copyright The MED Group 2006
PR
OD
UC
T
IN
FO
RM
AT
IO
N
FO
R
CU
ST
OM
ER
S
PICProduct Information For Customers
5
© Copyright The MED Group 1994, 1997, 2001Aerosol Therapy
AEROSOL THERAPY
1
Your doctor has prescribed Aerosol Therapy, also known as Nebulizer Treatments, for you at home. The nebulizer, a small spray-like device, converts the liquid medication to a fine mist, enabling you to inhale it deeply into your airways where it is deposited. The aerosol treatments help you to breathe easier and more effectively by relieving congestion and opening the air passages.
DOCTOR’S ORDER FOR AEROSOL THERAPY
1. Take treatments ____________ times per day. ______________________________________________________________________________________________________________________________________________________________________________________________________________________________________________________2. For each treatment use _______________ of __________________________________________________________________________________________________________________________________________________________________________________________________________________________________________________________________________________________________________________________________________________________3. Other instructions: ______________________________________________________________________________________________________________________________________________________________________________________________________________________________________________________________________________________________________________________________________________________________________________
4. General Instructions:• Check the expiration date. Do not use out-of-date medication.• Follow all instructions on your medication label, including any instructions related to proper storage.• The number and frequency of treatments as well as the medication dosage must be exactly as ordered by your doctor.• It is important to follow your doctor’s orders regarding the time between treatments. Some medications should not be taken closer than three to four hours, while others can be taken as needed. Check with your doctor.• Keep a spare nebulizer circuit on hand. When you begin to use your spare nebulizer, contact our office for a replacement.
Page 1 of 3
© Copyright The MED Group 2006
PR
OD
UC
T
IN
FO
RM
AT
IO
N
FO
R
CU
ST
OM
ER
S
PICProduct Information For Customers
6
© Copyright The MED Group 1994, 1997, 2001Aerosol Therapy
AEROSOL THERAPY
2
TREATMENT PREPARATION• Confirm that you have the proper medication and that you know the correct dosage prescribed by your doctor.• Choose a clean, quiet place where you can sit comfortably and where there is a convenient table or other clean surface on which to place the equipment and medication. Aclean paper towel on which to place the nebulizer and medication is recommended. Tissues and a glass of water for use during and after the treatment may also be helpful. • Plug the compressor into a properly grounded electrical outlet.• Wash your hands prior to handling the nebulizer and medication.• Your doctor may instruct you to check your pulse before and after each treatment.
TAKING THE TREATMENT• Assume a comfortable sitting position.• Add the prescribed medication to the nebulizer cup, using precisely the prescribed dosage. • Assemble the nebulizer and mouthpiece or mask. Some units may also have a T-shaped piece as part of this assembly. Attach the assembly to the compressor with the air tubing.• Turn ON the compressor.• Take a deep breath and exhale completely.• Place the mouthpiece in your mouth, between your teeth. Close your mouth and seal your lips around the mouthpiece. If a mask is being used instead of the mouthpiece, place the mask over your mouth and nose and breathe through your mouth.• Hold the nebulizer in a level, upright position to avoid spilling and to obtain the most effective nebulization of the medication.• Breathe normally through your mouth. Exhale slowly and completely. Take an occasional deep breath, hold it for a few seconds, then exhale completely. One deep breath for every four times you inhale is usually about right.• Relax and take your time.• If while taking your treatment, your pulse rate increases significantly, or you feel dizzy, light headed or shaky, stop the treatment. Restart the treatment when the symptoms disappear. If symptoms persist or reoccur, call your doctor.• Tap the side of the nebulizer cup periodically to shake droplets of medication that accumulate on the inside back down into the cup. • Continue the treatment until the nebulizer is no longer producing mist. • Treatment time will normally range from 10 to 15 minutes and may vary from treatment to treatment.• Turn OFF the compressor.• Use a controlled cough to expectorate mucus loosened by the treatment.
Page 2 of 3
© Copyright The MED Group 2006
PR
OD
UC
T
IN
FO
RM
AT
IO
N
FO
R
CU
ST
OM
ER
S
PICProduct Information For Customers
7
© Copyright The MED Group 1994, 1997, 2001Aerosol Therapy
AEROSOL THERAPY
3
CARE AND CLEANING OF THE EQUIPMENTImmediately after each treatment• Remove the nebulizer assembly from the air tubing.• Separate the nebulizer and the mouthpiece or mask. Disassemble the nebulizer.• Thoroughly rinse all of the above parts under warm, running water.• Shake off excess water and place the parts on a clean paper towel to air dry. Cover lightly with a second paper towel.• Make sure all parts are completely dry before being stored or used for another treatment.
ONCE EACH DAY• Disassemble the nebulizer assembly as previously described. Wash all parts in a solution of mild dish washing detergent. • Thoroughly rinse under warm, running water and shake off excess water.• Soak all parts in white vinegar solution, one cup of white vinegar to three cups of water, for 30 to 40 parts must be completely covered by the solution while soaking. • Thoroughly rinse under warm running water and shake off excess water.• Place the parts on a clean paper towel to air dry. Cover lightly with a second clean paper towel.• All parts must be completely dry before being stored or used for another treatment.
NOTE: Unless you are instructed otherwise, the white vinegar solution can be stored in an appro priate covered container in your refrigerator and may be re-used for up to one week.
NOTE: Your doctor may recommend a commercially available disinfectant product instead of the white vinegar solution. If this is the case, carefully follow instructions on the product container for: (1) Mixing Instructions (2) Soaking Time (3) Rinsing Requirements (4) Solution Storage
OTHER IMPORTANT INFORMATION• Do NOT overuse medications. Use precisely the amount prescribed by your doctor. • To avoid infection or re-infection, adhere strictly to the cleaning procedure for the nebulizer assembly.• Keep the compressor clean and free of dust. With the compressor unplugged, wipe with a clean, slightly damp cloth as needed. Check the inlet filter and replace it periodically according to instructions.• Nebulizers should be replaced periodically according to instructions. • Report any change in your condition to your doctor.
Page 3 of 3
© Copyright The MED Group 2006
PR
OD
UC
T
IN
FO
RM
AT
IO
N
FO
R
CU
ST
OM
ER
S
PICProduct Information For Customers
8
INTRODUCTION
Your doctor has prescribed a home apnea monitor for your child. While your child is on this monitor, your doctor, as well as other health care professionals and representatives from our company will be working with you. You are the most important member of this team. The home apnea monitor will also play an important part in this team effort. The monitor is there to help you and others keep careful watch over your child. Unless your doctor advises otherwise, the monitor must be used at all times, especially when the child is sleeping. You should not discontinue use of the monitor unless instructed by your doctor to do so.
An apnea monitor is a machine that continuously monitors the respiratory rate and the heart rate. If the child's breathing and/or heart rate are not within the limits prescribed by your doctor, visual and/or audible alarms will be activated.
You must understand the monitor will not prevent the loss of breathing or heart beat. It is designed to monitor breathing effort and heart beat patterns through electrodes placed on the child's chest and to alert you if it detects a change that requires your intervention.
Visual indicators on the monitor will respond to every breath and every heart beat. You can confirm that the monitor is accurately responding to your child's heart beat and breathing by comparing the child's actual pulse and breathing movements to these indicators, as you were instructed by our representative. If the visual indicators are not responding properly, check the electrodes and their correct placement as you were instructed. If, after ensuring correct positioning and application of electrodes, the visual indicators still do not respond properly, contact our office immediately.
IMPORTANT: If at anytime you feel the monitor is not functioning properly, contact our office immediately and visually monitor your child until proper operation is restored or confirmed.
IMPORTANT INFORMATION ABOUT APNEA MONITORS
An apnea monitor is intended only to act as an early warning device to alert parents or caregivers that immediate action is necessary. An alarm means the monitor has received signals which may indicate the patient is experiencing an event that could be life threatening. The monitor is designed to alarm at thresholds prescribed by your doctor. To safely attend to the child, you should not be more than ten seconds away. Even with this short response time, there is no guarantee that a properly operating monitor and appropriate CPR techniques will always result in successful resuscitation. Be attentive in your training, practice your technique, and be prepared. There is no guarantee that a properly operating monitor will alarm in time to allow successful resuscitation of the patient.
APNEA MONITORS
© Copyright The MED Group 1994, 1997, 2001Apnea Monitors 1
Page 1 of 7

© Copyright The MED Group 2006
PR
OD
UC
T
IN
FO
RM
AT
IO
N
FO
R
CU
ST
OM
ER
S
PICProduct Information For Customers
9
© Copyright The MED Group 1994, 1997, 2001Apnea Monitors 2
Page 2 of 7
Apnea monitors may not detect some apnea episodes (periods during which breathing stops). For example, the monitor may mistake body movement such as rocking or riding in a car for breathing. Also, if a child has apnea during choking, the monitor could mistake the movement caused by choking for breathing. If your child is experiencing movement of any kind you must not rely on the monitor for alarms.
Although the monitor is not fool-proof, it will detect most apnea episodes not caused by choking. It will also alert you if your child's heart rate becomes abnormal. Remember, the monitor can only do its job if it is turned ON and properly connected to your child. Do not stop using the monitor until advised to do so by your doctor.
Check the operation of your monitor regularly, using the test procedure as you were instructed. Each visual indicator will activate as the monitor goes through the self-check. The self-check ends with an audible signal. Perform this self-check several times a day and before going to bed at night. If the alarm does not operate properly during these checks, call our office immediately and visually monitor your child until a properly operating monitor is in place.
"False alarms" are short alarms for which there is no apparent cause (alarms that appear to be invalid). Some "false alarms" may be actual apnea events during which the monitor alarm stimulated your child to resume breathing normally.
IMPORTANT: Adjusting the monitor to reduce the number of "false alarms" may also increase the chance that the monitor would not detect a real apnea episode. Never make monitor alarm limit adjustments unless advised to do so by your doctor or our representative.
Apnea monitors are equipped with battery back-up to supply power during brief household power failures. If your monitor has a separate battery charger, it is important to routinely check the charger connector. The monitor is equipped with a visual indicator to indicate when the battery is charging. This indicator should not flicker when the charger connector is gently twisted or wiggled.
If you live close to a strong transmitter, such as a television or radio station, a police or fire station, a HAM radio transmitter, an airport or any other source of electromagnetic radiation, these signals may be picked up as breathing by your monitor. Checking your monitor's breathing indicator, as described previously, will help to determine if your monitor is affected by electromagnetic interference. In some rare instances, it may not be possible for the monitor to perform properly in these environments. If you suspect a problem with this type of radiation, please ask our representative to test the monitor in your location.
Some electrical devices including microwave ovens, televisions, certain power tools, some electric blankets and waterbed heaters, and other electrical appliances may be a source of electromagnetic interference and could cause the monitor to malfunction. If you have any reason to suspect the monitor is not operating properly, contact our office immediately.
Static electricity can also cause monitor malfunction. In cool, dry weather static electricity can be generated simply by walking on carpeting or handling nylon or woolen bedding. Under these conditions, it is wise to touch a grounded metal object to eliminate the static charge before attaching or adjusting the electrodes.
The monitor must always be kept in a clean environment. Place the unit on a table (never on the floor) to avoid dirt or other foreign material from getting into the monitor enclosure.
Never allow another person (child or adult) or a pet to sleep in the same bed with the monitored child. Any movement near your child, the monitor, or the cables may cause the monitor to fail to detect an apnea episode. This also increases the danger of cables or electrodes being accidentally disconnected. The loose lead alarm should be tested regularly to ensure that it is working.
© Copyright The MED Group 2006
PR
OD
UC
T
IN
FO
RM
AT
IO
N
FO
R
CU
ST
OM
ER
S
PICProduct Information For Customers
10
© Copyright The MED Group 1994, 1997, 2001Apnea Monitors 3
Page 3 of 7
Check to make sure you can hear the monitor's alarms from other rooms or when the noise levels in your home are higher.
Our qualified health care professionals are available 24 hours a day. Call our office at any time you have questions or need assistance with the monitor.
IMPORTANT: Your monitor can only analyze your child's breathing and heart rate and warn you that something is wrong. It cannot help your child during an alarm event. You must take action.Read the equipment operating instructions that have been furnished by our representative. Those instructions are written specifically for the system you have been provided. These instructions serve as a reference. They should be used in conjunction with the instruction and protocol set by the doctor ordering the system and the training provided by our representative.
Setting up the Monitor
Post your list of emergency telephone numbers where it will be readily available in case of an emergency. Be sure that everyone who might be acting as caregiver knows where to find these numbers.
Keep your troubleshooting guide near the child's bed.
Place your monitor on a sturdy night stand or table out of reach of the child being monitored and any other children in the home. A grounded three-prong outlet should be within easy reach of the monitor's power cord. Never place the monitor on floor, on carpet or on the soft pillows or cushions of a chair or sofa. These soft surfaces might tend to muffle the audible alarm. Keep all objects away from the front of the monitor. Never cover the monitor. Place the monitor facing the door of the child's room so it will be easily visible from the doorway.
Keep a flashlight and your event log at the bedside.
Locate and identify the fuse or circuit breaker for the outlet used for the monitor.
TRAVELING WITH YOUR CHILD
LOCAL TRAVEL You should continue to use the monitor when traveling (even short distances). Follow the instructions you were given by our representative regarding the handling and use of the monitor and battery charger while traveling locally. If possible, plug your monitor into a wall outlet when you reach your destination. This will help keep battery fully charged.
LONG DISTANCE TRAVEL If you must travel long distances and/or out of our service area, please contact our representative well in advance of the trip for special instructions and assistance.
APPLYING ELECTRODES
Place the electrode belt on a firm flat surface, with the Velcro™ tab side facing up. Place the child face up on the belt. Position the belt at approximately the level of the child's nipples.
Plug the metal tips of the lead wires into the electrodes. The metal tips should be fully inserted into the electrodes so that no metal is showing.
With the wires inserted, pick up the electrodes so the electrode with the white wire is in your left hand and the electrode with the black wire is in your right hand. Turn the electrodes so the Velcro side is facing downward and the lead wires are toward the bottom edge of the belt.
© Copyright The MED Group 2006
PR
OD
UC
T
IN
FO
RM
AT
IO
N
FO
R
CU
ST
OM
ER
S
PICProduct Information For Customers
11
© Copyright The MED Group 1994, 1997, 2001Apnea Monitors
Page 4 of 7
4
Place each electrode on the belt so it will be positioned at nipple level and about halfway between the infant's nipple and armpit when the belt is worn. The white lead wire should be connected to the electrode on the child’s right side and the black lead wire should be connected to the electrode on the child’s left side.
Make sure the surface of the skin where the electrodes will make contact is clean, dry and free of lotion, powder or oil.
Before attaching the belt around the child's chest, wet the carbon/rubber contact surface of each electrode with a drop of water and rub it in. Wrap the belt snugly around the child's chest and fasten with the Velcro strip. The belt should not overlap more than three inches, or it may cover one of the electrodes and prevent contact with the skin. The extra material can be cut off with scissors. Once the belt is secured, you should be able to slip one finger between the belt and the child's body. This will indicate that the belt is snug enough to sense the child's heart beat and breathing, but not so tight as to interfere with the child's breathing.
IMPORTANT POINTS TO REMEMBER • Always be sure the electrodes are clean and free of any build up of lotion or skin oil. • When applying electrodes, always moisten the surface of the electrode with a drop of water. • Be sure the belt is snug around the child's chest so the electrodes are pressed firmly against the skin. • Never wrap the lead wires over the child's neck and shoulders. Always run the wires downward, out the bottom of the child's clothing (but not through the diaper). Keep the lead wires away from your child's head and neck.
CONNECTING TO THE MONITOR
Attach the free ends of the electrode lead wires to the patient cable. The patient cable is color coded. The black lead wire must be connected to the black pin on the patient cable, and the white lead wire must be connected to the white pin. You should feel a distinct click when you insert a lead wire into the patient cable.
The connector on other end of the patient cable should now be inserted into the socket marked "patient cable" on the monitor. You should hear and feel a distinct click as it snaps into place.
IMPORTANT: The connector on the patient cable locks into the socket on the monitor. When unplugging the patient cable, you must first release the locking mechanism. Do not pull on the cable without releasing the lock.
TURNING THE MONITOR ON
With the electrodes securely in place and the cables properly connected, turn the monitor power switch to the ON position.
The monitor will automatically go through a self-check sequence. Each visual indicator will flash ON during this self-check procedure. An audible beep will indicate when the self-check procedure is completed. If the monitor doesn't perform the self-check properly, contact our office immediately and observe your child until proper operation is reestablished.
The alarm limits on your monitor have been set specifically for your child according to your doctor's prescription. Please do not change any of these settings.
© Copyright The MED Group 2006
PR
OD
UC
T
IN
FO
RM
AT
IO
N
FO
R
CU
ST
OM
ER
S
PICProduct Information For Customers
12
© Copyright The MED Group 1994, 1997, 2001Apnea Monitors 5
Page 5 of 7
IF AN ALARM SOUNDS
If you hear the monitor alarm, check your child immediately. An alarm may be either a patient alarm or an equipment alarm. As explained during your training by our representative, you can distinguish between the two types of alarms by the difference in the sound.
PATIENT ALARM
A patient alarm indicates a change in your child's breathing or heart rate. Any delay in response to a patient alarm will result in a progressively more intense alarm. NOTE: You should never be more than 10 seconds away from your child.
THERE ARE FOUR GENERAL CONDITIONS RESULTING IN PATIENT ALARMS.
HEART FAST ALARM
Check your child. • Your child's heart is beating faster than the setting on the monitor. • It may increase with crying or physical activity. • The heart fast indicator on the monitor will turn on, and an alarm will sound. • Press the reset button. • If the heart continues to be fast, the alarm will continue. • Comforting the child may resolve the alarm condition. • Follow the instructions given to you by your doctor if the alarm continues. • After the alarm condition has been resolved, record the event on the alarm log and reset the monitor by pressing the reset button. HEART SLOW ALARM
Check your child. • Your child's heart is beating slower than the setting on the monitor. • The heart slow indictor on the monitor will turn on and an alarm will sound. • Press the reset button. • If the heart continues to be slow, the alarm will continue. • Follow the instructions given to you by your doctor if the alarm continues. • After the alarm condition has been resolved, record the event on the alarm log and reset the monitor by pressing the reset button.
BREATH SLOW ALARM
Check your child. • Your child's breathing is slower than the setting on the monitor. • The breath slow indictor on the monitor will turn on and an alarm will sound. • Press the reset button. • If the breathing continues to be slow, the alarm will continue. • Follow the instructions given to you by your doctor if the alarm continues. • After the alarm condition has been resolved, record the event on the alarm log and reset the monitor by pressing the reset button.

© Copyright The MED Group 2006
PR
OD
UC
T
IN
FO
RM
AT
IO
N
FO
R
CU
ST
OM
ER
S
PICProduct Information For Customers
13
© Copyright The MED Group 1994, 1997, 2001Apnea Monitors 6
Page 6 of 7
BREATH APNEA ALARMCheck your child. • It has been too long since your child has last attempted to take a breath. • The breath apnea indictor on the monitor will turn on and an alarm will sound. • Press the reset button. • If a breath has not been taken, the alarm will continue. • Follow the instructions given to you by your doctor if the alarm continues. • After the alarm condition has been resolved, record the event on the alarm log and reset the monitor by pressing the reset button.
EQUIPMENT ALARM
An equipment alarm indicates a problem with the monitor or the wires and electrodesconnecting it to your child. This could mean that your child is not being monitored properly.
Even with an equipment alarm, always check your child first. Once you have confirmed your child's breathing and heart rate are normal, proceed to check the equipment for loose connections, low battery, incorrect switch setting, incorrect lead wire connection, etc. If you are unable to correct the alarm condition, turn the monitor OFF and call our office. Observe your child until the equipment problem has been corrected.
Refer to the troubleshooting guide in the operating instructions furnished with your monitor to learn how to correct such common problems as loose lead, low battery, poor electrode contact, etc.
WHO TO CALL FOR ASSISTANCE
If you have to provide CPR, call EMS or the rescue squad. Your doctor can be notified after the episode has been resolved.
If you child is having medical problems of any kind, call your doctor. You should also call your doctor anytime you have to use vigorous stimulation to arouse your child.
If you are having problems with the monitor, call our office immediately. You must watch your child whenever you think the monitor is not working properly.
OTHER HELPFUL INFORMATION
• Review your emergency plan regularly. Keep instructions and emergency phone numbers in a specific, convenient location known to all caregivers, so the numbers are always quickly and easily available.
• Make sure that all caregivers are CPR trained. Older siblings should also understand the monitor equipment and know how to help. CPR should be periodically reviewed with your doctor or other health care provider. • Use the monitor at all time when the child is sleeping or is unattended and at all other times prescribed by your doctor. You should use the monitor whether you are at home, traveling, visiting friends, shopping, etc. Make no exceptions unless instructed to do so by your doctor.
• Turn the monitor OFF and remove the electrode belt and electrodes when bathing the child.
• Use fabric softener when washing your child's clothes to reduce static electricity, which can interfere with the proper operation of the monitor. The type of softener used in the washer, rather than dryer sheets is preferable.

© Copyright The MED Group 2006
PR
OD
UC
T
IN
FO
RM
AT
IO
N
FO
R
CU
ST
OM
ER
S
PICProduct Information For Customers
14
© Copyright The MED Group 1994, 1997, 2001Apnea Monitors 7
Page 7 of 7
OTHER HELPFUL INFORMATION
• To order additional supplies, please call our office during regular business hours several business days before your present supplies are exhausted. You should keep extra electrodes, a second set of lead wires and an extra patient cable on hand to allow you to immediately correct a failure of any of these accessory items. • Always stay within 10 seconds of your child. Be sure you can hear the monitor alarms over household noises such as your vacuum cleaner, dishwasher, radio or television and other appliances.
ROUTINE CLEANING
MONITORUnplug the monitor from the electrical outlet. Detach all cables before cleaning. Use a slightly damp cloth to clean the outside of the monitor. Do not use an abrasive cleaner. Do not allow liquids to get into the monitor.
PATIENT CABLEUse a damp cloth to clean the patient cable. Never use alcohol or solvent of any kind to clean the cable. NOTE: The cable cannot withstand excessive bending, twisting or coiling.
ELECTRODESThe electrodes should be cleaned daily with mild soap (dish washing soap) and water. Rinse thoroughly to assure soap is not left on the electrode.
BELTKeep electrodes and electrode belt clean to prevent skin irritation and false alarms. The belt can be hand or machine washed after removing the electrodes. Use mild detergent and warm water. For machine washing use gentle cycle. Rinse thoroughly to prevent skin irritation. Do not use bleach. Belt should be air dried. It should not be placed in an automatic dryer.
LEAD WIRESUse a damp cloth to clean lead wires. The metal tips should be cleaned with an mildly abrasive cleaner if they become tarnished. Special care is required when connecting or disconnecting the lead wires. Hold the hard plastic ends. Never pull on the wire itself.
DISCONTINUING USE OF THE MONITOR
Your doctor will determine when to discontinue use of the home apnea monitor. Please consult your doctor or his/her staff if you have questions.
© Copyright The MED Group 2006
PR
OD
UC
T
IN
FO
RM
AT
IO
N
FO
R
CU
ST
OM
ER
S
PICProduct Information For Customers
15
STANDARD TUB AND SHOWER SEATSThe primary difference between a tub seat and a shower seat is the seat height. Most units intended for tub use are 15 to 16 inches in height, while shower models are approximately 20 to 21 inches high.
The seat height for the tub model is intended to position the seat approximately level with the top of tub wall. Seat heights that are significantly lower than this often pose a problem for the user when it comes time to exit the tub. From these lower positions, body mechanics are bad for both user and attendant, creating the potential for a serious accident. One slip and the user AND the attendant may end up in adjoining hospital beds.
The objection frequently arises that this seat height prevents the user from taking a “real tub bath.” Users cannot sit and soak in the warm water. This is certainly a valid statement. Bathing at this height usually requires the use of a hand shower. The fact remains that the more you lower the seat height below the wall of the tub, the more difficult it is for the user to get down to, and up from, the bath seat. This obviously results in the seat providing less and less assistance, thus creating greater risk of injury. Lower seat heights can certainly be provided, but tub seat heights below 11 inches are generally not recommended.
INSTALLATIONInstallation of the standard bath seat consists simply of placing it in the tub in the appropriate position. This is usually near the end opposite the faucets. Most bath seats have rubber or plastic feet that are slip resistant but certainly not slip proof. Wiping these feet with alcohol removes any oil, grease or talc and enhances the slip resistant characteristics. The feet should be cleaned initially on a new product and cleaning should be repeated periodically during regular use. It is also important to keep the bathtub clean and free of soap film to help prevent slipping.
In spite of all the precautions to prevent slipping, it is important that the user understands the necessity to exert force only straight down in a vertical direction when sitting down or rising from the seat. Any significant force in a horizontal direction is likely to cause the seat to slip or even to tip over. These are relatively lightweight products, and they are not anchored to the tub in any way.
Please call our office if more information is needed regarding other products that will further enhance your safety and independence while bathing.
© Copyright The MED Group 1994, 1997, 2001Bath and Shower Seats
BATH AND SHOWER SEATS
1
Page 1 of 1

© Copyright The MED Group 2006
PR
OD
UC
T
IN
FO
RM
AT
IO
N
FO
R
CU
ST
OM
ER
S
PICProduct Information For Customers
16
OPERATING INSTRUCTIONSThe rails are lowered by pulling out on the pull buttons or plungers. Care should be exercised not to catch the patient’s hands or feet in the rails as they are lowered. It is wise to hold the rail with one hand, while releasing the pull button with the other. This way it can be lowered slowly and in a controlled manner.
To raise the rail, lift up in the center until the plungers snap into the holes in the rail. Visually check to confirm that the plungers are securely seated.
On the universal telescoping rails, the head end can be raised independently of the foot end to provide a half rail effect if desired.
When assisting a patient to turn on to his/her side, the rails should be in the up and locked position. The caregiver should stand on the side toward which the patient is to be turned — then reach over the rail and pull to provide the needed assistance. Providing this assistance can be made much easier by first adjusting the bed to a convenient height.
To make the bed: 1. Lower the rail on one side. 2. Drop the linen between the rails and the mattress. 3. Tuck the linen and blankets. 4. Raise the rail to the up position. 5. Follow the same procedure on the opposite side.
Periodic lubrication of the sliding and telescoping parts of the rails with silicone spray will keep them operating easily and smoothly. Only silicone spray should be used for this lubrication procedure. Similar petroleum-based sprays such as WD-40 will soil the bed linens.
IMPORTANT • A side rail is a safety device to prevent the patient from rolling out of bed. It should not be used as a restraint.
• A side rail may, however, unintentionally restrain a patient. Caregivers must be sensitive to the patient’s personal needs and safety at all times when using side rails.
• There will be a gap between the side rail and the mattress when the head spring is elevated.
© Copyright The MED Group 1994, 1997, 2001Bed Side Rail
BED SIDE RAIL
1
Page 1 of 1
© Copyright The MED Group 2006
PR
OD
UC
T
IN
FO
RM
AT
IO
N
FO
R
CU
ST
OM
ER
S
PICProduct Information For Customers
17
There are a variety of different styles of Bedside Commodes. Selection of the appropriate model depends on the physical limitations of the user and where it will be used. Most models fall into one of the following categories: •Basic Models with fixed arms •Drop-Arm Models or those with removable arms •Over-Toilet Models •Concealed Models
There are also other special models for individuals with special needs.
All four of the above categories provide toilet facilities at the bed side for individuals who have difficulty getting to the bathroom safely.
For ALL models, it is important that the user understands the necessity for exerting force only straight down in a vertical direction when getting up and down or transferring to and from the seat. Any significant force in a horizontal direction is likely to cause the commode to slide on the floor or even to tip over. Bedside Commodes are relatively lightweight and are not anchored to the floor like the conventional bathroom toilet.
BASIC MODELSThese models answer the needs of that large group of users who can walk but cannot contend with a flight of stairs or the distance involved to get to the bathroom. To use these models, it is necessary for the user to be able to stand, pivot and sit down safely.
All good quality basic Bedside Commodes have provisions for adjusting the seat height to the most functional level for the user. Increased seat heights generally offer greater independence and safety when sitting down and rising from the seat. This adjustment is accomplished by pressing the spring-tension buttons on each leg and telescoping the leg in or out to the desired length. Care should be exercised to see that the spring-tension buttons pop back out and lock securely into the selected hole. For individuals who have difficulty bending at the hip, the two back legs of the commode can be set higher than the two front legs to provide a sloping seat.
DROP-ARM MODELSThese models provide for the needs of non-ambulatory users by permitting lateral or sliding transfers to and from bed, chair or wheelchair. The arm on either side can easily be dropped down out of the way by activating the release mechanism. Other versions of this style commode with swing-away or removable arms are also available and provide similarly for lateral transfers. Seat height adjustment on the Drop Arm Commode is accomplished in the same manner as on the basic model bedside commode. The seat height should be set to the same level as the bed, chair or wheelchair from which the user will transfer.
© Copyright The MED Group 1994, 1997, 2001Bedside Commodes
BEDSIDE COMMODES
1
Page 1 of 2

© Copyright The MED Group 2006
PR
OD
UC
T
IN
FO
RM
AT
IO
N
FO
R
CU
ST
OM
ER
S
PICProduct Information For Customers
18
OVER-TOILET MODELSThese models are sometimes referred to as Backless Commodes or Three-in-One Commodes. They are available in either Basic or Drop-Arm versions and provide toilet facilities at bed side just as the two previous models. The unique feature of the Over-Toilet Model is that it can also be positioned over the regular bathroom toilet to provide adjustable seat height as well as assistance in getting up and down. Some users find it convenient to have the unit in the bathroom during the day but at the bedside at night.
To change from the Bedside to the Over-Toilet configuration, it is necessary to simply remove the container and replace it with the splash guard that is furnished with this model. Both the cover and seat of the regular bathroom toilet should be raised to the upright position before putting the Over-Toilet unit in position. Seat height adjustment for these models is accomplished exactly the same as for the Basic and Drop-Arm Commodes. CONCEALED MODELSThese models are also know as Residential Commodes and Furniture Commodes. These models function as a commode but do not look like one. The adjustable height feature is sacrificed in exchange for the more attractive appearance. The seat height is still somewhat higher than the usual bathroom toilet, and these models are functional for the less severely involved individual. Drop-Arm versions are not available in this model.
The Concealed Commode also serves as a comfortable chair when not being used as a commode. The chair seat is simply removed and the commode container put into place when the commode is needed.
© Copyright The MED Group 1994, 1997, 2001Bedside Commodes 2
Page 2 of 2
BEDSIDE COMMODES

© Copyright The MED Group 2006
PR
OD
UC
T
IN
FO
RM
AT
IO
N
FO
R
CU
ST
OM
ER
S
PICProduct Information For Customers
19
The fitting process and the use of standard canes and quad canes are very similar. The choice of which type cane you should use depends on how much support and added stability is needed. The quad cane provides much greater stability because of its multiple points on the ground and has the advantage of being free-standing. One disadvantage of the quad cane is that it is heavier.
Many improvements have been made in canes in recent years. The comfort of the hand grips and the shape of the shaft are two such improvements (Consider these features when selecting a cane). The choice of the handgrip will depend largely on the size of your hand. You also may want to consider one of the canes with a curve in the shaft. This design locates the handgrip directly over the cane tip, eliminating uncomfortable offsetting leverage and instability. This feature provides better balance, added confidence, and less fatigue to the hand and wrist.
In addition to the choice of hand grips and shaft design, quad canes are available in either a narrow base or a wide base version. The wide base models are used by individuals needing substantial support and who do not have to negotiate stairs. The wide base will not safely fit on a step.
The narrow-base quad cane provides somewhat less support but can be used on stairs. Even with the narrow base, the cane should be turned sideways on steps to provide greater safety. YOU SHOULD NOT ATTEMPT TO NEGOTIATE STAIRS WITH ANY TYPE OF CANE WITHOUT THE APPROVAL OF YOUR PHYSICIAN OR THERAPIST.
HEIGHT ADJUSTMENTThe correct height adjustment is one that provides a 20-to-30-degree bend in the elbow. This can be easily achieved by having the user stand erect, look straight ahead with shoulders squared and arms hanging relaxed at the sides. The height of the cane is then adjusted to place the handgrip just above the wrist.
After making any height adjustment, check carefully to ensure that the adjustment mechanism is locked securely.
INSTRUCTIONS FOR USEIF YOU HAVE HAD THE BENEFIT OF INSTRUCTION BY YOUR PHYSICIAN OR THERAPIST, FOLLOW HIS/HER INSTRUCTIONS CAREFULLY.
All canes or quad canes should always be used in the hand on the opposite side from the affected or weaker leg. For example, if the right leg is injured, the cane should be used in the left hand. This procedure should be followed regardless of whether you are right-or-left handed. The cane and the affected leg should be moved forward simultaneously while bearing weight on the stronger leg. Then, leaning on the cane to reduce weight on the involved leg, the stronger leg should be brought forward. This procedure may seem awkward at first and may require some patience and practice, but it will provide much safer and more stable walking. After a little practice, it will seem quite natural.
© Copyright The MED Group 1994, 1997, 2001Canes and Quad Canes
CANES AND QUAD CANES
1
Page 1 of 2
© Copyright The MED Group 2006
PR
OD
UC
T
IN
FO
RM
AT
IO
N
FO
R
CU
ST
OM
ER
S
PICProduct Information For Customers
20
For those who are just beginning to use a cane for the first time, it may be helpful to break the movement of the cane and the weak limb into two steps. Move the cane forward first, followed by the affected limb. Then, bearing weight on the cane, bring the strong leg forward.
Always take short steps. Overstriding tends to cause loss of balance.
If you are using a quad cane, the position of the base is an important safety factor. The bases of most quad canes are flat on one side. The two legs on the flat side are approximately parallel to the shaft, while the two legs on the opposite side extend outward for greater stability. It is very important that the cane be used with the flat side in toward the user so as to prevent tripping.
On some model quad canes, it may be necessary to rotate the base 180 degrees (1/2 turn) on the shaft to place the flat side toward the user. This is accomplished by using the same mechanism used to adjust the height of the cane. After making any adjustment of the height or the base position, always check to confirm that this adjustment mechanism is securely locked.
To sit down in a chair while using a cane or quad cane, simply back up to the chair until both legs are touching the seat. Then reaching downward for the arm rests, slowly lower yourself into the chair. The cane may be placed to the side or back of the chair during this procedure. When rising, pick up the cane and place it in the hand on the strong side. Then, with both feet squarely on the floor in front of you, reverse the process by pushing up on the arm rests.
If your physician’s or therapist’s instructions differ in any way from those given here, follow his/her instructions explicitly.
The rubber tips on your cane or quad cane should be inspected regularly. Worn or damaged tips should be replaced immediately. The security of the handgrip should also be checked frequently. A handgrip that could slip off or rotate during weight-bearing can cause a fall.
© Copyright The MED Group 1994, 1997, 2001Canes and Quad Canes 2
Page 2 of 2
CANES AND QUAD CANES
© Copyright The MED Group 2006
PR
OD
UC
T
IN
FO
RM
AT
IO
N
FO
R
CU
ST
OM
ER
S
PICProduct Information For Customers
21
Cervical traction is used to alleviate neck pain, as well as shoulder and upper arm pain associated with cervical spine disorders. It can also relieve muscle spasms and nerve compression, and it can aid in achieving proper alignment of the cervical vertebrae.
There are two commonly used methods of applying cervical traction. 1. Supine cervical traction (in bed) 2. Overdoor cervical traction (vertical-sitting up)
Your doctor has prescribed __________________________________________ cervical traction with___________________ pounds of weight for you to use at home.
To apply either of these types of cervical traction, you will wear a head halter that applies the pull to the base of the skull in the rear and under the chin. The proper choice of head halters and its correct adjustment is extremely important to obtain the maximum benefit from the traction. When properly adjusted, the head halter should always deliver more pull to the base of the skull in the rear than under the chin. This provides some slight flexion along with the extension of the neck (tending to tilt the chin slightly toward the chest), resulting in more effective separation of the cervical vertebrae.
To apply the head halter: 1. Hold the head halter by the two metal “D” rings, allowing the head halter to hang down. 2. Place your head up between the two straps from the bottom, positioning the chin in the chin cup and the rear strap at the base of the skull (away from the earlobes). 3. Fasten the connecting straps on the sides and adjust for proper fit as instructed by our representative.
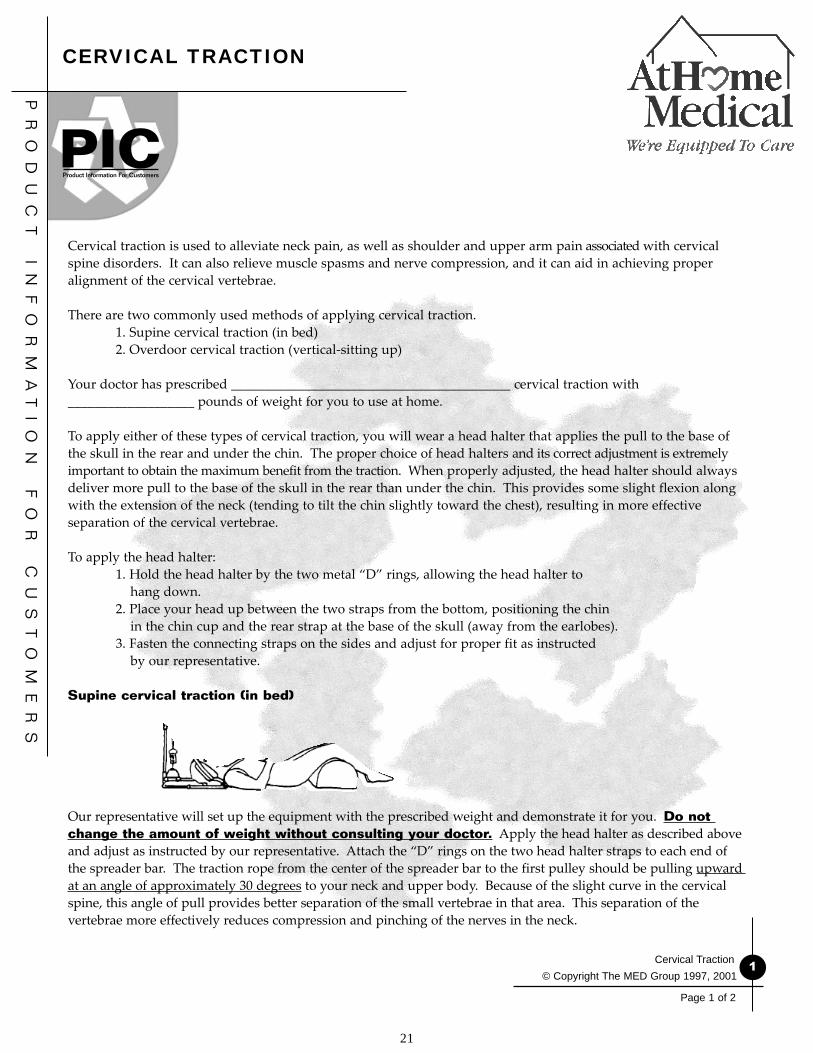
Supine cervical traction (in bed)
Our representative will set up the equipment with the prescribed weight and demonstrate it for you. Do not change the amount of weight without consulting your doctor. Apply the head halter as described above and adjust as instructed by our representative. Attach the “D” rings on the two head halter straps to each end of the spreader bar. The traction rope from the center of the spreader bar to the first pulley should be pulling upward at an angle of approximately 30 degrees to your neck and upper body. Because of the slight curve in the cervical spine, this angle of pull provides better separation of the small vertebrae in that area. This separation of the vertebrae more effectively reduces compression and pinching of the nerves in the neck.
© Copyright The MED Group 1997, 2001Cervical Traction
CERVICAL TRACTION
1
Page 1 of 2
© Copyright The MED Group 2006
PR
OD
UC
T
IN
FO
RM
AT
IO
N
FO
R
CU
ST
OM
ER
S
PICProduct Information For Customers
22
© Copyright The MED Group 1997, 2001Cervical Traction 2
Page 2 of 2
Note: If you are in a hospital bed, any change in the elevation of the head of the bed may change the angle of pull and may require adjustment of the traction equipment to maintain the correct angle.
Do not get in and out of traction to answer the phone, go to the door, etc. To benefi t from the traction, the pulling force must be applied without interruption until the muscles in the affected area relax and begin to stretch. This stretching allows desired separation of the vertebrae and relief for compressed or pinched nerves. Interruption of the pull prior to muscles relaxing and stretching may result in painful muscle spasms.
If you develop jaw pain from the pull of the traction, or if you have any questions concerning use of the traction, please call our offi ce.
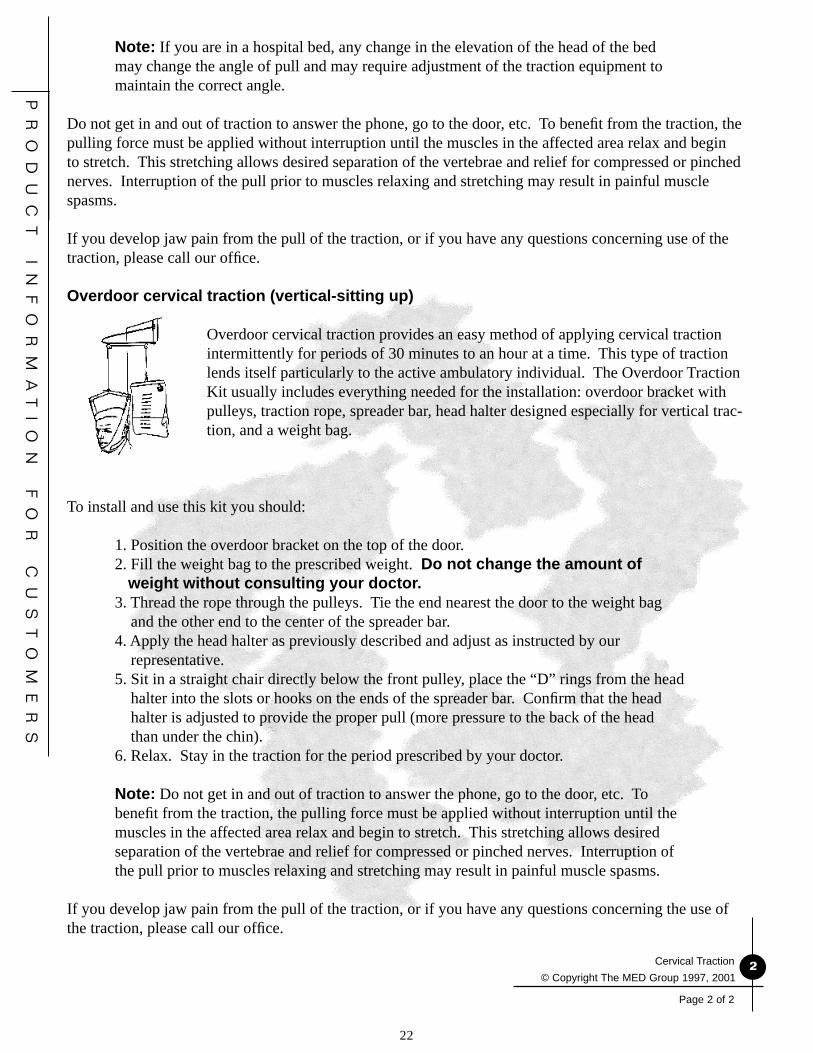
Overdoor cervical traction (vertical-sitting up)
Overdoor cervical traction provides an easy method of applying cervical traction intermittently for periods of 30 minutes to an hour at a time. This type of traction lends itself particularly to the active ambulatory individual. The Overdoor Traction Kit usually includes everything needed for the installation: overdoor bracket with pulleys, traction rope, spreader bar, head halter designed especially for vertical trac-tion, and a weight bag.
To install and use this kit you should: 1. Position the overdoor bracket on the top of the door. 2. Fill the weight bag to the prescribed weight. Do not change the amount of weight without consulting your doctor. 3. Thread the rope through the pulleys. Tie the end nearest the door to the weight bag and the other end to the center of the spreader bar. 4. Apply the head halter as previously described and adjust as instructed by our representative. 5. Sit in a straight chair directly below the front pulley, place the “D” rings from the head halter into the slots or hooks on the ends of the spreader bar. Confi rm that the head halter is adjusted to provide the proper pull (more pressure to the back of the head than under the chin). 6. Relax. Stay in the traction for the period prescribed by your doctor.
Note: Do not get in and out of traction to answer the phone, go to the door, etc. To benefi t from the traction, the pulling force must be applied without interruption until the muscles in the affected area relax and begin to stretch. This stretching allows desired separation of the vertebrae and relief for compressed or pinched nerves. Interruption of the pull prior to muscles relaxing and stretching may result in painful muscle spasms.
If you develop jaw pain from the pull of the traction, or if you have any questions concerning the use of the traction, please call our offi ce.
© Copyright The MED Group 2006
PR
OD
UC
T
IN
FO
RM
AT
IO
N
FO
R
CU
ST
OM
ER
S
PICProduct Information For Customers
23
CONTINUOUS PASSIVE MOTION
Continuous Passive Motion (CPM) is a postoperative treatment method that is designed to aid recovery after joint surgery. In most patients after extensive joint surgery, attempts at joint motion cause pain and as a result, the patient fails to move the joint. This allows the tissue around the joint to become stiff and for scar tissue to form resulting in a joint which has limited range of motion and often may take months of physical therapy to recover that motion.
Passive range of motion means that the joint is moved without the patient’s muscles being used. Continuous Passive Motion devices are machines that have been developed for patients to use after surgery. The CPM machine helps restore range of motion, prevents pooling of blood and resulting formation of blood clots, and accelerates wound healing by increasing fl uid circulation around the joint.
There are CPM devices for the knee, ankle, shoulder, elbow, wrist, and hand.
The physician prescribes how the CPM unit should be used by the patient (speed, duration of usage, amount of motion, rate of increase of motion, etc.). Your rehabilitation will consist of a series of progressive weight bearing, range of motion, muscle strengthening and cardiovascular exercises. Your strength should also improve gradually.
SAFETY INSTRUCTIONS: • Keep hair, loose clothing, fi ngers and all parts of the body away from moving components of the device. • Do not expose the device to water or extreme temperatures.
GETTING STARTED: Your mobility will be limited the fi rst few days, so get help with the following: • Head home with a continuous passive motion (CPM) machine. You may need to use it every day for the initial phase of your rehabilitation based on recommendation of your health care professional. • If applicable, have the CPM machine set up where you will enjoy spending long periods of time – in front of your favorite view, near a TV or stereo, or in the center of household activity. • Prepare lots of ice packs, such as re-sealable plastic bags or re-useable ice packs. Applying ice to the joint after therapy will help control swelling and pain.
1
Page 1 of 2
CPM - Continuous Passive Motion© Copyright The MED Group 2007
© Copyright The MED Group 2006
PR
OD
UC
T
IN
FO
RM
AT
IO
N
FO
R
CU
ST
OM
ER
S
PICProduct Information For Customers
24
USING THE CPM MACHINE: • Your health care professional will suggest when to start using the CPM device following surgery. • Your physician will determine your schedule, degree of fl exion, and how quickly to increase your degree of fl exion. An example schedule may be: Use CPM 8-10 hours a day for fi rst two weeks in two-hour sessions. Increase CPM settings 5% to 10% per day as pain allows. • Use assisted range of motion exercises by fl exing and extending. Gradually advance to the point where you feel comfortable. • Maintain fl exibility and mobility of your other joints unaffected by the surgery. • Be careful not to get stiff, but don’t push beyond point of pain.
PAIN AND SWELLING:If you experience swelling, use anti-infl ammatory measures like icing, elevation and compressive wraps. These measures should be used regularly throughout your entire rehabilitation. Ice can also be used to control pain; regular use after exercise sessions may reduce later discomfort. If the next level of increased activity / exercise causes pain, decrease the activity / exercise to the former level until the pain resolves. Contact your physician if pain persists.
THINGS TO REMEMBER: • The CPM should never increase your pain level. • While in the CPM the patient should let the machine do the work – NO fl exing, tensing, or helping it move.
If you have any diffi culty with the use of your machine, please contact our offi ce.
Should you have any questions regarding your treatment with this machine or have other questions regarding your rehab, please contact your health care professional.
2
Page 2 of 2
CONTINUOUS PASSIVE MOTION
Continuous Passive Motion© Copyright The MED Group 2007
© Copyright The MED Group 2006
PR
OD
UC
T
IN
FO
RM
AT
IO
N
FO
R
CU
ST
OM
ER
S
PICProduct Information For Customers
25
Your doctor has ordered chemotherapy for you. This medicine is used to treat cancer cells. The chemotherapy may also affect healthy cells. Because of this, you may have side effects. You will be provided additional information on the treatment of side effects.
Your doctor has prescribed a specific type of chemotherapy to treat your disease. It is important that you follow the directions on the label exactly as written.
The medicine will be mixed by the pharmacist and delivered to your home. The home care nurse will administer the chemotherapy through the catheter in your chest or arm.
SUPPLIES• Bag or cassette containing the chemotherapy medication• Ambulatory infusion pump• Pouch for infusion pump• Batteries for the pump
IMPORTANT: DO NOT USE THE MEDICATION IF THE MEDICINE LABEL DOES NOT HAVE YOUR NAME ON IT, IF YOU NOTICE ANY LEAKS OR CRACKS IN THE BAG OR CASSETTE, IF THE MEDICATION IS CLOUDY, OR IF YOU NOTICE PARTICLES IN IT.
OTHER SUPPLIES AND SOLUTIONS:• Sharps container• Chemowaste container• Dressing kit• Catheter caps• Tape• Alcohol wipes• Syringes• Saline solution (multiple dose vials for flushing)• Hep Lock solution (for flushing)• Chemo spill kit CHEMOTHERAPY SPILLIt is important to know what to do in case of accidental spills of chemotherapy medication in the home. A chemotherapy spill kit has been provided. Keep this kit in a safe, readily available place. If a chemotherapy spill occurs, it will require immediate attention to prevent unnecessary contamination of the environment. Please take time now to become familiar with the instructions on the chemotherapy spill kit box. Review these instructions periodically and follow them in the event of a spill.
© Copyright The MED Group 2000, 2001Chemotherapy
CHEMOTHERAPY
1
Page 1 of 3

© Copyright The MED Group 2006
PR
OD
UC
T
IN
FO
RM
AT
IO
N
FO
R
CU
ST
OM
ER
S
PICProduct Information For Customers
26
© Copyright The MED Group 2000, 2001Chemotherapy 2
Page 2 of 3
PREPARING TO RECEIVE YOUR CHEMOTHERAPYDepending upon the specific chemotherapy prescribed, it may be administered by Intravenous Push or by Intravenous Infusion.
INTRAVENOUS PUSHIf your chemotherapy is to be administered by Intravenous Push, your home care nurse will administer the chemotherapy through the IV catheter. The nurse will remain in your home throughout the Intravenous Push procedure.
INTRAVENOUS INFUSION• If your chemotherapy is to be administered by Intravenous Infusion, your home care nurse will start the
chemotherapy infusion by ambulatory pump to infuse over the period of time ordered by your doctor. This is a longer procedure, and the nurse probably will not remain with you throughout the entire administration.
• See pump instructions for operation or troubleshooting guidelines.• Monitor all IV connections to assure that there is no leaking.• Report any problems with infusion or side effects to your home care nurse and your doctor.
Your catheter will need to be flushed with normal saline BEFORE and AFTER you administer your medicine.• Wash your hands before starting.• Check the expiration date on the normal saline. Check the vial for cracks or leakage. If anything appears to be
wrong with the saline, DO NOT USE IT.• Clean the rubber stopper on the vial with an alcohol wipe and allow to air dry.
If using the needleless system:• Attach the vial adapter, then wipe the cap with an alcohol wipe and allow to air dry.• Pull the plunger of the syringe out to allow the syringe to fill with air. DO NOT TOUCH the stem of the
plunger because it is sterile.• Attach the syringe to the vial adapter or attach a syringe cannula to the end of the syringe and then insert
the cannula into the vial adapter.
If using syringes with needles:• Pull the plunger of the syringe out to allow the syringe to fill with air. DO NOT TOUCH the stem of the
plunger because it is sterile.• Insert the needle into the rubber stopper of the saline vial.
• Turn the vial upside down and push air into the vial. • Pull back on the plunger to draw out the desired amount of saline. • Remove the syringe from the vial and then remove the air bubbles from the syringe by tapping the syringe
and gently pushing some saline solution through the cannula. • Wipe the end of the catheter with alcohol and allow to air dry, then screw the syringe onto the end of the
catheter or insert the syringe cannula into the cap and check for blood return/patency. • Inject the saline slowly. DO NOT FORCE THE SALINE. If you feel resistance, call your nurse. • Remove the syringe and discard into the Sharps container.
You are now ready to receive the chemotherapy medication, which will be administeredor started by your home care nurse.
When your chemotherapy is complete, your catheter will need to be flushed with saline again as described above. If instructed to do so, repeat the above flush procedure using heparin.
WASTE DISPOSAL• Dispose of any needles in the Sharps container.

© Copyright The MED Group 2006
PR
OD
UC
T
IN
FO
RM
AT
IO
N
FO
R
CU
ST
OM
ER
S
PICProduct Information For Customers
27
© Copyright The MED Group 2000, 2001Chemotherapy 3
Page 3 of 3
• Dispose of all chemotherapy bags and IV tubing in the chemowaste container.• Dispose of all supplies that come into contact with chemotherapy medicine in the chemowaste container.• When your therapy is complete, or when your Sharps container and/or chemowaste container becomes 2/3 full,
please call our office for proper disposal instructions.
NOTES: _____________________________________________________________________________________________
_____________________________________________________________________________________________________
_____________________________________________________________________________________________________
_____________________________________________________________________________________________________
_____________________________________________________________________________________________________
_____________________________________________________________________________________________________
_____________________________________________________________________________________________________
_____________________________________________________________________________________________________
_____________________________________________________________________________________________________
_____________________________________________________________________________________________________
_____________________________________________________________________________________________________
_____________________________________________________________________________________________________
_____________________________________________________________________________________________________
_____________________________________________________________________________________________________
_____________________________________________________________________________________________________
_____________________________________________________________________________________________________
_____________________________________________________________________________________________________
_____________________________________________________________________________________________________
_____________________________________________________________________________________________________
_____________________________________________________________________________________________________
_____________________________________________________________________________________________________
_____________________________________________________________________________________________________
_____________________________________________________________________________________________________

© Copyright The MED Group 2006
PR
OD
UC
T
IN
FO
RM
AT
IO
N
FO
R
CU
ST
OM
ER
S
PICProduct Information For Customers
28
Side effects are the result of the chemotherapy on your normal cells. These side effects are different for each person, depending on the chemotherapy prescribed. These may include the following:• Nausea and vomiting • Stomatitis (mouth sores) • Constipation• Low white cell count • Diarrhea • Hair loss• Tendency to bruise and bleed easily SUGGESTIONS FOR ALLEVIATING THE ABOVE SIDE EFFECTS ARE:Nausea and Vomiting• Eat small frequent meals.• Avoid spicy foods.• Call your doctor if you are unable to eat or drink, or if vomiting continues for more than 24 hours.
Stomatitis• Check your mouth for open, bleeding areas.• Call your doctor if mouth sores occur.• Brush your teeth with a soft sponge.• Do not wear dentures or partial plates if your mouth is sore.• Avoid using mouthwash containing alcohol, as this may dry your mouth.
Hair Loss• Use gentle shampoos.• Wear a scarf, wig or cap.• Avoid bleaching, hair spray or permanents.
Diarrhea• Drink plenty of fluids.• Call your doctor if diarrhea continues for more than 24 hours.
Constipation• Drink plenty of fluids.• Call your doctor for stool softener or a laxative.• DO NOT take over-the-counter medications or enemas.
Low White Cell Count• Take temperature daily. Notify your doctor if temperature is above 101 degrees.• Stay away from crowds and sick people. Your defenses are lowered and you may get sick easily.
Bruising or Bleeding Easily• You may have bleeding or bruising because your blood counts are lowered.• If you begin to bleed, hold pressure on the area to stop the bleeding. Call your doctor if bleeding does not stop
within 10 to 15 minutes, or if blood is noted in your urine or stool.• Use an electric shaver for shaving.
© Copyright The MED Group 2000, 2001Chemotherapy - Side Effects
CHEMOTHERAPY-SIDE EFFECTS
1
Page 1 of 1

© Copyright The MED Group 2006
PR
OD
UC
T
IN
FO
RM
AT
IO
N
FO
R
CU
ST
OM
ER
S
PICProduct Information For Customers
29
Sleep apnea is a disorder that causes people to frequently stop breathing for short periods while sleeping. As a result, they fail to get: • A restful night’s sleep • The oxygen their body needs If left untreated, sleep apnea increases the risk of high blood pressure, heart problems, and stroke. CPAP (Continuous Positive Airway Pressure) is utilized for the treatment of obstructive sleep apnea. Your doctor has prescribed a CPAP System for your use at home for the treatment of obstructive sleep apnea.
The equipment delivers a flow of air at a prescribed amount of pressure, applied through a mask over the nose. This pressure prevents the structures in your throat from blocking air movement in and out of your lungs while you sleep. You will experience almost immediate relief from your symptoms by using CPAP Therapy.
If your doctor has prescribed oxygen and/or a humidifier along with the CPAP system, this will be explained to you during your training.
The settings and other specifics of your prescribed therapy are shown below:
__________ cm H2O pressure __________ Maximum ramp time __________ O2 LPM (if ordered) __________ Humidifier (if ordered) __________ Nasal Mask/Pillow size __________ Spacer (if applicable) __________ Headgear/Softcap size __________ Chin Strap (if applicable)
These settings have been made and the prescribed accessories indicated above have been provided by our representative.
GENERAL INSTRUCTIONSThis system has been prescribed by your doctor. It is important that you use the system EXACTLY as your doctor prescribed.
The pressure (and other settings if applicable) has been prescribed specifically to treat your disorder. These settings have been made to your CPAP device according to what your doctor prescribed, and cannot be changed without consulting your doctor.
© Copyright The MED Group 1997, 1999, 2001CPAP
CONTINUOUS POSITIVEAIRWAY PRESSURE
1
Page 1 of 4

© Copyright The MED Group 2006
PR
OD
UC
T
IN
FO
RM
AT
IO
N
FO
R
CU
ST
OM
ER
S
PICProduct Information For Customers
30
© Copyright The MED Group 1997, 1999, 2001CPAP 2
Pages 2 of 4
Read the Operating Instructions that have been provided by our representative. These instructions are written specifically for the system you have been provided. These instructions serve as a reference. They should be used in conjunction with the instructions and protocol set by the doctor ordering the system and the training provided by our representative.
We provide 24-hour service to assist you with any problems you may encounter. However, CPAP therapy is not a life sustaining form of treatment and most services will be provided during normal business hours.
RECOMMENDED CLEANING PROCEDUREExpiration valve (when applicable), nasal mask/pillows
Each morning • Disassemble and wash with liquid dishwashing detergent and warm tap water in clean basin or container. • Rinse well with clear warm running tap water. Proper rinsing reduces the potential for skin irritation resulting from soap residue. • Air dry. • Reassemble when dry. • If still damp when ready to use, assemble the nasal mask/pillows to the swivel and then to the hose. Attach the other end of the hose to the flow generator. Turn the generator on and allow these items to blow dry for 10 to 20 minutes.
Flow Generator Cabinet Once a week, unplug the unit and wipe the outside of the cabinet with a cloth slightly dampened with warm water.
NEVER immerse the unit in water or allow water to enter any vents or ports.
Make sure the unit is completely dry before plugging in.
Filters Clean and/or replace filters as instructed by our representative (Refer to Operating Instructions).
Humidifier (if applicable) Clean and disinfect as instructed by our representative (Refer to Operating Instructions).
Headgear/Softcap and Straps These items should be washed once a week using mild detergent and warm water either by hand or in the washing machine. NEVER place in a dryer. Always hang to dry.
HELPFUL HINTSWashing your face with soap and water to remove excess facial oils before putting on the nasal mask helps prolong the life of the mask and headgear/softcap and straps.
Once the straps are properly adjusted, the mask and headgear/softcap can be removed and reapplied by unfastening or loosening one strap only. You can mark the positions where the end of each strap is fastened to the Velcro with a permanent marker for easy adjustment after washing.
A tighter fit is NOT necessarily better. It can be as loose as desired as long as you are able to maintain a seal.
If you are using a room humidifier, please be sure that it is placed at least six feet from your CPAP system.
© Copyright The MED Group 2006
PR
OD
UC
T
IN
FO
RM
AT
IO
N
FO
R
CU
ST
OM
ER
S
PICProduct Information For Customers
31
© Copyright The MED Group 1997, 1999, 2001CPAP 3
Pages 3 of 4
SAFETY PRECAUTIONSIf supplemental oxygen is being used in conjunction with your system, this equipment must be kept away from heat or open flame. Smoking in the area of this device is absolutely prohibited.When using supplemental oxygen, make sure that the CPAP System is running before the oxygen source is turned ON. Turn the oxygen flow OFF before turning the System OFF.
To avoid electrical shock, unplug the unit before cleaning or changing the fuses.
The System must be positioned on its base on a level, secure surface for proper operation.
DO NOT block the vents and filter openings of your unit. Air must flow freely around the unit for the system to work properly. Make sure that bedding, draperies, curtains, etc. do not restrict airflow.
Tobacco smoke will cause tar build-up that may result in the units malfunctioning. Do not permit smoking in the room with the unit.
Do not use the system around water, other than that contained in the humidifier. Electrical shock may occur. All settings must be determined by your doctor through appropriate diagnostic studies and monitoring. These settings are to be adjusted only by authorized personnel in compliance with your doctor’s prescription.
This system must never be turned on and left unattended.
If your system is dropped or otherwise damaged, or if any liquid is spilled into the system, do not use. Contact our office immediately.
Make sure that all fittings and connections have been properly secured prior to use. The exhalation port/valve on your mask system is designed to exhaust CO2 (carbon dioxide) from the patient circuit. Continuous flow is required for safe operation. Do not block or try to seal the exhalation opening.
If using a mask that covers your mouth and nose, do not eat or drink for two to three hours prior to bedtime.
Read and understand your operating instructions prior to using your system. If you have questions contact our office.
It is recommended that you not plug your system into an outlet that is controlled by a wall switch.
Your system is not intended for life support.
ROUTINE MAINTENANCEThere are no user-serviceable components in your system. DO not attempt to open the enclosure or service this device.
At least once a year arrangements should be made to have your unit tested. This check-up is necessary to assure the long life of your unit and to ensure that you are getting the treatment prescribed by your doctor. Our representative will check your equipment periodically including the circuit, mask fit, and the pressure being delivered by your unit. In typical use, the hose, mask nasal/pillows, and headgear/ softcap may need to be replaced once or twice a year and the hose annually.
TROUBLESHOOTING GUIDERefer to your operating instructions for such common problems as air leaks around the mask; sore or dry eyes; skin irritation; dryness or burning sensation in the throat, nose, or nasal sinuses, or ear pain; feeling that the pressure is too high or too low; air from the device seems warm; etc. The operating instructions will give possible causes and instructions to solve the problem. Contact our office if you are unable to correct the problem.

© Copyright The MED Group 2006
PR
OD
UC
T
IN
FO
RM
AT
IO
N
FO
R
CU
ST
OM
ER
S
PICProduct Information For Customers
32
© Copyright The MED Group 1997, 1999, 2001CPAP 4
Pages 4 of 4
TRAVEL TIPSWhen transporting your system, precautions should be used to avoid exposure to extreme temperatures. If exposure to such temperatures does occur, the unit should be allowed to return to room temperature before being turned ON.
The voltage selector switch, if applicable, must be set for the proper line voltage. Refer to the operating instructions for a guide to line voltages/fuse size required to operate your unit when traveling outside the United States. You can also call our office for assistance prior to your travel.
The carrying case, if provided, is designed to be used as an airline carry-on bag. When traveling, do not check your unit as baggage. Always use the carrying case for the unit’s protection. The accessories (including the humidifier) can also be placed inside the carrying case.
If your CPAP system is used on a 12-volt system in a recreational vehicle or a motor home, do not attempt to use any power cord other than the DC power cord provided by our representative. Using a different power cord may result in damage to your vehicle and/or to your CPAP system.
REMEMBERYour doctor has prescribed your course of treatment, which involves this system. You have been instructed on the use of this system. Should any problem occur, contact our office or your doctor immediately.

© Copyright The MED Group 2006
PR
OD
UC
T
IN
FO
RM
AT
IO
N
FO
R
CU
ST
OM
ER
S
PICProduct Information For Customers
33
Customer: ____________________________________________________________________________________________________________________
Equipment: ___________________________________________________________________________________________________________________
(Please Check Appropriate Items Below)( ) Provider Name and Address: ________________________________________________________________________________________________
______________________________________________________________________________________________________________________________
( ) Main Phone: _______________________________________________________________________________________________________________
( ) Normal Business Hours: ____________________________________________________________________________________________________
( ) After-Hours Phone: _________________________________________________________________________________________________________
( ) Should a life threatening emergency arise, it is suggested that the customer or caregiver dial___________________________________________________________________________ for professional emergency services. ( ) Mission Statement, Customer Information, Customer Rights and Responsibilities (See Reverse Side)( ) Medicare Supplier Standards (See Reverse Side)
( ) Acceptance of ServicesI understand that by signing this agreement, I authorize provision of products and services to me by the above PROVIDER. I also understand that the products and services provided are prescribed by my physician and that it is necessary that I remain under the supervision of my attending physician during the course of my care.
( ) Medical Information Authorization I hereby authorize release to the PROVIDER any and all of my medical records pertaining to my medical history, services rendered or treatments received from my physician(s) or hospital. In order to process insurance claims, I also hereby authorize the PROVIDER to furnish to my insurance carrier(s) any medical history, services rendered or treatment needed.
( ) Assignment of Insurance BenefitsI authorize direct payment of insurance benefits by my insurance company(s) to the PROVIDER. In the event that my insurance carrier will not pay benefits on an “assigned” basis, I understand that payments may be sent directly to me and that I am obligated to immediately endorse and send such payments to the PROVIDER for payment of my bill.
( ) Financial ResponsibilityI understand that I am responsible to the PROVIDER for all charges not covered by my insurance. I recognize that in the event that my insurance company, employer, or any other third party payer refuses to pay the charges for the above items and/or services, or delays payment beyond 90 days of my receipt of these items and/or services, or in the event that I have no insurance coverage or third party payer, that I will be responsible for said payment and will make prompt reimbursement within 30 days of notification by the PROVIDER for all charges.
© Copyright The MED Group 1998, 2001Customer Information Checklist
CUSTOMER INFORMATION CHECKLIST
1
Page 1 of 4

© Copyright The MED Group 2006
PR
OD
UC
T
IN
FO
RM
AT
IO
N
FO
R
CU
ST
OM
ER
S
PICProduct Information For Customers
34
© Copyright The MED Group 1998, 2001Customer Information Checklist 2
Page 2 of 4
( ) Equipment Set-Up and InstructionIndicate “yes” or “n/a” (not applicable) for each procedure below. _______ Assemble and install equipment_______ Perform safety and operation checks_______ Environmental safety checks (Home Assessment)_______ Demonstrate equipment and give verbal instructions to patient and caregiver_______ Instruct alternate caregiver if appropriate_______ Review printed instructional material including printed safety precautions_______ Explain physician’s prescription for equipment use_______ Explain customer’s responsibility for routine maintenance and cleaning_______ Give Provider’s address, phone, and business hours_______ Explain procedure for after-hours contact_______ Explain need to notify Provider of any change in patient status_______ Explain procedure for non-operating equipment_______ Provide a copy of manufacturer’s owner’s manual when appropriate
( ) Return Demonstration by Customer of Proper Equipment UseI ACKNOWLEDGE AND UNDERSTAND THE ENTIRE CONTENTS OF THIS DOCUMENT, INCLUDING THE REVERSE SIDE.
Customer Signature: __________________________________________________________________________________________________
Relationship: _____________________________________ Date: _______________________________________________________________
Provider Representative Signature: _____________________________________________________________________________________
Date: ________________________________________________________________________________________________________________
Customer: __________________________________________________________________________________________________________________________
Equipment: _________________________________________________________________________________________________________________________
(Please Check Appropriate Items Below)( ) Provider Name and Address: ______________________________________________________________________________________________________
____________________________________________________________________________________________________________________________________
( ) Main Phone: _____________________________________________________________________________________________________________________
( ) Normal Business Hours: __________________________________________________________________________________________________________
( ) After-Hours Phone: _______________________________________________________________________________________________________________
( ) Should a life threatening emergency arise, it is suggested that the customer or caregiver dial___________________________________________________________________________ for professional emergency services. ( ) Mission Statement, Customer Information, Customer Rights and Responsibilities (See Reverse Side)( ) Medicare Supplier Standards (See Reverse Side)
( ) Acceptance of ServicesI understand that by signing this agreement, I authorize provision of products and services to me by the above PROVIDER. I also understand that the products and services provided are prescribed by my physician and that it is necessary that I remain under the supervision of my attending physician during the course of my care.
( ) Medical Information Authorization I hereby authorize release to the PROVIDER any and all of my medical records pertaining to my medical history, services rendered or treatments received from my physician(s) or hospital. In order to process insurance claims, I also hereby authorize the PROVIDER to furnish to my insurance carrier(s) any medical history, services rendered or treatment needed.

© Copyright The MED Group 2006
PR
OD
UC
T
IN
FO
RM
AT
IO
N
FO
R
CU
ST
OM
ER
S
PICProduct Information For Customers
35
© Copyright The MED Group 1998, 2001Customer Information Checklist 3
Page 3 of 4
( ) Assignment of Insurance BenefitsI authorize direct payment of insurance benefits by my insurance company(s) to the PROVIDER. In the event that my insurance carrier will not pay benefits on an “assigned” basis, I understand that payments may be sent directly to me and that I am obligated to immediately endorse and send such payments to the PROVIDER for payment of my bill.
( ) Financial ResponsibilityI understand that I am responsible to the PROVIDER for all charges not covered by my insurance. I recognize that in the event that my insurance company, employer, or any other third party payer refuses to pay the charges for the above items and/or services, or delays payment beyond 90 days of my receipt of these items and/or services, or in the event that I have no insurance coverage or third party payer, that I will be responsible for said payment and will make prompt reimbursement within 30 days of notification by the PROVIDER for all charges.
( ) Equipment Set-Up and InstructionIndicate “yes” or “n/a” (not applicable) for each procedure below. _______ Assemble and install equipment_______ Perform safety and operation checks_______ Environmental safety checks (Home Assessment)_______ Demonstrate equipment and give verbal instructions to patient and caregiver_______ Instruct alternate caregiver if appropriate_______ Review printed instructional material including printed safety precautions_______ Explain physician’s prescription for equipment use_______ Explain customer’s responsibility for routine maintenance and cleaning_______ Give Provider’s address, phone, and business hours_______ Explain procedure for after-hours contact_______ Explain need to notify Provider of any change in patient status_______ Explain procedure for non-operating equipment_______ Provide a copy of manufacturer’s owner’s manual when appropriate
( ) Return Demonstration by Customer of Proper Equipment UseI ACKNOWLEDGE AND UNDERSTAND THE ENTIRE CONTENTS OF THIS DOCUMENT, INCLUDING THE REVERSE SIDE.
Customer Signature: __________________________________________________________________________________________________
Relationship: _____________________________________ Date: _______________________________________________________________
Provider Representative Signature: _____________________________________________________________________________________
Date: ________________________________________________________________________________________________________________
CUSTOMER INFORMATION
MISSION STATEMENTWe are dedicated to exceeding our customer’s expectations in providing the greatest expertise, selection, and value in home healthcare products, supplies and services.
CUSTOMER INFORMATIONOur address, phone numbers and normal business hours are provided on the reverse side. A voice message system will answer our phones after normal business hours. In the event of equipment problems, our on-call personnel can be reached by dialing the after-hours phone number on the reverse side. Should a life threatening situation arise, it is suggested that the customer or caregiver dial the emergency number on the reverse side for professional emergency services.
CUSTOMER COMPLAINTSAny customer who feels his/her rights have been denied, who desires further clarification of rights, or who desires to lodge a complaint or express dissatisfaction with any aspect of our service or equipment, should contact our office through our main telephone number, without fear of reprisal by the company or any of its employees. If the issue cannot be resolved by our customer service representative, it will automatically be referred to the appropriate manager.

© Copyright The MED Group 2006
PR
OD
UC
T
IN
FO
RM
AT
IO
N
FO
R
CU
ST
OM
ER
S
PICProduct Information For Customers
36
© Copyright The MED Group 1998, 2001
Customer Information Checklist 4
Page 4 of 4
CUSTOMER RIGHTS • You have the right to be treated fairly with courtesy and respect. • You have the right to quality homecare equipment services regardless of race, creed, religion, sex, or source payment. • You have the right to request and receive a detailed explanation of your bill for products and services. • You have the right to be allowed reasonable participation in decisions regarding your homecare services. • You have the right to be communicated with in a way that you can reasonably understand. • You have the right to refuse equipment or services; accepting full responsibility for that refusal. • You have the right to choose your provider of homecare services. • You have the right to receive our assistance in transferring your homecare services to another provider. • You have the right to receive homecare services in a timely manner, appropriate for your needs. • You have the right to be assured of confidentiality, to review your records, and to approve or refuse the release of records. • You have the right to have competent and qualified people carry out the services for which they are responsible. • You have the right to voice your grievances and recommend changes in policies and services. • You have the right to be given reasonable notice of discontinuation of services.
CUSTOMER RESPONSIBILITIES • To provide, to the best of your knowledge, accurate and complete information. • To follow the plan of care or service recommended by your physician. • To care for, use as instructed, and return loaner (rented) equipment in good condition, normal wear and tear excepted. • To pay for the replacement costs of any equipment damaged, destroyed or lost due to misuse, abuse, or neglect. • To notify our office of any equipment malfunction or defect, and allow company technicians to enter the premises to repair, elocate, or provide substitute equipment. • To be responsible for any payment not paid by your insurance company, except where not allowed by law. • To make it known that you clearly understand the equipment and services being provided. • To advise our office of any changes in your status, including address, medical condition, insurance coverage, etc.
MEDICARE SUPPLIER STANDARDS 1. We are in compliance with all applicable Federal and State licensure and regulatory requirements. 2. We must provide complete and accurate information on the DMEPOS supplier application. Any changes to this information must be reported to the National Supplier Clearinghouse within 30 days. 3. An authorized individual (one whose signature is binding) must sign the application for billing privileges. 4. We must fill orders from our own inventory, or must contract with other companies for the purchase of items necessary to fill the order. We may not contract with any entity that is currently excluded from the Medicare program, any State health care programs, or from any other Federal procurement or non-procurement programs. 5. We must advise beneficiaries that they may rent or purchase inexpensive or routinely purchased durable medical equipment, and of the purchase option for capped rental equipment. 6. We must notify beneficiaries of warranty coverage and honor all warranties under applicable State law, and repair or replace free of charge Medicare covered items that are under warranty. 7. We must maintain a physical facility on an appropriate site. 8. We must permit HCFA, or its agents to conduct on-site inspections to ascertain our compliance with these standards. Our location must be accessi- ble to beneficiaries during reasonable business hours, and must maintain a visible sign and posted hours of operation. 9. We must maintain a primary business telephone listed under the name of the business in a local directory or a toll free number available through directory assistance. The exclusive use of a beeper, answering machine or cell phone is prohibited. 10. We must have comprehensive liability insurance in the amount of at least $300,000 that covers both the place of business and all customers and employees of ours. If we manufacture our own items, this insurance must also cover product liability and completed operations. 11. We must agree not to initiate telephone contact with beneficiaries, with a few exceptions allowed. This standard prohibits us from calling beneficiaries in order to solicit new business. 12. We are responsible for delivery and must instruct beneficiaries on use of Medicare covered items, and maintain proof of delivery. 13. We must answer questions and respond to complaints of beneficiaries, and maintain documentation of such contacts. 14. We must maintain and replace at no charge or repair directly, or through a service contract with another company, Medicare-covered items we have rented to beneficiaries. 15. We must accept returns of substandard (less than full quality for the particular item) or unsuitable items (inappropriate for the beneficiary at the time it was fitted and rented or sold) from beneficiaries. 16. We must disclose these supplier standards to each beneficiary to whom it supplies a Medicare-covered item. 17. We must disclose to the government any person having ownership, financial, or control interest in the supplier. 18. We must not convey or reassign our supplier number; i.e., we may not sell or allow another entity to use our Medicare billing number. 19. We must have a complaint resolution protocol established to address beneficiary complaints that relate to these standards. A record of these complaints must be maintained at the physical facility. 20. Complaint records must include: the name, address, telephone number and health insurance claim number of the beneficiary, a summary of the complaint, and any actions taken to resolve it. 21. We must agree to furnish HCFA any information required by the Medicare statute and implementing regulations.
© Copyright The MED Group 2006
PR
OD
UC
T
IN
FO
RM
AT
IO
N
FO
R
CU
ST
OM
ER
S
PICProduct Information For Customers
37
DUAL PURPOSECONCENTRATOR
Dual Purpose Concentrator© Copyright The MED Group 1994, 1997, 2001 1
An Oxygen Transfi lling Concentrator is a machine that separates room air into oxygen and nitrogen. The nitrogen is discarded, while the oxygen is stored, concentrated and delivered to you or your cylinder in a controlled dose at 91% to 95% purity.
Your unit may or may not be a single unit attached to the stationary concentrator.
PURPOSEYour dual purpose concentrator will allow you to receive oxygen at home while you fi ll tanks at the same time. This will allow you to always have the portability you need at your convenience.Read the manual provided at the time of delivery so you thoroughly understand how your equipment works.
FILLING A CYLINDER Always review your Owners Manual when needed
1. Turn on your unit.(unit may already be on if it your Stationary oxygen unit.)2. Make sure your cylinder valve is in the OFF position before attaching to the fi lling unit. The tank cannot fi ll properly if the valve is not closed.3. Securely attach a cylinder to the fi lling mount bracket. Follow directions in your manual. Do not force or over tighten any connections between your tanks and the fi ll port.4. Press the FILL button. Your tank will not begin fi lling until the oxygen purity reaches acceptable levels. Your tank will also not fi ll if it is attached incorrectly.5. Observe fi lling notifi cation. Do not leave the unit until you are sure it is fi lling correctly.6. Depending on the unit and the tank size your unit will take from 45 minutes to 3 hours to fi ll a tank. Once you have fi lled a few you will know typically how long it will take. Once your tank has fi lled remove it and start the process again.7. Repeat the process until all of your tanks are fi lled.
TROUBLESHOOTING AND TIPS
1. Never use an extension cord with any component of your system. Use a properly grounded receptacle only.2. If you observe any frayed or worn cords, tubing, or connections contact your provider for replacement or repair.3. Always keep OXYGEN IN USE signs in all rooms where your equipment is used.4. Keep fl ame, heat sources , and all forms of combustion away from your equipment. Do not allow anyone to smoke in or around rooms where your equipment is functioning.5. If your fi ll unit is also providing you with stationary oxygen DO NOT lower the liter fl ow being supplied to you to fi ll your tanks faster.
Page 1 of 2
© Copyright The MED Group 2006
PR
OD
UC
T
IN
FO
RM
AT
IO
N
FO
R
CU
ST
OM
ER
S
PICProduct Information For Customers
38
TROUBLESHOOTING AND TIPS 6. If the unit will not fi ll the tanks your unit may not be producing pure enough oxygen. Call your equipment provider for additional troubleshooting guidance.7. Check and clean the fi lters in your unit(s) every week. If they are extremely dirty you may need to do this twice a week. Rinse the fi lters under running water then towel dry. Do not replace a wet fi lter in your unit.8. Treat your portable tanks with care. If you have any problems with the regulators or you experience shortness of breath when using them, discontinue use and contact your provider immediately.9. Keep all contact points on your equipment clean and dust free, replacing all dust covers when not in use. Keep the protective caps in place when fi lling station and portable units are not connected.10. Do not immerse or spray your equipment. Use a damp cloth with a mild soap to clean the exterior of your equipment only.11. Do not store your portables in a hot car or trunk. Extreme temperatures can damage components of your tanks or cause them to leak. Always carry your portables in an approved container or bag specifi cally designed for oxygen.12. Try to keep all of your portables fi lled or fi lling. In case of a power failure you will have adequate backup oxygen on hand until your provider can assess your situation and make sure you are taken care of until power can be restored to you.13. Use only the portable tanks provided with your transfi ll unit. Other tanks will not attach properly and may damage the fi ttings.
Carefully follow your doctor’s orders for thefl ow rate and duration of daily oxygen
The oxygen equipment provided to you is transported, handled and installed by professionals with experi-ence in oxygen therapy. Feel free to ask them any questions about your oxygen therapy and/or equipment.
2
DUAL PURPOSECONCENTRATOR
Dual Purpose Concentrator© Copyright The MED Group 2007
Page 2 of 2
© Copyright The MED Group 2006
PR
OD
UC
T
IN
FO
RM
AT
IO
N
FO
R
CU
ST
OM
ER
S
PICProduct Information For Customers
39
An enteral feeding pump is used to administer a balanced, liquid nutritional formula directly to the digestive tract through a flexible tube. Enteral therapy allows your healthcare team to adjust the amounts of protein, carbohydrates, fat, vitamins and minerals you receive by adjusting the amounts and types of formula you receive.
ADMINISTRATION OF FEEDINGS
Tube feeding can be provided in three ways: 1. Bolus (with a large syringe) 2. Gravity (by using a bag without a pump) 3. By pump (to control the flow rate and total amount of nutrition received).
Using a pump will control the amount of food administered over a prescribed period of time. Sometimes patients fed using either the bolus or gravity methods have a problem receiving too much formula too quickly and have nutrition back up in the digestive tract (reflux) or have a problem with diarrhea (dumping syndrome). An enteral pump is used to help prevent reflux and/or dumping.
Enteral pumps come in a variety of models, but they have common features. The pump will have a clamp to attach to an IV pole. It will have an ON/OFF switch and controls for setting the amount of food (in mls or ccs) to be delivered per hour and for setting the number of hours for which the nutrition will be administered. Most pumps have an internal battery that recharges any time the pump is plugged into an electrical outlet. This allows feeding to continue even during a power failure. It will also be equipped with audible and/or visual alarms that warn of any interruption of electrical power or pump malfunction. For specific details on the operation of your particular pump, please refer to the manufacturer’s operating instructions provided.
The nutrition bags or "pump sets" may be the cassette type which are inserted directly into the pump or flexible bags which are hung on the IV pole above the pump. These flexible bags may be pre-filled and sealed with a prescribed amount of liquid nutrition in them, or they may be designed with an opening into which nutrition can be poured. Unless otherwise instructed by your doctor or healthcare team, PUMP SETS SHOULD BE CHANGED EVERY TWENTY-FOUR (24) HOURS TO PREVENT BACTERIA GROWTH. Every eight hours the bag should be disconnected from the pump and flushed with hot water to clear the bag of nutrition. You should never fill the bag with more nutrition than will be used in an eight-hour period.
The pre-filled flexible bags do NOT need to be flushed since they are sealed to prevent contamination, but they do need to be changed every 24 hours or as instructed.
© Copyright The MED Group 2001
Enteral Feeding Pump
ENTERAL FEEDING PUMP
1
Page 1 of 2

© Copyright The MED Group 2006
PR
OD
UC
T
IN
FO
RM
AT
IO
N
FO
R
CU
ST
OM
ER
S
PICProduct Information For Customers
40
Cleanliness is especially important for tube feeders. The most effective way to prevent bacterial growth and germ-transfer is for caregivers to wash their hands thoroughly with warm water and antibacterial soap for at least one to two minutes before handling tubing or any part of the enteral pump set or the nutrition. Keep enteral formula in a cool dry area. Most unopened enteral formula can be stored at normal room temperature, but you should refer to the Nutritional Supplement Storage & Handling Guidelines and follow these and any additional instructions from your doctor or other members of your healthcare team.
Your doctor will also have prescribed the number of calories per day or the number mls or ccs of nutrition per hour you are to receive. These amounts are determined based on your body weight and whether there is a need to gain, lose or maintain current weight. NEVER change the amount of nutrition or the rate of feeding without a doctor’s order. Please notify our office immediately of any changes, so we can adjust the quantity of product we deliver to meet these new needs.
Always follow your doctor’s instructions regarding use of full-strength or diluted nutrition. Shake the can vigorously prior to opening to mix any contents that may have settled or separated during storage. If you do not use all of the formula in an opened can, cover and store the remainder in the refrigerator. If the opened formula is not used within twenty-four hours, it should be discarded unless your have been otherwise instructed by your doctor or a member your healthcare team
The enteral pump itself requires very little care. Wipe the outside of the pump with a clean, damp cloth to remove dust and droplets of formula. Check the "wheels" of the pump through which the tubing is threaded. These will often collect small amounts of formula and may begin to stick or drag. Wipe these moving parts with a clean damp cloth.
If you have a problem with your enteral pump or supplies, please call our office for assistance.
If you experience a change in your health or medical condition, call your doctor.
If you experience physical distress or any type of medical emergency, call 911, the rescue squad or an ambulance.
© Copyright The MED Group 2001Enteral Feeding Pump 2
Page 2 of 2
ENTERAL FEEDING PUMP

© Copyright The MED Group 2006
PR
OD
UC
T
IN
FO
RM
AT
IO
N
FO
R
CU
ST
OM
ER
S
PICProduct Information For Customers
41
INTRATHECAL OR EPIDURAL MEDICATION BY PUMP
Your doctor has prescribed a medication to control pain that will be given to you through a catheter that has been placed in your back. An infusion pump will be used to administer this medication to you. The doctor has ordered the type of medication and how often you should receive it. It is important that you follow the directions on the label exactly as written.
TYPE OF CATHETER
1. Epidural - this catheter lies at the outside covering of the spinal canal. This area has many blood vessels and much fatty tissue as well as lymphatic and loose connective tissue.
2. Intrathecal - this is an area where the fluid that bathes the spinal canal and brain is located. This area does not contain blood vessels or nerve endings, but does contain spinal fluid. Because this area is near the spinal cord and brain, your medication will be given in very small doses.
THERE ARE THREE TYPES OF CATHETERS THAT MAY BE USED FOR THIS TYPE OF INFUSION.
• A catheter with an external hub and which connects directly to the PCA pump. • A catheter with an internal port - this device will be accessed with a huber needle, which
stays in place during the infusion. The needle and dressing will need to be changed weekly or as your doctor orders.
• A catheter with an implanted pump - this device will not need an external pump. It will, however, need refilling. You will also need to go to the hospital or doctor’s office to have any dosage changes made on the pump.
Your nurse will instruct you on the type of catheter you will be using.
SUPPLIES
• Bag of medication - this will be single use and should be discarded each time. • Infusion Pump
Important - DO NOT use the medication if: the label on the bag of medication does not have your name on it; you notice leaks or cracks in the bag; the medication is cloudy or you notice any particles in it. Important: Never use alcohol to clean your epidural catheter or the epidural catheter site.
© Copyright The MED Group 2000, 2001Epidural and Intrathecal Pain Management
EPIDURAL AND INTRATHECAL PAIN MANAGEMENT
1
Page 1 of 2
© Copyright The MED Group 2006
PR
OD
UC
T
IN
FO
RM
AT
IO
N
FO
R
CU
ST
OM
ER
S
PICProduct Information For Customers
42
© Copyright The MED Group 2000, 2001Epidural and Intrathecal Pain Management 2
Page 2 of 2
RESTRICTIONSSome activities will be restricted, such as: • Long baths or saunas • Deep sea or scuba diving • Activities which may increase body temperature • Diathermy and ultrasound therapy, especially in the area of the pump
RECEIVING YOUR PAIN MEDICATIONYour home care nurse will assist you in administering your pain management medication. The nurse will give you instructions on the specific type of infusion pump you will be using and on how to change the medication bag. Report problems with infusion or side effects to your doctor and nurse.
MONITORING YOUR THERAPYThe medication that you are using may have some side effects. It is important that you watch for these and report them to your home care nurse and doctor. These side effects can be managed. Some possible side effects include:
• Decreased appetite, nausea, vomiting • Decrease in the amount of bowel movements • Sleepiness • Confusion (you may forget things easily) • Inability to urinate • Numbness or tingling • Rapid or very slow breathing
NOTES: _______________________________________________________________________________________________________________________________________________________________________________________________________________________________________________________________________________________________________________________________________________________________________________________________________________________________________________________________________________________________________________________________________________________________________________________________________________________________________________________________________________________________________________________________________________________________________________________________________________________________________________________________________________________________________________________________________________________________________________________________________________________________________________________________________________________________________________________________________________________________________________________________________________________________________________________________________________________________________________________________________________________________________________________________________________________________________________________________________________________________________________________________________________________________________________________________________________________________________________________________________________________________________________________________________________________________________________________________________________________________________________________________________________________________________________________________________________________________________________________________________________________________________________________________________________________________________________________________________________________________________________________________________________________________________________________________________________________________________________________________________________________________________________________________________________________________________________________________________________________________________________________________________________________________________________________________________________________________________________________________________________________________

© Copyright The MED Group 2006
PR
OD
UC
T
IN
FO
RM
AT
IO
N
FO
R
CU
ST
OM
ER
S
PICProduct Information For Customers
43
INTRAVENOUS MEDICATION BY GRAVITY
Your doctor has ordered a medication, which will be given in your vein. This medication will be given by gravity IV.
Your doctor has prescribed the type of medication and how often you will need to receive it. It is important that you follow the instructions on the label exactly as written.
Supplies • Bag of Medication – This will be single dose (single use) and any leftover medication should be discarded after
each infusion. • IV Tubing – The tubing should be used for 24 hours and then discarded and replaced.
IMPORTANT: DO NOT USE THE MEDICATION IF THE MEDICINE LABEL DOES NOT HAVE YOUR NAME ON IT, IF YOU NOTICE ANY LEAKS OR CRACKS IN THE BAG OR CASSETTE, IF THE MEDICATION IS CLOUDY, OR IF YOU NOTICE PARTICLES IN IT.
Other Supplies and Solutions • Sharps Container • Dressing Kit (for IV site) • Catheter Cap • Tape • Syringes • Needle with Cap • Saline Solution (multiple dose vial for flushing) • Hep Lock Solution (for flushing) if ordered • Alcohol Wipes Preparing and Giving Your Medication • Remove medicine from the refrigerator 30 to 60 minutes before the dose is due or as instructed on the label. • Clean your work area with antibacterial soap and water. Dry with a paper towel. • Gather your supplies, alcohol, tape, Sharps container, medicine, saline, heparin, syringes and tubing. • Wash your hands with warm soapy water for about two minutes. • Check the label on the medication bag as instructed. • Close the clamp or regulator on your tubing. • Remove the seal from the spike port on the bag and remove the cap from the spike on the tubing. • Place the spike on the tubing into the spike port on the bag. • Gently squeeze the drip chamber until it is half full. Open the clamp or regulator and let the fluid slowly run
through the tubing until all visible air is removed. • Close the IV tubing clamp and place the sterile cap on the end of the tubing.
© Copyright The MED Group 2000, 2001Gravity Infusion
GRAVITY INFUSION
1
Page 1 of 2
© Copyright The MED Group 2006
PR
OD
UC
T
IN
FO
RM
AT
IO
N
FO
R
CU
ST
OM
ER
S
PICProduct Information For Customers
44
Page 2 of 2
© Copyright The MED Group 2000, 2001Gravity Infusion 2
Your catheter will need to be flushed with normal saline before giving your medication. • Check the expiration date on the normal saline. Check the vial for cracks or leakage. If anything appears to be wrong with the saline DO NOT USE IT! • Clean the rubber stopper in the vial with an alcohol wipe and allow to air dry. Or if using the needleless system • Attach the vial adapter, then wipe the cap with alcohol wipe and allow to air dry.
Continue:
• Pull the plunger of the syringe out to fill the syringe with air. DO NOT TOUCH THE STEM OF THE SYRINGE because it is sterile. • Insert the needle into the bottle, or attach the syringe cannula to the end of the syringe and insert the cannula
into the vial adapter. • Turn the vial upside down and push air into the vial. • Pull the plunger out to draw the desired amount of saline into the syringe. • Remove the syringe from the vial then expel air bubbles from the syringe by tapping the syringe and gently
pushing some fluid through the needle or cannula into the interlink cap. • Wipe the end of the catheter with alcohol and allow to air dry, then screw the syringe onto the end of the
clave adapter or insert the syringe cannula into the interlink cap. • Inject the saline slowly. DO NOT FORCE THE SALINE. If you feel resistance, call your nurse. • Remove the syringe and discard into the Sharps container.
You are now ready to infuse the medication. • Connect the end of the tubing to the clave adapter. • Open the tubing clamp and adjust the clamp to infuse ______ drops every 15 seconds into the drip chamber or
set the regulator to ________. • When the infusion is complete, close the clamp or the regulator, remove from adapter and place covered needle
on end to protect for the next infusion. • Flush your catheter again with normal saline as above. • Using the same procedure as flushing with saline, flush with heparin solution if instructed by your nurse to do so. • Place all used syringes into the Sharps container. • When your therapy is complete, or when your Sharps container becomes 2/3 full, please call our office for
instructions on proper disposal. • Store all unused supplies in a safe place and keep them together for your next dose of medication.
NOTES: _______________________________________________________________________________________________________________________________________________________________________________________________ ____________________________________________________________________________________________________________________________________________________________________________________________________________________________________________________________________________________________________________________________________________________________________________________________________________________________________________________________________________________________________________________________________________________________________________________________________________________________________________________________________________________________________________________________________________________________________________________________________________________________________________________________________________________________________________________________________________________________________________________________________________________________________________________________________________________________________________________________________________________________________________________________________________________________________________________________________________________________________________________________________________________
© Copyright The MED Group 2006
PR
OD
UC
T
IN
FO
RM
AT
IO
N
FO
R
CU
ST
OM
ER
S
PICProduct Information For Customers
45
Although the hand-held shower may seem to be a small, less significant accessory item compared to some of the other bath aid products, it is an important part of the self-care package. It is an essential item for users of bath seats and transfer benches.
Good quality hand showers have two common features. First, they have on/off controls built into the handle. This allows the user to turn the water off and on as needed without having to readjust water temperature each time. Second, they all have hoses of sufficient length to permit the user, seated on a bath seat or in the tub, to easily reach every part of the body with the shower spray.
The on/off control varies from one model shower to another, and care should be exercised to select an appropriate model that is compatible with your hand function and finger dexterity. A control that is appropriate for a severe arthritic may not be functional for a quadriplegic.
A hose length of 5 1/2 to 6 feet is usually sufficient for most users.
Optional features, such as pulsating massage showers, are primarily a matter of personal taste and are fine as long as they do not interfere with any of the more essential features.
Most hand-held showers are provided with one or more wall-mounting brackets for storage, or to permit use of the shower in a normal wall-mounted position.
INSTALLATION Installation of a hand-held shower can be made in three ways:
1. It can simply replace an existing shower head. By removing the existing shower head, the hose from the hand-held shower can be attached in its place. Don’t forget the washer to prevent leaking at this attachment point.
2. It can be attached as an addition to the existing shower by using an optional diverter valve. Remove the shower head and attach the diverter valve, then attach the existing shower head back on the end of the diverter valve. The hose from the hand-held shower can now be attached to the side of the diverter valve. Washers may be required at some or all of these attachment points. 3. If there is no existing shower, the tub spout can be replaced with an optional diverter spout and the shower hose connected to the side of the new spout.
© Copyright The MED Group 1994, 1997, 2001Hand-Held Showers
HAND-HELD SHOWERS
1
Page 1 of 2
© Copyright The MED Group 2006
PR
OD
UC
T
IN
FO
RM
AT
IO
N
FO
R
CU
ST
OM
ER
S
PICProduct Information For Customers
46
OPERATION The use of the hand-held shower is self explanatory. There are a few precautions, however, that should be called to the attention of the user.
When the water has been turned off at the valve on the shower handle, there can be a temperature increase of the water in the initial spray when it is turned back on. After it is turned back on, it is wise to direct this spray away from the body for the first few seconds. This temperature build-up can be avoided by not turning the water completely off and allowing a small stream to continue to flow. This safety feature is built into some hand-held showers and should not be mistaken for a leak or a valve malfunction.
It is wise NOT to allow the hand-held shower to fall into the tub or otherwise become immersed in the water standing in the tub. It is possible, under very rare circumstances, for water to be siphoned from the bath water back into the water system in the home, creating a temporary unsanitary condition. This can be easily avoided by placing a wall-mounted storage bracket in an easily accessible position for the user.
A good quality, properly installed hand-held shower can do much to provide greater independence while bathing. Please call our office if more information is needed regarding other helpful bathing aid products.
© Copyright The MED Group 1994, 1997, 2001Hand-Held Showers 2
Page 2 of 2
HAND-HELD SHOWERS
© Copyright The MED Group 2006
PR
OD
UC
T
IN
FO
RM
AT
IO
N
FO
R
CU
ST
OM
ER
S
PICProduct Information For Customers
47
Hospital beds in the home serve two major purposes:
• They permit body positioning that is not feasible in a regular home bed. • They permit the attachment of other pieces of equipment that cannot be used on a regular home bed.
Of course, hospital beds may provide several other advantages such as: making it easier and safer for the patient to get in and out of the bed; and to reach a standing position for ambulation with crutches, walker or cane making transfers to and from wheelchairs or bed side commode’s easier and safer, and making care giving much easier by placing the bed at a more convenient height for providing assistance with position changes, turning, bathing, eating and performing other bedside care.
Both patient and caregivers should be familiar with all of the basic operations of the bed in order to enjoy maximum benefits from its use. They should also be alert to any unusual noises during operation of the bed, or any changes, such as cranks becoming stiff or more difficult to turn, that might indicate a mechanical problem. Symptoms of this nature should be reported to our office immediately.
OPERATING INSTRUCTIONS___ On manual multi-height models, when facing the foot of the bed, the crank on the left raises and lowers the head section of the spring. The crank on the right raises and lowers the foot section of the spring. The center crank raises and lowers the height of the bed. Turning any of these three cranks clockwise raises and turning any crank counter-clockwise lowers.
___ On semi-electric models, the pendant has four buttons. One pair of buttons operates the head spring section, and the other pair operates the foot spring section. In each pair, one button raises, and the other one lowers. The function of each button is indicated on the pendant. The semi-electric models have a manual crank system to raise and lower bed height. This bed height adjustment operates exactly the same as it does on the manual multi-height bed described above.
___ On the full-electric models, the control pendant has six buttons. Four of the buttons are the same as those described above for the semi-electric models. The two additional buttons operate the bed height. One button raises the bed; the other lowers the bed. The function of each button is indicated on the pendant. On both electric models, an emergency crank is furnished. This crank can be inserted into the appropriate sockets at the foot of the bed to allow manual adjustment of all bed functions. This provides emergency back-up operation in the event of power failure or the failure of one of the motors.
© Copyright The MED Group 1994, 1997, 2001Hospital Beds
HOSPITAL BEDS
1
Page 1 of 2
© Copyright The MED Group 2006
PR
OD
UC
T
IN
FO
RM
AT
IO
N
FO
R
CU
ST
OM
ER
S
PICProduct Information For Customers
48
For all manual and electric models, before elevating the head section, it is always wise to elevate the thighs first, by raising the foot section slightly. This prevents the patient from sliding down in the bed. Raising the thighs and flexing the knees in this manner also provides a more comfortable position for most individuals.
By raising or lowering the height of the bed, getting in or out of bed can be made much easier. If the patient is using an ambulation aid, such as a walker or cane, the bed height can be increased to make reaching a stable standing position much safer and easier. This allows the caregiver to concentrate his/ her efforts on assisting the patient rather than with struggling to lift the individual up to a standing position.
For transfers to and from a wheelchair or a bedside commode, the bed height can be set slightly higher for transfers out of the bed, and slightly lower for transfers back into bed. This makes transfers easier by using the assistance of gravity. (Making transfers “down hill”)
It is extremely important that the brakes be applied on the two locking casters any time the patient is entering or leaving the bed, to prevent the bed from rolling away and causing a fall. Even with these locks applied, patients who are unstable on their feet should not attempt to enter or exit the bed without assistance. The brakes are not absolutely positive. Even though the wheels may not turn, the casters may slide on the floor, allowing the bed to shift, causing an accident. An attendant or caregiver should be present to assist the patient and to help stabilize the bed.
In addition to being helpful with transfers, the bed height can be raised to reduce bending or stooping by the caregiver when assisting the patient with turning or changing positions in bed. This is also helpful during bathing, feeding and other bedside care. This feature is a great “back saver” for the caregiver.
When assisting a patient to turn in bed, the caregiver should first lock the caster brakes and then stand on the side of the bed toward which the individual will be turning. Side rails should be in the up and locked position and the bed set at a height that permits the caregiver to reach over the rails and to roll the patient toward them. Never assist by rolling the patient toward the opposite side of the bed.
Please keep this information available for reference. If questions arise concerning the use or operation of the hospital bed, please call our office.
© Copyright The MED Group 1994, 1997, 2001Hospital Beds 2
Page 2 of 2
HOSPITAL BEDS

© Copyright The MED Group 2006
PR
OD
UC
T
IN
FO
RM
AT
IO
N
FO
R
CU
ST
OM
ER
S
PICProduct Information For Customers
49
INTRAVENOUS ANTIBIOTIC/ANTIVIRAL THERAPYYour doctor has prescribed a medicine called an antibiotic or antiviral. This medication is used to fight a bacterial or viral infection. This medication will be administered through a catheter in a vein in your arm, hand or chest. Your doctor has prescribed the type of medicine and how often you will need to receive it. It is important that you follow directions on the label exactly as written.
HYDRATION THERAPYYour doctor has prescribed a solution for hydration therapy. The hydration solution is used to replace fluids your body has lost. The hydration solution is administered through a catheter placed in a vein in your arm, hand or chest. Your doctor has prescribed the type of solution and how often you will need to receive it. It is important that you follow the directions on the label exactly as written.
INOTROPIC THERAPYYour doctor has prescribed a medicine called an inotropic. This medicine is used to decrease the symptoms related to congestive heart failure and improves your heart’s performance. This medication will be administered through a catheter in a vein in your arm, hand or chest. Your doctor has prescribed the type of medicine and how often you will need to receive it. It is important that you follow directions on the label exactly as written.
An infusion pump will infuse your medicine or hydration solution at the rate prescribed by your doctor.
SUPPLIES • Medicine in a cassette or bag • Ambulatory infusion pump or a pole mounted infusion pump • Pouch for the ambulatory pump if this type pump is used • Batteries for the ambulatory pump • Instructions specific to the type of pump you are using
Important: Do not use the medicine if the label on the medicine does not have your name on it, you notice any leaks or cracks in the vials or syringes, or the medicine is cloudy or you notice any particles. OTHER SUPPLIES AND SOLUTIONS • Sharps container • Dressing kit (for IV site) • Catheter Cap • Tape • Saline (multiple dose vials for flushing) • Hep Lock Solution (for flushing) if ordered • Alcohol wipes • Syringes
© Copyright The MED Group 2000, 2001Infusion by Ambulatory or Pole Mounted Pump
INFUSION BY AMBULATORY OR POLE MOUNTED PUMP
1
Page 1 of 2

© Copyright The MED Group 2006
PR
OD
UC
T
IN
FO
RM
AT
IO
N
FO
R
CU
ST
OM
ER
S
PICProduct Information For Customers
50
© Copyright The MED Group 2000, 2001Infusion by Ambulatory or Pole Mounted Pump 2
Page 2 of 2
Preparing to administer your medicine • Clean your work area with antibacterial soap and water, dry with a paper towel. • Gather your supplies: alcohol, tape, Sharps container, medicine, saline, heparin, and syringe. • Wash your hands with warm soapy water for about two minutes. • Prepare the medicine cassette or bag and connect to the pump as instructed by your nurse (you have been provided separate instructions for your specific pump). Insert battery if needed.
Your catheter will need to be flushed before and after your medicine is administered. • Wash your hands before starting the following flushing procedure. • Check the expiration date on the normal saline. Check the vial for cracks or leakage.
If anything appears to be wrong with the saline DO NOT USE IT. • Clean the rubber stopper on the vial with an alcohol wipe and allow to air dry. • If using the needleless system, attach the vial adapter then wipe the cap with an alcohol
wipe and allow to air dry. • Pull the plunger of the syringe out to allow the syringe to fill with air. DO NOT touch
the stem of the syringe because it is sterile. • Attach the syringe to the vial adapter or attach a syringe cannula to the end of the
syringe and insert the cannula into the vial. • Turn the vial upside down and push air into the vial. • Pull the plunger out again to draw the desired amount of saline into the syringe. • Remove the syringe from the vial and remove air bubbles from the syringe by tapping
the syringe and gently pushing some fluid through the cannula. • Wipe the end of the catheter with alcohol and allow to air dry. • Screw the syringe onto the end of the catheter or into the cap. • Inject the saline slowly over 1 to 2 minutes. DO NOT force the saline. If you feel resistance, call
your nurse. • Remove the syringe and discard into the Sharps container.
You are now ready to infuse the medication.If using a pole mounted pump: • Turn the pump ON. • Set the correct rate and volume on the pump or confirm preprogrammed settings. • Open the clamps. • Start the pump. • When the infusion is complete, close the clamps and remove the tubing from the pump. If using the same tubing for another infusion within 24 hours, cover the end of the tubing with a sterile cap. If not using the tubing again within 24 hours, discard appropriately.If using an ambulatory pump: • Follow all of the steps above. • In addition, change the battery and reset the volumes per your specific pump instructions. • Flush your line with normal saline as above. Flush with heparin in the same way if
instructed to do so.
When your therapy is complete, or when the Sharps container is 2/3 full, please call our office for instructions on proper disposal.
Store any unused supplies in a safe place and keep them together for your next infusion.
NOTES: ________________________________________________________________________________________________________________________________________________________________________________________________________________________________________________________________________________________________________________________________________________________________________________________________________

© Copyright The MED Group 2006
PR
OD
UC
T
IN
FO
RM
AT
IO
N
FO
R
CU
ST
OM
ER
S
PICProduct Information For Customers
51
Your doctor has ordered care/flush items for your intravenous infusion (IV). There are many types of IV catheters, devices, and infusion ports. Your doctor and/or nurse will explain what type of IV you have and how best to care for it at home. You or your nurse may perform this care procedure. Your caregiver may also be taught the procedure.
To help organize information and the care procedure for your IV, please ask your doctor or nurse to provide the following information.
Type of IV: ________________________________________________________________________________________Insertion Date: _____________________________________________________________________________________Dressing Change: __________________________________________________________________________________Extension Tubing/End Cap Change: __________________________________________________________________ Catheter Flush: ____________________________________________________________________________________ Frequency: ____________________________________________________________________________________ Normal Saline (Sodium Chloride): ________________________________________________________________ Heparin: _______ u/ml ___________ cc
Please refer to Storage of Infusion Medication Instruction SheetPlease refer to IV Push Medication Instruction Sheet
Care Tips: • Good hand washing (FIRST, LAST and ALWAYS) • Clean work area • Assemble catheter care items • Examine IV site and surrounding skin area. (Is the dressing dry, wet, loose? Is the insertion site red, tender? Is there any drainage or swelling? Is the catheter placement the same or does it appear to have changed in any way? Is the skin surrounding the IV red, swollen, irritated, etc.?)
Flushing: • Prepare syringe • Unclamp tubing if necessary • Flush slowly and smoothly • Re-clamp if indicated • Disposal: Place needles in Sharps container. Place all other IV supplies in plastic bag, seal and discard in trash. • When your therapy is complete, or when the Sharps container is 2/3 full, please call our office for pick-up. If you have a “mailable” Sharps container, you may return it via US mail. Follow instructions on the container.
© Copyright The MED Group 2000, 2001Infusion: Catheter Care
INFUSION: CATHETER CARE
1
Page 1 of 2

© Copyright The MED Group 2006
PR
OD
UC
T
IN
FO
RM
AT
IO
N
FO
R
CU
ST
OM
ER
S
PICProduct Information For Customers
52
Page 2 of 2
Be Sure To Report: • Breathing problems • Fever or chills • Drainage, soreness or redness in or near the catheter site • Any change in the catheter or catheter site • Resistance when flushing the catheter • Swelling in your arm, neck, chest, or if the catheter is near the abdomen or leg, any noted changes in the leg
NOTES: _______________________________________________________________________________________________
_______________________________________________________________________________________________________
_______________________________________________________________________________________________________
_______________________________________________________________________________________________________
_______________________________________________________________________________________________________
_______________________________________________________________________________________________________
_______________________________________________________________________________________________________
_______________________________________________________________________________________________________
_______________________________________________________________________________________________________
_______________________________________________________________________________________________________
_______________________________________________________________________________________________________
_______________________________________________________________________________________________________
_______________________________________________________________________________________________________
_______________________________________________________________________________________________________
_______________________________________________________________________________________________________
_______________________________________________________________________________________________________
_______________________________________________________________________________________________________
_______________________________________________________________________________________________________
_______________________________________________________________________________________________________
_______________________________________________________________________________________________________
_______________________________________________________________________________________________________
_______________________________________________________________________________________________________
_______________________________________________________________________________________________________
_______________________________________________________________________________________________________
© Copyright The MED Group 2000, 2001Infusion: Catheter Care 2
INFUSION: CATHETER CARE
© Copyright The MED Group 2006
PR
OD
UC
T
IN
FO
RM
AT
IO
N
FO
R
CU
ST
OM
ER
S
PICProduct Information For Customers
53
If you follow the guidelines outlined, most complications can be prevented. However, if they do occur, staying calm and being well informed will help you deal with them properly. The following is a list of problems that may occur, ways to prevent them from occurring and what to do if complications should occur.
Problem
Catheter Occlusion: The infu-sion will not run into the vein. You cannot flush your catheter. This hap-pens when the catheter is blocked or kinked.
Catheter is not in the vein: You may have pain, redness or swelling at the insertion site.
Blood in the tubing:
Reaction to the IVmedication: Difficulty breathing, rash or hives, nausea, vomiting, con-tinuous diarrhea, abdominal cramps, chills, sweating, weakness, anxious-ness, dizziness.
Air Embolism: This occurs when air gets into the bloodstream. Symp-toms are shortness of breath, cough-ing and chest pain.
Infection: This can occur at the catheter site or inside the catheter. Infections can occur from contamina-tion of the tubing, solution, supplies, and catheter tip or catheter exit site. Symptoms of infection in the catheter are fever, chills, sweats, drowsiness or weakness. Symptoms of infection at exit site: redness, drainage, swell-ing and pain.
1. Do not allow your infusion to run dry.2. Always flush your catheter imme-
diately after your medication is completed.
3. Make sure the tubing and catheter are not clamped.
1. Be careful not to pull or bump the catheter.
2. Always check IV site prior to start of therapy.
1. Make sure to stop the infusion by shutting the roller clamp when the infusion is completed.
2. Do not hold your arm up in air when the IV is infusing.
3. Make sure the IV pole is high enough.
1. Carefully discuss all medicine and food allergies with your doctor or pharmacist before you begin your infusion therapy.
1. Remember to fill the IV tubing with fluid before starting it.
2. Make sure all connections are tightened.
3. Remove air bubbles from syringe.
1. Strictly follow the measures taught regarding aseptic technique in your manual.
2. If you are already taking antibiot-ics, take your temperature once a day and notify your doctor if it is elevated (101 degrees for 24 hours).
3. Frequent, thorough hand washing.
1. Unclamp catheter, check for kinks.2. Do not try to force the saline or
heparin into the catheter.3. Call your nurse for help and
instructions.
1. Stop the infusion immediately and call your nurse for help.
2. Apply warm soaks or cold packs as directed by your nurse.
1. Turn off IV if it is completed and flush the catheter immediately.
2. Raise the IV pole if the infusion is not complete.
3. Keep your arm that the IV is run-ning into lower than the IV is.
4. Flush IV with saline and observe site for redness, edema or drainage.
5. Call your nurse for help if neces-sary.
1. Stop the infusion.2. Call 911 (if you’re in severe dis-
tress).3. Call your nurse.4. Call your doctor.
1. Lie on your left side with your feet raised and your head lowered.
2. Call 911 (if you’re in severe distress).3. Call your nurse.4. Call your doctor.
1. Call your nurse if you are having problems at the IV site. It may need to be changed.
2. If you experience symptoms of infection, call your doctor.
Prevention Management
© Copyright The MED Group 2000, 2001Infusion Complications
INFUSION COMPLICATIONS
1
Page 1 of 1
© Copyright The MED Group 2006
PR
OD
UC
T
IN
FO
RM
AT
IO
N
FO
R
CU
ST
OM
ER
S
PICProduct Information For Customers
54
INTRAVENOUS ANTIBIOTIC/ANTIVIRAL THERAPYYour doctor has ordered a medicine called an antibiotic or antiviral. This medicine is used to fight a bacterial or viral infection. This medicine is given through a catheter placed in a vein in your arm, hand or chest.
Your doctor has prescribed the type of medicine and how often you are to receive it. It is important that you follow the direction on the label exactly as written.
DIURETIC THERAPY Your doctor has ordered a medicine called a “diuretic.” This medicine is used to rid your body of excess fluid. The medicine is given through a catheter placed in a vein in your arm, hand or chest.
Your doctor has prescribed the type of medicine and how often you are to receive it. It is important that you follow the directions on the label exactly as written.
SUPPLIES • Vial containing a liquid medicine - This may be a single or a multiple dose vial (see instructions on label of vial). Or • Vial containing a powdered medicine -This medicine must be mixed with sterile water or normal saline solution. • For each dose, use the single dose vials of sterile water or normal saline. Or • Syringe containing a single dose of the medicine.
IMPORTANT: DO NOT USE THE MEDICATION IF THE MEDICINE LABEL DOES NOT HAVE YOUR NAME ON IT, IF YOU NOTICE ANY LEAKS OR CRACKS IN THE BAG OR CASSETTE,IF THE MEDICATION IS CLOUDY, OR IF YOU NOTICE PARTICLES IN IT.
OTHER SUPPLIES AND SOLUTIONS: • Sharps Container • Dressing Kit (to cover IV site) • Catheter Caps • Tape • Saline (multiple dose vials for flushing) • Hep Lock Solution (for flushing) • Alcohol wipes • Syringes
© Copyright The MED Group 2000, 2001IV Push Medications
IV PUSH MEDICATIONS
1
Pages 1 of 2

© Copyright The MED Group 2006
PR
OD
UC
T
IN
FO
RM
AT
IO
N
FO
R
CU
ST
OM
ER
S
PICProduct Information For Customers
55
© Copyright The MED Group 2000, 2001IV Push Medications 2
Pages 2 of 2
PREPARING AND GIVING YOUR MEDICINE • Remove medicine from your refrigerator 30 to 60 minutes before your medicine is due or as written on the label. • Clean your work area with antibacterial soap and water and dry with a paper towel. • Gather your supplies: alcohol, tape, Sharps container, medicine, saline, heparin, and syringes. • Wash your hands with warm soapy water for two minutes. • If your medicine is not in a ready-to-use single dose syringe, prepare it for use as instructed on the label. • Your catheter will need to be flushed with normal saline before you give your medicine. • Check the expiration date on the normal saline. Check the vial for cracks or leakage. If anything appears
wrong with the saline, DO NOT USE IT. • Clean the rubber stopper on the vial with an alcohol wipe and allow to air dry. • If using the needleless system, attach the vial adapter, then wipe cap with an alcohol wipe and allow to air dry.
• Pull the plunger of the syringe out to allow the syringe to fill with air. DO NOT touch the stem of the plunger because it is sterile.
• Attach the syringe to the vial adapter or attach a syringe cannula to the end of the syringe, then insert the cannula into the vial.
• Turn the vial upside-down and push air into the vial. • Pull back the plunger to draw out the desired amount of saline. • Remove the syringe from the vial, and then remove the air bubbles from the syringe by tapping the syringe
and gently pushing some fluid through the cannula. • Wipe the end of the catheter with alcohol and allow to air dry. Screw the syringe onto the end of the Clave
catheter or insert the syringe cannula into the Baxter cap. • Inject saline slowly over one to two minutes. DO NOT force the saline. If you feel resistance, call your nurse. • Remove syringe and discard into Sharps container. THE MEDICINE IS NOW READY TO BE INJECTED. • Remove the protective cap from the medicine syringe. Add syringe cannula if needed, then insert or screw
the syringe into the catheter. • Slowly inject your medicine (over the number of minutes shown on the label). • Remove the syringe and discard into the Sharps container. • Flush the catheter with normal saline as described above. • If your doctor has ordered heparin, repeat the above flush procedures using heparin. • Discard all used syringes into the appropriate container. • When the Sharps container is 2/3 full, or when you have completed the prescribed therapy, please call our office for instructions on proper disposal. • Store all unused supplies in a safe place away from children and pets. All supplies should be kept together so you will be ready for your next dose.
NOTES: ____________________________________________________________________________________________________________________________________________________________________________________________________________________________________________________________________________________________________________________________________________________________________________________________________________________________________________________________________________________________________________________________________________________________________________________________________________________________________________________________________________________________________________________________________________________________________________________________________________________________________________________________________________________________________________________________________________________________________________________________________________________________________________________________________________________________________________________________________________________
© Copyright The MED Group 2006
PR
OD
UC
T
IN
FO
RM
AT
IO
N
FO
R
CU
ST
OM
ER
S
PICProduct Information For Customers
56
Your doctor, nurse or therapist will show you the correct way to use the suction machine for nasal suction. Follow his/her instructions exactly.
The guidelines below may be helpful as a reminder.
PREPARATION
If the patient is alert and able to cooperate, have him or her relax and breathe deeply several times. If possible, elevate the patient’s head and upper body. If you are using a hospital bed, elevate the knees slightly, then elevate the head of the bed to about 45 degrees. In the absence of a hospital bed, elevate the patient’s head and upper body using pillows. Tilt the patient’s head back slightly.
Plug the Suction Machine into a grounded outlet. Turn the switch “ON” and adjust the machine to the desired negative pressure by temporarily sealing the tubing from the suction machine and observing the pressure gauge while adjusting the knob. Your doctor or other health care professional will advise you regarding the approximate suction pressure to be used. Turn the knob clockwise to increase pressure and counter-clockwise to decrease pressure. Please Note: The pressure gauge will not read unless the tubing is sealed.
If the patient is receiving oxygen by nasal cannula, the doctor may instruct that the oxygen flow rate be increased for a few minutes prior to starting the nasal suctioning, which necessitates removal of the oxygen cannula. It may also be helpful to place the cannula tips just below the lower lip while performing nasal suction to help maintain the oxygen level for the patient. After suctioning is completed, return the oxygen cannula and use the higher flow rate for a few more minutes. Do not forget to return the oxygen flow to the prescribed rate.
Wash your hands thoroughly.
Open the suction catheter package, but do not remove the catheter.
Open the disposable glove. Holding it by the cuff, slip it on the hand that you will be using to handle the catheter. Using your gloved hand, remove the catheter from its package. For the rest of this procedure, your gloved hand should not touch anything but the catheter, and the catheter should not be touched by anything except your gloved hand.
Attach the larger end of the catheter to the tubing from the Suction Machine. To test the equipment: Hold the tubing with your bare hand near the end where it connects to the catheter, place the thumb of your bare hand over the catheter control valve and suction an ounce or two of water through the catheter. This confirms that the machine is working properly and will make the secretions flow through the catheter and tubing more easily. This small amount of water in the collection bottle will also make it easier to clean.
© Copyright The MED Group 1994, 1997, 1999, 2001Nasal Suction
NASAL SUCTION
1
Page 1 of 2

© Copyright The MED Group 2006
PR
OD
UC
T
IN
FO
RM
AT
IO
N
FO
R
CU
ST
OM
ER
S
PICProduct Information For Customers
57
© Copyright The MED Group 1994, 1997, 1999, 2001Nasal Suction 2
Page 2 of 2
With your gloved hand, place the end of the catheter in the container of water. Wetting the catheter will make it easier to insert into the patient’s nose. The doctor, nurse or therapist may recommend the use of a water-soluble lubricant to make insertion of the catheter easier and more comfortable.
SUCTIONING:
With the patient breathing through an open mouth, gently insert the moistened catheter into one nostril, directing the tip backward and downward. Continue insertion until resistance is met. Important: Do not close the control valve during insertion. This will create suction at the tip of the catheter causing it to stick to the side of the nasal passage, making insertion more difficult and possibly causing irritation to the tender tissue.
Once the proper length of catheter has been inserted, close the control valve intermittently with the thumb of your bare hand to begin suctioning. Slowly withdraw the catheter while opening and closing the control valve. Roll the catheter between the thumb and index finger of your gloved hand as it is being withdrawn. This makes suctioning more effective and prevents irritation of the tender lining of the nose.
The entire process of inserting the catheter, suctioning and withdrawing the catheter should be performed with care and gentleness, but for the comfort of the patient, it should also be performed quickly and decisively. The procedure should require no more than 10 to 15 seconds.
After the catheter is withdrawn, have the patient take several deep breaths. If breathing is still difficult or obstructed, the procedure may be repeated. If, during the suctioning procedure, the catheter becomes clogged by mucus or secretions, remove it and place the tip in the water with the control valve closed. This will draw water through the catheter and usually clear the obstruction quickly so that suctioning can be resumed. WHEN SUCTIONING IS COMPLETED
After the catheter is withdrawn, immediately place the tip of the catheter in the water and close the control valve for a few seconds to flush all secretions from the inside of the catheter and the tubing. Care must be exercised during this flushing procedure not to suction so much water through the system that you overfill the collection bottle. The Suction Machine can now be turned “OFF.” Discard the glove and catheter in a plastic-lined wastebasket. If a reusable catheter is being used, follow the cleaning procedure below. Remove the collection bottle and flush the contents down the toilet. Rinse the bottle thoroughly with hot water several times and flush contents down the toilet each time.
Important: Never allow the collection bottle to become more than half full before emptying.
CLEANING REUSABLE CATHETERS
If recommended by the doctor, you may be provided reusable catheters. Particular care should be exercised in the cleaning of these catheters.
1. Wash the catheter thoroughly in warm soapy water. Rinse well with clear water.
2. In a separate, small, covered container, soak the catheter in the solution recommended and for the length of time specified by the doctor, nurse or therapist.
3. Using a disposable glove, remove the catheter, allow it to drain and place it in a clean, covered container to store it for later use.

© Copyright The MED Group 2006
PR
OD
UC
T
IN
FO
RM
AT
IO
N
FO
R
CU
ST
OM
ER
S
PICProduct Information For Customers
58
For individuals who will be standing in a bathtub or shower, even momentarily during the process of getting in or out, something to ensure safe footing is very important. There are two general types of non-slip products:
• Plastic or rubber mats that are removable
• Strips or mats that are permanently installed with an adhesive.
The better quality, more effective, removable mats usually depend upon hundreds of tiny suction cups on the bottom surface of the mat — or upon a material that has been specially formulated and textured to be slip-resistant. In either case, keeping the mat and tub surface clean and free of soap, oil and grease is essential to maintaining the slip-resistant properties. It should be noted that no removable mat can be totally slip-proof in a wet bath tub, even under the best of conditions. These products certainly enhance safe footing, but care, discretion and common sense must still be exercised.
The safety tread (strips or mats) that is installed with adhesive can also be effective in the prevention of falls in the bath tub. However, these too are not slip-proof.
During the installation of these adhesive products, it is absolutely essential that the bathtub surface be perfectly clean, dry and free of soap residue, oil or grease. The tub should be washed carefully and rinsed thoroughly — and then allowed to dry completely. The surface on which the tread is to be placed should then be cleaned with a cloth saturated in rubbing alcohol and again allowed to dry. The tread should be applied precisely according to the manufacturer’s instructions, and those instructions should also be followed with regard to how long to wait before the tub is used. These products should not be installed over badly chipped or rusted surfaces because to ensure a secure bond, a smooth surface is required. Regular cleaning of the treaded surface will help maintain its slip-resistant texture.
There are many other bath safety products available such as grab bars, bath seats and hand-held showers that will enhance safety and independence while bathing. Please call our office if you would like more information on these products.
© Copyright The MED Group 1994, 1997, 1999, 2001Non-Slip Bath Mats and Safety Treads
NON-SLIP BATH MATS AND SAFETY TREADS
1
Page 1 of 1
© Copyright The MED Group 2006
PR
OD
UC
T
IN
FO
RM
AT
IO
N
FO
R
CU
ST
OM
ER
S
PICProduct Information For Customers
59
FORMULA• Check the expiration date on the formula package or can to assure the product is in date• Formula lids should be cleaned and dried prior to opening
Although most ready to use enteral formulas are commercially sterile, preparation and administration techniques greatly influence potential microbial contamination. Enteral feeding solutions have been reported to support appreciable bacterial growth. It is important to minimize the risk of contamination.
• The formula should be transferred directly, with minimal handling, to the feeding container. The container should be immediately capped and kept closed until feeding is complete. Care must be taken not to touch the inside of the feeding container.
• It is usually not necessary for unopened formula to be refrigerated, however, once opened, the formula must be refrigerated until the time of use. Opened and unused liquid products should be labeled with the time and date that they were opened and refrigerated.
• Label opened formula containers with the date and time of formula preparation. Discard any unused portion after 24 hours or according to manufacturer’s instructions.
HANDLINGPrior to handling equipment or formulas you should thoroughly wash your hands with bacteriostatic soap. Special attention must be paid to the hang time of the formula as specified by the formula manufacturer. (Hang time is the time the formula remains in the feeding container on the IV pole.) Manufacturer’s instructions generally limit hang time to no more than four hours at room temperature. The feeding containers and administration set should be replaced at least every 24 hours or according to manufacturer’s instructions.
STORAGEUnopened formula containers should be stored in a dry area which is not exposed to temperature extremes. Do not expose to freezing temperatures (below 34 degrees) or excessive heat (above 95 degrees).
© Copyright The MED Group 2001
Nutritional Supplement Storage & Handling
NUTRITIONAL SUPPLEMENT STORAGE & HANDLING
1
Page 1 of 1
© Copyright The MED Group 2006
PR
OD
UC
T
IN
FO
RM
AT
IO
N
FO
R
CU
ST
OM
ER
S
PICProduct Information For Customers
60
Your doctor, nurse or therapist will show you the correct way to use the suction machine for oral suction. Follow his/her instructions exactly.
The following guidelines may be helpful as a reminder.
PREPARATION:
If the patient is alert and able to cooperate, have him or her relax and breathe deeply several times. If possible, elevate the patient’s head and upper body. If you are using a hospital bed, elevate the knees slightly, then elevate the head of the bed to about 45 degrees. In the absence of a hospital bed, elevate the patient’s head and upper body using pillows. Turn the patient’s head toward you.
Plug the Suction Machine into a grounded outlet. Turn the switch “ON” and adjust the machine to the desired negative pressure by temporarily sealing the tubing from the Suction Machine and observing the pressure gauge while adjusting the knob. Your doctor or other health care professional will advise you regarding the approximate suction pressure to be used. Turn the knob clockwise to increase and counter-clockwise to decrease pressure. Please Note: The pressure gauge will not read unless the tubing is sealed.
If the patient is receiving oxygen by nasal cannula, it should remain “ON” and in place during oral suctioning. If instructed to do so, increase the oxygen flow rate for a few minutes before and during suctioning. Be sure to return the oxygen to the prescribed flow rate after suctioning is completed.
Wash your hands thoroughly.
Open the suction catheter package, but do not remove the catheter. If a Yankauer oral suction device has been ordered by the doctor, have it ready.
Open the disposable glove. Holding it by the cuff, slip it on the hand that you will be using to handle the catheter. Using your gloved hand, remove the catheter from its package. For the rest of this procedure, your gloved hand should not touch anything but the catheter, and the catheter should not be touched by anything except your gloved hand.
Attach the larger end of the catheter to the tubing from the suction machine. With your gloved hand, place the end of the catheter in the container of water. Wetting the catheter will make it easier to insert and move around in the patient’s mouth. To test the equipment: Hold the tubing with your bare hand near the end where it connects to the catheter, place the thumb of your bare hand over the catheter control valve and suction an ounce or two of water through the catheter. This confirms that the machine is working properly and will make the secretions flow through the catheter and tubing more easily. This small amount of water in the collection bottle will also make it easier to clean.
© Copyright The MED Group 1994, 1997, 1999, 2001Oral Suction
ORAL SUCTION
1
Page 1 of 2
© Copyright The MED Group 2006
PR
OD
UC
T
IN
FO
RM
AT
IO
N
FO
R
CU
ST
OM
ER
S
PICProduct Information For Customers
61
© Copyright The MED Group 1994, 1997, 1999, 2001Oral Suction 2
Page 2 of 2
SUCTIONING:Insert the moistened catheter or Yankauer into one side of the patient’s mouth and direct it along the side until it reaches the back of the mouth and upper throat area. Important: Do NOT close the control valve with your thumb while inserting the catheter. This will create suction at the tip of the catheter, causing it to stick to the side of the mouth and throat, making insertion more difficult and possibly causing irritation to the tender tissue.
If the patient gags, stop the insertion for a few moments. If gagging persists, remove the catheter, have the patient take a few deep breaths and try again. Gagging can usually be avoided by inserting the catheter along the side of the mouth and throat rather than over the tongue. If gagging or coughing occurs after the catheter tip is in the upper throat and you are unable to remove it easily, do not be alarmed. Simply leave it in place, disconnect it from the tubing, and it will act as an airway until the gagging or coughing stops.
Once the tip of the catheter has reached the area where the mucus and saliva have collected, alternately close and open the control valve with the thumb of your bare hand, and maneuver the catheter with your gloved hand to suction the secretions out of the throat and mouth. The intermittent suction provided by repeatedly opening and closing the control valve allows for more rapid evacuation of thick, tenacious secretions.
Continue to intermittently close the control valve with your bare thumb and slowly withdraw the catheter. Roll the catheter between your gloved thumb and index finger as it is withdrawn. This technique allows the tip of the catheter to pick up secretions from all directions and prevents damage to the tender lining of the throat and mouth.
The entire process of inserting the catheter, suctioning and withdrawing the catheter should be performed with care and gentleness, but for the comfort of the patient, it should also be performed quickly and decisively. The procedure should require no more than 10 to 15 seconds.
After the catheter is withdrawn, have the patient take several deep breaths. If raspy breathing or gurgling persists, the procedure may be repeated. If, during the suctioning procedure, the catheter becomes clogged by mucus or secretions, remove it, place the tip in the water, and close the control valve. This will draw water through the catheter and usually clear the obstruction quickly so that suctioning can be resumed.
In certain situations your doctor may recommend the use of a Yankauer or tonsil suction device instead of the usual flexible catheter just described. This is a rigid tube similar to the one used by dentists. It is curved slightly at the end to facilitate suctioning the back of the mouth and upper throat. The basic technique for oral suction with the Yankauer Catheter is the same as for the flexible catheter.
WHEN SUCTIONING IS COMPLETEDAfter the catheter is withdrawn, immediately place the tip of the catheter in the water and close the control valve for a few seconds to flush all the secretions from the inside of the catheter and the tubing. Care must be exercised during this flushing procedure not to suction so much water through the system that you overfill the collection bottle. The Suction Machine can now be turned “OFF.” Discard the glove and catheter in a plastic-lined wastebasket. If a reusable catheter is being used, follow the cleaning procedure below. Remove the collection bottle and flush the contents down the toilet. Rinse the bottle thoroughly with hot water several times and flush contents down the toilet each time.
Important: Never allow the collection bottle to become more than half full before emptying.CLEANING REUSABLE CATHETERS
If recommended by the doctor, you may be provided reusable catheters or a Yankauer. Particular care should be exercised in the cleaning of these devices.
1. Wash the catheter or Yankauer thoroughly in warm soapy water. Rinse well with clear water.
2. In a separate, small, covered container, soak the catheter or Yankauer in the solution recommended and for the length of time specified by your doctor, nurse or therapist.
3. Using a disposable glove, remove the catheter or Yankauer, allow it to drain and place it in a clean, covered container to store it for later use.
© Copyright The MED Group 2006
PR
OD
UC
T
IN
FO
RM
AT
IO
N
FO
R
CU
ST
OM
ER
S
PICProduct Information For Customers
62
An oxygen concentrator is a machine that separates room air into oxygen and nitrogen. The nitrogen is discard-ed, while the oxygen is stored, concentrated and delivered at 90% to 95% purity.
PLEASE NOTE: The use of this device does NOT reduce the oxygen in the room air because of the small amount of oxygen required.
If you are using an oxygen concentrator, you may want to notify your power company and explain to them that you have life-sustaining equipment in your home. In the event of power failure in your area, they will then know to give priority to restoring power to your home over others in the area who are not using life-sustaining equipment.
TURNING ON OXYGEN 1. Plug the concentrator into a properly grounded electrical wall outlet. DO NOT use an extension cord. DO NOT plug into an outlet controlled by a wall switch or dimmer. 2. Attach the tubing from your cannula to the oxygen outlet. 3. Set the switch to the “ON” position. 4. Turn the flow adjustment knob until the flow meter registers the flow rate prescribed by your doctor. Your doctor prescribed a flow rate of _____ liters per minute. 5. Put on the cannula and adjust for comfort. See “Facts About Your Nasal Cannula” in the general information on oxygen therapy that was provided with these instructions.
If you are using a humidifier, refer to “Facts About Your Humidifier” in the general information for instructions on the proper use and maintenance of your humidifier.
TURNING OFF OXYGEN 1. Remove the nasal cannula. 2. Set the concentrator power switch to the “OFF” position. 3. It is not necessary to turn the flow control “OFF” after it has been set properly. It should be checked, however, each time the concentrator is turned “ON” and periodically during use. The flow control may require minor adjustments from time to time.
IF THE ALARM GOES OFFYour oxygen concentrator is equipped with an alarm to alert you in case of a power failure or an equipment malfunction. If the alarm goes off, first check to see that the power cord is still connected to the electrical wall outlet. Then, quickly check other electrical appliances in the home to determine if there is a power failure, or if a fuse or circuit breaker has blown.
© Copyright The MED Group 1994, 1997, 2001Oxygen Concentrators
OXYGEN CONCENTRATORS
1
Page 1 of 2
© Copyright The MED Group 2006
PR
OD
UC
T
IN
FO
RM
AT
IO
N
FO
R
CU
ST
OM
ER
S
PICProduct Information For Customers
63
If there is a power failure, turn “OFF” the concentrator to stop the alarm. Then, turn “ON” your back-up cylinder system and connect your oxygen tubing to it. If your electrical service does not return within a reasonable length of time, notify our office so you can be provided additional oxygen for your back-up system.
If you determine that there is no power failure and that the alarm indicates an equipment malfunction, turn “OFF” the concentrator. Then, turn “ON” your back-up cylinder system and connect your oxygen tubing to it. Notify our office of the malfunction immediately.
If you find it necessary to use your back-up cylinder system during several intermittent short-term power failures, it is important to check the pressure gauge to ensure that you have an adequate supply of back-up oxygen. Please follow the instructions provided for your back-up system to determine the amount of oxygen you have left. CLEANING AND MAINTENANCETwice each week you will need to clean the inlet air filter. This sponge-like filter should be removed and washed under running tap water. Be sure to shake out the excess water, then press or squeeze dry with a clean towel before replacing the filter. The concentrator should NOT be used without this filter in place.
You should also wipe down the outside of the concentrator with a damp cloth periodically.
Our representative will check your equipment _____________________________ .
OTHER IMPORTANT INFORMATIONNever place your concentrator directly against a wall, drapes or other objects. There must be sufficient space to allow free circulation of air around all sides of the unit. You may notice some heat from the unit. This is normal.
“NO SMOKING” signs should be prominently displayed in all areas where oxygen is being used or stored. Follow all of the other safety precautions outlined in the general instructions.
Carefully follow your doctor’s orders for the flow rate and duration of daily oxygen.
The oxygen equipment provided to you is transported, handled and installed by professionals with experience in oxygen therapy. Feel free to ask them any questions about your oxygen therapy and/or equipment.
© Copyright The MED Group 1994, 1997,2001Oxygen Concentrators 2
Page 2 of 2
OXYGEN CONCENTRATORS

© Copyright The MED Group 2006
PR
OD
UC
T
IN
FO
RM
AT
IO
N
FO
R
CU
ST
OM
ER
S
PICProduct Information For Customers
64
Your doctor has prescribed an Oxygen-Conserving Device (OCD) to be used in conjunction with your primary oxygen equipment. This device significantly increases the use time for any given supply of oxygen. It is particularly useful on portable oxygen systems, increasing the mobility and frequently the comfort of the user.
HOW THE OCD WORKSDuring your normal breathing pattern you are inhaling for about 1/3 of the time and exhaling for approximately 2/3 of the time. By providing oxygen in brief pulses at the very beginning of the inhalation part of the breathing cycle, the OCD frequently extends the use time of the oxygen supply by as much as three to one. Some oxygen users have reported even greater savings. The device senses the start of inhalation and immediately releases a short, pulsed dose of oxygen, which is inhaled deep into the lungs. As a result, less oxygen is required to provide the same benefits than with a continuous flow oxygen system.
Because the OCD responds to each individual’s breathing pattern, the actual use time will vary for each individual depending upon the flow rate prescribed, the size of the oxygen supply and the rate of breathing. The instruction booklet for your particular OCD provides a chart that will enable you to estimate use times for your particular flow rate and oxygen supply.
Since oxygen is released for only short periods during inhalation, the constant flow of oxygen into the nostrils is avoided, and the discomfort caused by the drying effect on the nasal passages is reduced.
INSTALLING THE OCDOur representative will install the OCD on your oxygen system. If you are using portable oxygen cylinders and occasionally have to replace an empty cylinder with a full one, you will be instructed how to switch the OCD along with your primary oxygen equipment to the full cylinder.
USING YOUR OCDIf your conserving device uses batteries, check the energy level on the batteries in the OCD (Make sure that the oxygen supply is turned OFF before testing the batteries). If needed, replace or re-charge the batteries as instructed (You may want to refer to the OCD instruction booklet).
Check the contents gauge to ensure that you have an adequate supply of oxygen.
Turn ON the oxygen supply.
Set the flow selector on the OCD to your prescribed dosage (If your unit has been pre-set internally, omit this step).
Position the nasal cannula with the prongs inserted into your nostrils. Do not put on the cannula before turning ON the unit and adjusting the flow selector.
Breathe normally.
© Copyright The MED Group 2000, Oxygen Conserving Device
OXYGEN CONSERVING DEVICE
1
Page 1 of 2

© Copyright The MED Group 2006
PR
OD
UC
T
IN
FO
RM
AT
IO
N
FO
R
CU
ST
OM
ER
S
PICProduct Information For Customers
65
TURNING OFF THE OCDTurn OFF the oxygen supply.
Set the flow selector on the OCD to the OFF position (If your unit has been pre-set internally, omit this step).
OTHER OPERATING TIPS AND PRECAUTIONS Do not change the flow rate settings from those prescribed by your doctor.
Do not use the OCD with a humidifier. The short pulses of oxygen will not cause drying of the nasal passages as you may have experienced with continuous flow oxygen systems. The use of a humidifier will prevent the OCD from sensing the beginning of inhalation and interfere with proper operation of the device.
Rare instances have been reported in which certain oxygen users could not be treated effectively with the OCD. If you experience the feeling that you are not receiving enough oxygen, report this to your doctor.
Do not expose the OCD to water or other liquids.
Do not expose the device to extreme temperatures.
Maintain an adequate supply of oxygen. Check the contents gauge periodically.
Do not use the OCD with the batteries removed. Maintain a spare set of batteries with your unit at all times.
Do not use the OCD if the oxygen tubing is kinked or obstructed in any way.
Use only the oxygen tubing and cannula supplied with your unit. Do not extend or shorten the length of the tubing or cannula supplied.
Keep the OCD and associated equipment in a well-ventilated environment. On portable units, DO NOT carry equipment under a coat.
Turn OFF the oxygen supply when not in use.
Follow all operating instructions and safety precautions for your primary oxygen equipment.
© Copyright The MED Group 2000, Oxygen Conserving Device 2
Page 2 of 2
OXYGEN CONSERVING DEVICE

© Copyright The MED Group 2006
PR
OD
UC
T
IN
FO
RM
AT
IO
N
FO
R
CU
ST
OM
ER
S
PICProduct Information For Customers
66
Liquid oxygen systems are frequently prescribed for individuals who are mobile and active outside their homes. In its liquid state, oxygen takes up less space and can be stored at much lower pressures than when in its gaseous state. This means more oxygen can be carried in a portable liquid unit, and the portable container is much lighter in weight than an oxygen gas cylinder.
Liquid oxygen systems consist of a stationary unit or reservoir which stores a large volume ofliquid oxygen and a portable unit which can be refilled from the reservoir. When you are at home, you will probably use the stationary unit as your source of oxygen. But, for exercise or other activities outside your home, or within the home out of reach of your stationary source, you can fill the portable unit and be free to go wherever you choose.
To remain in a liquid form, oxygen must be stored at approximately minus 300 degrees F. For this reason the reservoir and the portable unit are actually large thermos containers. When you turn ON the oxygen, the liquid warms as it leaves the container, changes to gas, and is supplied at room temperature for you to breathe. THE RESERVOIR Your stationary unit is equipped with a contents indicator that registers the amount of oxygen in the unit, a flow selector that controls the oxygen flow rate, an oxygen outlet for attaching a humidifier or an adapter for direct attachment of your cannula, and a fill port that connects to a matching connector on the portable unit.
Our representative will help you select a location for your reservoir in an open, well-ventilated area that is convenient for you. The surface on which the reservoir is placed must be level, and the area should be cool, dry, out of direct sunlight, and not near any source of heat or flame such as a radiator, heat vent, stove, fireplace, etc.
If a humidifier has been prescribed as part of your oxygen therapy, it should be attached to the oxygen outlet. (See “Facts About Your Humidifier” in the general information on oxygen therapy that was provided with these instructions). Then, connect the tubing from your cannula to the humidifier output.
If no humidifier is prescribed, connect the tubing from your cannula directly to the tapered fitting that is provided on the oxygen outlet of the reservoir. Do not allow the oxygen tubing to become kinked, become bent or to go under furniture, rugs or blankets. If the tubing becomes kinked or crushed, the flow will be restricted.
The reservoir must be kept in an upright position at all times. If the reservoir is ever accidentally turned over on its side, place it in an upright position immediately and notify our office.
Turning on oxygen 1. Adjust the flow selector to the flow rate prescribed by your doctor. Your doctor prescribed a flow rate of ______ liters per minute. NOTE: If you are using a humidifier it should bubble when the oxygen is turned on if it has been properly filled with water and all connections are tight.
OXYGEN EQUIPMENT:LIQUID SYSTEMS
© Copyright The MED Group 1994, 1997, 2001Oxygen Equipment: Liquid Systems 1
Page 1 of 3
© Copyright The MED Group 2006
PR
OD
UC
T
IN
FO
RM
AT
IO
N
FO
R
CU
ST
OM
ER
S
PICProduct Information For Customers
67
© Copyright The MED Group 1994, 1997, 2001
Oxygen Equipment: Liquid Systems 2
Page 2 of 3
2. Put on the cannula and adjust for comfort. See “Facts About Your Nasal Cannula” in the general information on oxygen therapy that was provided with these instructions.
Turning off oxygen 1. Remove the nasal cannula. 2. Set the flow selector to the OFF position.
Ordering more oxygenIt is important to check the reservoir contents gauge regularly to avoid running out of oxygen. Although our representative will do everything possible to schedule delivery so as to prevent this, he or she cannot monitor your oxygen supply as closely as you can. This responsibility must be assumed by you, a member of your family or your caregiver.
When your reservoir contents indictor registers __________________ , contact our office.
THE PORTABLE UNITYour portable unit is equipped with: an oxygen outlet to which the tubing from your cannula is connected; a flow-rate selector that controls the oxygen flow rate; a contents indicator that shows the amount of oxygen in the unit; a fill port that connects to a matching connector on the reservoir for refilling; and a carrying strap.
Before attempting to fill your portable unit, check the level of oxygen in your reservoir. If the reservoir contents indicator registers below _____________________ , you should not attempt to fill your portable. Contact our office so we can refill the reservoir.
Filling the portable unit 1. Make sure that the fill ports on both the reservoir and the portable are free of dirt and moisture by cleaning both with a clean dry cloth or paper towel. Any moisture on these couplings could cause the connection to temporarily freeze during the filling process. 2. Set the flow selector on both units to the “OFF” position. 3. Holding the portable unit in the proper position, align the fill port coupling on the portable with the one on the reservoir. 4. Mate the couplings as demonstrated by your representative. 5. After the connection has been secured, open the vent valve on the portable. You will hear a hissing sound at this time. This sound is normal and is caused by the remaining gas in the portable being forced out by the liquid oxygen from the reservoir. 6. It will take approximately 1 to 4 minutes to fill the portable. Do not leave the units unattended during the filling process. You can tell when the portable is full by a continuous stream of white vapor being vented from the vent port of the portable unit. 7. When this continuous liquid venting occurs, quickly close the vent valve. If some venting continues, re-open and close the vent valve quickly to completely seal the valve. Do not attempt to force the valve closed. If venting is allowed to continue for a prolonged period, the valve may freeze open. 8. After closing the vent valve, leave the two units connected for at least 30 seconds to allow the pressure in both containers to equalize. 9. You may now adjust the flow selector on the reservoir to your prescribed flow-rate, put on the cannula, and resume receiving oxygen from the reservoir while you proceed to disconnect the portable as described below.
Disconnecting the portable unit 1. After the 30-second waiting period, disengage the couplings and separate the two units. If you are unable to easily disengage and remove the portable from the reservoir, the connection may be temporarily frozen. Do not attempt to force the units apart. Do not touch any frosted parts of either unit.

© Copyright The MED Group 2006
PR
OD
UC
T
IN
FO
RM
AT
IO
N
FO
R
CU
ST
OM
ER
S
PICProduct Information For Customers
68
© Copyright The MED Group 1994, 1997, 2001Oxygen Equipment: Liquid Systems
3
Page 3 of 3
2. If the fill connection is temporarily frozen, check to see that the vent valve is in the closed position and leave the units connected for a few minutes to allow the connectors to warm up to room temperature. After a few minutes the couplings should disengage easily. 3. After disconnecting the portable, check for leakage on both units. If a minor leak is detected, re-connect the units and repeat steps 1 and 2. If minor leakage persists, leave the units connected and call our office. 4. After connections have warmed to room temperature, wipe off any moisture that may have collected on both units. In the unlikely event that severe leakage occurs, such as a stream of liquid flowing from the reservoir or the portable, move well away from the equipment and call our office immediately. Exercise caution to avoid skin contact with the liquid. Severe burns can result.
Turning on portable oxygen 1. Attach the tubing from the cannula to the tapered oxygen outlet on the portable. 2. Adjust the flow-rate selector to the flow rate prescribed by your doctor. Your doctor prescribed a flow rate of ______ liters per minute. 3. Put on the cannula and adjust for comfort. See “Facts About Your Nasal Cannula” in the general information on oxygen therapy that was provided with these instructions.
Turning off portable oxygen 1. Remove the cannula. 2. Set the flow selector to the “OFF” position.
The portable unit must be kept upright at all times.
Do not store the portable unit in a closet or other confined area. Always keep the portable as well as the reservoir in an open, well-ventilated area away from any source of heat or flame.
Cleaning and maintenanceYour liquid oxygen system should be cleaned periodically with a soft, lint-free cloth moistened with water. A mild household detergent may be used if necessary. Do not use abrasive cleaners.
If you are using a humidifier, see “Facts About Your Humidifier” in the general information on oxygen therapy provided with these instructions for the proper procedure for cleaning your humidifier.
Other helpful information“NO SMOKING” signs should be prominently displayed in all areas where oxygen is being used or stored. Follow all of the other safety precautions outlined in the general information on oxygen therapy.
We recommend that you do not attempt to partially fill your portable unit. Fill it completely each time. If you are away from home for only a short period, simply continue to use the portable unit after returning home until it is empty, then switch to your reservoir. This provides the most economical use of your oxygen.
Our representative will demonstrate, in detail, the process for filling your portable unit as well as any other special features that your liquid oxygen system may provide.
Carefully follow your doctor’s orders for the flow rate and duration of daily oxygen.
The oxygen provided to you is transported, handled and installed by professionals with experience in oxygen therapy. Feel free to ask them any questions about your oxygen therapy and/or equipment.

© Copyright The MED Group 2006
PR
OD
UC
T
IN
FO
RM
AT
IO
N
FO
R
CU
ST
OM
ER
S
PICProduct Information For Customers
69
OXYGEN EQUIPMENT: LARGE CYLINDER
© Copyright The MED Group 1994, 1997, 1999, 2001Oxygen Equipment: Large Cylinder 1
If your oxygen is being supplied from a cylinder or tank, be sure to have it secured so it cannot be knocked over. A stand has been provided for this purpose. If you keep extra cylinders on hand, be certain they are also secured with a belt, chain or rope. It is important to secure empty cylinders as well as full ones. All large cylinders, whether full or empty, when not in use must have the protective cap on and screwed down. All cylinders must be kept away from radiators, heat ducts, stoves or any other sources of heat. “NO SMOKING” signs should be prominently displayed in all areas in which oxygen is being used or stored. Review the other safety precautions in the general information on oxygen therapy that was provided with these instructions.
TURNING ON OXYGEN 1. Make sure that the flow adjustment knob is turned completely “OFF,” finger tight only –do not force. 2. Slowly turn the cylinder valve “ON” completely. The pressure gauge will now indicate the amount of oxygen in the tank. A full tank will register approximately 2,000 pounds, a half tank 1,000 pounds, etc. 3. Turn the flow adjustment knob “ON,” until the flowmeter gauge registers the flow rate prescribed by your doctor. Your doctor prescribed a flow-rate of ______ liters per minute.
PLEASE NOTE: If a humidifier is being used, it should bubble when the oxygen is turned “ON,” if it has been properly filled with water, and all connections are tight. 4. Attach the tubing from the cannula to the humidifier output or to the outlet nipple if a humidifier is not to be used. 5. Put on the cannula and adjust for comfort. See “Facts About Your Nasal Cannula” in the general information on oxygen therapy that was provided with these instructions. 6. If a humidifier is being used, refer to “Facts About Your Humidifier” in the general information for instructions on the proper use and maintenance of your humidifier.
TURNING OFF OXYGEN 1. Turn the cylinder valve fully “OFF.” The pressure gauge and flow meter will slowly drop to zero as oxygen flows from the regulator. 2. When both gauges register zero, turn the flow adjustment knob “OFF,” finger tight only - do not force.
ORDERING MORE OXYGENIt is important to check the pressure gauge regularly to avoid running out of oxygen. Although our representative will do everything possible to assist you, he or she cannot monitor your oxygen supply as closely as you can. This responsibility must be assumed by you, a member of your family or your caregiver. The following chart will assist you in determining when to order more oxygen.
Page 1 of 2
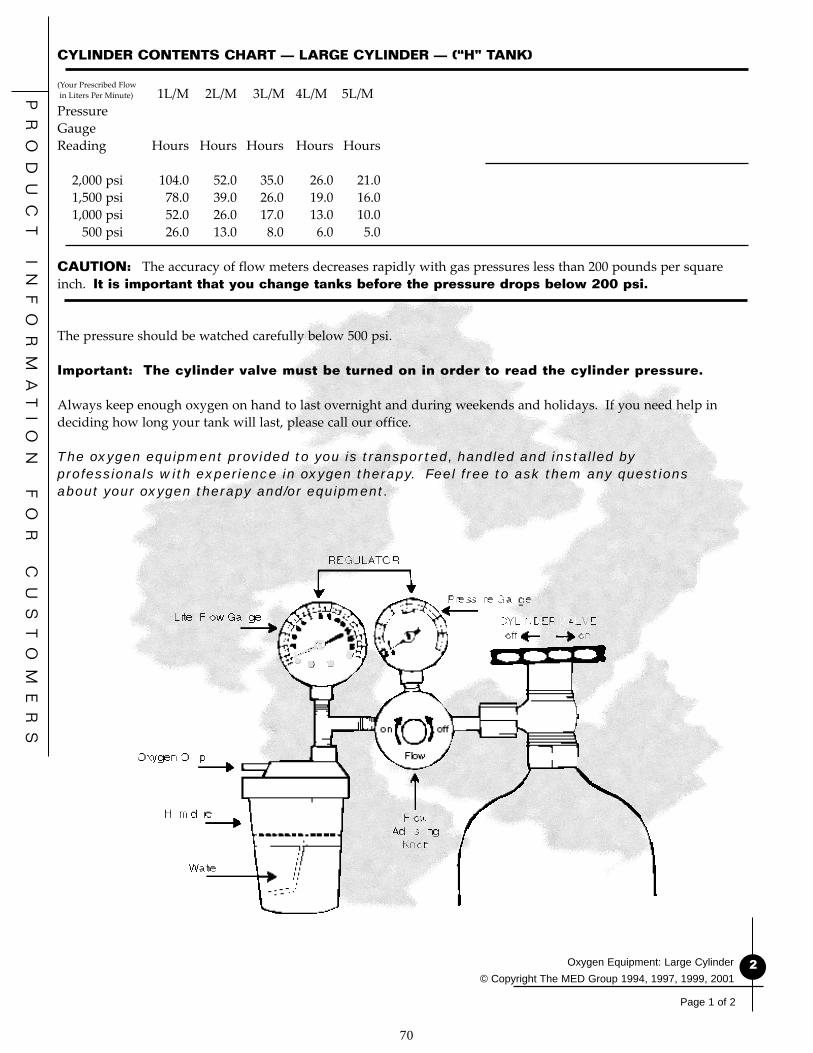
© Copyright The MED Group 2006
PR
OD
UC
T
IN
FO
RM
AT
IO
N
FO
R
CU
ST
OM
ER
S
PICProduct Information For Customers
70
© Copyright The MED Group 1994, 1997, 1999, 2001Oxygen Equipment: Large Cylinder 2
Page 1 of 2
CYLINDER CONTENTS CHART — LARGE CYLINDER — (“H” TANK)
(Your Prescribed Flow in Liters Per Minute) 1L/M 2L/M 3L/M 4L/M 5L/MPressureGaugeReading Hours Hours Hours Hours Hours
2,000 psi 104.0 52.0 35.0 26.0 21.0 1,500 psi 78.0 39.0 26.0 19.0 16.0 1,000 psi 52.0 26.0 17.0 13.0 10.0 500 psi 26.0 13.0 8.0 6.0 5.0
CAUTION: The accuracy of flow meters decreases rapidly with gas pressures less than 200 pounds per square inch. It is important that you change tanks before the pressure drops below 200 psi.
The pressure should be watched carefully below 500 psi.
Important: The cylinder valve must be turned on in order to read the cylinder pressure.
Always keep enough oxygen on hand to last overnight and during weekends and holidays. If you need help in deciding how long your tank will last, please call our office.
The oxygen equipment provided to you is transported, handled and installed by professionals with experience in oxygen therapy. Feel free to ask them any questions about your oxygen therapy and/or equipment.
© Copyright The MED Group 2006
PR
OD
UC
T
IN
FO
RM
AT
IO
N
FO
R
CU
ST
OM
ER
S
PICProduct Information For Customers
71
If your oxygen is being supplied from a cylinder or tank, be sure to have it secured so it cannot be knocked over. A stand has been provided for this purpose. If you keep extra cylinders on hand, be certain that they are stored lying down when they are not in a stand or cart. It is important to secure empty cylinders as well as full ones. All cylinders must be kept away from radiators, heat ducts, stoves or any other sources of heat. “NO SMOKING” signs should be prominently displayed in all areas where oxygen is being used or stored. Review the other safety precautions in the general information on oxygen therapy that was provided with these instructions.
ATTACHING THE REGULATOR TO A SMALL CYLINDERPortable oxygen cylinders usually require a washer between the regulator and the post valve of the cylinder to prevent leaking. If your cylinder does not require this washer, skip to step #3 below. 1. Remove the plastic wrapper from the post valve of the full cylinder and save the washer inside. 2. Place the new washer on the largest peg located inside the yoke of the regulator. If the previous washer is still in place, remove it before installing the new washer. 3. Attach the regulator by slipping the regulator yoke down over the post valve of the cylinder and aligning the pegs inside the regulator yoke with the holes in the post valve of the cylinder. 4. Tighten the “T” handle firmly. If the “T” bolt is not secure or if the regulator washer is not in place, the cylinder will make a loud hissing sound when the valve is turned on, indicating oxygen is escaping. There is no danger. Turn the cylinder valve “OFF” and check positioning of the regulator on the cylinder. Be sure it is aligned properly. Be sure a washer is in place, and re-tighten the “T” handle firmly.
TURNING ON OXYGEN 1. Make sure that the flow adjustment knob is turned completely “OFF,” finger tight only do not force. 2. Using the small-cylinder wrench, key or the small handle on the top of some cylinders, slowly turn the cylinder valve “ON,” one full turn. When this valve is opened, the pressure gauge will indicate the amount of oxygen in the tank. A full tank will register approximately 2,000 pounds, a half tank 1,000 pounds, etc. 3. Turn the flow adjustment knob “ON,” until the flow meter gauge registers the flow rate prescribed by your doctor. Your doctor prescribed a flow rate of ______ liters per minute. 4. Attach the tubing from your cannula to the nipple adapter on the regulator outlet. 5. Put on the cannula and adjust for comfort. See “Facts About Your Nasal Cannula” in the general information on oxygen therapy that was provided with these instructions.
TURNING OFF OXYGEN 1. Using the small-cylinder wrench or handle, turn the cylinder valve completely “OFF.” The pressure gauge and flow meter will slowly drop to zero as oxygen flows from the regulator. 2. When both gauges register zero, turn the flow adjustment knob “OFF,” finger tight only - do not force.
REMOVING THE REGULATOR
OXYGEN EQUIPMENT: PORTABLE CYLINDER
© Copyright The MED Group 1994, 1997, 1999, 2001Oxygen Equipment: Portable Cylinder
1
Page 1 of 2

© Copyright The MED Group 2006
PR
OD
UC
T
IN
FO
RM
AT
IO
N
FO
R
CU
ST
OM
ER
S
PICProduct Information For Customers
72
© Copyright The MED Group 1994, 1997, 1999, 2001
Oxygen Equipment: Portable Cylinder 2
Page 2 of 2
1. Turn “OFF” the oxygen as described. 2. Loosen the “T” bolt enough to permit the pegs in the regulator yoke to be disengaged from the holes in the post valve of the cylinder. Lift off the regulator.
CHANGING CYLINDERS AND ORDERING MORE OXYGENIt is important to check the pressure gauge regularly to avoid running out of oxygen. Although our representative will do everything possible to assist you, he or she cannot monitor your oxygen supply as closely as you can. This responsibility must be assumed by you, a family member or a caregiver. The following charts will assist you in determining when to order more oxygen.
“E” TANK
FLOW IN LITERS PER MINUTE 1 2 3 4 5PressureGaugeReading Hours Hours Hours Hours Hours
2,000 psi 8.0 4.0 3.0 2.0 1.41,500 psi 6.0 3.0 2.2 1.5 1.01,000 psi 4.0 2.0 1.5 1.0 .7 500 psi 2.0 1.25 0.75 0.5 0.25
“D” TANK
FLOW IN LITERS PER MINUTE 1 2 3 4 5PressureGaugeReading Hours Hours Hours Hours Hours
2,000 psi 5.0 2.5 1.8 1.2 1.01,500 psi 4.0 2.0 1.25 1.0 0.75 1,000 psi 2.5 1.25 0.9 0.6 0.50500 psi 1.25 0.6 0.4 0.3 0.25
CAUTION: The accuracy of flow meters decreases rapidly with gas pressures less than 200 pounds per square inch. It is important that you change tanks before the pressure drops below 200 psi.The pressure should be watched carefully below 500 psi.
Important: The cylinder valve must be turned “ON” in order to read the cylinder pressure.
Always keep enough oxygen on hand to last overnight and during weekends and holidays. If you need help in deciding how long your tank will last, please call our office.
The oxygen equipment provided to you is transported, handled and installed by professionals with experience in oxygen therapy. Feel free to ask them any questions about your oxygen therapy and/or equipment.

© Copyright The MED Group 2006
PR
OD
UC
T
IN
FO
RM
AT
IO
N
FO
R
CU
ST
OM
ER
S
PICProduct Information For Customers
73
Oxygen is a colorless, odorless and tasteless gas. Air is made up of approximately 21% oxygen, so you have been breathing oxygen all your life. It is simply now going to be supplied to you in concentrations higher than the 21% found in the air. It can be supplied in this more concentrated form from Oxygen Tanks of various sizes, by an Oxygen Concentrator or from a Liquid Oxygen System. Each of these three sources of oxygen has different unique advantages. Your doctor has chosen the best one for you.
We all need oxygen. Our body cells require energy to function. These cells get their energy from a combination of the food we eat and the oxygen we breathe. It is much like the process of burning fuel. Food is the fuel, but it will only burn and produce heat or energy in the presence of oxygen.
FOOD + OXYGEN = ENERGY + CARBON DIOXIDE
The energy produced from this process enables our bodies to function, allowing us to move, to walk, to think, to breathe and to carry out all other bodily functions.
THE MECHANICS OF BREATHING The visible aspects of breathing appear to be very simple; we just inhale and exhale. Inside, however, a much more complex process is taking place. When air is inhaled into our lungs, the oxygen in the air is transferred to our blood stream. The blood transports the oxygen to all of our body cells. The cells combine the oxygen with nutrients from the food we have eaten to produce energy. A by-product of this process is carbon dioxide. The carbon dioxide is absorbed by the blood and returned to the lungs where it is exhaled. When everything is normal, the 21% oxygen in the air we breathe is adequate to meet the needs of our bodies.
WHY SOME PEOPLE NEED EXTRA OXYGEN When the body cells don’t get enough oxygen, a condition called hypoxia results. This can cause shortness of breath and cause the heart to beat faster. It can also cause you to feel restless and even confused.
This shortage of oxygen can result from three causes. 1. The lungs may not be functioning efficiently and providing enough oxygen to the blood. 2. The heart may not be functioning efficiently and pumping an adequate amount of blood. 3. The blood itself may not be carrying enough oxygen to the cells. Your doctor has determined that you need to breathe a higher concentration of oxygen to offset one or more of these deficiencies.
© Copyright The MED Group 1994, 1997,1999, 2001Oxygen Therapy
OXYGEN THERAPY
1
Page 1 of 4

© Copyright The MED Group 2006
PR
OD
UC
T
IN
FO
RM
AT
IO
N
FO
R
CU
ST
OM
ER
S
PICProduct Information For Customers
74
© Copyright The MED Group 1994, 1997,1999, 2001Oxygen Therapy 2
Page 2 of 4
YOUR DOCTOR’S PRESCRIPTION Oxygen is a drug and must be prescribed by your doctor. Like other drugs, it is important that you use oxygen exactly as your doctor prescribes it. An exact flow rate, in liters per minute, has been prescribed to increase the supply of oxygen to your body cells. This flow rate must never vary from the amount your doctor prescribes. Too much oxygen can be just as harmful as too little.
In addition to an exact flow rate, your doctor has specified the length of time that you should use oxygen each day. You should never vary from these instructions without first consulting with your doctor.
The amount of oxygen your doctor has ordered for you is:
At Rest __________ liters per minute
During Exercise __________ liters per minute While Sleeping __________ liters per minute
Use For __________ hours per day
Other Special Instructions: __________________________________________________________________________
_____________________________________________________________________________________________________
_____________________________________________________________________________________________________
_____________________________________________________________________________________________________
_____________________________________________________________________________________________________
_____________________________________________________________________________________________________
_____________________________________________________________________________________________________
SAFETY PRECAUTIONS Oxygen does not explode, and it does not burn. But an atmosphere enriched with oxygen will make a fire burn faster and hotter. To avoid the chance of fire and other possible hazards associated with oxygen, follow these rules:
1. DO NOT permit open flames or smoking in the room where oxygen is being used or stored.2. DO NOT permit the use of friction toys or other devices that may create a spark where oxygen is being used or stored.3. DO NOT use electrical equipment in an oxygen enriched atmosphere. (Examples: electric shavers, electric blankets, electric heating pads, etc.) Keep these appliances at least five feet from any oxygen source. 4. DO NOT use any petroleum products such as oily back rubs, lotions, creams, or Vaseline while receiving oxygen. DO NOT handle or allow others to handle oxygen equipment with these substances on their hands.5. DO NOT use aerosol sprays in the vicinity of oxygen.6. DO NOT use alcohol or alcohol-based products, or products containing ether or other flammable products. 7. DO NOT oil or grease oxygen equipment.8. DO NOT allow oxygen tubing to be covered by bedding or any other objects.9. DO NOT route longer oxygen supply tubing under carpet or furniture. 10. DO NOT leave oxygen turned on when not in use.11. DO NOT abuse or handle oxygen containers roughly. 12. DO NOT store oxygen in a confined area.13. DO NOT allow untrained persons to use or adjust equipment.14. DO NOT attempt to repair oxygen equipment.15. DO NOT place oxygen containers near radiators, heat ducts, stoves, or any other sources of heat.16. DO NOT touch frosted fittings or piping on liquid oxygen systems with bare hands.

© Copyright The MED Group 2006
PR
OD
UC
T
IN
FO
RM
AT
IO
N
FO
R
CU
ST
OM
ER
S
PICProduct Information For Customers
75
© Copyright The MED Group 1994, 1997,1999, 2001Oxygen Therapy
3
Page 3 of 4
17. DO NOT open cylinder valves quickly. 18. DO NOT transport oxygen in an enclosed area such as the trunk of your car.19. DO use a stand for all oxygen cylinders in use. Extra cylinders may be secured upright with a belt, chain or rope. Smaller, portable cylinders may be stored lying on the floor.20. DO use a stand for all oxygen cylinders or secure them with a belt, chain, or rope.21. DO use all cotton clothing and all cotton bedding to avoid sparks from static electricity. Avoid the use of nylon and other synthetic fabrics as well as wool. 22. DO keep liquid oxygen containers upright. 23. DO keep oxygen equipment out of reach of children. 24. DO keep oxygen equipment free of dust by wiping it off periodically with warm water. A mild household detergent may be used if necessary. Never change the oxygen flow rate from what your doctor prescribed.
FACTS ABOUT YOUR HUMIDIFIER A humidifier is often included as part of your oxygen equipment. A humidifier is a container that is filled with water and attached to the oxygen system to moisten the oxygen before you inhale it. Medical oxygen is completely dry, and breathing this completely dry gas may cause discomfort.
If you use a humidifier it MUST be kept clean at all times. Bacteria can grow in the water and on the wet surfaces in the moist environment of the humidifier. This bacteria growth can lead to infection.
HUMIDIFIER CARE 1. Empty, rinse, and refill your humidifier everyday. Do not overfill. Wash hands before refilling humidifier. Be sure that the cap is screwed on to the bottle tightly enough to prevent leaks and that the humidifier fitting is properly attached to the oxygen equipment. 2. Your humidifier should be thoroughly cleaned and sanitized at least once a week, more often if ordered by your doctor or therapist. 3. Disconnect the tubing to the cannula or mask and unscrew the humidifier fitting. 4. Disassemble the humidifier; there are two parts (the bottle and the cap with the stem attached). 5. Avoid touching any of the internal parts of your humidifier with your hands or allowing them to touch the surfaces of counter tops, sinks, etc. when you are adding water or when you are cleaning and sanitizing.
CLEANING INSTRUCTIONS To clean your humidifier, you will need: • Dishwashing detergent • White vinegar • A small brush (a bottle brush or tooth brush) • Two basins or buckets (Plastic containers of the appropriate size are ideal)
Basin #1 contains warm water and detergent. This detergent solution should be discarded after each cleaning.Basin #2 contains one cup of white vinegar to three cups of water. Double this amount if necessary to have enough solution to cover the disassembled humidifier completely when soaking. This solution is good for two weeks if stored in a covered container in the refrigerator between use.
CLEANING STEPS 1. Wash the disassembled humidifier in warm sudsy water (Basin #1). Use a brush to remove any residue. 2. Rinse all parts thoroughly under clear, warm running water. 3. Soak all parts in vinegar solution for 30 to 40 minutes (Basin #2). Make sure all parts are completely submerged in the solution. No rinse is required after this soaking unless otherwise instructed by your doctor or health care professional. 4. Wash hands before removing the humidifier components from the solution. Avoid touching internal surfaces with the hands. 5. Shake off excess solution. Place on clean paper towels and cover with paper towels. Allow to air dry.
© Copyright The MED Group 2006
PR
OD
UC
T
IN
FO
RM
AT
IO
N
FO
R
CU
ST
OM
ER
S
PICProduct Information For Customers
76
© Copyright The MED Group 1994, 1997,1999, 2001Oxygen Therapy
4
Page 4 of 4
6. Extra humidifiers should be stored in clean ziplock or twist tied plastic bags after they have been allowed to thoroughly air dry. 7. It is best to have two humidifiers, one to use while the other is being cleaned and sanitized. Remember, never touch the inside of the humidifier bottle or the stem. You should discard the humidifier if you notice discoloration of the bottom of the stem inside the humidifier.
FACTS ABOUT YOUR NASAL CANNULAA nasal cannula is the flexible plastic device with two short tips or prongs that fit into your nostrils. It is used to administer low to moderate oxygen concentrations through your nose.
With the humidifier, tubing and cannula connected, set the oxygen flow at a low rate. Insert the tips of the cannula in the nostrils. Slip the two smaller plastic tubes over the ears and down under the chin. Adjust the plastic slide until the cannula fits snugly but comfortably. Clip the tubing to the clothes to allow enough slack for comfort and to allow turning the head. Adjust flow up to the rate prescribed by the doctor. 1. A nasal cannula should always be worn with the prongs curved toward you. 2. You do not have to always breathe through your nose when using a nasal cannula. The continuous flow of oxygen will collect in the space in your nose and throat. Then each time you inhale, you breathe this collected oxygen into the lungs. 3. The flow rate prescribed by your doctor is set on the flow meter of your oxygen system. DO NOT increase the flow rate to compensate for longer tubing. If an adjustment is needed, it will be made by your respiratory therapist. 4. If your nose becomes irritated from wearing the nasal cannula for long periods of time, you may want to use a water-based lubricant inside your nostrils. It may be helpful to consult your doctor or pharmacist, who can suggest a good water-based preparation. DO NOT use an oil-based product such as Vaseline. 5. It is recommended that you change cannulas every two weeks to avoid possible contamination. 6. Tubing to the cannula should be replaced monthly. If no humidifier is used, the tubing should be changed every three months.
TRAVEL TIPS 1. Transport oxygen in the back seat of your car, never in the trunk. Secure the oxygen container in a stable, upright position. 2. Open your window one inch or more when transporting oxygen, to prevent an accumulation of oxygen in your car. 3. Always keep liquid oxygen systems, reservoirs or portable packs in an upright position when handling as well as when transporting. Try using a seat belt and/or hanging the portable unit from a headrest. 4. Contact our company representative well in advance if you plan to travel outside our service area.
OTHER SUGGESTIONS 1. Continue to practice the breathing training and physical conditioning recommended by your doctor or therapist. 2. Take all medicines your doctor prescribed at the proper times and in the correct amounts. 3. DO NOT stop exercising. Within the limits set by your doctor, continually try to increase your level of activity while taking oxygen. 4. Make note of and keep all appointments with your doctor and other healthcare providers. 5. If you sense a change in your general health condition, contact your doctor. 6. Please notify our office if you will not be at home for a scheduled delivery or if your prescription, your doctor, or your insurance changes.
REMEMBER: CAREFULLY FOLLOW YOUR DOCTOR’S RECOMMENDATIONS FOR THE FLOW RATE AND DURATION OF DAILY OXYGEN.
© Copyright The MED Group 2006
PR
OD
UC
T
IN
FO
RM
AT
IO
N
FO
R
CU
ST
OM
ER
S
PICProduct Information For Customers
77
The purpose of the patient lifter is to allow a person to be lifted and transferred safely with as little physical effort as possible. Before attempting to lift an ill or injured patient it is wise to practice with an able-bodied person. Take turns lifting as well as being lifted to learn how the patient will feel in the lifter. When lifting a patient who has never used a lifter before, explain each step in advance, as you go through the lifting procedure.SAFETY PRECAUTIONS
Never exceed the maximum weight capacity of the lifter or sling. It is wise to leave a substantial safety margin in making this determination. Injured, ill or physically challenged individuals may not have actually been weighed recently and may not know their present weight. Of course the weight of heavy casts, etc., must also be taken into account.
Use the steering handle to move the lifter. Never push or pull on the lifter boom or the patient. This can cause the lifter to tip over.
The patient should always be centered over the base and facing the caregiver who is operating the lifter.
Do not lock the caster brake when anyone is in the lifter. This brake is intended for use during parking and storage only.
To reduce the danger of tipping over, always spread the adjustable base lifter to its widest position before lifting a patient.
Safe and successful use of patient lifters begins with proper sling placement and proper positioning of the patient. To avoid the risk of the patient sliding out of the sling, always position the patient so that knees are slightly above the waist. NOTE: Slippery garments greatly increase the risk of sliding out of the sling.
Never move a lifter and patient over shag or deep pile carpet, thresholds, uneven surfaces, or any other obstructions that could block the wheels and cause the lifter to tip over.
Safety straps or restraints may be advisable for comatose, spastic agitated or severely handicapped patients. Use care, discretion, and common sense in determining if a severely spastic or handicapped person can be lifted safely. Use restraints only when prescribed by the attending physician.
BASIC OPERATING INSTRUCTIONS
There are two basic types of Patient Lifters currently available, the Hydraulic Lifter and the Mechanical or Crank Style Lifter. Both of these products perform exactly the same functions. They differ only in the way they are operated to raise and lower the patient.
The Hydraulic Lifter is operated by pumping the hydraulic pump handle to raise the patient and by slowly opening the hydraulic pressure release valve by turning the knob counterclockwise to lower the patient.
The Crank Style Lifter is operated by turning the crank clockwise to raise the patient (on some models, after raising the patient, it is necessary to turn the crank counterclockwise of a turn to securely lock the cranking mechanism). To lower the patient, turn the crank counterclockwise. On some models of the crank style lifter you will hear a clicking sound when the crank is turned. This clicking sound is normal and does not indicate a problem.
PATIENT LIFTER: WITH ONE-PIECE SLING
© Copyright The MED Group 2001Patient Lifter: With One-Piece Sling 1
Page 1 of 4

© Copyright The MED Group 2006
PR
OD
UC
T
IN
FO
RM
AT
IO
N
FO
R
CU
ST
OM
ER
S
PICProduct Information For Customers
78
Both of the above types of patient lifters may be equipped with either a “U” shaped base or a “C” shaped base. Each of these bases performs its function equally well. Most “U” shaped bases are equipped with an adjusting lever to allow the base to be narrowed for storage or for passing through a narrow doorway. This adjustable base must always be spread and locked in its widest possible position when lifting a patient to maximize stability.
Both the hydraulic and crank style lifters are also available in electrically powered versions on which the lifter is operated by simply pressing the appropriate push button or lever to raise or lower the patient.
GENERAL USE INSTRUCTIONSTransferring a Patient from Bed
Note: If the patient is in a hospital bed, raising the over-all height of the bed before proceeding will reduce the strain on the caregiver’s back. However, when the patient is ready to be lifted, you should lower the height of the bed to reduce the height to which the patient must be lifted to complete the transfer. Stand beside the bed; place the bedside rails in the up and locked position. Lift the patient’s opposite foot and leg up and across the nearer foot and leg. Carefully roll the patient toward you onto his/her side. Fold the sling as shown.
Place the folded sling lengthwise on the bed behind the patient’s back. Roll the patient back onto his/her back. Pull the leg loops forward and under the thigh as shown. Cross the loops between the legs.
A little practice, with positioning the sling behind the patient initially, will enable you to have the sling properly centered under the patient and positioned so that, when lifted, the knees will be slightly above the waist.
If the patient is in a hospital bed, elevate the foot of the bed to flex patient’s knees, then elevate the head of the bed to place the patient in a semi-sitting position. Next, lower the overall height of the bed to decrease the height to which the patient will have to be raised for transfer from the bed. If the patient is in a home bed, either have him/her flex the knees or place a pillow under the knees to support them in a flexed position. Check to see that the brake(s) on the lifter wheel(s) are NOT locked. Roll the lifter into position with the base under the side of the bed and the boom cradle centered over the patient. Lower the boom until the loops on the sling will reach the cradle hooks.
Attach each loop of the sling to its proper position on the cradle (Remember the leg loops must be crossed between the legs). The patient may now be raised slowly. Repositioning of the patient may needed to ensure that a safe sitting position (knees slightly above the waist)
is attained as the patient is raised. The patient may need assistance when being lifted from a home bed. If this is the case, place your hand behind his/her head and lift until a sitting position is reached. Confirm that all loops are securely attached to the cradle.
Confirm that the lifter boom is centered over the patient and that the parking brake is NOT locked. The bedside rail on the side from which the transfer will take place can now be safely lowered. When the patient has been raised until the buttocks are clear of the mattress, grasp the patient’s feet and legs with your hands, lift and turn until he/she is facing you and the lifter mast, and the legs are off the side of the bed. Using the steering handles, move the lifter and patient away from the bed.
© Copyright The MED Group 2001Patient Lifter: With One-Piece Sling
2
Page 2 of 4
© Copyright The MED Group 2006
PR
OD
UC
T
IN
FO
RM
AT
IO
N
FO
R
CU
ST
OM
ER
S
PICProduct Information For Customers
79
© Copyright The MED Group 2001Patient Lifter: With One-Piece Sling 3
Page 3 of 4
Confirm that all loops are securely attached to the cradle. Confirm that the lifter boom is centered over the patient and that the parking brake is NOT locked. The bedside rail on the side from which the transfer will take place can now be safely lowered. When the patient has been raised until the buttocks are clear of the mattress, grasp the patient’s feet and legs with your hands, lift and turn until he/she is facing you and the lifter mast, and the legs are off the side of the bed. Using the steering handles, move the lifter and patient away from the bed.
When returning a patient to the bed, simply reverse the above procedure.
A patient lifter should not be used as a transport device. If a patient must be transported any significant distance, it is much safer to transfer to a wheelchair for that purpose. To transport a patient for short distances, turn him/her until he/she is facing the lifter mast. Slowly and carefully lower the patient until his/her feet are resting on the base of the lifter with the legs straddling the mast. This lowers the center of gravity, making the lifter easier to push and providing much greater stability. This also reduces the pendulum action and makes the patient feel more secure. Push and pull the lifter ONLY with the steering handles.
Transferring a Patient to a Wheelchair
• Raise the patient until the buttocks are slightly above the seat of the chair.• With the patient facing the lifter mast, move the wheelchair into position under the patient. Apply the wheelchair locks. DO NOT lock the lifter brake.• Lower the patient slowly and carefully with one hand, while simultaneously pushing back gently but firmly on the patient’s knees with the other hand. Pressing the patient’s back against the back of the chair, as his/her weight descends onto the seat, positions the hips correctly, well back in the seat of the chair. Continue to lower the lifter boom until there is enough slack to easily remove the loops of the sling from the cradle.• When transferring a patient from a chair simply reverse this procedure.• The above procedure for transferring a patient to a wheelchair can also be used for transfers to an easy chair or to most other appropriate home or office type chairs. Removing Sling from Under Patient in a Wheelchair
NOTE: It is not always necessary or desirable to remove the sling from beneath the patient in a wheelchair. This is particularly true if another transfer is anticipated within a relatively short period of time (toilet transfer, car transfer, back to bed, etc.). Leaving the sling in place allows transfers from the chair to be performed much more quickly and simply. The “U” Style sling is, however, designed to allow wheelchair removal if desired.
• If the wheelchair has removable arms, you may want to remove them to simplify this procedure.• Stand in front of the patient, lean the patient forward and place his/hers arms on the knees for stability. Pull the flaps to the side and out from under the patient’s thighs.• While still standing in front of the patient, reach over his/her shoulder and pull the sling up and out from behind the patient’s back. Return the patient to an upright sitting position. Replacing Sling Under Patient in a Wheelchair
• Fold the sling as illustrated for bed transfers.• While standing in front of the patient, lean him/her forward and place his/her arms on the knees for stability.• While still standing in front of the patient, place the folded sling behind the patient’s back and press it down until it touches the seat of the wheelchair. Return the patient to an upright position.• The leg sections of the “U” Style sling can now be pulled forward and beneath the patient’s thighs by the long loops. The loops are then crossed between the legs as before.
© Copyright The MED Group 2006
PR
OD
UC
T
IN
FO
RM
AT
IO
N
FO
R
CU
ST
OM
ER
S
PICProduct Information For Customers
80
© Copyright The MED Group 2001Patient Lifter: With One-Piece Sling 4
Page 4 of 4
Toilet Transfers
Patient Lifters are designed to provide access to most bathrooms and can be used with either the standard bathroom fixture or a bedside commode. It is recommended that the upper loops of the “U” Style Sling be left connected to the lifter during toilet use.
• Position the lifter base around the commode. Position the patient over the commode and slowly lower him/her. • When the patient is securely seated on the commode, unhook the leg flaps of the sling and pull them to the side and back out of the way. • When toileting is complete, return the leg flaps to their proper position under the thighs, cross the loops between the legs and reconnect them securely to the cradle.• Lift the patient until the buttocks are clear of the commode.• Using the steering handles, move the lifter away from the commode and lower the patient for transport. Transfers to and from the floor
There is an occasional need to transfer a patient to and from the floor for various exercise activities, or to lift a patient from the floor who ended up there by accident. In the case of an accident, it is important to FIRST CONFIRM THAT THERE ARE NO INJURIES that might be aggravated by the lifting procedure.
• To lift a patient from the floor, fold and place the “U” Style sling under the patient, using the same procedure described earlier for lifting the patient from the bed. • Position the lifter over the patient. Lower the boom so the sling loops will reach the cradle. • Raise the patient’s knees and attach the loops to the cradle. Raise the patient. • Support the head if assistance is needed.• To transfer a patient to the floor, simply reverse the above procedure.Automobile Transfers For automobile transfers, certain special features may be needed on the lifter. Cars with low ground clearance may require a lifter base with smaller three-inch or four-inch casters instead of the standard five-inch casters.
• As you approach the fully opened door of the car, raise the patient so that his/her head just clears the top of the door opening. Place one hand on the patient’s head for protection and guide it under the opening of the car door. • Raise the lifter as required until the patient’s buttocks are slightly above the car seat and move the lifter forward and into the car until the patient is positioned over the car seat with the legs and feet hanging out the door. Be sure to protect the patient’s head. • Grasp the patient’s legs with your hands lifting them and rotating him/her to face toward the front of the car. • Slowly lower the patient onto the car seat until there is enough slack to remove the sling loops from the cradle. The patient should remain seated on the sling. • The lifter can now be disassembled for loading into the trunk or back seat of the car.
Upon arrival at your destination and before attempting to transfer the patient out of the car, always confirm that the sling is still positioned properly. Lift the patient slowly and adjust his/her positioning, if necessary, before moving the lifter and patient away from the car seat. (The knees must be slightly above the waist.)

© Copyright The MED Group 2006
PR
OD
UC
T
IN
FO
RM
AT
IO
N
FO
R
CU
ST
OM
ER
S
PICProduct Information For Customers
81
PATIENT LIFTER:WITH U STYLE SLING
© Copyright The MED Group 2001Patient Lifter: With U-Style Sling 1
The purpose of the patient lifter is to allow a person to be lifted and transferred safely with as little physical effort as possible. Before attempting to lift an ill or injured patient it is wise to practice with an able-bodied person. Take turns lifting as well as being lifted to learn how the patient will feel in the lifter. When lifting a patient who has never used a lifter before, explain each step in advance, as you go through the procedure.
SAFETY PRECAUTIONS
Never exceed the maximum weight capacity of the lifter or sling. It is wise to leave a substantial safety margin in making this determination. Injured, ill or physically challenged individuals may not have actually been weighed recently and may not know their present weight. Of course the weight of heavy casts, etc., must also be taken into account.
Use the steering handles to move the lifter. Never push or pull on the lifter boom or the patient. This can cause the lifter to tip over.
The patient should always be centered over the base and facing the caregiver who is operating the lifter.
Do not lock the caster brake when anyone is in the lifter. This brake is intended for use during parking and storage only.
To reduce the danger of tipping over, always spread the adjustable base lifter to its widest position before lifting a patient.
Safe and successful use of patient lifters begins with proper sling placement and proper positioning of the patient. Whether in a reclined or sitting position, the bottom edge of the one-piece sling should be positioned just below the bend of the knees. The short section of the chains or straps should always be hooked to the top of the sling and the long section to the bottom. The patient should be centered laterally on the sling.
To avoid the risk of the patient sliding out of the sling, always adjust the chains or straps and the sling to position the patient so that knees are slightly above the waist. NOTE: Slippery garments greatly increase this risk of sliding out of the sling.
Never move a lifter and patient over shag or deep pile carpet, thresholds, uneven surfaces or any other obstructions that could block the wheels and cause the lifter to tip over.
Safety straps or restraints may be advisable for comatose, spastic agitated or severely handicapped patients. Use care, discretion and common sense in determining if a severely spastic or handicapped person can be lifted safely. Use restraints only when prescribed by the attending physician.
BASIC OPERATING INSTRUCTIONS
There are two basic types of Patient Lifters currently available, the Hydraulic Lifter and the Mechanical or Crank Style Lifter. Both of these products perform exactly the same functions. They differ only in the way they are operated to raise and lower the patient.
Page 1 of 4
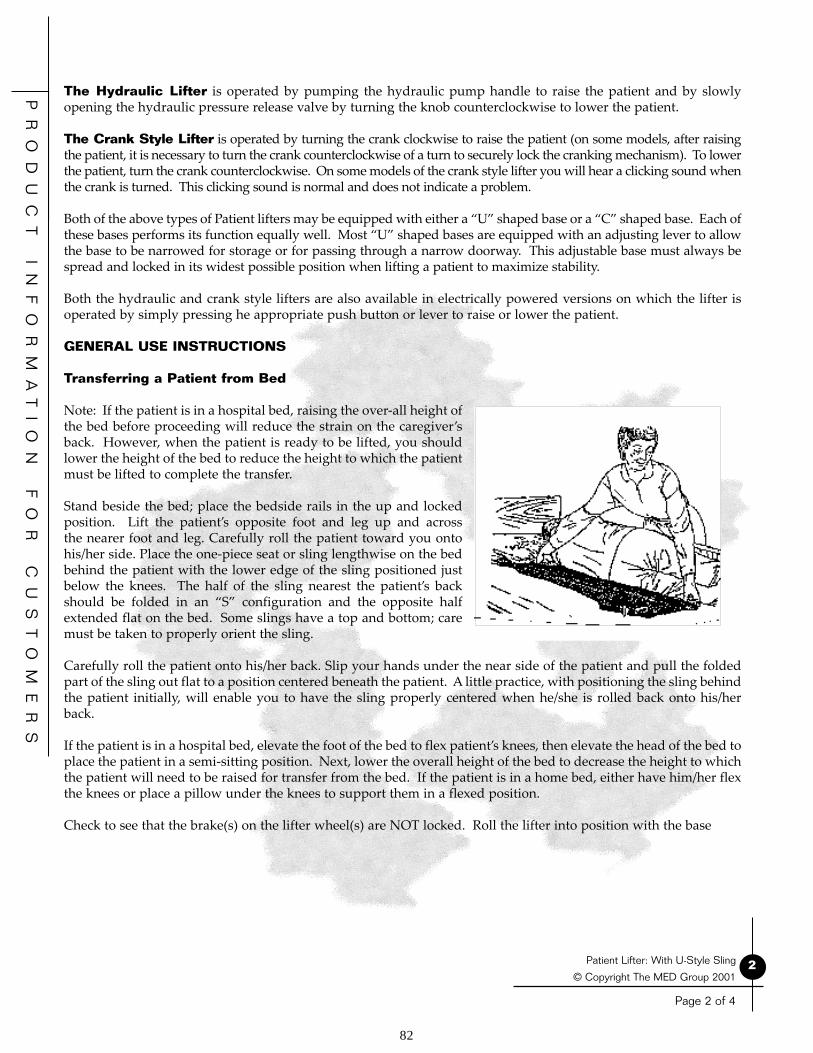
© Copyright The MED Group 2006
PR
OD
UC
T
IN
FO
RM
AT
IO
N
FO
R
CU
ST
OM
ER
S
PICProduct Information For Customers
82
2© Copyright The MED Group 2001
Patient Lifter: With U-Style Sling
Page 2 of 4
The Hydraulic Lifter is operated by pumping the hydraulic pump handle to raise the patient and by slowly opening the hydraulic pressure release valve by turning the knob counterclockwise to lower the patient.
The Crank Style Lifter is operated by turning the crank clockwise to raise the patient (on some models, after raising the patient, it is necessary to turn the crank counterclockwise of a turn to securely lock the cranking mechanism). To lower the patient, turn the crank counterclockwise. On some models of the crank style lifter you will hear a clicking sound when the crank is turned. This clicking sound is normal and does not indicate a problem.
Both of the above types of Patient lifters may be equipped with either a “U” shaped base or a “C” shaped base. Each of these bases performs its function equally well. Most “U” shaped bases are equipped with an adjusting lever to allow the base to be narrowed for storage or for passing through a narrow doorway. This adjustable base must always be spread and locked in its widest possible position when lifting a patient to maximize stability.
Both the hydraulic and crank style lifters are also available in electrically powered versions on which the lifter is operated by simply pressing he appropriate push button or lever to raise or lower the patient.
GENERAL USE INSTRUCTIONS
Transferring a Patient from Bed
Note: If the patient is in a hospital bed, raising the over-all height of the bed before proceeding will reduce the strain on the caregiver’s back. However, when the patient is ready to be lifted, you should lower the height of the bed to reduce the height to which the patient must be lifted to complete the transfer. Stand beside the bed; place the bedside rails in the up and locked position. Lift the patient’s opposite foot and leg up and across the nearer foot and leg. Carefully roll the patient toward you onto his/her side. Place the one-piece seat or sling lengthwise on the bed behind the patient with the lower edge of the sling positioned just below the knees. The half of the sling nearest the patient’s back should be folded in an “S” configuration and the opposite half extended flat on the bed. Some slings have a top and bottom; care must be taken to properly orient the sling.
Carefully roll the patient onto his/her back. Slip your hands under the near side of the patient and pull the folded part of the sling out flat to a position centered beneath the patient. A little practice, with positioning the sling behind the patient initially, will enable you to have the sling properly centered when he/she is rolled back onto his/her back.
If the patient is in a hospital bed, elevate the foot of the bed to flex patient’s knees, then elevate the head of the bed to place the patient in a semi-sitting position. Next, lower the overall height of the bed to decrease the height to which the patient will need to be raised for transfer from the bed. If the patient is in a home bed, either have him/her flex the knees or place a pillow under the knees to support them in a flexed position.
Check to see that the brake(s) on the lifter wheel(s) are NOT locked. Roll the lifter into position with the base

© Copyright The MED Group 2006
PR
OD
UC
T
IN
FO
RM
AT
IO
N
FO
R
CU
ST
OM
ER
S
PICProduct Information For Customers
83
© Copyright The MED Group 2001Patient Lifter: With U-Style Sling 3
Page 3 of 4
under the side of the bed and the cradle or spreader bar centered over the patient. Lower the boom until the chains or straps will reach the sling. Attach the appropriate chain links, hooks or “D” rings to the spreader bar or cradle. Insert the hooks on the ends of shorter chains or straps into the holes in the top of the sling. Insert the hooks on the ends of longer chains or straps into the holes in bottom of the sling. The hooks should always be inserted from the inside so the ends of the hooks are away from the patient.
Confirm that all hooks, links and/or “D” rings are securely attached to the swivel bar or cradle. Confirm that the lifter boom is centered over the patient and that the parking brake is NOT locked. Operate the lifter to raise the patient. The sling will automatically bring the patient to a sitting position. The bedside rail on the side from which the transfer will take place can now be safely lowered. The patient may need assistance when being lifted from a home bed. If this is the case, place your hand behind his/her head and lift until a sitting position is reached. When the patient has been lifted until the buttocks are clear of the mattress, grasp the patient’s feet and legs with your hands, lift and turn until he/she is facing you and the lifter mast, and the legs are off the side of the bed. Using the steering handles, move the lifter and patient away from the bed.
When returning a patient to the bed, simply reverse the above procedure.
A patient lifter should not be used as a transport device. If a patient must be transported any significant distance, it is much safer to transfer to a wheelchair for that purpose. To transport a patient for short distances, turn him/her until he/she is facing the lifter mast. Slowly and carefully lower the patient until his/her feet rest on the base of the lifter with the legs straddling the mast. This lowers the center of gravity, making the lifter easier to push and providing much greater stability. This also reduces the pendulum action and makes the patient feel more secure. Push and pull the lifter ONLY with the steering handles.
Transferring a Patient to a Wheelchair
Raise the patient until the buttocks are slightly above the seat of the chair. With the patient facing the lifter mast, move the wheelchair into position under the patient. Apply the wheelchair locks. DO NOT lock the lifter brake.
Lower the patient slowly and carefully with one hand, while simultaneously pushing back gently but firmly on the patient’s knees with the other hand. Pressing the patient’s back against the back of the chair, as his/her weight descends onto the seat, positions the hips correctly, well back in the seat of the chair. Continue to lower the lifter boom until there is enough slack to easily remove the hooks from the sling. NOTE: It is frequently not necessary or desirable to remove the sling from beneath the patient in a wheelchair. Leaving the sling in place allows transfers from the chair to be performed much more quickly and simply. The standard one-piece sling does not lend itself to easy wheelchair removal. If removal is required, other special purpose slings should be considered.
© Copyright The MED Group 2006
PR
OD
UC
T
IN
FO
RM
AT
IO
N
FO
R
CU
ST
OM
ER
S
PICProduct Information For Customers
84
© Copyright The MED Group 2001Patient Lifter: With U-Style Sling 4
Page 4 of 4
The above procedure for transferring a patient to a wheelchair can also be used for transfers to an easy chair or to most other appropriate home or office type chairs.
When transferring a patient from a chair simply reverse this procedure.
Toilet Transfers
Patient Lifters are designed to provide access to most bathrooms and can be used with either the standard bathroom fixture or a bedside commode. Most one-piece seats and slings are available with an optional commode opening, which will be necessary for toileting purposes. It is recommended that the sling be left connected to the lifter during toilet use to provide security and support for the patient. When toileting is completed, CONFIRM THAT THE BOTTOM EDGE OF THE SLING IS STILL JUST BELOW THE KNEES. Then lift the patient clear of the commode before attempting to move the lifter.
Transfers to and from the Floor
There is an occasional need to transfer a patient to and from the floor for various exercise activities, or to lift a patient from the floor who ended up there by accident. In the case of an accident, it is important to FIRST CONFIRM THAT THERE ARE NO INJURIES that might be aggravated by the lifting procedure.
• To lift a patient from the floor, place the one-piece sling under the patient using the same procedure described earlier for lifting the patient from the bed. • Position the lifter over the patient. Lower the boom so the chains or straps reach the holes of the sling. • Raise the patient’s knees and attach the hooks to the sling. Raise the patient by operating the lifter. Support the head if assistance is needed.• To transfer a patient to the floor, simply reverse the above procedure.
Automobile Transfers For automobile transfers, a special-purpose spreader bar or cradle and possibly a special purpose sling maybe recommended. These components raise the buttocks, reducing the distance between the top the lifter boom and the buttocks for greater clearance when entering the car door. Cars with low ground clearance may require a lifter base with smaller three-inch or four-inch casters instead of the standard five-inch casters.
• As you approach the fully opened door of the car, raise the patient so that his/her head just clears the top of the door opening. Place one hand on the patient’s head for protection and guide it under the opening of the car door. • Raise the lifter as required until the patient’s buttocks are slightly above the car seat and move the lifter forward and into the car until the patient is positioned over the car seat with the legs hanging out the door. Be sure to protect the patient’s head. • Grasp the patient’s legs with your hands lifting them into the car and rotating him/her to face toward the front of the car. • Slowly lower the patient onto the car seat until there is enough slack to remove the chains or straps. The patient should remain seated on the sling. • The lifter can now be disassembled for loading into the trunk or back seat of the car.
Upon arrival at your destination and before attempting to transfer the patient out of the car, always confirm that the sling is still positioned properly with the bottom edge just behind the knees.
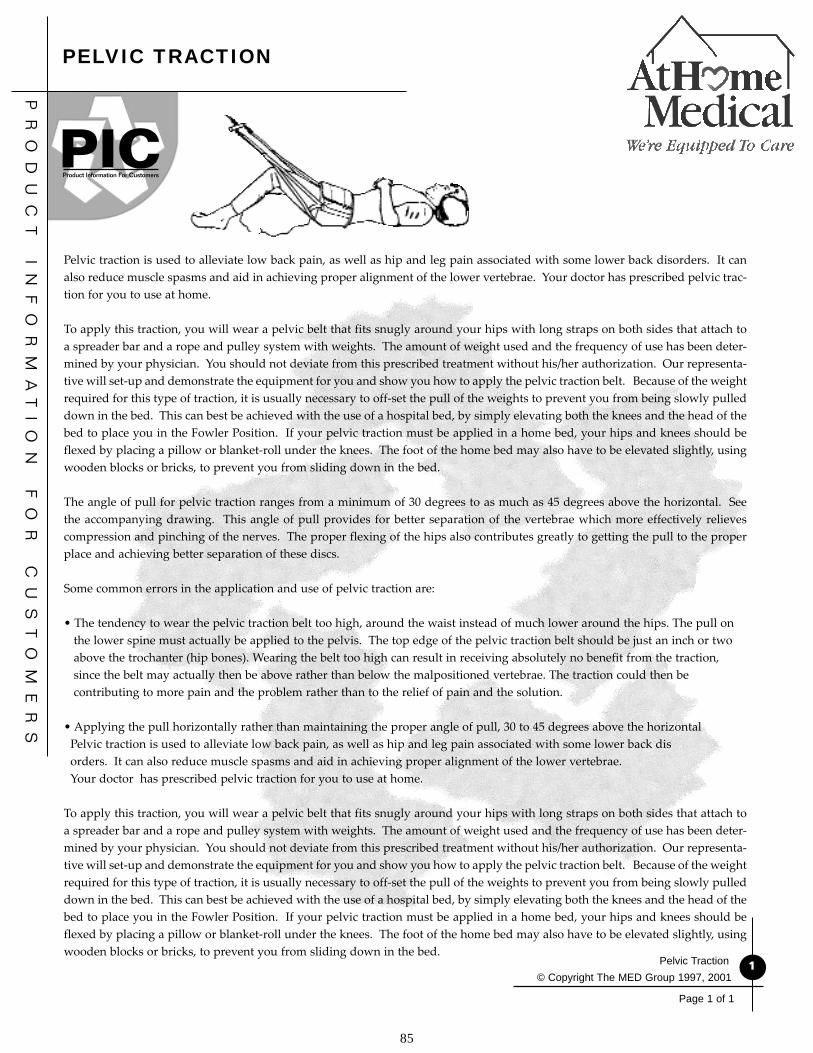
© Copyright The MED Group 2006
PR
OD
UC
T
IN
FO
RM
AT
IO
N
FO
R
CU
ST
OM
ER
S
PICProduct Information For Customers
85
Pelvic traction is used to alleviate low back pain, as well as hip and leg pain associated with some lower back disorders. It can also reduce muscle spasms and aid in achieving proper alignment of the lower vertebrae. Your doctor has prescribed pelvic trac-tion for you to use at home.
To apply this traction, you will wear a pelvic belt that fits snugly around your hips with long straps on both sides that attach to a spreader bar and a rope and pulley system with weights. The amount of weight used and the frequency of use has been deter-mined by your physician. You should not deviate from this prescribed treatment without his/her authorization. Our representa-tive will set-up and demonstrate the equipment for you and show you how to apply the pelvic traction belt. Because of the weight required for this type of traction, it is usually necessary to off-set the pull of the weights to prevent you from being slowly pulled down in the bed. This can best be achieved with the use of a hospital bed, by simply elevating both the knees and the head of the bed to place you in the Fowler Position. If your pelvic traction must be applied in a home bed, your hips and knees should be flexed by placing a pillow or blanket-roll under the knees. The foot of the home bed may also have to be elevated slightly, using wooden blocks or bricks, to prevent you from sliding down in the bed.
The angle of pull for pelvic traction ranges from a minimum of 30 degrees to as much as 45 degrees above the horizontal. See the accompanying drawing. This angle of pull provides for better separation of the vertebrae which more effectively relieves compression and pinching of the nerves. The proper flexing of the hips also contributes greatly to getting the pull to the proper place and achieving better separation of these discs.
Some common errors in the application and use of pelvic traction are:
• The tendency to wear the pelvic traction belt too high, around the waist instead of much lower around the hips. The pull on the lower spine must actually be applied to the pelvis. The top edge of the pelvic traction belt should be just an inch or two above the trochanter (hip bones). Wearing the belt too high can result in receiving absolutely no benefit from the traction, since the belt may actually then be above rather than below the malpositioned vertebrae. The traction could then be contributing to more pain and the problem rather than to the relief of pain and the solution.
• Applying the pull horizontally rather than maintaining the proper angle of pull, 30 to 45 degrees above the horizontal Pelvic traction is used to alleviate low back pain, as well as hip and leg pain associated with some lower back dis orders. It can also reduce muscle spasms and aid in achieving proper alignment of the lower vertebrae. Your doctor has prescribed pelvic traction for you to use at home.
To apply this traction, you will wear a pelvic belt that fits snugly around your hips with long straps on both sides that attach to a spreader bar and a rope and pulley system with weights. The amount of weight used and the frequency of use has been deter-mined by your physician. You should not deviate from this prescribed treatment without his/her authorization. Our representa-tive will set-up and demonstrate the equipment for you and show you how to apply the pelvic traction belt. Because of the weight required for this type of traction, it is usually necessary to off-set the pull of the weights to prevent you from being slowly pulled down in the bed. This can best be achieved with the use of a hospital bed, by simply elevating both the knees and the head of the bed to place you in the Fowler Position. If your pelvic traction must be applied in a home bed, your hips and knees should be flexed by placing a pillow or blanket-roll under the knees. The foot of the home bed may also have to be elevated slightly, using wooden blocks or bricks, to prevent you from sliding down in the bed.
PELVIC TRACTION
© Copyright The MED Group 1997, 2001Pelvic Traction 1
Page 1 of 1
© Copyright The MED Group 2006
PR
OD
UC
T
IN
FO
RM
AT
IO
N
FO
R
CU
ST
OM
ER
S
PICProduct Information For Customers
86
INTRODUCTIONYour doctor has prescribed home phototherapy for your baby. While your baby is receiving phototherapy, your doctor, other health care professionals and representatives from our company, will be working with you. You are the most important member of this team. The phototherapy equipment (bilirubin light) will also play an important part in this team effort. This equipment is used to treat a condition called jaundice. You should carefully follow your doctor’s instruction in the use of the phototherapy equipment.
WHAT IS JAUNDICE?Jaundice is a common, temporary and usually harmless condition in newborn infants. It affects both full-term and premature babies, usually appearing during the first week of the baby’s life.
Jaundice occurs when there is a build-up of a naturally occurring waste substance in the blood called bilirubin. This build up causes the baby’s skin and the whites of the eyes to appear yellow. Bilirubin is normally processed in the liver and excreted from the body.
“Normal” jaundice occurs in newborns because their liver is not yet fully developed and cannot process the bilirubin quickly enough. This creates the condition of higher levels of bilirubin in the blood called hyperbilirubinemia. Some normal jaundice will disappear within a week or two without treatment. Other babies will require treatment. High levels of bilirubin can be dangerous to your baby. It is important to monitor levels and, if necessary, to treat the jaundice to ensure the healthy development of your child. Phototherapy is the most common treatment for jaundice. Normal jaundice is usually treated with phototherapy for a few days until the liver is mature enough to handle the bilirubin on its own.
WHAT IS PHOTOTHERAPY?Phototherapy (photo = light; therapy = treatment) is the process of using a special blue light to eliminate bilirubin in the blood. These light waves absorbed by the baby’s skin and blood change bilirubin into a product that can pass through their system. Phototherapy consists simply of shining this special blue light onto the baby. The manufacturers of some bilirubin lights also incorporate additional white florescent lights to permit easier monitoring of the baby’s skin color.
THE PHOTOTHERAPY SYSTEMA bilirubin light usually consists of bilirubin lamps mounted over a small portable baby bed into which the infant is placed for treatment by the therapeutic light. The small baby bed is designed to keep the infant properly positioned and the correct distance from the bilirubin lamps. This portable baby bed is usually sized to fit inside a standard crib for added safety and to provide a convenient height for monitoring and caring for the baby during treatment.
© Copyright The MED Group 2001Phototherapy (Bilirubin Light)
PHOTOTHERAPY (BILIRUBIN LIGHT)
1
Page 1 of 4

© Copyright The MED Group 2006
PR
OD
UC
T
IN
FO
RM
AT
IO
N
FO
R
CU
ST
OM
ER
S
PICProduct Information For Customers
87
© Copyright The MED Group 2001Phototherapy (Bilirubin Light) 2
Page 2 of 4
Other supplies needed include: The manufacturer’s instructions for the specific bilirubin light being used; vinyl-covered mattress for the bed; eye protection (you may use either a face shield or the traditional eye patches); disposable absorbent pads to cover the mattress; mini diapers (required for boys only); and an accurate thermometer for monitoring the infant’s body temperature.
SETTING UP THE PHOTOTHERAPY SYSTEMThe phototherapy system prescribed by your doctor will be delivered to your home. You will be instructed in its use by our representative, who will ensure that everything is working properly and that you understand how the equipment is to be used. He/she will review with you the doctor’s instructions as well as the information in this instruction sheet and the manufacturer’s Instructions for the specific equipment you will be using.
CHOOSING A LOCATIONLocation of the unit is important. Select a location with a room temperature between 70 and 76 degrees Fahrenheit for the baby’s comfort and safety. Choose a position that is off the floor, free from drafts, and where the baby is readily visible and accessible. As previously mentioned, the baby’s crib is usually the best location. A grounded electrical outlet must be nearby. It is best to avoid the use of extension cords. If you must use an extension cord, it should be a heavy-duty cord with three prong (grounded) plugs such as those used for power tools.
SETTING UPThe Bilirubin Light Unit should be set-up as you have been instructed. Refer to your copy of the manufacturer’s instructions if needed. After set-up, double-check to see that the unit is properly assembled and sturdy.
PLUG IT INCheck to see that the OFF/ON switch is in the OFF position. If the power cord is detachable from the unit, plug it in to the unit first before plugging in to the wall outlet. (On units with detachable power cords, the female end attaches to the unit.) The male end with the three-pronged grounded plug should then be plugged into a grounded wall outlet.
BECOME FAMILIAR WITH THE CONTROLSControls switches and indicator lights will vary somewhat among different units. Refer to the manufacturer’s instructions for the specific unit you are using.
GENERAL DESCRIPTION FOR TYPICAL CONTROLSAll units will be equipped with an OFF/ON switch to control power to the unit. Most units will also have a power ON indicator light. Some units are equipped with a visual and/or audible alarm that will be activated if the room temperature becomes too warm. This alarm may be a flashing indicator light and/or a beeper. The treatment lights themselves may also flash and then turn OFF.
In the event of low temperature in the infant area, some units are equipped with a heater to bring the temperature up to approximately 75 degrees F. A heater ON light usually alerts parents to this condition.
Some units may also have indicator lights to alert parents if treatment lamps need to be replaced.
Most units will have an hour timer to indicate the number of hours the unit is ON. This provides a convenient means of documenting how much therapy has been delivered.
PREPARE THE UNIT FOR THE BABYPlace a disposable pad on the vinyl-covered mattress in the baby bed (white absorbent side up).
If a face shield is to be used for eye protection, it should be installed on the unit.
© Copyright The MED Group 2006
PR
OD
UC
T
IN
FO
RM
AT
IO
N
FO
R
CU
ST
OM
ER
S
PICProduct Information For Customers
88
© Copyright The MED Group 2001Phototherapy (Bilirubin Light) 3
Page 3 of 4
PREPARE THE BABY FOR THE UNITRemove all of the baby’s clothing. Use mini diapers on boys. The disposable mattress pad will serve for girls. This allows more skin exposure to the therapeutic light.
Apply eye patches, IF face shield is not being used.
Place the baby on the pad in the unit. If the face shield is being used for eye protection, be sure the baby’s head is under the shield. Place a rolled up towel or pad between the baby’s feet and the end of the unit to prevent the baby from sliding down and out from under the face shield.
Turn the power ON to begin treatment.
CARING FOR BABY AND MONITORING TREATMENT
EYE PROTECTIONThe baby’s eyes should be protected from the bright phototherapy light. Check eye protection (face shield or eye patches) frequently.
POSITION OF THE BABYChange the baby’s position after each feeding to expose different skin surfaces to the light. This will increase the effectiveness of the phototherapy.
TEMPERATURESince your baby is unclothed, it is important to monitor the baby’s body temperature carefully. Axillary temperatures may be obtained by placing the thermometer in the baby’s armpit with the arm against the body for four minutes. Remember to shake the thermometer down each time before taking temperature.
Take the baby’s temperature immediately after placing the baby in the unit. Be sure to record all temperatures on the record sheet. Wait 30 minutes and take and record another axillary temperature while the baby is lying on the light bed. If the baby’s temperature is less than 97 degrees or over 100 degrees Fahrenheit, retake the temperature in five minutes. If it is still too low or too high, call your doctor.
If your Bilirubin Light Unit has built-in temperature warning and control systems. It is important to understand that that these systems are monitoring the room and unit temperature NOT the baby’s body temperature. It is the baby’s temperature, not the unit temperature that is most important. It is absolutely necessary to monitor and record the baby’s body temperature as you have been instructed.
Under normal circumstances, the unit temperature under the lights will be 6 to 7 degrees warmer than room air. This is ideal in most circumstances and will usually be just right for the unclothed baby’s comfort.
TURN THE UNIT OFF when the baby is out for feeding, diaper changing, cuddling and bonding, or other activities.
FEEDINGFollow your regular feeding schedule, but feed at least every four hours. Supplemental water should be offered after each feeding as phototherapy causes increased water loss through the skin, and needs to be replaced. If your baby feeds poorly for two consecutive feedings, call your doctor or nurse. Record feeding times and amounts on the record sheet.
BOWEL AND URINE OUTPUTRecord all bowel and urine output as instructed. Your doctor will use this information to determine if your baby is getting enough fluids. Loose stools are common during therapy. Severe diarrhea, no bowel movements for three days, or no urine for 12 hours should be reported to your doctor or nurse.
© Copyright The MED Group 2006
PR
OD
UC
T
IN
FO
RM
AT
IO
N
FO
R
CU
ST
OM
ER
S
PICProduct Information For Customers
89
© Copyright The MED Group 2001Phototherapy (Bilirubin Light) 4
Page 4 of 4
AMOUNT OF THERAPY DELIVEREDThe hour timer reading must be documented daily. This reading should be recorded at the beginning of each day’s treatment. This enables the doctor to determine how much therapy has been delivered. OTHER IMPORTANT INFORMATIONThe more the baby is under the light, the shorter will be the course of treatment, and the sooner your family can “get back to normal.” Your baby must be out of the unit for feeding, cuddling, and diaper changes; trips to the doctor’s office, and while you sleep, but should spend most of the time under the light.
If your doctor recommends a daily break from therapy, clothe and cover the baby when the lights are OFF.
It is important to turn OFF the bilirubin lights at any time the baby is not actually receiving treatment. If the unit is left ON while the baby is feeding, cuddling, bathing, or for any other reason, the hour meter will continue to run and reflect an inaccurate amount of treatment time. There is no warm-up time required for most current model bilirubin lights. However, room temperature should be 70 to 75 degrees Fahrenheit before placing the baby in the unit.
Some fretfulness is normal. If cuddling or feeding does not console your baby, you may want to try placing a small stuffed animal or a small rolled up towel in the light bed beside the baby. A nearby ticking clock is also sometimes helpful in consoling some infants. You will need to continue the therapy even if this means ignoring some protests.
Your doctor will want to examine your baby daily. Arrangements will be made for you to have a daily visit. Bring the baby and the Record Sheet. The Record Sheet will be reviewed, your baby examined, and a bilirubin test will be performed at least daily. A final bilirubin test may be done the day after therapy is discontinued. When therapy is complete, return the Record Sheet to your doctor’s office to be included in the baby’s medical record.
To clean the Phototherapy Unit disconnect the power cord and wipe down with a soft cloth moistened with a mild detergent solution such as dishwashing liquid. Do not immerse any part of the unit in liquid. Do not use abrasive cleaners.
SAFETY PRECAUTIONS• Always turn OFF and unplug the phototherapy unit when cleaning or otherwise servicing the unit.
• Do not attempt to bathe the baby while in the phototherapy unit.
• Do not allow the unit to become wet or to be immersed in water or any other liquid.
• Do not operate the unit if it has a damaged power cord or plug.
• Keep the cord away from heated surfaces.
• Always keep the unit on a secure surface.
• Never obstruct the flow of air to the unit.
• Always connect the unit to a properly grounded outlet.
• After use, allow the unit to cool for at least 20 minutes before moving it.
• Do not use the unit outdoors or where aerosol (spray) products are being used or where oxygen is being administered.
If you have any questions regarding the operation of the system, please contact our office.

© Copyright The MED Group 2006
PR
OD
UC
T
IN
FO
RM
AT
IO
N
FO
R
CU
ST
OM
ER
S
PICProduct Information For Customers
90
INTRODUCTION
Your doctor has prescribed home phototherapy for your baby. While your baby is receiving phototherapy, your doctor, other health care professionals and representatives from our company will be working with you. You are the most important member of this team. The phototherapy equipment (bilirubin light) will also play an important part in this team effort. This equipment is used to treat a condition called jaundice. You should carefully follow your doctor’s instruction in the use of the phototherapy equipment.
WHAT IS JAUNDICE?
Jaundice is a common, temporary and usually harmless condition in newborn infants. It affects both full-term and premature babies, usually appearing during the first week of the baby’s life.
Jaundice occurs when there is a build-up of a naturally occurring waste substance in the blood called bilirubin. This build up causes the baby’s skin and the whites of the eyes to appear yellow. Bilirubin is normally processed by the liver and excreted from the body.
“Normal” jaundice occurs in newborns because their liver is not yet fully developed and cannot process the bilirubin quickly enough. This creates the condition of higher levels of bilirubin in the blood called hyperbilirubinemia. Some normal jaundice will disappear within a week or two without treatment. Other babies will require treatment High levels of bilirubin can be dangerous to your baby. It is important to monitor levels and, if necessary, to treat the jaundice to ensure the healthy development of your child. Phototherapy is the most common treatment for jaundice. Normal jaundice is usually treated with phototherapy for a few days until the liver is mature enough to handle the bilirubin on its own. WHAT IS PHOTOTHERAPY?
Phototherapy (photo = light; therapy = treatment) is the process of using special light to eliminate bilirubin in the blood. These light waves absorbed by the baby’s skin and blood change bilirubin into a product which can pass through their system.
Phototherapy is administered through the use of a fiberoptic fabric panel held in place by a cover which may be in the form of a wrap, blanket, vest, etc. In these devices, the panel of woven fiber is used to transport light from the light source to your child. This covered panel is placed directly against your baby to bathe the skin in light. Absorption of this light leads to the elimination of bilirubin.
With this safe, convenient form of phototherapy you can diaper, clothe, hold and nurse your baby during treatment.
PHOTOTHERAPY (FIBEROPTIC PANEL)
© Copyright The MED Group 1998, 1999, 2001Phototherapy (Fiberoptic Panel) 1
Page 1 of 4

© Copyright The MED Group 2006
PR
OD
UC
T
IN
FO
RM
AT
IO
N
FO
R
CU
ST
OM
ER
S
PICProduct Information For Customers
91
© Copyright The MED Group 1998, 1999, 2001Phototherapy (Fiberoptic Panel) 2
Page 2 of 4
THE PHOTOTHERAPY SYSTEM
A phototherapy system consists of a light box or illuminator box, which is the source of therapeutic light, fiberoptic panel which delivers the therapeutic light to your baby and a panel cover which provides a comfortable surface for the baby.
SETTING UP THE PHOTOTHERAPY SYSTEM
You will be instructed in the phototherapy system’s use by our representative, who will ensure that everything is working properly and that you understand how the equipment is to be used. He/she will review with you the doctor’s instructions as well as the information in this instruction sheet and the manufacturer’s instructions for the specific equipment you’ll be using.
1. The light source or illuminator should be placed on a hard flat surface no more than three feet from where the baby will be lying or held. To insure adequate air flow, do not block any of the air vents in the light source box. Place the light source on a stand or table next to the baby’s bed or near where you will be sitting to nurse your baby. Do not place it near a radiator or heater. Securely attach and lock the connector from the fiberoptic panel to the opening on the light source box. Plug the electric power cord from the light source into a three prong (grounded) electrical outlet. Use of extension cords should be avoided if possible. If you must use an extension cord it should be a heavy duty cord with three prong (grounded) plugs such as those used for power tools.
2. Insert the fiberoptic panel into a disposable cover, ensuring that the bright light faces the translucent side of the cover. Secure the panel in the cover, as you were instructed by our representative, using tape tabs where appropriate (do not apply tape to the baby’s skin). Some panels and covers require the use of cushioned tape applied to the top edge of the panel and cover to prevent possible skin irritation under the baby’s arms. If this is required, the tape has been provided and you have been instructed by our representative on its application. A T-shirt may also be put on the baby and rolled up from the bottom until it fits comfortably under the baby’s arms. This provides a cushion between the top edge of the panel and the baby’s underarms.
3. Depending upon the type of fiberoptic panel and cover being used, place the covered panel under, on or around the baby as you were instructed. Ensure that the fabric or sheer side (the illuminated side) of the cover is touching the skin. When appropriate use tape tabs to secure the panel as you were instructed by our representative (do not apply tape to the baby’s skin).
4. If using a wrap type panel cover, do not wrap the baby too tightly. A good rule of thumb is to place one finger between the panel and the baby’s body to allow adequate room for breathing. For a larger more active baby, you may want to tape the fiberoptic panel to the baby’s diaper to prevent it from riding up under the baby’s underarms. When using a vest type cover, the vest should be snug but not tight–one finger of space between the chest and the panel.
5. The baby can now be wrapped in a blanket, bundled, swaddled or clothed in a sleeper and continue to receive effective phototherapy as long as the lighted section of the covered panel remains in contact with the skin. You may hold and/or nurse the infant while continuing treatment.
6. If your light source (illuminator) is equipped with an intensity level selector switch, begin therapy on the lower level, wait five minutes, then switch to the higher level. Turning the unit ON while on the higher level may shorten the life of the lamp. If your unit does not have an intensity selector switch, simply turn the light source ON.
7. You may pick up your baby at any time during the phototherapy treatment. You may rock, cuddle or feed your baby without disruption of treatment as long as you remain within the reach of the fiberoptic panel connector.
© Copyright The MED Group 2006
PR
OD
UC
T
IN
FO
RM
AT
IO
N
FO
R
CU
ST
OM
ER
S
PICProduct Information For Customers
92
© Copyright The MED Group 1998, 1999, 2001Phototherapy (Fiberoptic Panel)
3
Page 3 of 4
MONITORING Wet Diapers: Your baby should have six or more wet diapers in a 24 hour period. Determining when the baby has urinated can be difficult with some of the new super absorbent disposable diapers. These diapers contain a chemical that converts urine into a gel which may be difficult to see or feel. If you use this type of diaper, try placing a folded tissue or paper towel between the diaper and the baby. This will show immediately if the baby has wet. Recording the number of wet diapers will indicate if your baby is getting adequate fluids during his or her treatment.
Bowel Movements: Your baby will have more bowel movements than usual during phototherapy. The stools will be loose (watery) and a dark brown or dark green color. This is normal, and is a result of the breakdown of the bilirubin. To prevent dehydration from the frequent bowel movements, your doctor will probably recommend more frequent nursing or feeding.
Feeding: A newborn infant usually requires feeding every three to four hours. Your doctor or his/her staff will explain proper feeding requirements and schedules. Follow the feeding schedule that is recommended by your doctor.
Blood Tests: When your baby begins to receive phototherapy, his/her skin may no longer indicate accurately the severity of the jaundice. Blood tests will be required to monitor the progress of the baby’s treatment. A nurse or other healthcare professional may obtain the blood samples in your home or your doctor may have you bring the baby into his/her office to obtain the sample. These blood tests provide the doctor with the information on the bilirubin level and other indications of the baby’s condition.
OTHER IMPORTANT INFORMATION
Each baby’s phototherapy treatment time varies. Usually phototherapy treatment is required for two to four days. Your doctor will prescribe the amount of time your baby should be on the system each day and will determine from the blood tests when to discontinue the treatment.
The light from the fiberoptic panel is a cool light. No heat will come into contact with your baby. Only light can be transmitted through the cable to the fiberoptic panel.
The baby’s skin that is in direct contact with the light emitted by the fiberoptic panel may be a different color because the bilirubin in the skin and tissue in that area is broken down first. Since the majority of the bilirubin is in the blood, as the blood circulates to the lighted area, the rest of the bilirubin will be removed. As the bilirubin level approaches normal, all of the baby’s skin will return to a normal color.
Eye protection is not usually necessary while the fiberoptic panel is wrapped around the baby, or while it is inserted into the cover or vest and fastened around the baby. Since the baby’s eyes can be effected by any bright light, always turn the unit OFF prior to removing the fiberoptic panel.
Some phototherapy systems are equipped with an alarm that alerts you if the lamp burns out. If you hear this alarm, or if you notice there is no light coming from the fiberoptic panel, please call our office.
To clean the fiberoptic panel, disconnect the power cord on the light box and wipe down the panel with a mild detergent solution such as dishwashing liquid. Do not immerse the panel in liquid. Do not use abrasive cleaners.
© Copyright The MED Group 2006
PR
OD
UC
T
IN
FO
RM
AT
IO
N
FO
R
CU
ST
OM
ER
S
PICProduct Information For Customers
93
Page 4 of 4
© Copyright The MED Group 1998, 1999, 2001Phototherapy (Fiberoptic Panel) 4
SAFETY PRECAUTIONS
• Always turn OFF and unplug the phototherapy unit when cleaning or otherwise servicing the unit.
• Do not use the phototherapy system while bathing the baby.
• Do not allow the unit to become wet or to be immersed in water or any other liquid.
• Do not attempt to walk around with the baby wrapped in the fi beroptic panel.
• Except for brief testing, do not leave the unit ON when the panel is not around the baby.
• Do not operate the unit if it has a damaged power cord or plug.
• Keep the cord away from heated surfaces.
• Always keep the light box on a hard fl at surface.
• Never block the air vents on the unit or place it on a soft surface such as a bed, crib, carpeted fl oor, upholstered chair or sofa where air vents may be obstructed.
• Never put fi ngers or objects into the openings of the light box.
• Always connect the unit to a properly grounded outlet.
• Do not dry the fi beroptic panel with artifi cial heat.
• After use, allow the unit to cool for at least 20 minutes before moving it.
• Do not use the unit outdoors or where aerosol (spray) products are being used or where oxygen is being administered.
• Replace the fuse only with a recommended fuse listed in the manufacturer’s instructions.
IF YOU HAVE ANY QUESTIONS REGARDING THE OPERATION OF THE SYSTEM, PLEASE CONTACT OUR OFFICE.
© Copyright The MED Group 2006
PR
OD
UC
T
IN
FO
RM
AT
IO
N
FO
R
CU
ST
OM
ER
S
PICProduct Information For Customers
94
PORTABLE OXYGEN CONCENTRATOR
A Portable Oxygen Concentrator is a machine that separates room air into oxygen and nitrogen. The ni-trogen is discarded, while the oxygen is stored, concentrated and delivered to you in a controlled dose at 90% to 95% purity.
PLEASE NOTE: The use of this device does NOT reduce the oxygen in the room air because of the small amount of oxygen required.
TURNING ON OXYGEN1. Ensure that your unit is plugged into a properly grounded electrical wall outlet, a functioning power port in your vehicle, or that you have a charged battery in the unit.2. Read the manual provided with your Portable Oxygen Concentrator that was delivered with your unit. Make sure you fully understand the function of all the keys or buttons on the user panel.3. Once your unit is powered on, make sure that it is set to your prescribed liter fl ow. Do not change this without a prescription from your physician.4. Just like a regular concentrator, It will take from three to ten minutes, depending on the model, to concentrate enough oxygen to reach proper operating levels. Go ahead and begin using the unit immediately.5. Attach a nasal cannula to the unit and adjust for comfort.
TURNING OFF OXYGEN1. Remove the nasal cannula.2. Swap to alternative oxygen source.3. Power down the concentrator.
IF THE ALARM GOES OFF1. Refer to the unit manual to see error codes that the unit may give you to troubleshoot alarms. Sometimes alarms on these units will go off when a breath is not detected or if the tubing is twisted or kinked. You may also get a warning alarm if you are running on battery power and you are running low. You may also get a warning buzz if your unit is too hot or a battery is hot.
• NEVER place your concentrator where the intake vents are blocked from room air. This will cause the unit to overheat and malfunction. • NEVER smoke while using your unit or allow others to smoke around you. Keep away from all sources of fl ame or direct heat for your safety. • NEVER allow children or anyone to manipulate your unit if they have not read the manual and understand how the unit functions.
Portable Oxygen Concentrator© Copyright The MED Group 2006
Page 1 of 2
1
© Copyright The MED Group 2006
PR
OD
UC
T
IN
FO
RM
AT
IO
N
FO
R
CU
ST
OM
ER
S
PICProduct Information For Customers
95
PORTABLE OXYGEN CONCENTRATOR
GENERAL TIPS A Portable Oxygen Concentrator contains highly sensitive circuit boards and electronics.Keep this in mind when storing or transporting the unit.
1. Never store the unit in a hot or cold vehicle. If the temperature is uncomfortable for you, prolonged exposure could damage the unit or make it function improperly.2. Treat the batteries of the unit the same way. Never store them in a very hot or very cold place for prolonged periods.3. Keep your unit away from dust and dirt. Remember that anything in the air can affect the purity of the oxygen you receive from the device.4. Check your fi lters DAILY. They may not need to be cleaned daily but you should get in the habit of checking them. Clean a fi lter by knocking off as much dirt as you can then rinsing under running water. DO NOT put wet fi lters back into the machine. Make sure they are dry fi rst. Excess moisture is not good for a Portable Oxygen Concentrator.5. Clean the unit with a damp cloth only. Do not use abrasives or harsh chemicals to clean the unit. NEVER IMMERSE THE UNIT IN WATER.6. Avoid prolonged exposure to the elements. If it is raining protect your unit.
BATTERY CARE
1. Your unit is equipped with batteries specifi cally designed for it. Do not attempt to charge the batteries with equipment other than what was provided with the unit.2. These types of batteries will lose life over time so it is recommended that you “cycle” the battery occasionally. You cycle a battery by using it until it is completely drained. Once you have drained the battery recharge it fully and you will have extended the life of the battery.
These are intended as general tips for the care and use of Portable Oxygen Concentrators. Please read and understand the manual that was provided with your unit for specifi c operatinginstructions.
2
Page 2 of 2
Portable Oxygen Concentrator© Copyright The MED Group 2006
© Copyright The MED Group 2006
PR
OD
UC
T
IN
FO
RM
AT
IO
N
FO
R
CU
ST
OM
ER
S
PICProduct Information For Customers
96
A power wheelchair is one of the most expensive and service-intensive products available to the physically challenged individual. The use of high-tech electronics in today’s power wheelchairs results in the need for the user to observe certain precautions to operate them in a safe, reliable manner. Scooters, although not as expensive or as technically advanced, have some similarity with regard to certain safety precautions.
OWNER’S MANUALThe tremendous variety of features and designs found in modern power wheelchairs and scooters makes it impossible to cover the specific operating instructions for every model of every manufacturer in these brief instructions. It is essential that the user studies and understands the information in the owner’s manual provided with all new power wheelchairs or scooters by the manufacturer. A regular review of information in the owner’s manual is also recommended. The owner’s manual is always the most reliable source of information about these products.
There are, however, certain important precautions common to almost all power wheelchairs and scooters. These precautions are listed below.
PRUDENT USEAlways operate your power wheelchair or scooter well within its reasonable capabilities as well as within your own. Do not attempt to negotiate steep inclines, either up or down. Avoid operating your chair or scooter laterally across inclines; approach even moderate inclines directly, straight up or straight down.
Operate your wheelchair or scooter only on hard, relatively smooth surfaces. Avoid rough terrain and soft surfaces such as gravel, sand, and thick grass. As you move about in your power wheelchair or scooter, observe the surface ahead of you to avoid getting stuck or running over bumps, holes, etc. that might turn you over, cause you to be thrown out, or severely damage your wheelchair or scooter.
SERVICE AND MAINTENANCEHave your power wheelchair or scooter serviced only by qualified power wheelchair technicians. The high-tech electronics and complex circuitry in your chair should not be adjusted, serviced, or repaired by even the best intentioned hobbyist or experimenter. Individuals who are highly competent to service other electrical or electronic products may not be knowledgeable regarding power wheelchairs. Do not install accessories that have not been specifically approved by the manufacturer for use on your power wheelchair. Even approved accessories must be properly installed.
BATTERY SAFETYAll batteries intended for use on power wheelchairs and scooters contain lead and sulfuric acid and can be quite dangerous. The sulfuric acid is highly caustic and corrosive. Also, during the charging process, these batteries produce hydrogen gas, which is highly flammable and can be explosive. For these reasons, installation, handling, and servicing of these batteries should also be left to properly trained technicians. Charging should always take place in an open, well-ventilated area away from living and sleeping facilities.
POWER WHEELCHAIRS, SCOOTERS & BATTERIES
© Copyright The MED Group 1994, 1997, 2001Power Wheelchairs, Scooters & Batteries 1
Page 1 of 3
© Copyright The MED Group 2006
PR
OD
UC
T
IN
FO
RM
AT
IO
N
FO
R
CU
ST
OM
ER
S
PICProduct Information For Customers
97
© Copyright The MED Group 1994, 1997, 2001Power Wheelchairs, Scooters & Batteries 2
Page 2 of 3
The batteries in your wheelchair or scooter may be the wet type, sometimes referred to as lead-acid batteries, or they may be the sealed type, sometimes referred to as sealed lead-acid batteries or SLA batteries. The sealed type battery may also be referred to as a Gel Cell or an Absorbed Glass Mat Battery (AGM). The sealed battery enhances safety and reduces maintenance in several ways.
If your batteries are of the wet type, it will be necessary to maintain the proper level of electrolyte or acid by periodically adding distilled water to each cell (six filler caps on each 12-volt battery), to bring the electrolyte level up to the lower edge of the filler tubes. The electrolyte level should never be allowed to become so low as to expose the top edges of the lead plates which could cause serious damage to the battery. However, care should also be exercised to avoid over-filling. If it is possible and convenient for you to come into our repair center, we will be happy to check electrolyte level for you, but this check must be conducted regularly. Our technicians will be glad to show you how you, a member of your family or a friend can check the electrolyte level and add distilled water, if this is more convenient.
If your batteries are the sealed type, they are virtually maintenance free, and the need to add distilled water to maintain the electrolyte level is eliminated.
BATTERY REPLACEMENTAlthough battery life in power wheelchair and scooter service will vary greatly depending upon patterns of use, the average life of a good quality battery of the correct size and type will usually range from six months to one year. Although they look very much alike, wheelchair batteries are quite different from conventional automobile batteries. Wheelchair batteries are deep-cycle batteries. They are designed to be discharged relatively slowly over a longer period of time and then recharged more slowly for longer periods. Automotive batteries are used for starting a car. They are designed to provide a brief burst of power to start the engine and are quickly recharged by the alternator in the car. Automobile batteries WILL NOT perform well or last very long in deep-cycle service. It is actually quite dangerous to use a “maintenance-free, sealed type, non serviceable” automotive battery in deep cycle service. The longer periods of charging can cause them to explode. Also, contrary to popular belief, marine batteries are frequently NOT deep-cycle batteries; most are used strictly for starting purposes. It is also important to note that if you change from wet batteries to sealed batteries, even though both may be designed for deep-cycle service, you should have your technician confirm that your battery charger is suitable for the new type battery. Only a qualified power wheelchair technician has the knowledge of wheelchairs, batteries, and chargers, all of which have to be matched correctly, to avoid problems. The actual cost of the batteries may be the smallest expense in the wheeled mobility package, but it remains the most critical for reliability and safety.
ELECTROMAGNETIC INTERFERENCETests by the Food and Drug Administration (FDA) have determined that Electromagnetic Interference (EMI) can, under certain conditions, cause power wheelchairs and scooters to move unintentionally and/or erratically, or cause unintended release of the brakes. The most common sources of EMI are radio waves emitted from cellular phones, mobile two-way radios (like those used in police, fire, emergency medical vehicles and taxi cabs), walkie talkies, CB radios, and amateur (ham) radio transmitters. Other possible sources of EMI are microwave ovens, industrial RF heating equipment, scientific or industrial telemetry equipment and certain medical diagnostic equipment such as magnetic resonance imaging (MRI) machines. Areas in close proximity to TV or radio broadcast stations are frequently heavily saturated with EMI. Certain new devices associated with computer systems may also be a source of EMI.
© Copyright The MED Group 2006
PR
OD
UC
T
IN
FO
RM
AT
IO
N
FO
R
CU
ST
OM
ER
S
PICProduct Information For Customers
98
© Copyright The MED Group 1994, 1997, 2001Power Wheelchairs, Scooters & Batteries
Page 3 of 3
Some power wheelchairs and scooters have been shielded by the manufacturer to minimize the effect of EMI, but this “immunity level” cannot be made perfect or fool-proof. Even though you may have used your wheelchair or scooter for some time, and have never experienced unintended, erratic motion, or unintended brake release, you should always be alert to this possibility if you are exposed to any sources of radio waves. If unintended, erratic motion or unintended brake release should occur, turn the power wheelchair or scooter OFF as soon as it is safe to do so. You should also report the incident to the manufacturer.
It is important to note that adding accessories or components or otherwise modifying your power wheelchair or scooter may reduce its immunity level to EMI.
DO NOT turn ON or use communications devices such as cellular phones, walkie-talkies, CB radios, etc. while your power wheelchair or scooter is turned on.
Be alert to any nearby sources of radio waves, for example: hand-held cellular phones, walkie-talkies, etc. being used by others. Be aware of passing emergency vehicles that may be operating two-way radios, and, of course, be aware if you are in the vicinity of radio or TV broadcast stations. Avoiding accidents caused by EMI simply requires prudent use of electronic devices, being aware of your surroundings, and taking common sense precautions.
3

© Copyright The MED Group 2006
PR
OD
UC
T
IN
FO
RM
AT
IO
N
FO
R
CU
ST
OM
ER
S
PICProduct Information For Customers
99
Raised toilet seats are helpful to those who have difficulty getting up and down from the regular home toilet. These devices provide a great deal of safety and independence for the user. A wide choice of features are available on different models and the appropriate selection of features will depend upon your particular needs.
All better-quality raised toilet seats have at least two common features:
1. Some type of clips or brackets are present to help stabilize the seat on the toilet rim. If even greater stability is required, there are also models with locking brackets that clamp securely to the rim of the toilet.
2. Splash guards are provided on the underside of the seat.
On all models, it is wise to exercise care, discretion and common sense when sitting down or rising from the seat. If at all possible, sit down on the seat centered over the opening rather than sitting on the front edge and sliding back over the opening. Do not slide forward to position yourself on the front edge of the seat to stand. These maneuvers can cause the seat to flip forward and could result in a fall. If it is not possible for you to avoid these maneuvers, it is absolutely essential that your raised toilet seat be equipped with rear locking brackets and that these brackets be tightened securely at all times. If it is necessary for you to do lateral or sliding transfers to and from the seat, you should select a model with locking brackets, front and rear.
If you will be sitting for long periods, you may need a padded seat. If you have impaired sensation or skin pressure problems, you will need a heavily padded model.
If you need to be able to easily reach the perineal area for insertion of a suppository, digital stimulation, or just for personal cleaning, select a model that provides open access in whichever direction is best for you.
If you have hip or knee problems, select a model that permits you to adjust the front of the seat lower than the rear to avoid unnecessary flexion (bending) of the impaired joints. This angled seat will also make it easier to push up off the toilet.
Finally, you should seriously consider the use of toilet safety rails in conjunction with the raised toilet seat. The two products complement each other and greatly enhance safety and independence over the use of either product alone.
INSTALLATION:Read and follow carefully the manufacturer’s installation instructions provided with your particular Raised Toilet Seat. If questions arise during installation, please call our office.
Since all bathroom toilets are not uniform in shape and size, it may be necessary to equip your seat with optional oversized clips or locking brackets to achieve a safe installation.
RAISED TOILET SEATS
© Copyright The MED Group 1994, 1997, 2001Raised Toilet Seats
1
Page 1 of 1
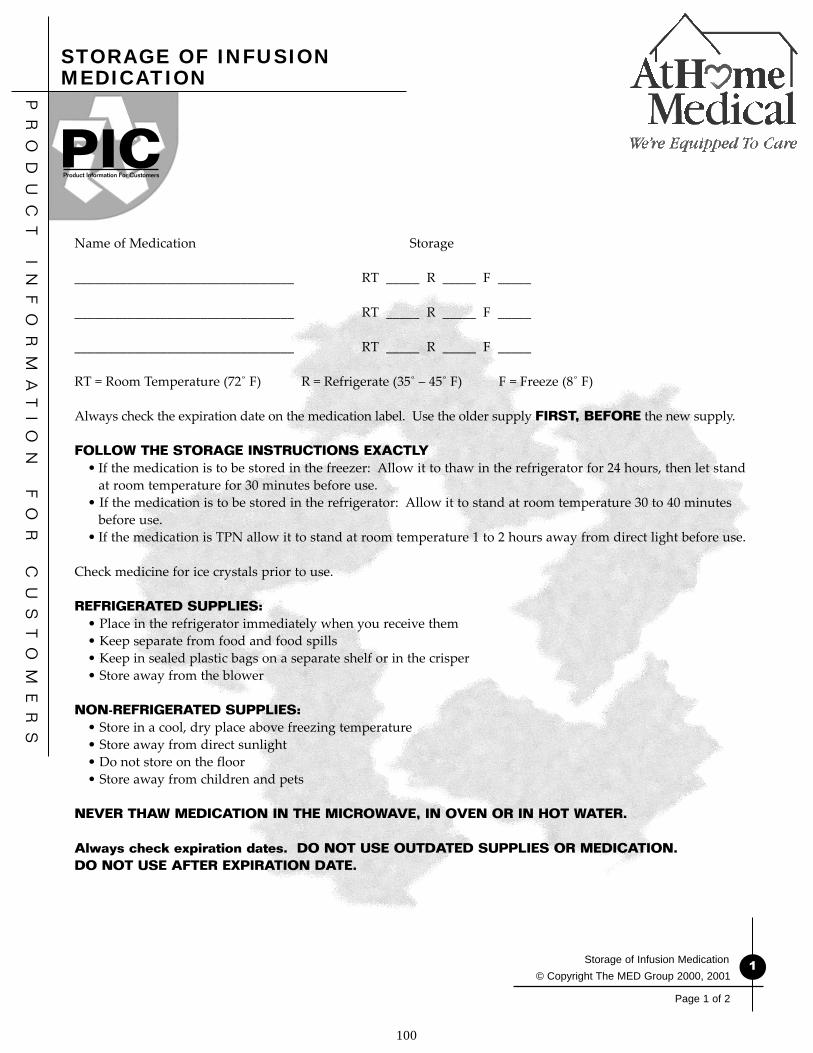
© Copyright The MED Group 2006
PR
OD
UC
T
IN
FO
RM
AT
IO
N
FO
R
CU
ST
OM
ER
S
PICProduct Information For Customers
100
Name of Medication Storage
_________________________________ RT _____ R _____ F _____
_________________________________ RT _____ R _____ F _____
_________________________________ RT _____ R _____ F _____
RT = Room Temperature (72˚ F) R = Refrigerate (35˚ – 45˚ F) F = Freeze (8˚ F)
Always check the expiration date on the medication label. Use the older supply FIRST, BEFORE the new supply.
FOLLOW THE STORAGE INSTRUCTIONS EXACTLY • If the medication is to be stored in the freezer: Allow it to thaw in the refrigerator for 24 hours, then let stand
at room temperature for 30 minutes before use. • If the medication is to be stored in the refrigerator: Allow it to stand at room temperature 30 to 40 minutes
before use. • If the medication is TPN allow it to stand at room temperature 1 to 2 hours away from direct light before use.
Check medicine for ice crystals prior to use.
REFRIGERATED SUPPLIES: • Place in the refrigerator immediately when you receive them • Keep separate from food and food spills • Keep in sealed plastic bags on a separate shelf or in the crisper • Store away from the blower
NON-REFRIGERATED SUPPLIES: • Store in a cool, dry place above freezing temperature • Store away from direct sunlight • Do not store on the floor • Store away from children and pets
NEVER THAW MEDICATION IN THE MICROWAVE, IN OVEN OR IN HOT WATER.
Always check expiration dates. DO NOT USE OUTDATED SUPPLIES OR MEDICATION. DO NOT USE AFTER EXPIRATION DATE.
STORAGE OF INFUSION MEDICATION
© Copyright The MED Group 2000, 2001Storage of Infusion Medication 1
Page 1 of 2

© Copyright The MED Group 2006
PR
OD
UC
T
IN
FO
RM
AT
IO
N
FO
R
CU
ST
OM
ER
S
PICProduct Information For Customers
101
© Copyright The MED Group 2000, 2001
Storage of Infusion Medication2
Page 2 of 2
If supplies get wet or packaging becomes damaged, DO NOT USE the supply. Call our office for replacement.
IMPORTANT: Use the Sharps container to dispose of all NEEDLES AND SYRINGES. When your therapy is complete, or when the Sharps container becomes 2/3 full, please call our office for pick-up. If you have a “mailable” Sharps container, you may return it via US mail. Follow the instructions on the container.
NOTES: ________________________________________________________________________________________________________________________________________________________________________________________________________________________________________________________________________________________________________________________________________________________________________________________________________
____________________________________________________________________________________________________________________________________________________________________________________________________________________________________________________________________________________________________________________________________________________________________________________________________________________________________________________________________________________________________________________________________________________________________________________________________________________________________________________________________________________________________________________________________________________________________________________________________________________________________________________________________________________________________________________________________________________________________________________________________________________________________________________________________________________________________________________________________________________________________________________________________________________________________________________________________________________________________________________________________________________________________________________________________________________________________________________________________________________________________________________________________________________________________________________________________________________________________________________________________________________________________________________________________________________________________________________________________________________________________________________________________________________________________________________________________________________________________________________________________________________________________________________________________________________________________________________________________________________________________________________

© Copyright The MED Group 2006
PR
OD
UC
T
IN
FO
RM
AT
IO
N
FO
R
CU
ST
OM
ER
S
PICProduct Information For Customers
102
Your doctor has ordered a medication called “Desferal.” This medication is used to treat an excess of iron in your blood. Your therapy can vary depending on the iron levels in your blood. It is important that you follow the directions on the label exactly as written.
SUPPLIES • Sub-q-set (SQ set) or butterfly needle with IV tubing • Alcohol wipes • Transparent dressing • Sharps container • Bag or syringe containing Desferal dose • Infusion pump • Betadine swabs • Antibacterial soap IMPORTANT: DO NOT USE THE MEDICATION IF THE MEDICINE LABEL DOES NOT HAVE YOUR NAME ON IT, IF YOU NOTICE ANY LEAKS OR CRACKS IN THE BAG OR CASSETTE, IF THE MEDICATION IS CLOUDY, OR IF YOU NOTICE PARTICLES IN IT.
PREPARING AND GIVING YOUR MEDICATION 1. Never refrigerate your Desferal. 2. Clean your work area with antibacterial soap. 3. Wash your hands with warm soapy water for about two minutes. 4. Gather your supplies. 5. Prepare the bag of Desferal to be placed in the pump by attaching pump set tubing as needed. 6. Connect tubing into the pump as instructed (you will receive a separate instruction booklet for your particular pump). Insert new battery if needed. 7. Attach SQ set and clear air from tubing if necessary. 8. Choose an SQ site–usually on the abdomen or thigh. 9. Cleanse injection site by rubbing briskly with alcohol or betadine. • If using a straight needle, grasp the site of the injection firmly to form a cushion–do not pinch. • If using a 45-degree SQ needle–insert straight into the skin as instructed by your nurse. 10. Observe the site for bleeding. Continued bleeding should not occur from site. If this happens, discontinue
the infusion and remove the needle. 11. Secure SQ needle with dressing as instructed by your nurse. 12. Start the infusion pump as directed.
SUBCUTANEOUS INFUSION OF DESFERAL
© Copyright The MED Group 2000, 2001Subcutaneous Infusion of Desferal
1
Page 1 of 2
© Copyright The MED Group 2006
PR
OD
UC
T
IN
FO
RM
AT
IO
N
FO
R
CU
ST
OM
ER
S
PICProduct Information For Customers
103
© Copyright The MED Group 2000, 2001
Subcutaneous Infusion of Desferal 2
Page 2 of 2
STOPPING THE INFUSION 1. Stop the infusion pump. 2. Clamp any tubing connected to your infusion bag or cassette. 3. Wash hands as previously instructed. 4. Remove dressing. 5. Carefully remove the needle and discard into your Sharps container. 6. Apply bandage if needed. 7. Remove the battery from the pump, if indicated. 8. Wash hands again as previously instructed. 9. Place any unused supplies in a safe place. 10. Keep all supplies together so you will be ready for the next infusion. 11. When your therapy is complete, or when the Sharps container is 2/3 full, please call our office for
instructions on proper disposal.
NOTES: _____________________________________________________________________________________ ____________________________________________________________________________________________ ____________________________________________________________________________________________ ____________________________________________________________________________________________ ____________________________________________________________________________________________ ____________________________________________________________________________________________ ____________________________________________________________________________________________ ____________________________________________________________________________________________ ____________________________________________________________________________________________ ____________________________________________________________________________________________ ____________________________________________________________________________________________ ____________________________________________________________________________________________ ____________________________________________________________________________________________ ____________________________________________________________________________________________ ____________________________________________________________________________________________ ____________________________________________________________________________________________ ____________________________________________________________________________________________ ____________________________________________________________________________________________ ____________________________________________________________________________________________ ____________________________________________________________________________________________ ____________________________________________________________________________________________ ____________________________________________________________________________________________ ____________________________________________________________________________________________ ____________________________________________________________________________________________ ____________________________________________________________________________________________ ____________________________________________________________________________________________ ____________________________________________________________________________________________ ____________________________________________________________________________________________ ____________________________________________________________________________________________ ____________________________________________________________________________________________ ____________________________________________________________________________________________ ____________________________________________________________________________________________ ____________________________________________________________________________________________ ____________________________________________________________________________________________ ____________________________________________________________________________________________ ____________________________________________________________________________________________
© Copyright The MED Group 2006
PR
OD
UC
T
IN
FO
RM
AT
IO
N
FO
R
CU
ST
OM
ER
S
PICProduct Information For Customers
104
A healthy person clears his/her throat or coughs almost without any conscious thought. The suction machine or aspirator provides assistance for those who have difficulty clearing their throat, swallowing and coughing. By clear-ing the mouth and airway of fluid and mucus, the suction machine enables the person to breathe easier, as well as to eat, drink and talk more comfortably.
A patient may need suctioning by any of the following methods:
Oral Suctioning (suctioning through the mouth) Nasal Suctioning (suctioning through the nose) Tracheal Suctioning (suctioning through a tracheostomy tube or laryngectomy stoma)
Additional guidelines will be provided for the specific suctioning method prescribed by your doctor.
It is important that you use only the methods and techniques prescribed by your doctor or recommended by your nurse or therapist. Follow his/her instructions exactly.
The doctor may want the patient suctioned whenever he or she has trouble — breathing, swallowing saliva or coughing up mucus. A build-up of these secretions is usually indicated by raspy breathing or a gurgling sound. The doctor may choose to prevent this by prescribing suctioning at specific intervals. If the patient requires more frequent suctioning to breathe more easily, notify the doctor. Too frequent suctioning can be harmful.
To suction a patient you will need: A suction machine (with a collection bottle with lid and tubing) A suction catheter (with a control valve) A container of water (the doctor may specify sterile water) Disposable gloves
SUCTION MACHINE CLEANING PROCEDUREThe collection bottle should be emptied when it becomes half full. At least once a day the collection bottle, lid, and tubing should be cleaned and disinfected using the following procedure: 1. Empty the collection bottle contents into the toilet. Rinse the collection bottle thoroughly, empty all rinse water into the toilet and flush. Pour 1/4 cup of bleach into the bottle and fill to the brim with water. Allow to stand for 30 minutes. Empty and rinse thoroughly.
2. Wash the lid and tubing in warm soapy water. In a small container, soak these parts for 30 to 40 minutes in a solution of one cup of white vinegar and three cups of water. If this does not provide enough solution to completely cover the parts, double the mixture.
SUCTION MACHINES
© Copyright The MED Group 1994, 1997, 1999, 2001Suction Machines 1
Page 1 of 2

© Copyright The MED Group 2006
PR
OD
UC
T
IN
FO
RM
AT
IO
N
FO
R
CU
ST
OM
ER
S
PICProduct Information For Customers
105
3. With the suction machine unplugged from the electrical outlet, the outside surface of the machine may be cleaned by wiping with a soft cloth dampened with water.
4. When reassembling the machine, place the lid back on the bottle securely. Make sure all tubing connections are tight. A loose connection anywhere in the system will greatly reduce the suction.
IMPORTANT: The Suction Machine is equipped with a mechanical float-type shut-off valve which will stop the suction if the collection bottle is allowed to over-fill. The motor will continue to run, but there will be no suction. If this happens, turn the unit OFF immediately and empty and clean the collection bottle as previously described. If any fluid ever gets past the shut-off valve into the tubing between the bottle and the motor, turn the machine OFF immediately and call our office for servicing.
TIPS ON SUCTIONING:Before suctioning, encourage the patient to breathe deeply several times. This will increase the supply of oxygen and help the patient relax, which will make suctioning easier. Deep breathing may also stimulate coughing up secretions and make suctioning more effective.
During the suctioning procedure, do not appear rushed. The patient will be more relaxed if you appear confident and perform the procedure gently but decisively. However, do not prolong the procedure unnecessarily.
If you have difficulty clearing secretions from the patient’s airway by suctioning, or if you notice a change in the color, consistency, odor, or volume of secretions while suctioning, you should notify the doctor.
For some methods of suctioning, your doctor may order a specific negative pressure or level of suction. The desired negative pressure can only be adjusted by sealing or closing off the suction tubing and observing the pres-sure gauge while adjusting the vacuum control knob. The gauge will not read unless the tubing is sealed. Adjust the knob slowly and allow time for the gauge to stabilize.
© Copyright The MED Group 1994, 1997, 1999, 2001Suction Machine 2
Page 2 of 2
SUCTION MACHINES

© Copyright The MED Group 2006
PR
OD
UC
T
IN
FO
RM
AT
IO
N
FO
R
CU
ST
OM
ER
S
PICProduct Information For Customers
106
Toilet Safety Rails provide safety and assistance to individuals who have difficulty in safely lowering themselves down to the toilet and resuming a standing position. There are two types of Toilet Rails or Toilet Frames available: one type attaches to the toilet; the other is a free-standing frame with four legs that is simply placed around the toilet.
MODELS THAT ATTACH TO THE TOILETSafety rails that attach to the toilet do so through the use of a mounting bracket. This mounting bracket is held in place by the toilet seat bolts.
Installation of Rails: 1. Remove the two large nuts from the toilet seat bolts 2. Lift the seat off the toilet 3. Position the mounting bracket, aligning the holes in the bracket with the holes on the toilet 4. Replace the seat 5. Tighten securely 6. The rails or arms can now be inserted and locked into the bracket
On some models, provisions are made to allow a choice of the width or distance between the rails when attaching them to the mounting bracket. The arms can then be leveled by adjusting the leg extensions. For non-ambulatory users, either arm can be removed, allowing access to either side for lateral transfers.
It is important that the user understands the necessity for exerting force only straight down in a vertical direction when getting up and down or transferring to and from the toilet. Any significant force on the arms in a lateral or outward direction is likely to bend or break the tubular frame resulting in a fall. Although the rails are attached to the toilet, the leverage created by their length prohibits pulling or pushing on the arms in a horizontal direction.
FREE-STANDING MODELSThese toilet safety frames are completely self-supporting and do not attach to the toilet. To install, it is necessary to simply position the frame around the toilet, providing arm rests on either side. The height of the arms is adjustable to the most functional level for the user by adjusting the leg extensions on each leg.
It is important the user understands the necessity for exerting force only straight down in a vertical direction when sitting down or returning to a standing position. Any significant force on the arms in a horizontal direction is likely to result in the frame sliding on the floor or tipping over. It is also wise to keep the force on each arm reasonably well-balanced. Pushing down on only one side could tip the frame over. It should also be noted that the Free-Standing type toilet frame is usually not functional for the non-ambulatory user because it does not provide for lateral transfer.
With any Toilet Safety Rail, you should seriously consider the use of a Raised Toilet Seat. The two products complement each other and greatly enhance safety and independence over the use of either product alone. Please call our office if you would like more information on Raised Toilet Seats or other self-help products.
TOILET SAFETY RAILS
© Copyright The MED Group 1994, 1997, 2001Toilet Safety Rails 1
Page 1 of 1
© Copyright The MED Group 2006
PR
OD
UC
T
IN
FO
RM
AT
IO
N
FO
R
CU
ST
OM
ER
S
PICProduct Information For Customers
107
Total Parenteral Nutrition (TPN) is a liquid food that goes directly into the blood stream, by passing the digestive tract.
Total = “Complete.” The solution contains most of the components of a well-balanced diet: protein, vitamins, minerals, salts, sugar, fats and water.
Parenteral = Outside the digestive tract. To feed through the veins.
Nutrition = Foods and fluids which provide nutrients. Nutrients are substances essential to life and health. They are the building blocks for new tissue and the chemicals that support our vital body functions.
WHY IS TPN USED?
• To provide “rest” to the gastrointestinal system, for instance following surgery or radiation therapy or when vomiting prevents eating.
• When there is a disease or blockage of the small bowel or other digestive organs.
• When a portion of the bowel has been removed.
TPN can replace all of the food you have been eating. In some cases you may be permitted to eat and drink while receiving TPN. In these cases your physician and/or dietitian will review your diet with you.
HOW IS TPN ADMINISTERED?
You will have a “venous access” in your arm or chest. Your TPN will be administered or “infused” through this device with the help of a pump. Most TPN pumps operate on both rechargeable batteries and household current. You may have some time off your pump each day (or night, if you prefer.) We will work with you to find a good schedule. Your access device will be clamped or capped when you are not using it. To keep this area clean and free of infection, you will be shown how to put a sterile dressing on the access site. You will be taught to operate your pump. Written instructions on the use and care of the pump will be provided.
HOW SHOULD I STORE MY TPN SOLUTIONS AND SUPPLIES?
• TPN bags must be refrigerated. Clear a shelf in your refrigerator for their storage. Keep this space clean and away from other foods. Typically you’ll receive one week’s supply of TPN at a time. Use any bags remaining from your previous delivery before you begin using the new ones, unless you are instructed to discard the old bags.
• Remove TPN bags from the refrigerator ONE to TWO hours before your hook-up time.
TOTAL PARENTERAL NUTRITION
© Copyright The MED Group 1999, 2001Total Parenteral Nutrition 1
Page 1 of 5
© Copyright The MED Group 2006
PR
OD
UC
T
IN
FO
RM
AT
IO
N
FO
R
CU
ST
OM
ER
S
PICProduct Information For Customers
108
© Copyright The MED Group 1999, 2001Total Parenteral Nutrition
2
• Vitamins must be protected from light. They will be delivered in brown bags or brown vials.
• Refrigerate vitamins until ready to use.
• Check the labels of other medications for storage instructions.
• Syringes, alcohol wipes, dressings and tape, gloves, connectors and caps for your access device, batteries, and other supplies will be delivered with your first TPN solution. They will be replaced, as needed, on future deliveries of TPN solution. Your nurse will help you with your weekly order. Keep all supplies in a clean, dry place, out-of-reach of children and away from pets. A covered tote box is ideal.
• A “sharps container” will be provided for your use. This is a special wastebasket for needles and glass drug ampules. Our driver/technician will pick up your sharps container when it is full and replace it. Please notify us when the container is about two-thirds full.
ADDITIVES–THE EXTRA INGREDIENTS YOU ADD TO YOUR TPN BAGS
IMPORTANT: Always wash your hands thoroughly before handling your TPN bag and before adding drugs or vitamins.
Most of the ingredients in your TPN solution will be mixed in our pharmacy. (You will typically have one bag each day.) However, some TPN ingredients must be added in your home just before the TPN bag is connected to the pump:
• Vitamins. You may be given a multivitamin and perhaps additional vitamins. Vitamins have a short stability and must be protected from light. If you are given Vitamin K, this is typically added once per week, rather than daily. Always carefully follow the directions on the labels.
• Medicines. Insulin, antacids, other TPN compatible drugs prescribed by your doctor.
• Iron. Not included with other minerals in your solution, iron is an ingredient necessary for healthy red blood cells. Most people have good stores of iron they use during a shortfall, but your doctor may prescribe this for you based on your medical needs.
READING YOUR TPN LABEL
Always check the labels on your TPN bags to make sure that YOUR NAME is on them. Also check the expiration date. Do not use a solution that is past this date. Check the storage instructions for any additional medications and vitamins. Some must be refrigerated and/or protected from light.
Important Notice: Do not use TPN bags if they are leaking, if the solutions are separated or don’t seem to be mixed, or if you see specks or particles in them. Call our office for instructions.
Remember to wash your hands thoroughly and prepare a clean work area prior to handling your TPN solutions or additives!
Page 2 of 5

© Copyright The MED Group 2006
PR
OD
UC
T
IN
FO
RM
AT
IO
N
FO
R
CU
ST
OM
ER
S
PICProduct Information For Customers
109
© Copyright The MED Group 1999, 2001Total Parenteral Nutrition 3
Page 3 of 5
If you find anything on your TPN labels or additive labels that you do not understand, please call our office.
The illustration below shows typical information found on most TPN labels, as well as an explanation of the information in italics.
COMPANY NAMEADDRESS
PHONE NUMBER
PRESCRIPTION # DATE OF FILL PHARMACIST’S INITIALSYOUR NAME YOUR DOCTOR’S NAMEYOUR ADDRESS # OF BAGS IN THIS ORDER
INGREDIENTS:INDIVIDUALLY LISTED (Example: amino acids, dextrose, sodium chloride., etc.)
TOTAL VOLUME (How much was mixed; always contains some extra)
INFUSION VOLUME (How much you actually receive)
VITAMIN AND MEDICATIONS TO BE ADDED TO THE TPN Name(s) of drug(s) and dosage. Medicines and vitamins to be added will also be labeled. This label will indicate how much and how often (daily or once a week.)
ADMINISTRATION INSTRUCTIONS:TYPE OF PUMP = The brand name of your pump.RES VOL = Total volume of bag.INF VOL = The amount of solution you will receive during one infusion period.INFUSION PERIOD = How many hours you are on the pump.TAPER UP = Length of time rate is gradually increased at the beginning of the infusion period, (if required.)TAPER DOWN = Length of time rate is gradually decreased at the end of the infusion period (if required.)RATES = May be listed, depending on the type of pump used.REFRIGERATE = Storage instructions.EXPIRES = Expiration date. Not to be used after this date.
LIVING WITH TPN
Your Schedule. TPN solutions can infuse continuously (around the clock) or with a “time-off” period called cycling. The break is usually six to sixteen hours. Although most people can be on a cycled schedule, sometimes there are medical complications that prevent this. If your TPN can be cycled, you should think about when you would like to infuse your TPN.
DAYTIME INFUSION
The Advantages: • Doesn’t interfere with sleep, no pump noise to bother you or your partner. Good rest is essential for good health.
• Fewer nighttime trips to the bathroom.
• If you are more physically active during the day than at night, you get your calories when you need them the most.
The Disadvantages: • Solutions are heavy; you must carry them to get around. • Suppresses appetite, which can interfere with eating.

© Copyright The MED Group 2006
PR
OD
UC
T
IN
FO
RM
AT
IO
N
FO
R
CU
ST
OM
ER
S
PICProduct Information For Customers
110
© Copyright The MED Group 1999, 2001Total Parenteral Nutrition
4
Nighttime Infusion
The Advantages: • Free from pump during the day.
• Solutions are heaviest when the bag is full. If you hook-up just prior to going to bed there’s no need to carry it around.
• Doesn’t interfere with daytime eating, if permitted by your physician.
The Disadvantages: • May interfere with sleep.
• May have some weakness or lightheadedness during the daytime.
SUPPORT GROUPS Oley Foundation: This non-profit group provides educational materials and support for home parenteral and enteral (tube-fed) patients. They sponsor regional support groups in many areas across the country. They also publish and distribute a free, bi-monthly newsletter, the LifelineLetter. The newsletter has both educational articles and an information exchange for the home TPN and EN community. They hold an annual conference and other educational and social activities. The foundation also operates an equipment swap. There is a special section for parents of children on home nutrition support. They can be reached at 1-800-776-OLEY. Other groups that may be of interest and assistance:United Ostomy Association - 1-800-826-0826 (office hours are on Pacific Time)Celiac Sprue Association, USA - 1-402-558-0600Crohn’s and Colitis Foundation - 1-800-343-3637The Gluten Intolerance Group of North America - 1-206-325-6980
MONITORING YOUR TPN THERAPY
Your doctor and our staff monitor your TPN therapy. We need your help! We will ask you to report your weight on a regular basis. This helps us to know if you are getting the calories and protein you need. You will also have lab work done, which helps us fine-tune your solutions. The blood samples will usually be drawn through your IV line.
Please report any of the following conditions to your nurse immediately:
Signs of infection: • Redness, pain, swelling, or drainage at the catheter insertion site • Temperature over 100 degrees • Chills • Sweating
High blood sugar (hyperglycemia): • Nausea • Weakness • Thirst and increased urination • Elevated reading on your blood glucose meter (greater than 160 mg/dL) • Nervousness
Page 4 of 5
© Copyright The MED Group 2006
PR
OD
UC
T
IN
FO
RM
AT
IO
N
FO
R
CU
ST
OM
ER
S
PICProduct Information For Customers
111
© Copyright The MED Group 1999, 2001Total Parenteral Nutrition 5
Low blood sugar (hypoglycemia): • Shaking or shaky feeling • Blurred vision • Heart palpitations (“fluttering” or “racing”) • Loss of coordination, slurred speech • Lightheadedness • Sweating • Irritability
Fluid and Electrolyte/Mineral Imbalance: • Sudden increase or decrease in weight • Swollen ankles, hands or face (edema) • Shakiness • Muscle cramps • Numbness • Tingling of hands • Unexplained sense of “not feeling right”
MOUTH CARE
Although you may not be eating and drinking regularly, routine mouth care is still important for your overall health. It will also control “off” or bad tastes in your mouth.
• Brush your teeth at least twice daily with a soft tooth brush. Report bleeding gums to your nurse. (Soft dental sponges are available if you are unable to use a toothbrush or if you have too few teeth.)
• Mouthwash is OK. You can make your own, if you wish, with one teaspoon of salt in one quart of water. If
dry mouth is a problem, use an alcohol-free mouthwash.
• Chewing gum, sucking hard candy (especially sour flavors), or sucking ice chips can help moisten your mouth. If you are not permitted to take food or fluids by mouth, you may want to try a moisturizing spray. Check with your nurse.
• A lip balm or moisturizer is also helpful. Licking your lips increases chapping.
Important Names and Numbers
Nursing Agency _____________________________________________ Phone _________________________________
Physician ___________________________________________________ Phone _________________________________
Paramedics _________________________________________________ Phone __________________________________
Emergency Contact __________________________________________ Phone _________________________________
Other ______________________________________________________ Phone __________________________________
Page 5 of 5
© Copyright The MED Group 2006
PR
OD
UC
T
IN
FO
RM
AT
IO
N
FO
R
CU
ST
OM
ER
S
PICProduct Information For Customers
112
TRACHEAL SUCTION
© Copyright The MED Group 1994, 1997, 2001Tracheal Suction
1
Your doctor, nurse or therapist will show you the correct way to use the suction machine for tracheal or laryngec-tomy stoma suction. Follow his/her instructions exactly.
The guidelines below may be helpful as a reminder.
PREPARATION:Your doctor will want you to follow a sterile procedure when suctioning the trachea.
If the patient is alert and able to cooperate, have him or her relax and breathe deeply several times. If possible, elevate his/her head and upper body. If you are using a hospital bed, elevate the patient’s knees slightly, then elevate the head of the bed to about 45 degrees. In the absence of a hospital bed, elevate the patient’s head and upper body, using pillows. Position the head for comfort and to provide easy access to the tracheostomy tube or laryngectomy stoma.
Plug the Suction Machine into a grounded outlet. Turn the switch “ON” and adjust the machine to the desired negative pressure by temporarily sealing the tubing from the suction machine and observing the pressure gauge while adjusting the vacuum control knob. Your doctor will prescribe the correct suction pressure. Turn the knob clockwise to increase and counter-clockwise to decrease pressure. Please Note: The pressure gauge will not read unless the tubing is sealed.
If the patient is receiving oxygen through his/her tracheostomy, the doctor may instruct you to increase the oxy-gen flow briefly before removing the oxygen collar to suction the trachea. Do this only if instructed to do so by the doctor.
Wash your hands thoroughly.
The doctor will frequently prescribe the use of disposable sterile suction kits for trachea suctioning. Spread the sterile paper towel from the kit on a convenient clean flat surface to provide a sterile field. This sterile field is only for items that will come into contact with the patient’s trachea.
Open the suction catheter package, but do not remove the catheter. Pour some sterile water into a container.
Open the disposable glove. Holding it by the cuff, slip it on the hand that you will be using to handle the cath-eter. Using your gloved hand, remove the catheter from its package. For the rest of this procedure your gloved hand should not touch anything but the catheter, and the catheter should not be touched by anything except your gloved hand.
Attach the larger end of the catheter to the tubing from the Suction Machine.
Page 1 of 2
© Copyright The MED Group 2006
PR
OD
UC
T
IN
FO
RM
AT
IO
N
FO
R
CU
ST
OM
ER
S
PICProduct Information For Customers
113
Page 2 of 2
© Copyright The MED Group 1994, 1997, 2001Tracheal Suction
2
With your gloved hand, place the end of the catheter in the container of sterile water. Wetting the catheter will make it easier to insert into the tracheostomy tube.
To test the equipment: hold the tubing with your bare hand near the end where it connects to the catheter, place the thumb of your bare hand over the catheter control valve, and suction an ounce or two of sterile water through the catheter. This confirms that the machine is working properly and will make the secretions flow through the catheter and tubing more easily. This small amount of water in the collection bottle will also make it easier to clean.
If the patient is receiving oxygen, use your bare hand to spread a towel on his chest. Remove the tracheostomy collar and place it on the towel. Turn “OFF” the oxygen.
Gently insert the catheter into the trachea through the trach tube or laryngectomy stoma or according to the doc-tor’s instructions. Usually, for an adult, this will be a maximum of 6 to 8 inches and substantially less for young chil-dren.
Important: Do not close the control valve during insertion. This will create suction at the tip of the catheter, causing it to stick to the side of the trach tube and trachea, making insertion more difficult and possibly causing injury to the tender tis-sue.
As soon as the proper length of catheter has been inserted, close the control valve intermittently with the thumb of your bare hand to begin suctioning. Slowly withdraw the catheter while opening and closing the control valve. Roll the cath-eter between the thumb and index finger of your gloved hand as it is being withdrawn. This makes suctioning more effective and prevents irritation of the tender lining of the trachea.
This entire procedure of inserting the catheter, suctioning, and withdrawing the catheter should be performed with care and gentleness, but, for the comfort of the patient, it should also be performed quickly and decisively. The procedure should require no more than 5 to 10 seconds. Do not apply tracheal suction for longer than this at one time.
It may be necessary to repeat this procedure to achieve quiet, comfortable breathing. If so, allow the patient to rest for a few minutes before starting the procedure again.
As soon as you have finished suctioning, turn the oxygen back “ON,” adjust the flow rate to the prescribed level, and reapply the tracheostomy collar. WHEN SUCTIONING IS COMPLETEDAfter the catheter is withdrawn and oxygen has been reconnected, immediately place the tip of the catheter in the sterile water and close the control valve for a few seconds to flush all the secretions from the inside of the catheter and the tubing. Care must be exercised during this flushing procedure not to suction so much water through the system that you overfill the collection bottle. The suction machine can now be turned “OFF.” Discard the glove and catheter in a plastic-lined wastebasket. If the doctor has approved the use of a reusable catheter, follow carefully the sterilizing procedure specified by the doctor, nurse or therapist. Remove the collection bottle and flush the contents down the toilet. Rinse the bottle thoroughly with hot water several times and flush contents down the toilet each time.
Important: Never allow the collection bottle to become more than half full before emptying.
© Copyright The MED Group 2006
PR
OD
UC
T
IN
FO
RM
AT
IO
N
FO
R
CU
ST
OM
ER
S
PICProduct Information For Customers
114
TRANSFER TUB BENCHES
© Copyright The MED Group 1994, 1997, 2001Transfer Tub Benches
1
The transfer bench was originally designed for individuals who are unable to walk. The transfer bench gets its name from the fact that it permits a sliding transfer from a wheelchair. Because the transfer bench extends out beyond the edge of the tub, this sliding type transfer can be performed.
The transfer tub bench is also helpful to ambulatory users who have difficulty stepping over the side of the tub safely. Once seated on the bench, with legs outside the tub, all that is required is to lift one leg at a time into the tub.
Installation of the transfer tub bench consists simply of placing it in the tub in the appropriate position. Cleaning the rubber feet or suction cups with alcohol removes any oil, grease or talc and enhances the slip-resistant charac-teristics. The feet should be cleaned initially on a new product and cleaning should be repeated periodically dur-ing regular use. It is also important to keep the bath-tub clean and free of soap film to help prevent slipping.
The bench is placed in the tub facing the faucet end, with the two outer legs resting on the floor outside the tub. The two inner legs should be adjusted to a height approximately even with the side of the tub. The outside legs should then be adjusted so that the seat slopes slightly toward the inside of the tub. With this setting, any water falling on the seat surface drains into the tub instead of out onto the floor.
For models with provisions for clamping the bench to the wall of the tub, the rubber surfaces of the clamping mechanism as well as the wall of the tub should also be free of soap film, oil or grease. The clamps should then be tightened securely. The clamp should be checked periodically to ensure that it remains tight.
In spite of all precautions to prevent slipping, it is important that the user understands the necessity to exert force only straight down in a vertical direction when sitting, rising from the seat or shifting position on the bench. Any significant force in a horizontal direction is likely to cause the bench to slip or even to tip over. These are relative-ly lightweight products, and they are not securely anchored to the tub.
A hand-held shower is usually a necessity with the use of a transfer tub bench. Other bathing aids such as non-slip safety mats or tread may also be very helpful. Please call our office if more information is needed regarding other products that will further enhance your safety and independence while bathing.
Page 1 of 1
© Copyright The MED Group 2006
PR
OD
UC
T
IN
FO
RM
AT
IO
N
FO
R
CU
ST
OM
ER
S
PICProduct Information For Customers
115
TRAPEZE BAR
© Copyright The MED Group 1994, 1997,2001Trapeze Bar
1
The Trapeze Bar is intended to provide the patient with a means of self-help to change position in bed, to move onto a bedpan, to move from bed to bedside commode or to transfer to and from a wheelchair with minimal help from an attendant.
Both patient and caregivers should give careful consideration to the adjustment of the grab bar position before the delivery person leaves your home. This will prevent the necessity for you to loosen the clamps to readjust the trapeze bar later, with the obvious risk of either not getting the clamps tightened securely, or tightening them so tightly that damage to the equipment results. Damage such as stripped threads or fractured clamps can result in equipment failure and serious injury to the user.
All clamps should be checked daily to ensure that they are securely tight. Do not forget, however, the damage and resulting danger caused by excessive tightening.
When the head of the bed is elevated or when the caregiver is working with the patient in bed, the triangular grab bar can be placed out of the way by hooking it over the upper end of the offset bar and sliding it back toward the head of the bed.
IMPORTANT: Please discontinue use, and call our office immediately, in the event the Trapeze Bar ever becomes loose or unstable in any way.
Additional notes for special models:If your Trapeze Bar is installed on a floor stand, rather than being installed directly onto the head of the bed, you should be aware that it is not secured to the bed and may shift if pulled horizontally instead of vertically.
If your trapeze bar is a swivel model, it can be rotated right or left from the usual fixed center position. Simply pull up on the release plunger on the upper bed clamp and swing the horizontal arm to the desired position. Care must be exercised to ensure that the release plunger has re-seated securely after each change of position.
Page 1 of 1
© Copyright The MED Group 2006
PR
OD
UC
T
IN
FO
RM
AT
IO
N
FO
R
CU
ST
OM
ER
S
PICProduct Information For Customers
116
TUB GRAB BAR
© Copyright The MED Group 1994, 1997, 2001Tub Grab Bar
1
Tub Grab Bars serve two distinct purposes:
1. By providing “something to hold on to” while stepping over the side of the tub, they provide stability and assistance in getting in and out of the bathtub.
2. Once in the tub, a properly positioned tub bar provides assistance in getting up and down safely.
All tub grab bars are made strictly for rigid steel or cast iron porcelain tubs. Tub bars cannot be safely installed on fiberglass or plastic bathtubs.
It is important to select a tub bar with the correct type of mounting bracket to provide a tight and proper fit for your particular bath tub. Bars equipped with brackets that have straight parallel jaws cannot be safely installed on a bath tub on which the side walls of the tub are tapered or sloped. This type of tub requires a bracket that will swivel or adjust to conform to this wall configuration.
INSTALLATIONThe mounting position should be selected to provide the user with the maximum assistance. If the user has an involved hand, position the grab bar for the stronger hand. If a bath seat is to be used, position the bar to permit getting in and out of the tub without stepping on the seat. If the tub bar is to be used in conjunction with a wall-mounted grab bar, position it so that the two bars supplement each other to provide maximum assistance.
Once the best position has been determined, be sure the mounting surfaces on the tub are clean and free of soap film, oil or grease of any kind. Wiping these surfaces with rubbing alcohol is an easy way to get them “squeaky” clean. If the mounting brackets of the grab bar are lined or coated with rubber or plastic, it is also a good idea to wipe these surfaces with alcohol.
Follow explicitly the manufacturer’s instructions for installation packed with your grab bar. If questions arise during the installation process, please call our office.
The security of the mounting should be tested by pulling forcefully on the bar in all directions. The mounting of any tub grab bar should be re-checked frequently for tightness and security. A loose or unstable grab bar is worse than no grab bar at all. The false security provided by a poor quality bar, or one that is installed improperly can result in greater risk of injury than the lack of a grab bar altogether.Keeping the grab bar clean and free of soap film, oil or grease will help to retain any no-slip characteristic that may have been provided by the manufacturer.
If installed and used with care, discretion and common sense, the tub grab bar will provide you with a good mea-sure of safety and independence. A bath seat and a non-slip bath mat or safety tread may provide an even greater measure of safety and independence. Please call our office if more information is needed regarding other bath safety products.
Page 1 of 1
© Copyright The MED Group 2006
PR
OD
UC
T
IN
FO
RM
AT
IO
N
FO
R
CU
ST
OM
ER
S
PICProduct Information For Customers
117
UNDERARM CRUTCHES
© Copyright The MED Group 1994, 1997, 2001Underarm Crutches 1
Underarm crutches, also known as Axillary Crutches, are by far the most commonly used type. The majority of temporary crutch users should use this style crutch. They require a minimum of training and substantially less upper extremity strength than other types of crutches and are generally less expensive. Crutches are most likely to be the appropriate walking aid when a person must not bear any weight on one leg, as would be the case with a broken leg, ankle or foot.
FITTING UNDERARM CRUTCHESProper fitting of underarm crutches requires two adjustments. 1. Overall height (from rubber tip to underarm pad). 2. The distance from the hand grip to the underarm support.
Adjust the Overall Height of the crutch first. With the user standing erect, looking straight ahead with shoulders squared, place the crutch tip six to eight inches forward of the toes and the same distance out to the side. Then adjust the crutch height to bring the underarm pad up to a position approximately one inch below the front of the underarm. The height adjustment should not have the crutch pressed too tightly under the arm in order to avoid unnecessary pressure and irritation. However, it should not be so short as to cause the user to have to stoop in order to obtain support.
With the overall height adjusted properly, then adjust the handgrip position to provide approximately a 20 to 30 degree bend in the elbow. This can usually be achieved by again having the user stand straight as described above with eyes straight ahead, shoulders squared and arms hanging relaxed at the sides. Then place the crutch vertically beside the user and adjust the handgrip to a position slightly above the wrist.
This adjustment technique will encourage the user to support most of the weight with the hands and arms, not the underarms. This is very important. Prolonged and excessive pressure on the underarm will cause severe soreness and possible numbness and paralysis of the arm.
INSTRUCTIONS FOR USE If you have had the benefit of instruction by your physician or therapist, follow those instruc-tions carefully. There are several methods of using crutches. These methods are called crutch gaits. The choice of gaits and the gait training is usually performed by your physician or therapist.
The most frequent need for crutches is to relieve all weight bearing on one leg. For this situation your doctor or therapist will probably want you to use the three-point gait. This method might be described as an “assisted hop.” The three-point gait begins by standing with your weight distributed evenly between your strong leg and the two crutches. The knee of the injured leg is bent slightly to keep that foot off the floor completely.
Page 1 of 2
© Copyright The MED Group 2006
PR
OD
UC
T
IN
FO
RM
AT
IO
N
FO
R
CU
ST
OM
ER
S
PICProduct Information For Customers
118
Shift all weight to the strong leg momentarily while the two crutches are moved forward several inches. All weight is then supported by the crutches while the strong leg is swung forward to a point between the crutches.
As you gain confidence you may swing the the strong leg through to a point several inches in front of the crutch-es. This is called a swing-through three-point gait and provides faster ambulation.
If your doctor or therapist chooses any other gait for you, such as the two point gait or the four- point gait, they will probably be very specific in this regard and arrange for some special training in those methods.
It is possible for some crutch users to negotiate steps. DO NOT attempt this unless it has been recommended by your physician or therapist.
Assuming that you are using the three-point gait, going up stairs involves shifting the crutch that would be next to the banister to the other hand. Holding both crutches in one hand, shift the weight to the crutches and the ban-ister and hop onto the step with the strong leg. Bring the crutches up onto the step beside the foot. Repeat this procedure.
If no banister or handrail is available, leave the crutches in their normal position in each hand and face the stairs squarely. Putting all weight on the crutches, hop onto the first step and swing the crutches up alongside the foot. In either case, remember — going up stairs, the strong foot always goes first, followed by the crutches.
Going down stairs requires the same basic procedure with one major exception. First, place the crutches on the next step down, then carefully and slowly follow with the strong leg and foot.
To sit down in a chair, you should approach the chair so that the strong leg is close to the seat. Grasp both crutch-es in the opposite hand and place the strong side’s hand on the armrest of the chair. Place the crutches at the back of the chair. Then pivot on the strong foot until the back of the strong legs touches the seat. Place the other hand on the other armrest and lower yourself into the chair. To rise out of the chair simply reverse the above sequence.
If your physician’s or therapist’s instructions differ in any way from those given here, follow those instructions explicitly.
The rubber tips on your crutches should be inspected regularly. Worn or damaged tips should be replaced imme-diately, as should your underarm pads and hand grips. The security of all adjustment mechanisms should also be checked frequently.
© Copyright The MED Group 1994, 1997, 2001Underarm Crutches 2
Page 2 of 2
UNDERARM CRUTCHES

© Copyright The MED Group 2006
PR
OD
UC
T
IN
FO
RM
AT
IO
N
FO
R
CU
ST
OM
ER
S
PICProduct Information For Customers
119
WALKERS
© Copyright The MED Group 1994, 1997, 2001Walkers 1
A walker is intended to help an individual remain mobile by providing assistance in walking. It accomplishes this purpose by transferring some of the function normally performed by the legs and feet to the arms and hands. The most important of these functions is usually weight bearing, but others include balance as well as standing or walking stability.
If the walker was delivered to your home by our representative or if you personally picked it up from our store, our representative has no doubt adjusted it properly to your height. If a friend or family member picked it up for you, it is important to adjust it to the proper height before using it.
HEIGHT ADJUSTMENT The height of the hand grips should be such that it provides a slight bend in the elbow when you are standing straight and holding the hand grip. A 20 to 30 degree bend in the elbow is usually considered desirable. This can easily be achieved if you can safely stand for a few moments, look straight ahead with your shoulders squared and your arms hanging relaxed at your sides. While you maintain this position, a family member or friend should adjust the height of all four walker legs to place the height of the hand grips slightly above your wrists.
Do not attempt to stand if you cannot do so safely. You may have to approximate the height of the walker until a later time when a more accurate fitting can be accomplished safely. After making the height adjust-ment, check carefully to ensure that all four legs are locked securely in the selected position.
INSTRUCTIONS FOR USEIf you have had the benefit of instruction by your physician or therapist, follow those instruc-tions carefully.
If you are using a walker for the first time, it is advisable to have someone present who can provide assistance until you become familiar with its use.
You should follow slightly behind the walker, taking care not to step all the way into the front of the walker frame. Doing so could result in the loss of balance or the tendency to fall forward. Instead, you should lift the walker and place it forward so that the rear legs are a few inches ahead. You should then step forward so that your legs are about even with the rear of the walker. This procedure keeps the walker safely ahead, providing four stable legs on which to lean, if necessary. ALWAYS TAKE SHORT STEPS. Overstriding tends to cause loss of balance.
If your physician’s or therapist’s instruction differ in any way from those given here, follow those instructions explicitly.
Page 1 of 2

© Copyright The MED Group 2006
PR
OD
UC
T
IN
FO
RM
AT
IO
N
FO
R
CU
ST
OM
ER
S
PICProduct Information For Customers
120
If your walker is a folding model, become familiar with the process of folding and unfolding it. Anytime the walker is unfolded, check carefully to ensure that the folding mechanism is locked securely in the open position before using.
The rubber tips on your walker should be inspected regularly. Worn or damaged tips should be replaced immedi-ately. Hand grips should be checked frequently. A hand grip that rotates during weight bearing can cause a fall. The security of height adjustment mechanisms should also be confirmed often. Remember: safe use of your walker requires care, discretion and common sense.
SPECIAL MODEL WALKERSIf your physician or therapist ordered a reciprocating walker for your use, he or she has determined that this type of walker may assist you with better coordination and encourage a more natural gait.
If you have use of only one arm and hand, a hemi walker may have been ordered. This type of walker has a cen-ter handle that can be set for either right or left hand use.
If extreme weakness makes it difficult for you to lift the weight of the walker, wheel attachments may have been ordered for the two front legs. It is essential to exercise added caution with this type of walker so that it does not roll away, causing a fall.
Crutch attachments are sometimes ordered for individuals with impaired use of hands or forearms. These accessories can be installed on one or both sides of a walker.
The procedure for correct height adjustment and the basic instructions for use are much the same for all of these special models as they are for the standard walker. REMEMBER: be sure to follow your physician’s or therapist’s instructions.
© Copyright The MED Group 1994, 1997,2001Walkers
2
Page 2 of 2
WALKERS
© Copyright The MED Group 2006
PR
OD
UC
T
IN
FO
RM
AT
IO
N
FO
R
CU
ST
OM
ER
S
PICProduct Information For Customers
121
WALL GRAB BARS
© Copyright The MED Group 1994, 1997, 2001Wall Grab Bars 1
Wall-mounted grab bars are available in a variety of lengths, usually ranging from 12 to 32 inches. Right and left angle bars are also available as well as other special configurations. Wall grab bars are available in nylon polymer coating, stainless steel and chrome plated steel.
When placed in strategic positions, wall bars offer physically challenged individuals a great degree of safety. They may provide assistance in areas of the bathroom other than just the bath tub or shower.
The quality of the wall grab bar and proper installation are critical. The bar should be of heavy gauge steel and welded construction. There should be no opening for moisture to enter. Obviously they should be totally rust resistant.
With the proper tools an individual with good basic “do it yourself” skills should have little difficulty making safe, secure installations. These general guidelines may be helpful.
Tools Required:An electric drill (Preferably slow speed. It must have a chuck capacity to accommodate at least a 9/16” masonry bit).
A 1/4” Masonry BitA 9/16” Masonry Bit (May have 1/2” turned down shank)A 1/8” Standard Drill BitA Felt Tip MarkerAssorted Screw DriversA HammerA Punch (Must be very sharp)
Although not absolutely essential, an electronic stud locator is also a very handy device for wall grab bar installation
PROCEDURE:Please read through these instructions carefully and completely before starting the installation. Locate proper placement of grab bars to provide maximum assistance to user. Ideally, have the fully-dressed user get into the dry bath tub and simulate use of the grab bars to determine the best location. Once the prop-er location has been determined mark the holes in the grab-bar flange on the tile wall with a felt tip marker. Carefully and lightly chip the glaze on the tile at the hole markings with a sharp punch and a hammer.
Using an electric drill and a 1/4” masonry bit, carefully drill a hole through the tile and dry wall material behind the tile. If you hit a stud (indicated by wood shaving after penetrating the dry wall material), stop drilling, change to a 1/8” drill bit and finish drilling a pilot hole into the stud. That hole is ready for use with a long wood screw. The best choice of wood screws is stainless steel, as long as possible, up to 4 inches, with a pan head.
Page 1 of 2
© Copyright The MED Group 2006
PR
OD
UC
T
IN
FO
RM
AT
IO
N
FO
R
CU
ST
OM
ER
S
PICProduct Information For Customers
122
Page 2 of 2
If you do not hit a stud, re-drill the hole using a 9/16” masonry bit to accommodate a 1/4” toggle bolt (preferably stainless steel). When purchasing the toggle bolts, check the markings on the “butterfly” for the size of the hole required. Some 1/4” toggle bolts can be accommodated by a 1/2” hole. It is obvious that the smallest hole that will accommodate the toggle bolt is preferable. The hole should never be larger than 9/16” because, in all prob-ability, it would not be completely covered by the flange of the grab bar. Care must also be exercised in position-ing the holes to avoid the edge of the hole from extending beyond the edge of the flange.
Install grab bar using the above fasteners.
An Electronic Stud Locator is very helpful in many ways. When the proper location for the grab bar is determined, the wall can be checked for stud locations. If the hole will be near the edge of a stud, the grab bar can usually be shifted slightly, without impairing its helpfulness to the user. It is always preferable to mount grab bars into studs if this can be done without significantly reducing the effectiveness of the bar for the user. The Electronic Stud Locator is also helpful in avoiding electrical wiring and/or water pipes hidden behind the wall.
NOTES AND PRECAUTIONS:Installers of wall grab bars should be cognizant of several precautions.
Homes built since the late fifties usually have dry wall construction, and present few problems with grab bar installation. If there is reason to believe the walls are other than dry wall, (for example, wire mesh and plaster), it is wise to determine this before starting the installation. Temporarily removing a wall switch plate or receptacle cover will usually allow you to determine the construction of the wall.
If the wall is plaster and wire mesh, a great deal of caution must be exercised. The drill bit can easily hang in the wire mesh and result in breaking one or more pieces of the tile. Unless you have replacement pieces of the tile, and under-stand the risk, it may be wise not to proceed. Also, this type of wall construction frequently deteriorates over the years and may not be strong enough to provide a secure installation. Remember, this is generally a problem only in older homes. If there is any reason to doubt that a safe, secure installation can be expected, it is wise not to even begin the procedure. If the integrity of the wall is questionable the only solution may be mounting only to wall studs.
Wall grab bars generally cannot be installed satisfactorily on the new fiberglass or plastic tub/shower enclosures.
Other bathing aid products that might be helpful to you include: tub-mounted grab bars, bath seats, hand-held showers and non-slip bath mats. Please call us for more information regarding products to enhance safety and independence while bathing.
© Copyright The MED Group 1994, 1997, 2001Wall Grab Bars 2
WALL GRAB BARS
© Copyright The MED Group 2006
PR
OD
UC
T
IN
FO
RM
AT
IO
N
FO
R
CU
ST
OM
ER
S
PICProduct Information For Customers
123
WHEELCHAIRS
© Copyright The MED Group 1994, 1997, 2001Wheelchairs
1
A wheelchair should provide: easy transportation, comfortable seating and as much functional independence for the user as possible.
OPERATING INSTRUCTIONS1. Folding and unfolding the wheelchair: To fold, simply lift up under the center of the front edge of the seat upholstery. To unfold, tilt the chair slightly to one side to raise the wheels on the opposite side off the floor, then press down on one or both seat rails. 2. Applying the wheel locks: Push forward on the lock tips (or pull back on the pull-to-lock type), until the locks snap into the locked position. Do not attempt to enter or exit the wheelchair without having the locks securely engaged. 3. Folding the foot plates up into a vertical position: If the foot plates are equipped with heel loops, these must first be pulled forward over the rear of the foot plates. The foot plates themselves can then be folded up into the vertical position by lifting up on the inside edges of the foot plates. 4. Releasing and swinging away the front rigging: Whether the wheelchair is equipped with standard foot rests or elevating leg rests, this procedure permits the user to make much closer approaches for easier, safer transfers to beds, toilets, automobiles, etc. Simply activate the release mechanism and swing the front rigging around to the side of the wheelchair. While in this swing away position, the front rigging can also be removed from the chair entirely by lifting it off. This removal will make lifting the chair or loading into a car much easier for the caregiver.
From the swing-away position, the front rigging can be returned to the standard position by simply swinging it back to the front of the wheelchair. It will lock automatically in the forward position. If the front rigging has been removed from the chair, simply replace it in the swing-away position, then swing it back to the standard front position when required. 5. Elevating leg rest adjustment: If the wheelchair is equipped with elevating leg rests, the legs of the user can be elevated by simply lifting the leg rests up to the desired position. To lower them again, support the leg rest with one hand while activating the elevation release mechanism with the other and lower to the desired position.
6. Footrest length adjustment: The position of the foot plate on either standard foot rests or elevating leg rests is adjustable to fit the user’s leg length. The foot plate should be adjusted to support the weight of the user’s foot and lower leg in such a position that permits weight bearing by the thighs. A footrest adjust- ment that is too long will result in a line of pressure under the thigh, at the front edge of the seat upholstery. An adjustment that is too short will raise the user’s knees and cause excessive weight to be born by the buttocks. Either situation increases the risk of pressure sores. The knees and hips of the user should be at approximately the same level. The lowest edge of the foot plate must be at least two inches above the floor to provide safe clearance when negotiating ramps or inclines.
This adjustment is made by loosening the adjustment bolt with a wrench, telescoping the foot plate in or out to achieve the desired position, then re-tightening the bolt securely.
Page 1 of 2
© Copyright The MED Group 2006
PR
OD
UC
T
IN
FO
RM
AT
IO
N
FO
R
CU
ST
OM
ER
S
PICProduct Information For Customers
124
Page 2 of 2
© Copyright The MED Group 1994, 1997, 2001
Wheelchairs2
7. Removing and replacing detachable arms: This feature permits lateral or sliding transfers to and from the side of the wheelchair for those users who are unable to stand briefly to transfer. Release the arm lock on the front receiver socket and lift the arm from the center to avoid binding. To replace the arm, simply reverse the procedure. Attention to the location of the rear receiver socket will make replacing the arm easier.
Wheelchairs equipped with desk-length detachable arms permit closer approaches to tables or desks. If it is occasionally desirable to have arm support more forward on these models, this is easily accomplished by swapping sides and reversing the desk-length arms. Please Note: Reversing the arms without swapping sides will narrow the distance between the arms and could result in an accident. Wheelchairs with wrap- around or spacer-saver style arms can not be reversed. 8.Use of the tipping levers: Although many wheelchairs are equipped with tipping levers designed to allow a caregiver or attendant to assist in negotiating curbs and other small level changes, this procedure must be performed with extreme caution and should be attempted only at the advice of your therapist or physician. Injury could result from tipping the wheelchair on its rear wheels.
Tipping levers extend from the bottom rear of the wheelchair frame, just inside the large rear wheels. The attendant should apply pressure downward with one foot on the end of one tipping lever while pressing down on the push handles of the wheelchair. This technique makes small level changes much easier.
If anti-tip devices, which prevent using the above procedure, have been installed on your wheelchair, they should not be removed or adjusted without first consulting your therapist or physician. 9.Special Features: The driver/technician delivering your wheelchair will demonstrate the above basic operating procedures as well as any other special features or extra accessories that were ordered on the chair. These might include such things as; seat positioning or safety belts, grade aids or hill holders, anti- tipping devices, wheelchair tray, hemi or low seat frame, reclining back, and many others. Some of these accessories are provided for your safety, and the wheelchair should not be used without them in the correct functioning position.
IMPORTANT POINTS TO REMEMBER• The user or caregiver should perform basic safety checks on the wheelchair at frequent intervals. 1. Check hand grips and the rubber tips on the tipping levers to ensure that they are tight and secure. 2. Check the locks for proper adjustment to confirm that they lock the large wheels securely when engaged. 3. Look over all nuts, bolts and attaching hardware for proper tightness. 4. If the wheelchair is equipped with pneumatic tires, check for proper tire pressure. 5. Check for proper footrest length adjustment. 6. If any unsafe conditions are found, please discontinue use of the wheelchair and call our office immediately.
• If the user’s physical condition or body weight changes significantly, check with your physician or therapist to confirm that the present wheelchair is still appropriate.• Remember to engage the wheelchair locks before transferring to or from the chair.
• Avoid developing pressure sores from prolonged sitting by frequently practicing some type of weight shift. Do “push-ups” by pressing down on the arm rests to lift the buttocks off the seat, or shift weight by leaning first to one side then the other.
• Do not lean forward in the wheelchair unless both feet are flat on the floor. This is particularly important for users with heavy leg casts using elevating leg rests.
Becoming familiar with the wheelchair and following the above guidelines should increase the user’s mobility, comfort and functional independence. Please call our office if we can be of further service.