Embed Size (px)
Citation preview
PPT Lecture 1 v4.1 31/07/2020
Copyright FIT College 2020 1
Programming for Personal Training
Lecture 1
What you will learn
This session will teach you about:• Health screen• Behaviour change• Body composition• Physique science
• Hydrodensitometry• Air Displacement Plethysmography• Dual-energy x-ray absorptiometry• Bioelectrical impedance
• Anthropometry and practical skinfold skills
1
2
PPT Lecture 1 v4.1 31/07/2020
Copyright FIT College 2020 2
Health Screen
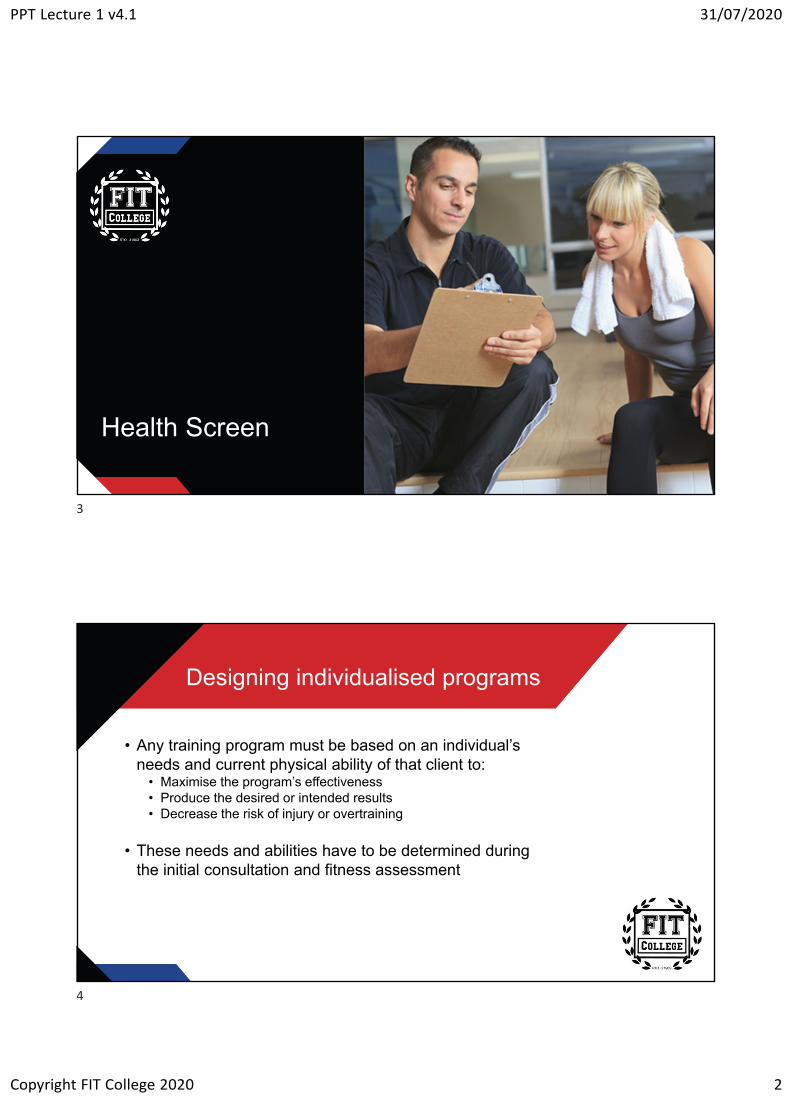
Designing individualised programs
• Any training program must be based on an individual’s needs and current physical ability of that client to:
• Maximise the program’s effectiveness • Produce the desired or intended results• Decrease the risk of injury or overtraining
• These needs and abilities have to be determined during the initial consultation and fitness assessment
3
4
PPT Lecture 1 v4.1 31/07/2020
Copyright FIT College 2020 3
Pre-exercise screening
• You must get a person’s health history before they commence a fitness and exercise program
• Get a DETAILED history of everything that has ever happened to them whether they think it pertains to fitness or not
• Even if a person says they are good to go, it pays to be thorough
The APSS - stage 1
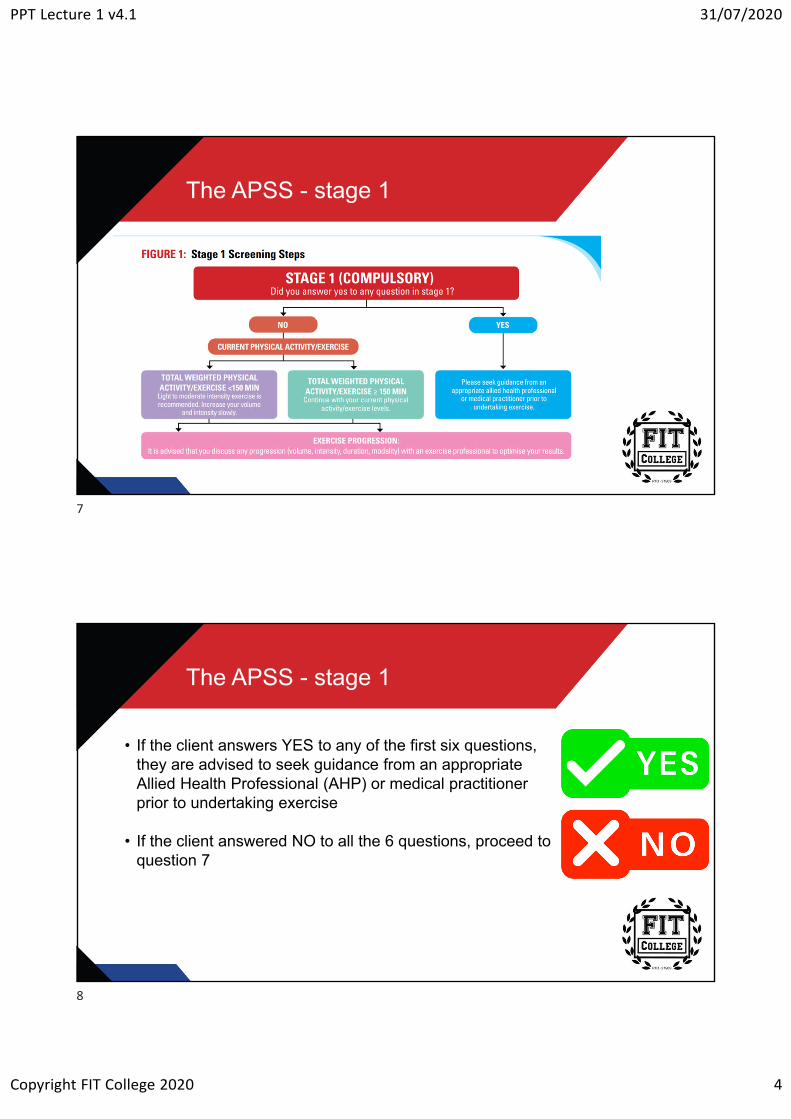
• This stage may be self-administered and self-evaluated
• The aim of this stage is to identify individuals with known disease, and/or signs or symptoms of disease, who may be at a higher risk of an adverse event due to exercise
• An adverse event refers to an unexpected event that occurs as a consequence of an exercise session, resulting in ill health, physical harm or death to an individual
5
6
PPT Lecture 1 v4.1 31/07/2020
Copyright FIT College 2020 4
The APSS - stage 1
The APSS - stage 1
• If the client answers YES to any of the first six questions, they are advised to seek guidance from an appropriate Allied Health Professional (AHP) or medical practitioner prior to undertaking exercise
• If the client answered NO to all the 6 questions, proceed to question 7
7
8
PPT Lecture 1 v4.1 31/07/2020
Copyright FIT College 2020 5
The APSS - stage 1
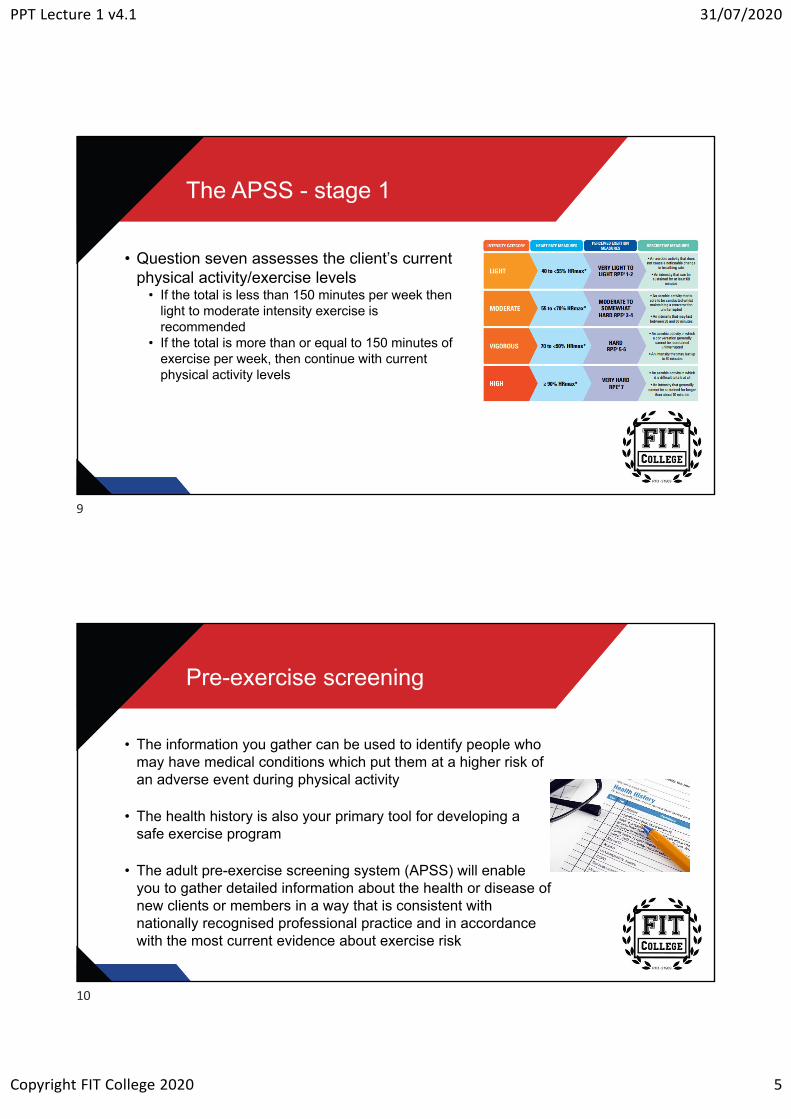
• Question seven assesses the client’s current physical activity/exercise levels
• If the total is less than 150 minutes per week then light to moderate intensity exercise is recommended
• If the total is more than or equal to 150 minutes of exercise per week, then continue with current physical activity levels
Pre-exercise screening
• The information you gather can be used to identify people who may have medical conditions which put them at a higher risk of an adverse event during physical activity
• The health history is also your primary tool for developing a safe exercise program
• The adult pre-exercise screening system (APSS) will enable you to gather detailed information about the health or disease of new clients or members in a way that is consistent with nationally recognised professional practice and in accordance with the most current evidence about exercise risk
9
10

PPT Lecture 1 v4.1 31/07/2020
Copyright FIT College 2020 6
Behaviour Change
Behaviour change
• It’s important that when you’re working with new clients, you assess the stage that they’re at regarding how willing they are to make changes
• You must see past the initial excitement that they may have, and make an appropriate assessment of their level of dedication to changing
11
12
PPT Lecture 1 v4.1 31/07/2020
Copyright FIT College 2020 7
Five stages of behaviour change
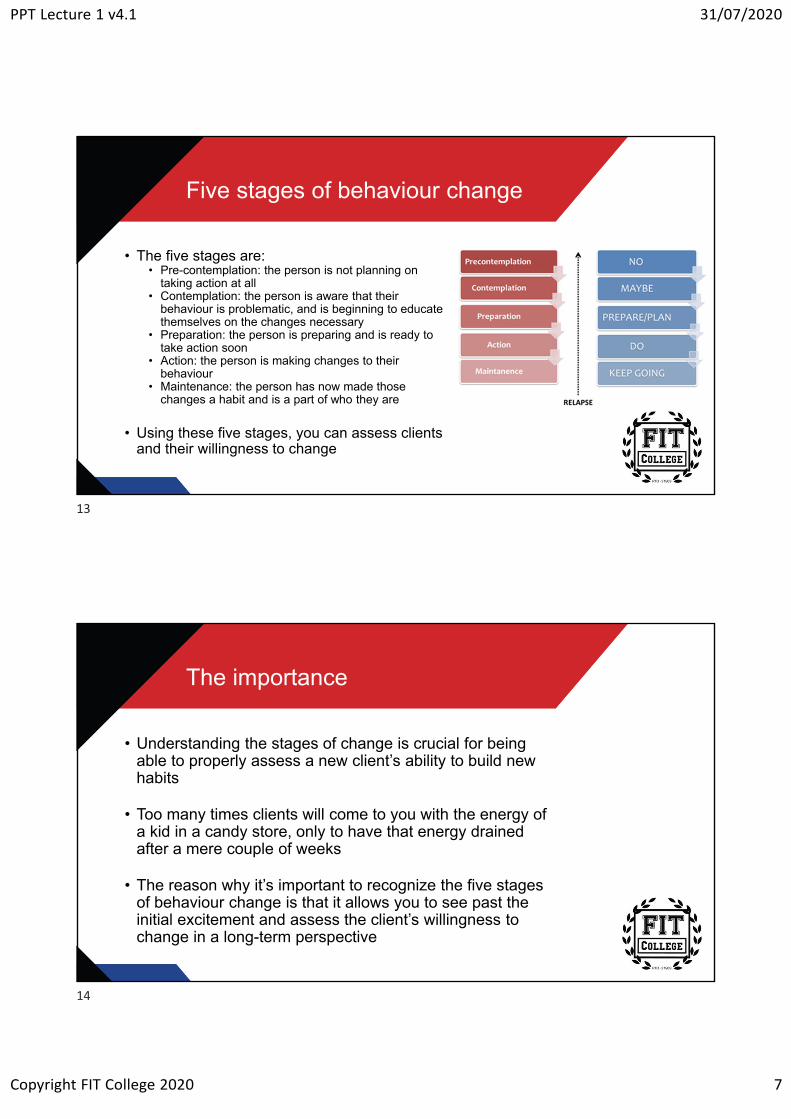
• The five stages are:• Pre-contemplation: the person is not planning on
taking action at all• Contemplation: the person is aware that their
behaviour is problematic, and is beginning to educate themselves on the changes necessary
• Preparation: the person is preparing and is ready to take action soon
• Action: the person is making changes to their behaviour
• Maintenance: the person has now made those changes a habit and is a part of who they are
• Using these five stages, you can assess clients and their willingness to change
The importance
• Understanding the stages of change is crucial for being able to properly assess a new client’s ability to build new habits
• Too many times clients will come to you with the energy of a kid in a candy store, only to have that energy drained after a mere couple of weeks
• The reason why it’s important to recognize the five stages of behaviour change is that it allows you to see past the initial excitement and assess the client’s willingness to change in a long-term perspective
13
14
PPT Lecture 1 v4.1 31/07/2020
Copyright FIT College 2020 8
The big three
• To do this assessment, here are three questions you can ask that will bring down the initial wavering excitement levels and decide if your client REALLY is ready for change
• Have you tried anything previously to make progress towards your goals?
• If a client tells you they have tried everything from callisthenics to Olympic lifting, there’s a good chance that they are probably in the preparation stage
• They are searching for answers but haven’t figured out an appropriate action plan
• This might also tell you that they are looking for a “magic pill” to solve their problems. Maybe they are looking for the quick fix rather than sticking with one plan
The big three
• What, specifically, has stopped you in the past from reaching your goals?
• This is where you get to see if the client comes up with an external excuse or not
• If they tell you they haven’t had enough time because of work, or because the family have kept them too busy – you can recognize that they are probably in either the contemplation or preparation stage
• While they see the value, their priorities lie elsewhere• Throwing them into an intensive program is doomed to fail (at this
point). They need to be introduced to change more slowly
15
16
PPT Lecture 1 v4.1 31/07/2020
Copyright FIT College 2020 9
The big three
• Using a scale of 1 to 10 (1 being “there’s no way” and 10 being “definitely will do”), would you be able to exercise for __minutes for __days this coming week?
• This is the ultimate test of the willingness to change• If a client says that they are probably at a 6 when it comes to
exercising 45 minutes, 4 times per week: they have got a lot of commitments next week, but they will “try their best”
• Do you think a 6 rating is really that convincing?• Do you really want to give a client a task that has at least a 40%
chance of failure? • “At least” because most clients overestimate their ability to take on
change in the beginning
Willing, ready, and able
• Question #1 gets the ball rolling. It lets you see how new or experienced your client is with training and nutrition, and their level of interest
• Question #2 throws a curveball to the client. They perhaps think that you are just asking a basic question, but really, you’re screening the client to see their attitude and willingness to change
• If your client blames the reason of not reaching their goals on external factors – deflecting the reason to things such as not enough time, too busy with work, not eating healthier meals or the kids bringing home junk food – then this is a sign of someone who’s in one of the earlier stages of change
• Again, the notion of wanting change is there, but perhaps not at the expense of other enjoyable things in life
17
18
PPT Lecture 1 v4.1 31/07/2020
Copyright FIT College 2020 10
Willing, ready, and able
• Question #3 is the true test of a client’s willingness to change
• “Action speaks louder than words”, and we’re about to find out how loud their actions really are
• Any number they give you shows their level of commitment to following a training plan
• Any number between 1 and 3 is a sign that they’re probably not ready for much of a change
• A number between 4 and 6 is an okay, mediocre response. A small change may be possible
• A number between 7 and 10 is a good sign that they’re ready to go
The plan
• You can’t give a client an intensive, thorough training plan when they’re not ready to change, so it’s important to identify which stage your client is at and adjust their needs from there
• Remember, most of them are going to say “they’re ready for everything right now” when their excitement levels are high, but it’s your job to assess how willing they truly are
• Clients that are in the precontemplation stage need help to find their “why.” Help them see why it’s important to work out and eat healthily
• You can relate it to having more self-confidence, living longer so they will be able to spend more time with their family etc.
19
20
PPT Lecture 1 v4.1 31/07/2020
Copyright FIT College 2020 11
The plan
• Clients that are in the contemplation stage will benefit by showing what they can achieve as well as the sacrifices they’re going to have to make to achieve it
• Also, a basic level of how to achieve their goals will help them
• Clients that are in the preparation stage will benefit from organising a custom training plan for them
• Sorting out times that they’re able to exercise, recipes that are healthy and they also like etc.
• Anything that is customised for them and moves them towards taking action
• When the client has reached the action stage, they’re now to start working on the fitness plan that you’ve customised for them
• Remember not jump the gun and start with extreme exercise sessions, to begin with. Gauge where your client's fitness levels are at and work your way up from there in small steps
The plan
• Once your client is in the maintenance stage, you’re now able to keep the ball rolling and help them, so they don’t fall back to their old ways
• Spice things up every now and then with different exercises, challenges; perhaps increasing their training frequency
• Remember, you’re the professional. It’s up to you to properly assess a new client and then deliver a program that has the highest likelihood of success
21
22
PPT Lecture 1 v4.1 31/07/2020
Copyright FIT College 2020 12
Body Composition
Body composition
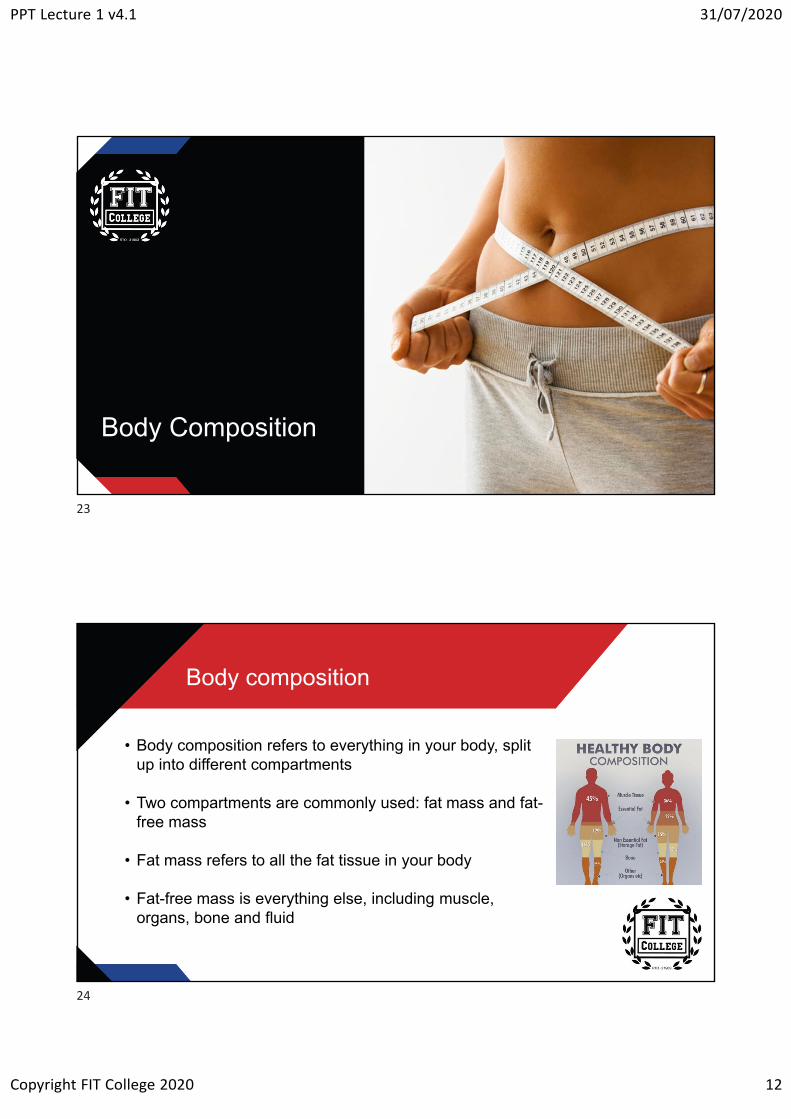
• Body composition refers to everything in your body, split up into different compartments
• Two compartments are commonly used: fat mass and fat-free mass
• Fat mass refers to all the fat tissue in your body
• Fat-free mass is everything else, including muscle, organs, bone and fluid
23
24

PPT Lecture 1 v4.1 31/07/2020
Copyright FIT College 2020 13
Body composition
• Body composition can be estimated through various techniques from field-based tests requiring only a calculator or tape measure, to advanced tests conducted in a laboratory
• Body mass index • Waist and hip girth (circumference)• Waist:Hip ratio• Waist:Height ratio• The sum of skinfold measurements• Bioelectrical impedance analysis• Dual-energy x-ray absorptiometry
• In this lecture, we will discuss body mass index, waist and hip girth, waist:hip ratio and waist:height ratio
Body mass index (BMI)
• Body Mass Index assesses a person’s weight (kilograms) in relation to their height (metres squared) and can be a useful indicator of whether a person’s weight is above, below or within a healthy range
• BMI = weight (kg) ÷ height (m)²
• While BMI may give an individual a general idea of increased risk for obesity-related health problems, it fails to distinguish the composition of that weight
• Two people who are the same height are unlikely to weigh the same amount. This is because bodyweight depends on factors such as bone structure (small, medium or larger frame), and the proportion of body fat compared to denser muscle
25
26
PPT Lecture 1 v4.1 31/07/2020
Copyright FIT College 2020 14
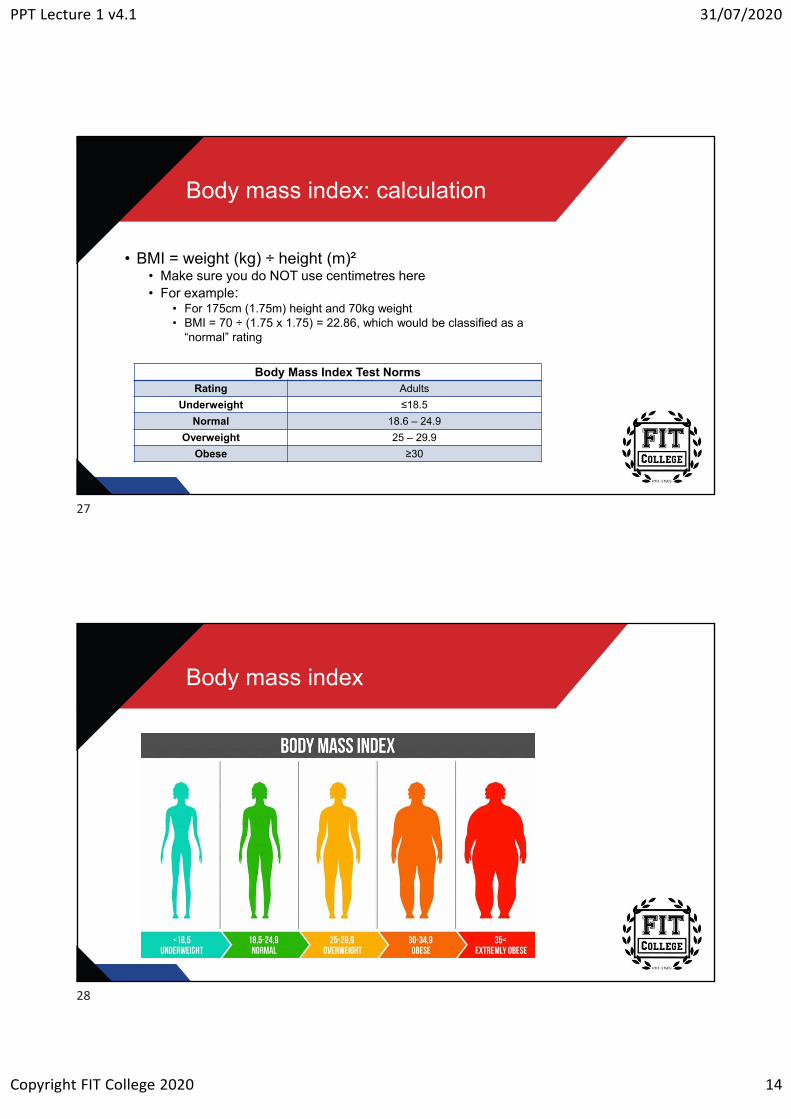
Body mass index: calculation
• BMI = weight (kg) ÷ height (m)²• Make sure you do NOT use centimetres here • For example:
• For 175cm (1.75m) height and 70kg weight • BMI = 70 ÷ (1.75 x 1.75) = 22.86, which would be classified as a
“normal” rating
Body Mass Index Test NormsRating Adults
Underweight ≤18.5
Normal 18.6 – 24.9
Overweight 25 – 29.9
Obese ≥30
Body mass index
27
28
PPT Lecture 1 v4.1 31/07/2020
Copyright FIT College 2020 15
Body mass index
• While measuring BMI does have flaws, it also has its positives
• It can be used as an inexpensive way to assess a person weight as a risk factor for the development of diseases
• Measuring BMI is an inexpensive method
• BMI is also easy to calculate, and the results are repeatable and consistent
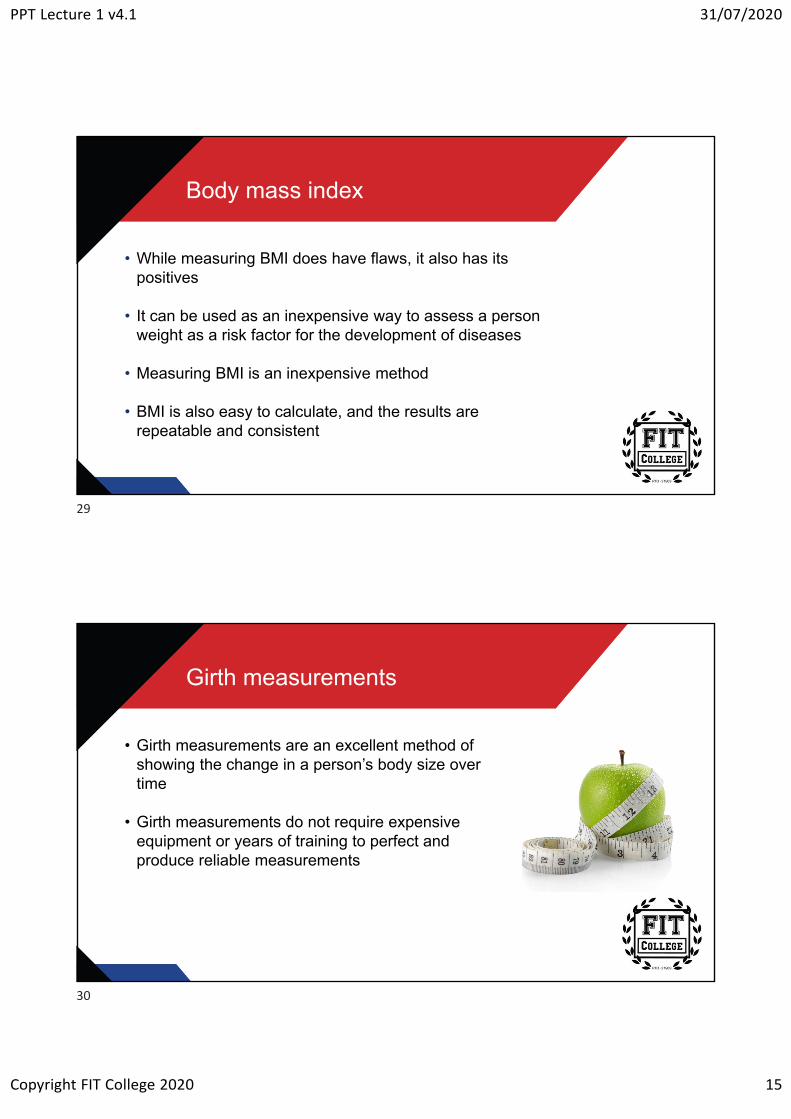
Girth measurements
• Girth measurements are an excellent method of showing the change in a person’s body size over time
• Girth measurements do not require expensive equipment or years of training to perfect and produce reliable measurements
29
30
PPT Lecture 1 v4.1 31/07/2020
Copyright FIT College 2020 16
Common girth measurements
• The most common girth measurements are taken around the midsection (waist and hip)
• These are used to determine fat gain/loss and/or predict the risk for developing health problems such as type 2 diabetes, heart disease and high blood pressure
• The science behind these girth measurements is because fat tends to accumulate around the midsection
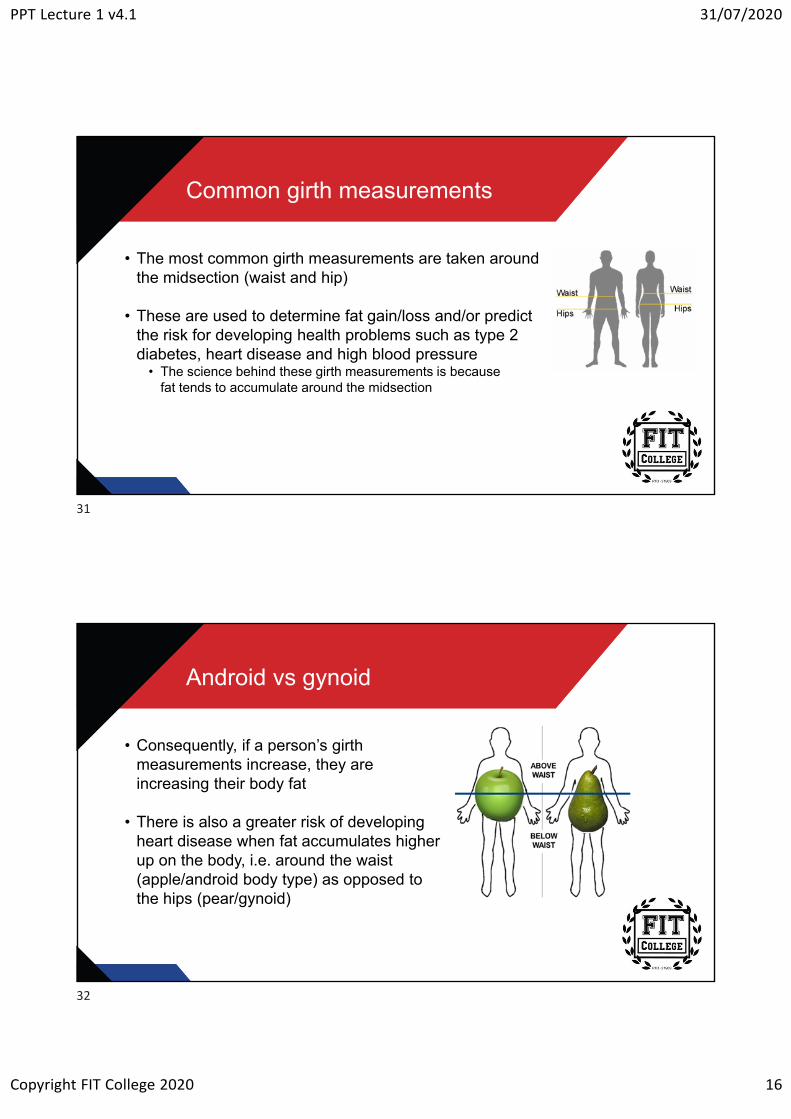
Android vs gynoid
• Consequently, if a person’s girth measurements increase, they are increasing their body fat
• There is also a greater risk of developing heart disease when fat accumulates higher up on the body, i.e. around the waist (apple/android body type) as opposed to the hips (pear/gynoid)
31
32
PPT Lecture 1 v4.1 31/07/2020
Copyright FIT College 2020 17
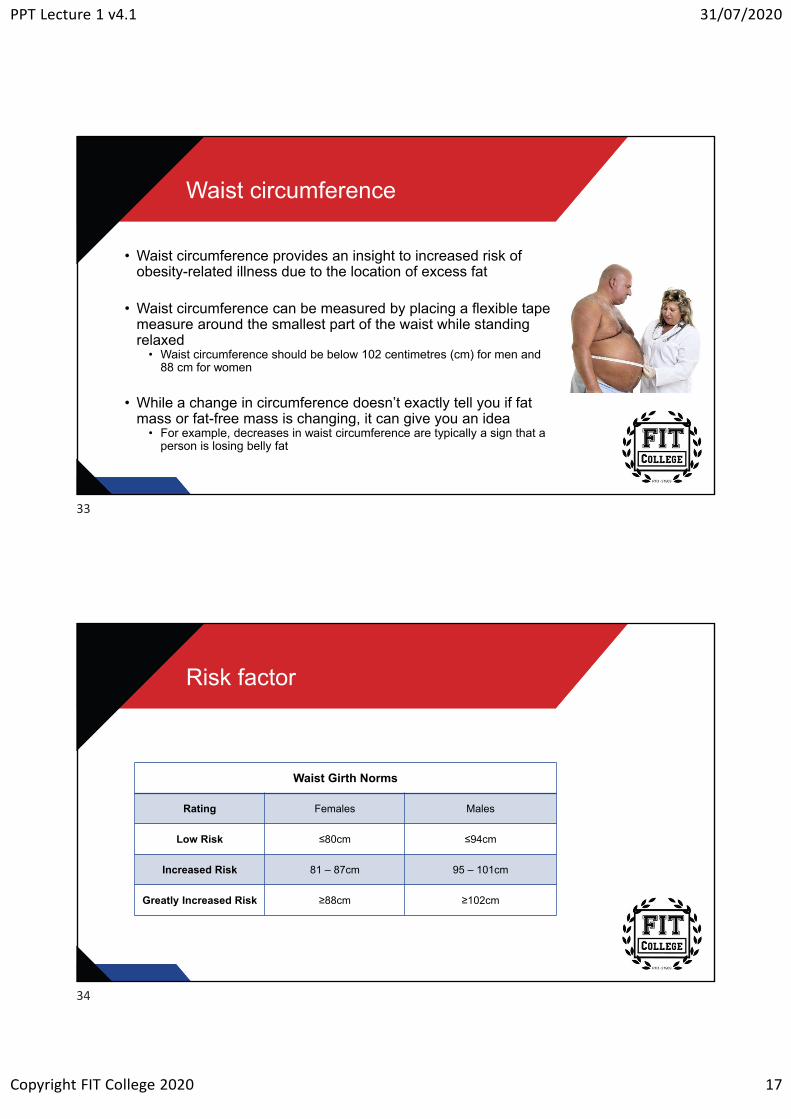
Waist circumference
• Waist circumference provides an insight to increased risk of obesity-related illness due to the location of excess fat
• Waist circumference can be measured by placing a flexible tape measure around the smallest part of the waist while standing relaxed
• Waist circumference should be below 102 centimetres (cm) for men and 88 cm for women
• While a change in circumference doesn’t exactly tell you if fat mass or fat-free mass is changing, it can give you an idea
• For example, decreases in waist circumference are typically a sign that a person is losing belly fat
Risk factor
Waist Girth Norms
Rating Females Males
Low Risk ≤80cm ≤94cm
Increased Risk 81 – 87cm 95 – 101cm
Greatly Increased Risk ≥88cm ≥102cm
33
34
PPT Lecture 1 v4.1 31/07/2020
Copyright FIT College 2020 18
Waist:Hip ratio
• Regardless of a person’s height and build, a relative excess of fat around the waist appears to increase the risk of developing one or more chronic diseases or conditions such as heart disease and diabetes
• Another way you can assess a person’s weight-related risk is by measuring their waist girth in relation to their hip girth
• Hip circumference can be measured by placing a flexible tape measure around the widest part of gluteal (buttock) muscles when viewed from the side
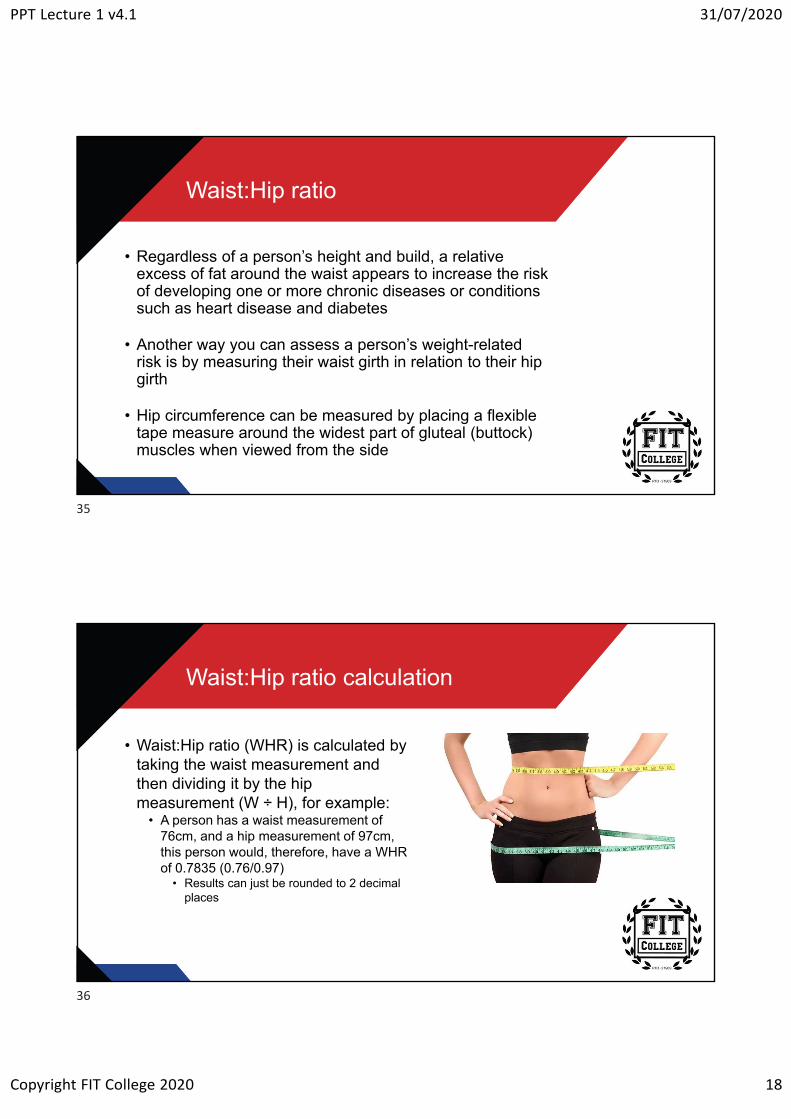
Waist:Hip ratio calculation
• Waist:Hip ratio (WHR) is calculated by taking the waist measurement and then dividing it by the hip measurement (W ÷ H), for example:
• A person has a waist measurement of 76cm, and a hip measurement of 97cm, this person would, therefore, have a WHR of 0.7835 (0.76/0.97)
• Results can just be rounded to 2 decimal places
35
36
PPT Lecture 1 v4.1 31/07/2020
Copyright FIT College 2020 19
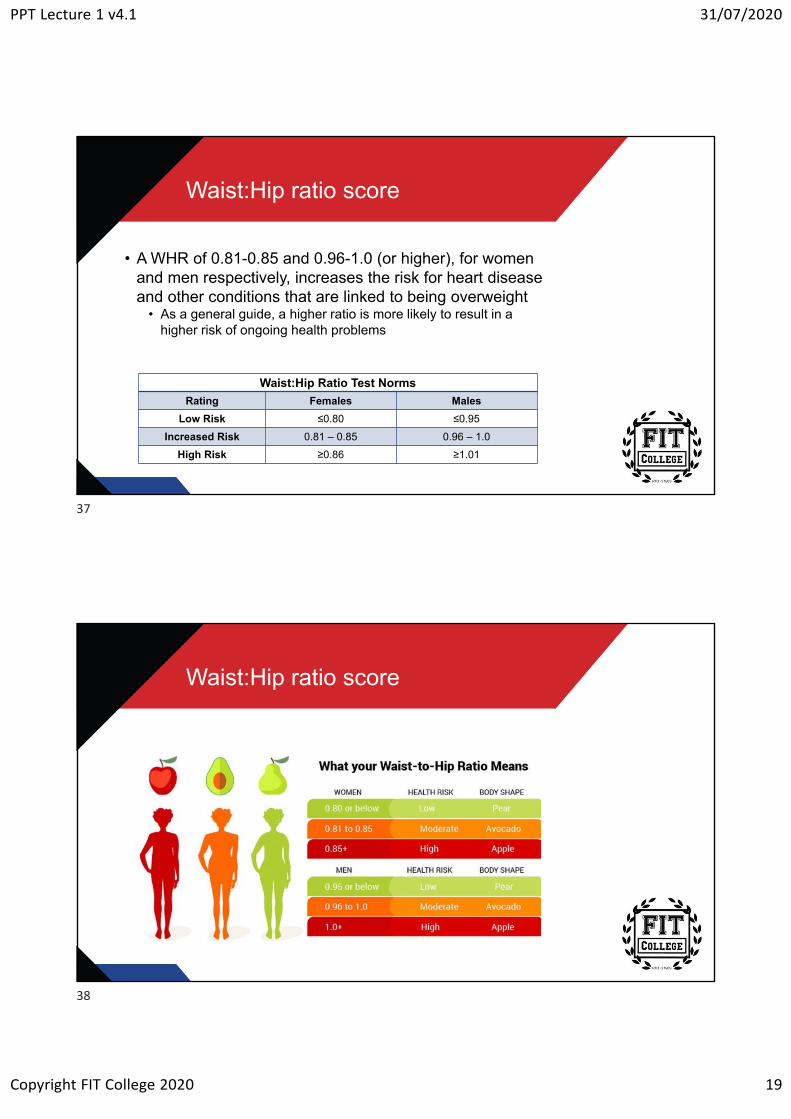
Waist:Hip ratio score
• A WHR of 0.81-0.85 and 0.96-1.0 (or higher), for women and men respectively, increases the risk for heart disease and other conditions that are linked to being overweight
• As a general guide, a higher ratio is more likely to result in a higher risk of ongoing health problems
Waist:Hip Ratio Test Norms
Rating Females Males
Low Risk ≤0.80 ≤0.95
Increased Risk 0.81 – 0.85 0.96 – 1.0
High Risk ≥0.86 ≥1.01
Waist:Hip ratio score
37
38
PPT Lecture 1 v4.1 31/07/2020
Copyright FIT College 2020 20
Waist:Height ratio
• Waist:Height ratio (WHtR) is another method to assess someone’s fat distribution, but it is much easier to calculate
• The WHtR is calculated by dividing the waist circumference (cm) by height (cm)
• Compared to just measuring waist circumference, WHtR is equally fair for short and tall people, children and adults
What do the results mean?
• Higher values of WHtR indicate a higher risk of obesity-related cardiovascular diseases (heart attack, stroke or death)
• Extremely slim: <0.34 both for men and women• Healthy: 0.43 to 0.52 for men and 0.42 to 0.48 for women• Overweight: 0.53 to 0.57 for men and 0.49 to 0.53 for women• Very overweight: 0.58 to 0.62 for men and 0.54 to 0.57 for women• Morbidly obese: >0.63 for men and >0.58 for women
• For example, a female with a 71 cm waist and is 170 cm tall has a WHtR of 0.42 and would fall into the healthy category
39
40
PPT Lecture 1 v4.1 31/07/2020
Copyright FIT College 2020 21
What do the results mean?
• Generally, both men and women should keep their waist circumference to less than half their height (<0.5)
• No increased risk: <0.5• Increased risk: ≥0.5 and 0.6• Very high risk: ≥0.6
• For people aged 40-50, the critical value increases to between 0.5 and 0.6, and for people over 50 the critical values start at 0.6
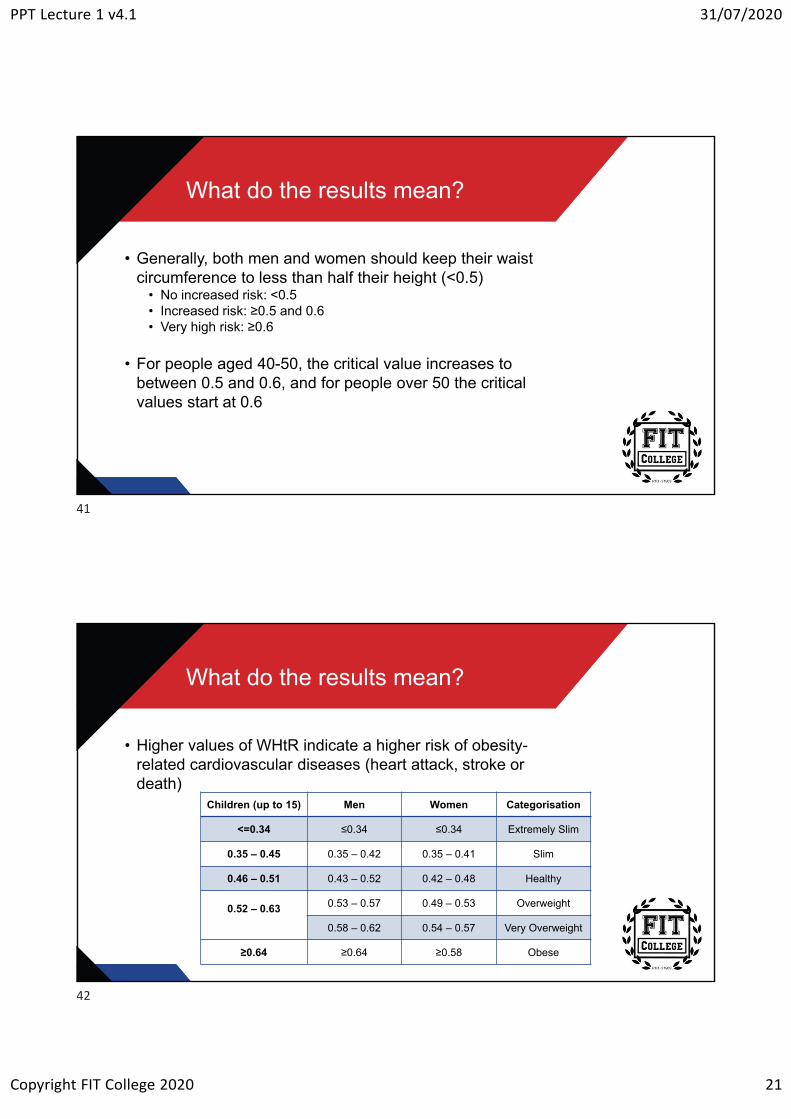
What do the results mean?
• Higher values of WHtR indicate a higher risk of obesity-related cardiovascular diseases (heart attack, stroke or death)
Children (up to 15) Men Women Categorisation
<=0.34 ≤0.34 ≤0.34 Extremely Slim
0.35 – 0.45 0.35 – 0.42 0.35 – 0.41 Slim
0.46 – 0.51 0.43 – 0.52 0.42 – 0.48 Healthy
0.52 – 0.63 0.53 – 0.57 0.49 – 0.53 Overweight
0.58 – 0.62 0.54 – 0.57 Very Overweight
≥0.64 ≥0.64 ≥0.58 Obese
41
42
PPT Lecture 1 v4.1 31/07/2020
Copyright FIT College 2020 22
Physique Science
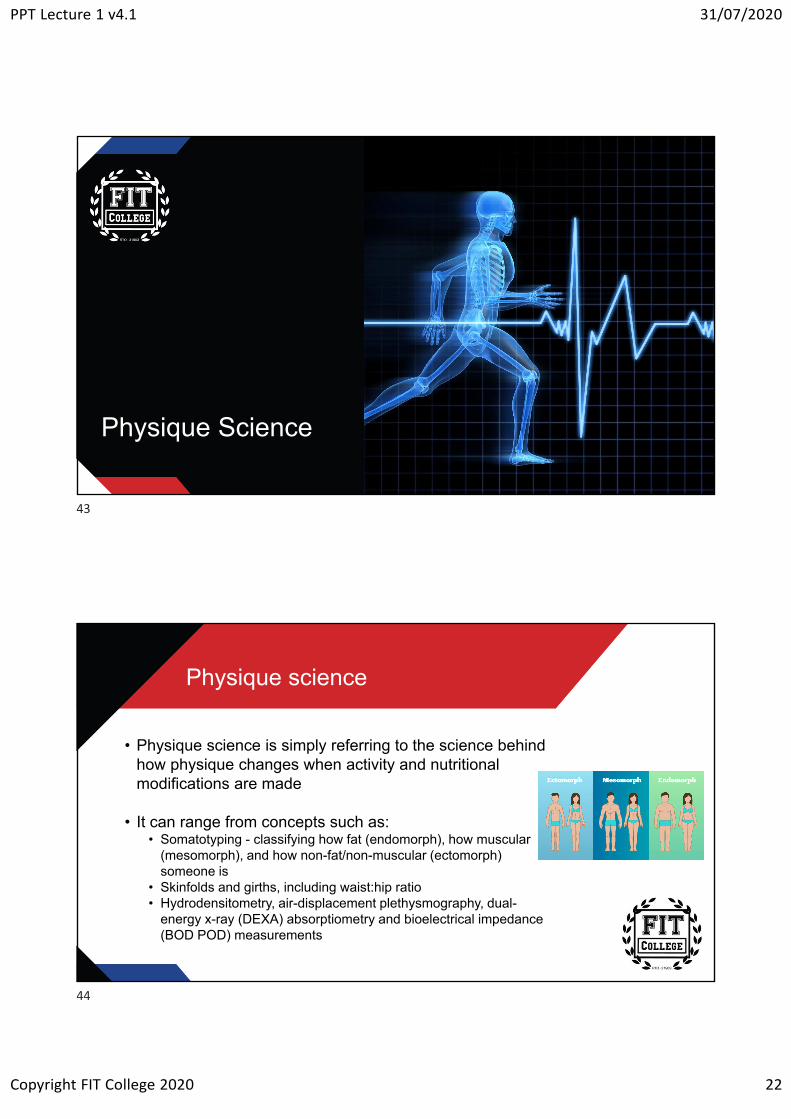
Physique science
• Physique science is simply referring to the science behind how physique changes when activity and nutritional modifications are made
• It can range from concepts such as:• Somatotyping - classifying how fat (endomorph), how muscular
(mesomorph), and how non-fat/non-muscular (ectomorph) someone is
• Skinfolds and girths, including waist:hip ratio• Hydrodensitometry, air-displacement plethysmography, dual-
energy x-ray (DEXA) absorptiometry and bioelectrical impedance (BOD POD) measurements
43
44
PPT Lecture 1 v4.1 31/07/2020
Copyright FIT College 2020 23
Physique science
• All physique science measurement methods have their pros and cons, but all of them help to track a person’s progress through lifestyle modifications
• The manual methods of assessment, e.g. skinfolds and girths, are quite inexpensive but they rely on the quality and accuracy of the person taking the measurements
• The following slides detail the most common mechanised methods of measuring body composition along with the pros and cons of each
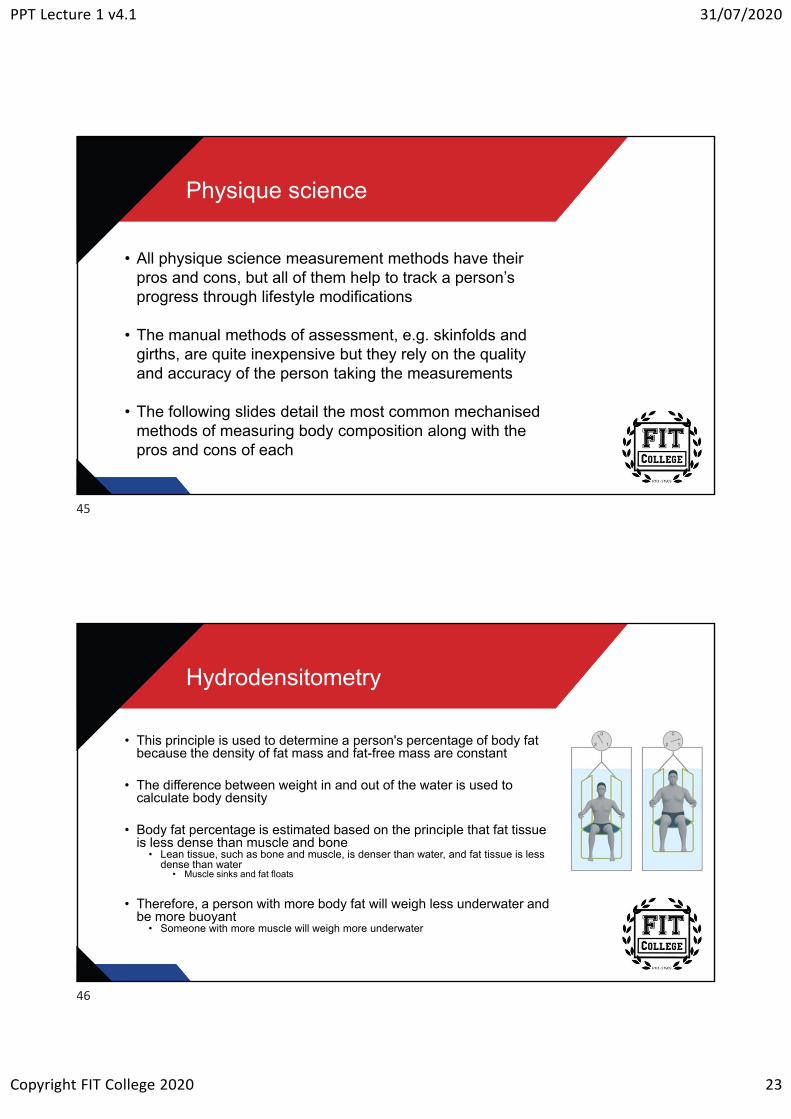
Hydrodensitometry
• This principle is used to determine a person's percentage of body fat because the density of fat mass and fat-free mass are constant
• The difference between weight in and out of the water is used to calculate body density
• Body fat percentage is estimated based on the principle that fat tissue is less dense than muscle and bone
• Lean tissue, such as bone and muscle, is denser than water, and fat tissue is less dense than water
• Muscle sinks and fat floats
• Therefore, a person with more body fat will weigh less underwater and be more buoyant
• Someone with more muscle will weigh more underwater
45
46
PPT Lecture 1 v4.1 31/07/2020
Copyright FIT College 2020 24
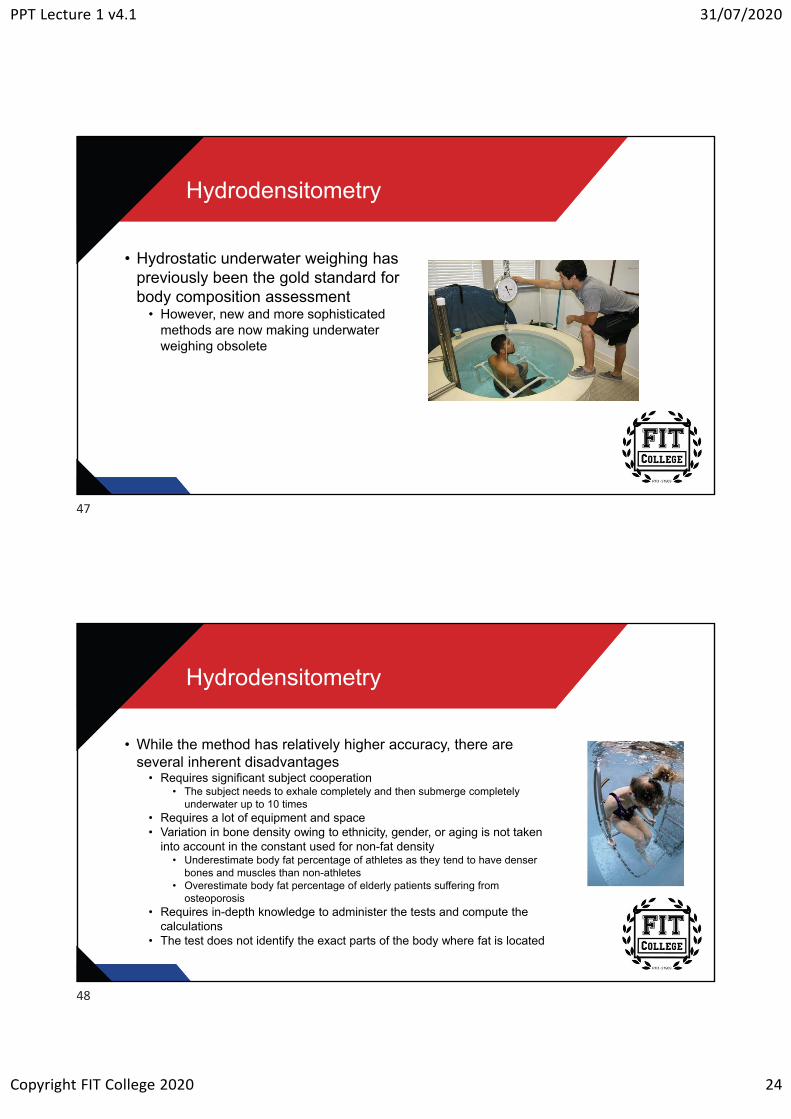
Hydrodensitometry
• Hydrostatic underwater weighing has previously been the gold standard for body composition assessment
• However, new and more sophisticated methods are now making underwater weighing obsolete
Hydrodensitometry
• While the method has relatively higher accuracy, there are several inherent disadvantages
• Requires significant subject cooperation• The subject needs to exhale completely and then submerge completely
underwater up to 10 times• Requires a lot of equipment and space• Variation in bone density owing to ethnicity, gender, or aging is not taken
into account in the constant used for non-fat density• Underestimate body fat percentage of athletes as they tend to have denser
bones and muscles than non-athletes• Overestimate body fat percentage of elderly patients suffering from
osteoporosis• Requires in-depth knowledge to administer the tests and compute the
calculations• The test does not identify the exact parts of the body where fat is located
47
48
PPT Lecture 1 v4.1 31/07/2020
Copyright FIT College 2020 25
Air displacement plethysmography
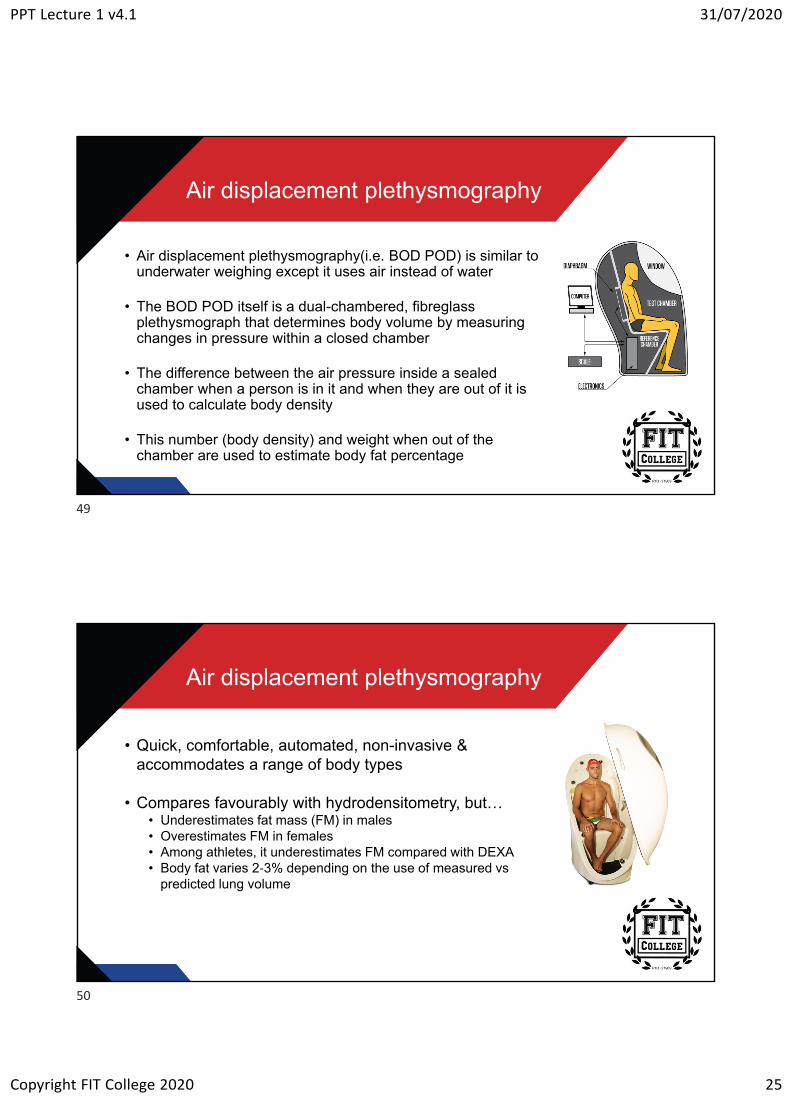
• Air displacement plethysmography(i.e. BOD POD) is similar to underwater weighing except it uses air instead of water
• The BOD POD itself is a dual-chambered, fibreglass plethysmograph that determines body volume by measuring changes in pressure within a closed chamber
• The difference between the air pressure inside a sealed chamber when a person is in it and when they are out of it is used to calculate body density
• This number (body density) and weight when out of the chamber are used to estimate body fat percentage
Air displacement plethysmography
• Quick, comfortable, automated, non-invasive & accommodates a range of body types
• Compares favourably with hydrodensitometry, but… • Underestimates fat mass (FM) in males • Overestimates FM in females• Among athletes, it underestimates FM compared with DEXA• Body fat varies 2-3% depending on the use of measured vs
predicted lung volume
49
50

PPT Lecture 1 v4.1 31/07/2020
Copyright FIT College 2020 26
Dual-energy x-ray absorptiometry
• Dual-energy x-ray absorptiometry (DEXA), is an enhanced form of x-ray technology that is used to assess the distribution of lean muscle, fat, water and bone within the body
• The DEXA body composition scan works by passing two very low dose x-ray beams at differing energy levels through the tissues of the body
• By using two different x-ray sources, rather than just one, the accuracy in measuring the tissue density is significantly improved
Dual-energy x-ray absorptiometry
• Provides detailed information on total and regional body composition• Total body bone mineral density, total body muscle mass, total body fat mass, total
body bone mass, total body fat percentage, muscle and fat mass of the trunk and each of your arms and legs and central abdominal fat measurement
• DEXA is today's established gold standard for body composition analysis
• It provides greater precision with only one measurement and shows exactly where fat is distributed
• One of the limitations of DEXA, however, is the size of the active scanning area
• Inability to measure whole-body composition of tall and/or large individuals
51
52
PPT Lecture 1 v4.1 31/07/2020
Copyright FIT College 2020 27
Bioelectrical impedance
• Bioelectrical impedance (BIA) involves passing a low-level electrical current through the body and resistance to the natural flow of electricity is measured
• Devices used for BIA measure the difference in impedance (the amount of opposition an electrical current encounters when it passes through a liquid or a solid) in the body
• Tissues with high water & electrolyte content are highly conductive• Blood, muscle
• Anhydrous tissues (without water) are highly resistive• Fat, bone, air-filled spaces
• Equations or formulas programmed into the instrument will use the readings to calculate fat mass or percentage body fat
• Bioelectrical impedance is safe, non-invasive, rapid, portable and relatively inexpensive
Bioelectrical impedance
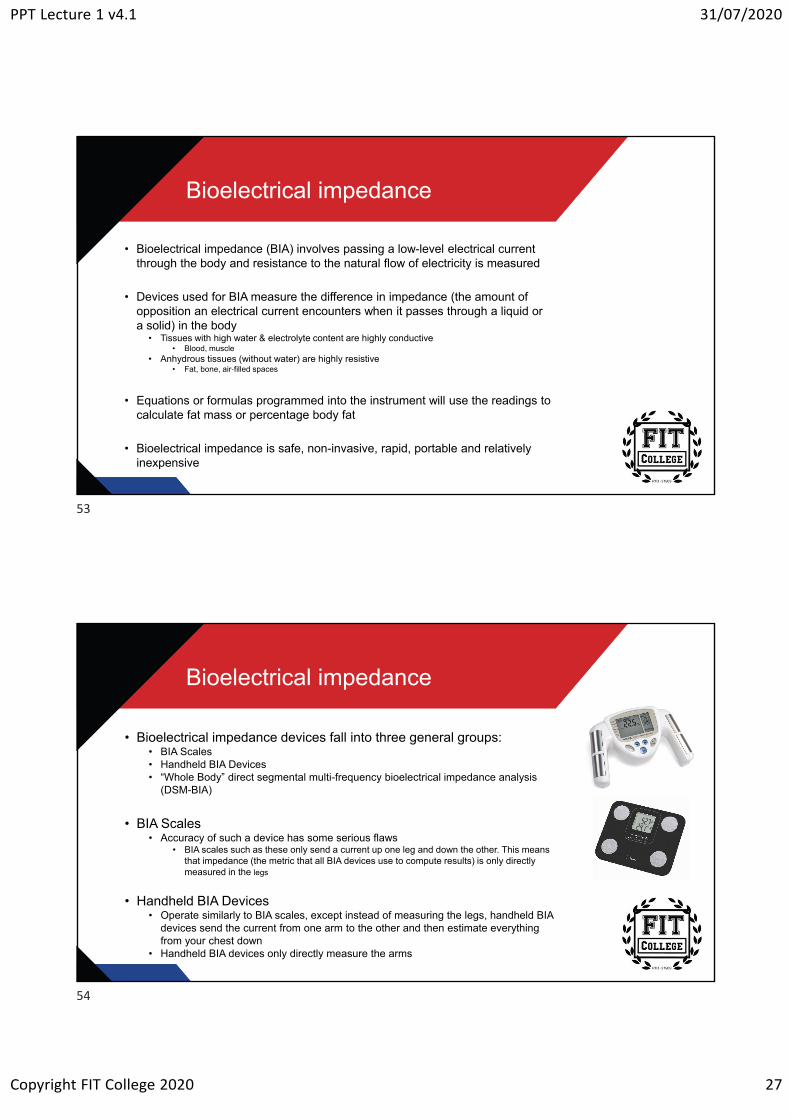
• Bioelectrical impedance devices fall into three general groups:• BIA Scales• Handheld BIA Devices• “Whole Body” direct segmental multi-frequency bioelectrical impedance analysis
(DSM-BIA)
• BIA Scales• Accuracy of such a device has some serious flaws
• BIA scales such as these only send a current up one leg and down the other. This means that impedance (the metric that all BIA devices use to compute results) is only directly measured in the legs
• Handheld BIA Devices• Operate similarly to BIA scales, except instead of measuring the legs, handheld BIA
devices send the current from one arm to the other and then estimate everything from your chest down
• Handheld BIA devices only directly measure the arms
53
54
PPT Lecture 1 v4.1 31/07/2020
Copyright FIT College 2020 28
Bioelectrical impedance
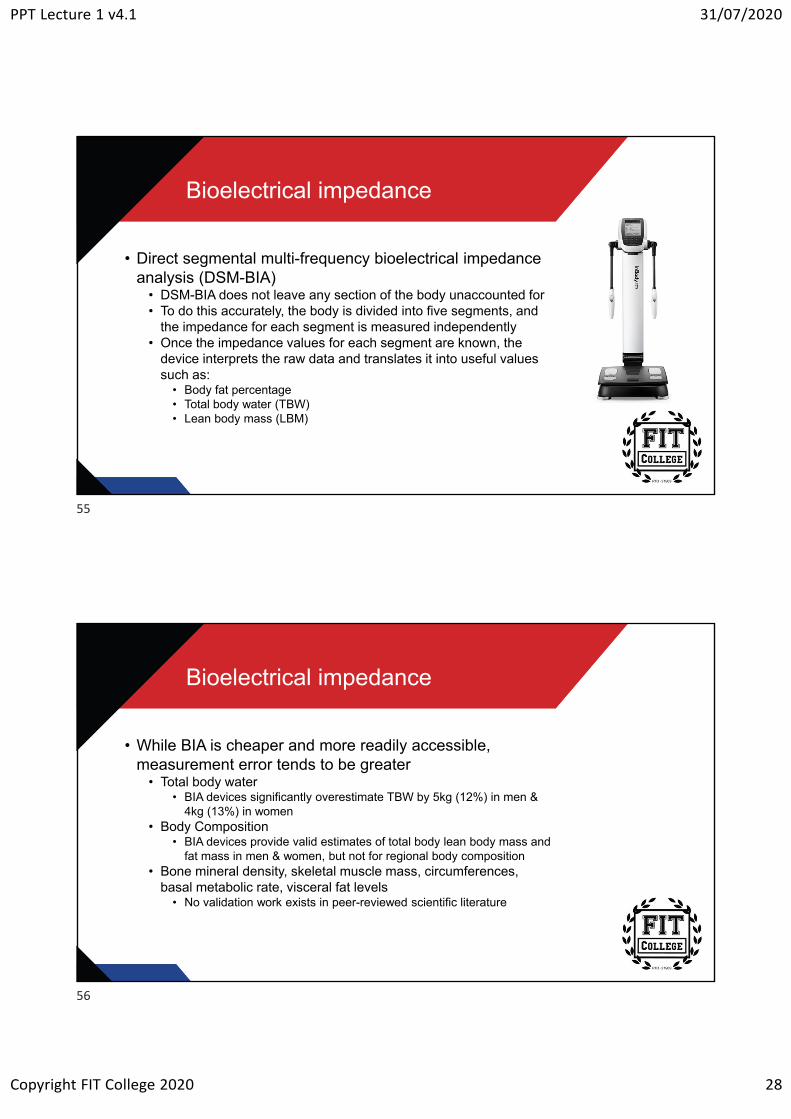
• Direct segmental multi-frequency bioelectrical impedance analysis (DSM-BIA)
• DSM-BIA does not leave any section of the body unaccounted for• To do this accurately, the body is divided into five segments, and
the impedance for each segment is measured independently• Once the impedance values for each segment are known, the
device interprets the raw data and translates it into useful values such as:
• Body fat percentage• Total body water (TBW)• Lean body mass (LBM)
Bioelectrical impedance
• While BIA is cheaper and more readily accessible, measurement error tends to be greater
• Total body water • BIA devices significantly overestimate TBW by 5kg (12%) in men &
4kg (13%) in women• Body Composition
• BIA devices provide valid estimates of total body lean body mass and fat mass in men & women, but not for regional body composition
• Bone mineral density, skeletal muscle mass, circumferences, basal metabolic rate, visceral fat levels
• No validation work exists in peer-reviewed scientific literature
55
56
PPT Lecture 1 v4.1 31/07/2020
Copyright FIT College 2020 29
Physique science
• Being able to show a person exactly how they are progressing by giving them specific numbers regarding fat loss and muscle gains can be extremely motivational in regards to keeping them on track to achieve their goals
• You need to be careful as to how you present and interpret results
• How often measurements are done, how accurate do measurements need to be, what does it mean if the person didn’t get the results they were hoping for, etc.
Anthropometry
• Anthropometry refers to the measurement of the human body
• Bone, muscle, and adipose (fat) tissue
• Anthropometry is a simple and reliable method for assessment of body composition or as a screening tool for disease risk
• Anthropometry includes measurements of body mass, height, lengths, breadths, skinfolds and girths
57
58
PPT Lecture 1 v4.1 31/07/2020
Copyright FIT College 2020 30
Anthropometry
• Anthropometric tools are moderately simple, precise, mobile and inexpensive
• The anthropometric examination is rapid and can be non-invasive (some clients may feel uncomfortable with some tests)
• The tools used for anthropometric evaluations include scales, stadiometers, tape measures and skinfold calipers
• The reliability of anthropometrics depends on standardising the caliper and site of measurement, and the measuring skill of the anthropometrist
Skinfolds
59
60
PPT Lecture 1 v4.1 31/07/2020
Copyright FIT College 2020 31
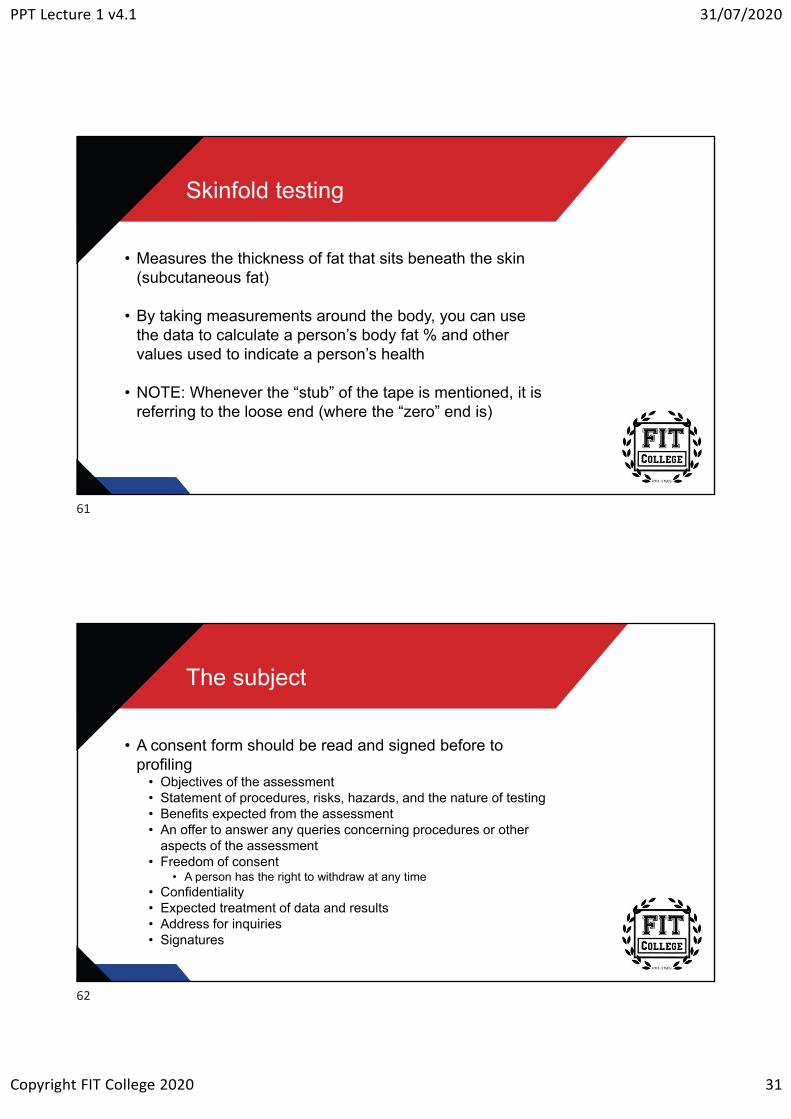
Skinfold testing
• Measures the thickness of fat that sits beneath the skin (subcutaneous fat)
• By taking measurements around the body, you can use the data to calculate a person’s body fat % and other values used to indicate a person’s health
• NOTE: Whenever the “stub” of the tape is mentioned, it is referring to the loose end (where the “zero” end is)
The subject
• A consent form should be read and signed before to profiling
• Objectives of the assessment• Statement of procedures, risks, hazards, and the nature of testing• Benefits expected from the assessment• An offer to answer any queries concerning procedures or other
aspects of the assessment• Freedom of consent
• A person has the right to withdraw at any time• Confidentiality• Expected treatment of data and results• Address for inquiries• Signatures
61
62
PPT Lecture 1 v4.1 31/07/2020
Copyright FIT College 2020 32
The subject
• Verbally explain procedures to those unfamiliar• What testing is to be undertaken• The reason for profiling• What measurements are to be taken• Positions to be assumed
The subject
• For measurements to be made as quickly and efficiently, the subjects should be asked to present themselves in minimal clothing
• Therefore, profiling must be planned in advance, e.g. clothing• Minimal thickness• Following the contours of the body• Allows access to bare areas of skin for skinfolds
• Lycra shorts• Sports tops• Two-piece swimwear
• In the matter of dress as in other concerns, you should always be sensitive to the cultural beliefs and traditions of the subject
• Therefore, the measurement room should provide for privacy and be at a comfortable temperature
63
64
PPT Lecture 1 v4.1 31/07/2020
Copyright FIT College 2020 33
The subject
• Be conscious of where you place your hands & body in relation to the subject
• It should be appreciated that everyone has an area around their body known as ‘personal space’ and that when this area is invaded, they may feel uncomfortable or threatened
• This is particularly true for the front of a person, and this is why most measurements are taken from the side or from behind: avoiding ‘personal space’
• Be mindful that some people may feel more comfortable being measured by people of the same gender
The subject
• There are some people for whom measures cannot be accurately taken
• Where values can’t be taken accurately…don’t measure• Injury• Large subcutaneous fat stores• Illness• Tight skin
• Why?• To avoid potentially very large errors and possible embarrassment of your
clients
• You should not take any measures which compromise the physical or emotional well-being of the subject
65
66

PPT Lecture 1 v4.1 31/07/2020
Copyright FIT College 2020 34
Data collection
• In general, the measurer should be able to move around the subject and manipulate the equipment easily
• This will be facilitated by setting aside adequate space for these measurement procedures
• Use the right side of the body, unless this is impractical for any reason• Comparisons indicate very little difference in skinfold thickness between the left
and right-hand side of the body
• Measurements are made in succession, meaning that we should mark all sites first, then measure everything once, then repeat all measures
• This will help to minimise• Excessive compression and experimenter bias
• If you have made a mistake on one site and then measure the same site again straight away, the odds of making the same mistake are much higher
Data collection
• Measurements MUST be repeated, or even taken a third time if required
• If the 2 measurements are more than the acceptable variation (0.5 cm for girths, 0.5 mm for skinfolds), a third measurement should be recorded
• If 2 measurements are taken use the average of the two measures• If 3 measurements are taken use the average of the three measures
• Ideally, future measurements are taken at the same time of day
• Avoid assessing post-exercise, sauna, showering, etc.• Hyperaemia (increased blood flow) • Hydration status…primarily because of the impact on body mass
67
68

PPT Lecture 1 v4.1 31/07/2020
Copyright FIT College 2020 35
Anatomical landmarks
• Landmarks are identifiable skeletal points which generally lie close to the body’s surface and are the ‘markers’ which identify the exact location of the measurement site, or from which a soft tissue site is located
• Landmarks are found by palpation (feeling) or measurement• For the comfort of the subject, the measurer’s fingernails should be
kept trimmed
Anatomical landmarks
• The site is released to remove any distortion of the skin, then is relocated and marked using a fine pen
• The site is marked directly over the landmark • The mark is then re-checked to ensure that there has been no
movement of skin away from the actual landmark
• All landmarks are identified before any measurements are made. The order of their identification is as listed in the next series of slides
• Remember, there are video resources in this topic for you to view each girth and skinfold mark-up and measurement
69
70
PPT Lecture 1 v4.1 31/07/2020
Copyright FIT College 2020 36
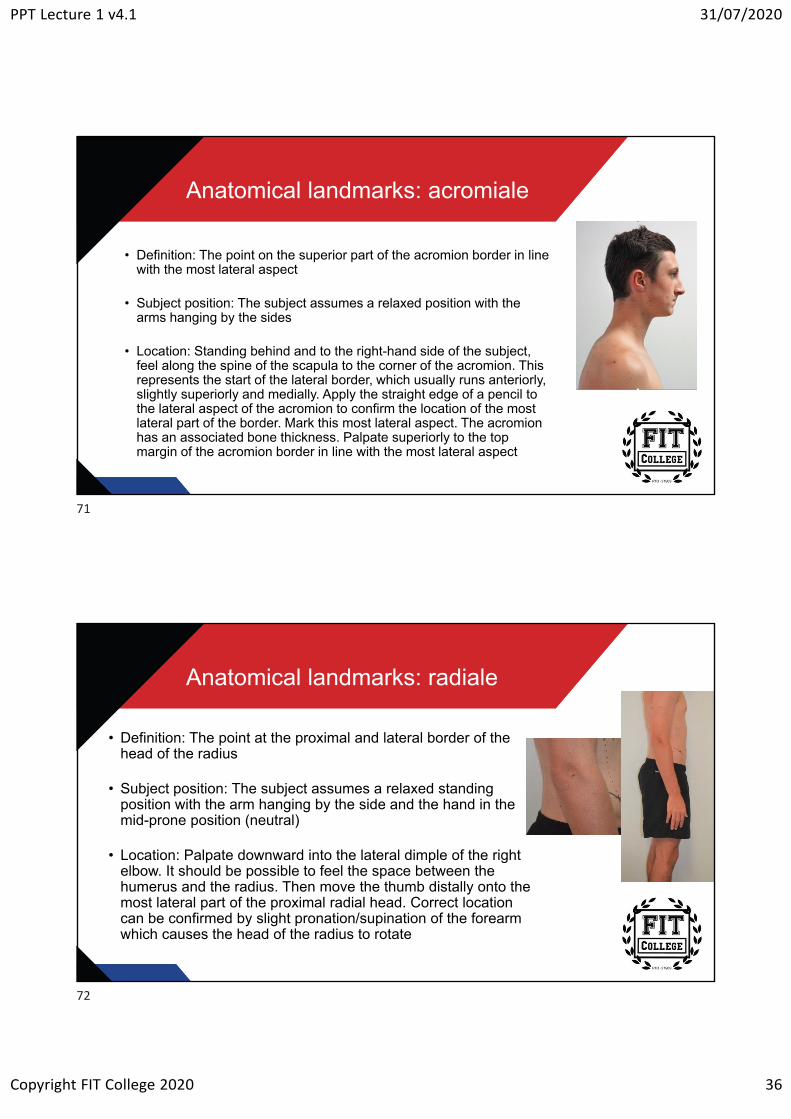
Anatomical landmarks: acromiale
• Definition: The point on the superior part of the acromion border in line with the most lateral aspect
• Subject position: The subject assumes a relaxed position with the arms hanging by the sides
• Location: Standing behind and to the right-hand side of the subject, feel along the spine of the scapula to the corner of the acromion. This represents the start of the lateral border, which usually runs anteriorly, slightly superiorly and medially. Apply the straight edge of a pencil to the lateral aspect of the acromion to confirm the location of the most lateral part of the border. Mark this most lateral aspect. The acromion has an associated bone thickness. Palpate superiorly to the top margin of the acromion border in line with the most lateral aspect
Anatomical landmarks: radiale
• Definition: The point at the proximal and lateral border of the head of the radius
• Subject position: The subject assumes a relaxed standing position with the arm hanging by the side and the hand in the mid-prone position (neutral)
• Location: Palpate downward into the lateral dimple of the right elbow. It should be possible to feel the space between the humerus and the radius. Then move the thumb distally onto the most lateral part of the proximal radial head. Correct location can be confirmed by slight pronation/supination of the forearm which causes the head of the radius to rotate
71
72
PPT Lecture 1 v4.1 31/07/2020
Copyright FIT College 2020 37
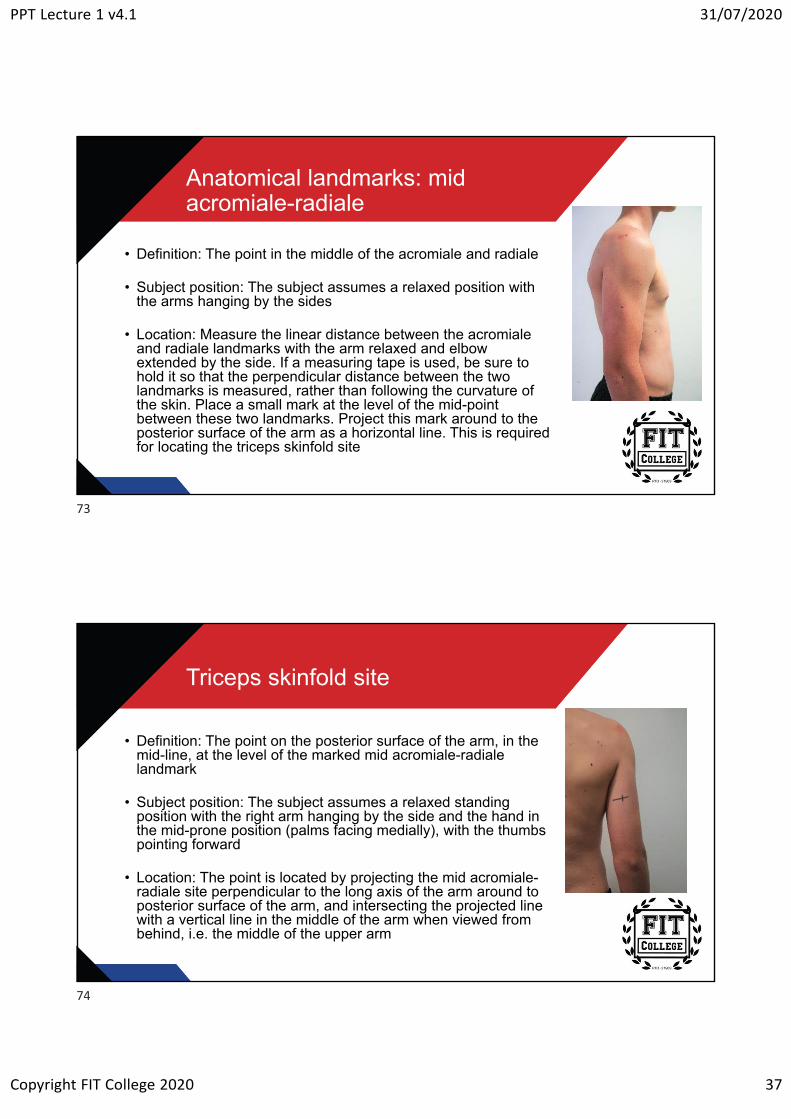
Anatomical landmarks: mid acromiale-radiale
• Definition: The point in the middle of the acromiale and radiale
• Subject position: The subject assumes a relaxed position with the arms hanging by the sides
• Location: Measure the linear distance between the acromiale and radiale landmarks with the arm relaxed and elbow extended by the side. If a measuring tape is used, be sure to hold it so that the perpendicular distance between the two landmarks is measured, rather than following the curvature of the skin. Place a small mark at the level of the mid-point between these two landmarks. Project this mark around to the posterior surface of the arm as a horizontal line. This is required for locating the triceps skinfold site
Triceps skinfold site
• Definition: The point on the posterior surface of the arm, in the mid-line, at the level of the marked mid acromiale-radiale landmark
• Subject position: The subject assumes a relaxed standing position with the right arm hanging by the side and the hand in the mid-prone position (palms facing medially), with the thumbs pointing forward
• Location: The point is located by projecting the mid acromiale-radiale site perpendicular to the long axis of the arm around to posterior surface of the arm, and intersecting the projected line with a vertical line in the middle of the arm when viewed from behind, i.e. the middle of the upper arm
73
74
PPT Lecture 1 v4.1 31/07/2020
Copyright FIT College 2020 38
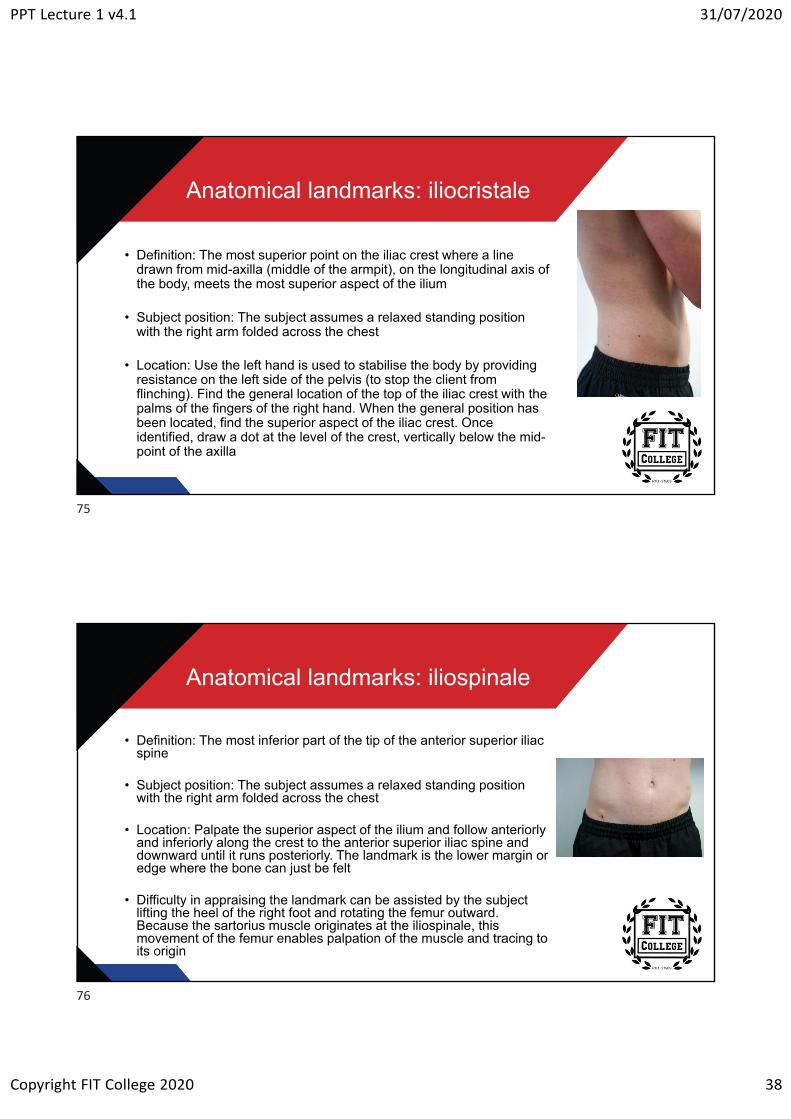
Anatomical landmarks: iliocristale
• Definition: The most superior point on the iliac crest where a line drawn from mid-axilla (middle of the armpit), on the longitudinal axis of the body, meets the most superior aspect of the ilium
• Subject position: The subject assumes a relaxed standing position with the right arm folded across the chest
• Location: Use the left hand is used to stabilise the body by providing resistance on the left side of the pelvis (to stop the client from flinching). Find the general location of the top of the iliac crest with the palms of the fingers of the right hand. When the general position has been located, find the superior aspect of the iliac crest. Once identified, draw a dot at the level of the crest, vertically below the mid-point of the axilla
Anatomical landmarks: iliospinale
• Definition: The most inferior part of the tip of the anterior superior iliac spine
• Subject position: The subject assumes a relaxed standing position with the right arm folded across the chest
• Location: Palpate the superior aspect of the ilium and follow anteriorly and inferiorly along the crest to the anterior superior iliac spine and downward until it runs posteriorly. The landmark is the lower margin or edge where the bone can just be felt
• Difficulty in appraising the landmark can be assisted by the subject lifting the heel of the right foot and rotating the femur outward. Because the sartorius muscle originates at the iliospinale, this movement of the femur enables palpation of the muscle and tracing to its origin
75
76
PPT Lecture 1 v4.1 31/07/2020
Copyright FIT College 2020 39
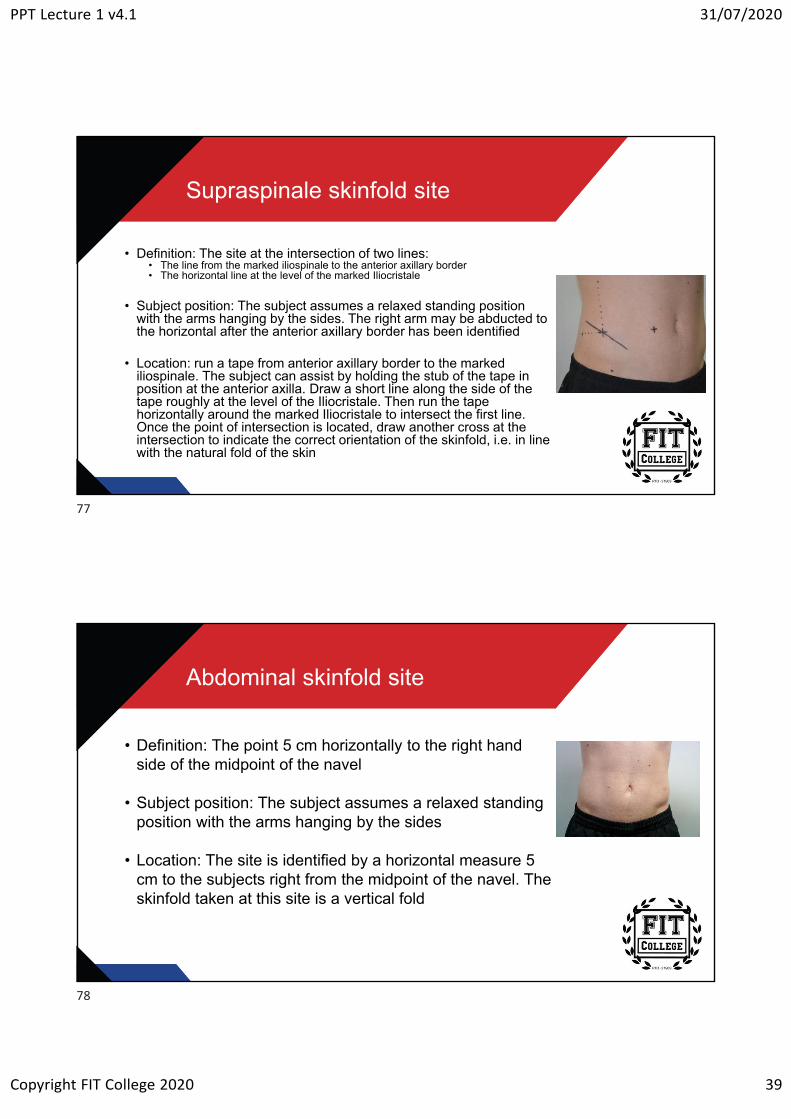
Supraspinale skinfold site
• Definition: The site at the intersection of two lines:• The line from the marked iliospinale to the anterior axillary border• The horizontal line at the level of the marked Iliocristale
• Subject position: The subject assumes a relaxed standing position with the arms hanging by the sides. The right arm may be abducted to the horizontal after the anterior axillary border has been identified
• Location: run a tape from anterior axillary border to the marked iliospinale. The subject can assist by holding the stub of the tape in position at the anterior axilla. Draw a short line along the side of the tape roughly at the level of the Iliocristale. Then run the tape horizontally around the marked Iliocristale to intersect the first line. Once the point of intersection is located, draw another cross at the intersection to indicate the correct orientation of the skinfold, i.e. in line with the natural fold of the skin
Abdominal skinfold site
• Definition: The point 5 cm horizontally to the right hand side of the midpoint of the navel
• Subject position: The subject assumes a relaxed standing position with the arms hanging by the sides
• Location: The site is identified by a horizontal measure 5 cm to the subjects right from the midpoint of the navel. The skinfold taken at this site is a vertical fold
77
78
PPT Lecture 1 v4.1 31/07/2020
Copyright FIT College 2020 40
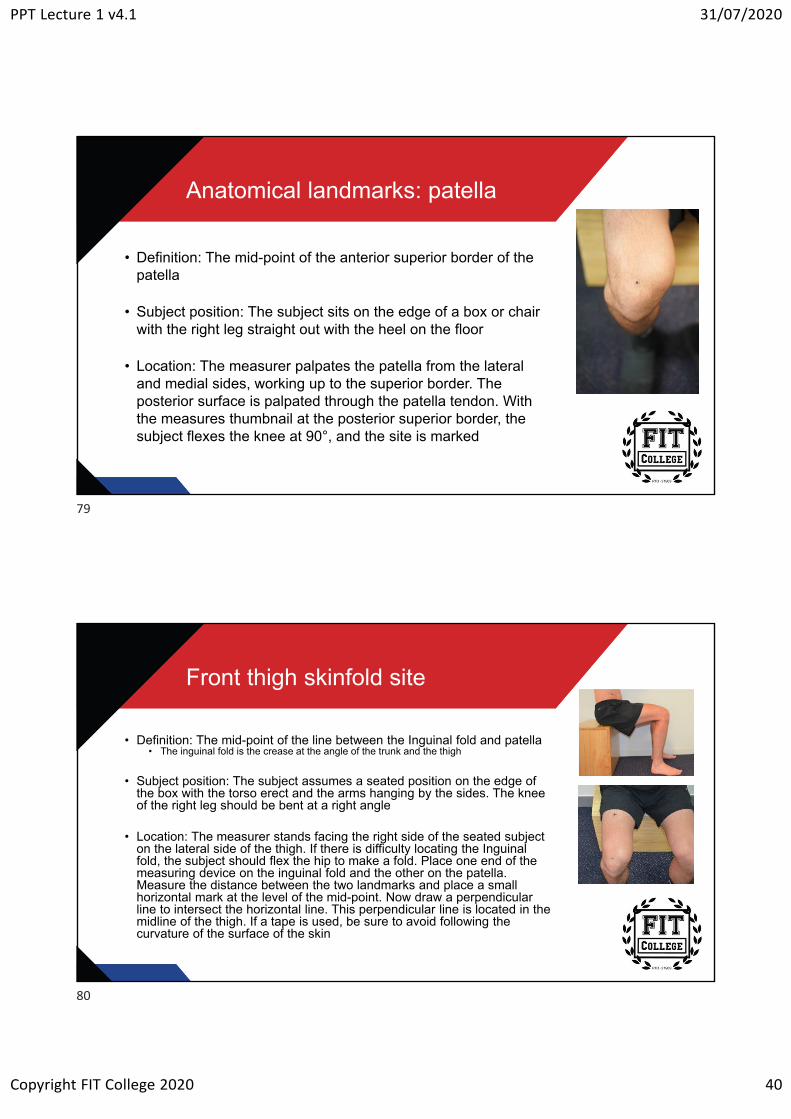
Anatomical landmarks: patella
• Definition: The mid-point of the anterior superior border of the patella
• Subject position: The subject sits on the edge of a box or chair with the right leg straight out with the heel on the floor
• Location: The measurer palpates the patella from the lateral and medial sides, working up to the superior border. The posterior surface is palpated through the patella tendon. With the measures thumbnail at the posterior superior border, the subject flexes the knee at 90°, and the site is marked
Front thigh skinfold site
• Definition: The mid-point of the line between the Inguinal fold and patella• The inguinal fold is the crease at the angle of the trunk and the thigh
• Subject position: The subject assumes a seated position on the edge of the box with the torso erect and the arms hanging by the sides. The knee of the right leg should be bent at a right angle
• Location: The measurer stands facing the right side of the seated subject on the lateral side of the thigh. If there is difficulty locating the Inguinal fold, the subject should flex the hip to make a fold. Place one end of the measuring device on the inguinal fold and the other on the patella. Measure the distance between the two landmarks and place a small horizontal mark at the level of the mid-point. Now draw a perpendicular line to intersect the horizontal line. This perpendicular line is located in the midline of the thigh. If a tape is used, be sure to avoid following the curvature of the surface of the skin
79
80

PPT Lecture 1 v4.1 31/07/2020
Copyright FIT College 2020 41
General technique for taking skinfolds
• The skinfold site should be carefully located using the correct anatomical landmarks
• Marking the skin with a fine-tipped felt-tip pen for all skinfold landmarks minimises location errors for repeat measures
• Inaccurate location of skinfold sites is the greatest source of error
General technique for taking skinfolds
• The skinfold is picked up at the marked site
• The near edge of the thumb and finger are in line with the shorter line of the landmark, perpendicular to the skinfold orientation
• The back of the hand should be facing the measurer
81
82
PPT Lecture 1 v4.1 31/07/2020
Copyright FIT College 2020 42
General technique for taking skinfolds
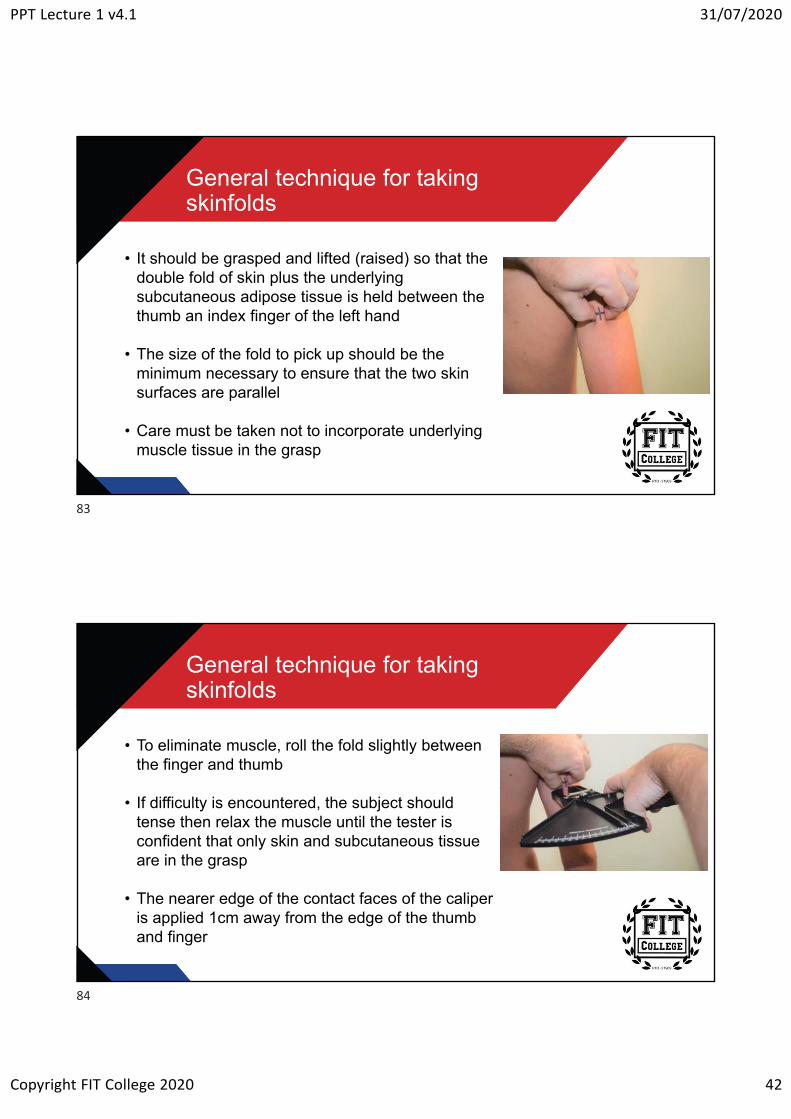
• It should be grasped and lifted (raised) so that the double fold of skin plus the underlying subcutaneous adipose tissue is held between the thumb an index finger of the left hand
• The size of the fold to pick up should be the minimum necessary to ensure that the two skin surfaces are parallel
• Care must be taken not to incorporate underlying muscle tissue in the grasp
General technique for taking skinfolds
• To eliminate muscle, roll the fold slightly between the finger and thumb
• If difficulty is encountered, the subject should tense then relax the muscle until the tester is confident that only skin and subcutaneous tissue are in the grasp
• The nearer edge of the contact faces of the caliper is applied 1cm away from the edge of the thumb and finger
83
84
PPT Lecture 1 v4.1 31/07/2020
Copyright FIT College 2020 43
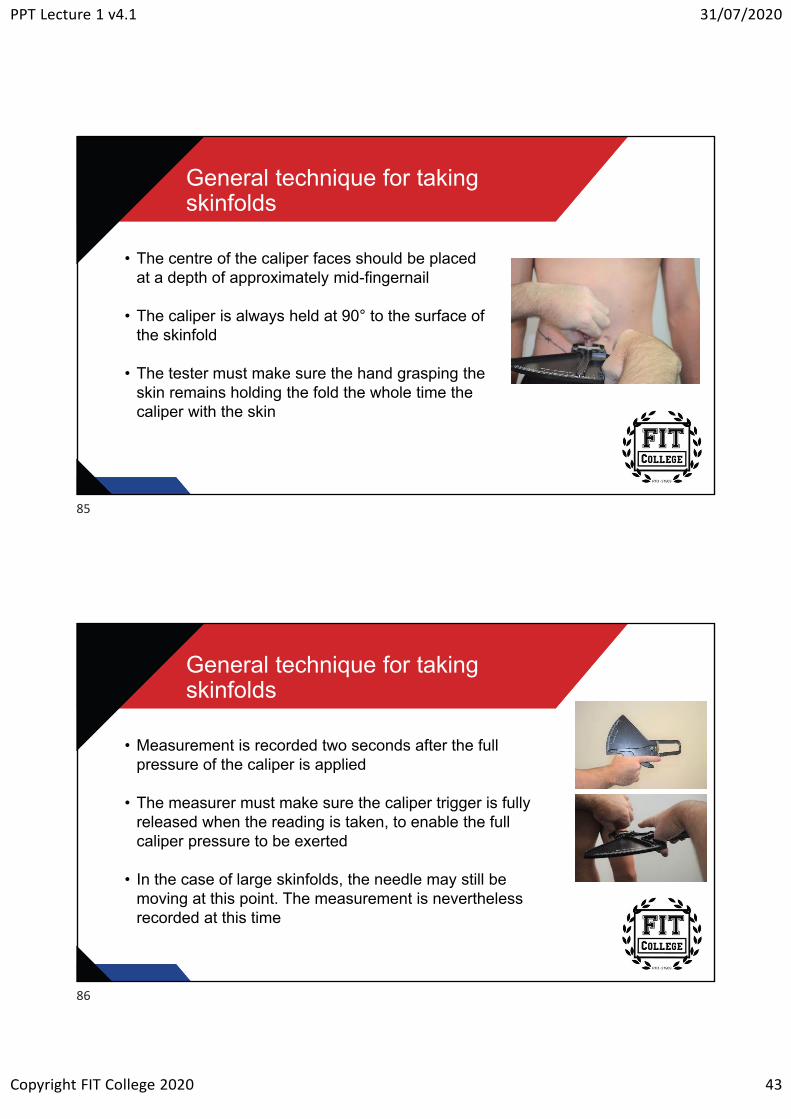
General technique for taking skinfolds
• The centre of the caliper faces should be placed at a depth of approximately mid-fingernail
• The caliper is always held at 90° to the surface of the skinfold
• The tester must make sure the hand grasping the skin remains holding the fold the whole time the caliper with the skin
General technique for taking skinfolds
• Measurement is recorded two seconds after the full pressure of the caliper is applied
• The measurer must make sure the caliper trigger is fully released when the reading is taken, to enable the full caliper pressure to be exerted
• In the case of large skinfolds, the needle may still be moving at this point. The measurement is nevertheless recorded at this time
85
86

PPT Lecture 1 v4.1 31/07/2020
Copyright FIT College 2020 44
General technique for taking skinfolds
• Skinfold sites should be measured in succession• That is, a complete set of skinfolds is obtained before repeating
the measurements for the second and then a third time
• The skinfolds should be measured in the same order as listed on the form so that errors are minimised
• Skinfold measurements should not be taken after training, completion, sauna, swimming and showering. This is because exercise, warm water and heat produce hyperemia(increased blood flow) in the skin with a natural increase in skinfold thickness
Skinfold sites
• Folds are either vertical, horizontal or diagonal
• Skinfold measurements are taken only on the right side of the body to ensure consistency and reliability of results
• Landmarks are marked with a dot or a short (0.5cm) line
• Actual skinfold sites are marked with a cross• Tricep• Supra spinale• Abdominal• Mid-thigh
87
88
PPT Lecture 1 v4.1 31/07/2020
Copyright FIT College 2020 45
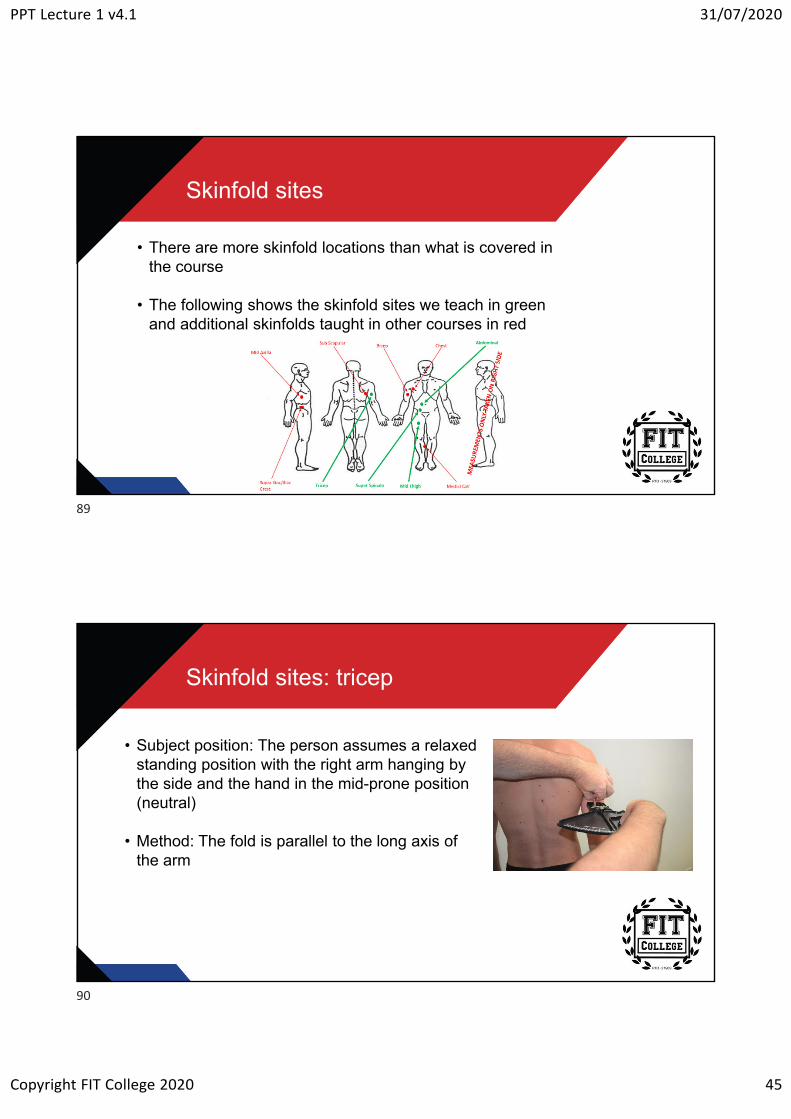
Skinfold sites
• There are more skinfold locations than what is covered in the course
• The following shows the skinfold sites we teach in green and additional skinfolds taught in other courses in red
Skinfold sites: tricep
• Subject position: The person assumes a relaxed standing position with the right arm hanging by the side and the hand in the mid-prone position (neutral)
• Method: The fold is parallel to the long axis of the arm
89
90
PPT Lecture 1 v4.1 31/07/2020
Copyright FIT College 2020 46
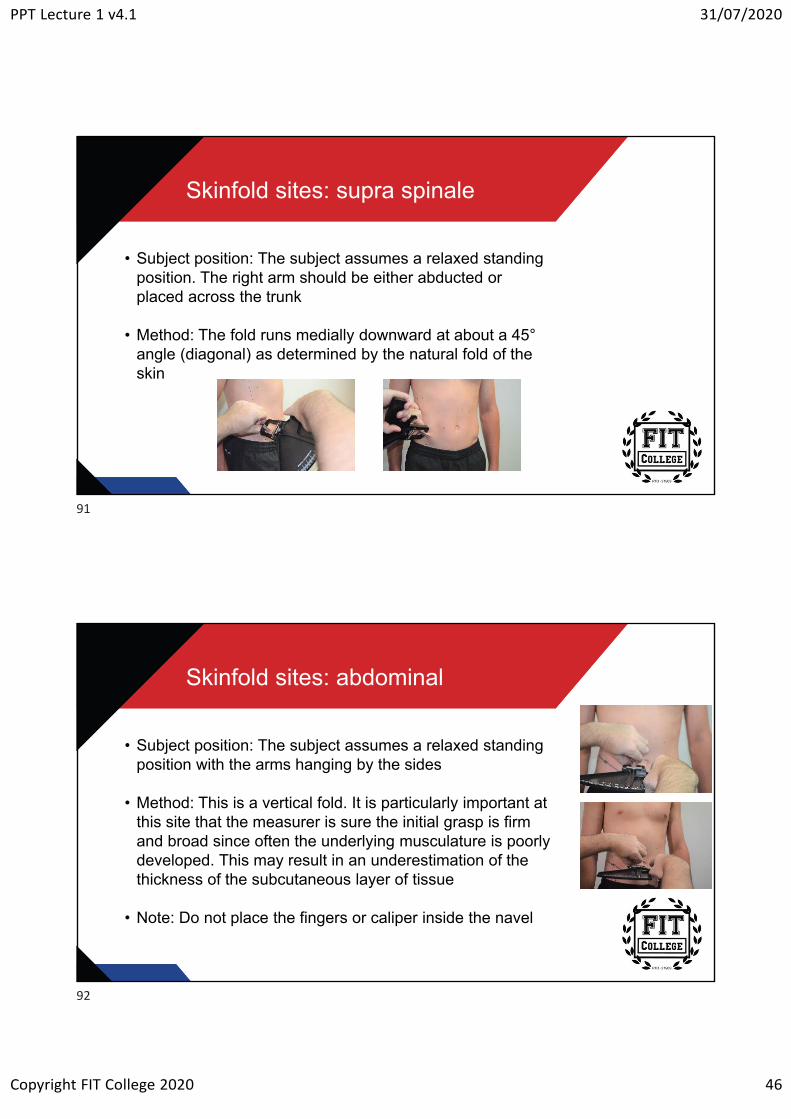
Skinfold sites: supra spinale
• Subject position: The subject assumes a relaxed standing position. The right arm should be either abducted or placed across the trunk
• Method: The fold runs medially downward at about a 45°angle (diagonal) as determined by the natural fold of the skin
Skinfold sites: abdominal
• Subject position: The subject assumes a relaxed standing position with the arms hanging by the sides
• Method: This is a vertical fold. It is particularly important at this site that the measurer is sure the initial grasp is firm and broad since often the underlying musculature is poorly developed. This may result in an underestimation of the thickness of the subcutaneous layer of tissue
• Note: Do not place the fingers or caliper inside the navel
91
92
PPT Lecture 1 v4.1 31/07/2020
Copyright FIT College 2020 47
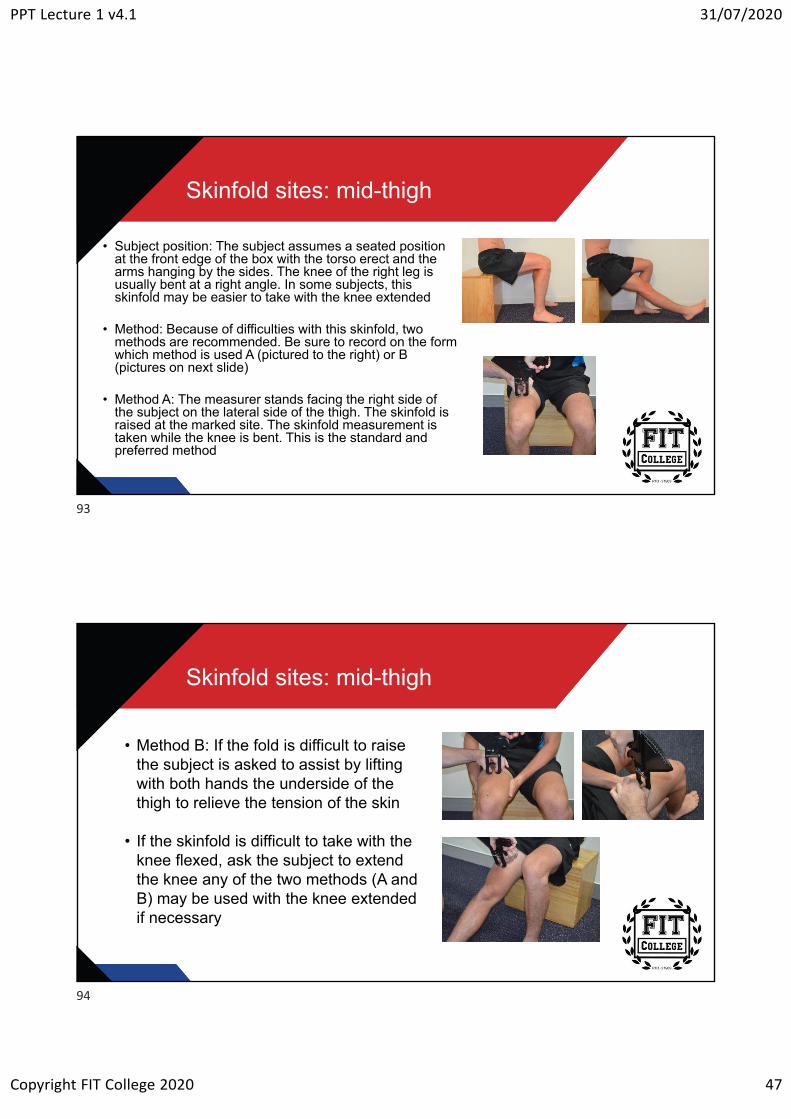
Skinfold sites: mid-thigh
• Subject position: The subject assumes a seated position at the front edge of the box with the torso erect and the arms hanging by the sides. The knee of the right leg is usually bent at a right angle. In some subjects, this skinfold may be easier to take with the knee extended
• Method: Because of difficulties with this skinfold, two methods are recommended. Be sure to record on the form which method is used A (pictured to the right) or B (pictures on next slide)
• Method A: The measurer stands facing the right side of the subject on the lateral side of the thigh. The skinfold is raised at the marked site. The skinfold measurement is taken while the knee is bent. This is the standard and preferred method
Skinfold sites: mid-thigh
• Method B: If the fold is difficult to raise the subject is asked to assist by lifting with both hands the underside of the thigh to relieve the tension of the skin
• If the skinfold is difficult to take with the knee flexed, ask the subject to extend the knee any of the two methods (A and B) may be used with the knee extended if necessary
93
94
PPT Lecture 1 v4.1 31/07/2020
Copyright FIT College 2020 48
Data interpretation
• You will need to deliver information on a level which is easily understood by the general population
• While there are many equations used to estimate body fat per cent, we will be using the Jackson-Pollock 4 method
• Tricep + supra spinale + abdominal + thigh
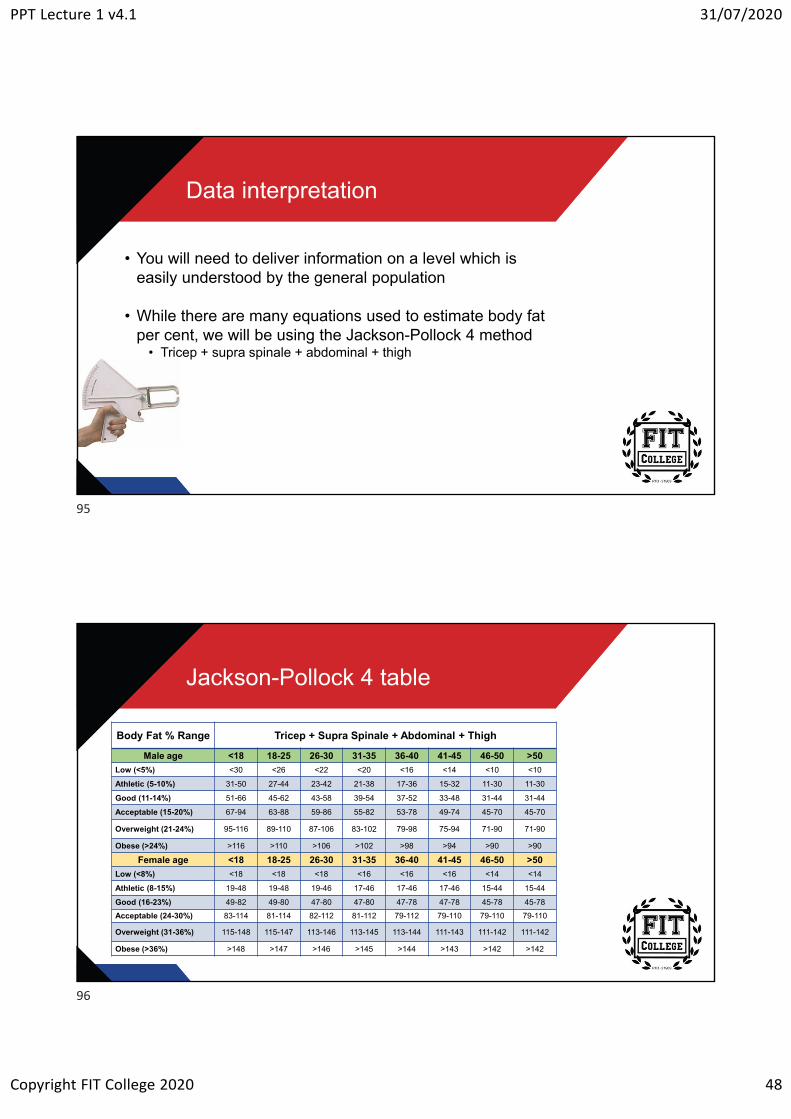
Jackson-Pollock 4 table
Body Fat % Range Tricep + Supra Spinale + Abdominal + Thigh
Male age <18 18-25 26-30 31-35 36-40 41-45 46-50 >50
Low (<5%) <30 <26 <22 <20 <16 <14 <10 <10
Athletic (5-10%) 31-50 27-44 23-42 21-38 17-36 15-32 11-30 11-30
Good (11-14%) 51-66 45-62 43-58 39-54 37-52 33-48 31-44 31-44
Acceptable (15-20%) 67-94 63-88 59-86 55-82 53-78 49-74 45-70 45-70
Overweight (21-24%) 95-116 89-110 87-106 83-102 79-98 75-94 71-90 71-90
Obese (>24%) >116 >110 >106 >102 >98 >94 >90 >90
Female age <18 18-25 26-30 31-35 36-40 41-45 46-50 >50
Low (<8%) <18 <18 <18 <16 <16 <16 <14 <14
Athletic (8-15%) 19-48 19-48 19-46 17-46 17-46 17-46 15-44 15-44
Good (16-23%) 49-82 49-80 47-80 47-80 47-78 47-78 45-78 45-78
Acceptable (24-30%) 83-114 81-114 82-112 81-112 79-112 79-110 79-110 79-110
Overweight (31-36%) 115-148 115-147 113-146 113-145 113-144 111-143 111-142 111-142
Obese (>36%) >148 >147 >146 >145 >144 >143 >142 >142
95
96
PPT Lecture 1 v4.1 31/07/2020
Copyright FIT College 2020 49
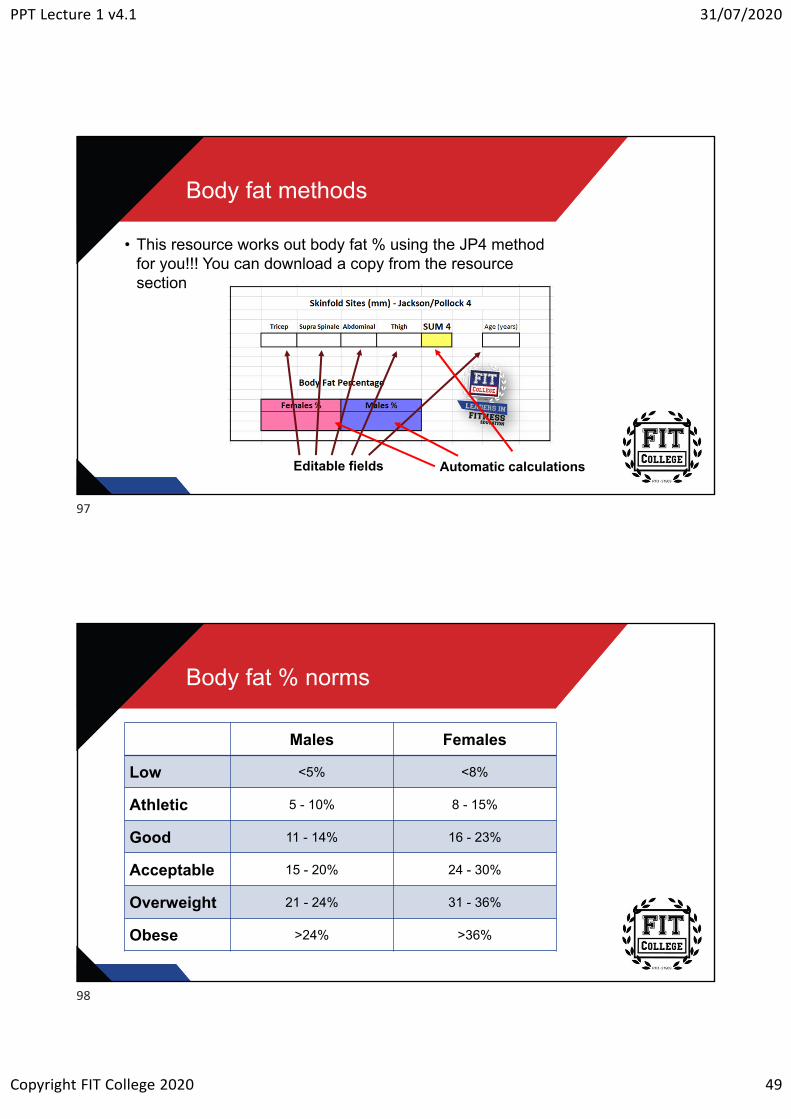
Body fat methods
• This resource works out body fat % using the JP4 method for you!!! You can download a copy from the resource section
Automatic calculationsEditable fields
Body fat % norms
Males Females
Low <5% <8%
Athletic 5 - 10% 8 - 15%
Good 11 - 14% 16 - 23%
Acceptable 15 - 20% 24 - 30%
Overweight 21 - 24% 31 - 36%
Obese >24% >36%
97
98
PPT Lecture 1 v4.1 31/07/2020
Copyright FIT College 2020 50
Body fat per cent norms
• Always remember, these tables are not intended to be used to “categorise” a person
• Depending on current health levels, “categorising” a person can often be quite demoralising
• They are more for you to use as a guide only• Still needs to be aimed at the person’s SMART goals
Girths
99
100

PPT Lecture 1 v4.1 31/07/2020
Copyright FIT College 2020 51
Girth measurements
• Girth measurements are a great method of showing the change in a person’s body size over time
• Girth measurements are becoming more and more popular amongst personal trainers
• This is because they do not require expensive equipment or years of training to perfect and produce reliable measurements
Techniques for measuring girths
• The cross-hand technique is used for measuring all girths?
• In measuring girths, the tape is held at right angles to the limb or body segment which is being measured, and the tension of the tape must be constant
• Constant tension is achieved by ensuring that there is no indentation of the skin, but the tape holds its place at the designated landmark
• The objective is to minimise the gaps between the tape and the skin and to minimise indentations of the skin wherever possible
• This is not always achievable, where the contour of the surface of the skin becomes concave
• For example, across the spinal column, continuous contact with the skin is neither achievable nor desirable
101
102
PPT Lecture 1 v4.1 31/07/2020
Copyright FIT College 2020 52
Techniques for measuring girths
• To position the tape, hold the case in the right hand and the stub in the left
• Facing the body part to be measured, pass the stub end around the back of the limb and take hold of the stub with the right hand which then holds both the stub and the casing
• At this point, the left hand is free to manipulate the tape to the correct level
• Apply sufficient tension to the tape with the right hand to hold it at that position while the left hand reaches underneath the casing to take hold of the stub again
• The tape is now around the part to be measured
Techniques for measuring girths
• The middle fingers of both hands are free to locate the tape at the landmark for measurement and to orientate the tape so that the zero is easily read
• The nearness of the tape ensures that there is contact of the two parts of the tape from which the girth is determined
• When reading the tape, the measurer’s eyes must be at the same level as the tape to avoid any errors
103
104
PPT Lecture 1 v4.1 31/07/2020
Copyright FIT College 2020 53
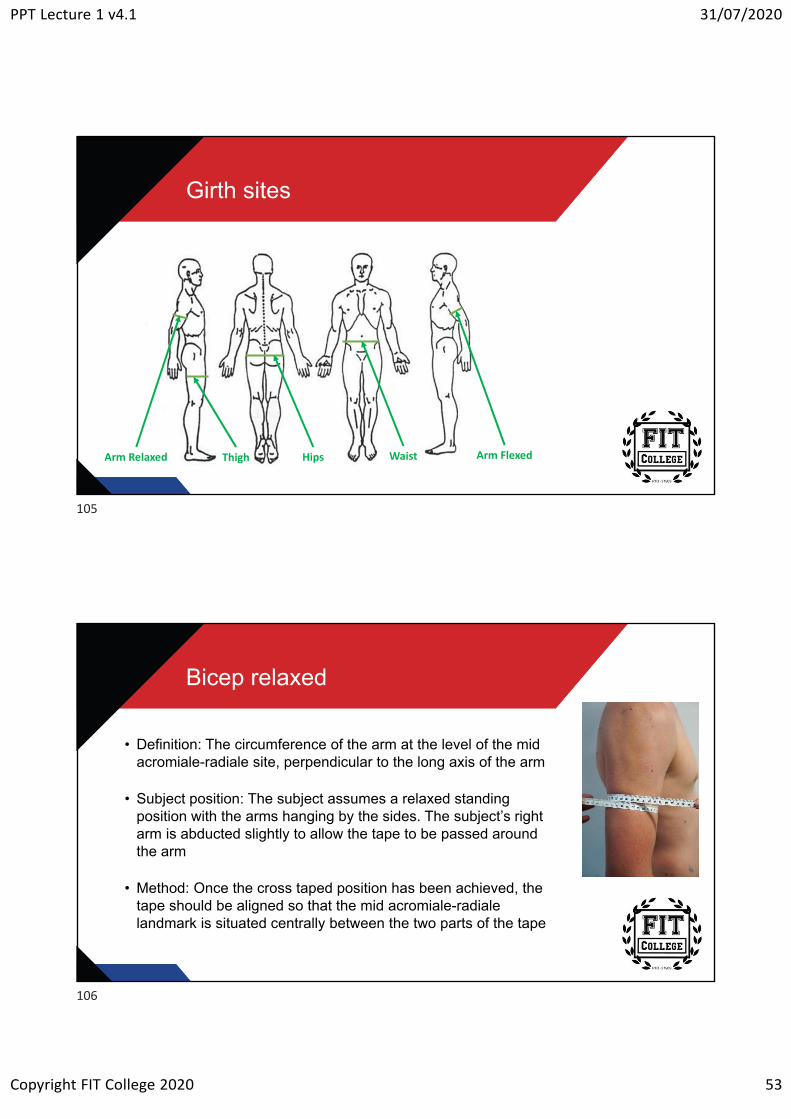
Girth sites
Arm Relaxed Thigh Hips Waist Arm Flexed
Bicep relaxed
• Definition: The circumference of the arm at the level of the mid acromiale-radiale site, perpendicular to the long axis of the arm
• Subject position: The subject assumes a relaxed standing position with the arms hanging by the sides. The subject’s right arm is abducted slightly to allow the tape to be passed around the arm
• Method: Once the cross taped position has been achieved, the tape should be aligned so that the mid acromiale-radiale landmark is situated centrally between the two parts of the tape
105
106
PPT Lecture 1 v4.1 31/07/2020
Copyright FIT College 2020 54
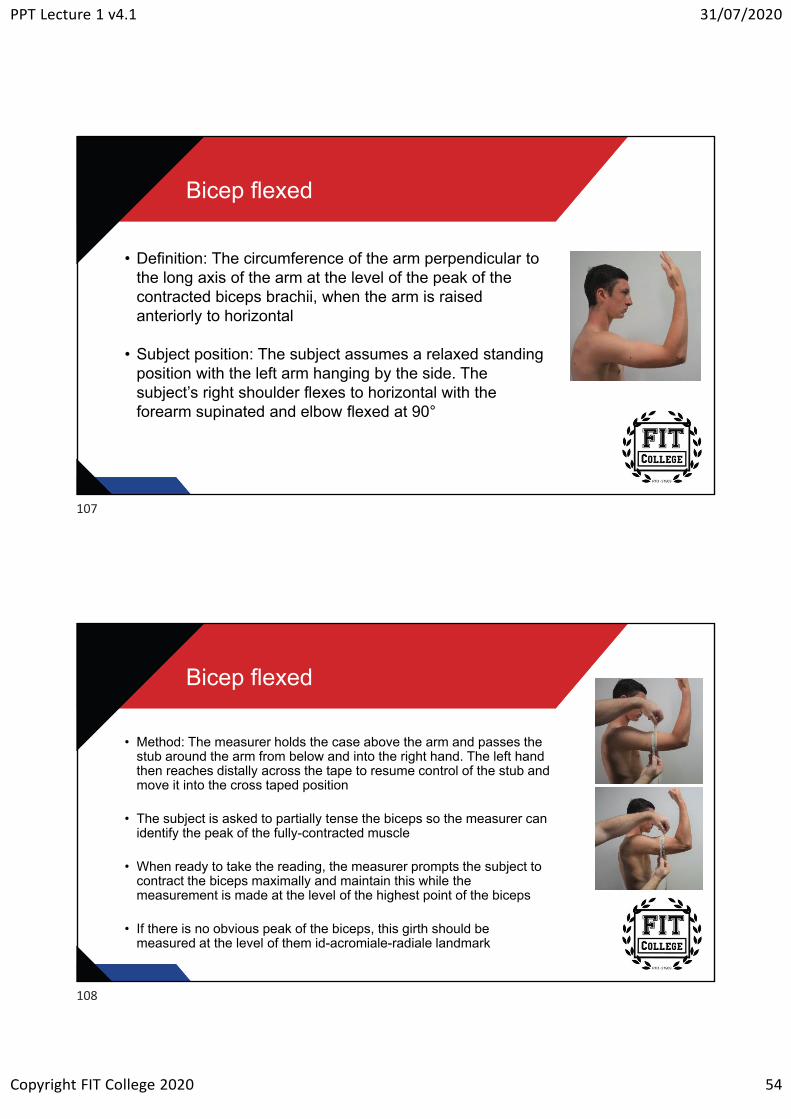
Bicep flexed
• Definition: The circumference of the arm perpendicular to the long axis of the arm at the level of the peak of the contracted biceps brachii, when the arm is raised anteriorly to horizontal
• Subject position: The subject assumes a relaxed standing position with the left arm hanging by the side. The subject’s right shoulder flexes to horizontal with the forearm supinated and elbow flexed at 90°
Bicep flexed
• Method: The measurer holds the case above the arm and passes the stub around the arm from below and into the right hand. The left hand then reaches distally across the tape to resume control of the stub and move it into the cross taped position
• The subject is asked to partially tense the biceps so the measurer can identify the peak of the fully-contracted muscle
• When ready to take the reading, the measurer prompts the subject to contract the biceps maximally and maintain this while the measurement is made at the level of the highest point of the biceps
• If there is no obvious peak of the biceps, this girth should be measured at the level of them id-acromiale-radiale landmark
107
108
PPT Lecture 1 v4.1 31/07/2020
Copyright FIT College 2020 55
Waist
• Definition: The circumference of the abdomen at its narrowest point between the lower coastal (10th rib) border and the top of the iliac crest, perpendicular to the long axis of the trunk
• Subject position: The subject assumes a relaxed standing position with the arms folded across the thorax
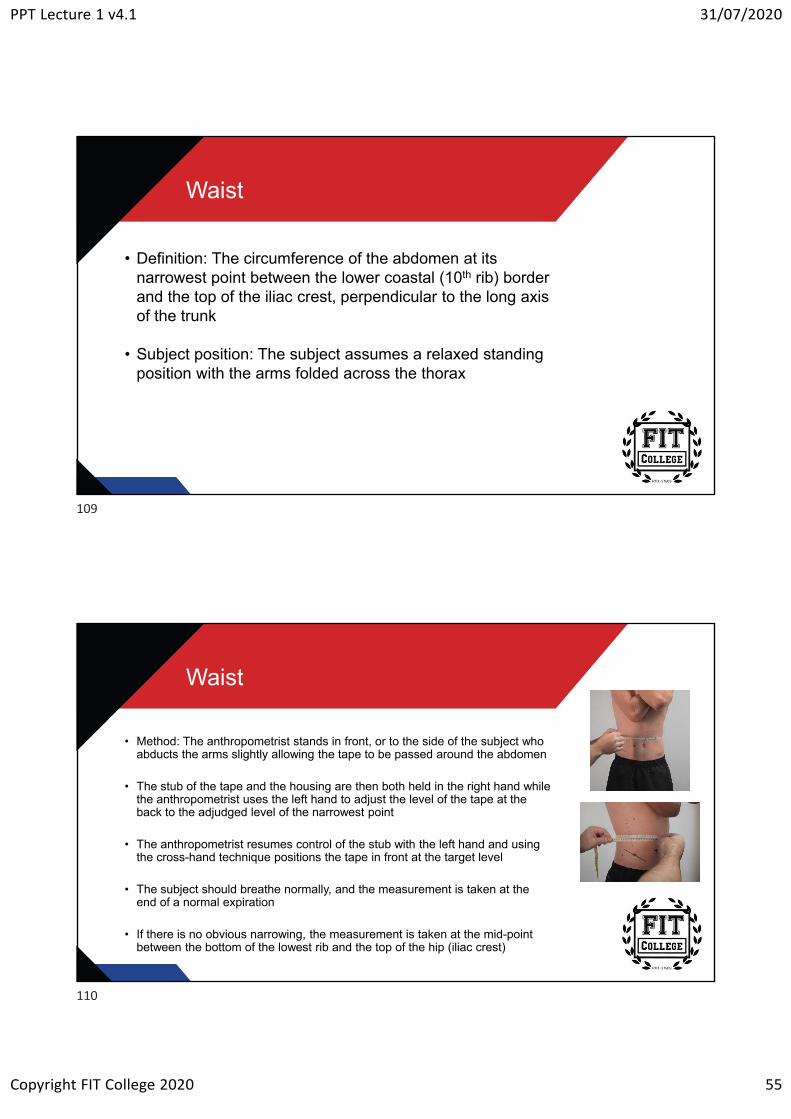
Waist
• Method: The anthropometrist stands in front, or to the side of the subject who abducts the arms slightly allowing the tape to be passed around the abdomen
• The stub of the tape and the housing are then both held in the right hand while the anthropometrist uses the left hand to adjust the level of the tape at the back to the adjudged level of the narrowest point
• The anthropometrist resumes control of the stub with the left hand and using the cross-hand technique positions the tape in front at the target level
• The subject should breathe normally, and the measurement is taken at the end of a normal expiration
• If there is no obvious narrowing, the measurement is taken at the mid-point between the bottom of the lowest rib and the top of the hip (iliac crest)
109
110
PPT Lecture 1 v4.1 31/07/2020
Copyright FIT College 2020 56
Gluteal (hip)
• Definition: The circumference of the buttocks at the level of their greatest posterior bulge, perpendicular to the long axis of the trunk
• Subject position: The subject assumes a relaxed standing position with the arms folded across the thorax. The subject’s feet should be together and the gluteal muscles relaxed
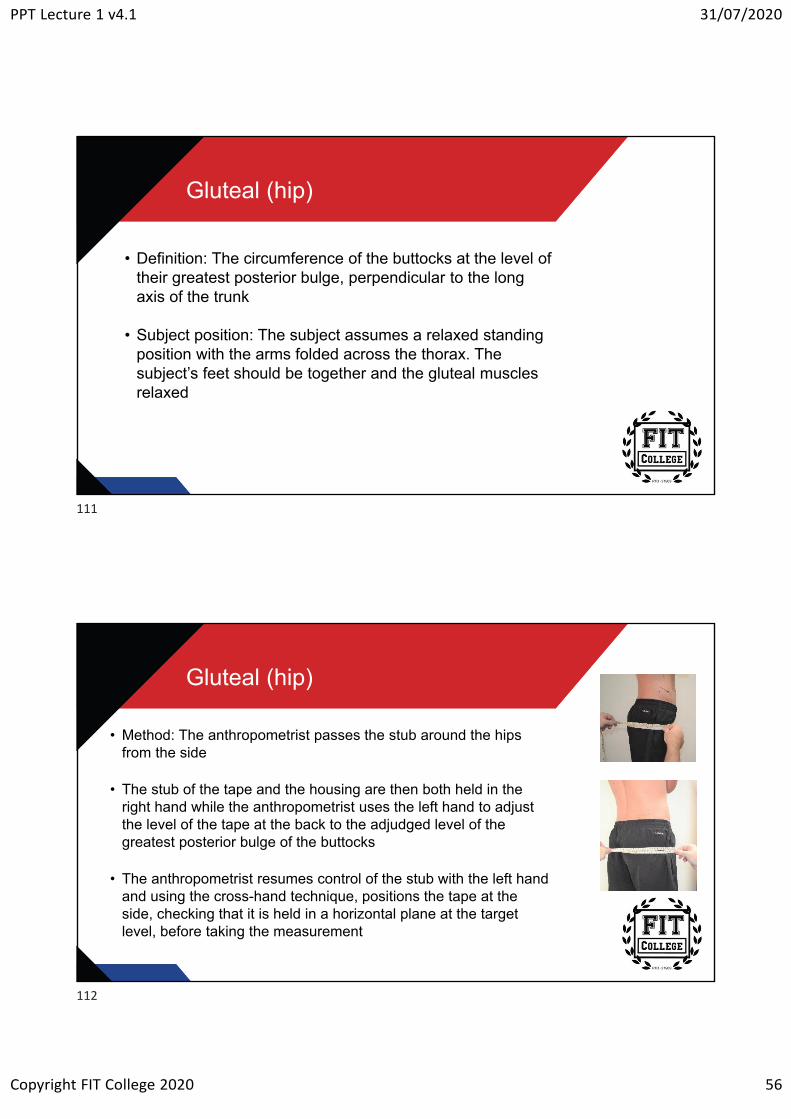
Gluteal (hip)
• Method: The anthropometrist passes the stub around the hips from the side
• The stub of the tape and the housing are then both held in the right hand while the anthropometrist uses the left hand to adjust the level of the tape at the back to the adjudged level of the greatest posterior bulge of the buttocks
• The anthropometrist resumes control of the stub with the left hand and using the cross-hand technique, positions the tape at the side, checking that it is held in a horizontal plane at the target level, before taking the measurement
111
112
PPT Lecture 1 v4.1 31/07/2020
Copyright FIT College 2020 57
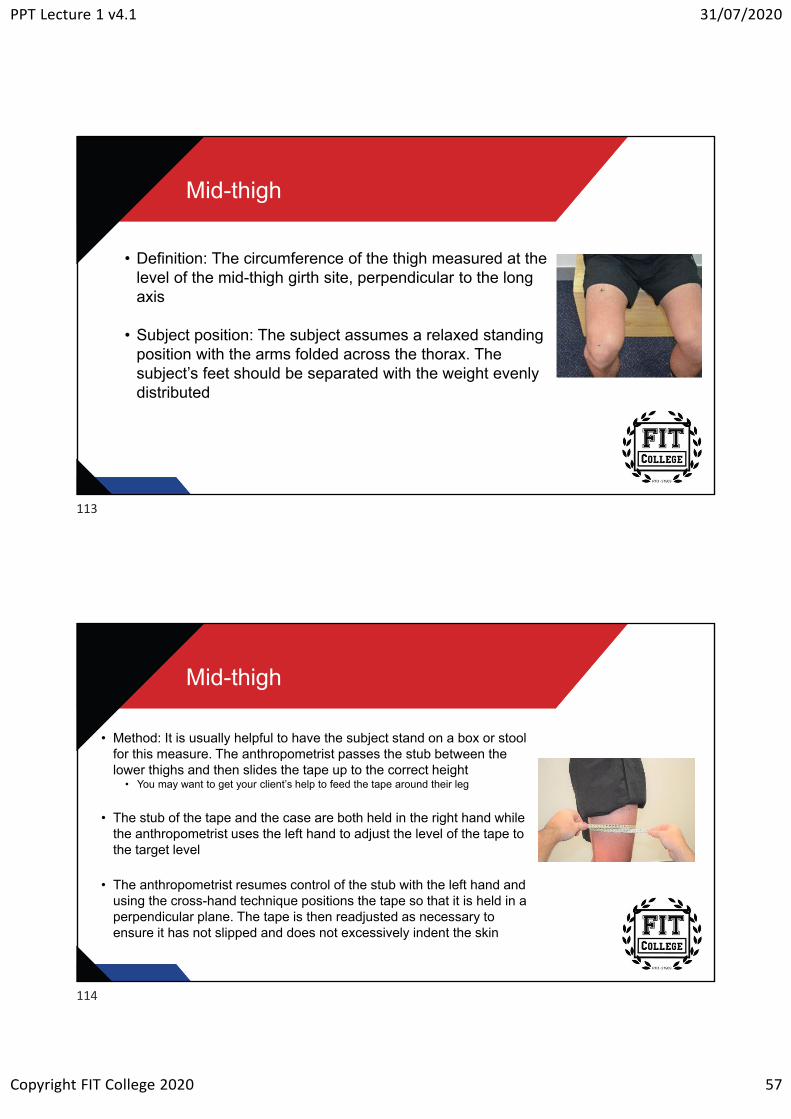
Mid-thigh
• Definition: The circumference of the thigh measured at the level of the mid-thigh girth site, perpendicular to the long axis
• Subject position: The subject assumes a relaxed standing position with the arms folded across the thorax. The subject’s feet should be separated with the weight evenly distributed
Mid-thigh
• Method: It is usually helpful to have the subject stand on a box or stool for this measure. The anthropometrist passes the stub between the lower thighs and then slides the tape up to the correct height
• You may want to get your client’s help to feed the tape around their leg
• The stub of the tape and the case are both held in the right hand while the anthropometrist uses the left hand to adjust the level of the tape to the target level
• The anthropometrist resumes control of the stub with the left hand and using the cross-hand technique positions the tape so that it is held in a perpendicular plane. The tape is then readjusted as necessary to ensure it has not slipped and does not excessively indent the skin
113
114
PPT Lecture 1 v4.1 31/07/2020
Copyright FIT College 2020 58
5RM Testing
5RM testing
• The purpose of the 5RM strength test is to measure the maximum strength of the movement
• Any strength exercise can be used for this test if the person has enough experience in performing the lift, and are confident in their technique
115
116
PPT Lecture 1 v4.1 31/07/2020
Copyright FIT College 2020 59
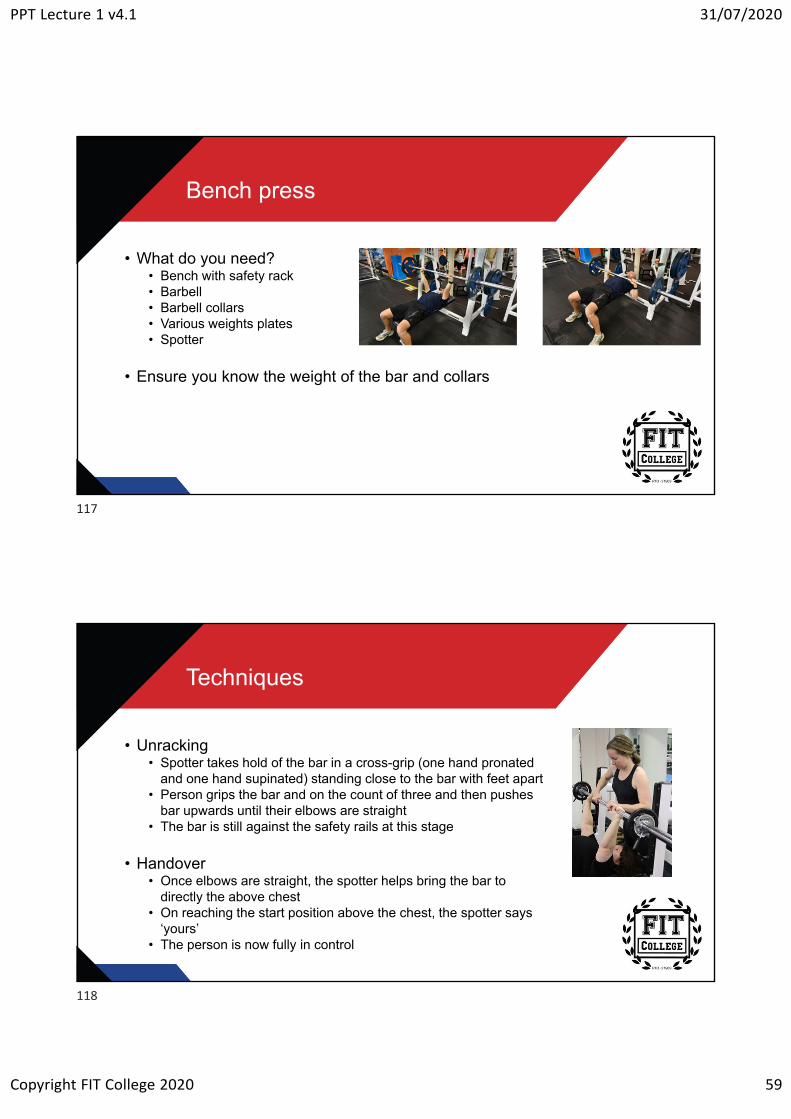
Bench press
• What do you need?• Bench with safety rack• Barbell• Barbell collars• Various weights plates• Spotter
• Ensure you know the weight of the bar and collars
Techniques
• Unracking• Spotter takes hold of the bar in a cross-grip (one hand pronated
and one hand supinated) standing close to the bar with feet apart• Person grips the bar and on the count of three and then pushes
bar upwards until their elbows are straight• The bar is still against the safety rails at this stage
• Handover• Once elbows are straight, the spotter helps bring the bar to
directly the above chest• On reaching the start position above the chest, the spotter says
‘yours’• The person is now fully in control
117
118
PPT Lecture 1 v4.1 31/07/2020
Copyright FIT College 2020 60
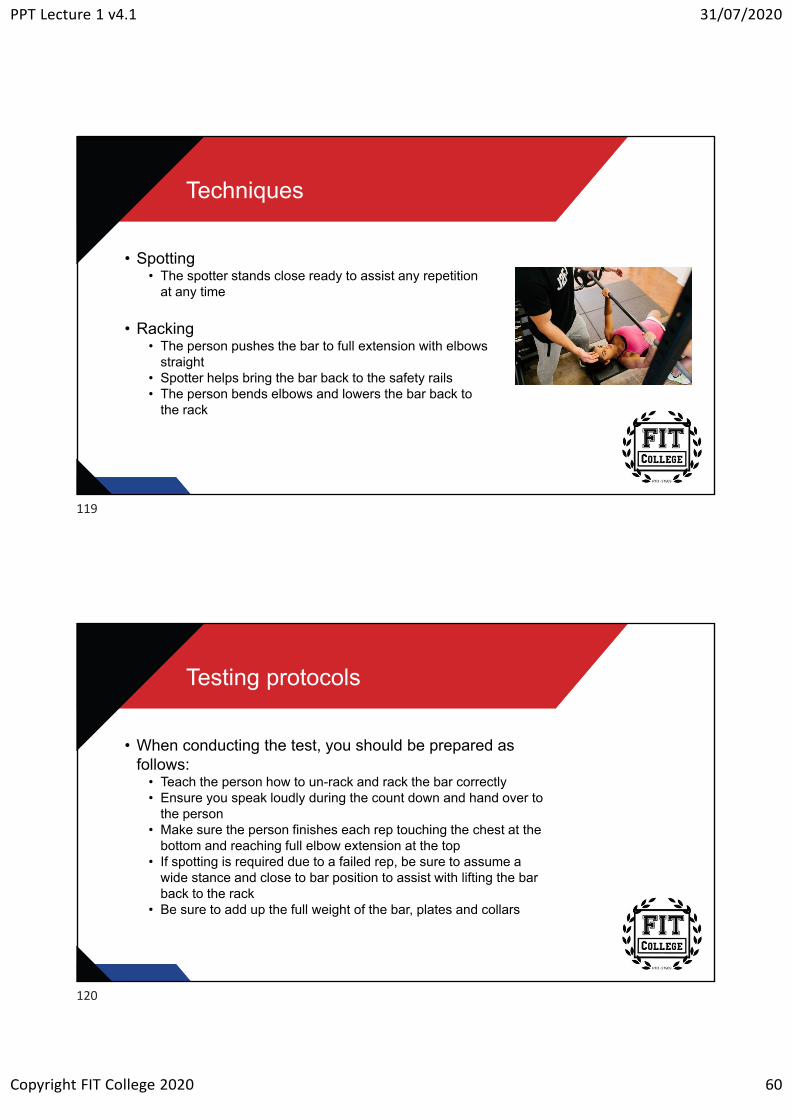
Techniques
• Spotting• The spotter stands close ready to assist any repetition
at any time
• Racking• The person pushes the bar to full extension with elbows
straight• Spotter helps bring the bar back to the safety rails• The person bends elbows and lowers the bar back to
the rack
Testing protocols
• When conducting the test, you should be prepared as follows:
• Teach the person how to un-rack and rack the bar correctly • Ensure you speak loudly during the count down and hand over to
the person• Make sure the person finishes each rep touching the chest at the
bottom and reaching full elbow extension at the top• If spotting is required due to a failed rep, be sure to assume a
wide stance and close to bar position to assist with lifting the bar back to the rack
• Be sure to add up the full weight of the bar, plates and collars
119
120
PPT Lecture 1 v4.1 31/07/2020
Copyright FIT College 2020 61
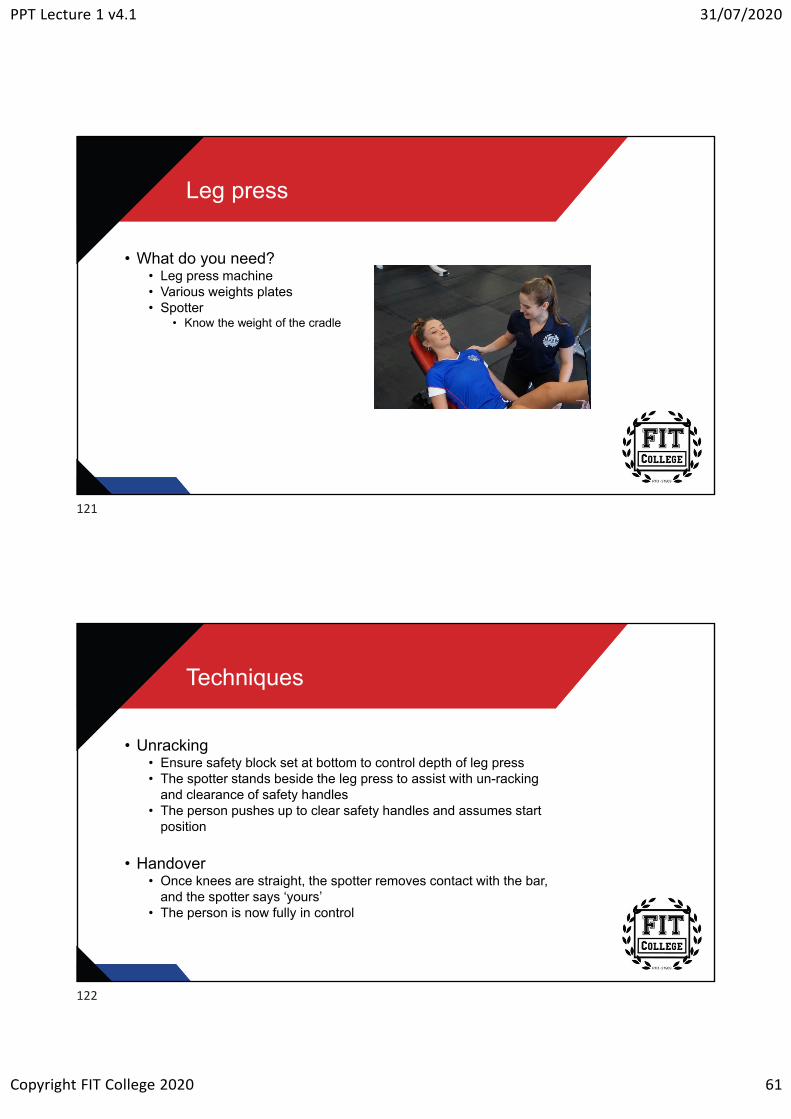
Leg press
• What do you need?• Leg press machine• Various weights plates• Spotter
• Know the weight of the cradle
Techniques
• Unracking• Ensure safety block set at bottom to control depth of leg press• The spotter stands beside the leg press to assist with un-racking
and clearance of safety handles• The person pushes up to clear safety handles and assumes start
position
• Handover• Once knees are straight, the spotter removes contact with the bar,
and the spotter says ‘yours’• The person is now fully in control
121
122

PPT Lecture 1 v4.1 31/07/2020
Copyright FIT College 2020 62
Techniques
• Spotting• Client lowers the cradle to the designated position and then
pushes upwards until knees are straight• Knees must reach a 90-degree angle• The spotter stands close ready to assist any repetition at any time
• Racking• The person pushes the cradle to full extension with knees straight• Spotter helps hold the cradle while the person brings in safety
handles• The person bends knees and lowers the cradle back to the rack
Testing protocols
• When conducting the test, you should be prepared as follows:
• Teach the person how to un-rack and rack the cradle correctly • Ensure you speak loudly during the count down and hand over to
the person• Make sure the person finishes each rep achieving 90-degree knee
bend at the bottom and reaching full knee extension at the top• If spotting is required due to a failed rep, be sure to assume a
wide stance and to the side of the cradle position to assist with lifting the bar back to the rack OR lowering the cradle with control to the safety block limiter
• Be sure to add up the full weight of the cradle and plates for total weight lifted
123
124
PPT Lecture 1 v4.1 31/07/2020
Copyright FIT College 2020 63
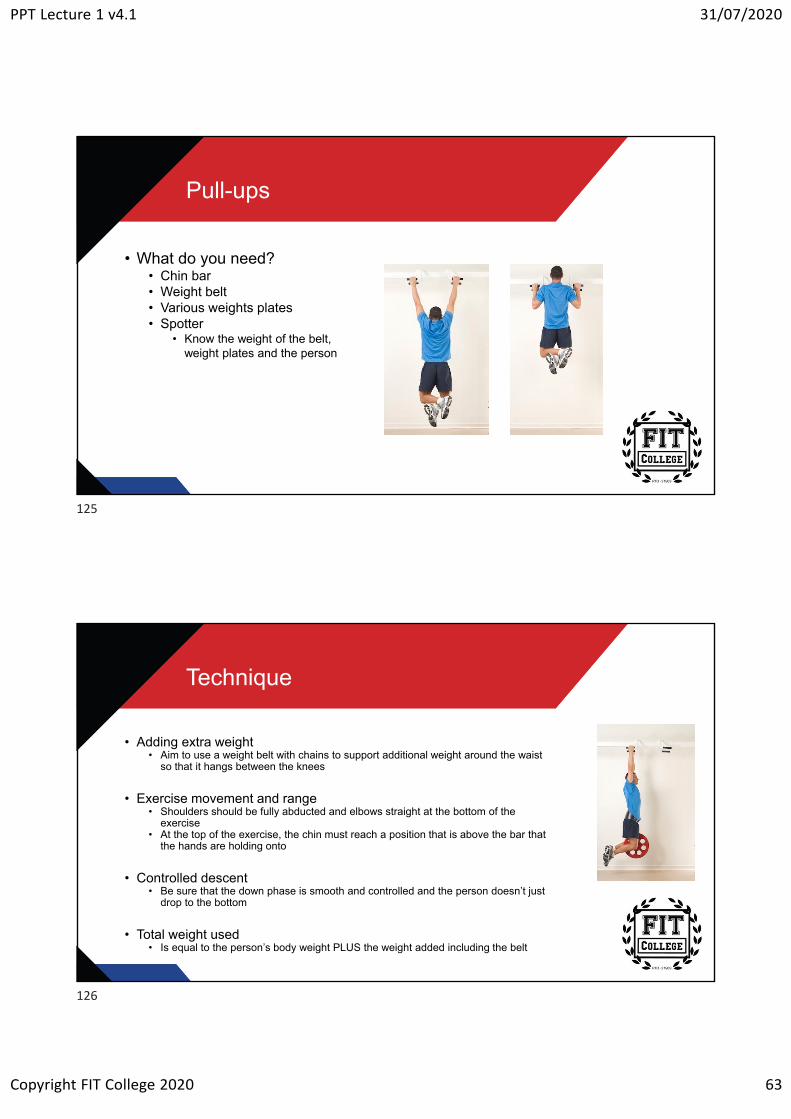
Pull-ups
• What do you need?• Chin bar• Weight belt • Various weights plates• Spotter
• Know the weight of the belt, weight plates and the person
Technique
• Adding extra weight• Aim to use a weight belt with chains to support additional weight around the waist
so that it hangs between the knees
• Exercise movement and range• Shoulders should be fully abducted and elbows straight at the bottom of the
exercise• At the top of the exercise, the chin must reach a position that is above the bar that
the hands are holding onto
• Controlled descent• Be sure that the down phase is smooth and controlled and the person doesn’t just
drop to the bottom
• Total weight used• Is equal to the person’s body weight PLUS the weight added including the belt
125
126
PPT Lecture 1 v4.1 31/07/2020
Copyright FIT College 2020 64
Testing protocols
• When conducting the test, you should be prepared as follows:
• Teach the person how to get into position and down from the bar correctly
• Ensure you speak loudly to identify if the person has achieved the chin above bar position
• Make sure the person finishes each rep reaching full elbow extension at the bottom
• Be sure to add up the full weight of the plates and belt to the person’s weight for total weight lifted
5RM test protocols
• The protocols for each 5RM test can be found in the "FIT Colleges Guide to Tests and Assessments“
• This guide can be found in "Resources" for this topic
127
128

PPT Lecture 1 v4.1 31/07/2020
Copyright FIT College 2020 65
The end
129