Embed Size (px)
Citation preview

Pxxx Linux Development Package
User Manual
Version 4
© Bluetechnix 2015
Bluetechnix
Waidhausenstraße 3/19
A-1140 Vienna
AUSTRIA
www.bluetechnix.com
Pxxx Linux Development Package – User Manual
Document No.: 900-308 / B
Publication date: October 20, 2015
Subject to change without notice. Errors excepted.
This document is protected by copyright. All rights reserved. No part of this document may be reproduced or
transmitted for any purpose in any form or by any means, electronically or mechanically, without expressly
written permission by Bluetechnix.
Windows is a registered trademark of Microsoft.
Blackfin® is a registered trademark of Analog Devices, Inc.

© Bluetechnix 2015
Table of Contents
1 General Information .......................................................................................................................... 6
1.1 Symbols Used ........................................................................................................................... 6
1.2 Commands ................................................................................................................................ 6
1.3 Code Excerpts .......................................................................................................................... 7
1.4 Nomenclature ............................................................................................................................ 7
2 Overview ........................................................................................................................................... 8
2.1 From PC to Embedded ............................................................................................................. 8
2.2 The Inner Life of a Bluetechnix ToF Device with Linux ............................................................. 9
2.2.1 Flash Map .......................................................................................................................... 9
2.2.2 Access ............................................................................................................................. 10
2.2.3 Happy Development ........................................................................................................ 10
3 Prerequisites ................................................................................................................................... 11
3.1 Work station ............................................................................................................................ 11
3.1.1 Specific packages............................................................................................................ 11
3.2 Pxxx Device............................................................................................................................. 11
4 Package Installation ....................................................................................................................... 12
4.1 Unpacking ............................................................................................................................... 12
4.2 Contents .................................................................................................................................. 12
5 Connecting to the ToF Device ....................................................................................................... 13
5.1 Configuration and Test ............................................................................................................ 13
5.2 Setup SSH key-based Authentication .................................................................................... 13
6 Build and Run the Demo Application ............................................................................................. 14
6.1 Build ........................................................................................................................................ 14
6.2 Run .......................................................................................................................................... 14
7 Demo Application ........................................................................................................................... 16
7.1 Application sequence .............................................................................................................. 16
7.2 System Log ............................................................................................................................. 17
7.3 ToF Device Access ................................................................................................................. 17
7.4 GPU/OpenCL .......................................................................................................................... 18
7.5 NEON example ........................................................................................................................ 20
8 Application Auto Start .................................................................................................................... 22
9 Debugging ...................................................................................................................................... 23
9.1 Installing Debug Tools on the Target ...................................................................................... 23
9.2 Release vs. Debug Build ......................................................................................................... 23
9.3 Running GDB on the Device ................................................................................................... 23
9.4 Running Remote GDB Debug Session ................................................................................... 24

© Bluetechnix 2015
10 Logging ....................................................................................................................................... 26
11 Additional Libraries ..................................................................................................................... 27
12 Efficient Embedded Development .............................................................................................. 28
12.1 Using the GPU/OpenCL ...................................................................................................... 28
12.2 Using NEON SIMD Instructions .......................................................................................... 28
13 Account Management ................................................................................................................ 30
14 Documentation Resources ......................................................................................................... 31
15 History ......................................................................................................................................... 32
15.1 Version Information ............................................................................................................. 32
15.2 Anomalies ............................................................................................................................ 32
16 Document Revision History ........................................................................................................ 33
© Bluetechnix 2015
© Bluetechnix 2015
All Rights Reserved.
The information herein is given to describe certain components and shall not be considered as a guarantee
of characteristics.
Terms of delivery and rights of technical change reserved.
We hereby disclaim any warranties, including but not limited to warranties of non-infringement, regarding
circuits, descriptions and charts stated herein.
Bluetechnix makes and you receive no warranties or conditions, express, implied, statutory or in any
communication with you. Bluetechnix specifically disclaims any implied warranty of merchantability or fitness
for a particular purpose.
Bluetechnix takes no liability for any damages and errors causing of the usage of this board. The user of this
board is responsible by himself for the functionality of his application. He is allowed to use the board only if he
has the qualification. More information is found in the General Terms and Conditions (AGB).
Information
For further information on technology, delivery terms and conditions and prices please contact Bluetechnix
(http://www.bluetechnix.com).
Warning
Due to technical requirements components may contain dangerous substances.
User Manual - Pxxx Linux Development Package Last change: 20 October 2015 Version 4
© Bluetechnix 2015 Page 6 | 33
1 General Information
This guide applies to all smart cameras based on the Argos® smart camera platform from Bluetechnix
GmbH. Follow this guide chapter by chapter to set up and understand your product. If a section of this
document only applies to certain camera models, this is indicated at the beginning of the respective section.
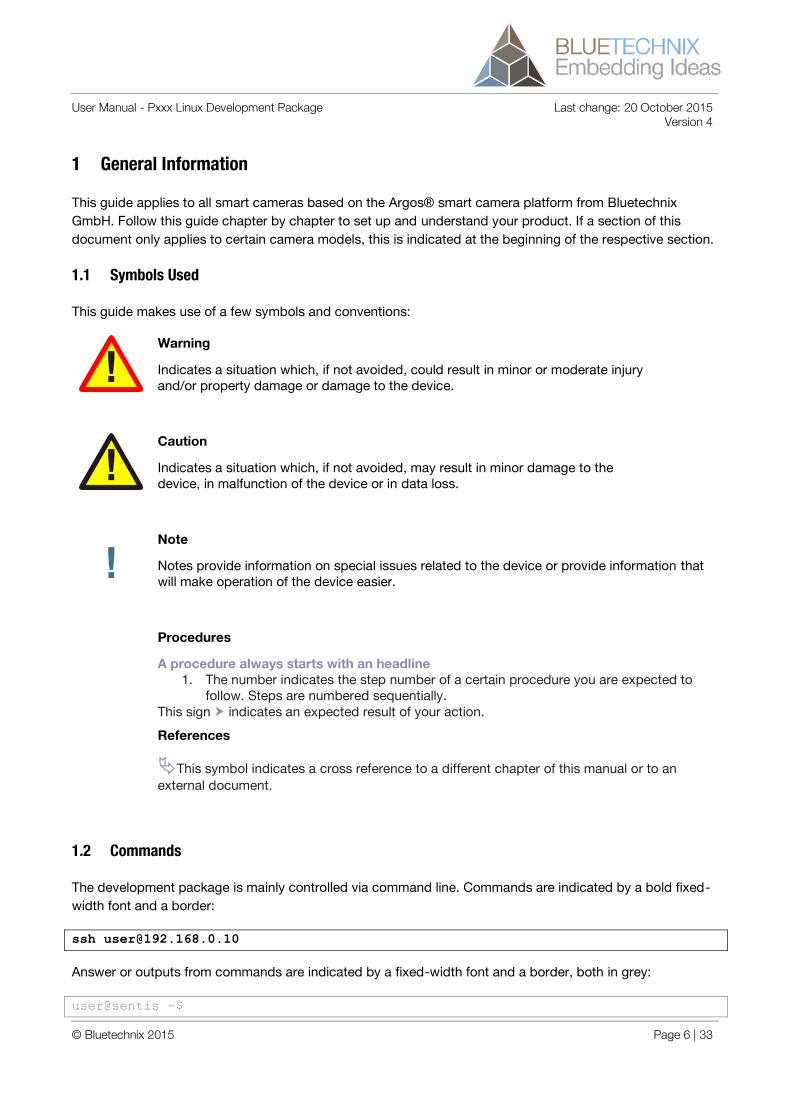
1.1 Symbols Used
This guide makes use of a few symbols and conventions:
Warning
Indicates a situation which, if not avoided, could result in minor or moderate injury and/or property damage or damage to the device.
Caution
Indicates a situation which, if not avoided, may result in minor damage to the device, in malfunction of the device or in data loss.
Note
Notes provide information on special issues related to the device or provide information that will make operation of the device easier.
Procedures
A procedure always starts with an headline 1. The number indicates the step number of a certain procedure you are expected to
follow. Steps are numbered sequentially. This sign indicates an expected result of your action.
References
This symbol indicates a cross reference to a different chapter of this manual or to an
external document.
1.2 Commands
The development package is mainly controlled via command line. Commands are indicated by a bold fixed-
width font and a border:
Answer or outputs from commands are indicated by a fixed-width font and a border, both in grey:
user@sentis ~$

User Manual - Pxxx Linux Development Package Last change: 20 October 2015 Version 4
© Bluetechnix 2015 Page 7 | 33
1.3 Code Excerpts
Code excerpts are listed similarly, but in blue color:
int main(int argc, char **argv) {
1.4 Nomenclature
“Host”, “Workstation” means your development PC (typically a Linux one).
“Device”, “ToF Device”, “Target” means your ToF device, i.e., a Bluetechnix ToF Camera Product, or a ToF
Evaluation Kit. “Embedded” means anything related to the ToF device (= the embedded device).
User Manual - Pxxx Linux Development Package Last change: 20 October 2015 Version 4
© Bluetechnix 2015 Page 8 | 33
2 Overview
Welcome to the Pxxx Linux Development Package!
This package enables you to develop your own embedded application on Bluetechnix Pxxx ToF devices.
Be aware that not all firmware versions of the ToF devices are fully compatible to this development package.
Please consult the Software User Manual of your ToF device in order to find out!
Please update your ToF device if it has an earlier firmware version. Refer to the appropriate Software User
Manual of your device for more information how to perform a firmware update.
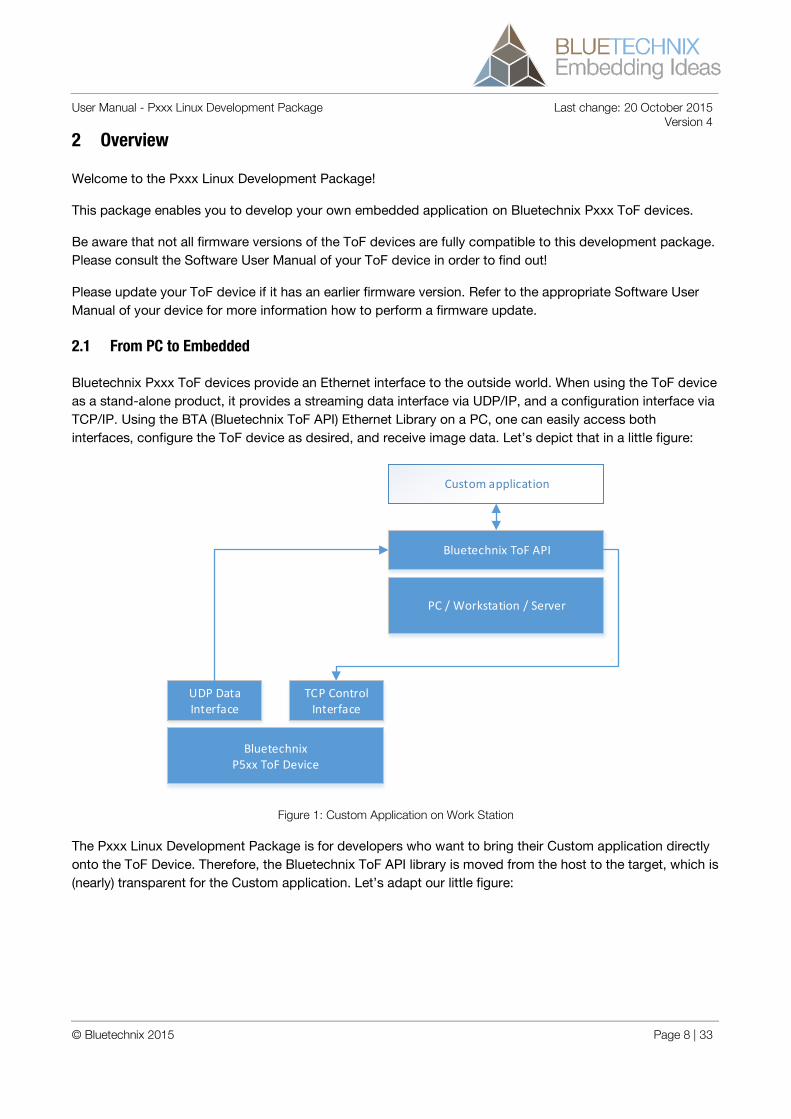
2.1 From PC to Embedded
Bluetechnix Pxxx ToF devices provide an Ethernet interface to the outside world. When using the ToF device
as a stand-alone product, it provides a streaming data interface via UDP/IP, and a configuration interface via
TCP/IP. Using the BTA (Bluetechnix ToF API) Ethernet Library on a PC, one can easily access both
interfaces, configure the ToF device as desired, and receive image data. Let’s depict that in a little figure:
BluetechnixP5xx ToF Device
PC / Workstation / Server
UDP Data Interface
TCP Control Interface
Bluetechnix ToF API
Custom application
Figure 1: Custom Application on Work Station
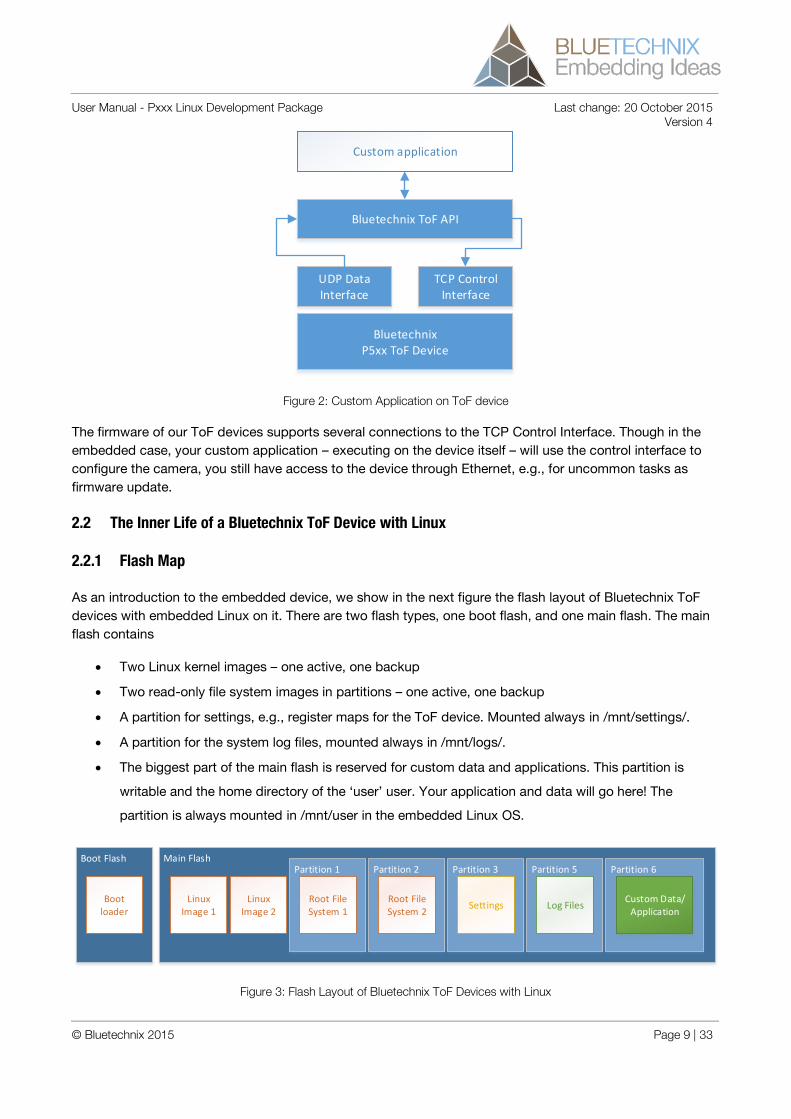
The Pxxx Linux Development Package is for developers who want to bring their Custom application directly
onto the ToF Device. Therefore, the Bluetechnix ToF API library is moved from the host to the target, which is
(nearly) transparent for the Custom application. Let’s adapt our little figure:
User Manual - Pxxx Linux Development Package Last change: 20 October 2015 Version 4
© Bluetechnix 2015 Page 9 | 33
BluetechnixP5xx ToF Device
UDP Data Interface
TCP Control Interface
Bluetechnix ToF API
Custom application
Figure 2: Custom Application on ToF device
The firmware of our ToF devices supports several connections to the TCP Control Interface. Though in the
embedded case, your custom application – executing on the device itself – will use the control interface to
configure the camera, you still have access to the device through Ethernet, e.g., for uncommon tasks as
firmware update.
2.2 The Inner Life of a Bluetechnix ToF Device with Linux
2.2.1 Flash Map
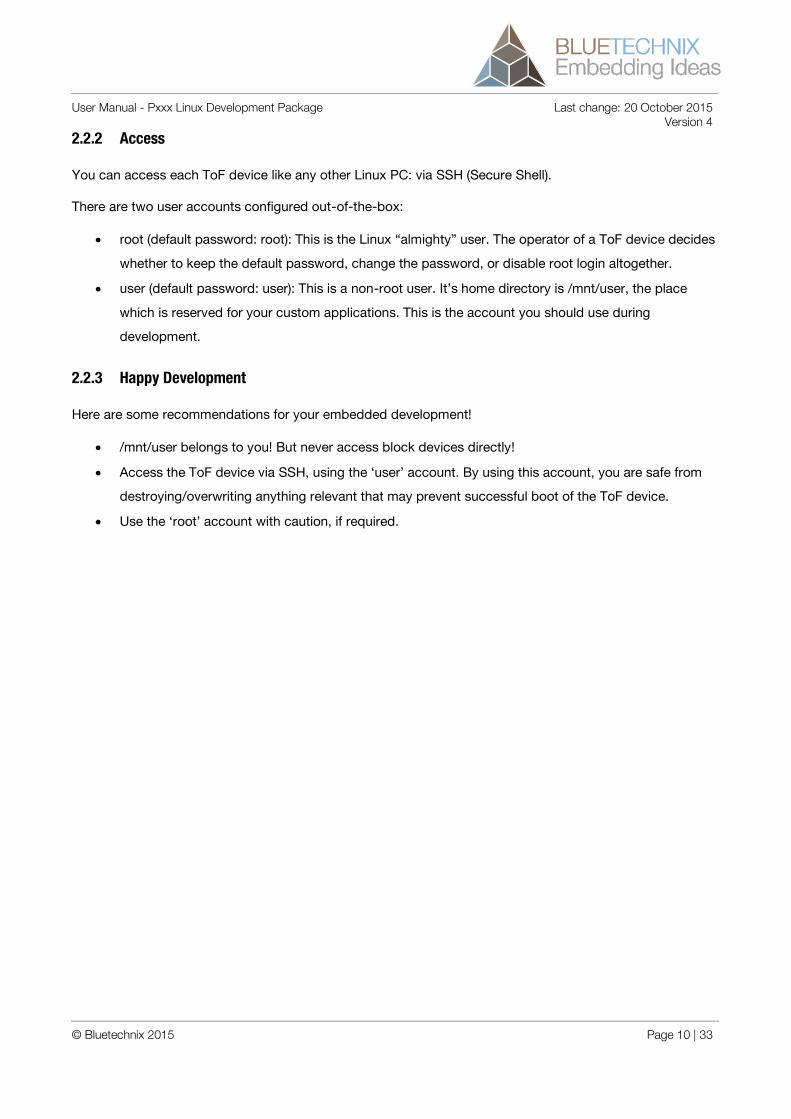
As an introduction to the embedded device, we show in the next figure the flash layout of Bluetechnix ToF
devices with embedded Linux on it. There are two flash types, one boot flash, and one main flash. The main
flash contains
Two Linux kernel images – one active, one backup
Two read-only file system images in partitions – one active, one backup
A partition for settings, e.g., register maps for the ToF device. Mounted always in /mnt/settings/.
A partition for the system log files, mounted always in /mnt/logs/.
The biggest part of the main flash is reserved for custom data and applications. This partition is
writable and the home directory of the ‘user’ user. Your application and data will go here! The
partition is always mounted in /mnt/user in the embedded Linux OS.
Boot Flash Main Flash
Boot loader
Linux Image 1
Linux Image 2
Partition 1
Root File System 1
Partition 2
Root File System 2
Partition 3
Settings
Partition 5
Log Files
Partition 6
Custom Data/Application
Figure 3: Flash Layout of Bluetechnix ToF Devices with Linux
User Manual - Pxxx Linux Development Package Last change: 20 October 2015 Version 4
© Bluetechnix 2015 Page 10 | 33
2.2.2 Access
You can access each ToF device like any other Linux PC: via SSH (Secure Shell).
There are two user accounts configured out-of-the-box:
root (default password: root): This is the Linux “almighty” user. The operator of a ToF device decides
whether to keep the default password, change the password, or disable root login altogether.
user (default password: user): This is a non-root user. It’s home directory is /mnt/user, the place
which is reserved for your custom applications. This is the account you should use during
development.
2.2.3 Happy Development
Here are some recommendations for your embedded development!
/mnt/user belongs to you! But never access block devices directly!
Access the ToF device via SSH, using the ‘user’ account. By using this account, you are safe from
destroying/overwriting anything relevant that may prevent successful boot of the ToF device.
Use the ‘root’ account with caution, if required.
User Manual - Pxxx Linux Development Package Last change: 20 October 2015 Version 4
© Bluetechnix 2015 Page 11 | 33
3 Prerequisites
3.1 Work station
We recommend your work station where you develop for the Pxxx target to be a Linux machine. We have
tested everything on the Ubuntu 14.04 x64 operating system, but any similar operating system should work
as well.
3.1.1 Specific packages
lib32ncursesw5 (required by GDB)
3.2 Pxxx Device
We assume that you have successfully brought up your Pxxx ToF device, using documentation and tools
provided with it. Your work station must have an Ethernet connection to the device, and you must know the
devices’ IP address.
It is recommended but not required that you set up NAT translation on your work station, so that the ToF
device has access to the Internet (for synchronization of the time with an NFS server).

User Manual - Pxxx Linux Development Package Last change: 20 October 2015 Version 4
© Bluetechnix 2015 Page 12 | 33
4 Package Installation
4.1 Unpacking
Unpack the compressed package using your favorite file manager, or use the following command on Linux
command line:
tar -xJf <File>
4.2 Contents
app/ Demo application source code inc/ Include Files (Header Files) lib/ Target Libraries lib/libbta_eth.so Bluetechnix ToF API compliant library for Ethernet devices Makefile The central Makefile for executing some sample tasks
(compilation, debugging, etc.) Type ‘make help’ to see a list of supported Make targets.
Target.inc Target connection information (IP address) toolchain/ Cross toolchain and debug tools
User Manual - Pxxx Linux Development Package Last change: 20 October 2015 Version 4
© Bluetechnix 2015 Page 13 | 33
5 Connecting to the ToF Device
5.1 Configuration and Test
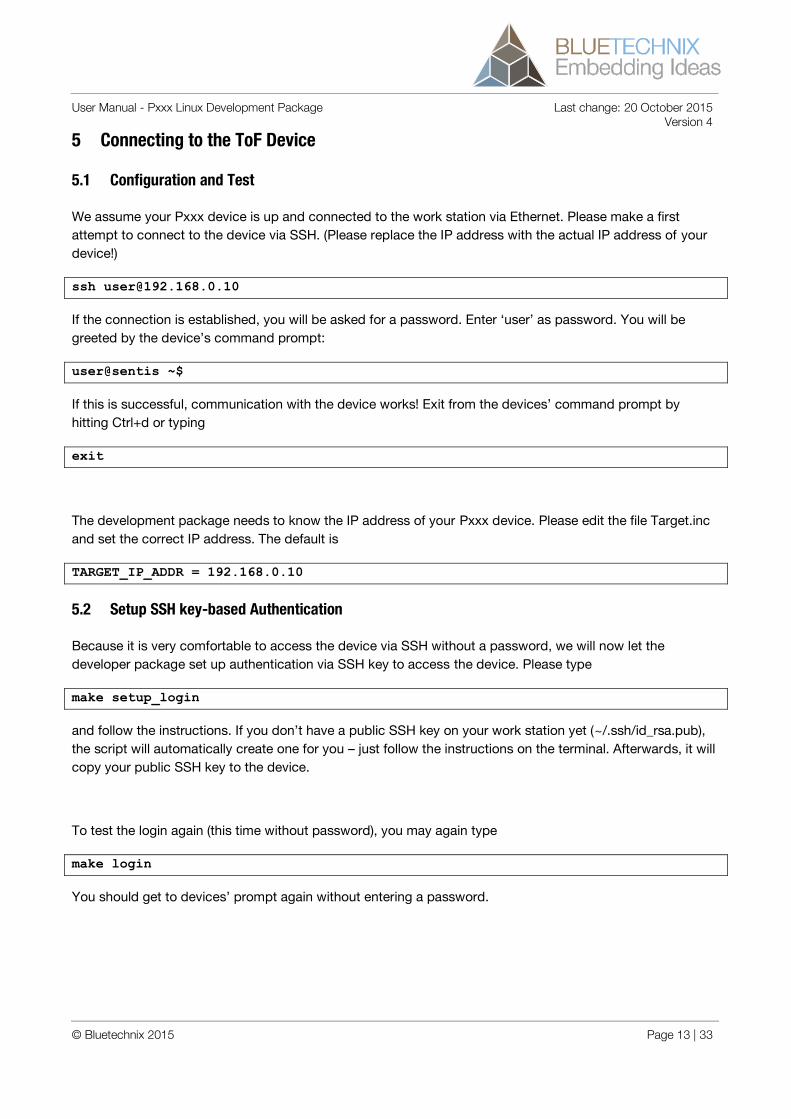
We assume your Pxxx device is up and connected to the work station via Ethernet. Please make a first
attempt to connect to the device via SSH. (Please replace the IP address with the actual IP address of your
device!)
If the connection is established, you will be asked for a password. Enter ‘user’ as password. You will be
greeted by the device’s command prompt:
user@sentis ~$
If this is successful, communication with the device works! Exit from the devices’ command prompt by
hitting Ctrl+d or typing
exit
The development package needs to know the IP address of your Pxxx device. Please edit the file Target.inc
and set the correct IP address. The default is
TARGET_IP_ADDR = 192.168.0.10
5.2 Setup SSH key-based Authentication
Because it is very comfortable to access the device via SSH without a password, we will now let the
developer package set up authentication via SSH key to access the device. Please type
make setup_login
and follow the instructions. If you don’t have a public SSH key on your work station yet (~/.ssh/id_rsa.pub),
the script will automatically create one for you – just follow the instructions on the terminal. Afterwards, it will
copy your public SSH key to the device.
To test the login again (this time without password), you may again type
make login
You should get to devices’ prompt again without entering a password.
User Manual - Pxxx Linux Development Package Last change: 20 October 2015 Version 4
© Bluetechnix 2015 Page 14 | 33
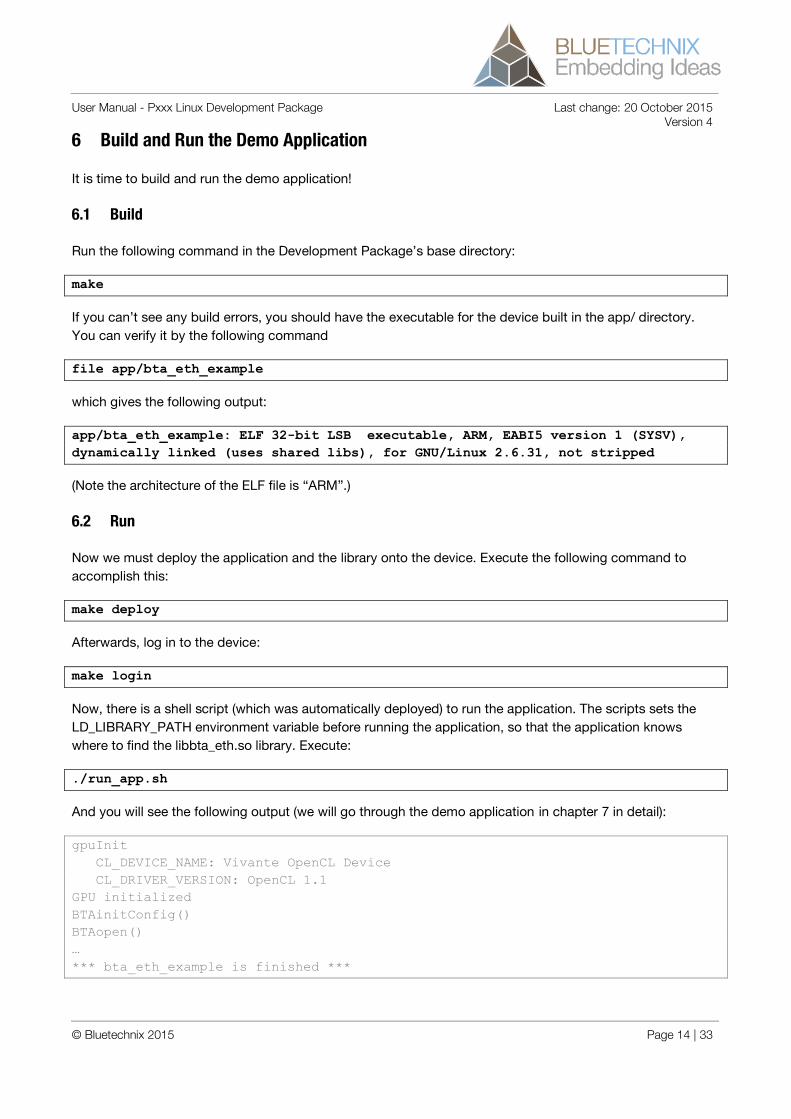
6 Build and Run the Demo Application
It is time to build and run the demo application!
6.1 Build
Run the following command in the Development Package’s base directory:
make
If you can’t see any build errors, you should have the executable for the device built in the app/ directory.
You can verify it by the following command
file app/bta_eth_example
which gives the following output:
app/bta_eth_example: ELF 32-bit LSB executable, ARM, EABI5 version 1 (SYSV),
dynamically linked (uses shared libs), for GNU/Linux 2.6.31, not stripped
(Note the architecture of the ELF file is “ARM”.)
6.2 Run
Now we must deploy the application and the library onto the device. Execute the following command to
accomplish this:
make deploy
Afterwards, log in to the device:
make login
Now, there is a shell script (which was automatically deployed) to run the application. The scripts sets the
LD_LIBRARY_PATH environment variable before running the application, so that the application knows
where to find the libbta_eth.so library. Execute:
./run_app.sh
And you will see the following output (we will go through the demo application in chapter 7 in detail):
gpuInit
CL_DEVICE_NAME: Vivante OpenCL Device
CL_DRIVER_VERSION: OpenCL 1.1
GPU initialized
BTAinitConfig()
BTAopen()
…
*** bta_eth_example is finished ***
User Manual - Pxxx Linux Development Package Last change: 20 October 2015 Version 4
© Bluetechnix 2015 Page 15 | 33
For further development, it is recommended to keep the SSH connection to the device open, and open an
additional terminal window for building on the work station.
User Manual - Pxxx Linux Development Package Last change: 20 October 2015 Version 4
© Bluetechnix 2015 Page 16 | 33
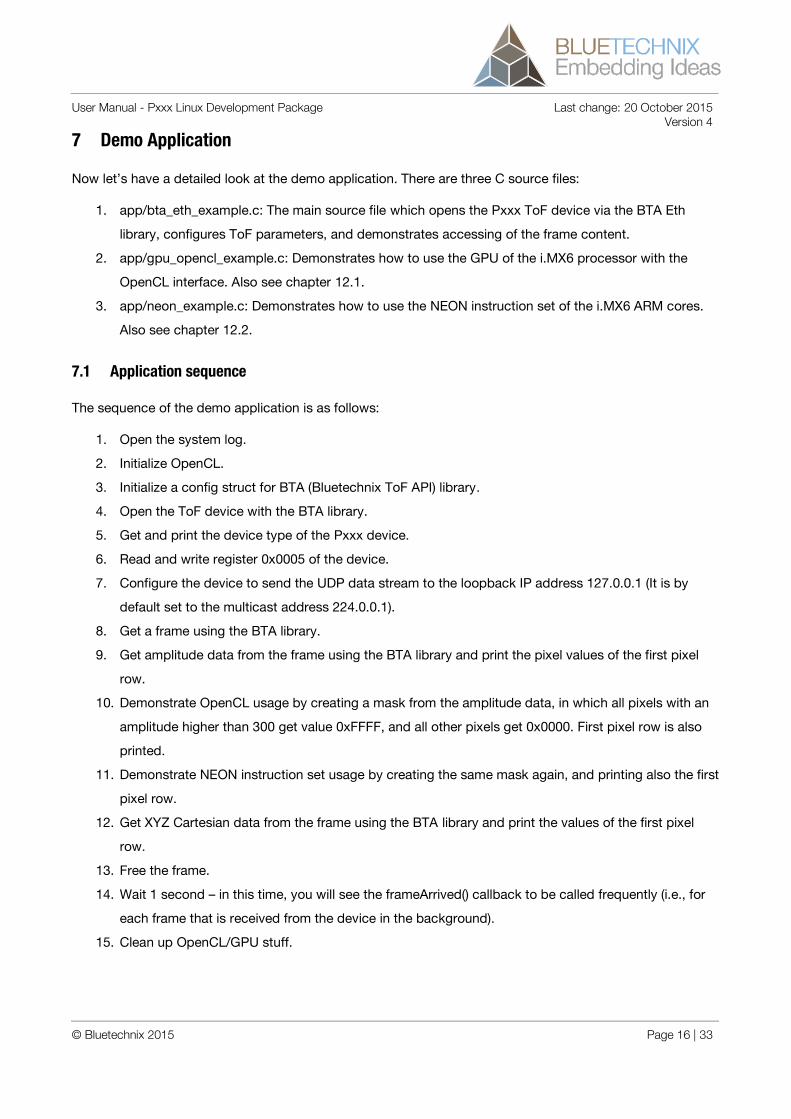
7 Demo Application
Now let’s have a detailed look at the demo application. There are three C source files:
1. app/bta_eth_example.c: The main source file which opens the Pxxx ToF device via the BTA Eth
library, configures ToF parameters, and demonstrates accessing of the frame content.
2. app/gpu_opencl_example.c: Demonstrates how to use the GPU of the i.MX6 processor with the
OpenCL interface. Also see chapter 12.1.
3. app/neon_example.c: Demonstrates how to use the NEON instruction set of the i.MX6 ARM cores.
Also see chapter 12.2.
7.1 Application sequence
The sequence of the demo application is as follows:
1. Open the system log.
2. Initialize OpenCL.
3. Initialize a config struct for BTA (Bluetechnix ToF API) library.
4. Open the ToF device with the BTA library.
5. Get and print the device type of the Pxxx device.
6. Read and write register 0x0005 of the device.
7. Configure the device to send the UDP data stream to the loopback IP address 127.0.0.1 (It is by
default set to the multicast address 224.0.0.1).
8. Get a frame using the BTA library.
9. Get amplitude data from the frame using the BTA library and print the pixel values of the first pixel
row.
10. Demonstrate OpenCL usage by creating a mask from the amplitude data, in which all pixels with an
amplitude higher than 300 get value 0xFFFF, and all other pixels get 0x0000. First pixel row is also
printed.
11. Demonstrate NEON instruction set usage by creating the same mask again, and printing also the first
pixel row.
12. Get XYZ Cartesian data from the frame using the BTA library and print the values of the first pixel
row.
13. Free the frame.
14. Wait 1 second – in this time, you will see the frameArrived() callback to be called frequently (i.e., for
each frame that is received from the device in the background).
15. Clean up OpenCL/GPU stuff.
User Manual - Pxxx Linux Development Package Last change: 20 October 2015 Version 4
© Bluetechnix 2015 Page 17 | 33
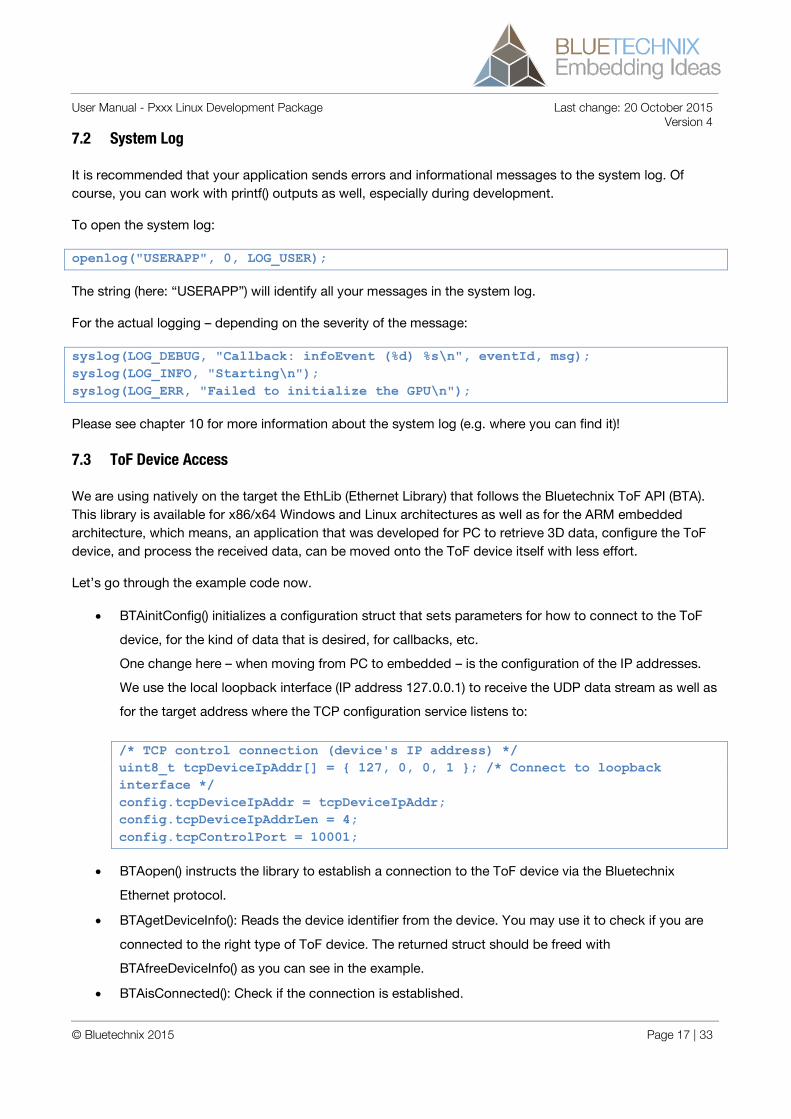
7.2 System Log
It is recommended that your application sends errors and informational messages to the system log. Of
course, you can work with printf() outputs as well, especially during development.
To open the system log:
openlog("USERAPP", 0, LOG_USER);
The string (here: “USERAPP”) will identify all your messages in the system log.
For the actual logging – depending on the severity of the message:
syslog(LOG_DEBUG, "Callback: infoEvent (%d) %s\n", eventId, msg);
syslog(LOG_INFO, "Starting\n");
syslog(LOG_ERR, "Failed to initialize the GPU\n");
Please see chapter 10 for more information about the system log (e.g. where you can find it)!
7.3 ToF Device Access
We are using natively on the target the EthLib (Ethernet Library) that follows the Bluetechnix ToF API (BTA).
This library is available for x86/x64 Windows and Linux architectures as well as for the ARM embedded
architecture, which means, an application that was developed for PC to retrieve 3D data, configure the ToF
device, and process the received data, can be moved onto the ToF device itself with less effort.
Let’s go through the example code now.
BTAinitConfig() initializes a configuration struct that sets parameters for how to connect to the ToF
device, for the kind of data that is desired, for callbacks, etc.
One change here – when moving from PC to embedded – is the configuration of the IP addresses.
We use the local loopback interface (IP address 127.0.0.1) to receive the UDP data stream as well as
for the target address where the TCP configuration service listens to:
/* TCP control connection (device's IP address) */
uint8_t tcpDeviceIpAddr[] = { 127, 0, 0, 1 }; /* Connect to loopback
interface */
config.tcpDeviceIpAddr = tcpDeviceIpAddr;
config.tcpDeviceIpAddrLen = 4;
config.tcpControlPort = 10001;
BTAopen() instructs the library to establish a connection to the ToF device via the Bluetechnix
Ethernet protocol.
BTAgetDeviceInfo(): Reads the device identifier from the device. You may use it to check if you are
connected to the right type of ToF device. The returned struct should be freed with
BTAfreeDeviceInfo() as you can see in the example.
BTAisConnected(): Check if the connection is established.

User Manual - Pxxx Linux Development Package Last change: 20 October 2015 Version 4
© Bluetechnix 2015 Page 18 | 33
BTAreadRegister() and BTAwriteRegister(): Read and write ToF device registers. The complete list of
available registers can always be found in the Software User Manual of the respective ToF device.
In the demo code, the BTAwriteRegister() function is used to configure the destination IP address for
the UDP 3D data stream, as well as the destination IP address for the 2D RTP data stream:
printf("Configuring camera to use loopback interface\n");
uint32_t camLocalConfig[4][2] = { /* Address */ /* Value */
{0x024c, 1}, /* UDP Stream IP: 127.0.0.1 */
{0x024d, (127<<8)},
{0x0252, 1}, /* 2D Stream IP: 127.0.0.1 */
{0x0253, (127<<8)},
};
for (int i=0; i<4; i++) {
status = BTAwriteRegister(btaHandle, camLocalConfig[i][0],
&camLocalConfig[i][1], 0);
if (status != BTA_StatusOk) {
BTAstatusToString(status, statusString, 50);
printf("error: %s\n", statusString);
return -1;
}
}
BTAgetFrame() returns a complete frame. Note in the example, there is also a callback target
frameArrived() registered, which is executed each time a new frame is received from the BTA library.
For fluent operation, there should not be long processing time within this callback!
After having processed the frame that was received with BTAgetFrame(), it must be freed with
BTAfreeFrame().
BTAgetAmplitudes(), BTAgetXYZCoordinates(), etc. each get the specified data from the frame
structure.
BTAclose() closes the library and the connection to the ToF device.
A complete Reference Manual for the BltTofApi is available in our Support Wiki:
https://support.bluetechnix.at/wiki/Bluetechnix_%27Time_of_Flight%27_API#Reference_Manual
7.4 GPU/OpenCL
The i.MX6 Quad processor has – as indicated by its name – four Cortex-A9 cores running at max. 1 GHz. A
part of the available processing power is used by the ToF device firmware – how much, depends heavily on
the current configuration or specification of the ToF device (frame rate, sensor size, filter configuration, etc.).
The GPU of the i.MX6Q features an OpenCL 1.1 interface and thus can be used – additionally to the ARM
cores – to execute fast calculations, as required for typical image processing.
Some ToF devices already use the GPU in their firmware, in which case the GPU cannot be used for any
user application!
User Manual - Pxxx Linux Development Package Last change: 20 October 2015 Version 4
© Bluetechnix 2015 Page 19 | 33
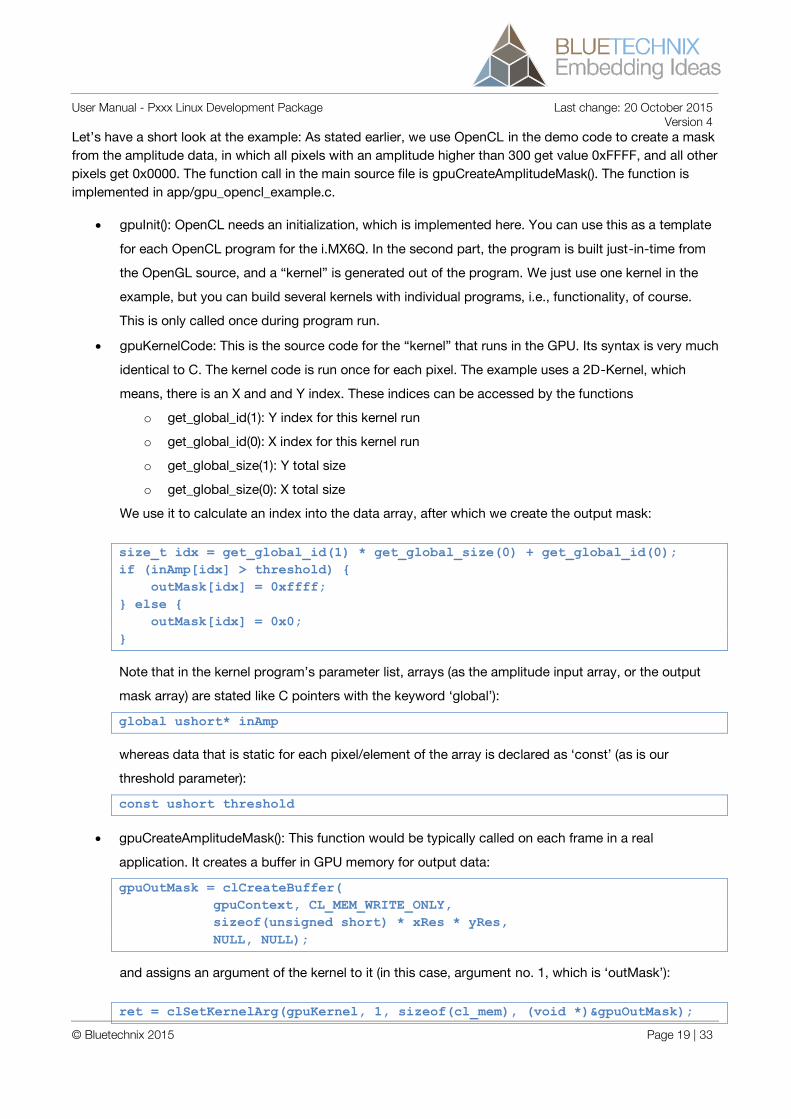
Let’s have a short look at the example: As stated earlier, we use OpenCL in the demo code to create a mask
from the amplitude data, in which all pixels with an amplitude higher than 300 get value 0xFFFF, and all other
pixels get 0x0000. The function call in the main source file is gpuCreateAmplitudeMask(). The function is
implemented in app/gpu_opencl_example.c.
gpuInit(): OpenCL needs an initialization, which is implemented here. You can use this as a template
for each OpenCL program for the i.MX6Q. In the second part, the program is built just-in-time from
the OpenGL source, and a “kernel” is generated out of the program. We just use one kernel in the
example, but you can build several kernels with individual programs, i.e., functionality, of course.
This is only called once during program run.
gpuKernelCode: This is the source code for the “kernel” that runs in the GPU. Its syntax is very much
identical to C. The kernel code is run once for each pixel. The example uses a 2D-Kernel, which
means, there is an X and and Y index. These indices can be accessed by the functions
o get_global_id(1): Y index for this kernel run
o get_global_id(0): X index for this kernel run
o get_global_size(1): Y total size
o get_global_size(0): X total size
We use it to calculate an index into the data array, after which we create the output mask:
size_t idx = get_global_id(1) * get_global_size(0) + get_global_id(0);
if (inAmp[idx] > threshold) {
outMask[idx] = 0xffff;
} else {
outMask[idx] = 0x0;
}
Note that in the kernel program’s parameter list, arrays (as the amplitude input array, or the output
mask array) are stated like C pointers with the keyword ‘global’):
global ushort* inAmp
whereas data that is static for each pixel/element of the array is declared as ‘const’ (as is our
threshold parameter):
const ushort threshold
gpuCreateAmplitudeMask(): This function would be typically called on each frame in a real
application. It creates a buffer in GPU memory for output data:
gpuOutMask = clCreateBuffer(
gpuContext, CL_MEM_WRITE_ONLY,
sizeof(unsigned short) * xRes * yRes,
NULL, NULL);
and assigns an argument of the kernel to it (in this case, argument no. 1, which is ‘outMask’):
ret = clSetKernelArg(gpuKernel, 1, sizeof(cl_mem), (void *)&gpuOutMask);
User Manual - Pxxx Linux Development Package Last change: 20 October 2015 Version 4
© Bluetechnix 2015 Page 20 | 33
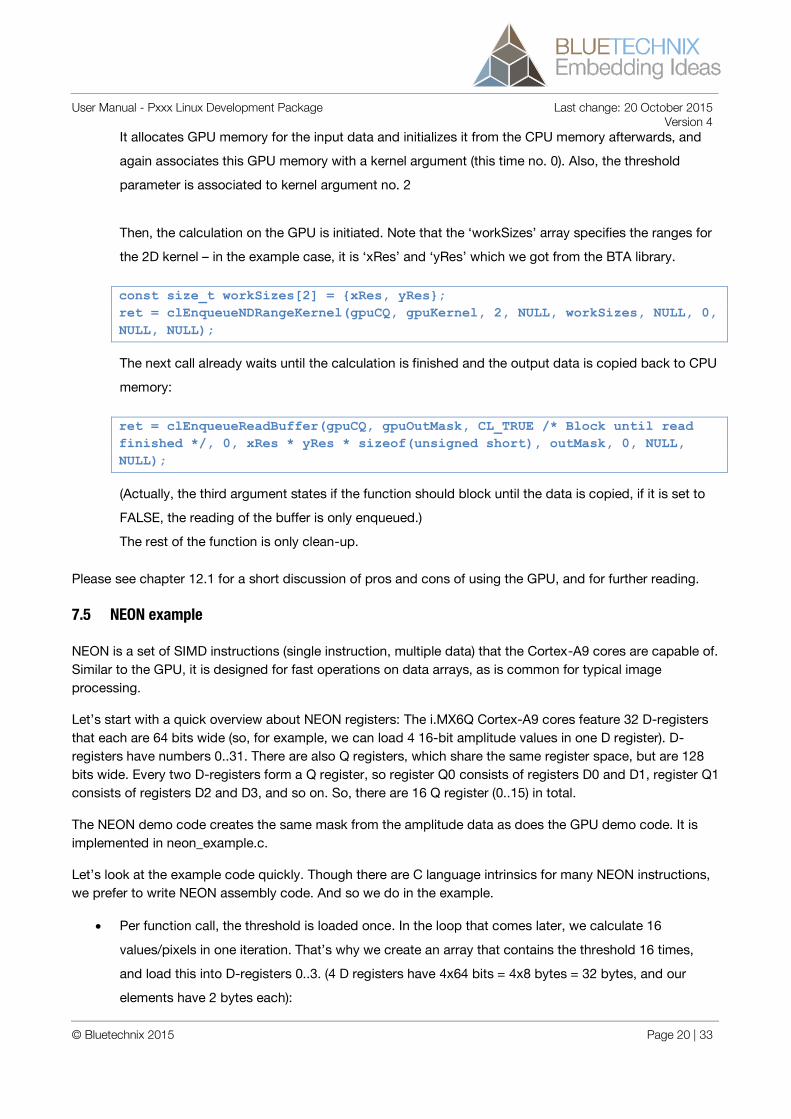
It allocates GPU memory for the input data and initializes it from the CPU memory afterwards, and
again associates this GPU memory with a kernel argument (this time no. 0). Also, the threshold
parameter is associated to kernel argument no. 2
Then, the calculation on the GPU is initiated. Note that the ‘workSizes’ array specifies the ranges for
the 2D kernel – in the example case, it is ‘xRes’ and ‘yRes’ which we got from the BTA library.
const size_t workSizes[2] = {xRes, yRes};
ret = clEnqueueNDRangeKernel(gpuCQ, gpuKernel, 2, NULL, workSizes, NULL, 0,
NULL, NULL);
The next call already waits until the calculation is finished and the output data is copied back to CPU
memory:
ret = clEnqueueReadBuffer(gpuCQ, gpuOutMask, CL_TRUE /* Block until read
finished */, 0, xRes * yRes * sizeof(unsigned short), outMask, 0, NULL,
NULL);
(Actually, the third argument states if the function should block until the data is copied, if it is set to
FALSE, the reading of the buffer is only enqueued.)
The rest of the function is only clean-up.
Please see chapter 12.1 for a short discussion of pros and cons of using the GPU, and for further reading.
7.5 NEON example
NEON is a set of SIMD instructions (single instruction, multiple data) that the Cortex-A9 cores are capable of.
Similar to the GPU, it is designed for fast operations on data arrays, as is common for typical image
processing.
Let’s start with a quick overview about NEON registers: The i.MX6Q Cortex-A9 cores feature 32 D-registers
that each are 64 bits wide (so, for example, we can load 4 16-bit amplitude values in one D register). D-
registers have numbers 0..31. There are also Q registers, which share the same register space, but are 128
bits wide. Every two D-registers form a Q register, so register Q0 consists of registers D0 and D1, register Q1
consists of registers D2 and D3, and so on. So, there are 16 Q register (0..15) in total.
The NEON demo code creates the same mask from the amplitude data as does the GPU demo code. It is
implemented in neon_example.c.
Let’s look at the example code quickly. Though there are C language intrinsics for many NEON instructions,
we prefer to write NEON assembly code. And so we do in the example.
Per function call, the threshold is loaded once. In the loop that comes later, we calculate 16
values/pixels in one iteration. That’s why we create an array that contains the threshold 16 times,
and load this into D-registers 0..3. (4 D registers have 4x64 bits = 4x8 bytes = 32 bytes, and our
elements have 2 bytes each):
User Manual - Pxxx Linux Development Package Last change: 20 October 2015 Version 4
© Bluetechnix 2015 Page 21 | 33
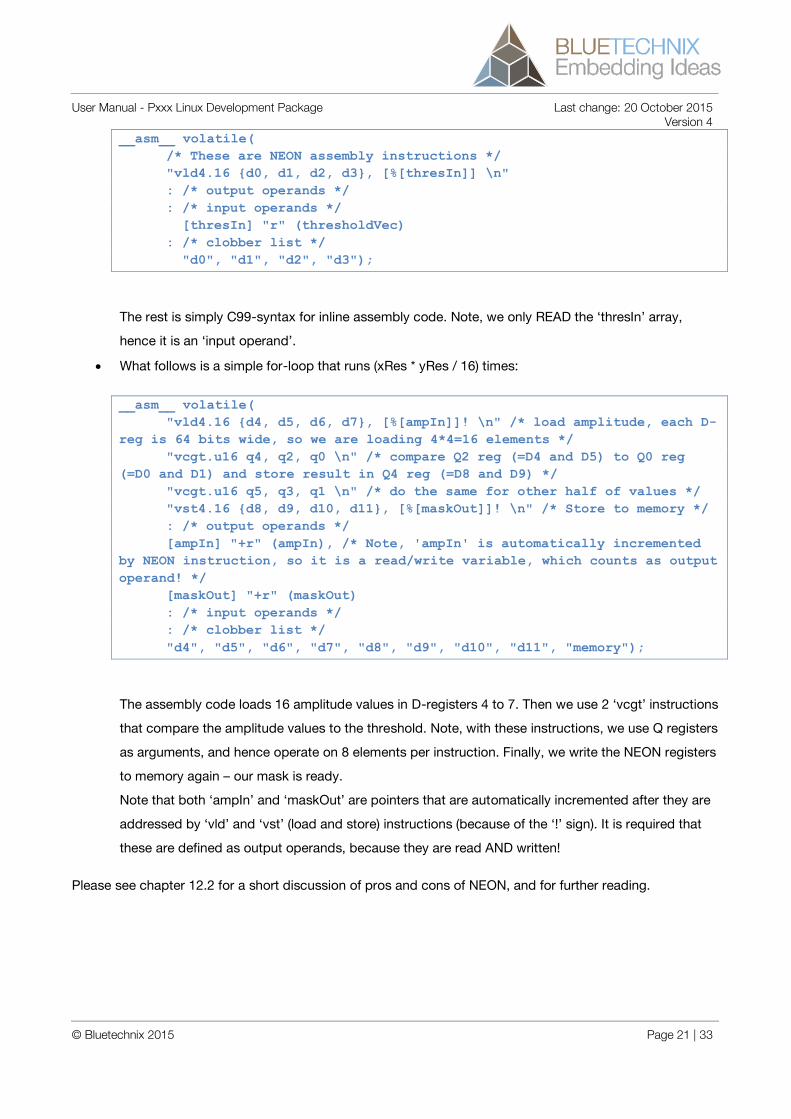
__asm__ volatile(
/* These are NEON assembly instructions */
"vld4.16 {d0, d1, d2, d3}, [%[thresIn]] \n"
: /* output operands */
: /* input operands */
[thresIn] "r" (thresholdVec)
: /* clobber list */
"d0", "d1", "d2", "d3");
The rest is simply C99-syntax for inline assembly code. Note, we only READ the ‘thresIn’ array,
hence it is an ‘input operand’.
What follows is a simple for-loop that runs (xRes * yRes / 16) times:
__asm__ volatile(
"vld4.16 {d4, d5, d6, d7}, [%[ampIn]]! \n" /* load amplitude, each D-
reg is 64 bits wide, so we are loading 4*4=16 elements */
"vcgt.u16 q4, q2, q0 \n" /* compare Q2 reg (=D4 and D5) to Q0 reg
(=D0 and D1) and store result in Q4 reg (=D8 and D9) */
"vcgt.u16 q5, q3, q1 \n" /* do the same for other half of values */
"vst4.16 {d8, d9, d10, d11}, [%[maskOut]]! \n" /* Store to memory */
: /* output operands */
[ampIn] "+r" (ampIn), /* Note, 'ampIn' is automatically incremented
by NEON instruction, so it is a read/write variable, which counts as output
operand! */
[maskOut] "+r" (maskOut)
: /* input operands */
: /* clobber list */
"d4", "d5", "d6", "d7", "d8", "d9", "d10", "d11", "memory");
The assembly code loads 16 amplitude values in D-registers 4 to 7. Then we use 2 ‘vcgt’ instructions
that compare the amplitude values to the threshold. Note, with these instructions, we use Q registers
as arguments, and hence operate on 8 elements per instruction. Finally, we write the NEON registers
to memory again – our mask is ready.
Note that both ‘ampIn’ and ‘maskOut’ are pointers that are automatically incremented after they are
addressed by ‘vld’ and ‘vst’ (load and store) instructions (because of the ‘!’ sign). It is required that
these are defined as output operands, because they are read AND written!
Please see chapter 12.2 for a short discussion of pros and cons of NEON, and for further reading.
User Manual - Pxxx Linux Development Package Last change: 20 October 2015 Version 4
© Bluetechnix 2015 Page 22 | 33
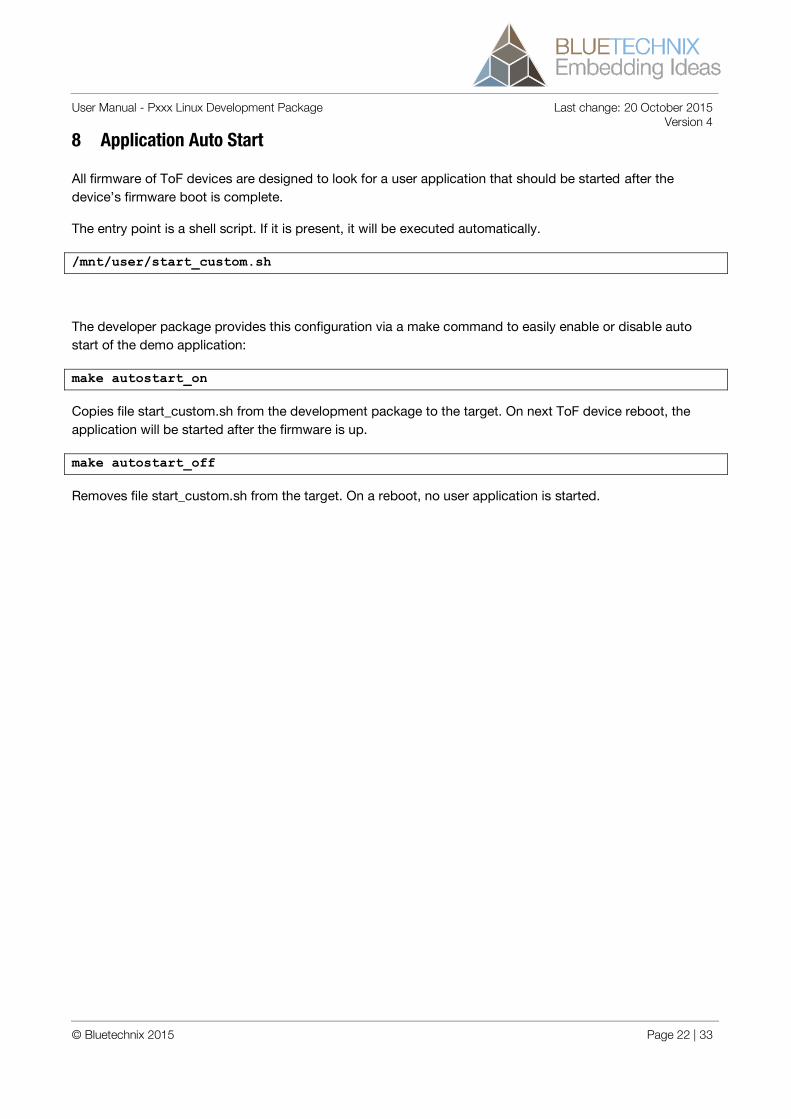
8 Application Auto Start
All firmware of ToF devices are designed to look for a user application that should be started after the
device’s firmware boot is complete.
The entry point is a shell script. If it is present, it will be executed automatically.
/mnt/user/start_custom.sh
The developer package provides this configuration via a make command to easily enable or disable auto
start of the demo application:
make autostart_on
Copies file start_custom.sh from the development package to the target. On next ToF device reboot, the
application will be started after the firmware is up.
make autostart_off
Removes file start_custom.sh from the target. On a reboot, no user application is started.
User Manual - Pxxx Linux Development Package Last change: 20 October 2015 Version 4
© Bluetechnix 2015 Page 23 | 33
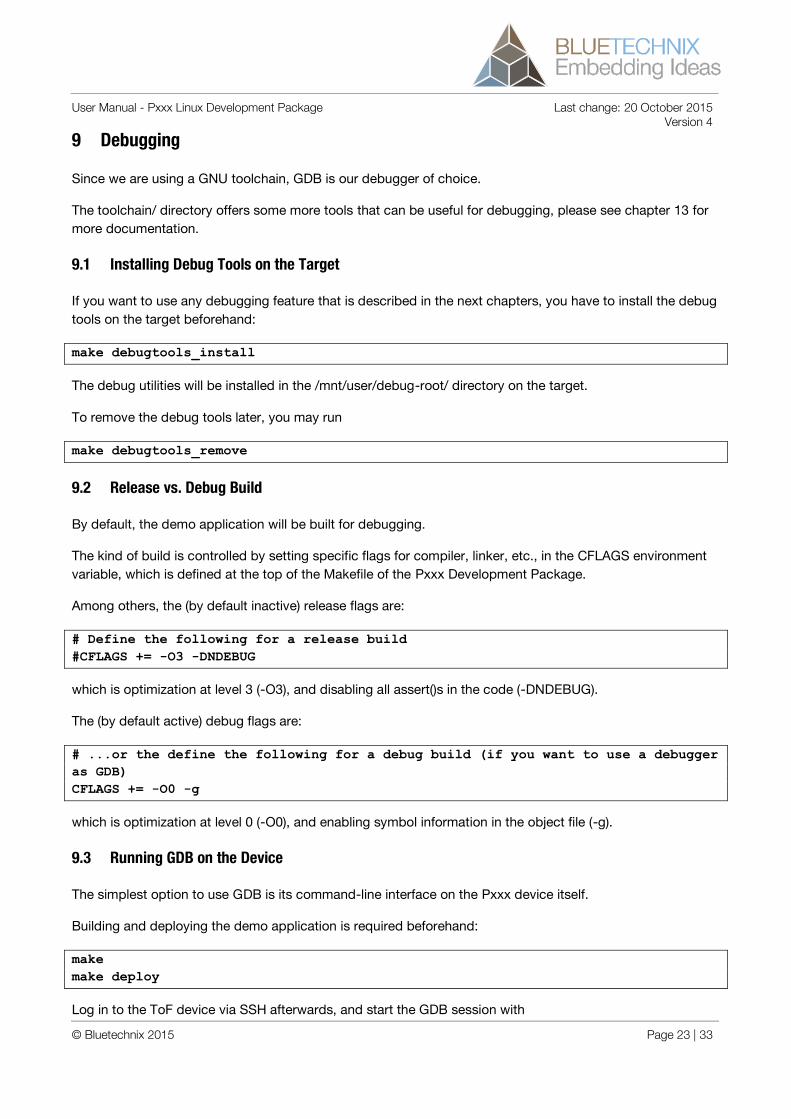
9 Debugging
Since we are using a GNU toolchain, GDB is our debugger of choice.
The toolchain/ directory offers some more tools that can be useful for debugging, please see chapter 13 for
more documentation.
9.1 Installing Debug Tools on the Target
If you want to use any debugging feature that is described in the next chapters, you have to install the debug
tools on the target beforehand:
make debugtools_install
The debug utilities will be installed in the /mnt/user/debug-root/ directory on the target.
To remove the debug tools later, you may run
make debugtools_remove
9.2 Release vs. Debug Build
By default, the demo application will be built for debugging.
The kind of build is controlled by setting specific flags for compiler, linker, etc., in the CFLAGS environment
variable, which is defined at the top of the Makefile of the Pxxx Development Package.
Among others, the (by default inactive) release flags are:
# Define the following for a release build
#CFLAGS += -O3 -DNDEBUG
which is optimization at level 3 (-O3), and disabling all assert()s in the code (-DNDEBUG).
The (by default active) debug flags are:
# ...or the define the following for a debug build (if you want to use a debugger
as GDB)
CFLAGS += -O0 -g
which is optimization at level 0 (-O0), and enabling symbol information in the object file (-g).
9.3 Running GDB on the Device
The simplest option to use GDB is its command-line interface on the Pxxx device itself.
Building and deploying the demo application is required beforehand:
make
make deploy
Log in to the ToF device via SSH afterwards, and start the GDB session with

User Manual - Pxxx Linux Development Package Last change: 20 October 2015 Version 4
© Bluetechnix 2015 Page 24 | 33
make login
cd /mnt/user
./run_app_gdb.sh
GNU gdb (Freescale MAD -- Linaro 2011.07 -- Built at 2011/08/10 09:20) 7.2-
2011.05-0
Copyright (C) 2010 Free Software Foundation, Inc.
License GPLv3+: GNU GPL version 3 or later <http://gnu.org/licenses/gpl.html>
This is free software: you are free to change and redistribute it.
There is NO WARRANTY, to the extent permitted by law. Type "show copying"
and "show warranty" for details.
This GDB was configured as "arm-fsl-linux-gnueabi".
For bug reporting instructions, please see:
<http://bugs.launchpad.net/gdb-linaro/>...
Reading symbols from /mnt/user/bta_eth_example...done.
(gdb)
Note that GDB reads symbols from the bta_eth_example ELF file, so you can set source-level breakpoints,
for example:
(gdb) break infoEvent
Breakpoint 1 at 0x8e74: file app/bta_eth_example.c, line 31.
(gdb) run
Starting program: /mnt/user/bta_eth_example
…
9.4 Running Remote GDB Debug Session
The debug tools also contain the GDBSERVER application, which is a backend that controls the ‘inferior’,
i.e., the application that is debugged, and which is controlled via Ethernet from the work station. On your
development work station, you can then run the GDB command-line interface or any IDE debugger that is
capable of working with GDB (as for example, Eclipse with the C Development toolkit (CDT) – but this is our
of scope for this document).
To start such a remote debugging session, you may use the provided Makefile target:
make gdbstart
Note, for remote debugging, the application cannot be run by the ‘run’ command, but by a simple ‘c’
(continue) command.
Here is what it does in the background (you may use this information to set up a GUI debugging
environment):
It starts GDBSERVER on the target – have a look at the run_app_gdbserver.sh script. The
GDBSERVER program needs an IP address and a port to listen for incoming connections – in our
case, it is “localhost:20000”, i.e., GDBSERVER listens on the target’s local port no. 20000.
User Manual - Pxxx Linux Development Package Last change: 20 October 2015 Version 4
© Bluetechnix 2015 Page 25 | 33
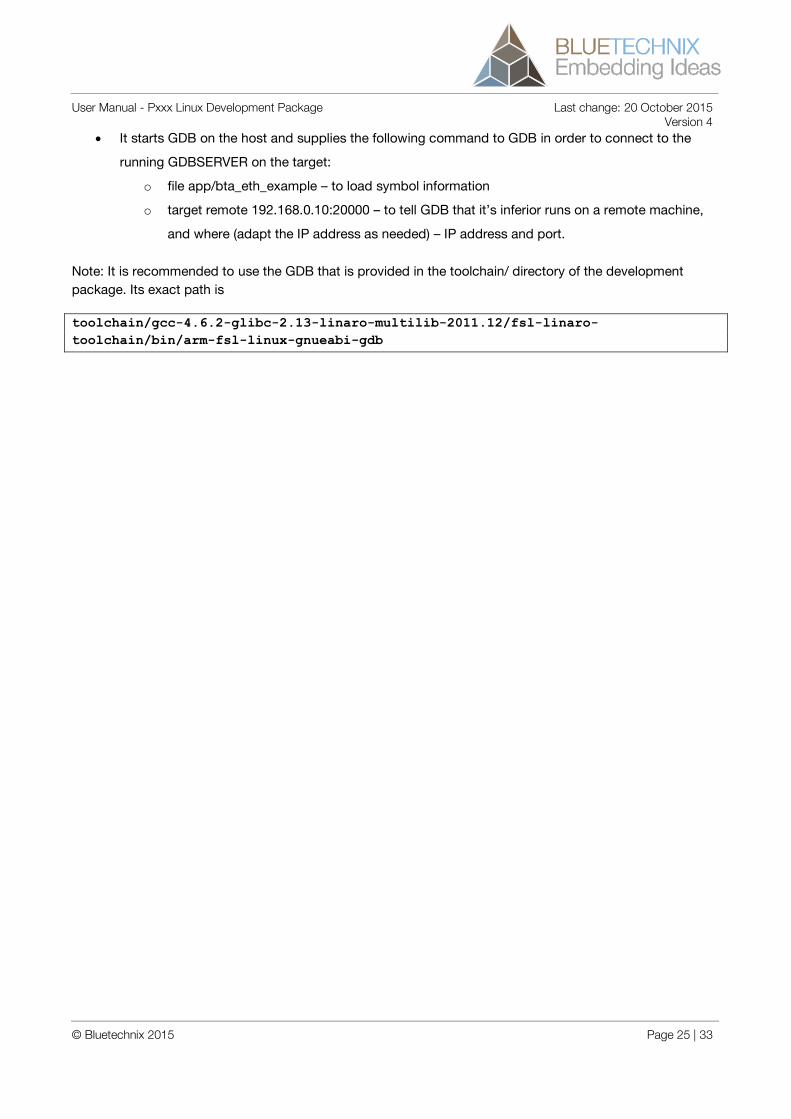
It starts GDB on the host and supplies the following command to GDB in order to connect to the
running GDBSERVER on the target:
o file app/bta_eth_example – to load symbol information
o target remote 192.168.0.10:20000 – to tell GDB that it’s inferior runs on a remote machine,
and where (adapt the IP address as needed) – IP address and port.
Note: It is recommended to use the GDB that is provided in the toolchain/ directory of the development
package. Its exact path is
toolchain/gcc-4.6.2-glibc-2.13-linaro-multilib-2011.12/fsl-linaro-
toolchain/bin/arm-fsl-linux-gnueabi-gdb
User Manual - Pxxx Linux Development Package Last change: 20 October 2015 Version 4
© Bluetechnix 2015 Page 26 | 33
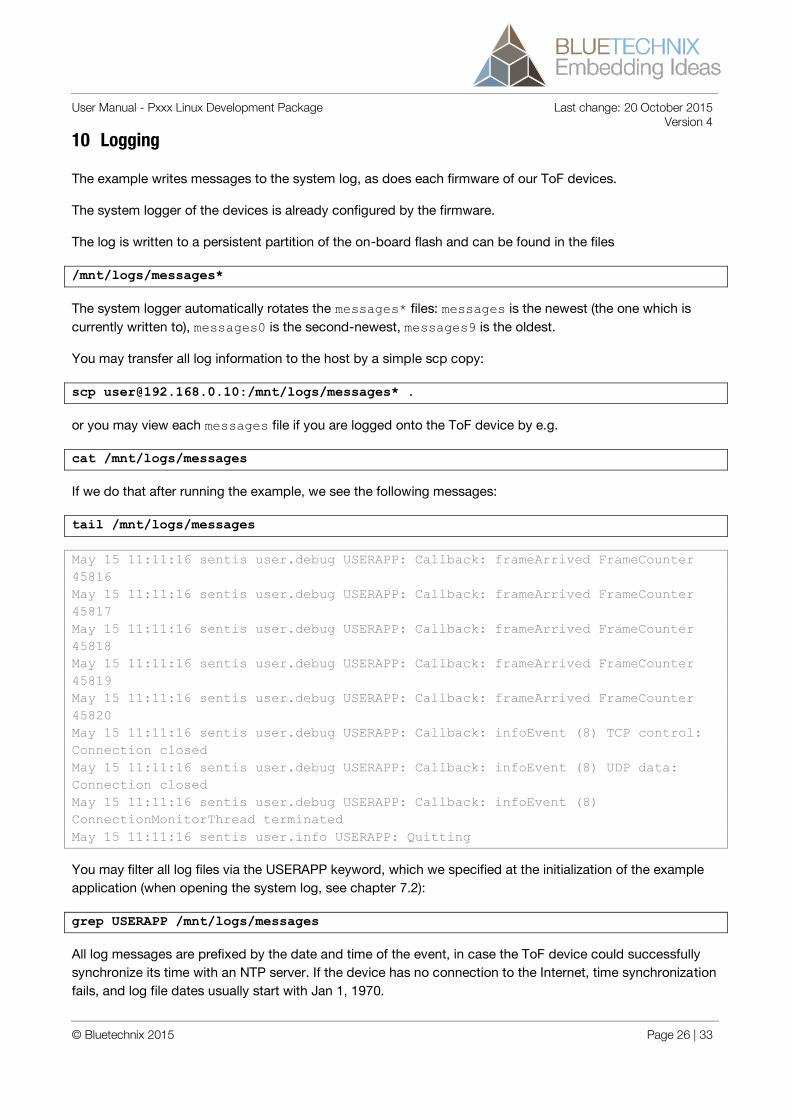
10 Logging
The example writes messages to the system log, as does each firmware of our ToF devices.
The system logger of the devices is already configured by the firmware.
The log is written to a persistent partition of the on-board flash and can be found in the files
/mnt/logs/messages*
The system logger automatically rotates the messages* files: messages is the newest (the one which is
currently written to), messages0 is the second-newest, messages9 is the oldest.
You may transfer all log information to the host by a simple scp copy:
scp [email protected]:/mnt/logs/messages* .
or you may view each messages file if you are logged onto the ToF device by e.g.
cat /mnt/logs/messages
If we do that after running the example, we see the following messages:
tail /mnt/logs/messages
May 15 11:11:16 sentis user.debug USERAPP: Callback: frameArrived FrameCounter
45816
May 15 11:11:16 sentis user.debug USERAPP: Callback: frameArrived FrameCounter
45817
May 15 11:11:16 sentis user.debug USERAPP: Callback: frameArrived FrameCounter
45818
May 15 11:11:16 sentis user.debug USERAPP: Callback: frameArrived FrameCounter
45819
May 15 11:11:16 sentis user.debug USERAPP: Callback: frameArrived FrameCounter
45820
May 15 11:11:16 sentis user.debug USERAPP: Callback: infoEvent (8) TCP control:
Connection closed
May 15 11:11:16 sentis user.debug USERAPP: Callback: infoEvent (8) UDP data:
Connection closed
May 15 11:11:16 sentis user.debug USERAPP: Callback: infoEvent (8)
ConnectionMonitorThread terminated
May 15 11:11:16 sentis user.info USERAPP: Quitting
You may filter all log files via the USERAPP keyword, which we specified at the initialization of the example
application (when opening the system log, see chapter 7.2):
grep USERAPP /mnt/logs/messages
All log messages are prefixed by the date and time of the event, in case the ToF device could successfully
synchronize its time with an NTP server. If the device has no connection to the Internet, time synchronization
fails, and log file dates usually start with Jan 1, 1970.
User Manual - Pxxx Linux Development Package Last change: 20 October 2015 Version 4
© Bluetechnix 2015 Page 27 | 33
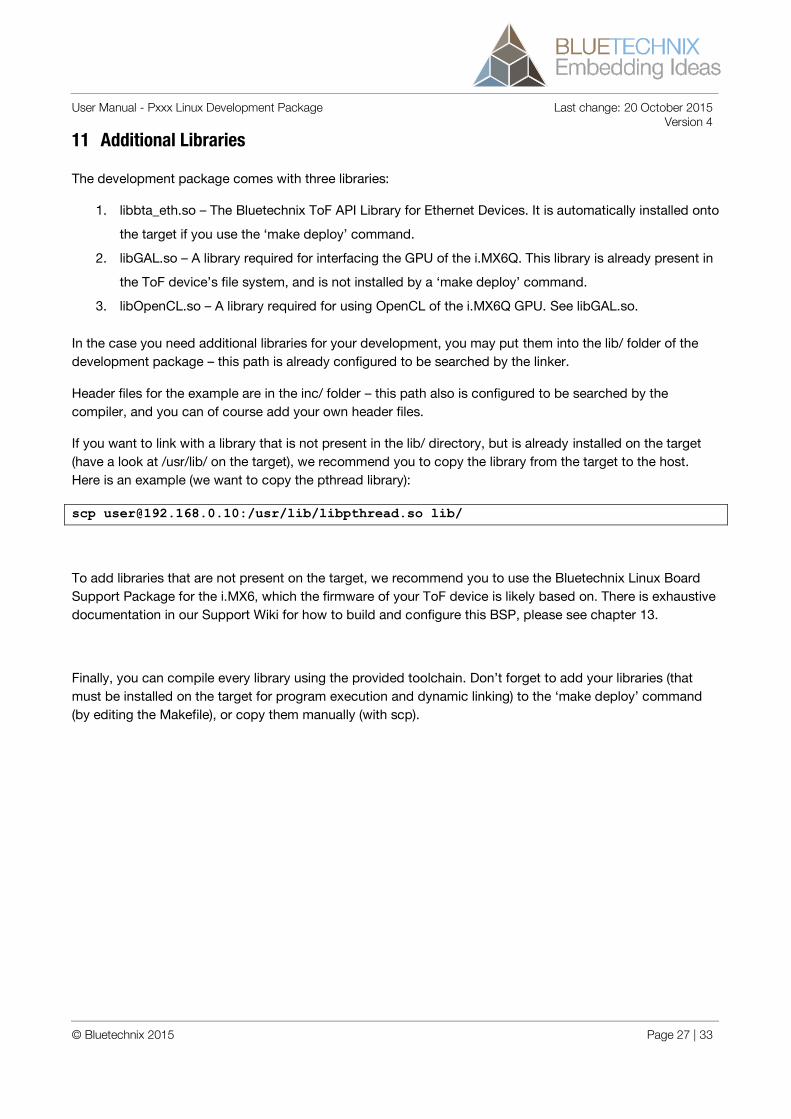
11 Additional Libraries
The development package comes with three libraries:
1. libbta_eth.so – The Bluetechnix ToF API Library for Ethernet Devices. It is automatically installed onto
the target if you use the ‘make deploy’ command.
2. libGAL.so – A library required for interfacing the GPU of the i.MX6Q. This library is already present in
the ToF device’s file system, and is not installed by a ‘make deploy’ command.
3. libOpenCL.so – A library required for using OpenCL of the i.MX6Q GPU. See libGAL.so.
In the case you need additional libraries for your development, you may put them into the lib/ folder of the
development package – this path is already configured to be searched by the linker.
Header files for the example are in the inc/ folder – this path also is configured to be searched by the
compiler, and you can of course add your own header files.
If you want to link with a library that is not present in the lib/ directory, but is already installed on the target
(have a look at /usr/lib/ on the target), we recommend you to copy the library from the target to the host.
Here is an example (we want to copy the pthread library):
scp [email protected]:/usr/lib/libpthread.so lib/
To add libraries that are not present on the target, we recommend you to use the Bluetechnix Linux Board
Support Package for the i.MX6, which the firmware of your ToF device is likely based on. There is exhaustive
documentation in our Support Wiki for how to build and configure this BSP, please see chapter 13.
Finally, you can compile every library using the provided toolchain. Don’t forget to add your libraries (that
must be installed on the target for program execution and dynamic linking) to the ‘make deploy’ command
(by editing the Makefile), or copy them manually (with scp).
User Manual - Pxxx Linux Development Package Last change: 20 October 2015 Version 4
© Bluetechnix 2015 Page 28 | 33
12 Efficient Embedded Development
This chapter should give some advices on differences between powerful PC platforms and embedded
platforms and how to use embedded platforms efficiently.
The BltTofApi enables you generally to start with your development on a PC, then later cross-compile the
application with little effort and have it execute on the embedded platform.
However, there are options on the embedded i.MX6Q platform that may legitimate a partly different
implementation for the embedded target, if your application needs more performance than can be satisfied
by a multi-threaded C program.
12.1 Using the GPU/OpenCL
The i.MX6Q GPU features OpenCL 1.1 EP (Embedded Profile) support. OpenCL stands for “Open
Computing Language” and was designed to use the calculation power of Graphics Processing Units not for
rendering graphics, but for fast calculations.
The i.MX6Q GPU can execute several “kernels” (GPU programs) in parallel, which makes typical image
processing steps pretty fast. On the i.MX6Q, the GPU “owns” a part of system memory, which is not under
control of the Embedded Linux operating system, and was earlier explained as “GPU memory”.
As we have presented in the example code, input data to the GPU is uploaded to GPU memory before
execution, and the resulting data is then again downloaded into memory-managed Linux memory. Though
there are several memory access methods defined in OpenCL, we have found this approach to be the
fastest, assuming that data has to be manipulated on the ARM CPUs before and after calculations on the
GPU.
For the programmer, it means, that there is a trade-off in terms of execution times between the ARM Cortex-
A9 CPU and the GPU. The GPU is typically faster than the CPU, but additional time is required for up- and
download of the data to and from the GPU. A rule of thumb should therefore be: If you use the GPU, do as
much as possible on it. And a second: Do it in one run, don’t switch often between CPU and GPU (which
always requires copying buffers).
Let’s summarize:
+ GPU is fast
+ GPU instructions are complete – integer, math, geometric, image built-in functions
- GPU consumes much power
- GPU requires up- and download of data to/from dedicated GPU memory
The OpenCL API is pretty straight-forward. Amongst many tutorials that are available on the Internet, we
recommend the official OpenCL reference: https://www.khronos.org/registry/cl/sdk/1.1/docs/man/xhtml/
12.2 Using NEON SIMD Instructions
NEON is an additional instruction set of the Cortex-A9 cores in the i.MX6Q. These are all SIMD instructions –
a single instruction operates on multiple data. The implementation on the i.MX6Q features 32 D-registers
User Manual - Pxxx Linux Development Package Last change: 20 October 2015 Version 4
© Bluetechnix 2015 Page 29 | 33
(with 64 bits each). NEON instructions operate either on these or on the 128-bit Q-registers. Two D-registers
can always be accessed as one Q-register.
Compared to the GPU (OpenCL), data must be loaded into NEON registers, and then stored back to
memory, but this is faster than the memory copy which is required for the GPU. Another advantage is that
each of the four CPU cores has an own set of NEON registers, so NEON code can easily be used in a multi-
threaded program. Also, NEON instructions and ARM instructions can be mixed nearly without a
performance penalty.
+ NEON doesn’t require memory copy
+ NEON consumes less power than the GPU
+ NEON can easily be multi-threaded
+ NEON is faster than plain C code (ARM instruction set)
- NEON features only basic instructions, there are no math built-in functions
There is a good reference from the ARM website about the NEON instruction set:
http://infocenter.arm.com/help/index.jsp?topic=/com.arm.doc.dui0489c/CJAJIIGG.html
For getting used to NEON, there is NEVADA – a web tool that let’s you graphically simulate NEON
instructions: http://szeged.github.io/nevada/
User Manual - Pxxx Linux Development Package Last change: 20 October 2015 Version 4
© Bluetechnix 2015 Page 30 | 33
13 Account Management
Change default password for root 1. Log in via SSH, e.g., ssh [email protected] 2. Type passwd 3. Supply the new password for two times 4. Copy the file /etc/shadow (containing the encrypted passwords) to the non-volatile
settings partition, to be restored again on next reboot: cp /etc/shadow /mnt/settings
Change default password for user 1. Log in via SSH, e.g., ssh [email protected] 2. Type passwd 3. Supply the new password for two times 4. Copy the file /etc/shadow (containing the encrypted passwords) to the non-volatile
settings partition, to be restored again on next reboot: cp /etc/shadow /mnt/settings
Add a user 1. Log in via SSH, e.g., ssh [email protected] 2. Type adduser –h /mnt/user/anotheruser anotheruser (Since /mnt/user is
the only writable partition, you should create the user’s home directory there; Replace ‘anotheruser’ with your desired user name)
3. Supply the new password for two times 4. Copy the files /etc/shadow (containing the encrypted passwords) and
/etc/passwd (contains user list) to the non-volatile settings partition, to be restored again on next reboot: cp /etc/shadow /etc/passwd /mnt/settings
User Manual - Pxxx Linux Development Package Last change: 20 October 2015 Version 4
© Bluetechnix 2015 Page 31 | 33
14 Documentation Resources
Here is a summary of documentation resources that will be helpful for you during development.
Hardware User Manual: Comes with each ToF device.
Software User Manual: Comes with each ToF device. Contains complete register list for each device.
Bluetechnix ToF API (BTA):
https://support.bluetechnix.at/wiki/Bluetechnix_%27Time_of_Flight%27_API#Reference_Manual
Board Support Package of the Bluetechnix CM-i.MX6 System-on-Module (which is used in i.MX6-
based ToF devices from Bluetechnix):
https://support.bluetechnix.at/wiki/Linux_Software_User_Manual_%28i.MX6%29 (Use it to build
additional libraries!)
“About GCC Linaro 4.6.2 Multilib Toolchain” – Document from Freescale (processor vendor) about
the toolchain which is part of the Pxxx Development Package. Has a short list of available debug
tools in chapter 3.2.
The document is provided in the Pxxx Development Package: doc/
about_gcc_linaro_4.6.2_multilib_toolchain.pdf
GDB (GNU Debugger) Quick Reference Card: doc/gdb-refcard.pdf
OpenCL 1.1 Reference Pages: https://www.khronos.org/registry/cl/sdk/1.1/docs/man/xhtml/
OpenCL 1.1 Quick Reference Card: doc/opencl-1-1-quick-reference-card.pdf
NEON reference:
http://infocenter.arm.com/help/index.jsp?topic=/com.arm.doc.dui0489c/CJAJIIGG.html
NEVADA, web NEON simulator: http://szeged.github.io/nevada/
i.MX6 Quad Processor Data Sheet and Reference Manual can be downloaded from Freescale’s
website (registration required): http://www.freescale.com
User Manual - Pxxx Linux Development Package Last change: 20 October 2015 Version 4
© Bluetechnix 2015 Page 32 | 33
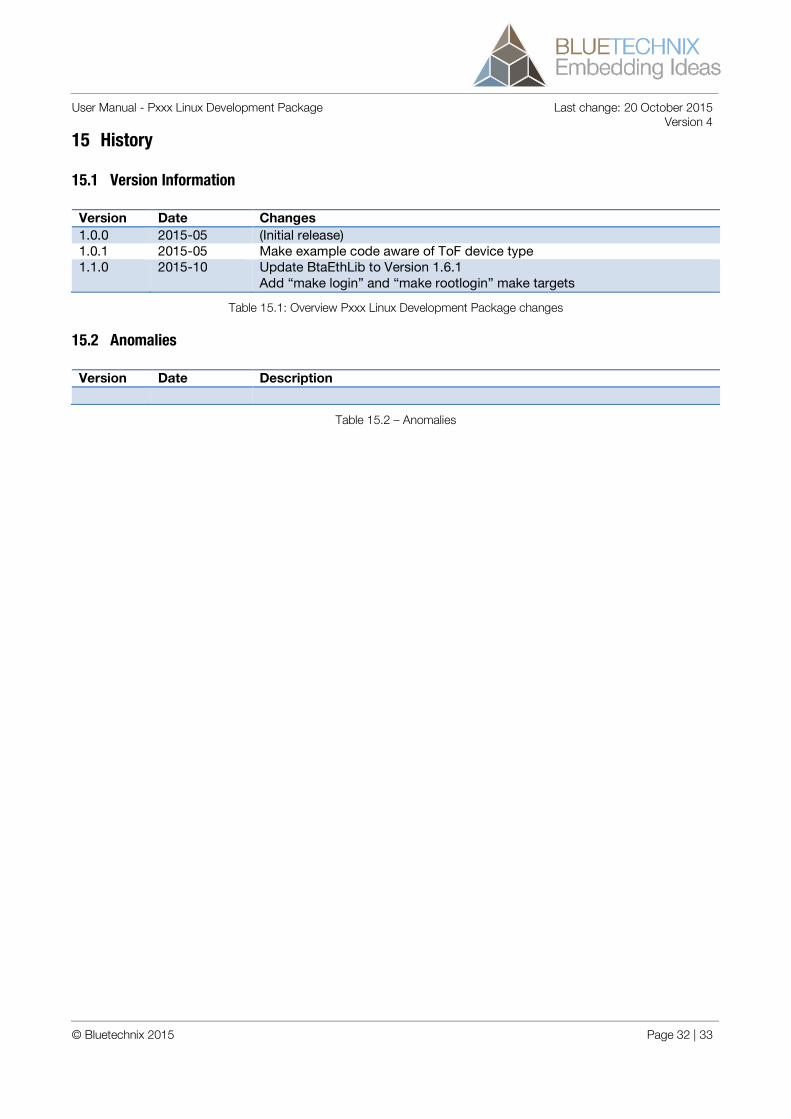
15 History
15.1 Version Information
Version Date Changes
1.0.0 2015-05 (Initial release) 1.0.1 2015-05 Make example code aware of ToF device type 1.1.0 2015-10 Update BtaEthLib to Version 1.6.1
Add “make login” and “make rootlogin” make targets
Table 15.1: Overview Pxxx Linux Development Package changes
15.2 Anomalies
Version Date Description
Table 15.2 – Anomalies
User Manual - Pxxx Linux Development Package Last change: 20 October 2015 Version 4
© Bluetechnix 2015 Page 33 | 33
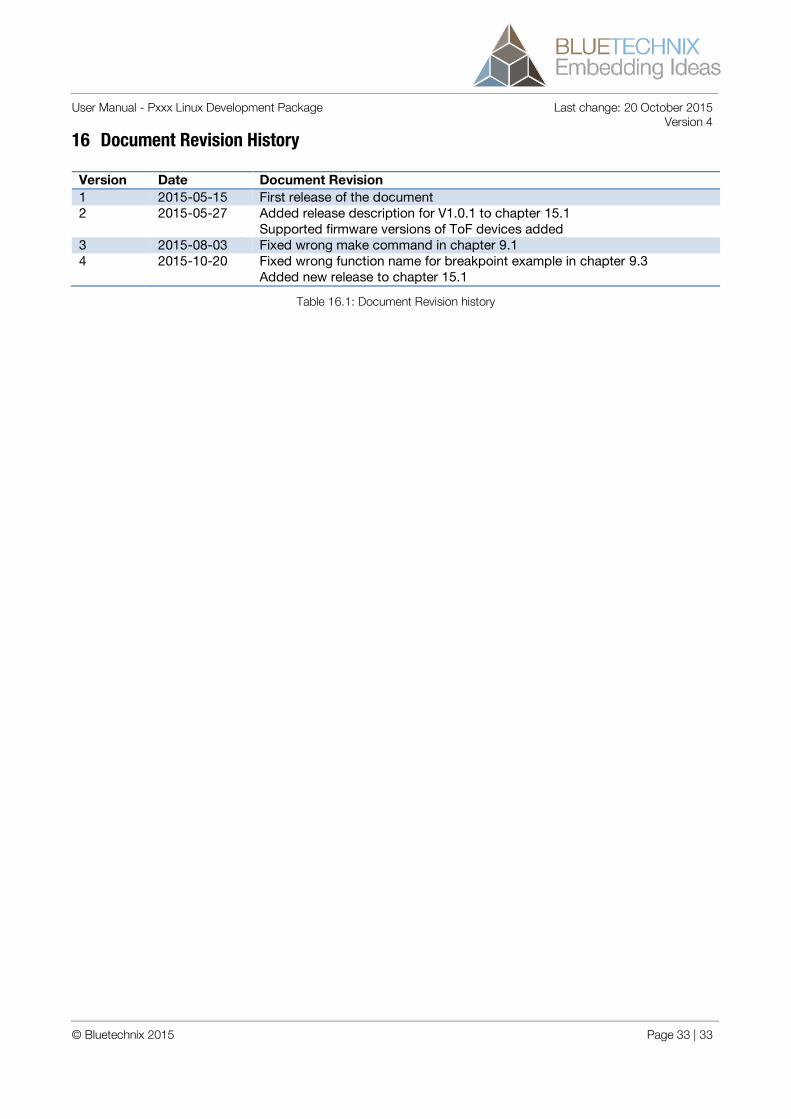
16 Document Revision History
Version Date Document Revision
1 2015-05-15 First release of the document 2 2015-05-27 Added release description for V1.0.1 to chapter 15.1
Supported firmware versions of ToF devices added 3 2015-08-03 Fixed wrong make command in chapter 9.1 4 2015-10-20 Fixed wrong function name for breakpoint example in chapter 9.3
Added new release to chapter 15.1
Table 16.1: Document Revision history