Embed Size (px)
Citation preview
Quickpay
Transferring employees from one company to another As with all major procedures, a backup of the affected companies should be taken before any changes are made to the payroll. If the Employee you are transferring is changing frequencies within Quickpay, then this should only be done at the beginning of the month. Steps 1. Print out the Tax Deduction Card for that employee. You can use the information from this report to set up the employee in the new frequency. Go to Reports, select Tax Deduction Card, enter that employee’s number in both of the Employee Range boxes and print. You will need to note down the Tax Credit and Std.Rate Cut-Off from their Employee Details.
2. Set up the employee on the destination company following the Mid-Year Setup procedure. (Refer to the Mid Year Setup document that follows). Remember that if the employee is moving from one frequency to another the period values such as payments, deductions, Tax Credit and Standard Rate Cut off will have to be converted with respect to the frequency.
Quickpay
Mid Year Set-up When setting up a computerised payroll product you would prefer to be starting off at the beginning of the tax year. In the majority of cases this is not possible. Usually the payroll will have been previously processed manually, on a different payroll package or by accountant or other third party. In cases like this, the existing payroll information needs to be transferred to Quickpay. This can be done in one of two ways. You can process all the previous periods individually on the software from the beginning of the tax year, although many times this cannot be done due to either to the amount of the employees on the books or the number of periods to be processed. The other option is to run through a procedure called a Mid Year Set-Up. The Mid Year Set-up basically involves inputting the total year to date, or cumulative figures in one lump sum into the Tax Deduction Card. This will automatically update the Details 1 & 2 sections with similar values. For example, if you had one employee who was paid for three weekly periods. The employee gets paid €500 a week, the tax is €100 per week and the employee and employer’s PRSI are €30 & €60 per week respectively. If we were to enter in the cumulative figures, the gross pay would be €1500, the tax €300, the employee’s PRSI €90 and the employer’s PRSI €180. You would also need to record the amount of insurance weeks the employee has accumulated with your company during the current year; in this case would be three. The routine to follow when running the Mid Year Setup will be listed step by step below:
• Gather all of the required information, when entering the pay after you may need to decide up to which period the cumulative figures apply to. This will also determine which period will be the first one to process in Quickpay.
• You will now need to set the first period. If you have paid up until period 17 and are
due to pay period 18 you can set period 17 and enter cumulative details up until that date. You can set period 18 when you have completed the Mid Year Setup
• The next thing that we need to do is setup the employee’s information. The basic
information such as address, basic hourly rate and standard hours can be entered but listed below will be the fields that must be entered before the Mid Year Set Up can be run. Please only enter details that are mentioned below. After successfully completing the Mid Year Setup and saving all employees you may proceed to enter the remaining details.
All of the following fields are on Details 1 of the Employee Details These are the mandatory fields that must be entered in Details 1 screen. Any other relevant information will be updates automatically later on in the Mid Year Set Up process.

Quickpay
Std Cut off: The amount of standard rate cut off the employee has per period. If it is a weekly payroll put in the weekly amount, if a monthly payroll put in the monthly figures etc.
Tax Credit: Similar to the STD cut off: enter the period amount of tax credit for each employee. In this situation it is a weekly figure as this is a weekly payroll.
Tax Status: In this case of most employees, this will be set to Normal but there will be exceptions to this e.g. in the case on new employees on Emergency tax. PPS Number: The PPS number is the new name for RSI number and should be entered next Medical Card Holder: You will need to tick this if this employee has a Full Medical Card. Medical cards are exempt from paying USC at 7%.
Base Code: This is the PRSI base code that an employee is classed under. For the majority of employees this will be A1 but if you are unsure of an employee base code, please contact the Department of Social and Family affairs. PRSI Code: This field stores the employee’s most recent PRSI code. The PRSI code field is not actually too important, as once the correct base code has been selected, the system will be then able to determine the correct PRSI code for an employee based on their earnings in the current period. If an employee is on a base code of A1 and they earn more than €500 per week, the system will automatically put the employee on a PRSI code of A1.
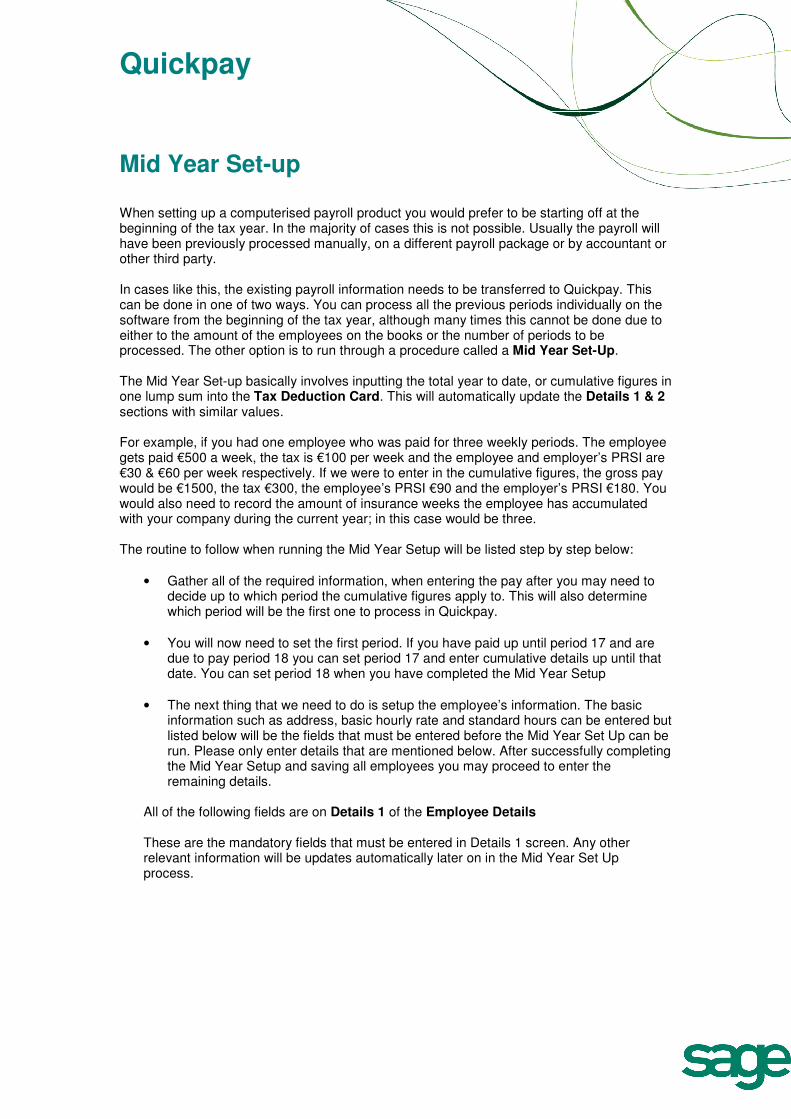
BIK YTD: If an employee has paid Benefit In Kind in the current tax year while in your employment, enter the notional pay in the Payments tab under total tax year.
Quickpay
This will update the value in the Details 1 tab also.
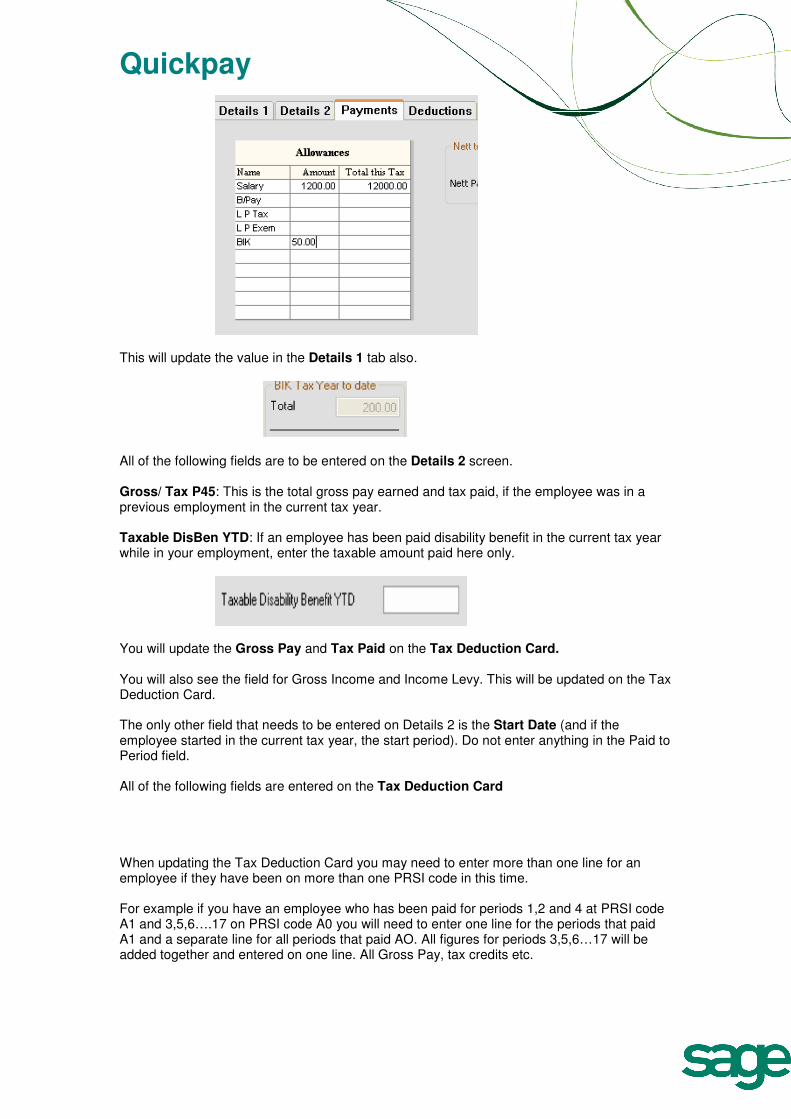
All of the following fields are to be entered on the Details 2 screen. Gross/ Tax P45: This is the total gross pay earned and tax paid, if the employee was in a previous employment in the current tax year. Taxable DisBen YTD: If an employee has been paid disability benefit in the current tax year while in your employment, enter the taxable amount paid here only.
You will update the Gross Pay and Tax Paid on the Tax Deduction Card. You will also see the field for Gross Income and Income Levy. This will be updated on the Tax Deduction Card. The only other field that needs to be entered on Details 2 is the Start Date (and if the employee started in the current tax year, the start period). Do not enter anything in the Paid to Period field. All of the following fields are entered on the Tax Deduction Card When updating the Tax Deduction Card you may need to enter more than one line for an employee if they have been on more than one PRSI code in this time. For example if you have an employee who has been paid for periods 1,2 and 4 at PRSI code A1 and 3,5,6….17 on PRSI code A0 you will need to enter one line for the periods that paid A1 and a separate line for all periods that paid AO. All figures for periods 3,5,6…17 will be added together and entered on one line. All Gross Pay, tax credits etc.
Quickpay
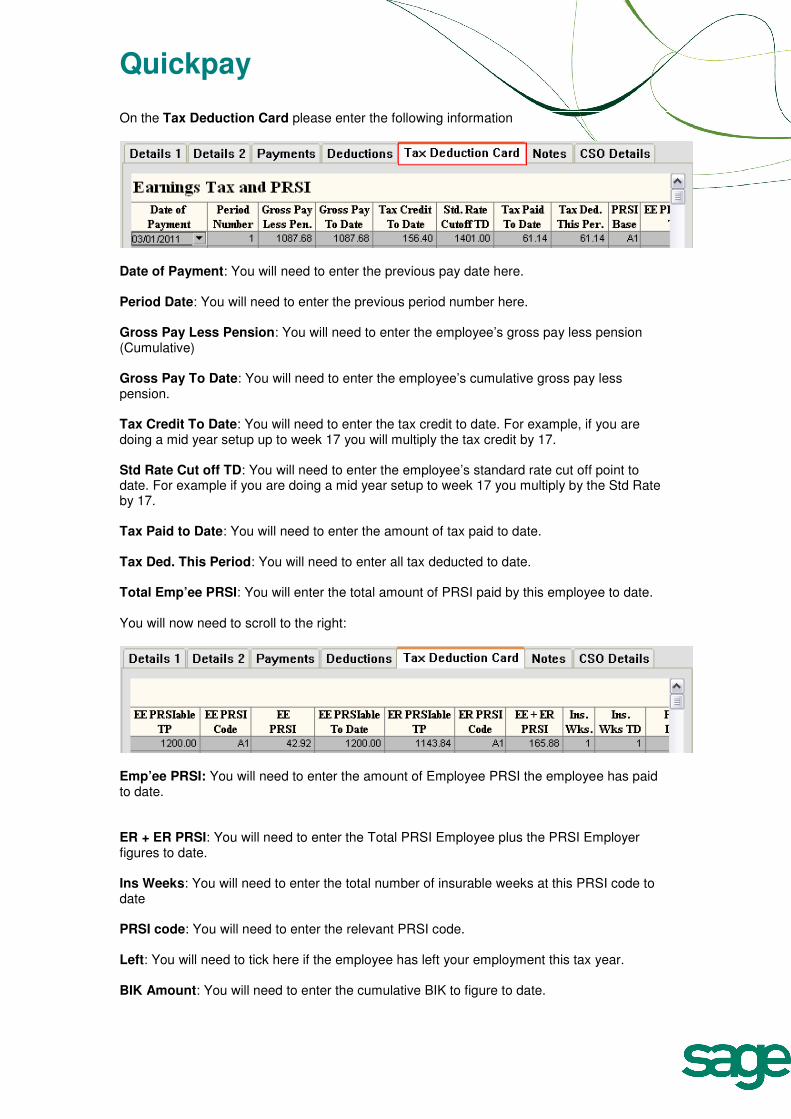
On the Tax Deduction Card please enter the following information
Date of Payment: You will need to enter the previous pay date here. Period Date: You will need to enter the previous period number here. Gross Pay Less Pension: You will need to enter the employee’s gross pay less pension (Cumulative) Gross Pay To Date: You will need to enter the employee’s cumulative gross pay less pension. Tax Credit To Date: You will need to enter the tax credit to date. For example, if you are doing a mid year setup up to week 17 you will multiply the tax credit by 17. Std Rate Cut off TD: You will need to enter the employee’s standard rate cut off point to date. For example if you are doing a mid year setup to week 17 you multiply by the Std Rate by 17. Tax Paid to Date: You will need to enter the amount of tax paid to date. Tax Ded. This Period: You will need to enter all tax deducted to date. Total Emp’ee PRSI: You will enter the total amount of PRSI paid by this employee to date. You will now need to scroll to the right:
Emp’ee PRSI: You will need to enter the amount of Employee PRSI the employee has paid to date. ER + ER PRSI: You will need to enter the Total PRSI Employee plus the PRSI Employer figures to date. Ins Weeks: You will need to enter the total number of insurable weeks at this PRSI code to date PRSI code: You will need to enter the relevant PRSI code. Left: You will need to tick here if the employee has left your employment this tax year. BIK Amount: You will need to enter the cumulative BIK to figure to date.
Quickpay
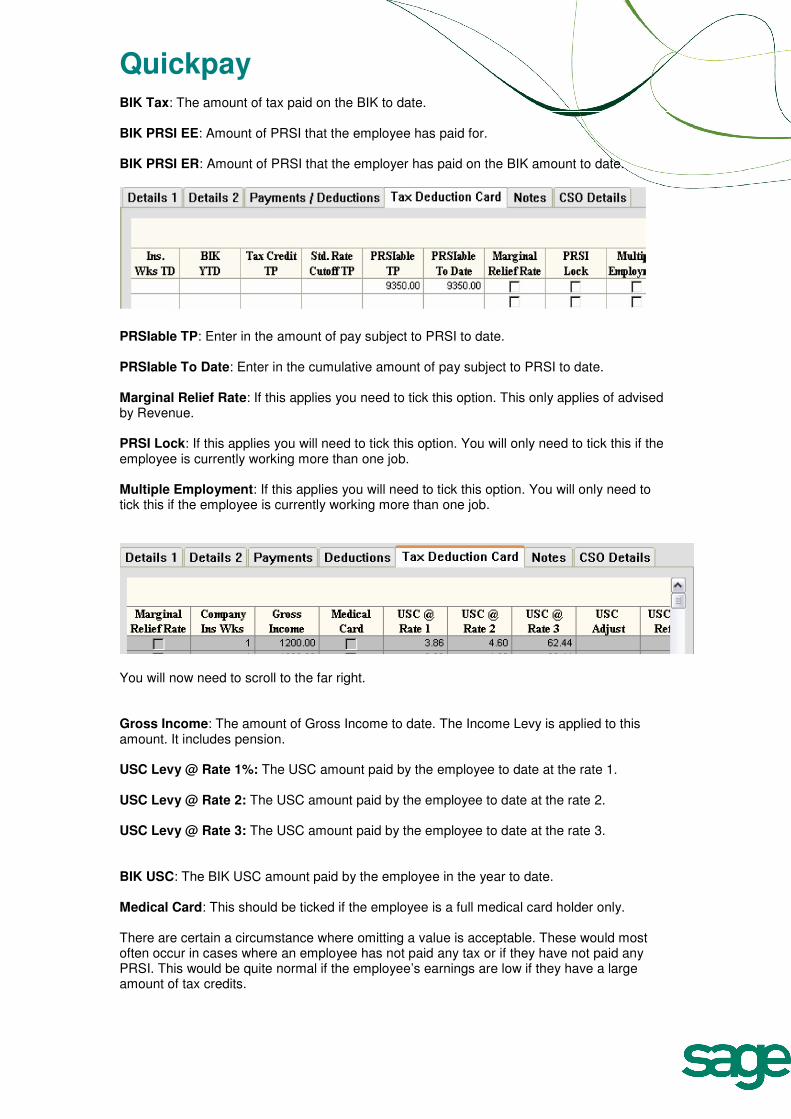
BIK Tax: The amount of tax paid on the BIK to date. BIK PRSI EE: Amount of PRSI that the employee has paid for. BIK PRSI ER: Amount of PRSI that the employer has paid on the BIK amount to date.
PRSIable TP: Enter in the amount of pay subject to PRSI to date. PRSIable To Date: Enter in the cumulative amount of pay subject to PRSI to date. Marginal Relief Rate: If this applies you need to tick this option. This only applies of advised by Revenue. PRSI Lock: If this applies you will need to tick this option. You will only need to tick this if the employee is currently working more than one job. Multiple Employment: If this applies you will need to tick this option. You will only need to tick this if the employee is currently working more than one job.
You will now need to scroll to the far right. Gross Income: The amount of Gross Income to date. The Income Levy is applied to this amount. It includes pension. USC Levy @ Rate 1%: The USC amount paid by the employee to date at the rate 1. USC Levy @ Rate 2: The USC amount paid by the employee to date at the rate 2. USC Levy @ Rate 3: The USC amount paid by the employee to date at the rate 3. BIK USC: The BIK USC amount paid by the employee in the year to date. Medical Card: This should be ticked if the employee is a full medical card holder only. There are certain a circumstance where omitting a value is acceptable. These would most often occur in cases where an employee has not paid any tax or if they have not paid any PRSI. This would be quite normal if the employee’s earnings are low if they have a large amount of tax credits.

Quickpay
When you have saved this information correctly, the Details 1 & 2 of the employee will automatically be updated with these totals. P30 Report After completing the Mid Year Set-up for all employees the p30 will automatically be updated. You can check this by selecting Company/Payroll Setup- P30/CC124.
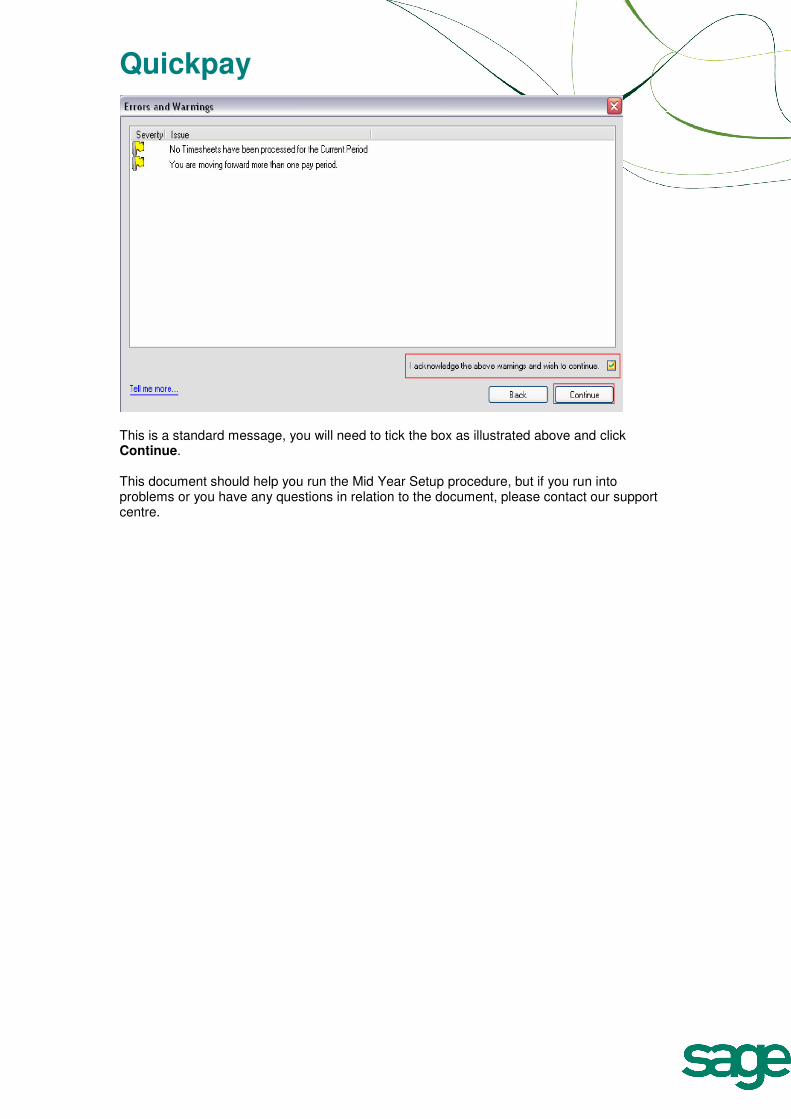
If you do not have the totals broken up correctly month-by month, then you can just differentiate between the tax and PRSI that will be due at the end of the current month and the amounts that you have paid in previous months. This is so you don’t repay amounts that you have already paid or forget to pay amounts that are due from the current month. Once all the steps have been completed correctly you can set the period you are due to pay. On Sage Quickpay when you try to move forward more than on pay period you will get the following message:
Quickpay
This is a standard message, you will need to tick the box as illustrated above and click Continue. This document should help you run the Mid Year Setup procedure, but if you run into problems or you have any questions in relation to the document, please contact our support centre.