Embed Size (px)
Citation preview

Quick Reference Guide
Optiset E Entry and Basic for Hicom 300 E CS
title.fm Page 1 Tuesday, February 1, 2000 2:57 PM

NOTE: This equipment has been tested and found to comply with the limits for a Class B digital device, pursuant to Part 15 of the FCC Rules. These limits are designed to provide reasonable protection against harmful interference in a residential installation. This equipment generates, uses and can radiate radio frequency energy and, if not installed and used in accordance with the instructions, may cause harmful interference to radio communications. However, there is no guarantee that interference will not occur in a particular installation. If this equipment does cause harmful interference to radio or television reception, which can be determined by turning the equipment off and on, the user is encouraged to try to correct the interference by one or more of the following measures:- Reorient or relocate the receiving antenna.- Increase the separation between the equipment and receiver.- Connect the equipment into an outlet on a circuit different from that to
which the receiver is connected.- Consult the dealer or an experienced radio/TV technician for help.
WARNING: Changes or modifications to the equipment that are not expressly approved by the responsible party for compliance could void the user’s authority to operate the equipment.
This equipment does not exceed Class B limits per radio noise emissions for digital apparatus, set out in the Radio Interference Regulation of the Canadian Department of Communications. Operation in a residential area may cause unacceptable interference to radio and TV reception requiring the owner or operator to take whatever steps are necessary to correct the interference.
Cet équipement ne dépasse pas les limites de Classe B d'émission de bruits radioélectriques por les appareils numériques, telles que prescrites par le Règlement sur le brouillage radioélectrique établi par le ministère des Commu-nications du Canada. L'exploitation faite en milieu résidentiel peut entraîner le brouillage des réceptions radio et télé, ce qui obligerait le propriétaire ou l'opérateur à prendre les dispositions nécessaires pour en éliminer les causes.
November 1998Form No. GU30-1603-01 Part No. 06D8630 EC No. A93070
No part of this publication may be reproduced, stored in a retrieval system, or transmitted, in any form or by any means, mechanical, electronic, photocopy-ing, recording, or otherwise, without prior written permission of Siemens Busi-ness Communication Systems, Inc.
Request Siemens publications from your Siemens representative or the Sie-mens branch serving you. Publications are not stocked at the address below.Siemens Business Communication Systems, Inc.4900 Old Ironsides DriveP.O. Box 58075Santa Clara, CA 95052-8075(408) 492-2000
PhoneMail is a registered trademark of Siemens Business CommunicationSystems, Inc.Siemens, Hicom, and Optiset are registered trademarks of SiemensAktiengesellschaft.Copyright Siemens Business Communication Systems, Inc. 1998.All rights reserved.
title.fm Page 2 Tuesday, February 1, 2000 2:57 PM
i
ContentsContents . . . . . . . . . . . . . . . . . . . . . . . . . . . . . . . . . . . . . . . . . iWelcome to Your Optiset E Telephone . . . . . . . . . . . . . . . . . 1Optiset E Entry Telephone . . . . . . . . . . . . . . . . . . . . . . . . . . . 1Optiset E Basic Telephone . . . . . . . . . . . . . . . . . . . . . . . . . . . 2Bay Option Modules . . . . . . . . . . . . . . . . . . . . . . . . . . . . . . . . 2Optiset E Local Power Supply . . . . . . . . . . . . . . . . . . . . . . . . 6Where to Go for Assistance . . . . . . . . . . . . . . . . . . . . . . . . . . 7Your Class of Service . . . . . . . . . . . . . . . . . . . . . . . . . . . . . . . 7Line Keys . . . . . . . . . . . . . . . . . . . . . . . . . . . . . . . . . . . . . . . . 7Status Lights . . . . . . . . . . . . . . . . . . . . . . . . . . . . . . . . . . . . . . 7Feature Keys and Access Codes . . . . . . . . . . . . . . . . . . . . . . . 8Volume Keys . . . . . . . . . . . . . . . . . . . . . . . . . . . . . . . . . . . . . 8Changing Your Audio Settings . . . . . . . . . . . . . . . . . . . . . . . 10Callback Request . . . . . . . . . . . . . . . . . . . . . . . . . . . . . . . . . 11Conference . . . . . . . . . . . . . . . . . . . . . . . . . . . . . . . . . . . . . . 12Connect . . . . . . . . . . . . . . . . . . . . . . . . . . . . . . . . . . . . . . . . . 13Consultation . . . . . . . . . . . . . . . . . . . . . . . . . . . . . . . . . . . . . 14Forwarding . . . . . . . . . . . . . . . . . . . . . . . . . . . . . . . . . . . . . . 15Hold . . . . . . . . . . . . . . . . . . . . . . . . . . . . . . . . . . . . . . . . . . . 16Last Number Redial . . . . . . . . . . . . . . . . . . . . . . . . . . . . . . . 17Mailbox . . . . . . . . . . . . . . . . . . . . . . . . . . . . . . . . . . . . . . . . . 18Park . . . . . . . . . . . . . . . . . . . . . . . . . . . . . . . . . . . . . . . . . . . . 19PhoneMail . . . . . . . . . . . . . . . . . . . . . . . . . . . . . . . . . . . . . . . 20Pickup . . . . . . . . . . . . . . . . . . . . . . . . . . . . . . . . . . . . . . . . . . 20Pick A Call and Add to Conference . . . . . . . . . . . . . . . . . . . 21Repertory Dialing (Repdial) Keys . . . . . . . . . . . . . . . . . . . . 22Saved Number Redial . . . . . . . . . . . . . . . . . . . . . . . . . . . . . . 23Speaker . . . . . . . . . . . . . . . . . . . . . . . . . . . . . . . . . . . . . . . . . 23Station Speed Dialing . . . . . . . . . . . . . . . . . . . . . . . . . . . . . . 24System Hold . . . . . . . . . . . . . . . . . . . . . . . . . . . . . . . . . . . . . 25System Speed Dialing . . . . . . . . . . . . . . . . . . . . . . . . . . . . . . 26Transfer . . . . . . . . . . . . . . . . . . . . . . . . . . . . . . . . . . . . . . . . . 27Feature Access Codes . . . . . . . . . . . . . . . . . . . . . . . . . . . . . . 28

ii

1
Welcome to Your Optiset E TelephoneThe Optiset E Entry and Optiset E Basic telephones work with your company’s Siemens Hicom 300 E Communications Server to give you advanced, easy-to-use telephone features. The communications server is your facility’s internal telecommunications system.
Optiset E Entry TelephoneThe Entry phone has three feature keys, one for a single line extension, two for optional features programmed at your communications server. Its speaker is only used for the ringing tone, not for voice transmission. When the phone is idle, users cannot do “on hook” dialing, dialing after pressing the line key or a feature key without lifting the handset. Instead, they must pick up the handset before dialing or initiating features such as Repdials for one-touch dialing, Station Speed Dialing, and System Speed dialing.
Figure 1. Optiset E Entry Telephone
1)
2)
3)
4 5 67 8 9
0
ABC DEF
MNOJKLGHI
PQRS TUV WXYZ
+
–
1 2 3
4 5 6
7 8 9
0
4)
5)
HandsetSpeaker for ringing tone onlyKeys for telephone settings3 feature keys with status lightsKey pad
1)2)3)4)5)

2
Optiset E Basic TelephoneThe Basic phone has a speaker and eight feature keys that may be used for up to four multiple-line extensions and for features programmed at your communications server. In addition, it has one option bay underneath its base that supports user-installable bay option modules.
Figure 2. Optiset E Basic Telephone
Bay Option ModulesThe bay option modules snap into place in the bay underneath the Basic phone. They are the same size and shape, but labels clearly identify their type.
Figure 3. Bay Option Modules
1)
2)
3)
4 5 67 8 9
0
MNOJKLGHI
PQRS TUV WXYZ
1 2 3
4 5 6
7 8 9
0
4)
5)
HandsetSpeaker (ringing tone/open listening)Keys for telephone settings8 feature keys with status lightsKey pad
1)2)3)4)5)

3
Optiset E Analog Adapter
The Analog Adapter lets you attach a standard analog device, such as a phone, facsimile machine, modem, or answering machine, to your phone via an RJ11 connector on the back of the adapter. The attached device is configured at your communications server to be completely independent, with its own phone number. It can be attached to a standard telephone cable up to 300 ft. long. This adapter requires the Optiset E Local Power Supply for operation. (See “Optiset E Local Power Supply” on page 6.)
Optiset E Data Adapter
The Data Adapter lets you connect your phone to a computer or terminal via a 25-pin connector for an EIA-232-E cable. You can make asynchronous data calls by issuing AT commands from your attached PC or terminal to your phone, much as you would to an attached modem. This adapter supports baud rates of up to 38.4 kilobytes per second (autobaud detection), simultaneous voice and data communication, hardware flow control (RTS/CTS) and full duplex operation. It also supports the Siemens Application Programming Interface (API), data loopback for customer service tests, and V.120 and DMI mode 2-Bit Rate Adaptation.
Optiset E ISDN Adapter
The ISDN Adapter lets you connect ISDN S0 bus devices such as phones, PC cards, LAN Bridges, G4 fax machines, and video equipment to your phone via an RJ45 connector. It supports up to 64 kilobytes per second simultaneously on each bearer channel. It will only work properly in a primary phone, not in a phone attached to another phone with the Phone Adapter. You can only connect two ISDN devices to the adapter.
Optiset E Phone Adapter
The Phone Adapter lets you attach another Optiset E phone to your Basic phone. It provides an RJ11 connector to which you can attach the second phone via a standard telephone cable up to 300 feet long. You can then place the second phone in an area not wired for a phone. The attached phone is configured at your communications server to be a completely independent phone with its own phone number.

4
Figure 4. Installation of Bay Option Modules
1. Disconnect the phone line from the wall jack or phone and place the phone ➀ on a soft surface with the keypad facing down.
2. Hold the adapter ➁ with the male connector strip facing down and mount it in the mounting location on the bottom of the phone, sliding the two tabs ➂ into the two slots ➃.
3. Gently press down on the adapter until the male connector strip is inserted all the way into the female connector strip ➄.
For the Analog Adapter, connect an analog device to the 6-pin RJ11 port on the back of the Analog Adapter (connecting tip/ring to pins 3 and 4). Reconnect the phone line to the phone. Note that the analog adapter requires the Optiset E Local Power Supply for operation.
For the Data Adapter, connect the data terminal equipment to the 25-pin (EIA232) connector on the back of the Data Adapter. Reconnect the phone line to the phone.
1
2
3
4
5

5
For the ISDN Adapter, connect the ISDN terminal to the RJ45 adapter. Reconnect the phone line to the phone.
For the Phone Adapter, connect the secondary Optiset E phone into the RJ11 connector on the adapter. Reconnect the phone line to the phone.

6
Optiset E Local Power SupplyThe Local Power Supply is required for the Analog Adapter. It may also be required in other situations, depending on the Optiset E telephone’s configuration, the type of phone cable used, the length of the phone cable from the communications server, and the type of communications server used. Only one Optiset E Local Power Supply can be used at a time on an Optiset E phone. However, one Local Power Supply can be used on a primary phone and a second Local Power Supply can be used on a secondary phone attached to the primary phone through a Phone Adapter.
Installation of Local Power Supply
To install a local power supply:
1. Disconnect the phone line from the wall jack and from the phone. New phones should have a line cord attached to the phone, but may not be plugged into the wall jack. Plug the line cord (PN 51A4871) ➀ that comes with the power supply into the jack on the phone and into the jack on the power supply labeled .
2. Plug one end ➁ of the line cord that you disconnected from the phone into the jack on the power supply labeled .
3. Plug the other end ➂ of this cord into the wall jack. Note that you could plug it into an Optiset E Phone Adapter installed in another properly installed phone instead.
4. Plug the power supply ➃ into a properly grounded 120 VAC electrical outlet.
Digital
Digital
3
4
2
1
Advance Plu

7
Where to Go for AssistanceAlthough every company has its own way of handling support for Optiset E telephones, most have a person responsible for making configuration changes and answering questions about the telephone system. This person, the system administrator, can provide you with information on the features you need to use and can help troubleshoot problems with your phone when necessary. For more detailed information about your phone’s features and operation, refer to the Optiset E Entry, Basic, Standard, Advance, Advance Plus, Advance Conference, and Liberator Administrator Guide for Hicom 300 E CS (GU30-1602-01).
Your Class of ServiceEach phone in your Siemens telephone system has a class of service (COS) that specifies the features available to it. Therefore, you may find that some features included in this guide are not available on your telephone. Ask your system administrator which features have been assigned to your telephone.
Line KeysYour Optiset E telephone has a separate line key for every extension that appears on your phone. You use the line keys to answer and place calls.
Status LightsThe red status lights next to the line keys tell you what is happening on those lines. A line key status light may turn on steadily, blink, or flash at different rates to signal the status of that line.
Table 1. Line Key Status Light Flash Rates
Flash Rate Line Status
Off Available
On steady In use
Blinking Ringing
Flashing (faster) On hold
Flickering (fastest) Forwarded

8
Feature Keys and Access CodesYou can press feature keys to gain access to Siemens telephone system features such as Hold, Transfer, Mailbox, and Program. Since your phone has already been assigned a set of feature keys, it may not have some of the feature keys described here. However, you may still use any feature available on your system and permitted by your class of service by dialing its feature access code, if it has one. This guide explains the basic steps for using many features, including the default feature access codes. Your system administrator may have configured both the acronyms for feature keys and the access codes differently from how they appear here.
Volume KeysUse the Volume Up and Volume Down keys to adjust the voice volume of your telephone. While on a call, press to raise the volume of the voice you are hearing, or press to lower it. Press either key repeatedly until you reach the desired voice level. Holding down either key only changes the volume one step.
When you hang up or switch to another call, the voice volume returns to the default level. To save the new setting before hanging up, press the and keys together before hanging up.
SoundsYour phone makes different sounds to let you know what’s going on; rings occur on a line that you are not using to indicate that you have an incoming call, tones occur while you are using your phone and provide information about calls and features.
Table 2. Rings
Sound Meaning
Single (repeated) Internal or Emergency call
Double (repeated) External call
Triple (repeated) Callback
+ -+
-
+ -

9
Table 3. Tones
Sound Meaning
Busy tone The party you called is on the phone.
Dial tone You can make a call or invoke a feature.
Fast busy tone Invalid call
Short tone every 20 secs.
Internal call waiting
3 short tones (confir-mation tone)
A feature has been suc-cessfully activated.
3 short tones followed by dial tone
Additional input, such as a PIN, is required.
2 short tones every 20 secs.
External call waiting
Wavering (error) tone Invalid feature request

10
Changing Your Audio SettingsTo change the audio settings on your phone:
1. When your phone is idle, press the key or the key.
2. Press one of the following digits:
1 for ring volume
2 for ring tone
3 for alert tone
Your phone will make the sound of the current setting.
3. If you want to exit without making changes, press #.
4. To adjust the setting higher or lower, press the or keys.
Your phone will make the sound of the adjustment.
5. If you want to exit without making changes, press #.
6. To save the adjustment you have made, press the and keys together.
+ -
+ -
+-
11
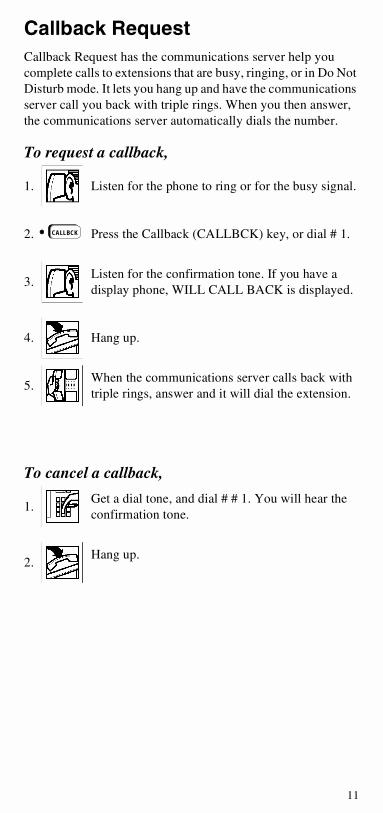
Callback RequestCallback Request has the communications server help you complete calls to extensions that are busy, ringing, or in Do Not Disturb mode. It lets you hang up and have the communications server call you back with triple rings. When you then answer, the communications server automatically dials the number.
To request a callback,
1. Listen for the phone to ring or for the busy signal.
2. Press the Callback (CALLBCK) key, or dial # 1.
3.Listen for the confirmation tone. If you have a display phone, WILL CALL BACK is displayed.
4. Hang up.
5.When the communications server calls back with triple rings, answer and it will dial the extension.
To cancel a callback,
1.Get a dial tone, and dial # # 1. You will hear the confirmation tone.
2.Hang up.
CALLBCK

12
ConferenceThe Conference feature lets you have up to eight parties, including yourself, in a telephone conversation. The other parties besides yourself can be on trunks (outside lines) or extensions.
To set up a conference,
1.During a call, press the Transfer (TRANSFR) key to put the party on consultation hold.
2.Listen for the confirmation tone, followed by the internal dial tone.
3.Dial the extension you want to add, or dial 9 and the outside number.
4.After the party answers, press the Conference (CONF) key (or TRANSFR) to join all the parties.
To reconnect to the conference when a called party isn’t joining,
Press the Connect key.
To drop the last added party,
1.Press the Clear key, or press TRANSFR and dial ∗ ∗ ∗ 4.
2.Press the Conference (CONF) key (or TRANSFR) to rejoin the conference.
TRANSFR
CONF
CONNECT
CLEAR
CONF
13
ConnectConnect lets you
• reconnect with a call placed on consultation hold
• reconnect with a transferred call before the transfer is com-plete
• alternate between two parties, when you have one of them on consultation hold
To reconnect with a call,
Press the Connect key.CONNECT
14
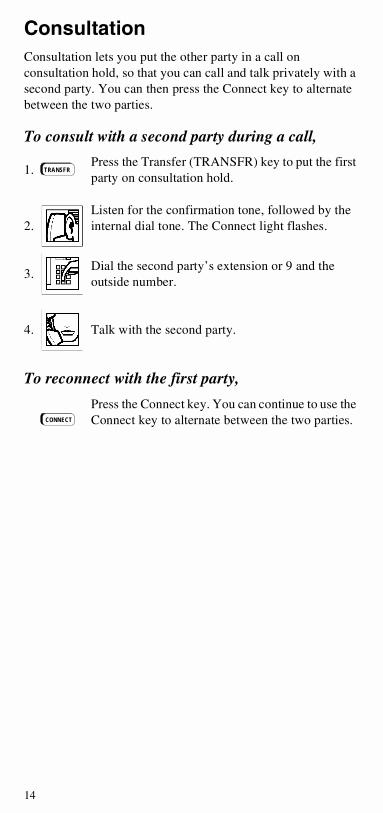
ConsultationConsultation lets you put the other party in a call on consultation hold, so that you can call and talk privately with a second party. You can then press the Connect key to alternate between the two parties.
To consult with a second party during a call,
1.Press the Transfer (TRANSFR) key to put the first party on consultation hold.
2.Listen for the confirmation tone, followed by the internal dial tone. The Connect light flashes.
3.Dial the second party’s extension or 9 and the outside number.
4. Talk with the second party.
To reconnect with the first party,
Press the Connect key. You can continue to use the Connect key to alternate between the two parties.
TRANSFR
CONNECT

15
ForwardingForwarding redirects your incoming calls to another extension or an outside number. Variable Forwarding lets you set up an extension or outside number for forwarding under conditions you specify. Fixed Forwarding sends calls to extensions set up for you at the communications server.
To use Variable Forwarding for all calls under all conditions,
1.Get a dial tone, and press the Forward key or dial# 9 1.
2.Dial the extension or 9 and the outside number you want to receive your calls.
3. Hang up.
To cancel Variable Forwarding,
1.Press the Forward key, or get a dial tone and dial# # 9 1.
2. Hang up.
To cancel Fixed Forwarding,
Get a dial tone and dial # # 9 0.
To restore Fixed Forwarding,
Get a dial tone and dial # 9 0.
FORWARD
FORWARD

16
HoldThe Hold key lets you hang up a line without disconnecting the other party. If you do not retrieve the call after a certain period of time (determined by the communications server), your phone will ring. If it is an external call and you do not answer, the call is transferred to the operator.
If you want to make another call after placing a call on hold, you must use another line. If your telephone has only one line, press the Transfer (TRANSFR) key, instead of the HOLD key, to place the call on consultation hold, then dial the second party.
To put a call on hold,
1. Press the Hold key.
2. Hang up.
To reconnect,
Press the line key next to the flashing status light, or pick up the handset and press the line key.
HOLD

17
Last Number RedialLast Number Redial lets you quickly redial the last number you have dialed. Each time you dial a valid internal or external telephone number it is automatically stored so that you can redial it later. Numbers dialed during consultation calls and transfers are also stored. Only one number is stored at a time, and once you dial a new number it replaces the number stored previously.
To redial the last number dialed,
Press the Last Number Redial (LNR) key.
Or get a dial tone and dial # # 4.
LNR

18
MailboxThis feature lets you receive and answer PhoneMail messages and reminder messages left on your phone by internal callers. Messages turn on the status light beside your Mailbox key and (on display phones) provide information about the call. If you have a PhoneMail key, PhoneMail messages turn on the status light beside it instead.
The Mailbox key also lets you leave reminder messages at other extensions.A reminder message left on an internal call turns on the Mailbox status light on the other phone. It also leaves a reminder message if the other phone has a display.
To answer a message,Press the Mailbox key. The communications server calls back the party or system that left the message. (It can call a voicemail system or another number configured at the communications server.) When the party or system answers, the message is deleted.
To leave a reminder message,
1.After receiving a busy or ringing signal, press the Mailbox key or dial # ∗ 1.
2.Hang up. The other party’s Mailbox status light turns on. If the other party has a display phone, the system will also leave a reminder message providing your name and the date and time of your call.
MAILBOX
MAILBOX

19
ParkPark lets you move a call to an extension and hold it there without ringing that extension. You or another party can then retrieve the call from the extension as needed.
To park a call to another extension,
1. Press the Transfer (TRANSFR) key.
2. Dial ∗ 6.
3.Dial the extension where you want to park the call.
4. Hang up.
To retrieve a parked call,
1. Get a dial tone.
2. Dial ∗ 6.
3.Dial the extension where the call is parked.
4. Begin speaking.
TRANSFR

20
PhoneMailThis feature lets you receive voicemail messages and perform other voicemail operations through the PhoneMail system. Messages turn on the status light beside your PhoneMail (PHMAIL) key. If you do not have a PhoneMail key, voicemail messages turn on your Mailbox key’s status light. (See “Mailbox” on page 18.)
To contact PhoneMail to receive a message or perform other operations,
Press the PhoneMail (PHMAIL) key.
PickupPickup features let you answer calls ringing, on hold, queued, or parked at other extensions.
Group Pickup lets you answer a call to an extension in your pickup group (set up at the communications server) even when you do not know the number for the extension.
Station Pickup lets you answer a call at any extension, provided that you know the number for the extension.
To answer a call in your pickup group,
Press the Pickup key twice. Or get a dial tone and dial ∗ ∗ 3.
To answer a call ringing, on hold, queued, or parked at any extension,
1.Press the Pickup key, or get a dial tone and dial ∗ 3.
2. Dial the extension.
PHMAIL
PICKUP PICKUP
PICKUP

21
Pick A Call and Add to ConferenceYou can use the Pickup feature to pick up the following kinds of calls and add them to a conference call.
• a call alerting or ringing on another extension, on your phone or other phones
• a call on hold on another line, on your phone or another phone
• a call parked on another extension
• a call on busy standby queuing for another extension
• a call on busy standby queuing for the line that you are using
To pick a call and add it to a conference,
1. Press the Pickup key during a two-party call or a conference call. Or get a dial tone and dial ∗ 3. The other call is placed on consultation hold.
2. Dial the extension where the call to be picked up is located.
If the call you are picking up is on busy standby queuing for your line, you will already be connected to it now. You do not have to dial an extension for it.
3. After the picked up party answers, press the Conference (CONF) key to join all the parties.
If the picked up party does not want to join the conference, press the Clear key. This disconnects the picked up party and returns you to the original call.
To go back and forth (toggle) between the picked up party and the original call, press the Connect key.
Note: You can also transfer, place on hold, place on consultation hold, or park a call you have picked up. (See “Transfer” on page 27, “Hold” on page 16, “Consultation” on page 14, and “Park” on page 19.) To screen an incoming call before picking it up, put the conference on hold and answer the call. Then return to the conference and pick up the call.
PICKUP
CONF

22
Repertory Dialing (Repdial) KeysThis feature lets you set up each repdial key on your faceplate for one-touch dialing of an extension, outside number, feature access code, or combination of numbers and feature access codes.
To set up a repdial key,
1. Press the Program key.
2. Press the repdial (R-) key that you want to use.
3.Enter the dialing sequence you want to assign to the key.
You can press to add multiple time delays (the default is 2 seconds for each) to the sequence.
4.Press the Program key. On your faceplate, label the key with the name of the feature or person that it dials.
To dial using a repdial key,
Press the repdial (R-) key.
PROGRAM
R-
-
PROGRAM
R-

23
Saved Number RedialThis feature saves a number that you have dialed. Later, you can redial your saved number by pressing the Saved Number Redial (SAV/RDL) key.
To save a number you have dialed, while you are still connected with that number,
Press the Saved Number Redial (SAV/RDL) key, or dial # 4 while the call is still ringing or busy.
To dial your saved number,
Press the Saved Number Redial (SAV/RDL) key, or get a dial tone and dial # 4.
SpeakerThe Basic phone has a speaker that you can use for receiving calls or listening to the PhoneMail system. You must pick up your handset to speak to the other party.
To answer a call,
Pick up the handset. The blinking status light next to the line key turns on steadily.
To hang up,
Hang up the handset.
SAV/RDL
SAV/RDL

24
Station Speed DialingStation Speed Dialing lets you assign frequently used dialing sequences (extensions, outside numbers, or feature access codes) to each of ten single-digit codes (0 through 9). You can then dial a single-digit code instead of the entire sequence. You can also be set up at the communications server for up to 30 codes, in groups of 10. If you are set up for more than ten, they follow a double-digit scheme (00 through 29).
To set up a station speed code,
1. Press the Station Speed (SPEED) key twice, or get a dial tone and dial # # 3.
2. Enter the station speed code.
3. Enter the dialing sequence. Then hang up.
To dial using a station speed code,
1. Press the Station Speed (SPEED) key.
2. Listen for the confirmation tone.
3. Dial the station speed code.
OR
1. Get a dial tone.
2. Dial # 3 and then the station speed code.
SPEED SPEED
SPEED

25
System HoldSystem Hold lets you move a call to a system slot (a temporary holding place) and hold it there. The call can then be retrieved from any extension.
To place a call on system hold,
1. Press the Transfer (TRANSFR) key. You will hear the confirmation tone and dial tone. Dial ∗ 8.
2.Enter a slot number (0-9). If you hear a busy signal, try a different slot number. If all slots are full, you will hear a fast busy signal. Then hang up.
To retrieve a call on system hold,
1. Get a dial tone.
2.Press the System Hold (SYSHOLD) key, or dial ∗ 8.
3.Dial the number of the system slot where the call is on system hold.
TRANSFR
SYSHOLD

26
System Speed DialingIf the System Speed Dialing feature is set up on your communications server, you can dial frequently called outside numbers (local, long distance, and international) by dialing a code number. Usually these codes are published for an entire company in a special system speed directory. Consult your system administrator if you do not know your system speed numbers. Your company may have up to sixteen system speed lists. You may have access to two of these lists. For release 6.5 and above, you may have access to two of these lists or to the first ten lists plus one additional list. A number set up for a system speed code can contain an initial Personal Identification Number (PIN), if one is necessary to make outside calls.
To make a system speed call,
1.
Press the correct System Speed key (SYS-SP1 for the first System Speed list or SYS-SP2 for the second). Or, get a dial tone and dial # 6 1 for the first list or # 6 2 for the second.
2. Dial the system speed code.
SYS-SP1
27
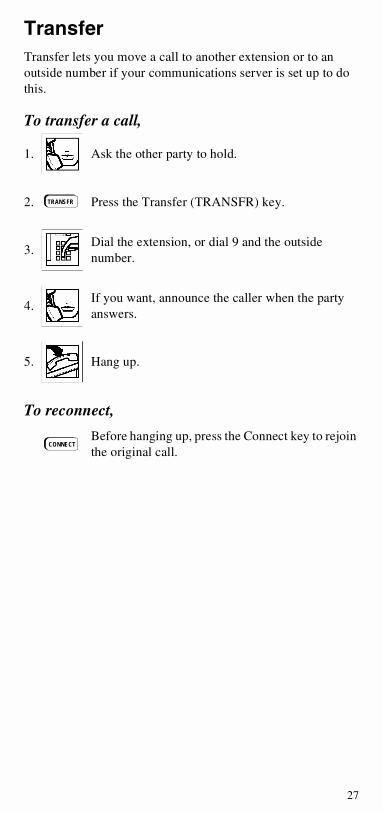
TransferTransfer lets you move a call to another extension or to an outside number if your communications server is set up to do this.
To transfer a call,
1. Ask the other party to hold.
2. Press the Transfer (TRANSFR) key.
3.Dial the extension, or dial 9 and the outside number.
4.If you want, announce the caller when the party answers.
5. Hang up.
To reconnect,
Before hanging up, press the Connect key to rejoin the original call.
TRANSFR
CONNECT

28
Feature Access CodesTo use feature access codes ➩ Get a dial tone, or press the Transfer key during a call. Dial the
feature access code. You may need to press the Connect key to return to your call.
Feature Access Code
Account Number ∗ 2
Bad Line Reporting ∗ 5 6 3
Busy Override # # 7
Buzz # ∗ 2
Callback Request # 1
Cancel # # 1
Class of Service
Restore Primary ∗ # 5 9 1
Return to Secondary ∗ # 5 9 0
Com Group Speaker Call ∗ ∗ 6
Conference
Remove Last Party ∗ ∗ ∗ 4
Remove Specific Party ∗ ∗ 4 1-8
Direct Trunk Select # # 8
Forwarding, Fixed # 9 0
Cancel # # 9 0
Forwarding, Variable
All # 9 1
Busy # 9 4
Busy/Ring No Answer # 9 5
External # 9 2
Internal # 9 3
Ring No Answer # 9 6
Cancel # # 9 1
Last Number Redial # # 4 Mailbox Callback Message
Leave Message # ∗ 1
Cancel # ∗ 8
Turn Off Light ∗ 5 2
Park ∗ 6
Pickup
Group ∗ ∗ 3
Station ∗ 3
PIN Authorization ∗ # 5 7
Cancel ∗ # 5 8
Privacy # 2
Cancel # # 2
Saved Number Redial # 4
Speaker Call, Fixed # ∗ 4
Speaker Call, One-Way # 8 1
Speaker Call, One-Way Broadcast # 8 0
Station Hunt
Prevent # ∗ 9 3
Allow # ∗ 9 2
Set Destination # ∗ 9 0
Clear Destination # ∗ 9 9
Station Speed Dialing
Set Up # # 3
Call # 3
System Hold ∗ 8 0-9
System Speed-1 # 6 1
System Speed-2 # 6 2
Trace Call # # # 1
Universal Night Answer ∗ # 3