Embed Size (px)
Citation preview

Quick start — How to get going 2
Introduction 6
System descriptions 10
Operation 19
All rights reserved. Reproduction by any means, electronic or mechanicalincluding photocopying, recording or by any information storage and retrievalsystem or translation in whole or part is not permitted without writtenauthorization from Ford Motor Company. Ford may change the contents withoutnotice and without incurring obligation.
Copyright © 2006 Ford Motor Company
Table of Contents
1
2007 (dvd)SupplementUSA (fus)

QUICK STARTYour Family Entertainment System includes a DVD system, two sets ofwireless infrared (IR) headphones and a wireless infrared (IR) remotecontrol.
TO PLAY A DVD IN THE DVD SYSTEM:The DVD system can play DVD-Video, DVD-R, DVD-R/W discs as well asaudio CDs and video CDs. To ensure proper disc operation, check thedisc for finger prints, scratches and cleanliness. Clean with a soft cloth,wiping from center to edge.
1. Ensure that the vehicle ignition is in the RUN or ACCESSORYposition.
2. Insert a DVD into the system,label-side up to turn on the system.It will load automatically and beginto play. If a DVD is already loaded in the system, press PLAY on the DVDplayer.
The power indicator will turn onautomatically indicating the DVDsystem is ON.
Press VIDEO to change the sourcedisplayed on the screen. Pressrepeatedly to cycle through:DVD-DISC, DVD-AUX, NON-DVD,OFF.
Press the power button to turn thesystem OFF. The indicator light willturn off indicating the system is off.
Note: The audio from the DVD system will play over all vehicle speakersand can be adjusted by the radio volume control.
TO PLAY A CD IN THE DVD SYSTEM:The DVD system can play audio CDs, CD-R and CD-R/W, CD-ROM andvideo CDs. To ensure proper disc operation, check the disc for fingerprints and scratches. Clean the disc with a soft cloth, wiping from thecenter to the edge.
2007 (dvd)SupplementUSA (fus)
Quick start — How to get going
2

1. Ensure that the vehicle ignition is in the RUN or ACCESSORYposition.
2. Insert a CD into the system,label-side up to turn on the DVDsystem,. It will load andautomatically begin to play. If thereis already a CD in the system, pressPLAY on the DVD player.
3. The disc will begin to play andthe ’CD Audio Disc’ screen willdisplay. From this screen, you canalso select from COMPRESSION,SHUFFLE and SCAN features.
TO PLAY AN MP3 DISC IN THE DVD SYSTEM:1. Ensure that the vehicle ignition is in the RUN or ACCESSORYposition.
2. Insert an MP3 disc into thesystem, label-side up to turn on theDVD system. It will load andautomatically begin to play. If thereis already a disc in the system, pressPLAY on the DVD player.
3. The disc will begin to play andthe ’MP3 Audio Disc’ screen willdisplay and allow you to access theCOMPRESSION, SHUFFLE, SCANand FOLDER MODE features.
TO PLAY AN AUXILIARY SOURCE THROUGH THE DVD SYSTEMThe DVD system can be used to connect and play auxiliary electronicdevices such as game systems, personal camcorders, video cassetterecorders, etc.1. Ensure that the vehicle ignition is in the RUN or ACCESSORYposition.
2007 (dvd)SupplementUSA (fus)
Quick start — How to get going
3

2. Press the power button to turnthe DVD system on. The indicatorlight next to the power button willilluminate.
3. Connect an auxiliary audio/videosource by connecting RCA cords(not included) to the RCA jacks onthe left hand side of the system.
• Yellow (1) — video input
• White (2) — left channel audioinput
• Red (3) — right channel audioinput
4. Press MEDIA on the DVD system to change the media source to AUX.
5. Press VIDEO on the DVD system to change the video source toDVD-AUX. If your source is properly plugged in, it will appear on theLCD (Liquid Crystal Display) screen. If your auxiliary source does nothave a video signal, or if the DVD system does not detect a video signalfrom the auxiliary source, the screen will remain black. If the videosource is set to DVD-AUX, the display will automatically turn on if avideo signal is detected.
TO LISTEN TO AUDIO OVER THE HEADPHONES (DUAL PLAYMODE):1. You may listen to channels A and B over wired or wirelessheadphones. Refer to Using the infrared wireless headphones andUsing wired headphones for further information.
• Black (4) — wired headphone output (wired headphones notincluded)
2. Press the headphone/speakerbutton on the DVD player.
A green light will illuminate next toeither the A or B Headphone Control Button to indicate which channel isactive (able to be controlled).
3. Press MEDIA to change the audio source of the active channel (A orB). The audio source will be shown on the display. You may change theactive channel by pressing the A or B headphone control button.
2007 (dvd)SupplementUSA (fus)
Quick start — How to get going
4

Note: Channel A can access any possible media source (AM, FM1, FM2,SAT (if equipped), CD, cassette, DVD, AUX). Channel B can only accessDVD and AUX sources.
Note: Refer to Single play/Dual play for more information.
USING THE INFRARED (IR) WIRELESS HEADPHONES:1. Press the power control on the earpiece to turn the headphones ON.
2. Select Channel A or B for each set of wireless headphones by usingthe A/B control on the ear piece.
3. Adjust the headphone volume using the rotary dial on the earpiece.
USING WIRED HEADPHONES (NOT INCLUDED):1. Connect the wired headphones in to the headphone jacks on eitherside of the DVD system. Each side is labeled A or B. Headphonesplugged into jack A will listen to Channel A and headphones plugged intojack B will listen to Channel B.
2. Adjust the volume levels usingthe volume controls on the DVDsystem.
TO ADJUST DISPLAY BRIGHTNESS:To decrease/increase the brightnesslevel on the display screen, pressthe brightness control on the DVDsystem. A display will appear at thebottom of the screen indicating thebrightness level. The brightness display will only appear when the menuis not displayed.
2007 (dvd)SupplementUSA (fus)
Quick start — How to get going
5

INTRODUCTIONYour vehicle is equipped with a Family Entertainment System (FES)which allows you to listen to audio CDs, MP3 discs, watch DVDs and toplug in and play a variety of standard video game systems. The DVDplayer is capable of playing standard DVDs, CDs, MP3s and is compatiblewith CD-R/W, CD-R and certain CD-ROM media.
Please review this user manual to become familiar with the FES featuresand controls as well as the very important safety information.
Safety informationRead all of the safety and operating instructions before operating thesystem and retain for future reference.
Do not attempt to service, repair or modify the Family EntertainmentSystem (FES). See your dealer.
Do not insert foreign objects into the DVD compartment.
Do not leave children unattended in the vehicle and do not letchildren operate the system while unsupervised. If wired
headphones or auxiliary systems are used, children may becomeentangled in the cords and seriously injure themselves.
The front glass on the liquid crystal display (LCD) flip-downscreen may break when hit with a hard surface. If the glass
breaks, do not touch the liquid crystalline material. In case of contactwith skin, wash immediately with soap and water.
The driver must not attempt to operate any function of the DVDsystem while the vehicle is in motion. Give full attention to
driving and to the road. Pull off the road and park in a safe placebefore inserting or extracting DVDs from the system. A remote controlis included in the system to allow the rear seat occupants to operatethe FES functions without distracting the driver.
Do not expose the liquid crystal display (LCD) flip-down screento direct sunlight or intensive ultraviolet rays for extensiveperiods of time. Ultraviolet rays deteriorate the liquid crystal.
2007 (dvd)SupplementUSA (fus)
Introduction
6

Be sure to review User Manuals for video games and video gameequipment when used as auxiliary inputs for your Family EntertainmentSystem (FES).Do not operate video games or video equipment if the power cordsand/or cables are broken, split or damaged. Carefully place cords and/orcables where they will not be stepped on or interfere with the operationof seats and/or compartments.Disconnect video games and video equipment power cords and/or cableswhen not in use.Avoid touching auxiliary input jacks with your fingers. Do not blow onthem or allow them to get wet or dirty.Do not clean any part of the DVD player with benzene, paint thinner orany other solvent.
Federal Communication Commission (FCC) ComplianceChanges or modifications not approved by Ford Lincoln-Mercury couldvoid user’s authority to operate the equipment. This equipment has beentested and found to comply with the limits for a Class B digital device,pursuant to Part 15 of the FCC Rules. These limits are designed toprovide reasonable protection against harmful interference in aresidential installation. This equipment generates, uses and can radiateradio frequency energy and, if not installed and used in accordance withthe instructions, may cause harmful interference and radiocommunications.
However, there is no guarantee that interference will not occur in aparticular installation. If this equipment does cause harmful interferenceto radio or television reception, which can be determined by turning theequipment off and on, the user is encouraged to consult the dealer or anexperienced radio/TV technician for help.
Care and service of the DVD player
Environmental extremesDVD players which are subjected to harsh environmental conditions maybe damaged or perform at less than maximum capability. To avoid theseoutcomes, whenever possible avoid exposing your DVD player to:
• extremely hot or cold temperatures.
• direct sunlight.
• high humidity.
• a dusty environment.
2007 (dvd)SupplementUSA (fus)
Introduction
7

• locations where strong magnetic fields are generated.
Temperature extremesWhen the vehicle is parked under direct sunlight or in an extremely coldplace for a long period of time, wait until the cabin temperature of thevehicle is at normal temperature before operating the system.
Humidity and moisture condensationMoisture in the air will condense in the DVD player under extremelyhumid conditions or when moving from a cold place to a warm one.Moisture condensation may cause damage to the DVD and/or player. Ifmoisture condensation occurs, do not insert a CD or DVD into theplayer. If one is already in the player, remove it. Turn the DVD player ONto dry the moisture before inserting a DVD. This could take an hour ormore.
Foreign substancesExercise care to prevent dirt and foreign objects from entering the DVDplayer compartment. Be especially careful not to spill liquids of any kindonto the media controls or into the system. If liquid is accidentallyspilled onto the system, immediately turn the system OFF and consult aqualified service technician.
Cleaning the liquid crystal display (LCD) flip-down screenClean the display screen by applying a small amount of water or anyammonia-based household glass cleaner directly to a soft cloth. Rub thescreen gently until the dust, dirt or fingerprints are removed. Do notspray the screen directly with water or glass cleaning solvents. Oversprayfrom these fluids could drip down into the internal electronics of thescreen and cause damage. Do not apply excessive pressure whilecleaning the screen.
Cleaning DVD and CD discsInspect all discs for contamination before playing. If necessary, cleandiscs only with an approved DVD and CD cleaner and wipe from thecenter out to the edge. Do not use circular motion.
Compatibility with aftermarket audio systems(headphone only mode)When the Family Entertainment System (FES) detects that the originalradio supplied by Ford Motor Company has been removed from thevehicle, the FES will work in a state referred to as “Headphone OnlyMode.” This mode allows the FES to operate as a standalone system,without interface to the radio.
2007 (dvd)SupplementUSA (fus)
Introduction
8

While operating in Headphone Only Mode, the system will have limitedfunctionality.
• The system will only output audio to the headphones. It will not becapable of providing audio to the speakers.
• The available sources in FES Headphone Only Mode are DVD-DISCand DVD-AUX, regardless of headphone channel (A or B).
• When a disc is inserted into the FES while in Headphone Only Mode,both headphone channels (A and B) will be connected to FES-DISC.
2007 (dvd)SupplementUSA (fus)
Introduction
9

SYSTEM DESCRIPTIONS
DVD player controls
1. Headphone control A/B: Pressto select either the A or Bheadphone source. Then pressMEDIA to select the desired playingmedia for that headset. When aheadphone channel has been selected (A or B), selections will affect thesource on that channel only.Note: Headphone A can access any possible media (AM, FM1, FM2, SAT(if equipped), CD, CASSETTE, DVD, DVD-AUX). Headphone B can onlyaccess DVD and DVD-AUX.For further information, refer to Single play/Dual play later in thissection.
2. / (Stop/Eject): Press onceto stop and press a second time toeject a disc from the DVD system.
3. (Reverse): Press andrelease for the previous chapter ortrack. Press and hold to reversesearch a DVD, Video CD, or FES CD in DVD/CD mode.
A
B VIDEO
VOLUME
MEDIARETURNMENUENTER
1
7
2
3
4
5
6
9
10
11
12
13
14
15
16
8
2007 (dvd)SupplementUSA (fus)
System descriptions
10

4. (Fast forward): Press andrelease for the next chapter ortrack. Press and hold to forwardsearch a DVD, Video CD, or FES CD in DVD/CD mode.
5. / (Play/Pause): Press (Play)to select DVD mode (and to turnthe DVD system on if it is off). If adisc is present, it will resume or begin to play. Press (Pause) whileplaying a disc to pause a DVD or CD.
6. On/Off: Press to turn the DVDsystem On/Off.
7. VIDEO: Press repeatedly to cyclethrough the following video stateoptions which will be indicated onthe bottom right hand corner of thedisplay: DVD DISC, DVD-AUX,NON-DVD and Off (no indicator). If you select the DVD-AUX videosource, the display will turn off if there is no video signal detected. Whena video signal is detected on the auxiliary video input, and the display isin the DVD-AUX video mode, the display will automatically turn on.
8. Infrared (IR) Receiver & Transmitter: System sensor which readsthe signals from the remote control and sends audio signals to theinfrared (IR) wireless headphones.
9. LCD screen: The eight inch diagonal screen rotates down to view andup into housing to store when not in use. Ensure that the screen islatched into the housing when being stored.
10. Volume: When in Single Play,press to increase ( ) or decrease( ) the volume over all speakers.When in Dual Play, press to increase( ) or decrease ( ) the volumefor the wired headphones. (Wireless headphone volume is controlledwith the rotary dial on the right ear piece.)
2007 (dvd)SupplementUSA (fus)
System descriptions
11

11. / (Headphones/Speakers): Press once for Dual Play(Headphone mode- the rear speakers are muted) and press again forSingle Play (same media playing through all speakers). For furtherinteraction information, refer to Single Play/Dual play.
12. MEDIA: Press repeatedly toselect from the various possibleplaying media sources (AM, FM1,FM2, SAT (if equipped), CD, CASSETTE, DVD, DVD-AUX). The mediawill show in the status display on the top of the screen when in DualPlay mode. When in Single Play mode, the media source will bedisplayed on the radio.Note: Channel A can access any possible media source (AM, FM1, FM2,SAT (if equipped), CD, CASSETTE, DVD, DVD-AUX). Channel B canonly access DVD and DVD-AUX sources.
13. RETURN: Press to return to theplaying media or to resumeplayback.
14. MENU: When playing a DVD,press MENU once to enter the DVDdisc menu (if available) and presstwice to enter the system set-up menu. From the set-up menu, you mayselect from Angle, Aspect Ratio, Language, Subtitles, Disc resume,Compression, Restore Defaults and Back. For more detailed information,refer to Menu mode.
15. ENTER: Press to select/confirmthe current selection.
16. Cursor /Brightness controls:Use the cursor controls to makevarious selections when in anymenu. When not in a menu, and inDVD mode, press / to adjustthe brightness. A display bar will appear at the bottom of the screenindicating the brightness levels.
2007 (dvd)SupplementUSA (fus)
System descriptions
12

Remote control
Unless otherwise stated, all operations can be carried out with theremote control. Always point the remote control directly at the player.Ensure that there are no obstructions between the remote and player.
1. Power control: Press to turn the FES (Family EntertainmentSystem) ON/OFF.
2. Cursor controls: Use in various active menus to advance the cursorup/down/left/right. When not in a Menu, the left and right cursor controlsdecrease and increase the display brightness.
3. DISPLAY: Press to access the on-screen display of the FES functionsand adjustments.
4. RETURN: Press to return to the previous menu screen.
5. ANGLE (DVD dependent): Press to select the angle to view thescene.
6. Channel A/B: Press to select either A or B headphones and then usethe MEDIA control to select the desired playing media for theheadphones.
2007 (dvd)SupplementUSA (fus)
System descriptions
13
7. VOL (Volume): When in Single Play, press to increase ( ) ordecrease ( ) the volume over all speakers. When in Dual Play, press toincrease ( ) or decrease ( ) the volume for the wired headphones.(Wireless headphone volume is controlled with the rotary dial on theright ear piece.)
8. Fast Forward/Next: In DVD mode, press and hold for a quickadvance within the DVD. Press and release to advance to the nextchapter. In CD/MP3 mode, press to access the next track.
9. Play/Pause: Press to play or pause a DVD.
10. SHUFFLE: Press to play all tracks on the current CD/MP3 disc inrandom order.
11. STOP: Press to stop the current DVD or CD/MP3.
12. / Speaker/Headphone (Single/Dual Play): Press to togglebetween Single Play (same media playing through all speakers) and DualPlay (headphone mode — the rear speakers are muted).
13. Keypad: Use the numeric controls to enter in a specific CD/MP3track or DVD chapter to be played.
14. C (Cancel): Press to cancel/clear the numeric input (i.e. chapternumber).
15. MEDIA: Press to cycle through the possible media sources: AM,FM1, FM2, SAT (if equipped), CD, CASSETTE, DVD, AUX.Channel B can only access DVD and AUX sources.
16. VIDEO: Press to cycle through video states: DVD-DISC, DVD-AUX,NON-DVD, Off.
17. EJECT: Press to eject a disc from the FES.
18. Fast reverse/Previous: When a DVD is playing, press and hold for aquick reverse within the DVD. Press and release for the previouschapter. Press PLAY to resume normal playback speed and volume.In CD/MP3 mode, press to access the previous track.
19. MENU: Press to access the DVD disc menu for selections. PressMENU again when in the DVD disc menu to access the system set-upmenu.
20. SUBTITLE (DVD dependent): Press to turn the subtitle feature ONor OFF.
21. LANGUAGE (DVD dependent): Press to select the desiredlanguage.
2007 (dvd)SupplementUSA (fus)
System descriptions
14
22. ENTER: Press to select the highlighted menu option.
23. ILLUMINATION: Press to illuminate the remote control andbacklight all of the buttons.
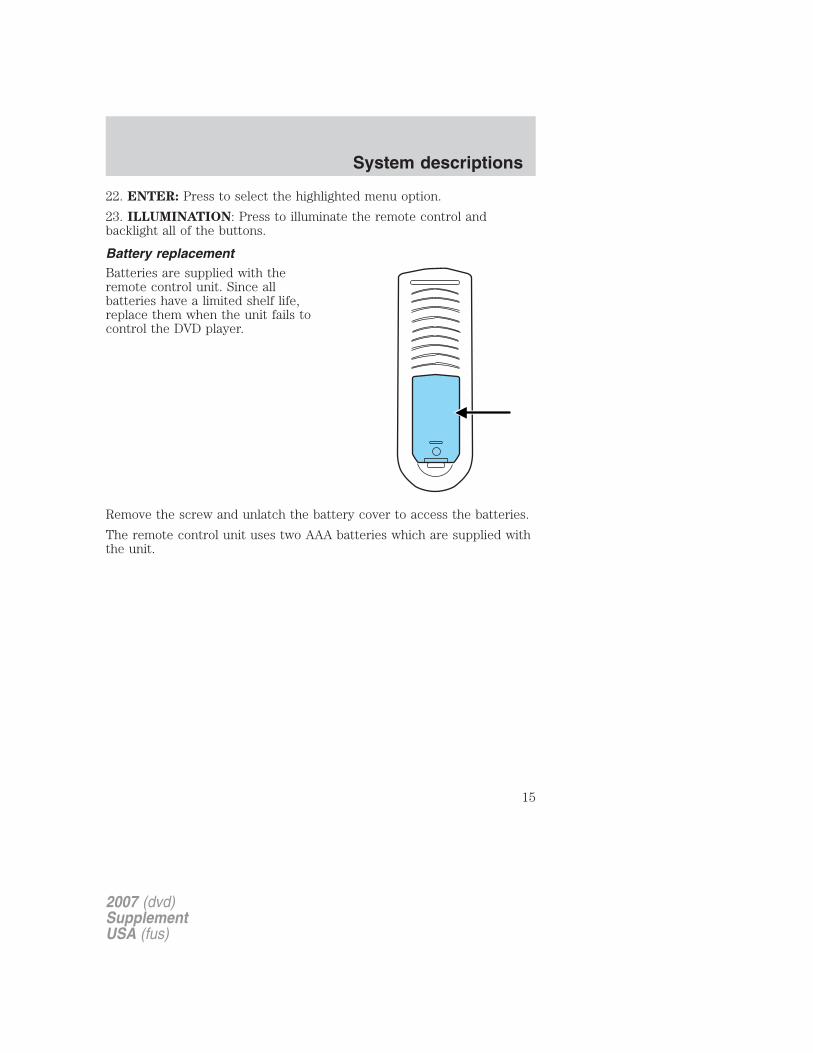
Battery replacementBatteries are supplied with theremote control unit. Since allbatteries have a limited shelf life,replace them when the unit fails tocontrol the DVD player.
Remove the screw and unlatch the battery cover to access the batteries.
The remote control unit uses two AAA batteries which are supplied withthe unit.
2007 (dvd)SupplementUSA (fus)
System descriptions
15

Headphones
Wireless headphones
Your FES system is equipped with two sets of battery powered, infraredwireless headphones. Two AAA batteries are needed to operate theheadphones. (Batteries are included.)
Additional infrared wireless headphones may be purchased for use withthe system. Also, wired headphones may be purchased and plugged inwhere indicated on the left and right hand sides of the system. Refer toWired Headphones below.
To install the batteries, remove thescrew at the bottom of the cover.Then, lightly press down on top andslide the cover off.
When replacing the batteries, usetwo new batteries (alkalinerecommended) and install themwith the correct orientation asindicated in the battery housing.
2007 (dvd)SupplementUSA (fus)
System descriptions
16

To operate the headphones:
• Press ON/OFF on the ear piece toturn on the headphones. A redindicator light will illuminateindicating the headphones areON. Press ON/OFF again to turnthe headphones off.
• Adjust the headphones tocomfortably fit your head usingthe headband adjustment.
• Select the desired audio source(Channel A or B) for each set ofwireless headphones by using theA/B selection switch on the earpiece.
• Adjust the volume control to thedesired listening level.
Ensure that the headphones are turned off when not in use. Afterapproximately one minute of not being in use (no infrared signal isreceived), the wireless headphones will automatically turn off. They willalso turn off after two hours of continuous use as a power save feature.If this happens, simply turn the headphones on again and continue use.
Wired headphones
You may purchase wired headphones for your FES (FamilyEntertainment System). Plug them into the 3.5 mm headphone jack(s)located on the left and right sides of the system. (Channel A is locatedon the left side and Channel B is located on the right side.) Theseheadphones will be active when in Dual Play mode.
To listen to the audio on wired headphones (not included), connect thewired headphones into the headphone jacks on the sides of the DVDsystem. The wired headphone jack for Channel A is located on the leftside of the FES and is labeled A. Headphones plugged into thisheadphone jack will hear audio from the audio source selected to be theChannel A source. The wired headphone jack for Channel B is located onthe right side of the FES and is labeled B. Headphones plugged intothis headphone jack will hear audio from the audio source selected to bethe Channel B source.
2007 (dvd)SupplementUSA (fus)
System descriptions
17

Adjust the headphone volume usingthe volume control on the DVDsystem.
2007 (dvd)SupplementUSA (fus)
System descriptions
18

SINGLE PLAY/DUAL PLAY
Your DVD and audio system work together with the infrared headphonesand wired headphones (not included) to enable the front and rear seatpassengers to listen to a variety of sources a variety of ways.
Single Play: Single play consists of all occupants in the vehicle listeningto the same playing media over the front and rear speakers. When theDVD system is on, and the same source is playing through the front andrear speakers, SINGLE PLAY will appear in the front radio display.
Dual Play: Dual play is when the rear seat passengers choose to listento a different playing media than the front seat passengers. With theDVD and Rear Seat Controls turned ON, the rear seat passengers maychoose to listen to the radio, CD, MP3, DVD, or DVD-AUX media sourcesover headphones while the front speakers play the chosen selection forthe front audio system, they may listen to another over the headphones.DUAL PLAY will appear in the radio display.
When both the front seat passengers and the rear seat passengers listento the same audio source, SHARED MODE will appear on the radio.
Note: If the front seat passengers are listening to the radio, the rear seatpassengers can also listen to the radio, however they will be limited tolistening to the same radio channel.
Press / on the DVD player tolisten to audio over the headphones.
The headphone control will now be active and a green light next to theA or B headphone control buttons will illuminate. The system can outputtwo different audio sources over the headphones. These are calledChannel A and Channel B. Both Channel A and Channel B can belistened to on the wired headphones (not included) or on the infrared(IR) wireless headphones.
Press the Headphone Control buttonA to change the audio source forChannel A.
Press MEDIA to change the audiosource for Channel A. Thisinformation will display on the DVDsystem screen.
2007 (dvd)SupplementUSA (fus)
Operation
19

Press the Headphone Control buttonB to change the audio source forChannel B.
Press MEDIA to change the audio source for Channel B. This informationwill display on the DVD system screen. Channel B can listen to eitherthe DVD media or the DVD system auxiliary inputs (DVD-AUX).
OPERATION WITH AN AFTERMARKET AUDIO SYSTEM(HEADPHONE ONLY MODE)
When the Family Entertainment System (FES) detects that the originalradio supplied by Ford Motor Company has been removed from thevehicle, the Family Entertainment System will work in a state referred toas “Headphone Only Mode”.
While operating in Headphone Only Mode, the system will have limitedfunctionality.
• The system will only output audio to the headphones. It will not becapable of providing audio to the speakers.
• The available sources in FES Headphone Only Mode are DVD-DISCand DVD-AUX, regardless of headphone channel (A or B).
• When a disc is inserted into the FES while in Headphone Only Mode,both headphone channels (A&B) will be connected to FES-DISC.
MENU MODE
Press MENU once on the DVD system to access the DVD disc menu ifavailable.
Press MENU twice to access the DVD set-up menu and the followingfeatures:
1. ZOOM
2. ANGLE
3. ASPECT RATIO
4. LANGUAGE
5. SUBTITLES
2007 (dvd)SupplementUSA (fus)
Operation
20

ANGLE MODESelect ANGLE to select variousangles of view for the DVD.
This is disc dependent — someDVD discs may have more viewingangles to select from. Once youhave made your selection, pressENTER to confirm. The systemdefault is Angle 1.
ASPECT RATIOSelect ASPECT RATIO to select theviewing size and shape of the videodisplayed on the LCD screen. This isdisc dependent.
You can select from: WIDE, LETTERBOX or PAN SCAN. Once you havemade your selection, press ENTERto confirm. The LCD screen displaywill immediately change to yourselection after the system resumesplayback of the DVD. The systemdefault is WIDE (16:9). This is discdependent.
2007 (dvd)SupplementUSA (fus)
Operation
21
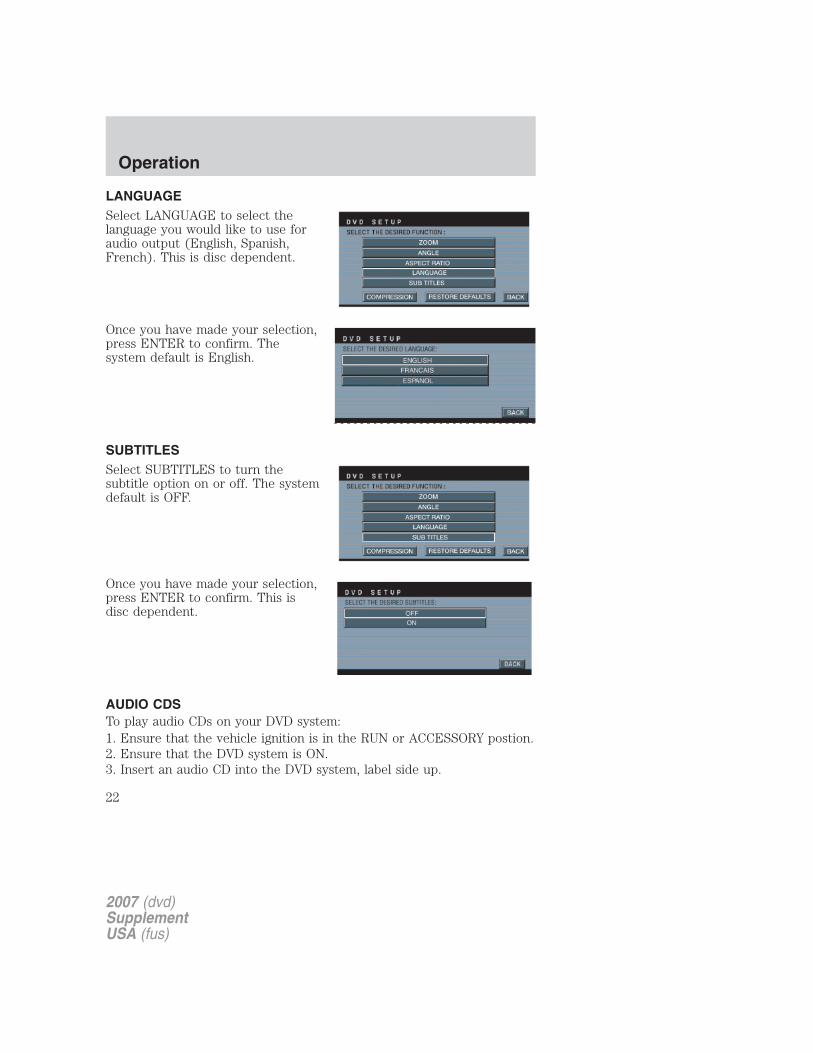
LANGUAGESelect LANGUAGE to select thelanguage you would like to use foraudio output (English, Spanish,French). This is disc dependent.
Once you have made your selection,press ENTER to confirm. Thesystem default is English.
SUBTITLESSelect SUBTITLES to turn thesubtitle option on or off. The systemdefault is OFF.
Once you have made your selection,press ENTER to confirm. This isdisc dependent.
AUDIO CDSTo play audio CDs on your DVD system:1. Ensure that the vehicle ignition is in the RUN or ACCESSORY postion.2. Ensure that the DVD system is ON.3. Insert an audio CD into the DVD system, label side up.
2007 (dvd)SupplementUSA (fus)
Operation
22

4. The track and elapsed time willappear in the status bar. Use theDVD cursor controls on the bezel tohightlight which track you wouldlike to play. You can also use thecursor controls to highlightCOMPRESSION, SHUFFLE orSCAN. Once you have highlightedthe desired track or function, press ENTER on the DVD bezel to confirmyour selection.COMP (Compression): Compression brings soft and loud CD passagestogether for a more consistent listening level when in CD mode. Press toturn the feature ON/OFF
SHUFFLE: Press to hear all tracks on the current CD in random order.Press again to stop.
SCAN: Press for a brief sampling of all tracks on the current CD. Pressagain to stop.
PLAYING MP3 DISCSTo play an MP3 disc on your DVD system:
1. Ensure that the vehicle ignition is in the RUN or ACCESSORY postion.
2. Ensure that the DVD system is ON.
3. Insert the MP3 disc into the DVD system, label side up.
4. The folder, track and elapsedtime will appear in the status bar.The screen will list the Artist, Title,Album and File Name.
COMP (Compression):Compression brings soft and loudCD/MP3 passages together for amore consistent listening level whenin CD mode. Press to turn the feature ON/OFF
SHUFFLE: Press to hear all tracks on the current MP3 folder in randomorder. Press again to stop.
SCAN: Press for a brief sampling of all tracks on the current MP3 folder.Press again to stop.
FOLDER LIST: Press access folder mode and to go to the previous/nextfolder in the MP3 disc.
2007 (dvd)SupplementUSA (fus)
Operation
23

MP3 DISC QUALITY FACTORSSeveral factors can effect disc playback quality:• Disc capacity — Each disc contains about 650 MB of storage capacity.
We do not recommend using high capacity discs containing 700MB ofstorage.
• Disc type — Some CD-RW discs may operate inconsistently and maycause an error message to appear. We recommend burning MP3 filesonto CD-R discs.
• Disc finalization — The disc may be left open for the purpose ofadding sessions to it at a later time, but be sure to close each sessionor the disc will not play.
• Bit rate — The player supports bit rates from 32–320 kbps, as well asvariable bit rate MP3 files, but lower bit rates will have a noticeableeffect on sound quality and are recommended only for speech or lowfidelity music material. We recommend that you encode MP3 filesusing a high quality encoder.
• PC configuration — Encoding MP3 files requires intensive use of yourcomputer’s resources. Follow the PC configuration recommendationsof the encoder software vendor. We recommend that you avoidrunning other software applications on your PC during MP3 encodingto avoid undesirable noise and distortion.
CD, MP3 AND CD PLAYER CARE• Handle discs by their edges only. Never touch the playing surface.
• Do not expose discs to direct sunlight or heat sources for extendedperiods of time.
• Do not insert more than one disc into the slot of the CD player (ifequipped).
• Always store discs out of direct sunlight. Excessive heat may damageor warp discs.
• Use care when handling and playing CD-R and CD-RW discs, whichare more susceptible to damage from heat, light and stress than areregular CDs.
• Always insert and remove a disc by holding the disc flat, with theplaying surface facing down, in order to prevent damage to the disc orthe player.
• Never insert any object other than a compact disc (CD) or digitalversatile disc (DVD) into the player, as doing so may damage theplayer and may cause injury to you.
2007 (dvd)SupplementUSA (fus)
Operation
24

• Do not disassemble the player. The laser used in disc playback isextremely harmful to the eyes.
The FES DVD system is designed to play commercially pressed 12cm (4.75 in) audio compact discs and digital versatile discs (DVD)only. Due to technical incompatibility, certain recordable andre-recordable compact discs may not function correctly whenused in Ford CD and DVD players. Irregular shaped CDs or DVDs,CDs or DVDs with a scratch protection film attached, and CDswith homemade paper (adhesive) labels should not be insertedinto the FES DVD system. The label may peel and cause the CDor DVD to become jammed. It is recommended that homemadeCDs or DVDs be identified with permanent felt tip marker ratherthan adhesive labels. Ball point pens may damage CDs or DVDs.Please contact your authorized dealer for further information.
PLAYING A DVD
1. Ensure that the vehicle ignition is in the RUN or ACCESSORYposition.
2. Ensure that the navigation system is on.
3. Insert a DVD label-side up into the system.
4. Use the DVD bezel controls to:
Press to play or pause a DVD.
Press to stop or eject use a DVD.
Press and release to go to theprevious chapter. Press and hold fora fast reverse search.
Press and release to go to the nextchapter. Press and hold for a fastforward search.
Press when not in menu mode toadjust brightness, or when in menumode to navigate through the menuselections.
2007 (dvd)SupplementUSA (fus)
Operation
25

Press to adjust volume levels.
SLOW PLAY1. With a DVD playing, press pause.
2. Press and hold the reverse oradvance button to enter into slowplay mode. Once in slow play mode,press and release the reverse or advance button repeatedly to cyclethrough 1/4 and 1/2. These will display on the status bar on top of thescreen as the screens cycle through at this rate.
FRAME BY FRAME1. With a DVD playing, press pause.
2. Press the right cursor button. TheDVD will advance once frame. Eachpress of the right cursor button willadvance the DVD video by oneframe.
HEADPHONE/AUXILIARY JACKS
There are wired headphone (not included) and auxiliary jacks on the leftand right side of your DVD system. They can be used to plug in wiredheadphones or to connect and play auxiliary electronic devices such asgame systems, personal camcorders, video cassette recorders, etc.
2007 (dvd)SupplementUSA (fus)
Operation
26

On the left side of the system is theHeadphone A input jack. Thisheadphone will listen to the mediaselected on the Channel A source.When you need to make anyadjustments to the media, volume,etc, ensure that the Channel Asource is highlighted. For moreinformation, refer to Headphoneadjustments.
Also located here are the variousauxiliary jacks which can be used to plug in a VCR, camcorder, videogames, etc. The specific jacks are as follows:1. Yellow: video input2. White: left channel audio input3. Red: right channel audio input4. Black: wired headphone jack ( not included)
The B headphone jack (5) is locatedon the right side of the DVD system.Plug in wired headphones (notincluded) here.
Note: The B headphones can onlyaccess DVD and AUX modes. Theycannot access radio sources.
AUDIO DISPLAYSYour DVD system interacts closely with the front audio system. Statusmessages will appear in the radio display showing the DVD status. Somepossible radio display messages:• SINGLE PLAY or DUAL PLAY• DVD LOAD
• DVD MENU
• DVD STOP
AUDIO INTERACTIONYou can then also use the front audio controls to advance, reverse, playand pause a DVD. While a DVD is playing you may use the followingcontrols on the front radio:
2007 (dvd)SupplementUSA (fus)
Operation
27
• SEEK: Press to advance to the previous ( ) or next ( ) DVDchapters.
• : Press to play a DVD or to pause the DVD.
When the radio displays “DVD MENU”, press PLAY on the radio(memory preset #6), to play the disc.
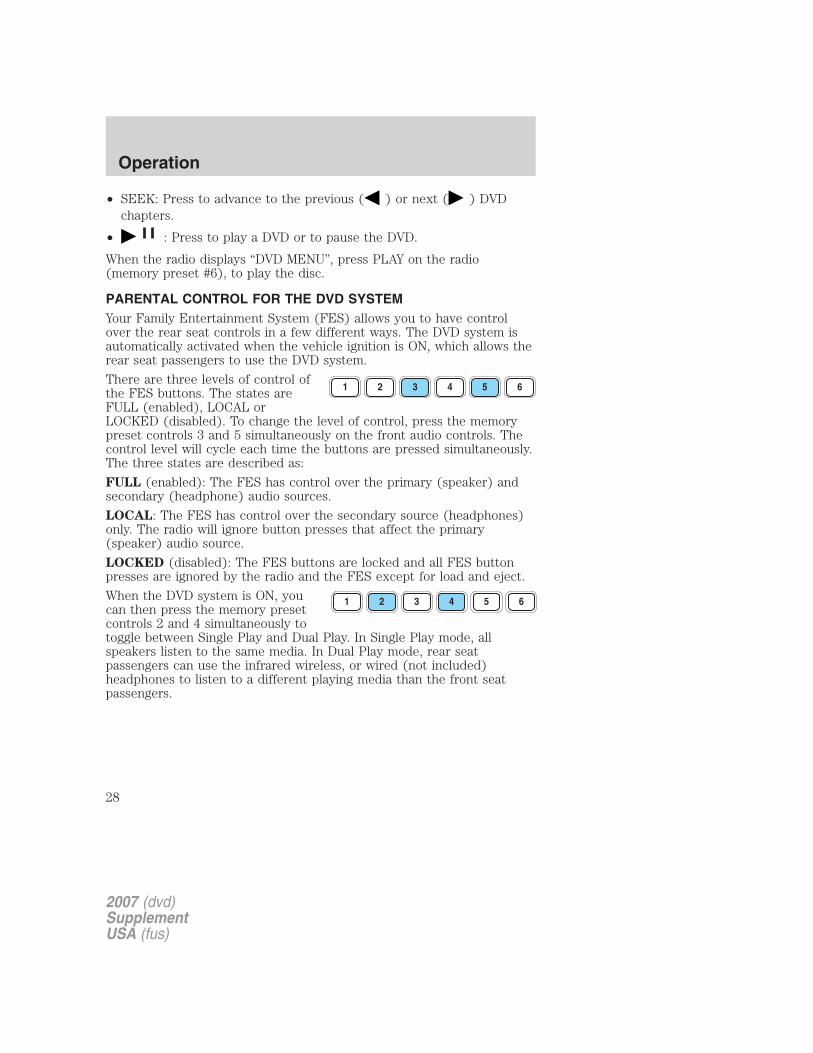
PARENTAL CONTROL FOR THE DVD SYSTEMYour Family Entertainment System (FES) allows you to have controlover the rear seat controls in a few different ways. The DVD system isautomatically activated when the vehicle ignition is ON, which allows therear seat passengers to use the DVD system.
There are three levels of control ofthe FES buttons. The states areFULL (enabled), LOCAL orLOCKED (disabled). To change the level of control, press the memorypreset controls 3 and 5 simultaneously on the front audio controls. Thecontrol level will cycle each time the buttons are pressed simultaneously.The three states are described as:
FULL (enabled): The FES has control over the primary (speaker) andsecondary (headphone) audio sources.
LOCAL: The FES has control over the secondary source (headphones)only. The radio will ignore button presses that affect the primary(speaker) audio source.
LOCKED (disabled): The FES buttons are locked and all FES buttonpresses are ignored by the radio and the FES except for load and eject.
When the DVD system is ON, youcan then press the memory presetcontrols 2 and 4 simultaneously totoggle between Single Play and Dual Play. In Single Play mode, allspeakers listen to the same media. In Dual Play mode, rear seatpassengers can use the infrared wireless, or wired (not included)headphones to listen to a different playing media than the front seatpassengers.
1 2 3 4 5 6
2007 (dvd)SupplementUSA (fus)
Operation
28

GENERAL INFORMATIONMacrovision: This product incorporates copyright protection technologythat is protected by method claims of certain U.S. patents and otherintellectual property rights owned by Macrovision Corporation and otherrights owners. Use of this copyright protection technology must beauthorized by Macrovision Corporation, and is intended for home andother limited viewing uses only unless otherwise authorized byMacrovision Corporation. Reverse engineering or disassembly isprohibited.
MP3: Supply of this product only conveys a license for private,non-commercial use and does not convey a license nor imply any right touse this product in any commercial (i.e. revenue generating) real timebroadcasting (terrestrial, satellite, cable and /or any other media)broadcasting/streaming via internet, intranets and/or other networks or inother electronic content distribution systems, such as pay-audio oraudio-on-demand applications. An independent license for such use isrequired. For details, please visit http:// www.mp3licensing.com.
2007 (dvd)SupplementUSA (fus)
Operation
29

30

31

32