Embed Size (px)
Citation preview
Rational DOORS Next Generation
Installation and Configuration Guide

Contents
1. Introduction ............................................................................................................................ 3
2. IBM Registration ....................................................................... ¡Error! Marcador no definido.
3. Download and Install Rational Software Architect ................................................................. 4

1. Introduction
A trial version for 60 days of Rational DOORS Next Generation can be downloaded from the Jazz
web site. This protocol explains how to create a new account in the Jazz web site (see section 2) as well as
the installation procedure for the tool (see section 3).
If you have comments or questions regarding this document or Rational DOORS Next
Generation, please contact [email protected]
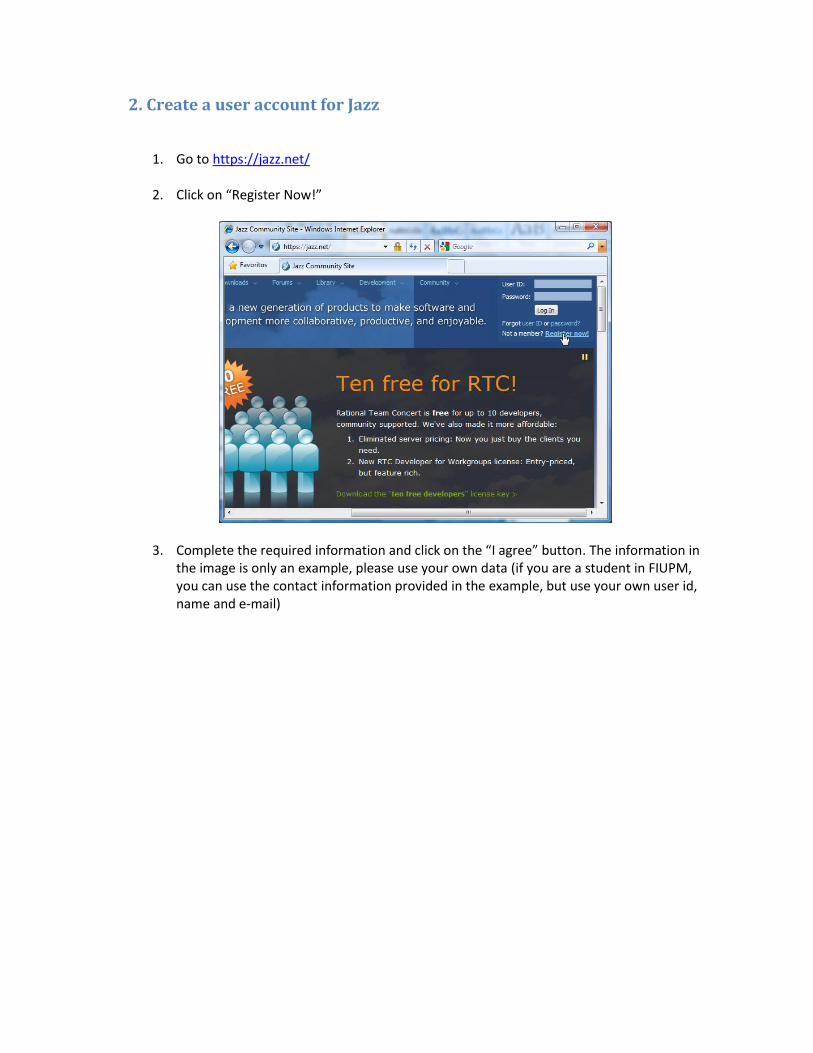
2. Create a user account for Jazz
1. Go to https://jazz.net/
2. Click on “Register Now!”
3. Complete the required information and click on the “I agree” button. The information in the image is only an example, please use your own data (if you are a student in FIUPM, you can use the contact information provided in the example, but use your own user id, name and e-mail)
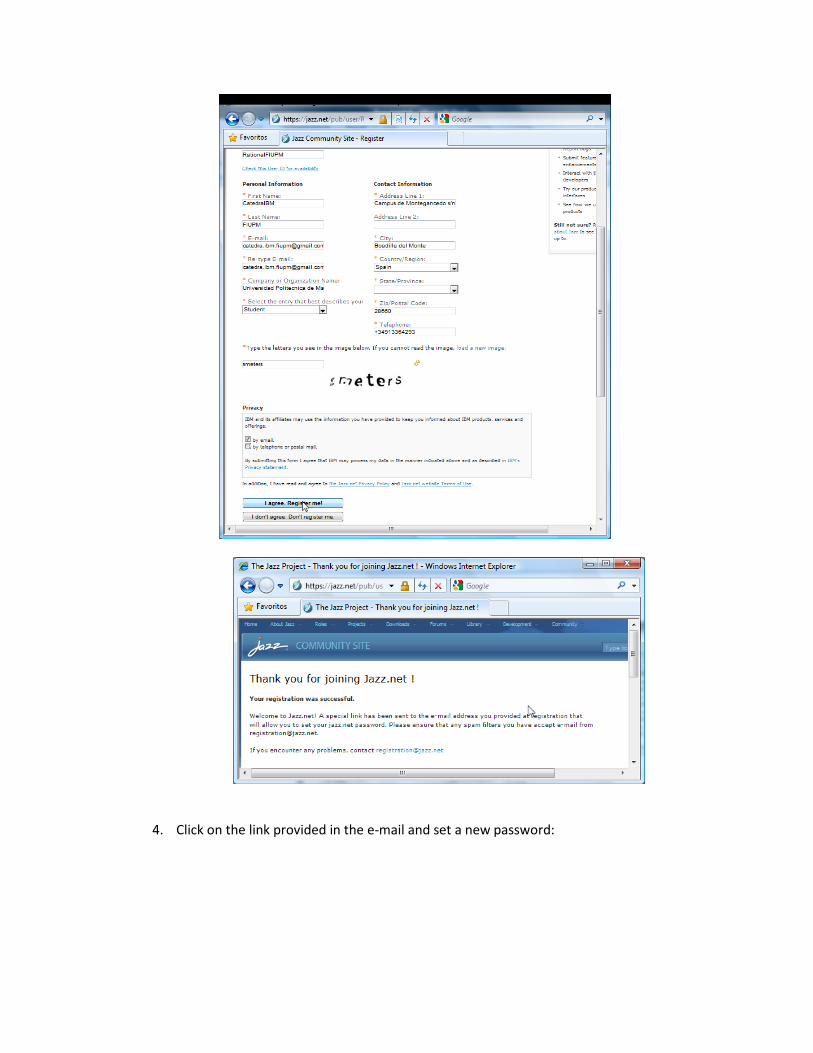
4. Click on the link provided in the e-mail and set a new password:
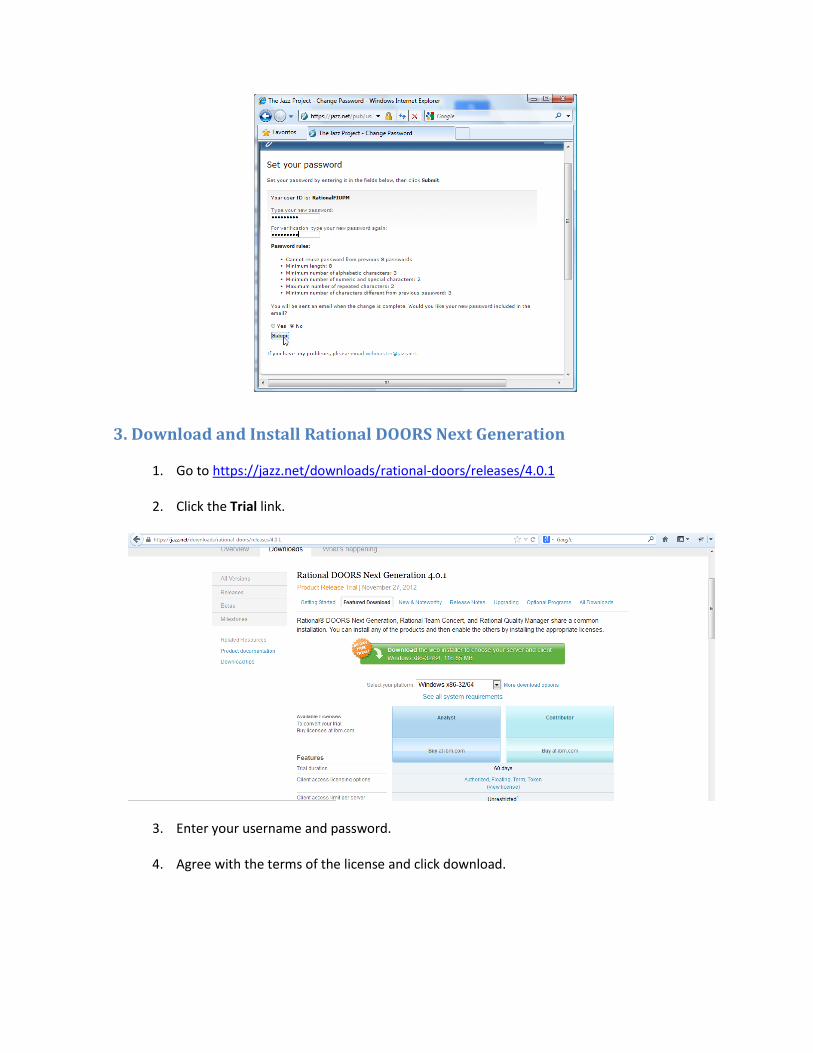
3. Download and Install Rational DOORS Next Generation
1. Go to https://jazz.net/downloads/rational-doors/releases/4.0.1
2. Click the Trial link.
3. Enter your username and password.
4. Agree with the terms of the license and click download.
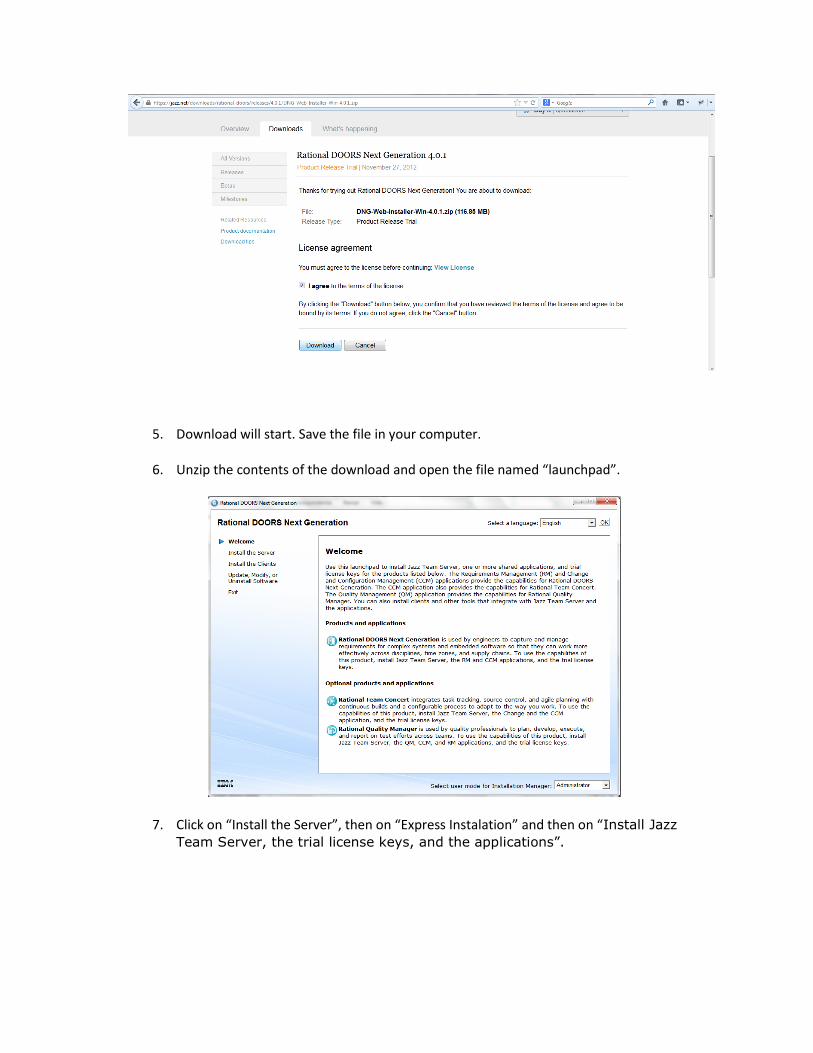
5. Download will start. Save the file in your computer.
6. Unzip the contents of the download and open the file named “launchpad”.
7. Click on “Install the Server”, then on “Express Instalation” and then on “Install Jazz
Team Server, the trial license keys, and the applications”.
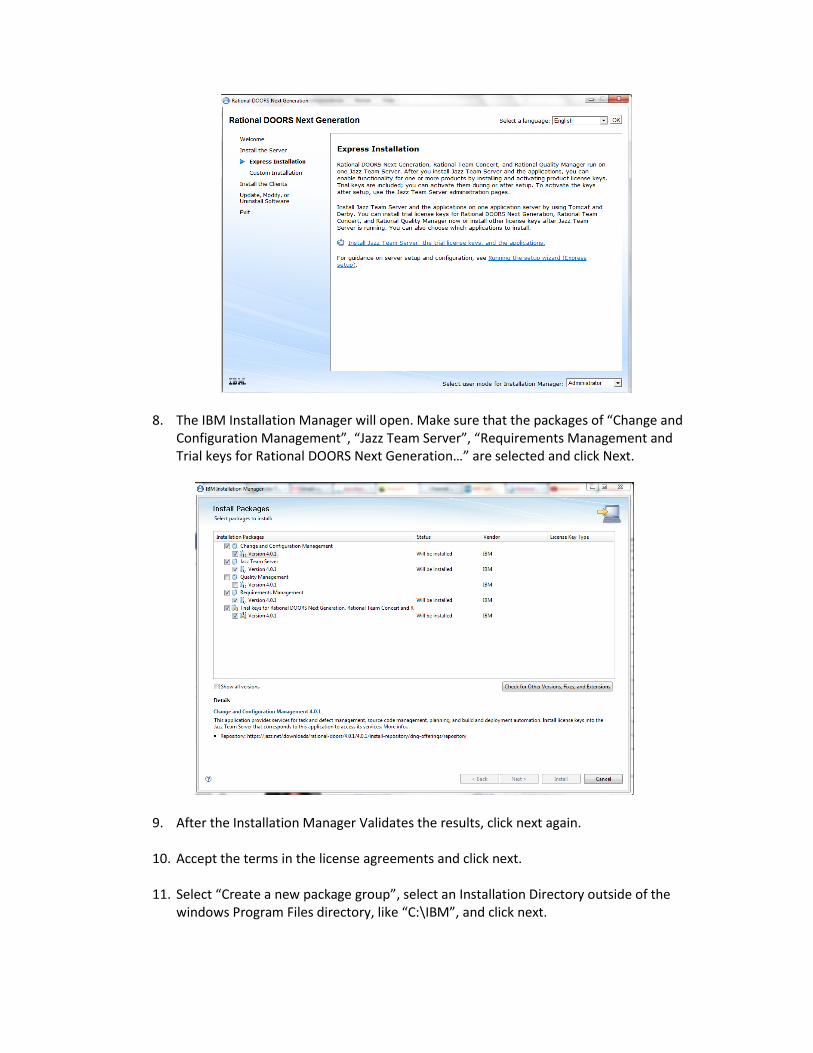
8. The IBM Installation Manager will open. Make sure that the packages of “Change and Configuration Management”, “Jazz Team Server”, “Requirements Management and Trial keys for Rational DOORS Next Generation…” are selected and click Next.
9. After the Installation Manager Validates the results, click next again.
10. Accept the terms in the license agreements and click next.
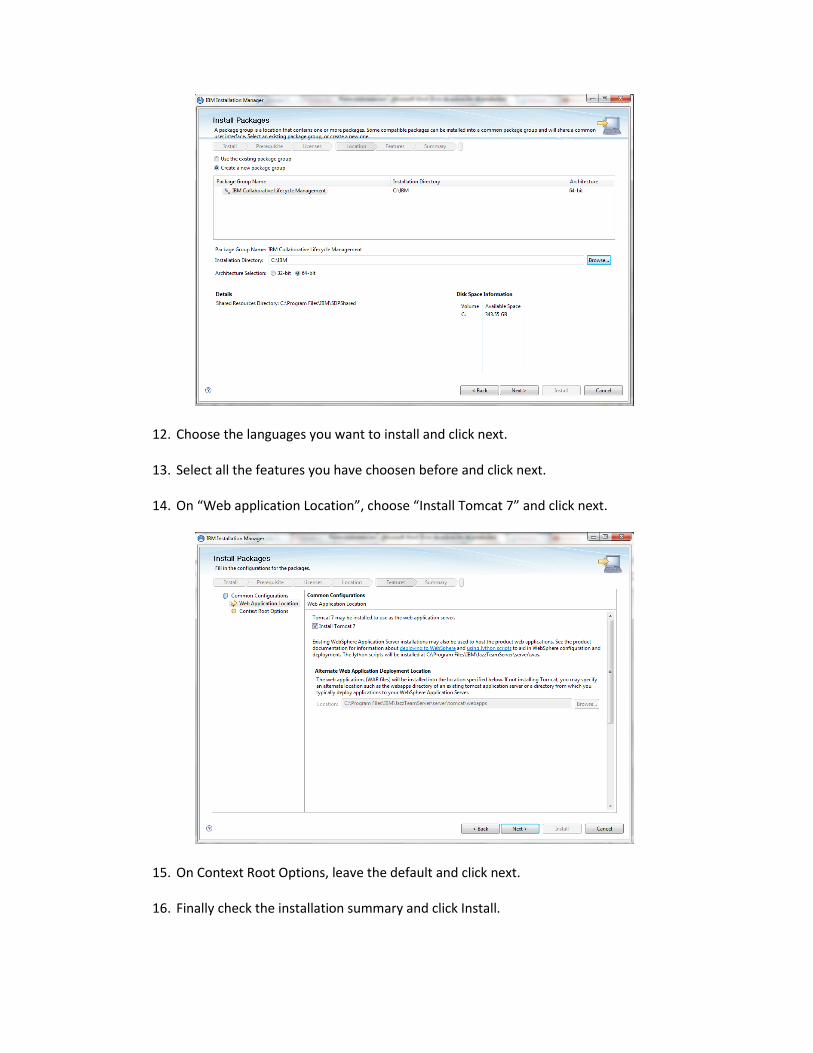
11. Select “Create a new package group”, select an Installation Directory outside of the windows Program Files directory, like “C:\IBM”, and click next.
12. Choose the languages you want to install and click next. 13. Select all the features you have choosen before and click next.
14. On “Web application Location”, choose “Install Tomcat 7” and click next.
15. On Context Root Options, leave the default and click next. 16. Finally check the installation summary and click Install.
17. The Installation Manager will indicate the results of the installation check that everything went well and click finish.
18. Go to the installation directory and open the server directory and run the server by executing “server.startup”.
19. Open in your browser the following URL: https://localhost:9443/jts/setup
20. Log in with the username “ADMIN” and password admin.
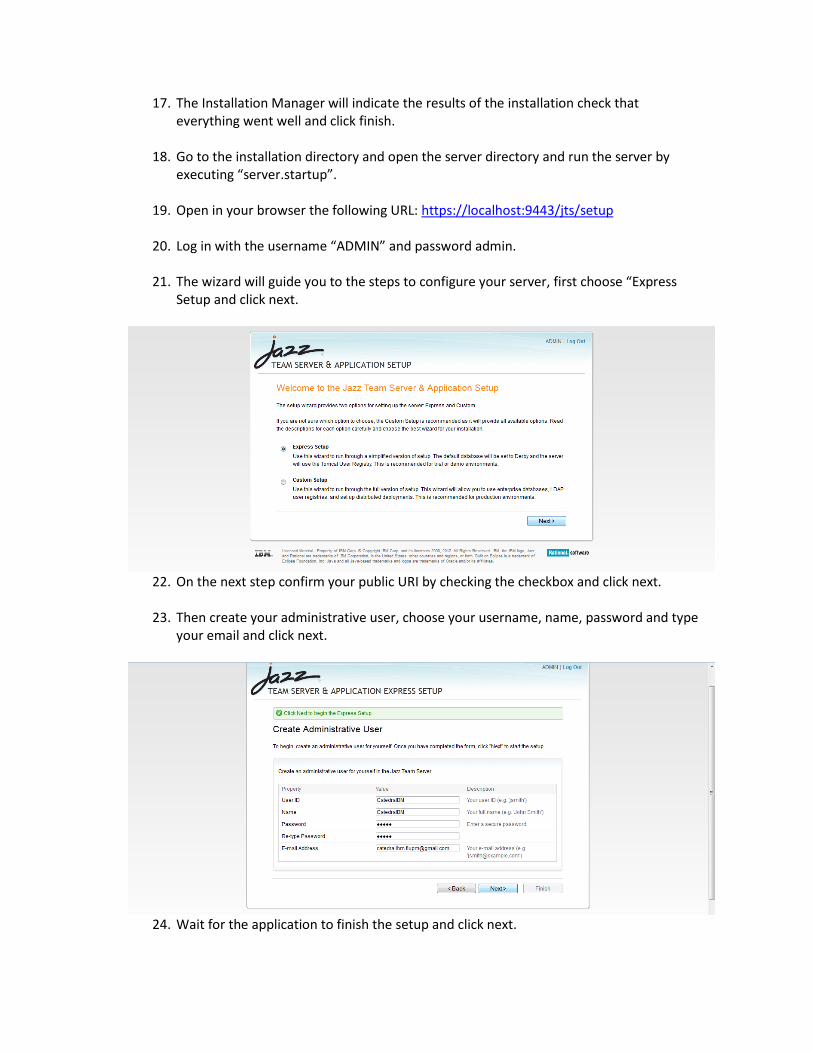
21. The wizard will guide you to the steps to configure your server, first choose “Express Setup and click next.
22. On the next step confirm your public URI by checking the checkbox and click next. 23. Then create your administrative user, choose your username, name, password and type
your email and click next.
24. Wait for the application to finish the setup and click next.

25. On the Assign Licenses step choose “Rational DOORS Next Generation – Analyst” and click finish.
26. Now you have the server installed with Rational DOORS Next generation, you will see the server administration home where you can add users, create and work on your requirement management projects, among other things.