Embed Size (px)
Citation preview
REDCap Data Migration from CSV file Build and migrate your existing CSV database file to REDCap.
Overview
The REDCap design has made it very easy to move existing data collected in a CSV file to REDCap, providing researchers with a better, more secure solution for their data storage.
10-Jul-14 2
Source File Conversion to CSV
1. Open the Source CSV file. 2. Select “Save As” and rename it to
preserve the original file in the event that you encounter issues.
3. Important: Edit new file to ensure that a unique record number is in the first column.
4. Click SAVE.
10-Jul-14 3
REDCap Data Dictionary Build
! This process is for data stored in a flat table with the column headers as field names and data in subsequent rows.
! Follow the steps in the following slides to create a data dictionary.
! Once the data dictionary is built and uploaded to REDCap, importing the data will be simple.
10-Jul-14 4
Create a REDCap Project ! Login to REDCap and create your project,
choosing “Basic Demography” as a template.
! REDCap will create a database with a form labeled Demographics.
! Navigate to the Project Setup page and select “Upload Data Dictionary.”
! Choose the “Download the current Data Dictionary” Excel link and open the target Excel Data Dictionary.
10-Jul-14 5
Modify the Data Dictionary
! The column headings represent information about the fields in your database, such as field type, variable name, minimum value, maximum values, etc.
! Modify the Target Data Dictionary to conform with your project by deleting all rows after Row 1.
! Open the Source CSV file to be migrated.
10-Jul-14 6
Step 1
10-Jul-14 7
a
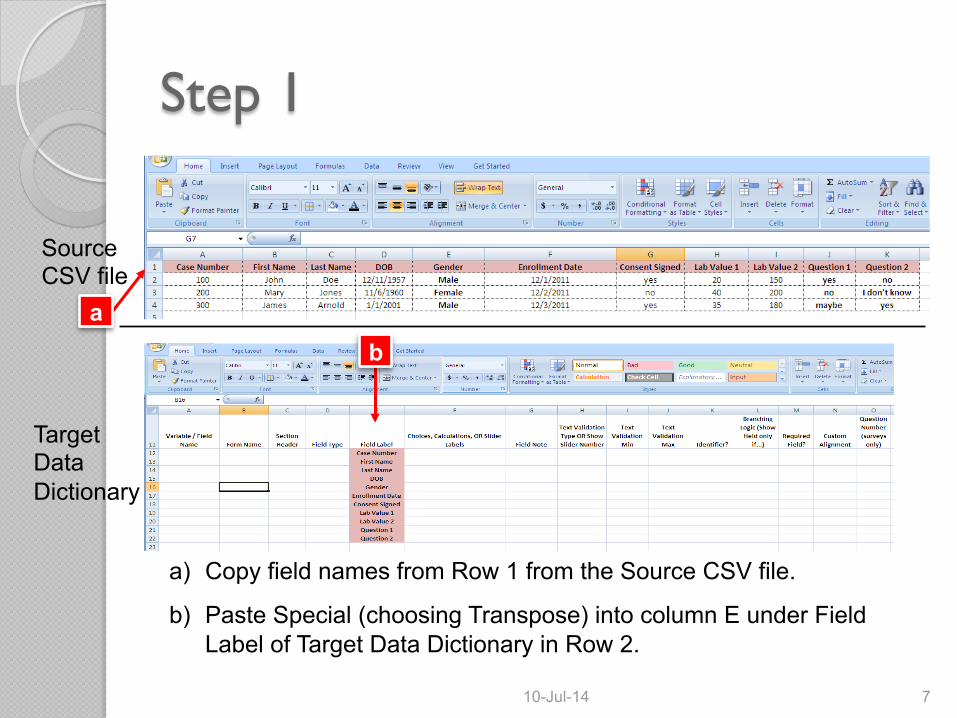
a) Copy field names from Row 1 from the Source CSV file.
b) Paste Special (choosing Transpose) into column E under Field Label of Target Data Dictionary in Row 2.
Source CSV file
Target Data Dictionary
b
Step 2
10-Jul-14 8
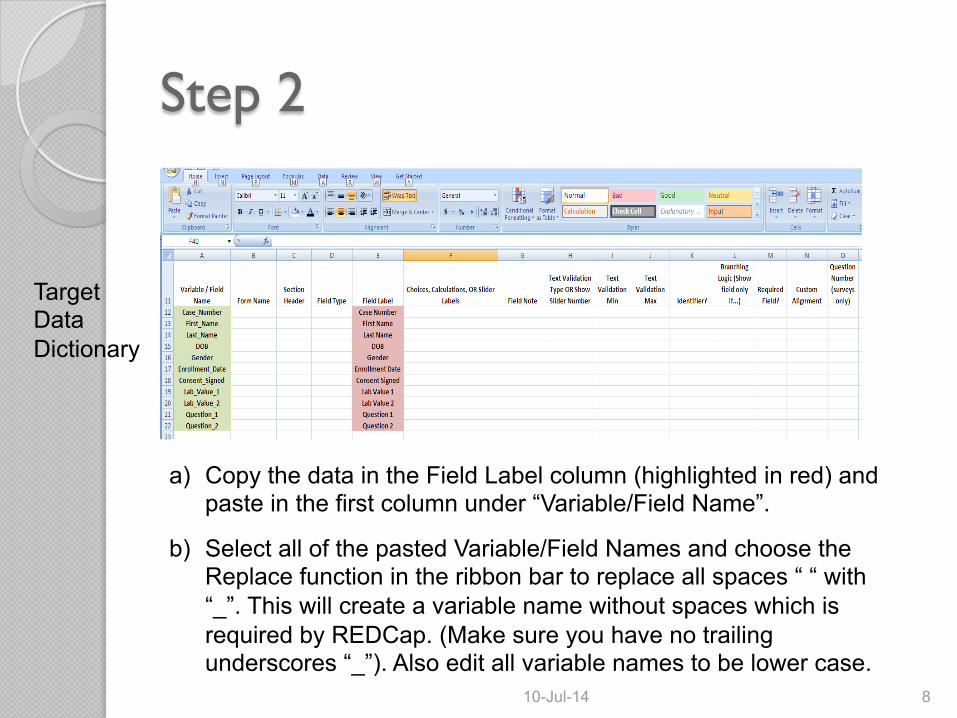
a) Copy the data in the Field Label column (highlighted in red) and paste in the first column under “Variable/Field Name”.
b) Select all of the pasted Variable/Field Names and choose the Replace function in the ribbon bar to replace all spaces “ “ with “_”. This will create a variable name without spaces which is required by REDCap. (Make sure you have no trailing underscores “_”). Also edit all variable names to be lower case.
Target Data Dictionary
Step 3
10-Jul-14 9
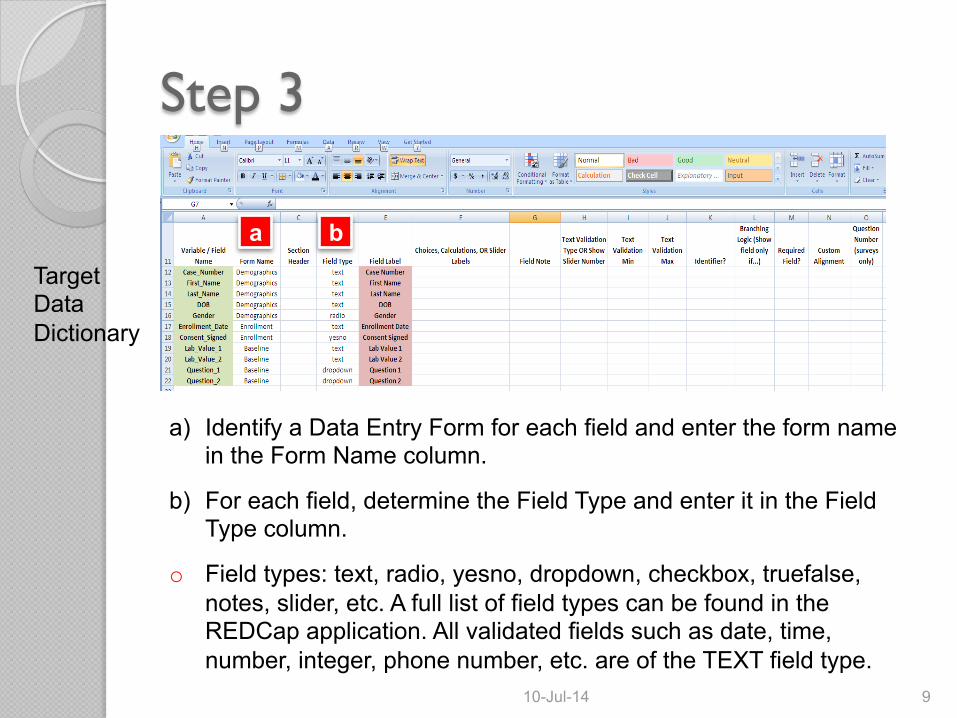
a) Identify a Data Entry Form for each field and enter the form name in the Form Name column.
b) For each field, determine the Field Type and enter it in the Field Type column.
o Field types: text, radio, yesno, dropdown, checkbox, truefalse, notes, slider, etc. A full list of field types can be found in the REDCap application. All validated fields such as date, time, number, integer, phone number, etc. are of the TEXT field type.
Target Data Dictionary
a b
Step 4
10-Jul-14 10
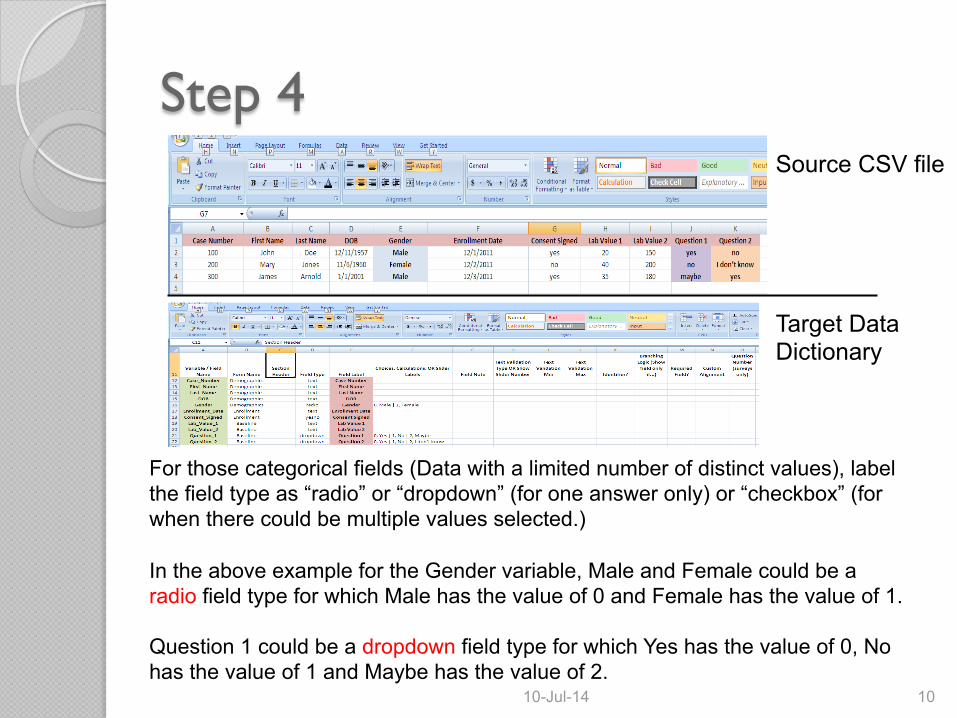
For those categorical fields (Data with a limited number of distinct values), label the field type as “radio” or “dropdown” (for one answer only) or “checkbox” (for when there could be multiple values selected.)
In the above example for the Gender variable, Male and Female could be a radio field type for which Male has the value of 0 and Female has the value of 1.
Question 1 could be a dropdown field type for which Yes has the value of 0, No has the value of 1 and Maybe has the value of 2.
Source CSV file
Target Data Dictionary
Step 5
10-Jul-14 11
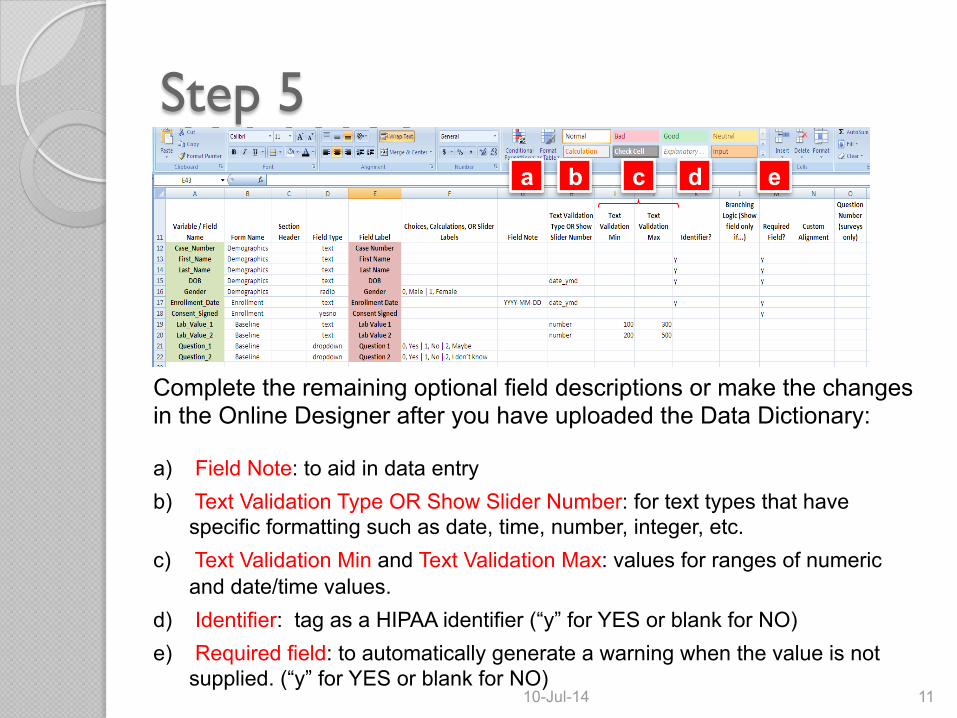
Complete the remaining optional field descriptions or make the changes in the Online Designer after you have uploaded the Data Dictionary: a) Field Note: to aid in data entry b) Text Validation Type OR Show Slider Number: for text types that have
specific formatting such as date, time, number, integer, etc. c) Text Validation Min and Text Validation Max: values for ranges of numeric
and date/time values. d) Identifier: tag as a HIPAA identifier (“y” for YES or blank for NO) e) Required field: to automatically generate a warning when the value is not
supplied. (“y” for YES or blank for NO)
e c ba d
Step 6 ! Save the Target Data Dictionary as a CSV
file. ! Navigate to your project’s Project Setup
page in REDCap and select the “Upload Data Dictionary” button.
! Browse to the Target Data Dictionary file and select “Upload your Data Dictionary.”
! You now have a completed building your REDCap database. Further modifications may be made at this time using the “Online Designer” found in the Project Setup page.
10-Jul-14 12
Step 7
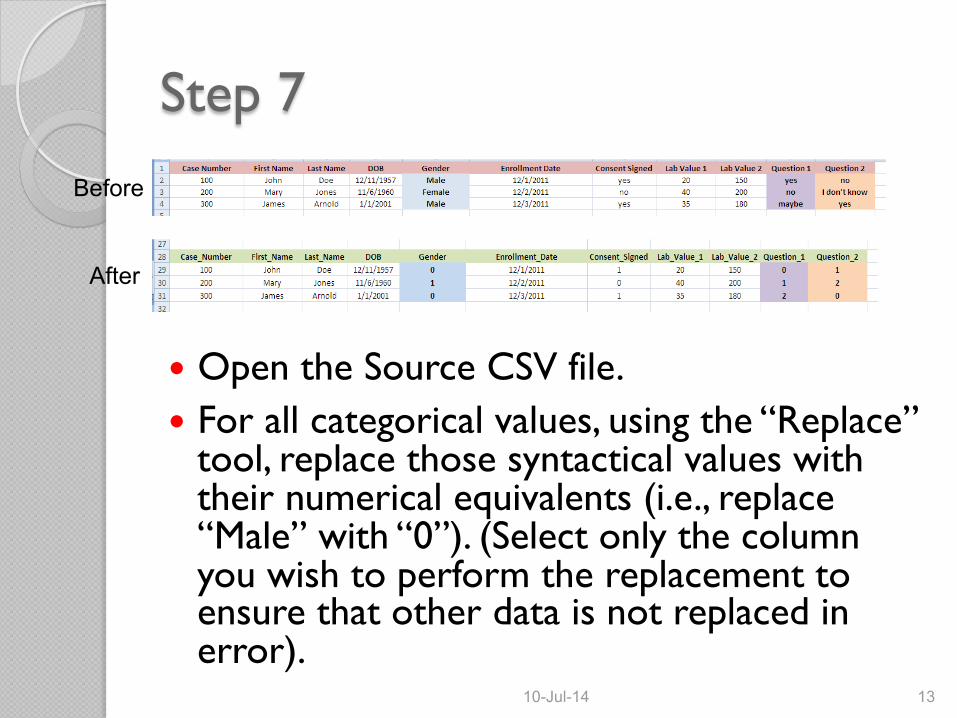
! Open the Source CSV file. ! For all categorical values, using the “Replace”
tool, replace those syntactical values with their numerical equivalents (i.e., replace “Male” with “0”). (Select only the column you wish to perform the replacement to ensure that other data is not replaced in error).
10-Jul-14 13
Before
After
Step 8 ! For date/time fields, ensure that the data
is in the proper format (YMD, DMY, etc.) ! For numerical and date/time fields, ensure
that the data values are in range specified in the data dictionary, otherwise an error will occur on import.
! Remove any fields that are calculated fields as they will be calculated by REDCap.
10-Jul-14 14
Step 9 ! Save the Source CSV file.
! Navigate to the Data Import tool in REDCap.
! Select the “Download the Data Import Template” link.
! In Excel, copy all of your data (except the column headers) to this template. The columns in the template should mirror exactly the columns in the Data Import Template however, they should be all in lower case with no spaces. Save it as a CSV file. Make sure your data is being copied to the correct columns.
! In REDCap, return to the Data Import tool and Browse to that CSV file.
! Select “Upload File.”
! REDCap will provide you with a report of the data imported. Be certain to review that data for accuracy prior to selecting “Import Data.”
10-Jul-14 15