Embed Size (px)
Citation preview

This material is based upon work supported by USDA/NIFA under Award
Number 2015-49200-24225.
Any reference to commercial products, trade names, or brand names is for
information only, and no endorsement or approval is intended. Issued in
furtherance of Cooperative Extension work, Acts of May 8 and June 30, 1914, in cooperation with the United States Department of Agriculture. University of
Vermont Extension, Burlington, Vermont. University of Vermont Extension, and
U.S. Department of Agriculture, cooperating, offer education and employment to everyone without regard to race, color, national origin, gender, religion, age, disability, political beliefs, sexual orientation, and marital or familial status.
Reduced Tillage and Cover Crops:
Five Factors for Success By Jeffrey Sanders, University of Vermont Northwest Crops and Soils Program
Introduction
There are no fields on your farm that could not be made more profitable by the proper
implementation of reduced tillage and cover crops. However, making the jump to adopting these
practices can be challenging. We know that regulatory, weather, and other conditions are
changing, requiring us to implement more resilient systems. The key to building resiliency to
extreme weather events on your farm, for example, is building healthy soils. Reduced tillage,
cover cropping, and other conservation practices can help you build soil health and manage these
risks to achieve a more resilient farm.
Therefore, this guide identifies five factors that you, as a farmer, will need to address when
considering reduced tillage and cover crops. They are:
1. Psychological (attitude related)
2. Educational (knowledge related)
3. Environmental (field related)
4. Agronomic (plant related)
5. Mechanical (equipment related)
The following describes each factor with some considerations for addressing them.

2
① Psychological Factors – Your Attitude
One of the most important factors in
looking at any new practice—including
reduced tillage and cover cropping—is
attitude. In the past, there has been a
general mindset that “no-till = no yield.” It
takes a different way of thinking to move
from this opinion and from conventional
to reduced tillage, so your attitude towards
managing risks will need to change
accordingly.
You need to be “in it to win it” as it is
more likely that you will not be successful
or profitable without the determination to
be both. You, the farmer, must learn about the system you are implementing, knowing when to
be patient and when to push and be prepared to do both.
As former Major League Baseball great Tommy Lasorda said, “The difference between
impossible and possible lies in an individual’s determination.” So when looking at reduced
tillage and cover cropping, it is best to plan your management around these three maxims:
Plan to be Profitable. Prepare to be Profitable. Expect to be Profitable.
No-till is more resilient (especially in years
with adverse weather) and can be simpler
than conventional tillage but it requires a
different kind of management. So before
you prepare your fields and equipment for
reduced tillage and cover cropping, you
need to prepare yourself for a new way of
thinking. The checklist on the left may help
give you some food for thought of questions
to consider and/or ask farmers and ag
service providers to help you prepare.
CHECKLIST Are You Ready for Reduced Tillage?
What is the drainage on your field?
What has the rotation been? Continuous corn?
Does your field get manure? What are your fertility levels?
How weedy is your field? How aggressive are you willing to address the weeds?
Can you get your field sprayed immediately after planting? (rolling down a cover crop)
What are your typical yields on this field? What population do you plant at? Will you be purchasing an excellent seedling Vigor hybrid?
Are you willing to wait until the field is dry?
Are you willing to add extra nitrogen to help young seedlings?
Reduced (left) vs conventional tillage. We need to change our way of thinking so we choose the field on the left over the field on the right.
3
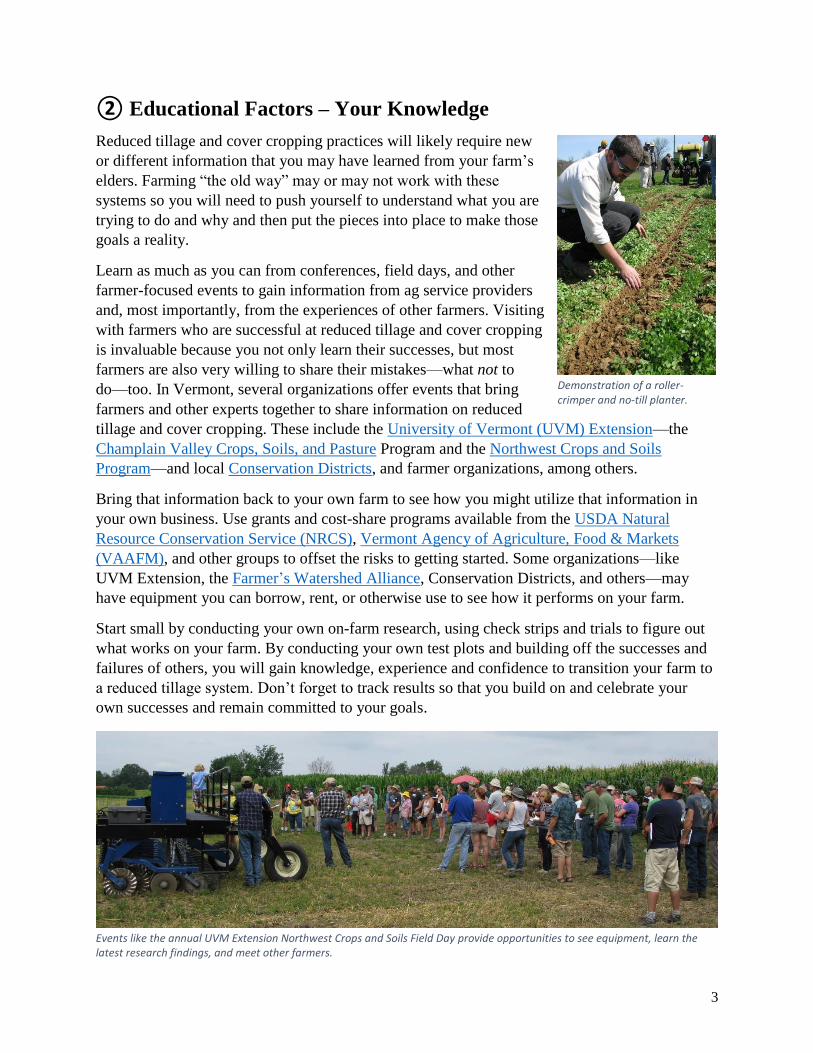
② Educational Factors – Your Knowledge
Reduced tillage and cover cropping practices will likely require new
or different information that you may have learned from your farm’s
elders. Farming “the old way” may or may not work with these
systems so you will need to push yourself to understand what you are
trying to do and why and then put the pieces into place to make those
goals a reality.
Learn as much as you can from conferences, field days, and other
farmer-focused events to gain information from ag service providers
and, most importantly, from the experiences of other farmers. Visiting
with farmers who are successful at reduced tillage and cover cropping
is invaluable because you not only learn their successes, but most
farmers are also very willing to share their mistakes—what not to
do—too. In Vermont, several organizations offer events that bring
farmers and other experts together to share information on reduced
tillage and cover cropping. These include the University of Vermont (UVM) Extension—the
Champlain Valley Crops, Soils, and Pasture Program and the Northwest Crops and Soils
Program—and local Conservation Districts, and farmer organizations, among others.
Bring that information back to your own farm to see how you might utilize that information in
your own business. Use grants and cost-share programs available from the USDA Natural
Resource Conservation Service (NRCS), Vermont Agency of Agriculture, Food & Markets
(VAAFM), and other groups to offset the risks to getting started. Some organizations—like
UVM Extension, the Farmer’s Watershed Alliance, Conservation Districts, and others—may
have equipment you can borrow, rent, or otherwise use to see how it performs on your farm.
Start small by conducting your own on-farm research, using check strips and trials to figure out
what works on your farm. By conducting your own test plots and building off the successes and
failures of others, you will gain knowledge, experience and confidence to transition your farm to
a reduced tillage system. Don’t forget to track results so that you build on and celebrate your
own successes and remain committed to your goals.
Events like the annual UVM Extension Northwest Crops and Soils Field Day provide opportunities to see equipment, learn the latest research findings, and meet other farmers.
Demonstration of a roller-crimper and no-till planter.
4
③ Environmental Factors – Your Fields
There are two levels of environmental factors to consider:
Field Level, and
Watershed/Ecosystem Level.
Field Level
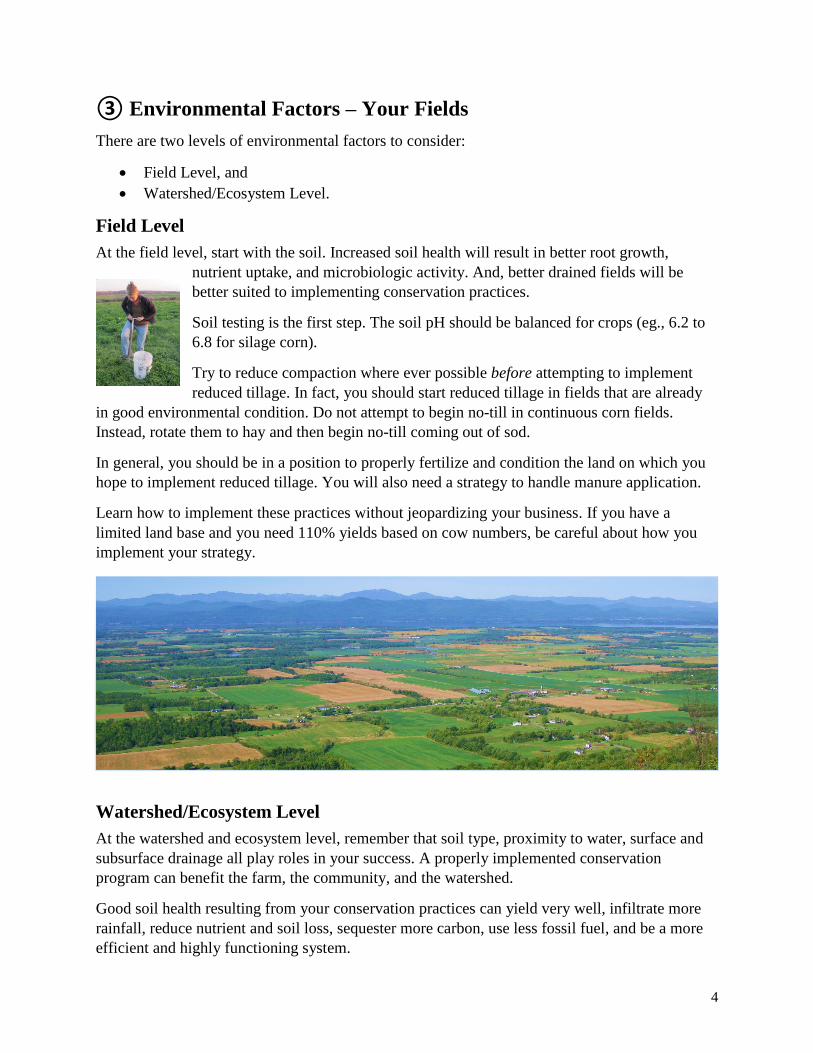
At the field level, start with the soil. Increased soil health will result in better root growth,
nutrient uptake, and microbiologic activity. And, better drained fields will be
better suited to implementing conservation practices.
Soil testing is the first step. The soil pH should be balanced for crops (eg., 6.2 to
6.8 for silage corn).
Try to reduce compaction where ever possible before attempting to implement
reduced tillage. In fact, you should start reduced tillage in fields that are already
in good environmental condition. Do not attempt to begin no-till in continuous corn fields.
Instead, rotate them to hay and then begin no-till coming out of sod.
In general, you should be in a position to properly fertilize and condition the land on which you
hope to implement reduced tillage. You will also need a strategy to handle manure application.
Learn how to implement these practices without jeopardizing your business. If you have a
limited land base and you need 110% yields based on cow numbers, be careful about how you
implement your strategy.
Watershed/Ecosystem Level
At the watershed and ecosystem level, remember that soil type, proximity to water, surface and
subsurface drainage all play roles in your success. A properly implemented conservation
program can benefit the farm, the community, and the watershed.
Good soil health resulting from your conservation practices can yield very well, infiltrate more
rainfall, reduce nutrient and soil loss, sequester more carbon, use less fossil fuel, and be a more
efficient and highly functioning system.
5
④ Agronomic Factors – Your Plants
Because reduced tillage and cover cropping go hand-in-hand, there are a number of agronomic
factors to consider when implementing these practices.
Cover Crop Considerations
Here are some questions to consider with regard to cover crop success.
What are your plans to terminate cover crops in the spring? You need to ensure that you have
a good herbicide program as existing cover crops need to be terminated before they become
competition to the cash crop.
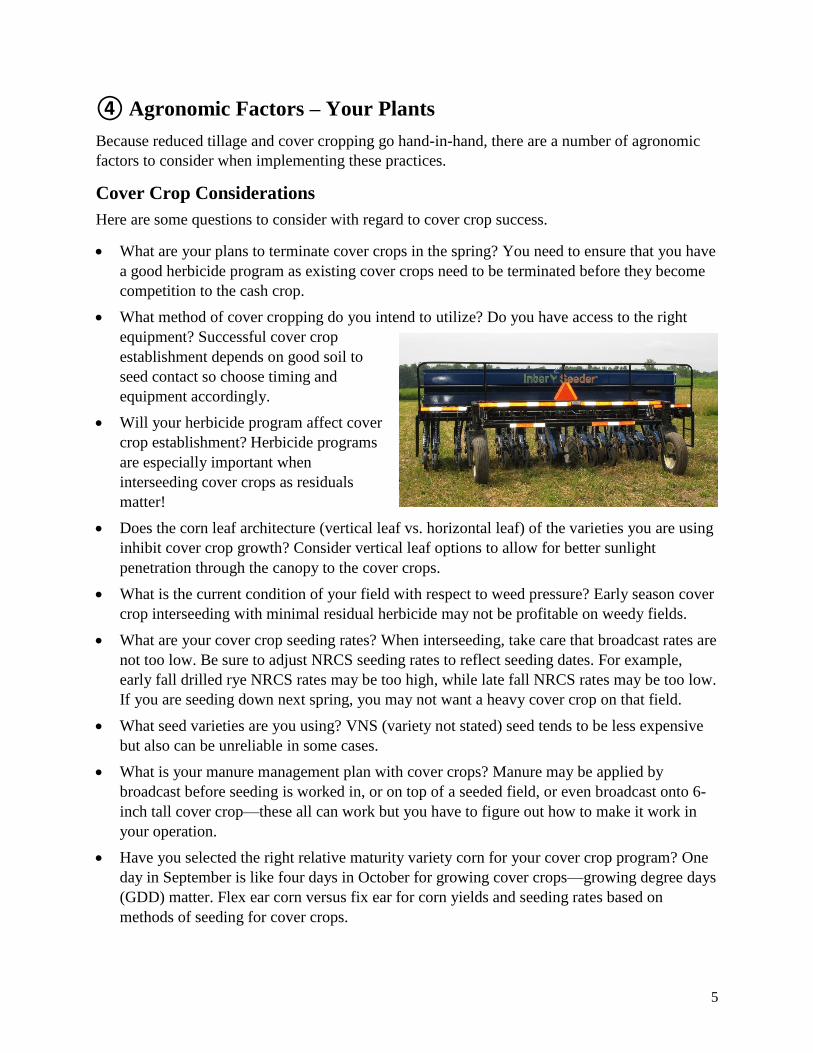
What method of cover cropping do you intend to utilize? Do you have access to the right
equipment? Successful cover crop
establishment depends on good soil to
seed contact so choose timing and
equipment accordingly.
Will your herbicide program affect cover
crop establishment? Herbicide programs
are especially important when
interseeding cover crops as residuals
matter!
Does the corn leaf architecture (vertical leaf vs. horizontal leaf) of the varieties you are using
inhibit cover crop growth? Consider vertical leaf options to allow for better sunlight
penetration through the canopy to the cover crops.
What is the current condition of your field with respect to weed pressure? Early season cover
crop interseeding with minimal residual herbicide may not be profitable on weedy fields.
What are your cover crop seeding rates? When interseeding, take care that broadcast rates are
not too low. Be sure to adjust NRCS seeding rates to reflect seeding dates. For example,
early fall drilled rye NRCS rates may be too high, while late fall NRCS rates may be too low.
If you are seeding down next spring, you may not want a heavy cover crop on that field.
What seed varieties are you using? VNS (variety not stated) seed tends to be less expensive
but also can be unreliable in some cases.
What is your manure management plan with cover crops? Manure may be applied by
broadcast before seeding is worked in, or on top of a seeded field, or even broadcast onto 6-
inch tall cover crop—these all can work but you have to figure out how to make it work in
your operation.
Have you selected the right relative maturity variety corn for your cover crop program? One
day in September is like four days in October for growing cover crops—growing degree days
(GDD) matter. Flex ear corn versus fix ear for corn yields and seeding rates based on
methods of seeding for cover crops.

6
Are you paying attention to nitrogen (N)? Take care to avoid over-fertilizing your cash crop
especially later in the season. Excessive nitrogen N in your corn crop will inhibit dry-down
that will push back harvest and increase silage moisture at harvest. On the other hand, paying
attention to nutrient requirements, particularly N, when you are no-till planting into mature
cover crops is a major consideration at the beginning of the season. The covers will tie up
about 60 units of N—based on recent observations of pre-sidedress N testing (PSNT) testing
in silage corn—so additional fertilizer may likely be needed to prevent delayed growth of
your cash crop.
Does your cover crop establishment method increase or decrease the likelihood of good soil
to seed contact? Soil to seed contact with cover crops is a key to success.
Reduced Tillage Planting of Silage Corn
Agronomic considerations for reduced
tillage planting of silage corn include the
following. First, crop rotations are critical
in no‐till systems. Corn on corn degrades
soil health much quicker than diversified
rotations. You may want to consider more
intensive rotations, as opposed to
continuous corn, to provide long-term
increased yields.
The goal of planting no‐till corn is simply
to get 99% of the corn seedlings to
uniformly emerge from the ground within 24 hours of each other. Optimal soil temperature must
be 50 or more degrees with somewhat dry soil.
Select your hybrids for seedling vigor as well as other factors. Consider vertical leaf varieties if
planting cover crops into standing corn to allow sunlight to penetrate the cash crop canopy.
Shading within rows is extremely stressful on growing cover crops in most conditions.
Plan to increase plant populations 10% above your target, depending on the conditions at
planting and equipment preparedness. You need to have even emergence to be successful;
remember, one ear of corn per 1,000 plants is equal to 7 bushels of corn per acre -- this translates
into nearly 1 ton of corn silage per acre.
It is recommended to add 30 to 50 units of N at planting, especially during your initial transition
to reduced tillage. If a corn plant turns yellow, there is a management issue of that field that
should be corrected. It could be nutrient-based, drainage-based, or some other factor, but it is not
the fault of the no‐till planter.
In general, the less tillage you plan to use, the more you should invest in your planter. Soil to
seed contact is very important as is closing the seed trench.
7
⑤ Mechanical Factors – Your Equipment
Once you have considered factors 1 through 4, the next step is considering equipment. Any
reduced tillage system follows three basic steps with the goal of getting a uniform crop:
1. Cut the soil and crop residue to create a furrow for the seed.
2. Place and firm the seed.
3. Close the trench.
Although it sounds straightforward, there are several challenges that may occur in each step, so
the simpler you can keep the system, the better. The trick to success is getting these steps right
99% of the time under varying field conditions down the row and across the rows.
The planter is the one factor you have absolute control over; you need to prepare it for success
and maintain it for performance. It doesn’t matter what brand of planter you have, the important
thing for you is how it is working in the soil and performing what you want it to do.
Corn Planter Modifications
Whether you plan to purchase a new planter or modify your current standard corn planter, there
are a number of considerations to prepare it for reduced tillage. With a conventional planter, you
are basically just asking it to the drop the seed. But with a no-till planter, you are asking it to do
everything including cut the soil, place the seed, and close the trench. So you need to make sure
everything is working well before you go out to the field. Tearing the planter down annually and
replacing any worn parts is important for success.
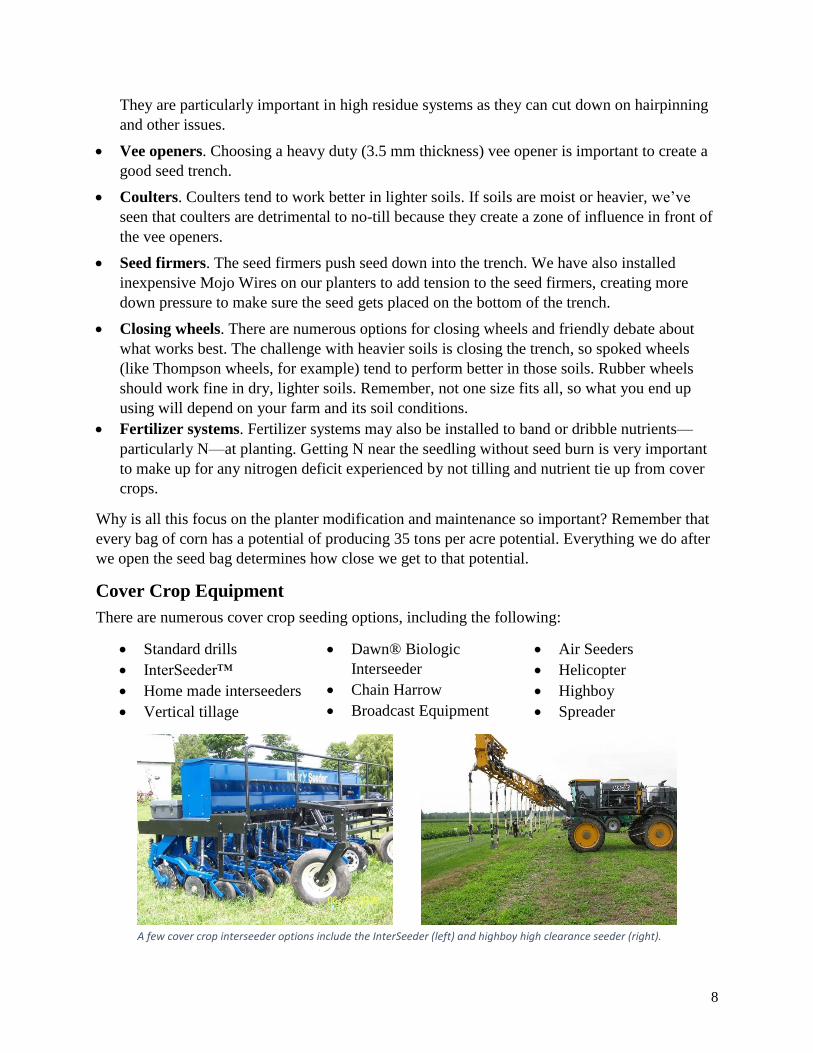
Any corn planter can be modified to plant no-till. The
following are a few highlights of modifications; these are
outlined in checklists prepared by UVM Extension as
reminders of things to check before planting season arrives:
No‐Till Corn Planter Tune‐Up Checklist and No-Till Corn
Planter Checklist: Planter Maintenance & Upgrades.
Floating row cleaners. Important in clearing the residue
from in front of the seed opener, row cleaners typically rolls
along the soil surface and throw the residue off to the side.
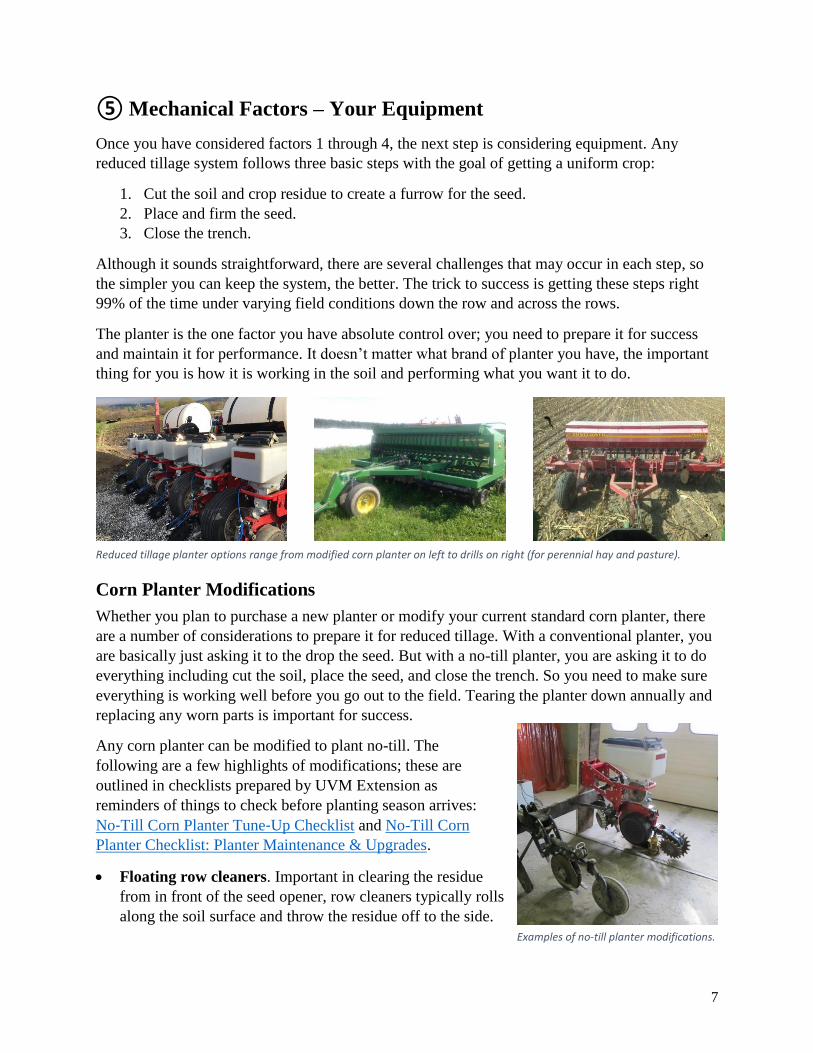
Reduced tillage planter options range from modified corn planter on left to drills on right (for perennial hay and pasture).
Examples of no-till planter modifications.
8
They are particularly important in high residue systems as they can cut down on hairpinning
and other issues.
Vee openers. Choosing a heavy duty (3.5 mm thickness) vee opener is important to create a
good seed trench.
Coulters. Coulters tend to work better in lighter soils. If soils are moist or heavier, we’ve
seen that coulters are detrimental to no-till because they create a zone of influence in front of
the vee openers.
Seed firmers. The seed firmers push seed down into the trench. We have also installed
inexpensive Mojo Wires on our planters to add tension to the seed firmers, creating more
down pressure to make sure the seed gets placed on the bottom of the trench.
Closing wheels. There are numerous options for closing wheels and friendly debate about
what works best. The challenge with heavier soils is closing the trench, so spoked wheels
(like Thompson wheels, for example) tend to perform better in those soils. Rubber wheels
should work fine in dry, lighter soils. Remember, not one size fits all, so what you end up
using will depend on your farm and its soil conditions.
Fertilizer systems. Fertilizer systems may also be installed to band or dribble nutrients—
particularly N—at planting. Getting N near the seedling without seed burn is very important
to make up for any nitrogen deficit experienced by not tilling and nutrient tie up from cover
crops.
Why is all this focus on the planter modification and maintenance so important? Remember that
every bag of corn has a potential of producing 35 tons per acre potential. Everything we do after
we open the seed bag determines how close we get to that potential.
Cover Crop Equipment
There are numerous cover crop seeding options, including the following:
Standard drills
InterSeeder™
Home made interseeders
Vertical tillage
Dawn® Biologic
Interseeder
Chain Harrow
Broadcast Equipment
Air Seeders
Helicopter
Highboy
Spreader
A few cover crop interseeder options include the InterSeeder (left) and highboy high clearance seeder (right).
9
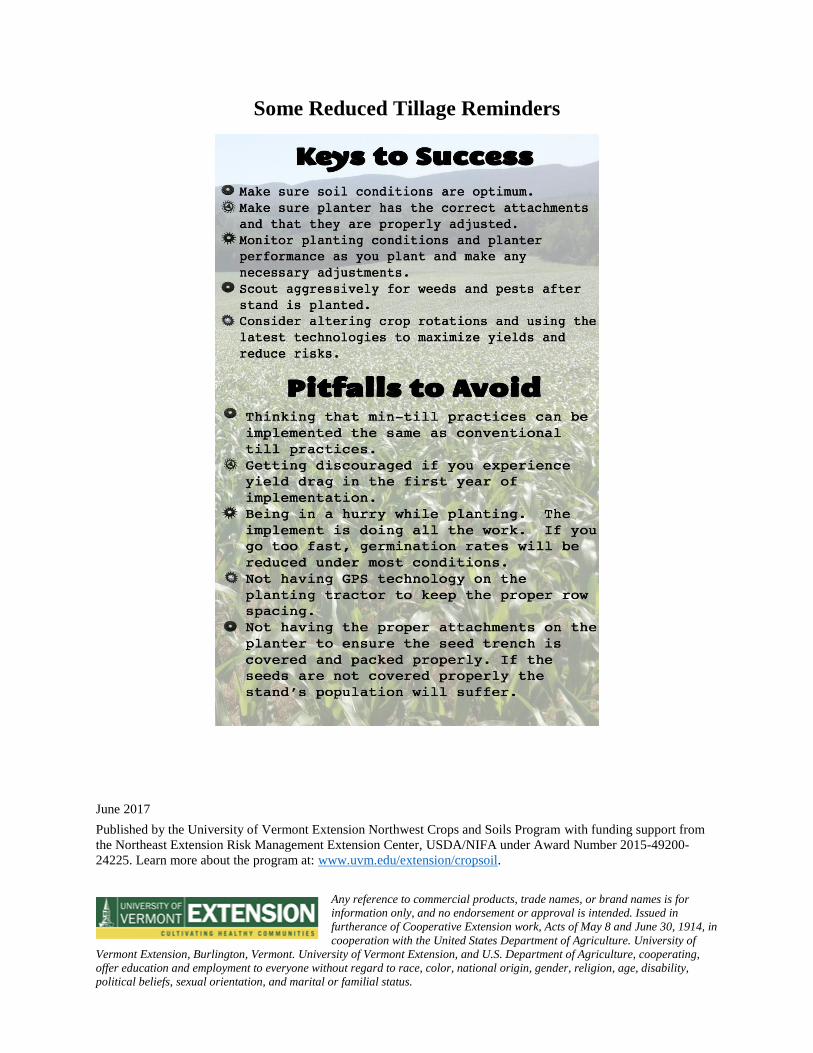
Conclusions
In conclusion, the degree of adaptation (success) of cover cropping and reduced tillage practices
on your farm will be determined by your commitment to make them work and your ability to
learn how to manage these practices on your farm.
Once you are committed to being successful, invest where it makes the most sense for your
business. Start with the planter first for no‐till, then move to seed and application equipment for
cover crops.
Do not forget to calculate the termination costs associated with cover crops.
You must look at how these practices fit into your overall business model, set goals and
expectations, then work to reach them. For example, reducing fuel and time to plant by 70% may
be a goal which translates into money—which must be balanced against any lost yield to see if it
was truly financially sustainable.
And don’t forget to keep records—you cannot measure success at any level without solid
information. Track costs, time, labor, yields, and whatever else you are using to gauge success.
Remember, UVM Extension and other organizations are here to help you succeed. Be sure to
contact us if you have questions.
Contact Information
UVM Extension Northwest Crops and Soils
Program
278 South Main Street, Suite 2
St. Albans, VT 05478-1866
802-524-6501
Heather Darby, ext. 437,
Jeff Sanders, ext. 453,
UVM Extension Champlain Valley Crops,
Soils, and Pasture Program
23 Pond Lane, Suite 300
Middlebury, VT 05753-1189
802-388-4969
Jeff Carter, ext. 332,
Kirsten Workman, ext. 347,
June 2017
Published by the University of Vermont Extension Northwest Crops and Soils Program with funding support from
the Northeast Extension Risk Management Extension Center, USDA/NIFA under Award Number 2015-49200-
24225. Learn more about the program at: www.uvm.edu/extension/cropsoil.
Any reference to commercial products, trade names, or brand names is for
information only, and no endorsement or approval is intended. Issued in
furtherance of Cooperative Extension work, Acts of May 8 and June 30, 1914, in
cooperation with the United States Department of Agriculture. University of
Vermont Extension, Burlington, Vermont. University of Vermont Extension, and U.S. Department of Agriculture, cooperating,
offer education and employment to everyone without regard to race, color, national origin, gender, religion, age, disability,
political beliefs, sexual orientation, and marital or familial status.
Some Reduced Tillage Reminders