Embed Size (px)
Citation preview

1. First download the "Metal_Sales_ Material_ Images" to a location on your local hard drive or a
network hard drive. (there are many benefits to copying this folder to a network location if available. For
example, a central location can be shared by many people. A network path can be setup at deployment
so all users have access to the maps.)
2. Open a current Revit Project (.rvt) or create a new Revit project. Go to the Application menu.
3. Chose "Options".
4. Select the "Rendering" tab.
5. Under "Additional Render Appearance Paths", select the "+(plus)" symbol
6. In the row highlighted, click inside the rectangle and a small "browse" button becomes visible on the
right side of the highlighted rectangle.
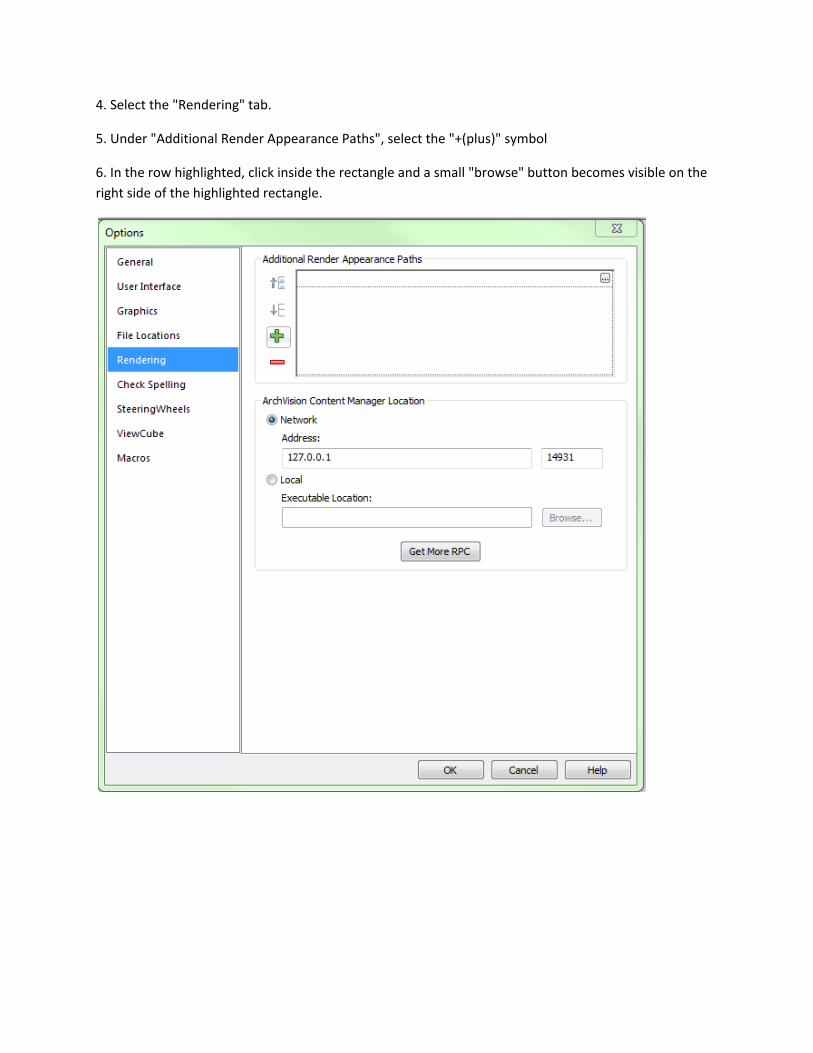
7. Navigate to the location the "Metal_Sales_Material_Images" folder was copied to.
8. Choose "Open"
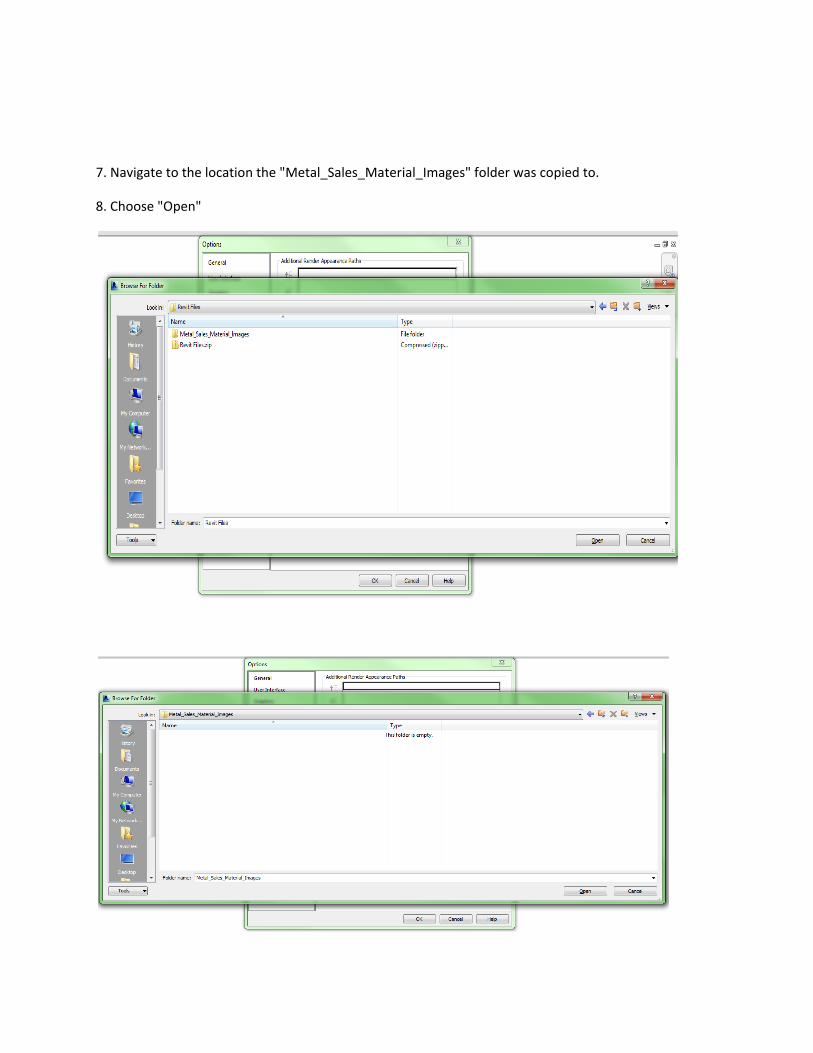
9. Select "OK" to save the path and close the "Options" dialogue box.
10. Repeat steps 5‐9 for each folder containing materials.
11. Now all of hte Revit Metal Sales Materials are available for use. You can load any of the Metal Sales
Wall assemblies into your project and the Metal Sales materials you select for that wall will render
properly.
CHANGING MATERIALS USING METAL SALES MATERIAL DEFINITIONS
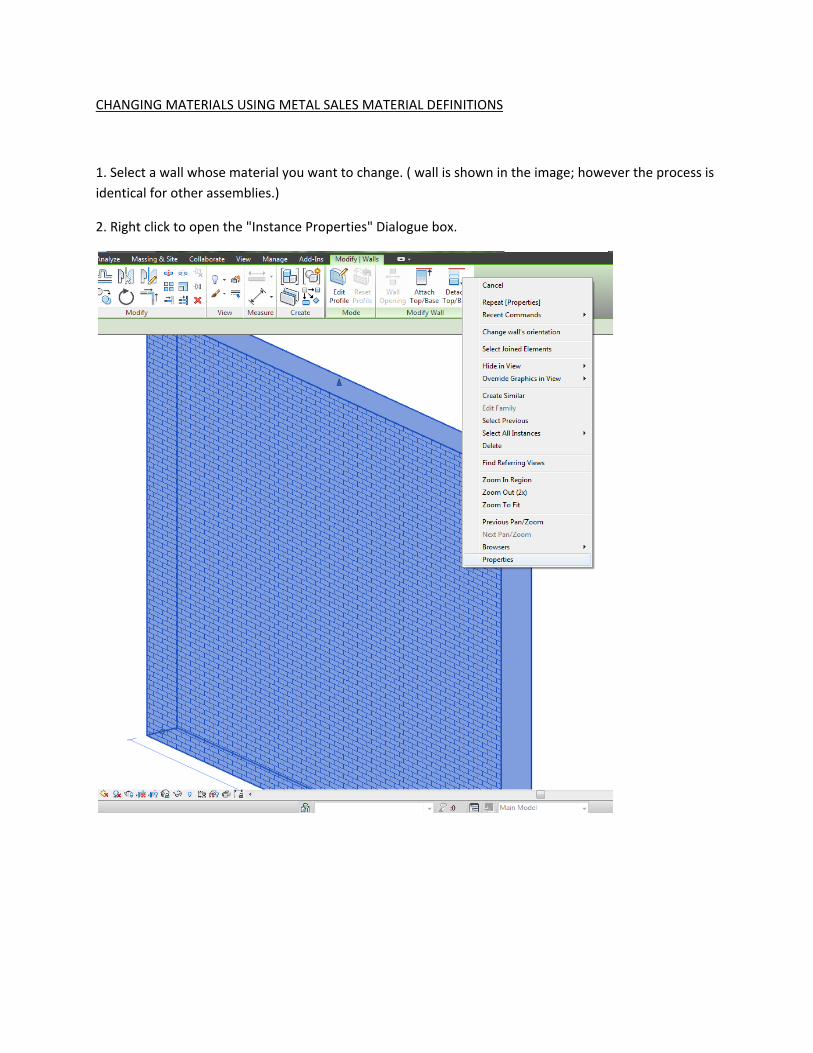
1. Select a wall whose material you want to change. ( wall is shown in the image; however the process is
identical for other assemblies.)
2. Right click to open the "Instance Properties" Dialogue box.
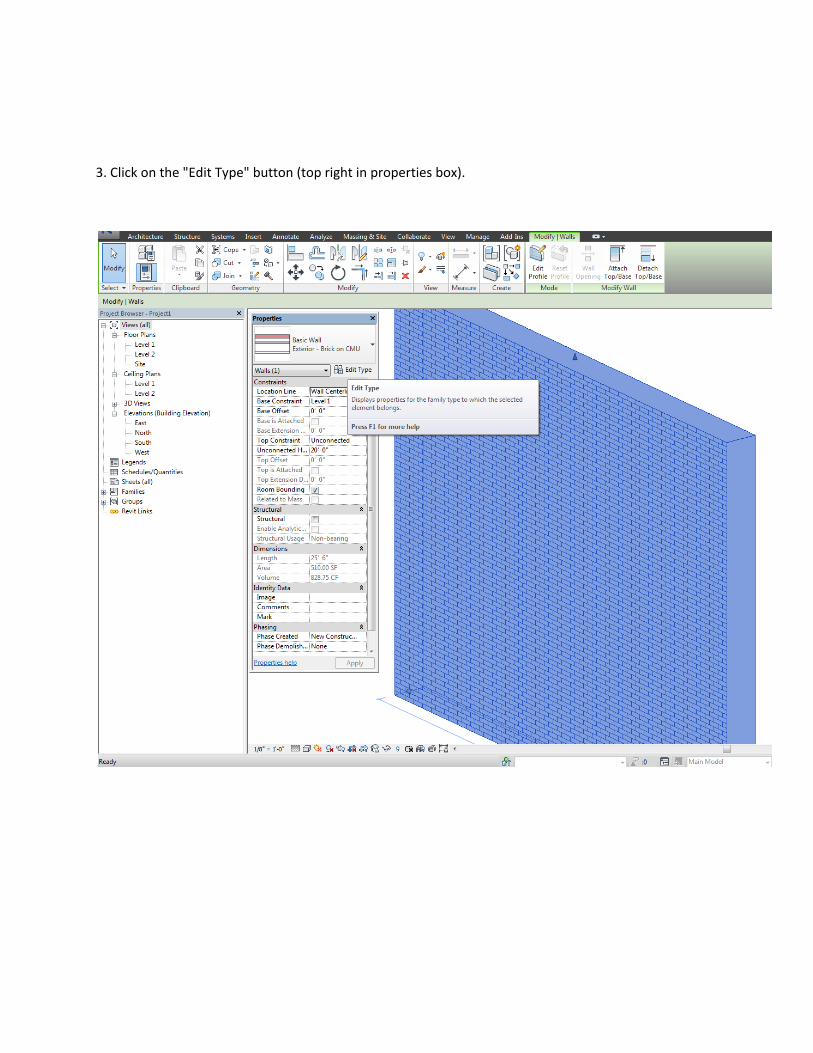
3. Click on the "Edit Type" button (top right in properties box).
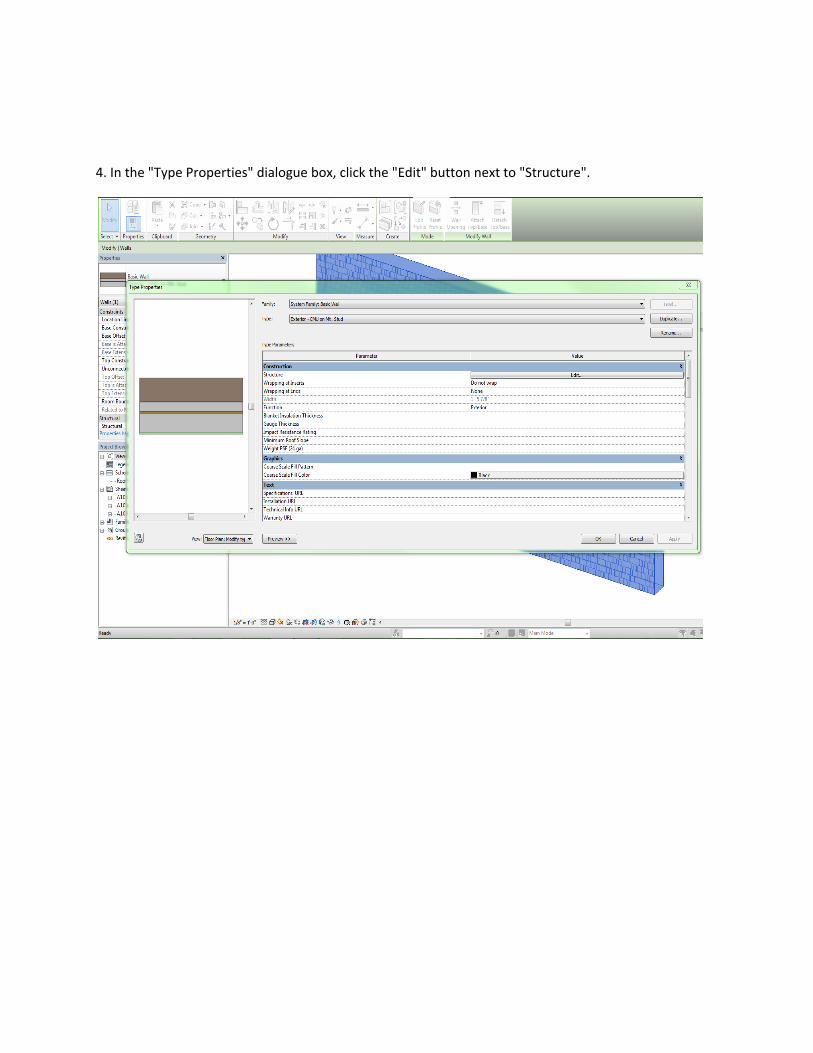
4. In the "Type Properties" dialogue box, click the "Edit" button next to "Structure".
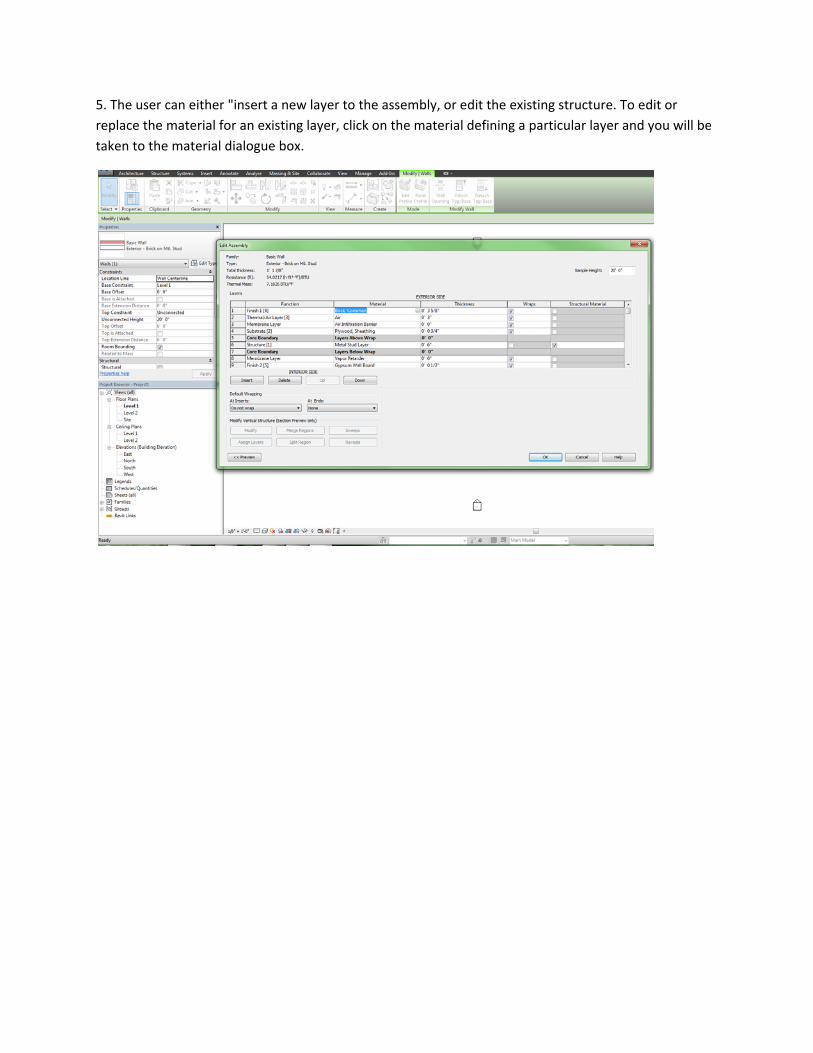
5. The user can either "insert a new layer to the assembly, or edit the existing structure. To edit or
replace the material for an existing layer, click on the material defining a particular layer and you will be
taken to the material dialogue box.

6. NOTE: At this point, you have the option of changing the material to another option available in your
current material library ( just select the material on the left most side that is appropriate and click OK).
Selecting a new material in the material dialog will update your structure dialog box with his selection
for that particular layer of your assembly.
7. You can also adjust the scale and alignment of the referring image, or import a different bump map
for the image by selecting the "Render Appearance" tab. NOTE: All of these setting default to Metal
Sales' specifications, so changing scale, alignment or bump map may give you an inaccurate material
image. This step is for advanced users only.
8. Click OK until you can see the building once again and all dialog boxes are exited.
9. Your assemble is now ready to render.