Embed Size (px)
Citation preview
8/2/2019 Rope Making Directions
http://slidepdf.com/reader/full/rope-making-directions 1/3
©2005 North East Independent School District
Experiential Learning Program
Rope Making Directions
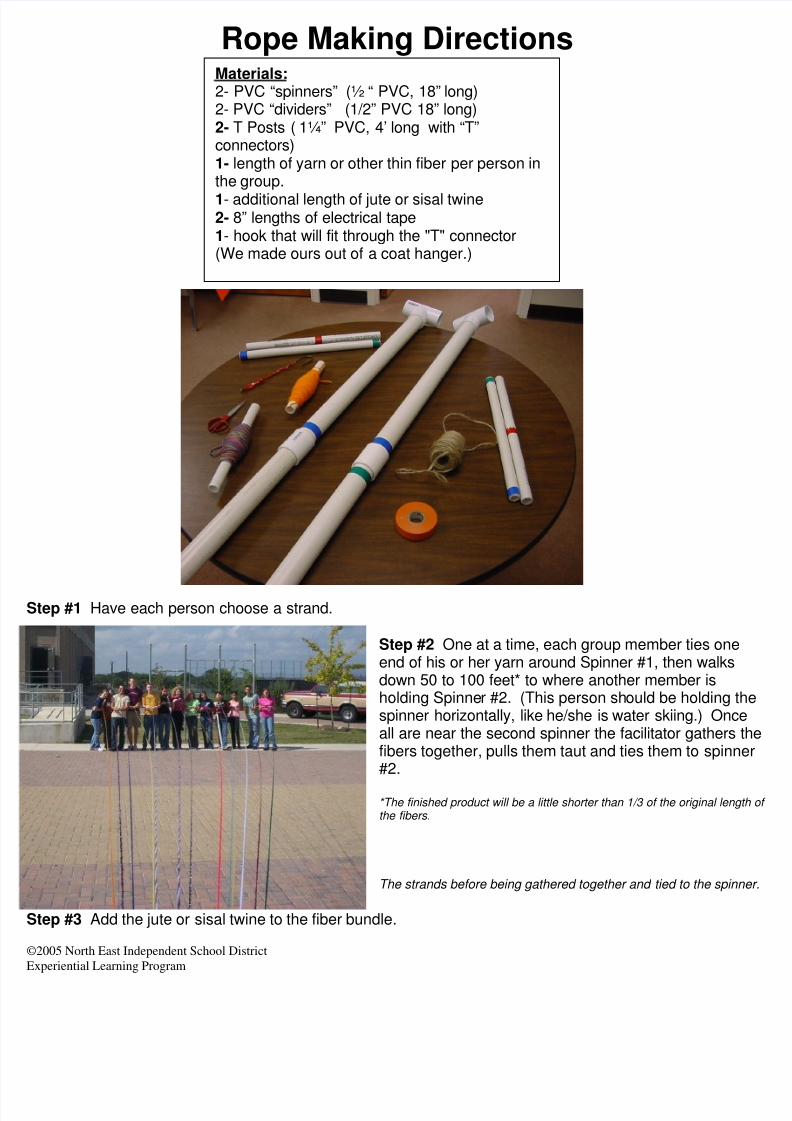
Step #1 Have each person choose a strand.
Step #2 One at a time, each group member ties oneend of his or her yarn around Spinner #1, then walksdown 50 to 100 feet* to where another member isholding Spinner #2. (This person should be holding tspinner horizontally, like he/she is water skiing.) Oncall are near the second spinner the facilitator gathers fibers together, pulls them taut and ties them to spinn#2.
*The finished product will be a little shorter than 1/3 of the original lengthe fibers.
The strands before being gathered together and tied to the spinn
Step #3 Add the jute or sisal twine to the fiber bundle.
Materials: 2- PVC “spinners” (½ “ PVC, 18” long)2- PVC “dividers” (1/2” PVC 18” long)2- T Posts ( 1¼” PVC, 4’ long with “T”connectors)1- length of yarn or other thin fiber per person inthe group.
1- additional length of jute or sisal twine2- 8” lengths of electrical tape1- hook that will fit through the "T" connector(We made ours out of a coat hanger.)
8/2/2019 Rope Making Directions
http://slidepdf.com/reader/full/rope-making-directions 2/3
8/2/2019 Rope Making Directions
http://slidepdf.com/reader/full/rope-making-directions 3/3
©2005 North East Independent School District
Experiential Learning Program
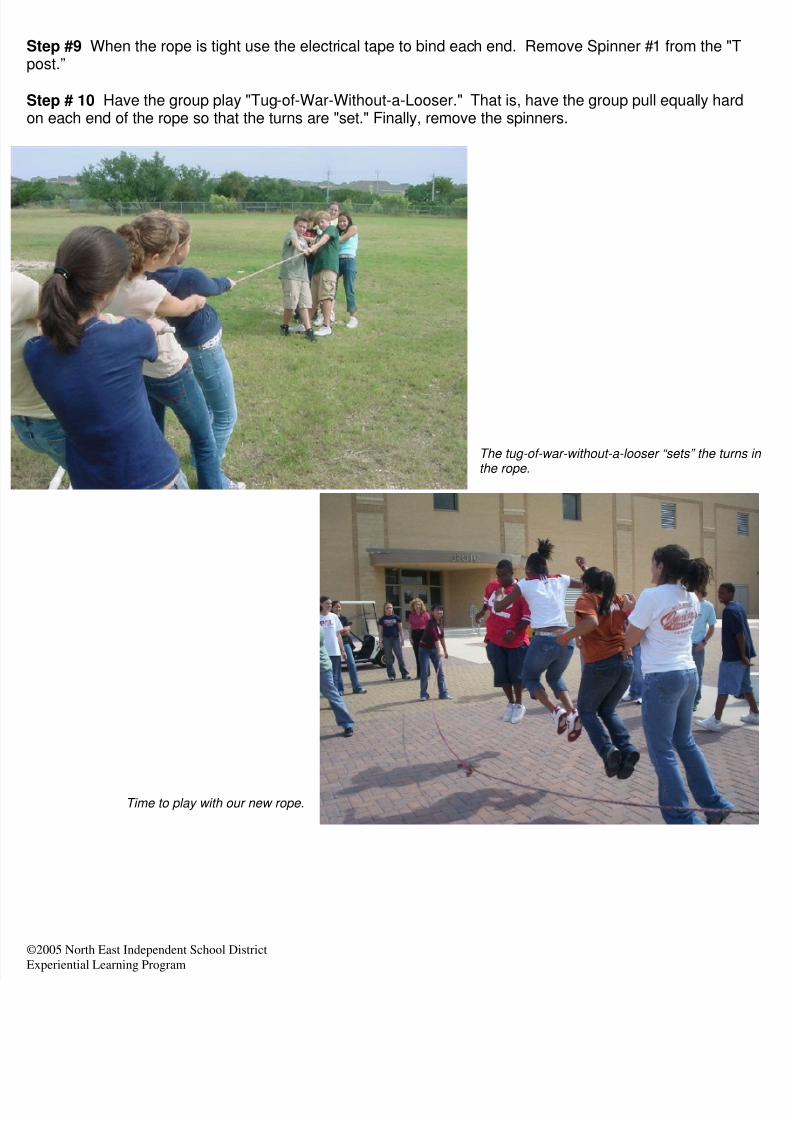
Step #9 When the rope is tight use the electrical tape to bind each end. Remove Spinner #1 from the "Tpost.”
Step # 10 Have the group play "Tug-of-War-Without-a-Looser." That is, have the group pull equally haron each end of the rope so that the turns are "set." Finally, remove the spinners.
The tug-of-war-without-a-looser “sets” the turnthe rope.
Time to play with our new rope.


![Directions in Scenario Planning Literature A Review of the ... · Directions in Scenario Planning Literature – A Review ... making: overconfidence and tunnel vision [5]. Scenario](https://img.pdfslide.net/doc/110x75/5f0aad2d7e708231d42cca84/directions-in-scenario-planning-literature-a-review-of-the-directions-in-scenario.jpg)