Embed Size (px)
Citation preview
Rosa M. Ros
Beatríz García
Ricardo Moreno
Alexandre Costa
Network for Astronomy School Education, 2020
Authors:
Rosa M. Ros
Beatríz García
Ricardo Moreno Alexandre Costa
Designed:
Silvina Pérez
Printed by: Albedo Fulldome S.L. Barcelona, España, 2020
ISBN: 978-84-15771-78-4

Introduction
NASE COURSES are mainly courses with a special character, they are very practical. So it is not
easy to offer a transmission presentation when the situation is not good for face-to-face courses.
However, we live in new and existing times when the different audiences can have different
approaches to the knowledge. The technology arrive to stay as part of our life and new and innovative
products associated with new communication tools must be part of the training courses. In the case
of NASE Program, the responsible committee discussed for a long time in which way to start this
approach, because the core of this proposal, is not ole hands-on activities, but also face-to-face actions.
The year 2020 will be recognized in the future, as the “year when all the planet was in danger: because
a pandemic. This is a very new situation for the humanity. In this context, NASE-Program developed
a mix proposal, with activities than can be made at home, with the help of trainers online, but in all
the cases thinking on “live presentation in real time”.
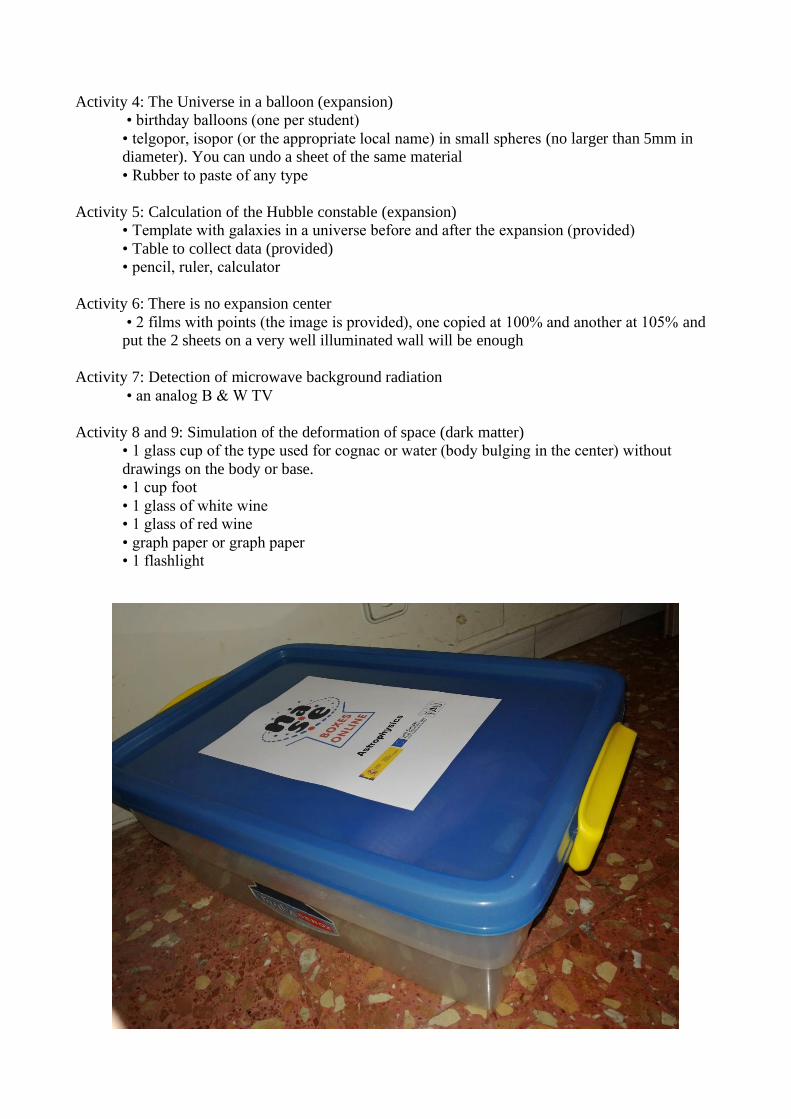
The innovation in this project is centered in the distribution of the NASE-boxes, with all the material
needed for the different courses (full and monographic) which will permit to develop each activity at
home or at the school in any place on the Planet, the participation will be certificate as long as the
participants complete the activity in contact with the trainer, online.
This new offer is a real challenge for NASE. We hope to have a good response from different
communities and to help to include astronomical contents in places where the face-to-face activities
are very difficult.
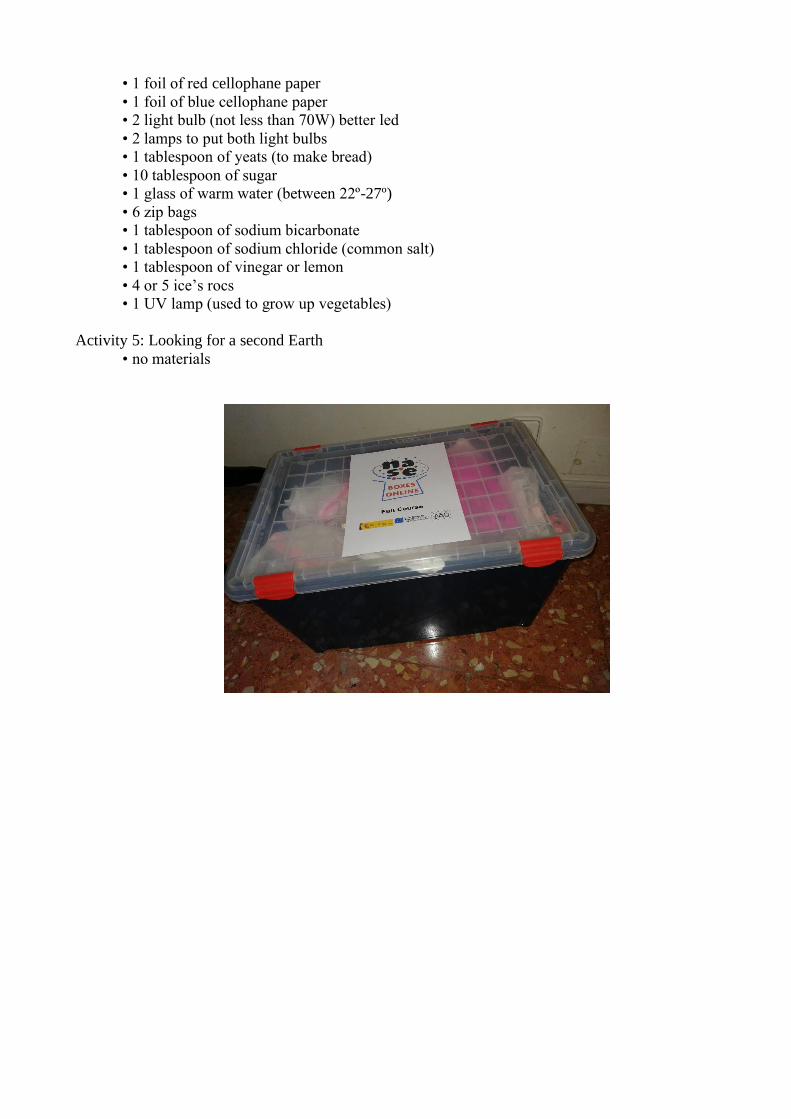
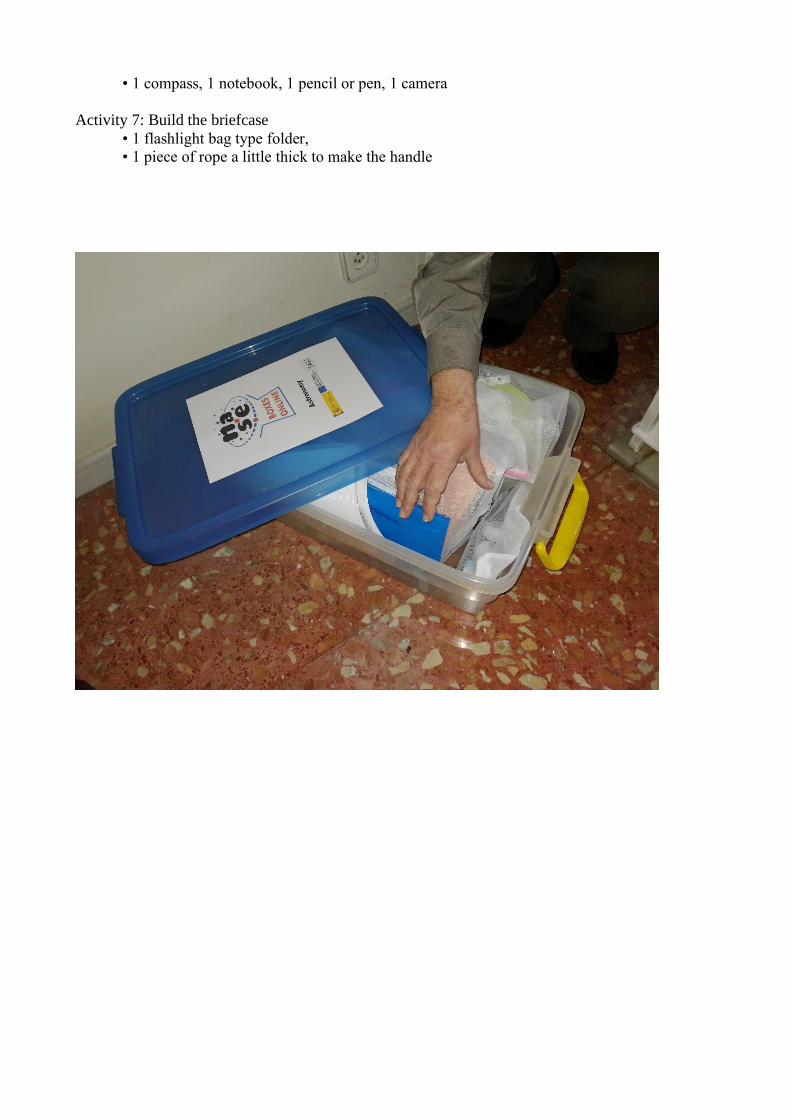
Description of NASE-boxes online
To facilitate an online NASE course, organizers can use the materials needed for hands-on activities
included in a NASE box. Local organizers can request receipt of NASE boxes by post. If they have
all the NASE materials before starting the course, they can repeat the activities that they can see
online during the course.
Of course, there is a possibility that participants in the online course will ask borrow the box to the
Local Working Group for a specific period of time.
There are different kind of NASE courses, that is to say there are the same number of NASE boxes
online
NASE offers boxes that included all materials necessaries in order to teach NASE curses. There are
different kind of courses:
• The basic course, the full course, which included astronomy, astrophysics and astrobiology.
This is the biggest one box of NASE. The course involve 4 lectures and 10 workshops.
• The course on astronomy in a not so big box. This course involve 2 lectures and 4 workshops.
• The course on astrophysics in a smaller box. This course involve 2 lectures and 4 workshops.
• The course on astronomy in a smaller box. This course involve 2 lectures and 4 workshops.
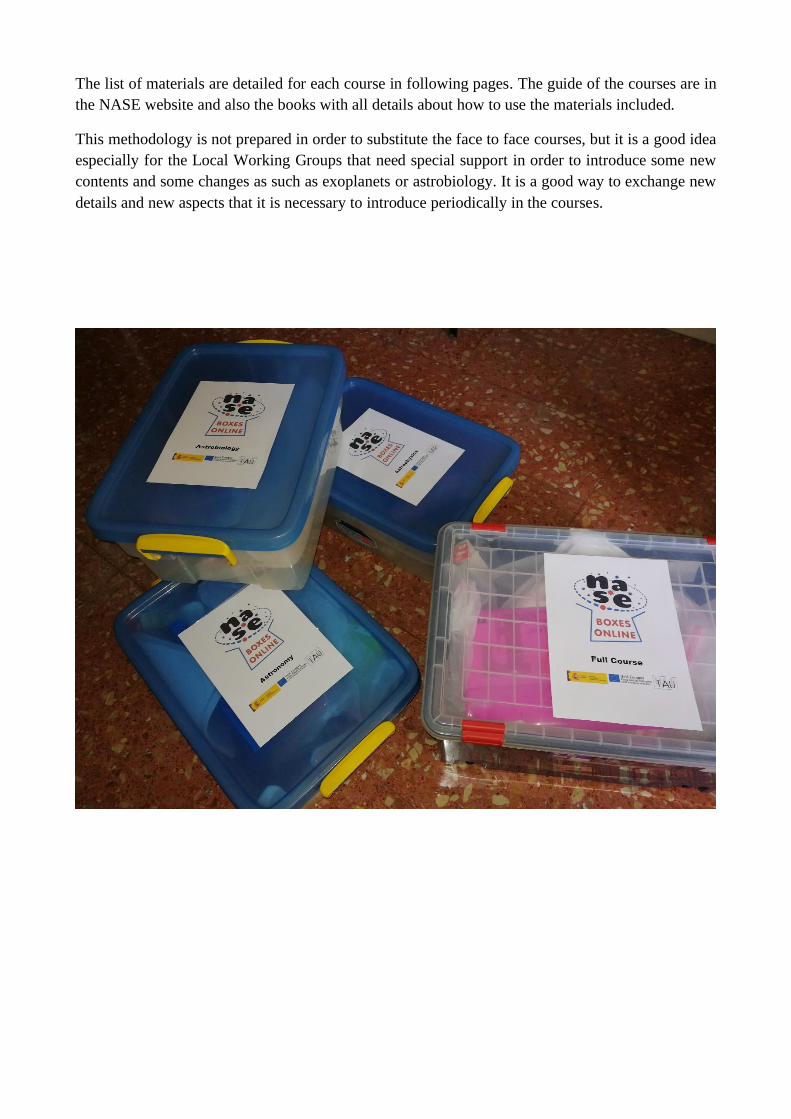
The list of materials are detailed for each course in following pages. The guide of the courses are in
the NASE website and also the books with all details about how to use the materials included.
This methodology is not prepared in order to substitute the face to face courses, but it is a good idea
especially for the Local Working Groups that need special support in order to introduce some new
contents and some changes as such as exoplanets or astrobiology. It is a good way to exchange new
details and new aspects that it is necessary to introduce periodically in the courses.
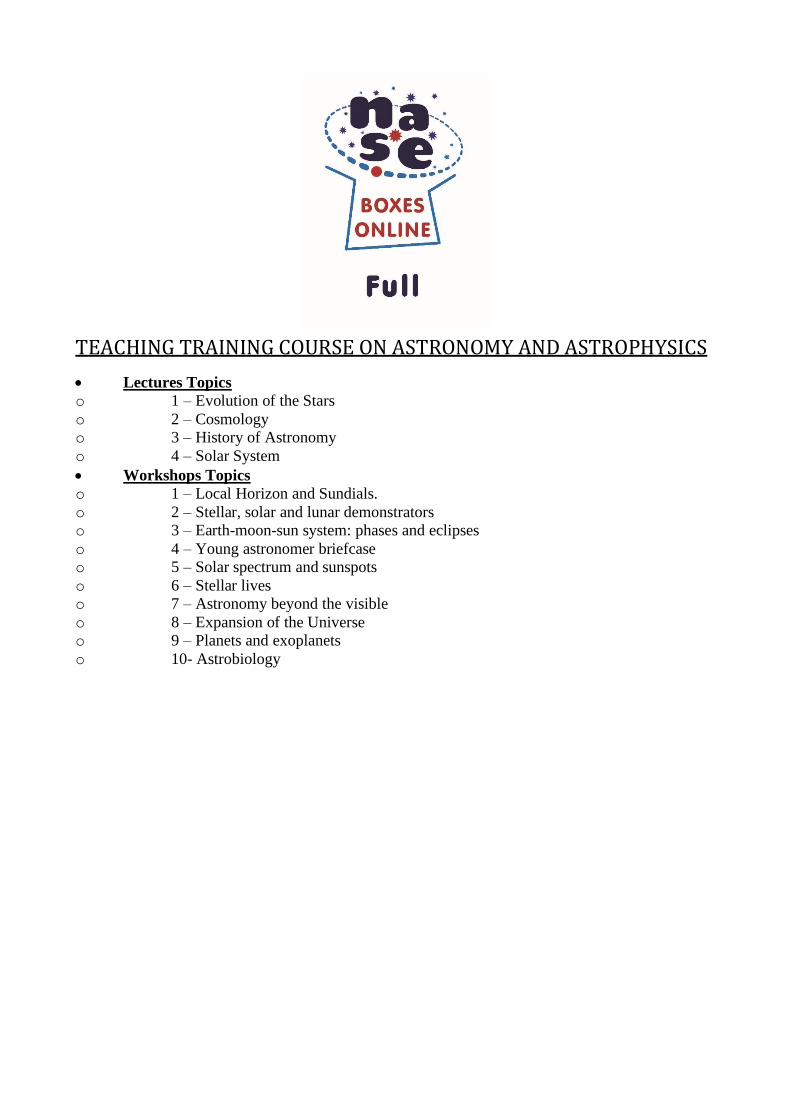
TEACHING TRAINING COURSE ON ASTRONOMY AND ASTROPHYSICS
• Lectures Topics
o 1 – Evolution of the Stars
o 2 – Cosmology
o 3 – History of Astronomy
o 4 – Solar System
• Workshops Topics
o 1 – Local Horizon and Sundials.
o 2 – Stellar, solar and lunar demonstrators
o 3 – Earth-moon-sun system: phases and eclipses
o 4 – Young astronomer briefcase
o 5 – Solar spectrum and sunspots
o 6 – Stellar lives
o 7 – Astronomy beyond the visible
o 8 – Expansion of the Universe
o 9 – Planets and exoplanets
o 10- Astrobiology
WS1: Local Horizon and Sundials
Summary
The study of the horizon is crucial to facilitate the students' first observations in an educational center.
A simple model that has to be made in each center allows us to make the study and the comprehension
of the first astronomical rudiments easier. The model is also presented as a simple model of an
equatorial clock and from it; we can make other models (horizontal and vertical).
Goals
- Understand the diurnal and annual movement of the Sun.
- Understand the celestial vault movement.
- Understand the construction of an elemental Sundial.
List of Materials.
Activity 1:
• 4-sphere model
• 1 Bulb,
• 1 Support for the light bulb,
• 2 meters of electric cable and a plug
• 4 balls of porexpan or icopor of 8 cm
• 4 sticks with 4 supports (2 of equal height, 1 lower, 1 higher as explained in the WS1 text)
• 1 circular mat that is used as a base for cakes or pies
• 1 a card with a cut angle of 23º
Activity 2: Model of the parallel Earth
• 1 terrestrial sphere that can be removed from your support. About 30 cm in diameter
• 1 bowl that serves to put the terrestrial sphere on it
• 1 compass
• 1 rope of 2 meters in length
• 1 box of chopsticks
• 1 package of play dough for children
Activity 3: Horizon model.
• a photo strip of the local horizon (taken as explained in the workshop)
• 1 Photo of stellar traces of the cardinal point east or west
• 1 Photo of sunrise at 2 or 3 minutes intervals (approx) made on the day of the equinox
• 3 photos of the sunrise (or sunset) on the first day of the solstices and an equinox
• 1 photo of the Orion belt area with about 15 or 20 minutes of exposure time
• 1 Wood sheet (cardboard or cork does not work because it is soft) of 40x 40
• 2 meters galvanized wire, cut into three sections, (simulation of the apparent path of the sun
at solstices and equinoxes and to simulate the rotation axis of the Earth)
• 1 Flashlight (with the light jet inside a cardboard tube so that it focuses well on the jet)
• 1 compass
• 1 wooden rod for the gnomon of the solar clock.
• Scissors and tail (for setting the sundial)
WS2: Stellar, solar, and lunar demonstrators
Summary
This worksheet presents a simple method to explain how the apparent motions of stars, the Sun, and
the Moon are observed from different places on Earth. The procedure consists of building a simple
model that allows us to demonstrate how these movements are observed from different latitudes.
Goals
- Understand the apparent motions of stars as seen from different latitudes.
- Understand the apparent motions of the Sun as seen from different latitudes.
- Understand the Moon’s movement and shapes as seen from different latitudes.
List of Materials
Activity 1: Stellar Simulator
• Extended photocopied material for the instructor, so it looks better.
• Scissors.
• Cutter, carving or scalpel
• Glue to paste.
Activity 2: Solar simulator
• Extended photocopied material for the instructor, so it looks better.
• Scissors.
• Cutter, carving or scalpel
• Glue to paste.
• 1 clip (to secure the Sun). You have to draw a sun and stick it on one end of the clip
Activity 3: Lunar Simulator
• Extended photocopied material for the instructor, so it looks better.
• Scissors.
• Cutter, carving or scalpel
• Rubber to paste.
• 1 clip (to secure the Moon). You have to draw a half moon and stick it on one end of the
clip with the diameter of the half-moon perpendicular to the clip
WS3: Earth-moon-sun system: Phases and eclipses
Summary
The following work deals with moon phases, solar eclipses, and lunar eclipses. These eclipses are
also used to find distances and diameters in the Earth-Moon-Sun system.
Goals
- To understand why the moon has phases.
- To understand the cause of lunar eclipses.
- To understand why solar eclipses occur.
- To determine distances and diameters of the Earth-Moon-Sun system.
- To understand the origin of the tides.
List of Materials
Activity 1: Model of the hidden face of the Moon
• 1 mask (cut out on white card) to simulate the visible face of the Moon
Activity 2: Model of the phases of the Moon
• 4 masks (cut out on white card) to simulate the 4 phases of the Moon
• 1 projector of the ones used to project the ppt (you have to leave it blank using a blank
Word page for example)
Activity 3: Tierra Luna model to scale
• 1 4cm sphere and 1 wait of 1cm in diameter
• 1 rigid wood or plastic rod 1.3 m
• 2 nails for driving the two spheres into the rod at a distance of 1.2 m
Activity 4: Sol Luna model at scale
• 1 savannah where to paint a Sun of 220 cm in diameter
• 1 Moon 6 mm in diameter (can be a pellet of play dough for children) punctured on a
toothpick
Activity 5: Finger Cinema
• 1 notebook with spiral
• a series of photos of a Moon or Sun eclipse
• 1 tube of glue or glue
Activity 6: Measure the diameter of the Sun
• 1 plastic tube at least 1 meter long and 8cm in diameter (camera obscured)
• 1 hour of translucent paper (vegetable, butter, tracing paper)
• 1 piece of aluminum foil
• 1 calculator
• 1 clip to undo and puncture with the aluminum foil
WS4: Young Astronomer Briefcase
Summary
To further observation it is necessary that students have a set of simple tools. It is proposed that they
construct some of them and then use them in observing the sky from the school itself.
Students should understand in a basic way how various instruments have been introduced over the
centuries, how they have developed, and have become necessary. It is an important part of astronomy,
noting the great ability to build them and the skill to use them to do readings of the observations.
These requirements are not easy to develop with students and for that reason here we propose very
simple instruments.
Goals
- Understand the importance of making careful observations.
- Understand the use of various instruments thanks to the fact that students do the construction by
themselves.
List of Materials
Scissors, cutter and glue or tail are required for the different activities
Activity 1: rule to measure angles
• 1 piece of cardboard of 20x3 cm
• 1 piece of string of 65 cm
• Paste the photocopy of the rule
Activity 2: simplified quadrant
• 1 piece of cardboard of 20x12 cm
• 1 piece of string of 25 cm
• 1 lead (can be anything heavy that can be knotted with the string
• Paste to the photocopy of the quadrant
• 2 pieces of cardboard 4x4 cm where the hole is made to measure the height of the sun
Activity 3: Simplified horizontal goniometer
• 1 piece of porexspan, isopor or quite thick cardboard of 25x20 cm
• Paste the photocopy of the semicircle
• 3 pins or needles with colored heads
Activity 4: Planisphere
• Cut out photocopies
Activity 5: Spectroscope
• 1 matchbox
• 1 piece of CD (1/8 of CD is enough). The CD can be used
• 1 black marker
Activity 6: Red light torch
• 1 flashlight,
• 1 piece of red cellophane paper to stick on the lantern
• 1 compass, 1 notebook, 1 pencil or pen, 1 camera
Activity 7: Build the briefcase
• 1 flashlight bag type folder,
• 1 piece of rope a little thick to make the handle
WS5: Solar Spectrum and Sunspots
Summary
This workshop includes a theoretical approach to the spectrum of sunlight that can be used in high
school. The activities are appropriate for primary and secondary levels.
The Sun is the main source of almost all wavelengths of radiation. However, our atmosphere has high
absorption of several non-visible wavelengths so we will only consider experiments related to the
visible spectrum, which is the part of the spectrum that is present in the daily lives of students. For
the activities in non-visible wavelengths, see the corresponding workshop.
First we will present the theoretical background followed by experimental demonstrations of all the
concepts developed. These activities are simple experiments that teachers can reproduce in the
classroom, introducing topics such as polarization, extinction, blackbody radiation, the continuous
spectrum, the emission spectrum, the absorption spectrum (eg sunlight) and Fraunhofer lines.
We also discuss differences between the areas of regular solar output and the emission of sunspots.
Additionally, we mention the evidence of solar rotation and how this concept can be used for school
projects.
Goals
- To understand what the Sun's spectrum is.
- Understand the spectrum of sunlight.
- Understand what sunspots are.
- Understand the historical significance of sunspots and of Galileo's work on the rotation of the Sun.
- Understand some characteristics of the light such as polarization, dispersion, etc.
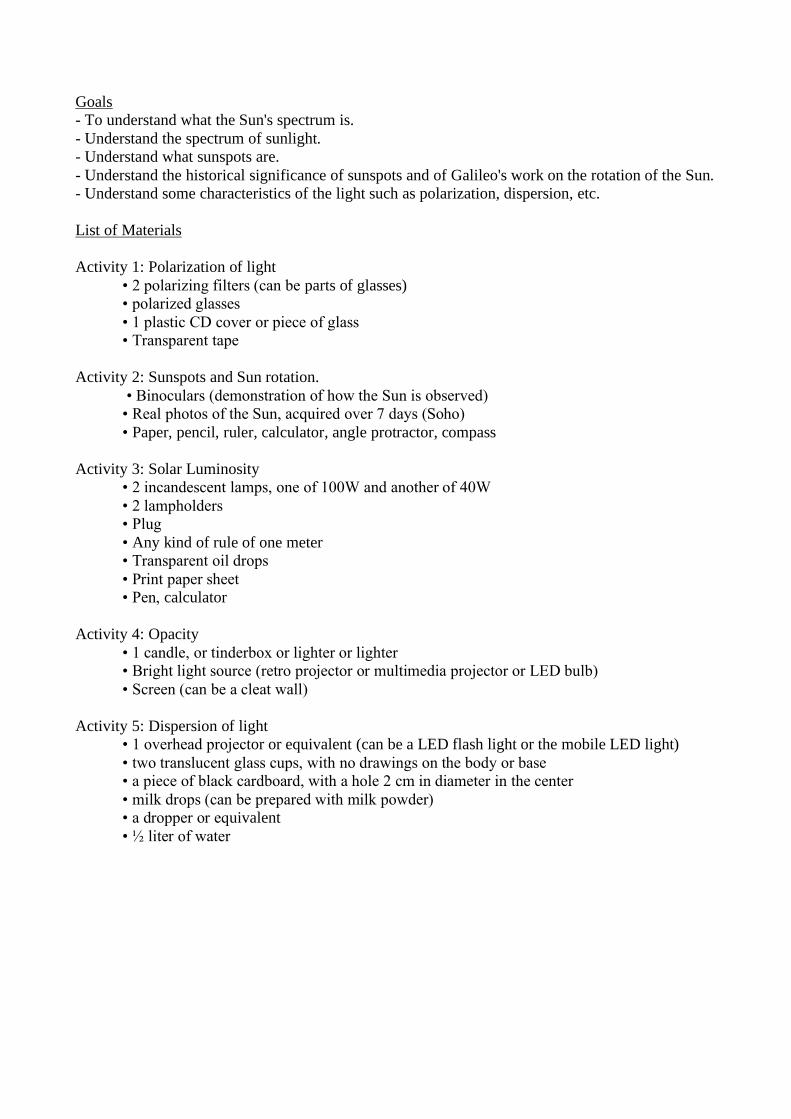
List of Materials
Activity 1: Polarization of light
• 2 polarizing filters (can be parts of glasses)
• polarized glasses
• 1 plastic CD cover or piece of glass
• Transparent tape
Activity 2: Sunspots and Sun rotation.
• Binoculars (demonstration of how the Sun is observed)
• Real photos of the Sun, acquired over 7 days (Soho)
• Paper, pencil, ruler, calculator, angle protractor, compass
Activity 3: Solar Luminosity
• 2 incandescent lamps, one of 100W and another of 40W
• 2 lampholders
• Plug
• Any kind of rule of one meter
• Transparent oil drops
• Print paper sheet
• Pen, calculator
Activity 4: Opacity
• 1 candle, or tinderbox or lighter or lighter
• Bright light source (retro projector or multimedia projector or LED bulb)
• Screen (can be a cleat wall)
Activity 5: Dispersion of light
• 1 overhead projector or equivalent (can be a LED flash light or the mobile LED light)
• two translucent glass cups, with no drawings on the body or base
• a piece of black cardboard, with a hole 2 cm in diameter in the center
• milk drops (can be prepared with milk powder)
• a dropper or equivalent
• ½ liter of water
WS6: Stellar Lives
Summary
To understand the life of the stars it is necessary to understand what they are, how we can find out
how far away they are, how they evolve and what are the differences between them. Through simple
experiments, it is possible to explain to students the work done by scientists to study the composition
of the stars, and also build some simple models.
Goals
This workshop complements the stellar evolution NASE course, presenting various activities and
demonstrations centered on understanding stellar evolution. The main goals are to:
-Understand the difference between apparent magnitude and absolute magnitude.
-Understand the Hertzsprung-Russell diagram by making a color-magnitude diagram.
-Understand concepts such as supernova, neutron star, pulsar, and black hole.
List of Materials
Activity 1: Parallax (distances)
• Attendees' fingers
• Background with reference elements
• pencil, paper, calculator
Activity 2: Law of the inverse square of distance (magnitudes)
• 2 squares glued on cardboard of 15cm x 15 cm minimum, in one of them cut out the
central square
• Rule
• Flash light
Activity 3: Colors of stars (temperatures)
• 3 flashlights (preferably not LED)
• 3 filters R, G and B, stuck on the flash lights (transparent red, green, blue paper)
• 3 white paper cones to produce the spot light (this is not mandatory)
Activity 4: HR diagram (cumulus ages)
• 1 photo of an open cluster (the kappa Crucis workshop is provided in the workshop)
• 1 grid (is provided) to relate temperature to magnitude.
• Rule, pencil
• Special rule with magnitude and color scales (provided with the cluster image)
• Comparative chart of HR diagrams of clusters of different ages (provided)
Activity 5: Supernova explosion simulation (star death)
• 1 basketball ball
• 1 tennis ball
Activity 6: Pulsars (star death)
• 1 flashlight
• 1 rope of at least 1 meter
Activity 7: Black hole simulation (star death)
• 1 piece of fabric or elastic mesh (lycra or similar) of at least 1.5 x 1.5 meters
• 1 tennis ball

• 1 heavy weight spherical object (can be constructed with a balloon full of water)
WS7: Astronomy beyond the visible
Summary
Celestial objects radiate in many wavelengths of the electromagnetic spectrum, but the human eye
only distinguishes a very small part: the visible region.
There are ways to demonstrate the existence of these forms of electromagnetic radiation that we do
not see through simple experiments. In this presentation, you will be introduced to observations
beyond what is observable with a telescope that can be used in a primary or secondary school.
Goals
This activity aims to show certain phenomena beyond what may be observable with amateur
telescopes, such as the existence of:
-Celestial bodies that emit electromagnetic energy that our eye cannot detect. Astronomers are
interested in these other wavelengths because visible radiation alone does not offer a complete picture
of the Universe.
-Visible emissions in the regions of radio waves, infrared, ultraviolet, microwave and X-rays.
List of Materials
Activity 1: Construction of a spectrograph (spectra)
• Template to make the spectrograph (provided)
• 1 CD out of use (or a DVD)
• Packing tape (wide adhesive tape, with resistant glue)
• Common adhesive or paper tape.
• Strong scissor
• Tack (cutter, stylet, scalpel) for fine cutting.
• Glue to be glued (preferably in a bar)
Activity 2: Natural decomposition of light (rainbow)
• a hose
• a patio or garden
Activity 3: Infrared detection (Herschel)
• 1 large cardboard box (type of sheets for photocopier)
• 1 prism
• 4 laboratory thermometers.
• Common adhesive tape
• clock
• paper, pencil
Activity 4: IR detection with the mobile
• 1 or more remotes with IR LED
• CCD camera of cellular phone (also serves the digital camera)
Activity 5: IR detection through interstellar medium
• 1 flashlight (or a bulb)
• a piece of cloth
• mobile phone camera
Activity 6: Constellation with LEDs
• IR LEDs
• base for installing LEDs
• wire and resistance
Activity 7: Constellations with remote controls
• Several remote controls (depends on the constellation you want to play)
Activity 8: Detection of radio waves.
• 1 9V battery
• 2 wires with peeled tips, 20 cm long
• a radio receiver.
Activity 9: Detecting Jupiter's radio waves
• an antenna built according to the indications in the text.
Activity 10: Uses of UV (Black light)
• 1 black light bulb (365nm recommended)
• fluorescent material, piece of glass or glass goggles
• plastic or organic glasses, tickets
WS8: Expansion of the Universe
Summary
This workshop contains several simple activities to do in which we are going to work with the key
concepts of the expanding universe. In the first activity we build a spectroscope to observe spectra
of gases. In the second, third, and fourth we experiment qualitatively with the expansion of a rubber
band, a balloon, and a surface of points, respectively. In the fifth activity we work quantitatively with
the expansion of a surface and even calculate the Hubble constant for this case. In the sixth activity
we detect the microwave background radiation.
Goals
- Understand the expansion of the universe.
- Understand that there is not a center of the universe.
- Understand Hubble's Law.
- Understand the meaning of the dark matter and simulate gravitational lens
List of Materials
Activity 1: Doppler effect (redshift)
• 1 rope clock with uniform sound
• 1 cloth bag with handle of at least 50 cm (or a string to attach the clock)
Activity 2: Stretching the photons (microwave background)
• 1 resistive wire of at least one meter
Activity 3: The Universe in a rubber (expansion)
• pieces of 20 cm of elastic of at least 2 cm wide (one piece per 2 students)
• rule of at least 40 cm
• pencil, paper
Activity 4: The Universe in a balloon (expansion)
• birthday balloons (one per student)
• telgopor, isopor (or the appropriate local name) in small spheres (no larger than 5mm in
diameter). You can undo a sheet of the same material
• Rubber to paste of any type
Activity 5: Calculation of the Hubble constable (expansion)
• Template with galaxies in a universe before and after the expansion (provided)
• Table to collect data (provided)
• pencil, ruler, calculator
Activity 6: There is no expansion center
• 2 films with points (the image is provided), one copied at 100% and another at 105% and
put the 2 sheets on a very well illuminated wall will be enough
Activity 7: Detection of microwave background radiation
• an analog B & W TV
Activity 8 and 9: Simulation of the deformation of space (dark matter)
• 1 glass cup of the type used for cognac or water (body bulging in the center) without
drawings on the body or base.
• 1 cup foot
• 1 glass of white wine
• 1 glass of red wine
• graph paper or graph paper
• 1 flashlight
WS9: Planets and exoplanets
Summary
This workshop provides a series of activities to compare the many observed properties (such as size,
distances, orbital speeds and escape velocities) of the planets in our Solar System. Each section
provides context to various planetary data tables by providing demonstrations or calculations to
contrast the properties of the planets, giving the students a concrete sense for what the data mean.
At present, several methods are used to find exoplanets, more or less indirectly. It has been possible
to detect nearly 4000 planets, and about 500 systems with multiple planets.
Goals
- Understand what the numerical values in the Solar System summary data table mean.
- Understand the main characteristics of extrasolar planetary systems by comparing their properties
to the orbital system of Jupiter and its Galilean satellites.
List of Materials
Activity 1: Scale of distances to the Sun
• 1 piece of calculating machine paper of just over 4.5 meters
• 1 roll of toilet paper of more than 30 units
Activity 2: Diameter model
• 1 piece of yellow paper or yellow cloth to cut a circle of 1.39 m in diameter
• Paintings to draw the planets or paper with different colors to cut the disks of different
sizes
Activity 3: Model of distances and diameters
• 1 basketball ball
• 2 pins of 1 mm head
• 2 pins of 2 mm head
• 1 ping pong ball
• 1 golf ball
• 2 glass marbles
Activity 4: Model in the city
• 1 map of the city
• 1 calculator
Activity 5: Model of times
• 1 calculator
Activity 6: Sun from the planets
• 1 circles template
Activity 7: Density model
• 3 similar fragments of pyrite
• 3 similar fragments of sulfur
• 1 fragment of clay
• 1 fragment of pine wood
• 1 fragment of blende
Activity 8: Flattening Model
• Cardboard
• 1 stick 50cm long and 1cm in diameter
Activity 9: Rotational model
• 1 a meter string
• 1 lead or something that weighs a little and can be easily tied
Activity 10: Model of superficial gravities
• 1 mechanical bath scale (other than electronic) for each planet
• 1 pliers to open the scale
• 1 card
• 1 marker
Activity 11: Model of craters
• 1 pack of 1 kilo of flour
• 1 pack of 400 gr of cocoa powder. Those that are difficult to dissolve are better, those that
are difficult to dissolve in the milk
• 1 fine sieve
• 1 old newspaper
• 1 soup spoon
Activity 12: Escape velocity model
• 1 tube of pills or medicines whose lid has no thread but is under pressure. It also serves a
tube of food for fish, a capsule of photographic film
• Water and an effervescent pill
• Bicarbonate and vinegar
• Coca cola and mentos
Activity 13: Doppler Effect
• 1 cellular
• 1 cloth bag tied with a rope
Activity 14: Transit simulation
• 1 large ball about 10 cm
• 1 small ball about 2 cm
Activity 15: Simulation of micro lenses
• 2 wine glass feet
• 1 small ball about 1 cm
Activity 16: Model of solar system and exoplanets
• 1 extensible meter
• 1 little ball of 0.2 cm
• 1 little ball of 0.3 cm
• 2 little ball of 0.6 cm
• 2 balls of 2.5 cm
• 1 ball of 6 cm
• 1 ball of 7 cm
• 1 paper lamp of 35 cm
• 1 ball of 5.5 cm
• 1 ball of 7 cm
• 1 ball of 9 cm
• 1 ball of 10 cm
• 1 paper lamp of 45 cm
• 1 little ball of 0.8 cm
• 1 little ball of 1.1 cm
• 1 little ball of 1.6 cm
• 1 ball of 10 cm
• 1 little ball of 0.7 cm
• 1 little ball of 1.7 cm
• 1 little ball of 1.8 cm
• 1 ball of 2 cm
• 1 ball of 2.4 cm
• 1 paper lamp of 22 cm
• 2 little ball of 1.0 cm
• 1 little ball of 1.2 cm
• 1 little ball of 1.3 cm
• 2 little ball of 1.4 cm
• 1 little ball of 1.5 cm
• 1 ball of 4 cm
WS10: Astrobiology
Summary
This workshop is essentially divided into two parts. The necessary chemical elements for life, a
simple study of the periodic table corresponding to the objectives of this work and some concepts of
astrobiology are introduced.
Goals
• Understand where from or how the different elements of the periodic table arise
• Understand the main characteristics of extra-solar planetary systems.
• Understand the habitability conditions necessary for the development of life
• Study the minimum guidelines of life outside the Earth.
List of Materials
Activity 1: Formation of the planetary system from gas and dust
• no material
Activity 2: Periodic table classification
• 3 basket (blue, yellow, red)
• 1 golden ring
• 1 drill bit coated with titanium
• a child’s balloon with helium inside
• 1 pan scourers of nickel
• 1 mobile/button battery
• 1 car spark plugs
• 1 electric cooper wire
• 1 iodine solution
• 1 water bottle
• 1 old cooking pan
• 1 black pencil lead
• 1 sulfur for agriculture
• 1 can of soft drink
• 1 wrist watch of titanium
• 1 silver medal
• 1 pipe lead
• 1 zinc pencil sharpener
• 1 thermometer
• 1 matchbox
Activity 3: Children of the stars
• no materials
Activity 4: Oxygen production by photosynthesis
• 1 punch
• 2 sheets of spinach
• 25g of sodium bicarbonate
• 1 disposable syringe of 10 ml
• 1 disposable syringe of 20 ml
• 1 foil of red cellophane paper
• 1 foil of blue cellophane paper
• 2 light bulb (not less than 70W) better led
• 2 lamps to put both light bulbs
• 1 tablespoon of yeats (to make bread)
• 10 tablespoon of sugar
• 1 glass of warm water (between 22º-27º)
• 6 zip bags
• 1 tablespoon of sodium bicarbonate
• 1 tablespoon of sodium chloride (common salt)
• 1 tablespoon of vinegar or lemon
• 4 or 5 ice’s rocs
• 1 UV lamp (used to grow up vegetables)
Activity 5: Looking for a second Earth
• no materials
TEACHING TRAINING COURSE ON ASTRONOMY
• Lectures Topics
o 1 – History of Astronomy
o 2 – Solar System
• Workshops Topics
o 1 – Local Horizon and Sundials.
o 2 – Stellar, solar and lunar demonstrators
o 3 – Earth-moon-sun system: phases and eclipses
o 4 – Young astronomer briefcase
WS1: Local Horizon and Sundials Summary
The study of the horizon is crucial to facilitate the students' first observations in an educational center.
A simple model that has to be made in each center allows us to make the study and the comprehension
of the first astronomical rudiments easier. The model is also presented as a simple model of an
equatorial clock and from it; we can make other models (horizontal and vertical).
Goals
- Understand the diurnal and annual movement of the Sun.
- Understand the celestial vault movement.
- Understand the construction of an elemental Sundial.
List of Materials.
Activity 1:
• 4-sphere model
• 1 Bulb,
• 1 Support for the light bulb,
• 2 meters of electric cable and a plug
• 4 balls of porexpan or icopor of 8 cm
• 4 sticks with 4 supports (2 of equal height, 1 lower, 1 higher as explained in the WS1 text)
• 1 circular mat that is used as a base for cakes or pies
• 1 a card with a cut angle of 23º
Activity 2: Model of the parallel Earth
• 1 terrestrial sphere that can be removed from your support. About 30 cm in diameter
• 1 bowl that serves to put the terrestrial sphere on it
• 1 compass
• 1 rope of 2 meters in length
• 1 box of chopsticks
• 1 package of play dough for children
Activity 3: Horizon model.
• a photo strip of the local horizon (taken as explained in the workshop)
• 1 Photo of stellar traces of the cardinal point east or west
• 1 Photo of sunrise at 2 or 3 minutes intervals (approx) made on the day of the equinox
• 3 photos of the sunrise (or sunset) on the first day of the solstices and an equinox
• 1 photo of the Orion belt area with about 15 or 20 minutes of exposure time
• 1 Wood sheet (cardboard or cork does not work because it is soft) of 40x 40
• 2 meters galvanized wire, cut into three sections, (simulation of the apparent path of the sun
at solstices and equinoxes and to simulate the rotation axis of the Earth)
• 1 Flashlight (with the light jet inside a cardboard tube so that it focuses well on the jet)
• 1 compass
• 1 wooden rod for the gnomon of the solar clock.
• Scissors and tail (for setting the sundial)
WS2: Stellar, solar, and lunar demonstrators
Summary
This worksheet presents a simple method to explain how the apparent motions of stars, the Sun, and
the Moon are observed from different places on Earth. The procedure consists of building a simple
model that allows us to demonstrate how these movements are observed from different latitudes.
Goals
- Understand the apparent motions of stars as seen from different latitudes.
- Understand the apparent motions of the Sun as seen from different latitudes.
- Understand the Moon’s movement and shapes as seen from different latitudes.
List of Materials
Activity 1: Stellar Simulator
• Extended photocopied material for the instructor, so it looks better.
• Scissors.
• Cutter, carving or scalpel
• Glue to paste.
Activity 2: Solar simulator
• Extended photocopied material for the instructor, so it looks better.
• Scissors.
• Cutter, carving or scalpel
• Glue to paste.
• 1 clip (to secure the Sun). You have to draw a sun and stick it on one end of the clip
Activity 3: Lunar Simulator
• Extended photocopied material for the instructor, so it looks better.
• Scissors.
• Cutter, carving or scalpel
• Rubber to paste.
• 1 clip (to secure the Moon). You have to draw a half moon and stick it on one end of the
clip with the diameter of the half-moon perpendicular to the clip
WS3: Earth-moon-sun system: Phases and eclipses
Summary
The following work deals with moon phases, solar eclipses, and lunar eclipses. These eclipses are
also used to find distances and diameters in the Earth-Moon-Sun system.
Goals
- To understand why the moon has phases.
- To understand the cause of lunar eclipses.
- To understand why solar eclipses occur.
- To determine distances and diameters of the Earth-Moon-Sun system.
- To understand the origin of the tides.
List of Materials
Activity 1: Model of the hidden face of the Moon
• 1 mask (cut out on white card) to simulate the visible face of the Moon
Activity 2: Model of the phases of the Moon
• 4 masks (cut out on white card) to simulate the 4 phases of the Moon
• 1 projector of the ones used to project the ppt (you have to leave it blank using a blank
Word page for example)
Activity 3: Tierra Luna model to scale
• 1 4cm sphere and 1 wait of 1cm in diameter
• 1 rigid wood or plastic rod 1.3 m
• 2 nails for driving the two spheres into the rod at a distance of 1.2 m
Activity 4: Sol Luna model at scale
• 1 savannah where to paint a Sun of 220 cm in diameter
• 1 Moon 6 mm in diameter (can be a pellet of play dough for children) punctured on a
toothpick
Activity 5: Finger Cinema
• 1 notebook with spiral
• a series of photos of a Moon or Sun eclipse
• 1 tube of glue or glue
Activity 6: Measure the diameter of the Sun
• 1 plastic tube at least 1 meter long and 8cm in diameter (camera obscured)
• 1 hour of translucent paper (vegetable, butter, tracing paper)
• 1 piece of aluminum foil
• 1 calculator
• 1 clip to undo and puncture with the aluminum foil
WS4: Young Astronomer Briefcase
Summary
To further observation it is necessary that students have a set of simple tools. It is proposed that they
construct some of them and then use them in observing the sky from the school itself.
Students should understand in a basic way how various instruments have been introduced over the
centuries, how they have developed, and have become necessary. It is an important part of astronomy,
noting the great ability to build them and the skill to use them to do readings of the observations.
These requirements are not easy to develop with students and for that reason here we propose very
simple instruments.
Goals
- Understand the importance of making careful observations.
- Understand the use of various instruments thanks to the fact that students do the construction by
themselves.
List of Materials
Scissors, cutter and glue or tail are required for the different activities
Activity 1: rule to measure angles
• 1 piece of cardboard of 20x3 cm
• 1 piece of string of 65 cm
• Paste the photocopy of the rule
Activity 2: simplified quadrant
• 1 piece of cardboard of 20x12 cm
• 1 piece of string of 25 cm
• 1 lead (can be anything heavy that can be knotted with the string
• Paste to the photocopy of the quadrant
• 2 pieces of cardboard 4x4 cm where the hole is made to measure the height of the sun
Activity 3: Simplified horizontal goniometer
• 1 piece of porexspan, isopor or quite thick cardboard of 25x20 cm
• Paste the photocopy of the semicircle
• 3 pins or needles with colored heads
Activity 4: Planisphere
• Cut out photocopies
Activity 5: Spectroscope
• 1 matchbox
• 1 piece of CD (1/8 of CD is enough). The CD can be used
• 1 black marker
Activity 6: Red light torch
• 1 flashlight,
• 1 piece of red cellophane paper to stick on the lantern
• 1 compass, 1 notebook, 1 pencil or pen, 1 camera
Activity 7: Build the briefcase
• 1 flashlight bag type folder,
• 1 piece of rope a little thick to make the handle

TEACHING TRAINING COURSE ON ASTROPHYSICS
• Lectures Topics
o 1 – Evolution of the Stars
o 2 – Cosmology
• Workshops Topics
o 1 – Solar spectrum and sunspots
o 2 – Stellar lives
o 3 – Astronomy beyond the visible
o 4 – Expansion of the Universe
WS1: Solar Spectrum and Sunspots
Summary
This workshop includes a theoretical approach to the spectrum of sunlight that can be used in high
school. The activities are appropriate for primary and secondary levels.
The Sun is the main source of almost all wavelengths of radiation. However, our atmosphere has high
absorption of several non-visible wavelengths so we will only consider experiments related to the
visible spectrum, which is the part of the spectrum that is present in the daily lives of students. For
the activities in non-visible wavelengths, see the corresponding workshop.
First we will present the theoretical background followed by experimental demonstrations of all the
concepts developed. These activities are simple experiments that teachers can reproduce in the
classroom, introducing topics such as polarization, extinction, blackbody radiation, the continuous
spectrum, the emission spectrum, the absorption spectrum (eg sunlight) and Fraunhofer lines.
We also discuss differences between the areas of regular solar output and the emission of sunspots.
Additionally, we mention the evidence of solar rotation and how this concept can be used for school
projects.
Goals
- To understand what the Sun's spectrum is.
- Understand the spectrum of sunlight.
- Understand what sunspots are.
- Understand the historical significance of sunspots and of Galileo's work on the rotation of the Sun.
- Understand some characteristics of the light such as polarization, dispersion, etc.
List of Materials
Activity 1: Polarization of light
• 2 polarizing filters (can be parts of glasses)
• polarized glasses
• 1 plastic CD cover or piece of glass
• Transparent tape
Activity 2: Sunspots and Sun rotation.
• Binoculars (demonstration of how the Sun is observed)
• Real photos of the Sun, acquired over 7 days (Soho)
• Paper, pencil, ruler, calculator, angle protractor, compass
Activity 3: Solar Luminosity
• 2 incandescent lamps, one of 100W and another of 40W
• 2 lampholders
• Plug
• Any kind of rule of one meter
• Transparent oil drops
• Print paper sheet
• Pen, calculator
Activity 4: Opacity
• 1 candle, or tinderbox or lighter or lighter
• Bright light source (retro projector or multimedia projector or LED bulb)
• Screen (can be a cleat wall)
Activity 5: Dispersion of light
• 1 overhead projector or equivalent (can be a LED flash light or the mobile LED light)
• two translucent glass cups, with no drawings on the body or base
• a piece of black cardboard, with a hole 2 cm in diameter in the center
• milk drops (can be prepared with milk powder)
• a dropper or equivalent
• ½ liter of water

WS2: Stellar Lives
Summary
To understand the life of the stars it is necessary to understand what they are, how we can find out
how far away they are, how they evolve and what are the differences between them. Through simple
experiments, it is possible to explain to students the work done by scientists to study the composition
of the stars, and also build some simple models.
Goals
This workshop complements the stellar evolution NASE course, presenting various activities and
demonstrations centered on understanding stellar evolution. The main goals are to:
-Understand the difference between apparent magnitude and absolute magnitude.
-Understand the Hertzsprung-Russell diagram by making a color-magnitude diagram.
-Understand concepts such as supernova, neutron star, pulsar, and black hole.
List of Materials
Activity 1: Parallax (distances)
• Attendees' fingers
• Background with reference elements
• pencil, paper, calculator
Activity 2: Law of the inverse square of distance (magnitudes)
• 2 squares glued on cardboard of 15cm x 15 cm minimum, in one of them cut out the
central square
• Rule
• Flash light
Activity 3: Colors of stars (temperatures)
• 3 flashlights (preferably not LED)
• 3 filters R, G and B, stuck on the flash lights (transparent red, green, blue paper)
• 3 white paper cones to produce the spot light (this is not mandatory)
Activity 4: HR diagram (cumulus ages)
• 1 photo of an open cluster (the kappa Crucis workshop is provided in the workshop)
• 1 grid (is provided) to relate temperature to magnitude.
• Rule, pencil
• Special rule with magnitude and color scales (provided with the cluster image)
• Comparative chart of HR diagrams of clusters of different ages (provided)
Activity 5: Supernova explosion simulation (star death)
• 1 basketball ball
• 1 tennis ball
Activity 6: Pulsars (star death)
• 1 flashlight
• 1 rope of at least 1 meter
Activity 7: Black hole simulation (star death)
• 1 piece of fabric or elastic mesh (lycra or similar) of at least 1.5 x 1.5 meters
• 1 tennis ball
• 1 heavy weight spherical object (can be constructed with a balloon full of water)
WS3: Astronomy beyond the visible
Summary
Celestial objects radiate in many wavelengths of the electromagnetic spectrum, but the human eye
only distinguishes a very small part: the visible region.
There are ways to demonstrate the existence of these forms of electromagnetic radiation that we do
not see through simple experiments. In this presentation, you will be introduced to observations
beyond what is observable with a telescope that can be used in a primary or secondary school.
Goals
This activity aims to show certain phenomena beyond what may be observable with amateur
telescopes, such as the existence of:
-Celestial bodies that emit electromagnetic energy that our eye cannot detect. Astronomers are
interested in these other wavelengths because visible radiation alone does not offer a complete picture
of the Universe.
-Visible emissions in the regions of radio waves, infrared, ultraviolet, microwave and X-rays.
List of Materials
Activity 1: Construction of a spectrograph (spectra)
• Template to make the spectrograph (provided)
• 1 CD out of use (or a DVD)
• Packing tape (wide adhesive tape, with resistant glue)
• Common adhesive or paper tape.
• Strong scissor
• Tack (cutter, stylet, scalpel) for fine cutting.
• Glue to be glued (preferably in a bar)
Activity 2: Natural decomposition of light (rainbow)
• a hose
• a patio or garden
Activity 3: Infrared detection (Herschel)
• 1 large cardboard box (type of sheets for photocopier)
• 1 prism
• 4 laboratory thermometers.
• Common adhesive tape
• clock
• paper, pencil
Activity 4: IR detection with the mobile
• 1 or more remotes with IR LED
• CCD camera of cellular phone (also serves the digital camera)
Activity 5: IR detection through interstellar medium
• 1 flashlight (or a bulb)
• a piece of cloth
• mobile phone camera

Activity 6: Constellation with LEDs
• IR LEDs
• base for installing LEDs
• wire and resistance
Activity 7: Constellations with remote controls
• Several remote controls (depends on the constellation you want to play)
Activity 8: Detection of radio waves.
• 1 9V battery
• 2 wires with peeled tips, 20 cm long
• a radio receiver.
Activity 9: Detecting Jupiter's radio waves
• an antenna built according to the indications in the text.
Activity 10: Uses of UV (Black light)
• 1 black light bulb (365nm recommended)
• fluorescent material, piece of glass or glass goggles
• plastic or organic glasses, tickets
WS4: Expansion of the Universe
Summary
This workshop contains several simple activities to do in which we are going to work with the key
concepts of the expanding universe. In the first activity we build a spectroscope to observe spectra
of gases. In the second, third, and fourth we experiment qualitatively with the expansion of a rubber
band, a balloon, and a surface of points, respectively. In the fifth activity we work quantitatively with
the expansion of a surface and even calculate the Hubble constant for this case. In the sixth activity
we detect the microwave background radiation.
Goals
- Understand the expansion of the universe.
- Understand that there is not a center of the universe.
- Understand Hubble's Law.
- Understand the meaning of the dark matter and simulate gravitational lens
List of Materials
Activity 1: Doppler effect (redshift)
• 1 rope clock with uniform sound
• 1 cloth bag with handle of at least 50 cm (or a string to attach the clock)
Activity 2: Stretching the photons (microwave background)
• 1 resistive wire of at least one meter
Activity 3: The Universe in a rubber (expansion)
• pieces of 20 cm of elastic of at least 2 cm wide (one piece per 2 students)
• rule of at least 40 cm
• pencil, paper
Activity 4: The Universe in a balloon (expansion)
• birthday balloons (one per student)
• telgopor, isopor (or the appropriate local name) in small spheres (no larger than 5mm in
diameter). You can undo a sheet of the same material
• Rubber to paste of any type
Activity 5: Calculation of the Hubble constable (expansion)
• Template with galaxies in a universe before and after the expansion (provided)
• Table to collect data (provided)
• pencil, ruler, calculator
Activity 6: There is no expansion center
• 2 films with points (the image is provided), one copied at 100% and another at 105% and
put the 2 sheets on a very well illuminated wall will be enough
Activity 7: Detection of microwave background radiation
• an analog B & W TV
Activity 8 and 9: Simulation of the deformation of space (dark matter)
• 1 glass cup of the type used for cognac or water (body bulging in the center) without
drawings on the body or base.
• 1 cup foot
• 1 glass of white wine
• 1 glass of red wine
• graph paper or graph paper
• 1 flashlight
TEACHING TRAINING COURSE ON ASTROBIOLOGY
• Lectures Topics
o 1 – Evolution of the Stars
o 2 – Solar System
• Workshops Topics
o 1 – Young astronomer briefcase
o 2 – Astronomy beyond the visible
o 3 – Planets and exoplanets
o 4 - Astrobiology
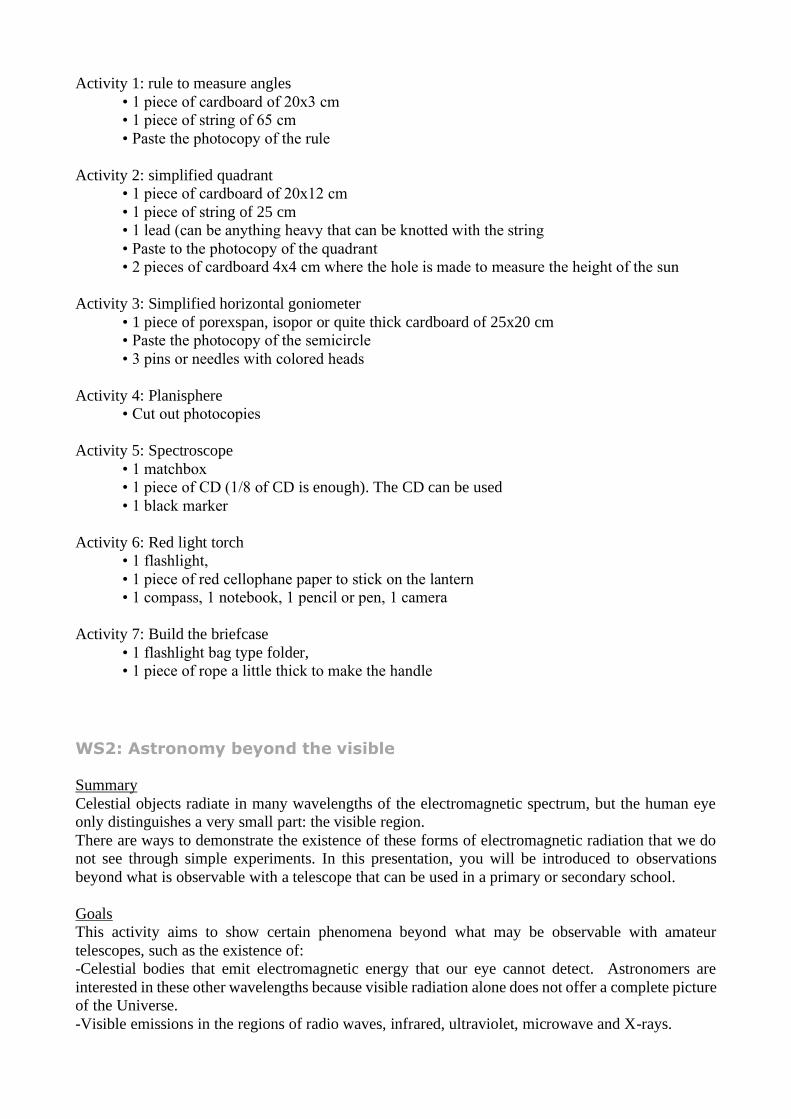
WS1: Young Astronomer Briefcase
Summary
To further observation it is necessary that students have a set of simple tools. It is proposed that they
construct some of them and then use them in observing the sky from the school itself.
Students should understand in a basic way how various instruments have been introduced over the
centuries, how they have developed, and have become necessary. It is an important part of astronomy,
noting the great ability to build them and the skill to use them to do readings of the observations.
These requirements are not easy to develop with students and for that reason here we propose very
simple instruments.
Goals
- Understand the importance of making careful observations.
- Understand the use of various instruments thanks to the fact that students do the construction by
themselves.
List of Materials
Scissors, cutter and glue or tail are required for the different activities
Activity 1: rule to measure angles
• 1 piece of cardboard of 20x3 cm
• 1 piece of string of 65 cm
• Paste the photocopy of the rule
Activity 2: simplified quadrant
• 1 piece of cardboard of 20x12 cm
• 1 piece of string of 25 cm
• 1 lead (can be anything heavy that can be knotted with the string
• Paste to the photocopy of the quadrant
• 2 pieces of cardboard 4x4 cm where the hole is made to measure the height of the sun
Activity 3: Simplified horizontal goniometer
• 1 piece of porexspan, isopor or quite thick cardboard of 25x20 cm
• Paste the photocopy of the semicircle
• 3 pins or needles with colored heads
Activity 4: Planisphere
• Cut out photocopies
Activity 5: Spectroscope
• 1 matchbox
• 1 piece of CD (1/8 of CD is enough). The CD can be used
• 1 black marker
Activity 6: Red light torch
• 1 flashlight,
• 1 piece of red cellophane paper to stick on the lantern
• 1 compass, 1 notebook, 1 pencil or pen, 1 camera
Activity 7: Build the briefcase
• 1 flashlight bag type folder,
• 1 piece of rope a little thick to make the handle
WS2: Astronomy beyond the visible
Summary
Celestial objects radiate in many wavelengths of the electromagnetic spectrum, but the human eye
only distinguishes a very small part: the visible region.
There are ways to demonstrate the existence of these forms of electromagnetic radiation that we do
not see through simple experiments. In this presentation, you will be introduced to observations
beyond what is observable with a telescope that can be used in a primary or secondary school.
Goals
This activity aims to show certain phenomena beyond what may be observable with amateur
telescopes, such as the existence of:
-Celestial bodies that emit electromagnetic energy that our eye cannot detect. Astronomers are
interested in these other wavelengths because visible radiation alone does not offer a complete picture
of the Universe.
-Visible emissions in the regions of radio waves, infrared, ultraviolet, microwave and X-rays.
List of Materials
Activity 1: Construction of a spectrograph (spectra)
• Template to make the spectrograph (provided)
• 1 CD out of use (or a DVD)
• Packing tape (wide adhesive tape, with resistant glue)
• Common adhesive or paper tape.
• Strong scissor
• Tack (cutter, stylet, scalpel) for fine cutting.
• Glue to be glued (preferably in a bar)
Activity 2: Natural decomposition of light (rainbow)
• a hose
• a patio or garden
Activity 3: Infrared detection (Herschel)
• 1 large cardboard box (type of sheets for photocopier)
• 1 prism
• 4 laboratory thermometers.
• Common adhesive tape
• clock
• paper, pencil
Activity 4: IR detection with the mobile
• 1 or more remotes with IR LED
• CCD camera of cellular phone (also serves the digital camera)
Activity 5: IR detection through interstellar medium
• 1 flashlight (or a bulb)
• a piece of cloth
• mobile phone camera
Activity 6: Constellation with LEDs
• IR LEDs
• base for installing LEDs
• wire and resistance
Activity 7: Constellations with remote controls
• Several remote controls (depends on the constellation you want to play)
Activity 8: Detection of radio waves.
• 1 9V battery
• 2 wires with peeled tips, 20 cm long
• a radio receiver.
Activity 9: Detecting Jupiter's radio waves
• an antenna built according to the indications in the text.
Activity 10: Uses of UV (Black light)
• 1 black light bulb (365nm recommended)
• fluorescent material, piece of glass or glass goggles
• plastic or organic glasses, tickets
WS3: Planets and exoplanets
Summary
This workshop provides a series of activities to compare the many observed properties (such as size,
distances, orbital speeds and escape velocities) of the planets in our Solar System. Each section
provides context to various planetary data tables by providing demonstrations or calculations to
contrast the properties of the planets, giving the students a concrete sense for what the data mean.
At present, several methods are used to find exoplanets, more or less indirectly. It has been possible
to detect nearly 4000 planets, and about 500 systems with multiple planets.
Goals
- Understand what the numerical values in the Solar System summary data table mean.
- Understand the main characteristics of extrasolar planetary systems by comparing their properties
to the orbital system of Jupiter and its Galilean satellites.
List of Materials
Activity 1: Scale of distances to the Sun
• 1 piece of calculating machine paper of just over 4.5 meters
• 1 roll of toilet paper of more than 30 units
Activity 2: Diameter model
• 1 piece of yellow paper or yellow cloth to cut a circle of 1.39 m in diameter
• Paintings to draw the planets
Activity 3: Model of distances and diameters
• 1 basketball ball
• 2 pins of 1 mm head
• 2 pins of 2 mm head
• 1 ping pong ball
• 1 golf ball
• 2 glass marbles
Activity 4: Model in the city
• 1 map of the city
• 1 calculator
Activity 5: Model of times
• 1 calculator
Activity 6: Sun from the planets
• 1 circles template
Activity 7: Density model
• 3 similar fragments of pyrite
• 3 similar fragments of sulfur
• 1 fragment of clay
• 1 fragment of pine wood
• 1 fragment of blende
Activity 8: Flattening Model
• Cardboard
• 1 stick 50cm long and 1cm in diameter
Activity 9: Rotational model
• 1 a meter string
• 1 lead or something that weighs a little and can be easily tied
Activity 10: Model of superficial gravities
• 1 mechanical bath scale (other than electronic) for each planet
• 1 pliers to open the scale
• 1 card
• 1 marker
Activity 11: Model of craters
• 1 pack of 1 kilo of flour
• 1 pack of 400 gr of cocoa powder. Those that are difficult to dissolve are better, those that
are difficult to dissolve in the milk
• 1 fine sieve
• 1 old newspaper
• 1 soup spoon
Activity 12: Escape velocity model
• 1 tube of pills or medicines whose lid has no thread but is under pressure. It also serves a
tube of food for fish, a capsule of photographic film
• Water and an effervescent pill
• Bicarbonate and vinegar
• Coca cola and mentos
Activity 13: Doppler Effect
• 1 cellular
• 1 cloth bag tied with a rope
Activity 14: Transit simulation
• 1 large ball about 10 cm
• 1 small ball about 2 cm
Activity 15: Simulation of micro lenses
• 2 wine glass feet
• 1 small ball about 1 cm
Activity 16: Model of solar system and exoplanets
• 1 extensible meter
• 1 little ball of 0.2 cm
• 1 little ball of 0.3 cm
• 2 little ball of 0.6 cm
• 2 balls of 2.5 cm
• 1 ball of 6 cm
• 1 ball of 7 cm

• 1 paper lamp of 35 cm
• 1 ball of 5.5 cm
• 1 ball of 7 cm
• 1 ball of 9 cm
• 1 ball of 10 cm
• 1 paper lamp of 45 cm
• 1 little ball of 0.8 cm
• 1 little ball of 1.1 cm
• 1 little ball of 1.6 cm
• 1 ball of 10 cm
• 1 little ball of 0.7 cm
• 1 little ball of 1.7 cm
• 1 little ball of 1.8 cm
• 1 ball of 2 cm
• 1 ball of 2.4 cm
• 1 paper lamp of 22 cm
• 2 little ball of 1.0 cm
• 1 little ball of 1.2 cm
• 1 little ball of 1.3 cm
• 2 little ball of 1.4 cm
• 1 little ball of 1.5 cm
• 1 ball of 4 cm
WS4: Astrobiology
Summary
This workshop is essentially divided into two parts. The necessary chemical elements for life, a
simple study of the periodic table corresponding to the objectives of this work and some concepts of
astrobiology are introduced.
Goals
• Understand where from or how the different elements of the periodic table arise
• Understand the main characteristics of extra-solar planetary systems.
• Understand the habitability conditions necessary for the development of life
• Study the minimum guidelines of life outside the Earth.
List of Materials
Activity 1: Formation of the planetary system from gas and dust
• no material
Activity 2: Periodic table classification
• 3 basket (blue, yellow, red)
• 1 golden ring
• 1 drill bit coated with titanium
• a child’s balloon with helium inside
• 1 pan scourers of nickel
• 1 mobile/button battery
• 1 car spark plugs
• 1 electric cooper wire
• 1 iodine solution
• 1 water bottle
• 1 old cooking pan
• 1 black pencil lead
• 1 sulfur for agriculture
• 1 can of soft drink
• 1 wrist watch of titanium
• 1 silver medal
• 1 pipe lead
• 1 zinc pencil sharpener
• 1 thermometer
• 1 matchbox
Activity 3: Children of the stars
• no materials
Activity 4: Oxygen production by photosynthesis
• 1 punch
• 2 sheets of spinach
• 25g of sodium bicarbonate
• 1 disposable syringe of 10 ml
• 1 disposable syringe of 20 ml
• 1 foil of red cellophane paper
• 1 foil of blue cellophane paper
• 2 light bulb (not less than 70W) better led
• 2 lamps to put both light bulbs
• 1 tablespoon of yeats (to make bread)
• 10 tablespoon of sugar
• 1 glass of warm water (between 22º-27º)
• 6 zip bags
• 1 tablespoon of sodium bicarbonate
• 1 tablespoon of sodium chloride (common salt)
• 1 tablespoon of vinegar or lemon
• 4 or 5 ice’s rocs
• 1 UV lamp (used to grow up vegetables)
Activity 5: Looking for a second Earth
• no materials
TEACHING TRAINING COURSE ON ASTROCULTURE
Lectures topics
1- History of Astronomy
2- Archaeoastronomy and its educational potential
Workshops and Working Groups topics
1 – Local Horizon and Sundials
2 – Stellar, solar and lunar demonstrators
3 – Preparing Observations
4- Astronomy in the city
WS1: Local Horizon and Sundials
Summary
The study of the horizon is crucial to facilitate the students' first observations in an educational center.
A simple model that has to be made in each center allows us to make the study and the comprehension
of the first astronomical rudiments easier. The model is also presented as a simple model of an
equatorial clock and from it; we can make other models (horizontal and vertical).
Goals
- Understand the diurnal and annual movement of the Sun.
- Understand the celestial vault movement.
- Understand the construction of an elemental Sundial.
List of Materials.
Activity 1:
• 4-sphere model
• 1 Bulb,
• 1 Support for the light bulb,
• 2 meters of electric cable and a plug
• 4 balls of porexpan or icopor of 8 cm
• 4 sticks with 4 supports (2 of equal height, 1 lower, 1 higher as explained in the WS1 text)
• 1 circular mat that is used as a base for cakes or pies
• 1 a card with a cut angle of 23º
Activity 2: Model of the parallel Earth
• 1 terrestrial sphere that can be removed from your support. About 30 cm in diameter
• 1 bowl that serves to put the terrestrial sphere on it
• 1 compass
• 1 rope of 2 meters in length
• 1 box of chopsticks
• 1 package of play dough for children
Activity 3: Horizon model.
• a photo strip of the local horizon (taken as explained in the workshop)
• 1 Photo of stellar traces of the cardinal point east or west
• 1 Photo of sunrise at 2 or 3 minutes intervals (approx) made on the day of the equinox
• 3 photos of the sunrise (or sunset) on the first day of the solstices and an equinox
• 1 photo of the Orion belt area with about 15 or 20 minutes of exposure time
• 1 Wood sheet (cardboard or cork does not work because it is soft) of 40x 40
• 2 meters galvanized wire, cut into three sections, (simulation of the apparent path of the sun
at solstices and equinoxes and to simulate the rotation axis of the Earth)
• 1 Flashlight (with the light jet inside a cardboard tube so that it focuses well on the jet)
• 1 compass
• 1 wooden rod for the gnomon of the solar clock.
• Scissors and tail (for setting the sundial)
WS2: Stellar, solar, and lunar demonstrators
Summary
This worksheet presents a simple method to explain how the apparent motions of stars, the Sun, and
the Moon are observed from different places on Earth. The procedure consists of building a simple
model that allows us to demonstrate how these movements are observed from different latitudes.
Goals
- Understand the apparent motions of stars as seen from different latitudes.
- Understand the apparent motions of the Sun as seen from different latitudes.
- Understand the Moon’s movement and shapes as seen from different latitudes.
List of Materials
Activity 1: Stellar Simulator
• Extended photocopied material for the instructor, so it looks better.
• Scissors.
• Cutter, carving or scalpel
• Glue to paste.
Activity 2: Solar simulator
• Extended photocopied material for the instructor, so it looks better.
• Scissors.
• Cutter, carving or scalpel
• Glue to paste.
• 1 clip (to secure the Sun). You have to draw a sun and stick it on one end of the clip
Activity 3: Lunar Simulator
• Extended photocopied material for the instructor, so it looks better.
• Scissors.
• Cutter, carving or scalpel
• Rubber to paste.
• 1 clip (to secure the Moon). You have to draw a half moon and stick it on one end of the
clip with the diameter of the half-moon perpendicular to the clip
WS3: Preparing Observations
Summary
An outing to observe the sky is always an opportunity to learn and have a good time, especially if it
is done with a group of amateur friends. You have to prepare this departure in time, especially if you
are going to bring instruments. However, you should not neglect the simplest exits to see the sky with
the naked eye, with binoculars or binoculars.
Goals
• Explain how to choose a suitable date and place to make astronomical observations, what material to bring
and how to plan the trip.
• Learn to use the Stellarium program.
• Recognize the problem of light pollution
List of Materials
Activity 1: Umbrella of the Celestial Vault
✓ 1 Black knight umbrella,
✓ 1 white concealer (ballpoint pen type as it is poorly easy to handle)
✓ 1 beamer to be able to use Stellarium to draw the constellations
Activity 2: Ligh Pollution
✓ 2 ping pong balls
✓ 1 flashlight (se be supplied with a mobile)
✓ 1 carton box
✓ Scissors
✓ Needles of various thicknesses to make holes in the boxa
WS4: Astronomy in the city Summary
A trip to visit a building, a monument or architectural or decorative element, or one of these
archaeologists in our city, or in a nearby place, is always an opportunity to learn more about
astronomy and culture. You have to prepare this output in time, especially if you are going to take
instruments to take measurements.
Goals
-Explain how to choose a suitable date and place to make astronomical observations, what material
to bring and how to plan the trip.
-Present some very varied examples corresponding to all the continents where NASE is developed
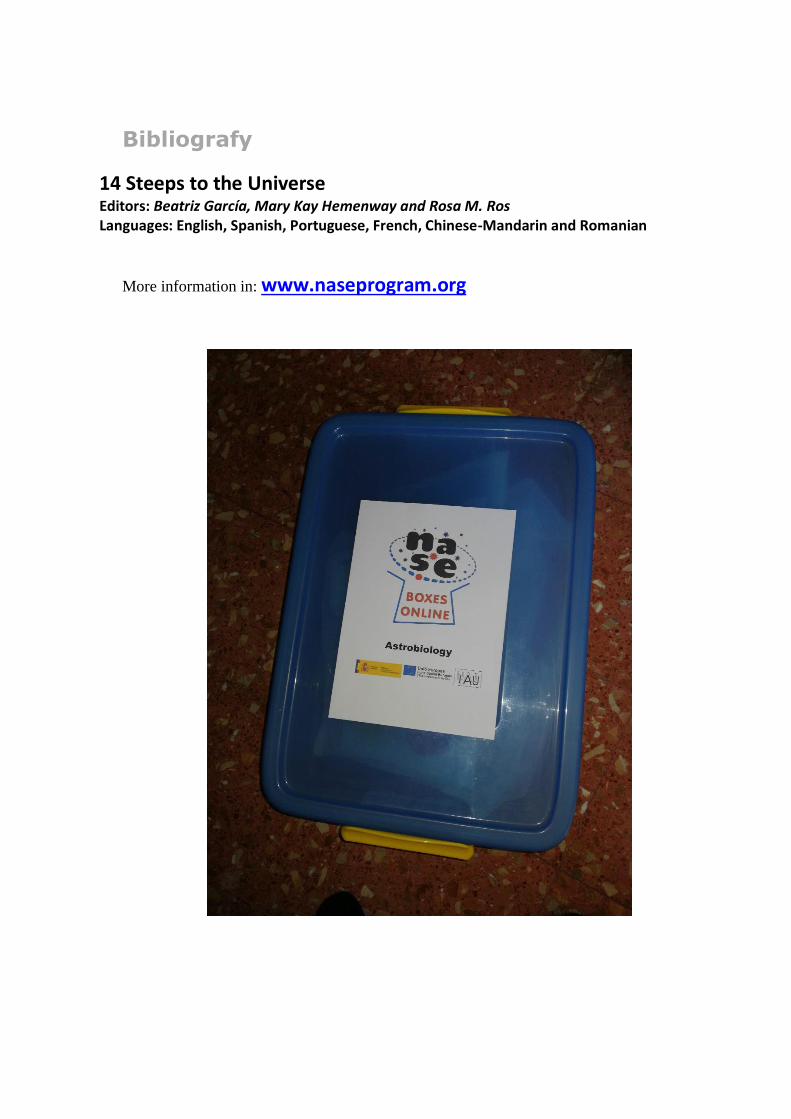
Bibliografy
14 Steeps to the Universe Editors: Beatriz García, Mary Kay Hemenway and Rosa M. Ros Languages: English, Spanish, Portuguese, French, Chinese-Mandarin and Romanian
More information in: www.naseprogram.org